

Create an SMPP SMSC trunk#
Create an SMPP SMSC trunk so that DIDWW can connect and bind to your SMSC as an ESME. Set the trunk name and Server location, enter the connection details and credentials of your SMSC, limit the DID numbers that can be used as the sender ID, and optionally add the trunk to an SMS trunk group.
For how DIDWW connects to your SMSC, see SMPP SMSC trunk.
Before you begin#
An active DIDWW account is required. Sign in to DIDWW or Create DIDWW account.
Your SMSC must run an SMPP service that accepts bind requests from external ESMEs. See Accept SMPP SMSC bind requests.
To use your DID numbers as sender IDs, at least one DID number with outbound P2P SMS enabled is required. See P2P Outbound SMS access.
Step 1: Open the creation form#
In the DIDWW User Panel, go to SMS > SMS Trunks.
Click Create New in the top-right corner.
Select SMPP SMSC.
Fig. 1. Select SMPP SMSC#
Step 2: Configure the General settings#
In the General section, name the trunk, choose the DIDWW SMPP server that binds to your SMSC, and enter the connection details and credentials of your SMSC.
In Friendly name, enter a unique, descriptive name to identify the trunk.
Optionally, in System type, enter the value that your SMSC expects, for example
VMS(voice mail system) orOTA(over-the-air activation system). DIDWW sends this value as thesystem_typebind parameter.In Server location, select US, NY or NL, AMS. This is the DIDWW SMPP server that connects and binds to your SMSC.
In Password and System ID, enter the credentials that your SMSC requires to authenticate DIDWW during the bind.
In Host, enter the public hostname or IP address of your SMSC.
To connect to your SMSC over TLS, turn on Use SSL. Use SSL does not change the ports. Your SMSC must accept TLS connections on the ports you enter.
Optionally, in Connection timeout, change the time between TCP connection retries, in seconds.
In TX port, enter the port of your SMSC for the transmitter session, or for the single transceiver session when Transceiver mode is on.
In RX port, enter the port of your SMSC for the receiver session. DIDWW uses it only when Transceiver mode is off.
Turn on Transceiver mode if your SMSC supports a single transceiver session. Leave it off if your SMSC uses separate transmitter and receiver sessions.
Field definitions, defaults, and constraints are listed in General settings.
Important
DIDWW connects to your SMSC from the DIDWW SMPP server of the trunk’s Server location. Your firewall must accept connections from that server’s IP address. See Server locations and IP addresses.
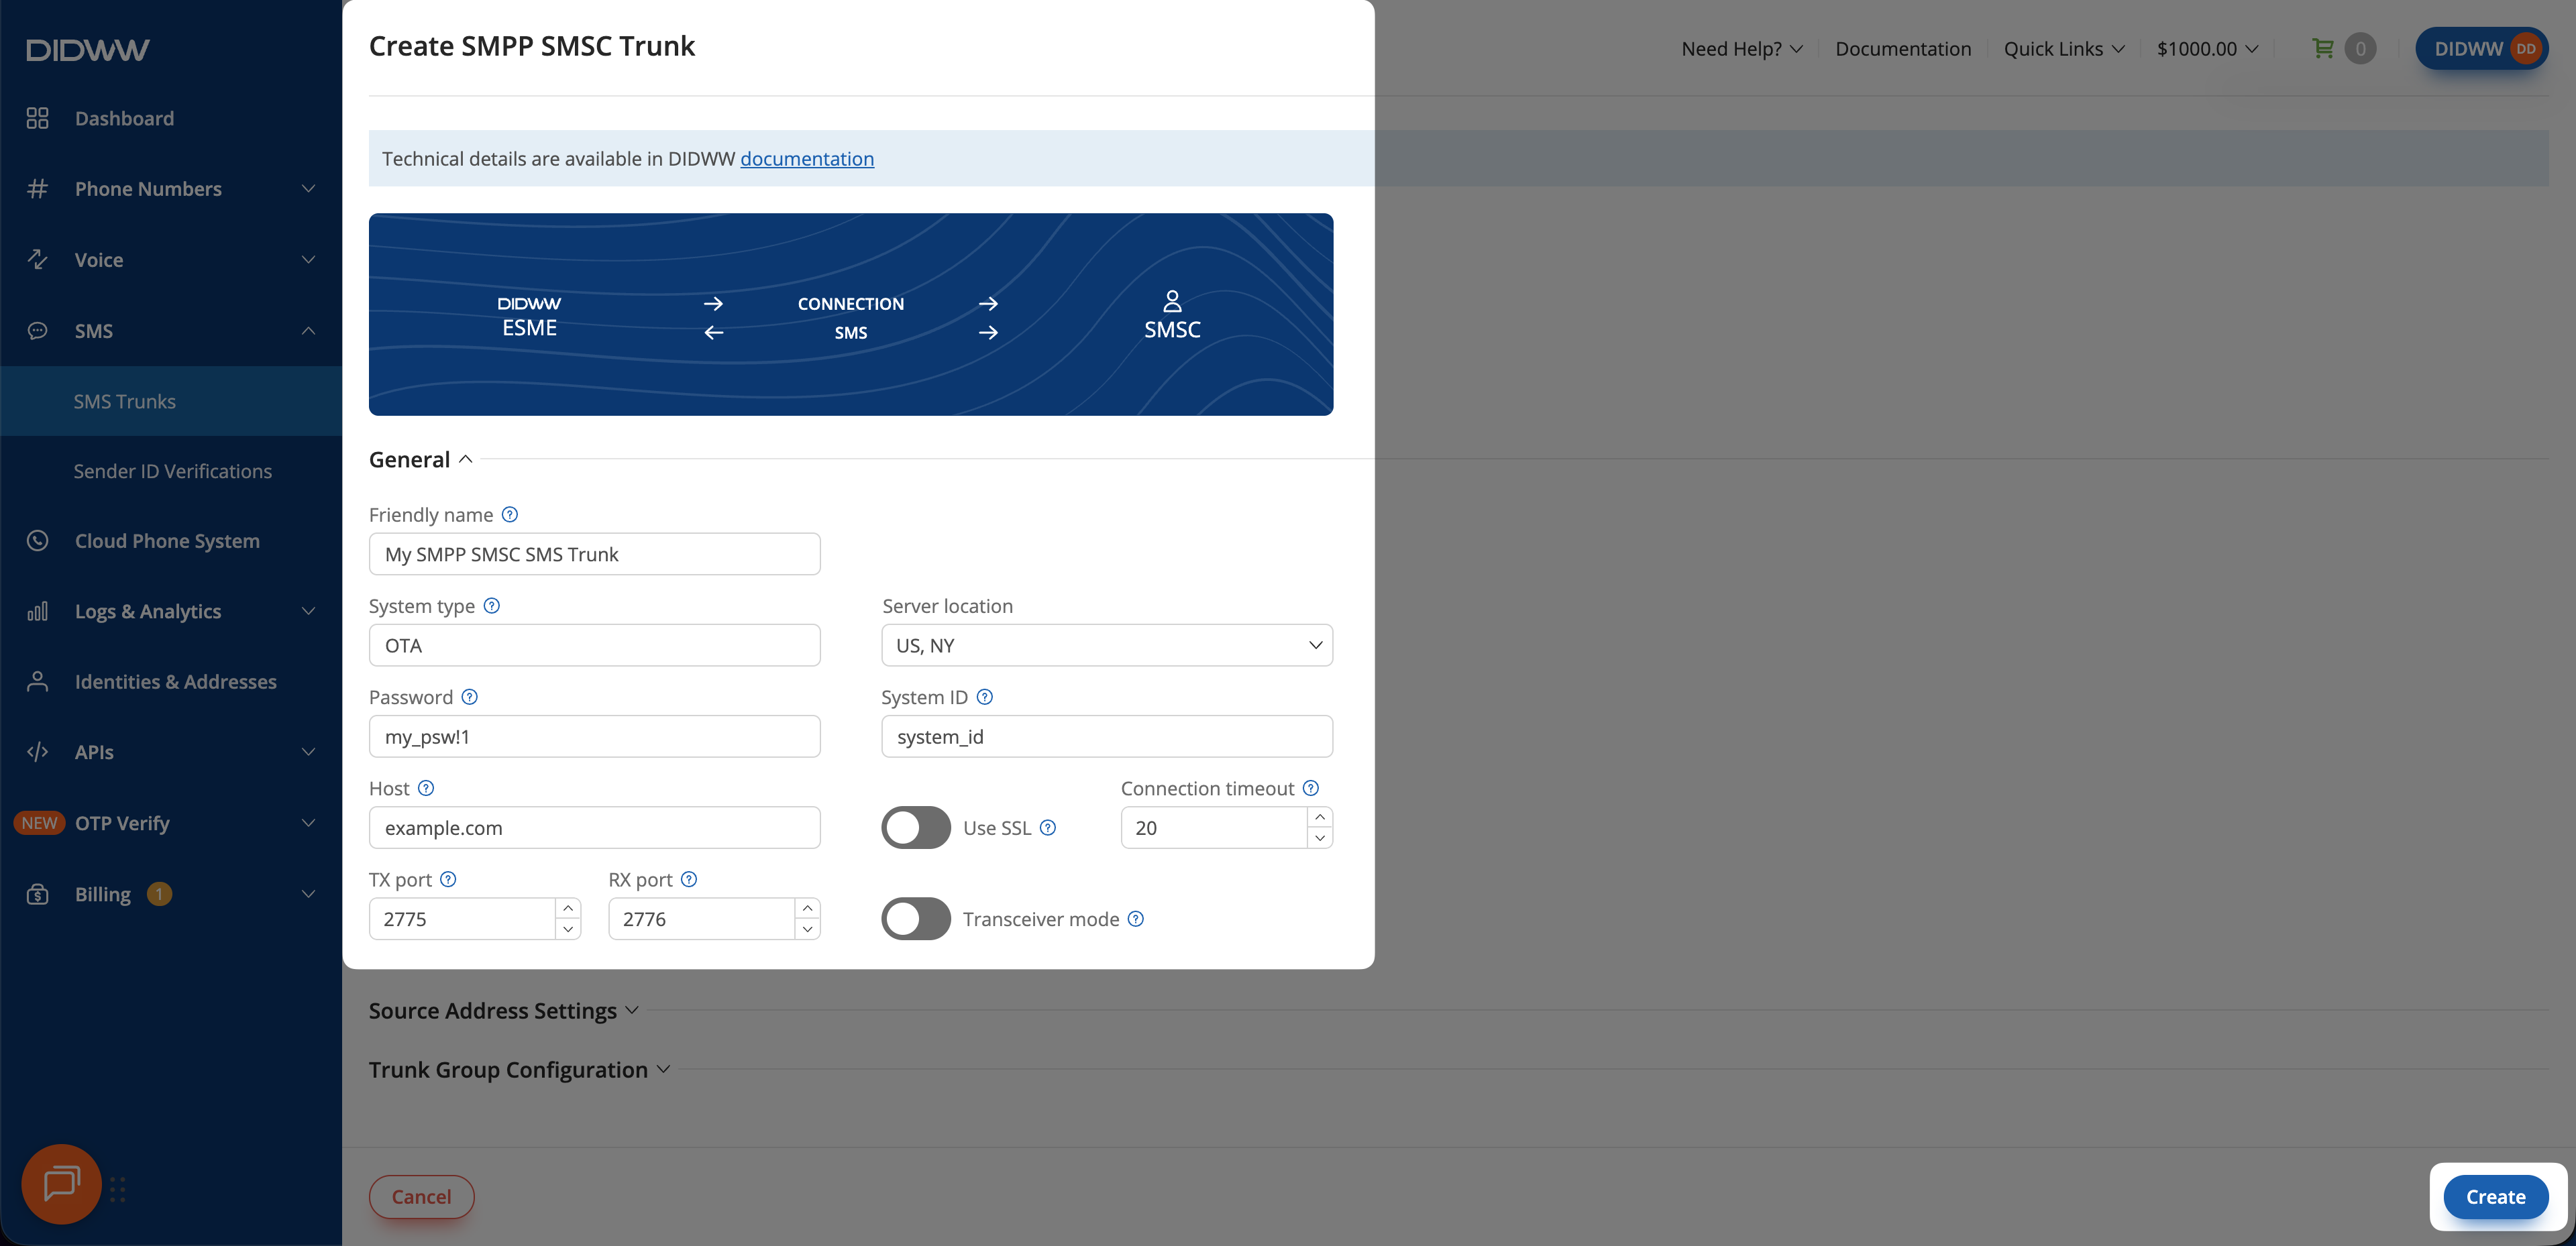
Fig. 2. Configure the General settings#
Step 3: Configure the source addresses#
By default, Allow any DID(s) for SMS OUT is on, and all DIDs with Outbound P2P SMS enabled in your account can be used as the sender ID. To allow only specific DID numbers, restrict the source addresses. Otherwise, skip this step.
In Source Address Settings, turn off Allow any DID(s) for SMS OUT.
In Available source addresses, select the DID numbers to allow. To find numbers, filter the list by Source address, Description, Country, or Region.
Click the right arrow button to add the selected numbers to Allowed source addresses, or click Add all to add every listed number. Only the numbers you add are available as sender IDs.
To remove numbers, select them in Allowed source addresses and click the left arrow button, or click Remove all.
Field definitions are listed in Source address settings.
Note
When the Allow any DID(s) for SMS OUT toggle is turned off, the Available source addresses list shows only DIDs that support outbound P2P SMS.
Fig. 3. Select the allowed source addresses#
Step 4: Add the trunk to a trunk group (optional)#
You may assign the trunk to an existing SMS trunk group in order to enable failover for inbound SMS. Within the trunk group, the trunk’s priority determines the order in which trunks will be used. If the trunk will not be part of a trunk group, skip to Step 5.
Expand the Trunk Group Configuration section and select the group in Assign to trunk group.
In Priority, enter the trunk’s priority within the group, from
0to32767.
Field definitions are listed in Trunk group settings. To create a group, see Create an SMS trunk group.
Note
The system attempts to contact the target SMS trunk with the highest-numbered priority first.
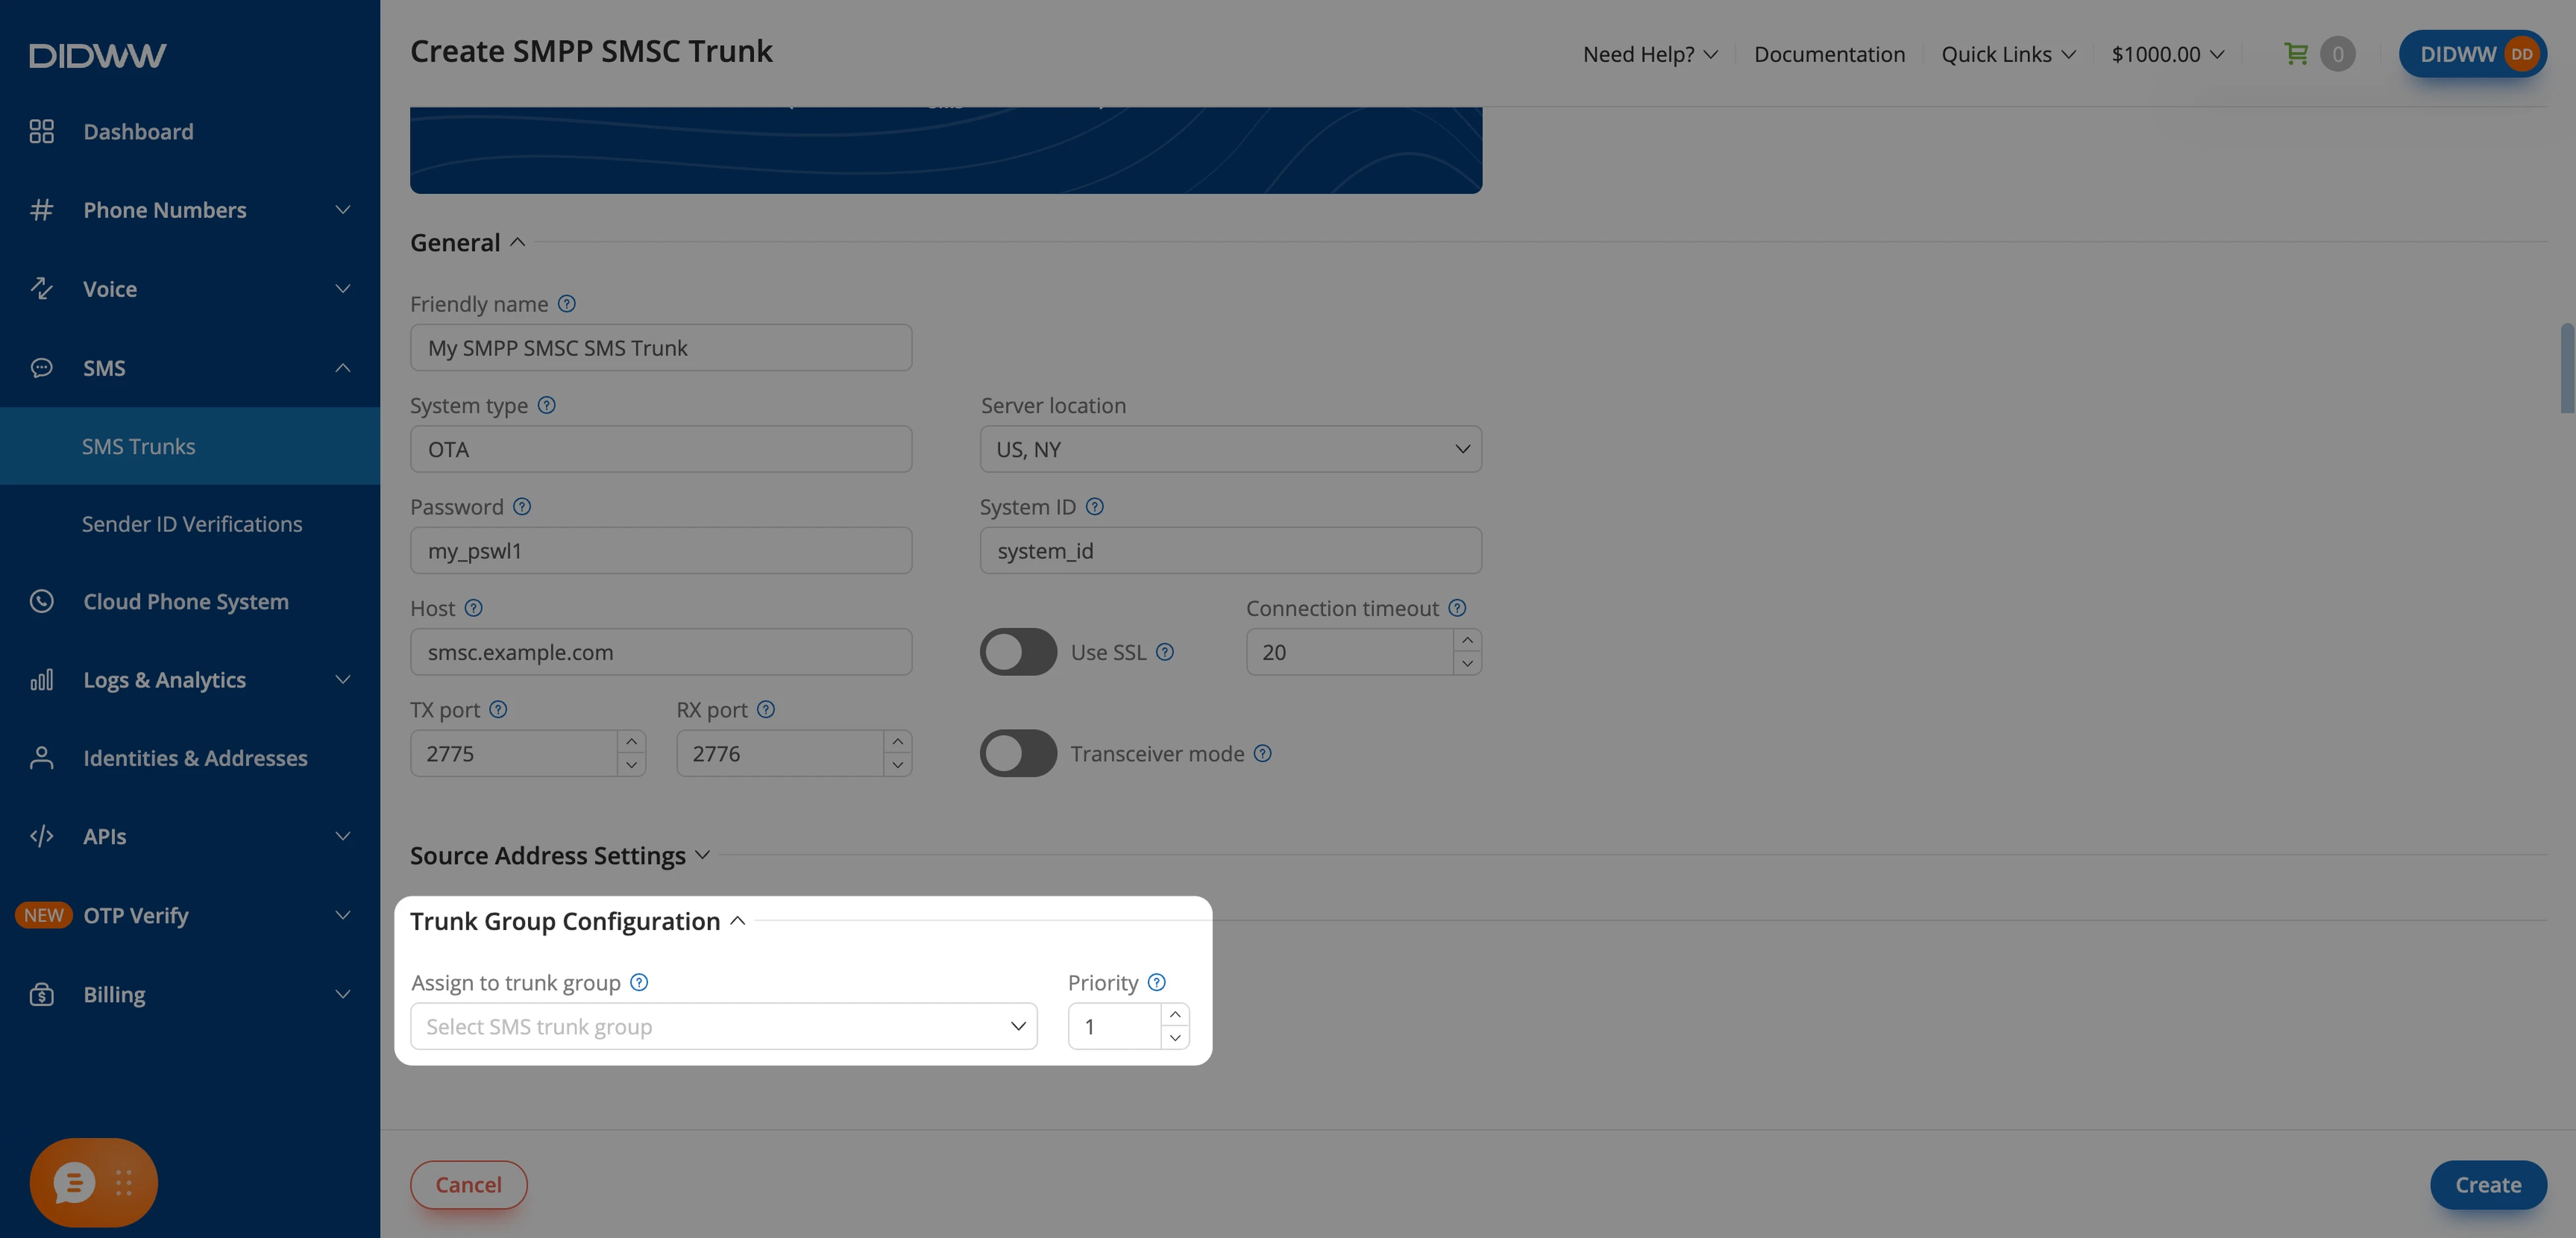
Fig. 4. Configure the trunk group settings#
Step 5: Create the trunk#
Click Create at the bottom of the page to save the new trunk.
The new trunk appears on the SMS Trunks page. DIDWW then starts the bind process and connects to your SMSC from the DIDWW SMPP server of the selected Server location, with the connection details and credentials you entered. Creating the trunk does not assign it to a DID number.
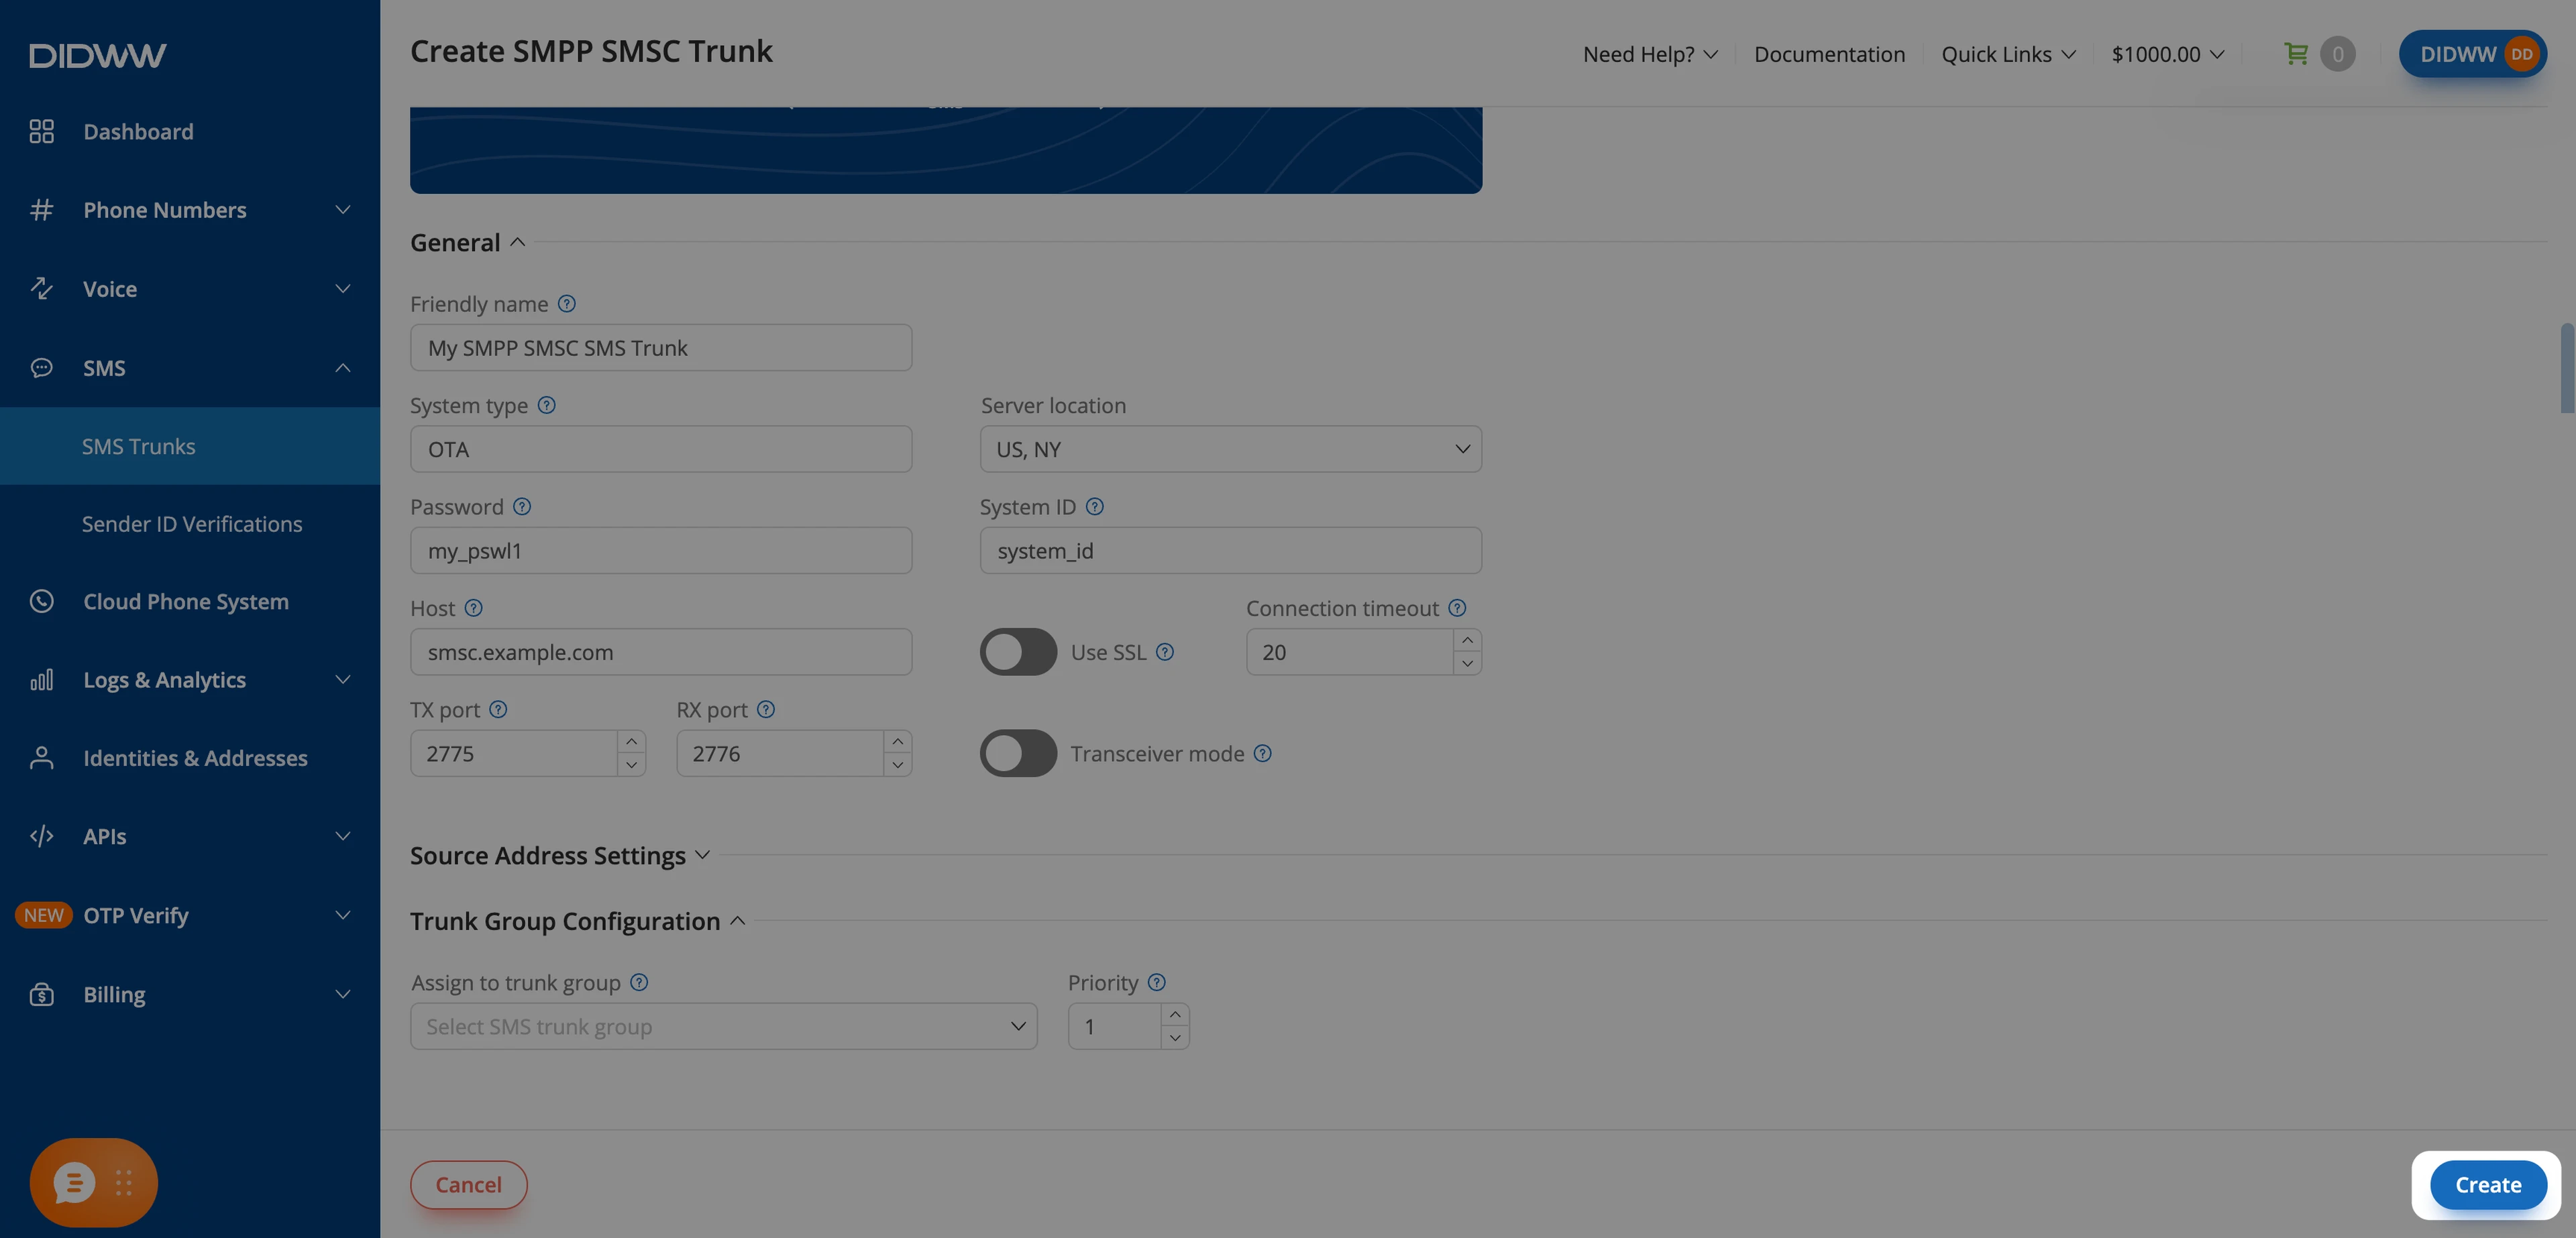
Fig. 5. Create the trunk#
Next steps#
Make sure that your SMSC accepts the bind requests that DIDWW sends. See Accept SMPP SMSC bind requests.
Check the connection status to confirm that DIDWW is bound to your SMSC.
To receive SMS, assign the trunk to one or more DIDs that support inbound SMS. For outbound SMS, DID assignment is not required.
To send A2P messages with a verified Sender ID, associate an active Sender ID Verification with the trunk.