Register an Account with DIDWW#
Open the DIDWW Registration Page to begin the registration process.
Follow the steps below to complete your registration.
Step 1: Complete the Registration Form#
You can register either a Business or a Personal account. The account type depends on the information you provide in the registration form.
A Business account is intended for companies and organizations.
Enter the following details:
Company name
Contact name
Corporate business email address
Phone number
Country
Review and accept the DIDWW Terms & Agreements and Privacy Notice , and complete the reCAPTCHA.
Click Register.
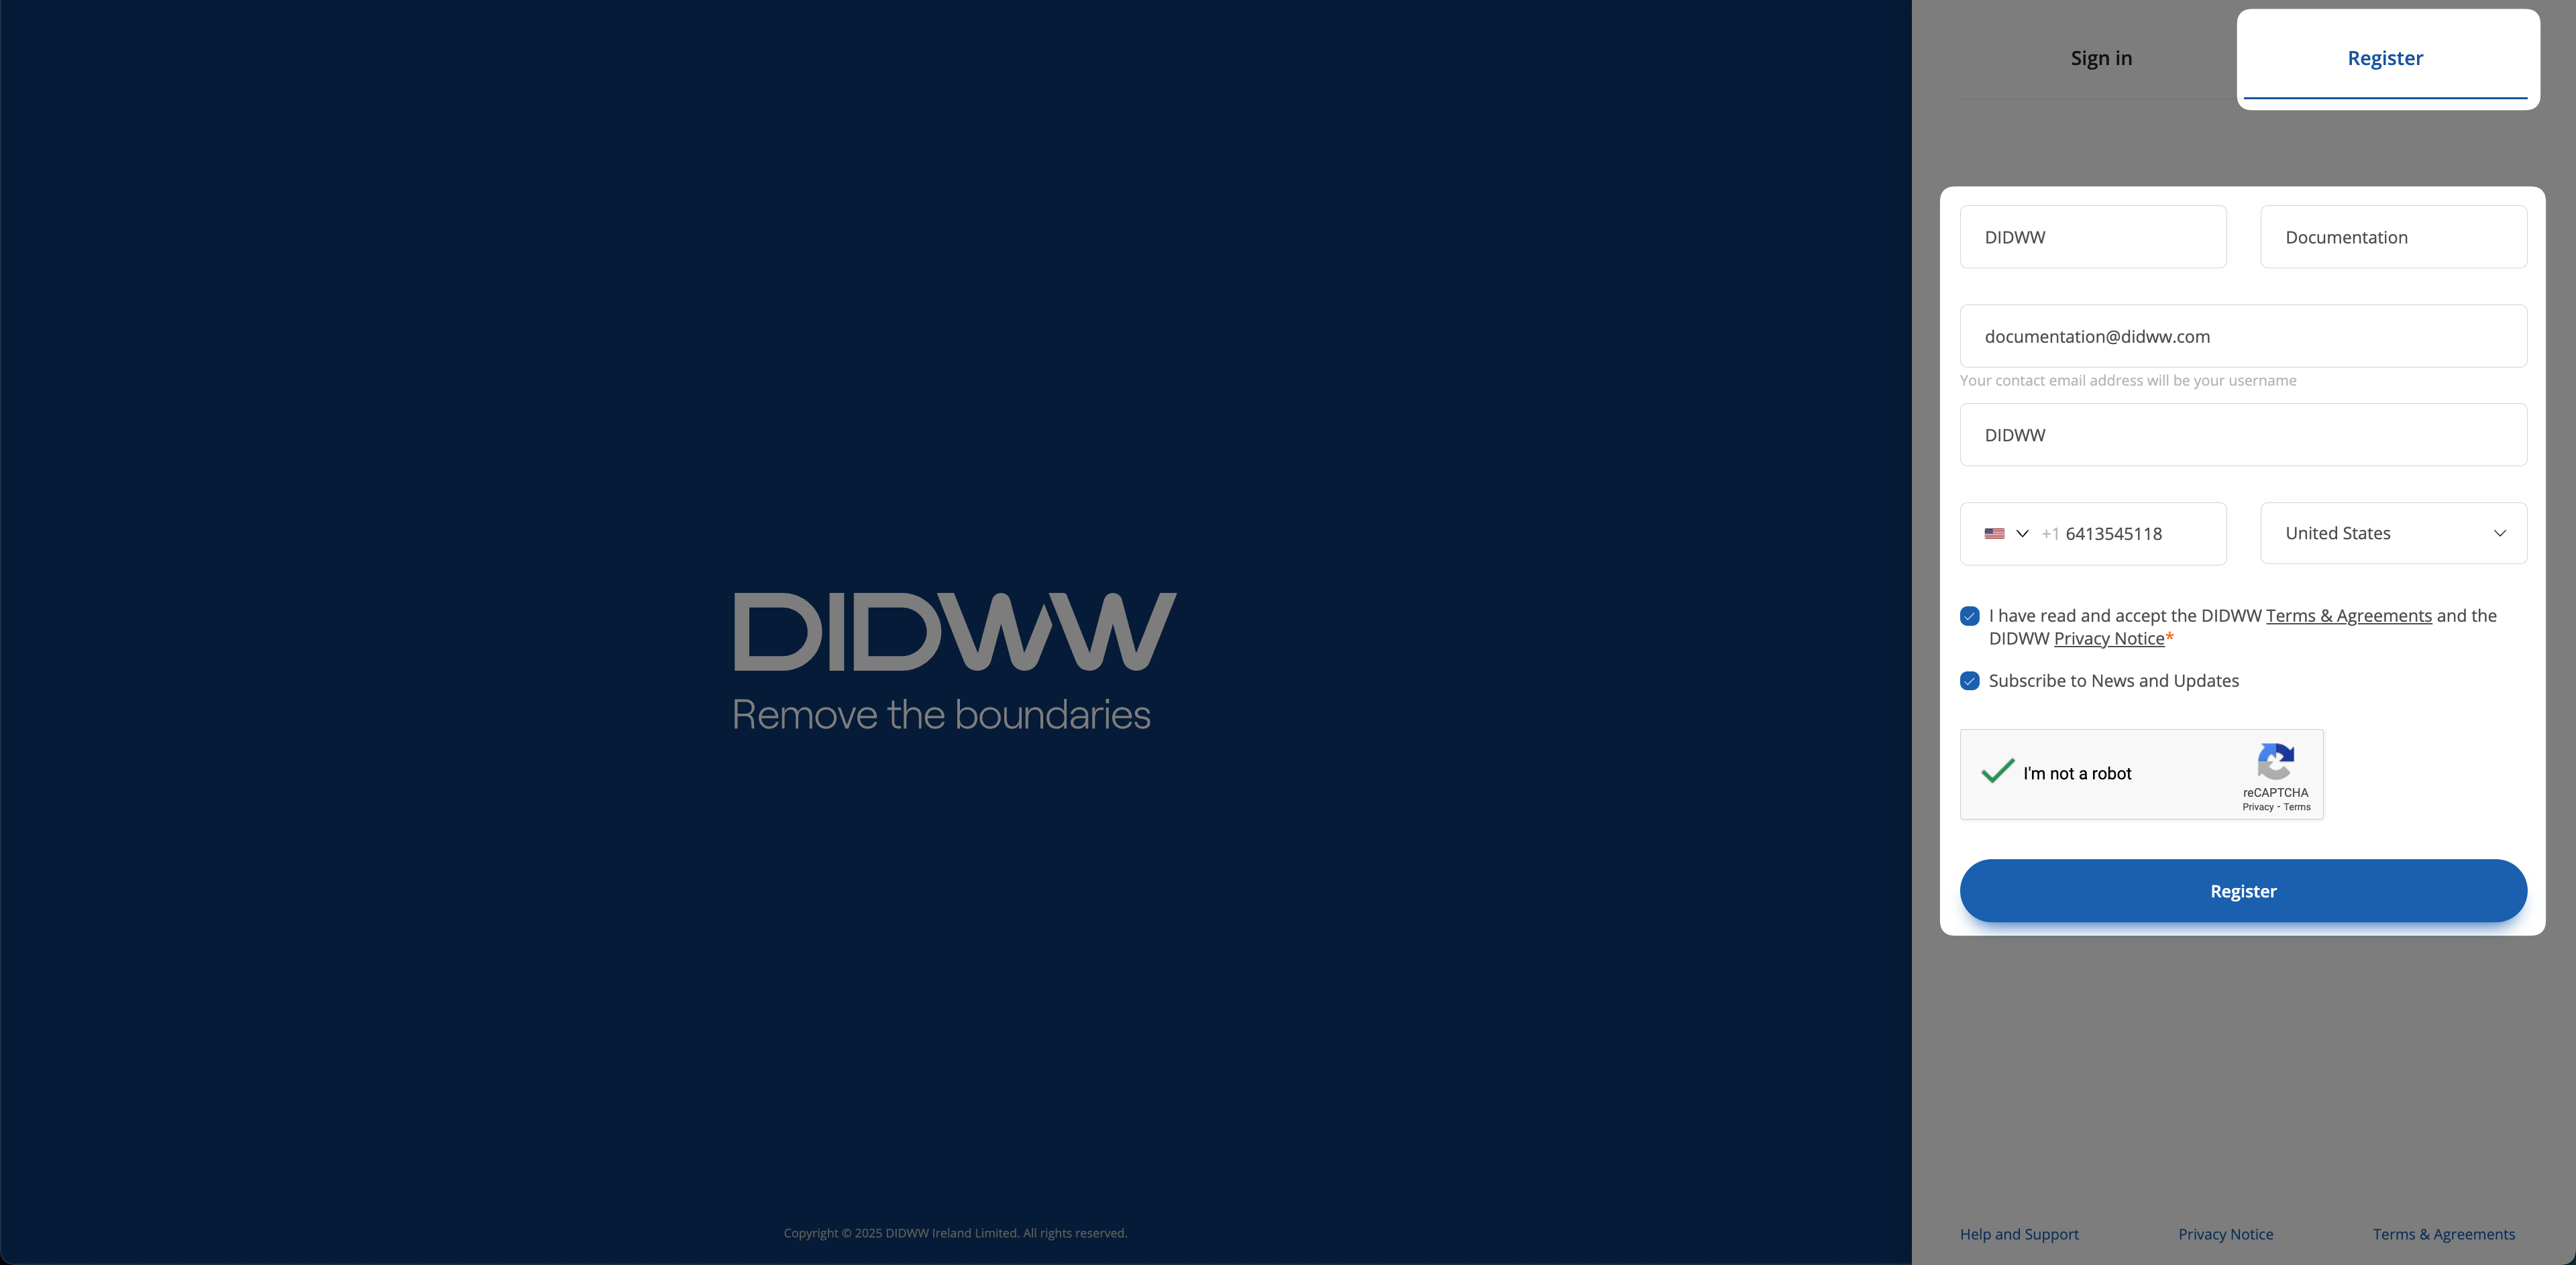
Fig. 1. Business Account Details.#
A Personal account is intended for individual use.
Enter the following details:
Contact name
Email address
Phone number
Country
Important
To register a Personal account, leave the Company name field empty. If a Company name is provided, the account may be treated as a Business account.
Review and accept the DIDWW Terms & Agreements and Privacy Notice , and complete the reCAPTCHA.
Click Register.
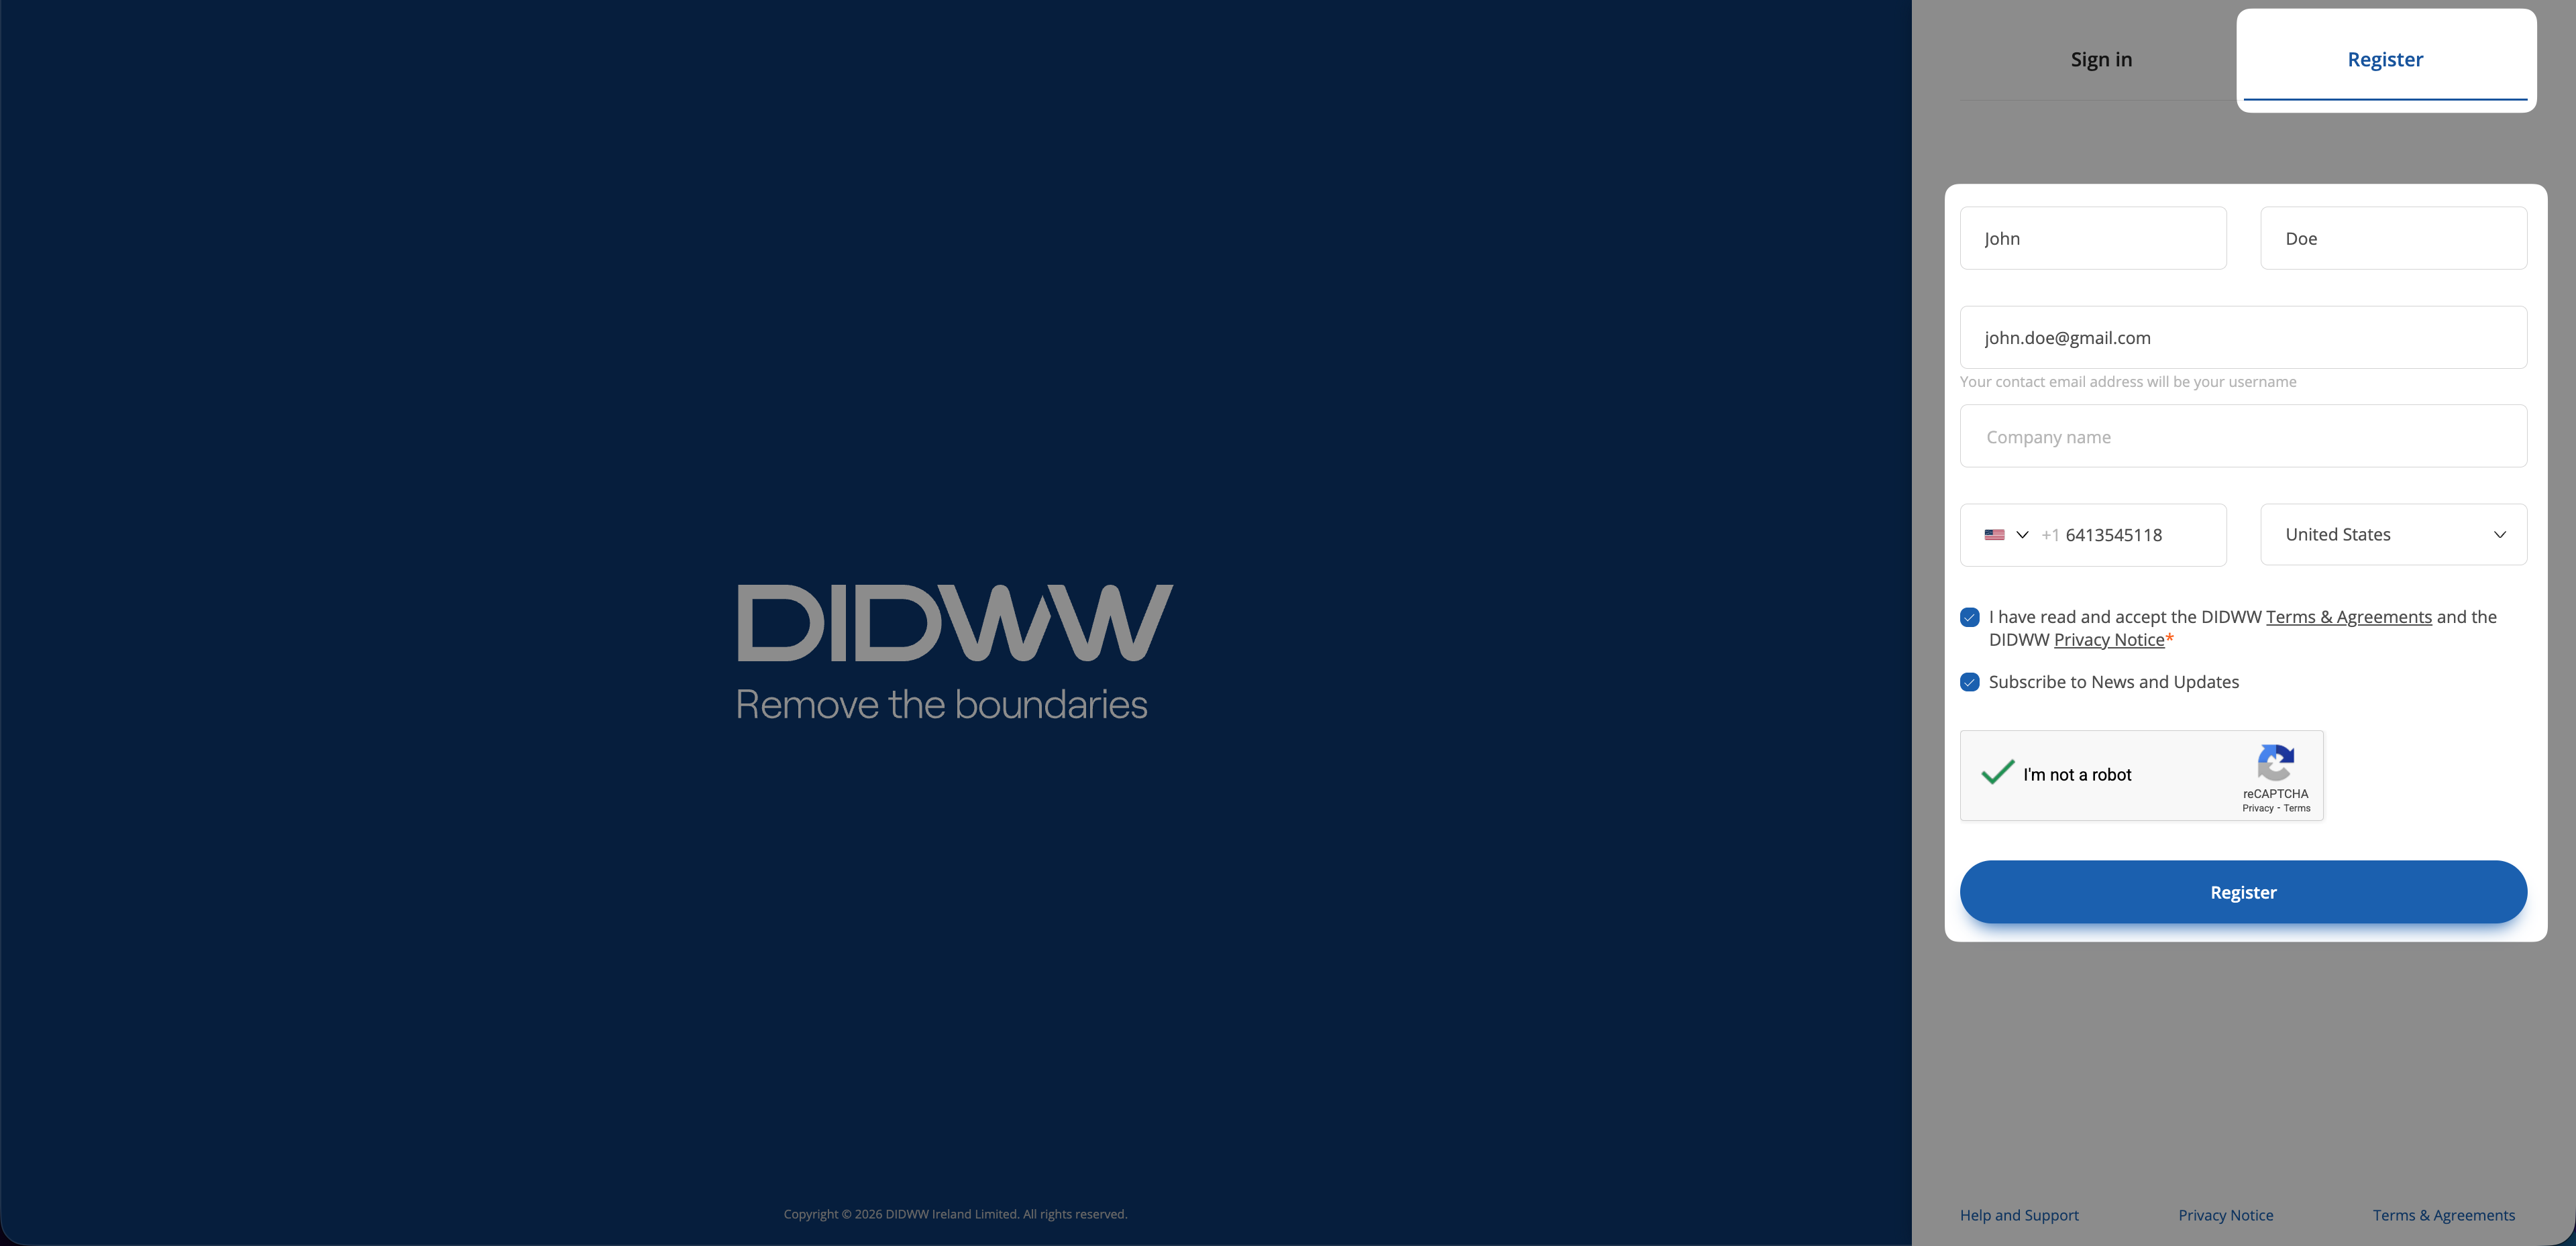
Fig. 2. Personal Account Details.#
Step 2: Confirm Your Email Address#
Check your email inbox for a confirmation message from DIDWW.
Open the email and select Confirm my account.
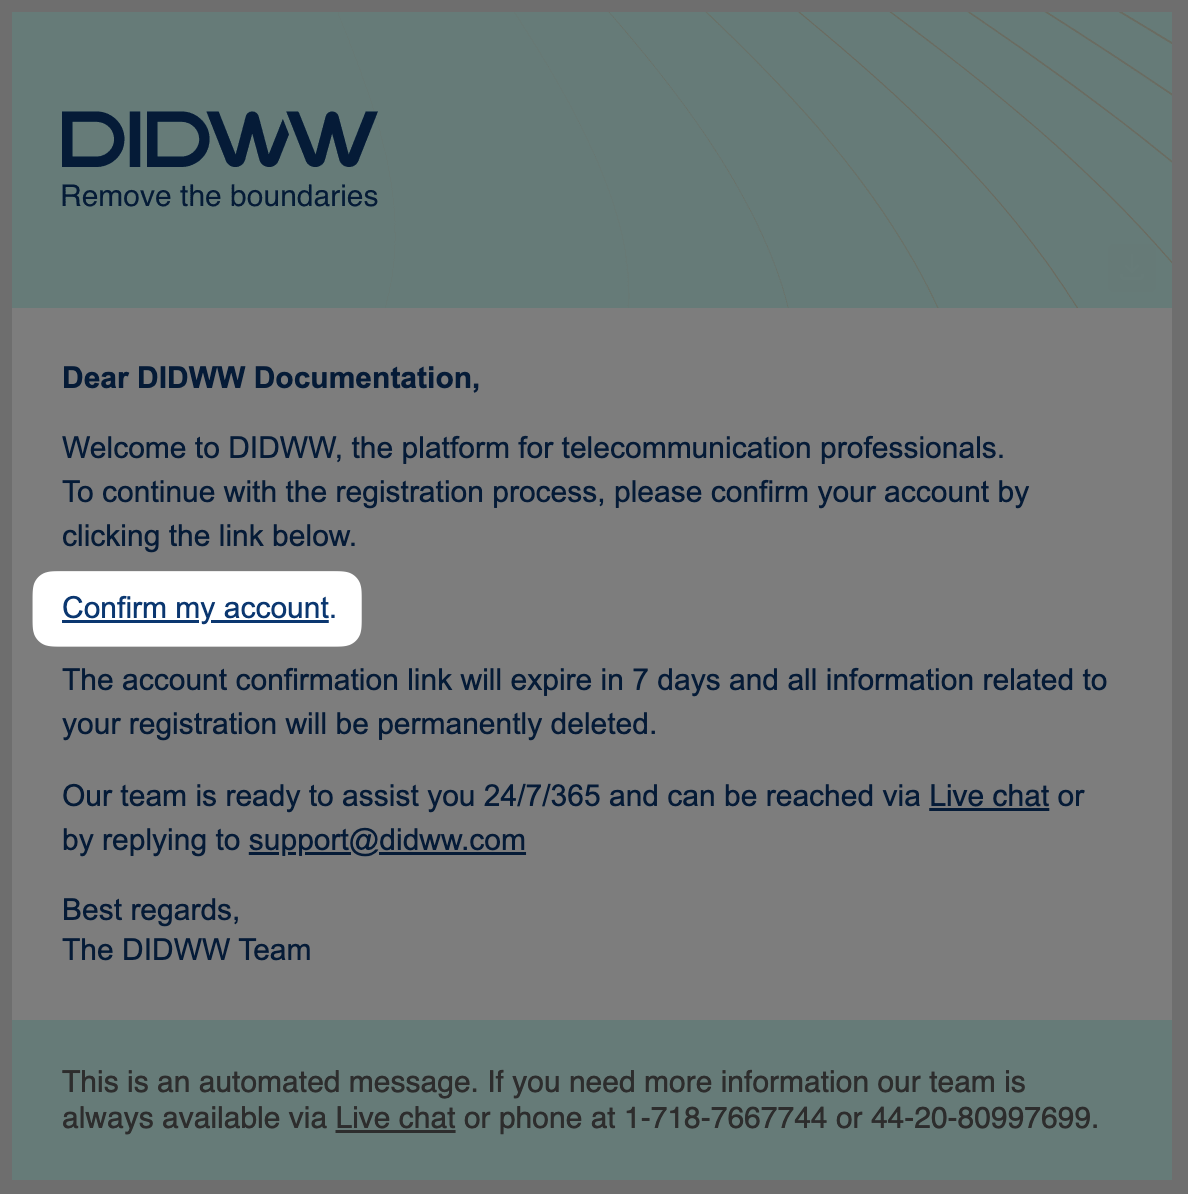
Fig. 3. Confirm Your Email Address.#
Note
The account confirmation link will expire in 7 days and all information related to your registration will be permanently deleted.
Step 3: Set Your Account Password#
After selecting Confirm my account in the confirmation email, you will be redirected to the Set password for your account page.
Enter a strong password in both the Password and Confirm password fields.
Select Submit to complete the setup.
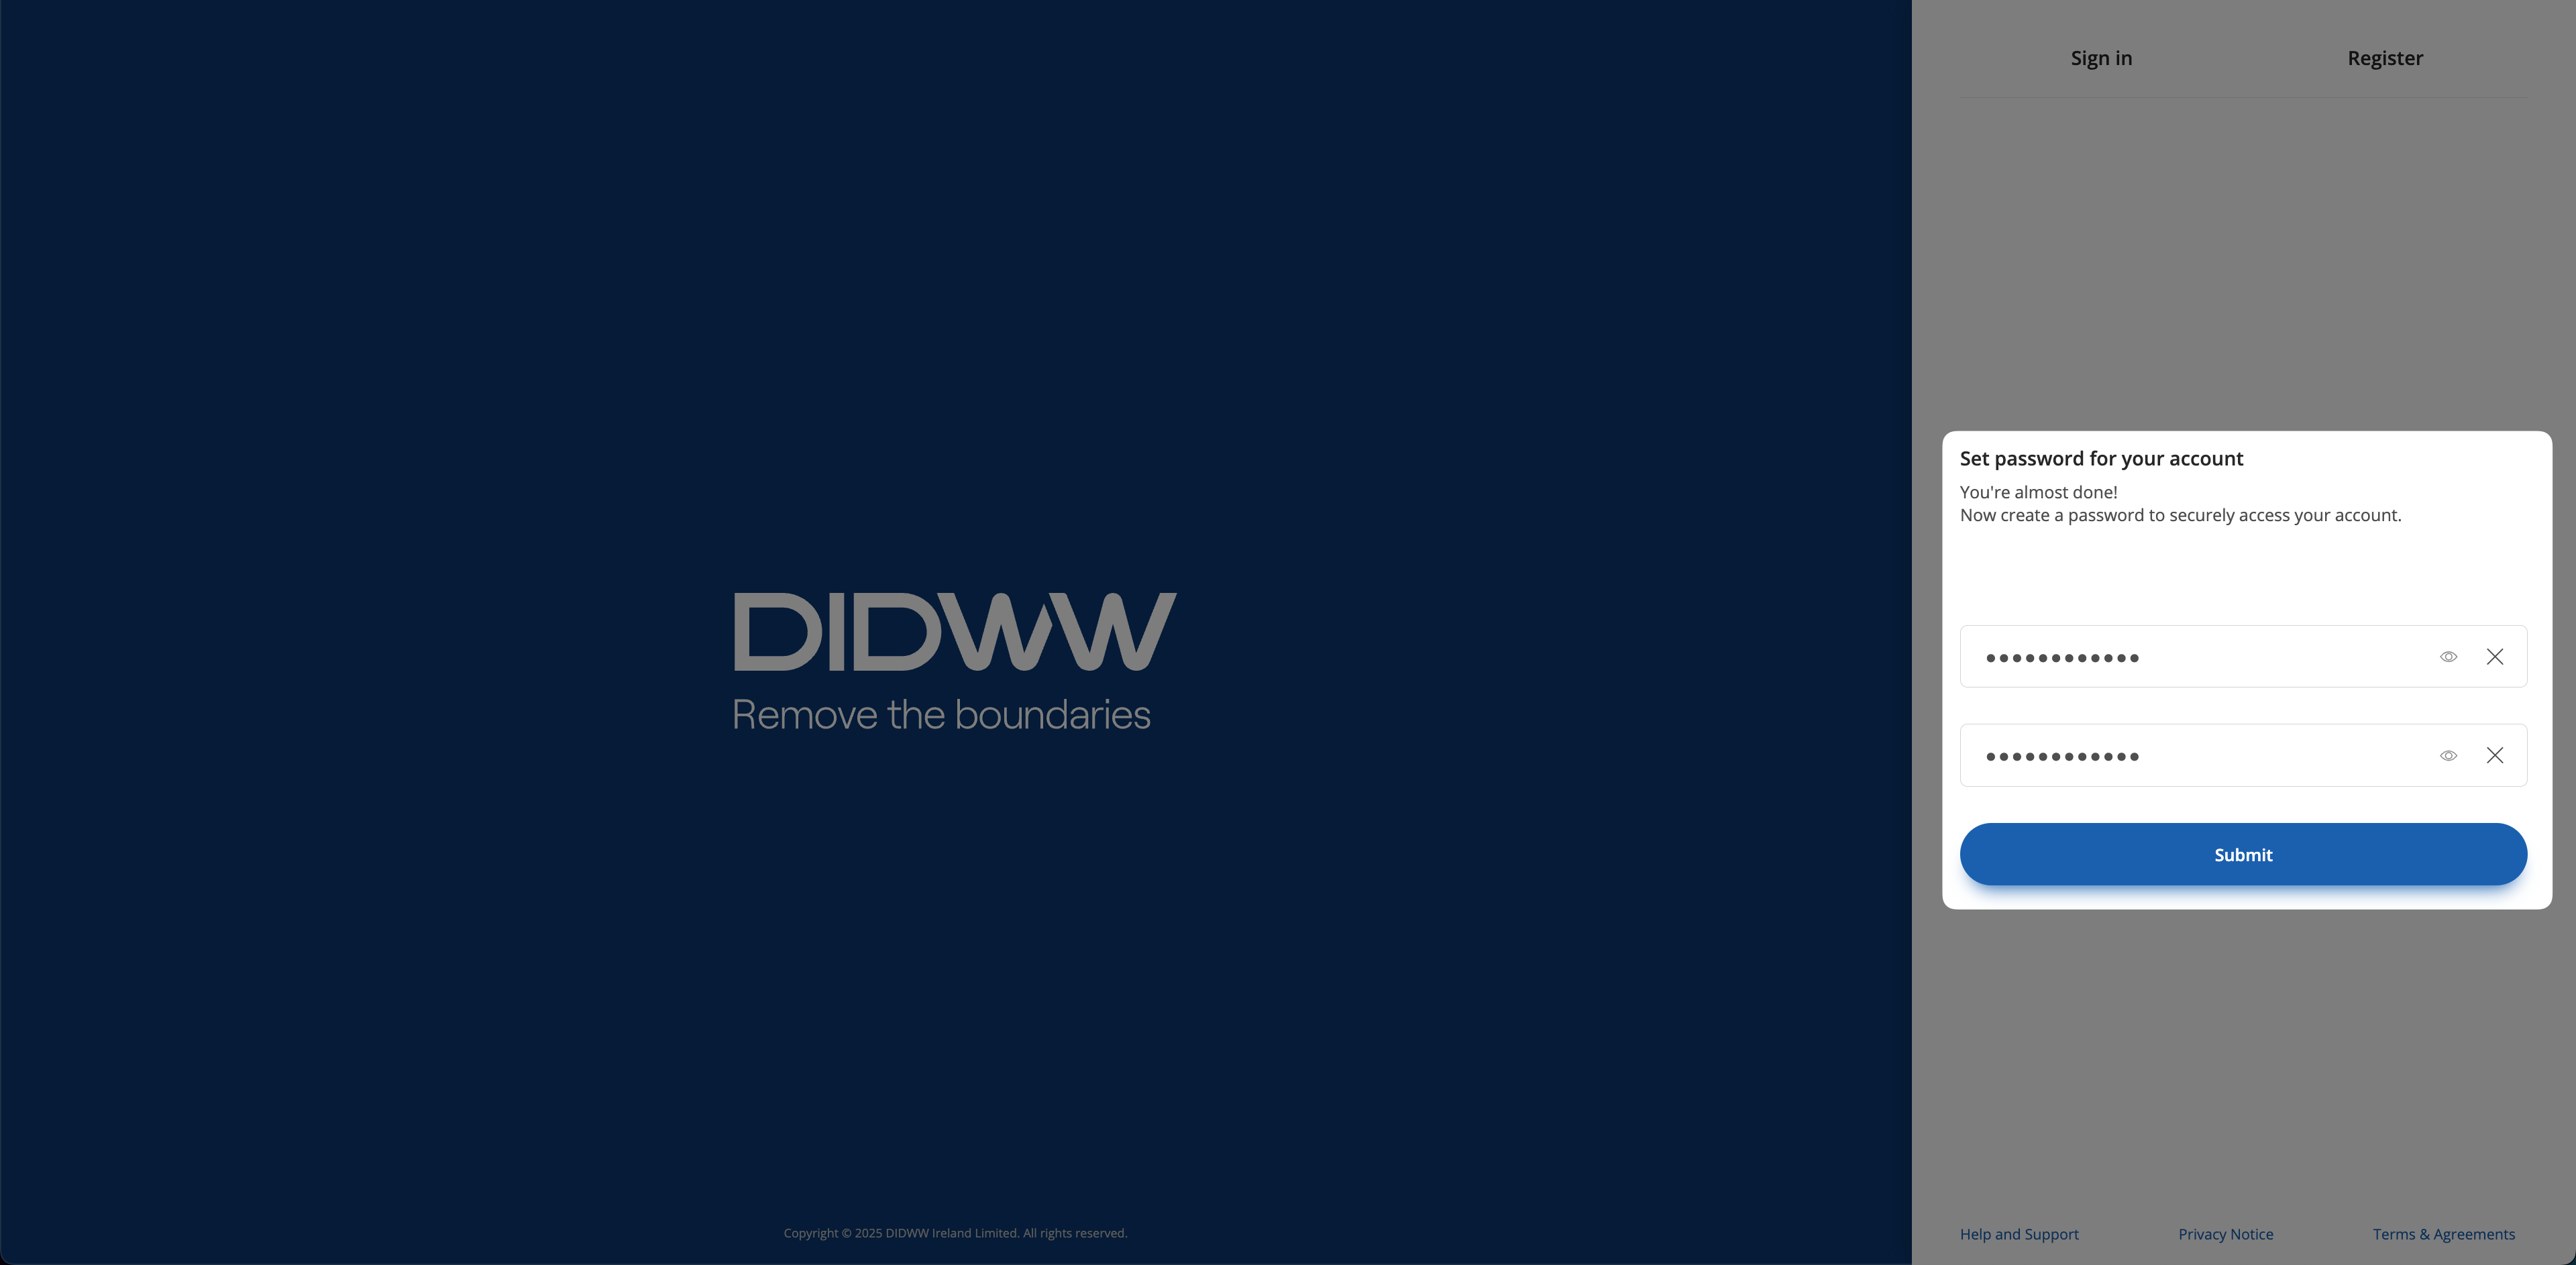
Fig. 4. Create a Secure Password.#
Note
Once you’ve entered and confirmed your password, your account will be created.
If you experience any issues during registration, contact DIDWW Customer Support through live chat on the DIDWW website or by email at support@didww.com .
Additional Information#
Learn what DID numbers are, how to purchase them, and how to manage your number inventory.
Discover how to manage your voice communication services, including Inbound and Outbound Trunks, Emergency Calling, and CNAM. These features support reliable call routing, caller name delivery, and emergency call handling.
Learn how to configure and manage your cloud-based PBX using phone.systems™, including call flow design, number assignments, and user setup.