Resubmit porting request#
Before a porting request can be processed, it goes through a verification stage to confirm that end user details are correct. While in Pending status, the request is under review. If the information is incorrect, incomplete, or cannot be verified, the request will move to Changes Required status. In this state, staff will provide a reason and, if needed, additional comments to help you resolve the issue before resubmitting.
Before you begin#
The porting request must be in Changes Required status.
Updated end user details, documents, or carrier information must be available.
Step 1: Filter requests by status#
In the DIDWW User Panel, go to Phone Numbers > Number Porting.
Open the Request Status filter.
Select Changes Required to display the relevant porting requests.
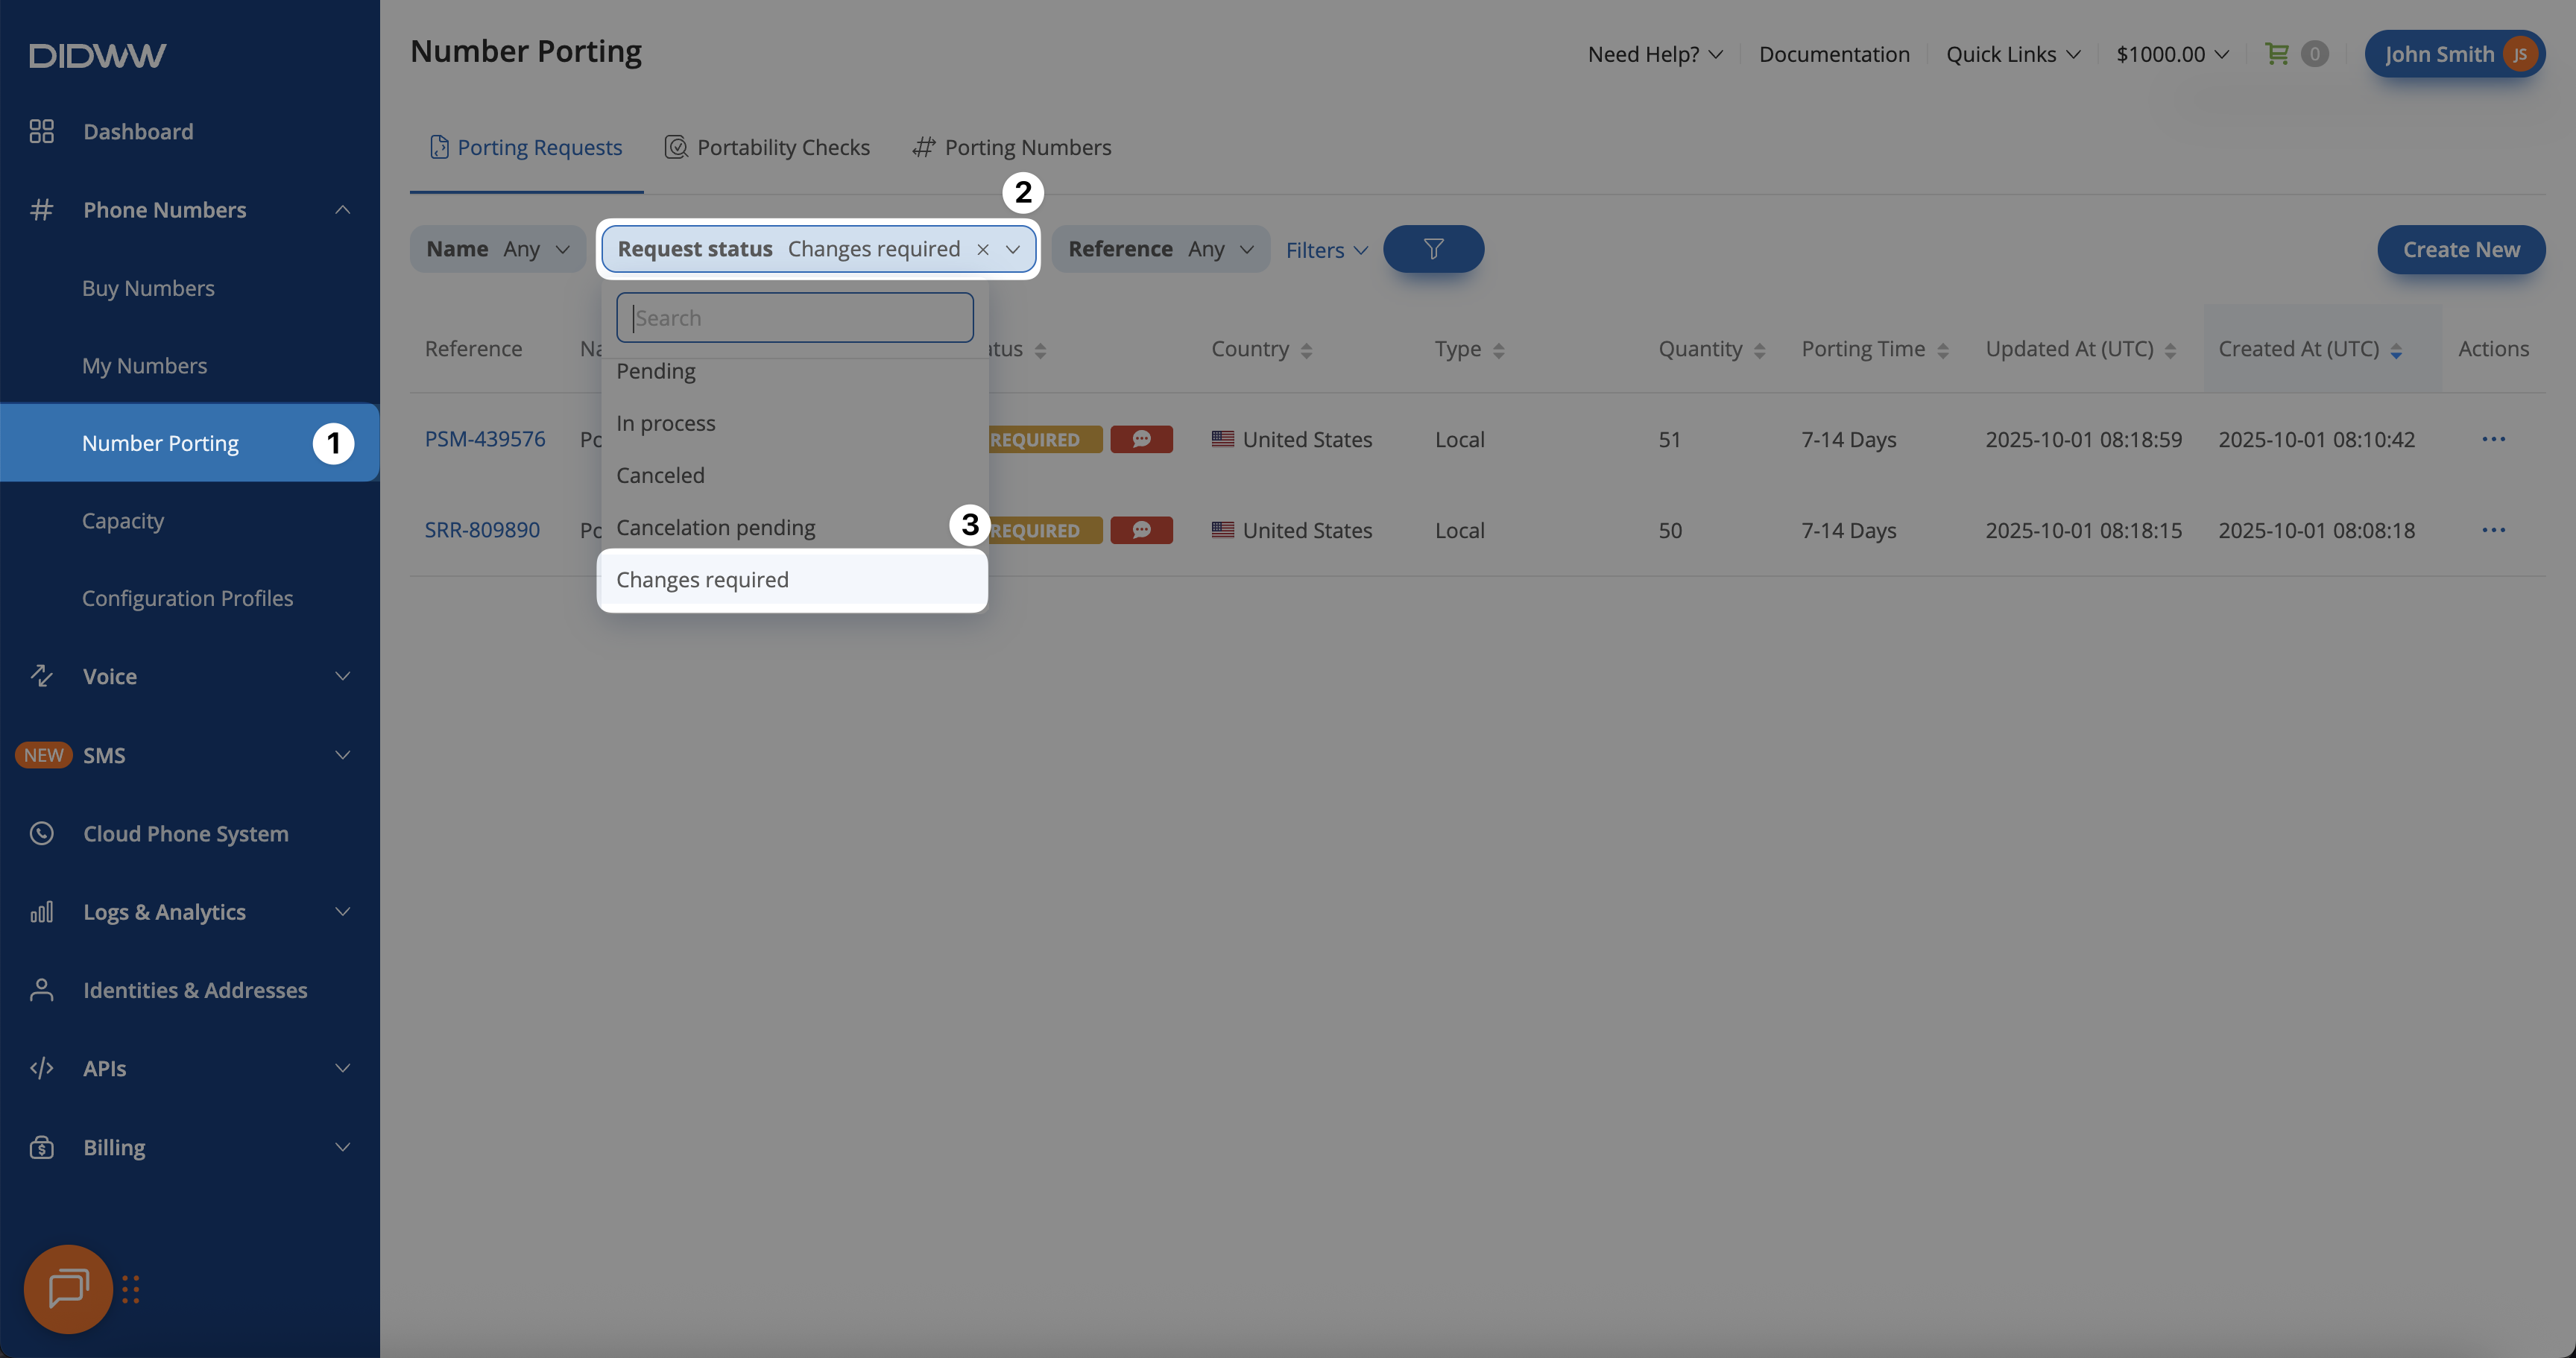
Fig. 1. Filtering porting requests in Changes Required status.#
Step 2: Open the porting request edit page#
Locate the porting request, then click the Reference ID or use the Actions (…) menu and select Edit.
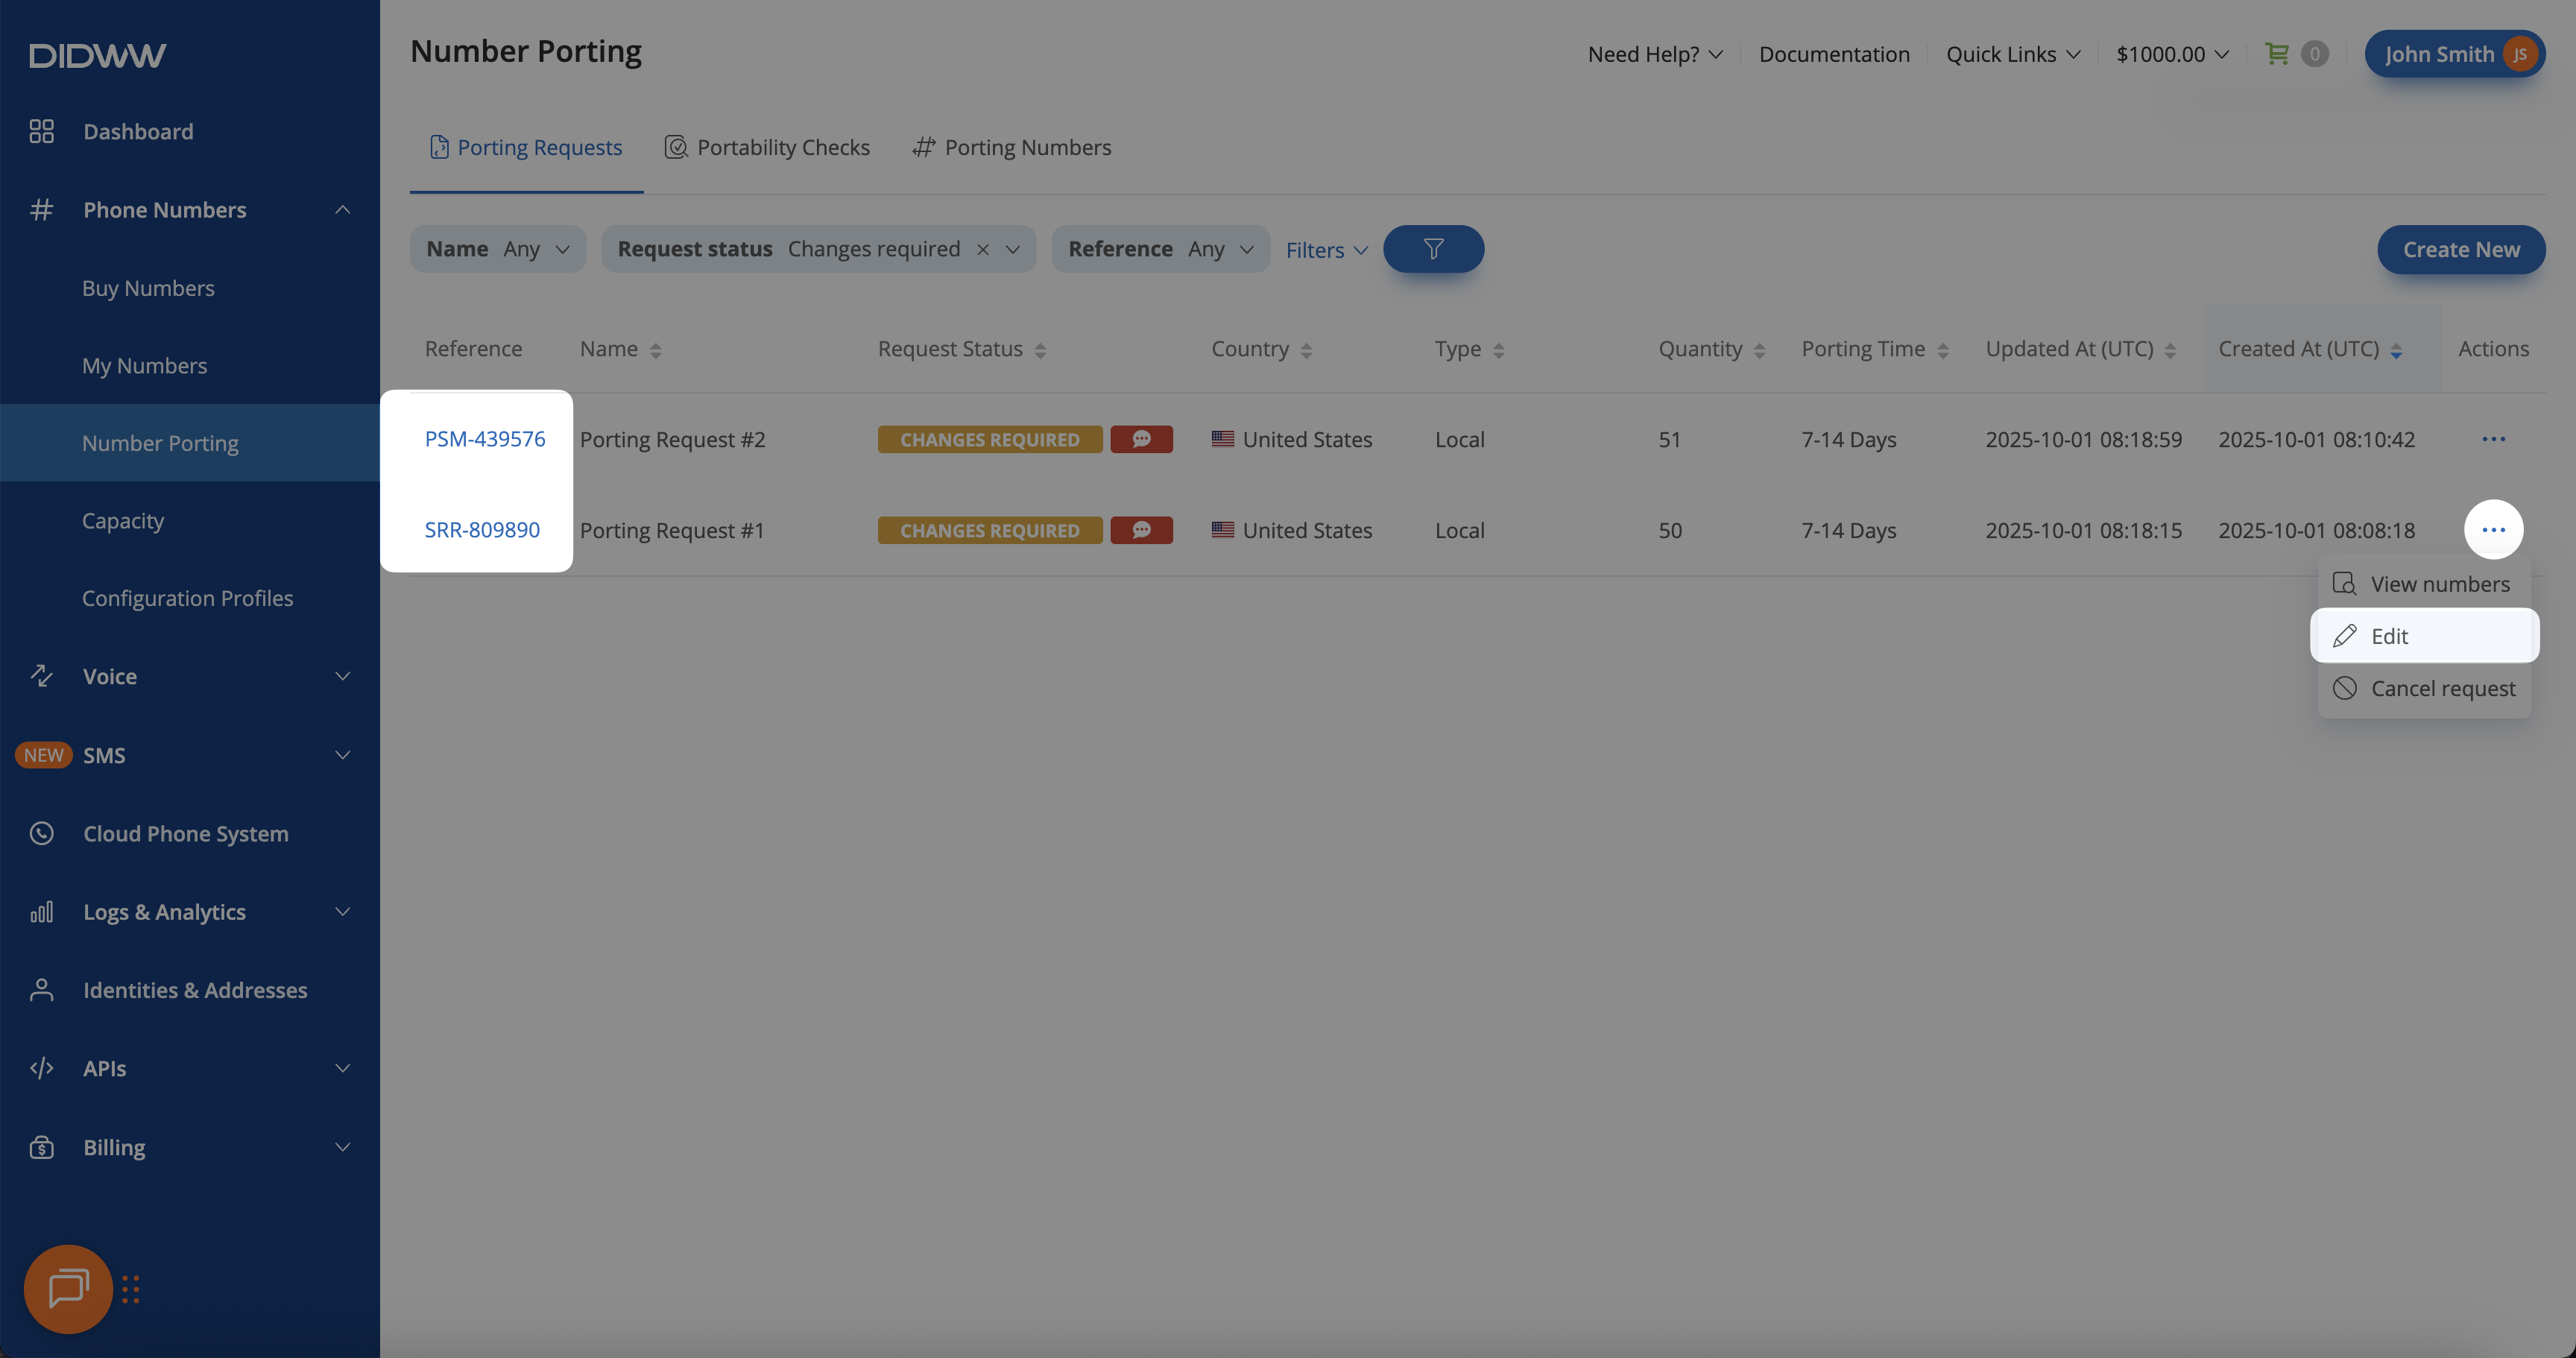
Fig. 2. Opening the porting request to review details and rejection reasons.#
Step 3: Review verification details and reject reason(s)#
On the Edit Porting Request page, review the Verification Details and Reject Reason(s) sections. These sections show why the request requires changes.
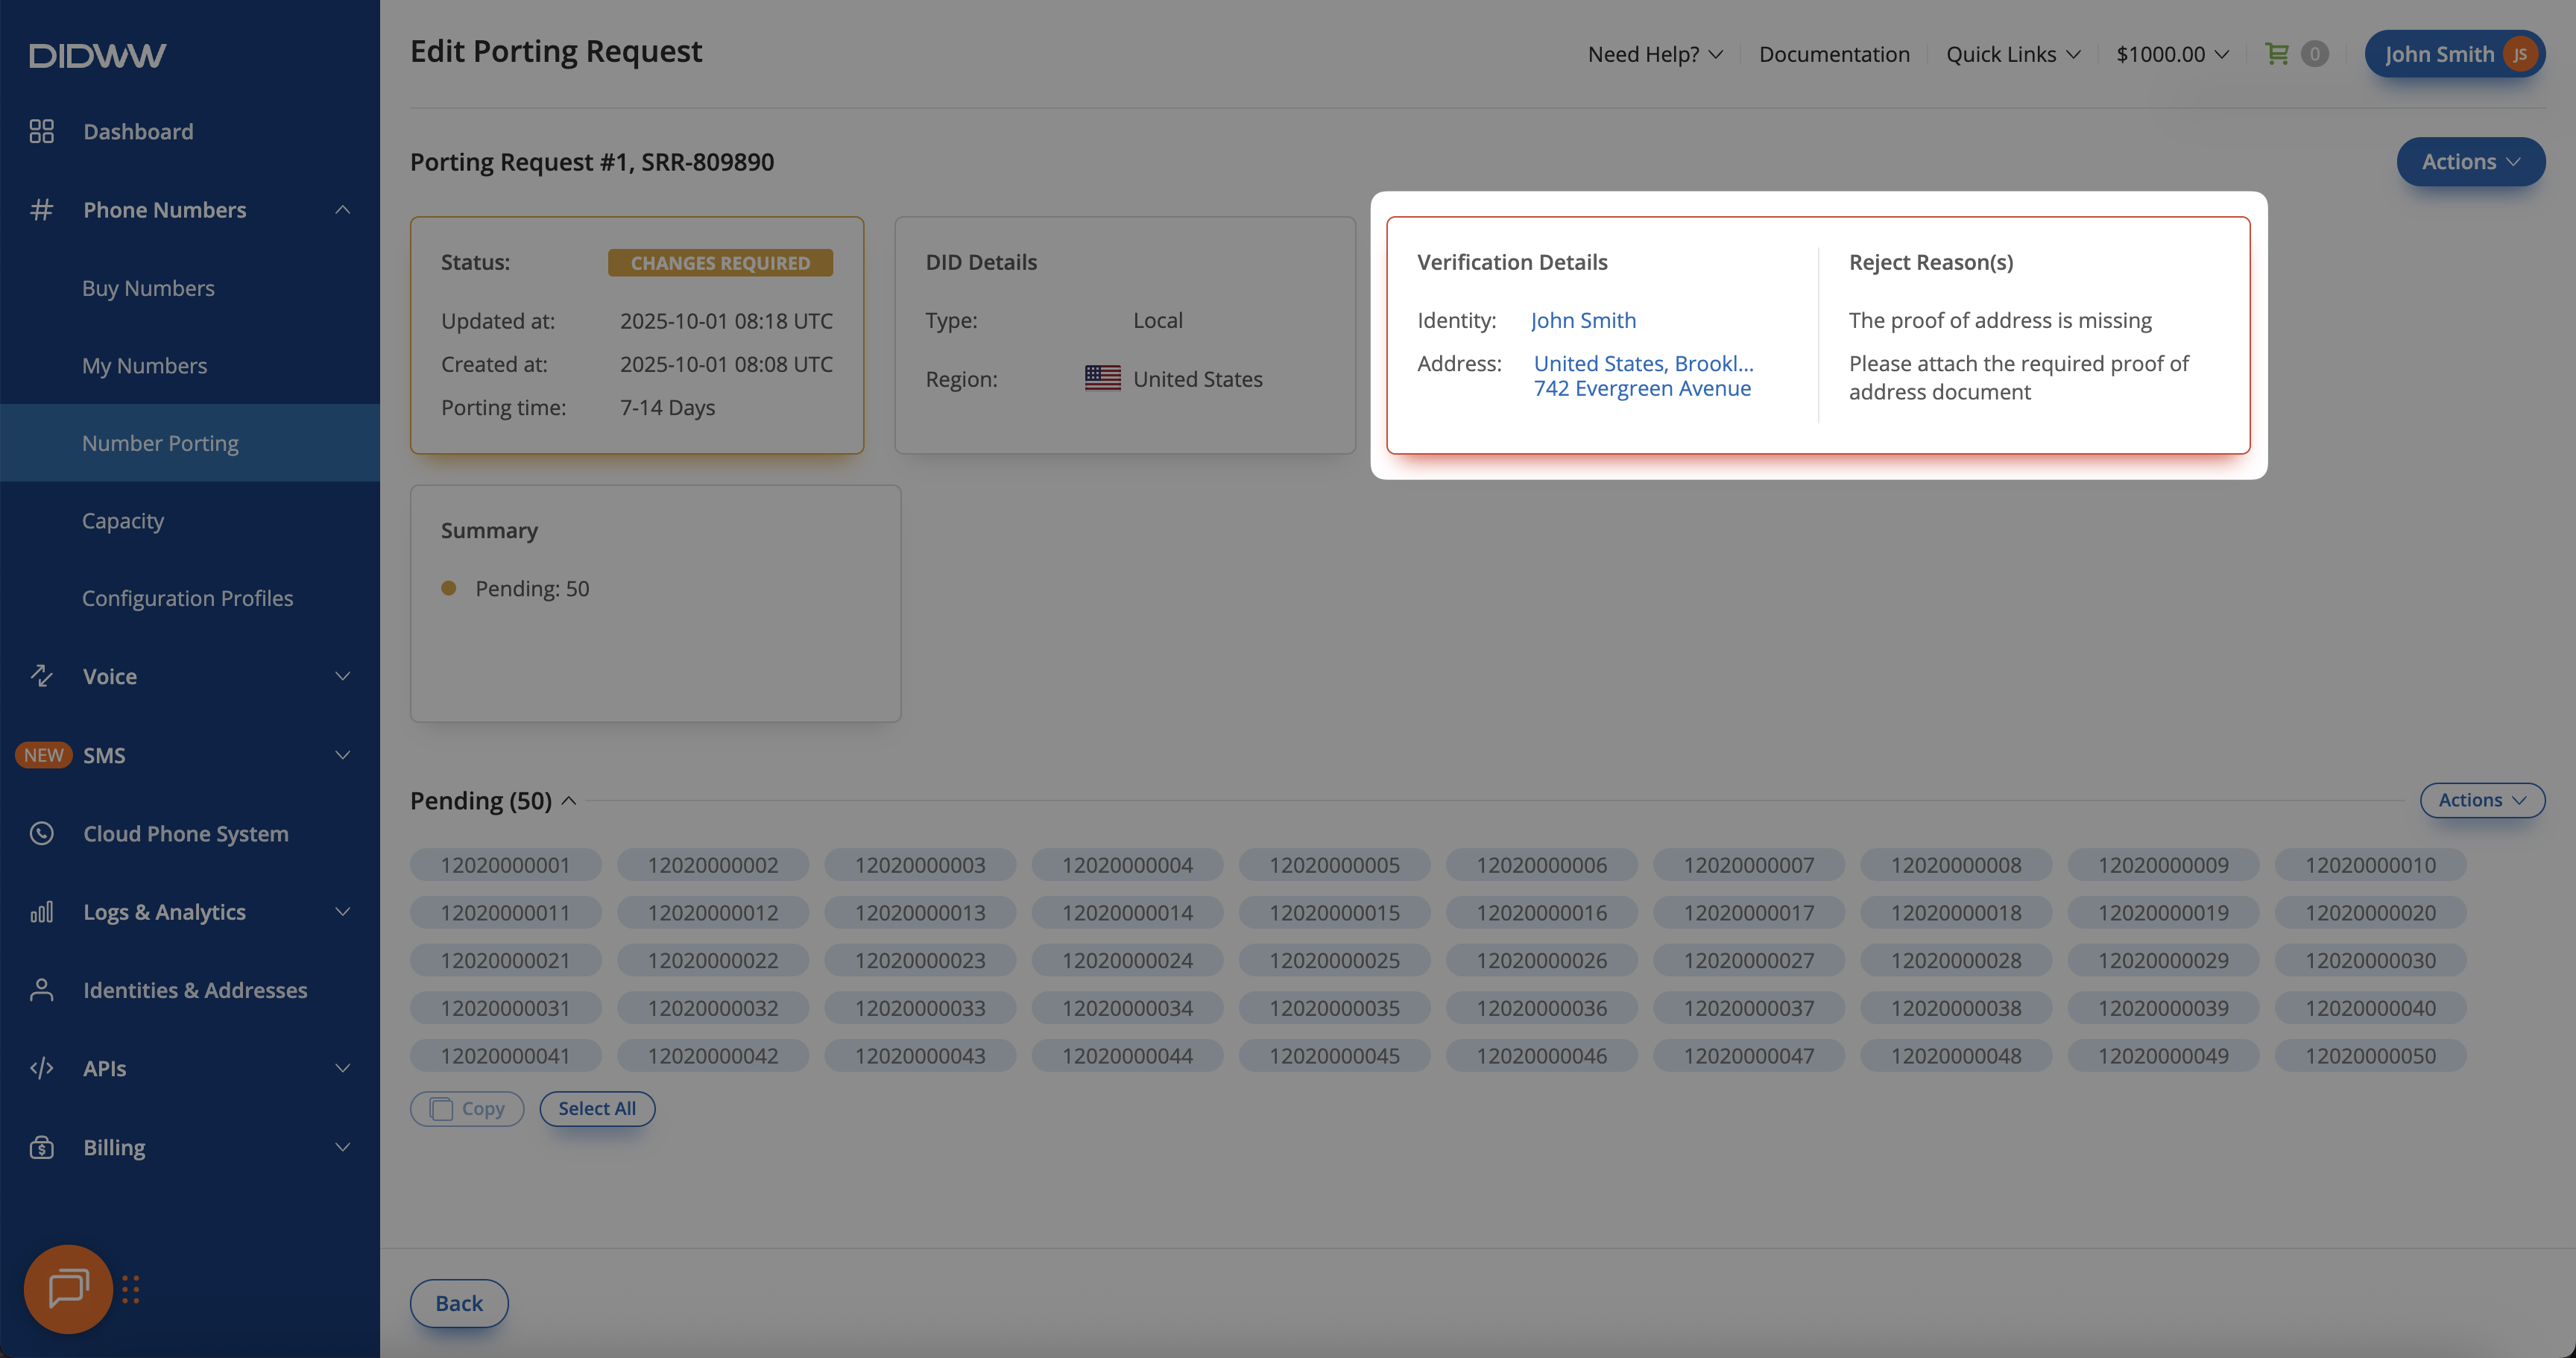
Fig. 3. Verification details and rejection reasons for the porting request.#
Step 4: Update identity or address information#
Depending on the rejection reason, update the assigned identity, address, or both.
On the Edit Porting Request page, click Actions > Edit assigned identity or Actions > Edit assigned address.
Update the required fields.
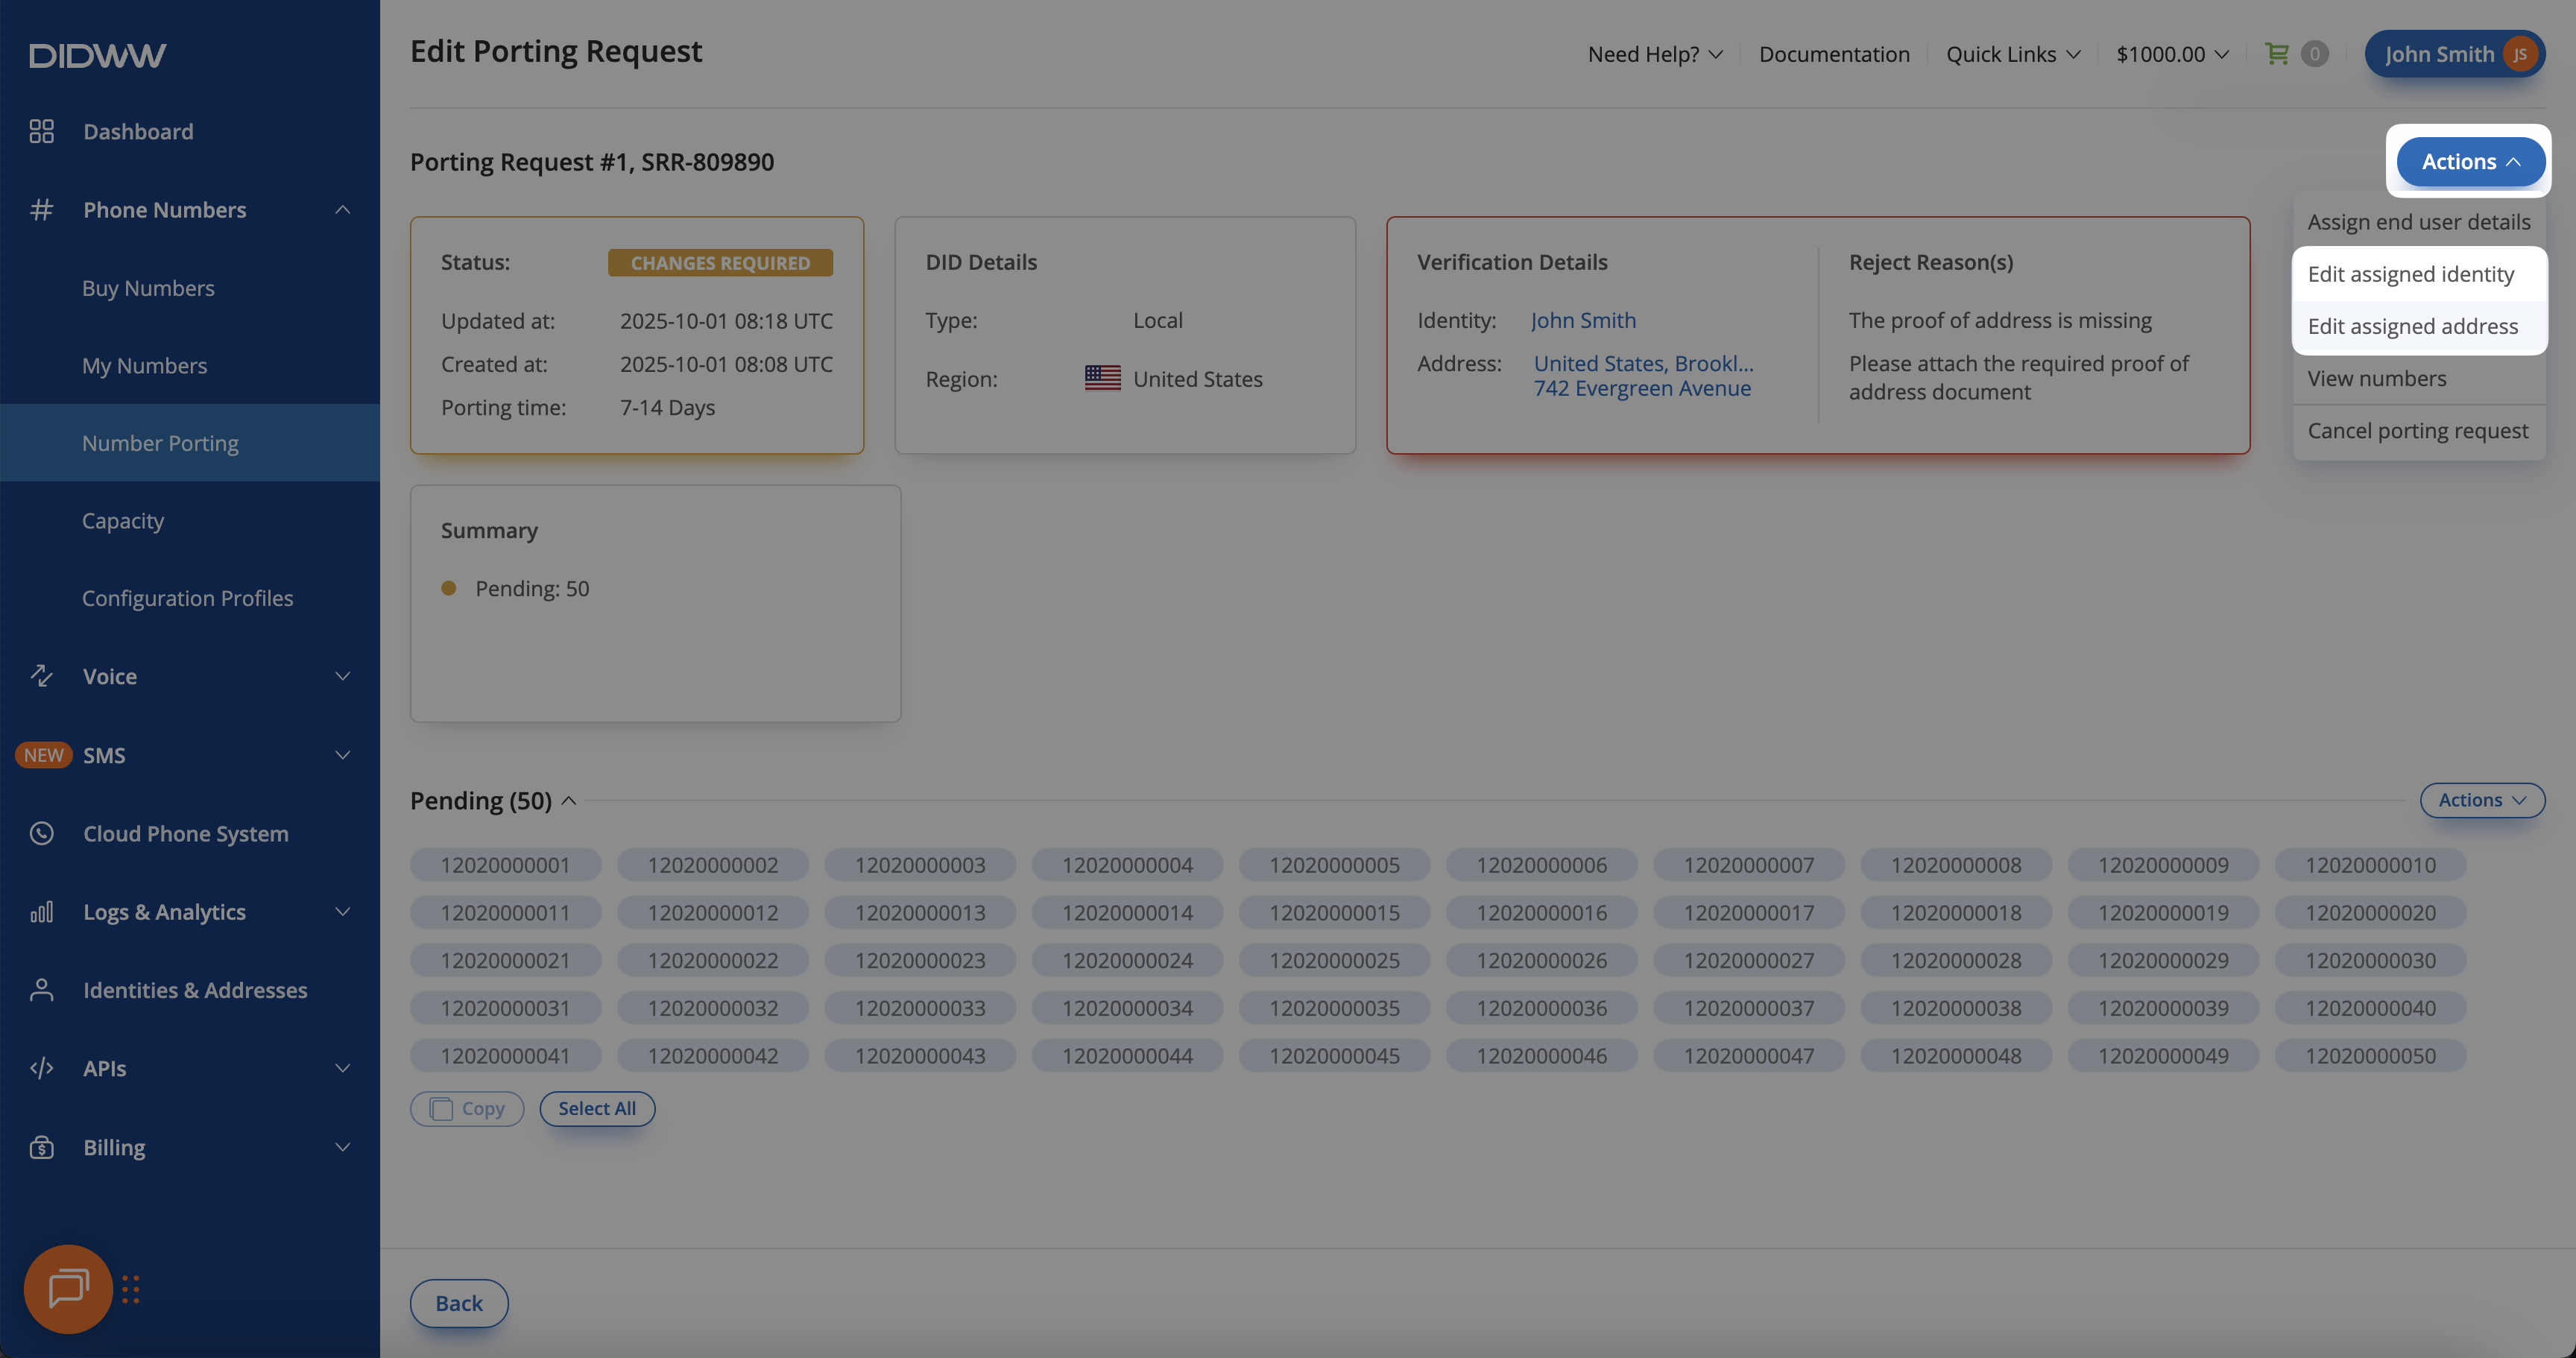
Fig. 4. Editing assigned address or identity based on rejection reasons.#
Upload any missing or corrected documents.
Click Submit.
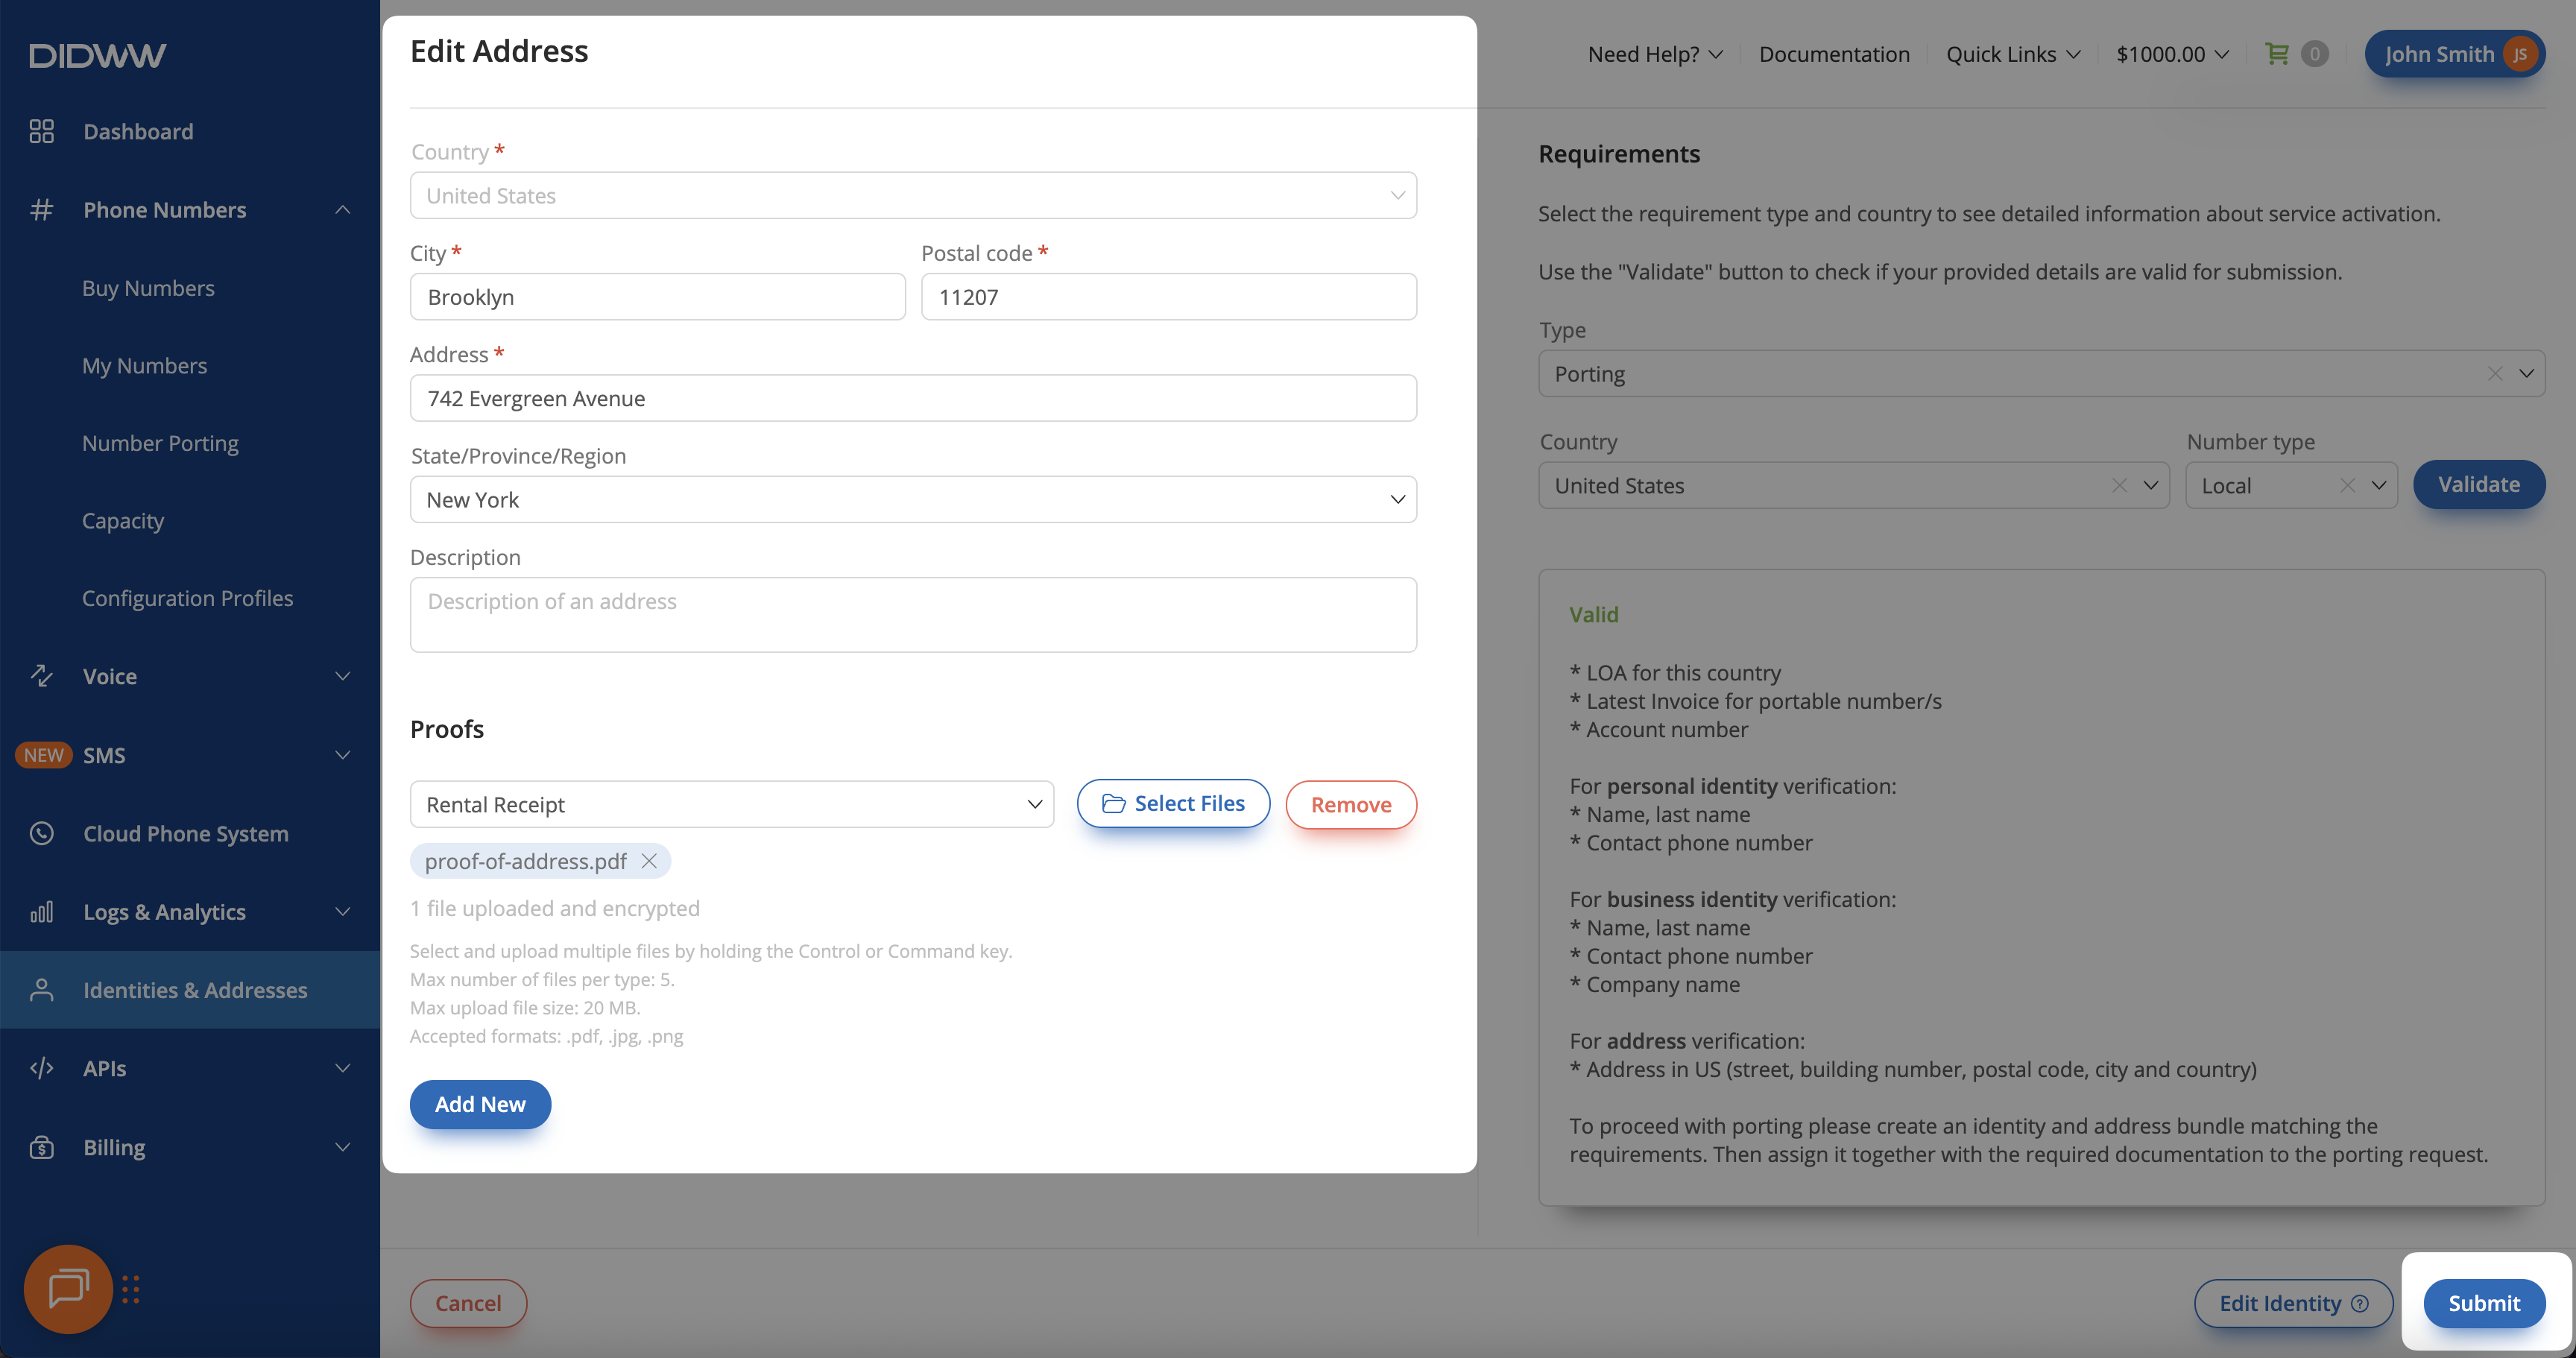
Fig. 5. Uploading proof documents and submitting changes.#
Step 5: Reassign end user details#
After updating the required information, reassign the updated end user details before resubmitting the request.
On the Edit Porting Request page, click Actions > Assign end user details.
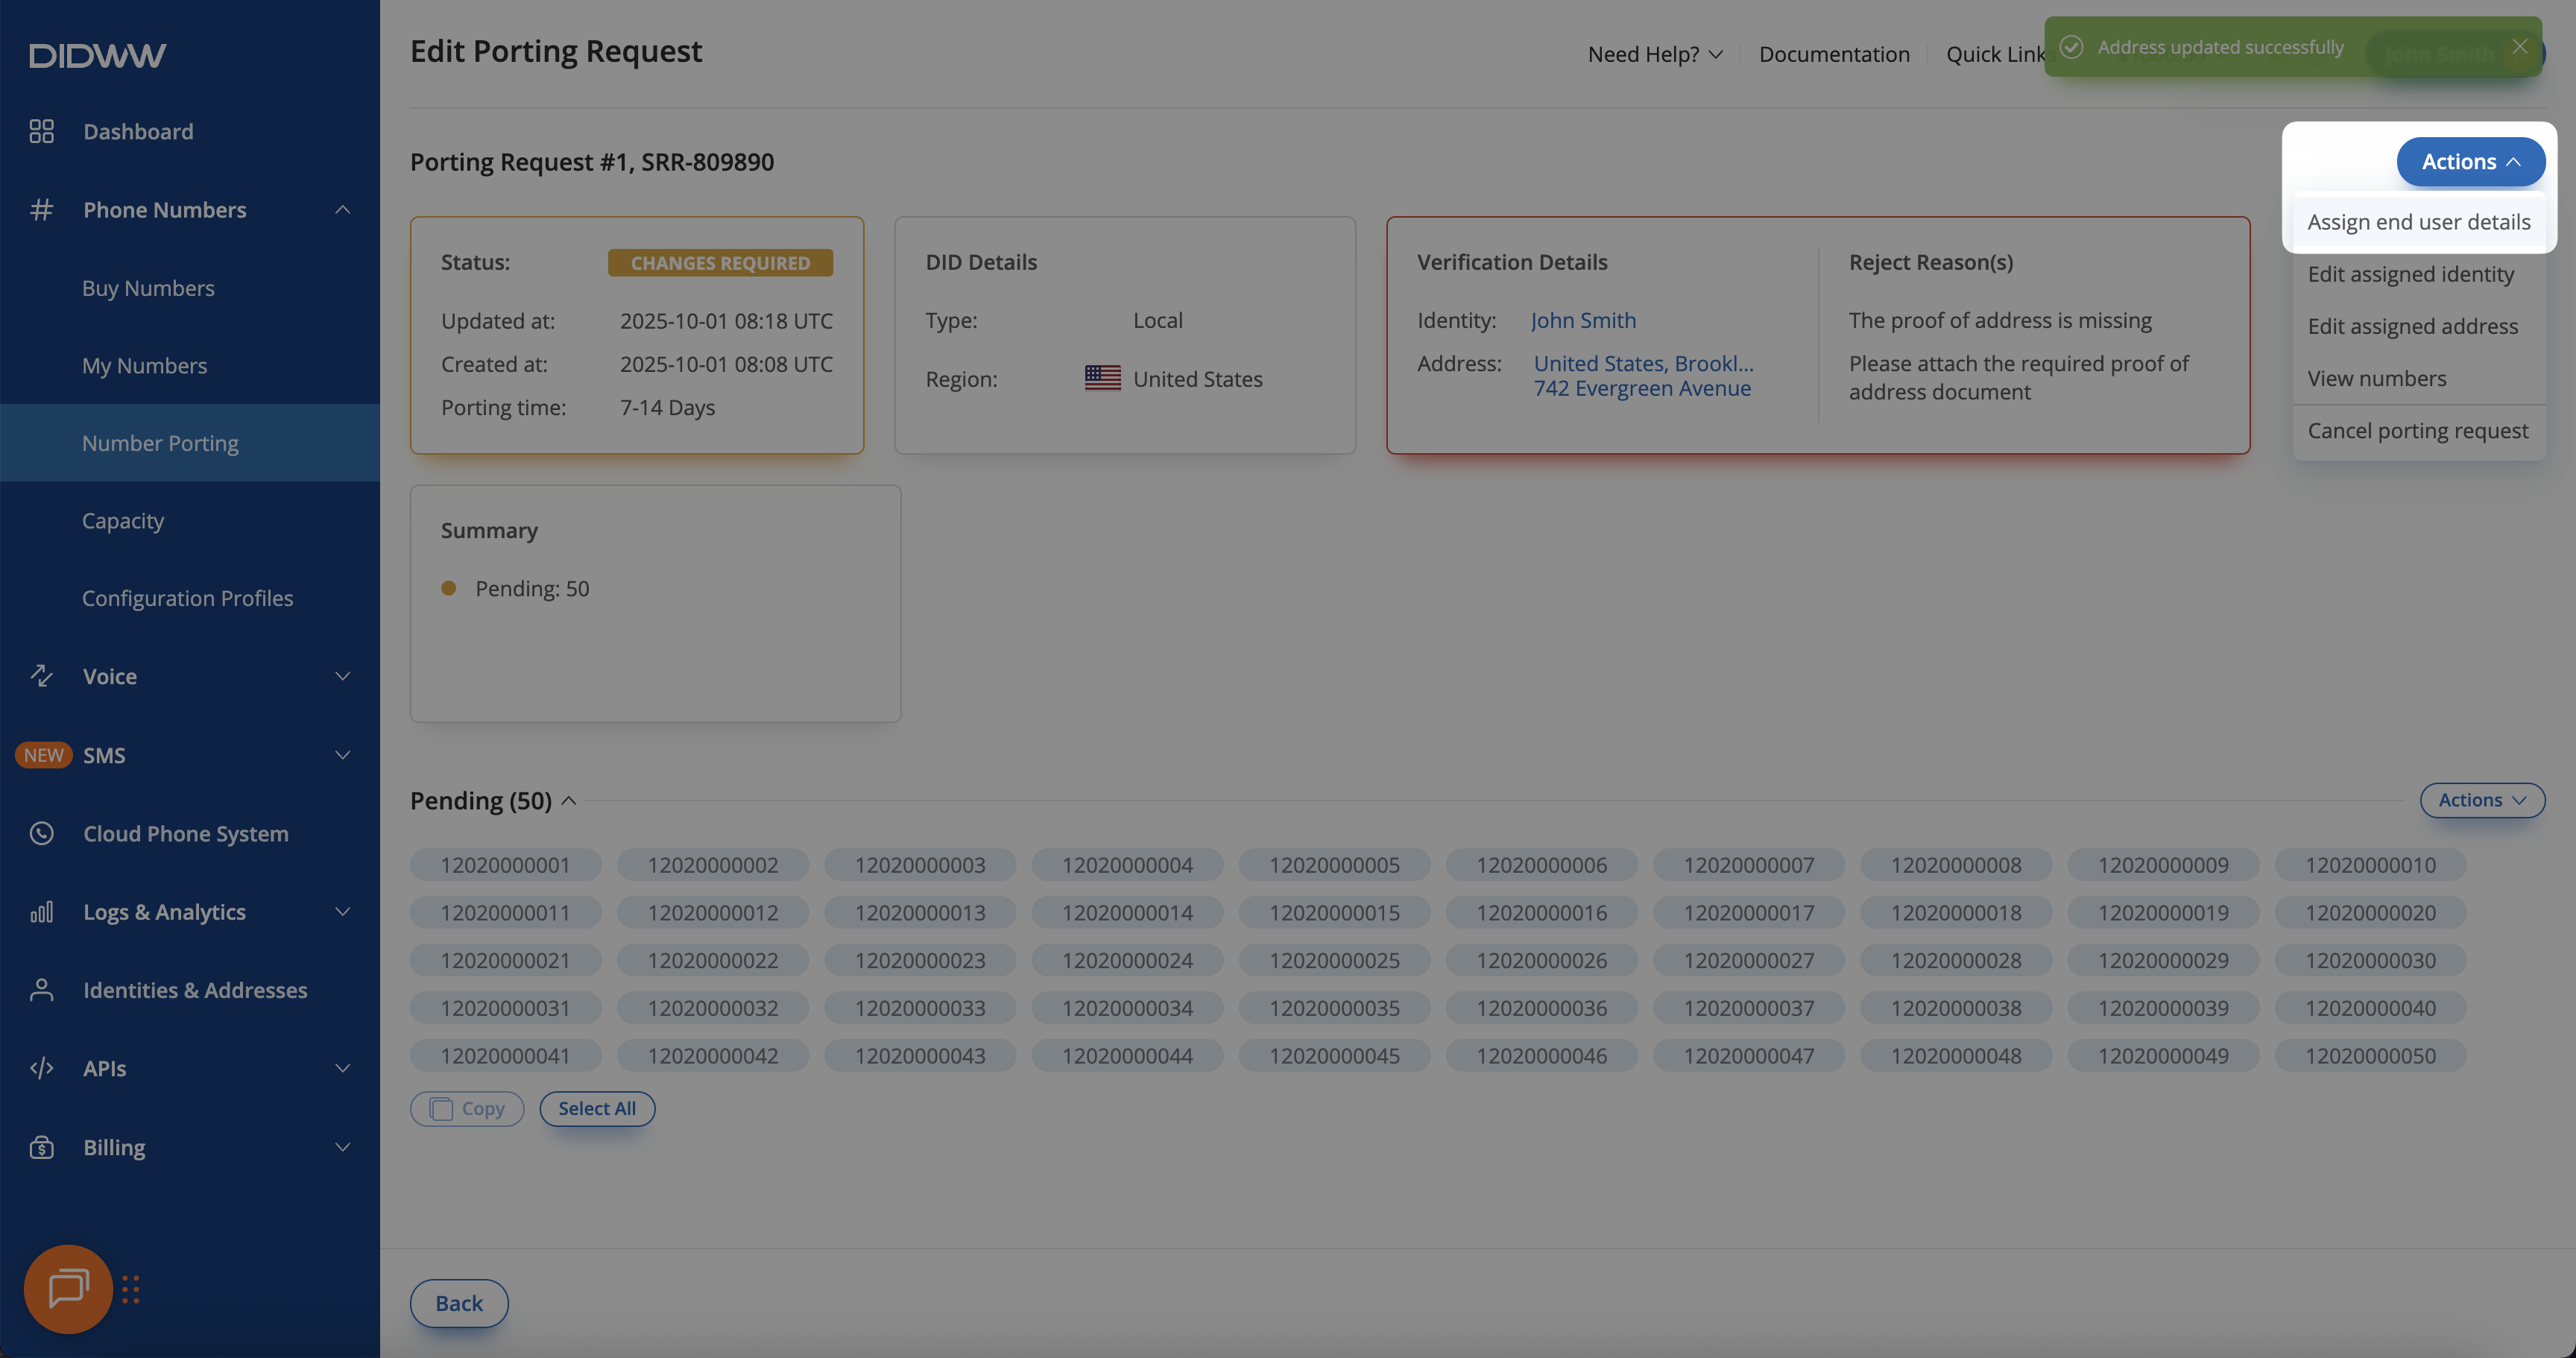
Fig. 6. Assigning end user details with the updated information.#
In the Assign End User Details pop-up window, select the updated Identity and Address.
Upload the required LOA document.
Enter the current carrier account number.
Click Submit.
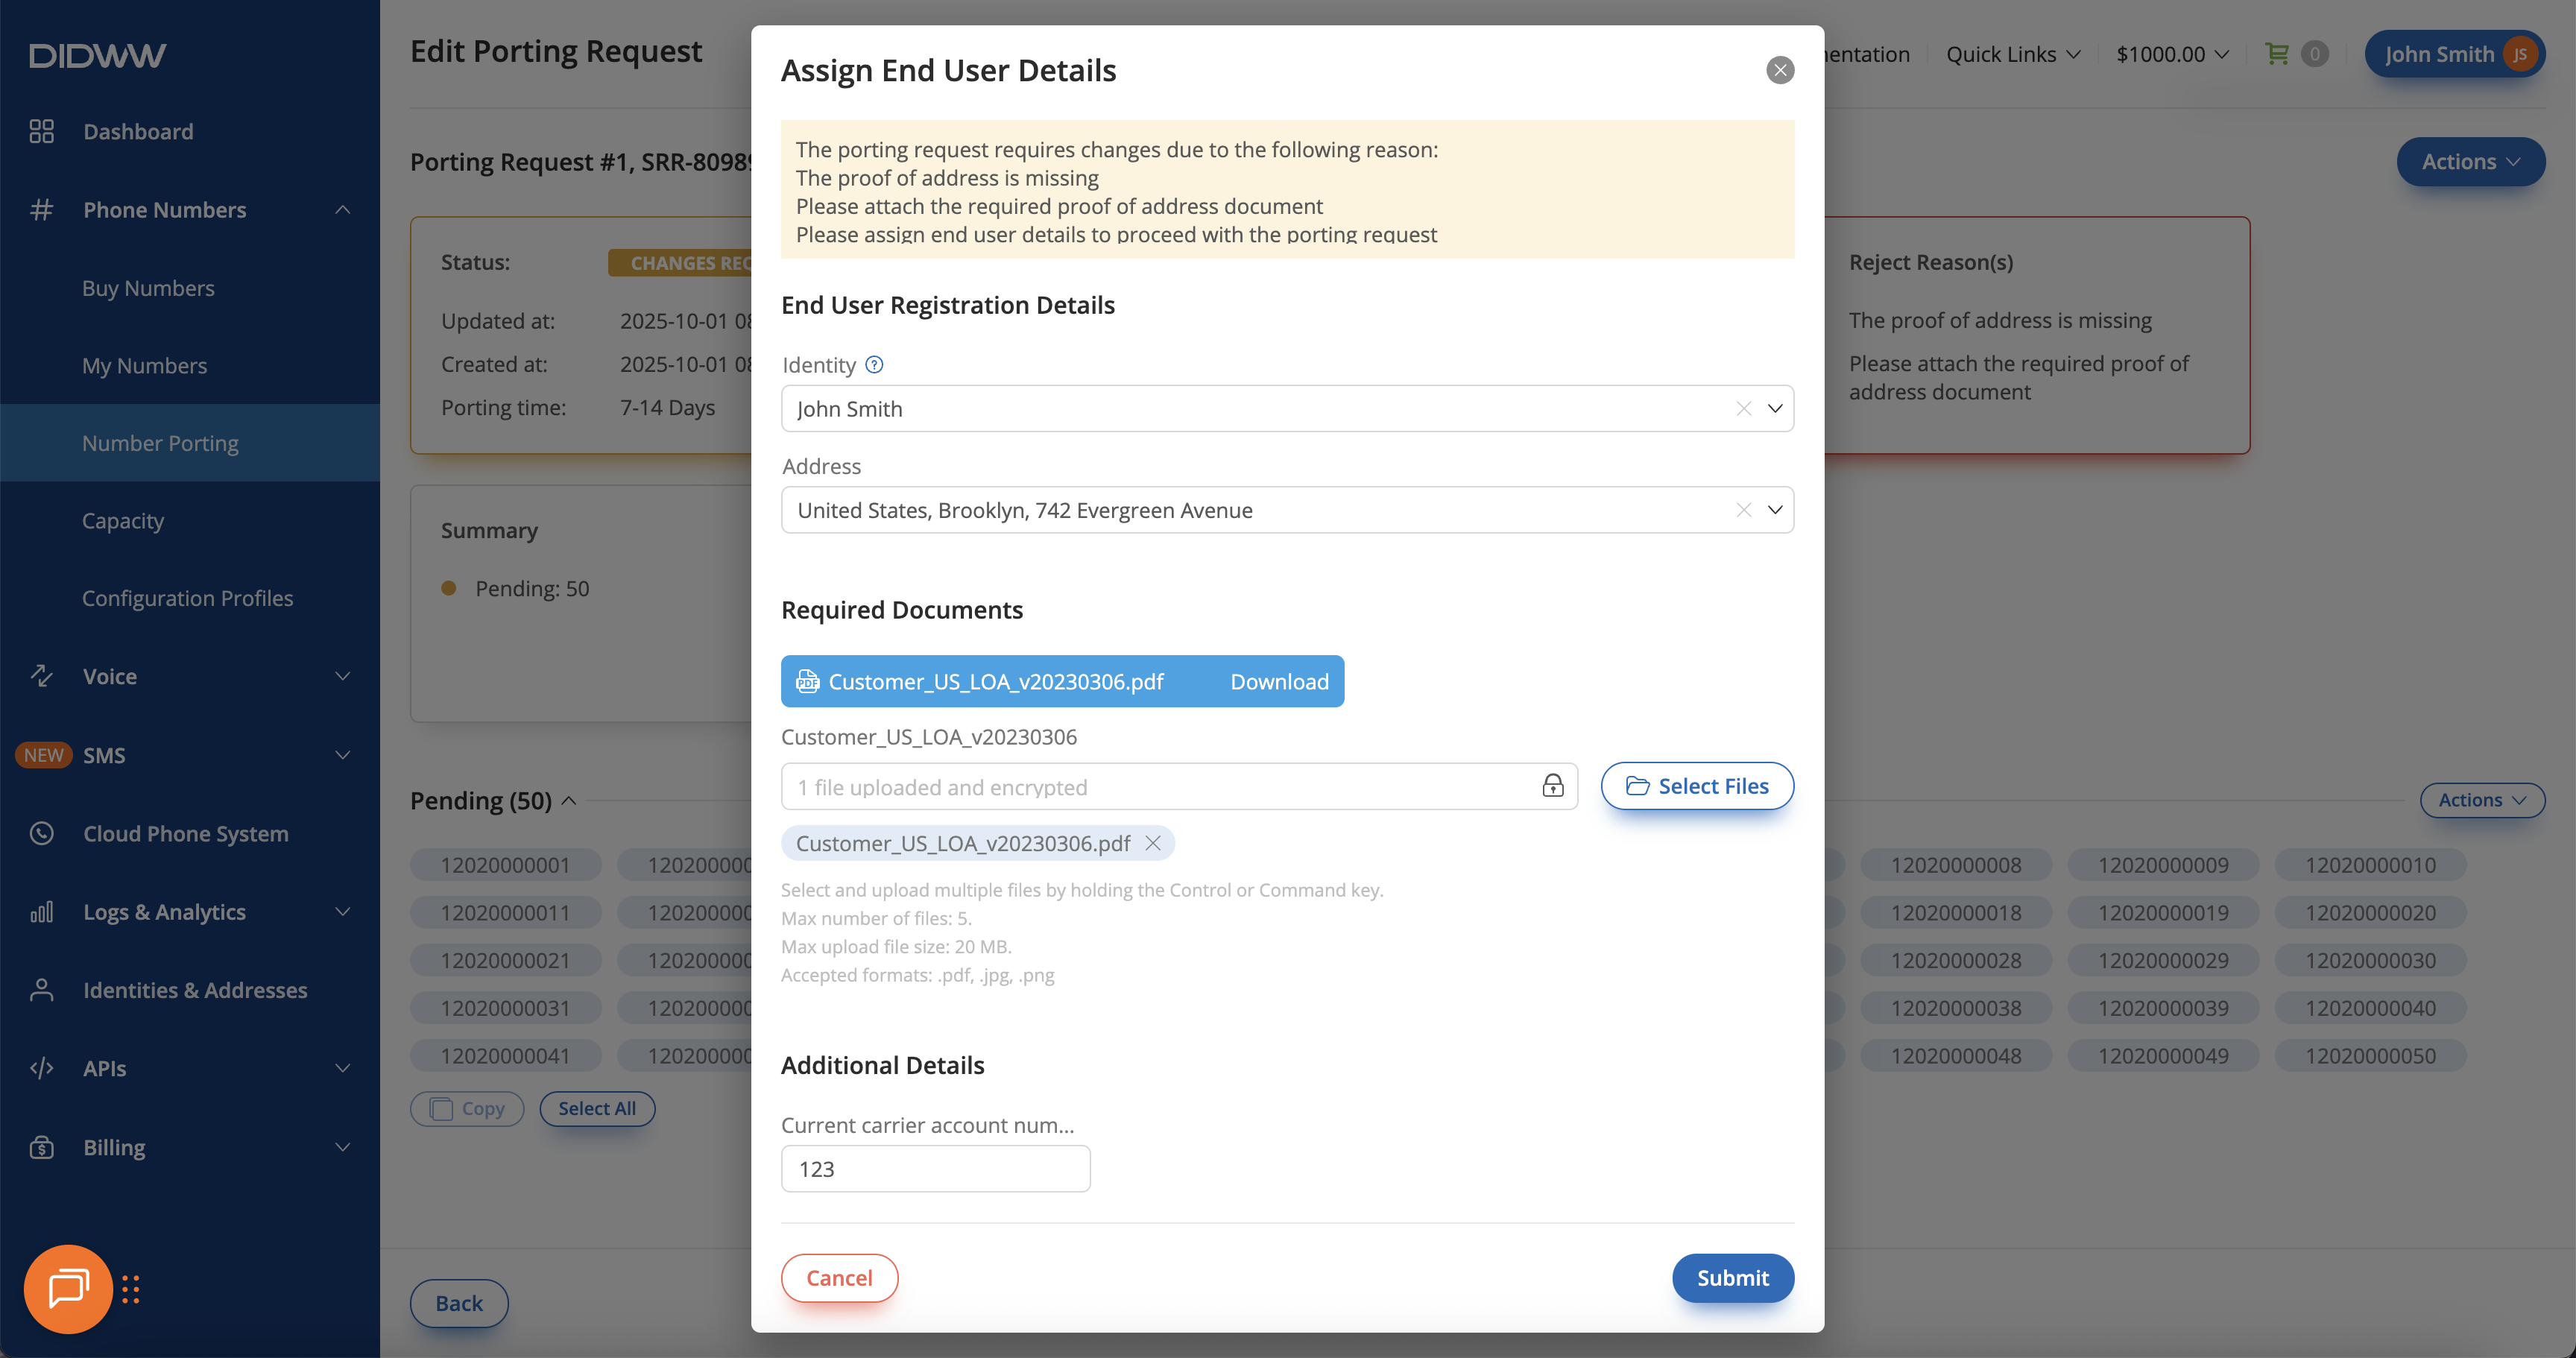
Fig. 7. Uploading LOA and required documents before resubmitting.#
After the end user details are assigned, the porting request returns to Pending status for re-verification.
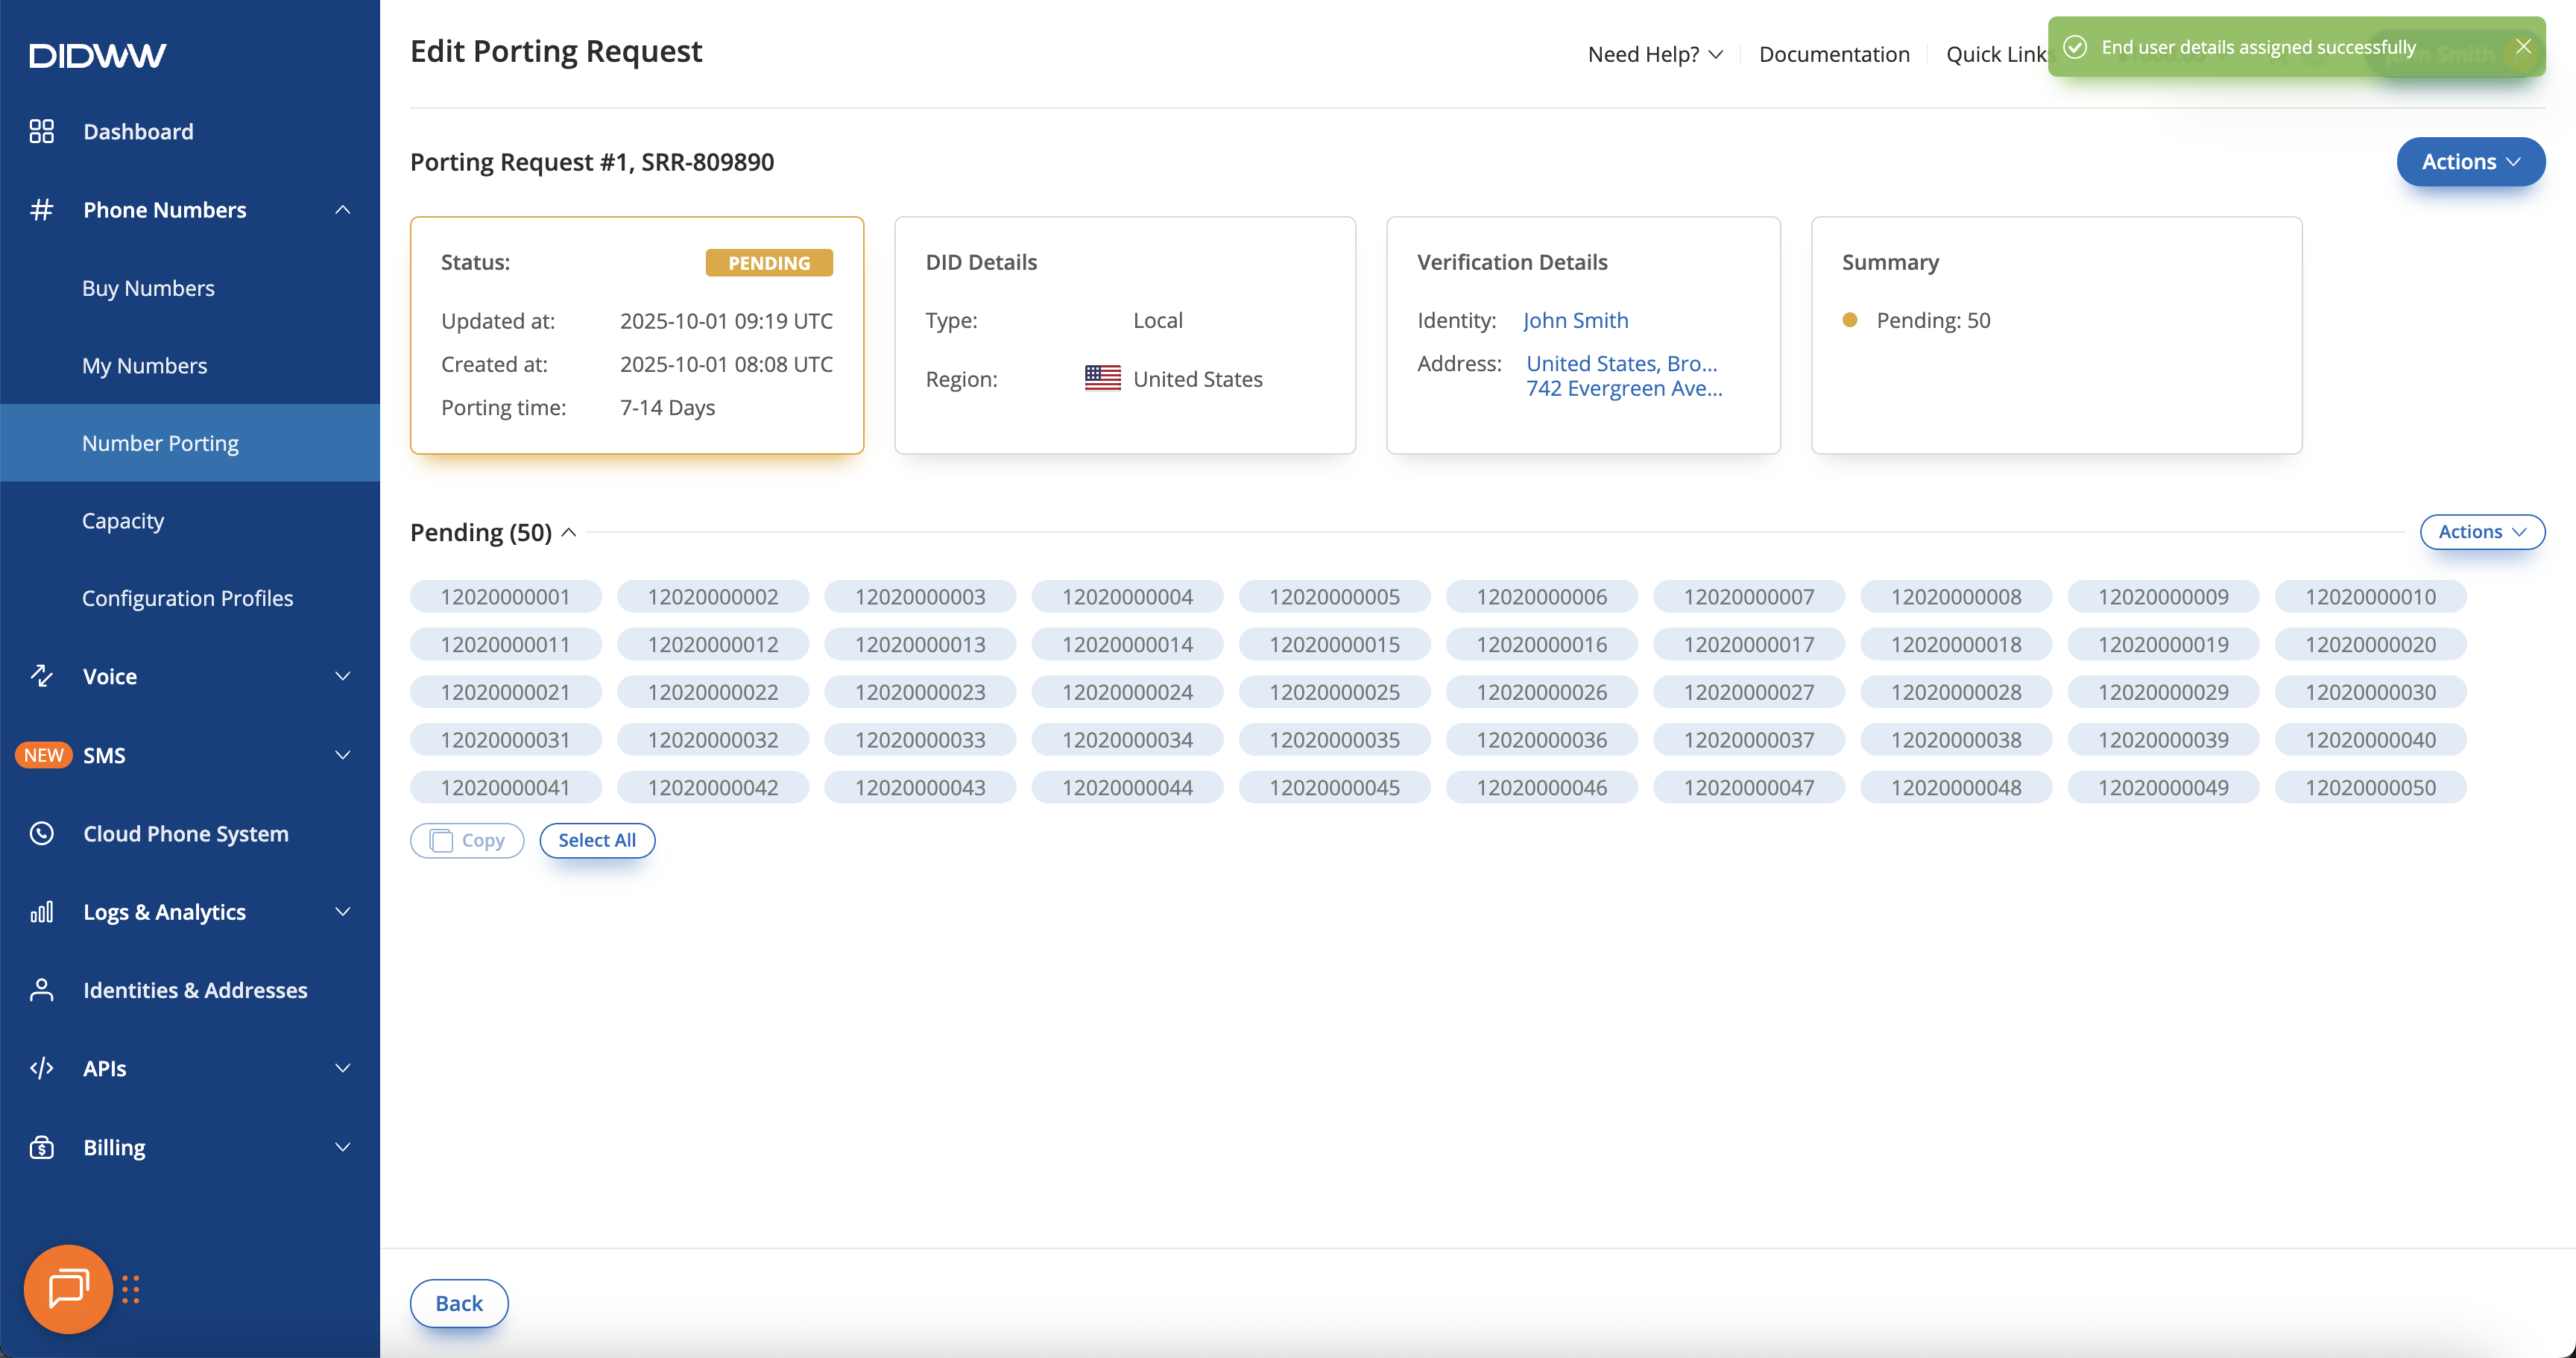
Fig. 8. Confirmation message after end user details are assigned.#