Identities#
An identity contains the end-user’s personal or business information, along with uploaded proof documents. This information is used to meet the regulatory requirements for various services.
Learn how identities are prioritized for different services.
Follow a step-by-step guide to create a new Personal or Business identity.
Modify the details of an existing identity.
Permanently remove an identity that is no longer in use.
Identity Hierarchy#
The identity hierarchy is a ranking system that determines which identity takes precedence when it is assigned to a specific service. While identities can be reused, it is important to note that once an identity is used to activate a service, it should be used for subsequent service activations for the same number to ensure consistency.
The priority is ranked as follows, from highest (1) to lowest (3):
Number Registration Identity
A2P Campaign Identity, Emergency Calling Identity, CNAM Identity
Porting Identity
The assigned identity for a number is displayed in the Identity column of the Phone Numbers > My Numbers section.
Note
A2P Campaigns can only be registered with a Business identity.
If a number registration is pending, that identity cannot be assigned to other services (A2P, Emergency, CNAM) until it is approved.
Create a New Identity#
Follow the steps below to create a new identity in the DIDWW User Panel.
Step 1: Add New Identity#
Go to the Identities & Addresses section
Click the Add New Identity button.
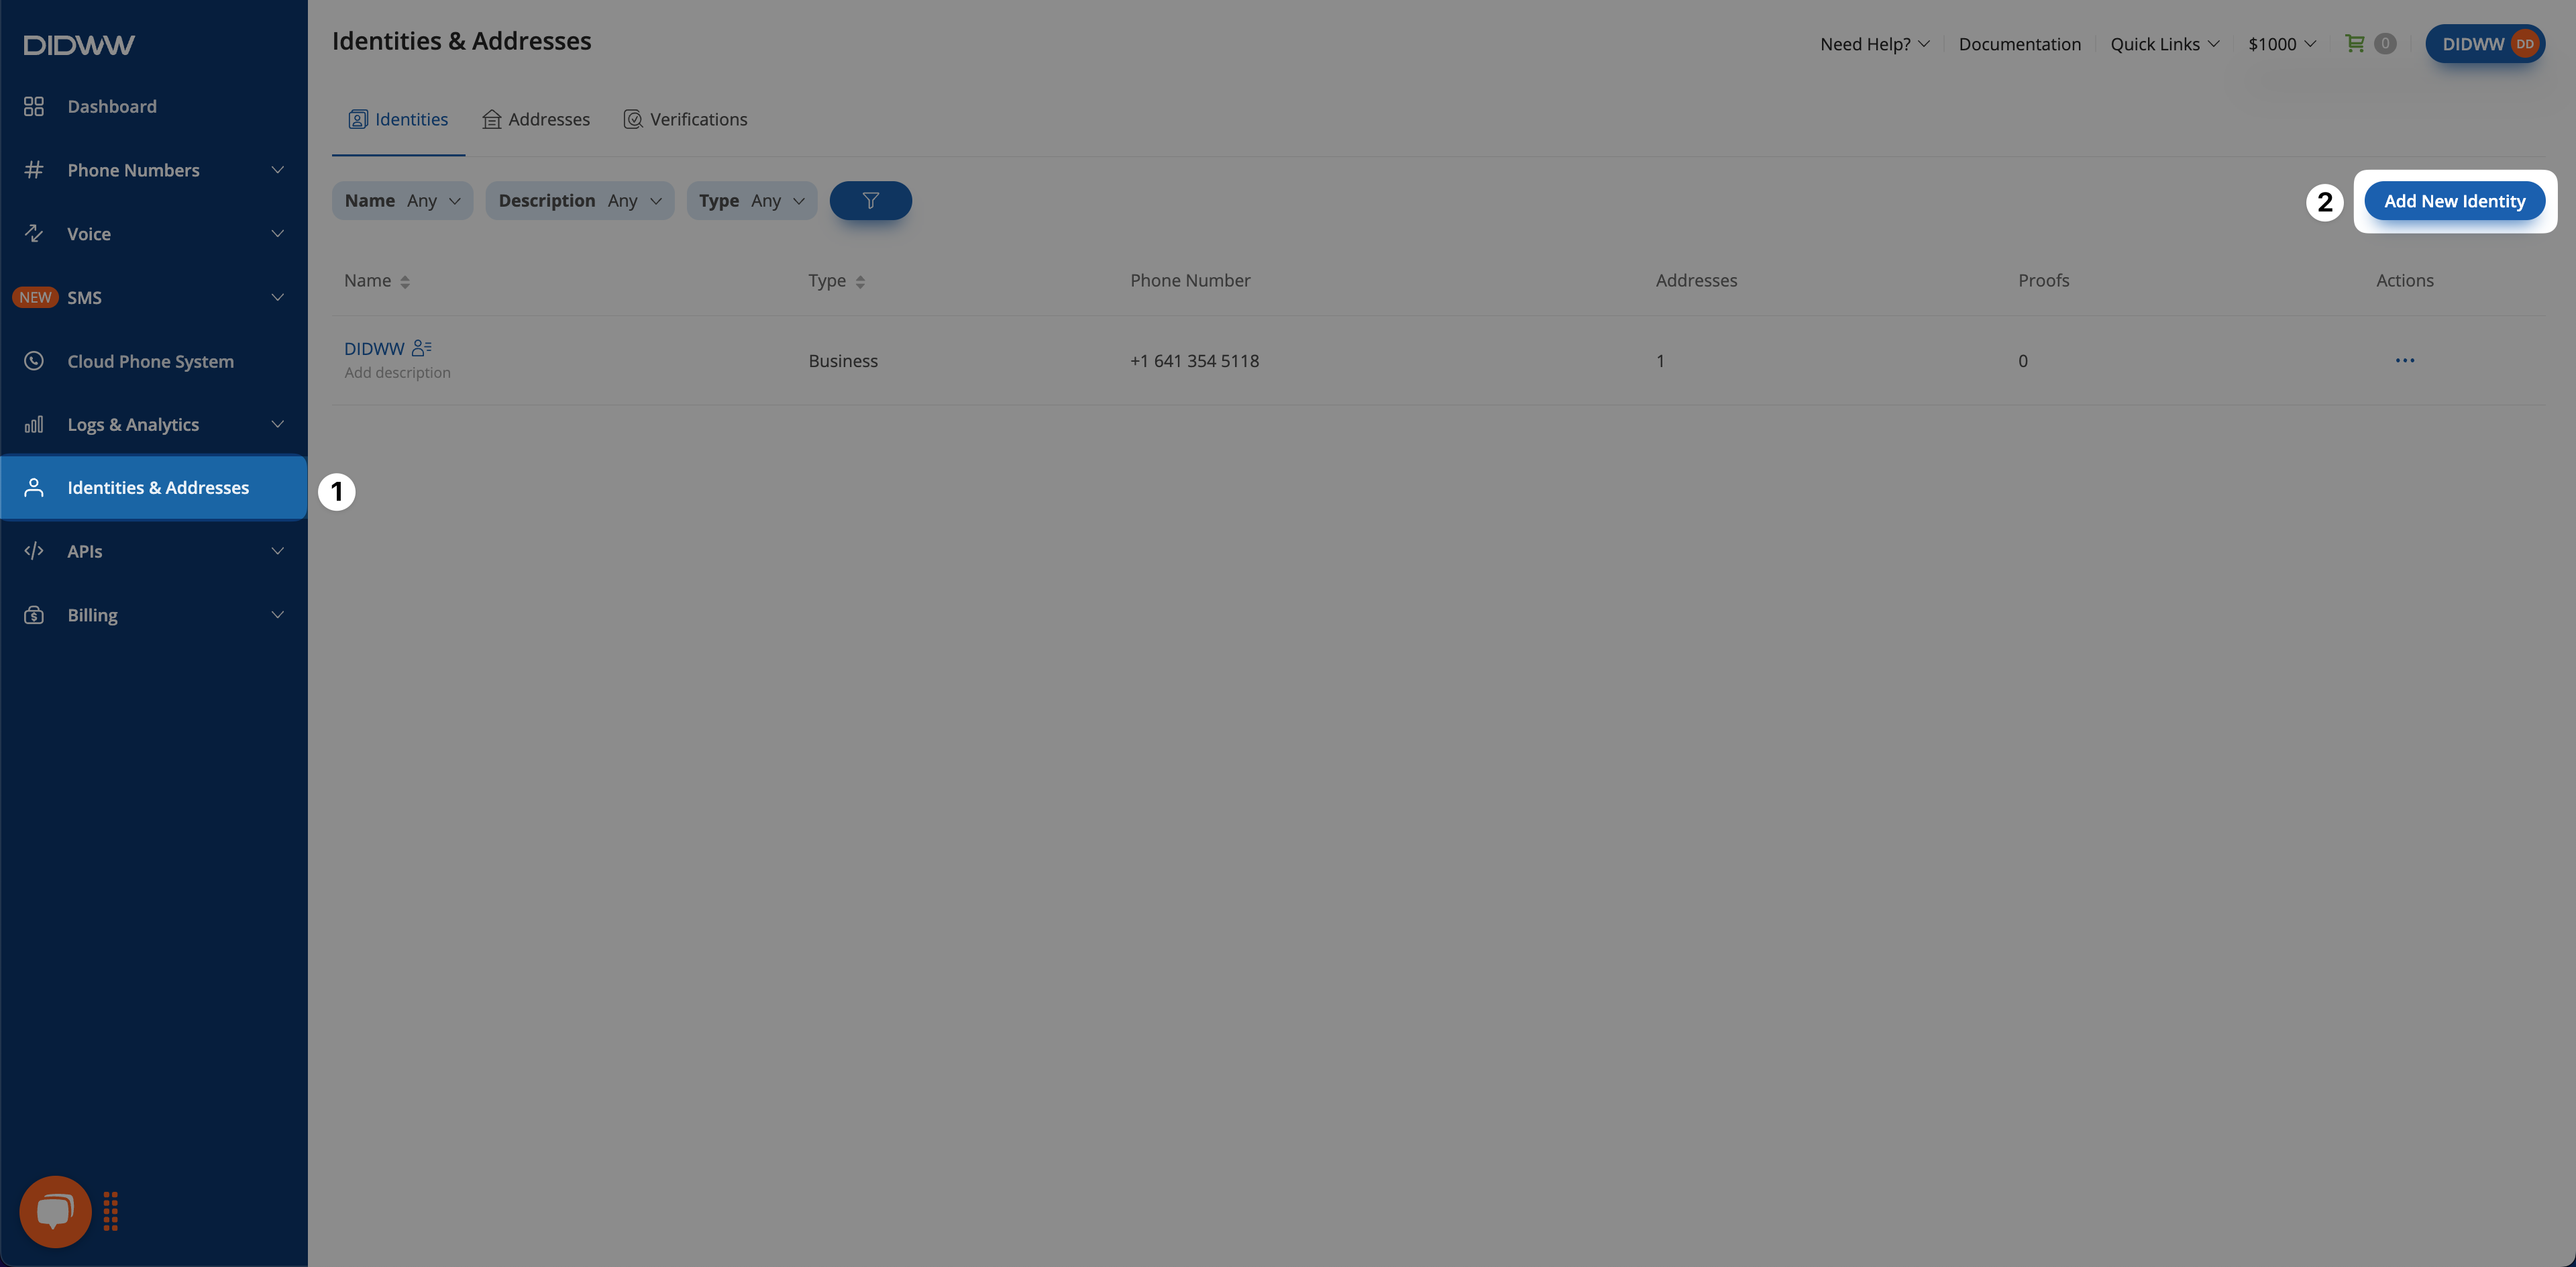
Fig. 1 The Identities & Addresses main page.#
Step 2: Check Requirements by Service Type#
For the most efficient workflow, start by checking the requirements for your use case on the New Identity page. This ensures you have the correct documents and information before proceeding.
Use the Requirements checker on the right side of the page.
Select the service Type (e.g., Registration, Porting, A2P Campaigns, or Emergency Calling) and the target Country (e.g., Belgium).
Review the displayed list of required documents and details. If any downloadable forms are provided, download them, complete as instructed, and upload them as part of the submission.
Note
Each requirement type corresponds to a specific use case:
Registration – Submit documents needed to register a DID number’s end-user.
Porting – Provide details to create a porting request from another provider to DIDWW.
A2P Campaigns – Required to register and enable SMS delivery via Long Code or Alphanumeric Sender ID for A2P messaging services.
Emergency Calling – Required to register and enable emergency calling services for your DID number.
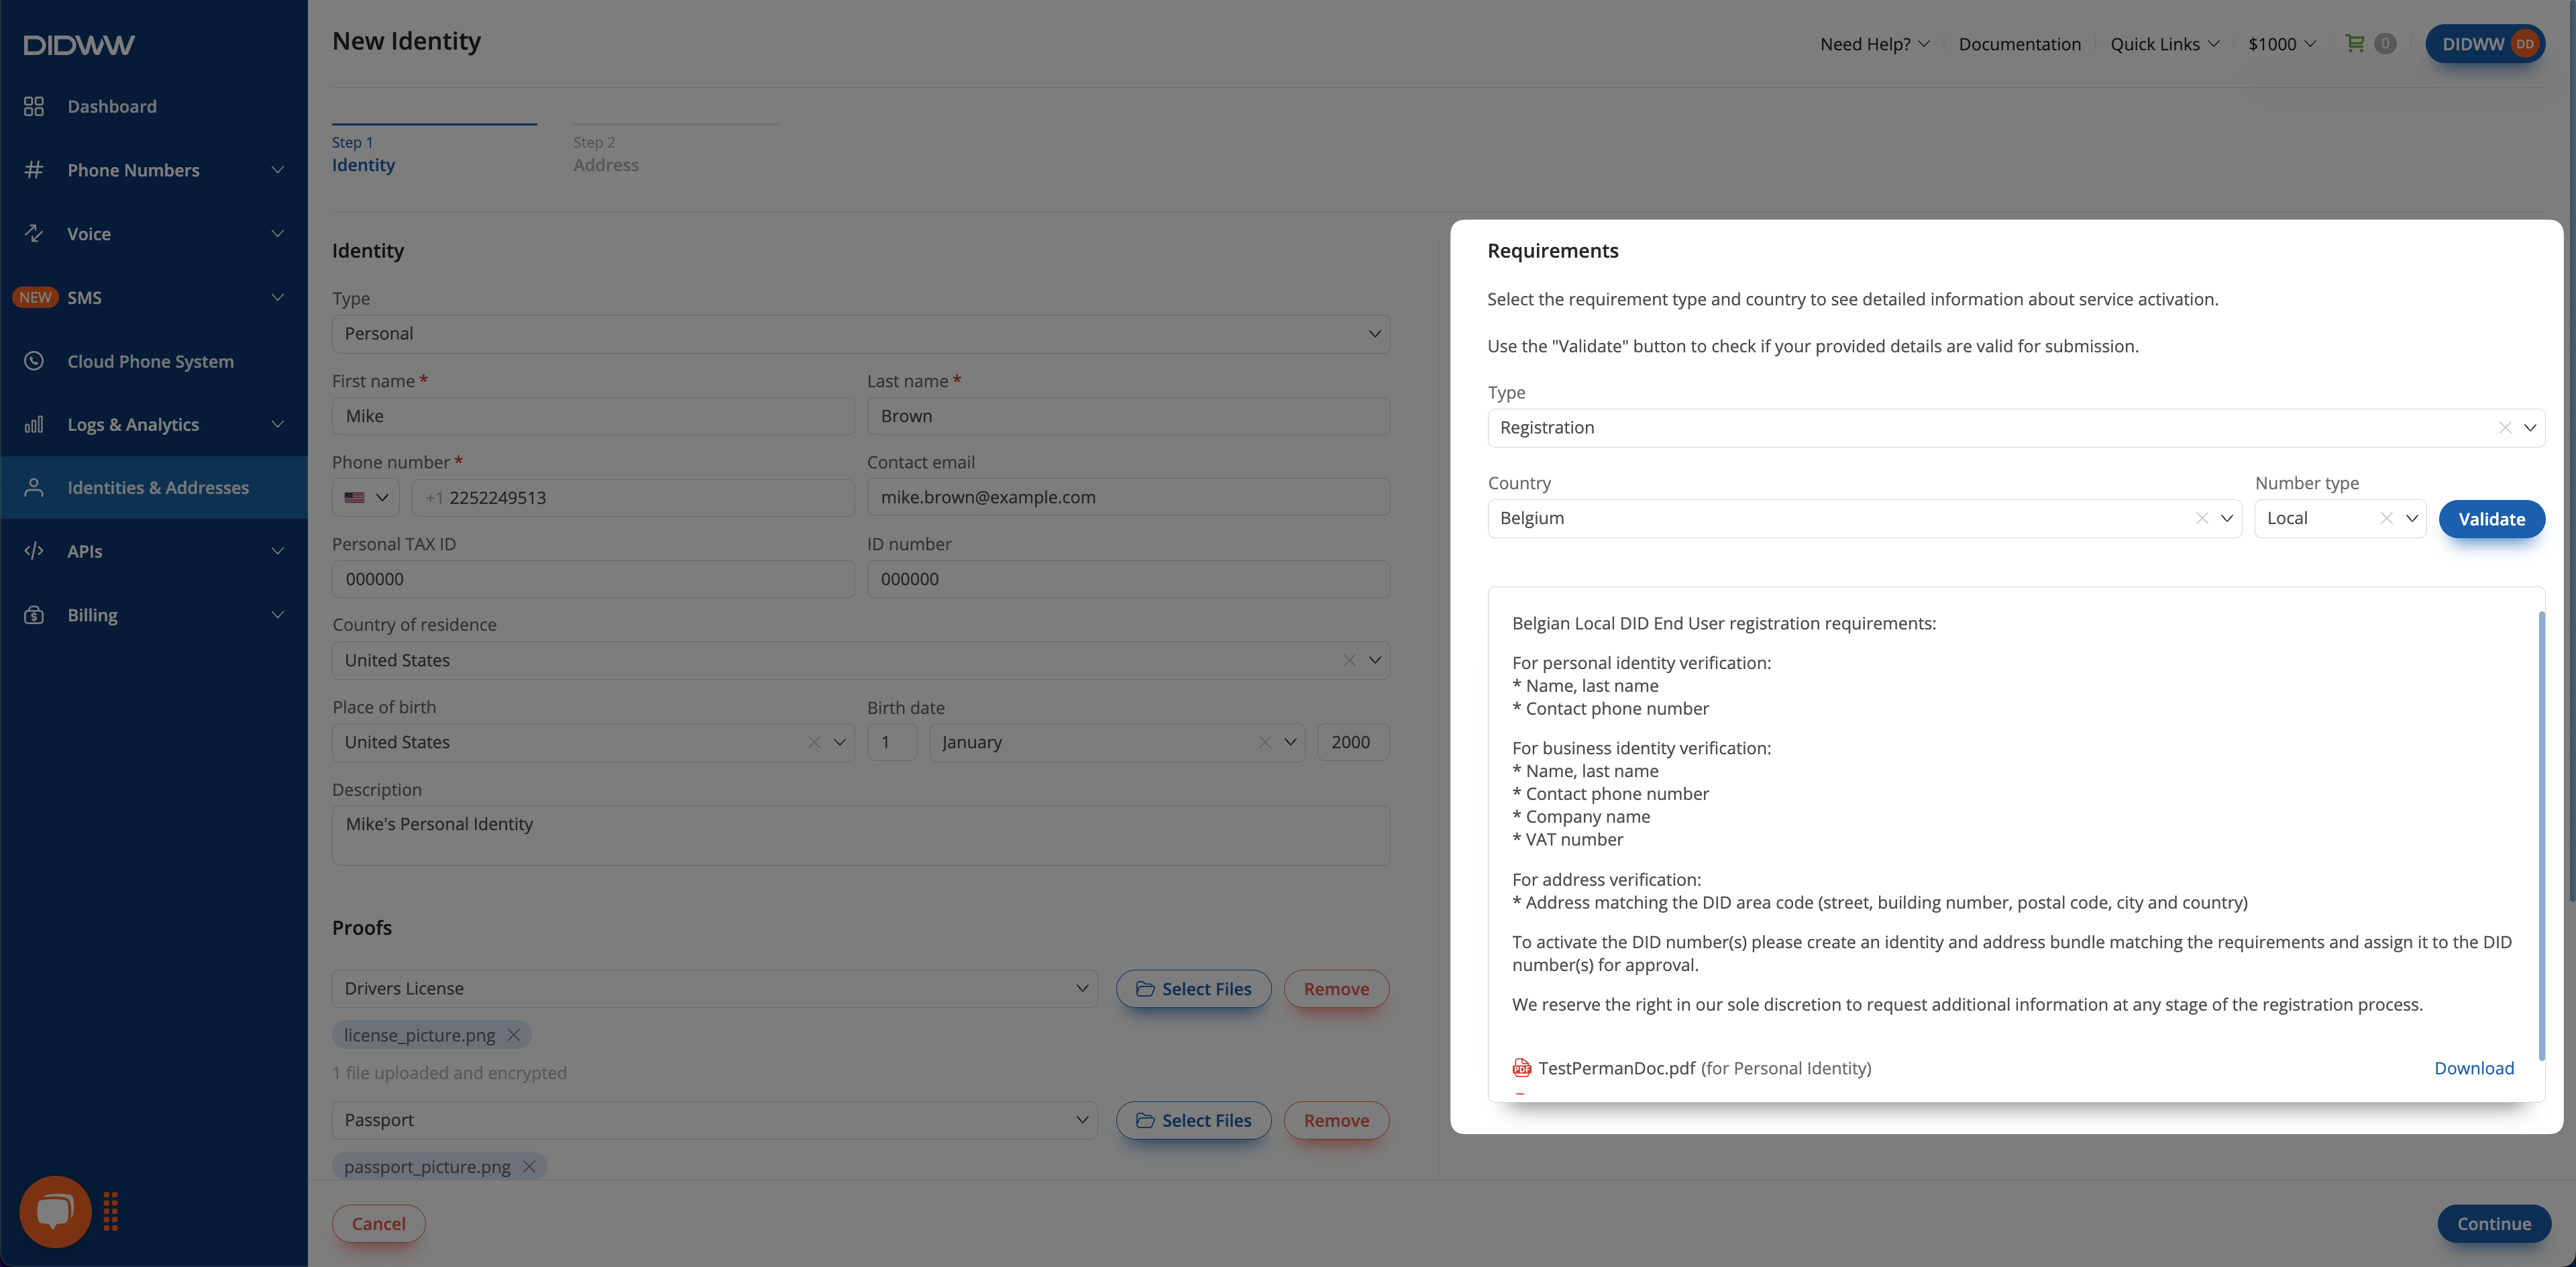
Fig. 2 Checking registration requirements for Belgium.#
Step 3: Enter Identity Details and Upload Documents#
Important
Providing incorrect or insufficient documents may result in a delayed or declined registration process.
All file content is encrypted with AES‑256‑CBC and stored on our servers. Only authorized parties can decrypt it using private keys stored in a Hardware Security Module (HSM).
The maximum upload file size
is 20 MB. The supported file formats.pdf,.jpg,.png.
After reviewing the requirements, fill in the Step 1: Identity details and upload the required documents.
Based on the requirements, choose the appropriate identity Type: Personal or Business.
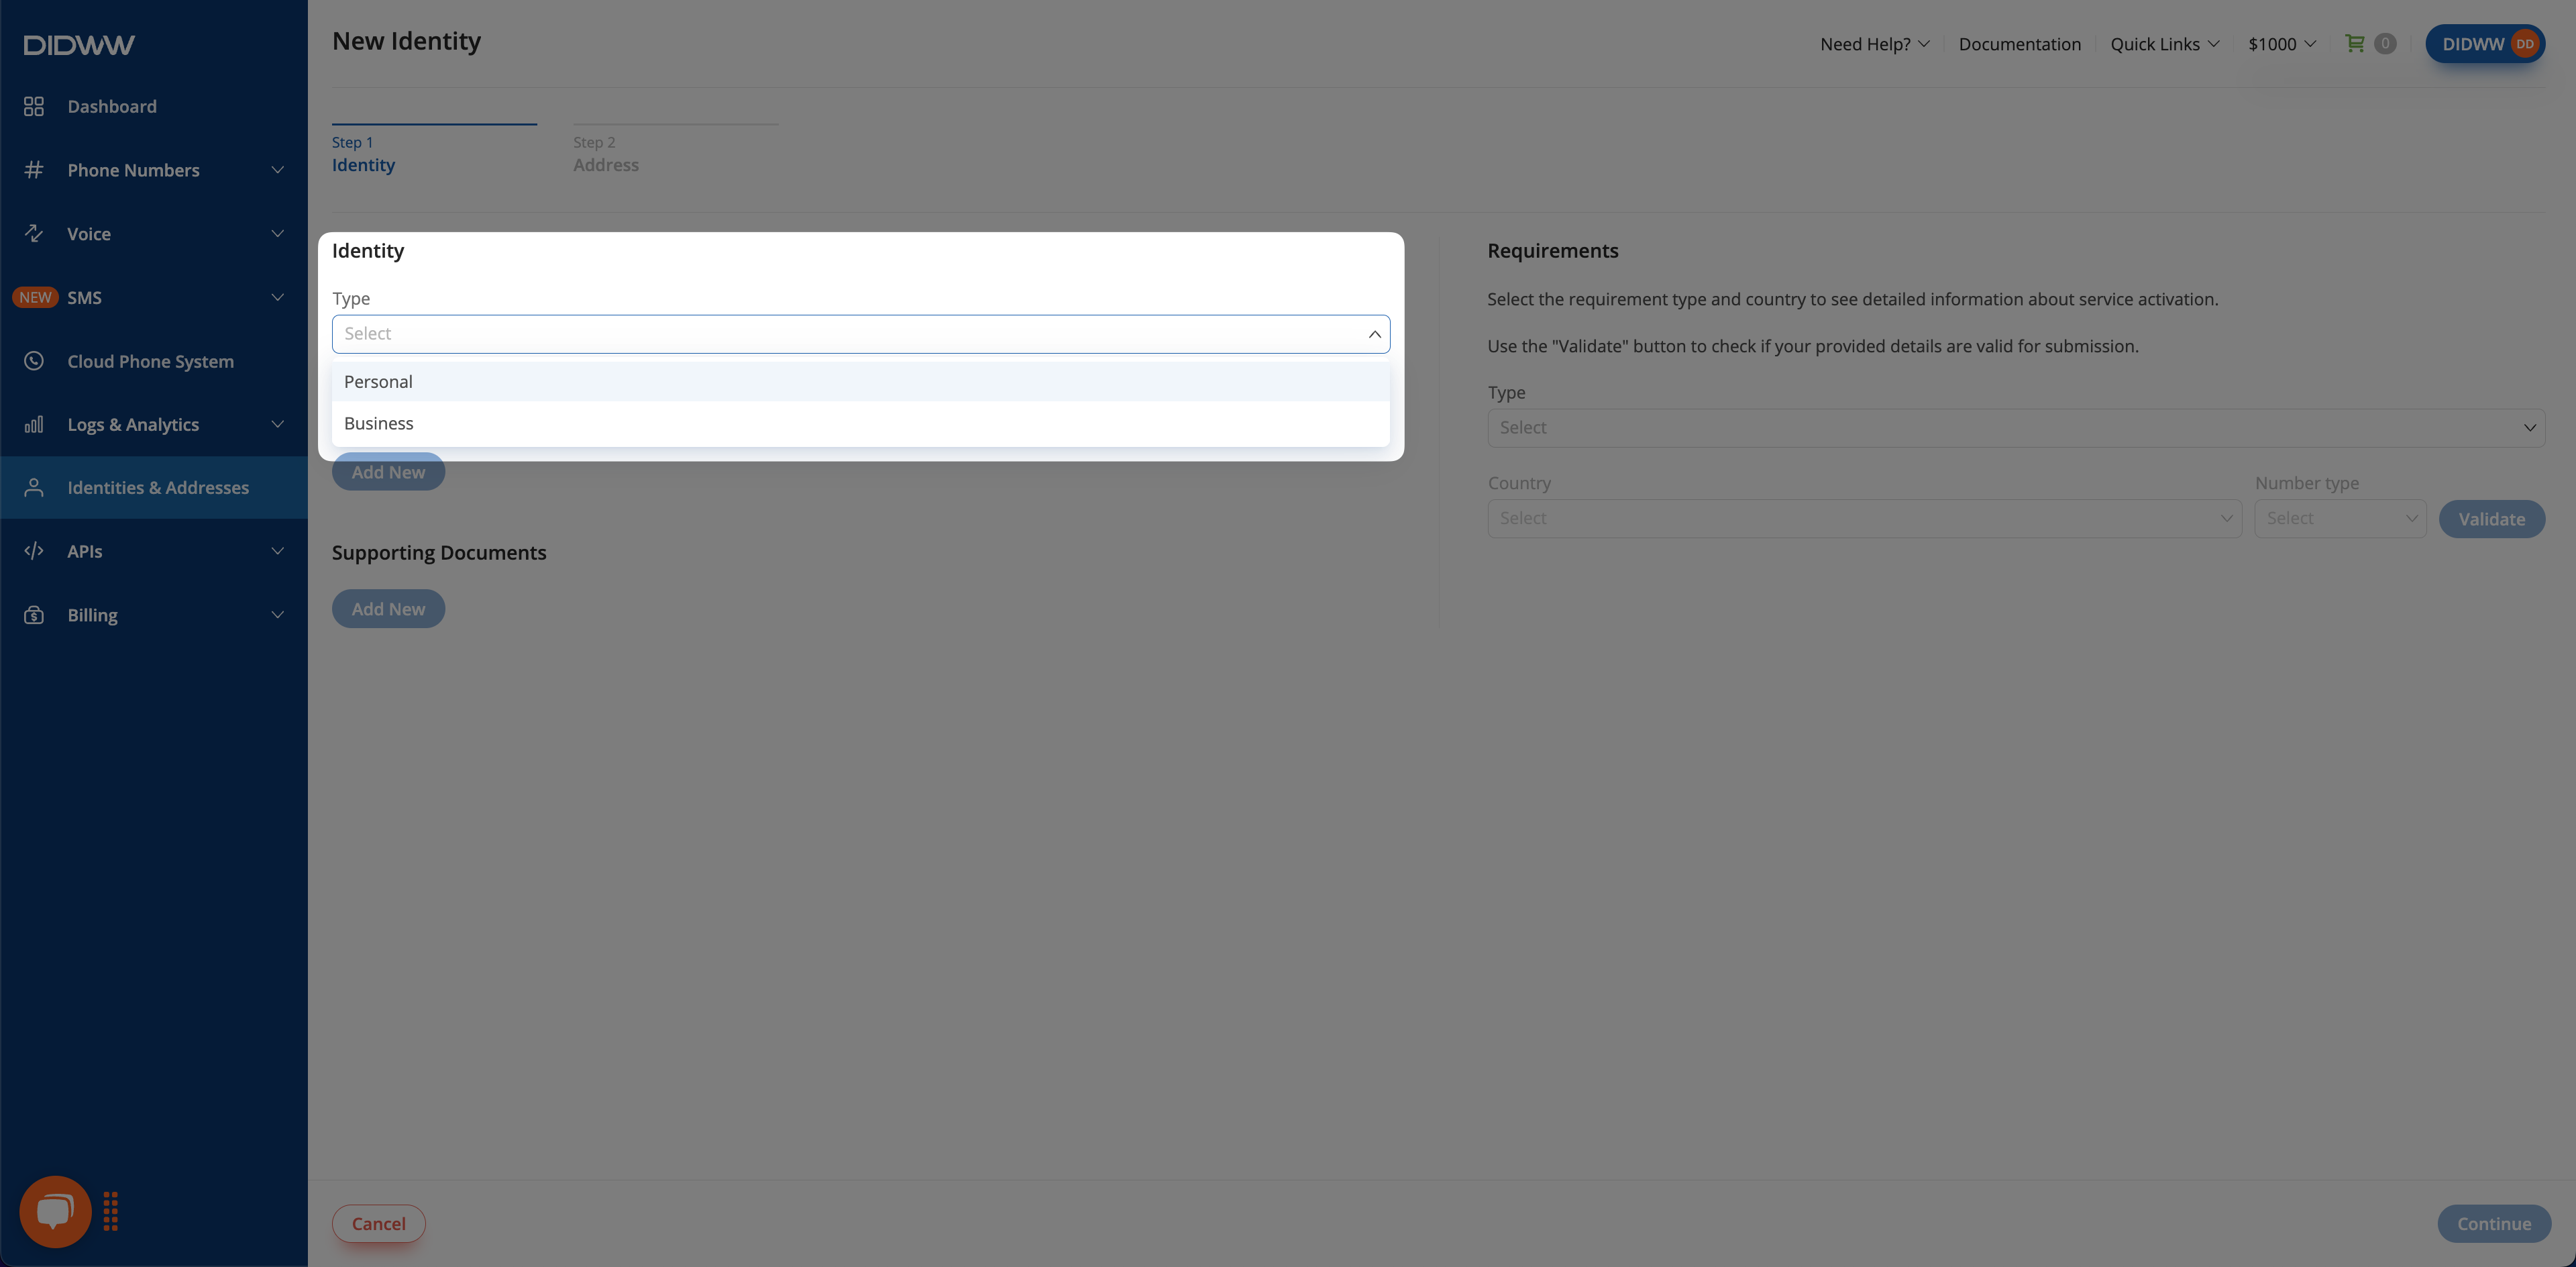
Fig. 3 Selecting the identity type.#
Fill in all required fields and upload documents by clicking Add New in the Proofs and if required Supporting Documents sections.
Identity Details
Field
Description
First Name
The individual’s legal first name.
Last Name
The individual’s legal last name.
Phone number
A valid contact phone number.
Contact email
A valid contact email address.
Personal TAX ID
The individual’s personal tax identification number.
ID number
The number from an official identification document.
Country of residence
The country where the individual currently resides.
Place of Birth
The individual’s place of birth.
Birth date
The individual’s date of birth.
Description
A friendly name to help you identify this record.
Documents
Field
Description
Proofs
Click Add New to upload required documents verifying the identity or business. Accepted types include:
Driver's LicenseNational IDPassportResidence PermitVisaOther
Supporting Documents
Upload any additional required files (e.g., regional forms). Download them from the Requirements section.
Company Details
Field
Description
Company Name
The full legal name of the business.
Company registration number
The official registration number of the business.
VAT/TAX number
The Value Added Tax or other official tax number.
Country of incorporation
The country where the business is legally registered.
Company website
The official website for the business.
Description
A friendly name to help you identify this record.
Representative’s Details
Field
Description
First Name
The representative’s legal first name.
Last Name
The representative’s legal last name.
Phone number
A valid contact phone number for the representative.
Contact email
A valid contact email address for the representative.
Representative’s TAX ID
The representative’s personal tax identification number.
ID number
The representative’s number from an official identification document.
Place of Birth
The representative’s place of birth.
Birth date
The representative’s date of birth.
Documents
Field
Description
Proofs
Click Add New to upload required documents verifying the identity or business. Accepted types include:
Business Registration Certificate / Incorporation CertificateTrade LicenseExcerpt from the commercial registerPassport(of the representative)Driver's License(of the representative)National ID(of the representative)Other
Supporting Documents
Upload any additional required files (e.g., regional forms). Download them from the Requirements section.
Step 4: Validate Identity Details and Continue#
After entering your identity information, click Validate to check your identity input against the selected requirements. If all required fields are complete and correct, click Continue to proceed to the next step.
Note
When you click Validate, any missing required information will be shown in a highlighted red text. Because the address form has not been completed yet, related fields may also show as incomplete. It is recommended to validate identity details before proceeding to the next step.
Step 5: Enter Address Details and Upload Documents#
In the Step 2: Address form, fill in the address details and upload the required proof documents.
Field
Description
Add address later
Toggle to skip this step and finalize the identity creation without an address.
Note
You can add an address to the identity later.
Country
The country of the address.
City
The city of the address.
Postal code
The postal or ZIP code.
Address
The street name and number.
State/Province/Region
The state, province, or region.
Description
A friendly name to help you identify this address.
Proofs
Click Add New to select a proof type and upload the document. Available proof types include:
Copy of Phone Bill
Utility Bill
Rental Receipt
Other
Step 6: Validate and Submit#
After entering both identity and address information, click Validate to confirm everything is complete. The green Valid text will appear in the requirements section if all required information has been provided correctly.
Click Submit to finalize and create your identity and address.
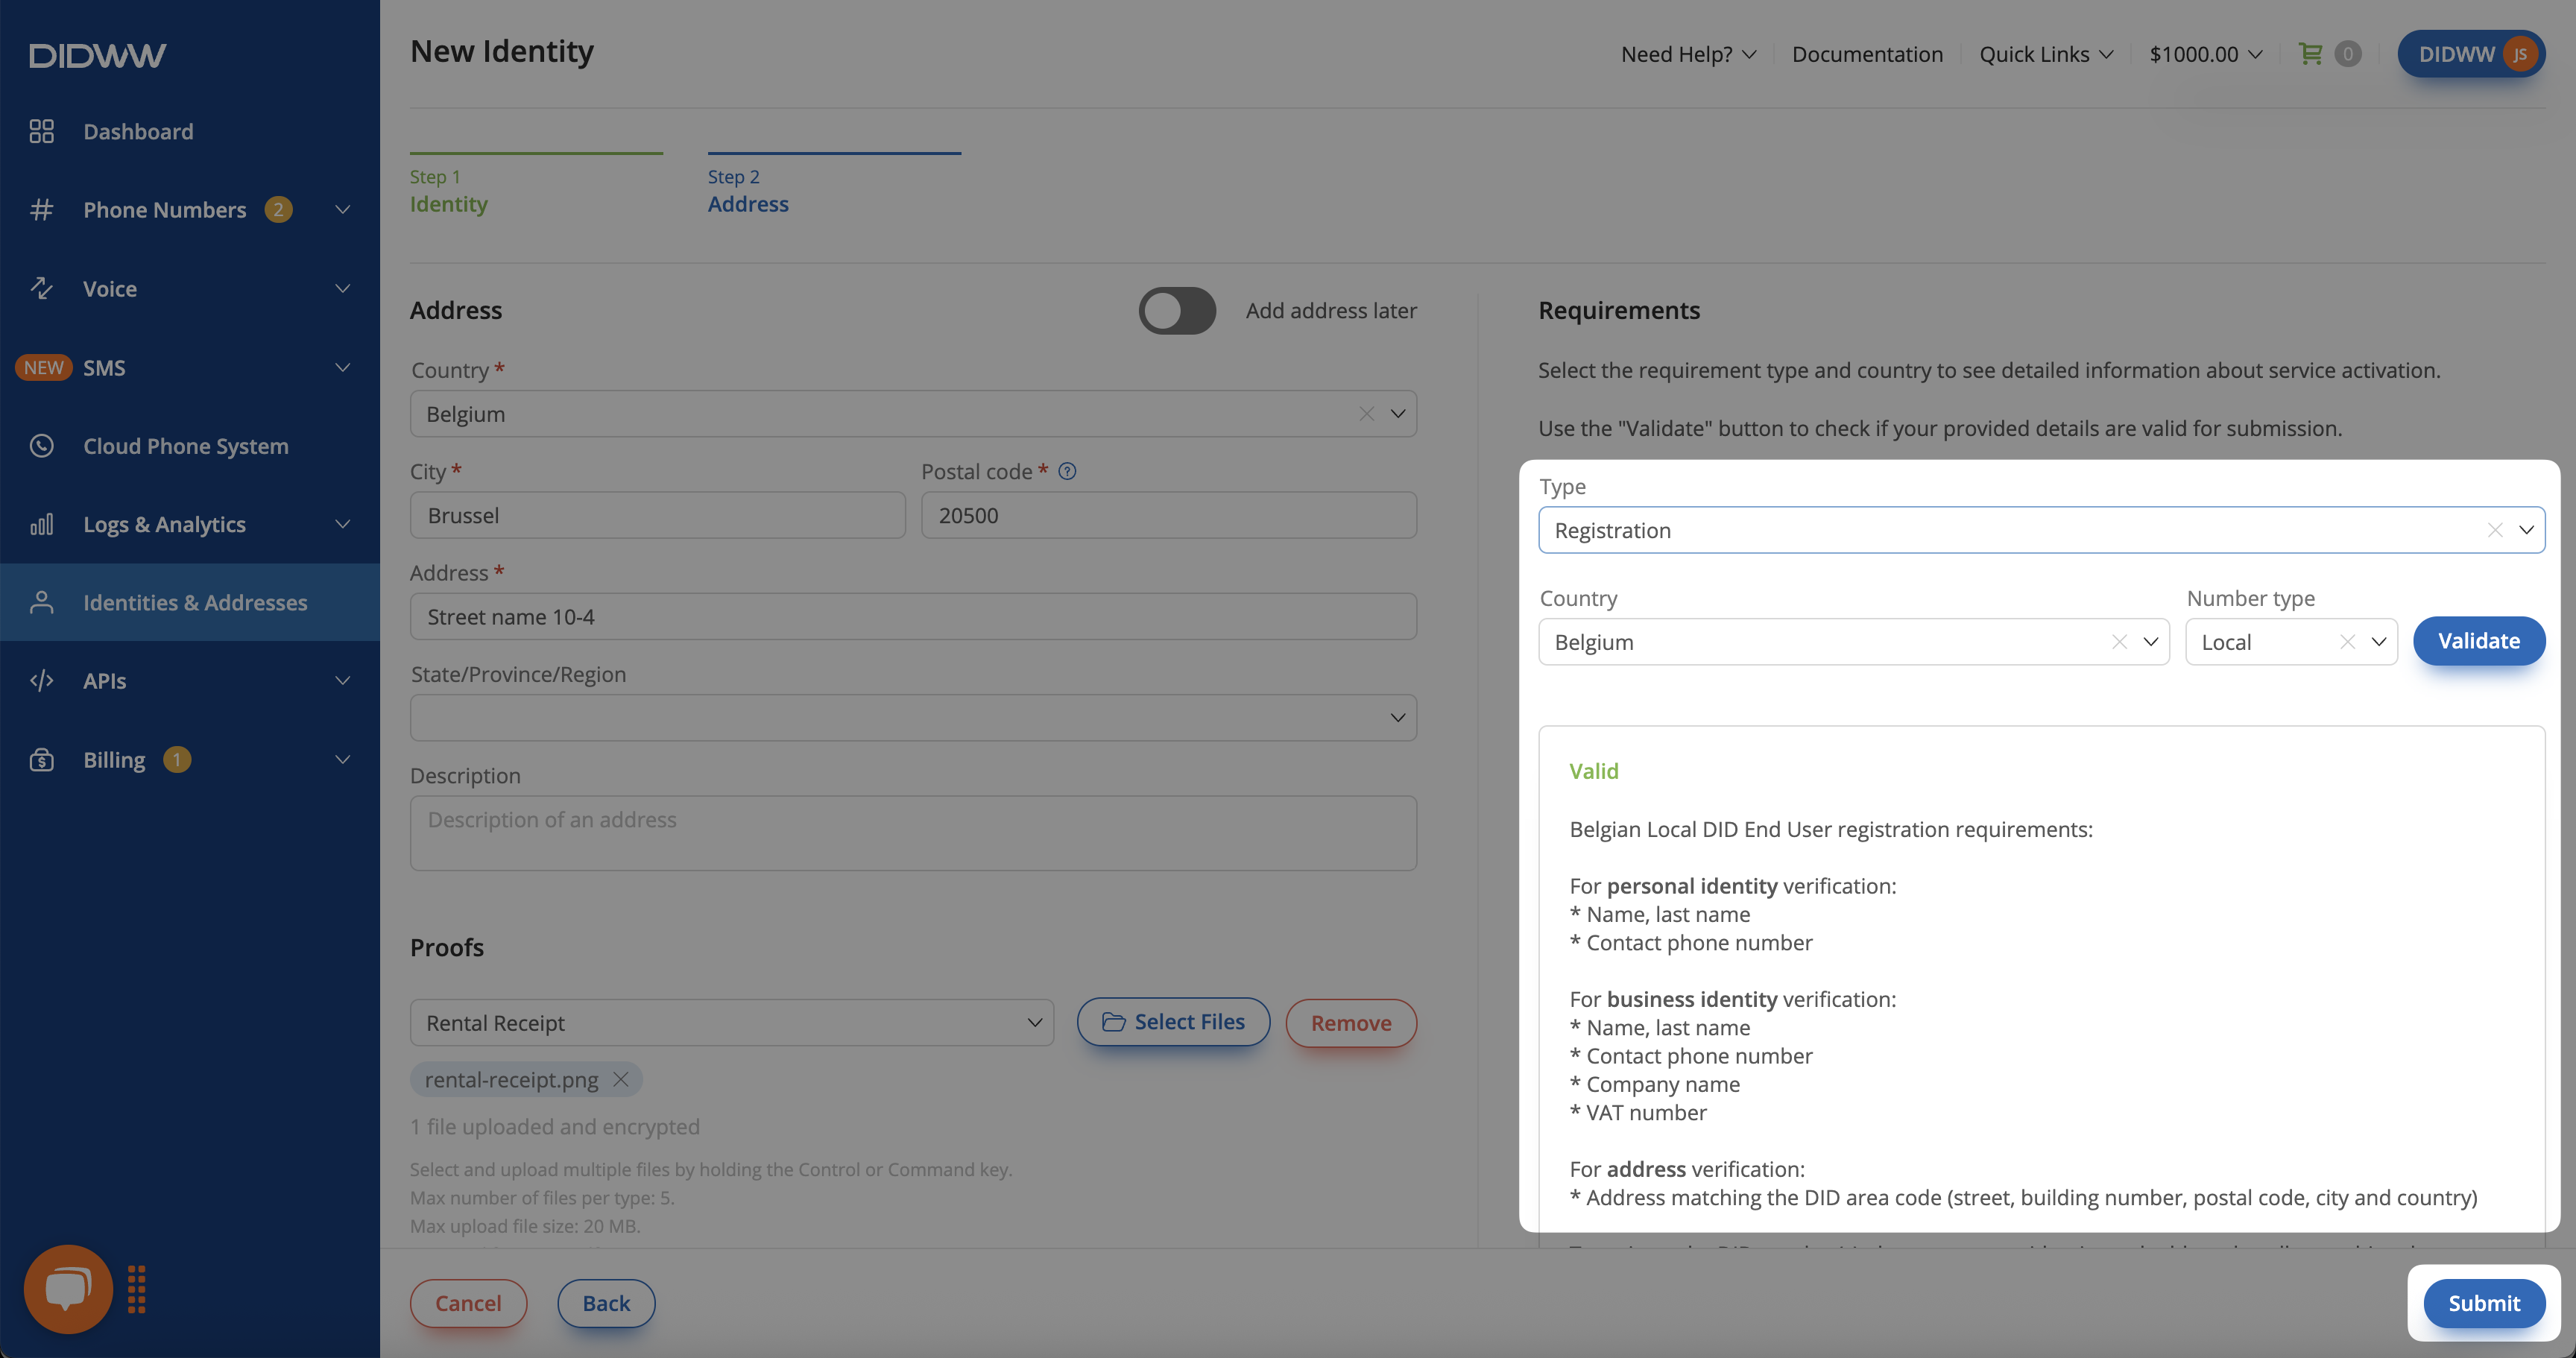
Fig. 4 Validating identity and address requirements before submission#
Edit Identity#
Navigate to the Identities & Addresses > Identities tab.
Find the identity you wish to update and click the actions
 button on the right.
Select Edit from the dropdown menu to open the edit identity window.
Make your changes and click Submit to apply the changes.
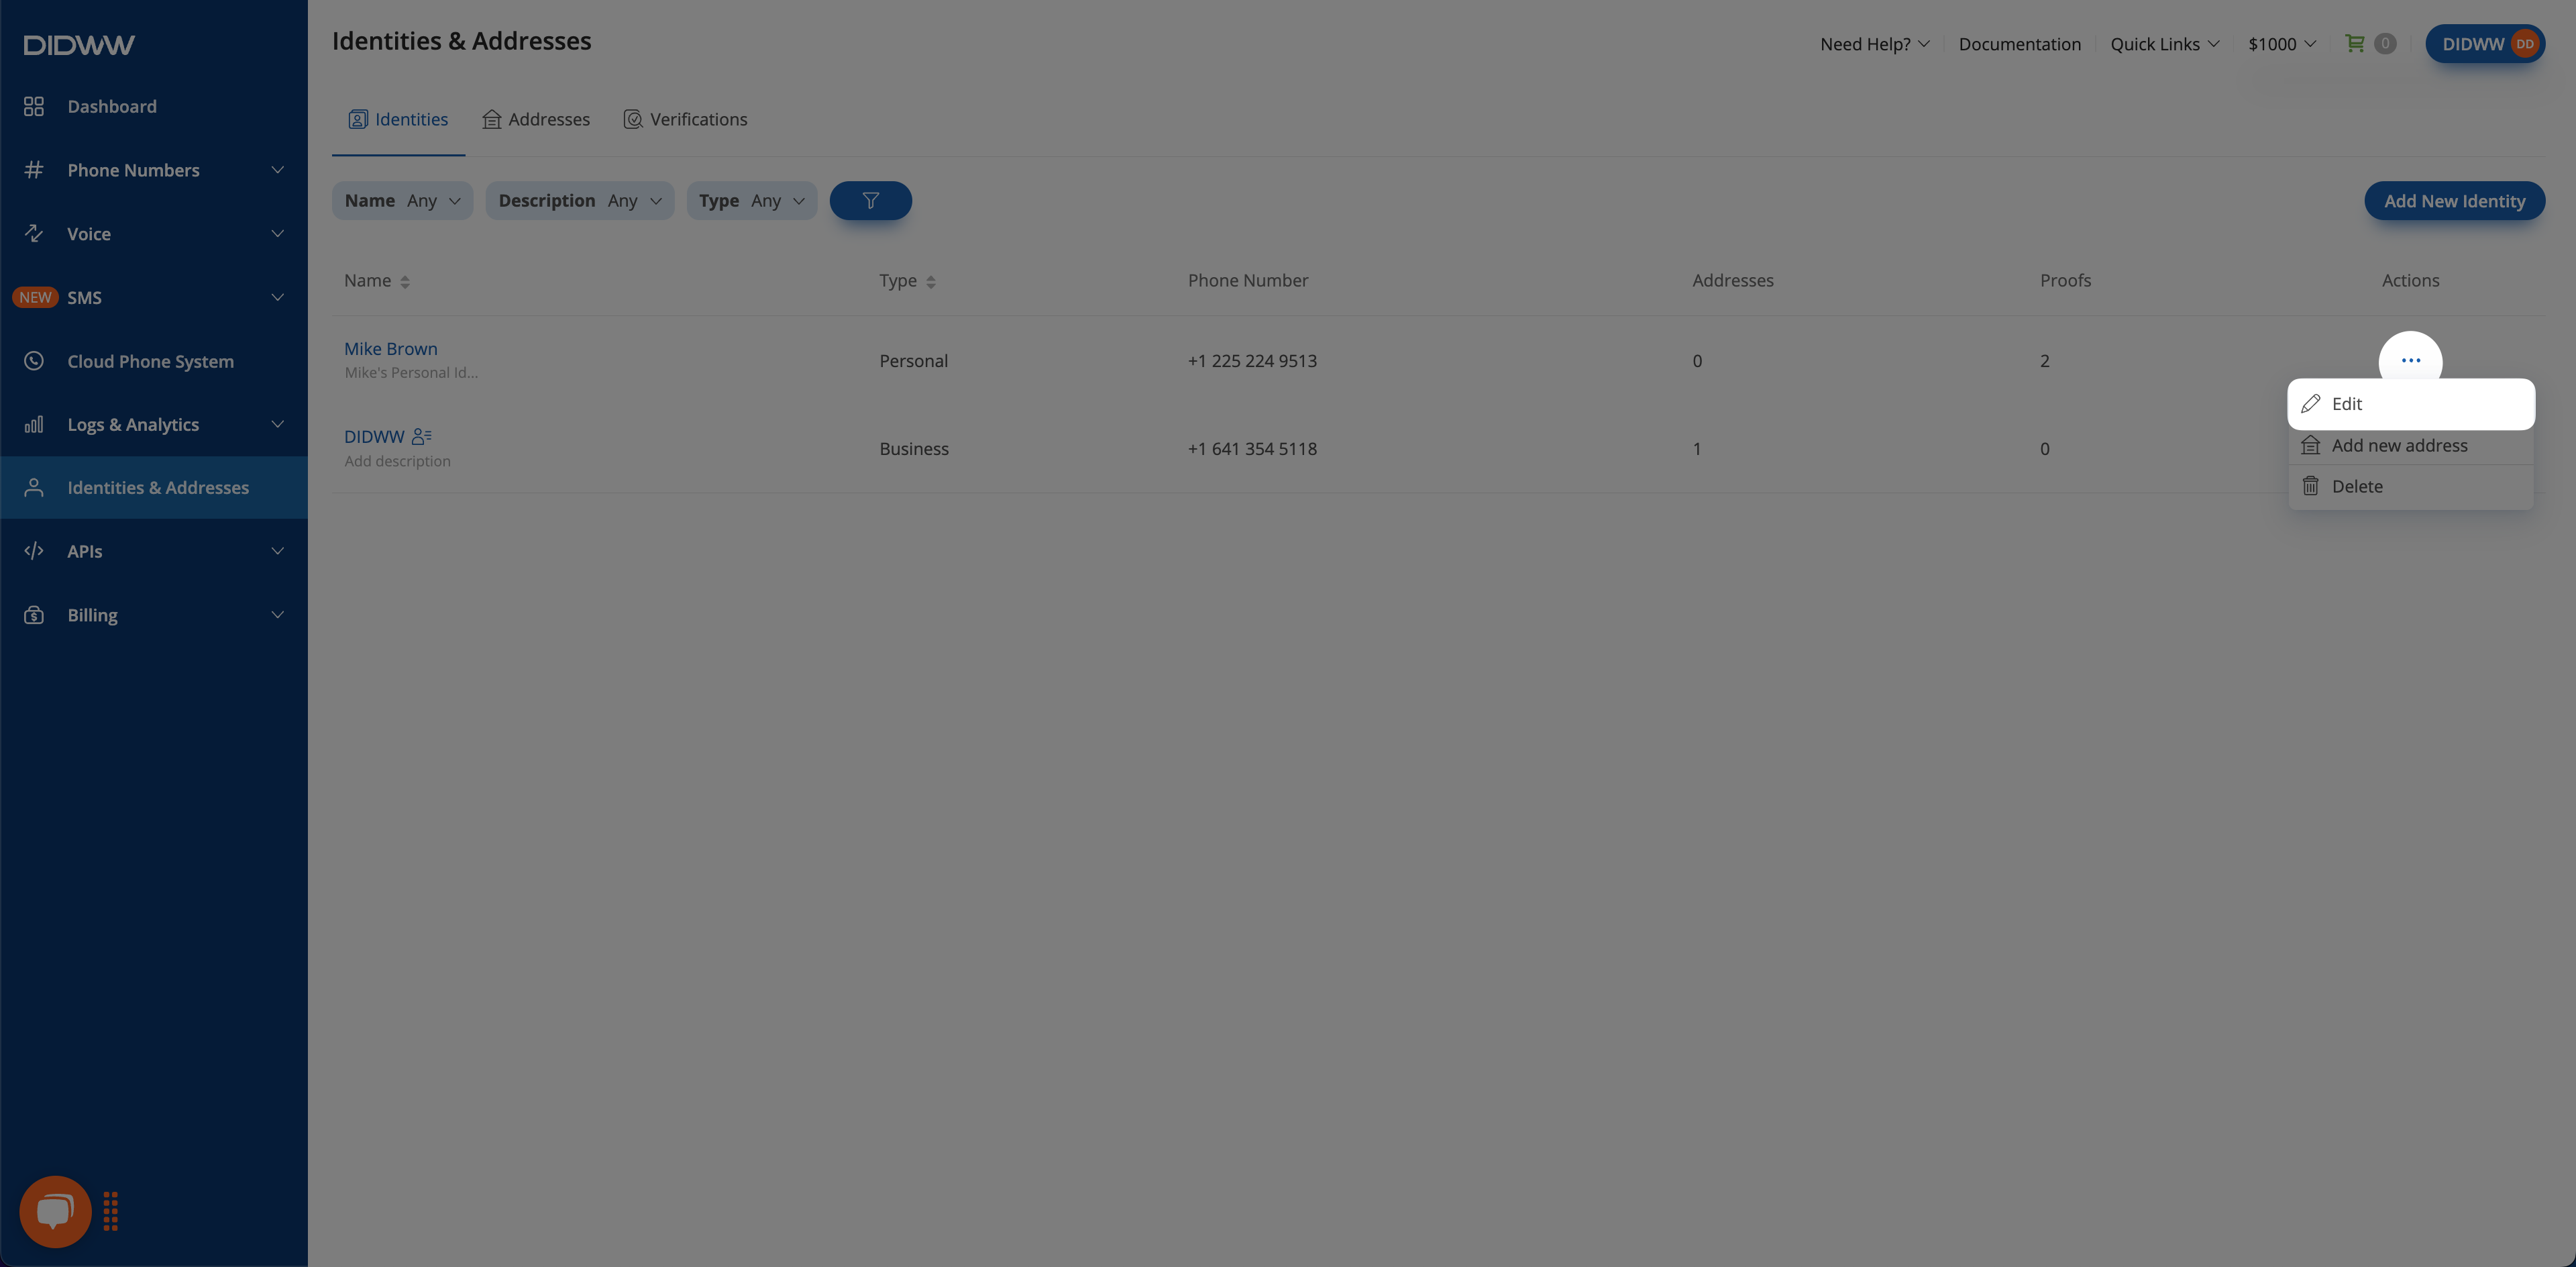
Fig. 5 Edit button.#
Delete Identity#
Important
An identity cannot be deleted if it is currently assigned to any active services. This action cannot be undone.
Navigate to the Identities & Addresses section and select the Identities tab.
Find the identity you wish to remove and click the actions
button on the right.Select Delete from the dropdown menu.
A confirmation pop-up will appear. Click Delete to permanently delete the identity.
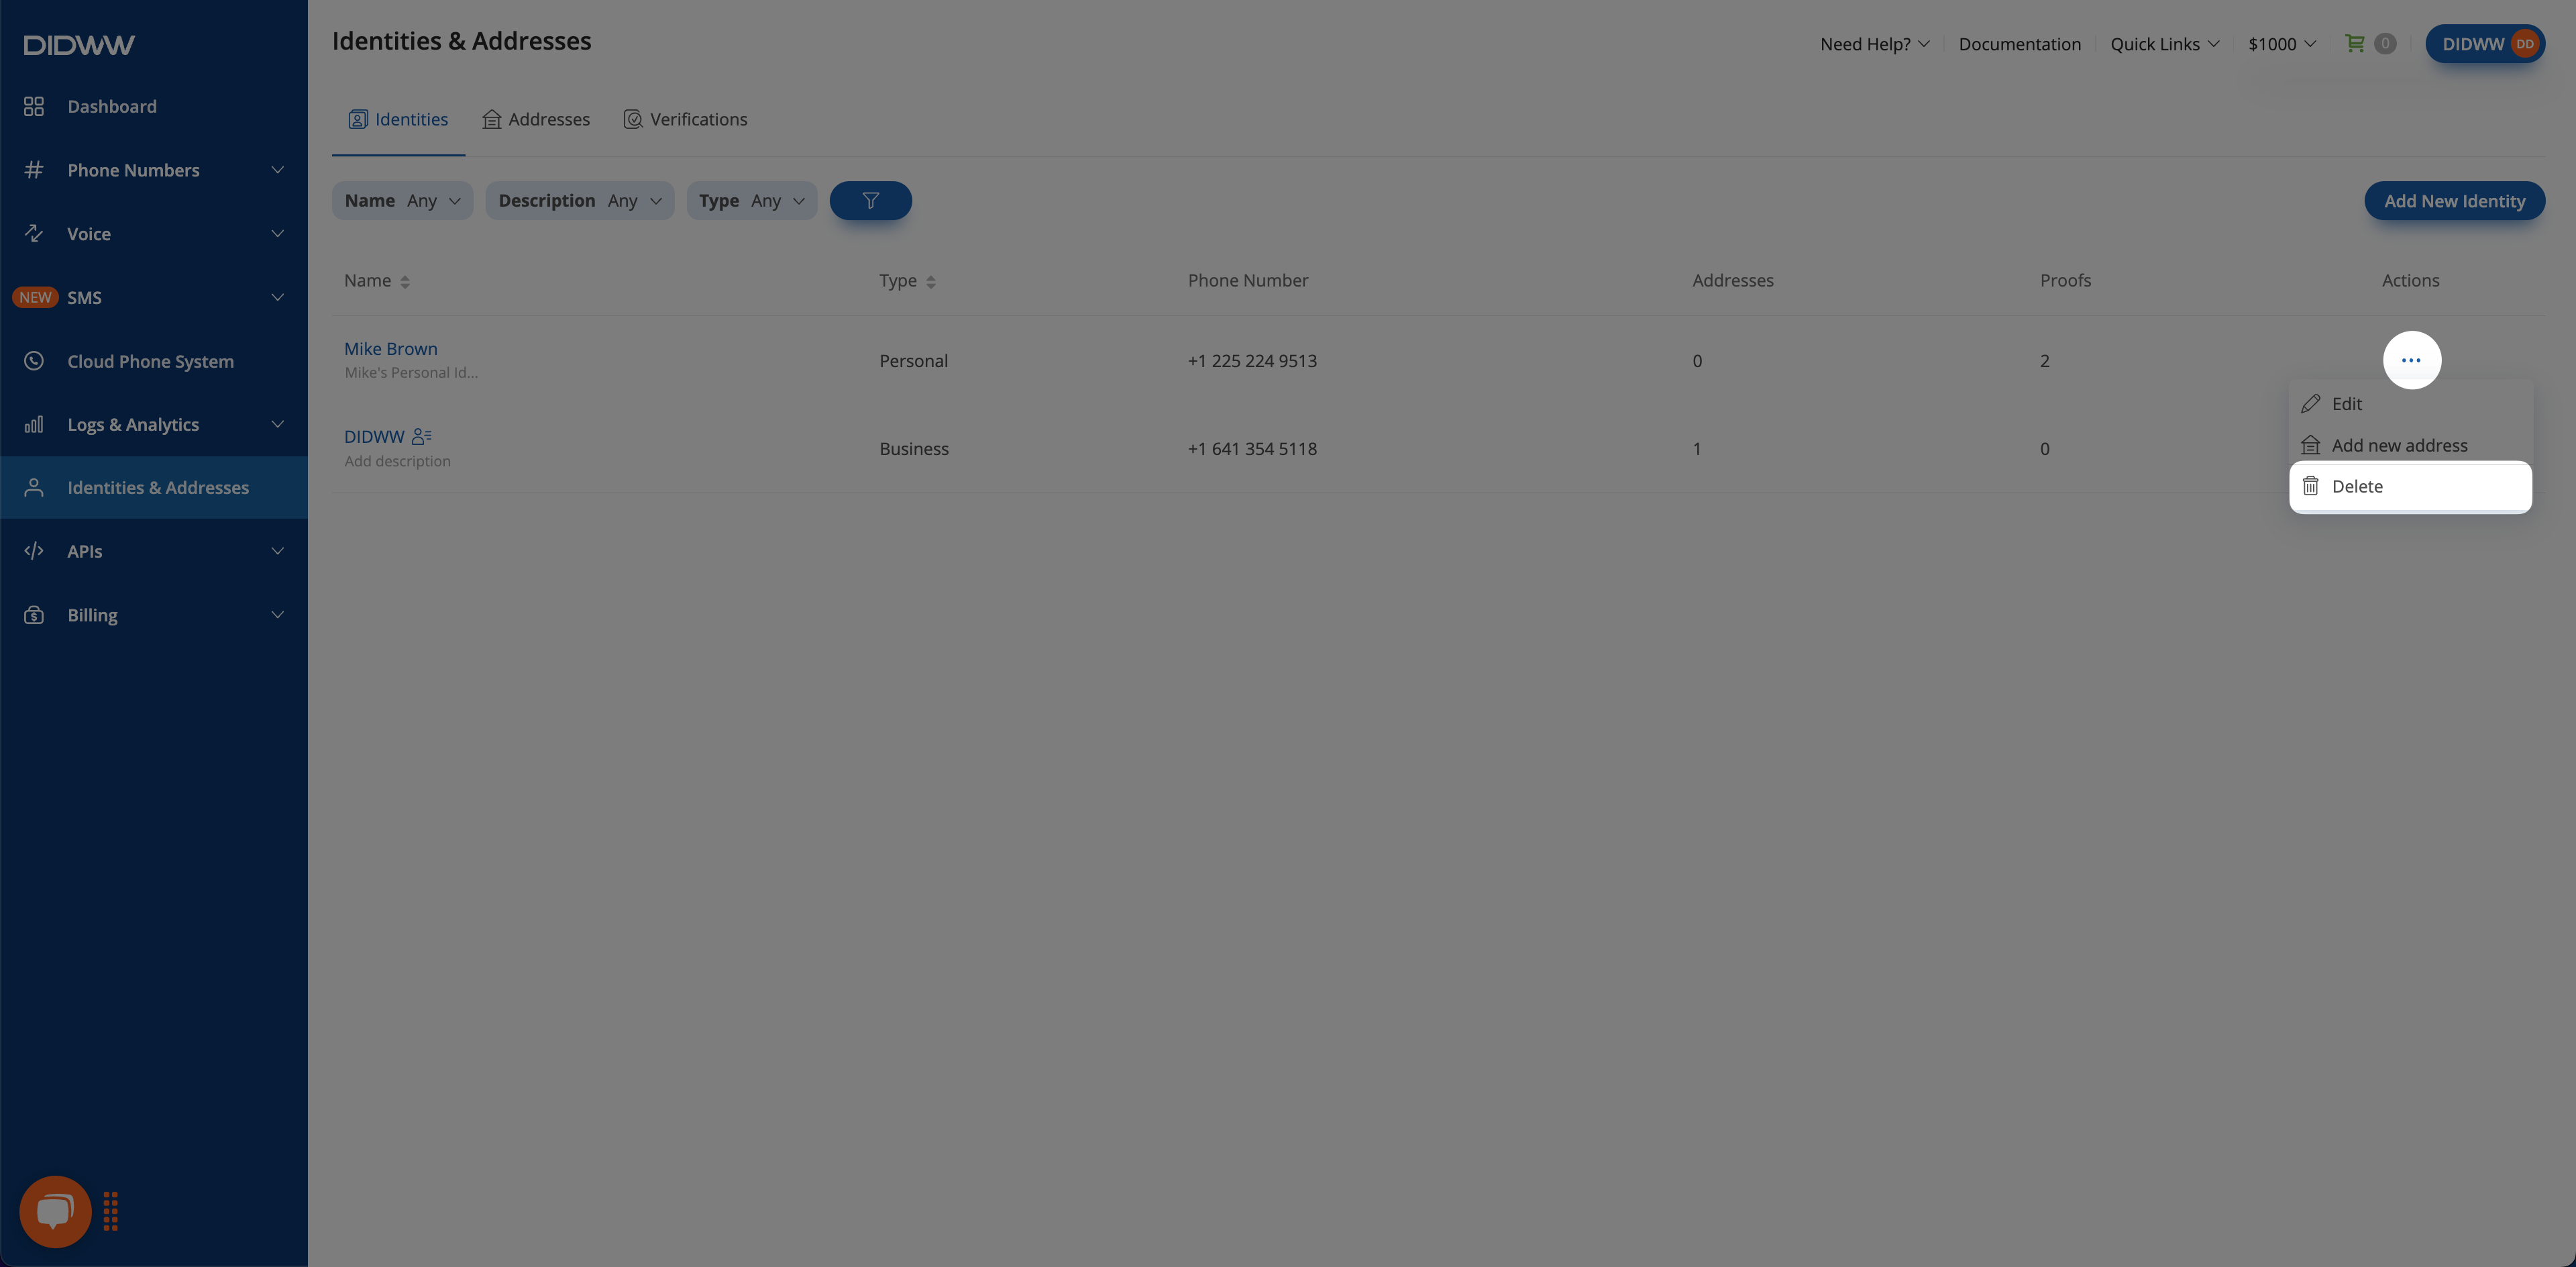
Fig. 6 Delete button.#