

Create an Alphanumeric Sender ID Verification#
Follow these steps to submit an Alphanumeric Sender ID for verification before using it to send A2P SMS messages.
Before you begin#
Review Alphanumeric Sender IDs to confirm that this Sender ID type matches your messaging use case.
Create a business identity and address in advance, or create them during Step 2: Enter general details. See Manage identities and addresses.
Review A2P SMS compliance requirements before preparing sample messages or consent information.
Step 1: Open the verification form#
In the DIDWW User Panel, go to SMS > Sender ID Verifications.
Open the Get Started tab.
Find the Alphanumeric Sender ID type and click Create New.
Alternatively, on the Verifications tab, open Create New and select the Alphanumeric Sender ID type.
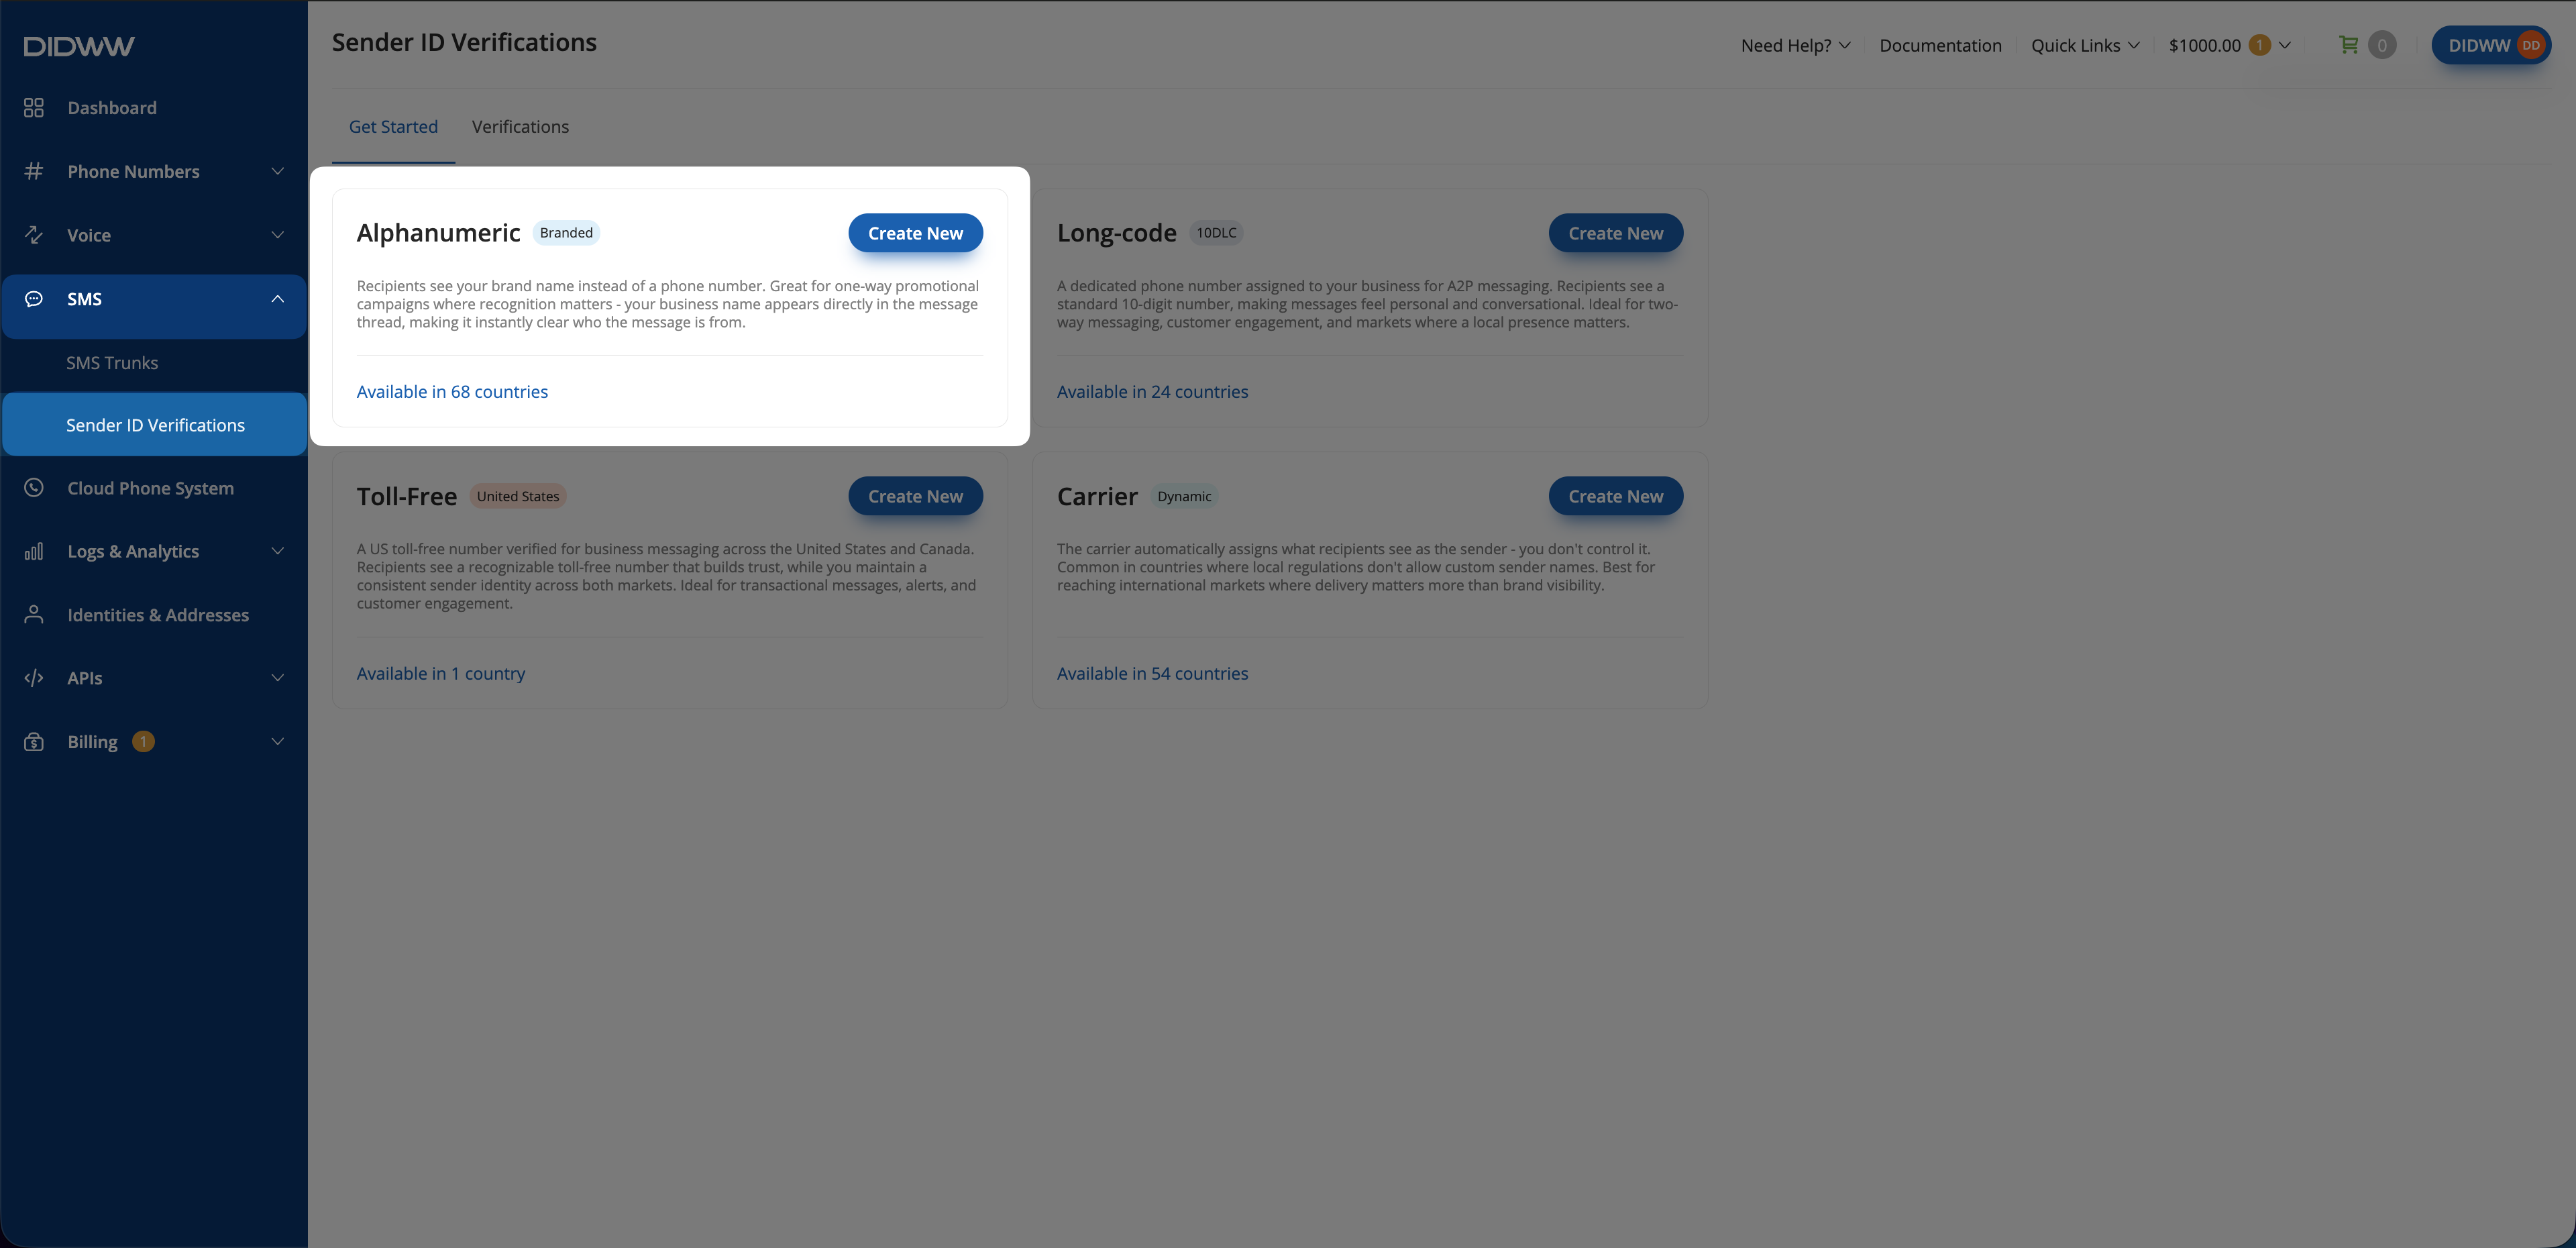
Fig. 1. Open the Alphanumeric verification form.#
Step 2: Enter general details#
Enter a Friendly name.
Select the Target countries.
Enter the Sender ID.
Review the Pricing and Identity Requirements shown for the selected countries.
Select an existing business Identity and Address, or create them during this step.
Click Next.
Important
Target countries are organized into predefined groups. Selecting any country in a group selects the entire group, and a verification can target only one group. Countries in a selected group cannot be added or removed individually, and groups cannot be combined in the same verification. Pricing and Identity Requirements apply once to the whole group, not per country.
For field descriptions, see Alphanumeric verification setup fields.
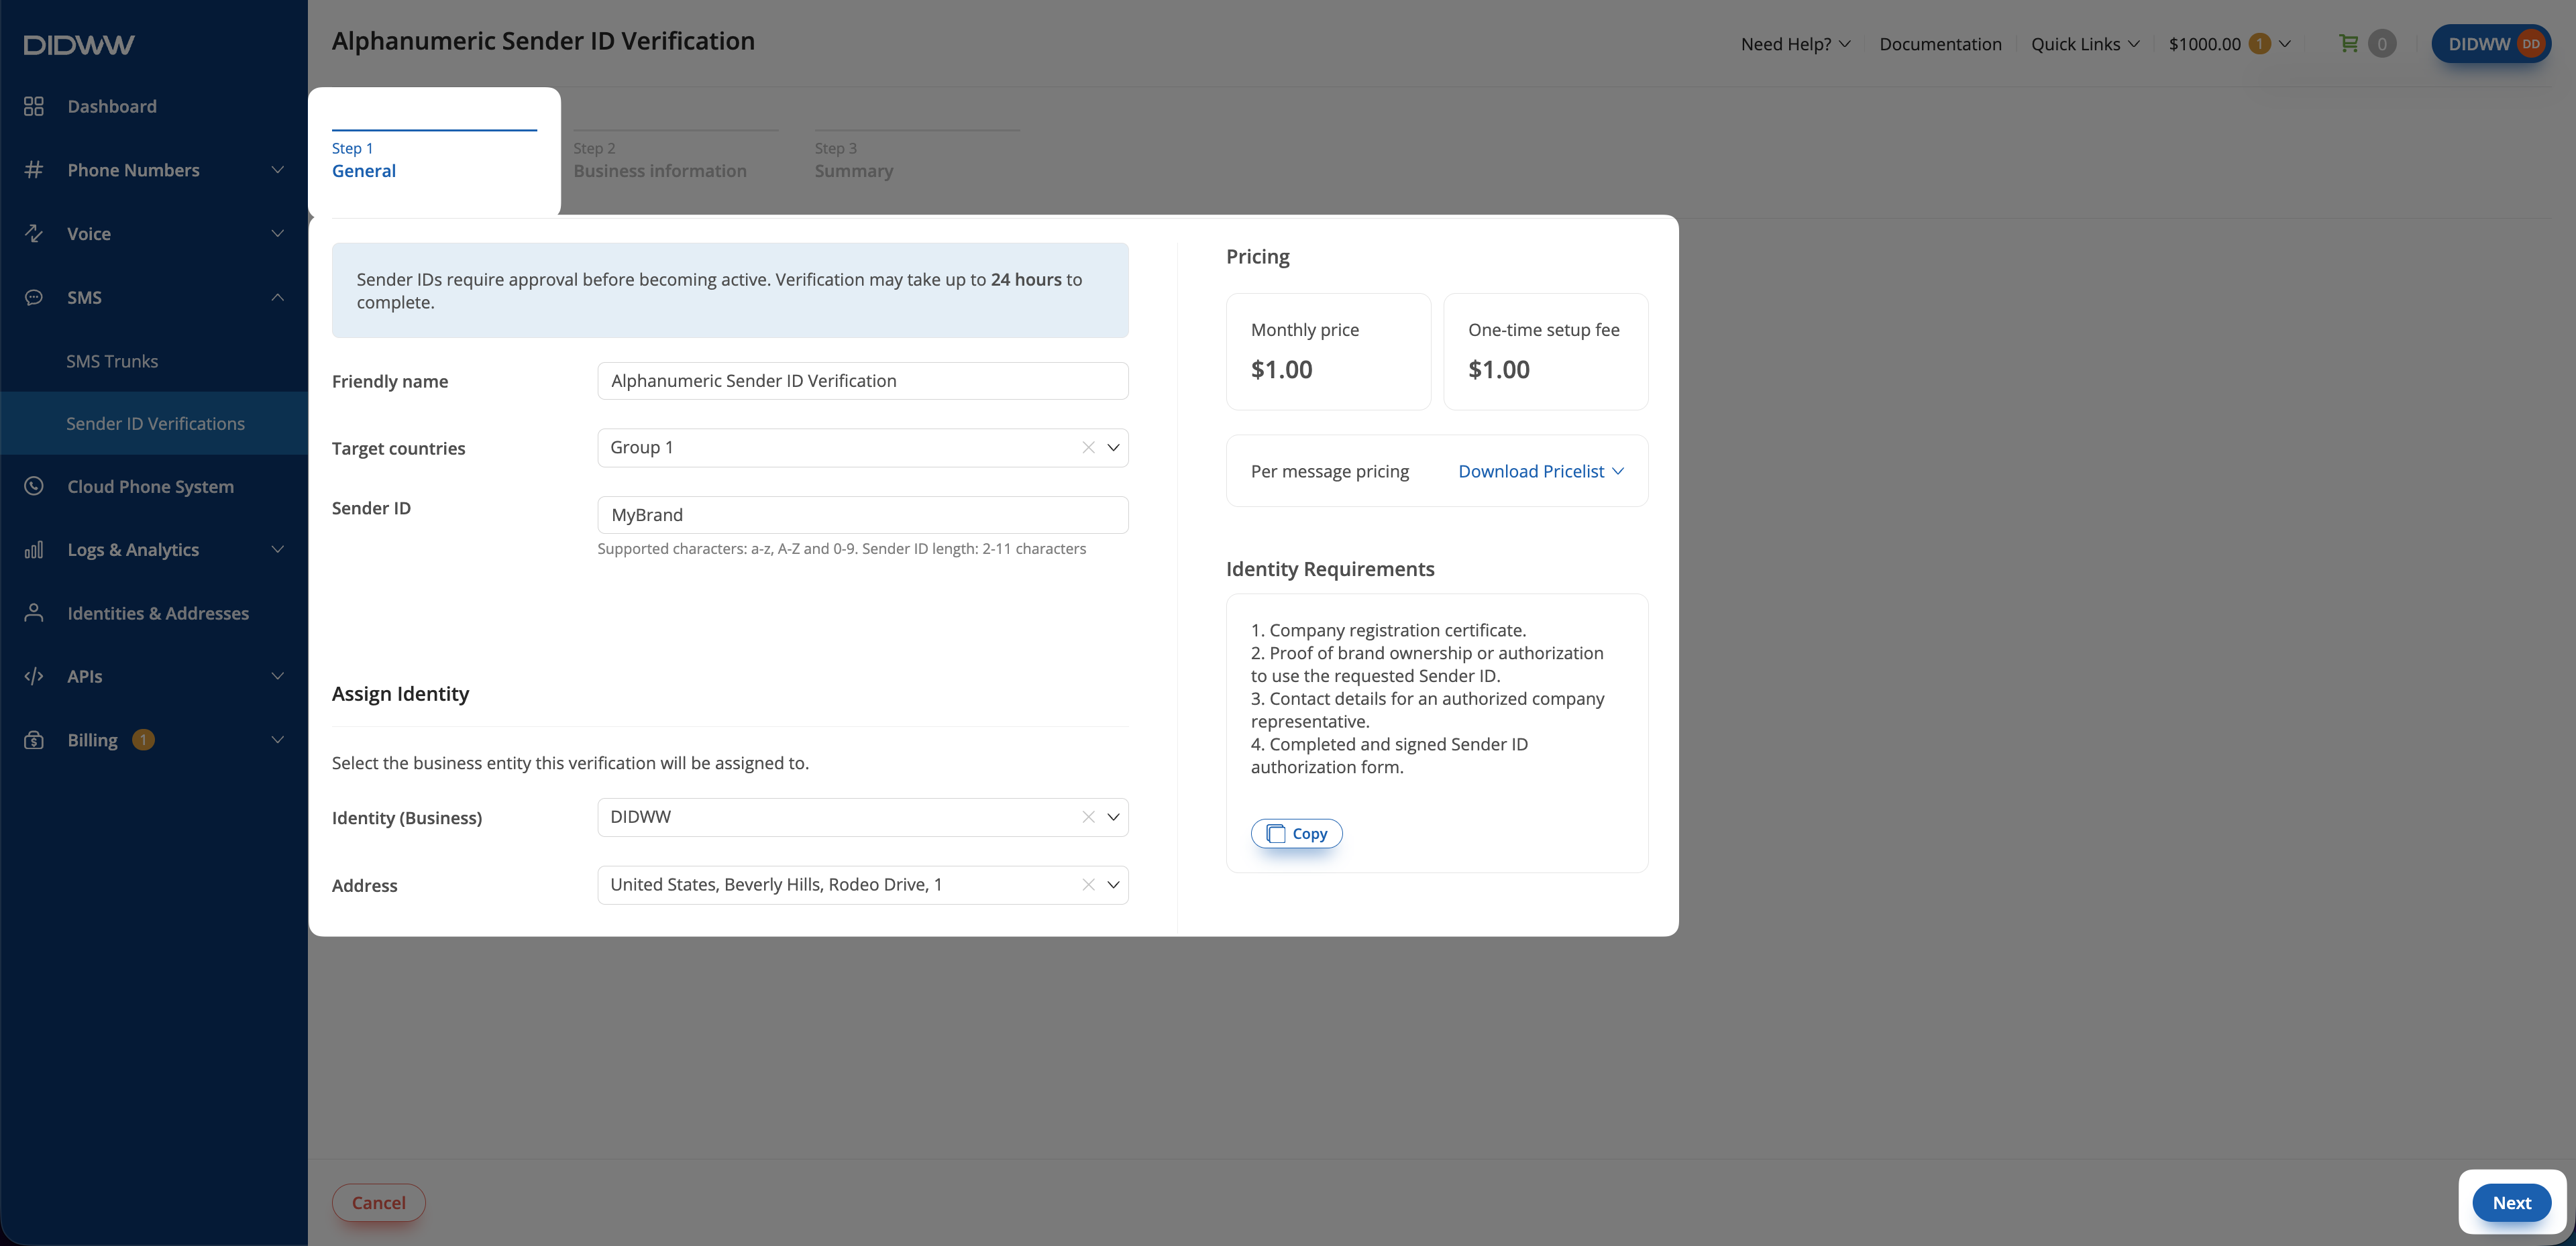
Fig. 2. General.#
Step 3: Enter verification details#
Enter the Legal Company Name and Website.
Select the Use case type.
Enter the Campaign description.
In How will consumers opt in?, explain how recipients agree to receive the messages.
Enter two representative messages in Sample content message #1 and Sample content message #2.
Click Next.
For field descriptions, see Alphanumeric verification details fields.
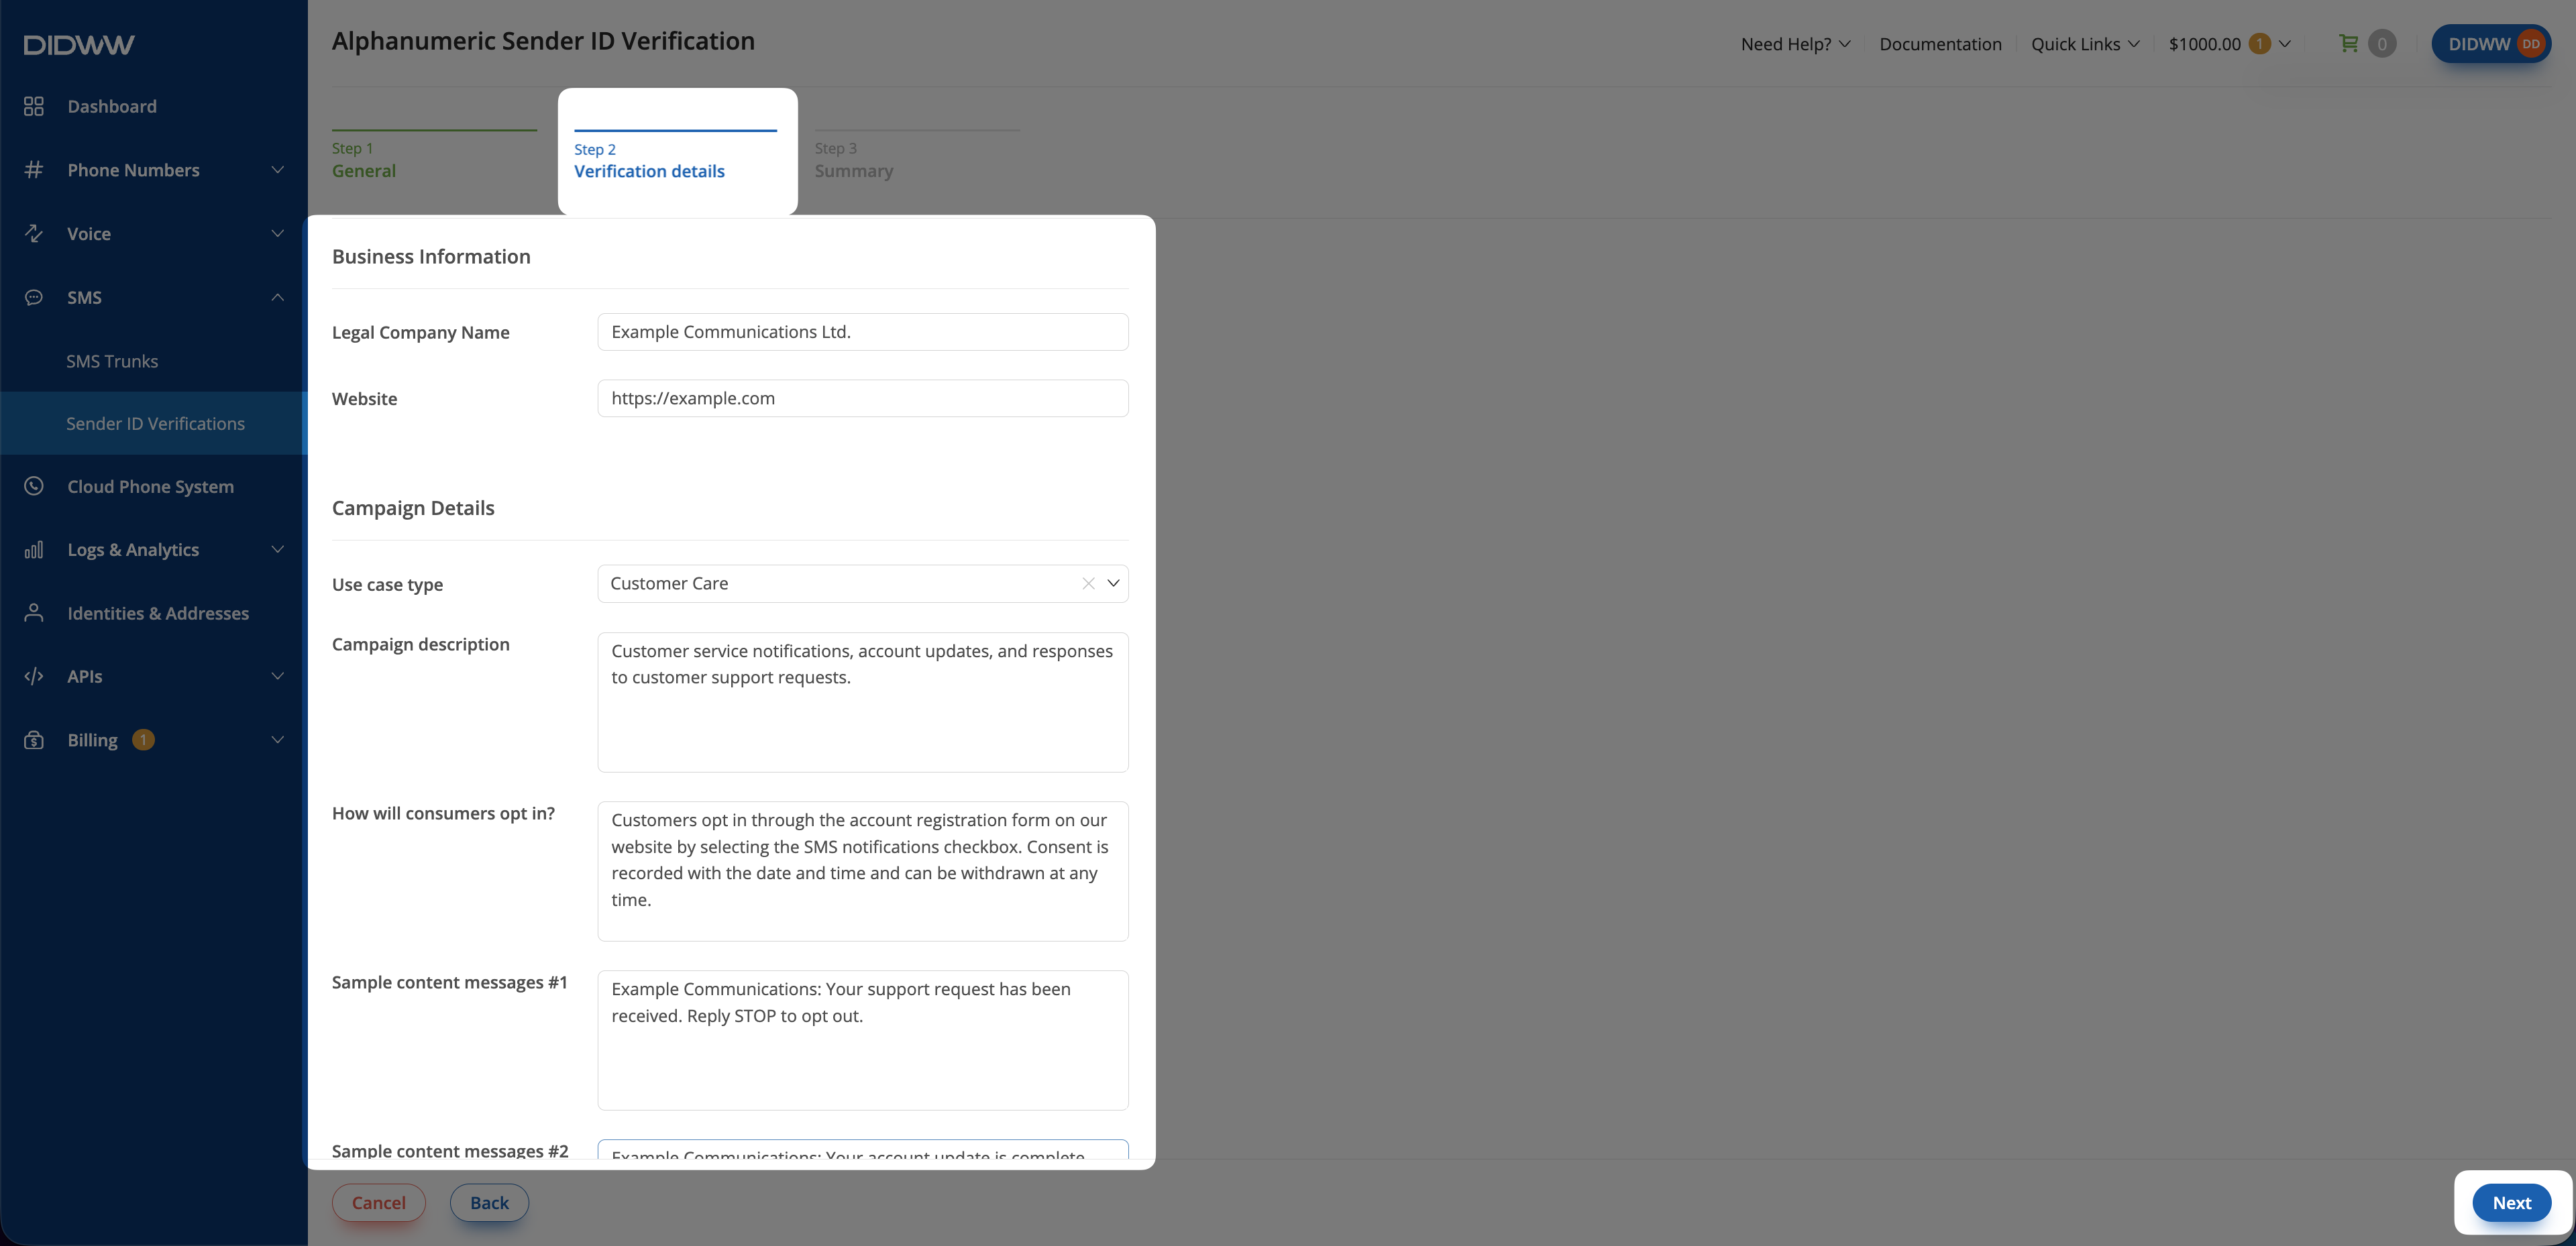
Fig. 3. Verification details.#
Step 4: Review summary and submit#
Review the Verification Details and Identity Details.
Review the estimated verification time and charges under Summary.
Click Submit.
After submission, the verification is added to the Verifications tab on the Sender ID Verifications page. When you open this page, the Get Started tab is displayed by default. Open the Verifications tab to find the submitted verification and use its status to track the review.
The estimated review time is shown in the verification summary. The actual review time may vary depending on the selected countries and whether additional information is required.
If the status changes to Changes Required, see Resubmit a Sender ID Verification.
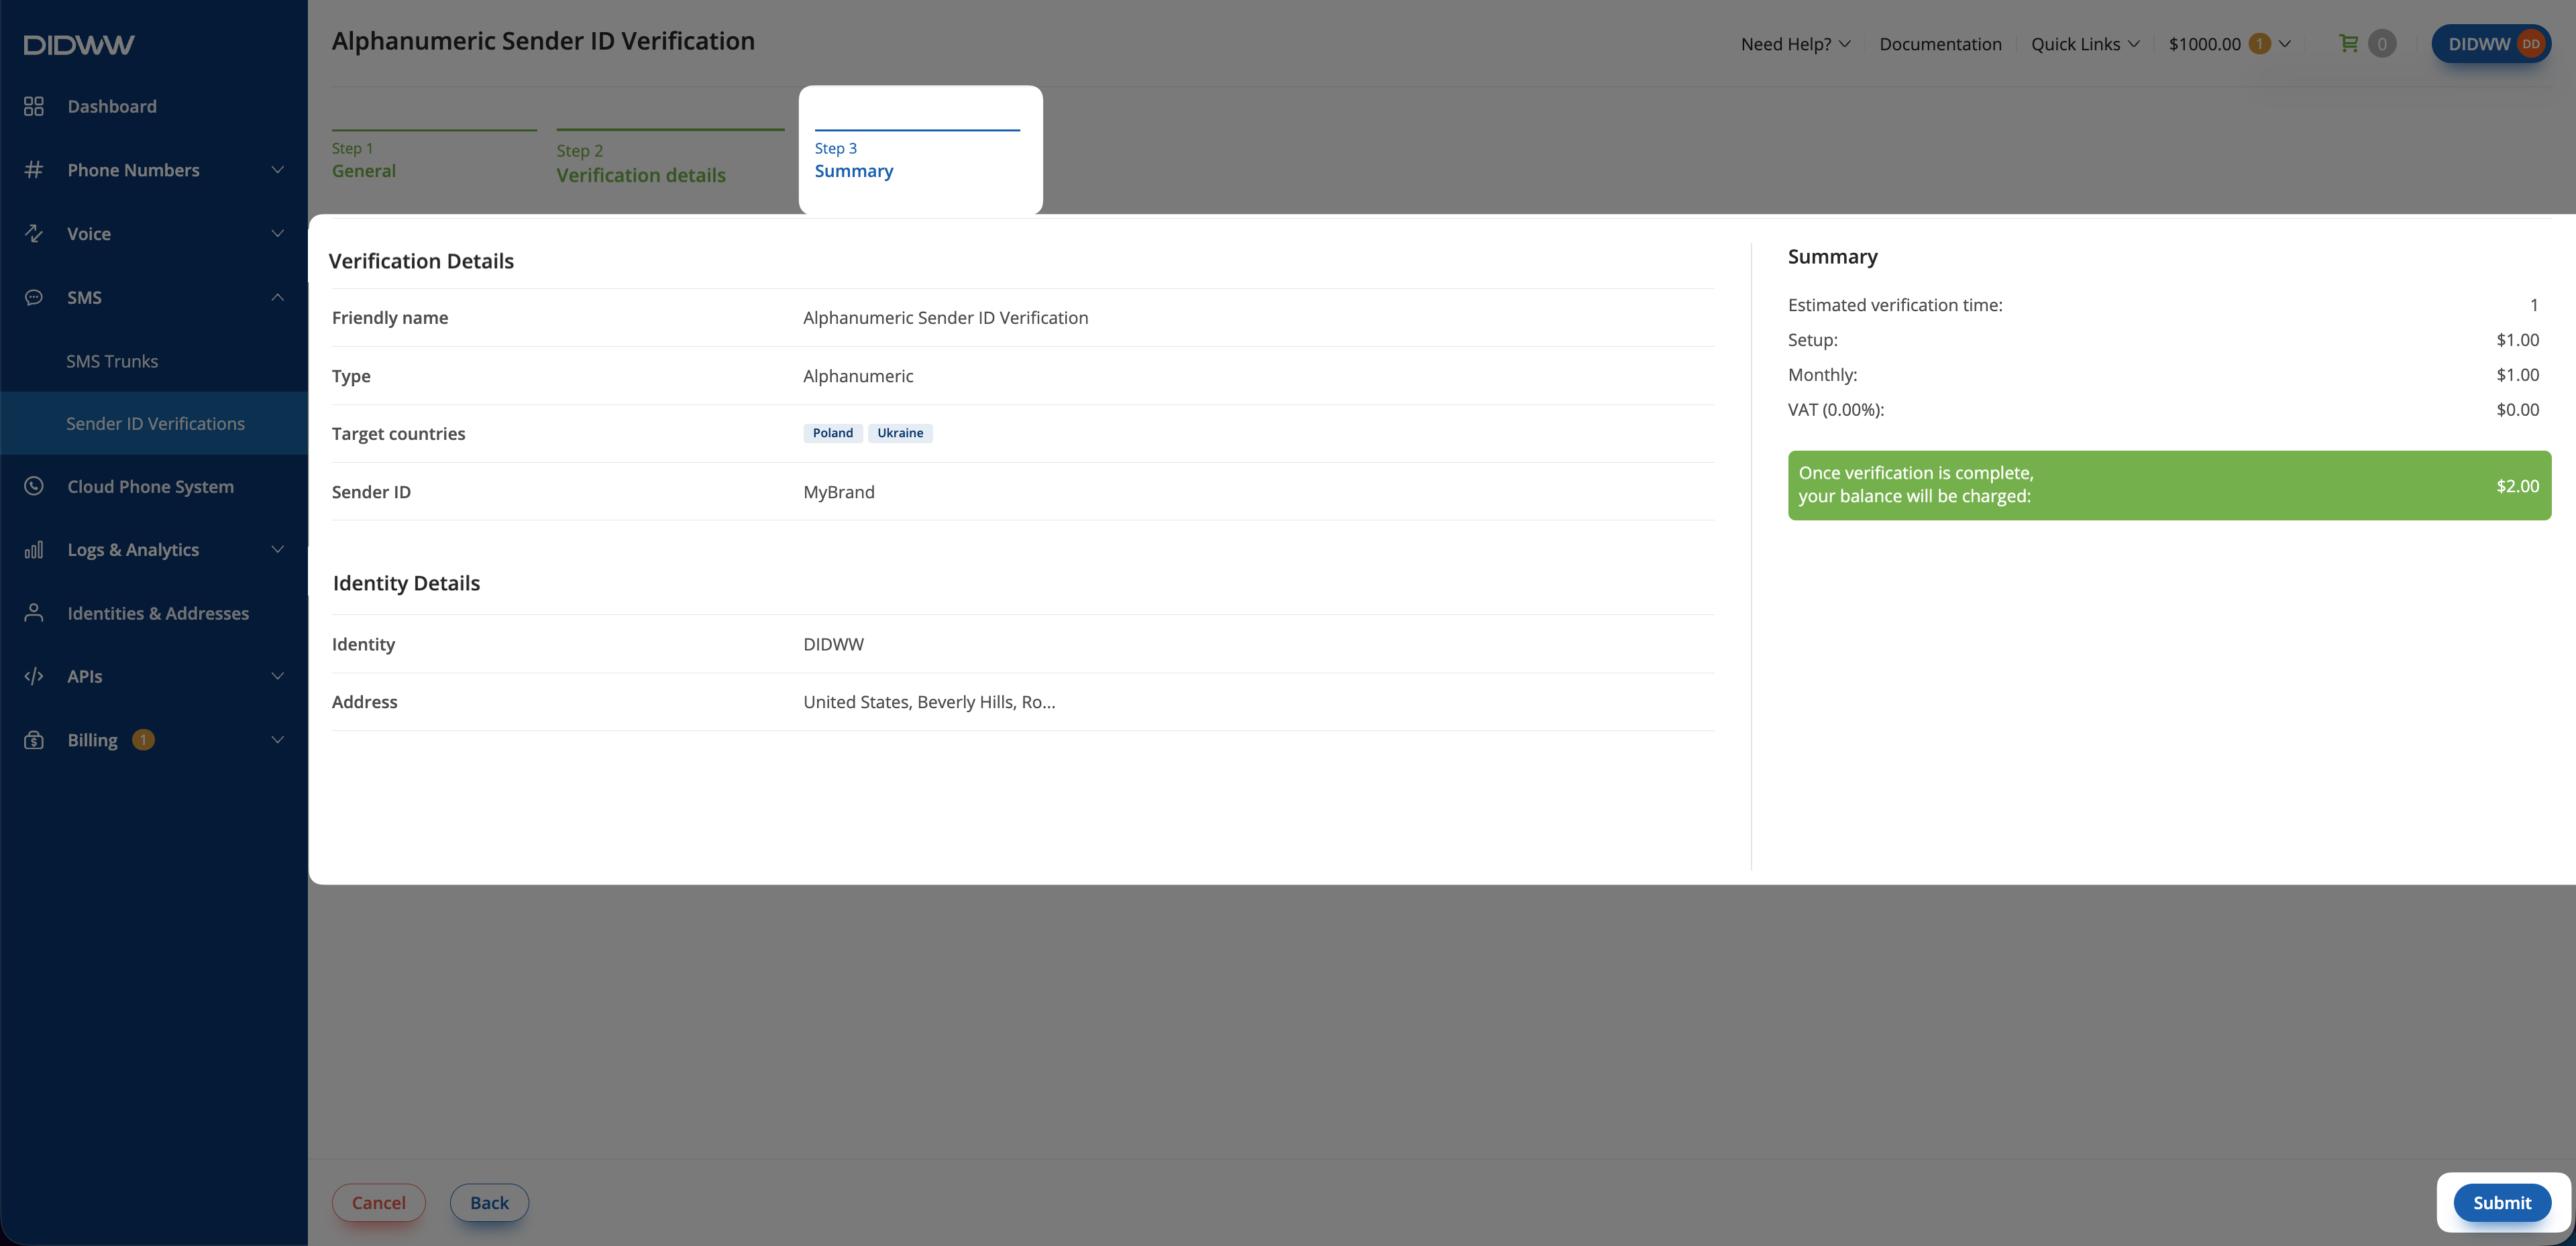
Fig. 4. Summary.#