Create a capacity group#
Create a Capacity group to assign shared channels, metered channels, or both to multiple DID numbers.
Before you begin#
Choose the channel pool that matches the DID numbers you plan to assign. For pool and group behavior, see Capacity groups.
At least one active is required if you plan to assign the group to numbers, if you do not own any, see How to buy numbers.
For shared channels, at least one unassigned flat-rate channel must be available in the selected pool. See Purchase flat-rate channels.
For metered channels, your account must have a positive prepaid balance. To add funds, go to Payment Methods.
Create and configure the group#
In the DIDWW User Panel, go to Phone Numbers > Capacity.
Select the capacity pool, such as Standard or Extended.
Click Create Capacity Group.
In the pop-up window, enter a Group name.
Enter the number of Assigned shared Channels, Assigned metered Channels, or both.
Click Create.
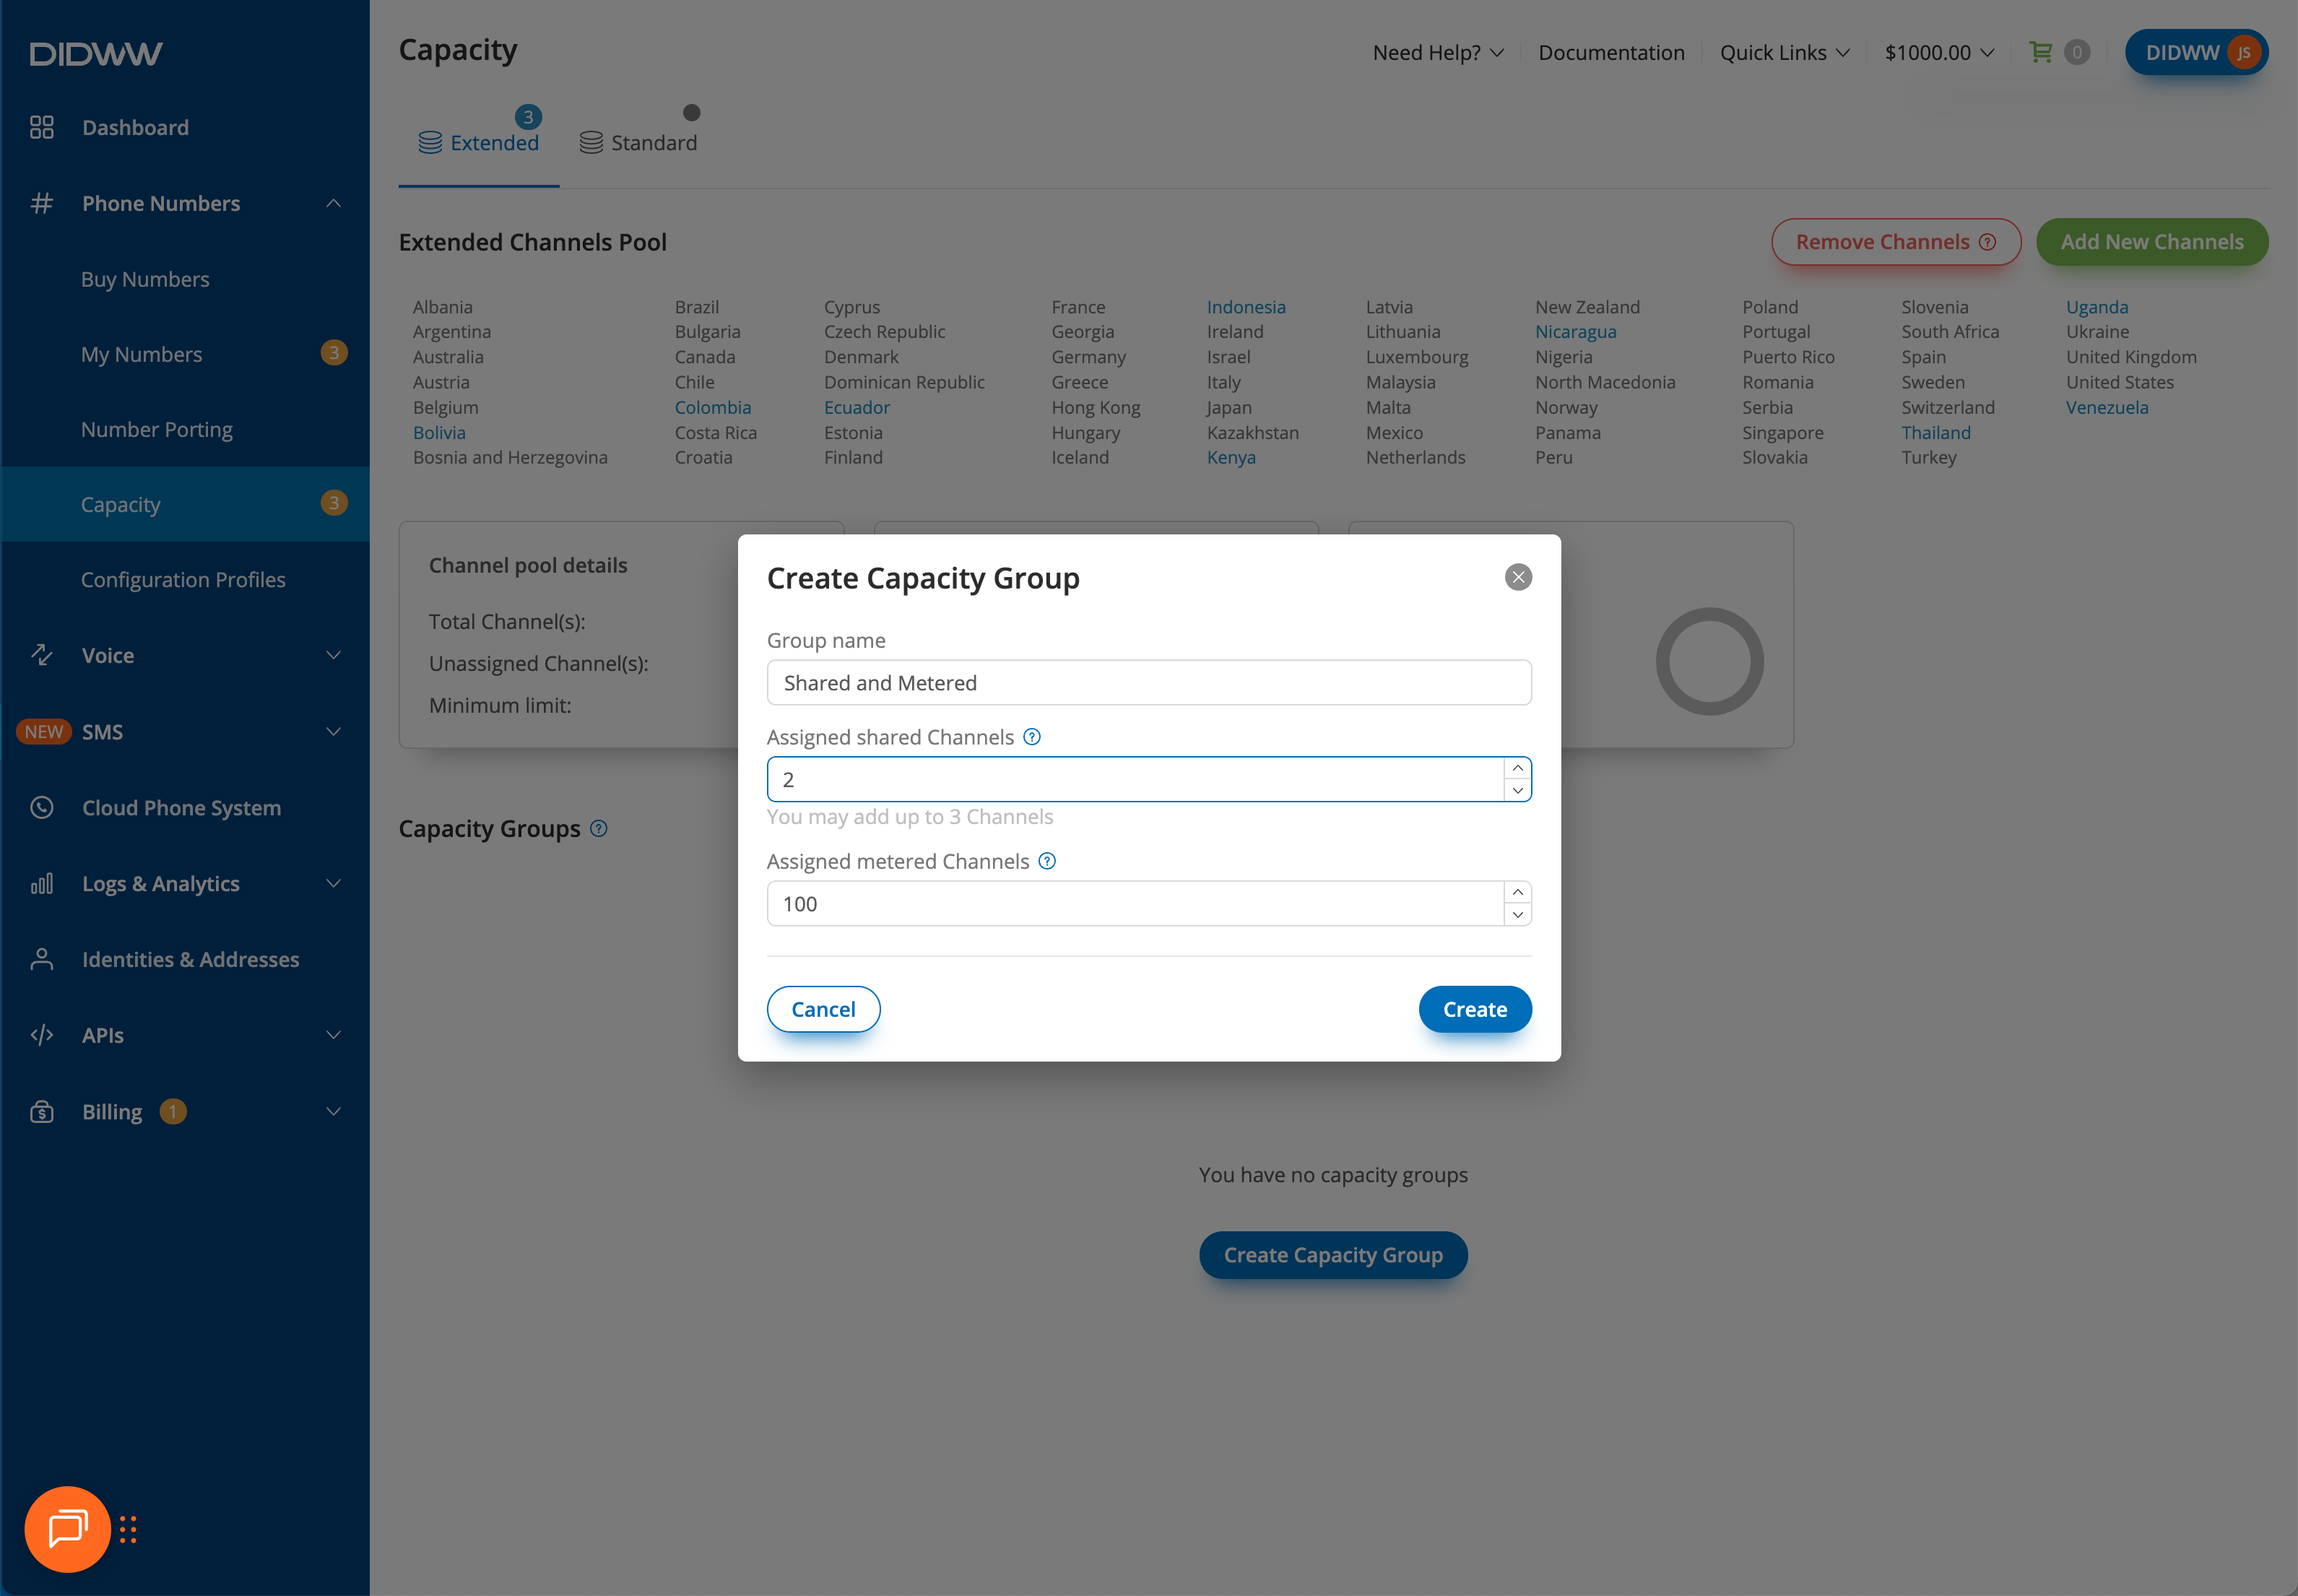
Fig. 2. Configure Capacity group channels#
Important
At least one shared or metered channel must be assigned when creating a Capacity group.
Note
Flat-rate channels can be assigned only when they are available as unassigned channels. A Capacity group can include shared channels, metered channels, or both.