Manage shared channels#
Assign shared flat-rate channels to a Capacity group when multiple DID numbers should share additional inbound call capacity. Unassign shared channels when the group no longer needs them.
Before you begin#
At least one active DID number is required.
At least one unassigned flat-rate channel is required to assign shared channels. See Purchase flat-rate channels.
Only DID numbers that support additional Capacity can be assigned to a Capacity group.
Assign shared channels#
Use this flow to create a Capacity group with shared flat-rate channels and assign DID numbers to that group.
Step 1: Open Capacity and create a group#
In the DIDWW User Panel, go to Phone Numbers > Capacity.
Select the capacity pool, such as Standard or Extended, where you have at least one unassigned channel.
Click Create Capacity Group.
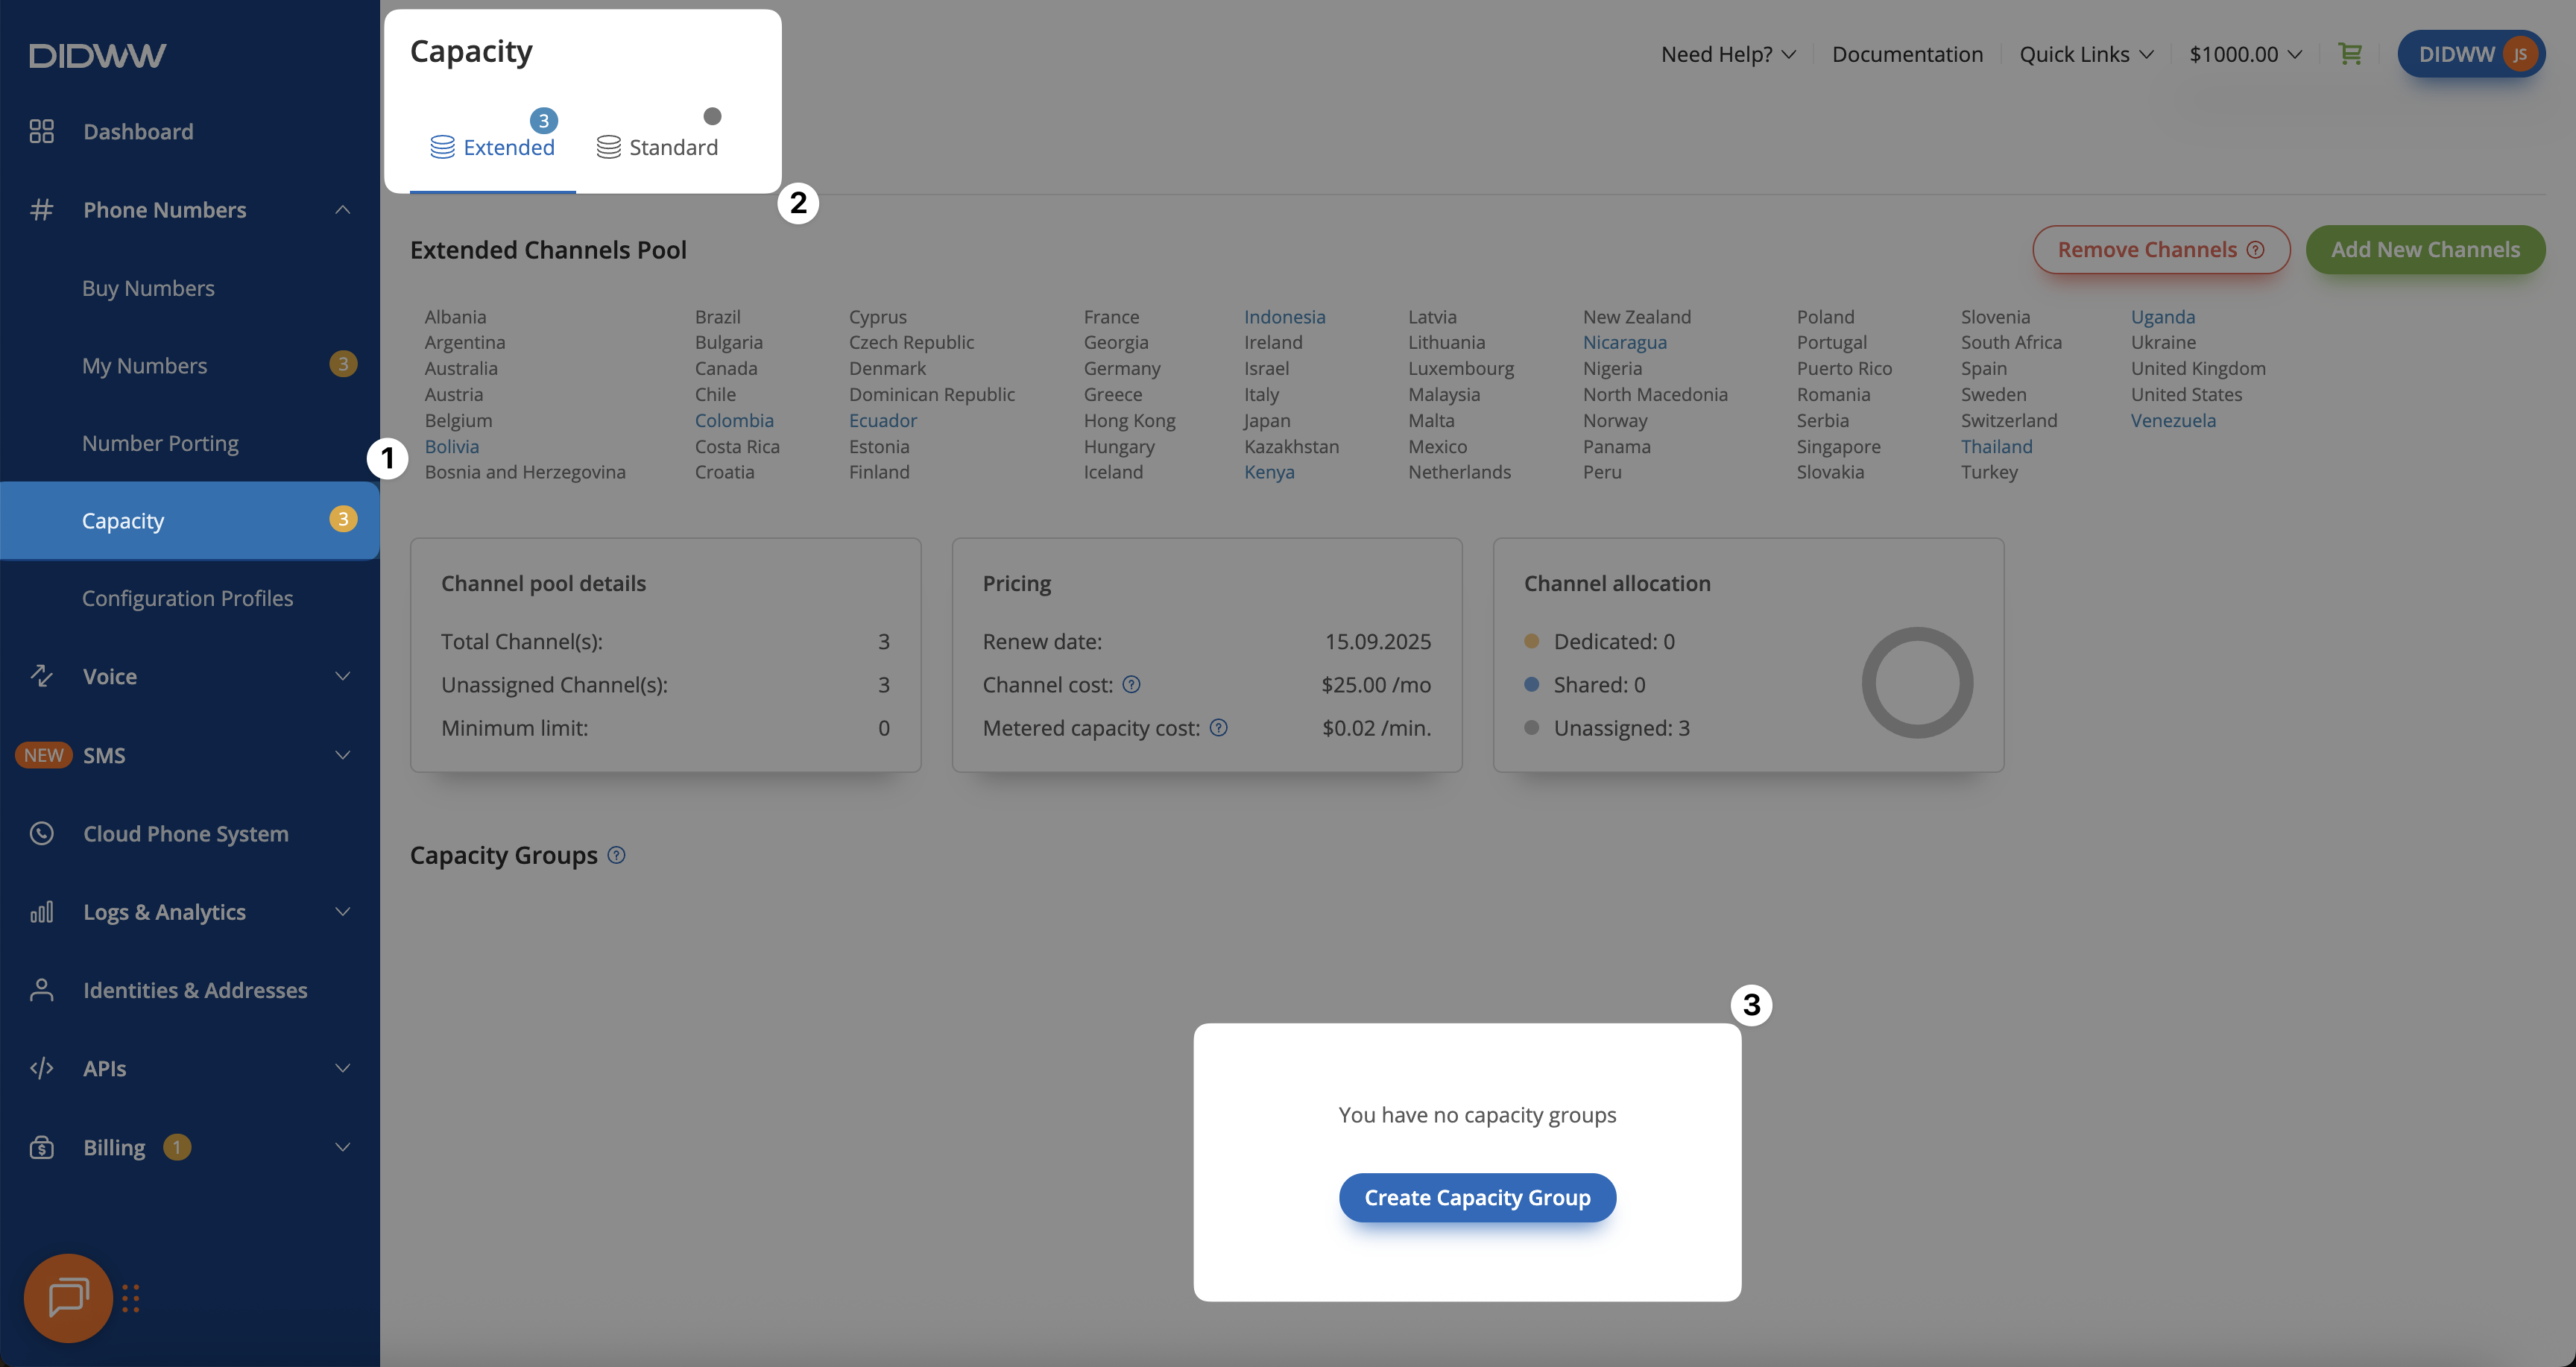
Fig. 1. Create a Capacity group#
Step 2: Assign shared channels to the group#
In the pop-up window, enter a Group name.
Enter the number of channels in Assigned shared Channels.
Click Create.
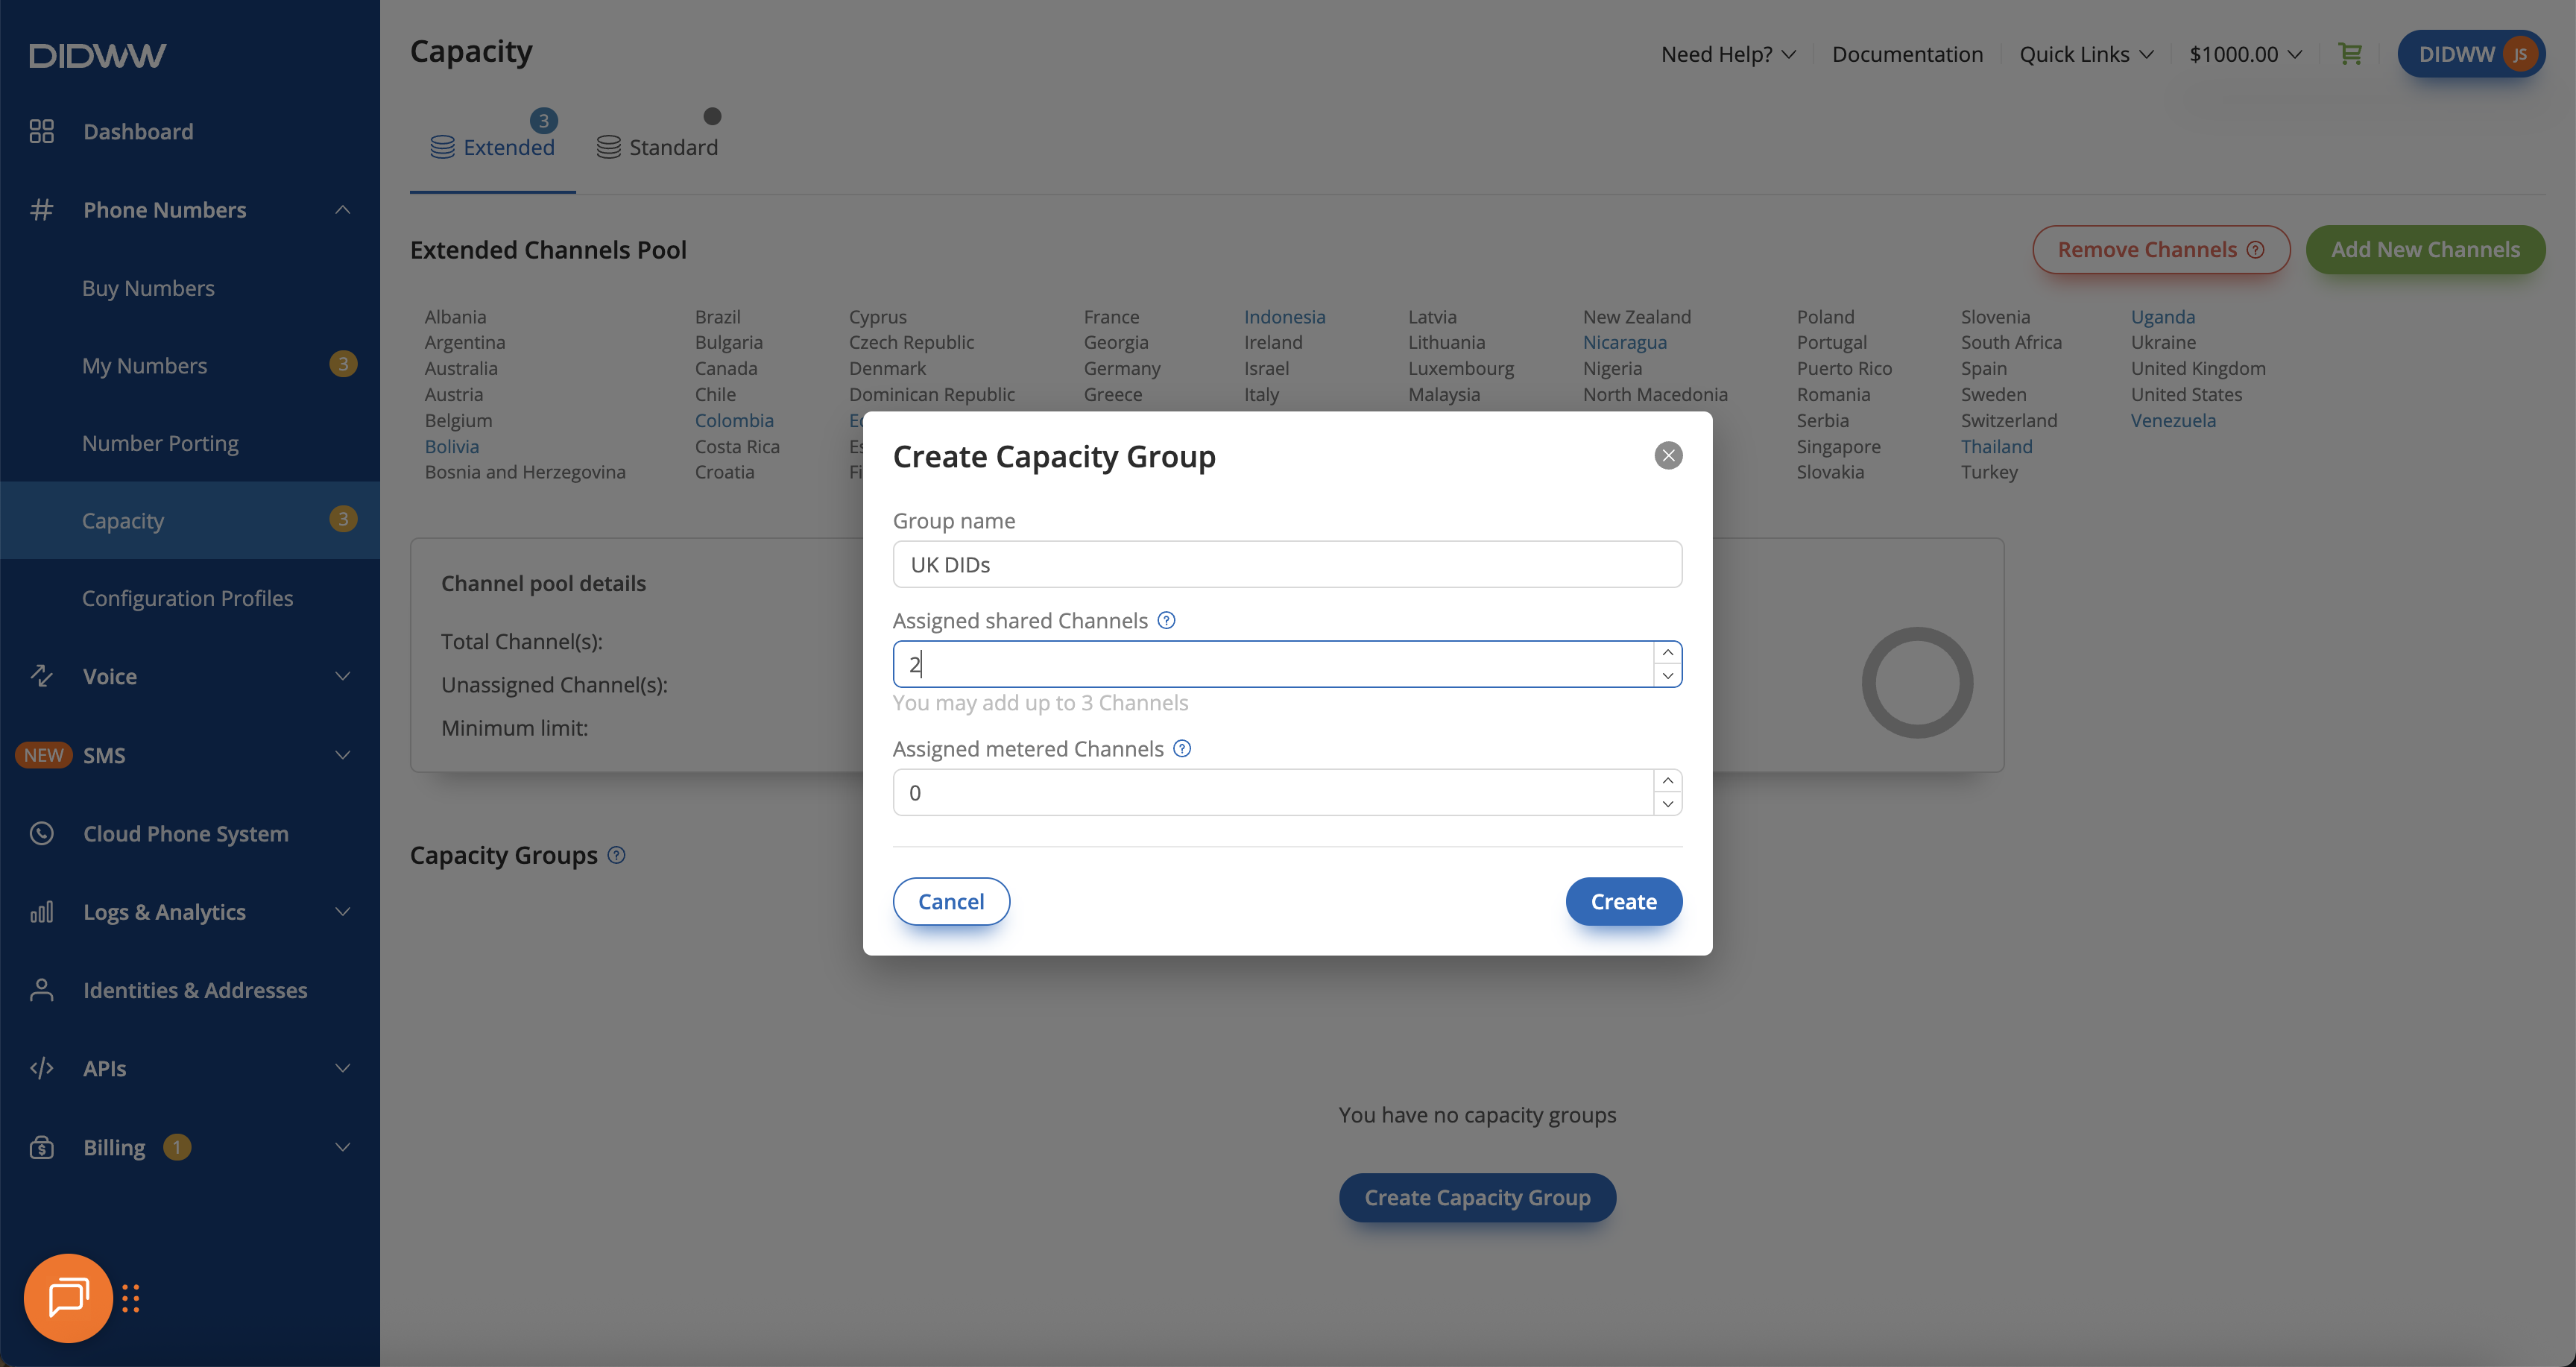
Fig. 2. Assign shared channels#
Step 3: Select DID numbers#
In the DIDWW User Panel, go to Phone Numbers > My Numbers.
Select the DID numbers you want to assign to the Capacity group.
At the bottom of the page, click Batch Actions.
Select Update Capacity Group.
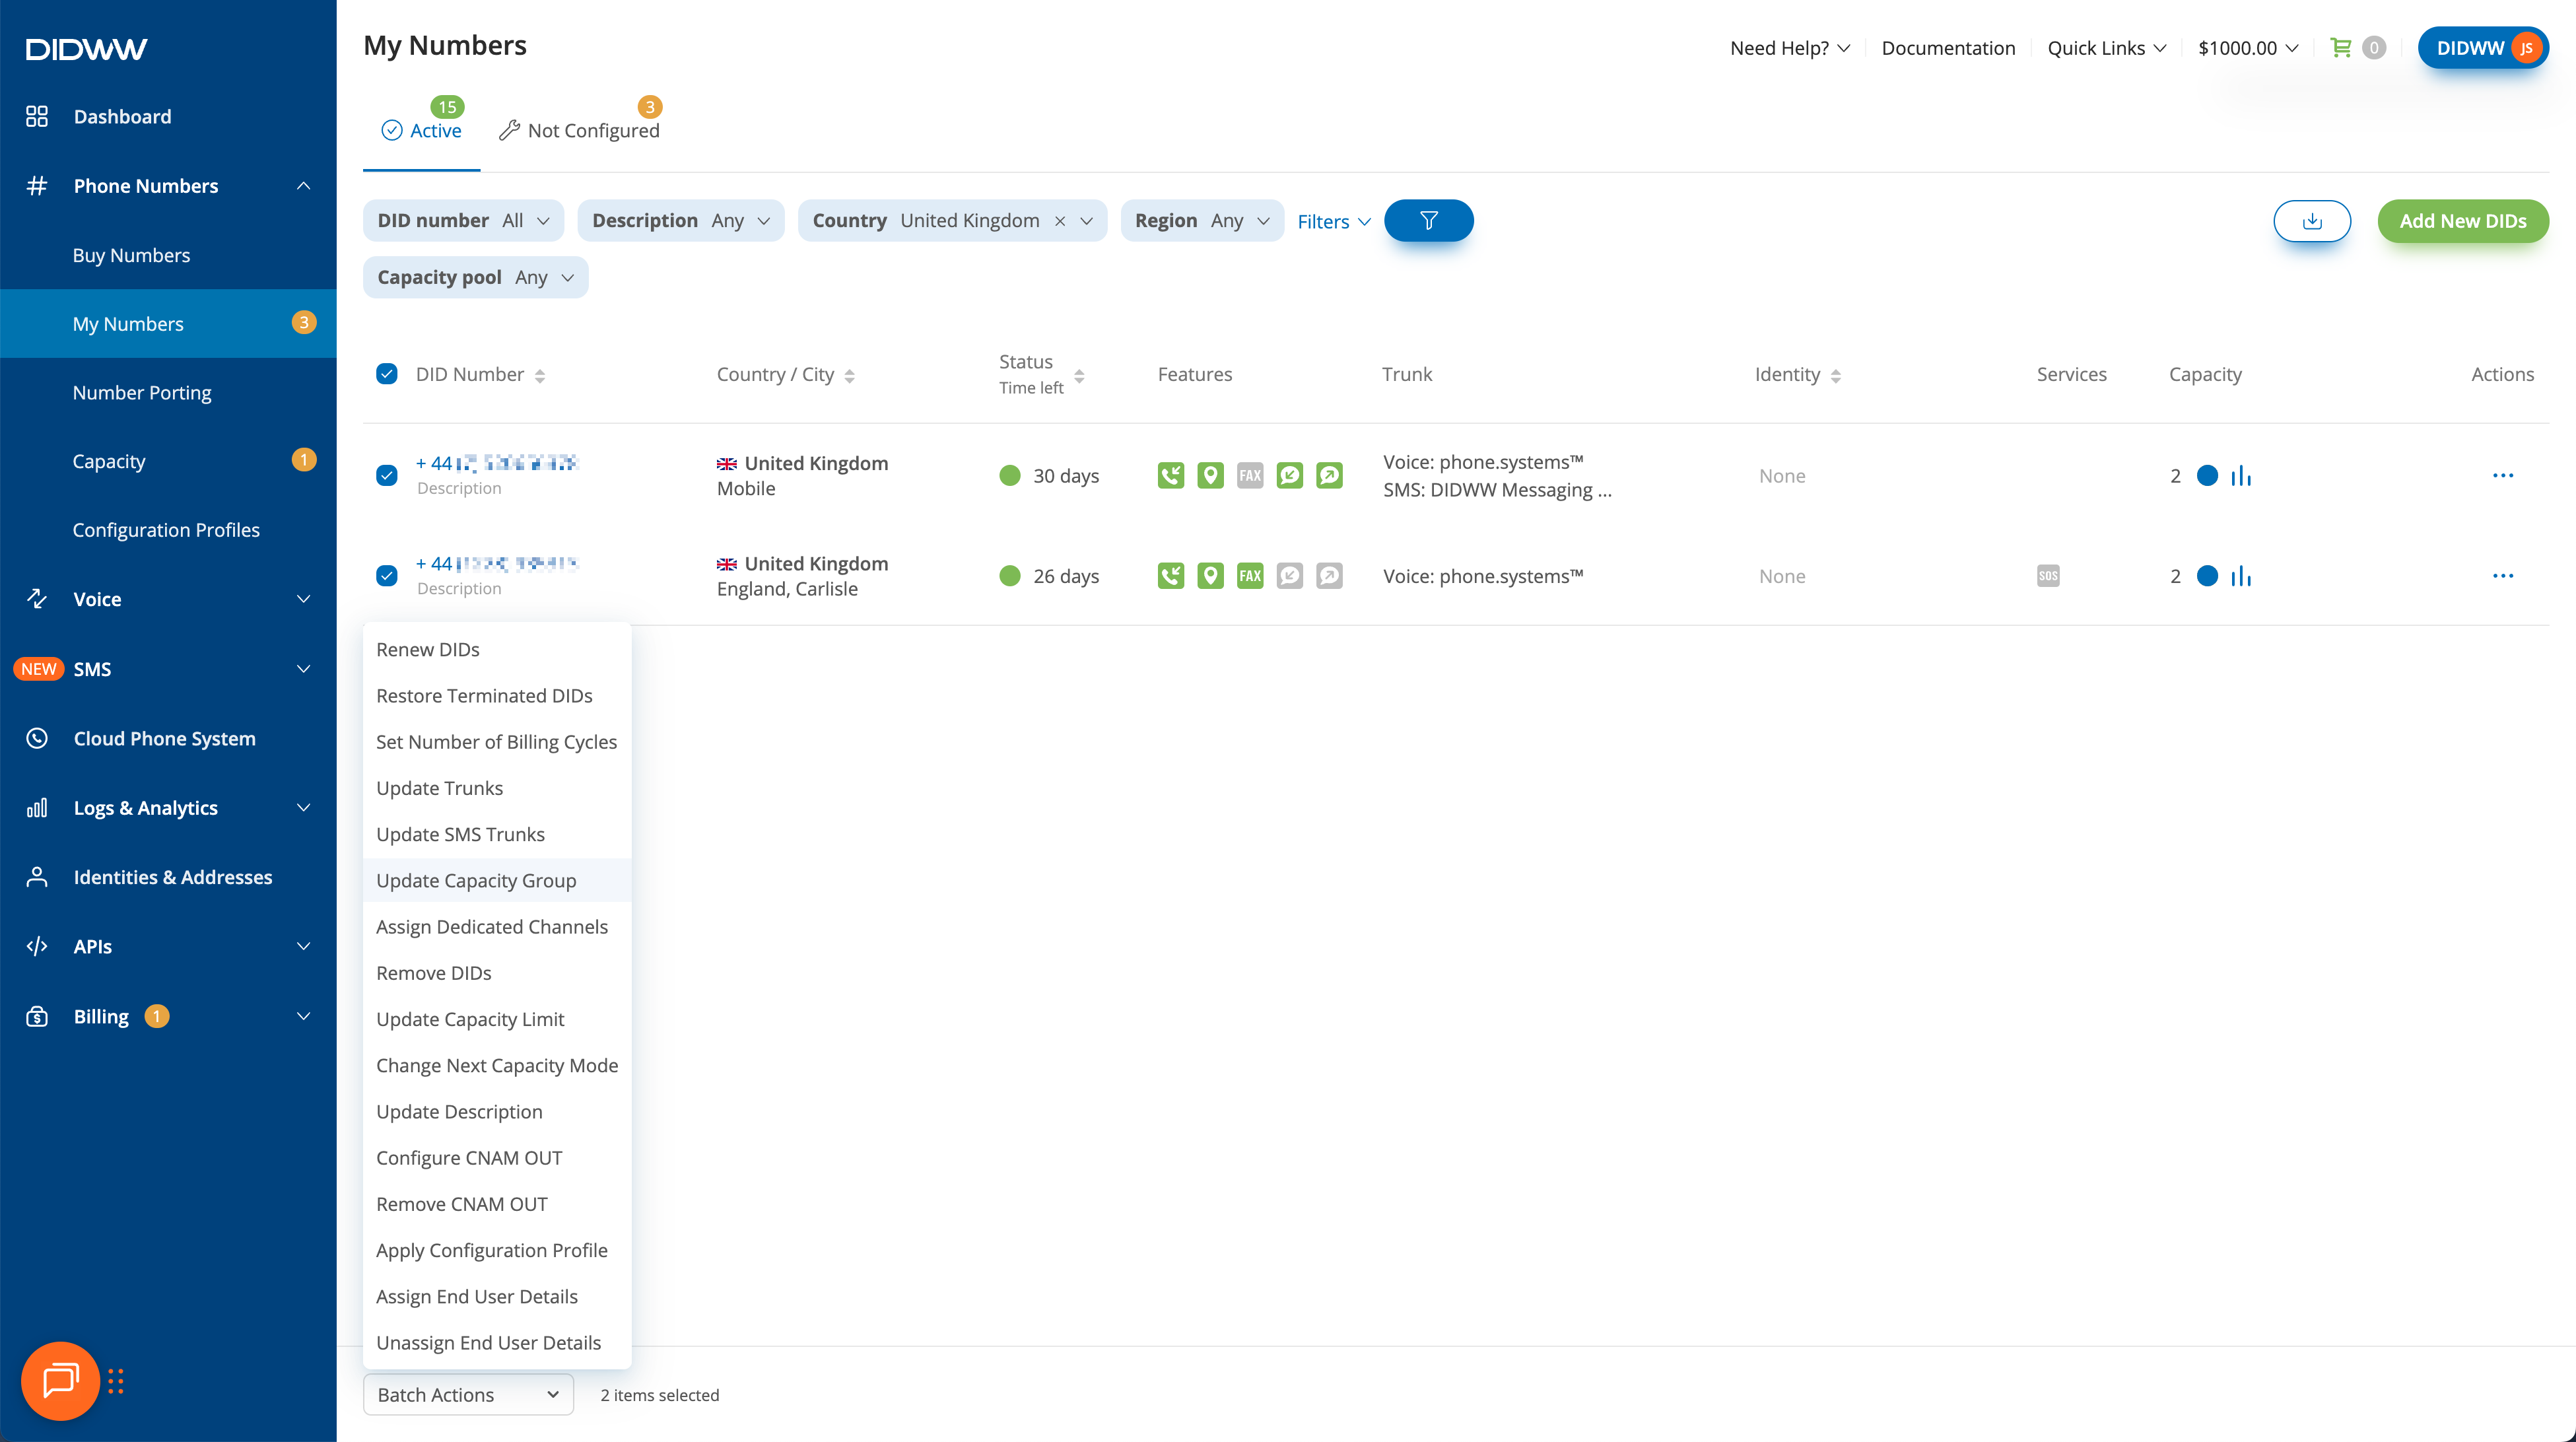
Fig. 3. Select DID numbers and open Batch Actions#
Step 4: Assign the capacity group#
In the Update Capacity Group window, select a Capacity Group.
Click Confirm.
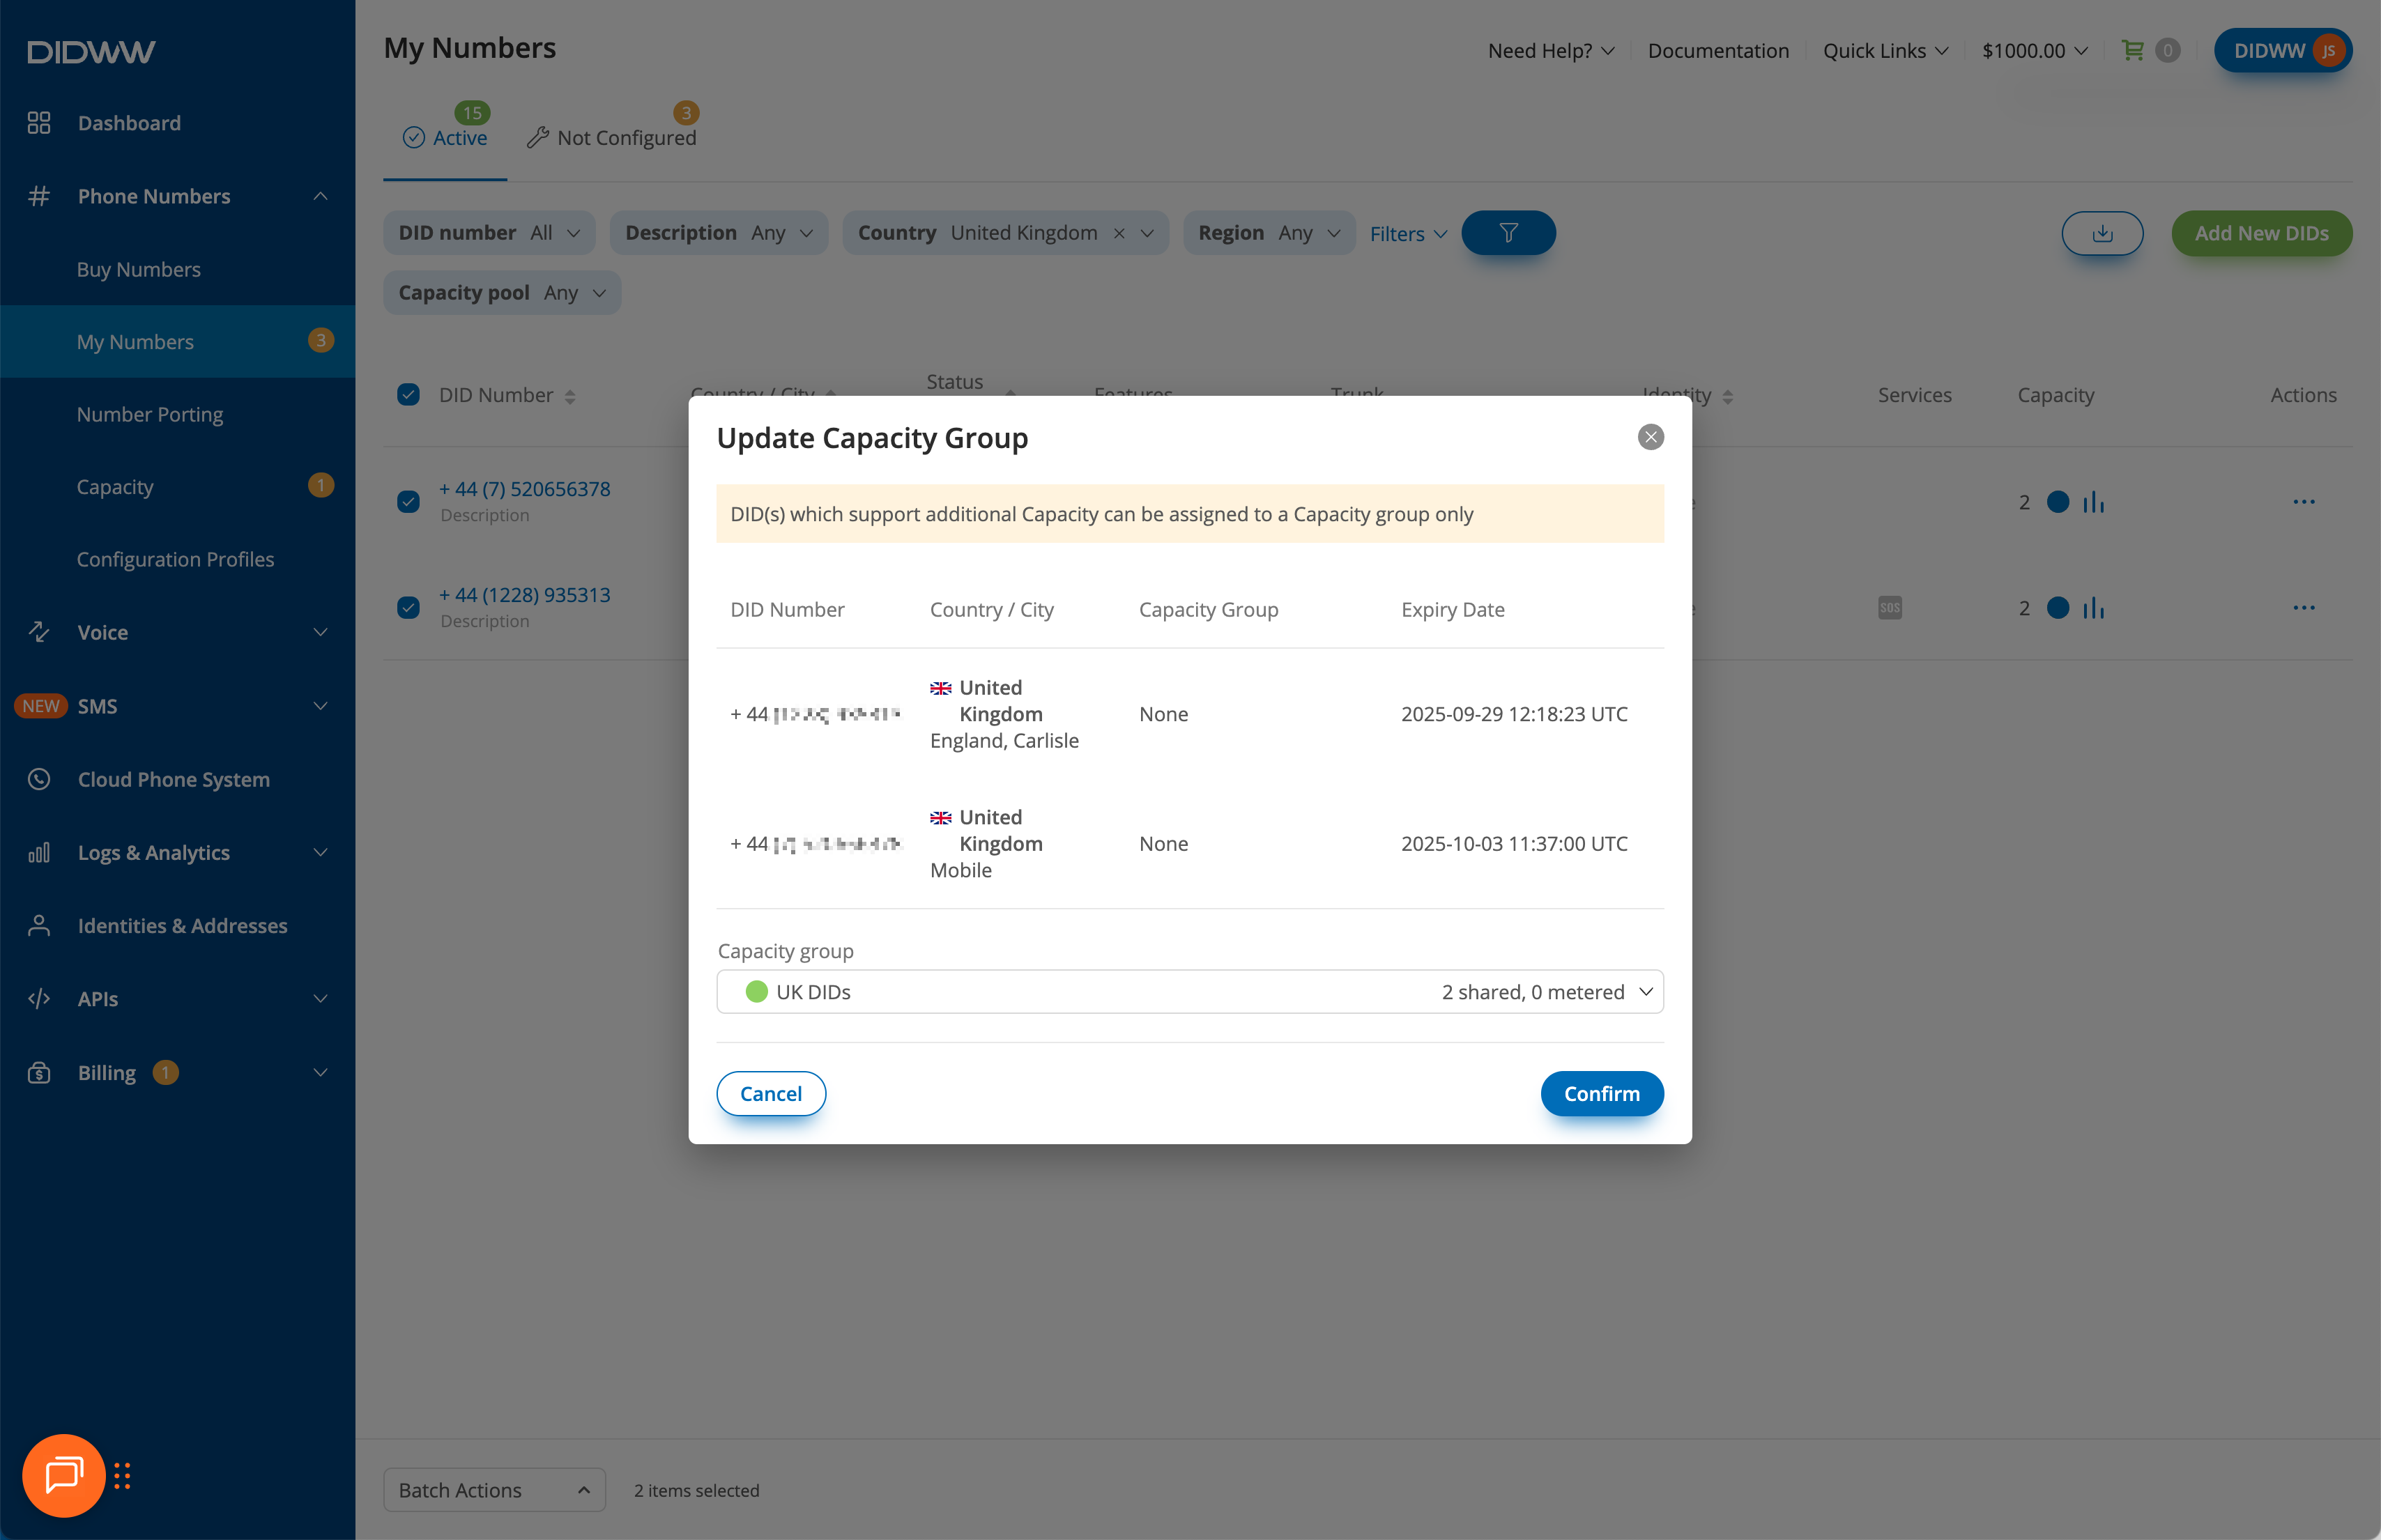
Fig. 4. Update Capacity Group#
Unassign shared channels#
Use this flow to reduce the number of shared flat-rate channels assigned to an existing Capacity group.
Step 1: Review shared channel allocation#
In the DIDWW User Panel, go to Phone Numbers > Capacity.
Select the capacity pool where the shared channels are allocated.
In the Channel allocation block, review the number of channels assigned as shared.
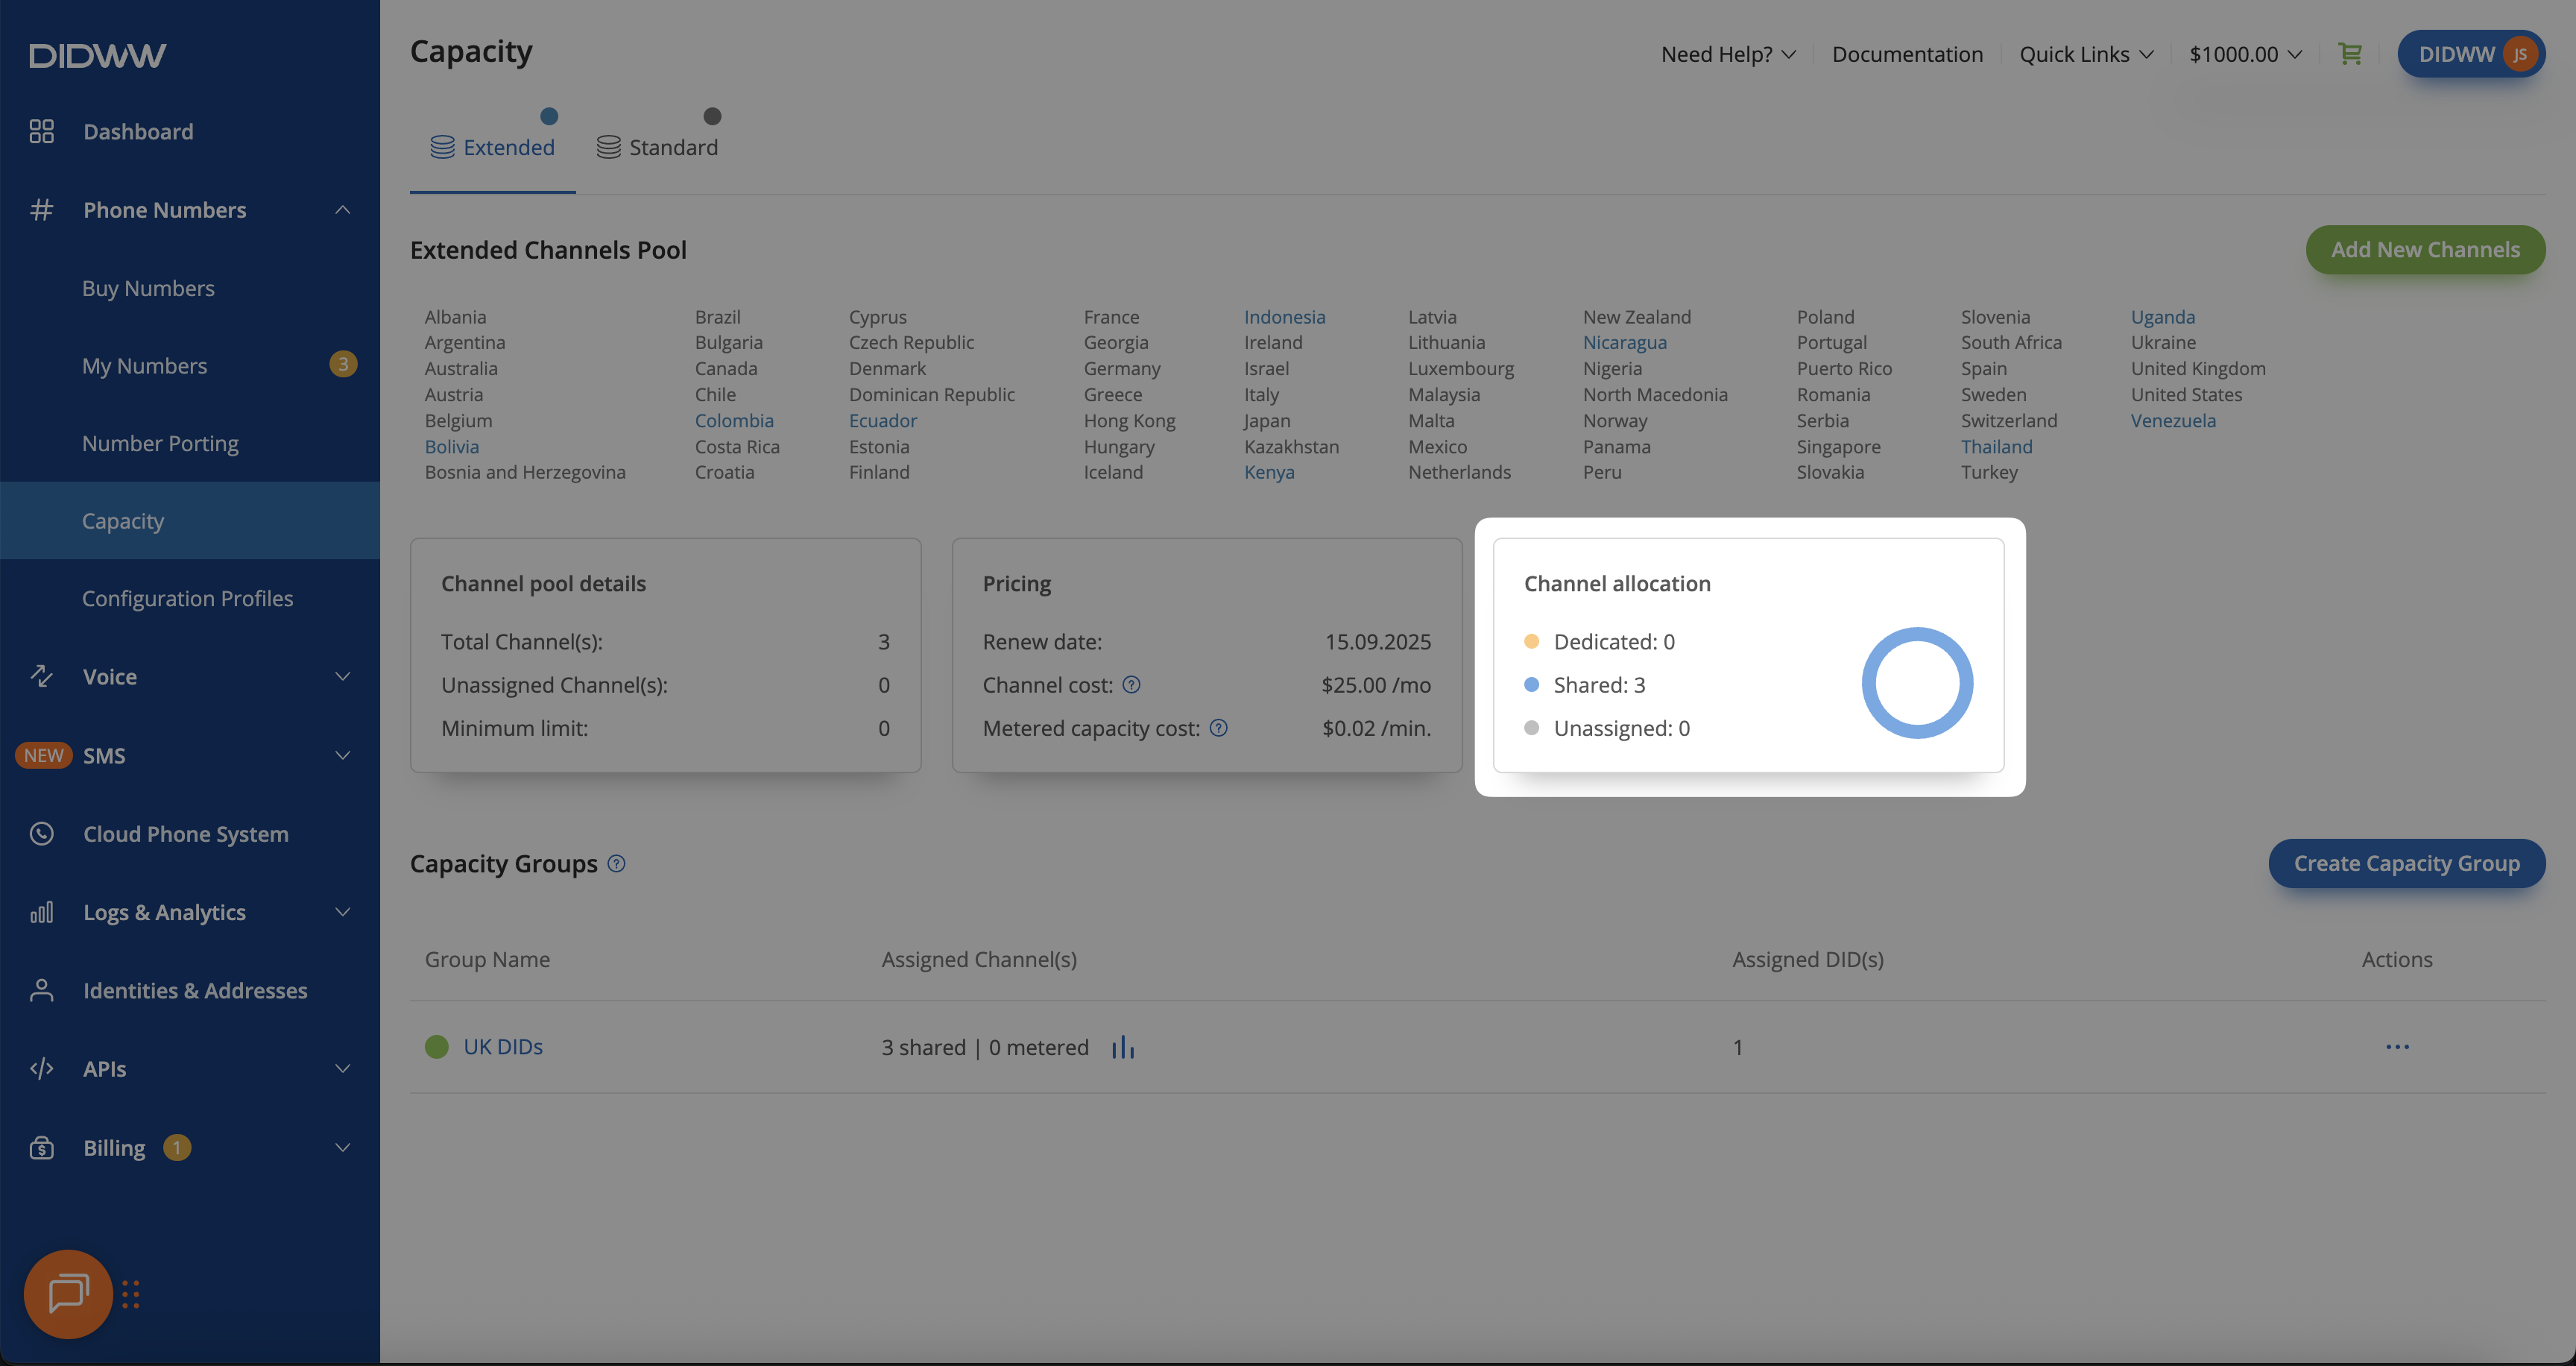
Fig. 5. Review channel allocation#
Step 2: Open the group editor#
Find the Capacity group where the Assigned Channels column shows shared channels.
Edit the capacity group by clicking Actions > Edit group.
Fig. 6. Open Edit group#
Important
Before reducing shared channels, make sure the reduction will not cause call failures or traffic loss. A Capacity group must have at least one shared or metered channel.
To cancel all shared channels while keeping the group active, first increase the number of metered channels to at least 1, then reduce assigned shared channels to 0. To remove all channels from a group, first unassign all DID numbers from the group, then delete the group.
Step 3: Reduce shared channels#
In the Edit Capacity Group pop-up window, locate Assigned shared Channels.
Reduce the number of shared channels to the required value, or 0 to completely remove them from a capacity group.
Click Submit.
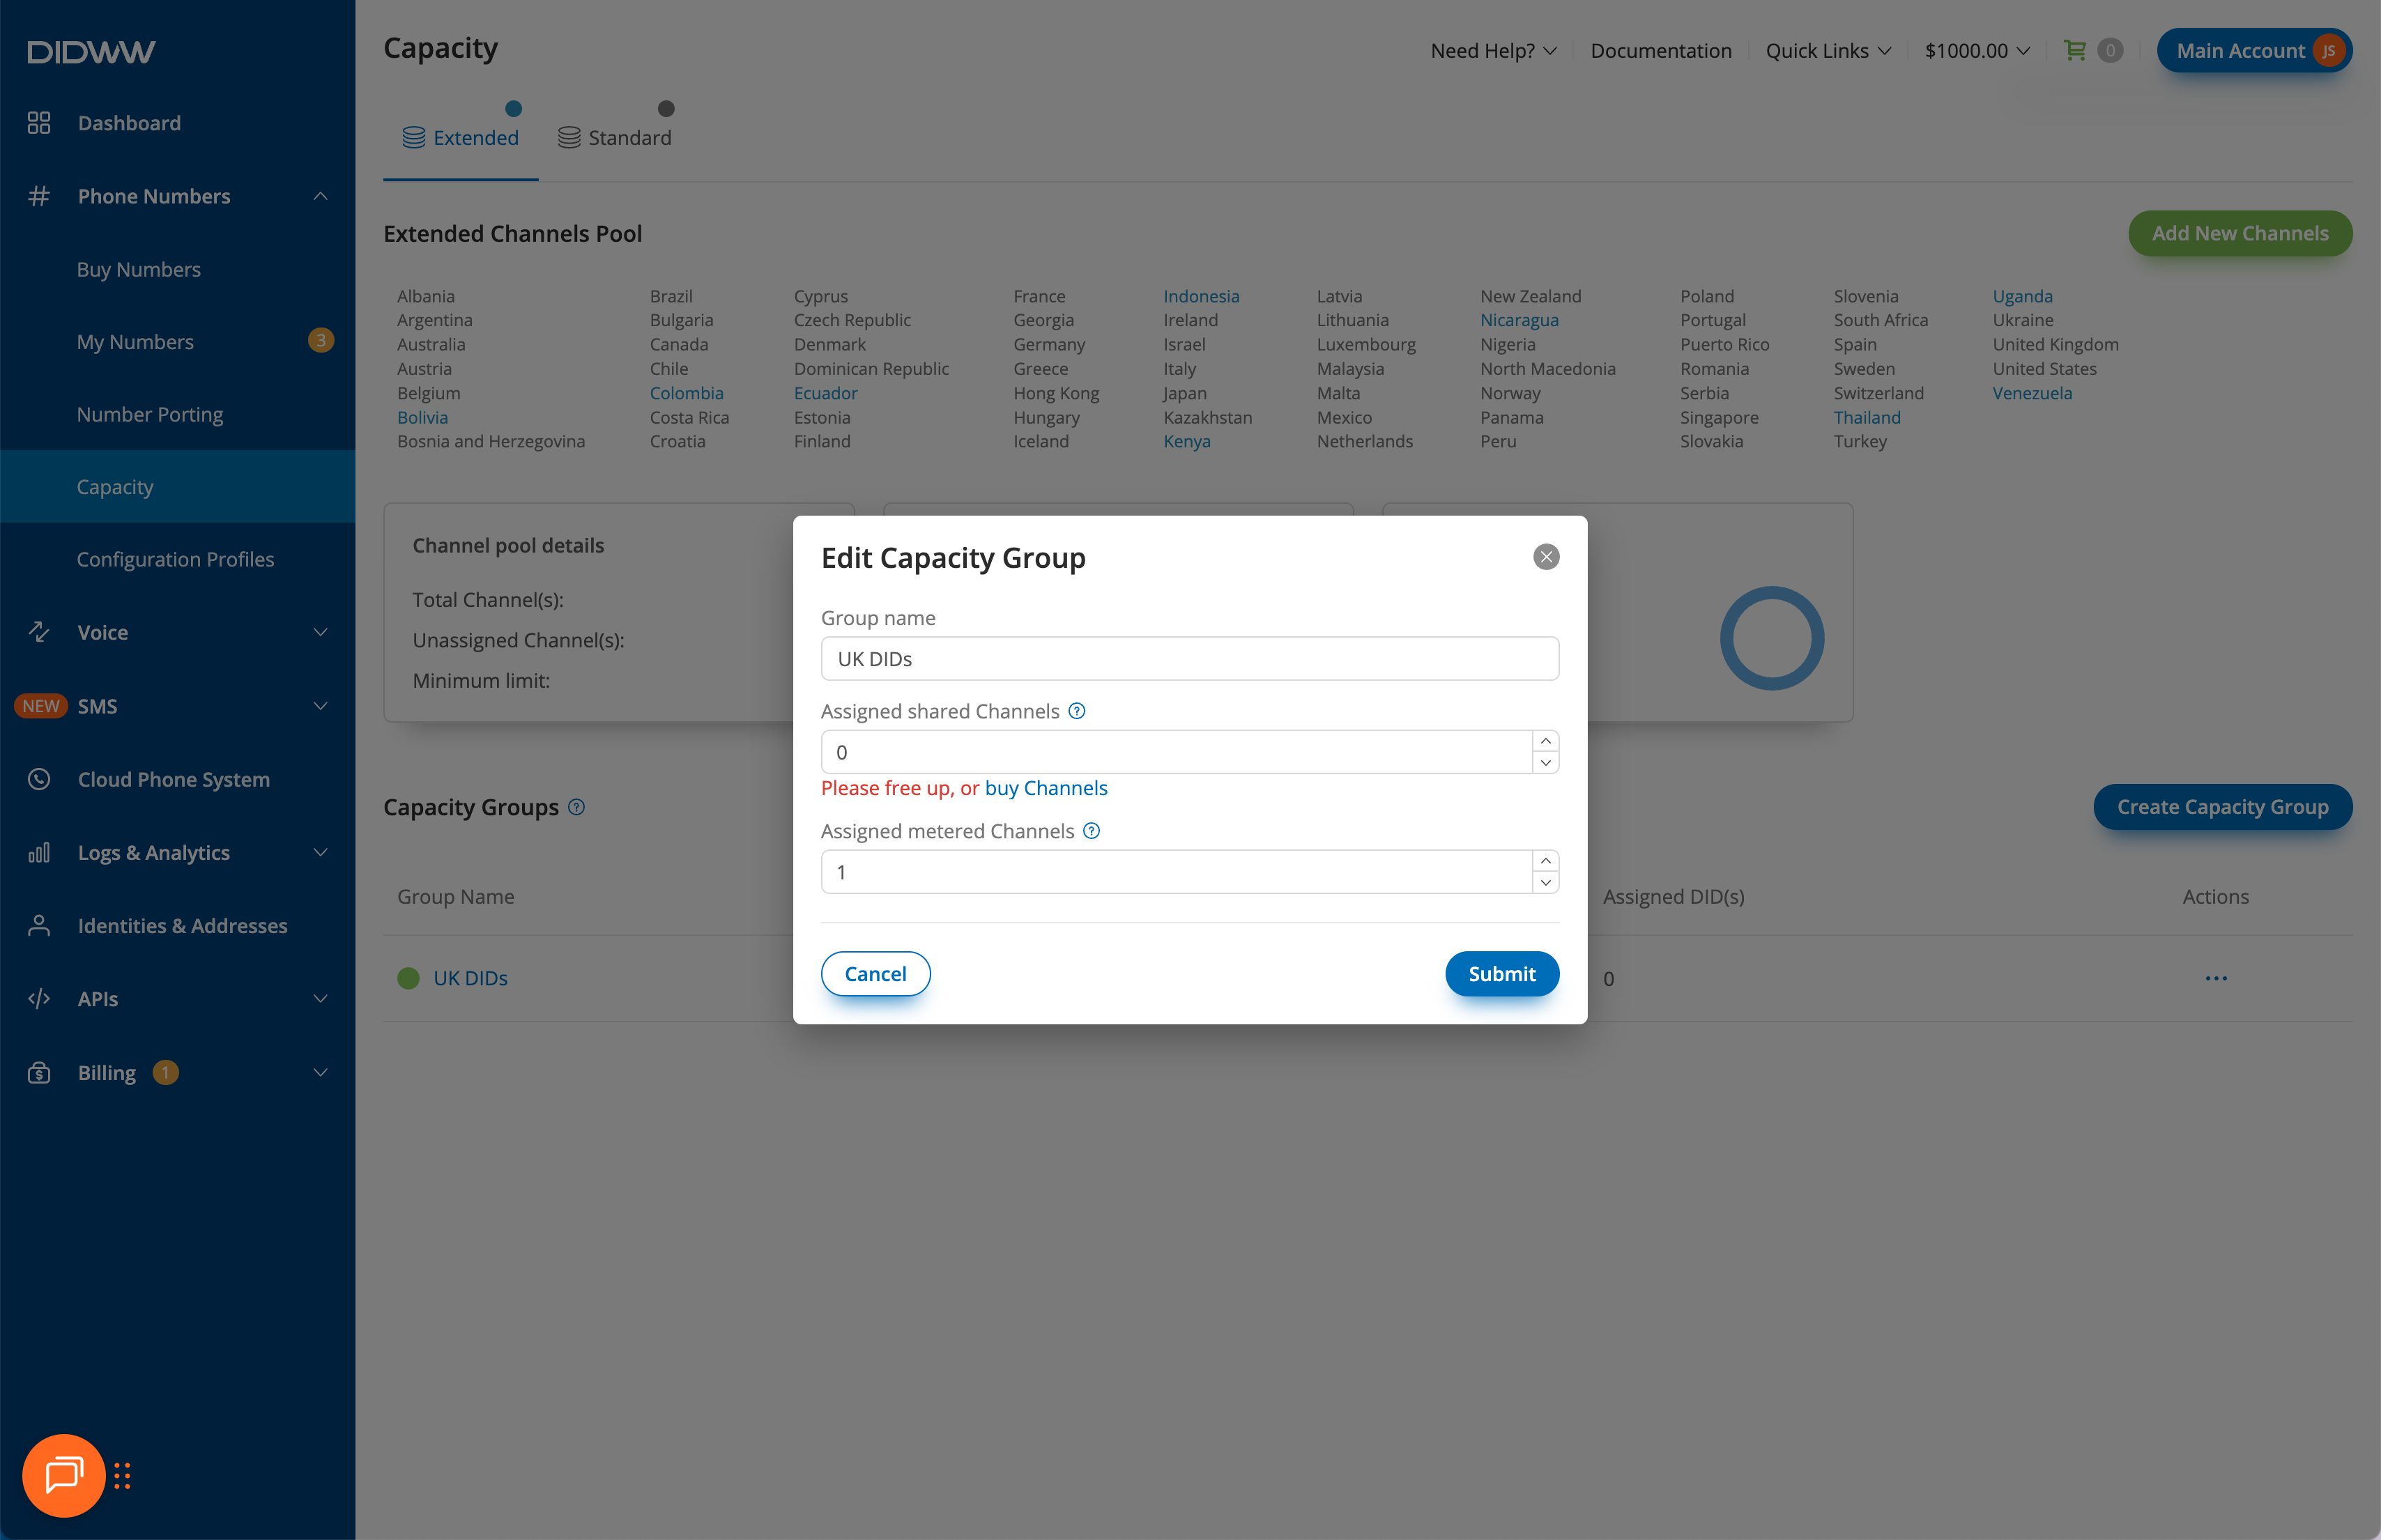
Fig. 7. Unassign shared channels#