Manage port-out requests#
Manage port-out requests in DIDWW by reviewing transfer requests and deciding whether they can be approved or must be rejected.
Approve port-out requests#
Approve a request when the numbers can be released to the gaining carrier. Once ported-out, the action cannot be undone.
Before you begin#
The port-out request must be in Action required status before it can be approved.
Step 1: Open the port-out request#
Go to the Phone Numbers > Number Porting > Port Out Requests tab.
Filter the Port Out Requests by Action required status. Click here to apply the filter .
Find the request you want to review and click on the Port Out Request reference ID or Actions > View details to open the View Port Out Request window.
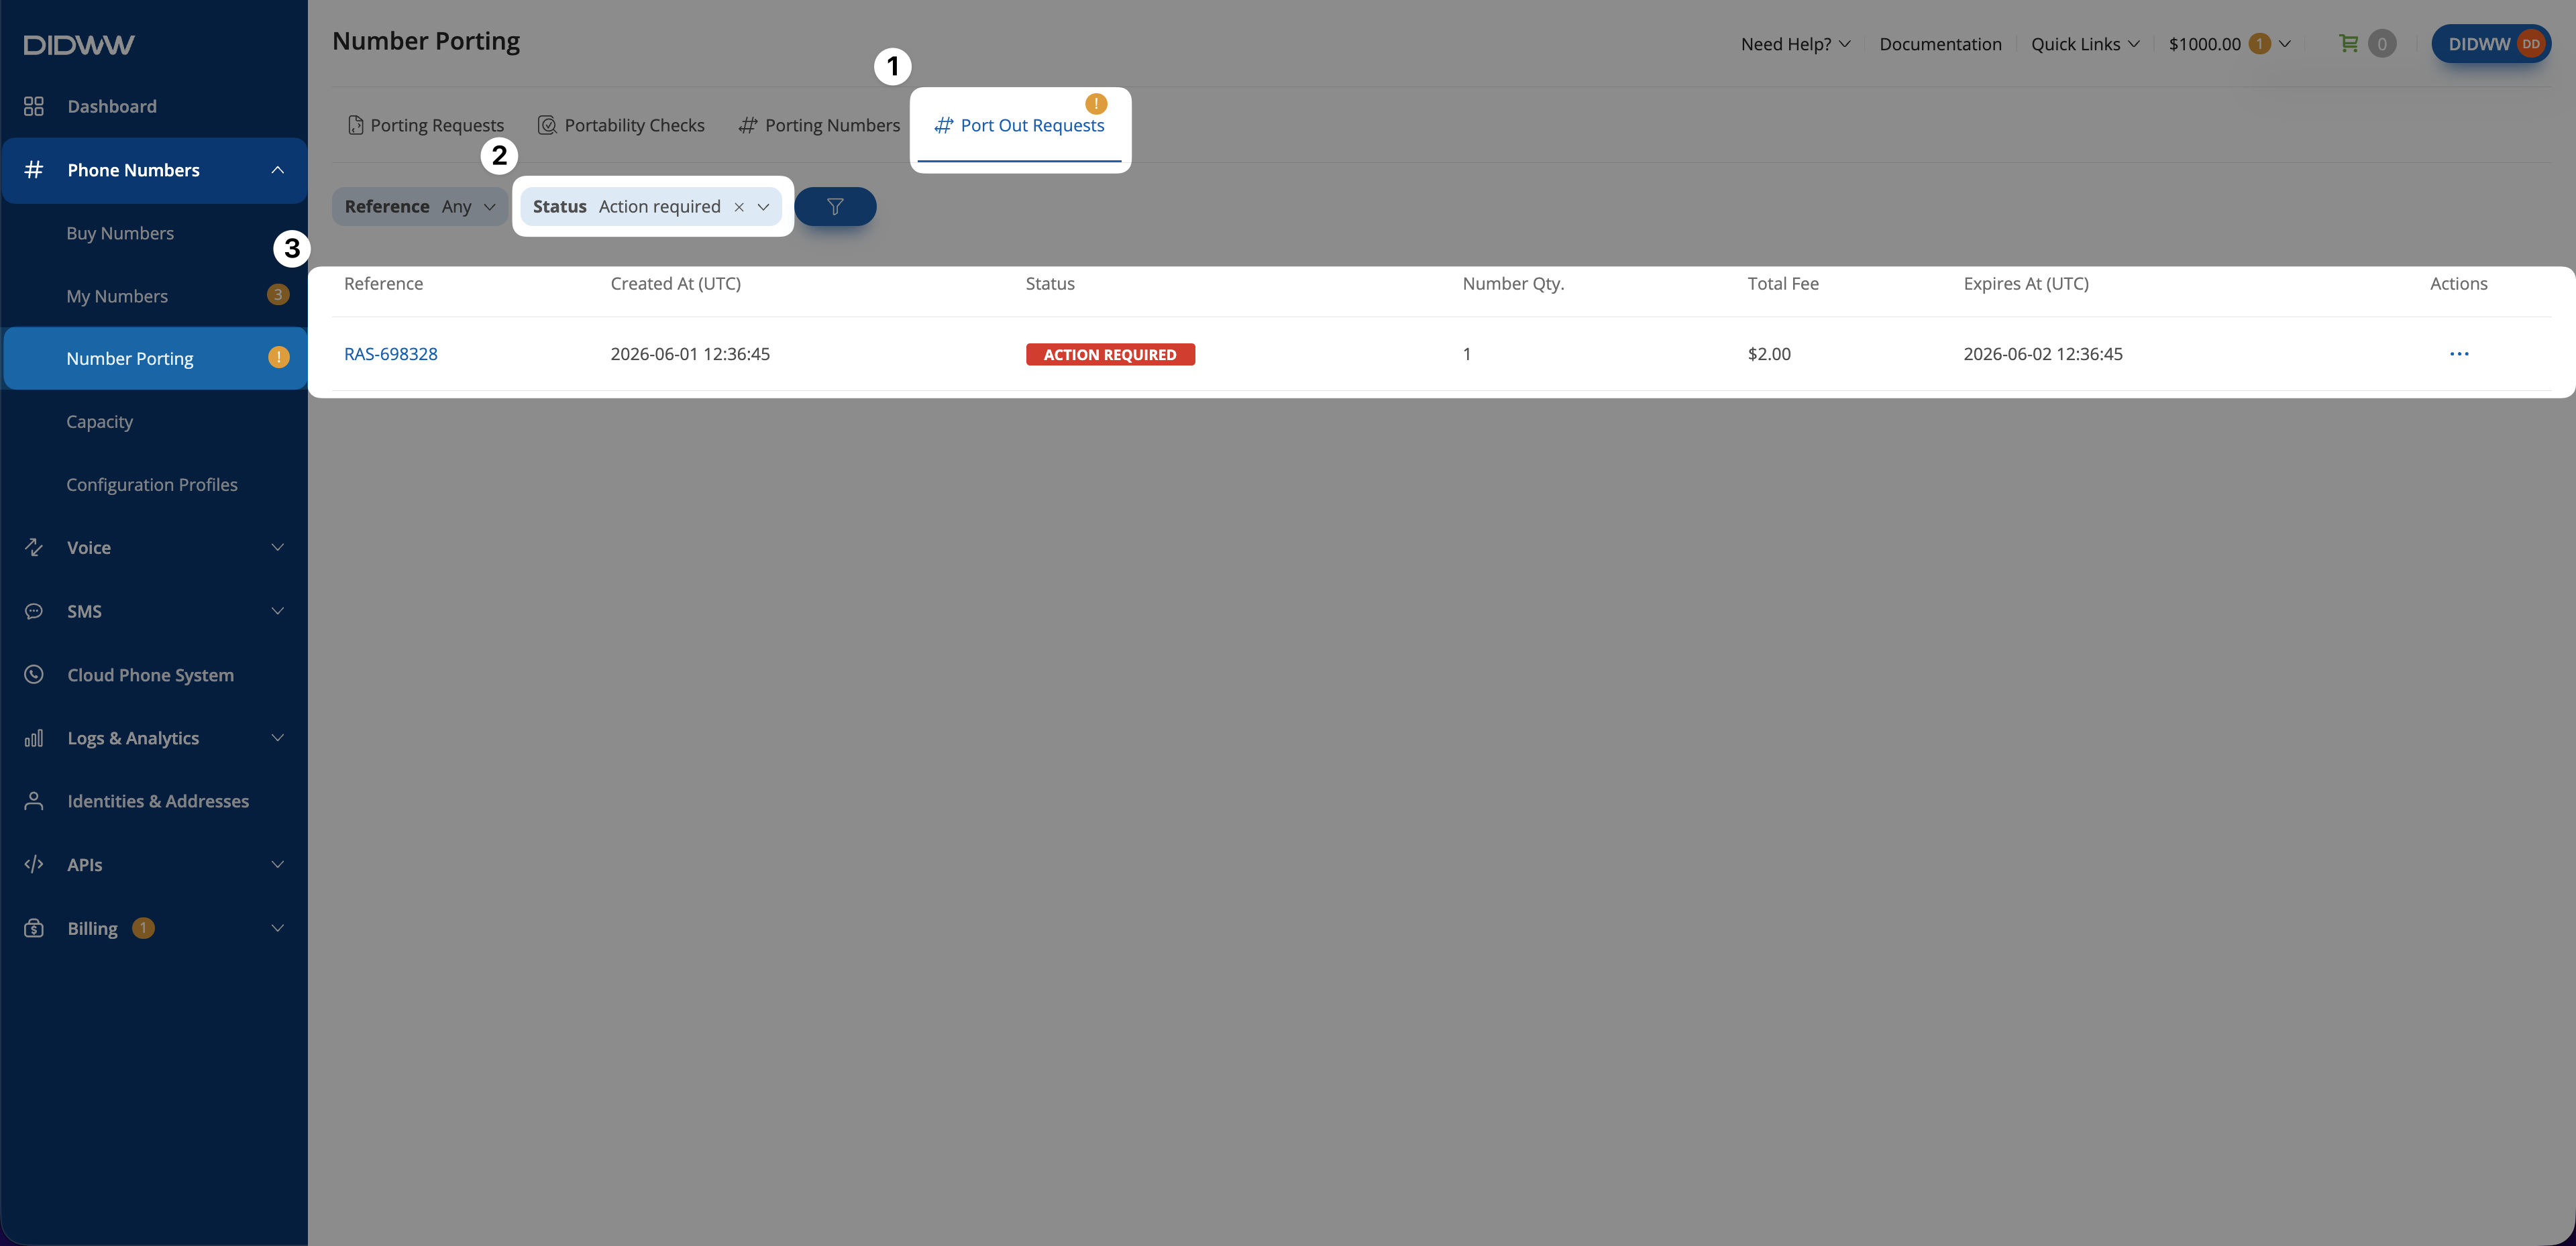
Fig. 1. Opening a port-out request from the Port Out Requests table.#
Step 2: Review the request details#
On the View Port Out Request page review the General details.
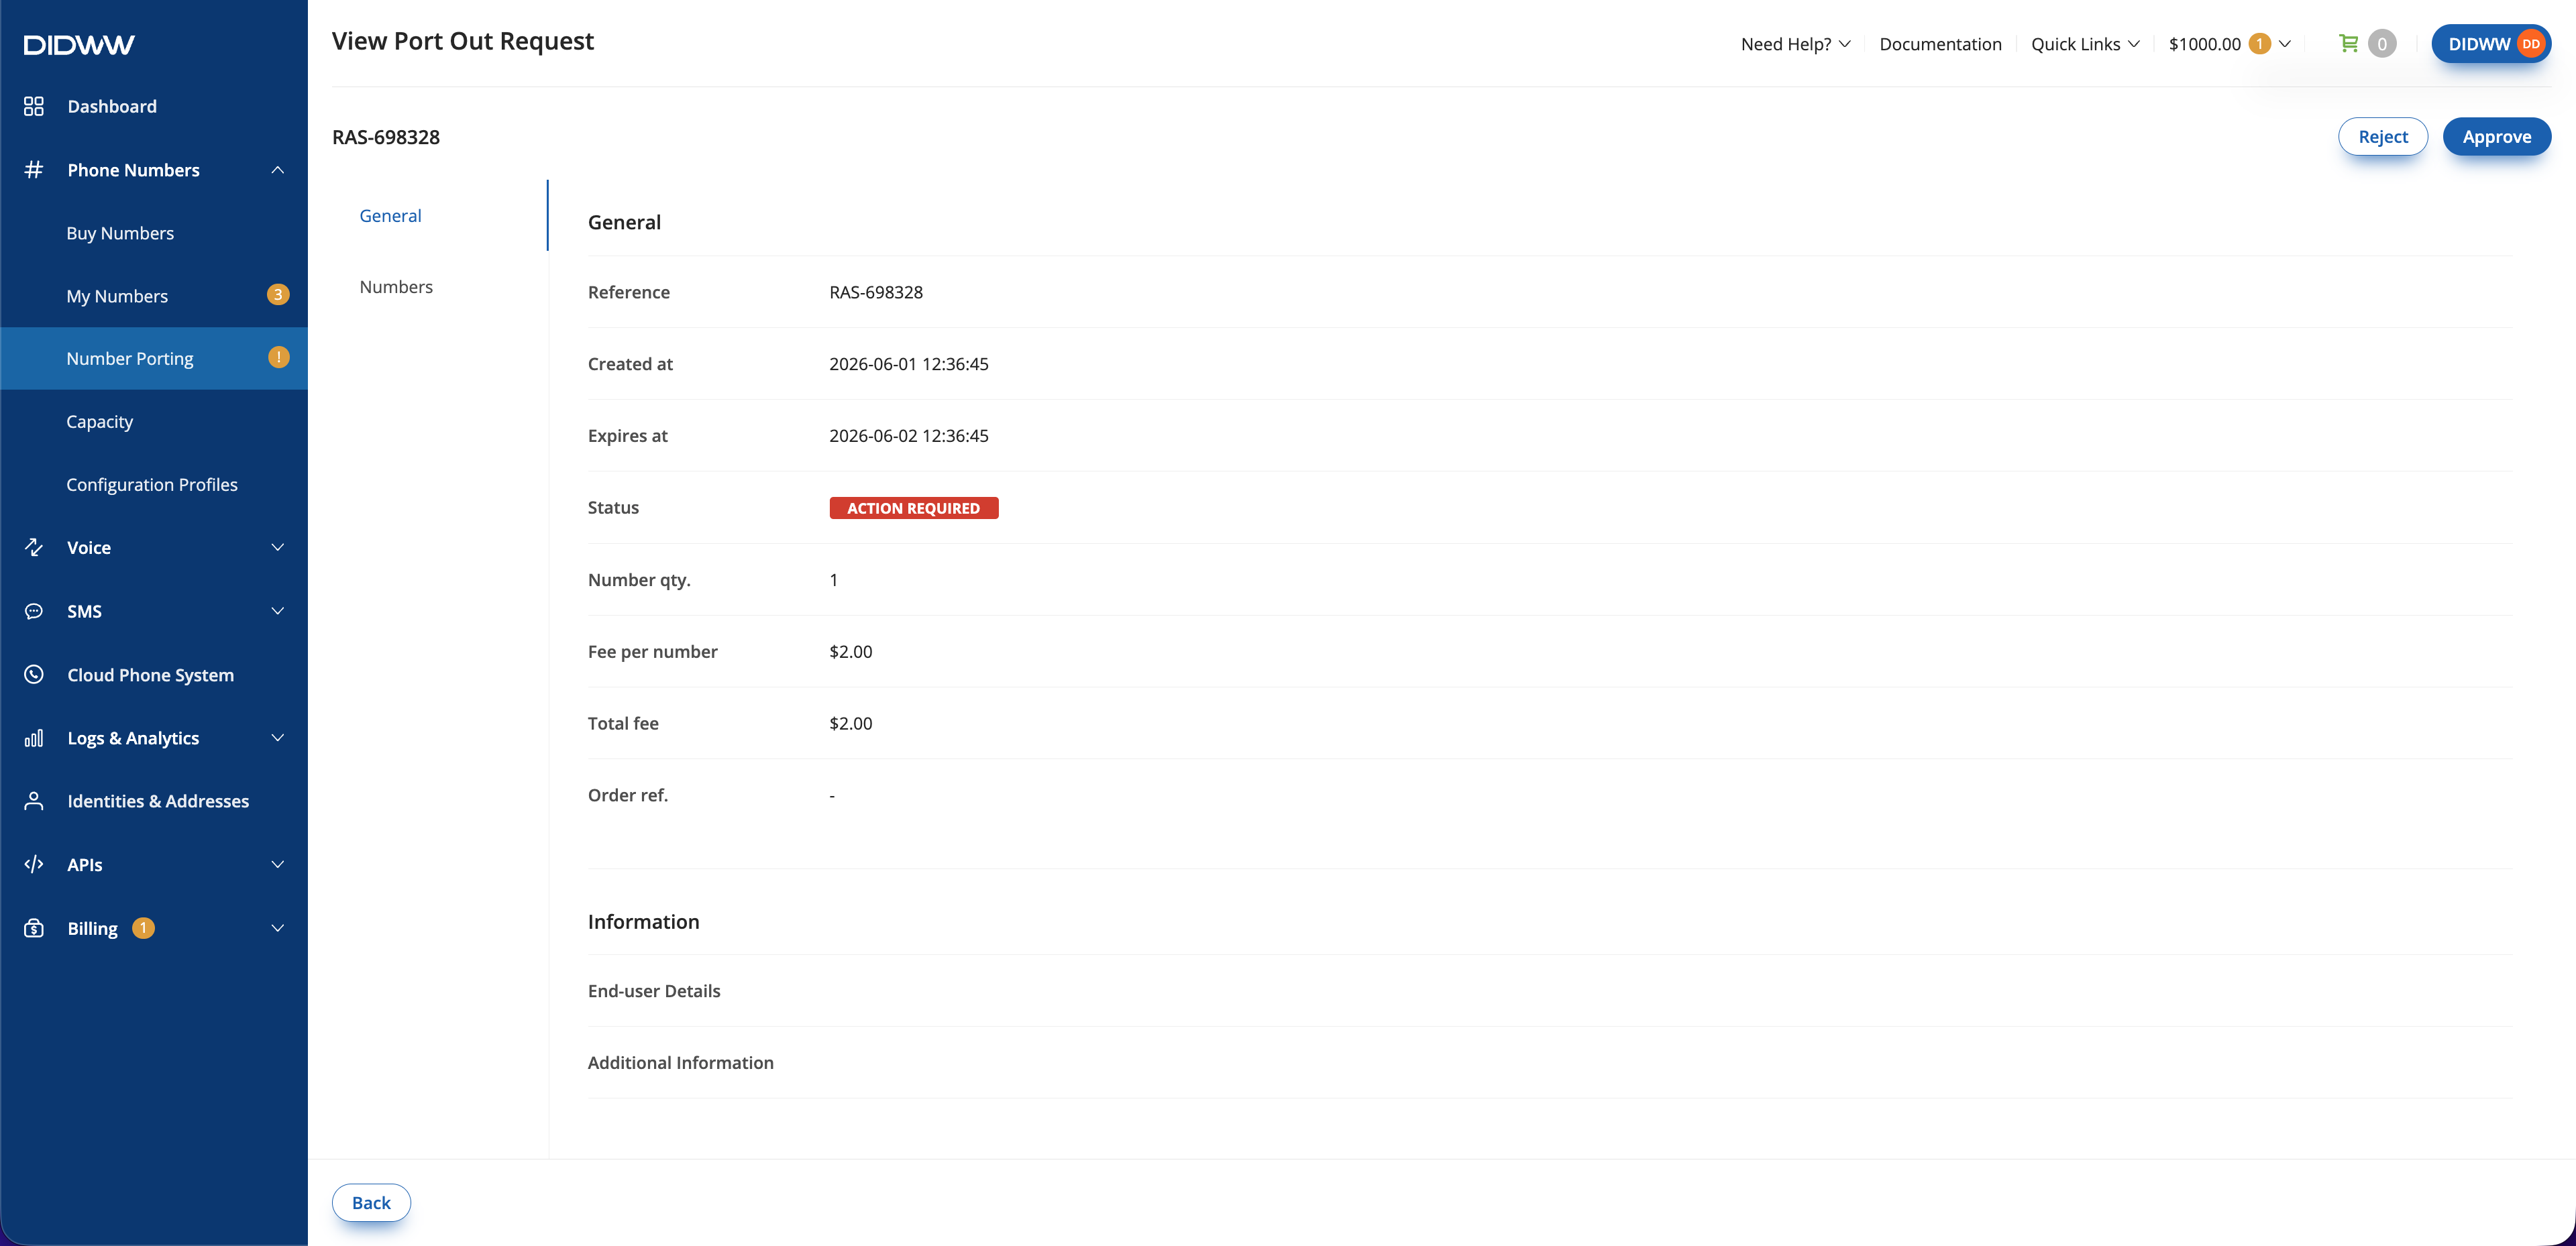
Fig. 2. View Port Out Request page.#
Open the Numbers section and confirm that the expected numbers appear in the Port Out Request.
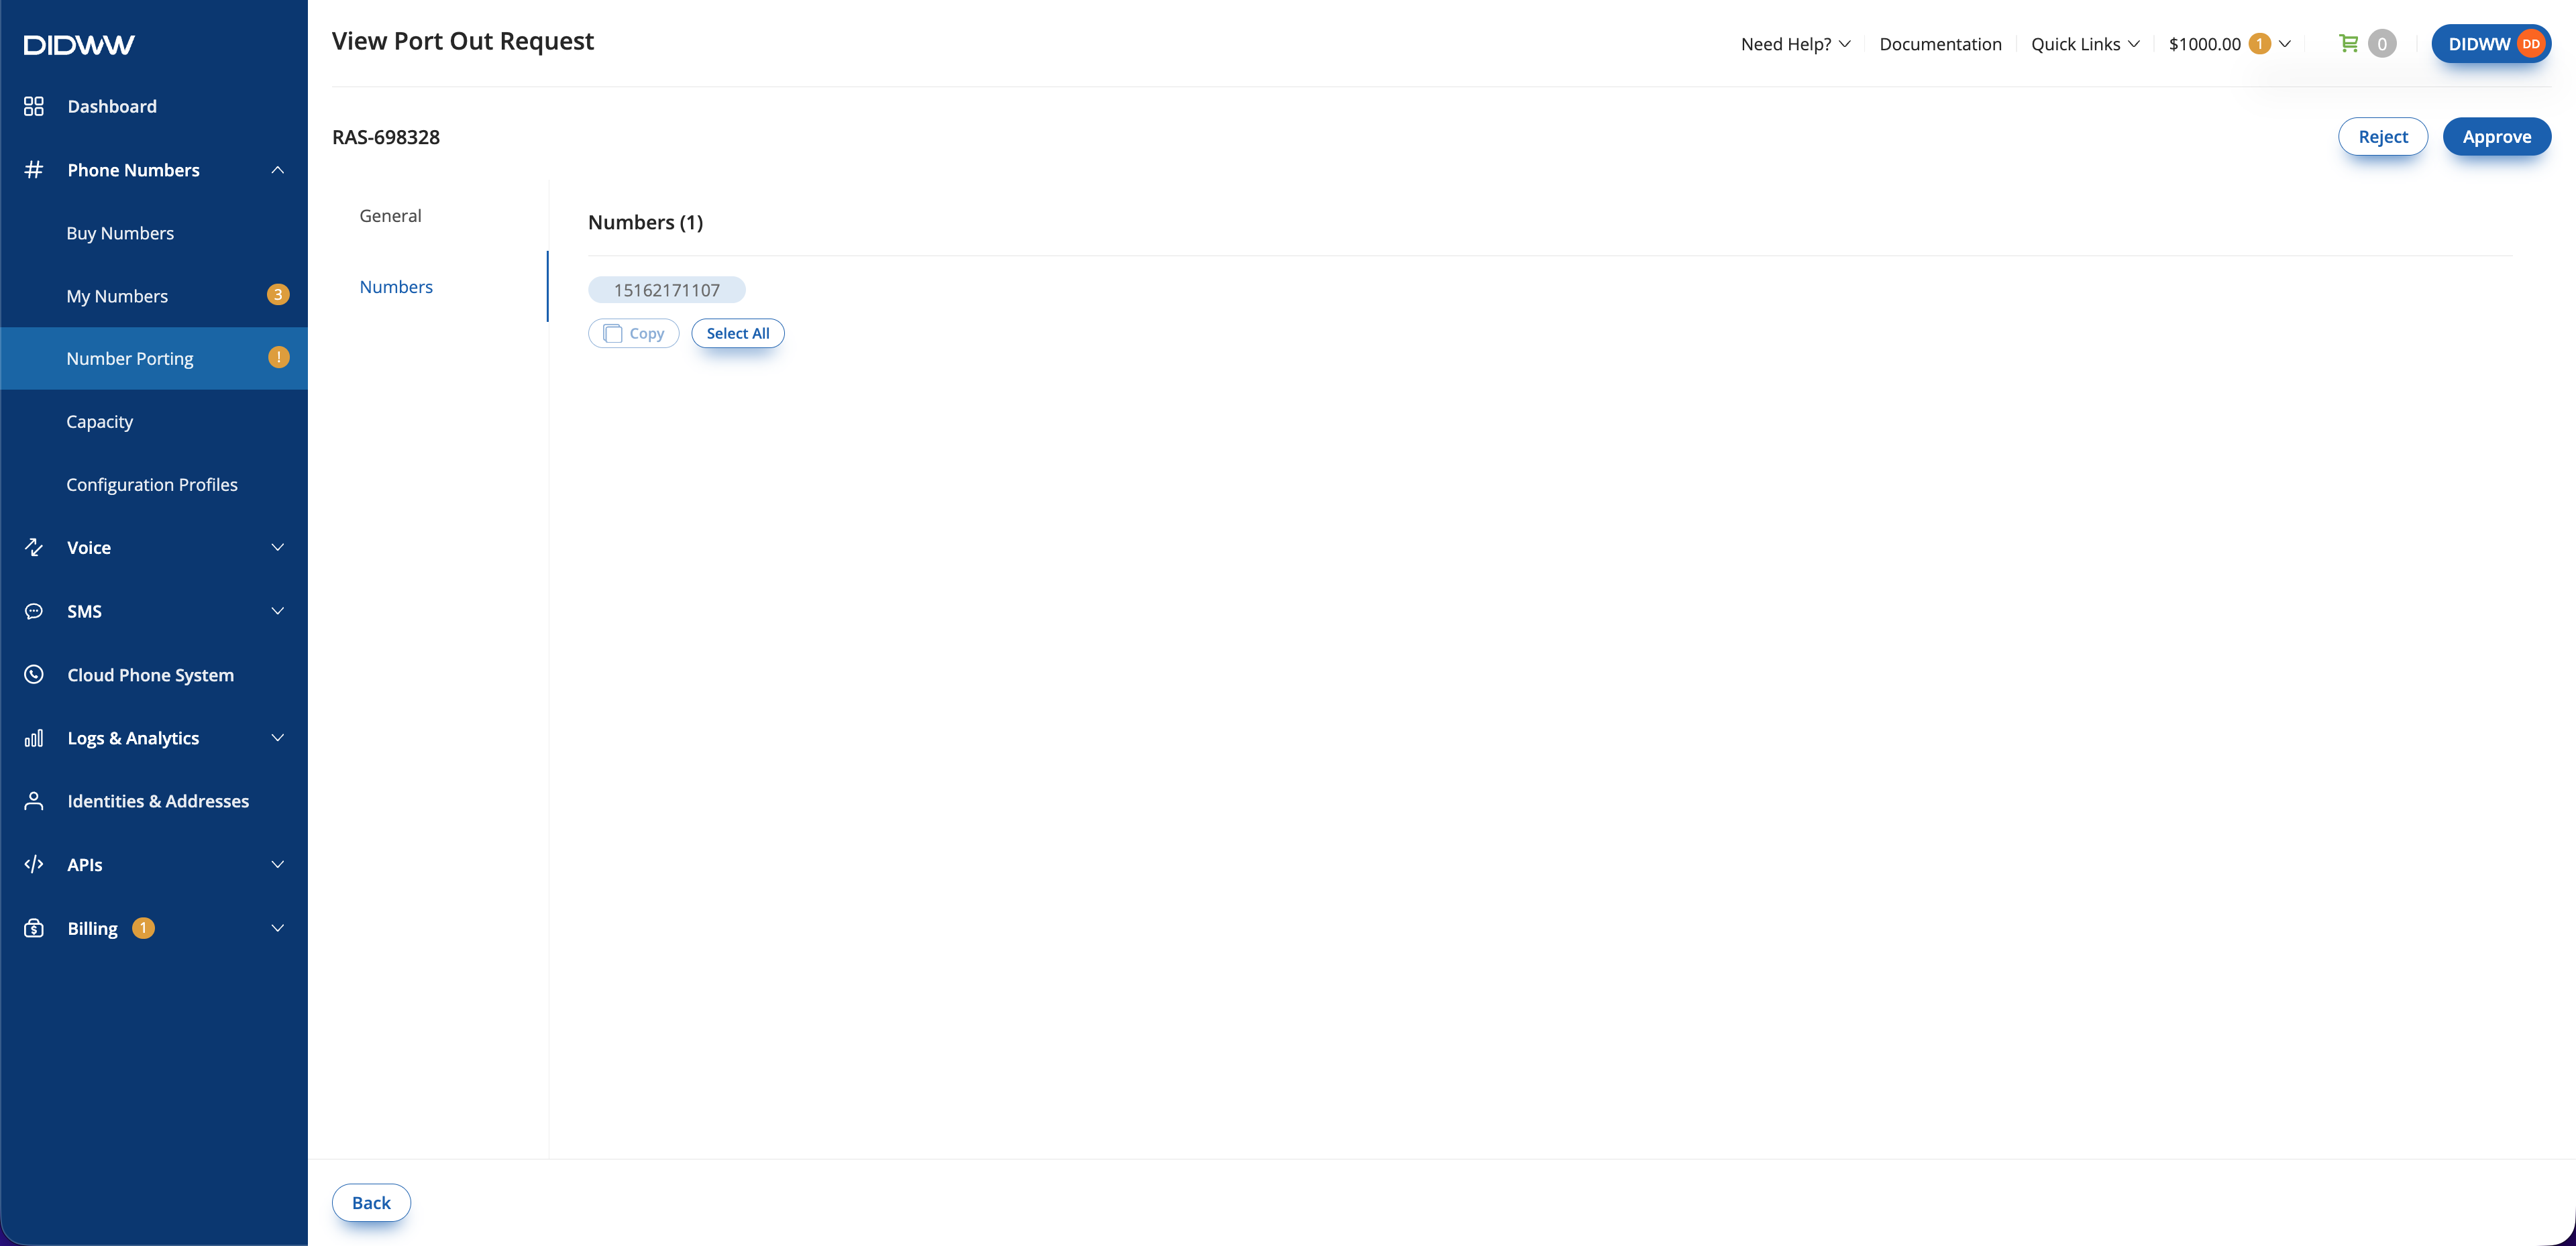
Fig. 3. View Port Out Request page.#
Step 3: Approve the request#
Click Approve in the upper-right corner.
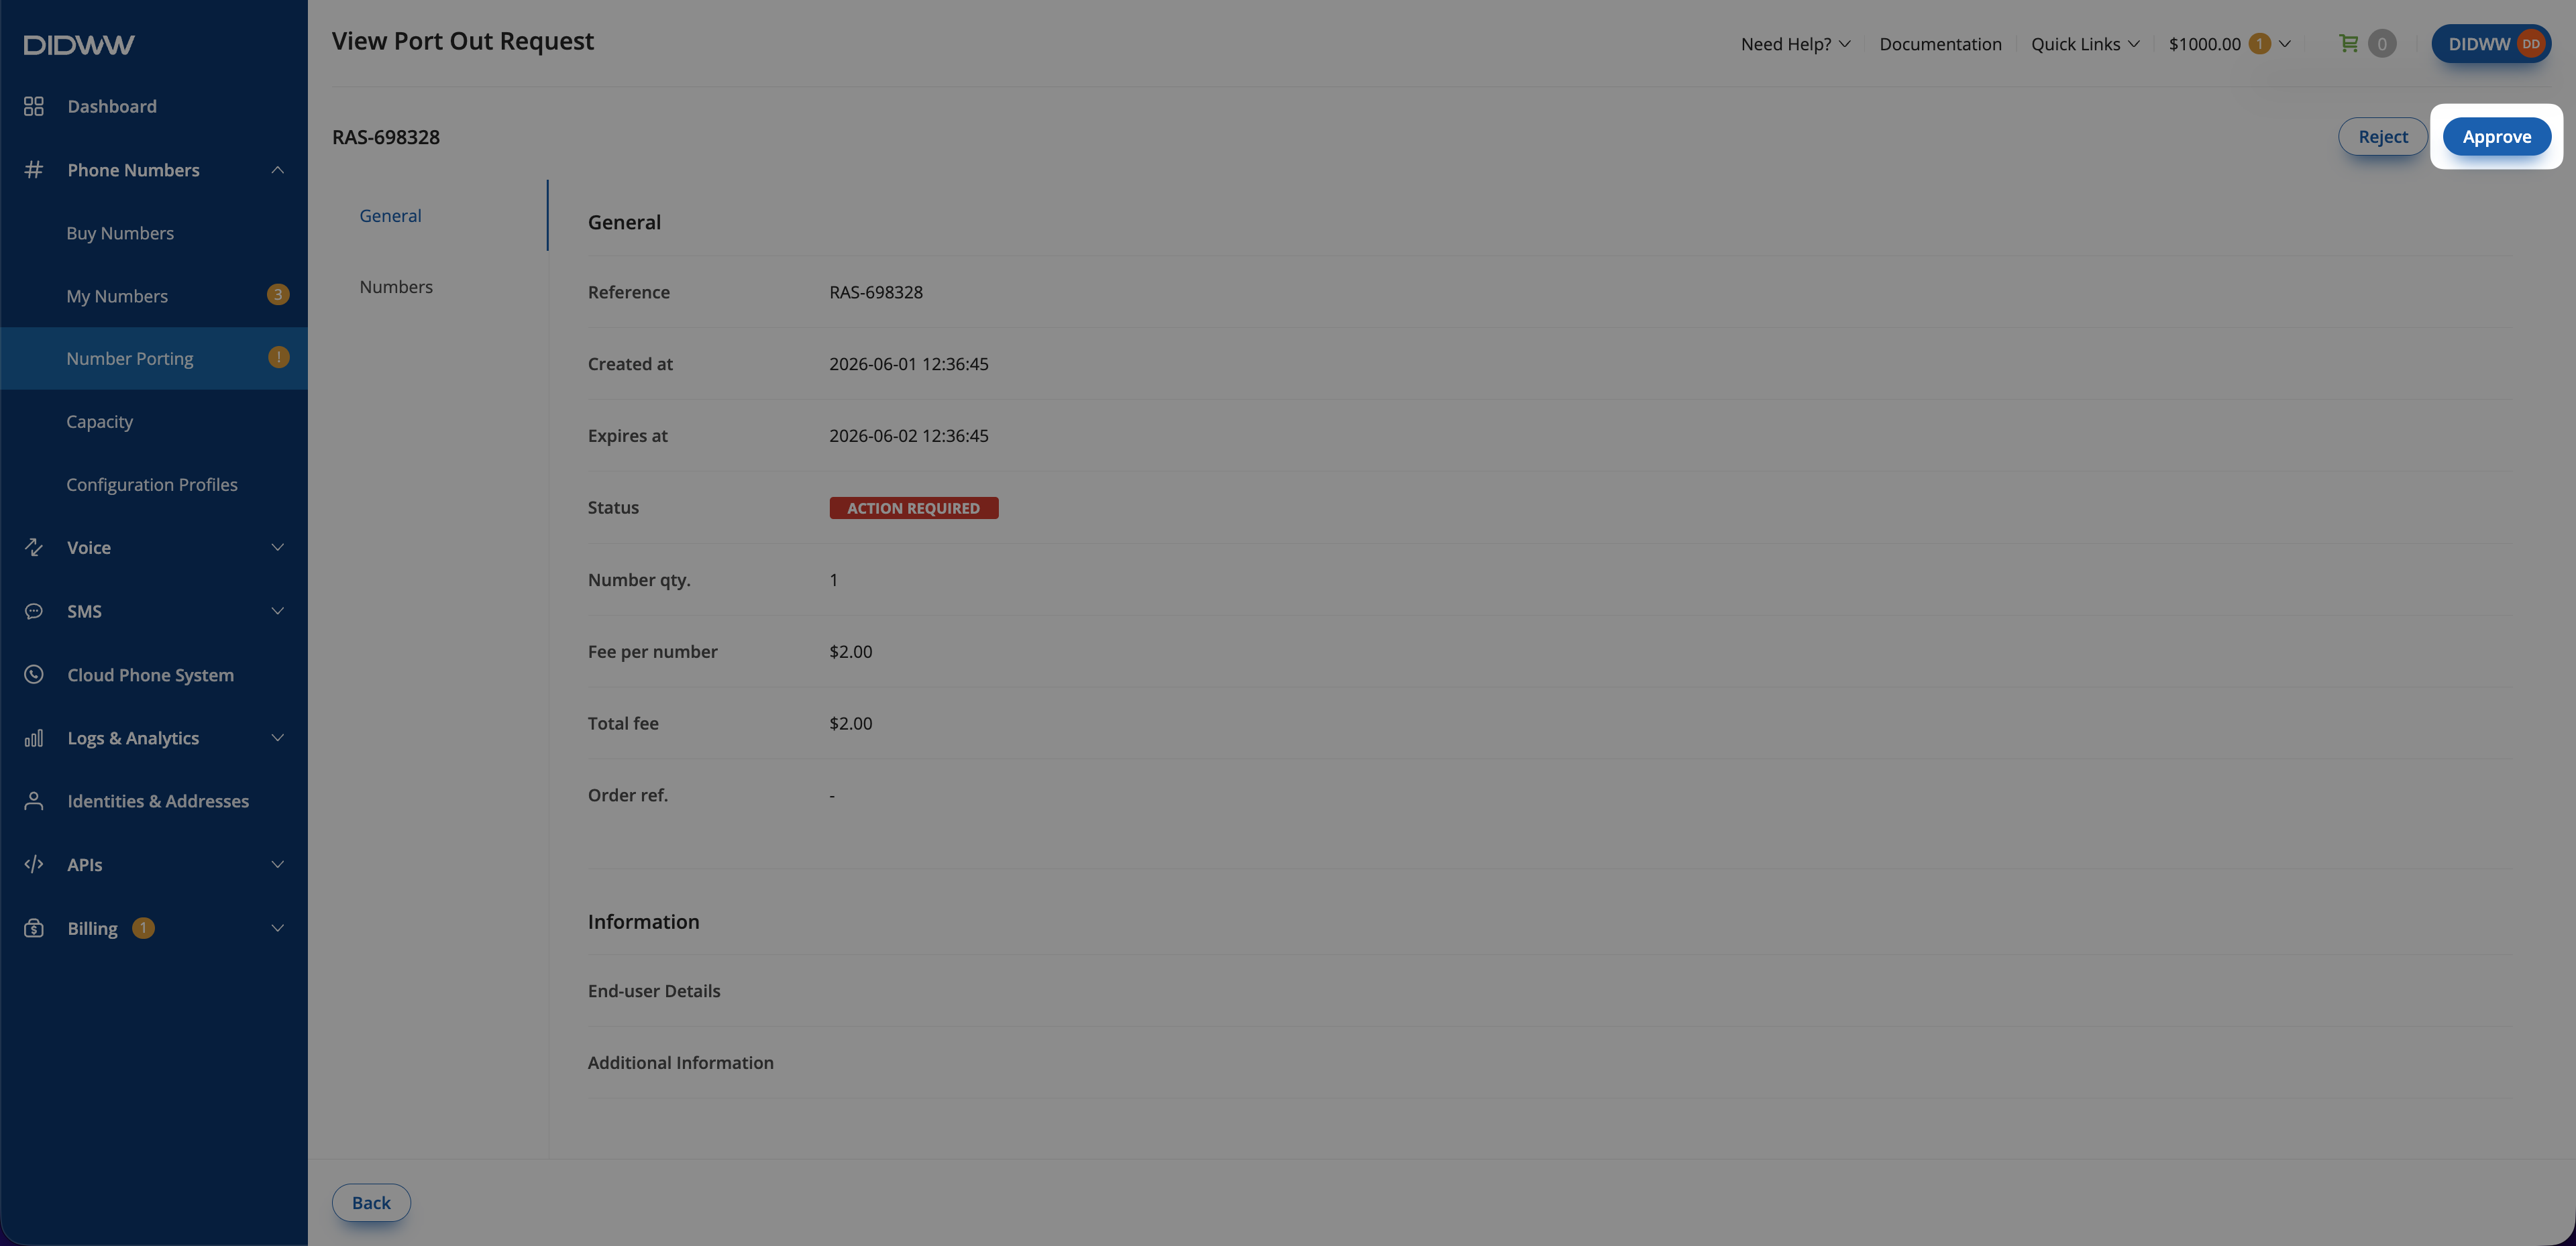
Fig. 2. View Port Out Request page.#
In the Approve Port Out Request pop-up, review the confirmation message that explains the numbers will be released to the gaining carrier and the action cannot be undone.
Click Submit.
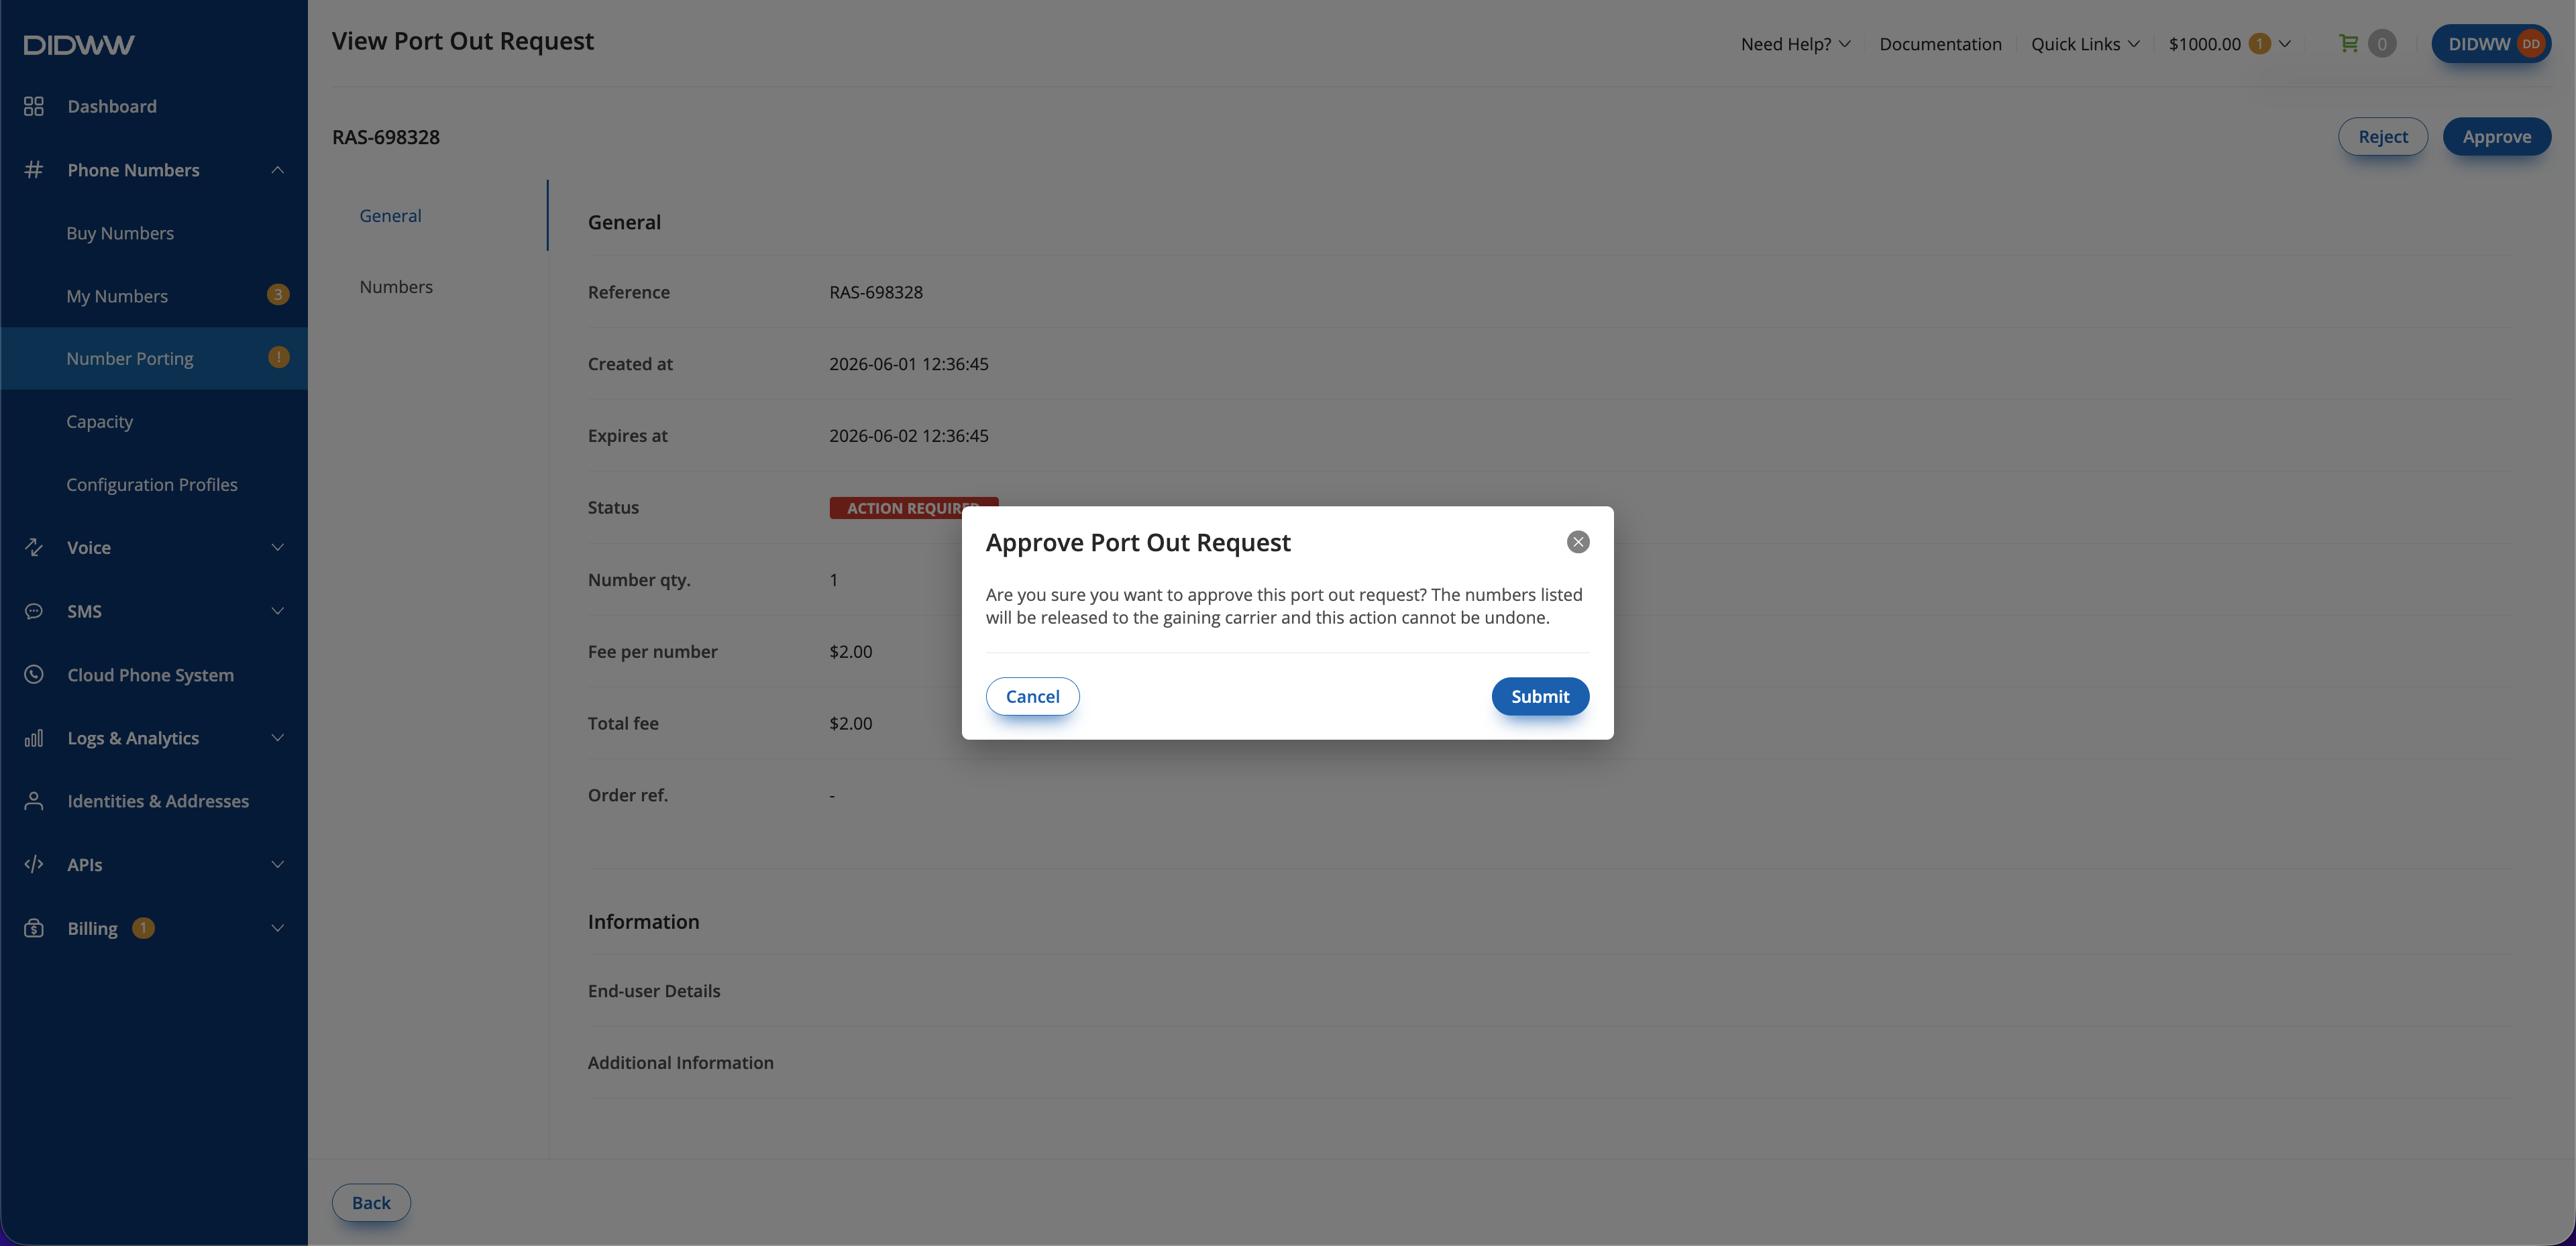
Fig. 2. View Port Out Request page.#
After the request is approved, DIDWW shows a success message and the request status changes to Approved.
Reject port-out requests#
Reject a request when the numbers should not be released to the gaining carrier.
Before you begin#
The port-out request must be in Action required status before it can be rejected.
Step 1: Open the port-out request#
Go to the Phone Numbers > Number Porting > Port Out Requests tab.
Filter the Port Out Requests by Action required status. Click here to apply the filter .
Find the request you want to review.
Click on the Port Out Request reference ID or Actions > View details to open the View Port Out Request window.
Fig. 1. Opening a port-out request from the Port Out Requests table.#
Step 2: Review the request details#
On the View Port Out Request page review the General details.
Fig. 2. View Port Out Request page.#
Open the Numbers section and see which numbers are pending to be ported out.
Fig. 2. View Port Out Request page.#
Step 3: Reject the request#
On the View Port Out Request page, click Reject in the upper-right corner.
Confirm that the reject action opens the Reject Port Out Request pop-up.
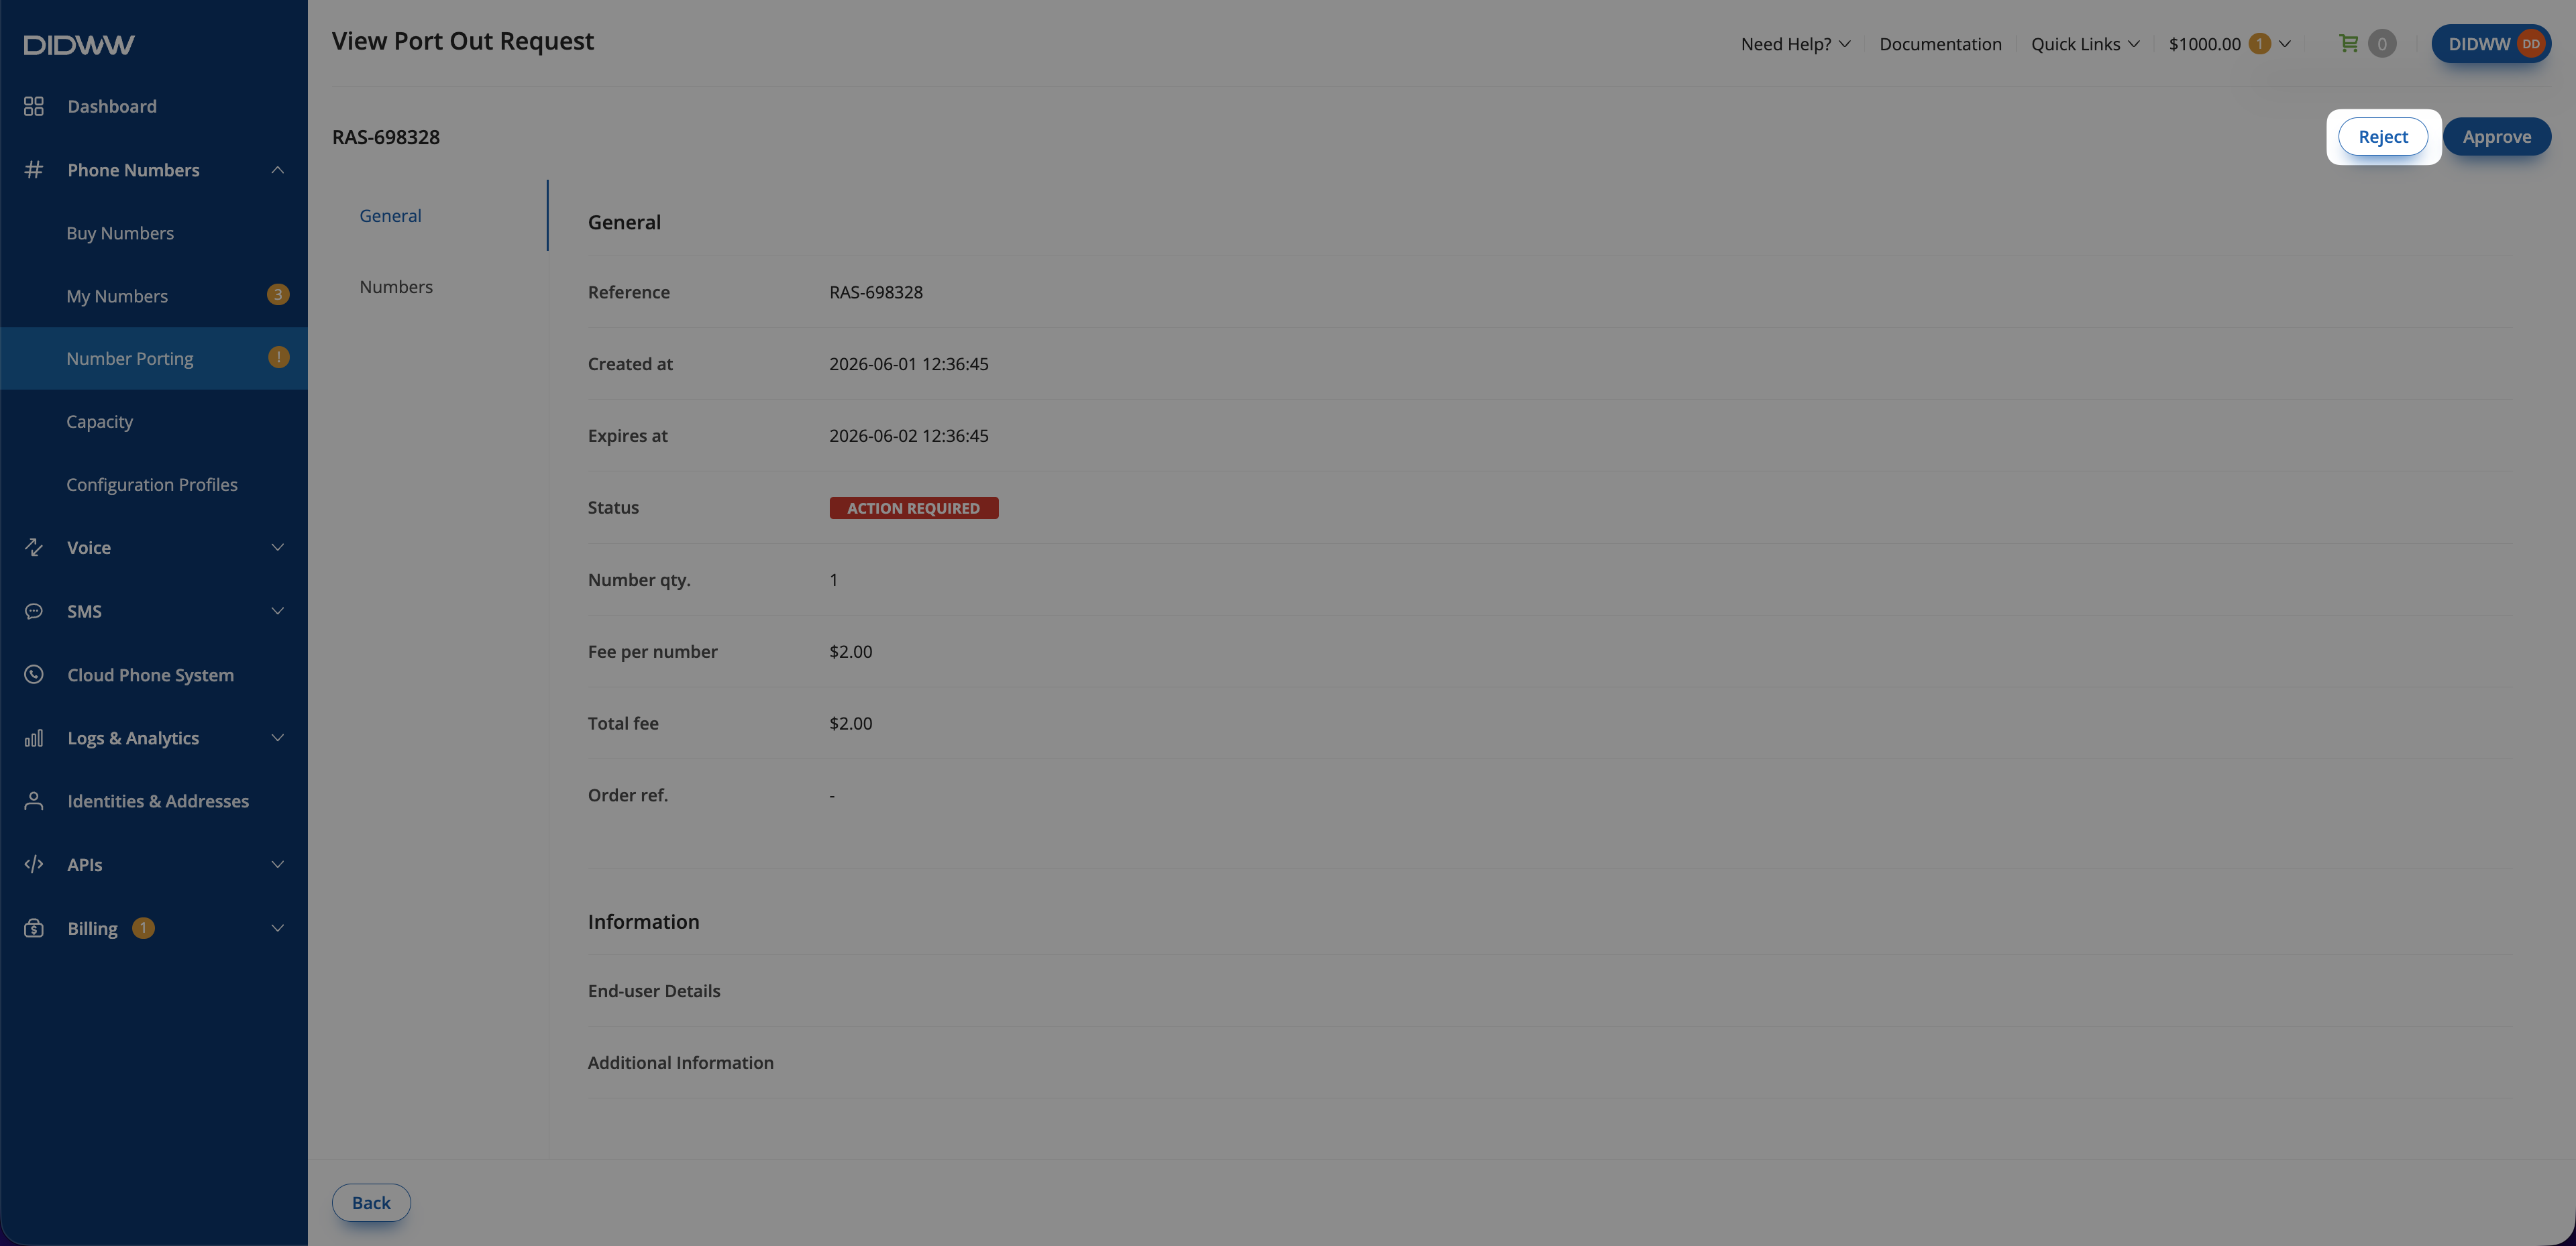
Fig. 4. View Port Out Request page with the reject action highlighted.#
Select the reason for rejection from the Reject reason dropdown.
Click Submit.
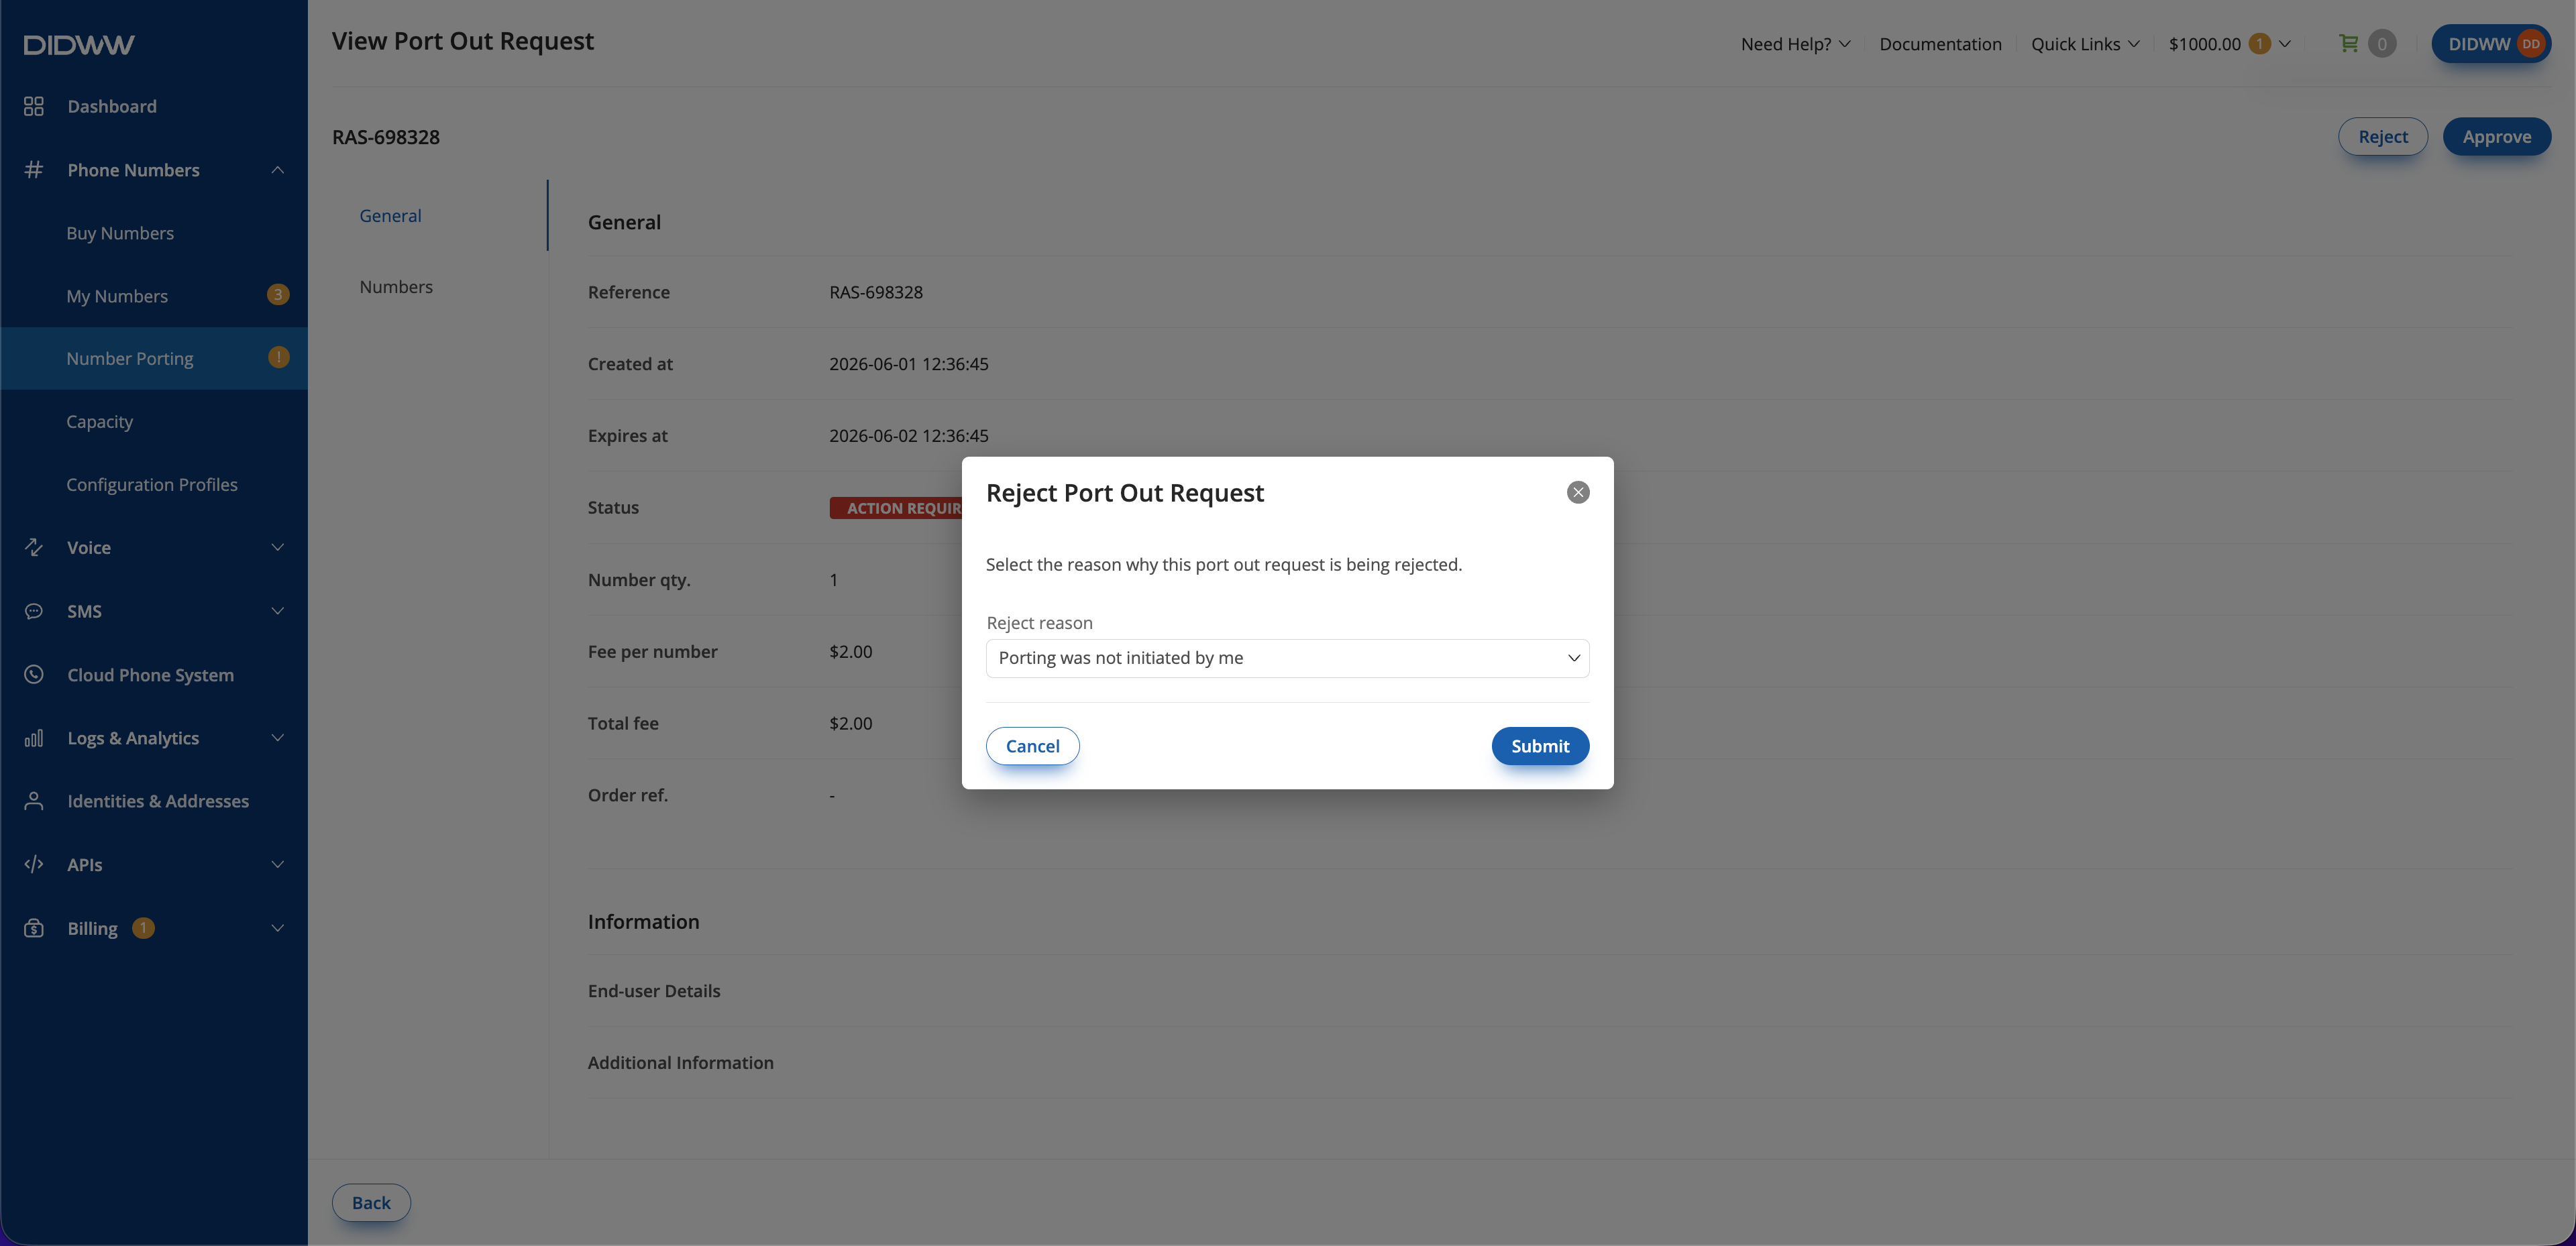
Fig. 5. Reject Port Out Request dialog.#
After the request is rejected, the port-out request status changes to Rejected.