Account Setup#
Account setup prepares your account for service usage by verifying identity information and configuring security settings. Completing this process helps ensure that services can be purchased, activated, and managed without interruption.
The procedure starts automatically when an account initiates an action related to payment or service activation, such as:
Purchase a DID number.
Purchase additional Capacity.
Subscribe to a phone.systems™ plan.
Add a credit card payment method.
Follow the steps below to complete the account setup process:
Provide your personal or organization’s details, including contact information and address.
Verify your identity through a secure service by submitting your ID and a selfie.
Protect your DIDWW account by enabling Two-Factor Authentication (2FA).
1. Account Details#
When the Identity Verification pop-up appears, click Complete Account Setup to be redirected to the Account Setup page. The first step is to review or complete your Account Details.
This section may already be prefilled with your information. Verify that all details are accurate, fill in any missing fields if needed, and click Continue to proceed.
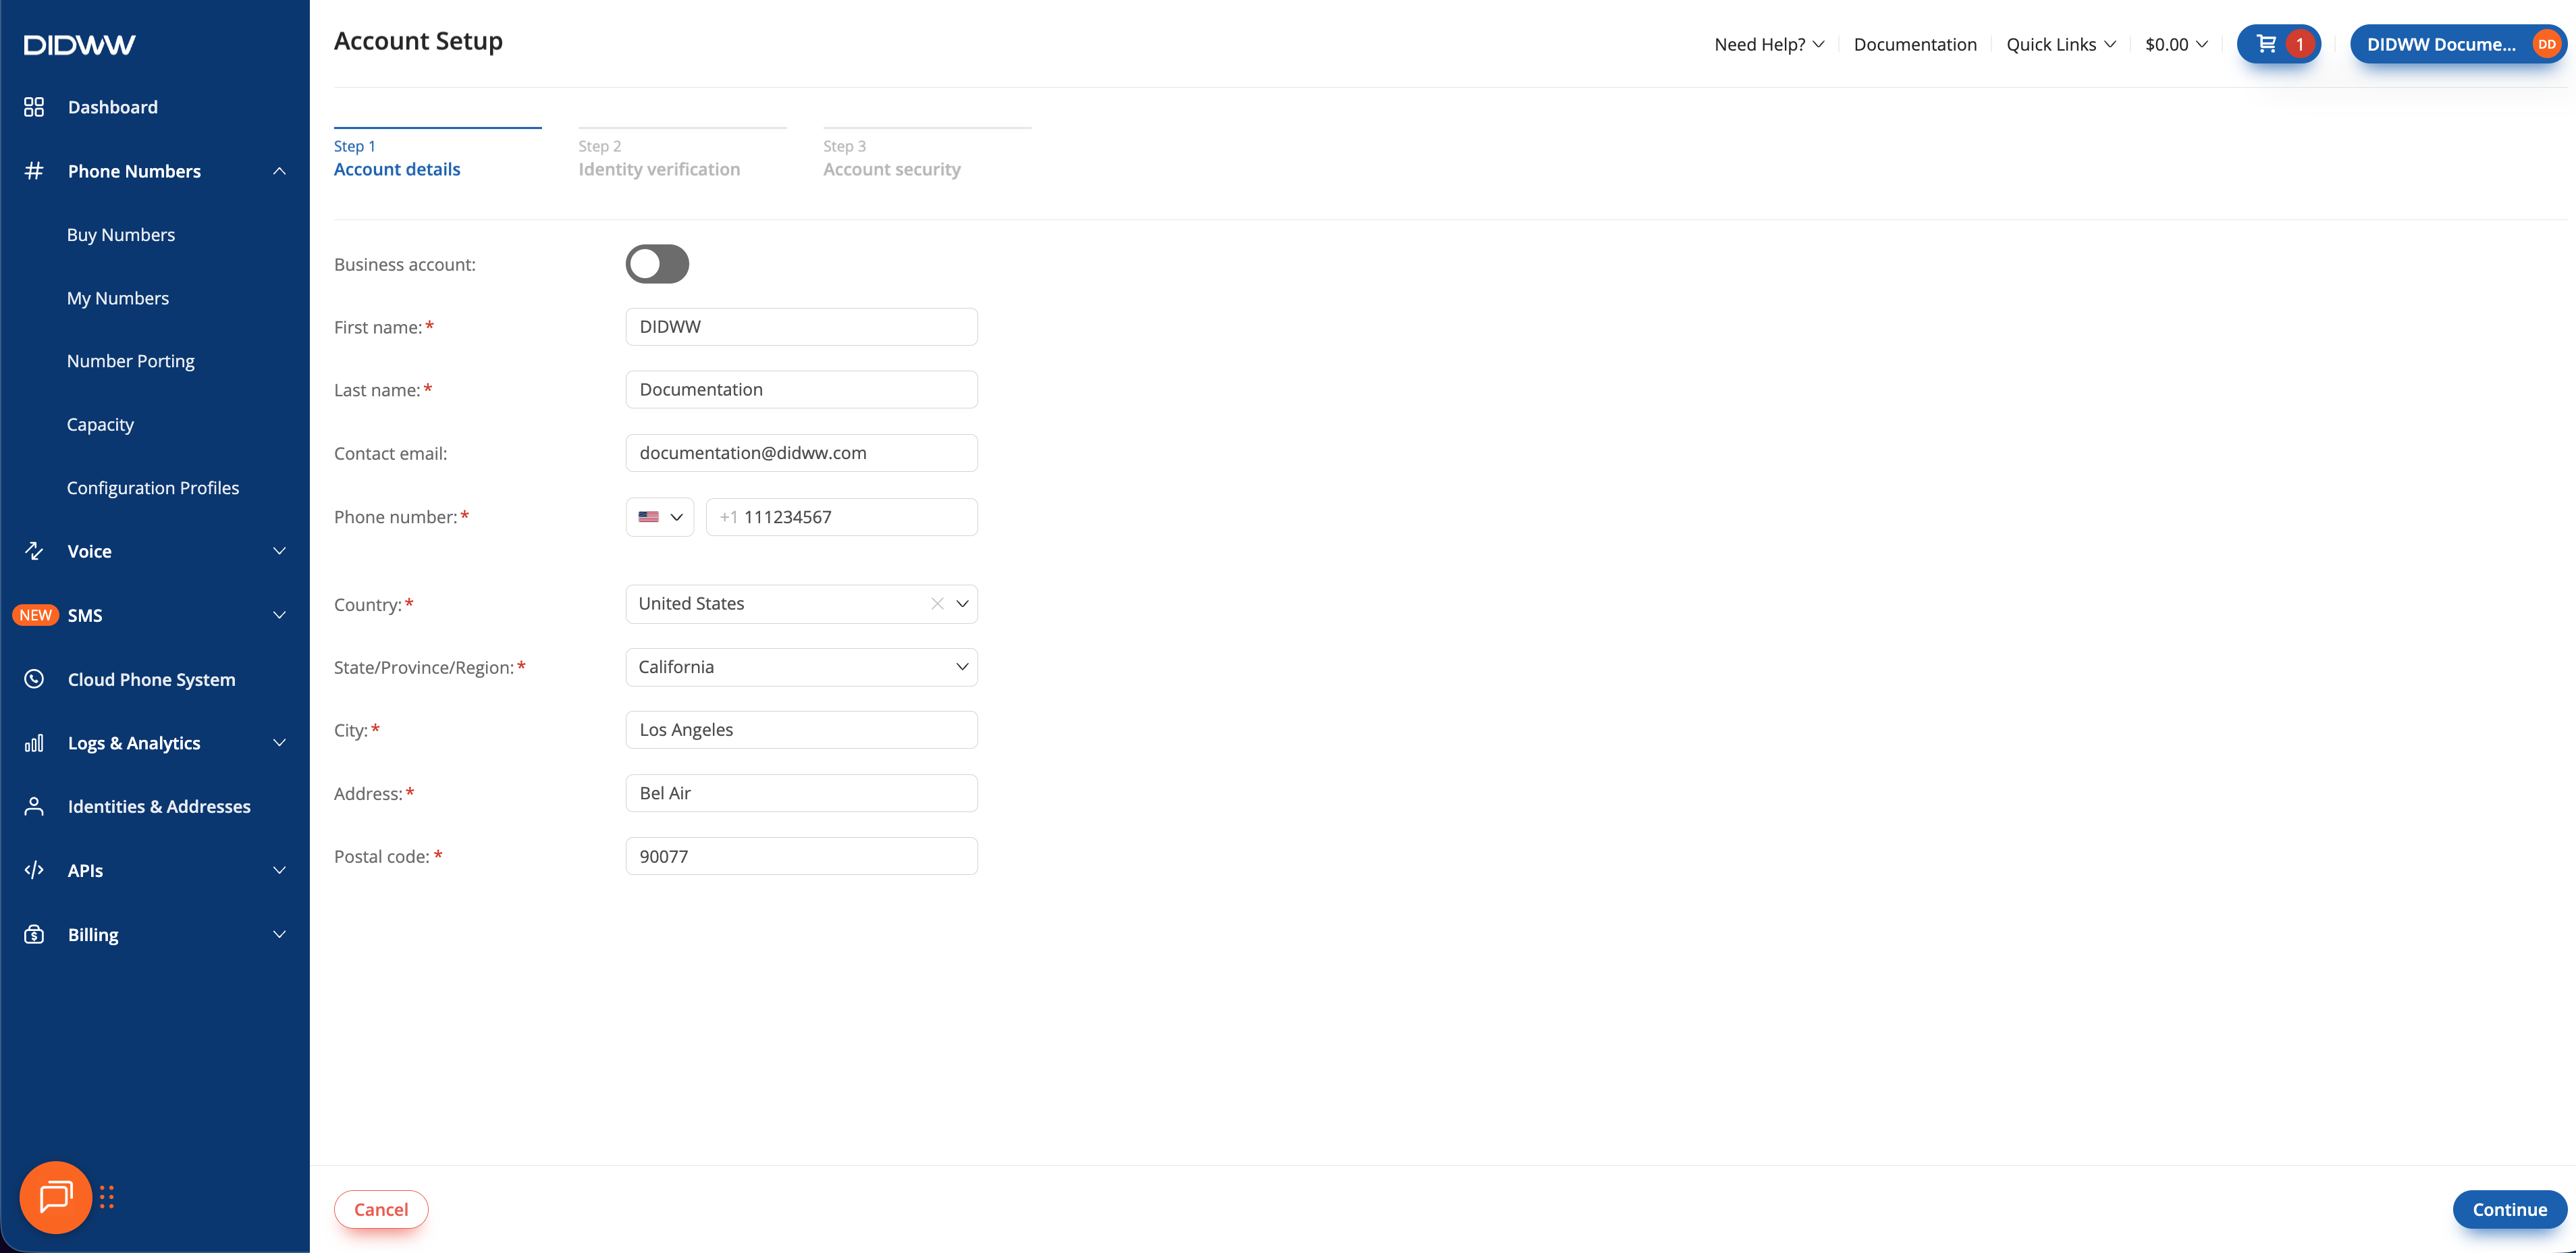
Fig. 1. Account details form in the User Panel.#
After submitting your details, a confirmation window will appear prompting you to continue with identity verification. Click Continue to start the verification process.
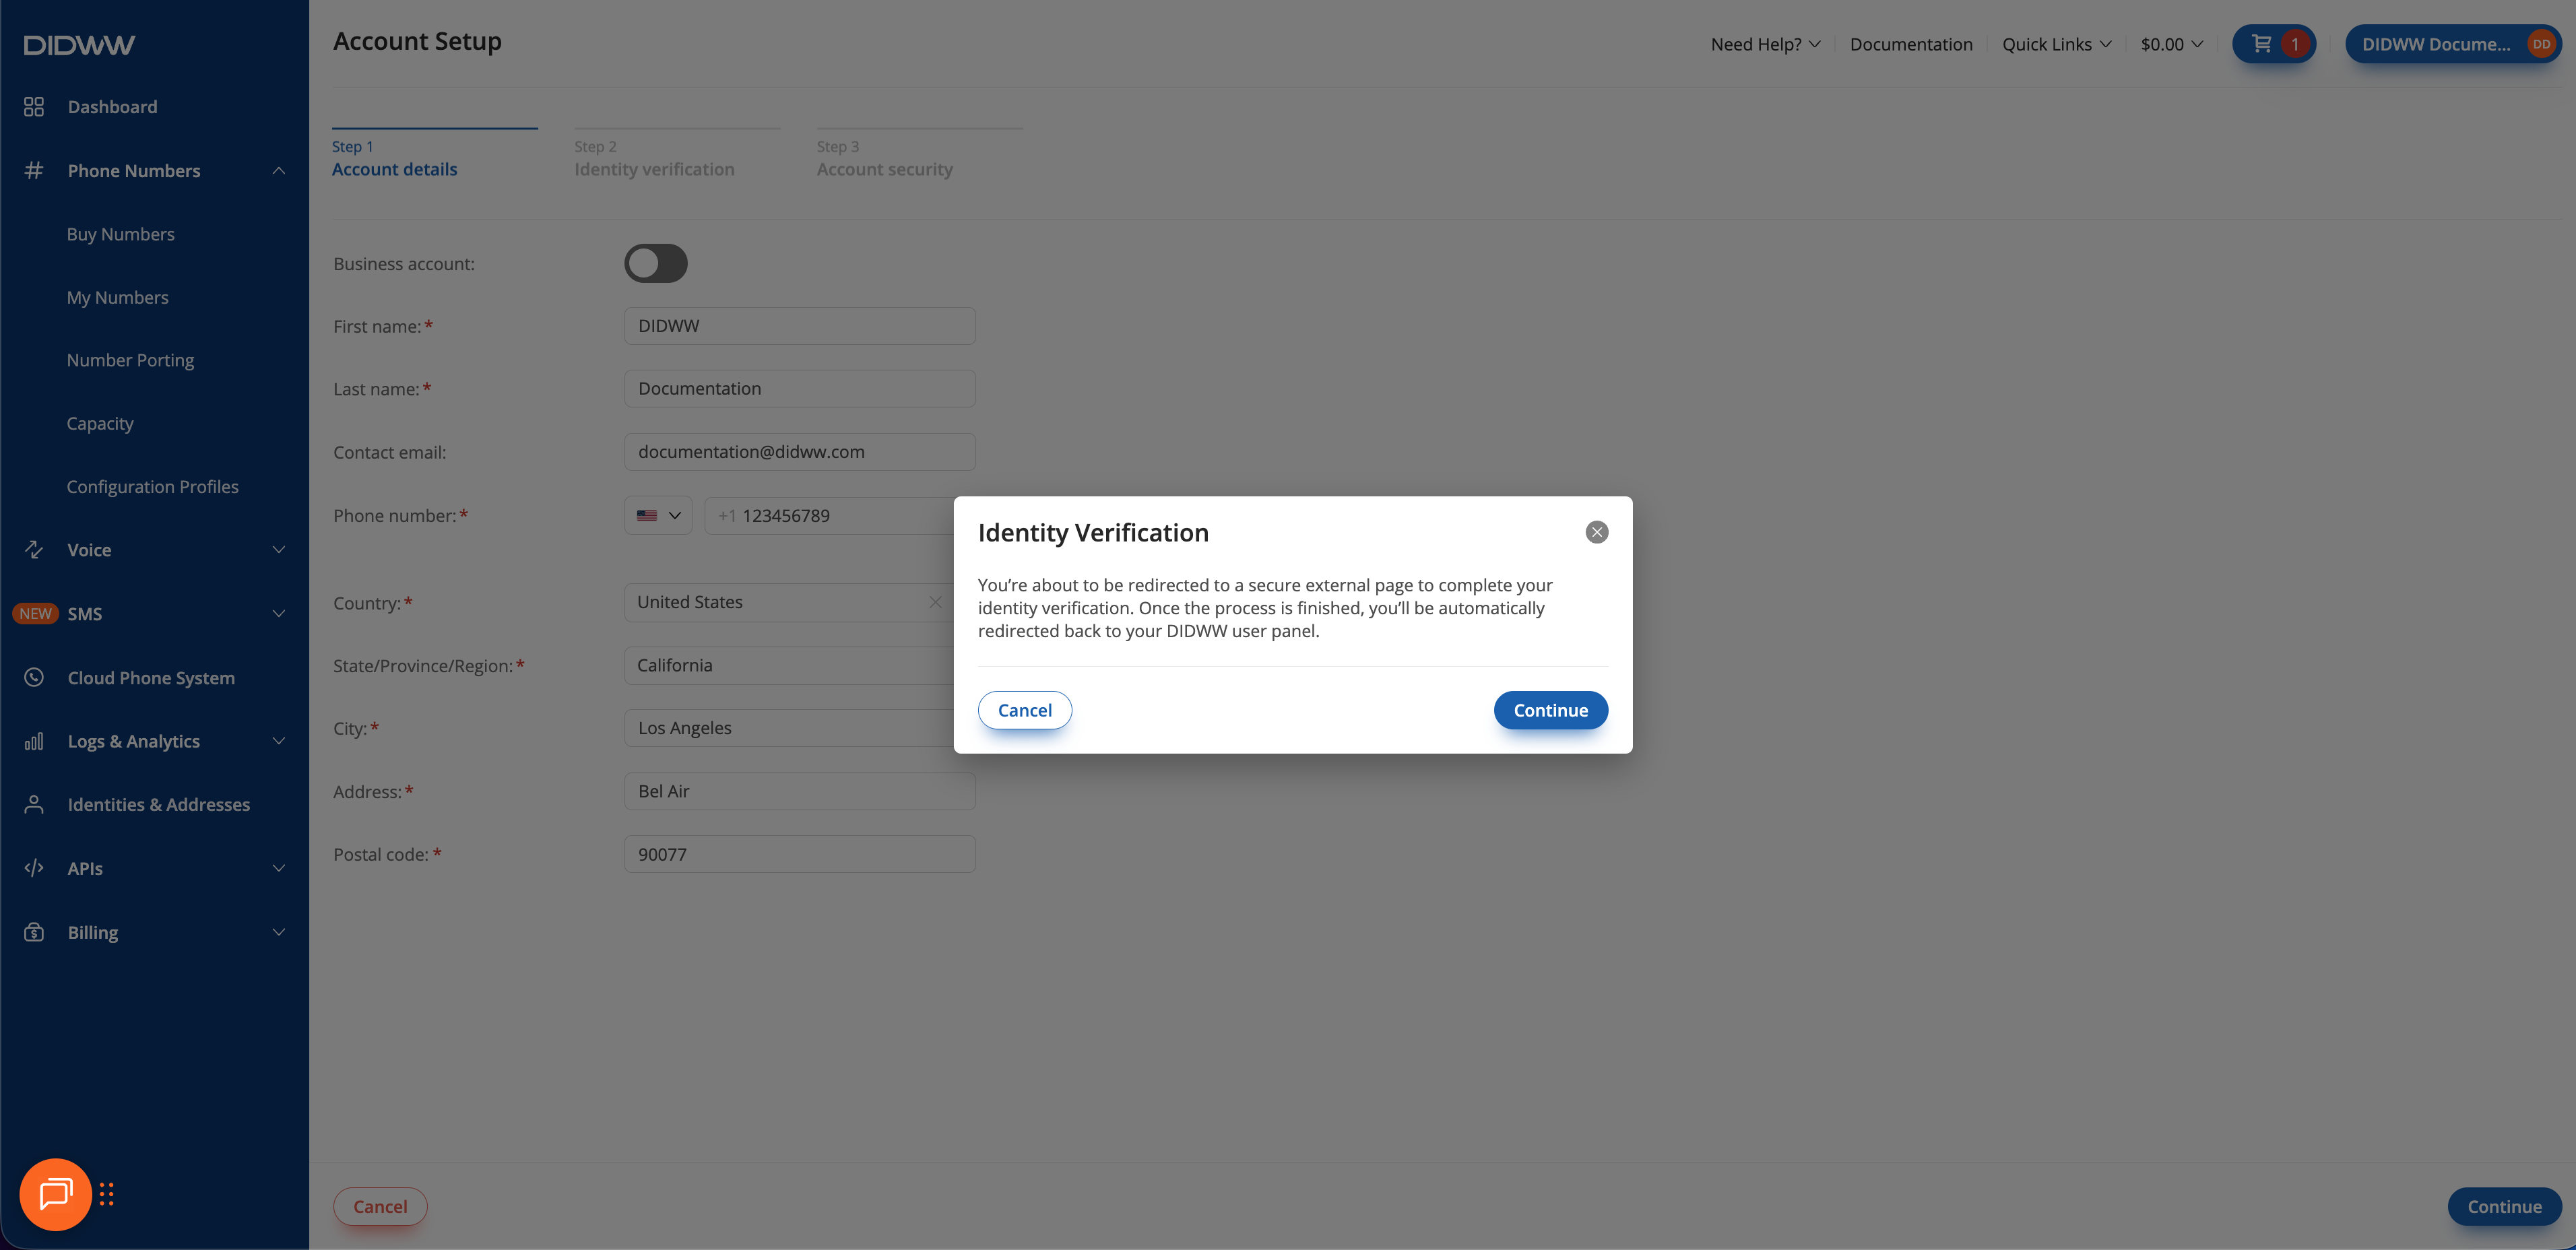
Fig. 2. Identity verification confirmation window.#
2. Identity Verification#
Verify your identity to confirm account ownership by submitting your documents. You will be redirected to a secure external page to complete the verification process. Follow the on-screen instructions to verify your identity.
Note
If the verification process is interrupted or canceled, you’ll be returned to Step 2: Identity Verification. Click Try again to restart the process from the beginning.
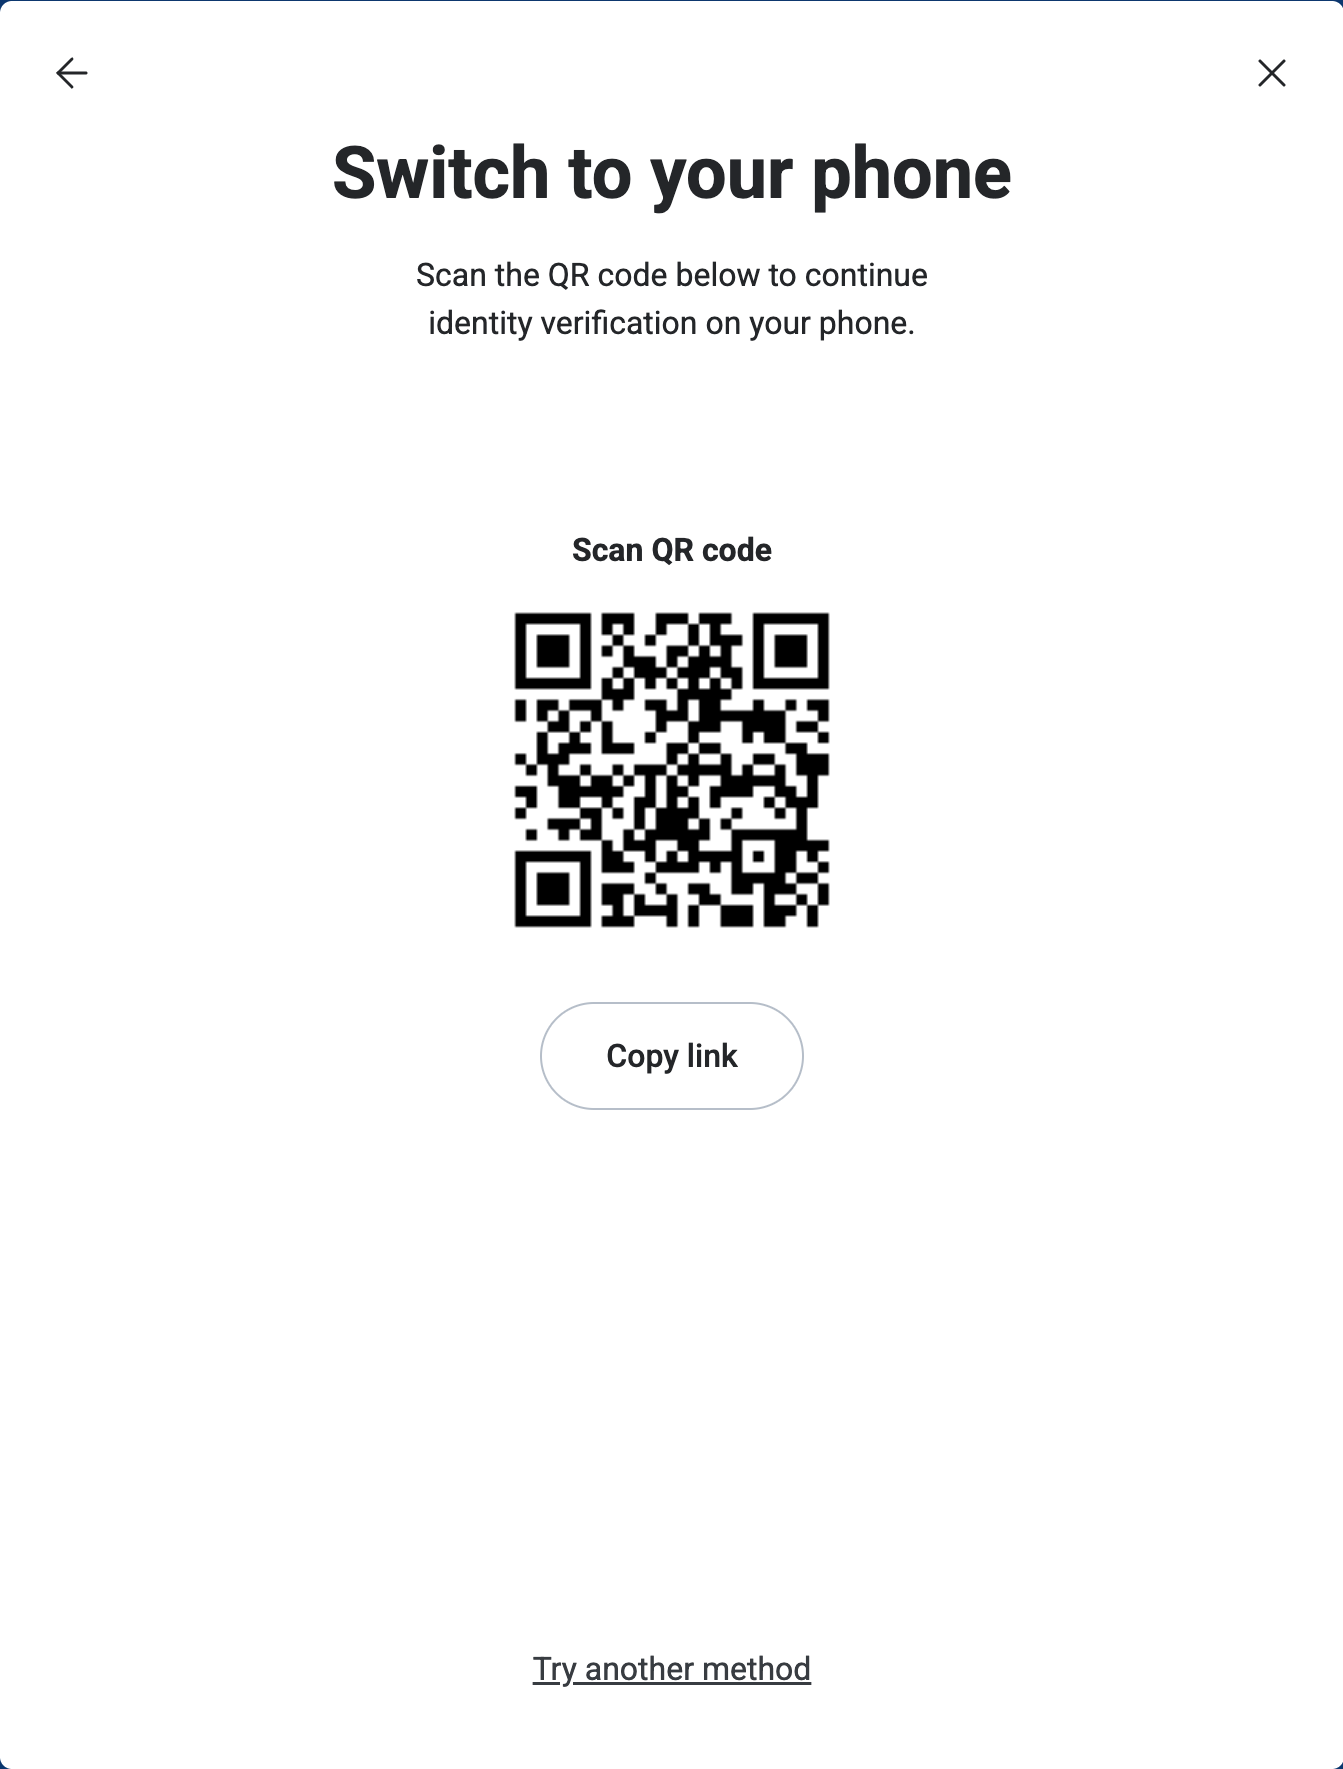
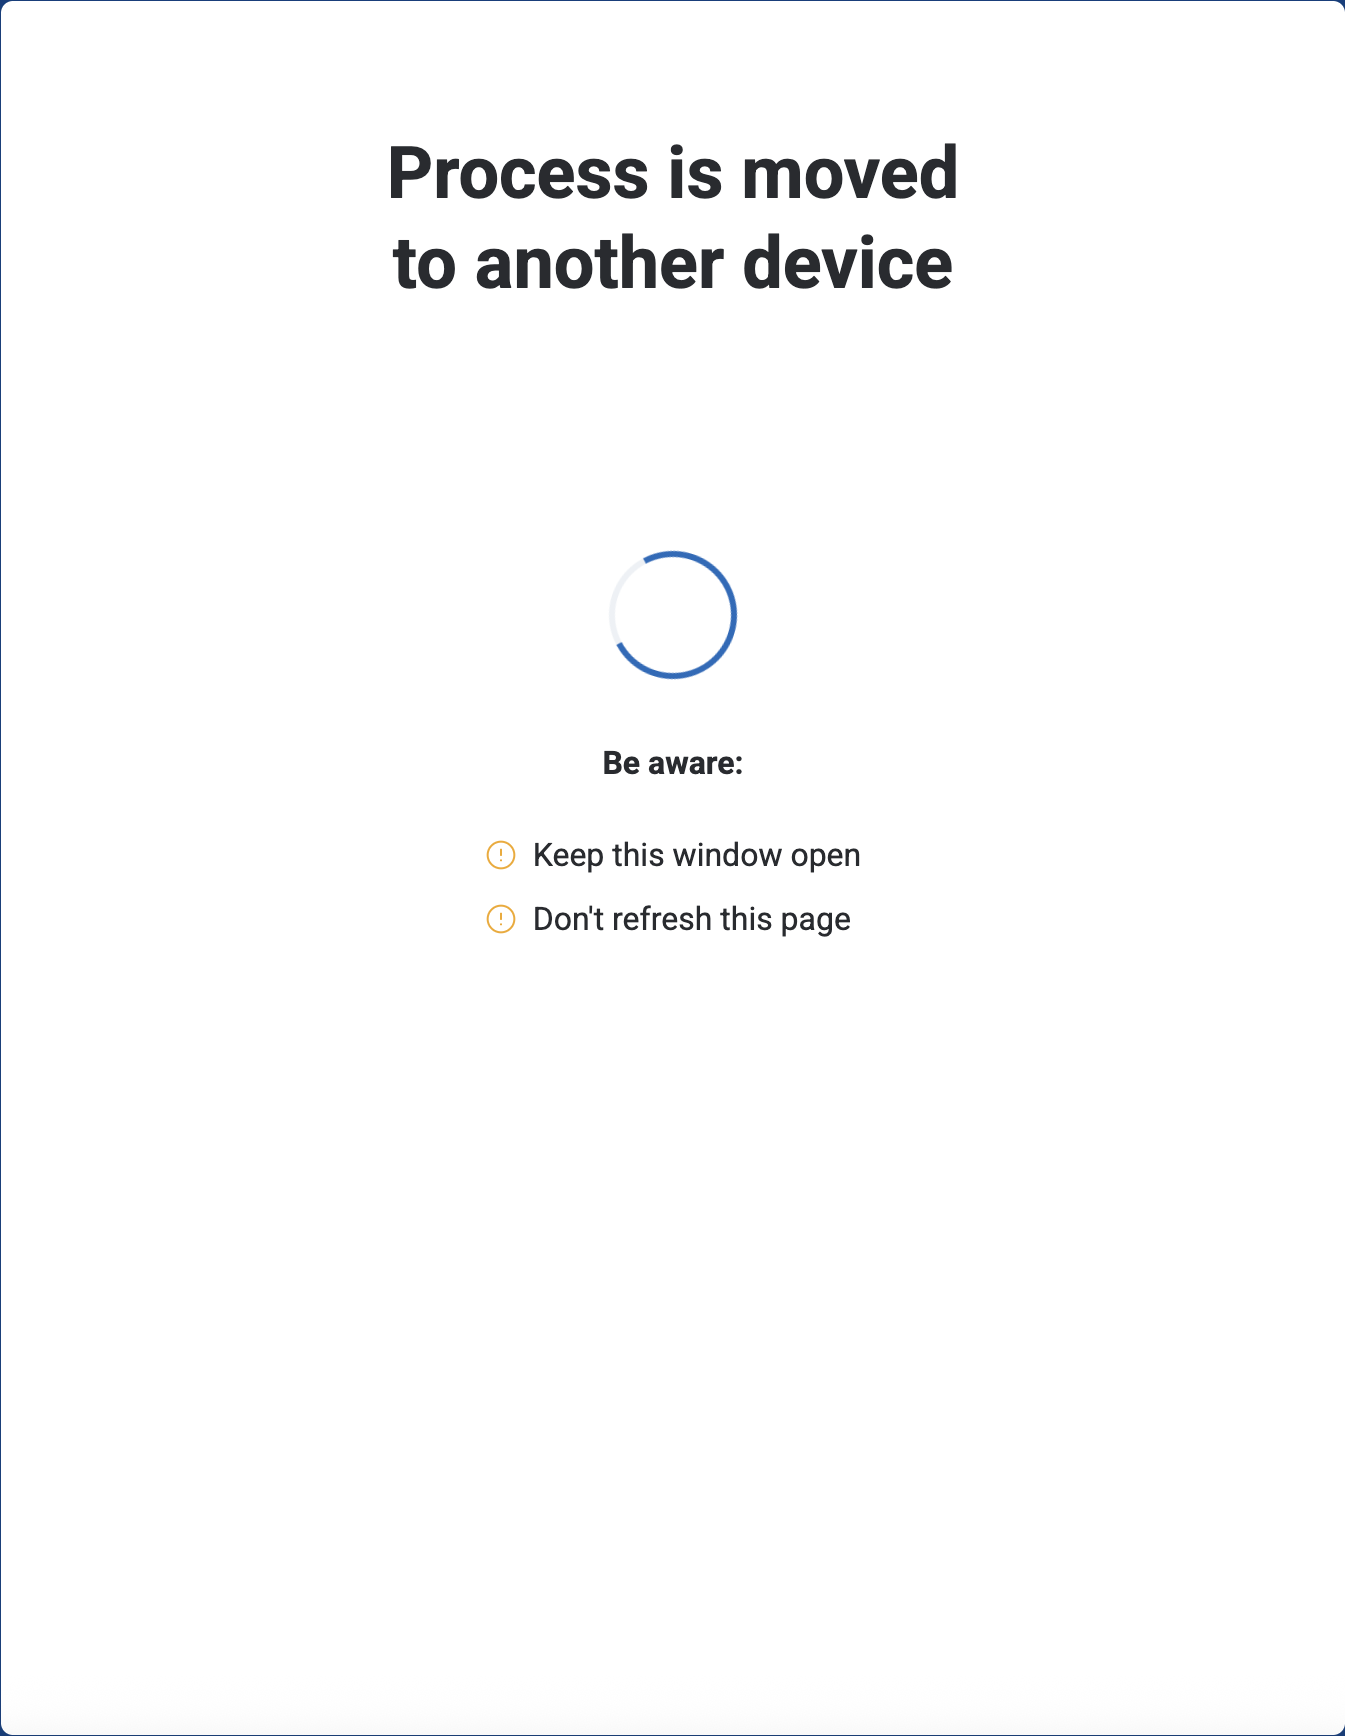
Step 1: Switch to a Mobile Device#
Identity verification can only be completed on a mobile device. Choose Switch device, then scan the QR code or click Copy link to open the verification page on your mobile device. Once opened, the message “Process is moved to another device” will appear on your computer screen.
Note
After opening the verification process on your mobile device, a Consent for Personal Data Processing message will appear.
Review the information carefully and click I Agree to continue.
Selecting Disagree will cancel the verification process.
Step 2: Select Your Document#
Choose a document for verification: Identity card, Passport, or Driver’s license.
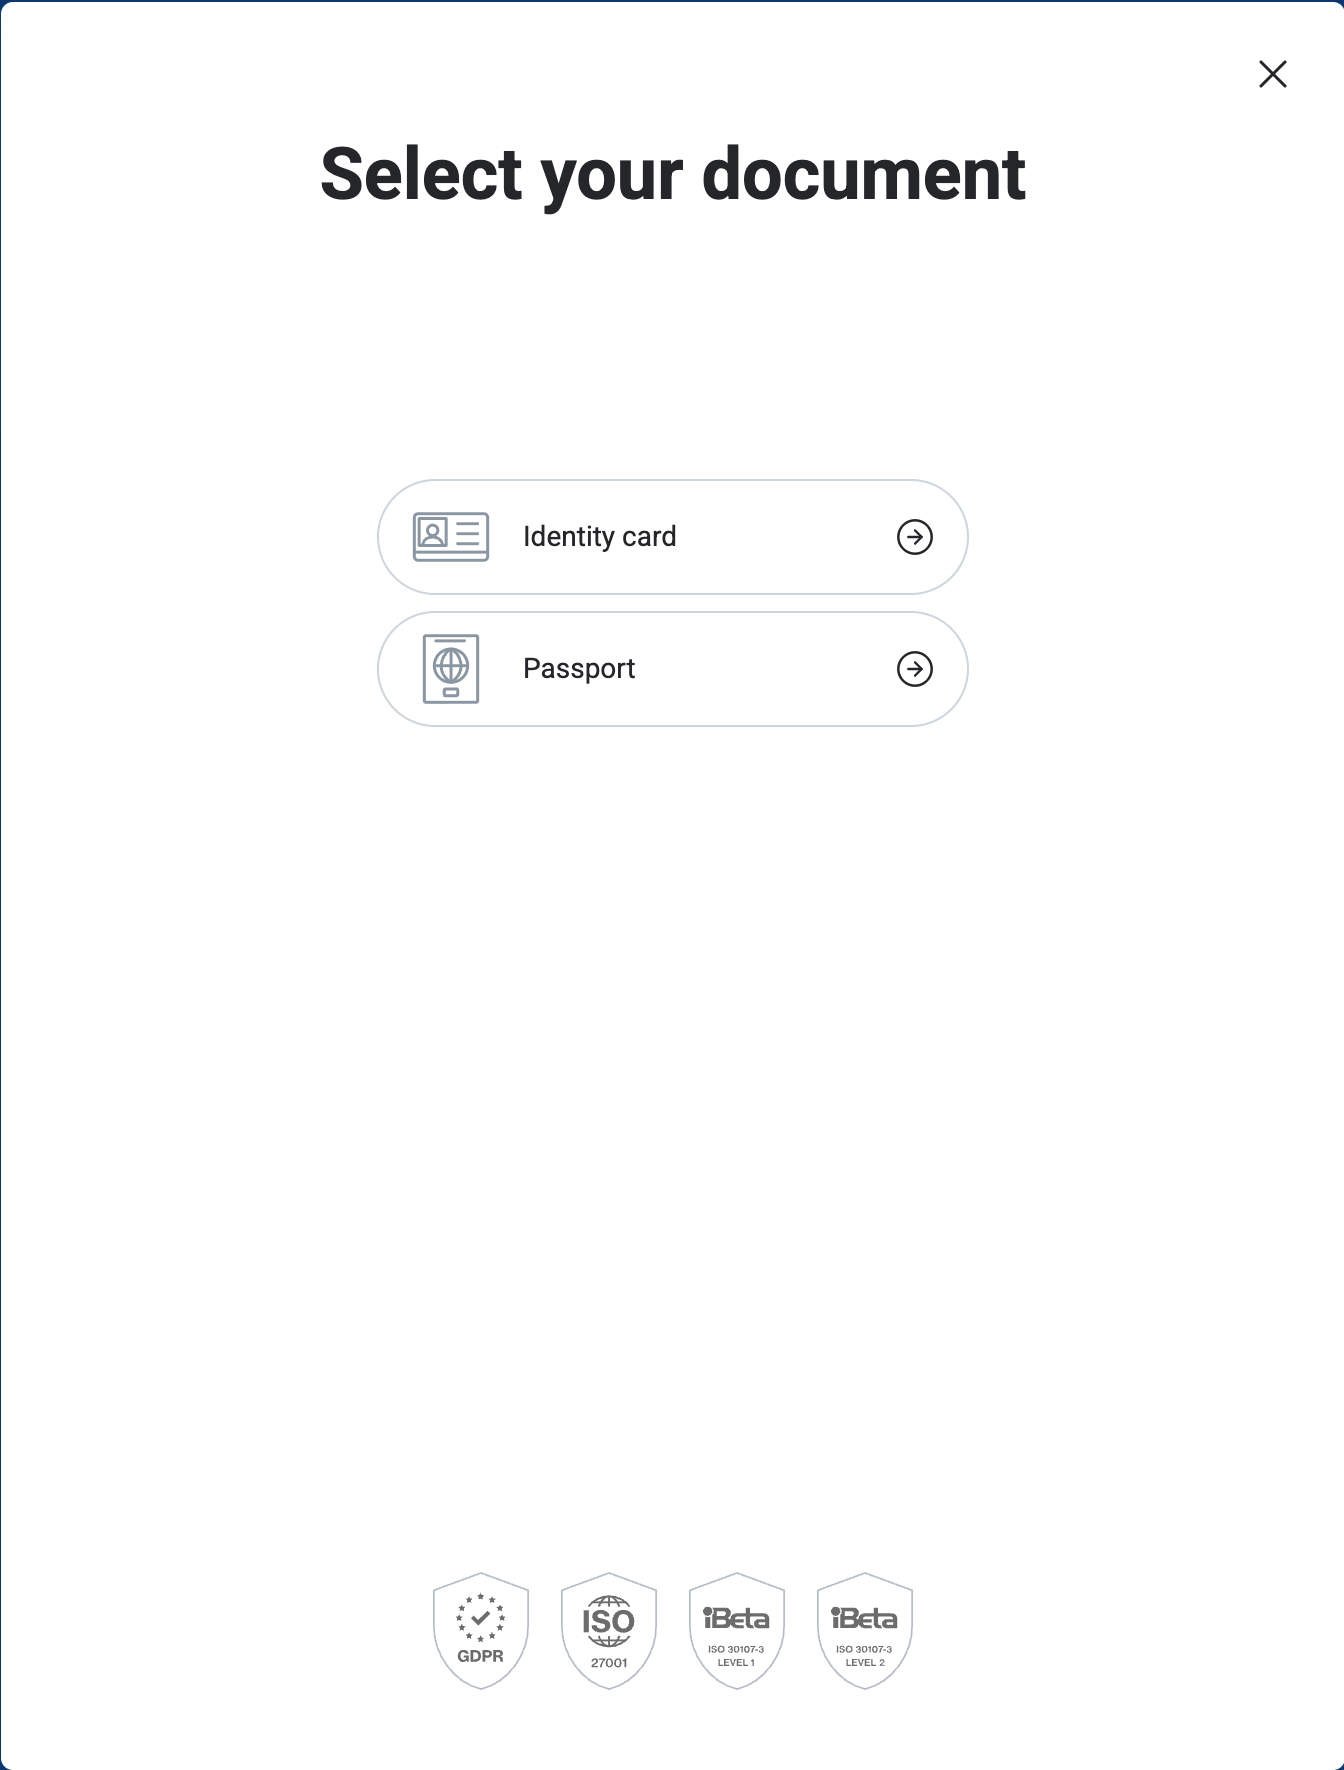
Fig. 5. Selecting the document type for verification.#
Step 3: Capture the Front & Back of Your Document#
Follow the on-screen prompts to capture clear images of your identification document.
Requirements:
The image is sharp and well-lit.
All text and details are clearly visible.
The entire document fits within the frame.
Capture the Front of Your Document#
Use your device’s camera to take a clear photo of the front side of your document. Click Capture photo to begin the process.

Fig. 6. Front side capture of an identity document.#
Capture the Back of Your Document#
Use your device’s camera to take a clear photo of the back side of your document. Click Capture photo to begin the process.
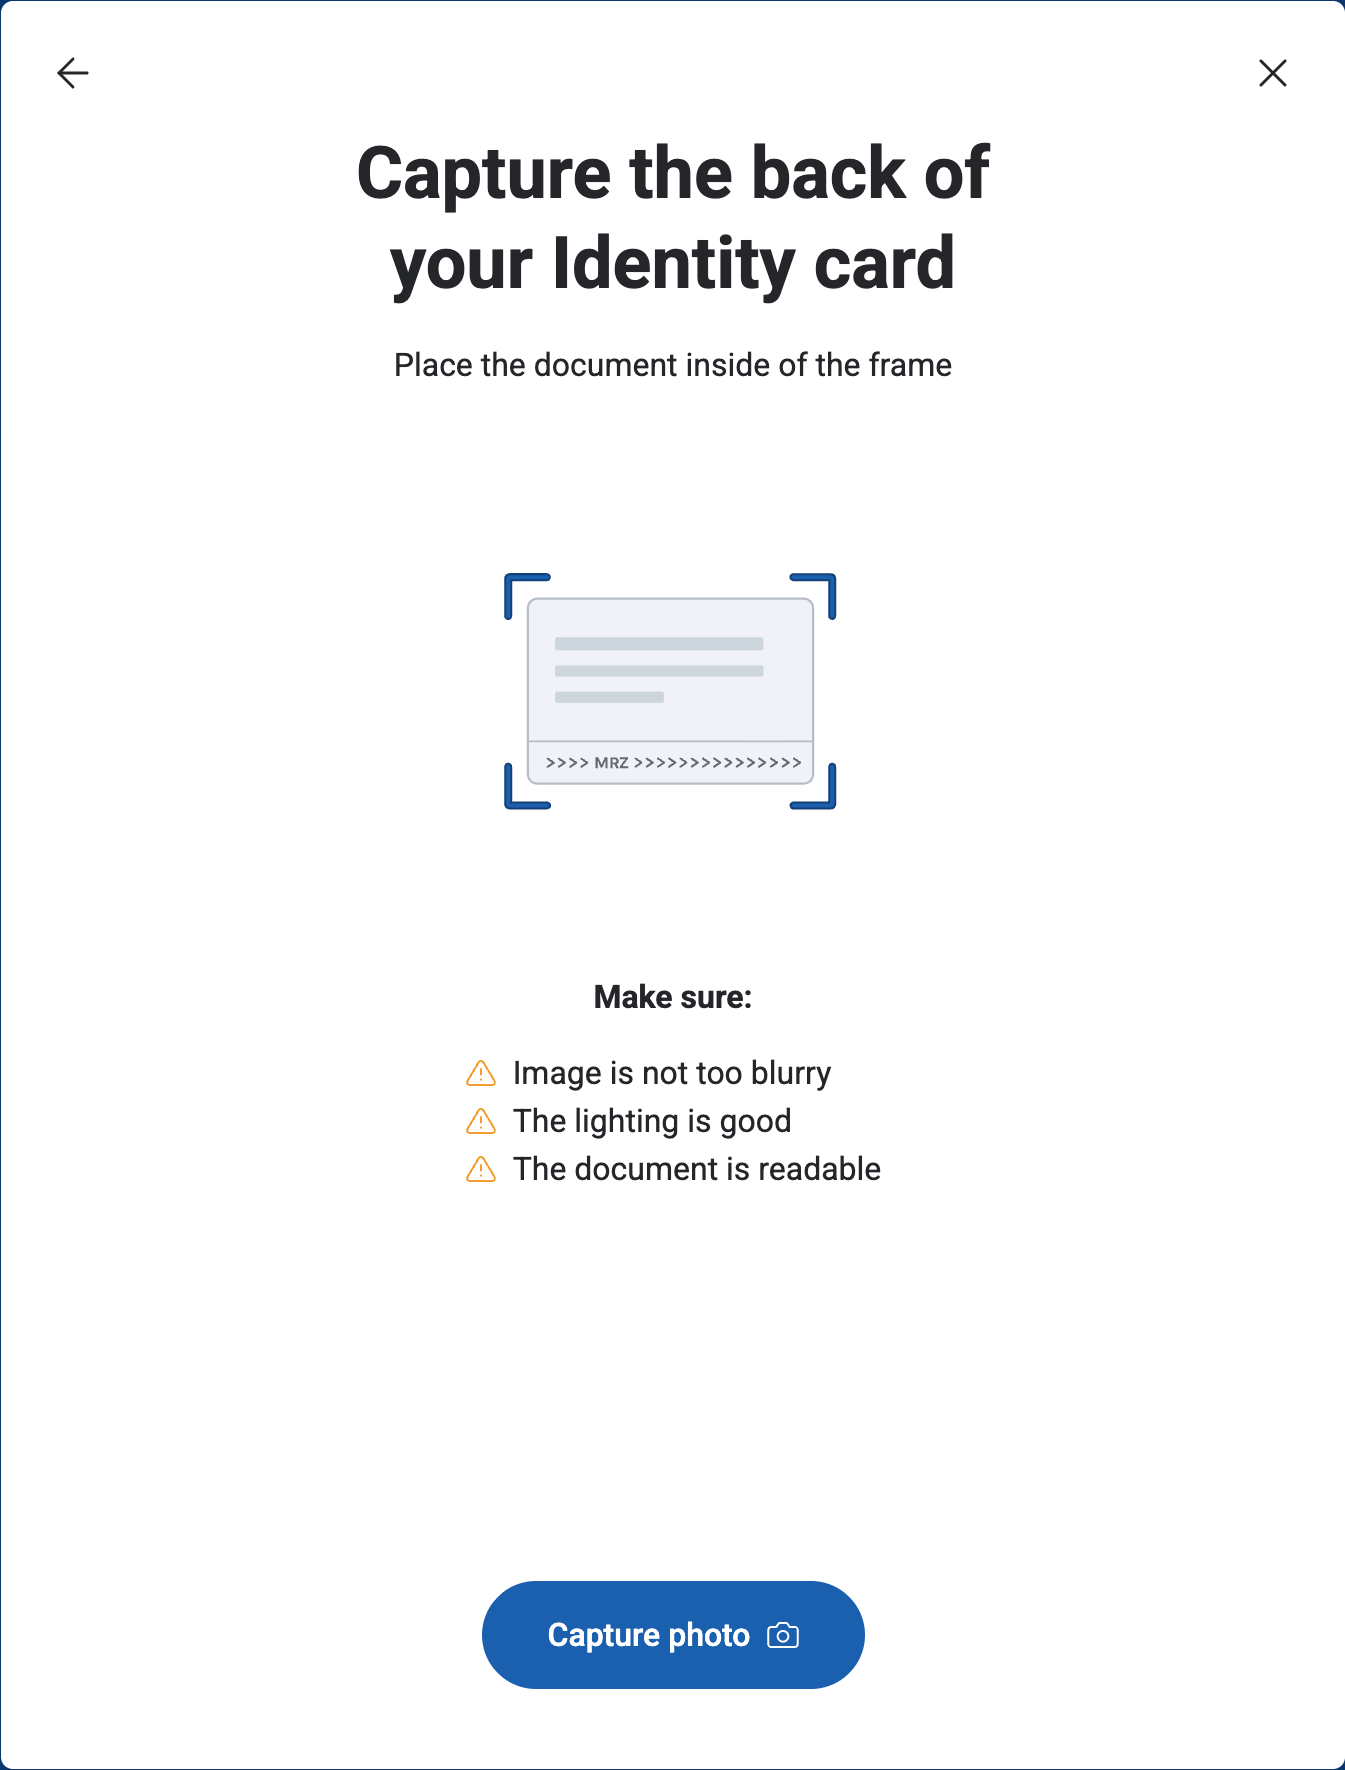
Fig. 7. Back side capture of an identity document.#
Step 4: Take a Selfie#
Click Start and follow the on-screen instructions to take a selfie for identity verification. Position your face within the frame and ensure the image is clear.
Requirements:
The face is well-lit and clearly visible.
A neutral expression is maintained.
The image is sharp and not blurry.
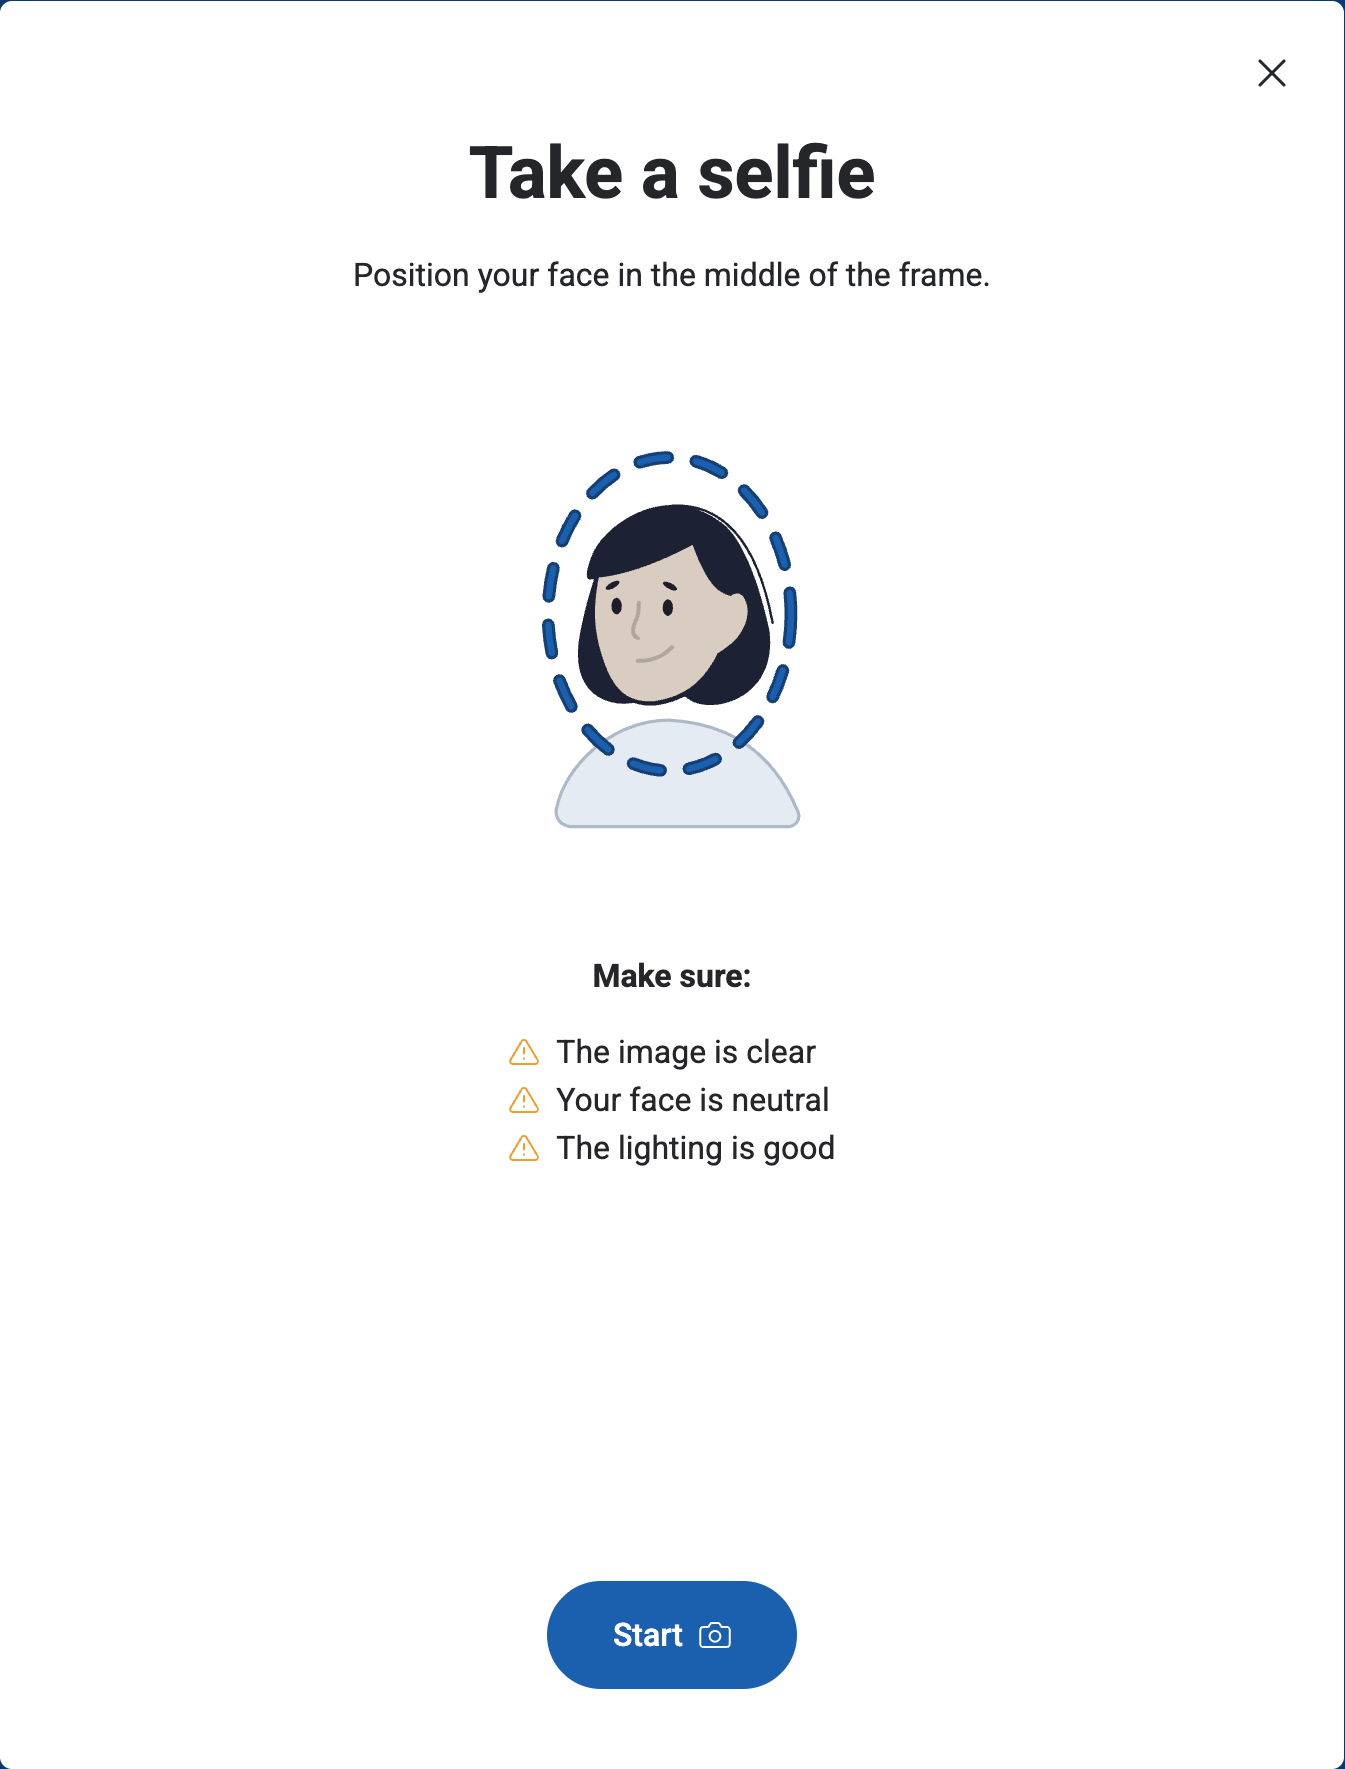
Fig. 8. Taking a selfie for identity verification.#
Step 5: Verification Successful#
Once verification is complete, a Success screen will appear. Click Finish to return to the DIDWW User Panel.


3. Account Security#
Note
The Account Security step appears only when Two-Factor Authentication (2FA) has not been configured.
Setting up Two-Factor Authentication (2FA) is strongly recommended for better protection and is required for all accounts with active orders.
Set up Two-Factor Authentication (2FA) methods to protect your DIDWW account. Choose from multiple verification methods to add an extra layer of security when signing in.
Use a mobile application, such as Google Authenticator or Microsoft Authenticator, to generate a verification code each time you sign in. For the full step-by-step guide and authenticator app download links, see Security.
Enable the Authenticator App option.
Scan the QR code using your authentication app.
Enter the 6-digit code generated by the app and click Submit to complete setup.
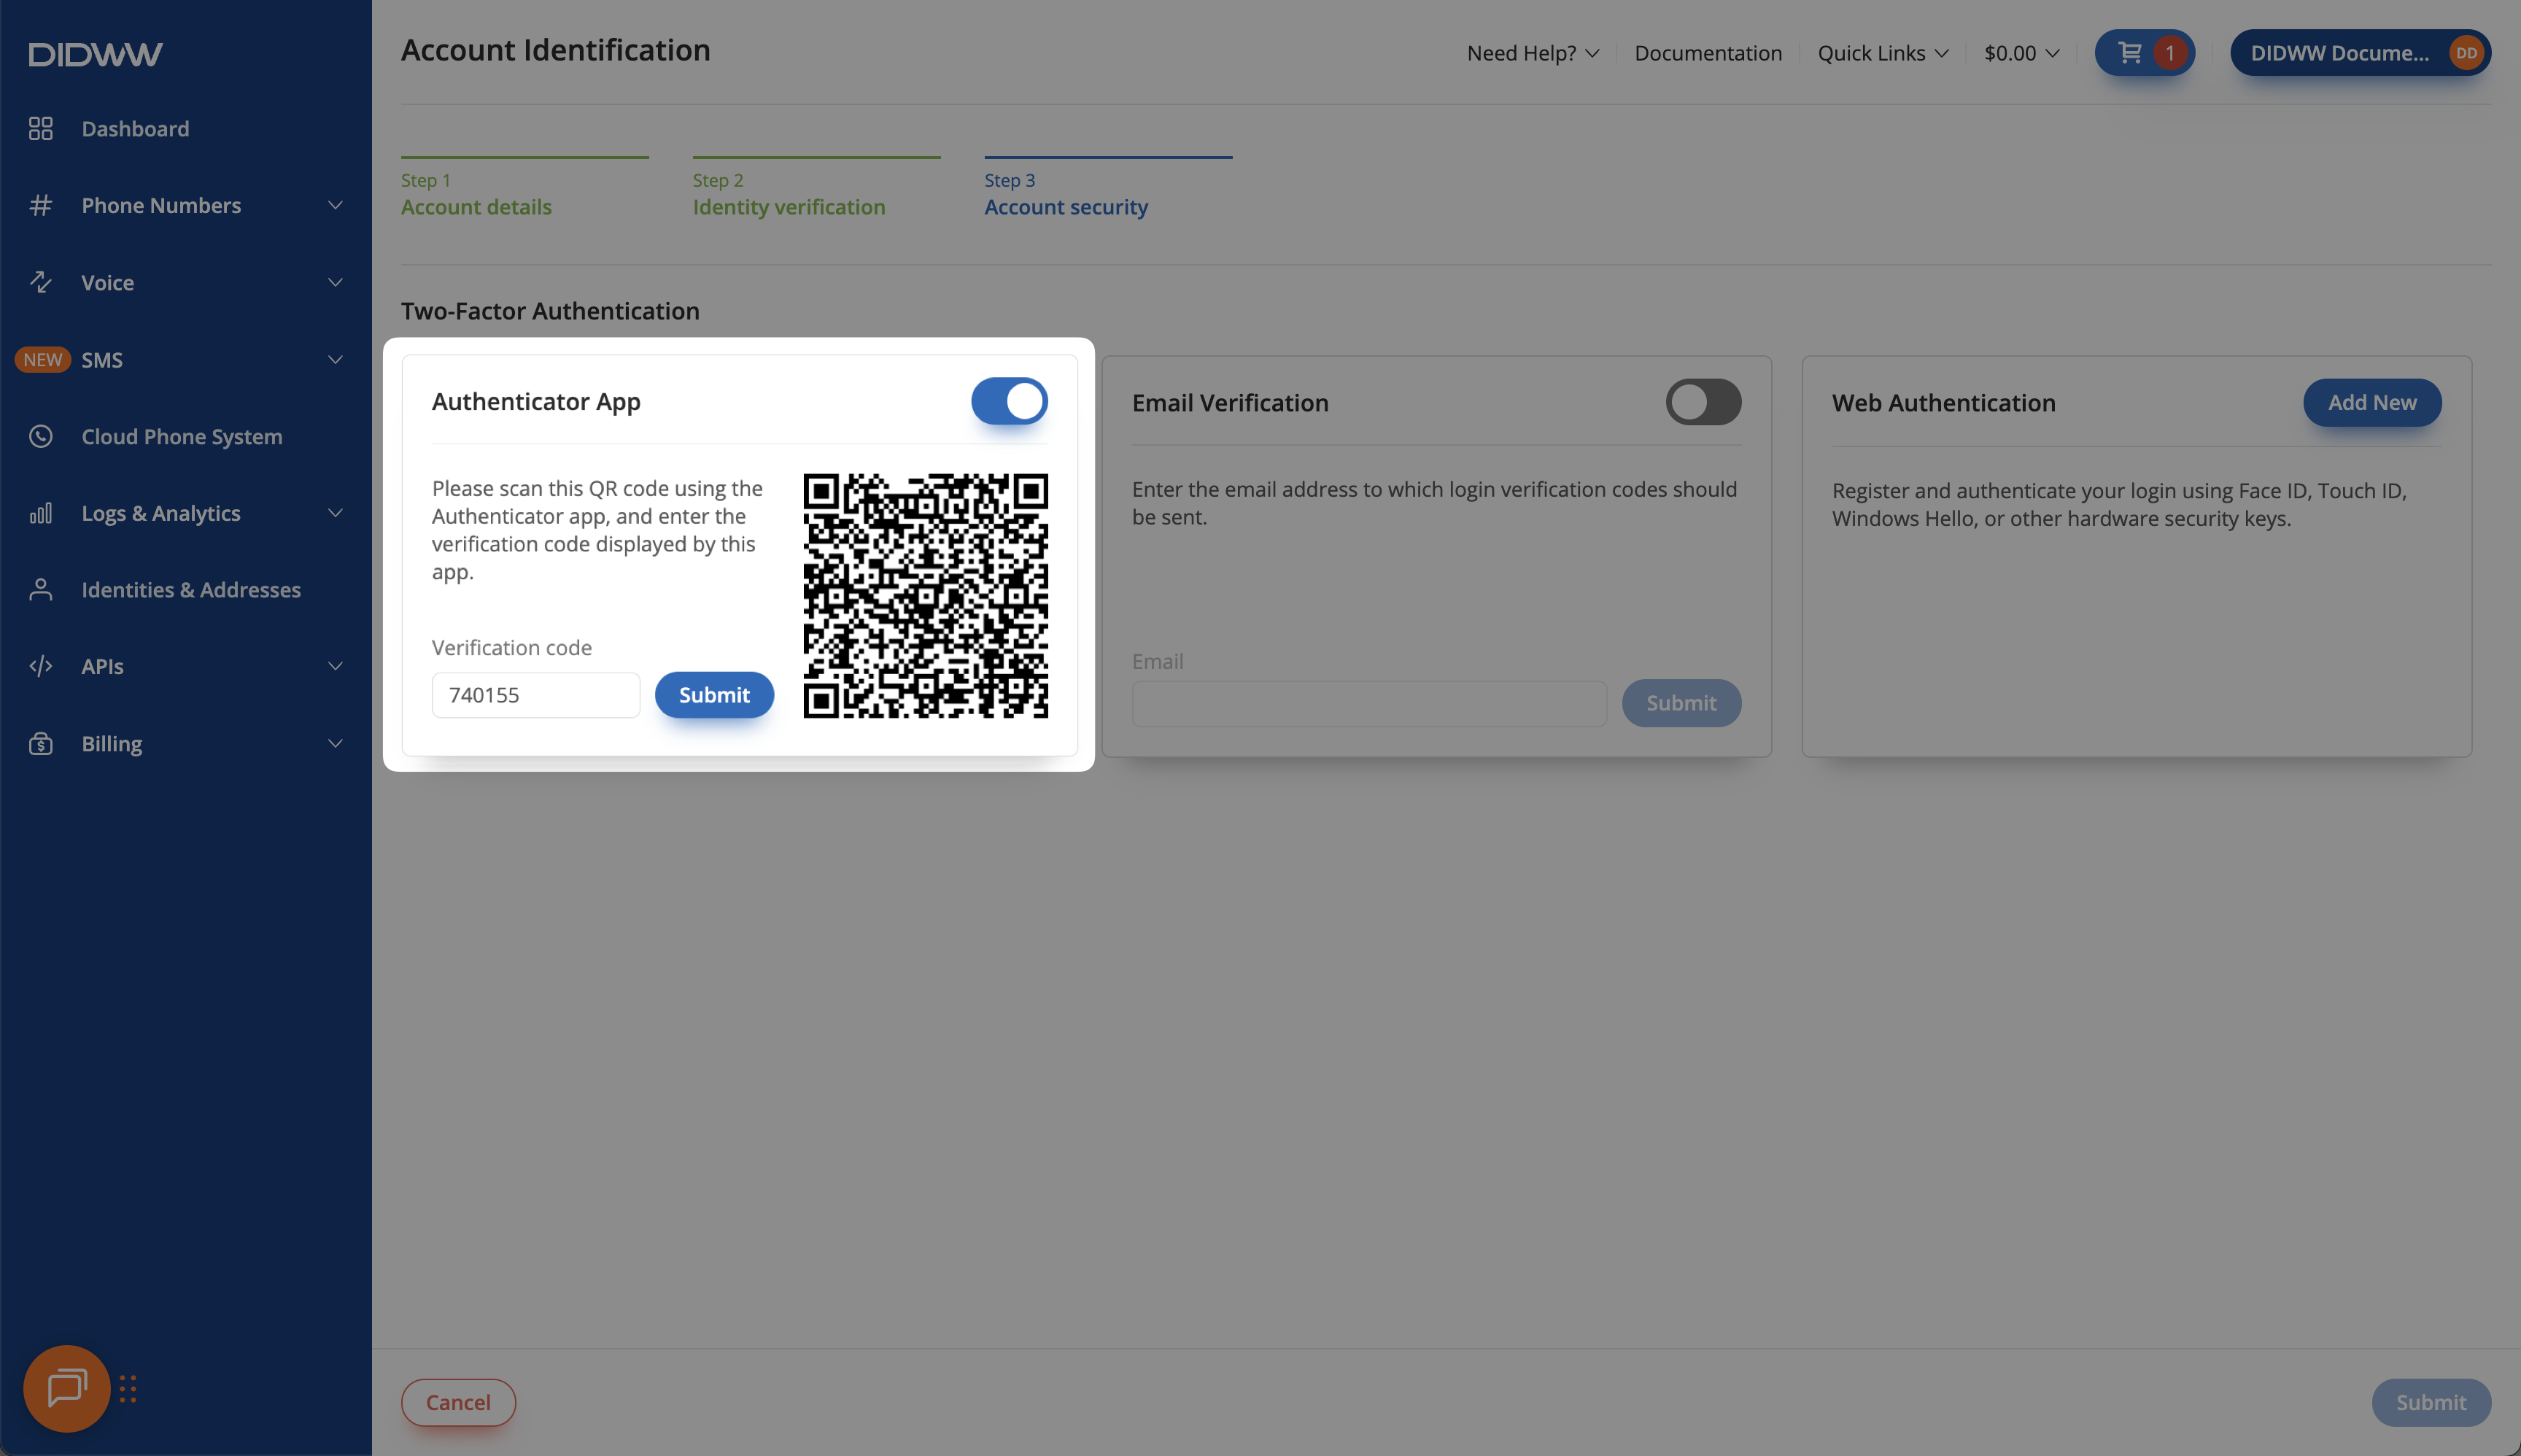
Fig. 11. Setting up 2FA using an Authenticator App.#
Receive a one-time verification code by email each time you log in.
Enable the Email Verification option.
Confirm your email address and click Submit.
Enter the 6-digit code sent to your email to finalize setup.
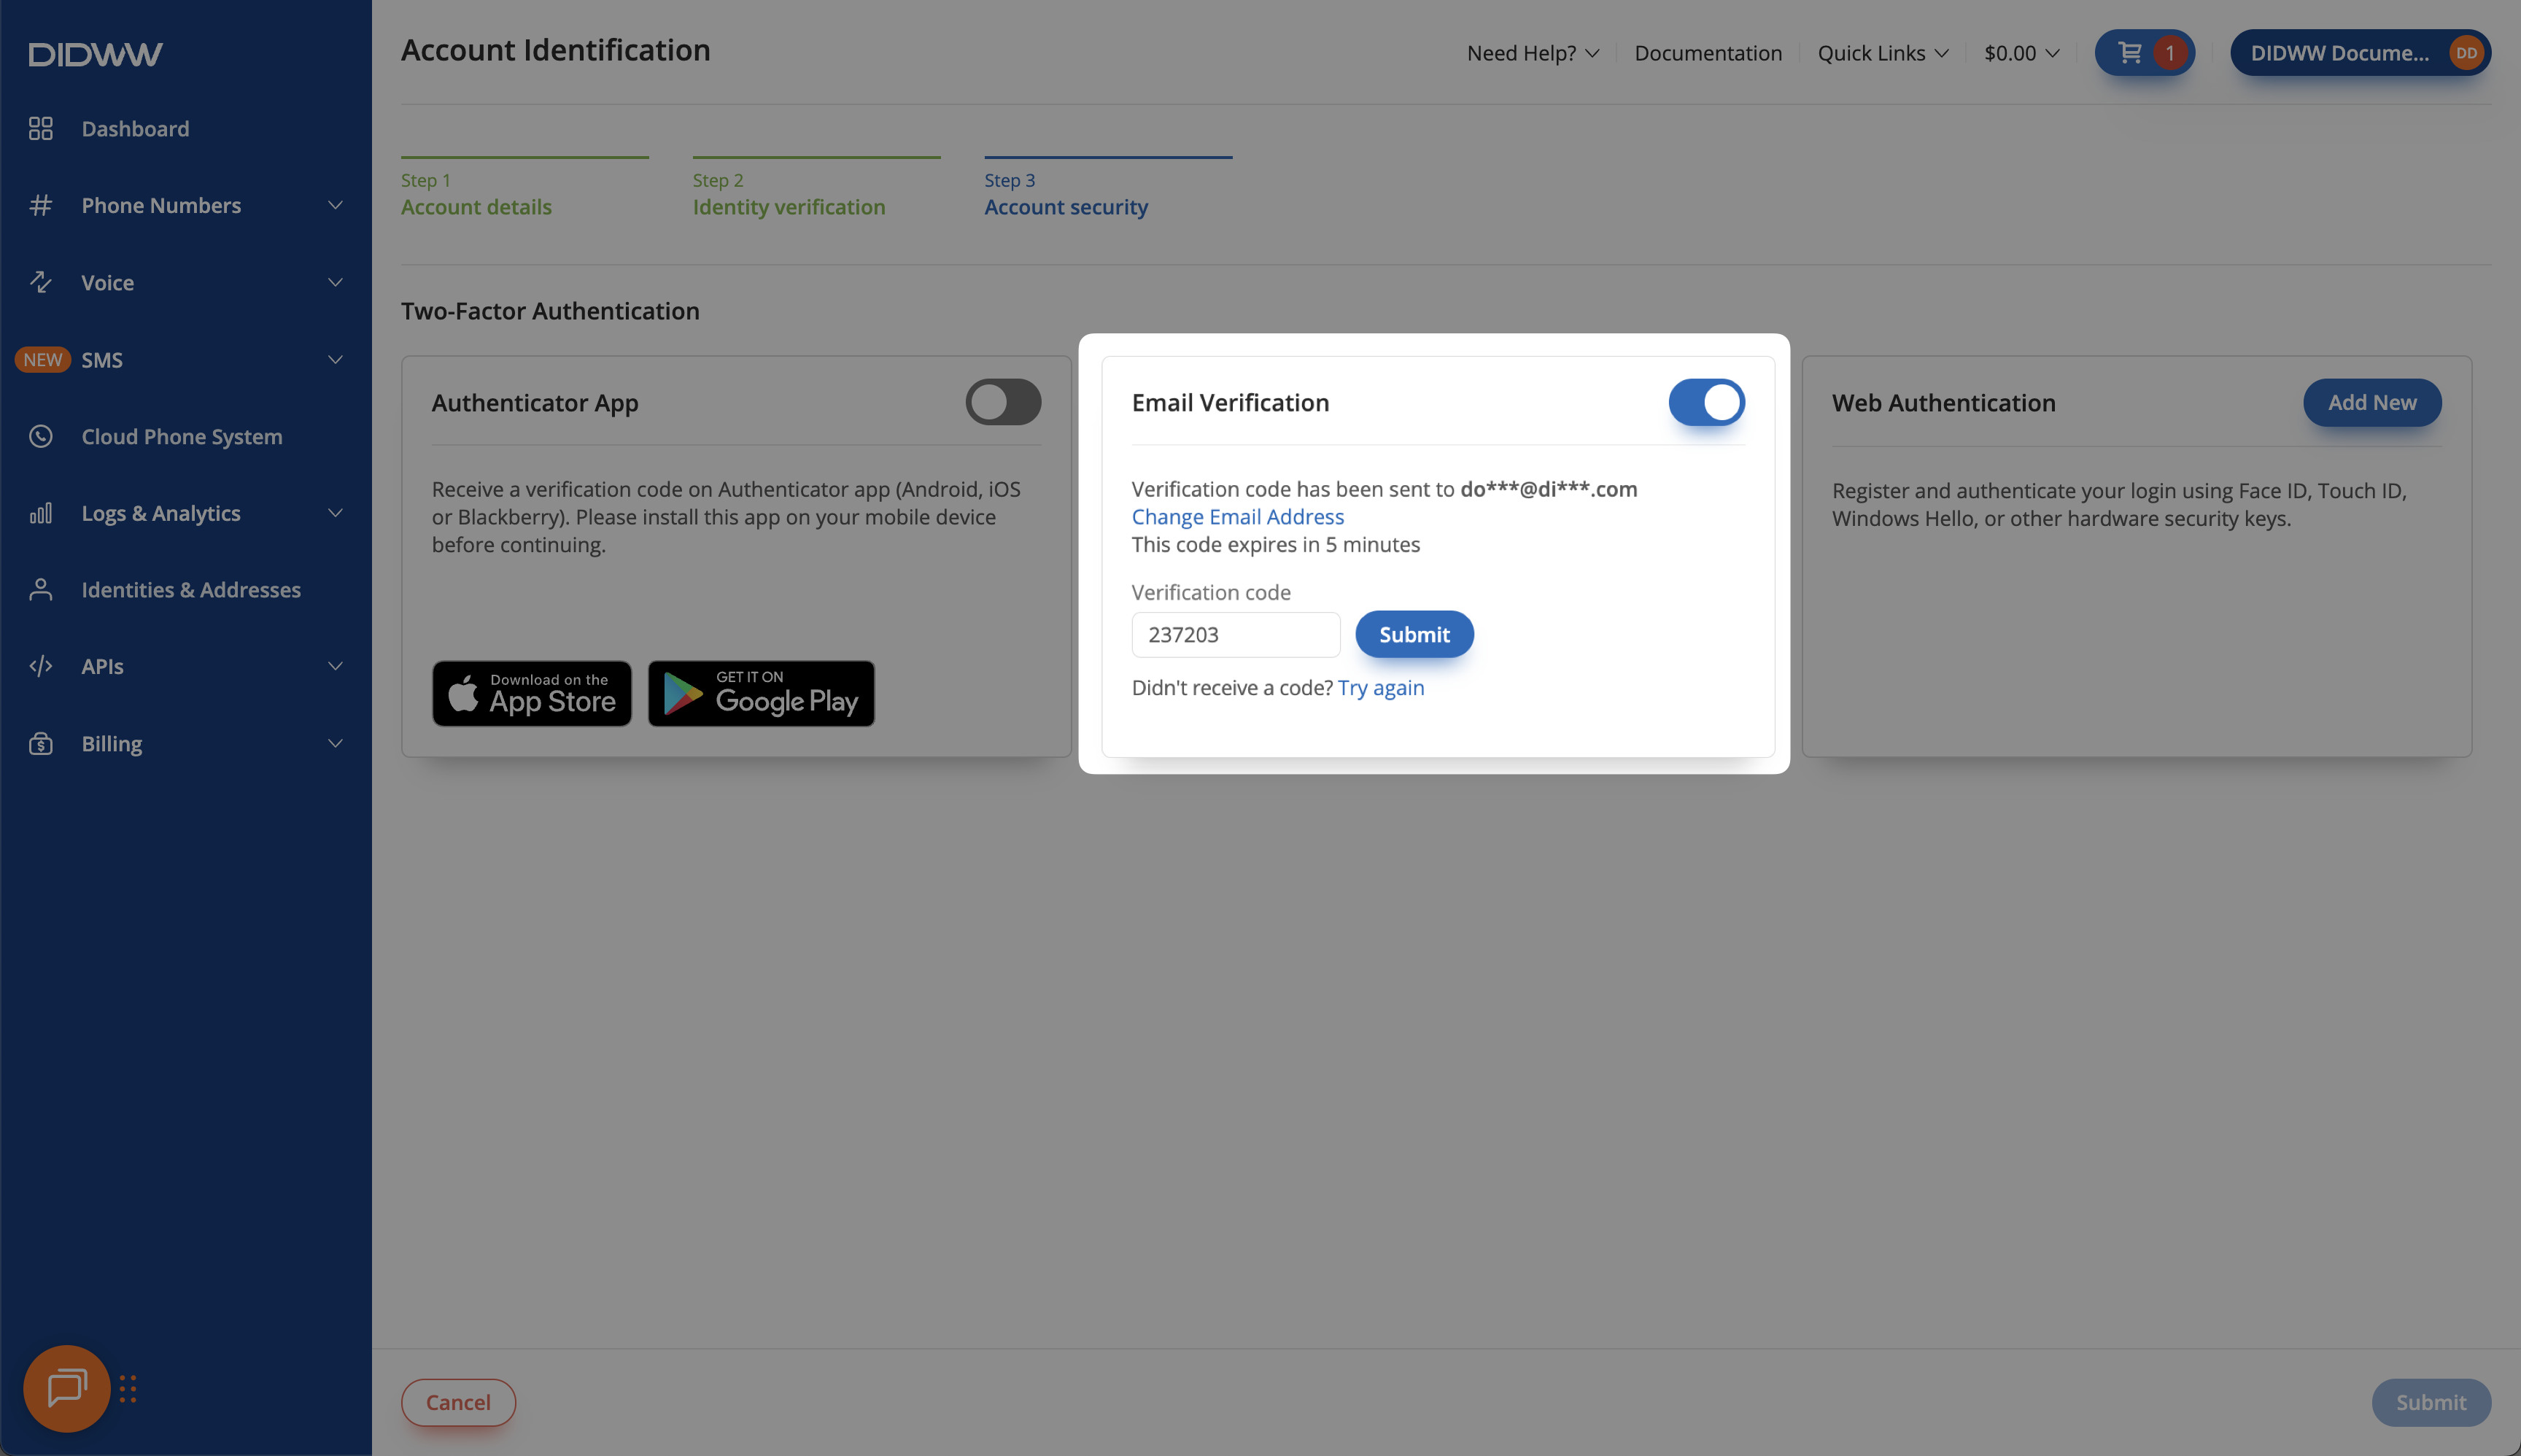
Fig. 12. Setting up 2FA using Email Verification.#
Use a hardware-based or built-in authentication method, such as Face ID, Touch ID, or Windows Hello, for quick and secure login.
Click Add New and give your device a name.
Follow your browser’s instructions to register the device.
Once registered, the device will appear in your authentication list.
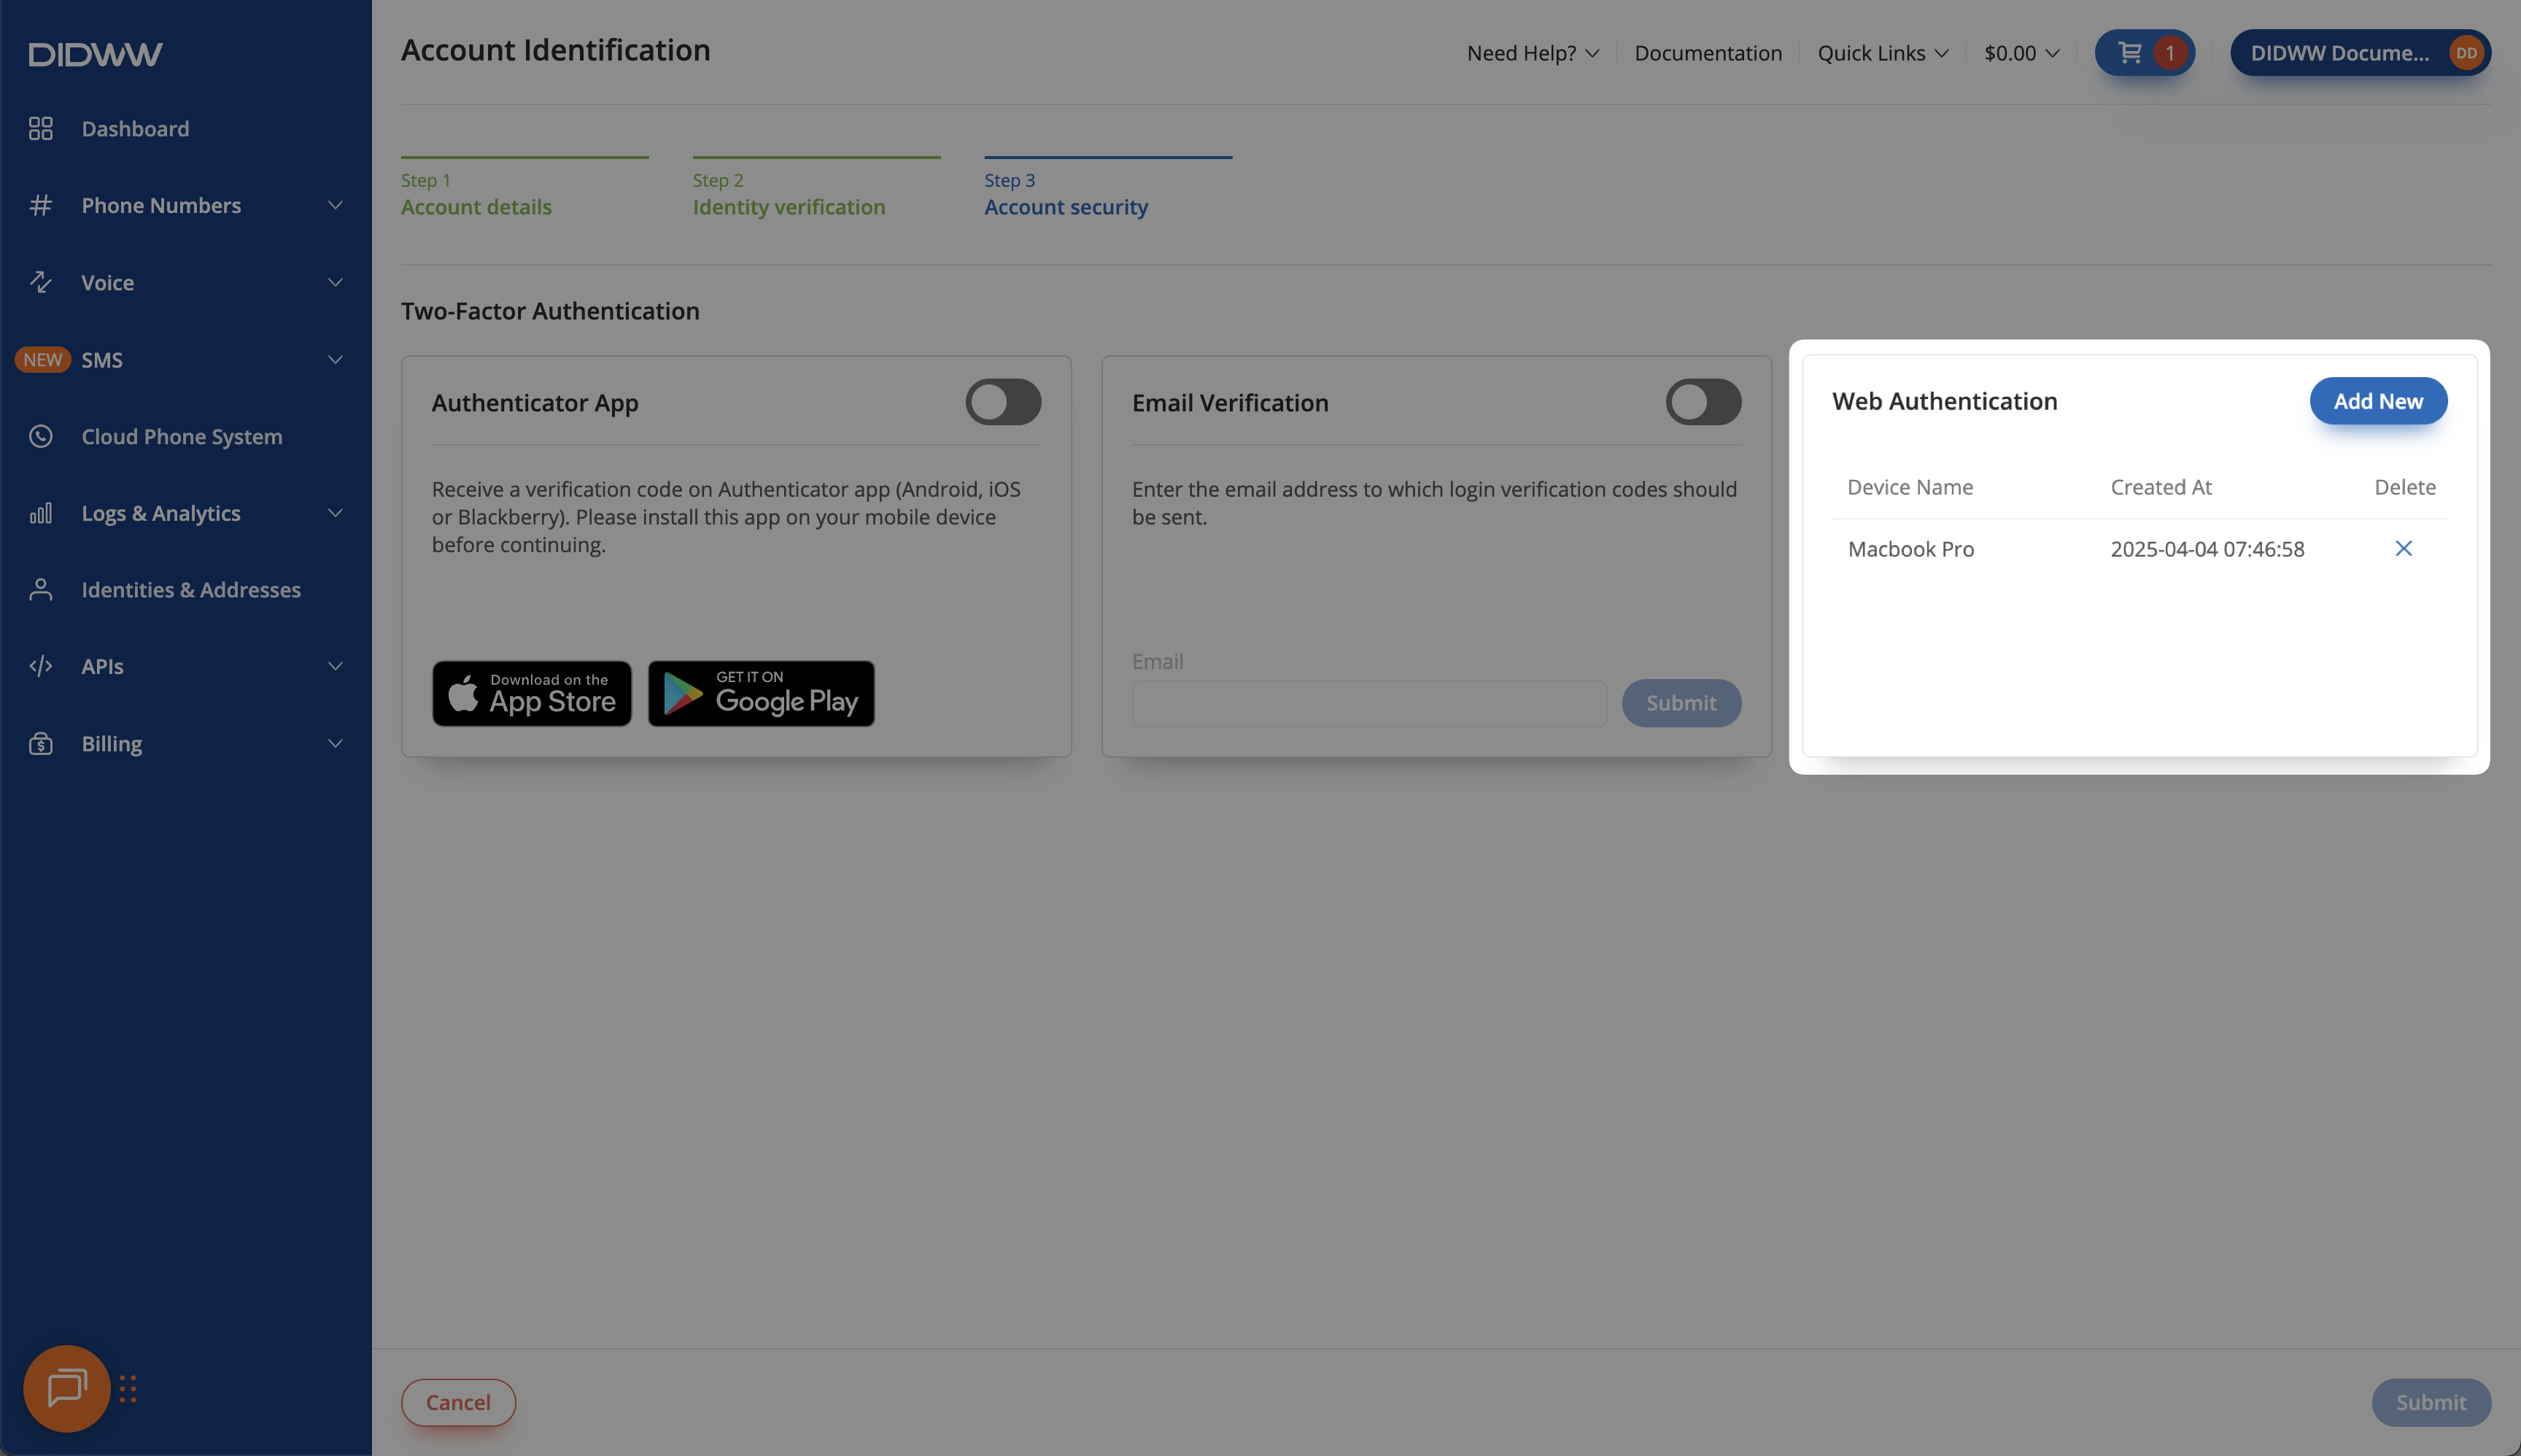
Fig. 13. Setting up 2FA using Web Authentication.#