

Manage SIP trunks#
Manage existing inbound SIP trunks from the Inbound Trunks page. View a trunk’s configuration, edit its settings, enable CNAM lookup, or delete trunks that are no longer required.
Before you begin#
An active DIDWW account is required. Sign in to DIDWW.
An existing inbound SIP trunk is required. If you do not have one, see Create a SIP trunk.
View a SIP trunk#
In the DIDWW User Panel, go to Voice > Inbound Trunks.
Click the name of the SIP trunk.
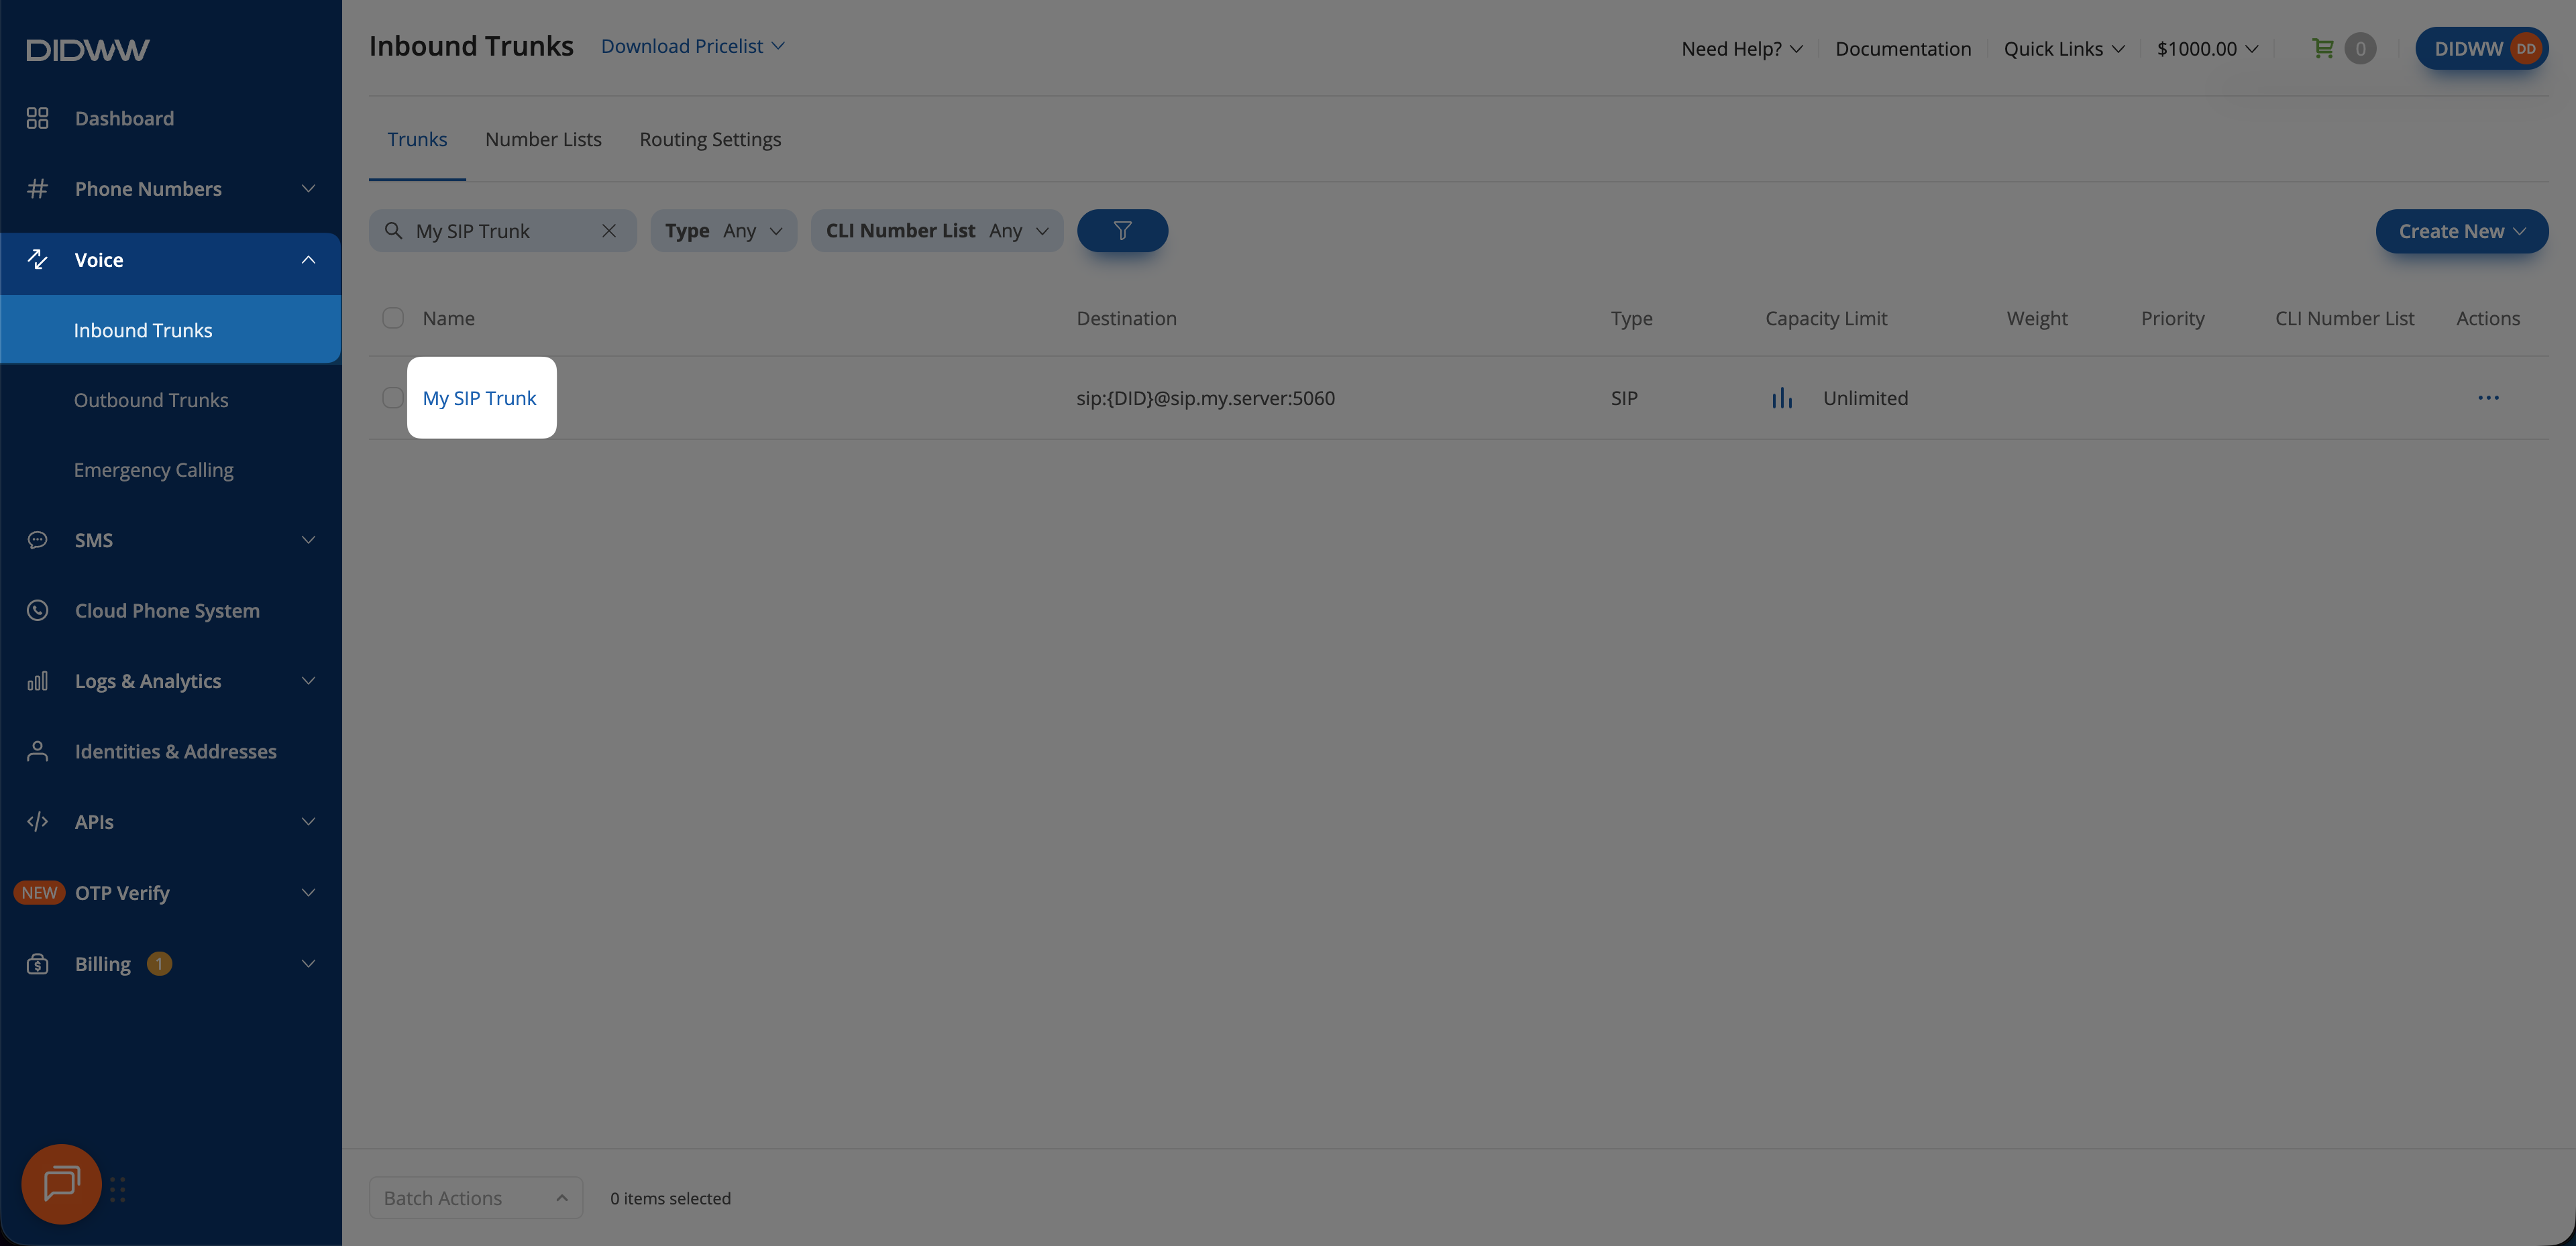
Fig. 1. Open the SIP trunk details#
In View Inbound SIP Trunk, select a tab to review its settings, then click Close. The page shows the trunk configuration in read-only mode. For a Dynamic Registration trunk, it also shows the registration credentials and registrar endpoints. See View SIP registration credentials.
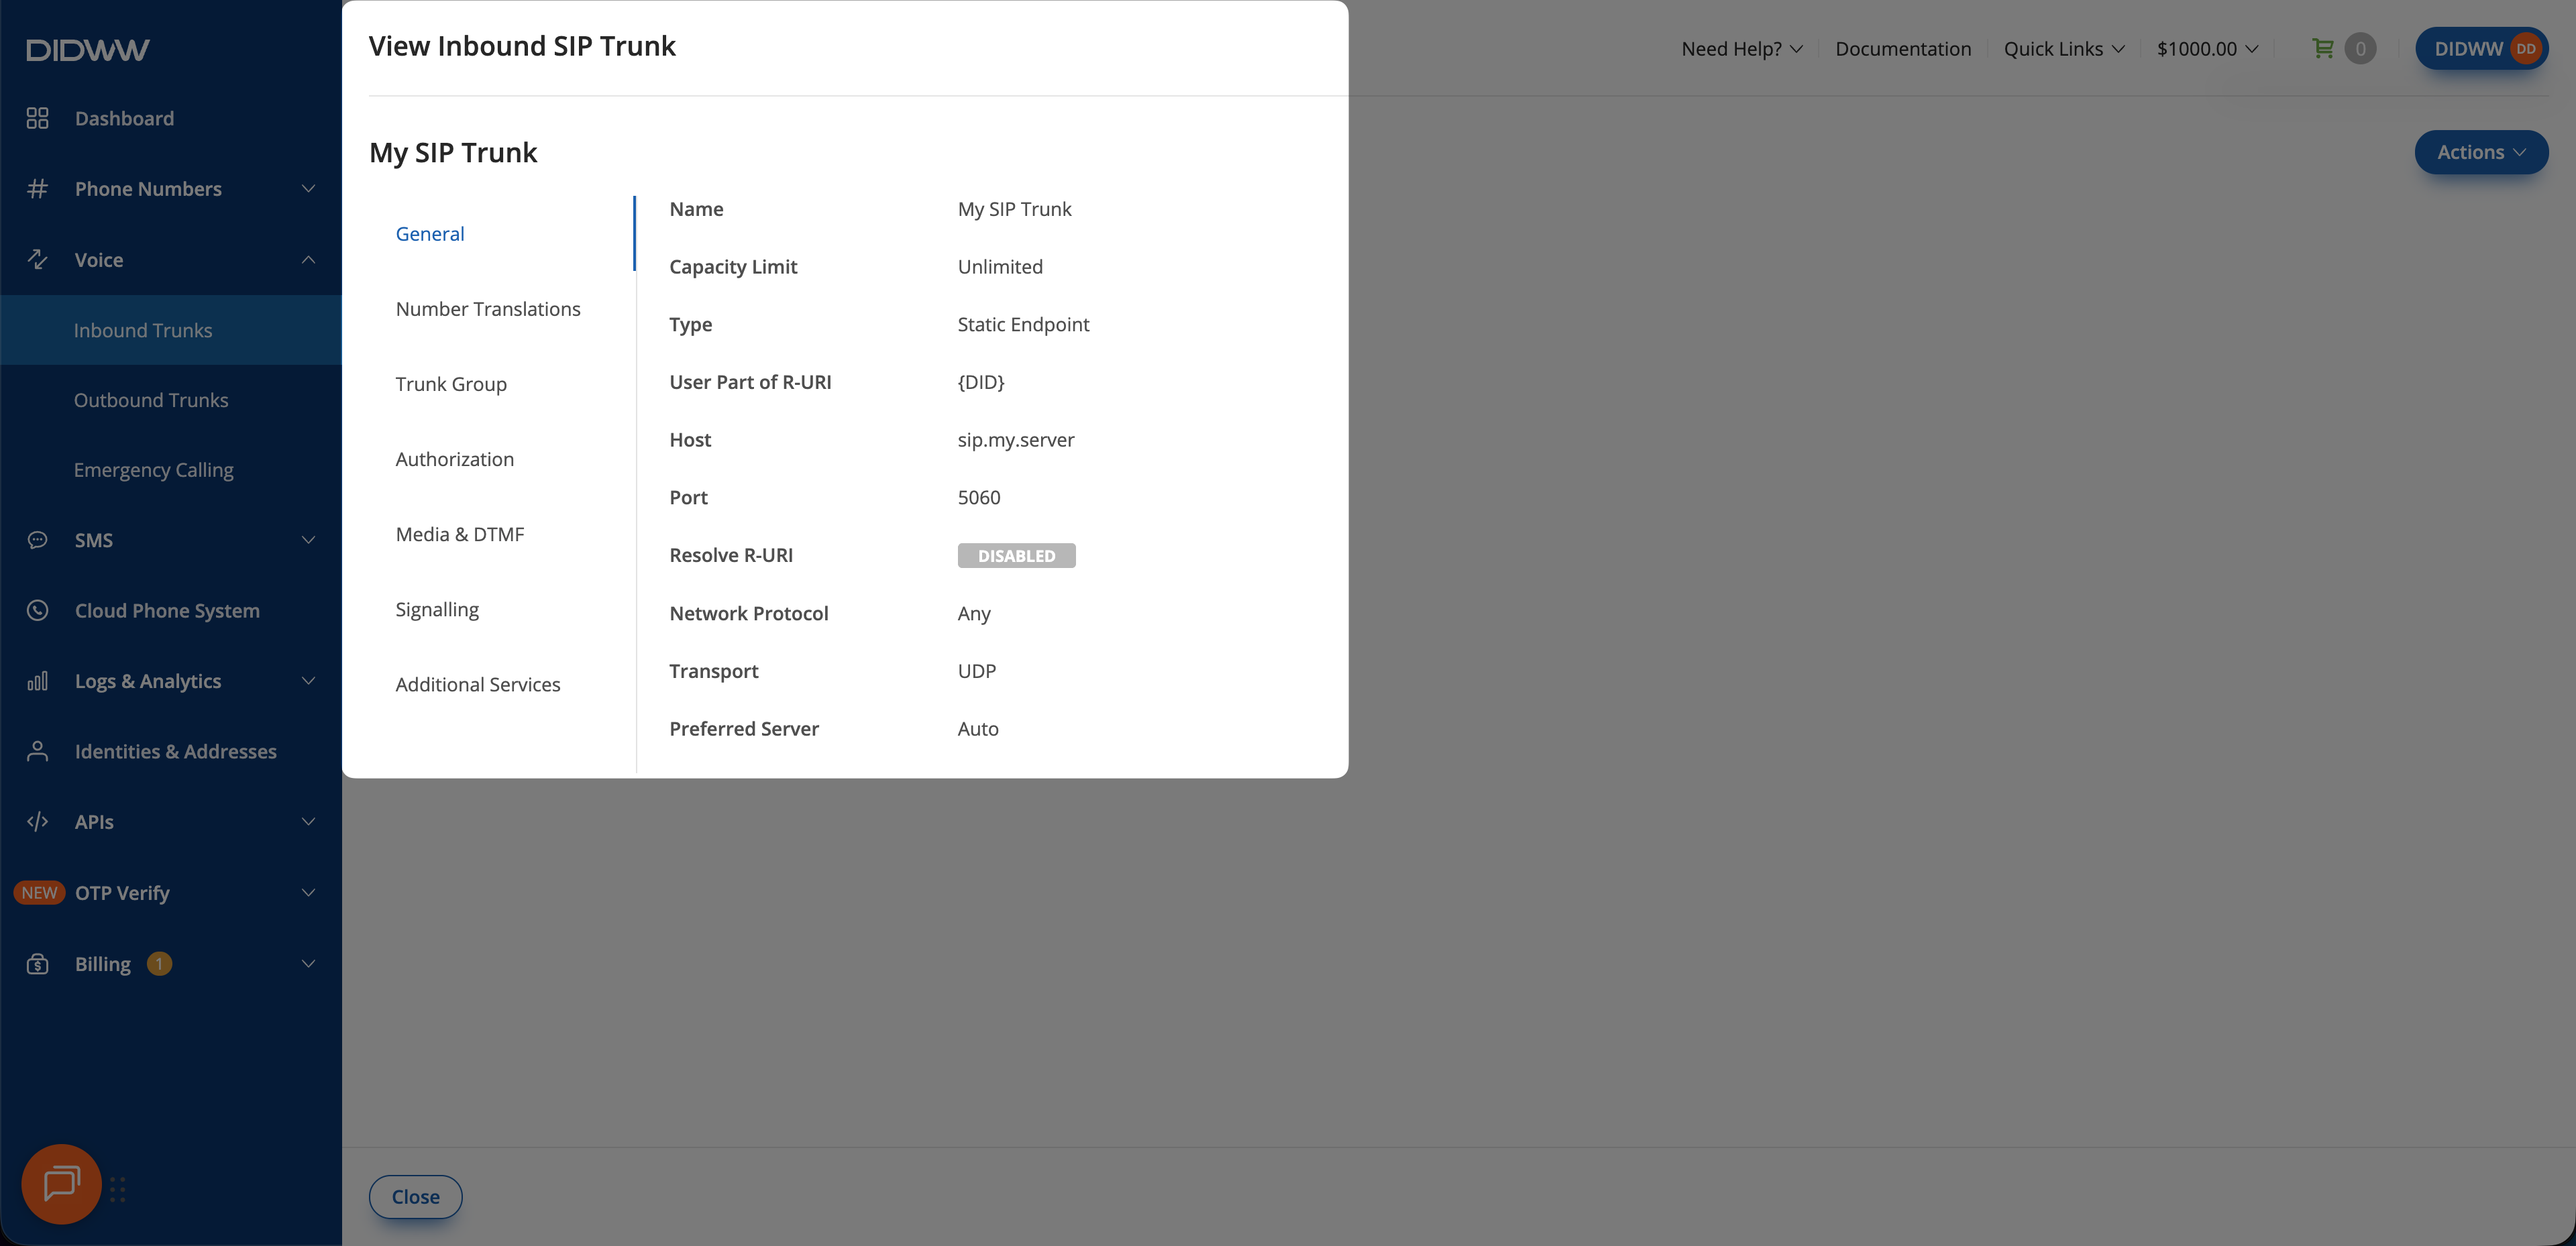
Fig. 2. Review the SIP trunk details#
Edit a SIP trunk#
In the DIDWW User Panel, go to Voice > Inbound Trunks.
Locate the SIP trunk and open its Actions menu.
Click Edit.
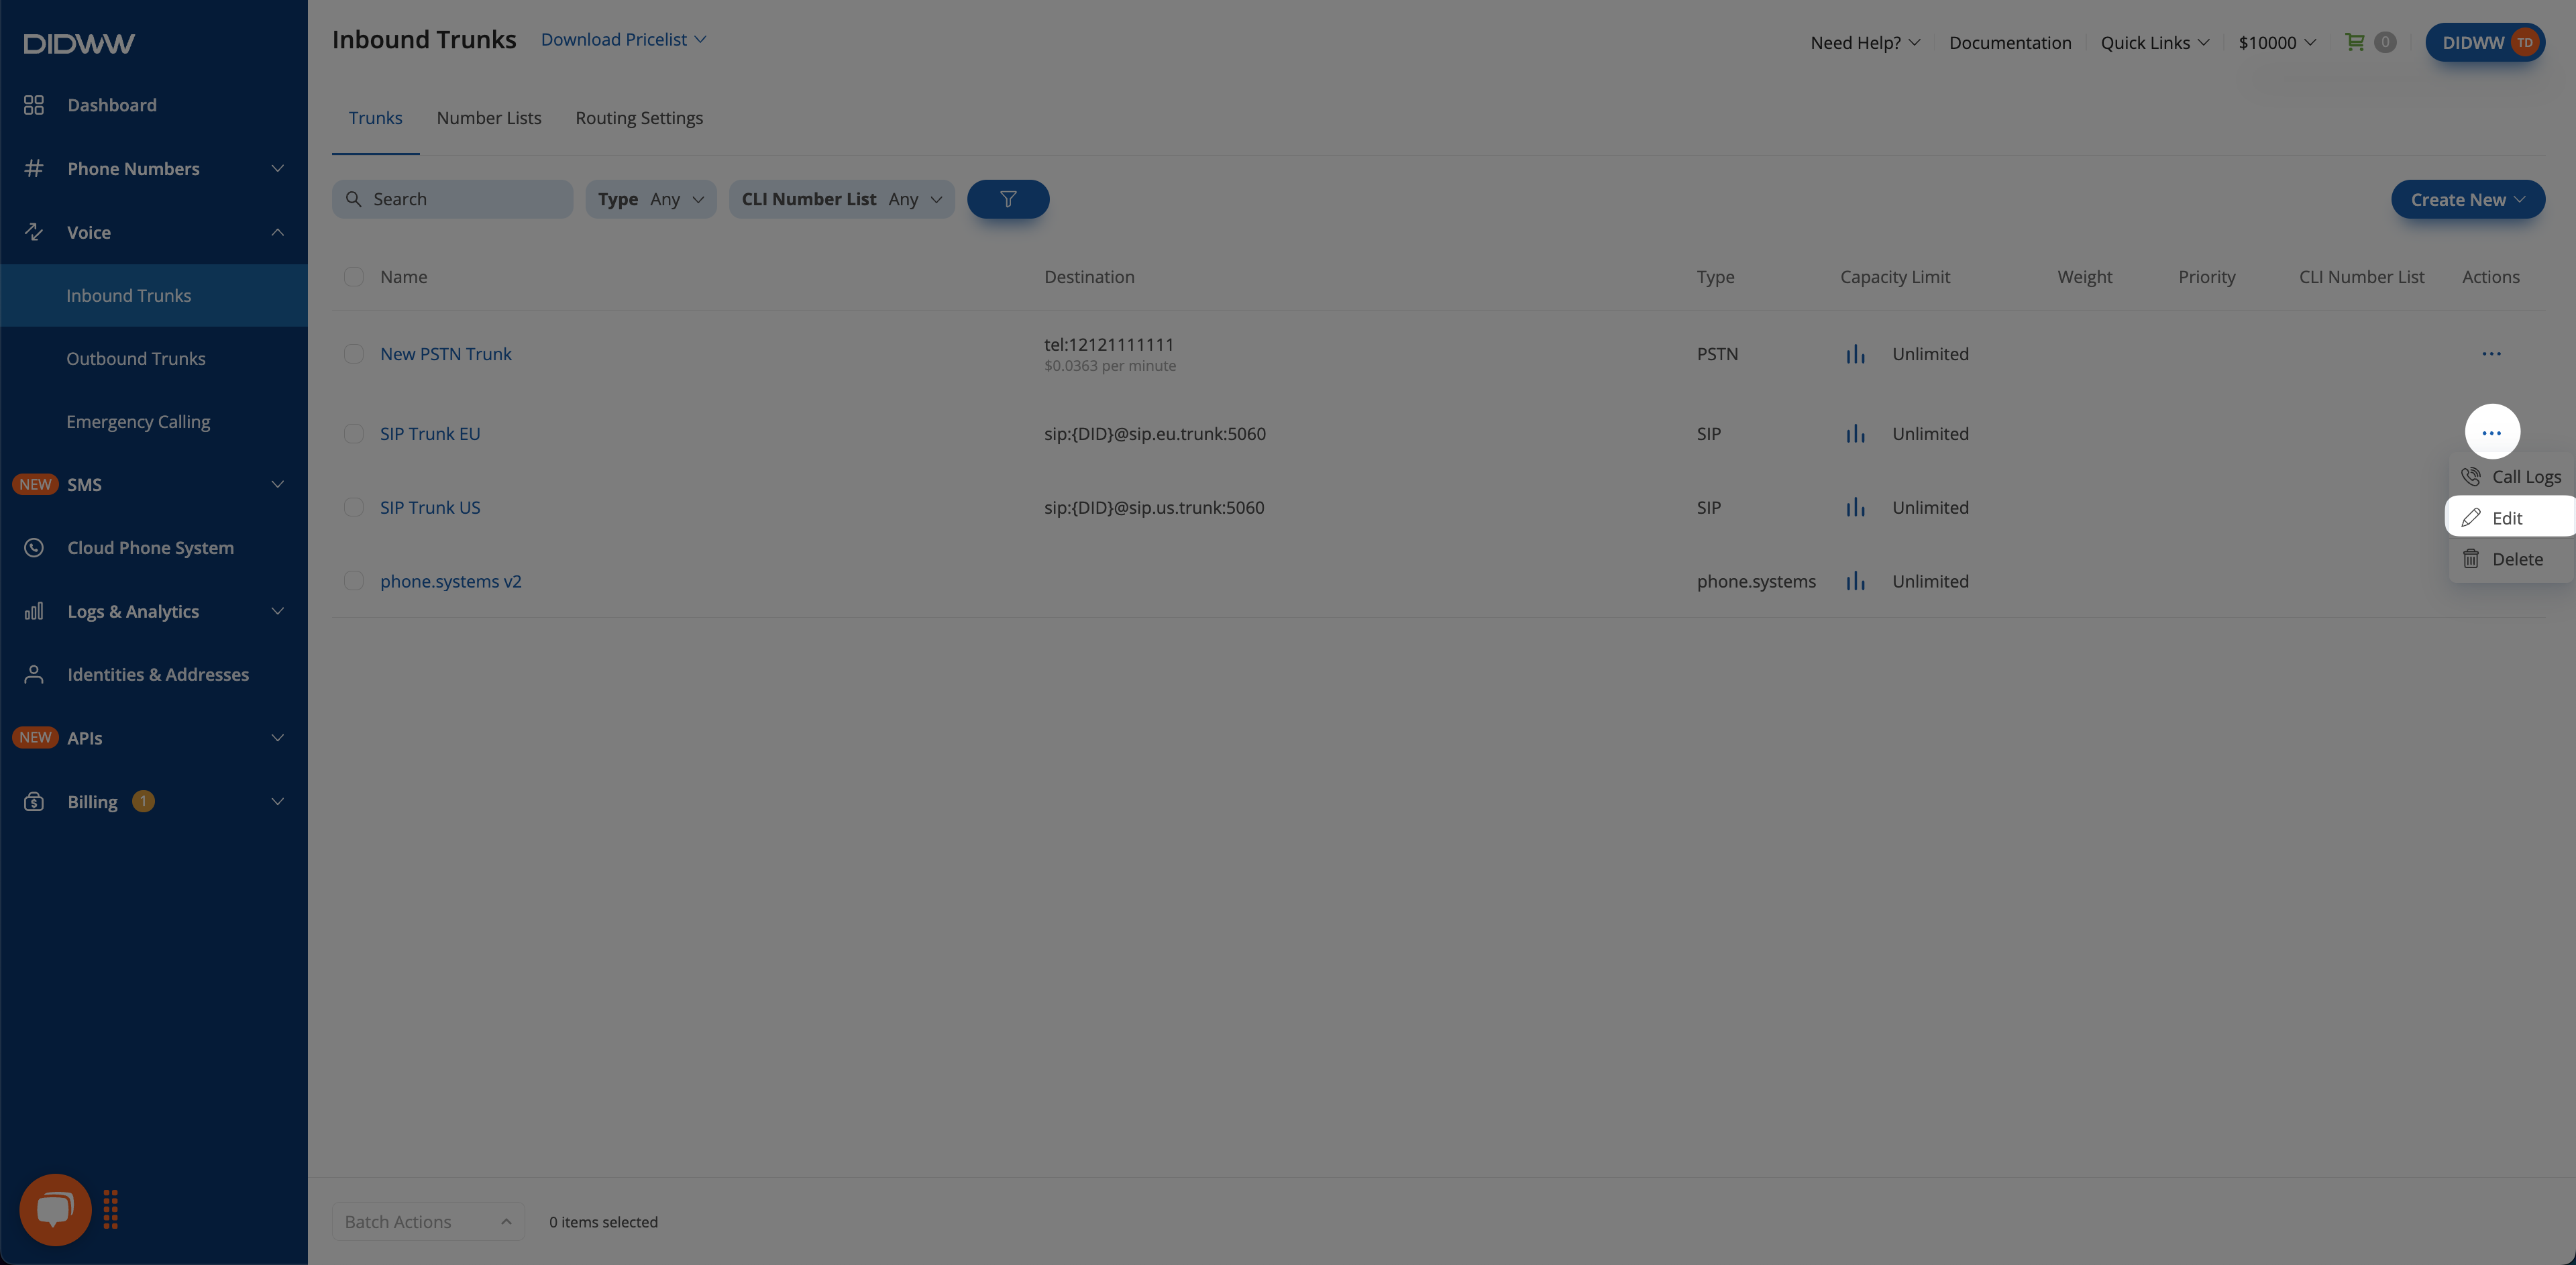
Fig. 3. Open the SIP trunk edit form#
In Edit Inbound SIP Trunk, update the required settings on any tab. The tabs match those on the creation form. See Configure optional settings for guidance on the optional tabs.
Review the changes and click Submit.
For definitions, defaults, dependencies, and limits for all settings, see SIP trunk settings reference.
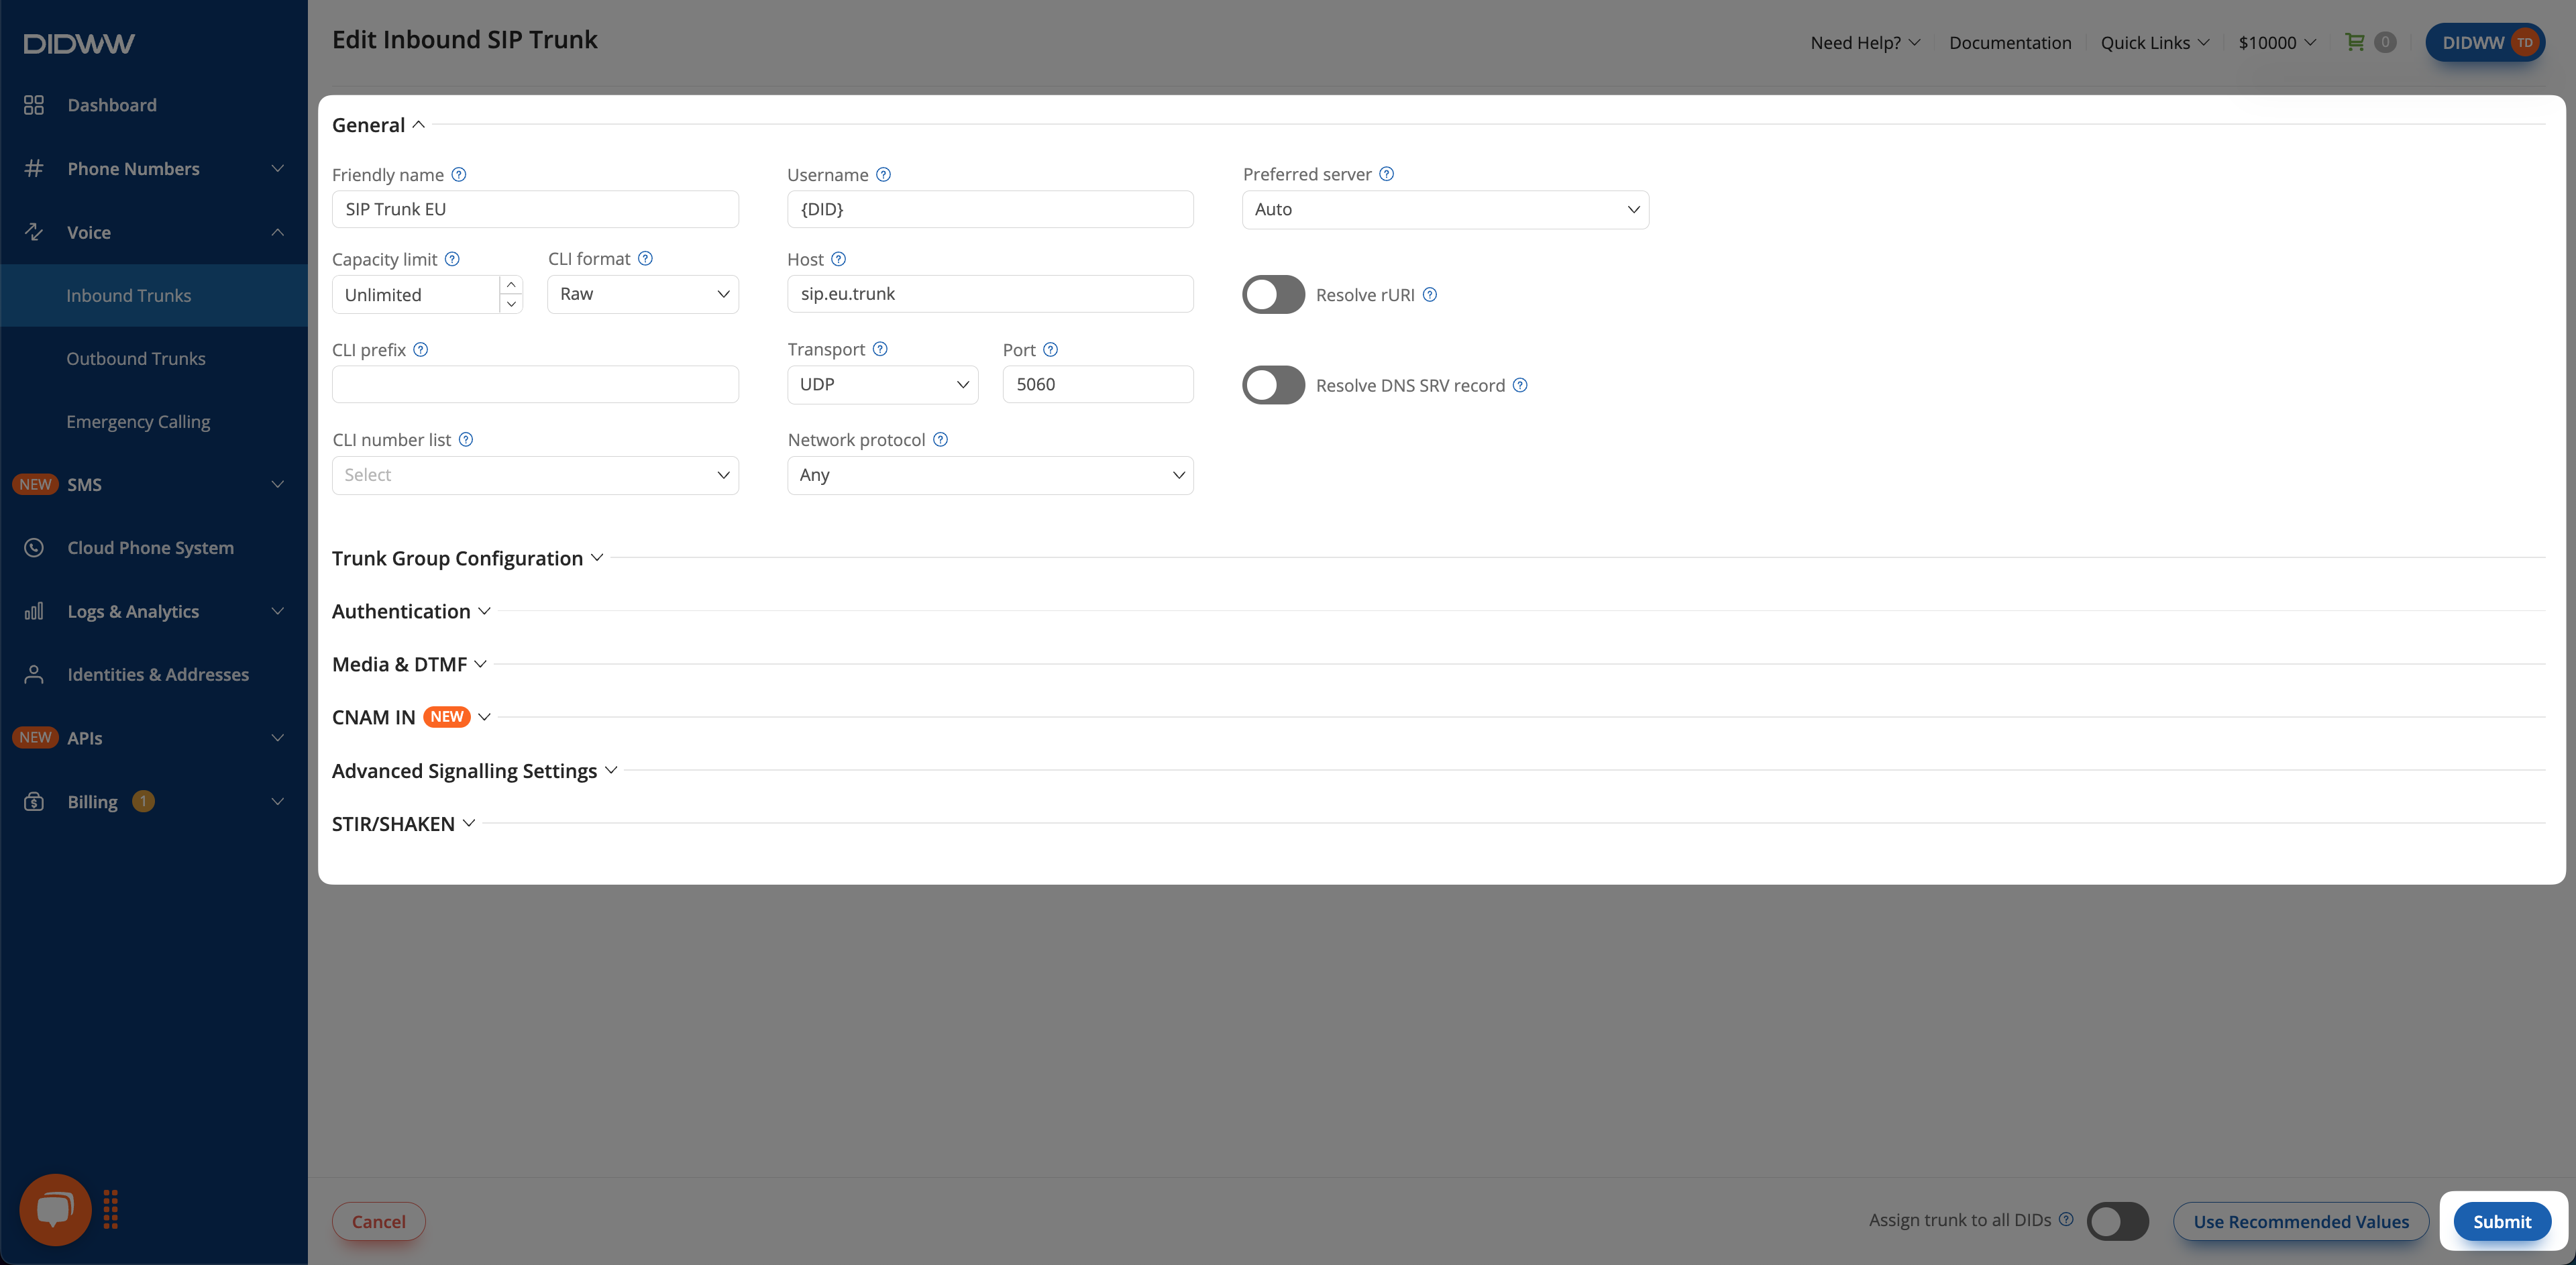
Fig. 4. Update and save the SIP trunk settings#
Enable CNAM lookup#
Open the SIP trunk for editing. See Edit a SIP trunk.
Select Additional Services.
Turn on Enable CNAM Lookup.
Click Submit.
An additional charge applies to each call from a U.S. source number. If the trunk belongs to a Trunk Group, review Trunk Group behavior before enabling the setting. See CNAM IN for SIP trunks for how caller names are delivered and where CNAM IN charges appear in call logs.
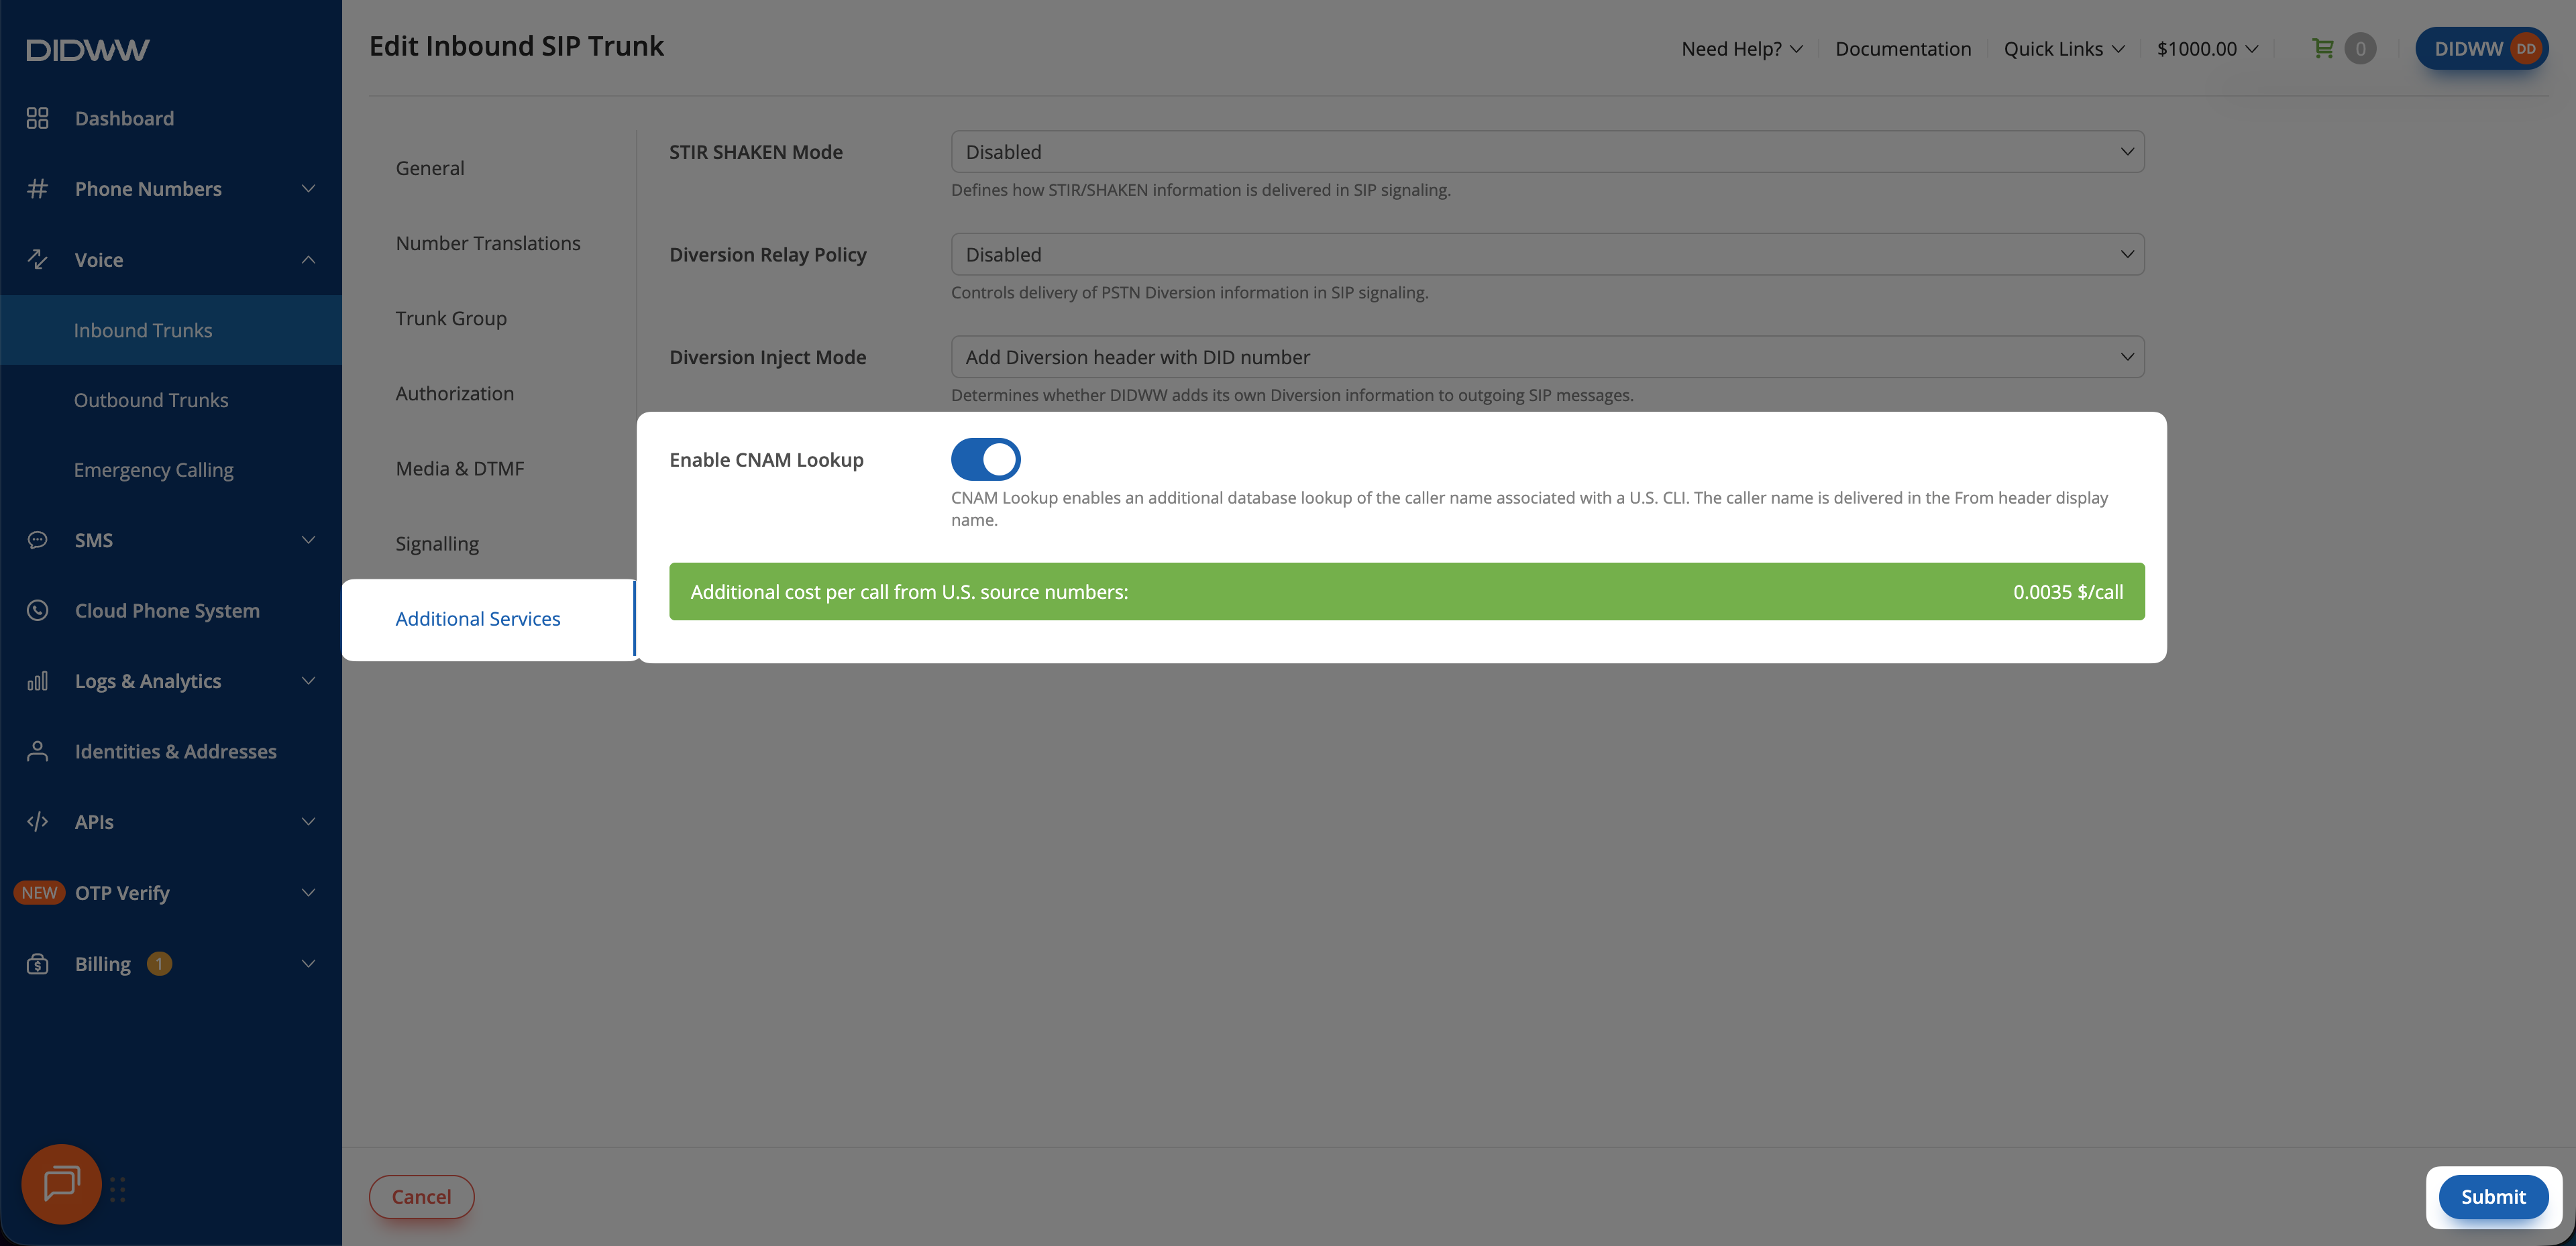
Fig. 5. Enable CNAM lookup#
Delete SIP trunks#
Delete one SIP trunk from its Actions menu or delete multiple SIP trunks using Batch Actions.
Warning
Deleting a trunk is permanent and cannot be undone. Confirm that the trunk is no longer required before continuing.
A trunk that is assigned to a DID number or otherwise in use cannot be deleted. First unassign the trunk from every DID number and remove any other configuration that uses it.
Delete one SIP trunk#
Go to Voice > Inbound Trunks.
Locate the SIP trunk and open its Actions menu.
Click Delete.
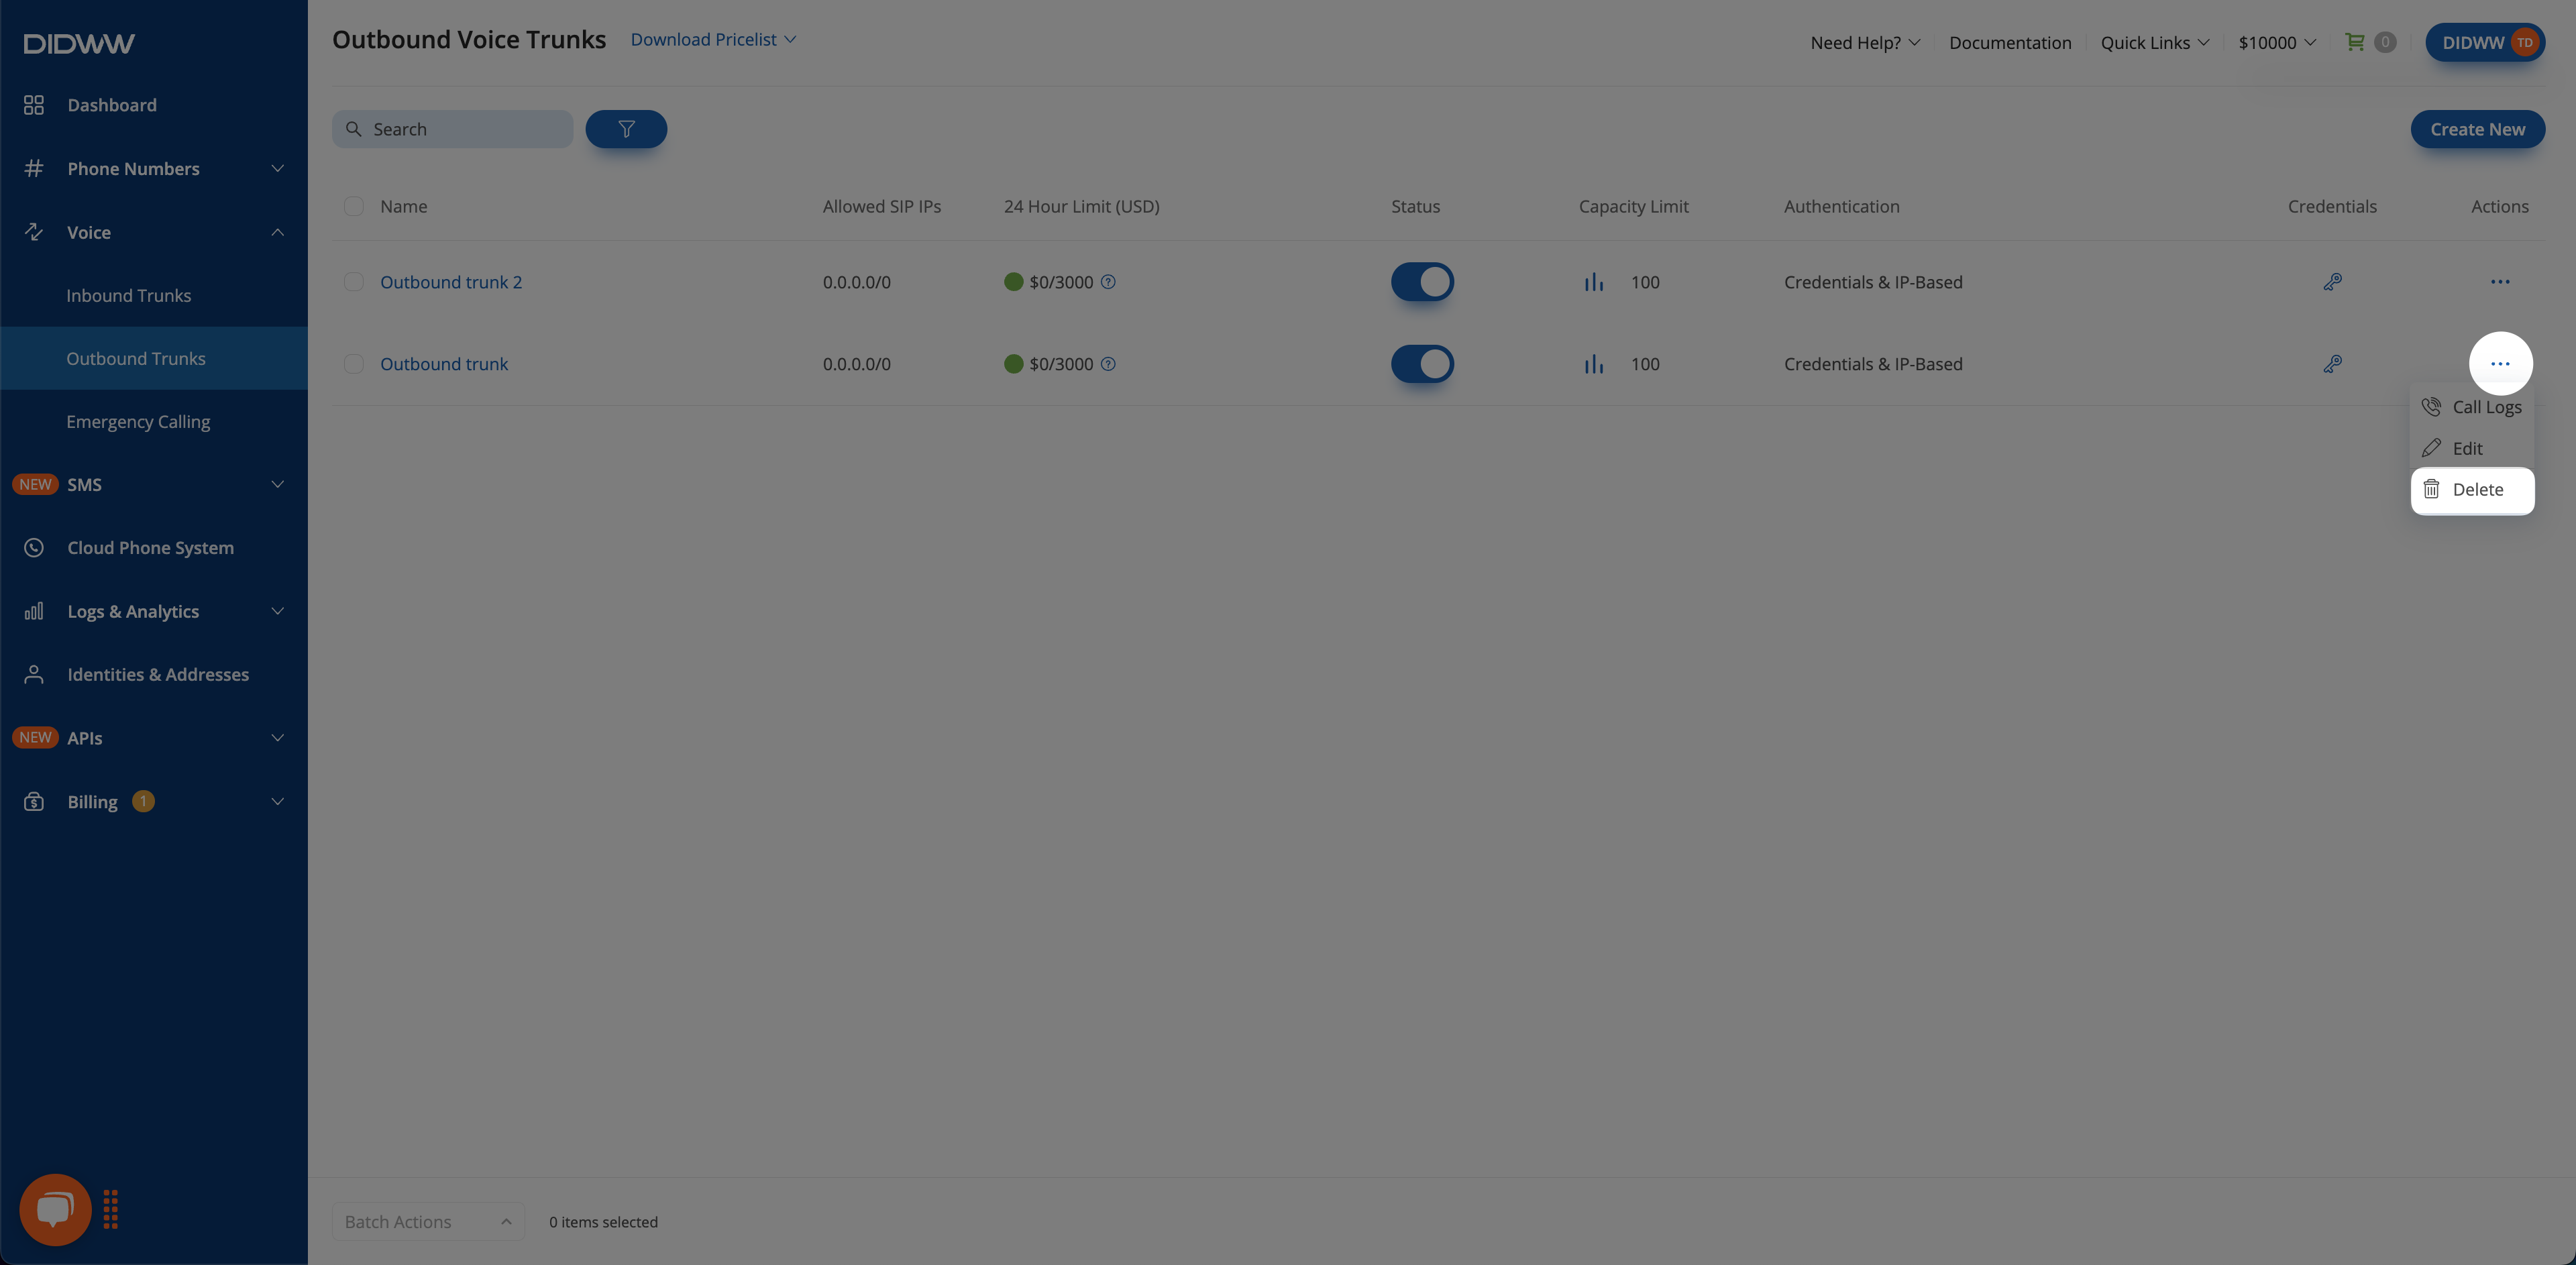
Fig. 6. Delete one SIP trunk#
In the Delete Trunk(s) confirmation window, review the selected trunk and click Delete.
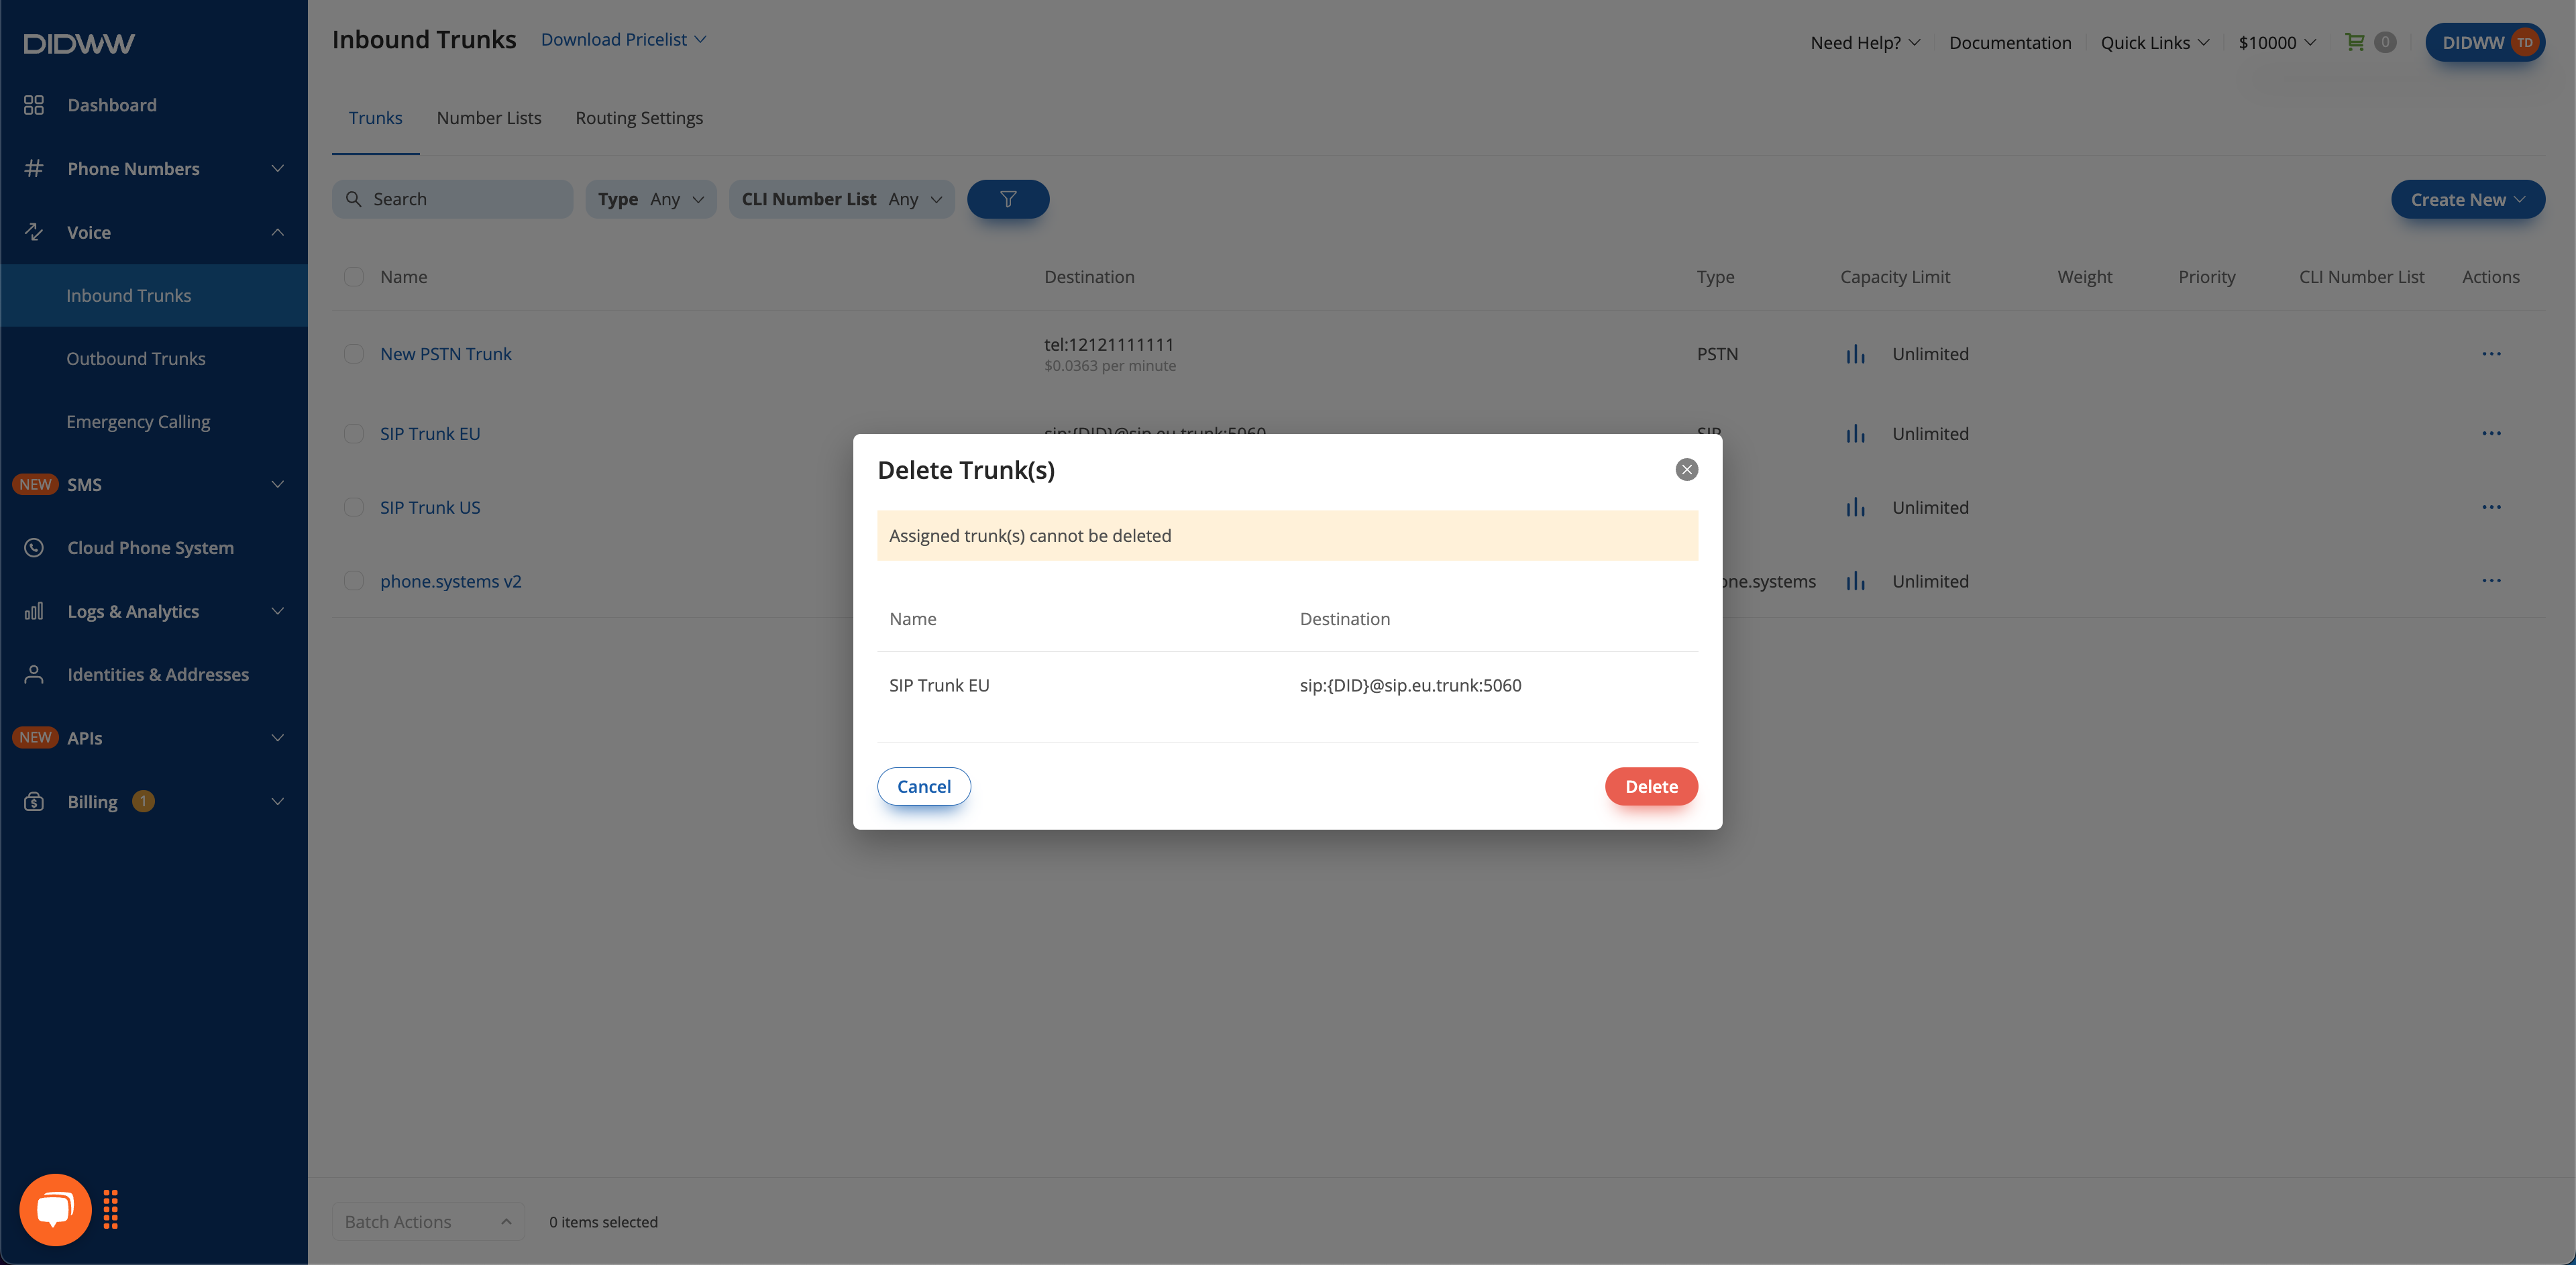
Fig. 7. Confirm the deletion#
Delete multiple SIP trunks#
Go to Voice > Inbound Trunks.
Select the SIP trunks to delete.
Click Batch Actions > Delete Trunk(s).
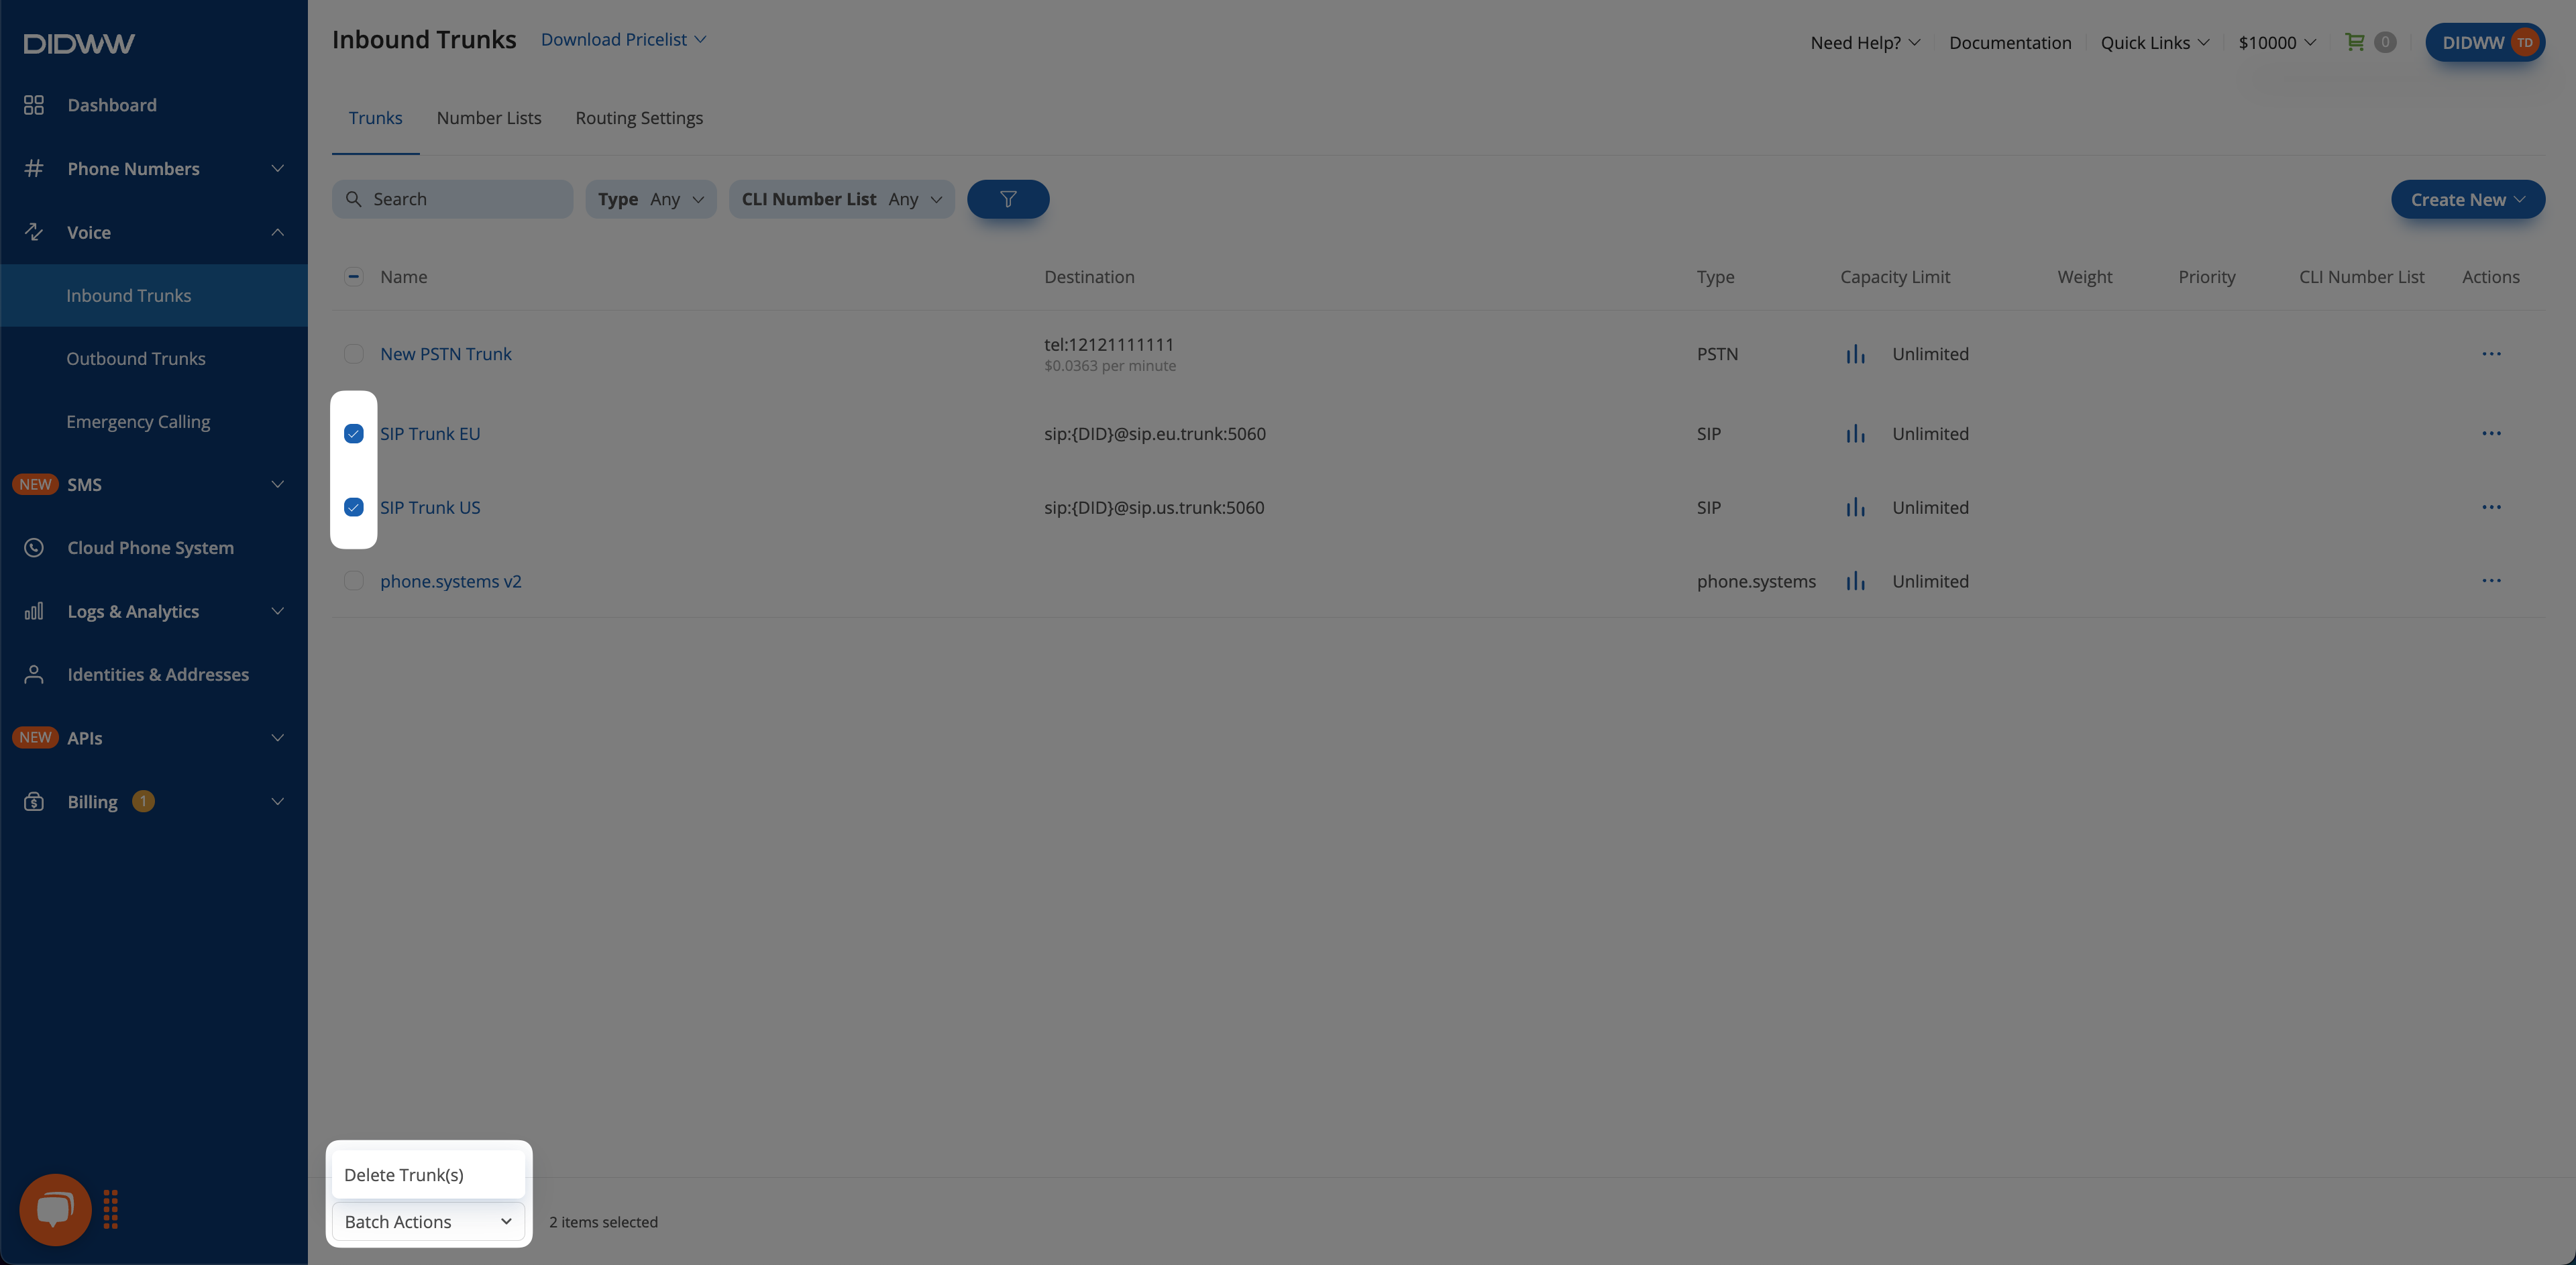
Fig. 8. Delete multiple SIP trunks#
In the Delete Trunk(s) confirmation window, review the selected trunks and click Delete.
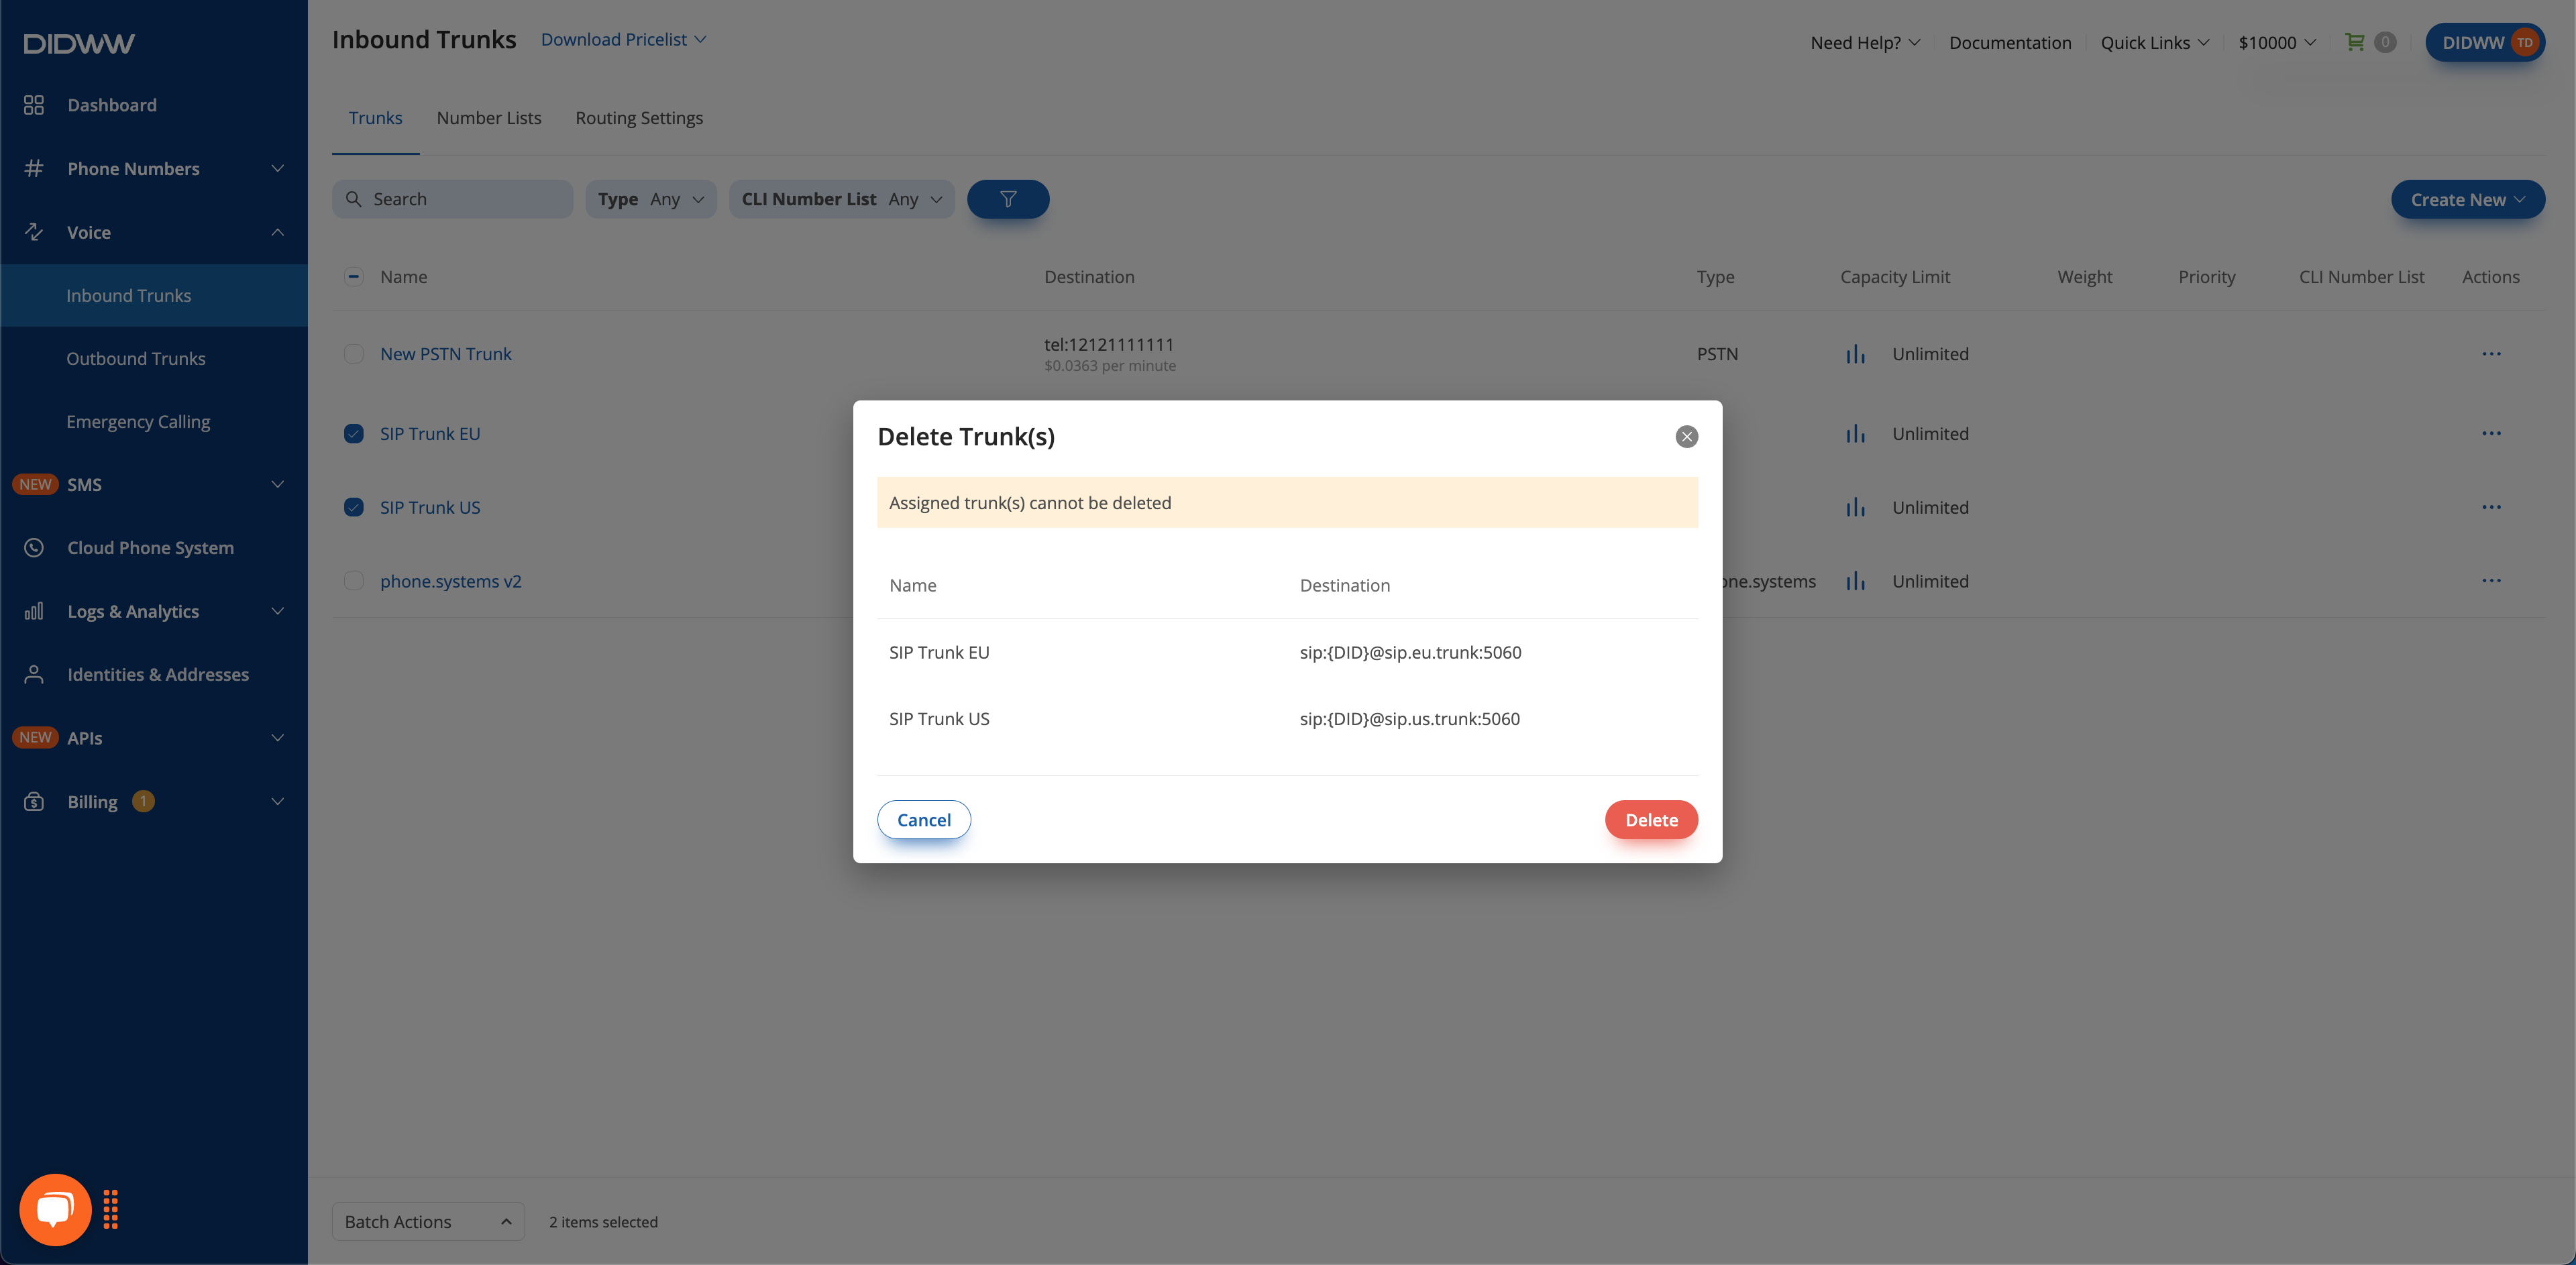
Fig. 9. Confirm the batch deletion#