

Create a Toll-Free Sender ID Verification#
Follow these steps to submit US Toll-Free DID numbers for verification before using them to send A2P SMS messages.
Before you begin#
Review Toll-Free Sender IDs to confirm that this Sender ID type matches your messaging use case.
Make sure your DIDWW account has an active US Toll-Free DID number that supports Outbound A2P SMS. See Buy Numbers and Supported feature filters.
Create a business identity and address before you begin, or create them during Step 2: Enter general details. See Manage identities and addresses.
Review Compliance content requirements before preparing your business, campaign, consent, and sample-message information.
Step 1: Open the verification form#
In the DIDWW User Panel, go to SMS > Sender ID Verifications.
Open the Get Started tab.
Find the Toll-Free Sender ID type and click Create New.
Alternatively, on the Verifications tab, open Create New and select the Toll-Free Sender ID type.
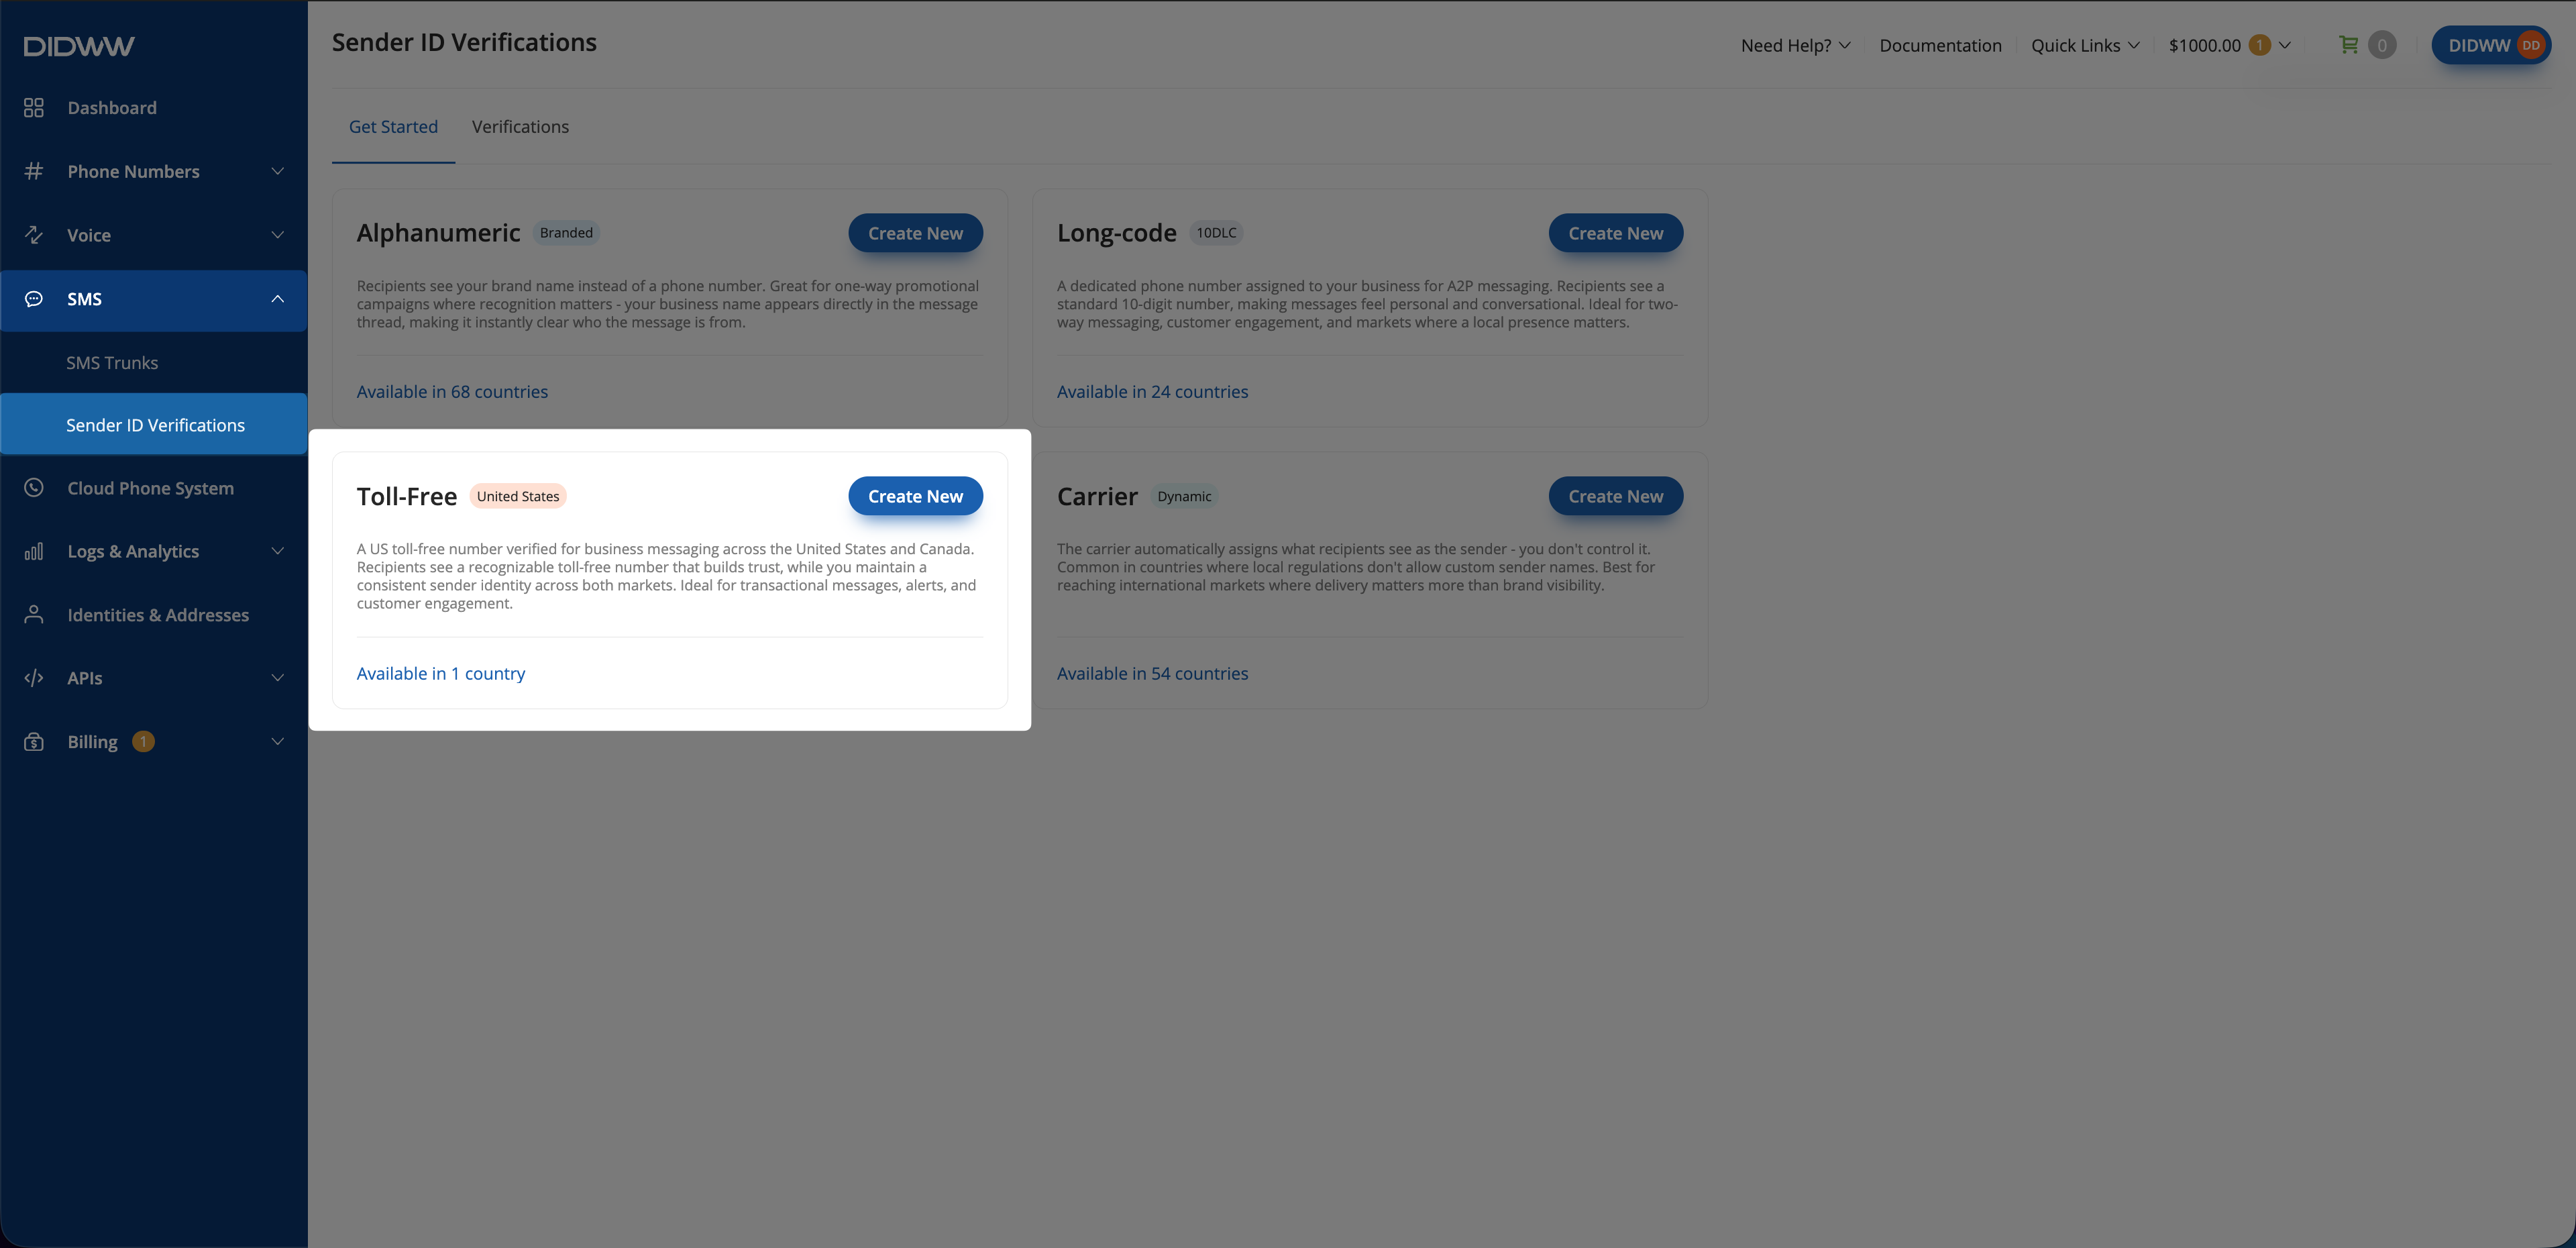
Fig. 1. Open the Toll-Free verification form.#
Step 2: Enter general details#
Enter a Friendly name.
Review the Pricing and Identity Requirements.
Select an existing business Identity and Address, or create them during this step.
Click Next.
Important
A DID number can be linked to only one identity. If a number already uses an identity for DID registration or another service, select the same business identity for the Toll-Free Sender ID Verification.
If the number does not have an identity, you can use the business identity selected during this step. Personal identities cannot be used for a Toll-Free Sender ID Verification.
For field descriptions, see Toll-Free verification setup fields.
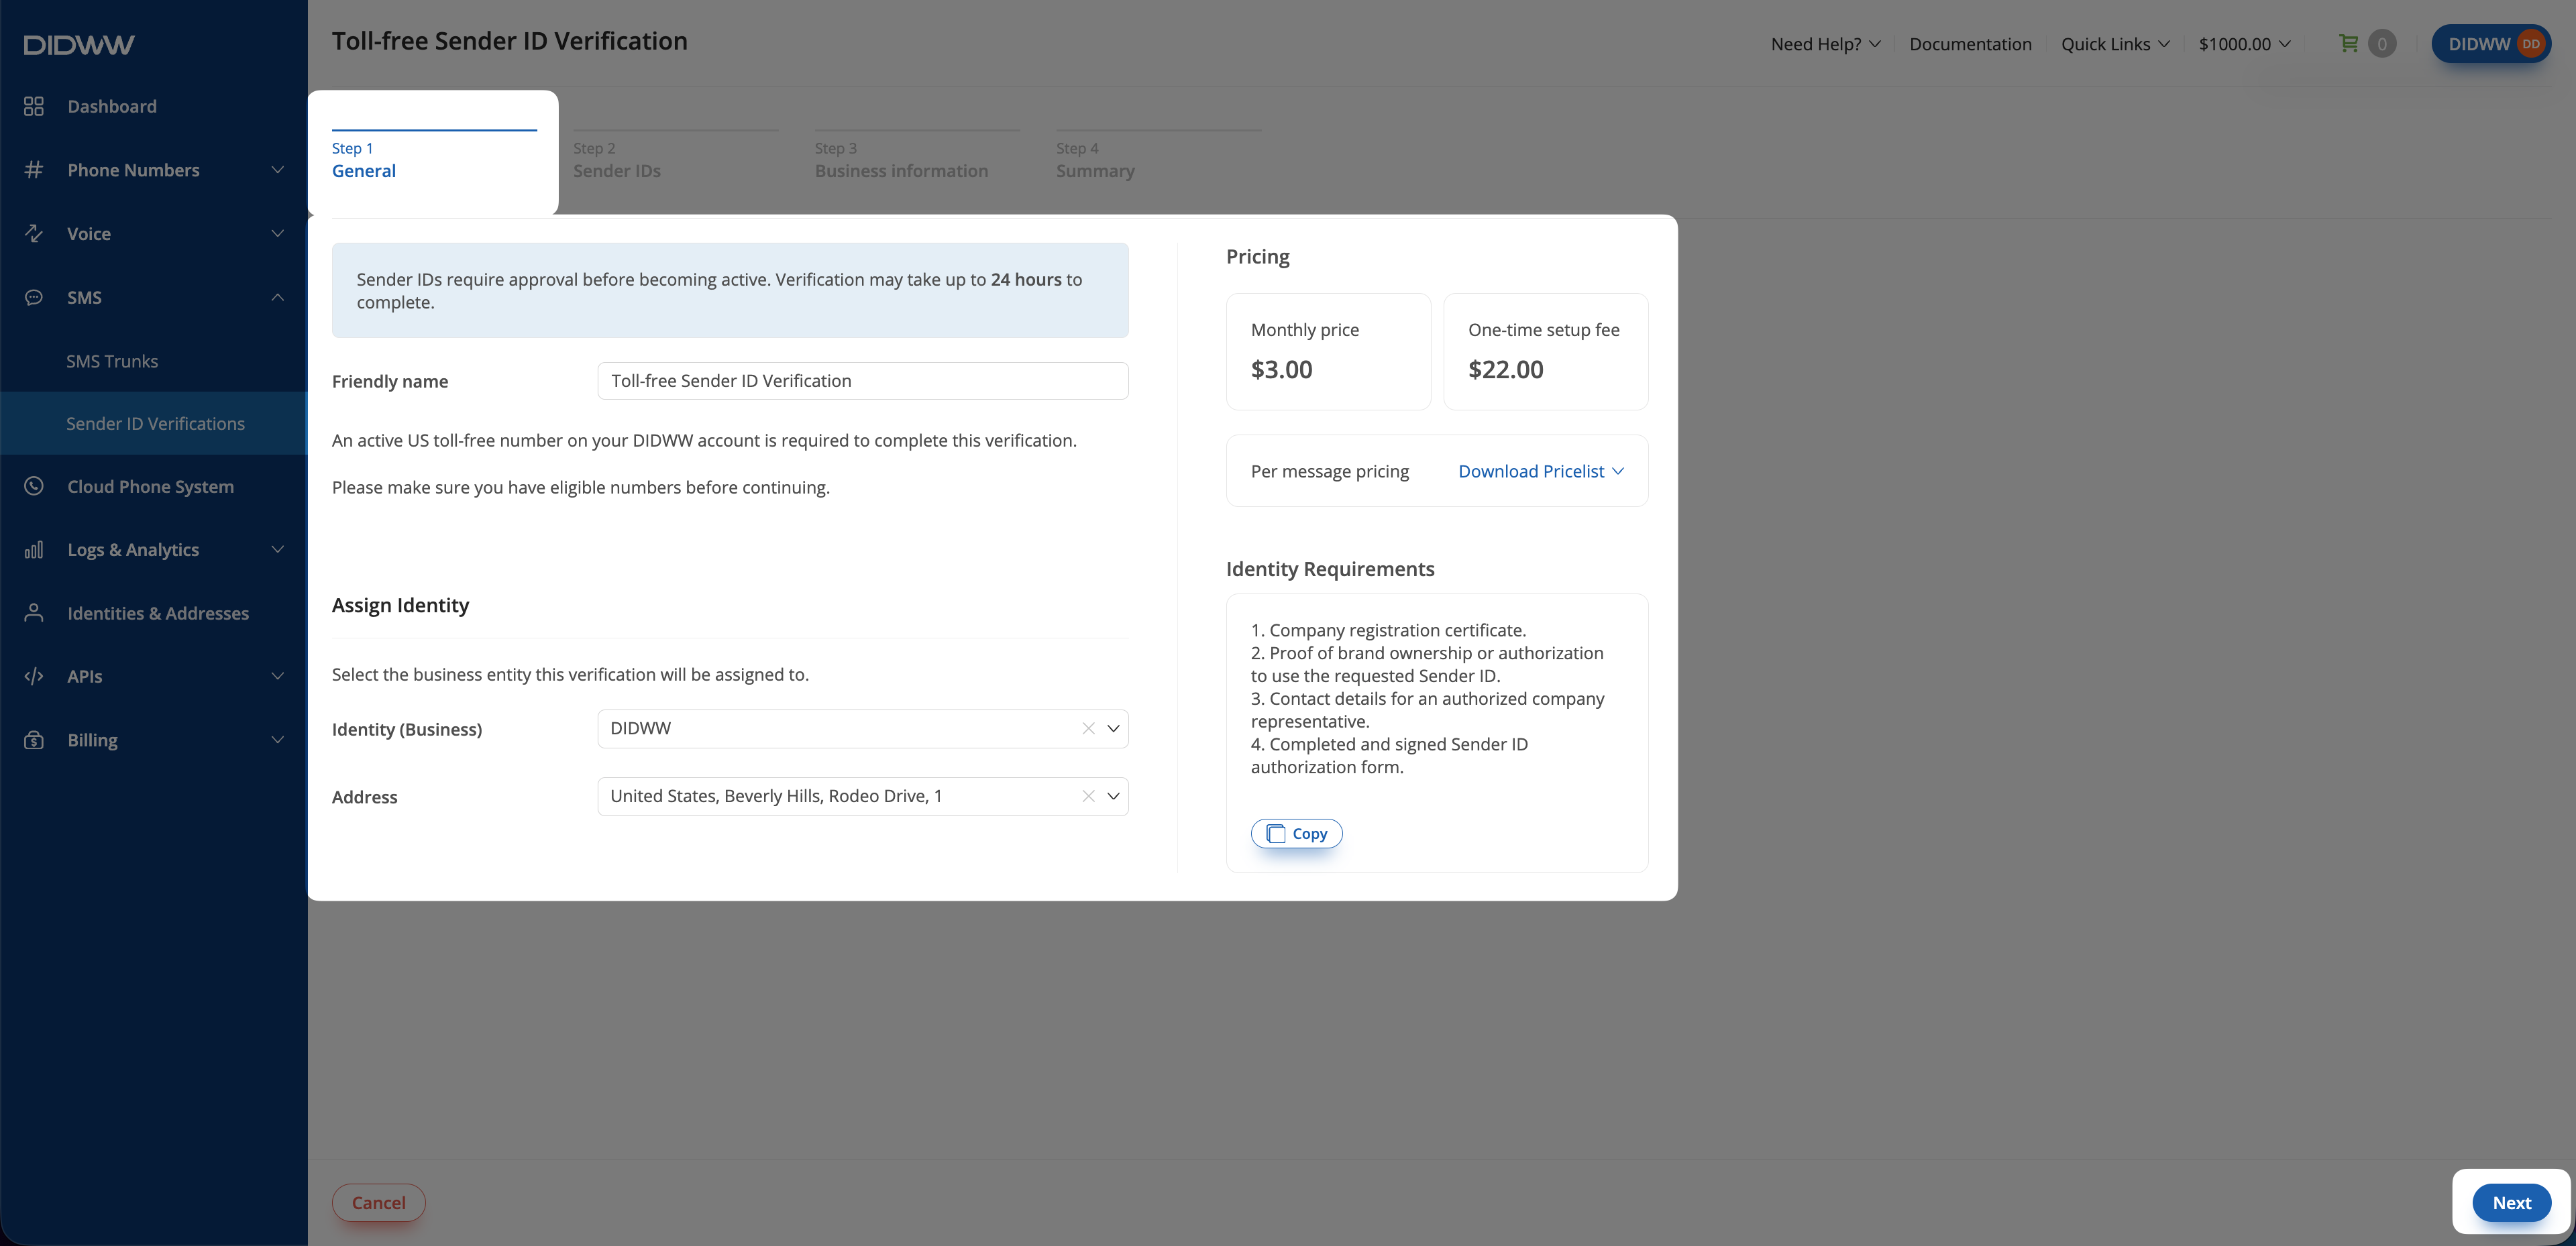
Fig. 2. General.#
Step 3: Select Sender IDs#
Under Available source numbers, select the eligible United States Toll-Free DID numbers to verify.
Move the selected numbers to Allowed source addresses.
Review the selected Sender IDs and click Next.
Note
You can include up to 49 Sender IDs in one verification.
Use the DID number and Description filters to narrow the list of available numbers. To remove all numbers from Allowed source addresses, click Remove all.
Only DID numbers that meet all the following requirements appear under Available source numbers:
The number is an active US Toll-Free DID number.
It supports Outbound A2P SMS.
It is not assigned to another Sender ID Verification.
It has no assigned identity or uses the business identity selected in Step 2: Enter general details.
Numbers linked to a different business identity or a personal identity are not available for selection.
If no numbers appear, check whether your existing numbers meet these requirements. To purchase a new number, see Buy Numbers.
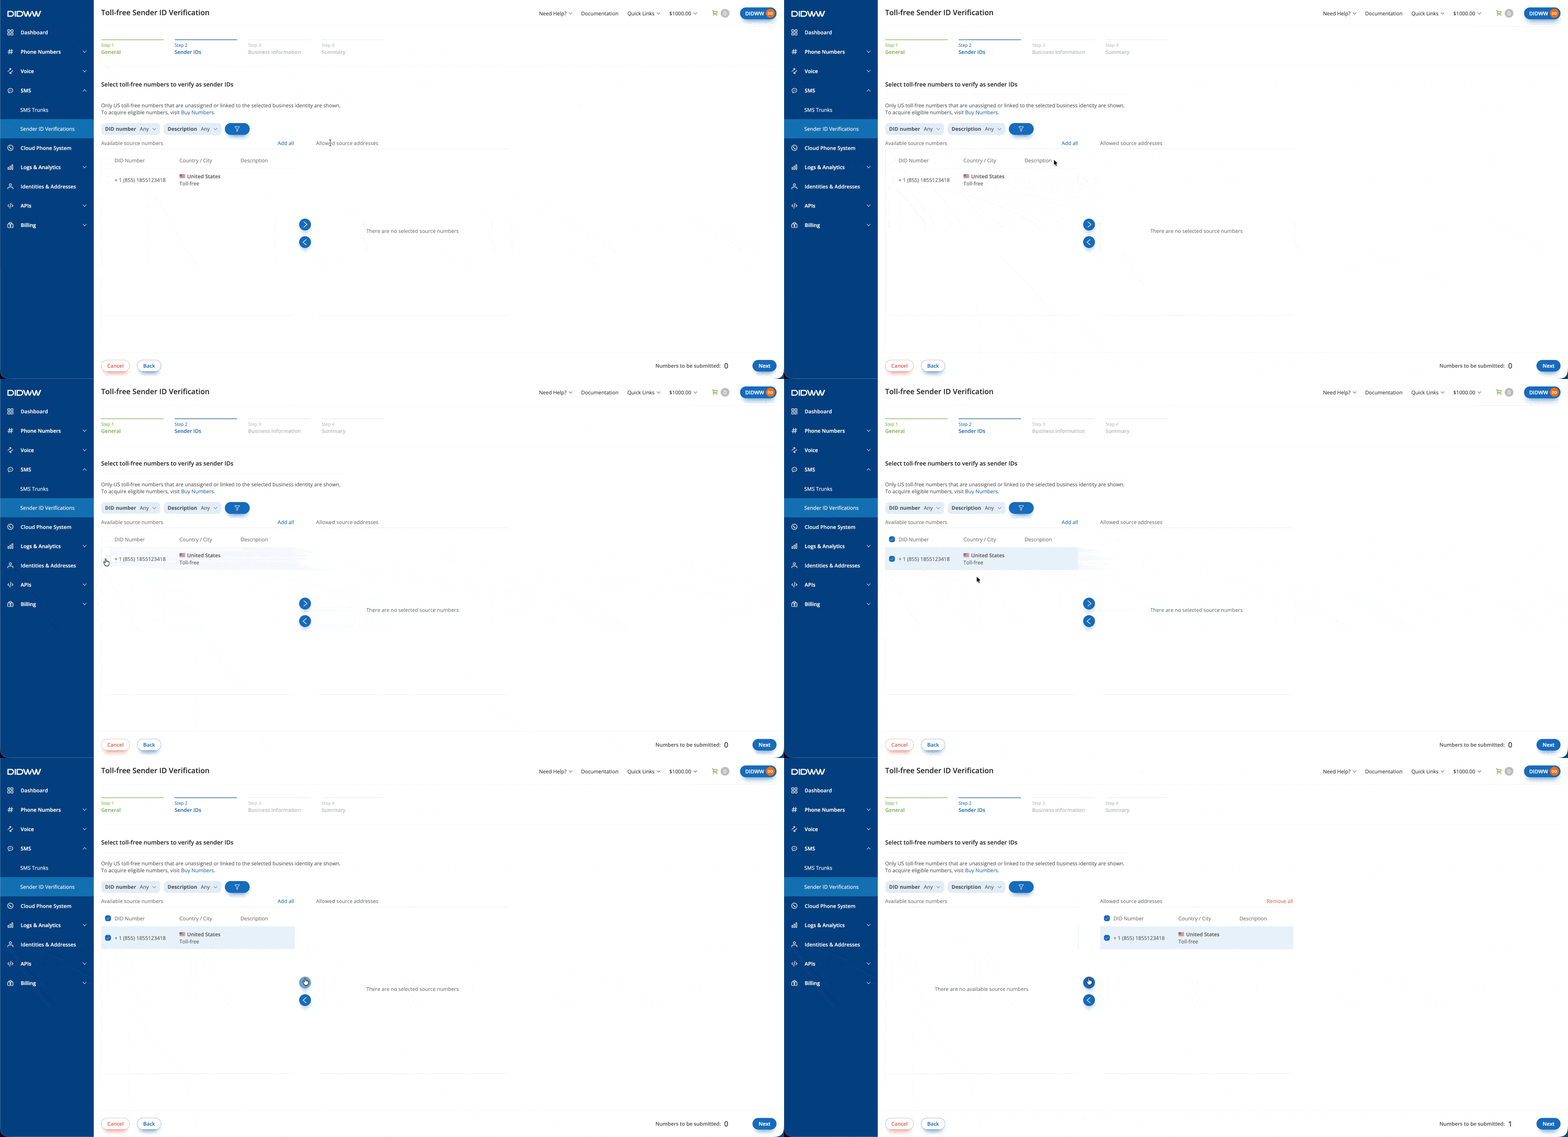
Fig. 3. Select Sender IDs.#
Step 4: Enter verification details#
Enter the business registration information.
Enter the Website.
Indicate whether the business is a Fortune 500 or 1000 company.
Select the Use case type.
Enter the Campaign description.
Under How will customers opt in?, select one or more methods: Through my website, Through my app, Verbal agreement, or Physical form.
If you select Through my app or Physical form, upload the requested screenshots or scans of the opt-in form.
Enter the Detailed opt-in flow description and select the required opt-in confirmation checkbox.
Enter two representative messages in Sample content messages #1 and Sample content messages #2.
If the messages contain URLs or phone numbers, list them in the appropriate fields.
Describe where customers can find the Toll-Free numbers and upload supporting screenshots when applicable.
Enter the expected message volume.
Indicate whether the messages promote a commercial product.
Select whether this traffic was previously sent using another messaging service. If it was sent using a short code or long number, enter the previous content and numbers used with that service.
Provide links to the privacy policy and terms and conditions.
Click Next.
For field descriptions, see Toll-Free verification details fields.
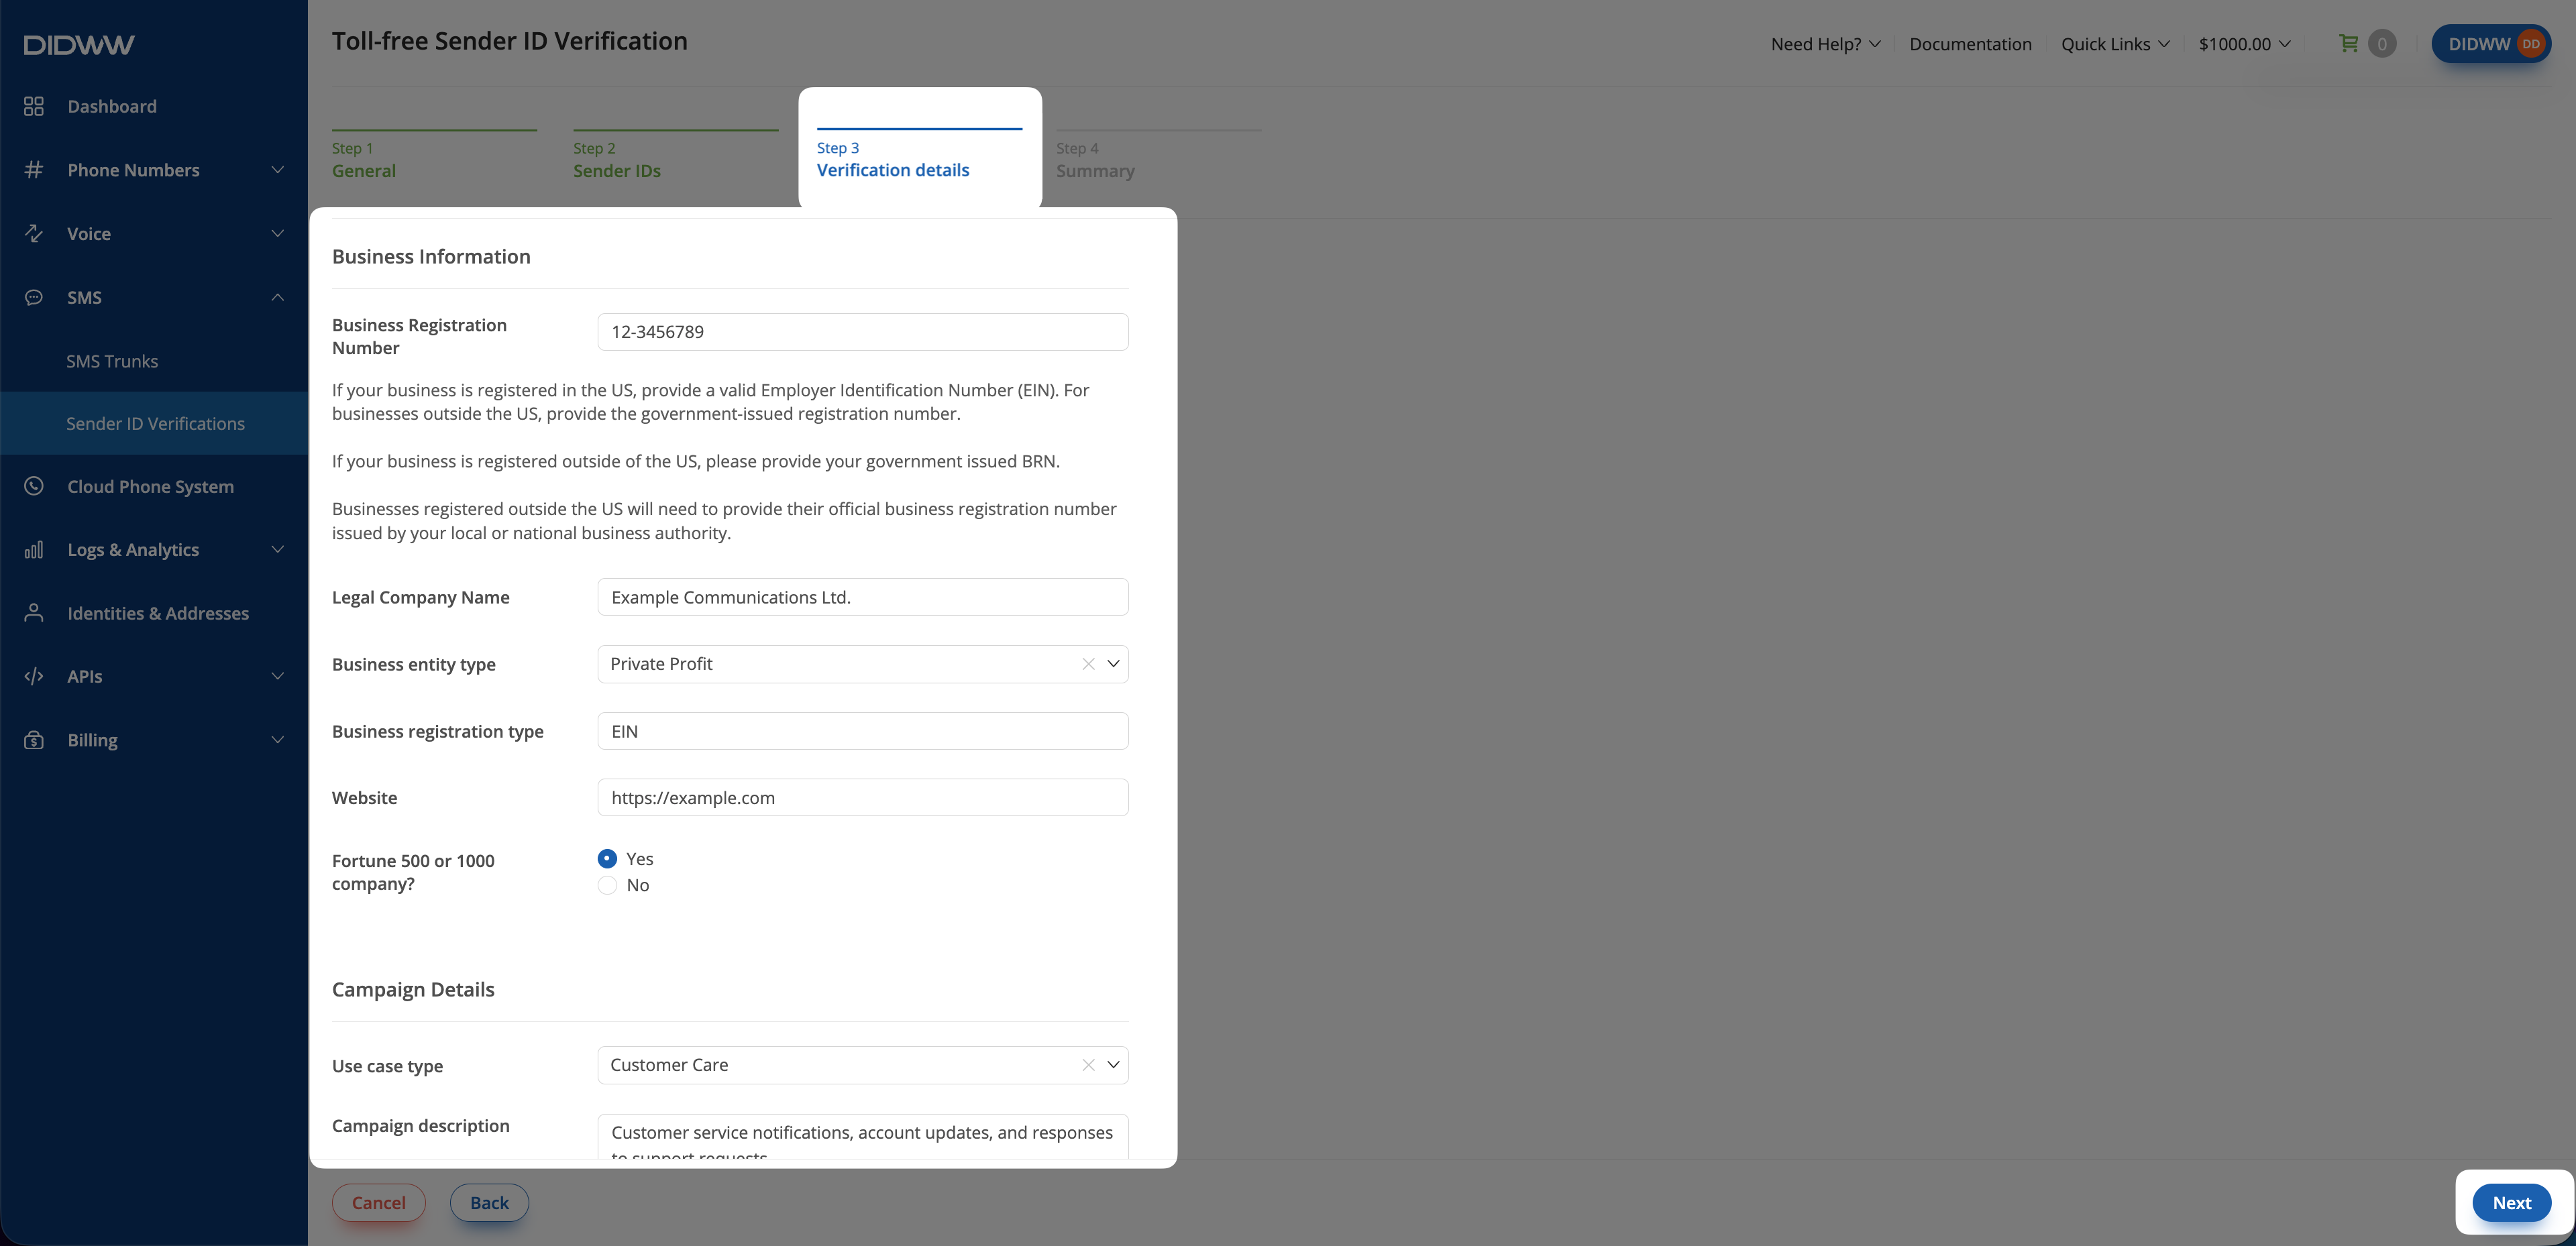
Fig. 4. Verification details.#
Step 5: Review summary and submit#
Review the Verification Details, Identity Details, and Sender IDs. Use Copy or Select All to copy the listed Sender IDs.
Review the estimated verification time and charges under Summary.
Click Submit.
After submission, the verification is added to the Verifications tab on the Sender ID Verifications page. When you open this page, the Get Started tab is displayed by default. Open the Verifications tab to find the submitted verification and use its status to track the review.
The actual review time may vary depending on whether additional information is required.
If the status changes to Changes Required, see Resubmit a Sender ID Verification.
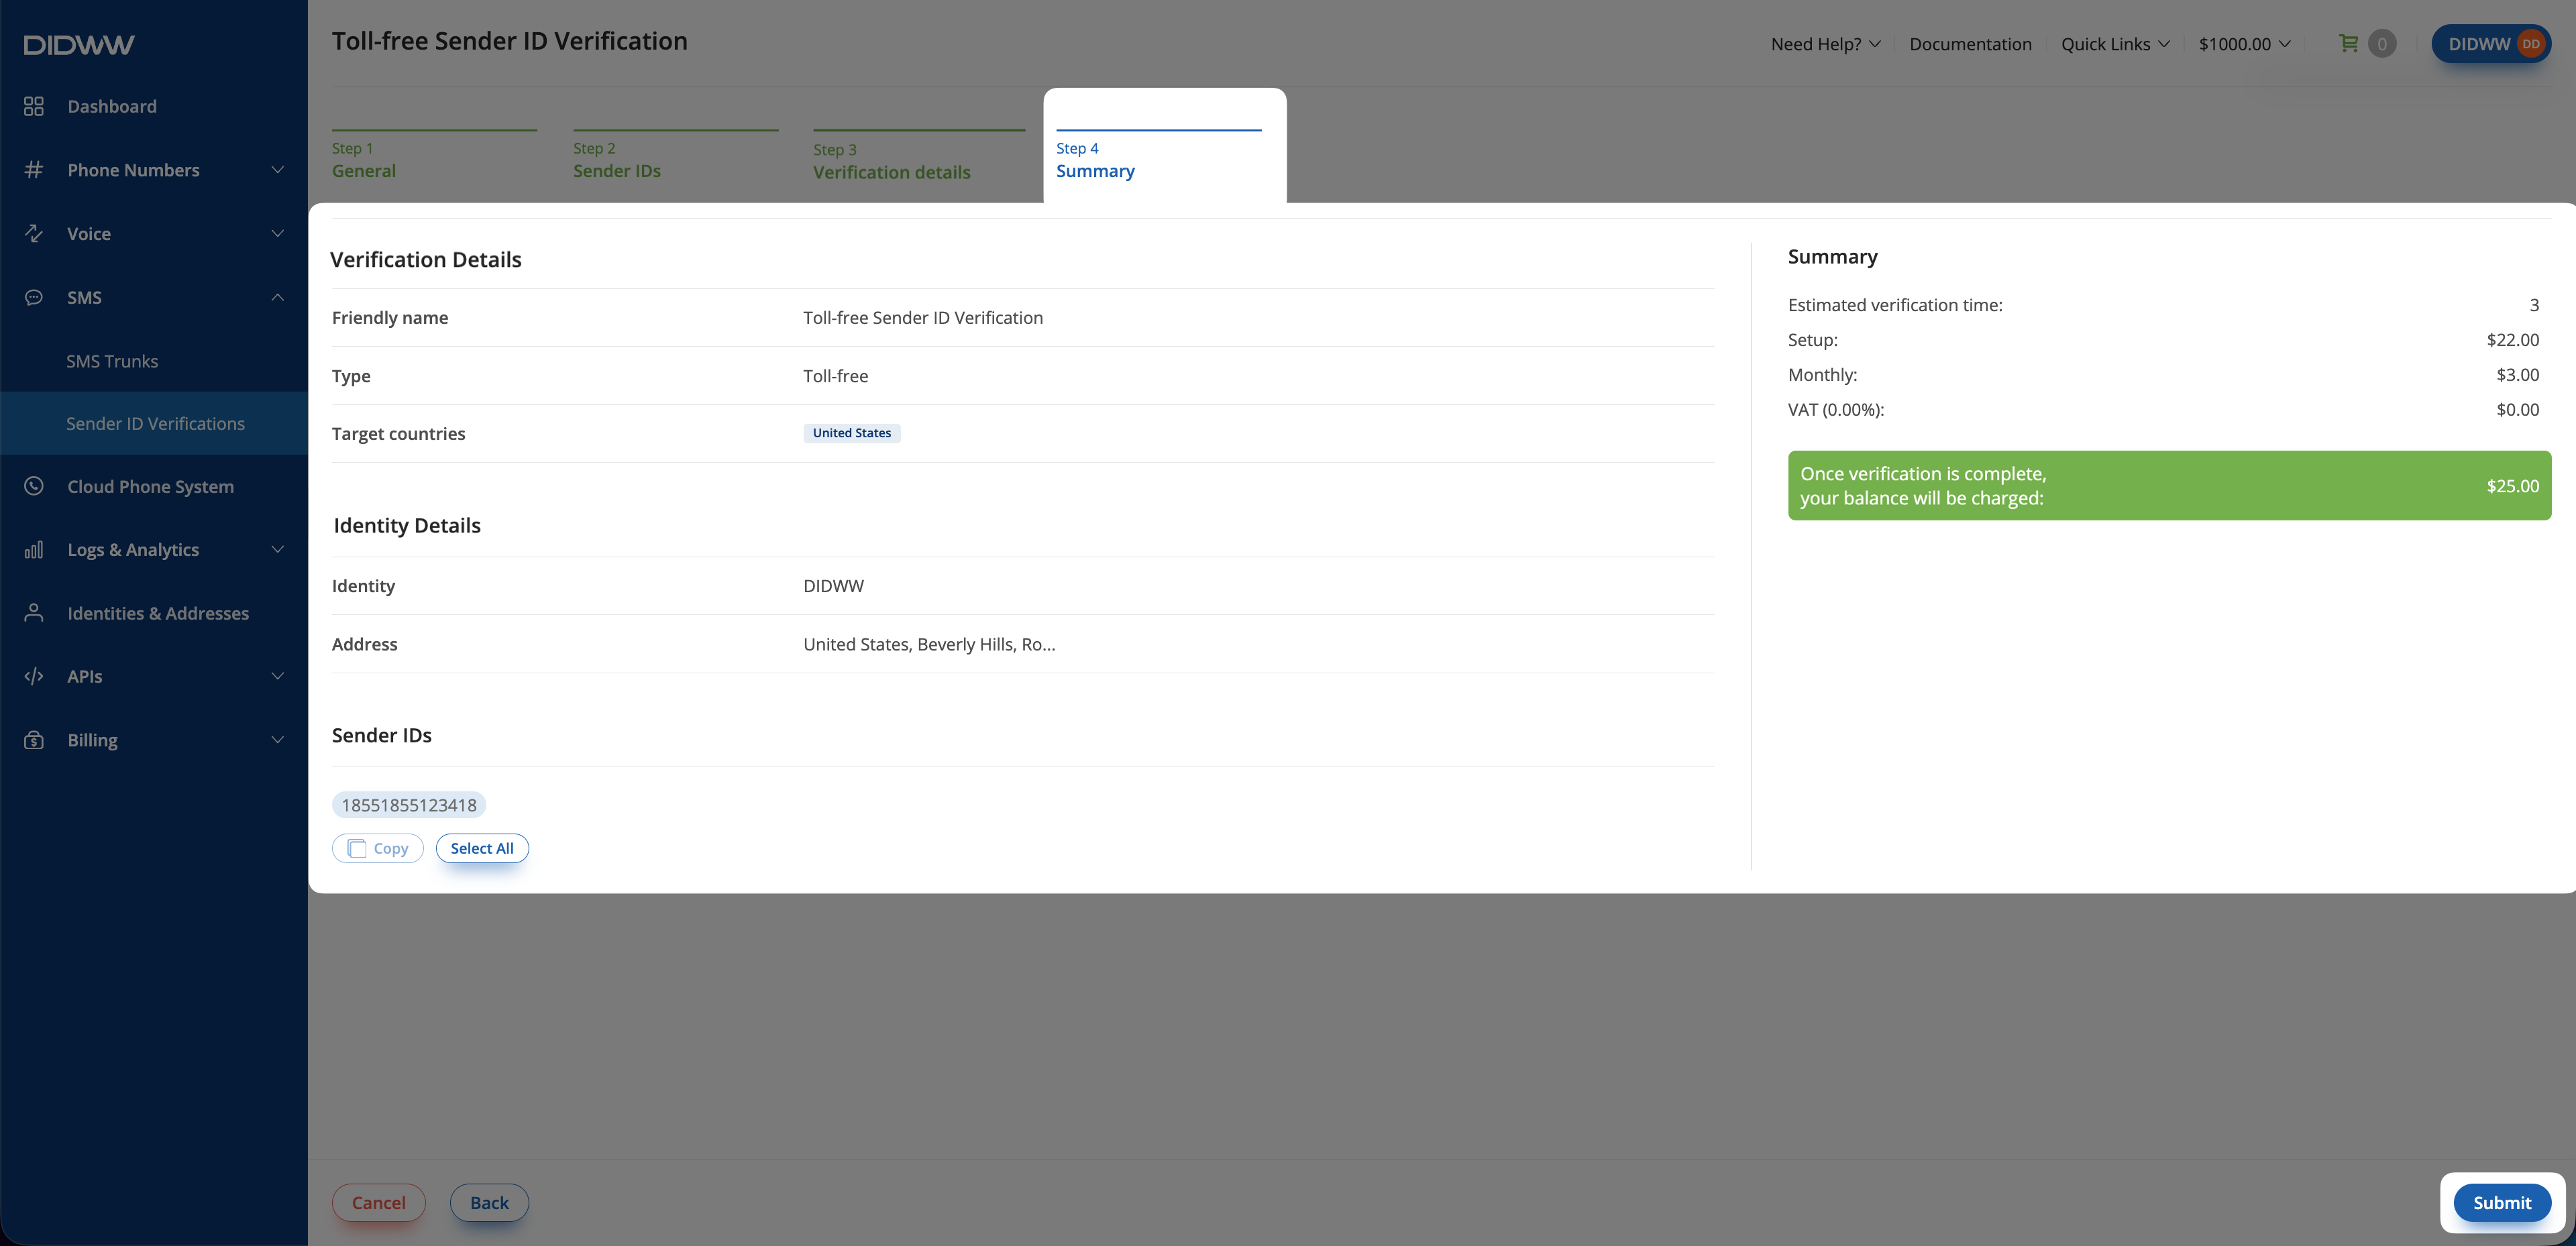
Fig. 5. Summary.#