Manage DID(s) in a group#
Use the Manage DID(s) in Group page to assign DID numbers to a Capacity group or remove them from the group without leaving the Capacity workspace.
Before you begin#
A Capacity group is required before you manage DID numbers in it. See Create a Capacity group.
Assign DID numbers to the group#
Use this flow to move DID numbers from the supported list into the selected Capacity group.
Step 1: Open the manage DID page#
In the DIDWW User Panel, go to Phone Numbers > Capacity.
Select the capacity pool where the group is configured.
Find the Capacity group you want to manage and click Actions > Manage assigned DID(s).
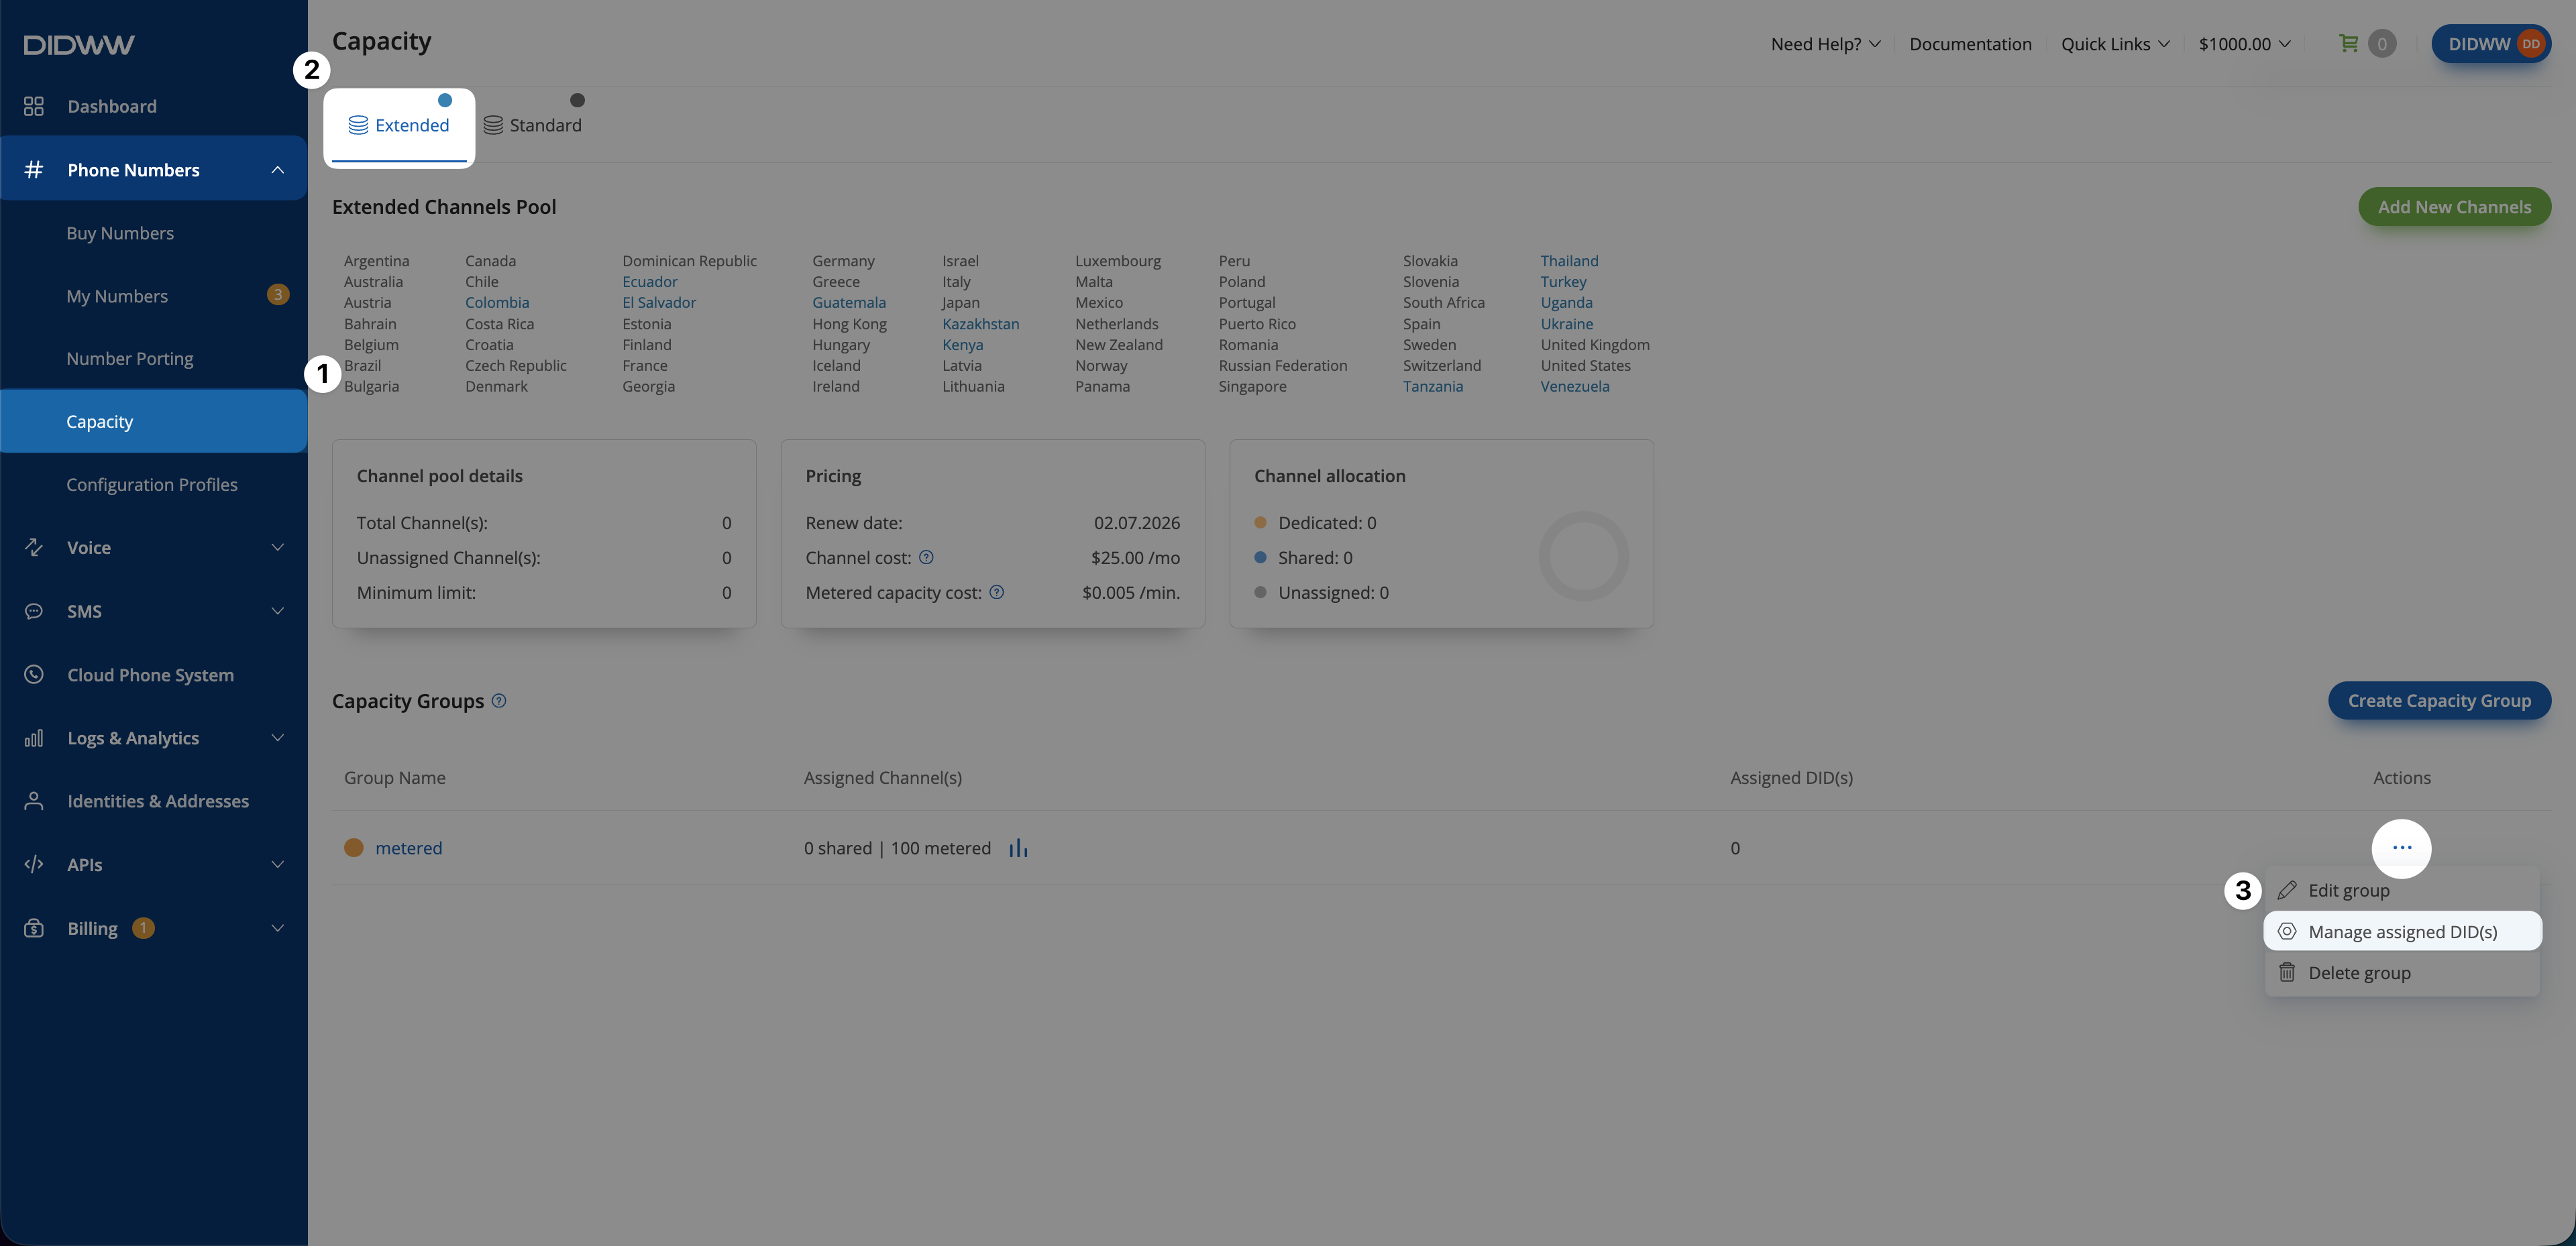
Fig. 1. Open Manage assigned DID(s)#
Step 2: Assign to group#
In the top table, review the DID numbers supported by the selected capacity pool.
Use the filters to narrow the list if needed.
Select the DID numbers you want to add to the group.
Click Assign to Group.
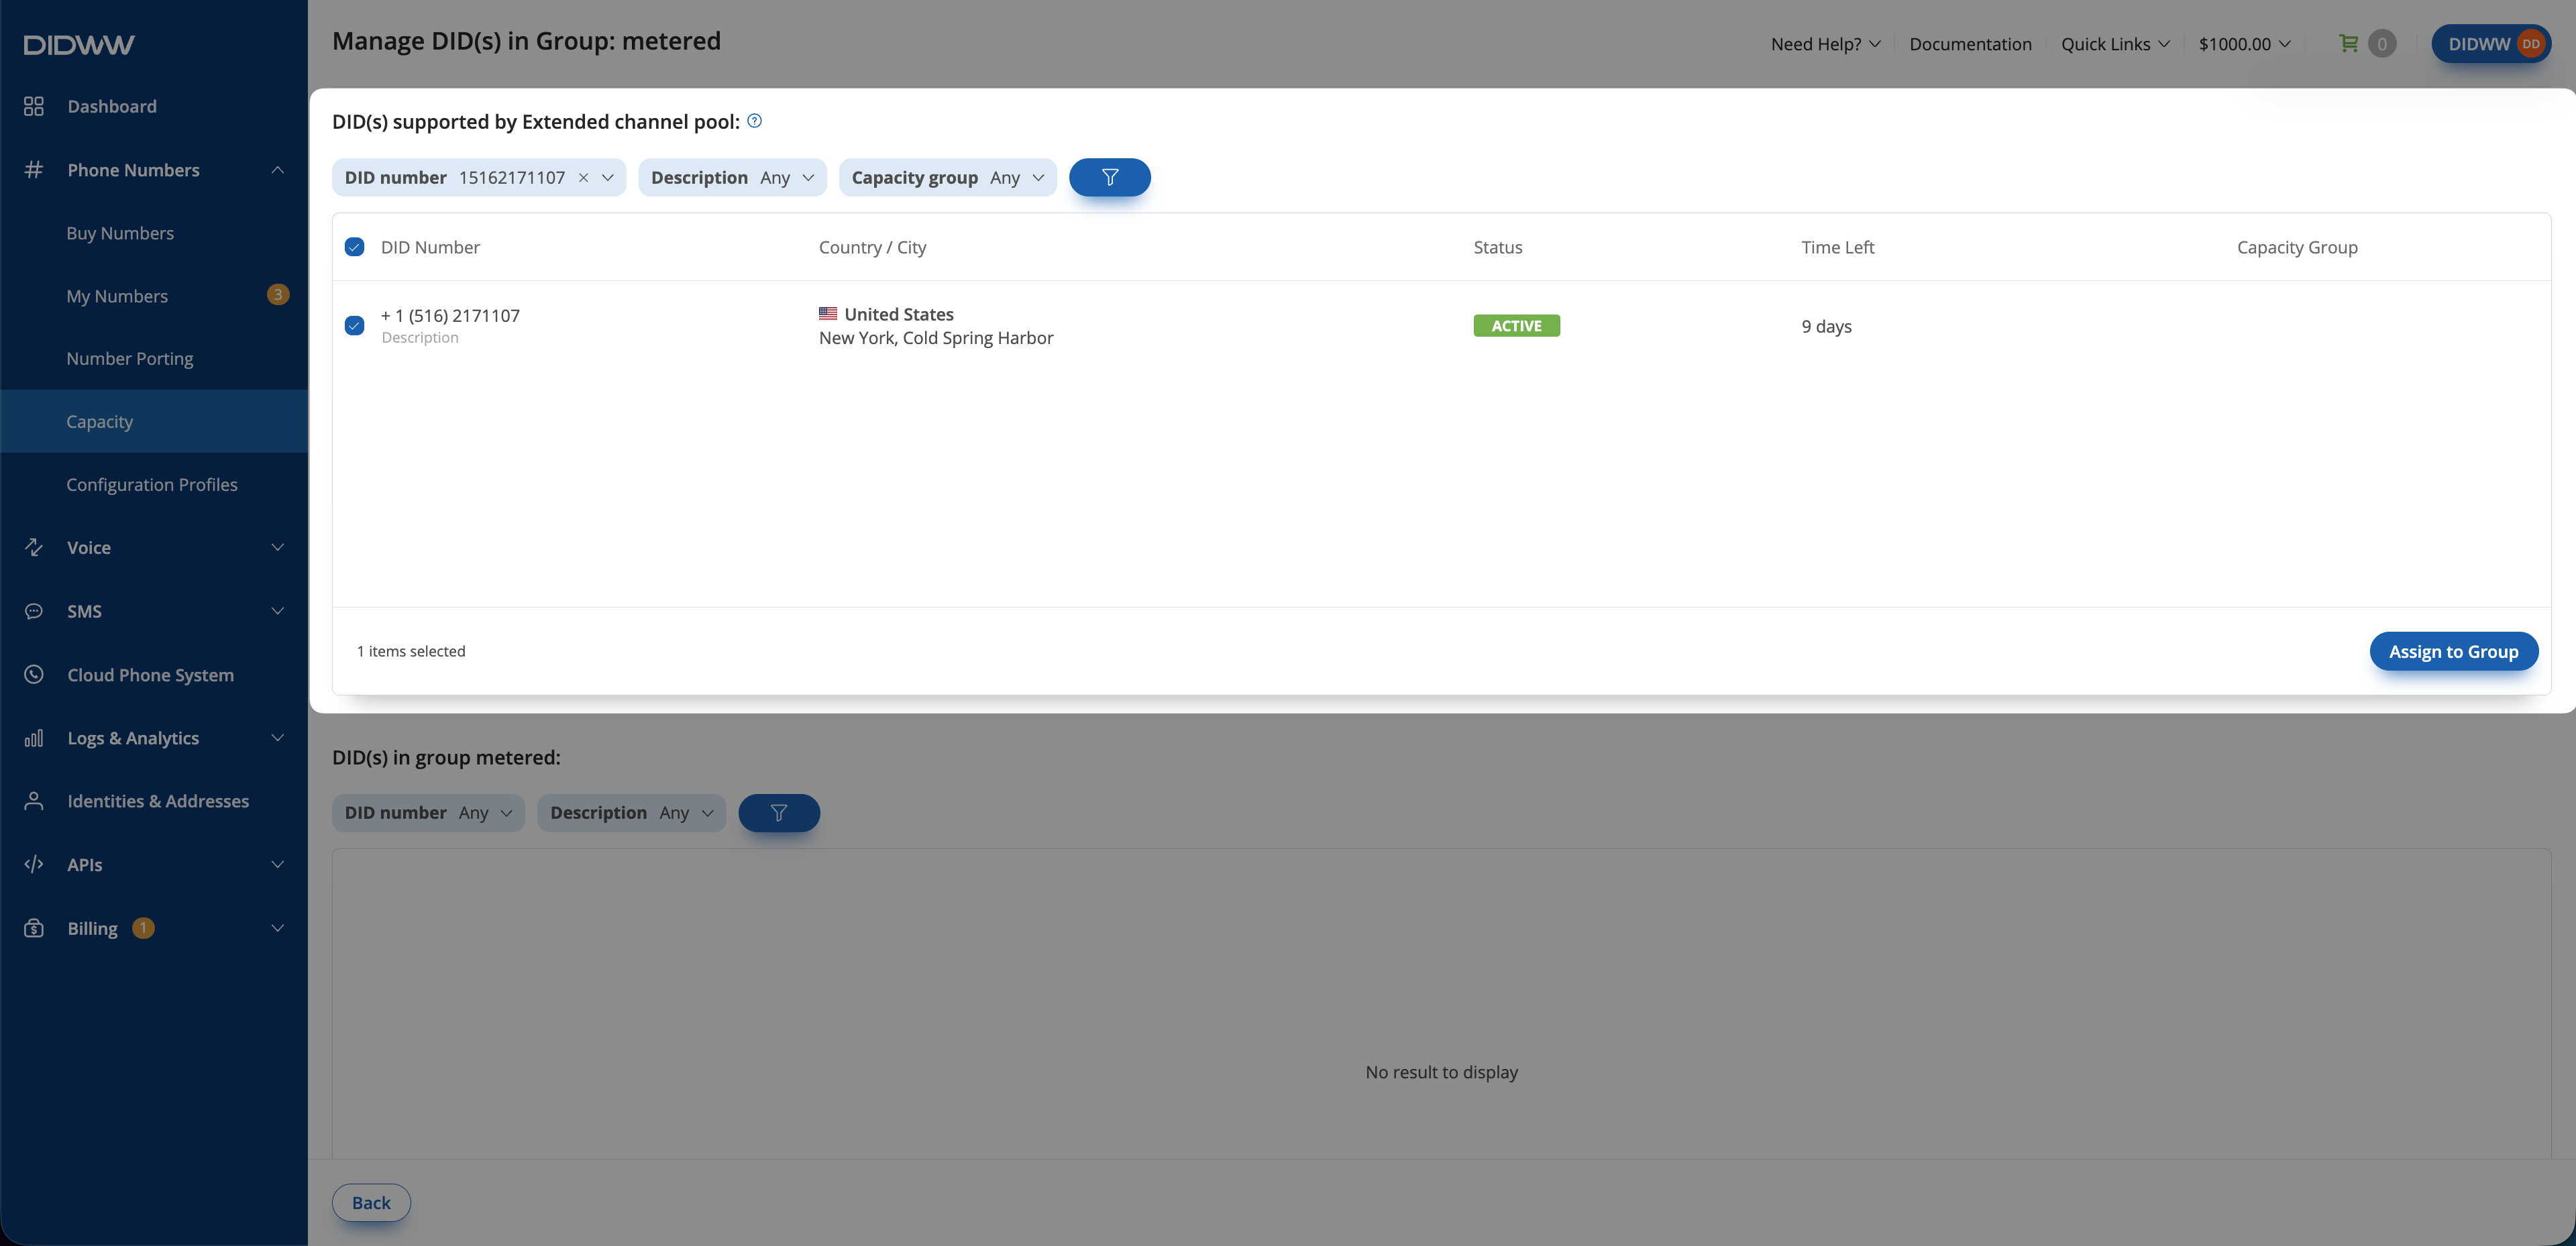
Fig. 2. Assign to Group#
Remove DID numbers from the group#
Use this flow to remove DID numbers from the selected Capacity group.
Step 1: Open the manage DID page#
In the DIDWW User Panel, go to Phone Numbers > Capacity.
Select the capacity pool where the group is configured.
Find the Capacity group you want to manage and click Actions > Manage assigned DID(s).
Fig. 3. Open Manage assigned DID(s)#
Step 2: Remove from group#
In the bottom table, review the DID numbers supported by the selected capacity pool.
Use the filters to narrow the list if needed.
Select the DID numbers you want to remove from the group.
Click Remove from Group.
In the pop-up confirmation window click Remove.
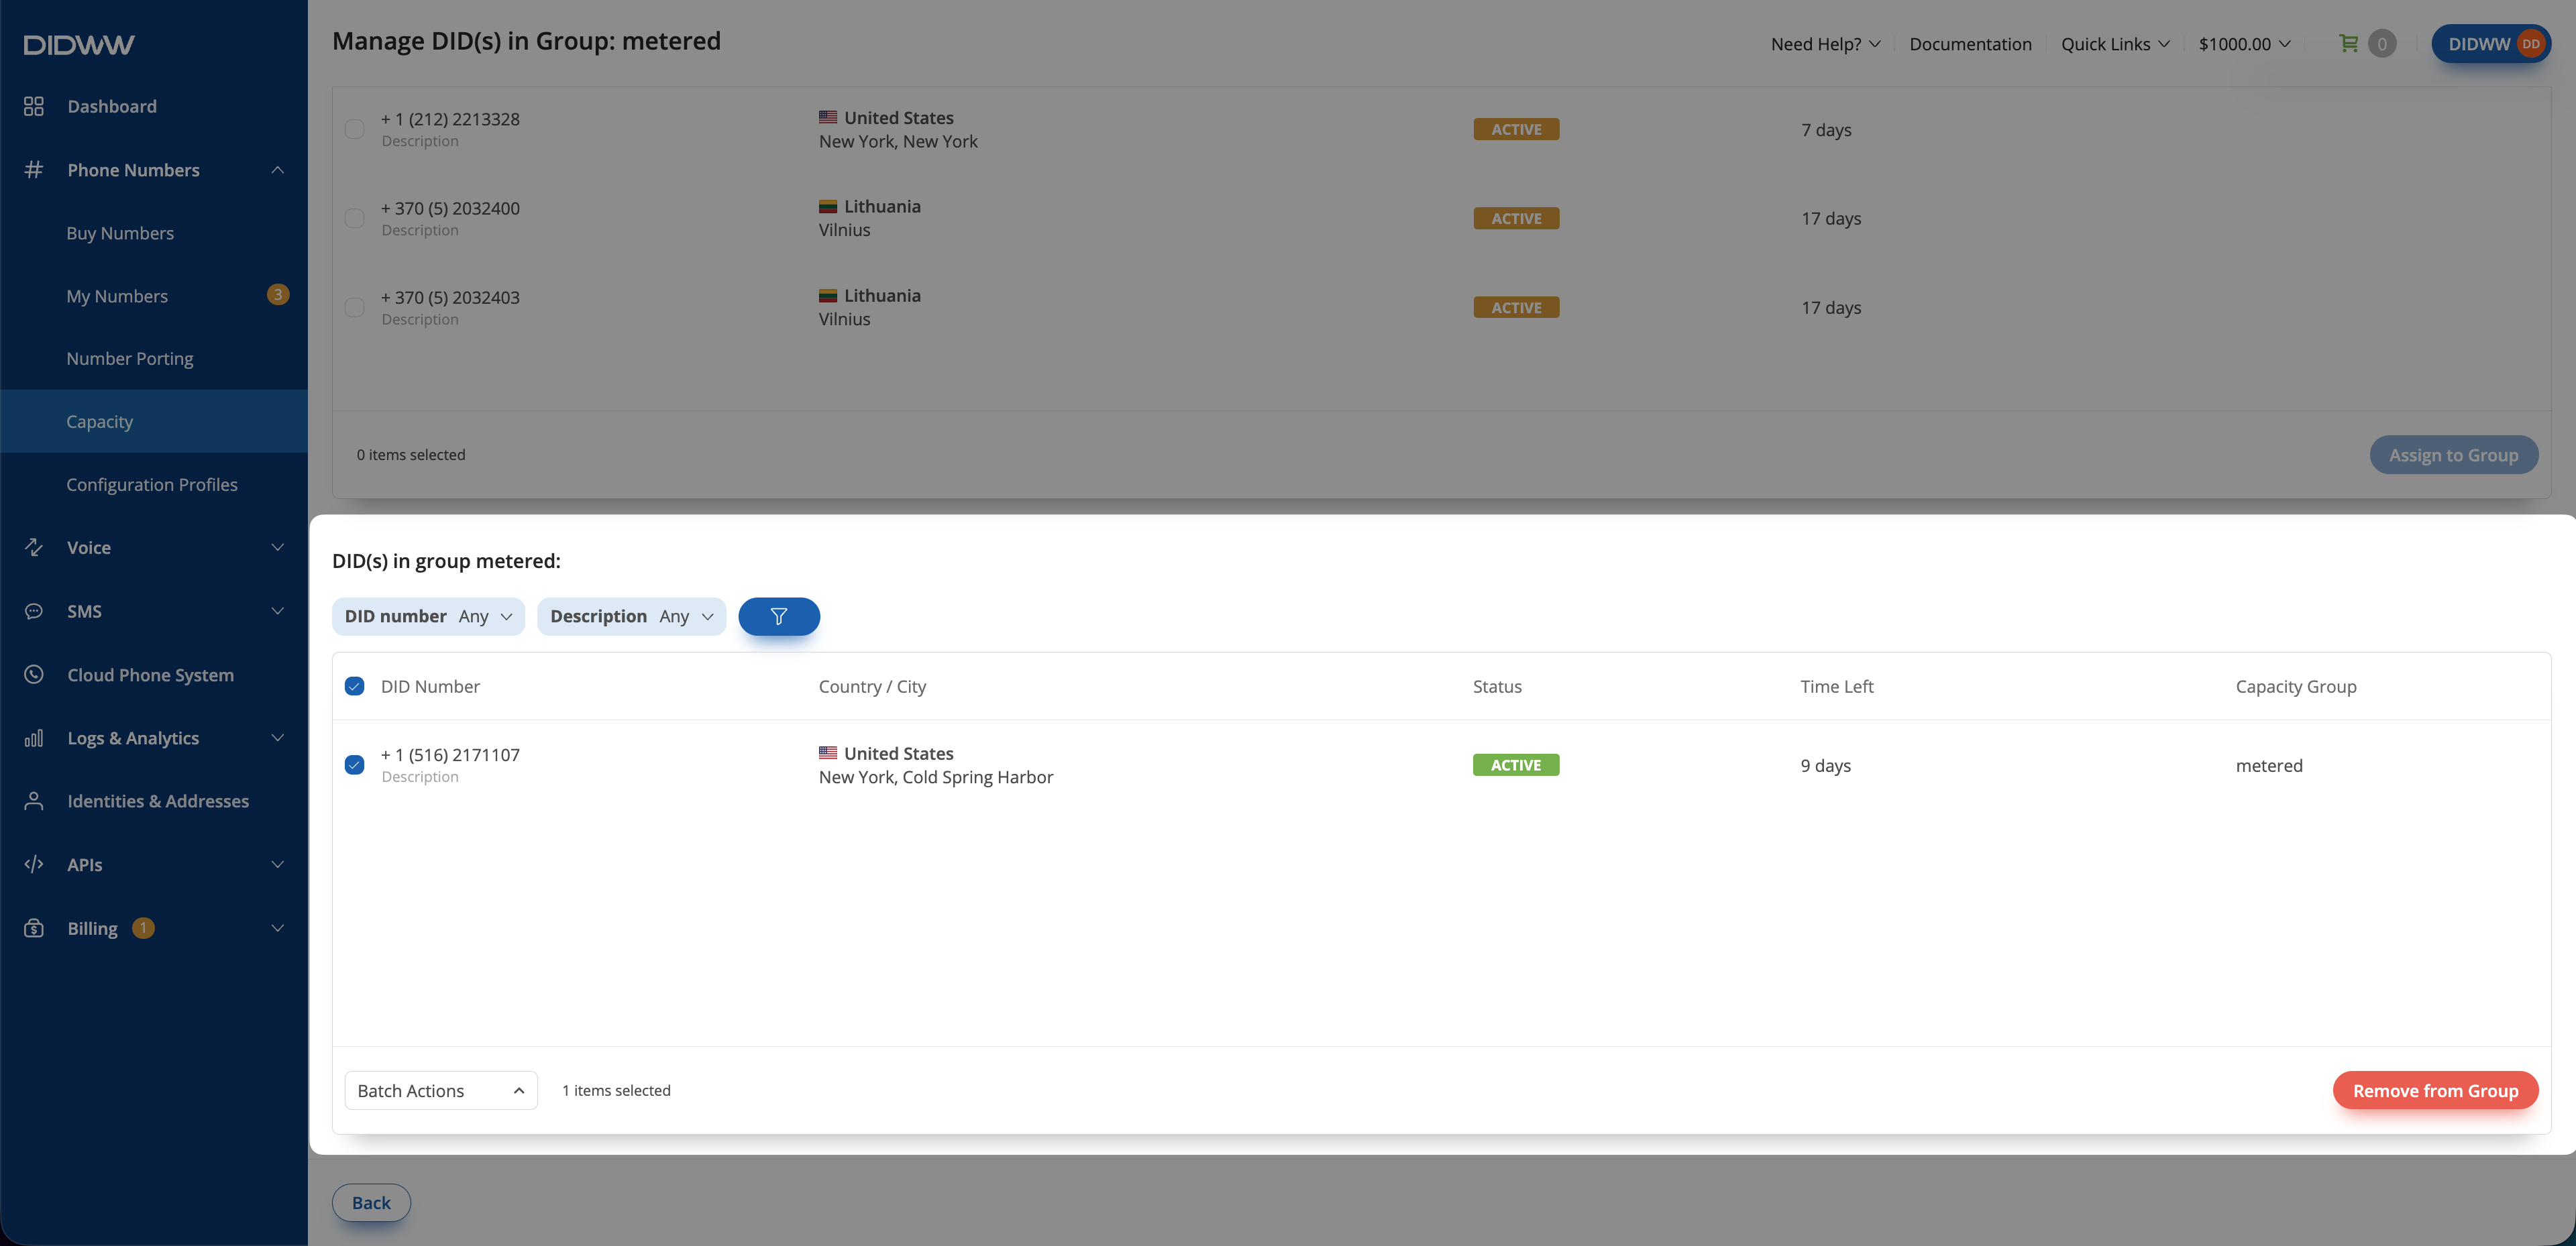
Fig. 4. Remove from Group#