Assign DID numbers to a capacity group#
Assign DID numbers to a Capacity group so they can use the group’s shared channels, metered channels, or both.
Before you begin#
Create the Capacity group before assigning DID numbers to it. See Create a Capacity group.
Choose a Capacity group in the pool that matches the DID numbers you plan to assign. For pool and group behavior, see Capacity groups.
Only DID numbers that support additional Capacity can be assigned to a Capacity group. For capacity modes and channel priority, see How capacity works.
Use this flow to assign one or more DID numbers to an existing Capacity group.
Step 1: Select DID numbers#
In the DIDWW User Panel, go to Phone Numbers > My Numbers.
Select the DID numbers you want to assign to the Capacity group.
At the bottom of the page, click Batch Actions.
Select Update Capacity Group.
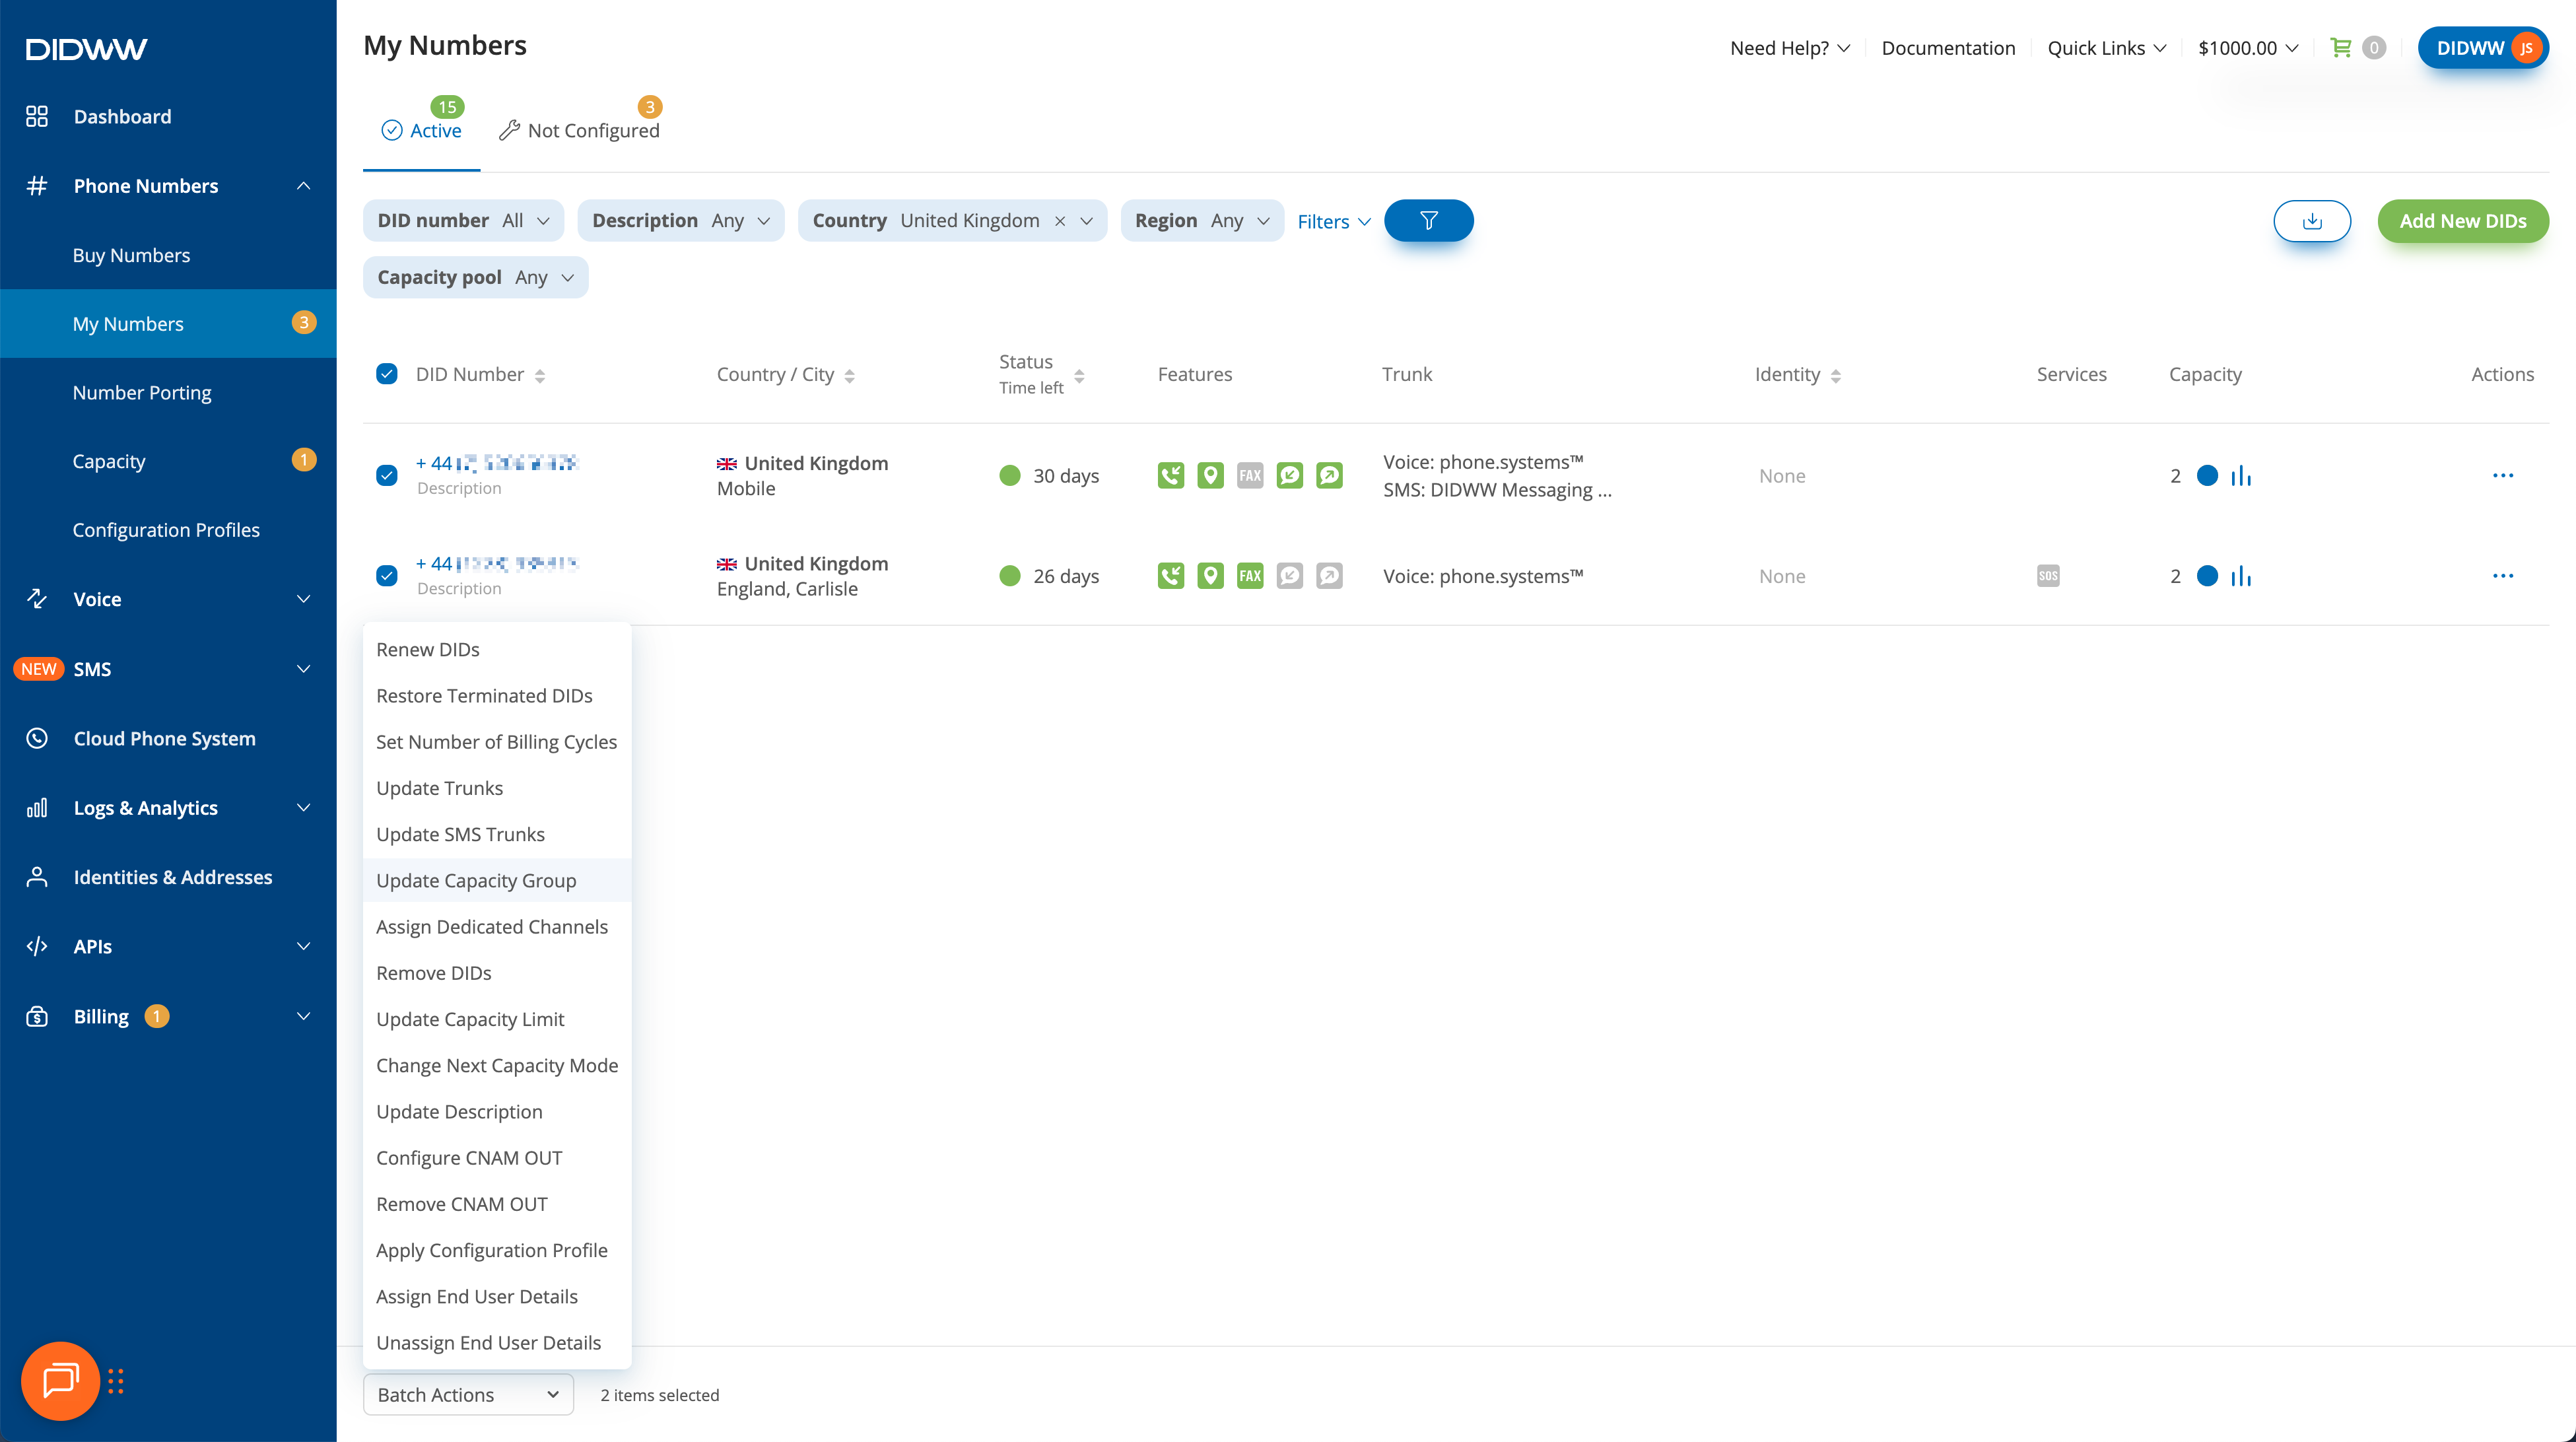
Fig. 1. Select DID numbers and open Batch Actions#
Step 2: Assign the capacity group#
In the Update Capacity Group window, select a Capacity Group.
Click Confirm.
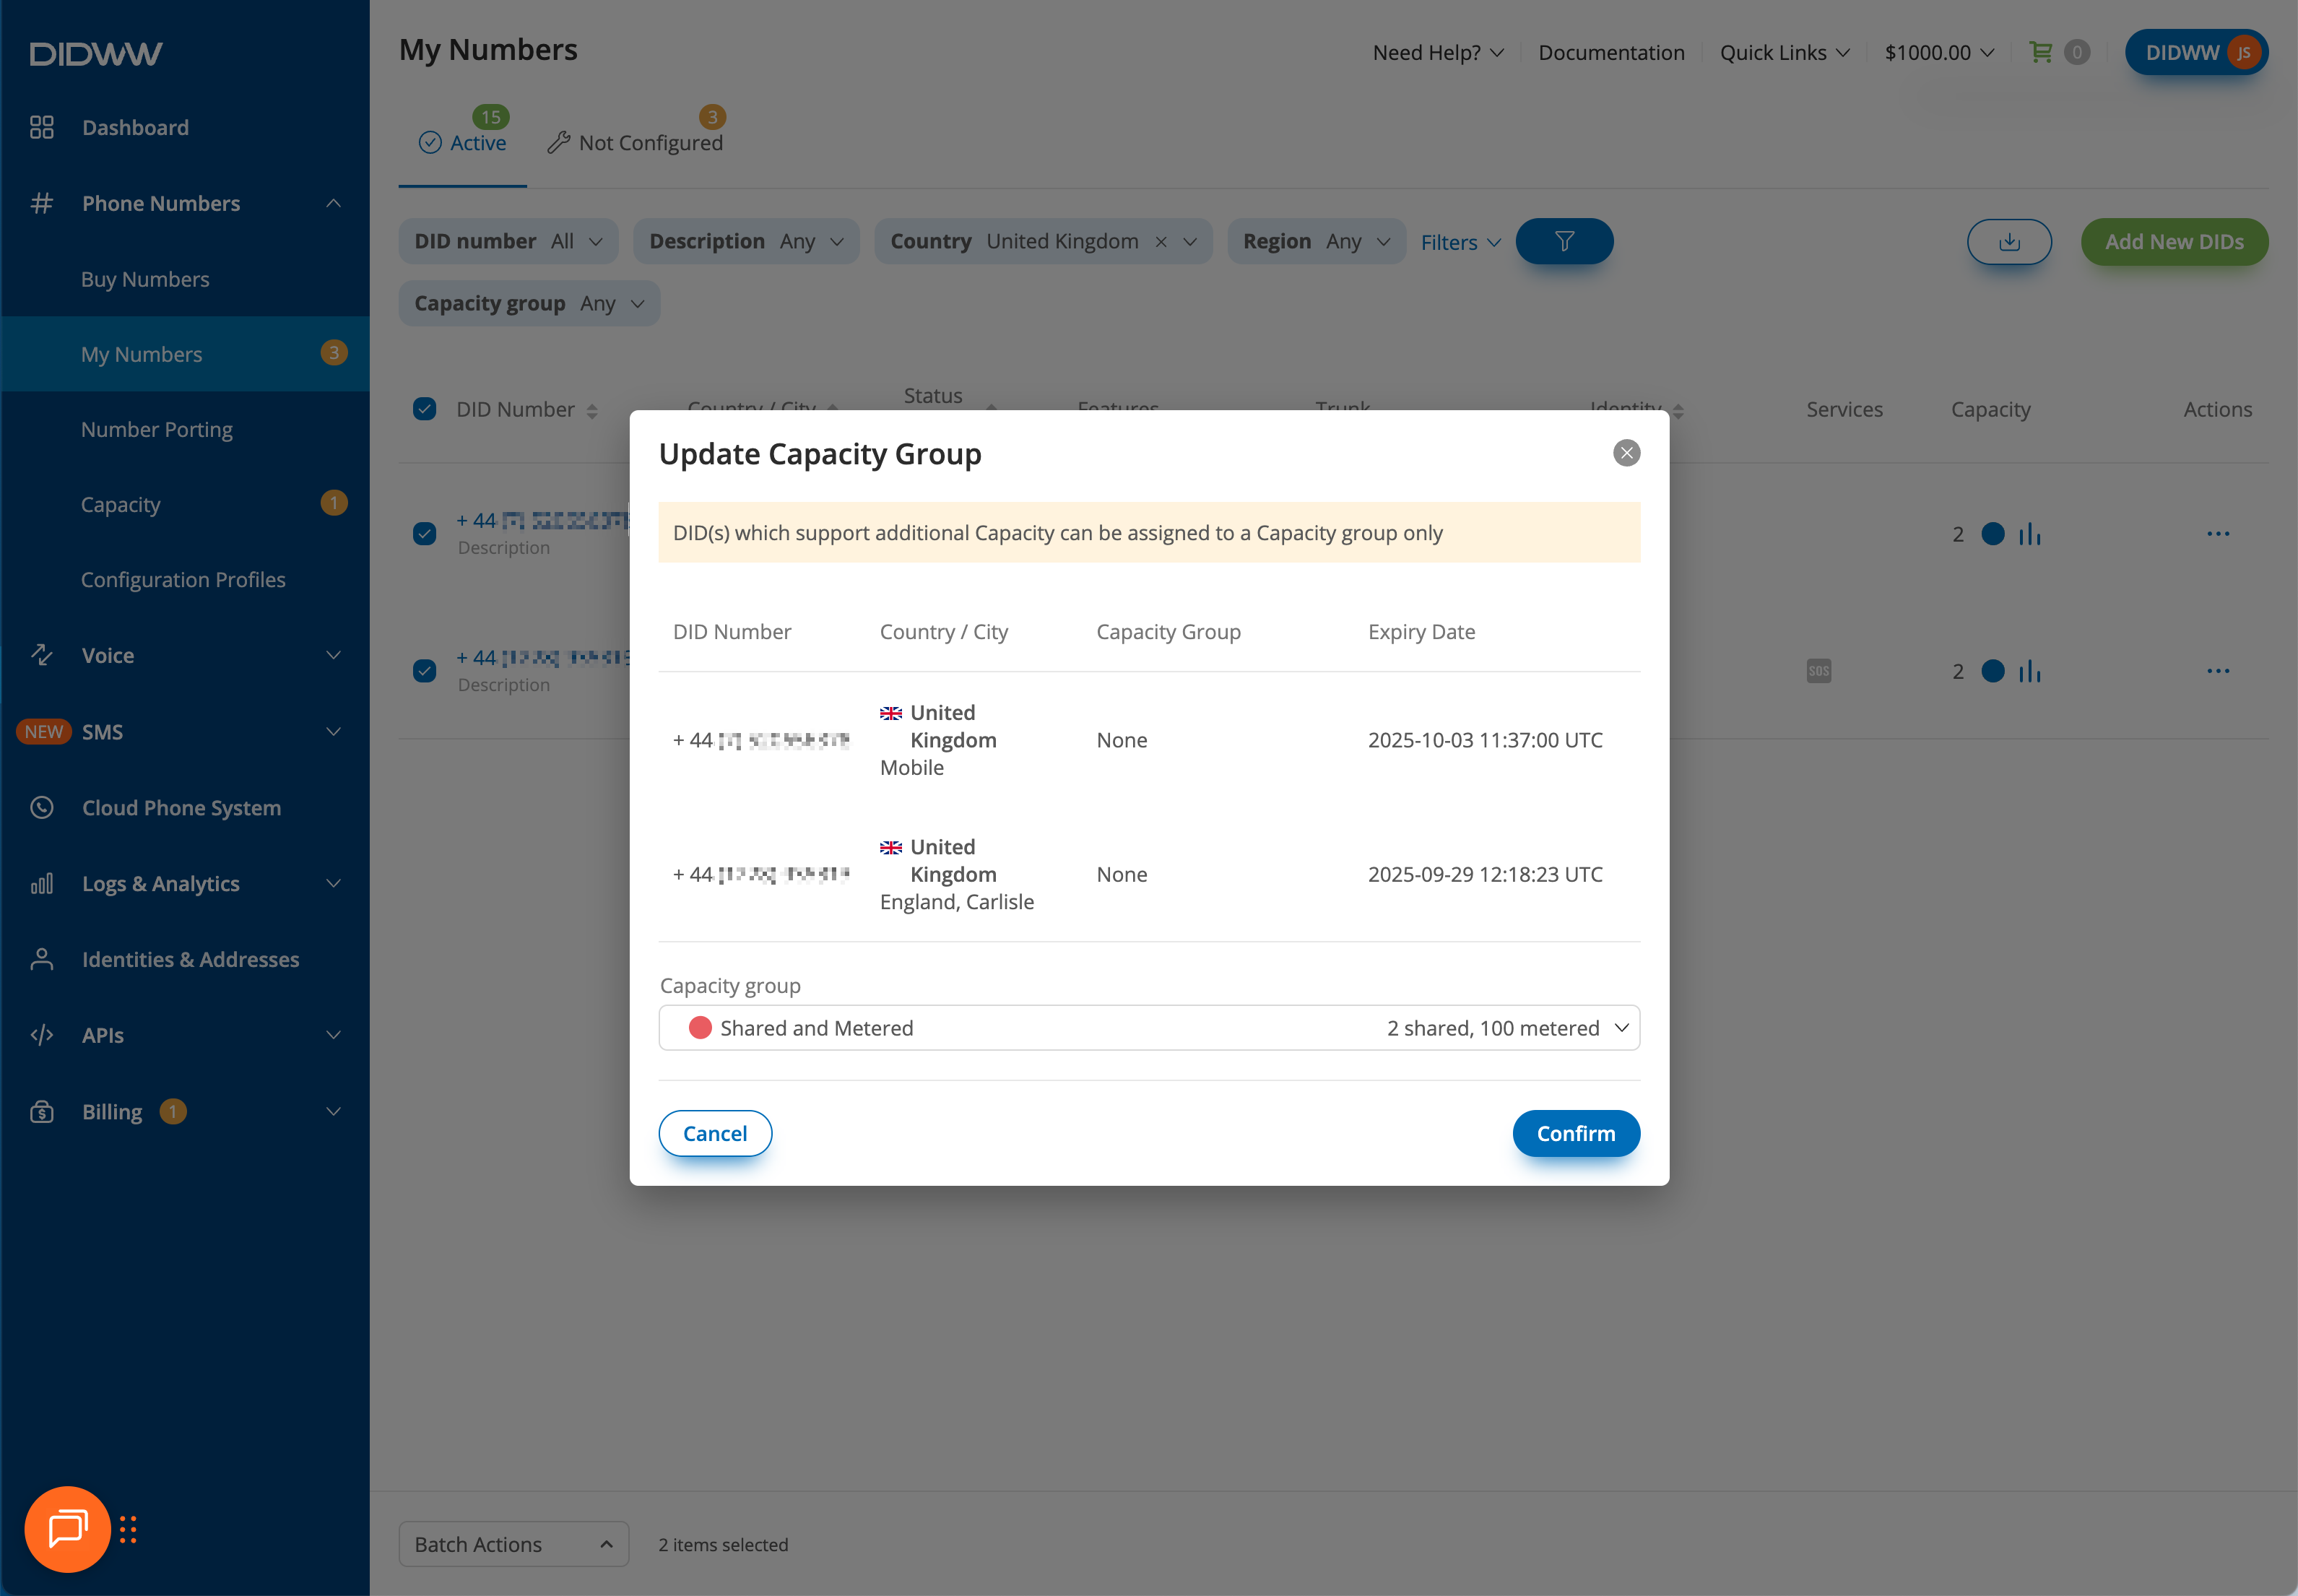
Fig. 2. Update Capacity Group#