Start port in from portability check#
Start a porting request from a reviewed portability check when it contains numbers with Portable status.
Before you begin#
Make sure the portability check has at least one portable number in Reviewed status to start a porting request.
Verify the regulatory requirements for the selected country and number type. See the full list at DIDWW Phone Number Porting .
Create or select a valid Identity & Address for the chosen country and number type to meet portability compliance requirements. See Create New Identity & Address.
Ensure you have the current carrier account number, the latest invoice, and any additional documents.
Note
To avoid service interruption when porting is completed, create a Configuration Profile in advance.
Step 1: Open the reviewed portability check#
In the DIDWW User Panel, go to Phone Numbers > Number Porting.
Open the Portability Checks tab.
Locate the reviewed portability check and click Actions (…) > Edit.
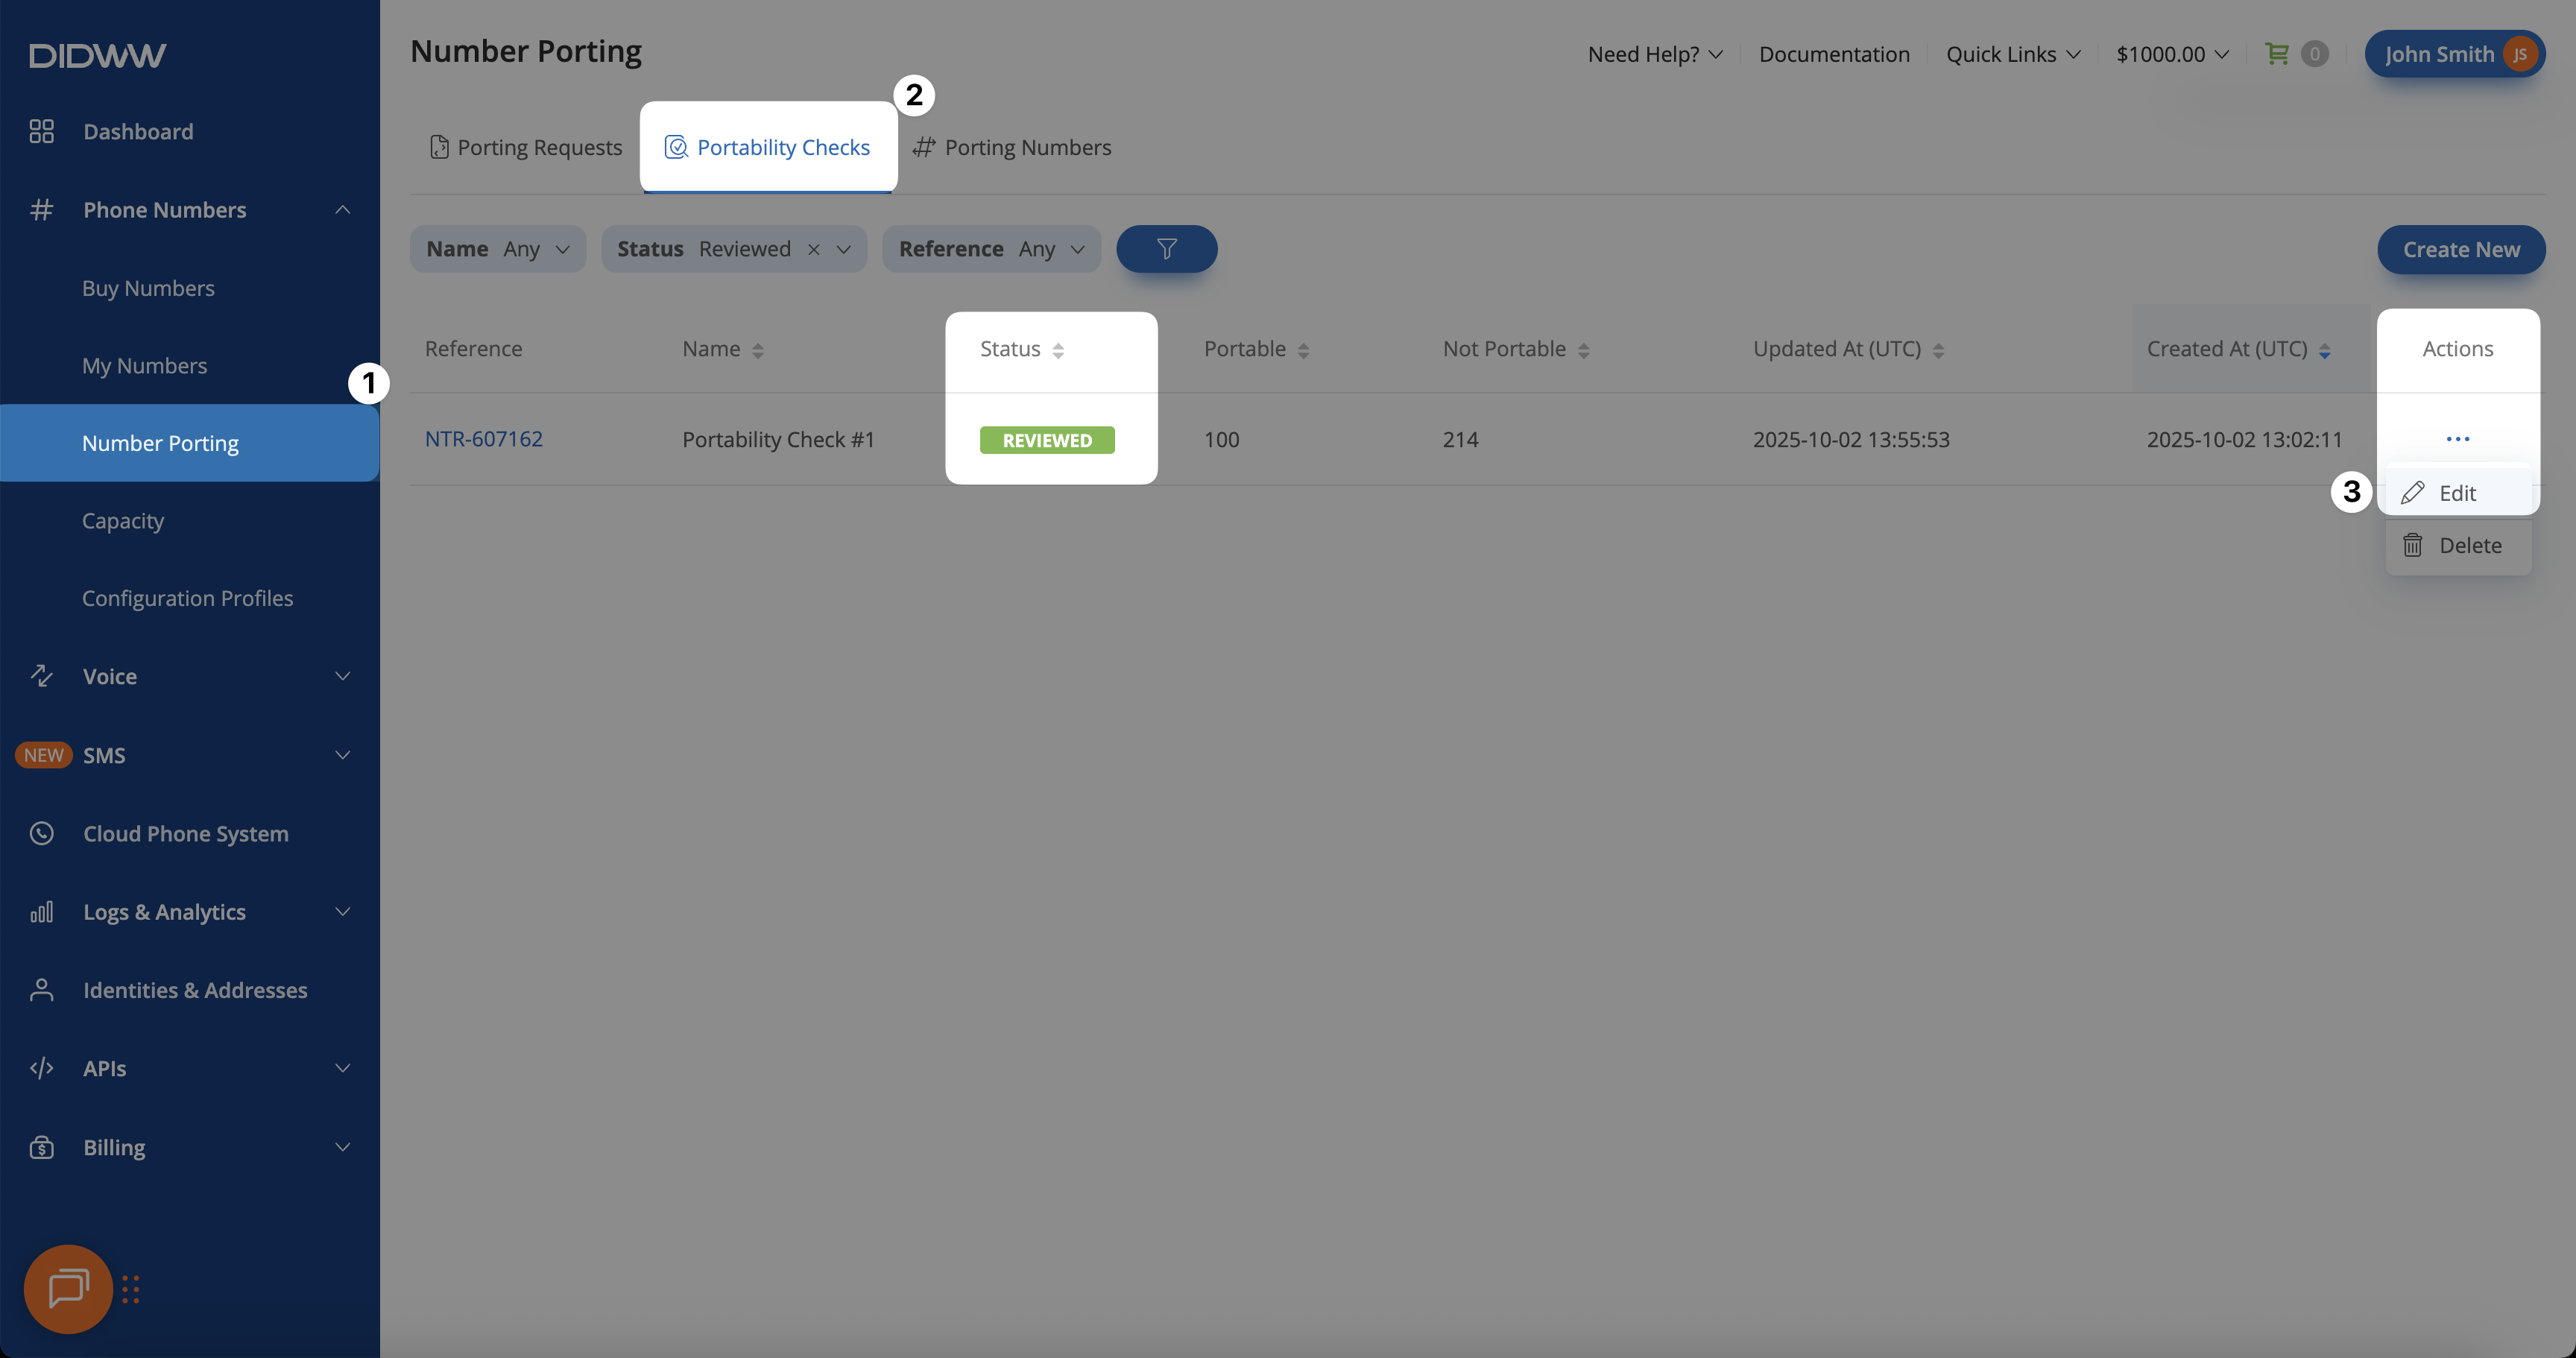
Fig. 1. Opening a reviewed portability check to start port-in.#
Step 2: Submit portable numbers to port in#
On the Edit Portability Check page, numbers are grouped by Country and Number Type.
Select the Country and Number Type if multiple countries were checked, the review the list of numbers with Portable status.
Click Submit to Port In to start the porting process for all portable numbers in the selected group.
Important
Only numbers with Portable status from the same country and number type can be submitted for porting.
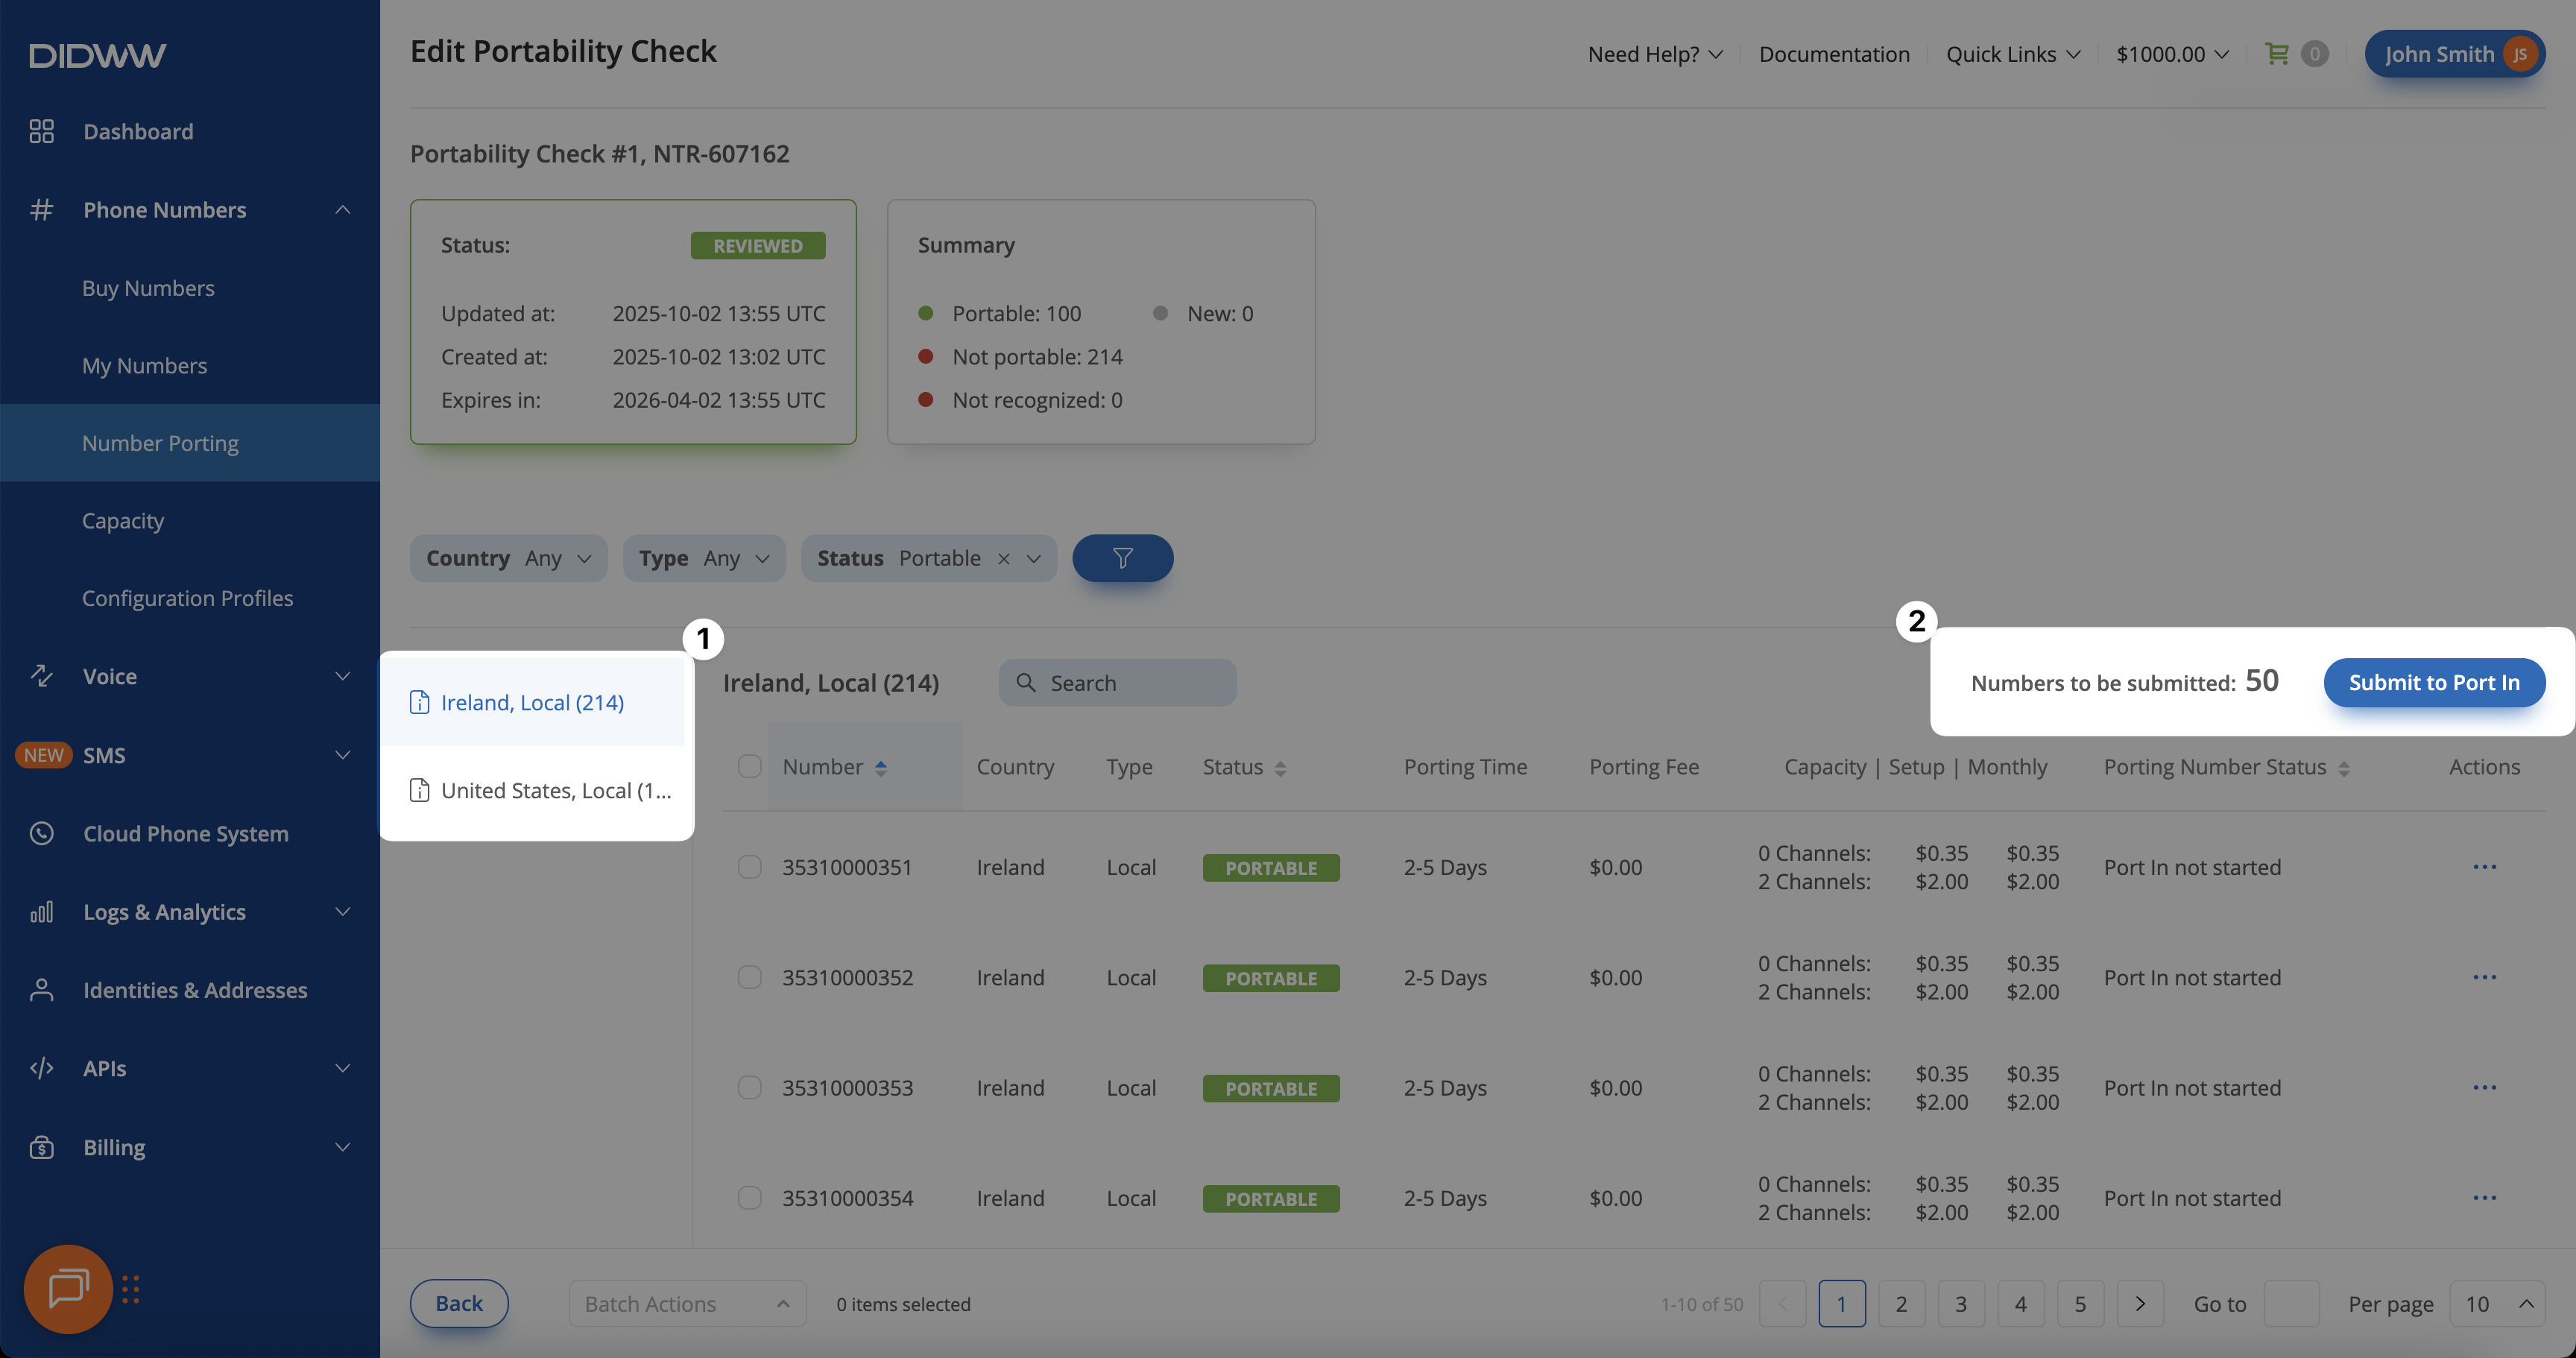
Fig. 2. Starting the porting process for portable numbers.#
Step 3: Fill in end user details#
After the portability check is reviewed and you submit the portable numbers to port in, a new Porting Request form opens. Here, you need to provide End User Registration Details, upload the Required Documents, and fill in any Additional Details required to proceed with creating the porting request.
End user registration details#
Enter a Friendly Name to identify the porting request once it’s created.
From the Identity dropdown, select an existing identity or create a new one.
Choose the associated Address from the dropdown, or click Create New to add a new address for the selected identity.
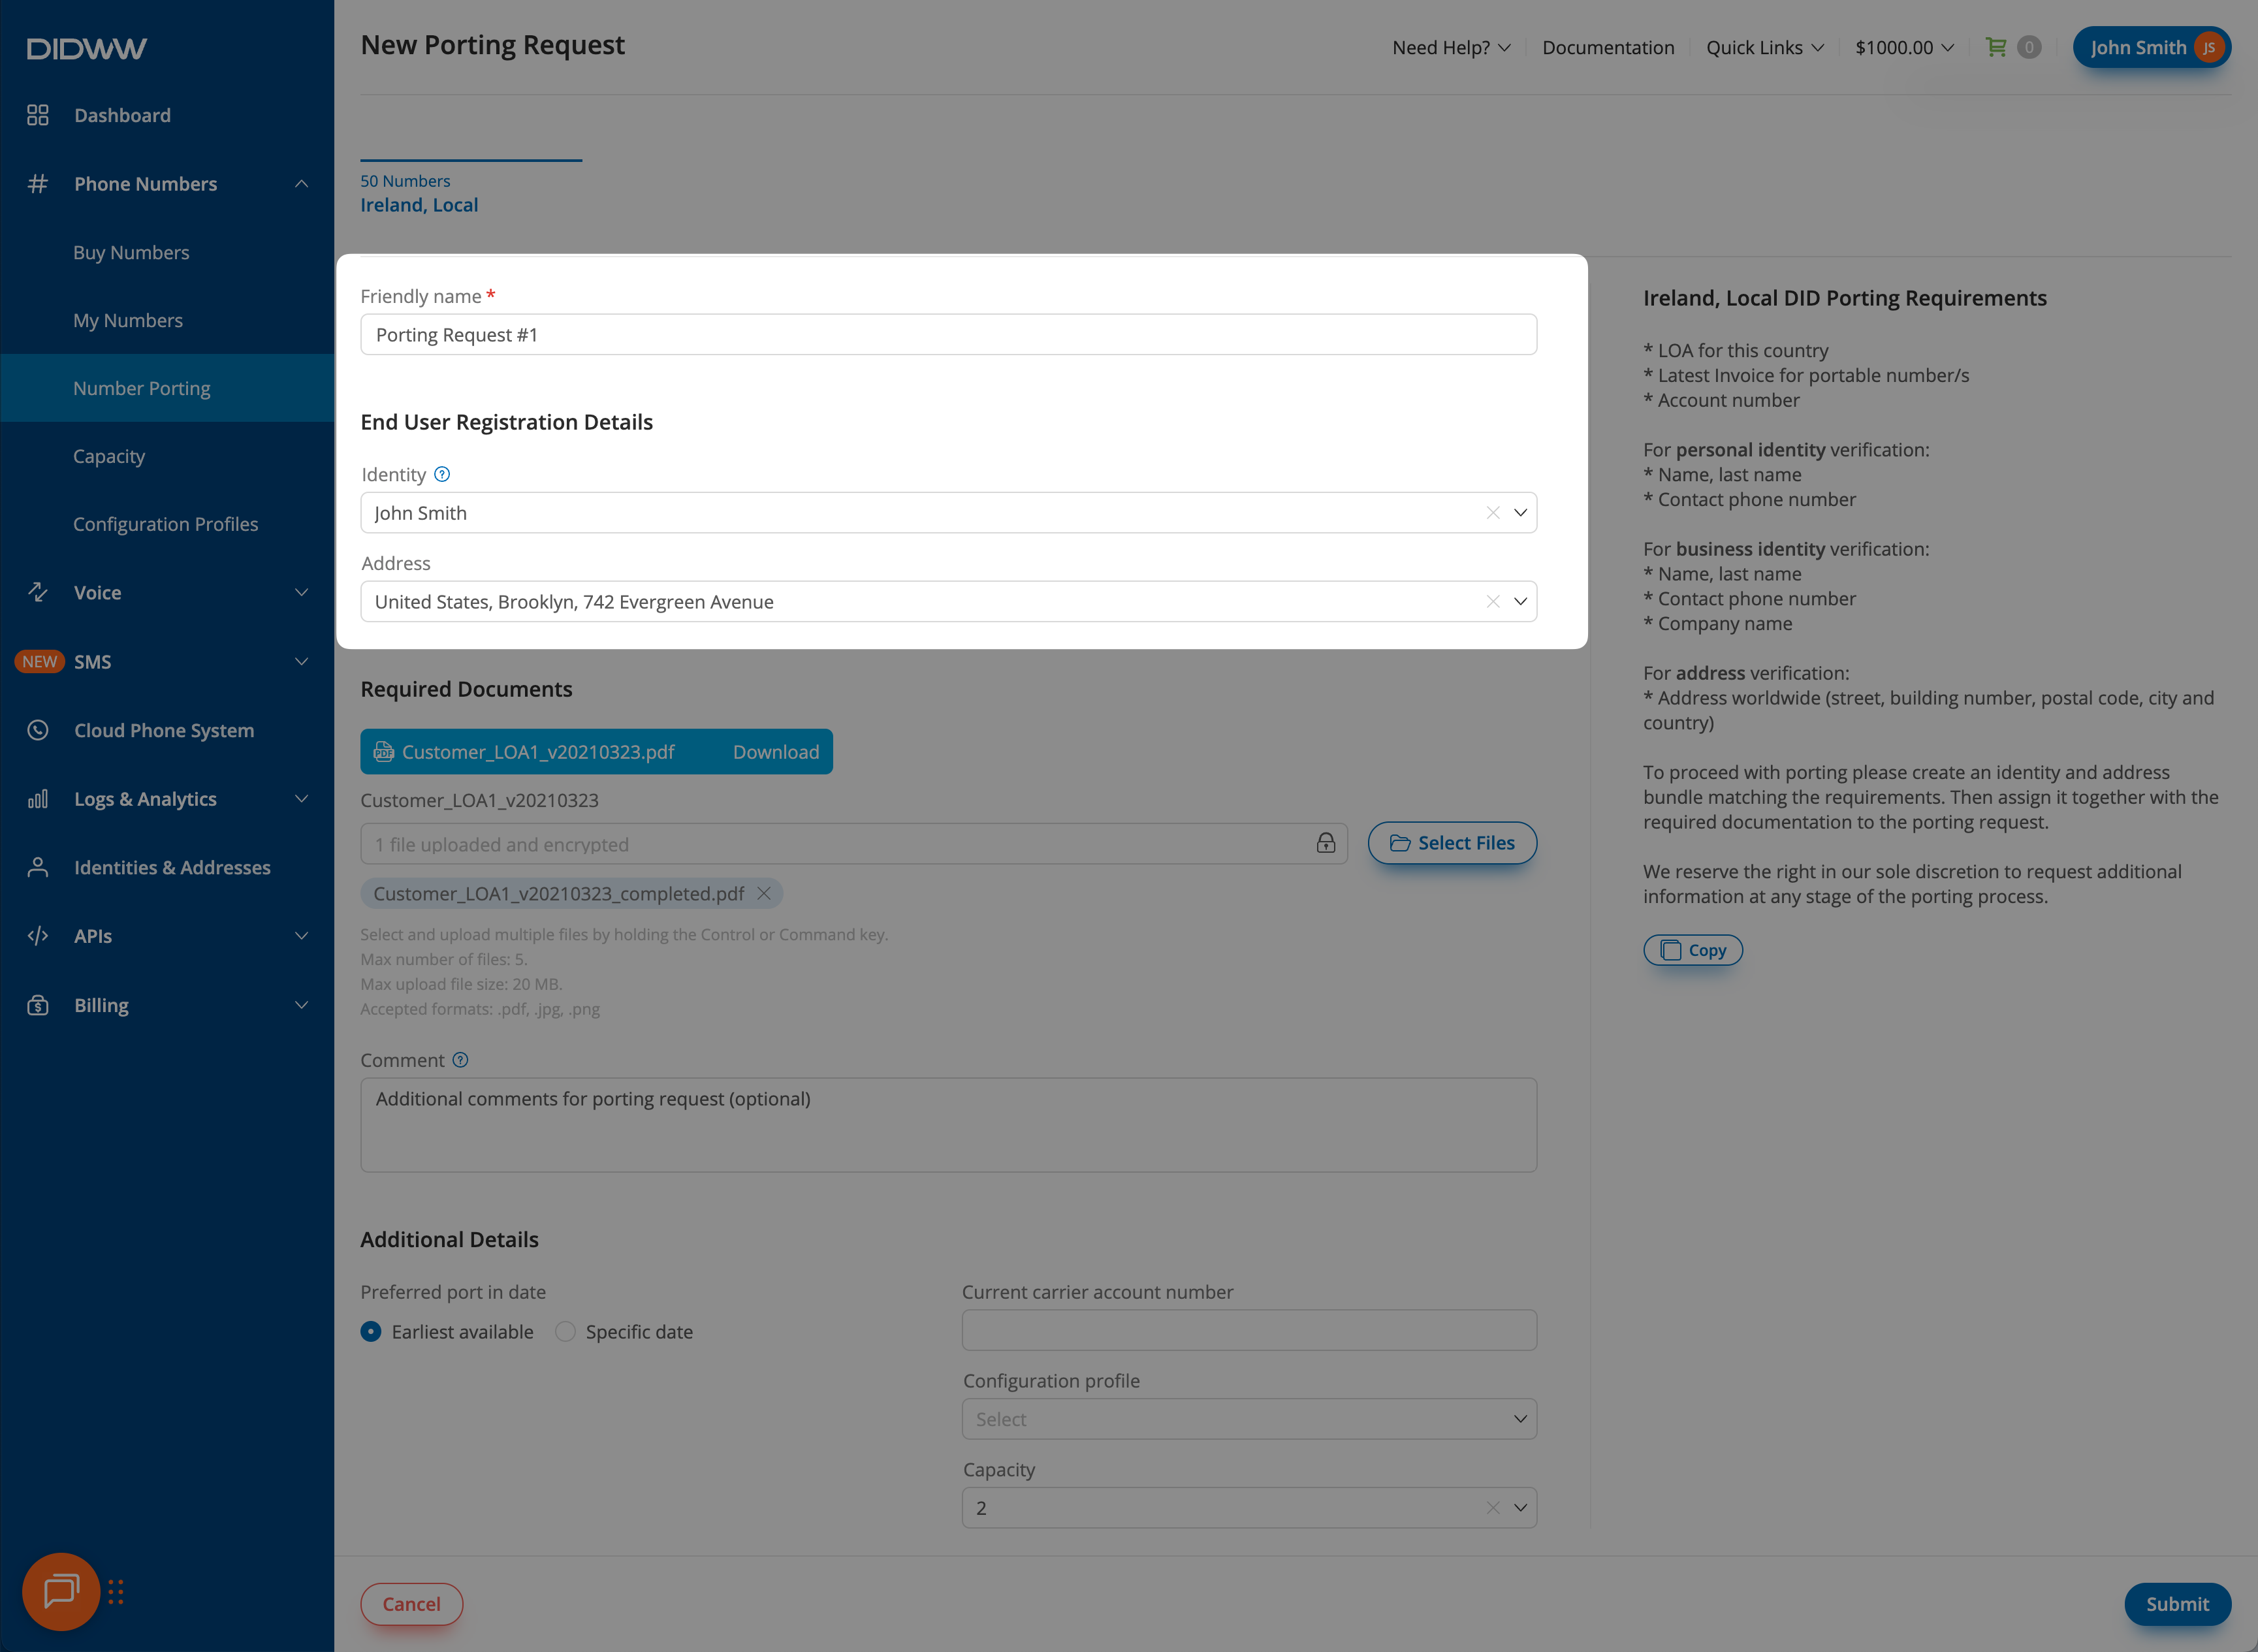
Fig. 3. Click continue to proceed to the end user details step#
Required documents#
Download the Letter of Authorization (LOA) template.
Complete the LOA fully, sign it, and upload the file.
Upload the Latest Invoice for the numbers being ported.
Note
All uploaded files are encrypted for security.
Leave Comment for additional notes on the porting request (optional).
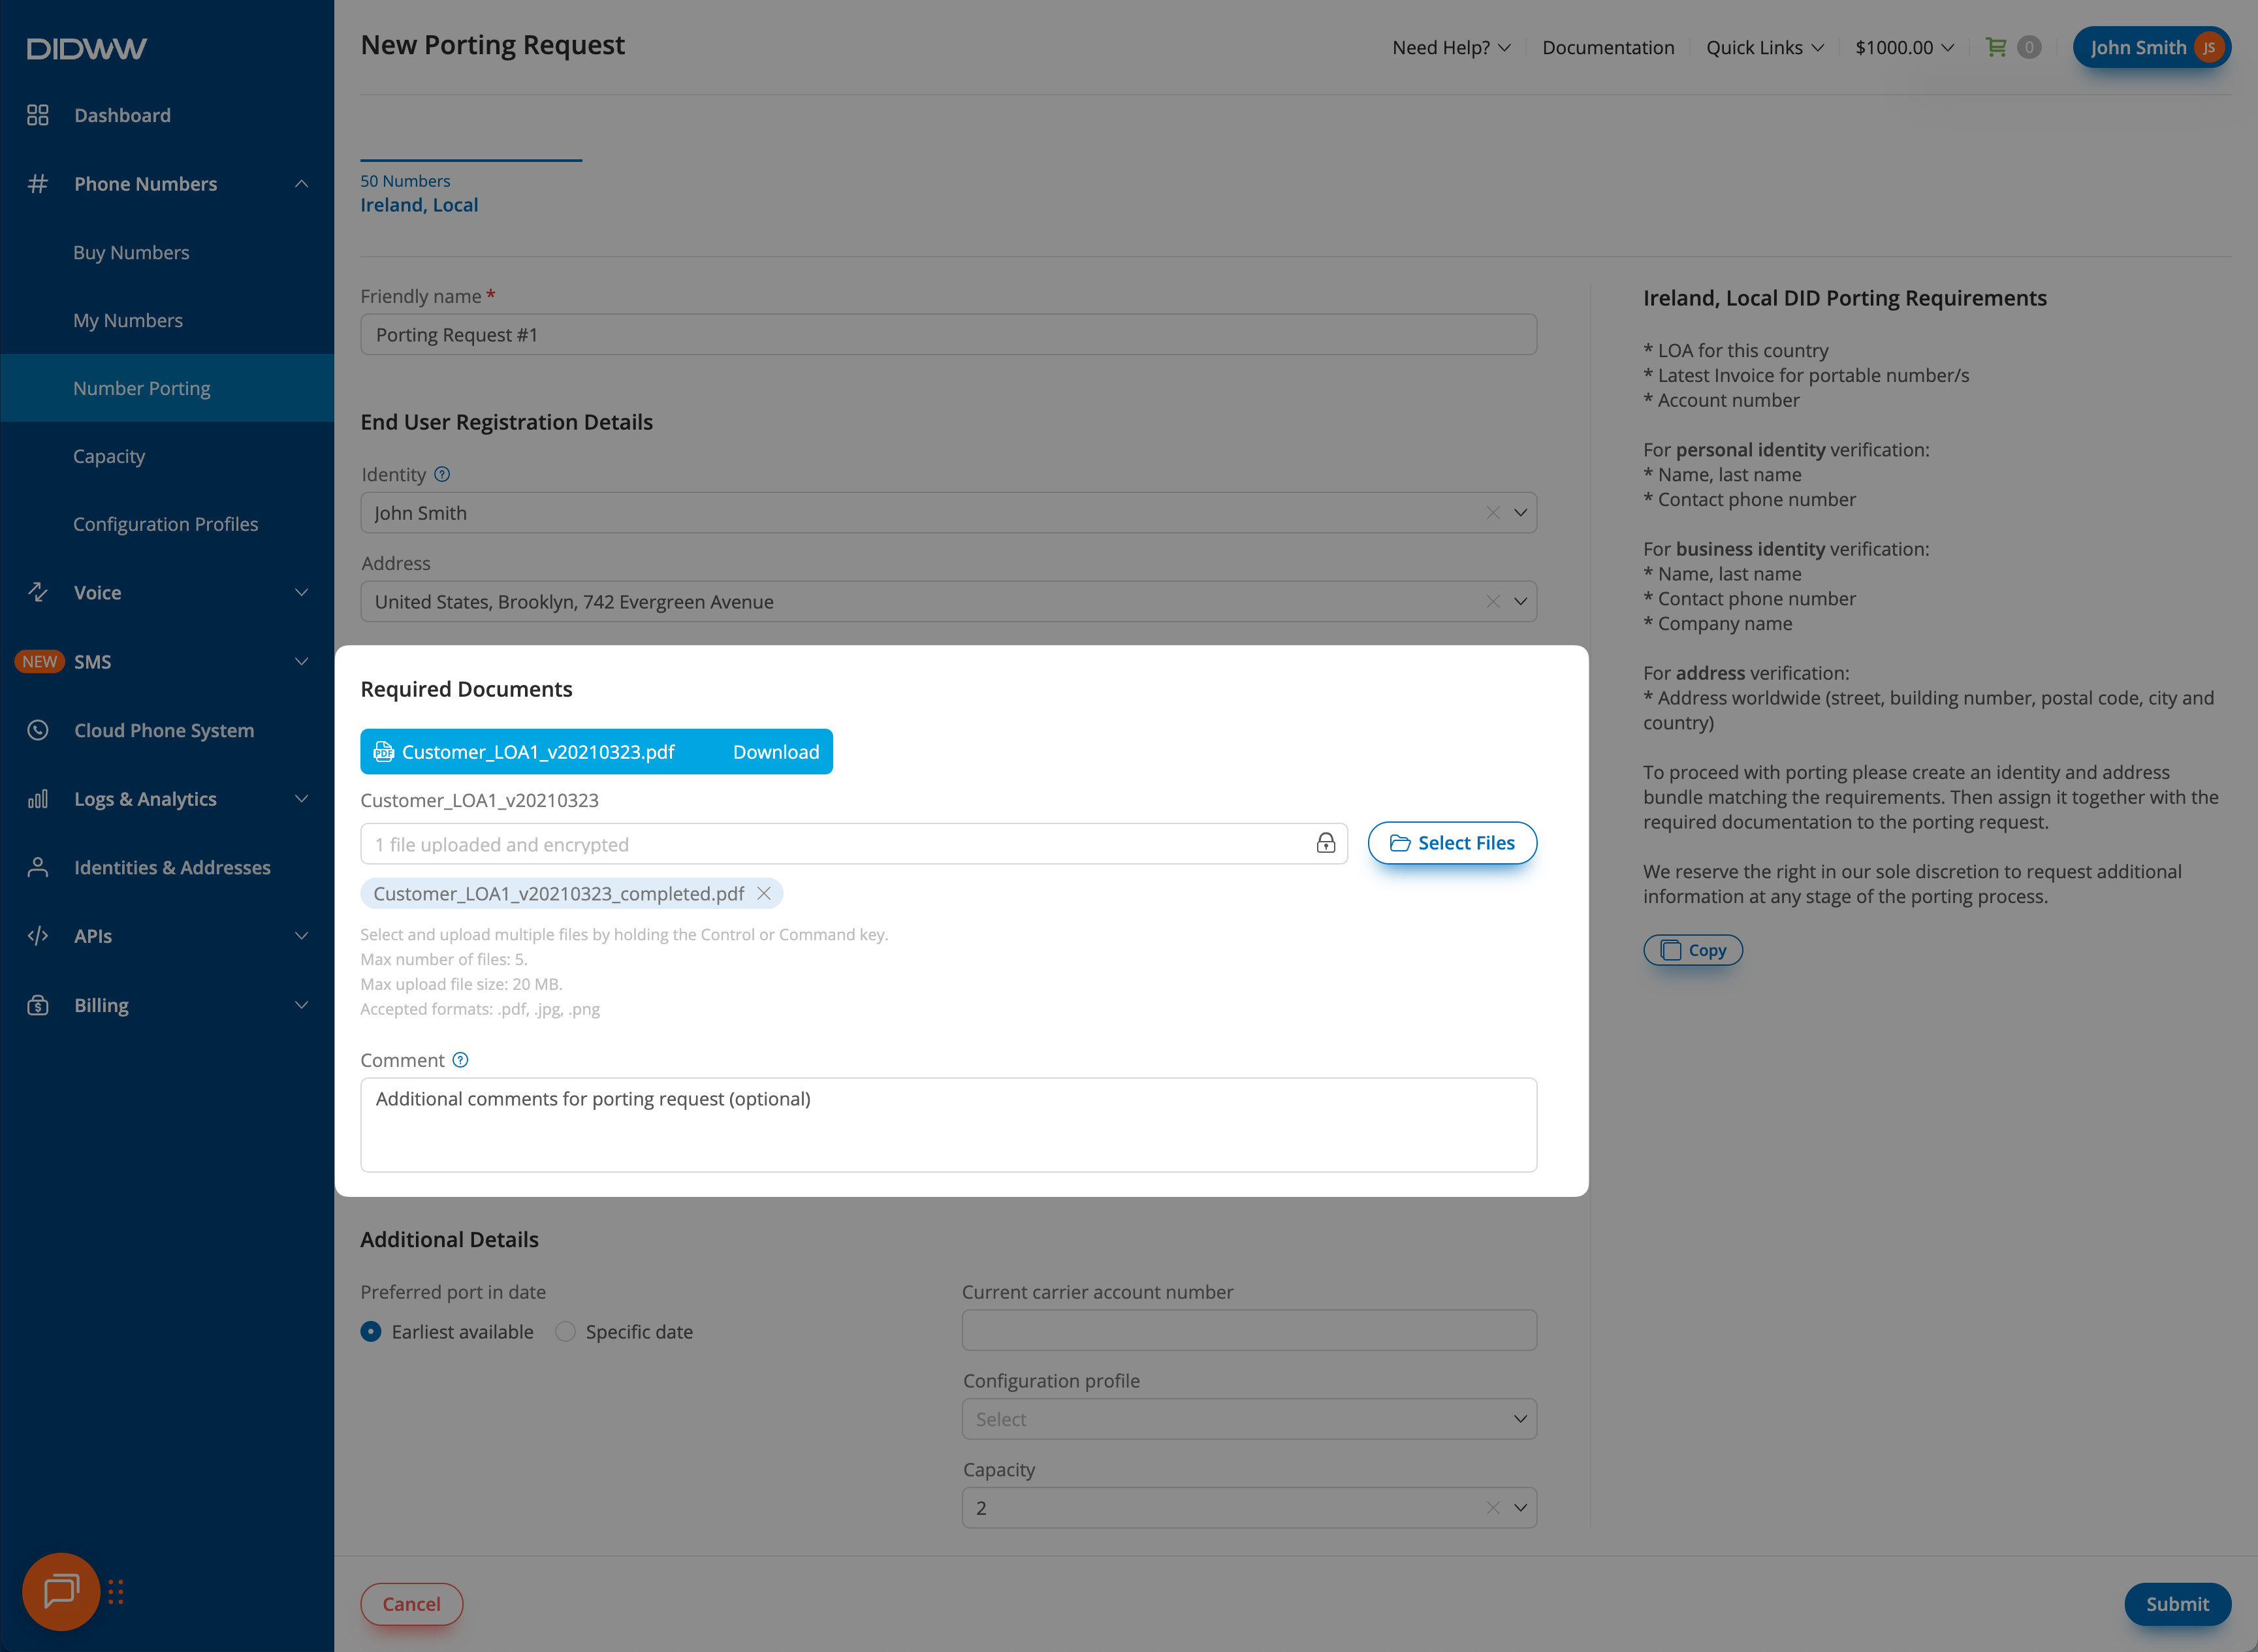
Fig. 4. Click continue to proceed to the end user details step#
Additional details#
Choose the Preferred port in date or leave it as Earliest available.
Provide the Current carrier account number to match the request with the carrier’s records.
Assign a Configuration profile from the dropdown, or click Create New to add a new one.
Select the DID number channels included by choosing the Capacity option (DID+2 or DID+0 plan). See DID+0 and DID+2 capacity modes .
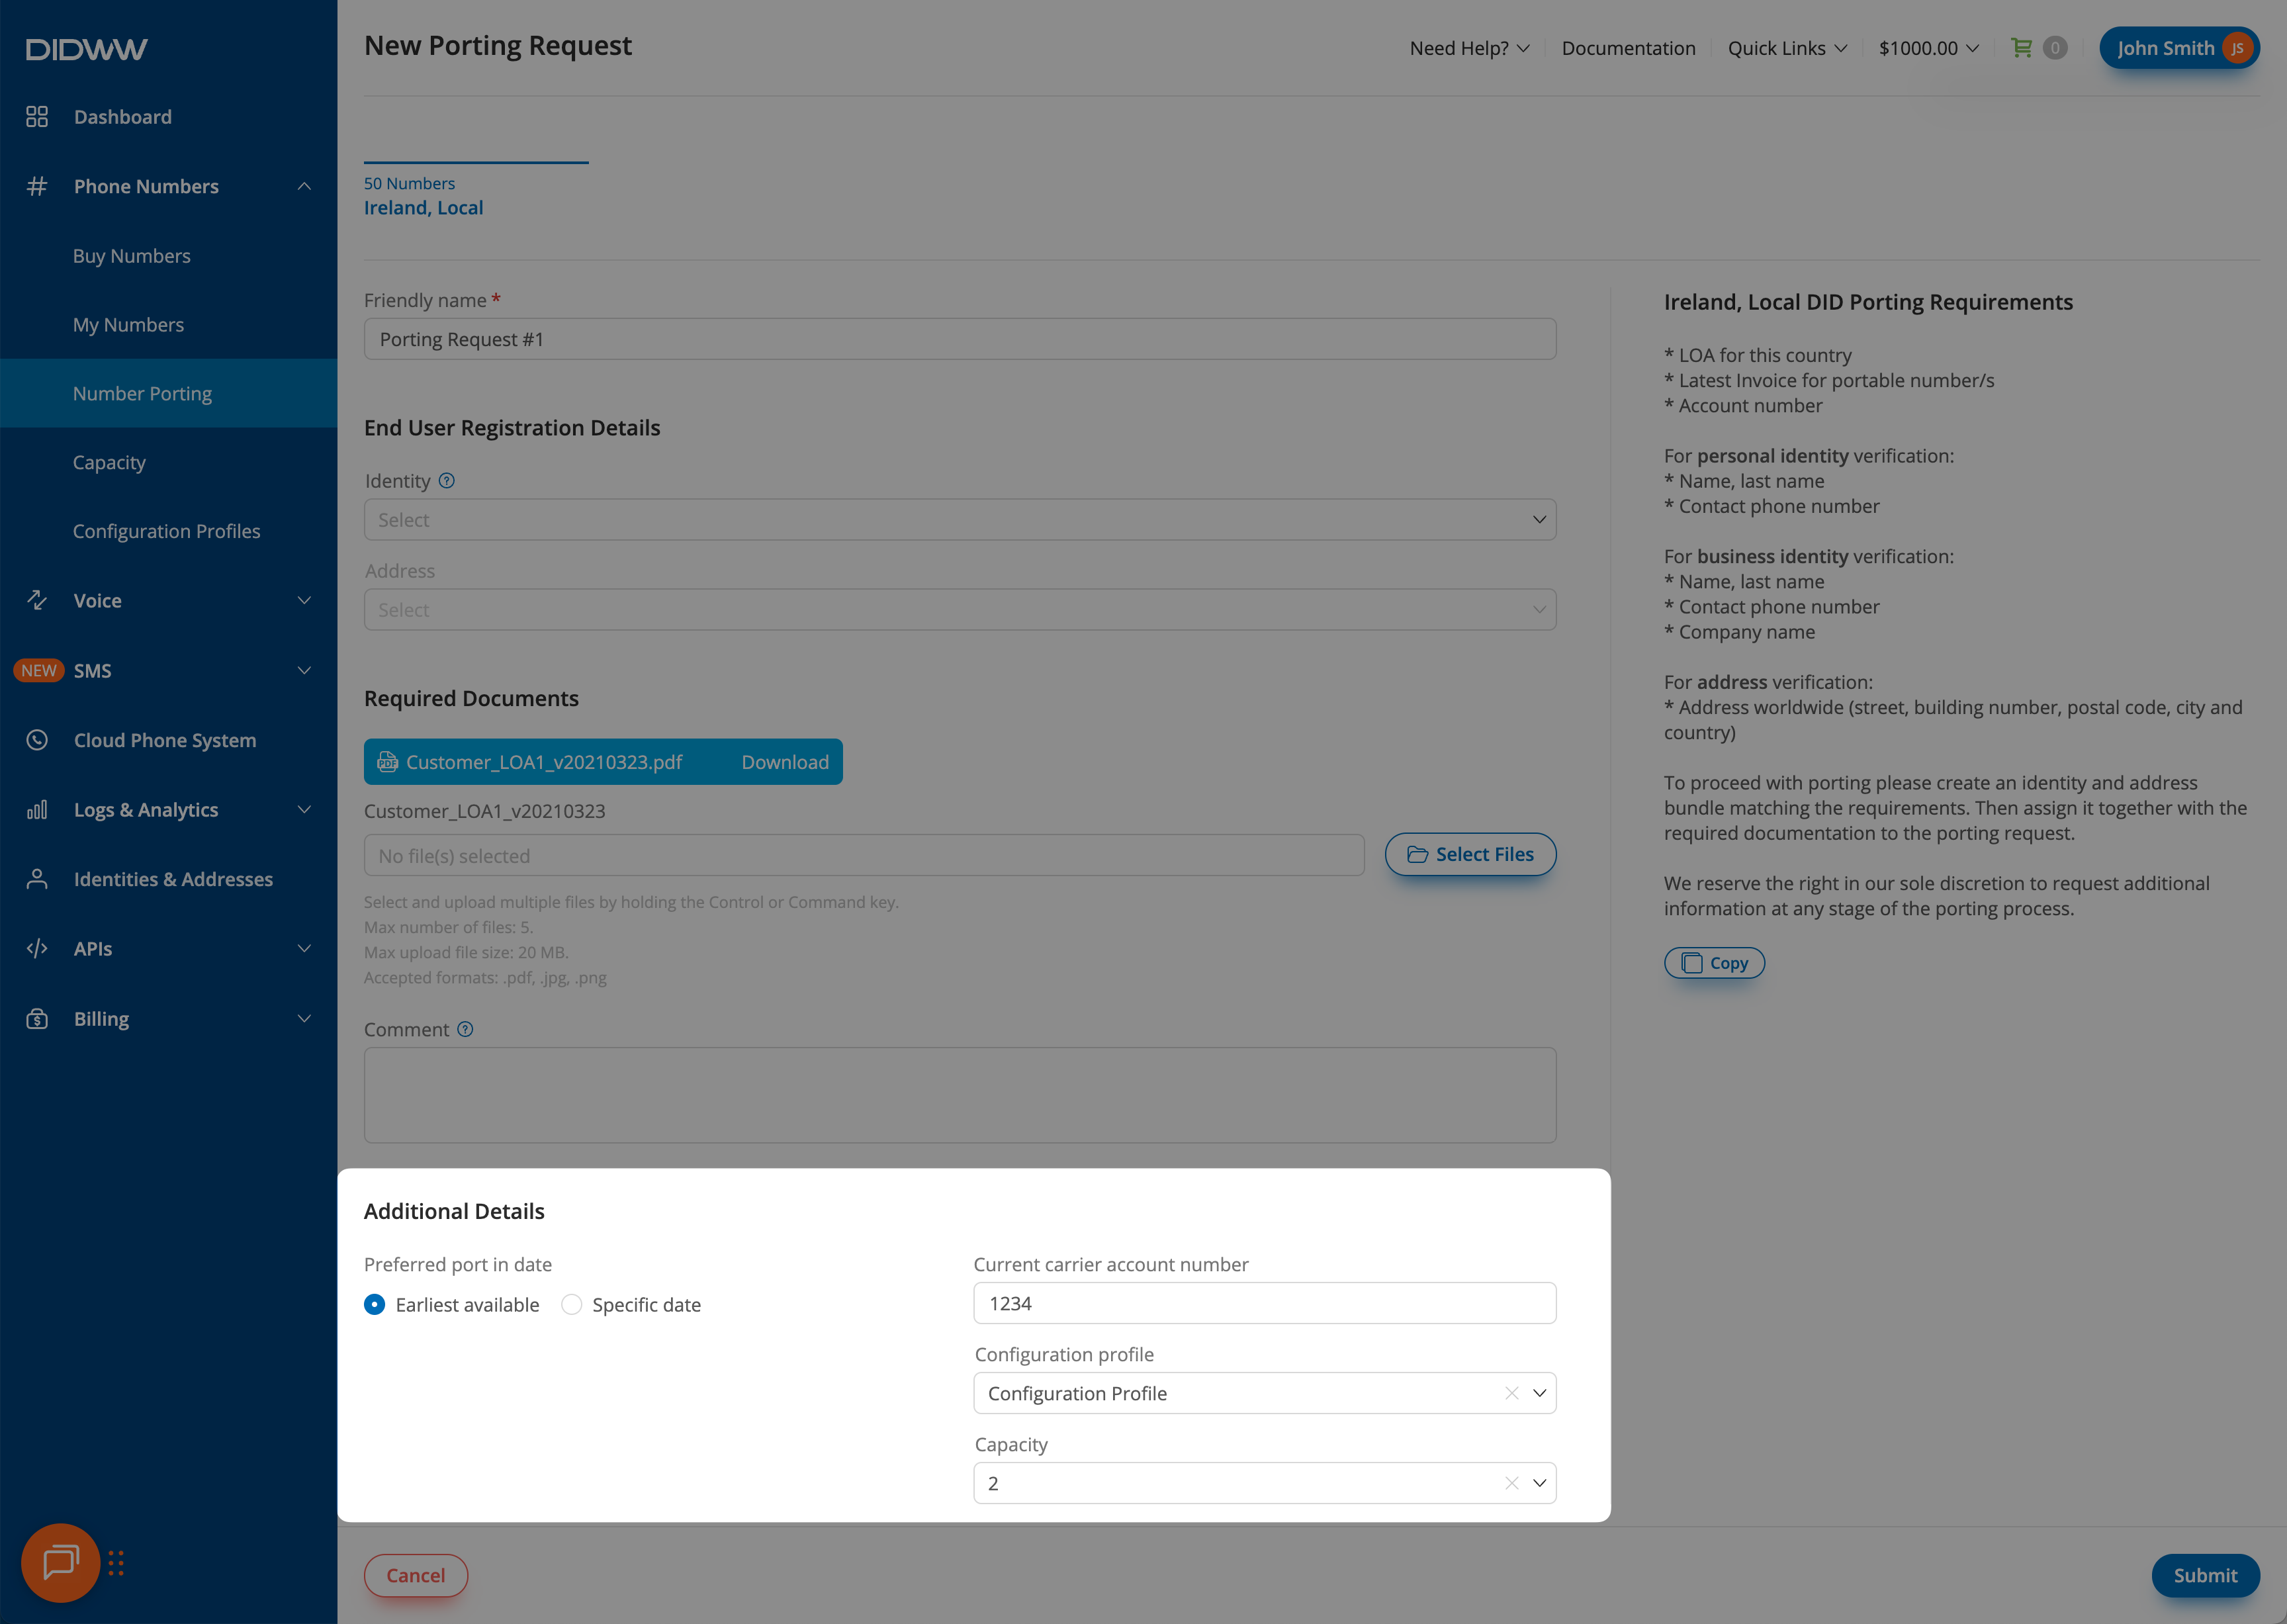
Fig. 5. Click continue to proceed to the end user details step#
Step 4: Submit the porting request#
Review all details and documents, then select Submit to create the porting request for the selected numbers, country, and number type.