HTTP OUT Trunks#
HTTP OUT SMS trunks allow you to send outbound SMS messages from your DID numbers to a specified HTTP(s) endpoint. This enables direct integration with your own systems or third-party services.
Create and configure a new SMS HTTP OUT Trunk.
Access or update HTTP OUT trunk credentials.
Send a test SMS message from HTTP OUT trunk.
Update the settings of an existing trunk.
Remove one or more trunks from your account.
Create HTTP OUT Trunk#
Step 1: Start Creating HTTP OUT Trunk#
In the user panel menu, navigate to SMS > SMS Trunks. Click the Create New button in the top-right corner and select HTTP OUT from the dropdown menu.
Fig. 1. Navigating to create a new SMS to HTTP OUT Trunk.#
Step 2: Configure HTTP OUT Trunk#
Enter the general information required to set up your SMS to HTTP OUT trunk. Provide a descriptive friendly name, configure the callback URL for delivery notifications, specify allowed IP addresses, and define the sender ID settings for outbound SMS.
Fig. 2. SMS to HTTP OUT Trunk configuration window.#
General Settings#
Setting
Description
Friendly name
A unique name to identify this trunk.
Callback URL
URL to get the delivery status of the text messages you have sent.
The server will call your callback URL and post SMS delivery notifications.Allowed IP addresses
IP addresses from which access to the API is allowed in the format (IPv4|IPv6)[/mask] (not mandatory).
Allow all IP addresses if empty.
Source Address Settings#
The Source Address Settings section controls which DID numbers can be used as the sender ID for outbound SMS.
Use the Allow any DID(s) for SMS OUT toggle to choose how sender IDs are assigned:
Toggle on (default): All DIDs with Outbound P2P SMS enabled in your account can be used as the sender ID.
Toggle off: You can specify which DIDs are allowed. To do this, select numbers from the Available Source Addresses list and add them to the Allowed Source Addresses list. Only the numbers you add will be available as sender IDs.
Fig. 3. Source address selection for SMS to HTTP OUT Trunk.#
Note
When the Allow any DID(s) for SMS OUT toggle is turned off, the Available Sender IDs list shows only DIDs that support outbound P2P SMS.
Step 3: Create the Trunk#
Click Create at the bottom of the page to save the new trunk.
View or Regenerate HTTP OUT Trunk Credentials#

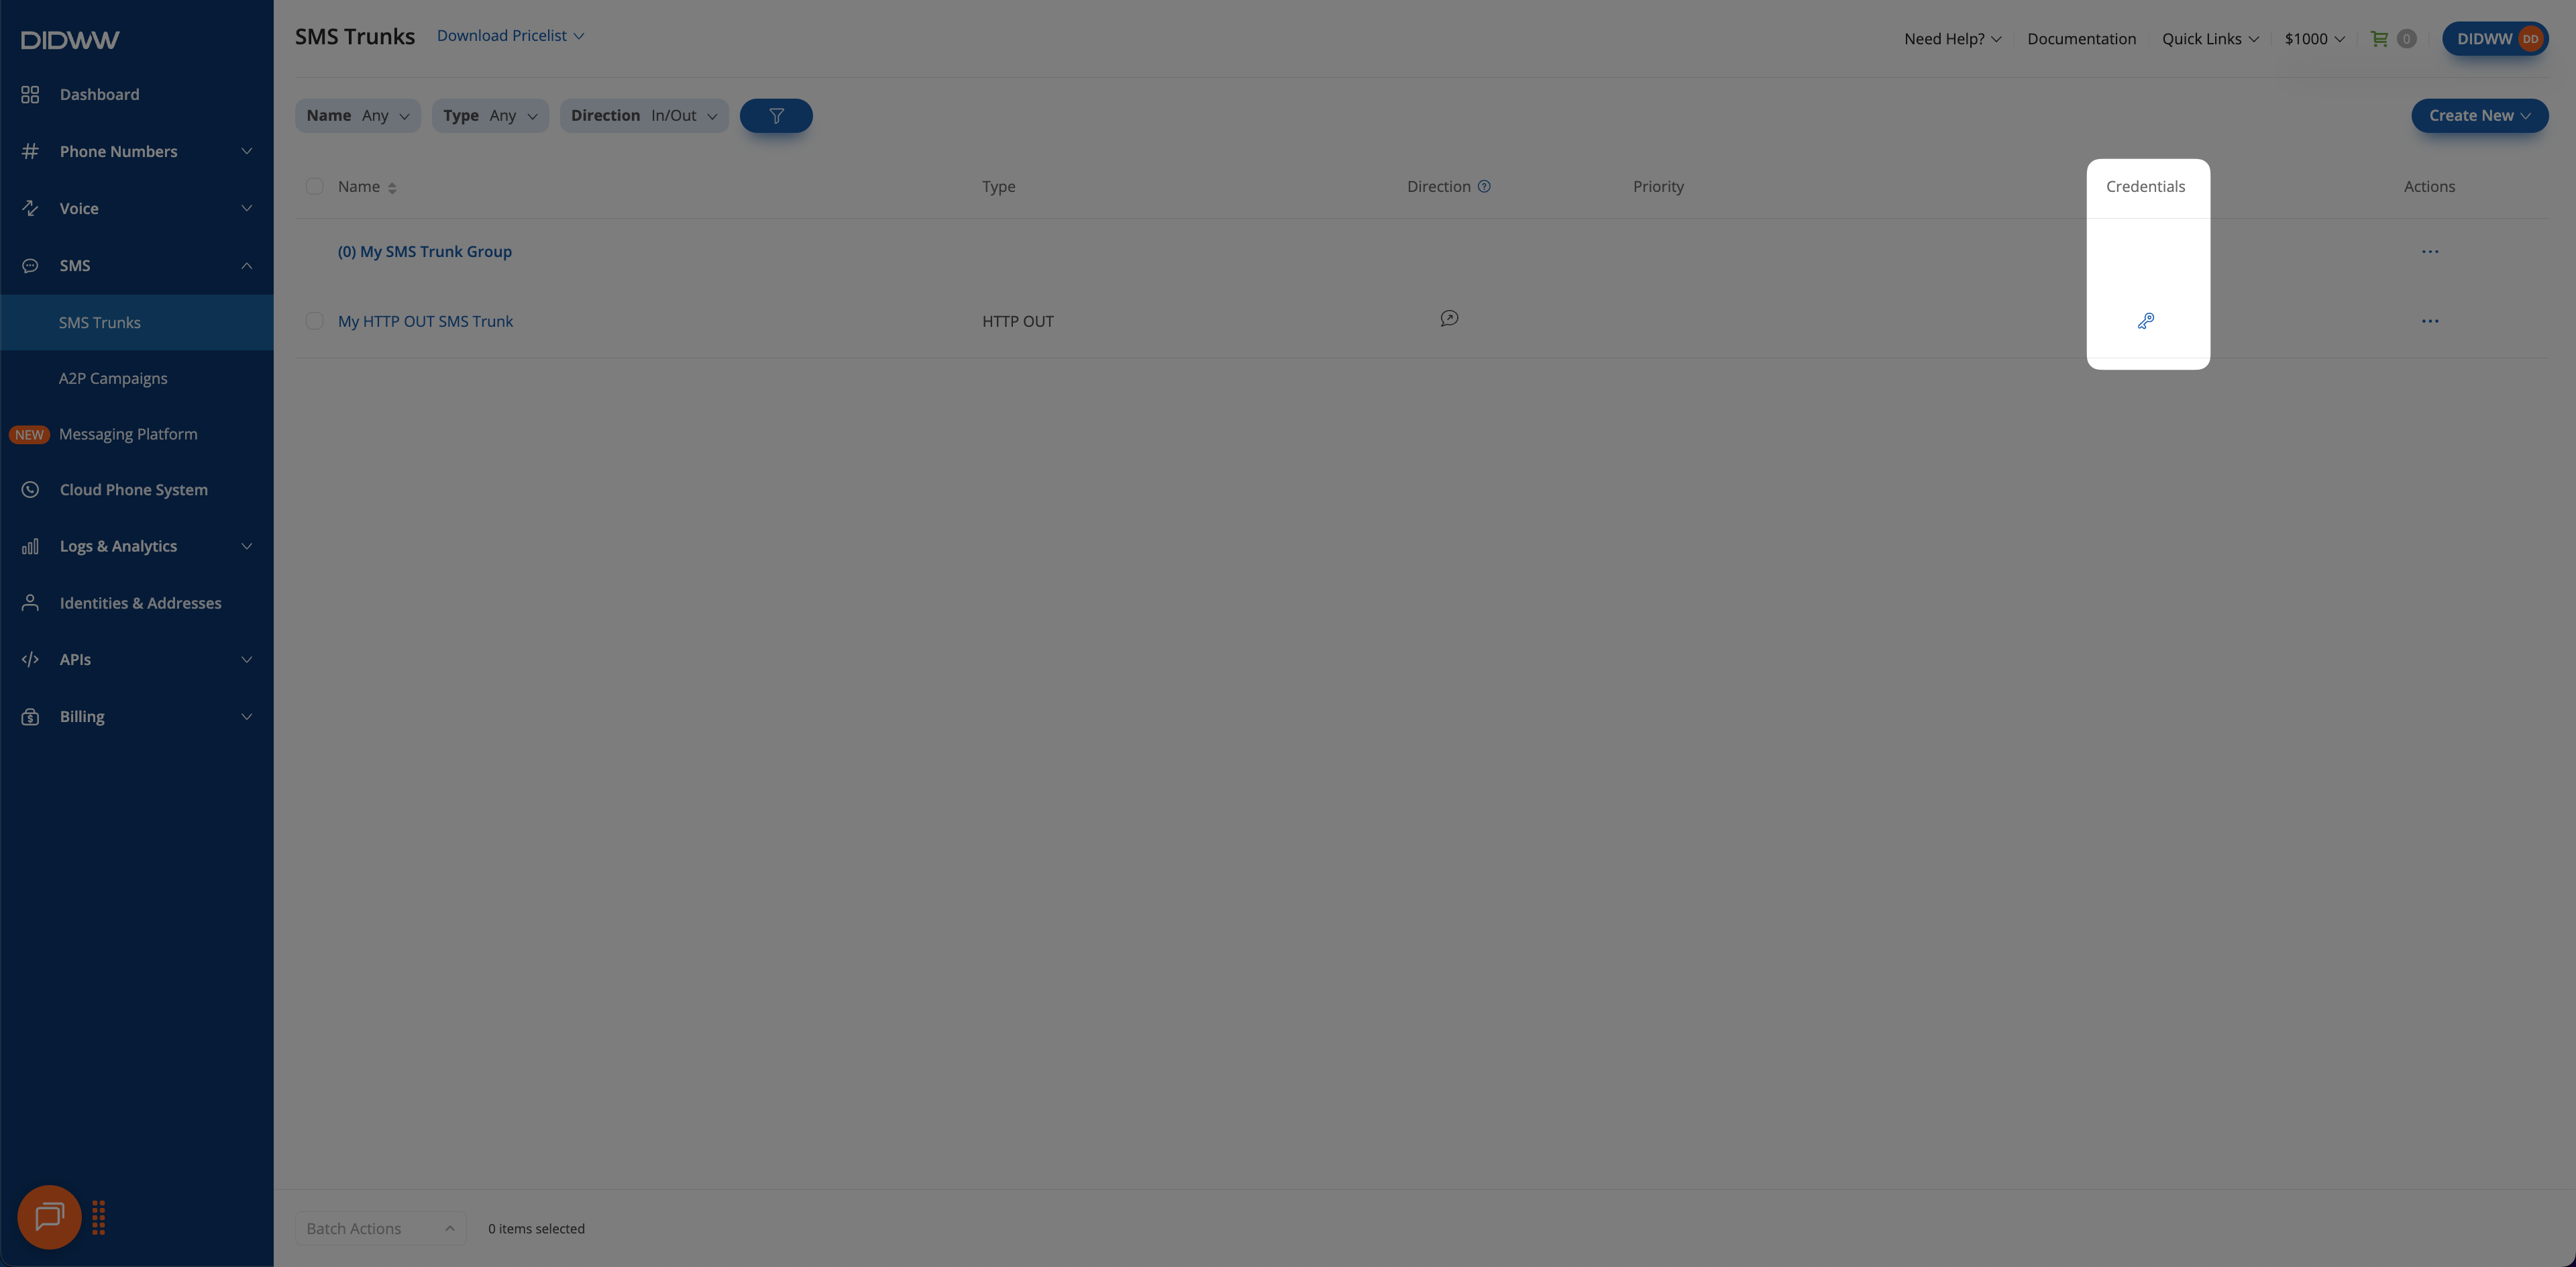
Fig. 4. Credentials button for SMS to HTTP OUT Trunk.#
In the credentials pop-up window, you can see the HTTP OUT trunk Username and Password. Click the eye icon to show the password.
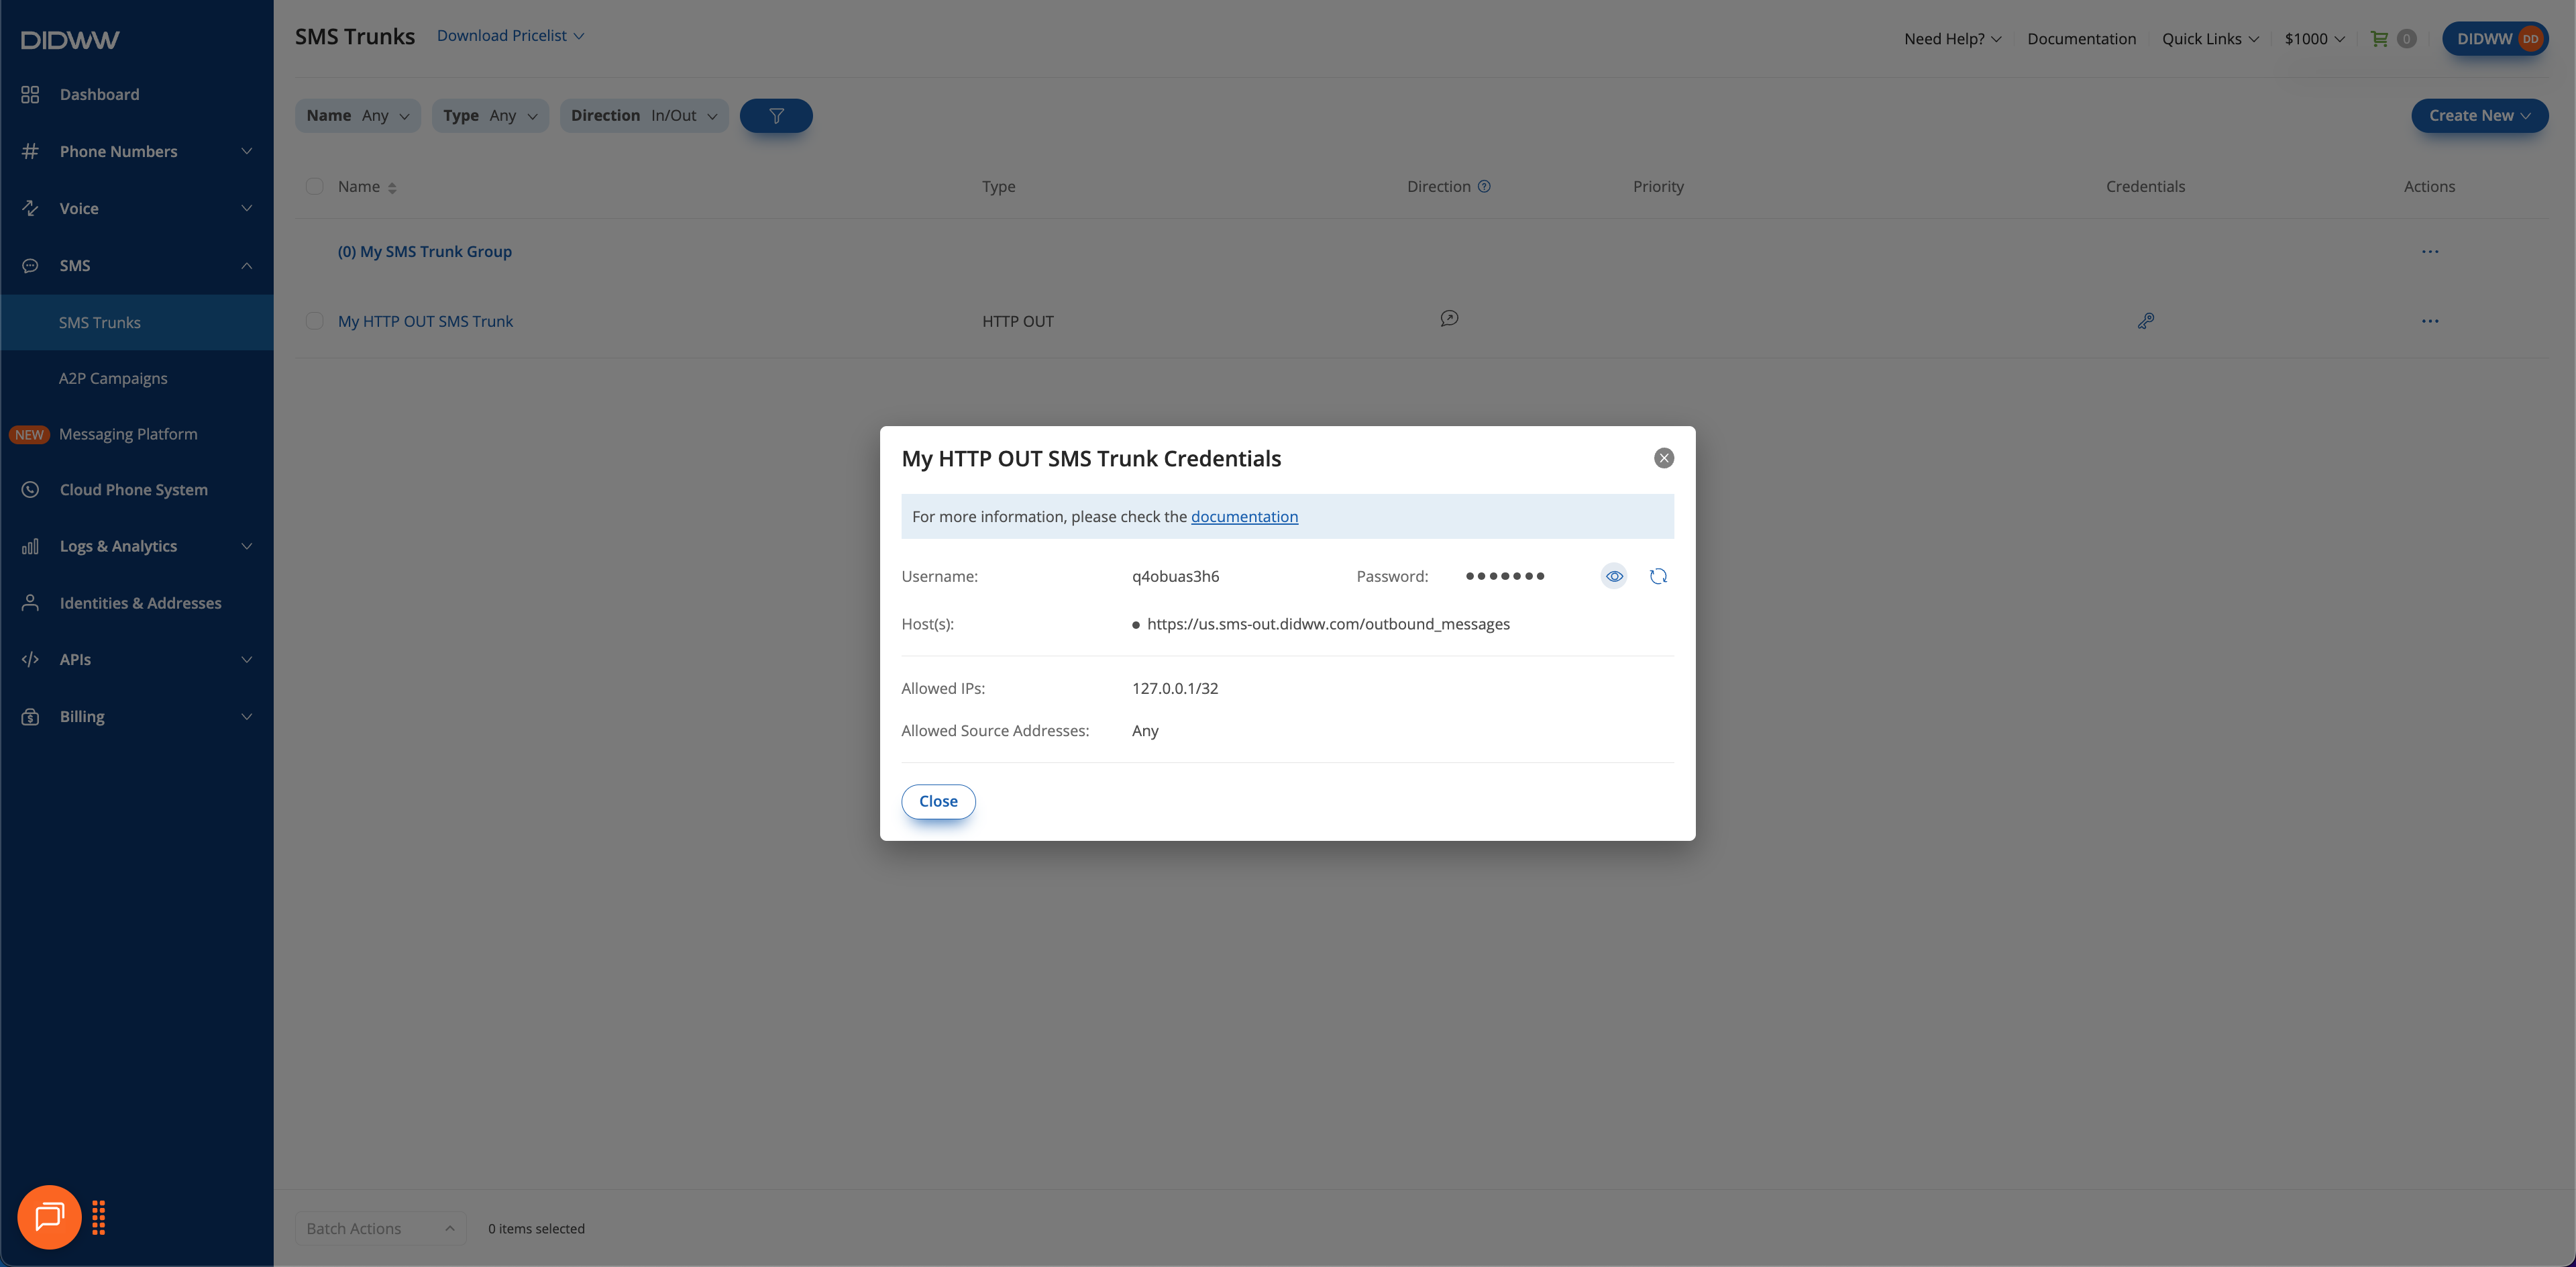
Fig. 5. Viewing credentials.#
Important
The password is updated immediately when you regenerate credentials. Update all integrations right away to avoid authentication failures.
In the credentials pop-up window, click Regenerate next to the Password field to generate new credentials.
Copy the new credentials and update any systems that use them.
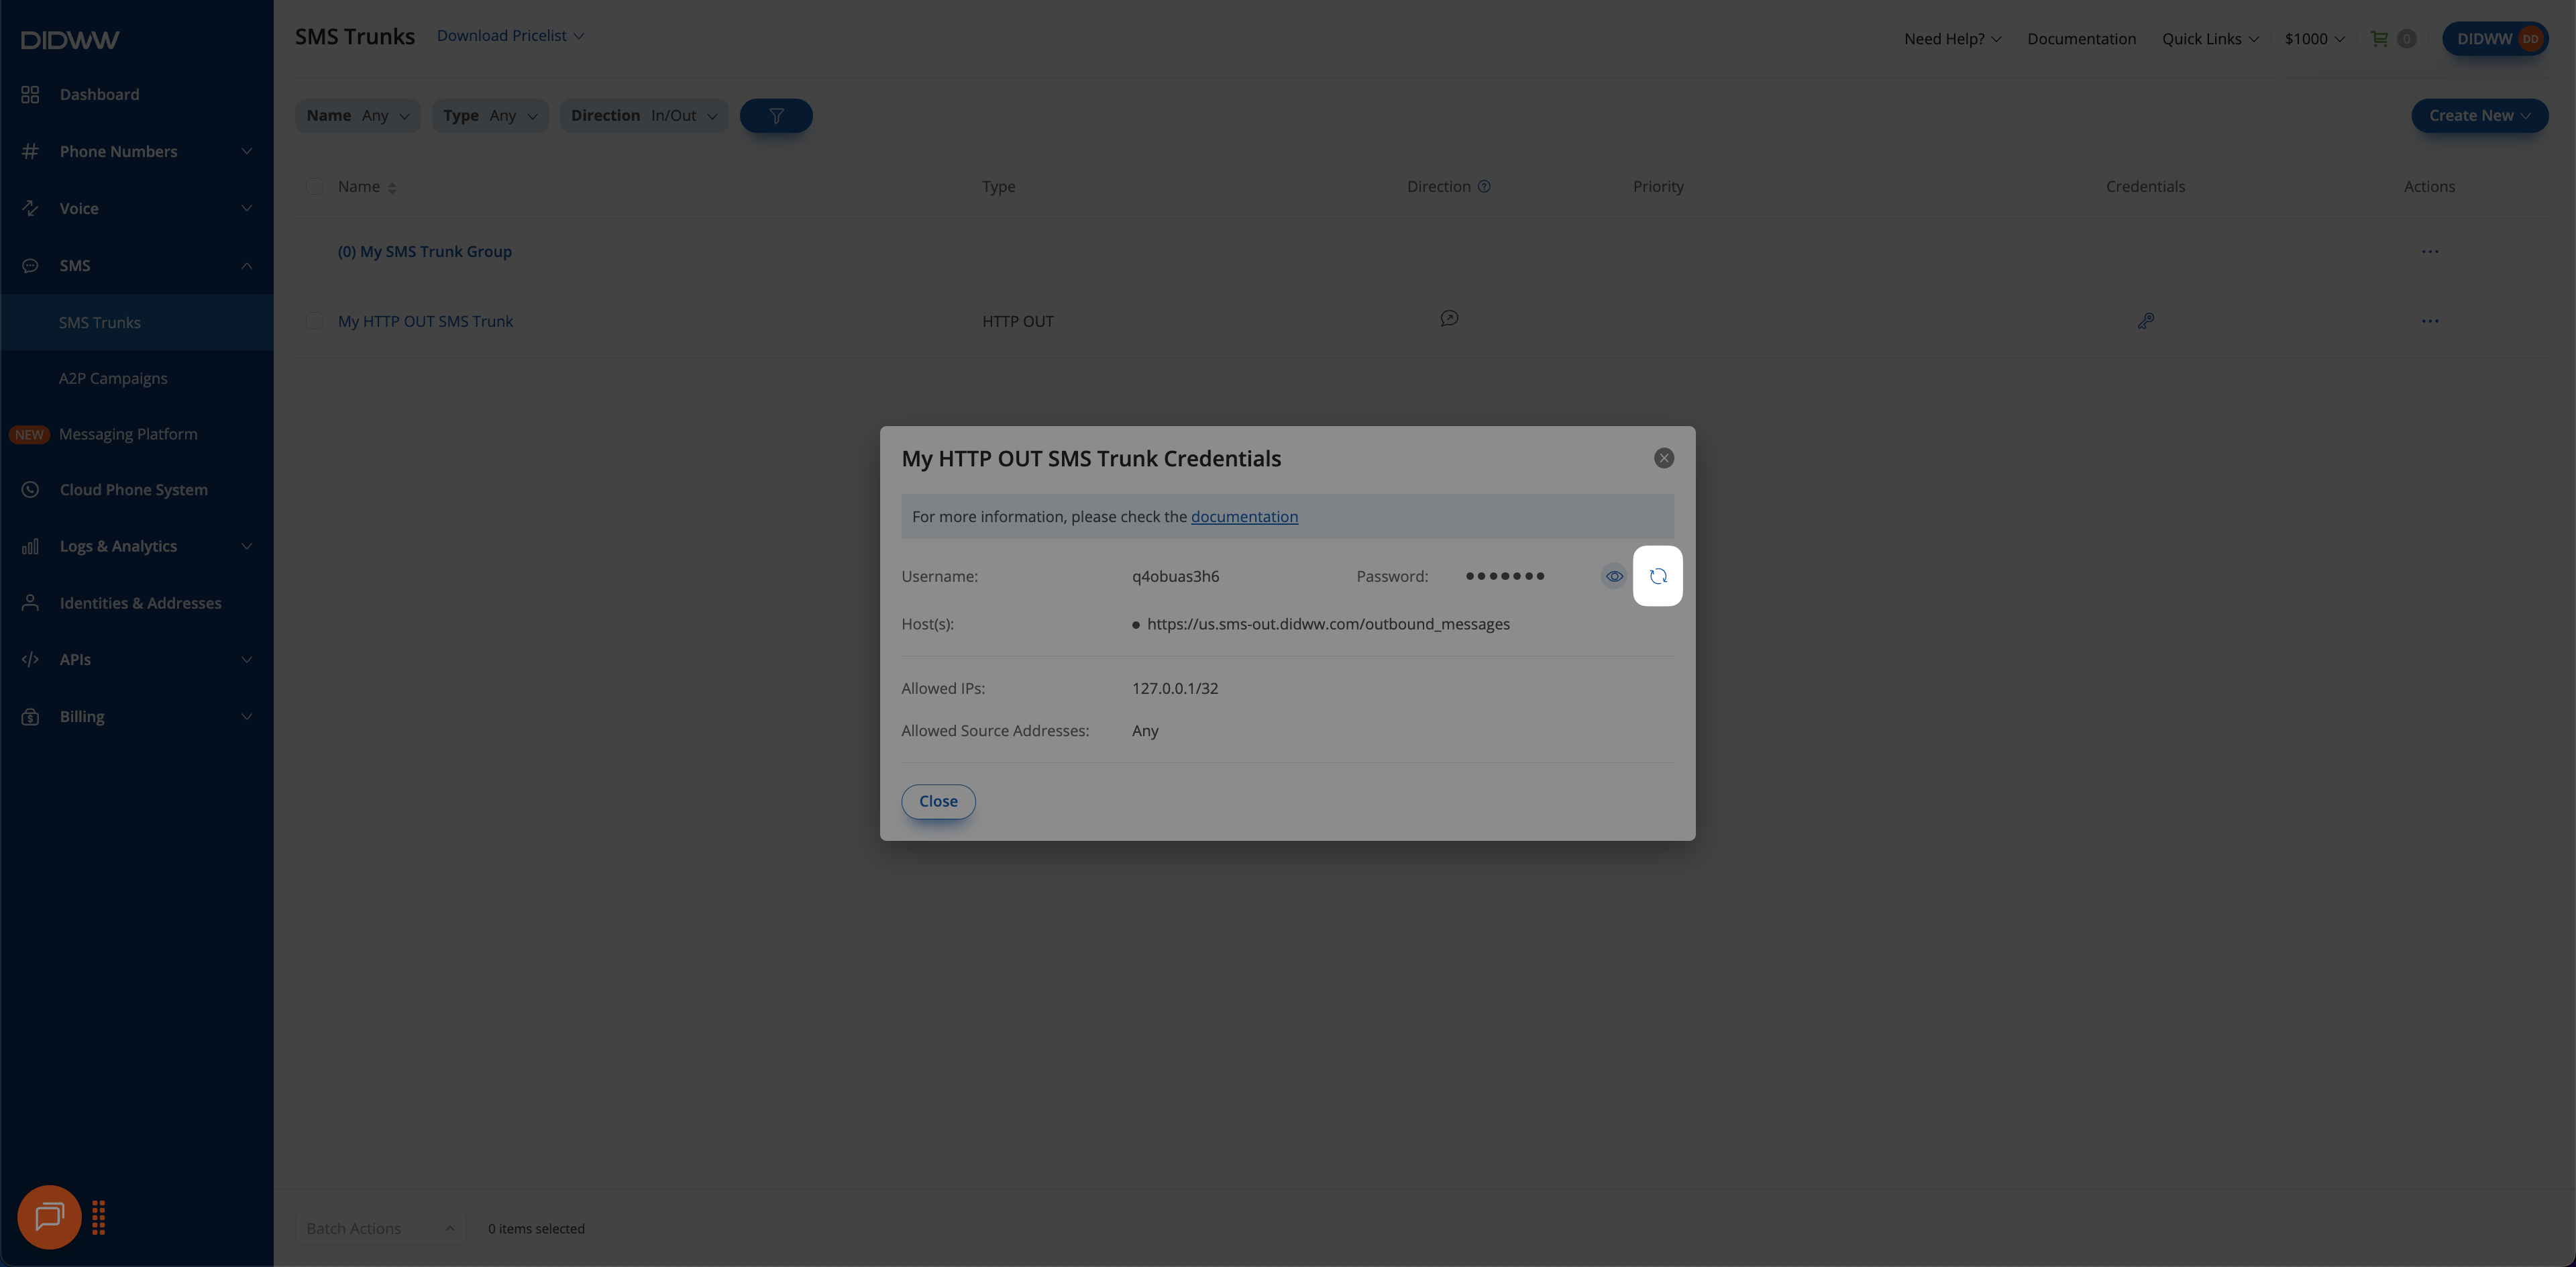
Fig. 6. Regenerating credentials.#
Send SMS#
From the SMS Trunks list, you can use the built-in tool to send a test message or a one-time message through any of your HTTP OUT trunks.
Note
To send SMS, Outbound P2P SMS services must be activated for your account. Contact our sales team at sales@didww.com for more information.
Before You Begin#
Before sending messages, make sure you have:
A DID number with outbound P2P SMS enabled. If you don’t have one, see How to Buy DID Numbers.
Sender IDs configured in your HTTP OUT trunk. For details, see Source Address Settings.
Step 1: Open the Send SMS Tool#
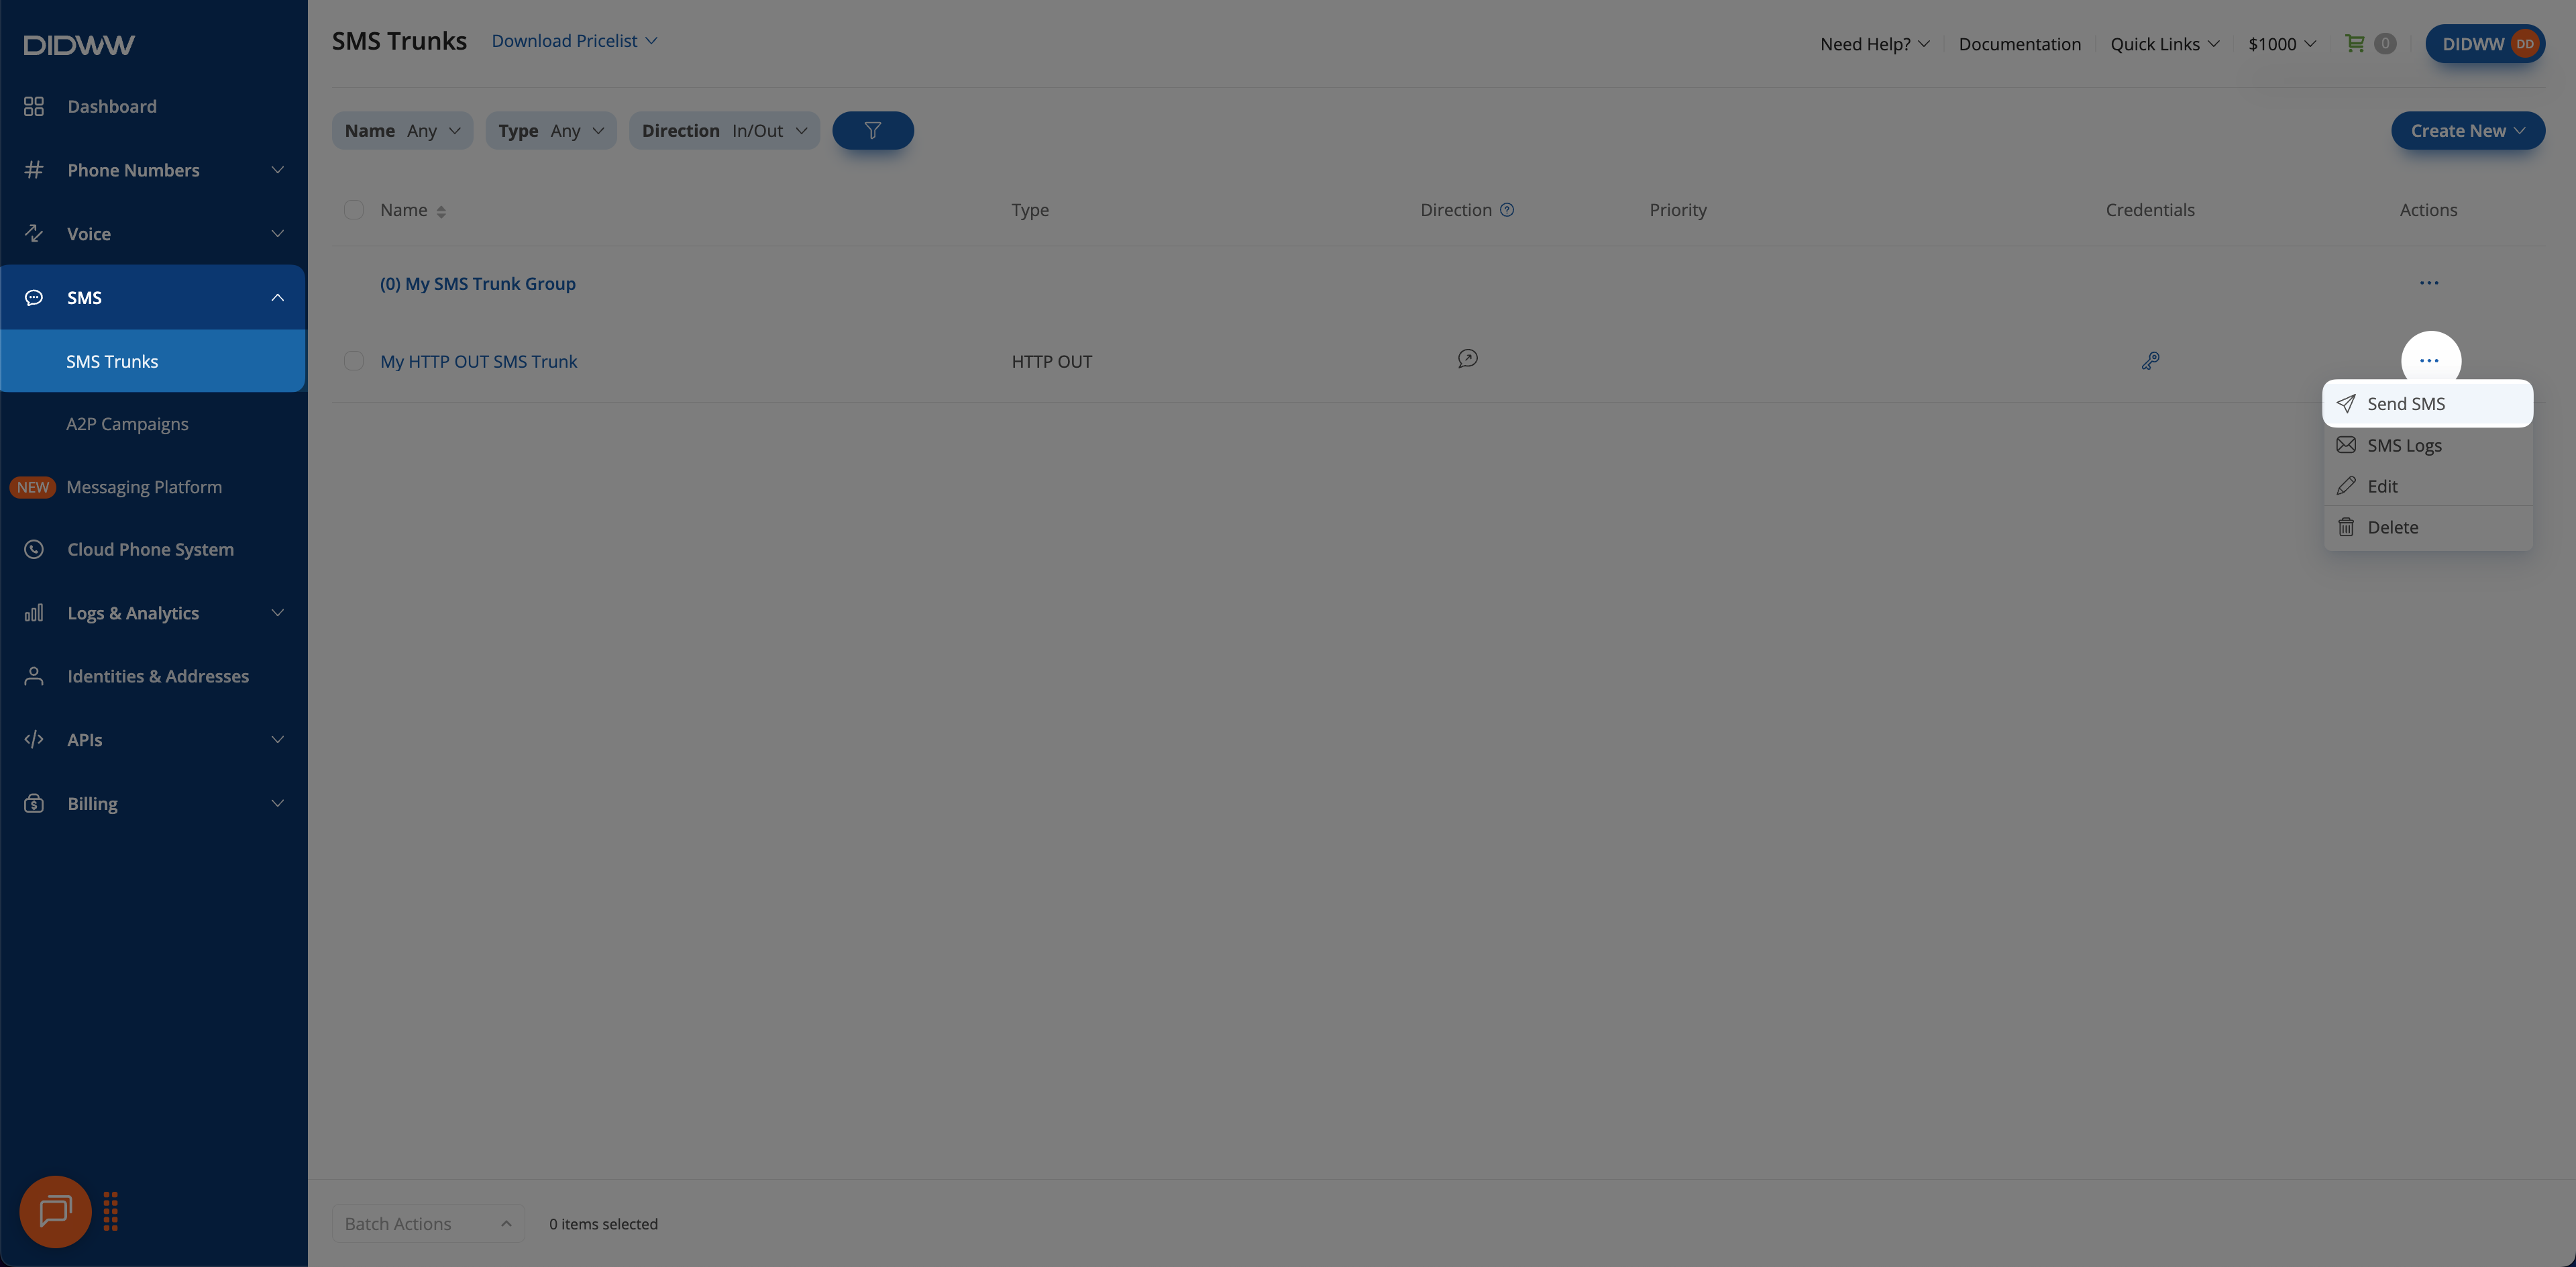
Fig. 7. Accessing the SMS sending tool.#
Step 2: Compose the Message#
In the Send SMS window, select a source address, enter the destination number, and type your message.
Field |
Description |
|---|---|
Source Address |
Select one of your authorized DID numbers with outbound P2P SMS enabled. |
Destination |
Enter the recipient’s phone number in international format (for example, |
Text |
Enter the message content. |
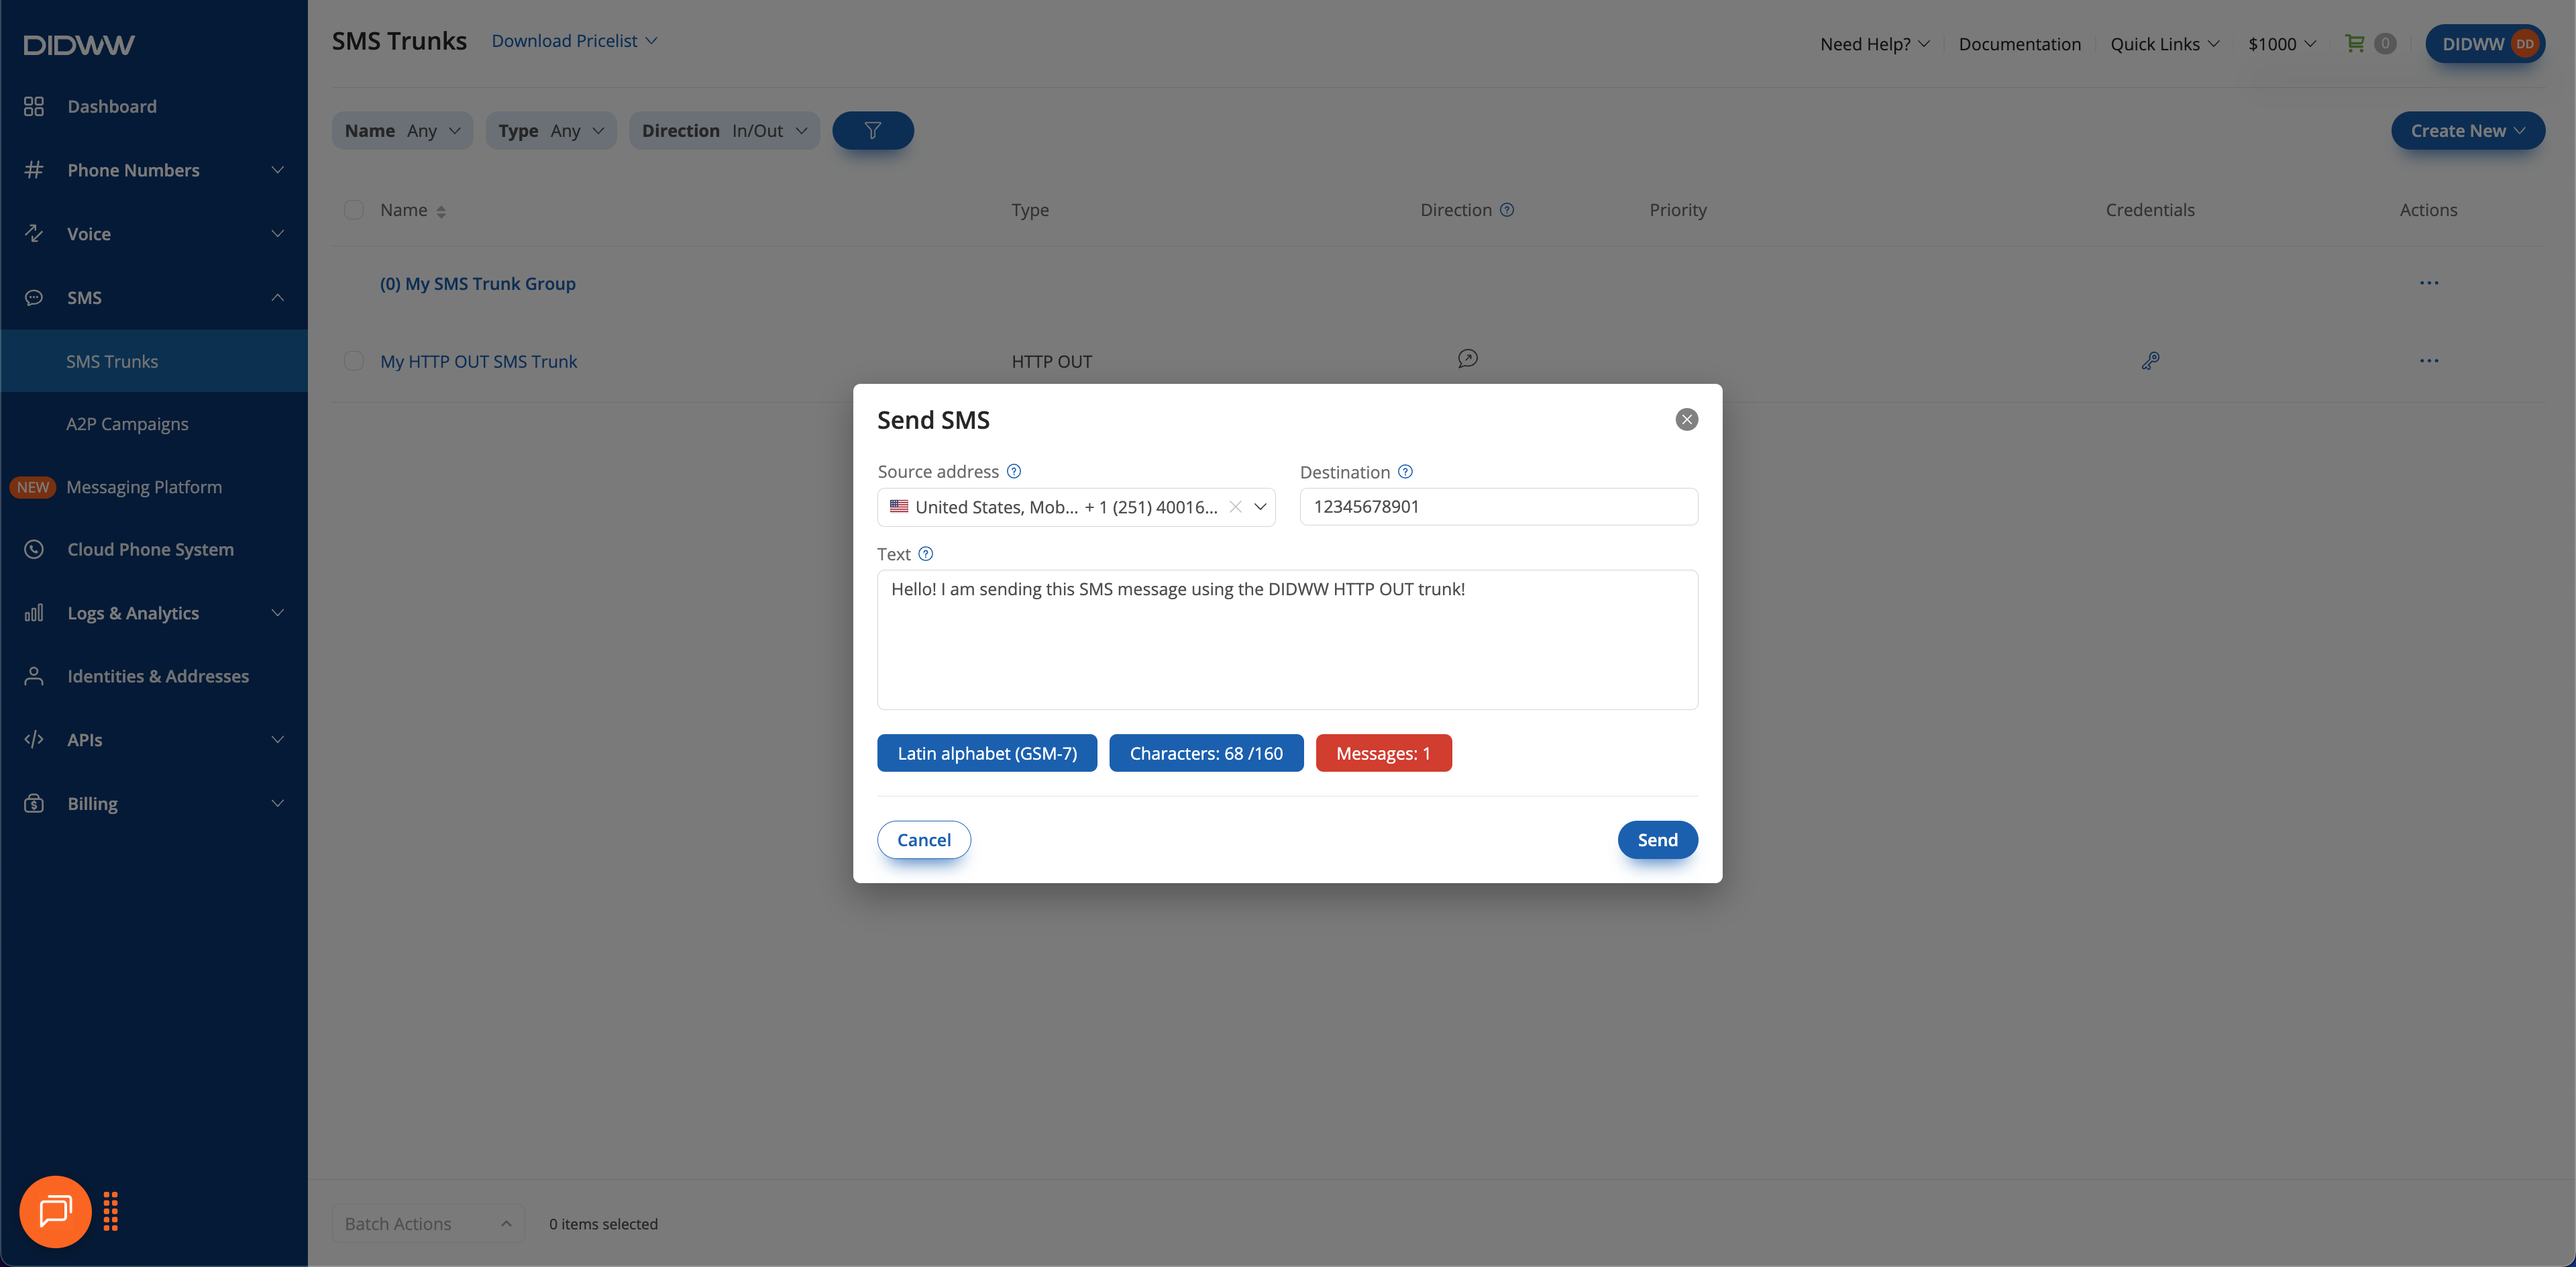
Fig. 8. Composing an SMS message.#
Step 3: Send the Message#
Click Send to deliver your message.
Note
The system automatically selects the message encoding:
GSM-7 is used for Latin-based characters. Each SMS fragment can contain up to 160 characters.
UCS-2 is used for non-Latin characters. Each SMS fragment can contain up to 70 characters.
Edit HTTP OUT SMS Trunk#
In the user panel menu, navigate to SMS > SMS Trunks.
Locate the trunk you wish to edit and click the
button next to it.
Select Edit from the dropdown menu.
On the Edit SMS to HTTP OUT Trunk page, modify the settings as needed.
Click Save to apply your changes.
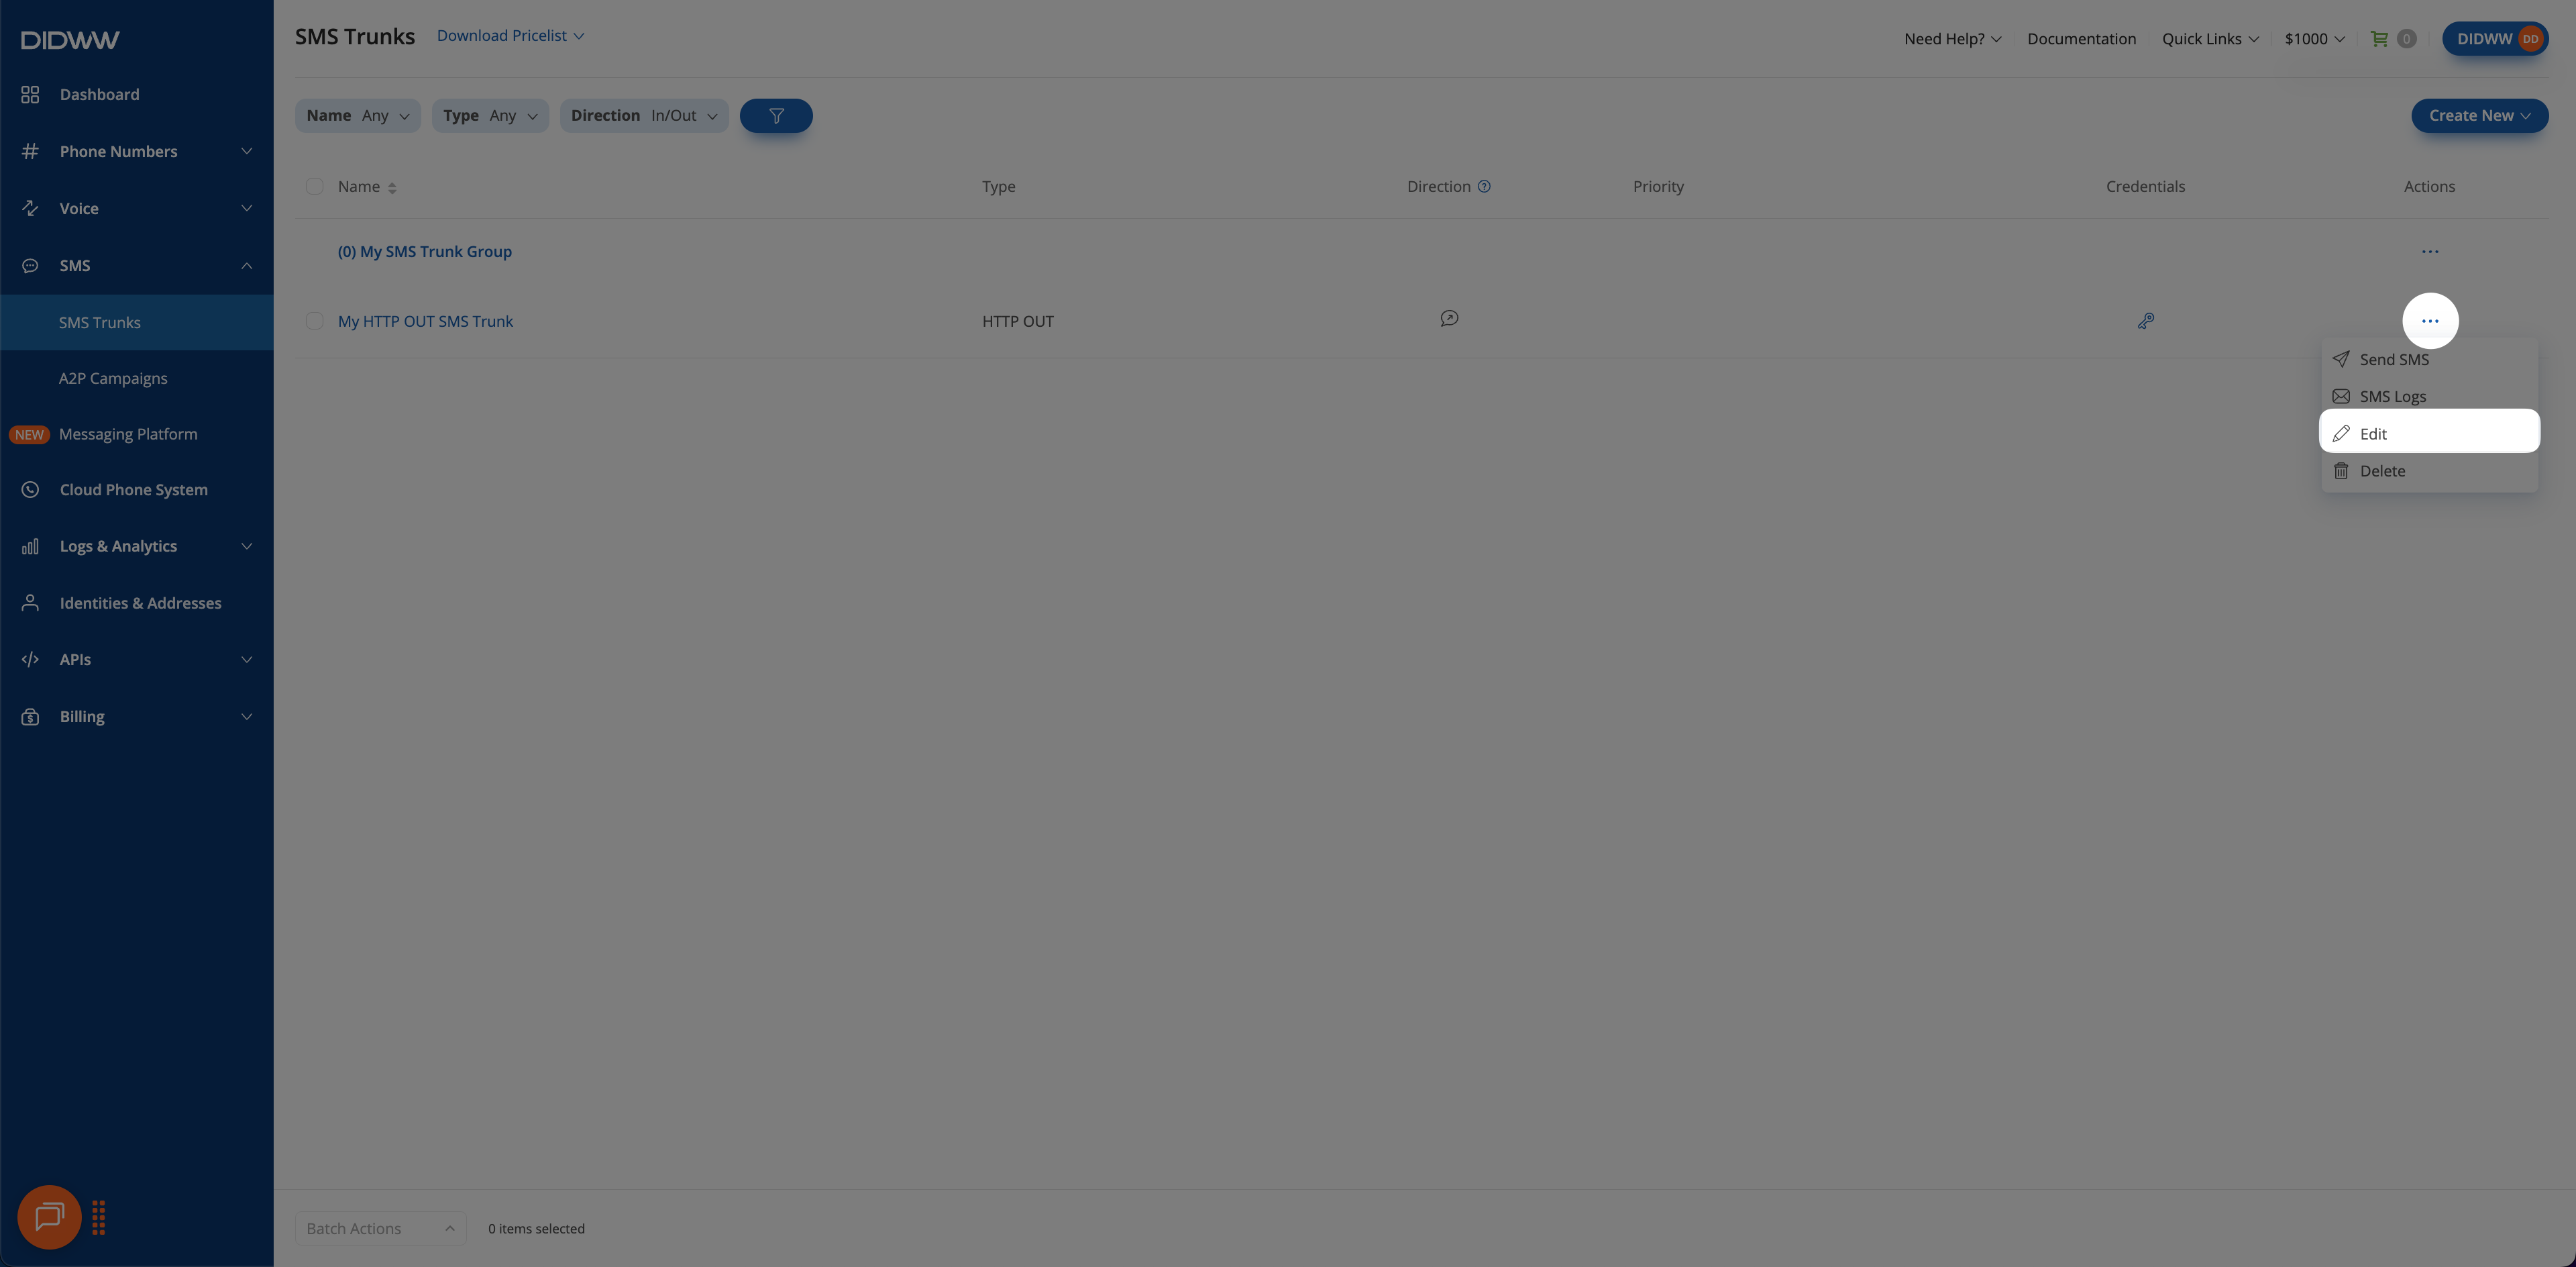
Fig. 9. Edit option for SMS to HTTP OUT Trunk.#
Delete HTTP OUT Trunk(s)#
You can delete a single SMS to HTTP OUT trunk or multiple trunks at once by using batch actions.
Navigate to the SMS Trunks list page.
Locate the trunk you wish to remove and click the
button next to it.Select Delete from the dropdown menu.
In the confirmation pop-up window, click Delete to permanently remove the trunk.
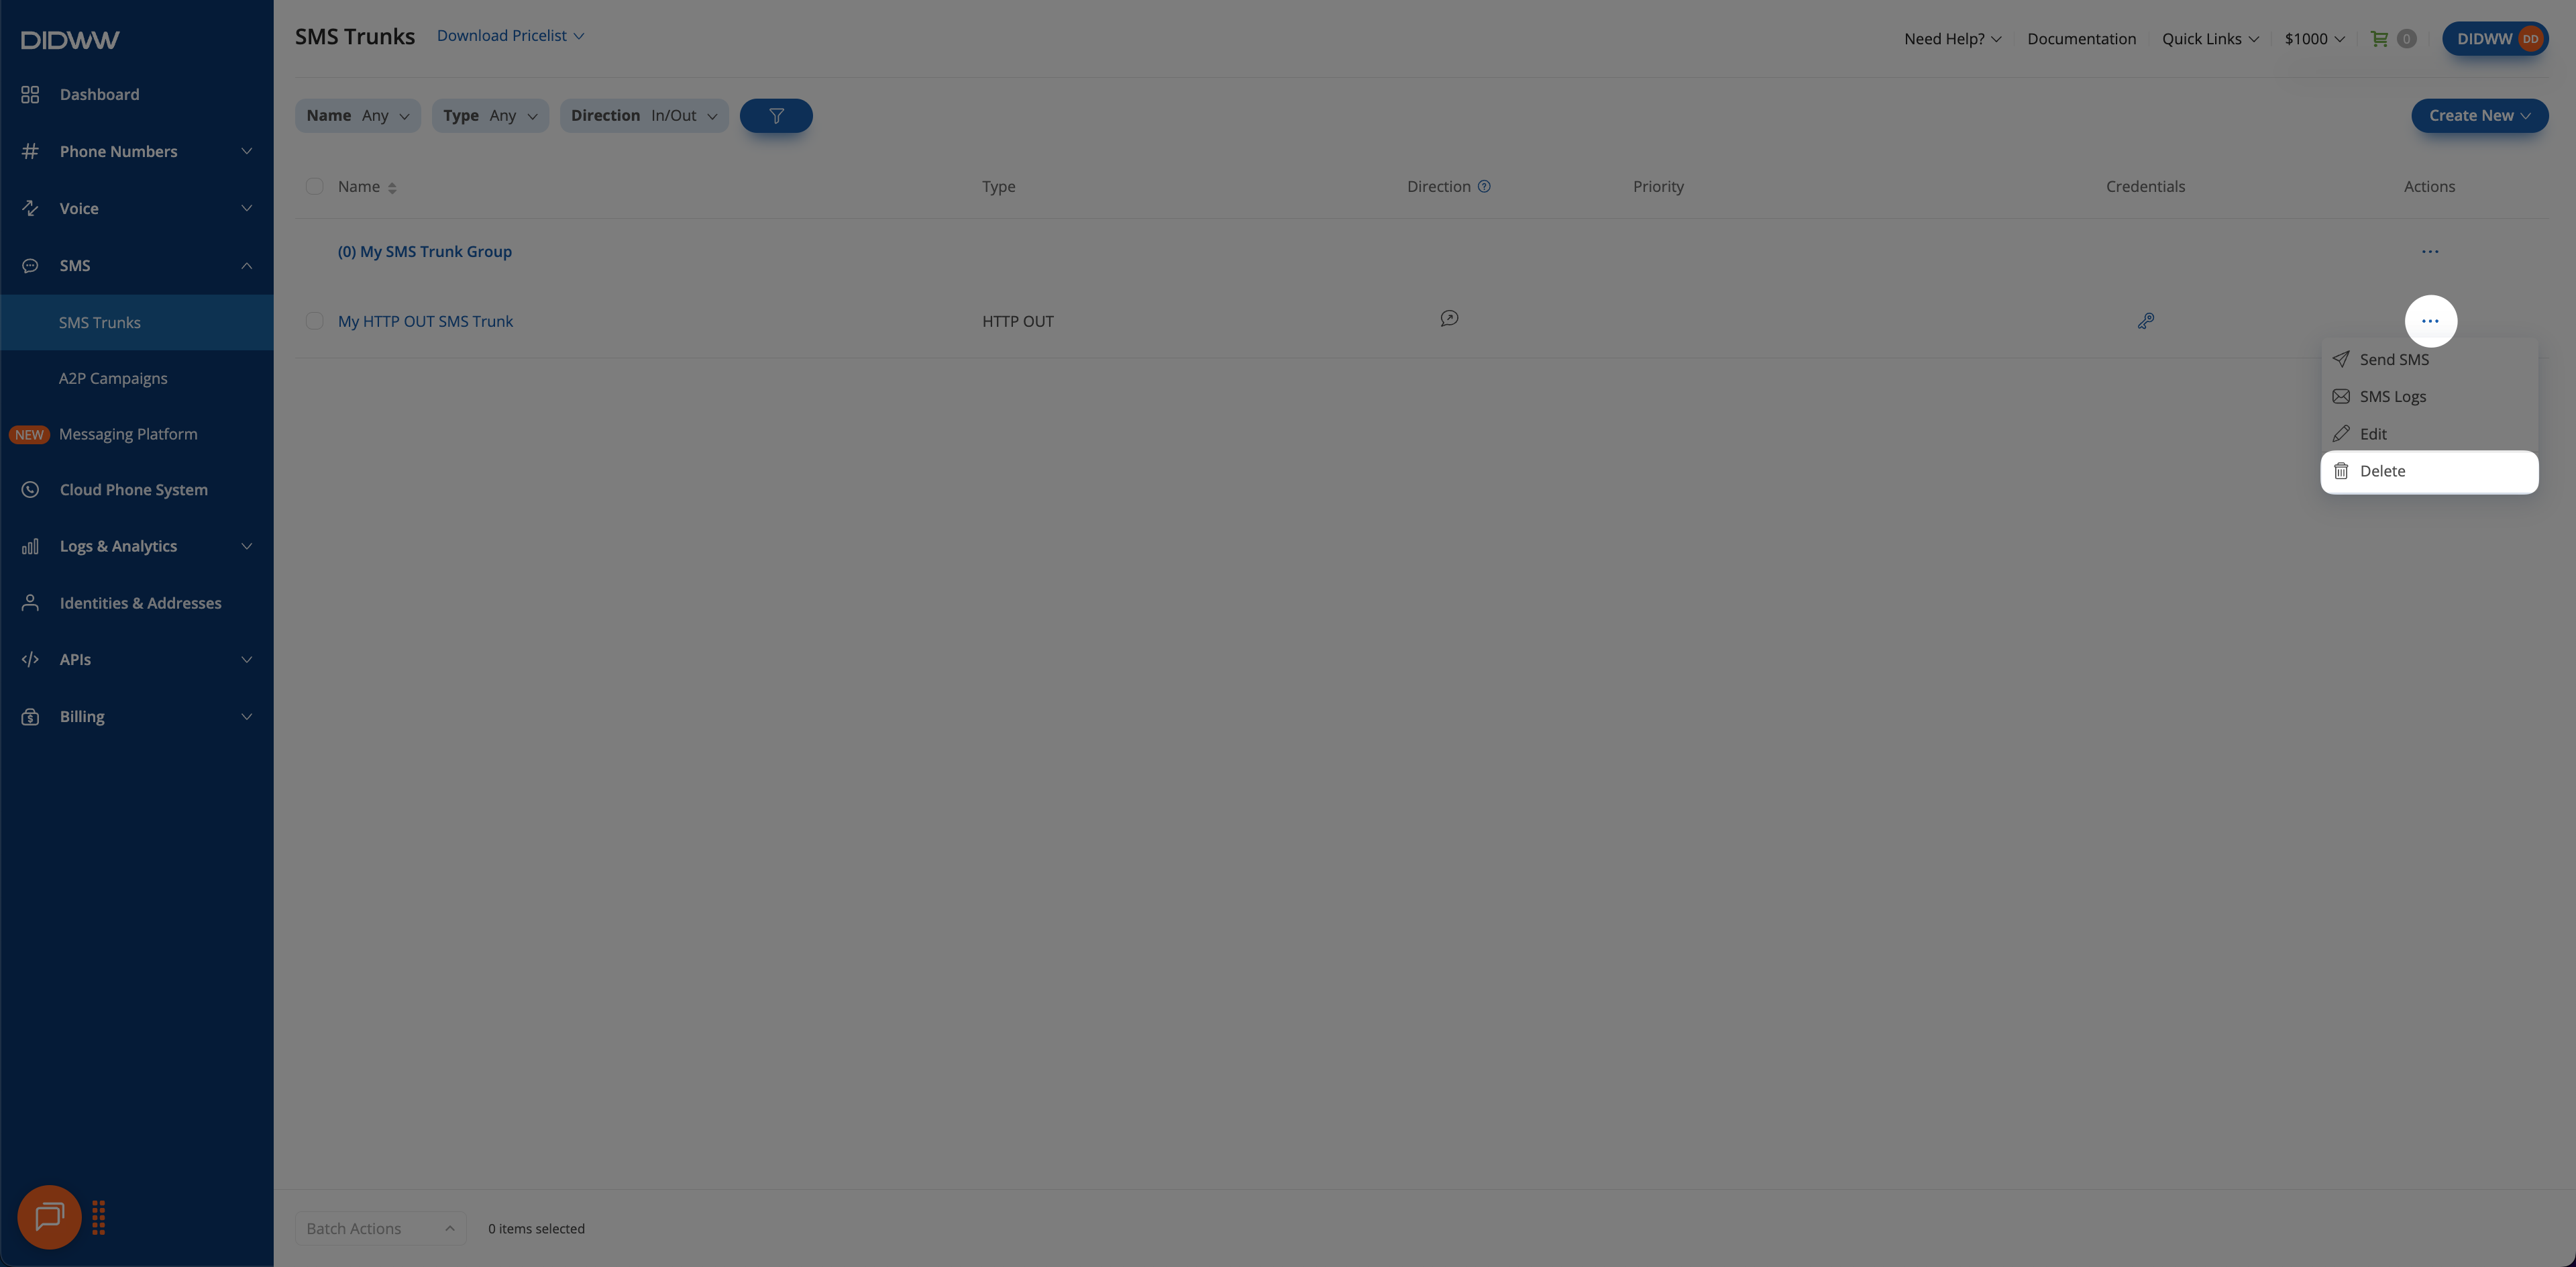
Fig. 10. Delete option for SMS to HTTP OUT Trunk.#
Navigate to the SMS Trunks list page.
Select the trunks you wish to delete by checking the boxes next to them.
At the bottom of the page, click Batch Actions and select Delete Trunks.
In the confirmation pop-up window, click Delete to permanently remove the selected trunks.
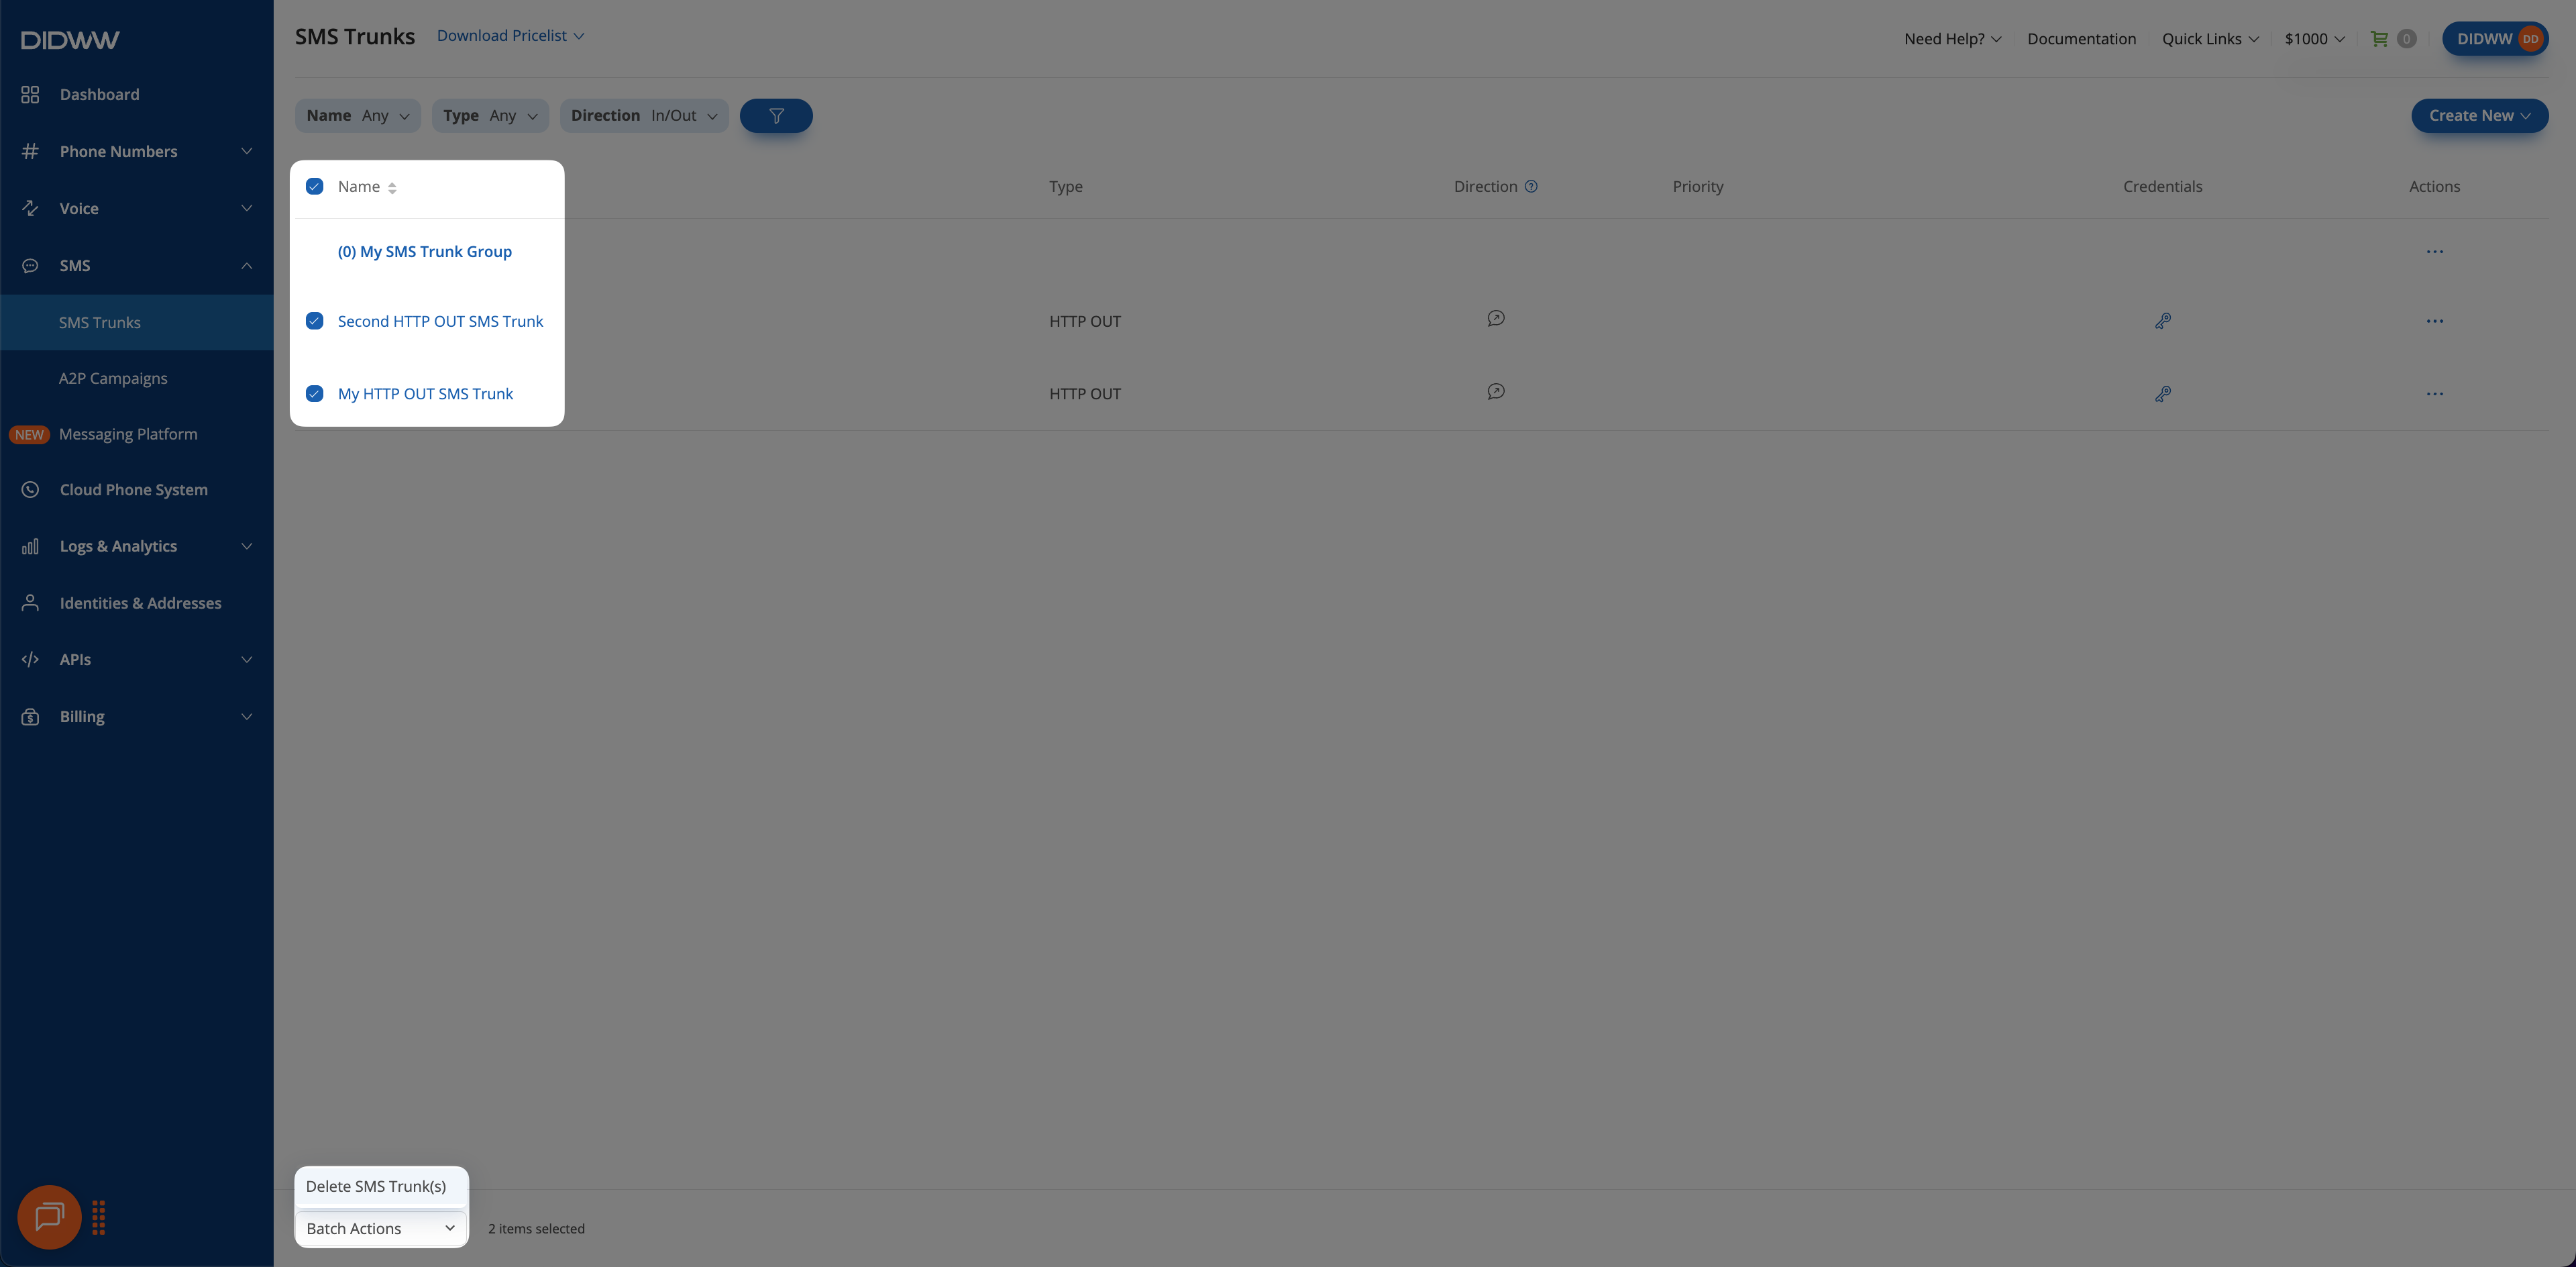
Fig. 11. Batch delete option for SMS to HTTP OUT Trunks.#