Getting Started

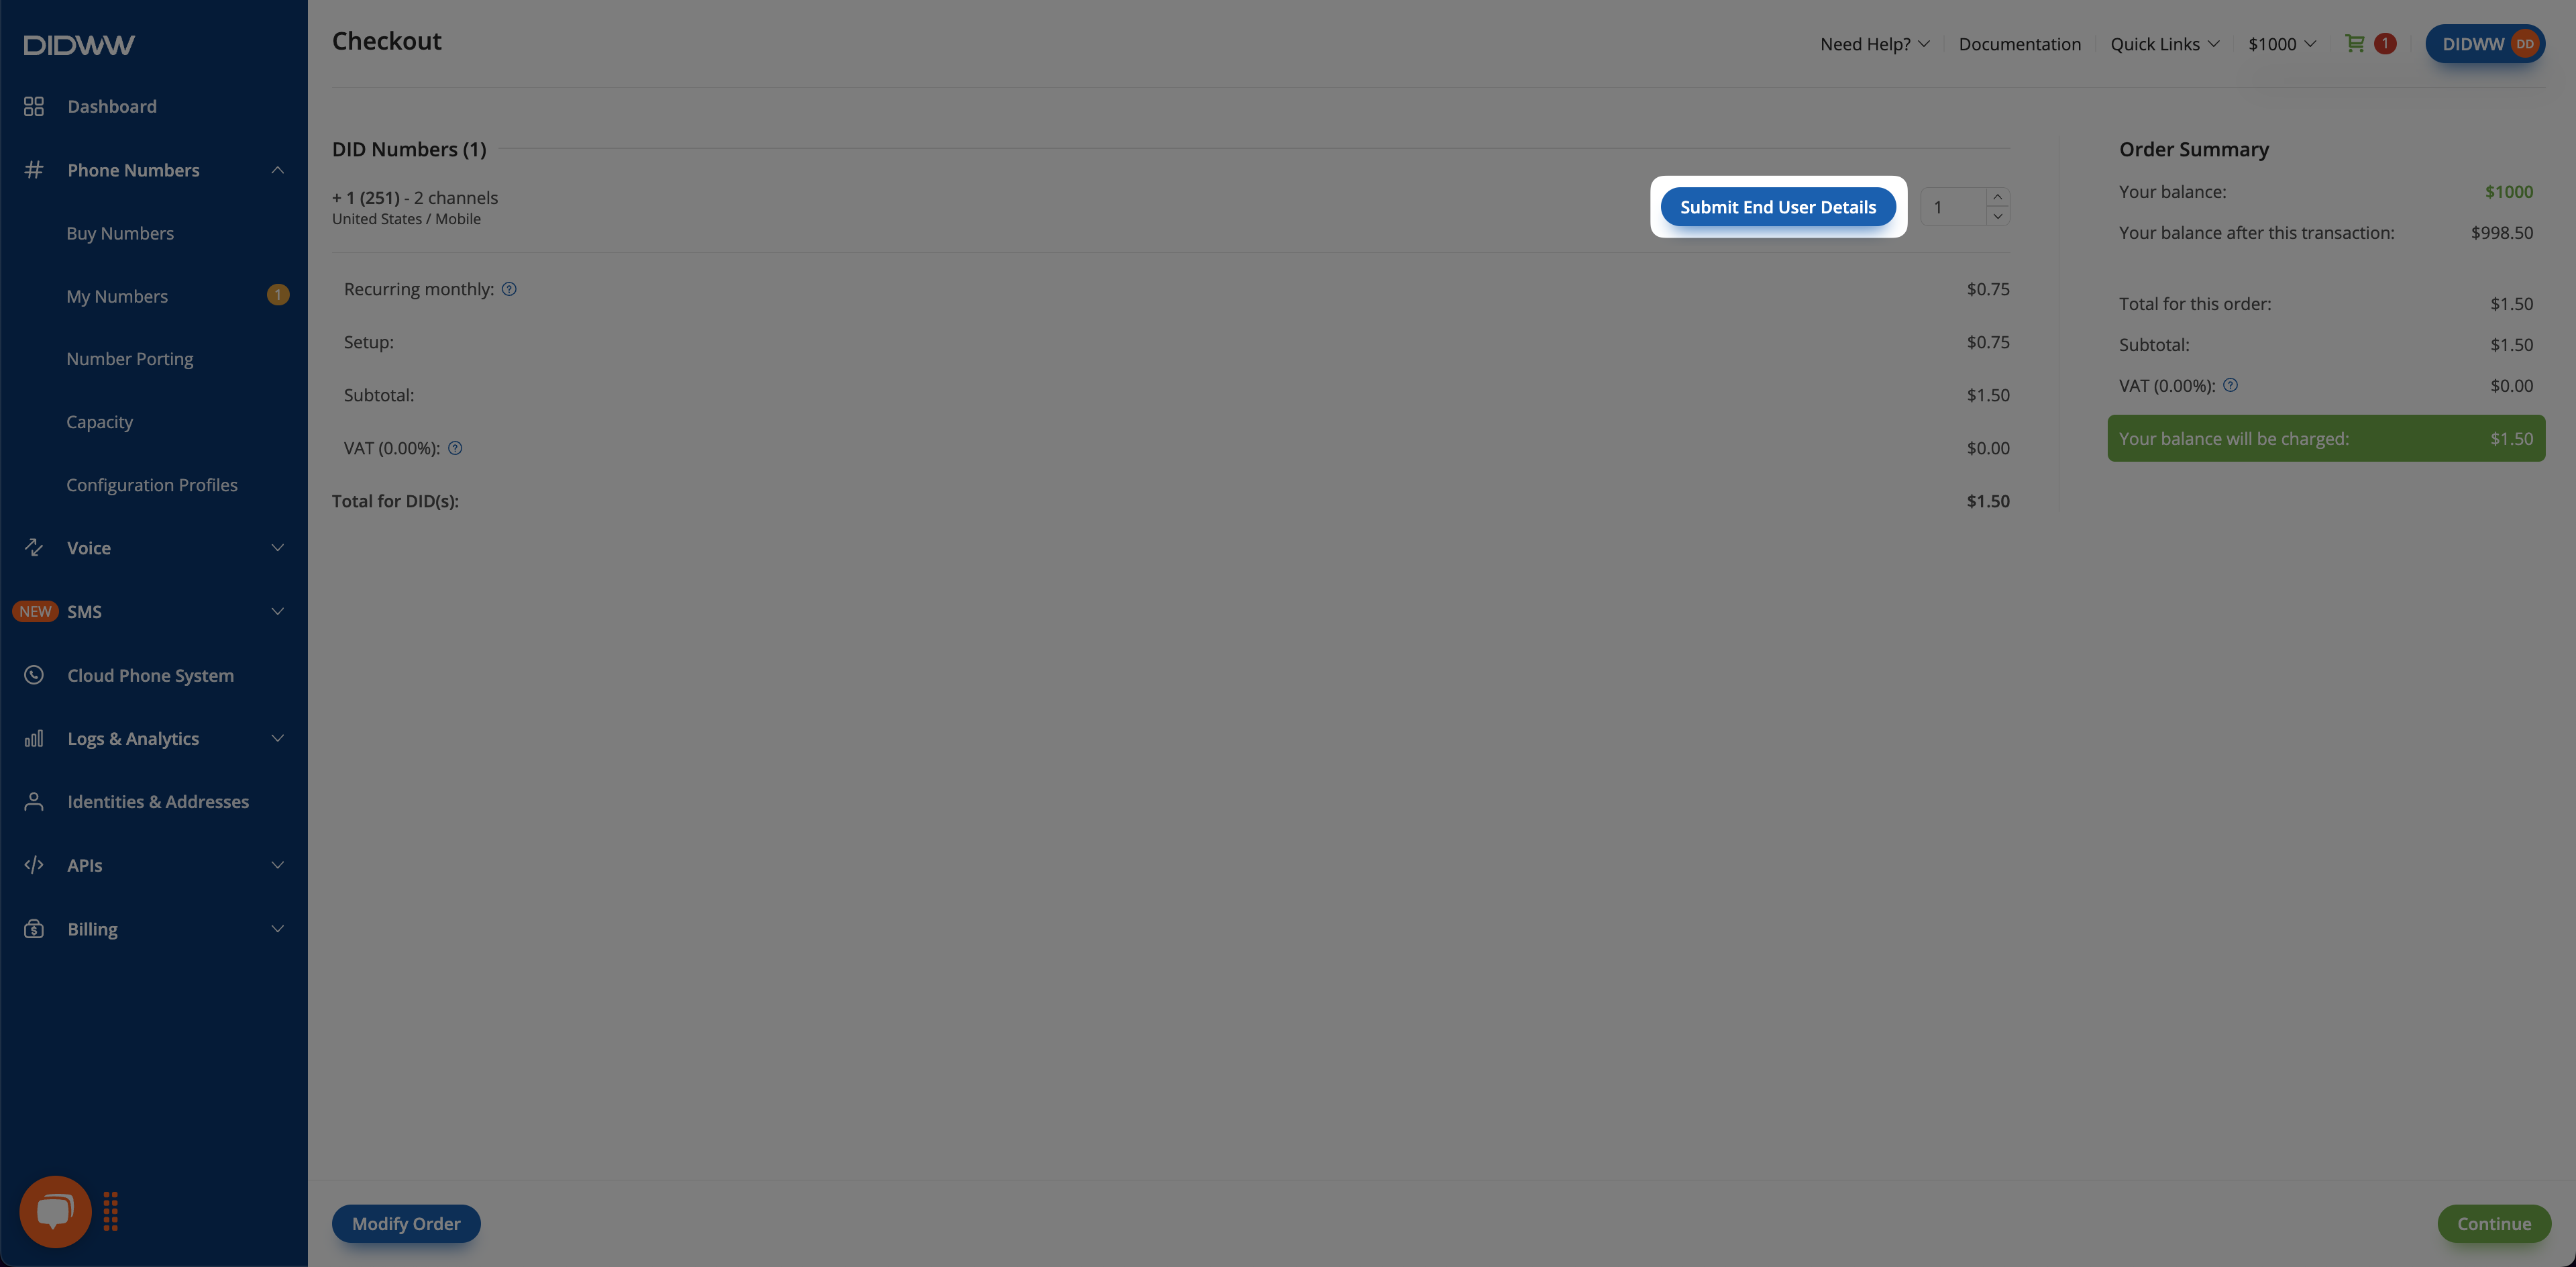
To purchase and activate DID numbers in countries with regulatory requirements (see Registration Required ), 
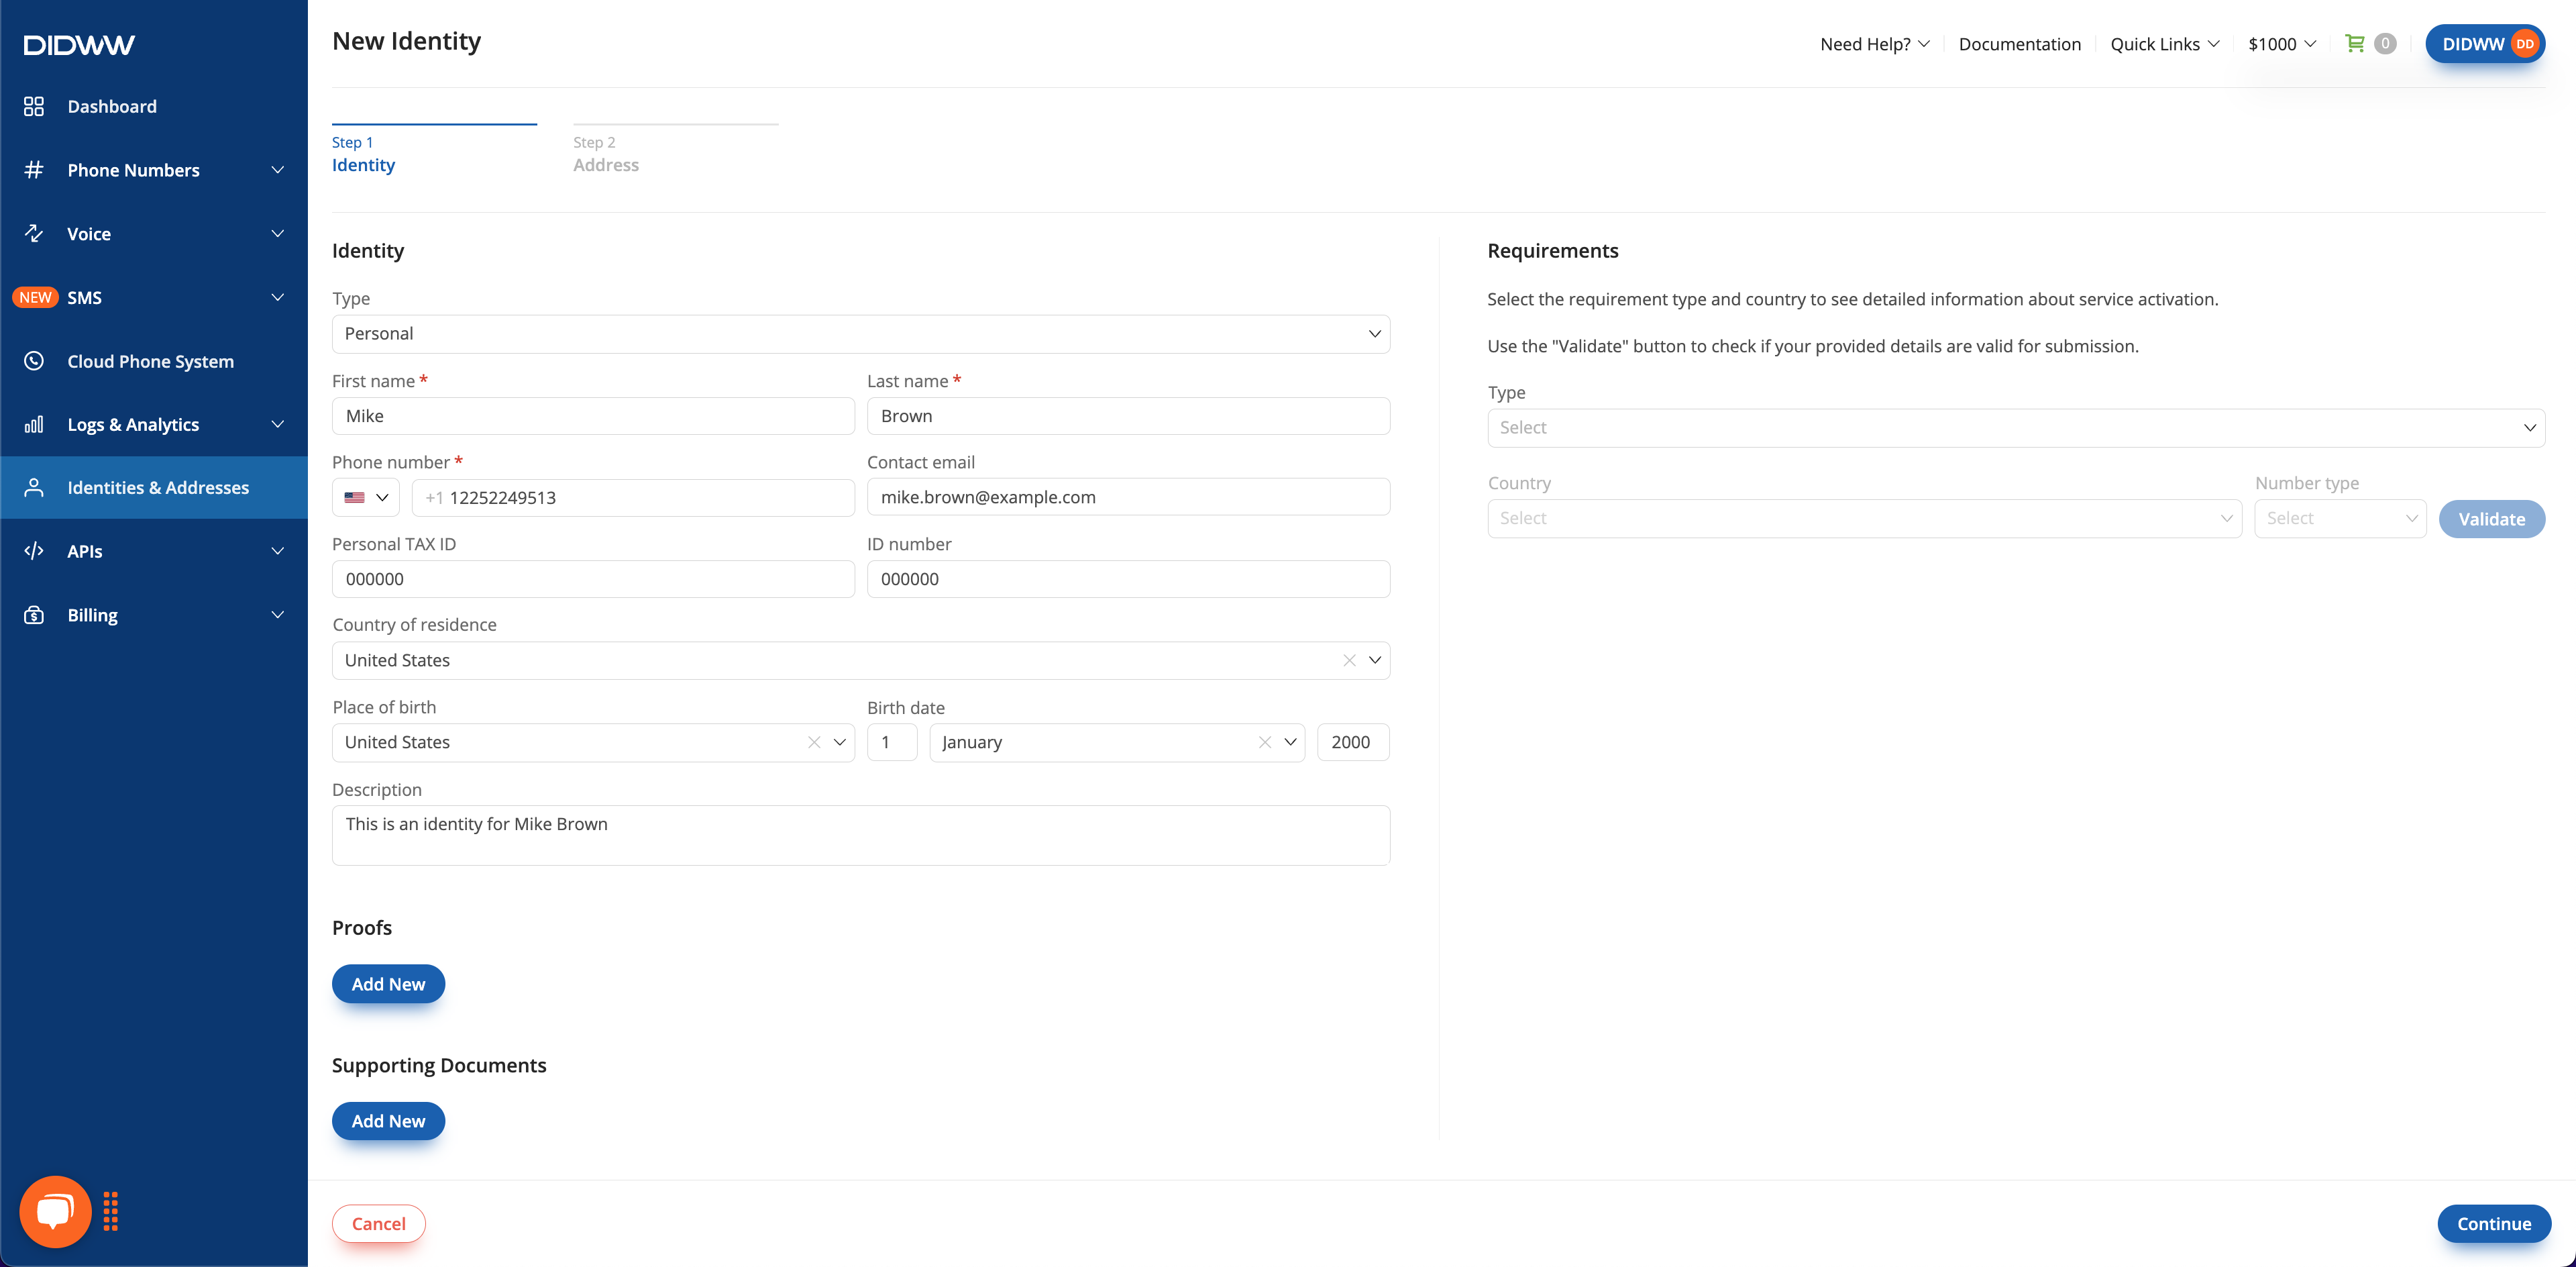
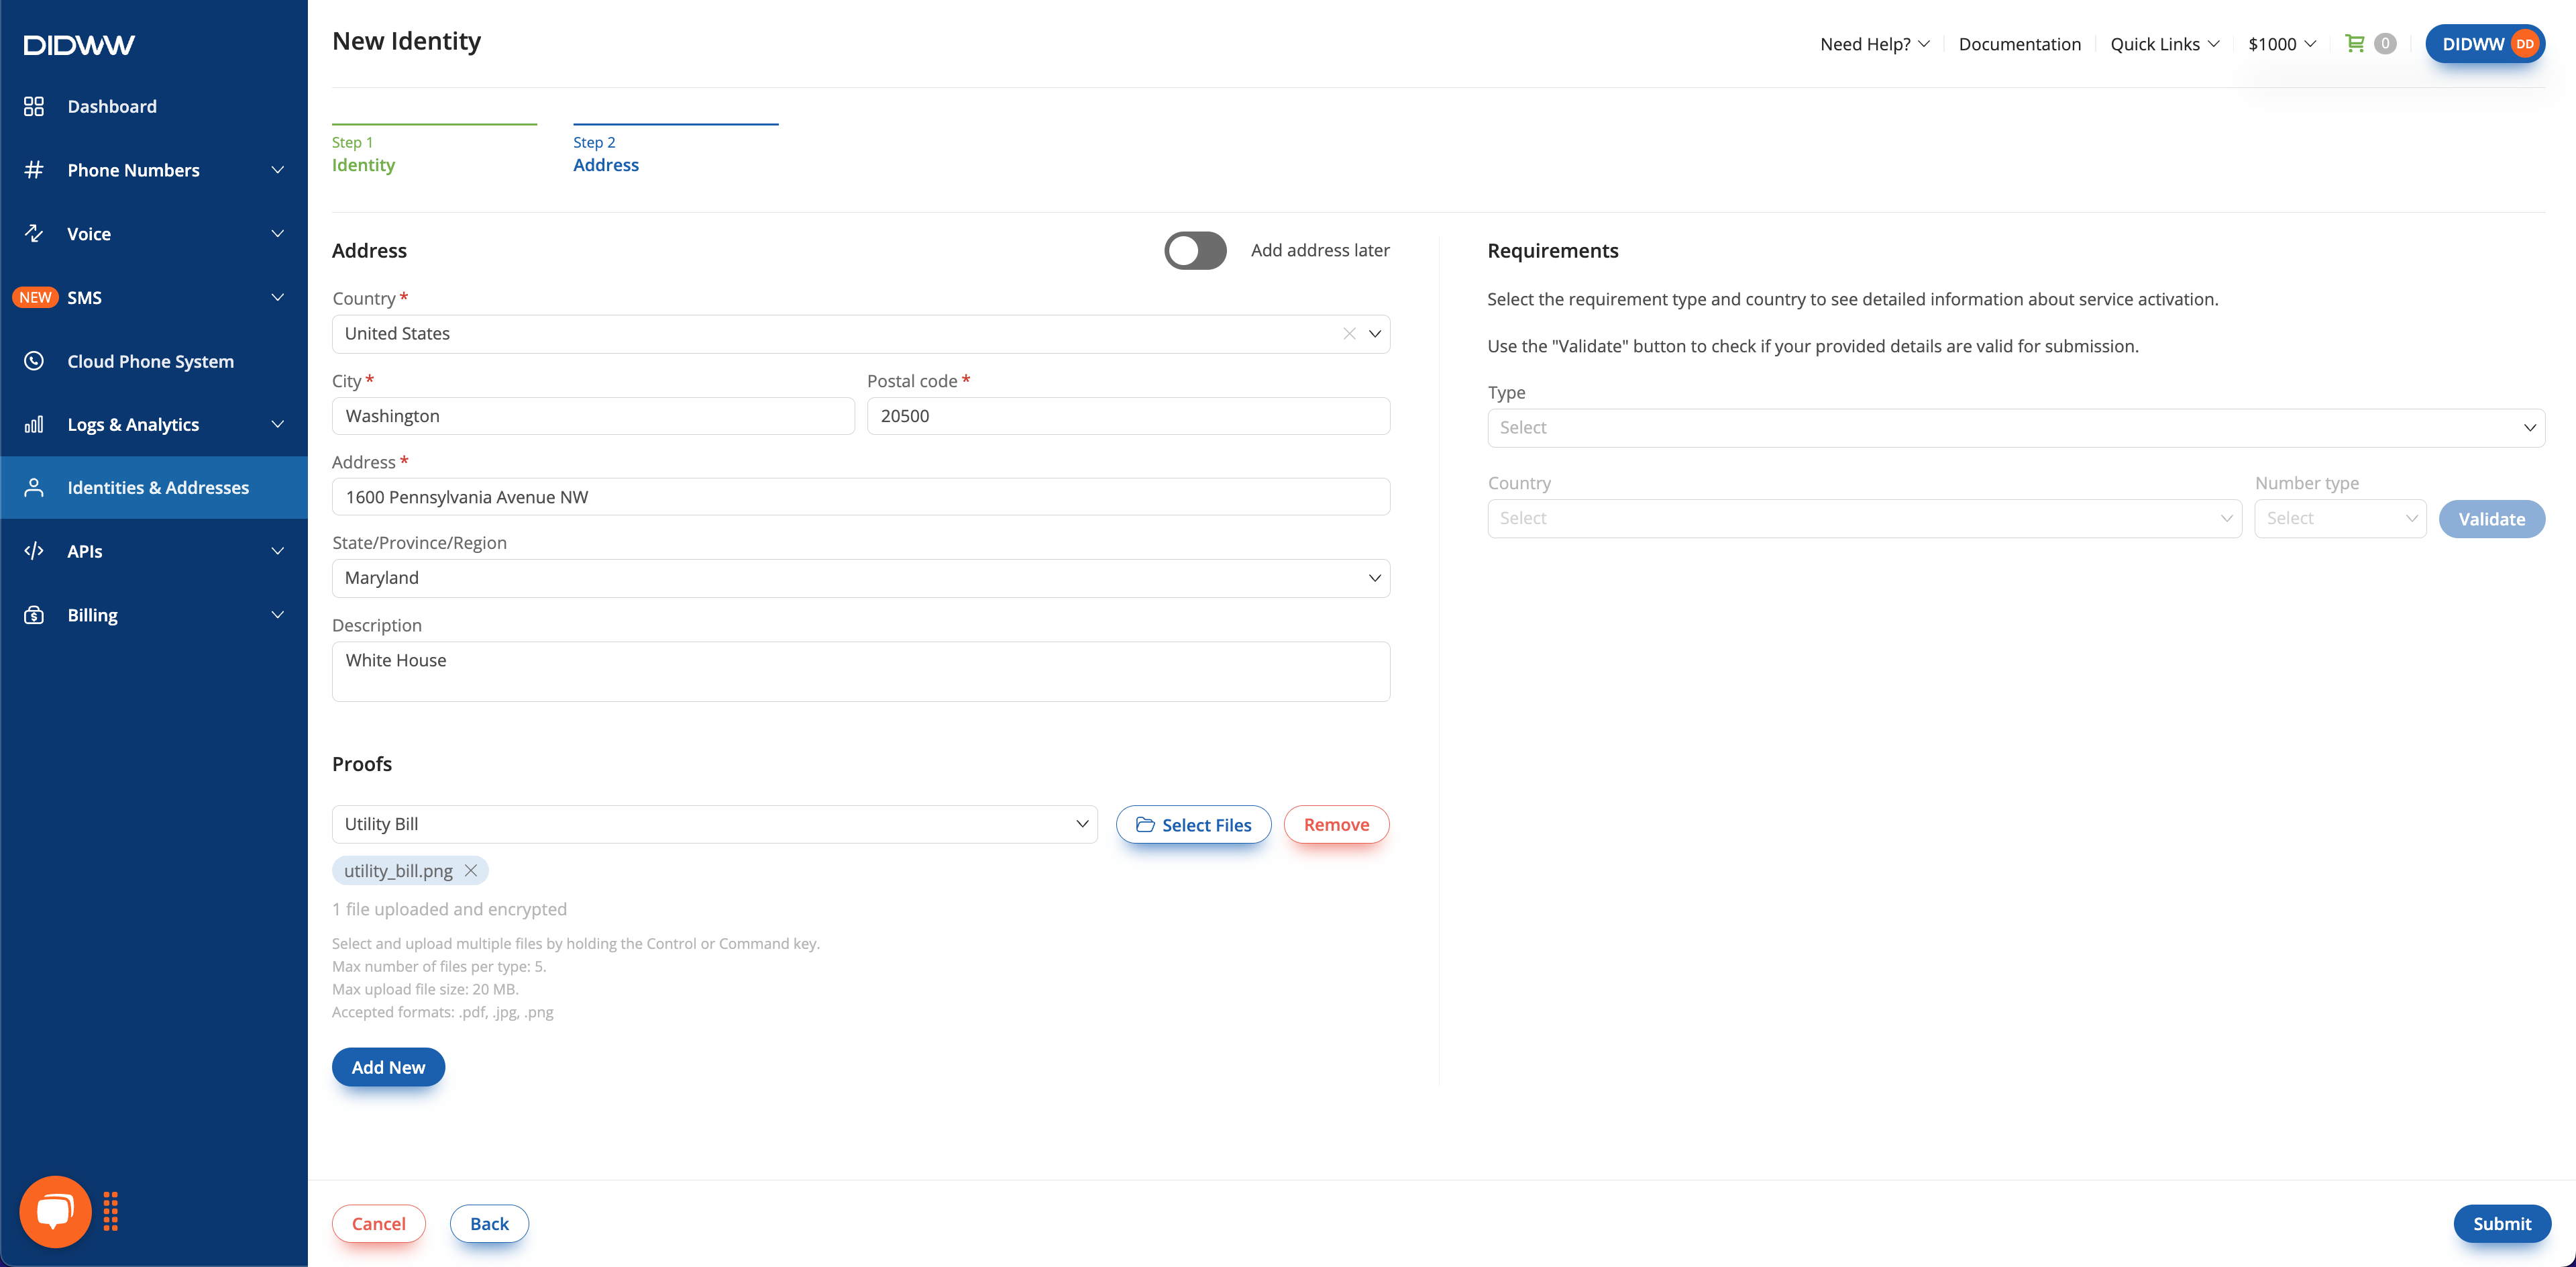
you must provide valid identity and address information. The Identities & Addresses feature simplifies this by letting you create, verify, and reuse these records for multiple services, helping you meet compliance requirements and speed up activation.


Before You Begin

Before starting the verification process, please ensure you have the following:

  • An Active DIDWW Account – You must be logged into your account to access the User Panel.

  • Digital Copies of Documents – Have your required proof of identity (e.g., Passport) and proof of address (e.g., Utility Bill) files ready for upload. Supported formats include .pdf, .jpg, and .png.


Step 1: Create a New Identity

  1. Go to Identities & Addresses or click here .

  2. Click the Add New Identity button.

  3. On the New Identity page, use the Requirements checker on the right to confirm which specific documents you will need.

  4. Fill in the Step 1: Identity form with your details (Personal or Business) and upload your proof of identity.

  5. Click Continue to proceed to the next step in the wizard.

Note

For a complete guide on all available options, please see the detailed Identities Guide.

Filling in identity details.

Fig. 1 Example of a completed identity form.


Step 2: Create a New Address

After you complete the identity form in Step 1, the wizard opens the Step 2: Address form.

  1. Enter your Address details and upload a valid proof-of-address document.

  2. Check the Requirements panel on the right to see which documents are needed. Select Validate to confirm that all entered information is correct.

  3. Select Submit to create both the identity and address records.

Note

For a complete guide on all available options, see the detailed Addresses Guide.
You can also create and assign an address to an existing identity.

The Address step in the New Identity wizard.

Fig. 2 The Address step in the New Identity wizard.


Step 3: Submit End User Details During Number Checkout

Once your identity and address are ready, you can assign them to a new number as you purchase it.

  1. When purchasing a DID number that requires registration, click the Submit End User Details button in your cart.

    Submit End User Details Button in the cart.

    Fig. 3 Submit End User Details Button.

  2. In the pop-up window, choose the identity and address you just created.

  3. Select Submit to complete the DID Number purchase and start the verification process.

    Selecting the Identity and Address for a new number.

    Fig. 4 Selecting the Identity and Address.

Note

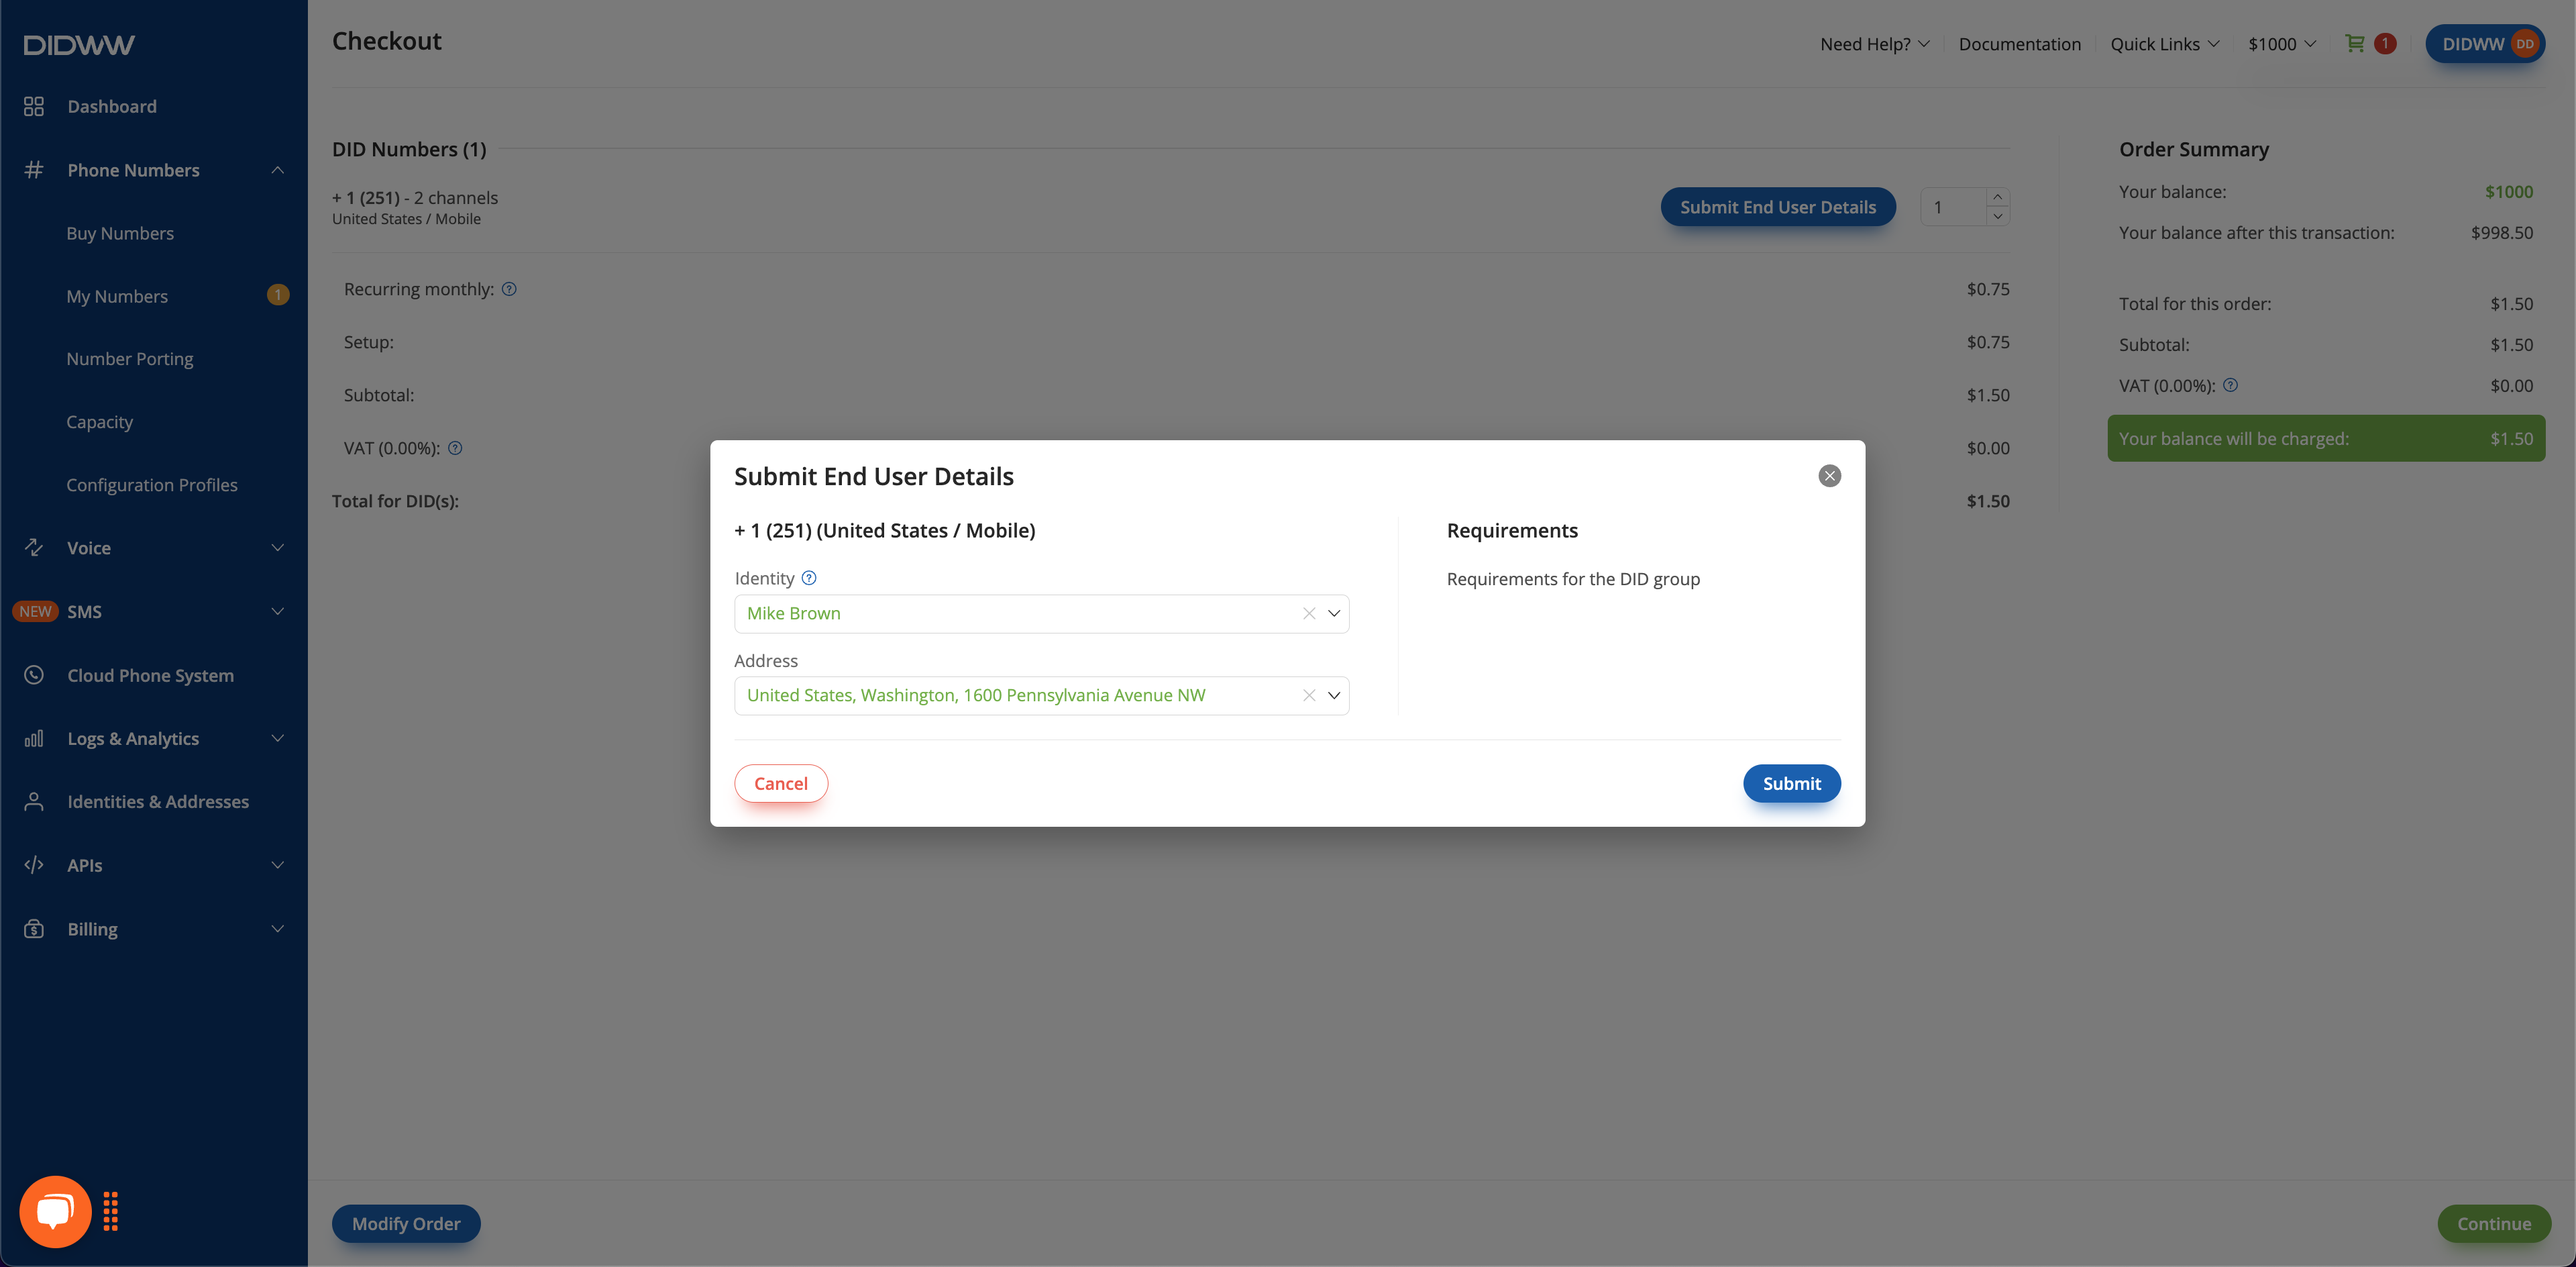
If you already have a number that is awaiting registration, you can assign an identity to it at any time from the Phone Numbers > My DIDs page. Both methods are covered in the full Verifications Guide.


Step 4: Track Your Verification Status

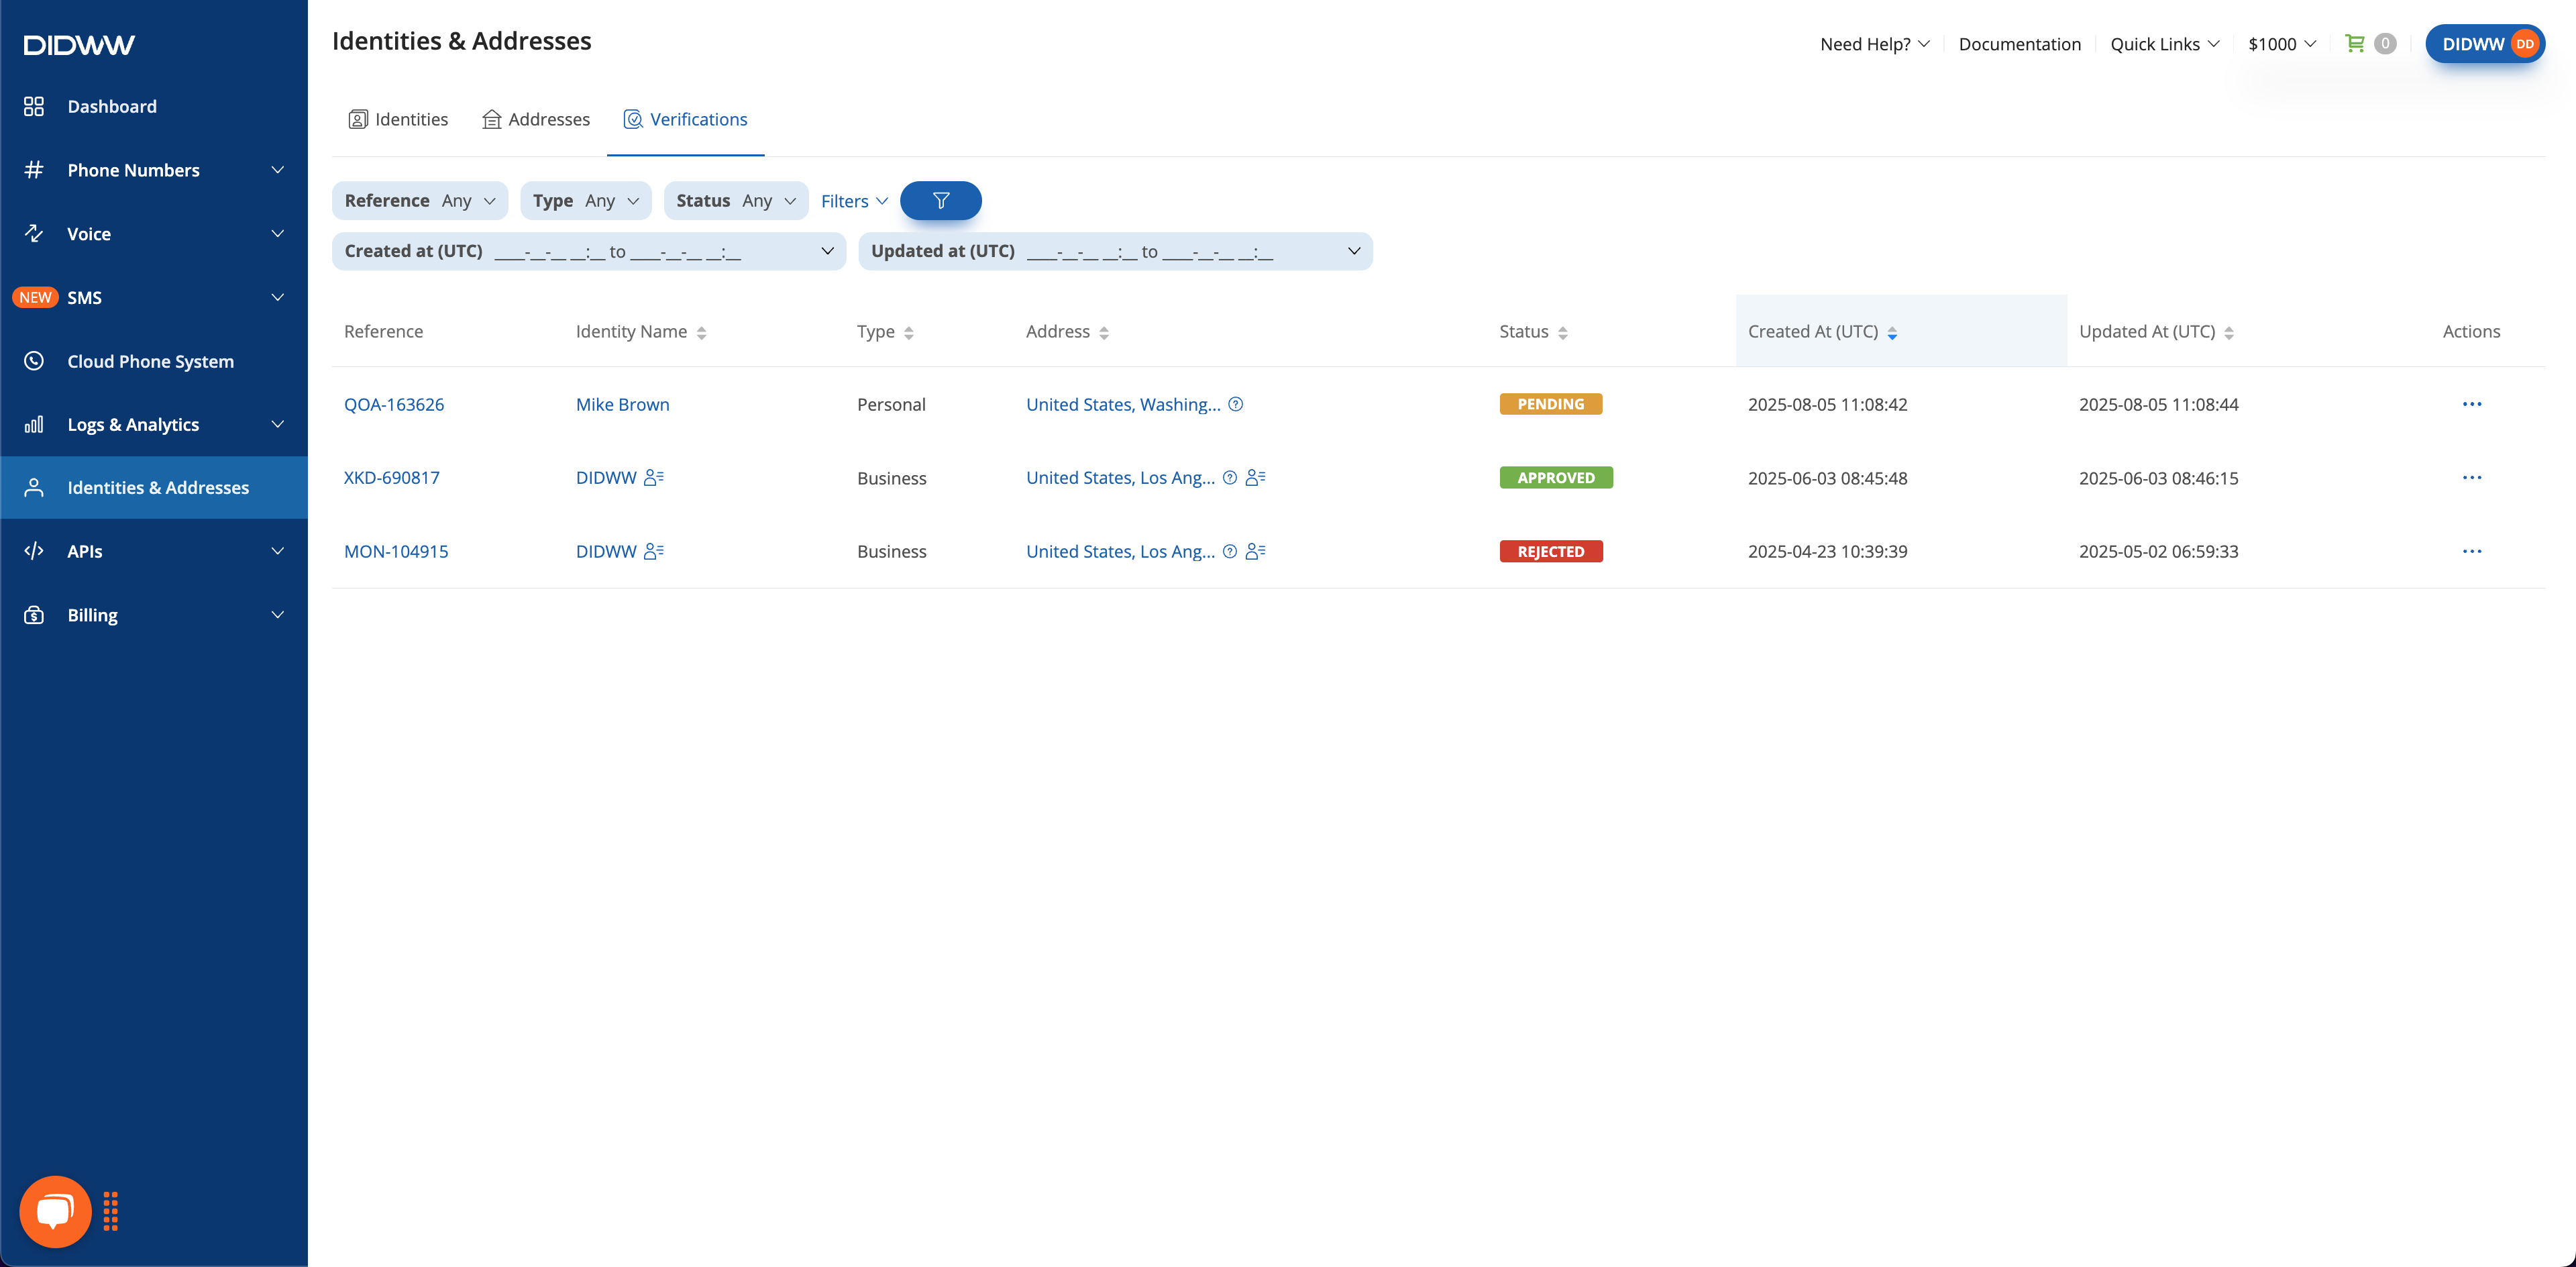
The verification process starts after you submit your request. You can track its progress in the Verifications tab and view the history of previous DID number verification requests.

  1. Go to Identities & Addresses, then select the Verifications tab.

  2. Find your request in the list.

  3. When the responsible department reviews your request, you will receive an email notification with the updated verification status and any required information.

Note

For a detailed look at verifications, see the full Verifications Guide

The Verifications tab showing the status of requests.

Fig. 5 The Verifications tab.