SMS to Email Trunk#
SMS to Email trunks allow you to forward incoming SMS messages from your Direct Inward Dialing (DID) numbers directly to a specified email address. Each message is converted and delivered as a standard email.
Create and configure a new SMS to Email Trunk.
Update the settings of an existing trunk.
Remove one or more trunks from your account.
Create SMS to Email Trunk#
Step 1: Start Creating SMS to Email Trunk#
In the user panel menu, navigate to SMS > SMS Trunks. Click the Create New button in the top-right corner and select Email from the dropdown menu.
Fig. 1. Navigating to create a new SMS to Email Trunk.#
Step 2: Configure SMS To Email Trunk#
Enter the general information required to set up your SMS to Email trunk. Provide a descriptive friendly name and define how incoming SMS messages should be forwarded by email.

Fig. 2. SMS to Email Trunk configuration settings.#
General Settings#
Setting |
Description |
|---|---|
Friendly name |
Enter a unique name to identify this trunk. |
Recipient email |
Specify the email address where incoming SMS messages will be delivered. |
Email subject |
Define the subject line of the forwarded email. Dynamic variables are supported. |
Email body |
Define the body content of the forwarded email. Dynamic variables are supported. |
Note
You can use the following variables in the Email subject and Email body fields to customize the output:
{SMS_TIME}: The time the SMS was received.
{SMS_SRC_ADDR}: The sender’s phone number.
{SMS_DST_ADDR}: The recipient DID number.
{SMS_TEXT}: The raw text of the SMS message.
{SMS_TEXT_BASE64_ENCODED}: The SMS message content encoded in Base64.
Trunk Group Configuration (Optional)#
You may assign the trunk to an existing trunk group in order to enable failover or load-balancing. Within the trunk group, you can also define the trunk’s priority, which determines the order in which trunks will be used.
Note
The system will always attempt to contact the target SMS trunk with the lowest-numbered priority first.
Step 3: Create the SMS To Email Trunk#
Click Create at the bottom of the page to save the new trunk.
Step 4: Assign the SMS To Email Trunk to DIDs#
To receive messages, assign the new trunk to one or more DIDs that support inbound SMS. For detailed steps, see Assign an SMS trunk.
Edit SMS to Email Trunk#
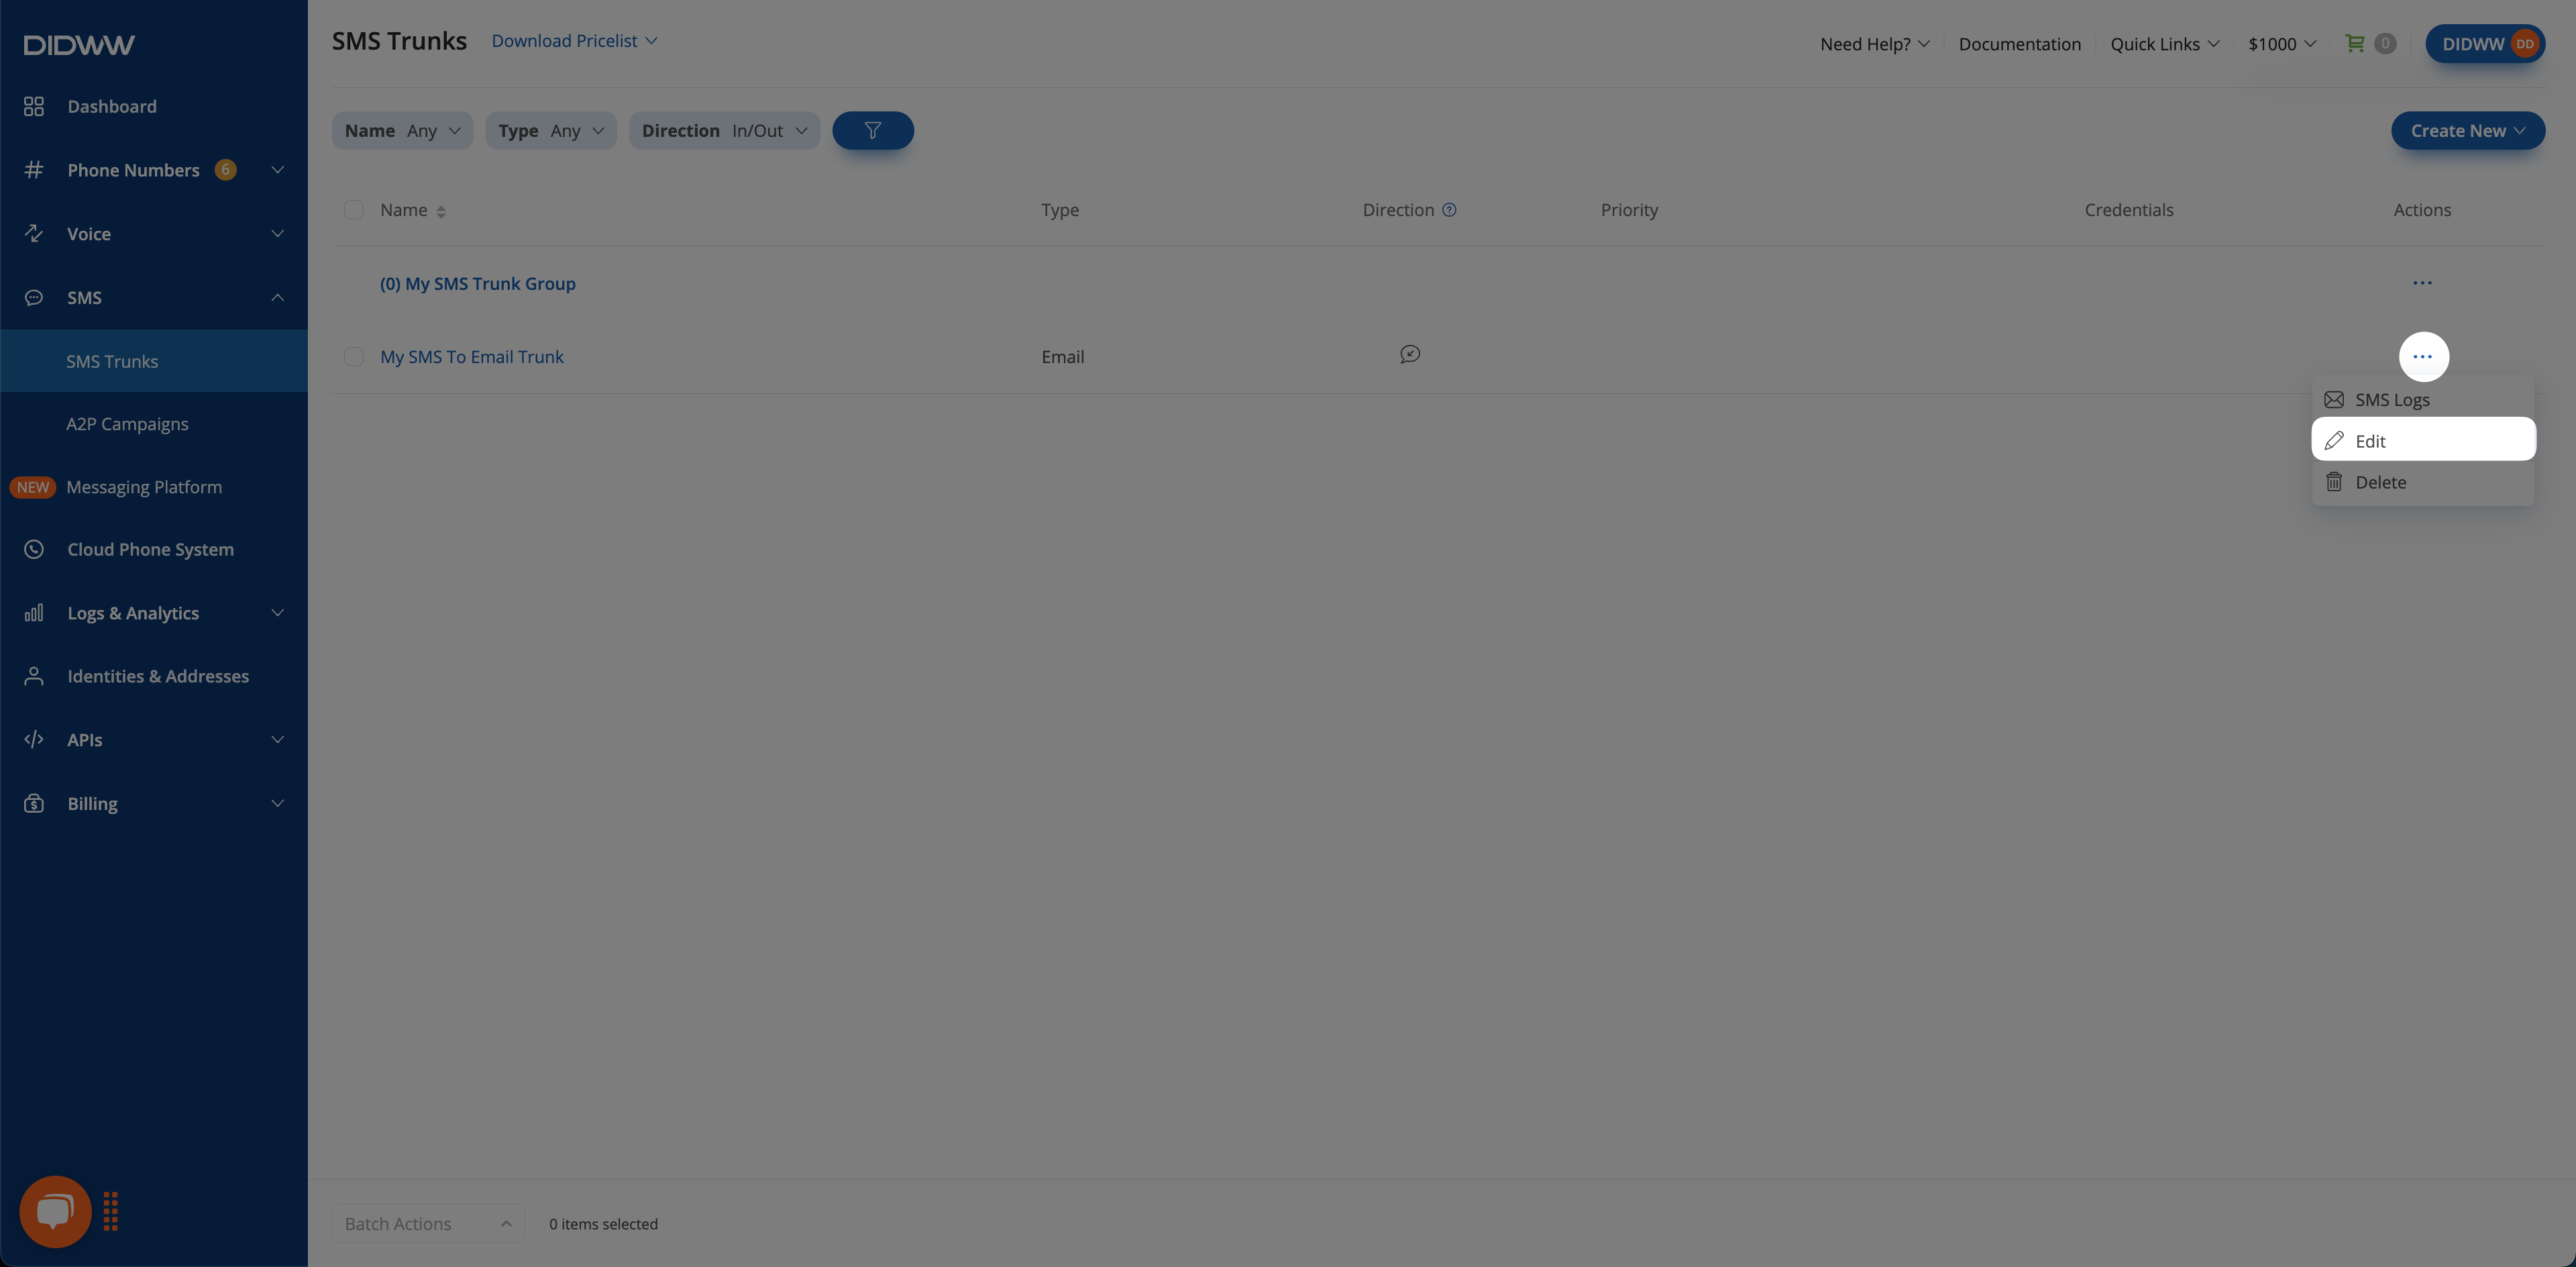
Fig. 3 Edit option for an SMS to Email Trunk.#
Delete SMS to Email Trunk(s)#
You can delete a single SMS to Email trunk or multiple trunks at once by using batch actions.
Note
A trunk that is currently assigned to any DID number cannot be deleted until it is unassigned.
Navigate to the SMS Trunks list page.
Locate the trunk you wish to remove and click the
 button next to it.
Select Delete from the dropdown menu.
In the confirmation pop-up window, click Delete to permanently remove the trunk.
Fig. 4 Delete option for an SMS to Email Trunk.#
Navigate to the SMS Trunks list page.
Select the trunks you wish to delete by checking the boxes next to them.
At the bottom of the page, click Batch Actions and select Delete Trunks.
In the confirmation pop-up window, click Delete to permanently remove the selected trunks.
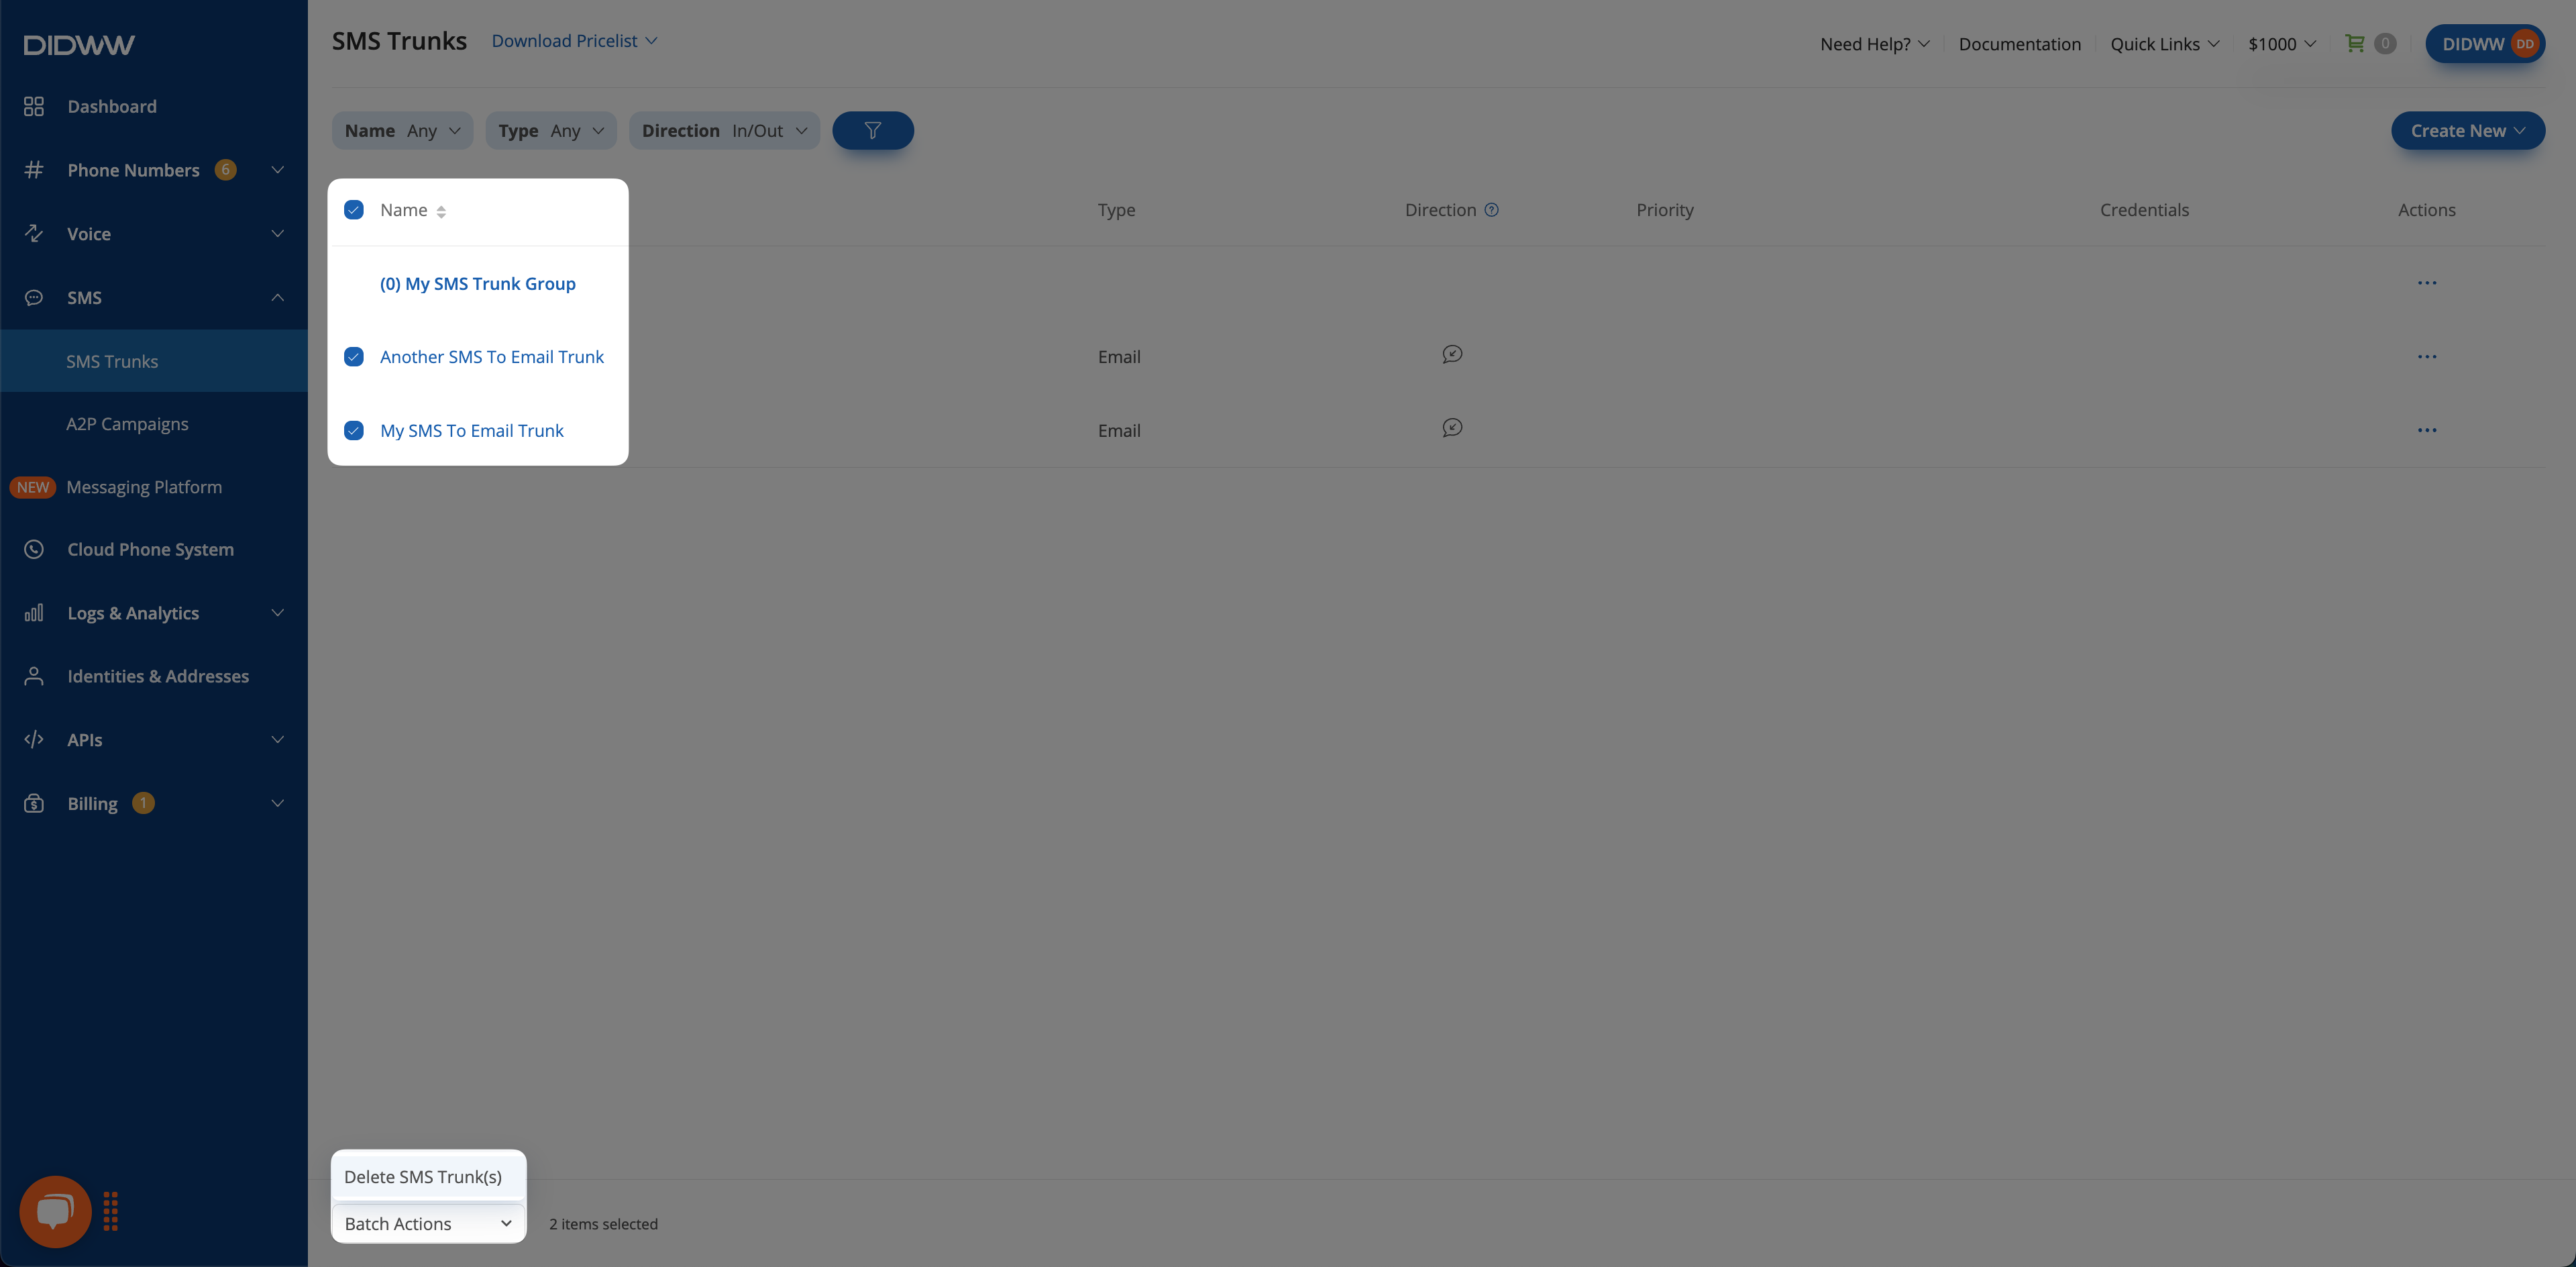
Fig. 5 Batch delete option for SMS to Email Trunks.#