Manage Emergency Calling Service#
When you create an Emergency Calling Service request, it goes through several stages from creation and verification to activation. During this process, the submitted information and selected DID numbers are reviewed to ensure compliance with local emergency service requirements.
You can manage the service by resubmitting requests, removing source numbers, or canceling the Emergency Calling Service when needed.
Submit a request to change the emergency address for an active Emergency Calling Service.
Update the identity or address information and resubmit the request after changes are required.
Remove individual DID numbers from an existing Emergency Calling Service request without canceling the entire request.
Cancel a pending or active Emergency Calling Service request when it’s no longer needed.
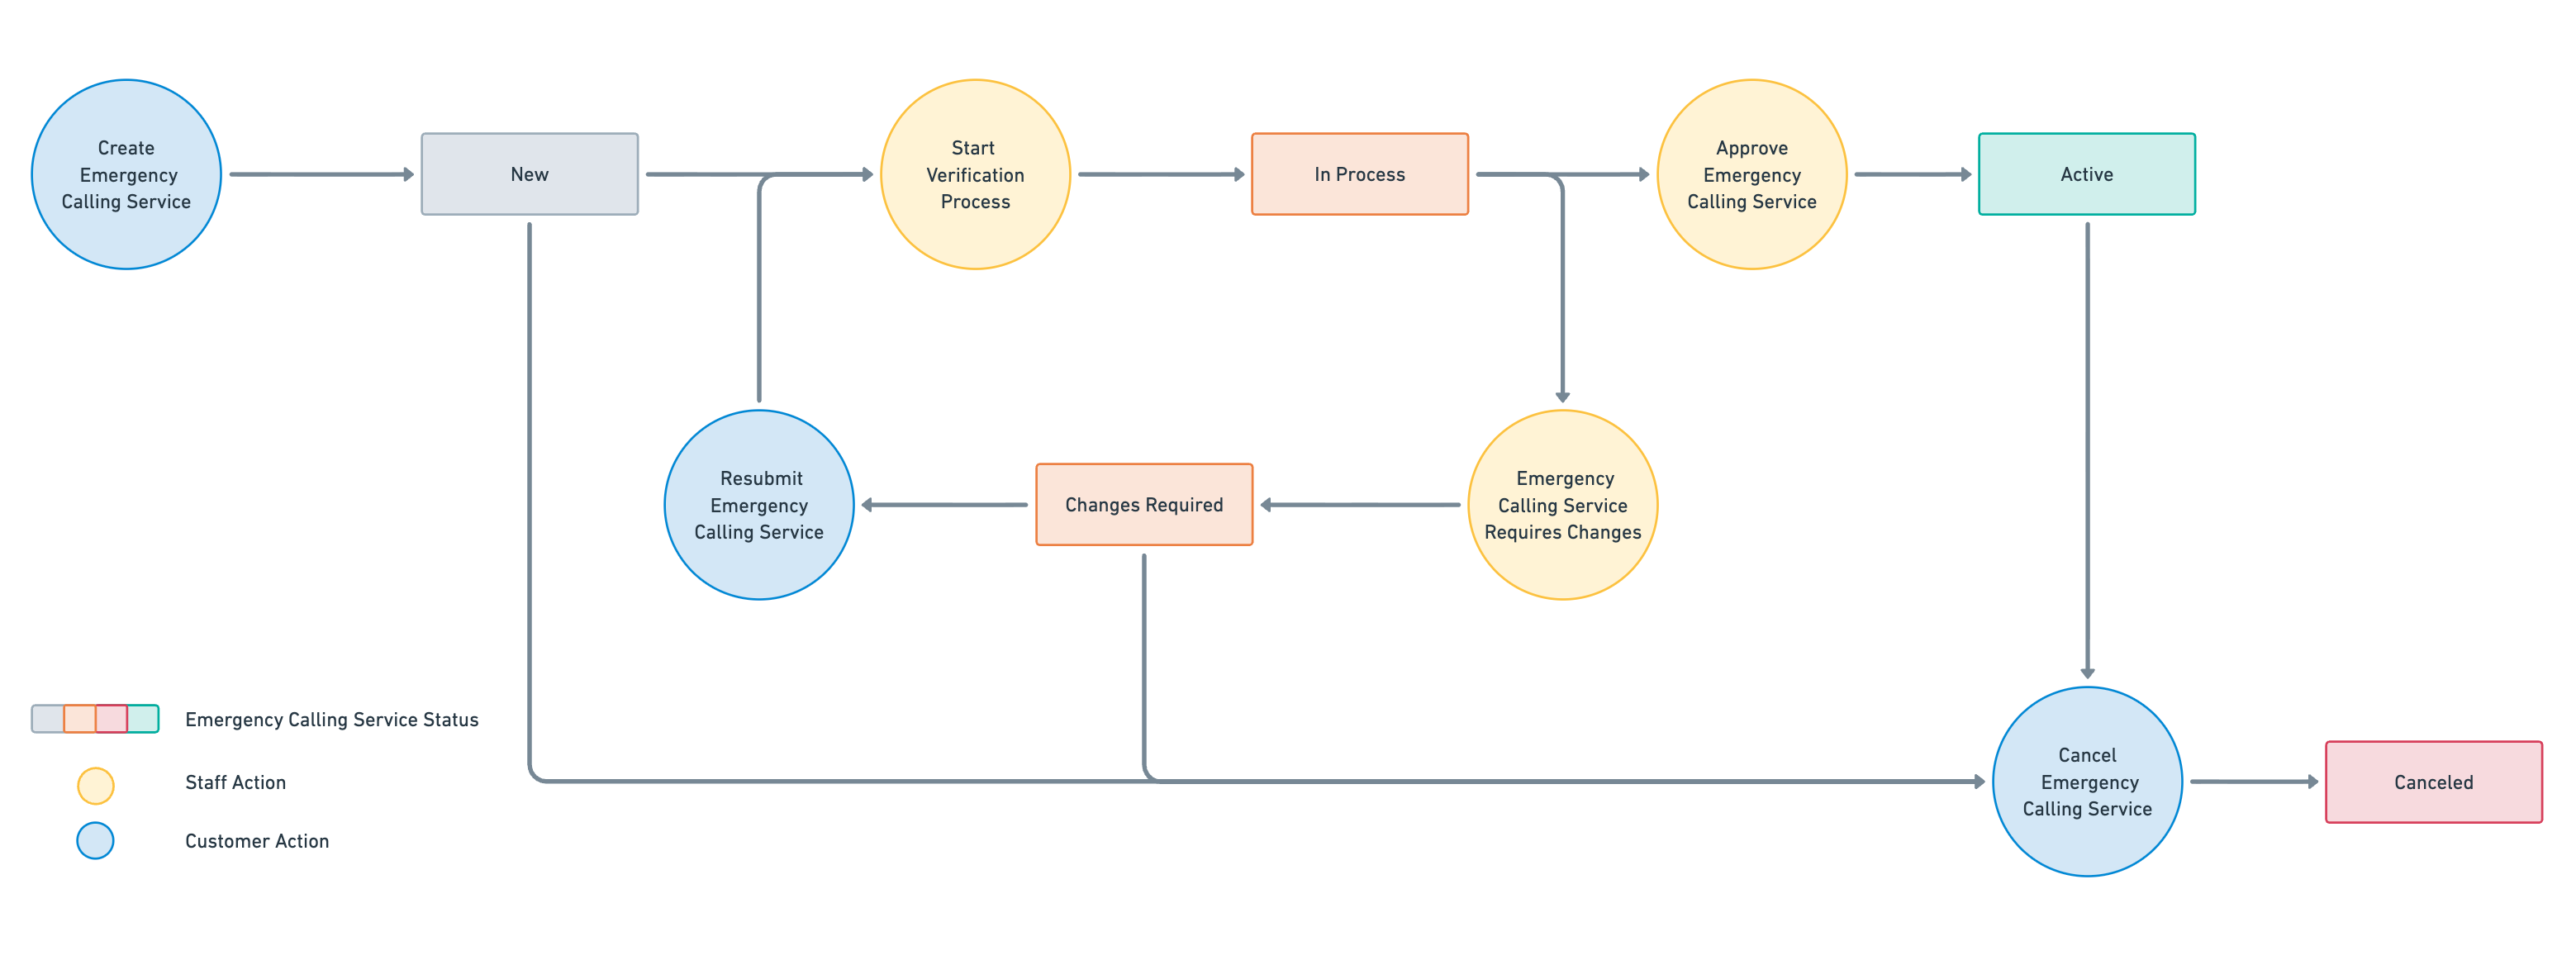
Emergency Calling Service Flow#
This flow illustrates how an Emergency Calling Service request progresses through its stages until activation. The process begins with creating a new request and continues through review, confirmation, and approval. The request can be canceled at any time while it is in New, Changes Required, or Active status.
Emergency Calling Service Statuses#
Status |
Description |
|---|---|
New |
Emergency Calling service verification has not been started yet. |
In Process |
Emergency Calling service verification is in process. |
Changes Required |
Emergency Calling service verification needs to be resubmitted. |
Active |
Emergency Calling service is active. |
Pending Update |
Emergency Calling service is active, but a request to change the emergency address is being processed. |
Canceled |
Emergency Calling service has been canceled. |
Change Emergency Calling Address#
When an Emergency Calling Service is Active, you can submit a request to change the assigned emergency address. Emergency calling remains active under the currently verified address while the new address is being verified.
After submission, the service enters Pending Update status until verification is completed.
Important
Address verification may take up to 5 business days.
Emergency calling remains active under the currently verified address until the update is verified.
While the service is in Pending Update status, no additional address change requests can be submitted.
Step 1. Locate the Emergency Calling Service and open Change Address#
In the DIDWW User Panel, go to Voice → Emergency Calling.
Locate an Emergency Calling Service with Active status.
Click Actions (⋯) and select Change address.
Note
When the Emergency Calling Service is in Pending Update status, the Change address option is disabled.
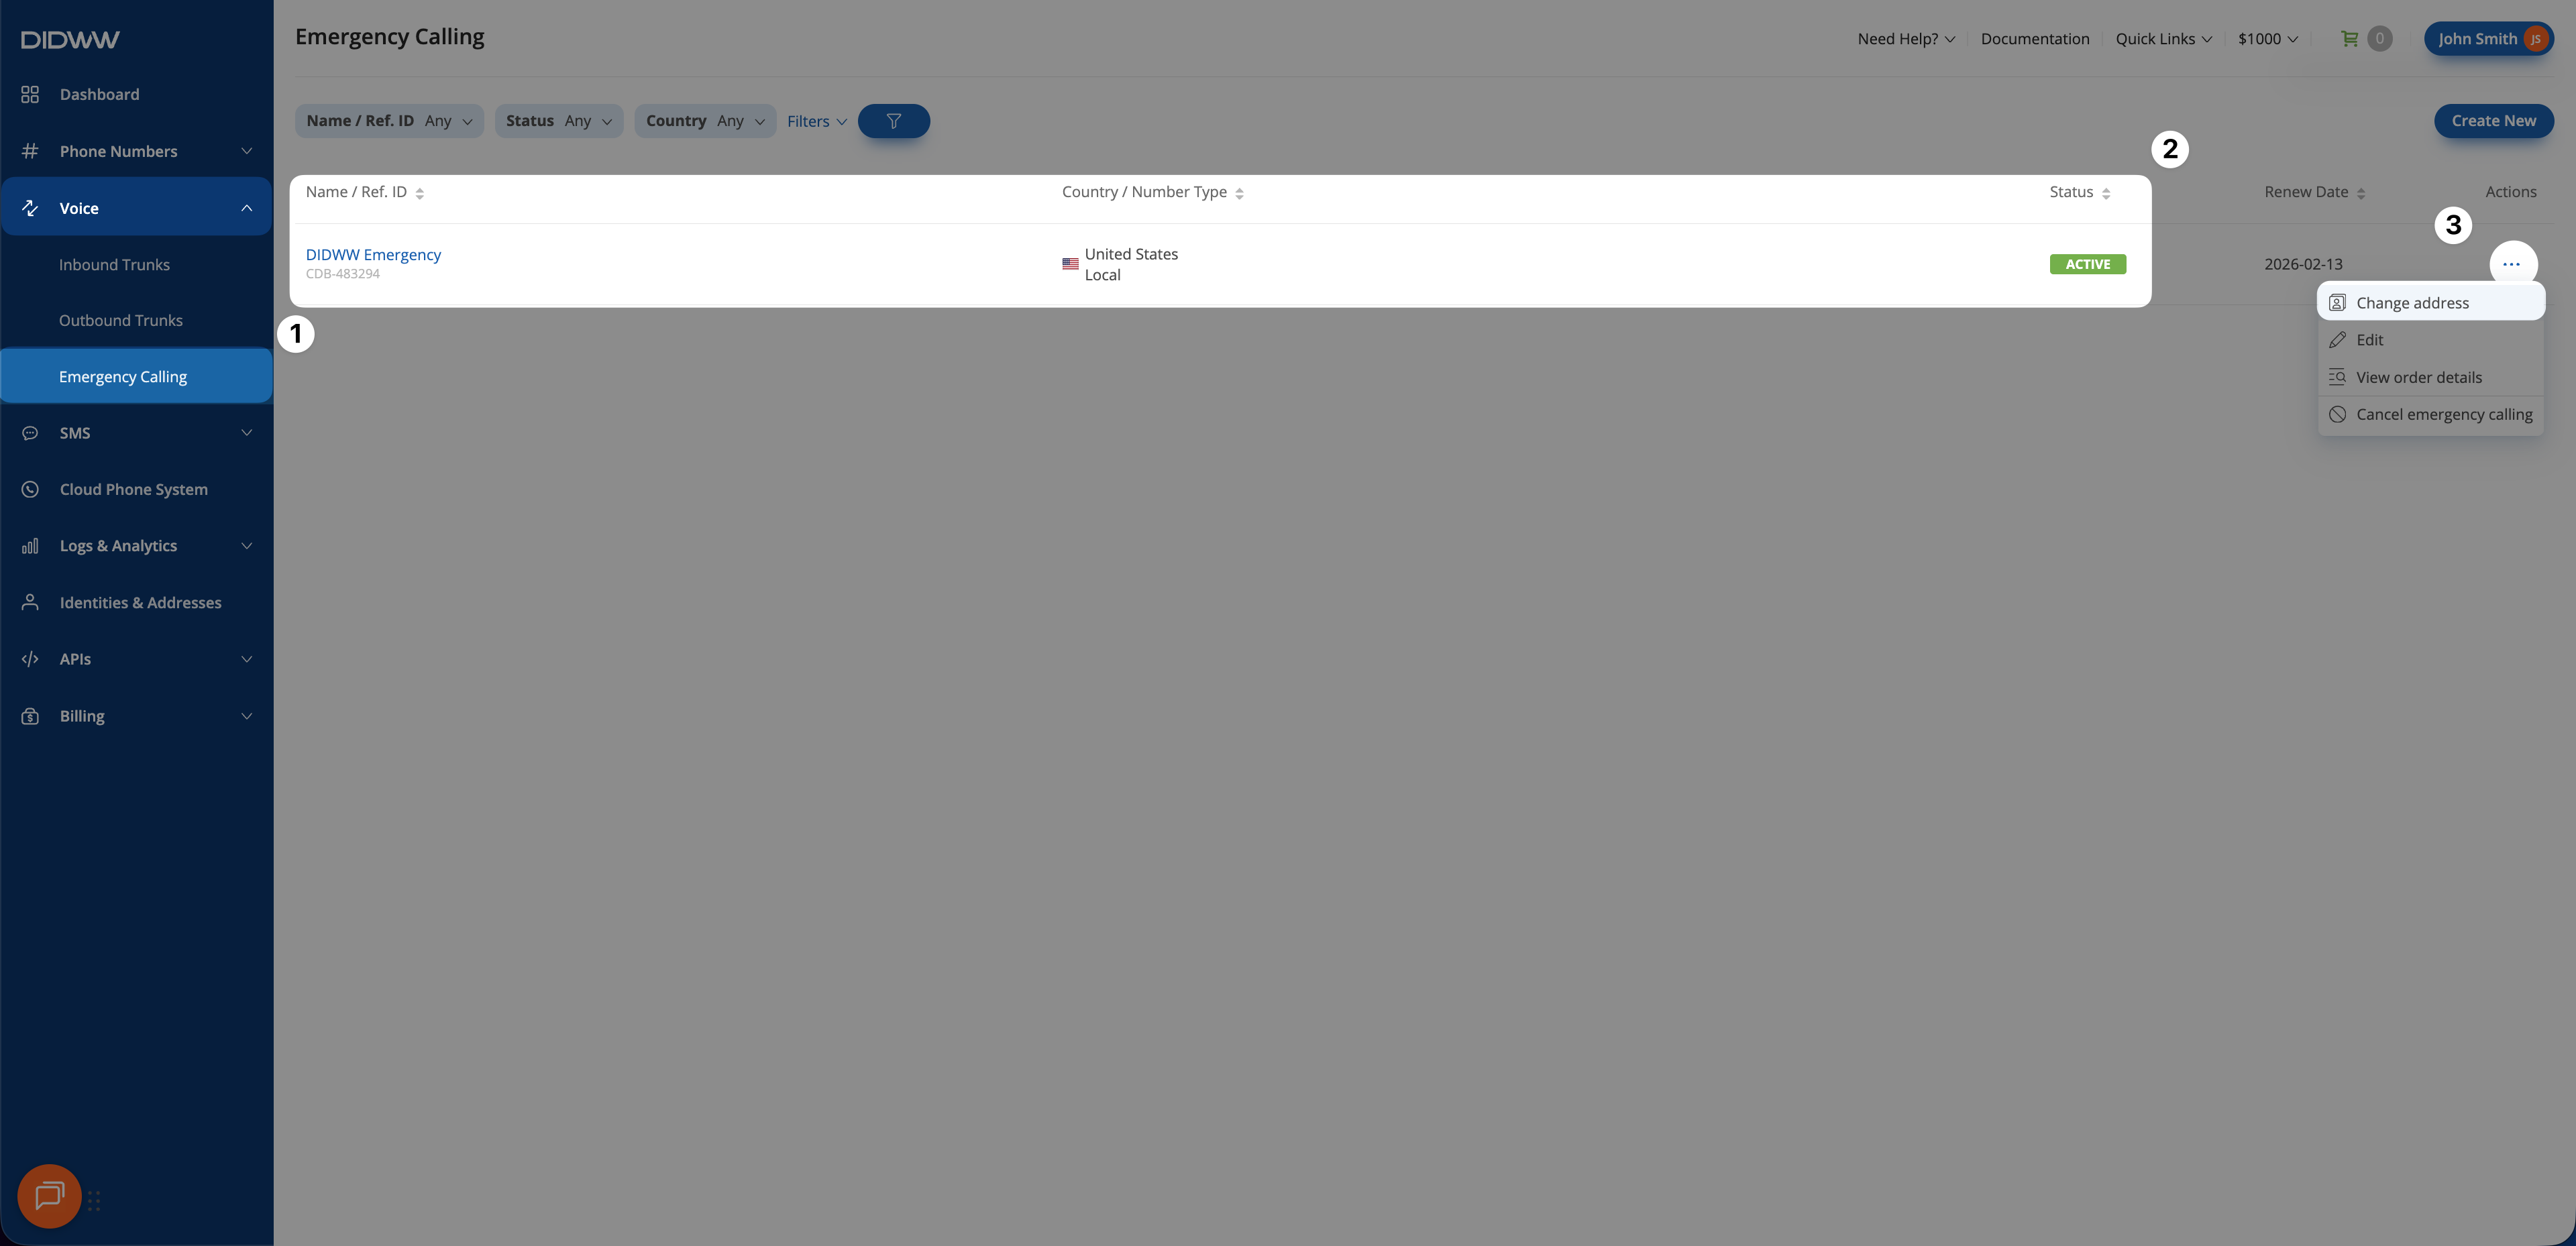
Fig. 1. Change address option available for an Active Emergency Calling Service.#
Step 2. Select a New Address and Submit the Request#
Select a new address from the Address dropdown list.
Click Submit.
Once the new address is verified, the Emergency Calling Service status changes back to Active, and the new address is applied automatically.
Note
If the address verification is rejected, the Emergency Calling Service status changes back to Active and continues using the previously verified address.
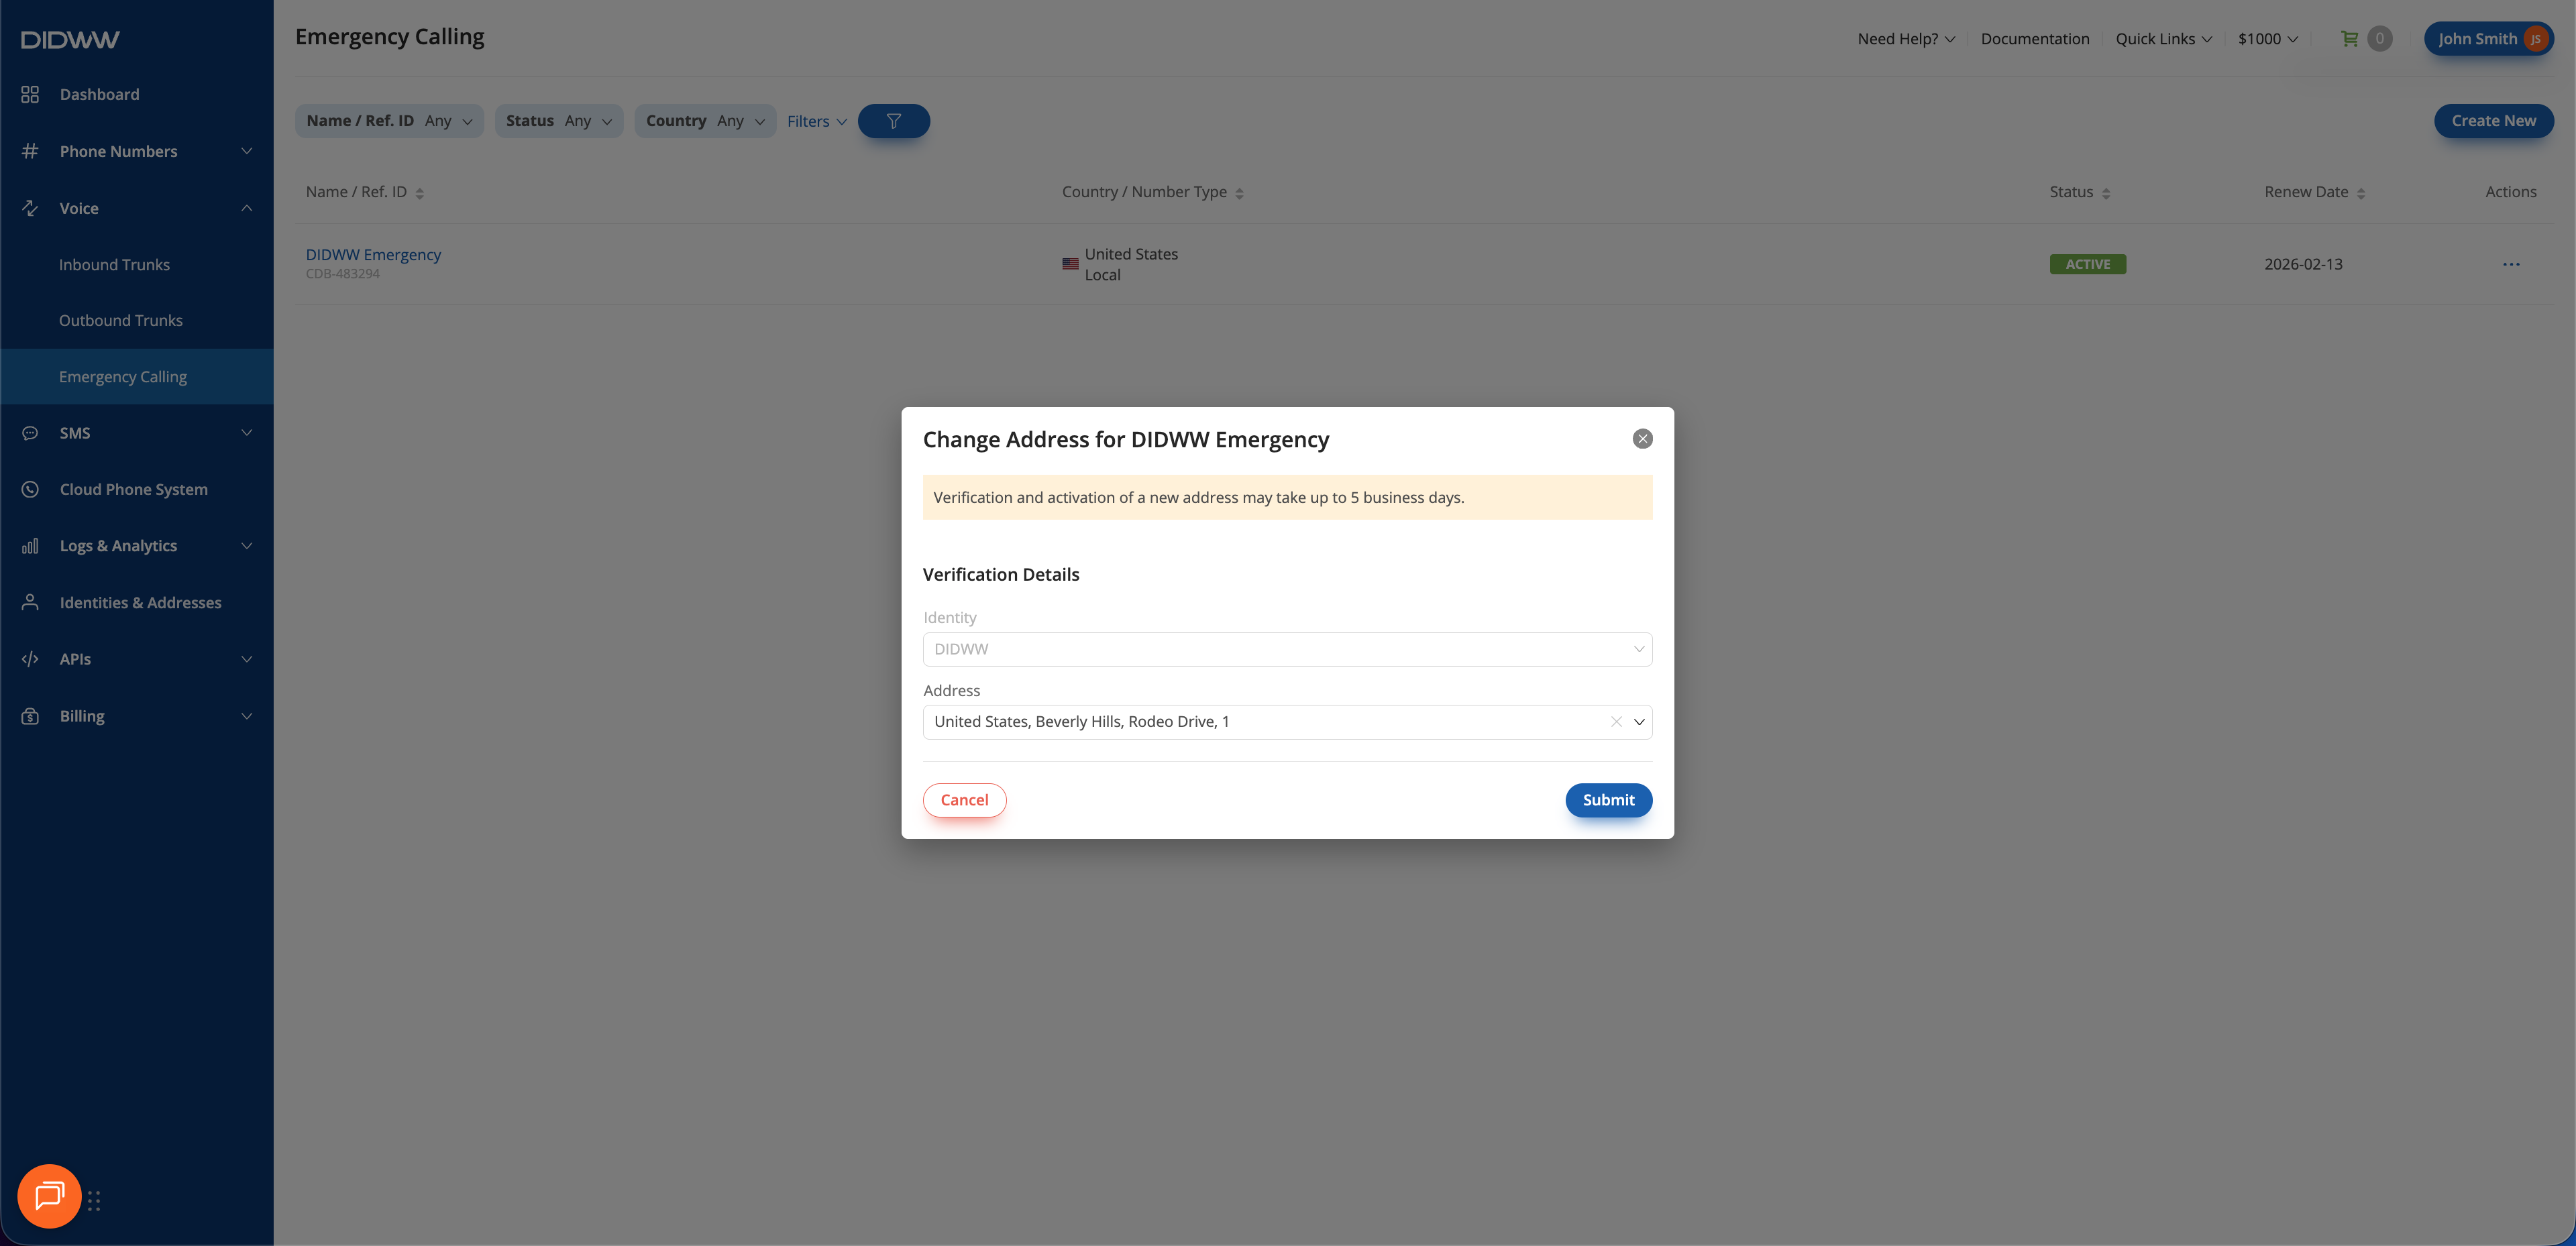
Fig. 2. Selecting a new address for the Emergency Calling Service.#
Resubmit Emergency Calling Request#
Before an Emergency Calling Service request can be activated, it must pass a verification stage to ensure that all submitted details are correct and compliant. You can resubmit a request while it is in New or Changes Required status, if some details are incorrect, incomplete, or did not pass verification. When the Emergency Calling Service request is in Changes Required status, a reason and any additional comments will be displayed to help you update and resubmit the request.
Step 1. Filter Emergency Requests by Status: Changes Required (Optional)#
In the DIDWW User Panel, go to Voice → Emergency Calling.
Open the Status filter.
Select the Changes Required status to display the relevant Emergency Calling requests.
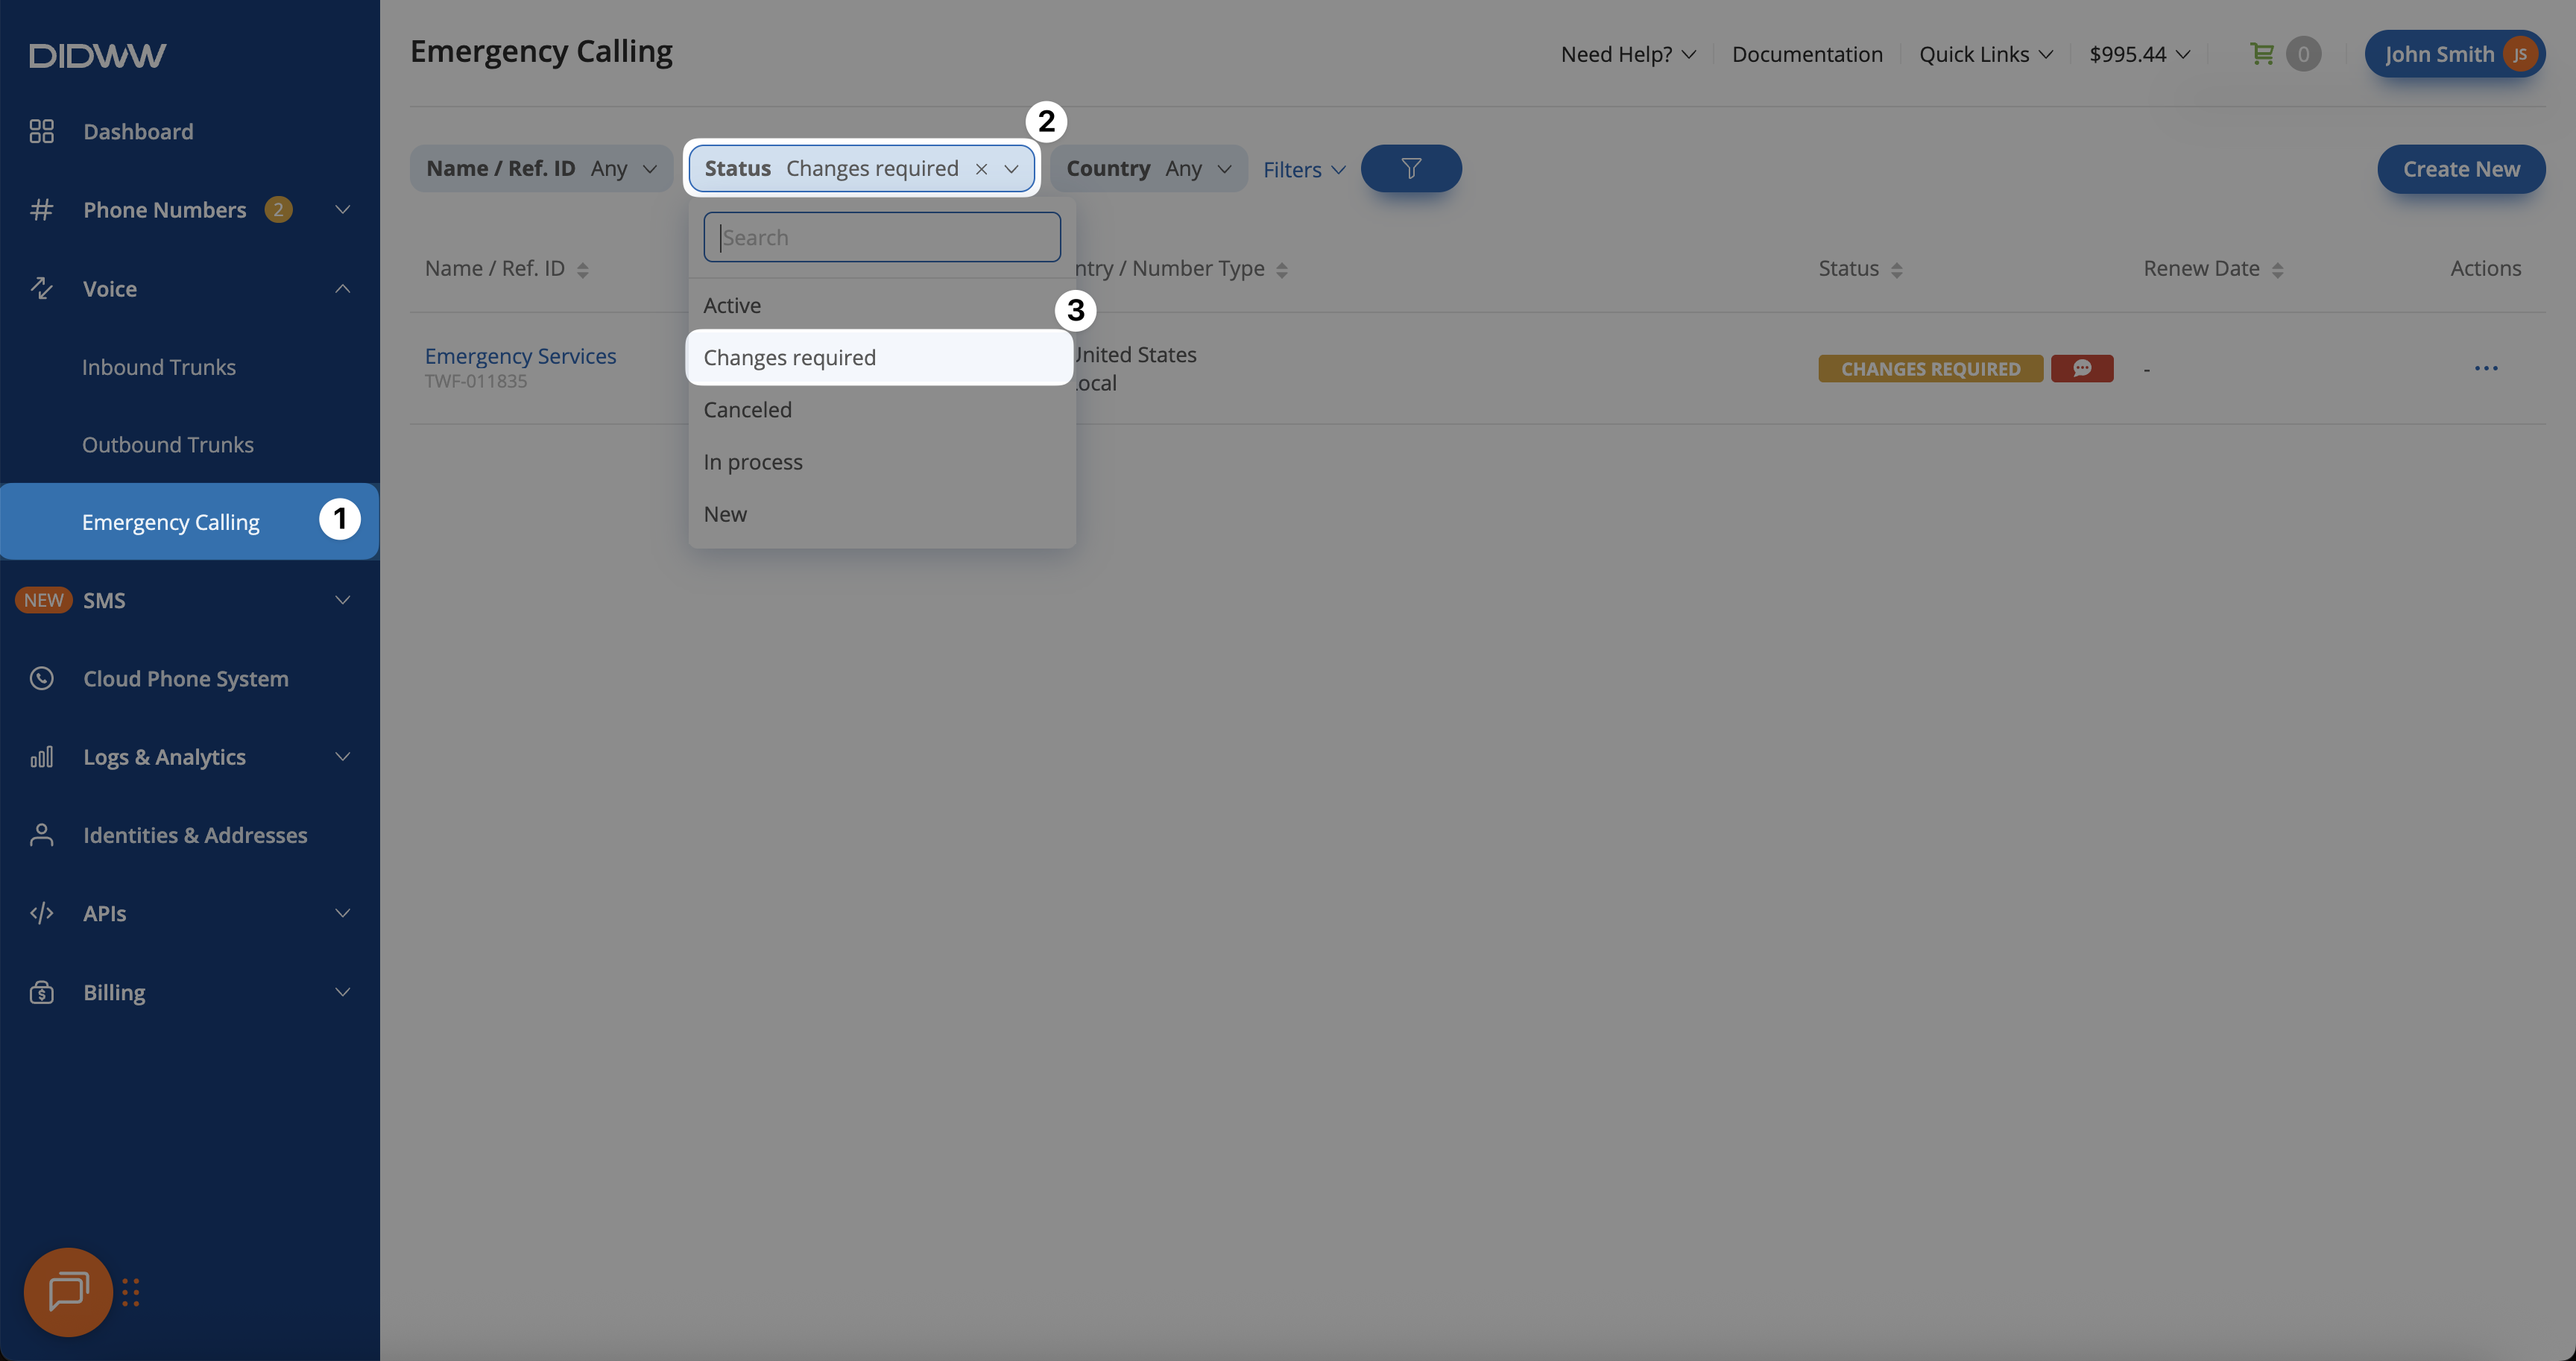
Fig. 3. Filtering Emergency Calling requests in Changes Required status.#
Step 2. Open Emergency Calling Edit Page#
Locate the Emergency Calling request, then click the Reference ID or use the Actions (⋯) menu and select Edit.
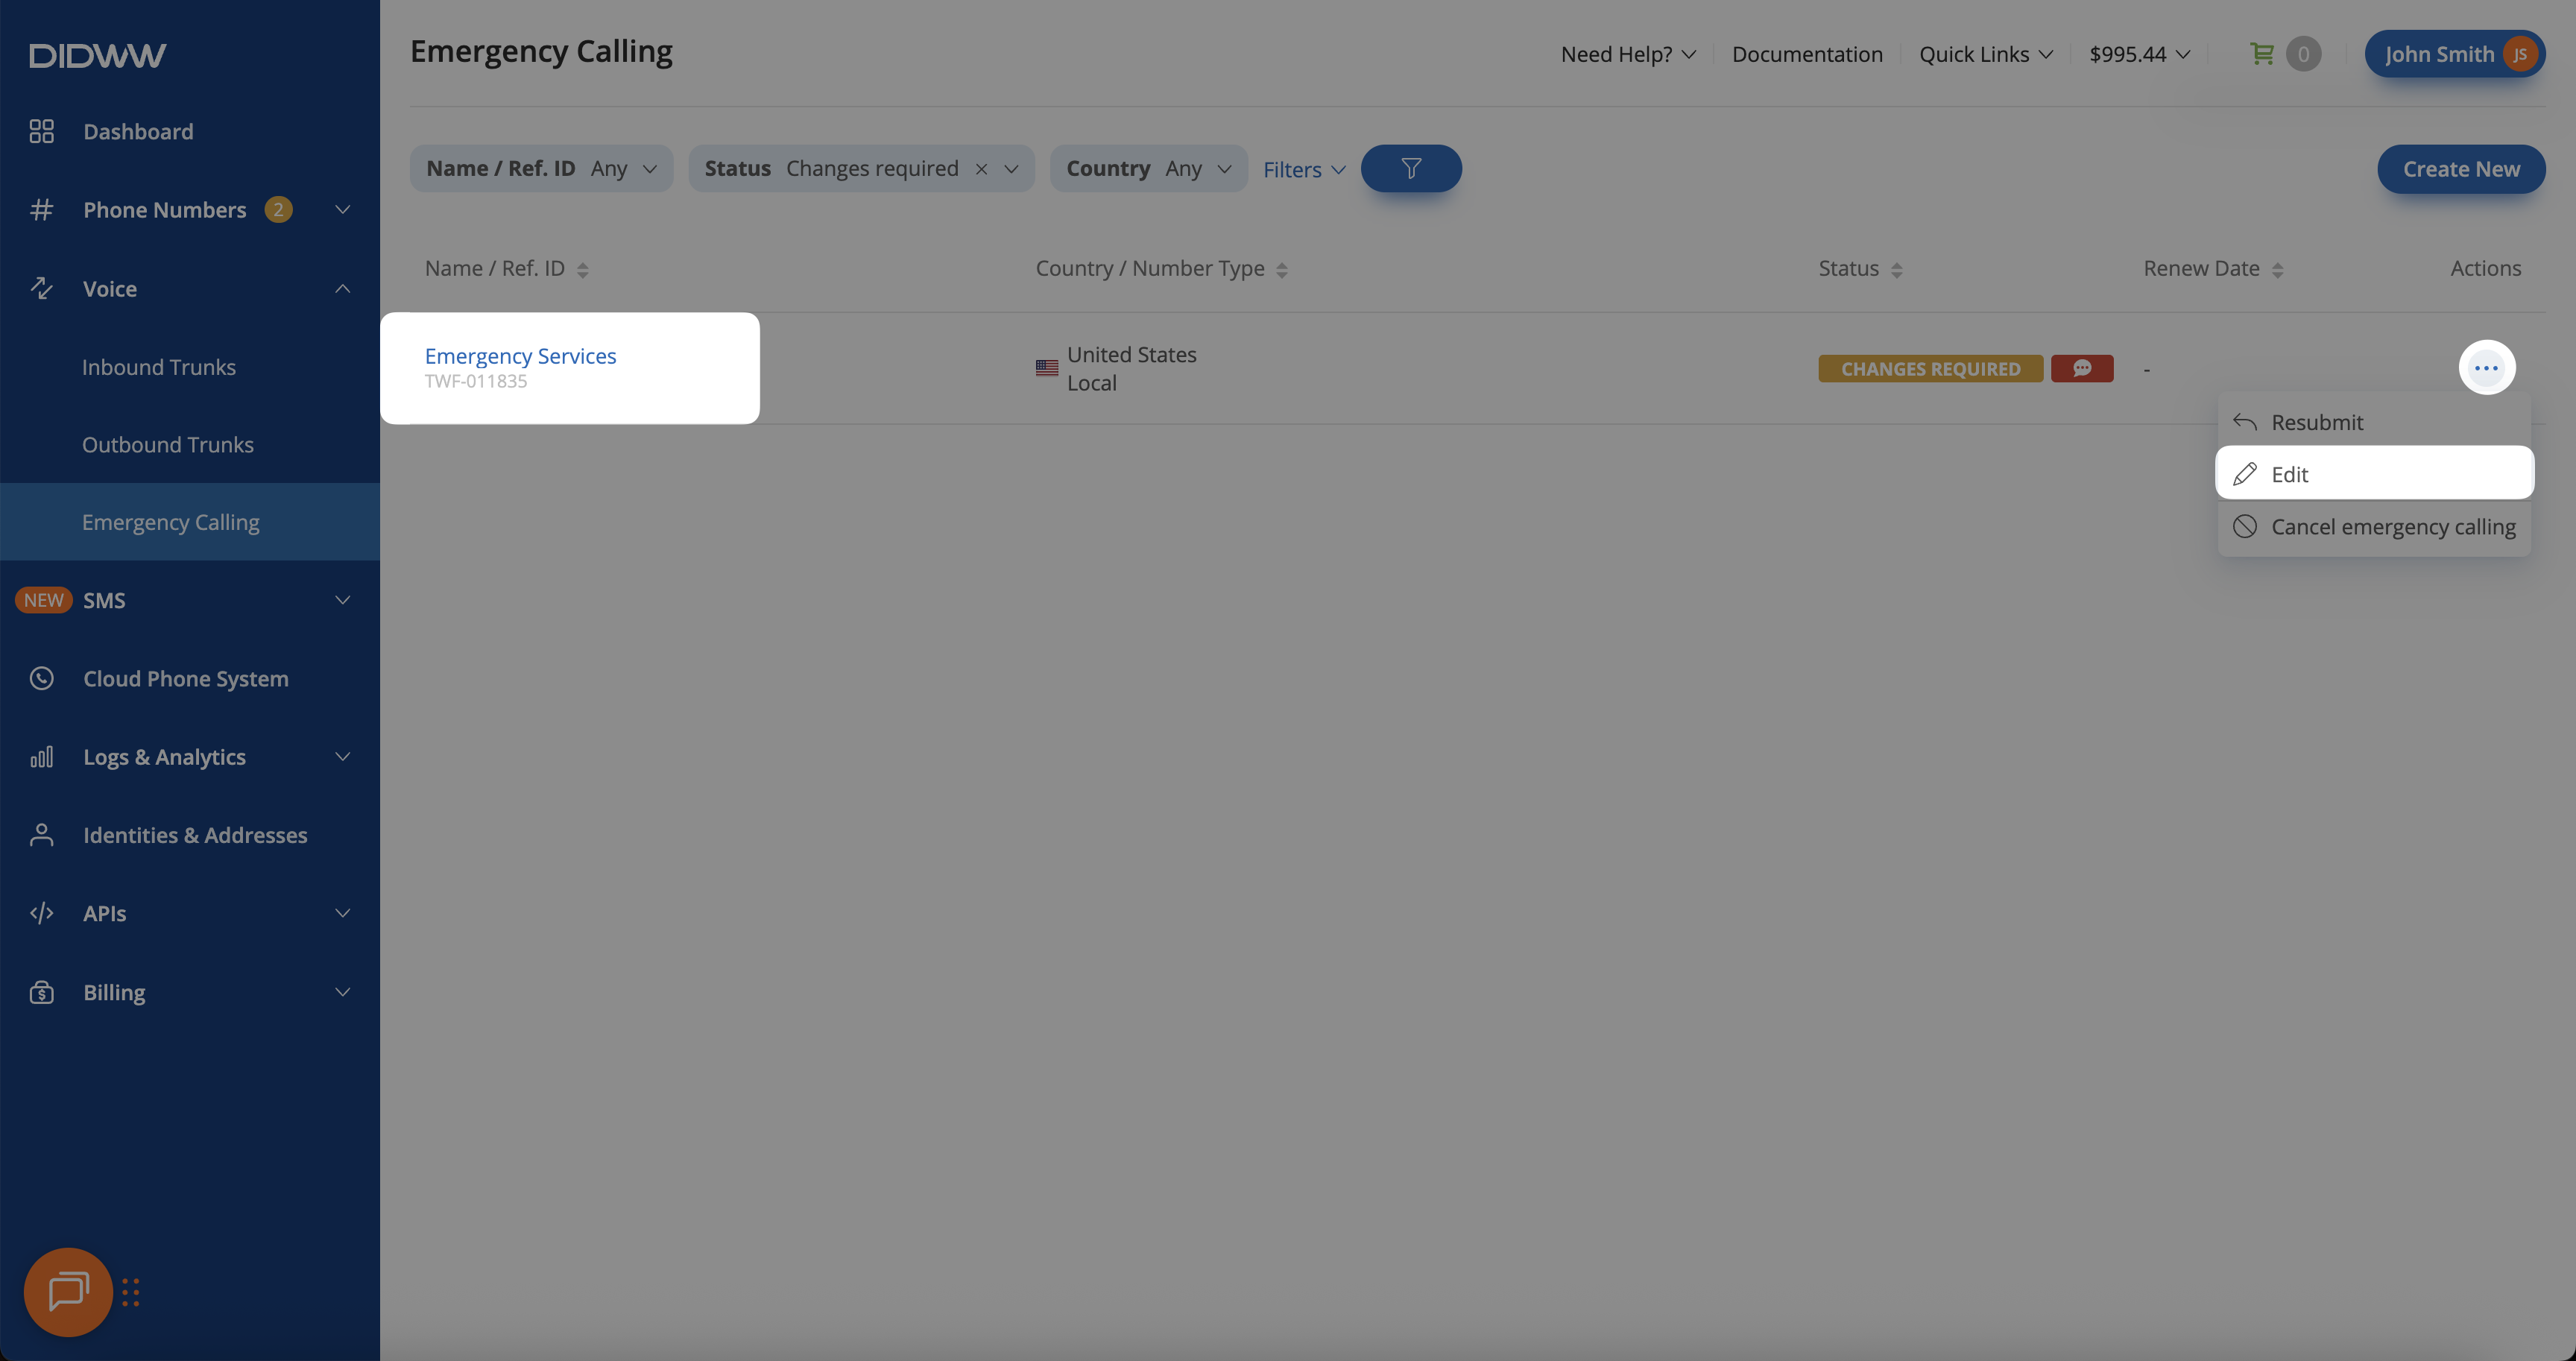
Fig. 4. Opening the emergency calling request to review details and rejection reasons.#
Step 3. View Verification Details and Reject Reason(s)#
On the Edit Emergency Calling request page, review the Verification Details and Reject Reason(s) sections. This will show exactly why the request requires changes (for example, a missing proof of address).
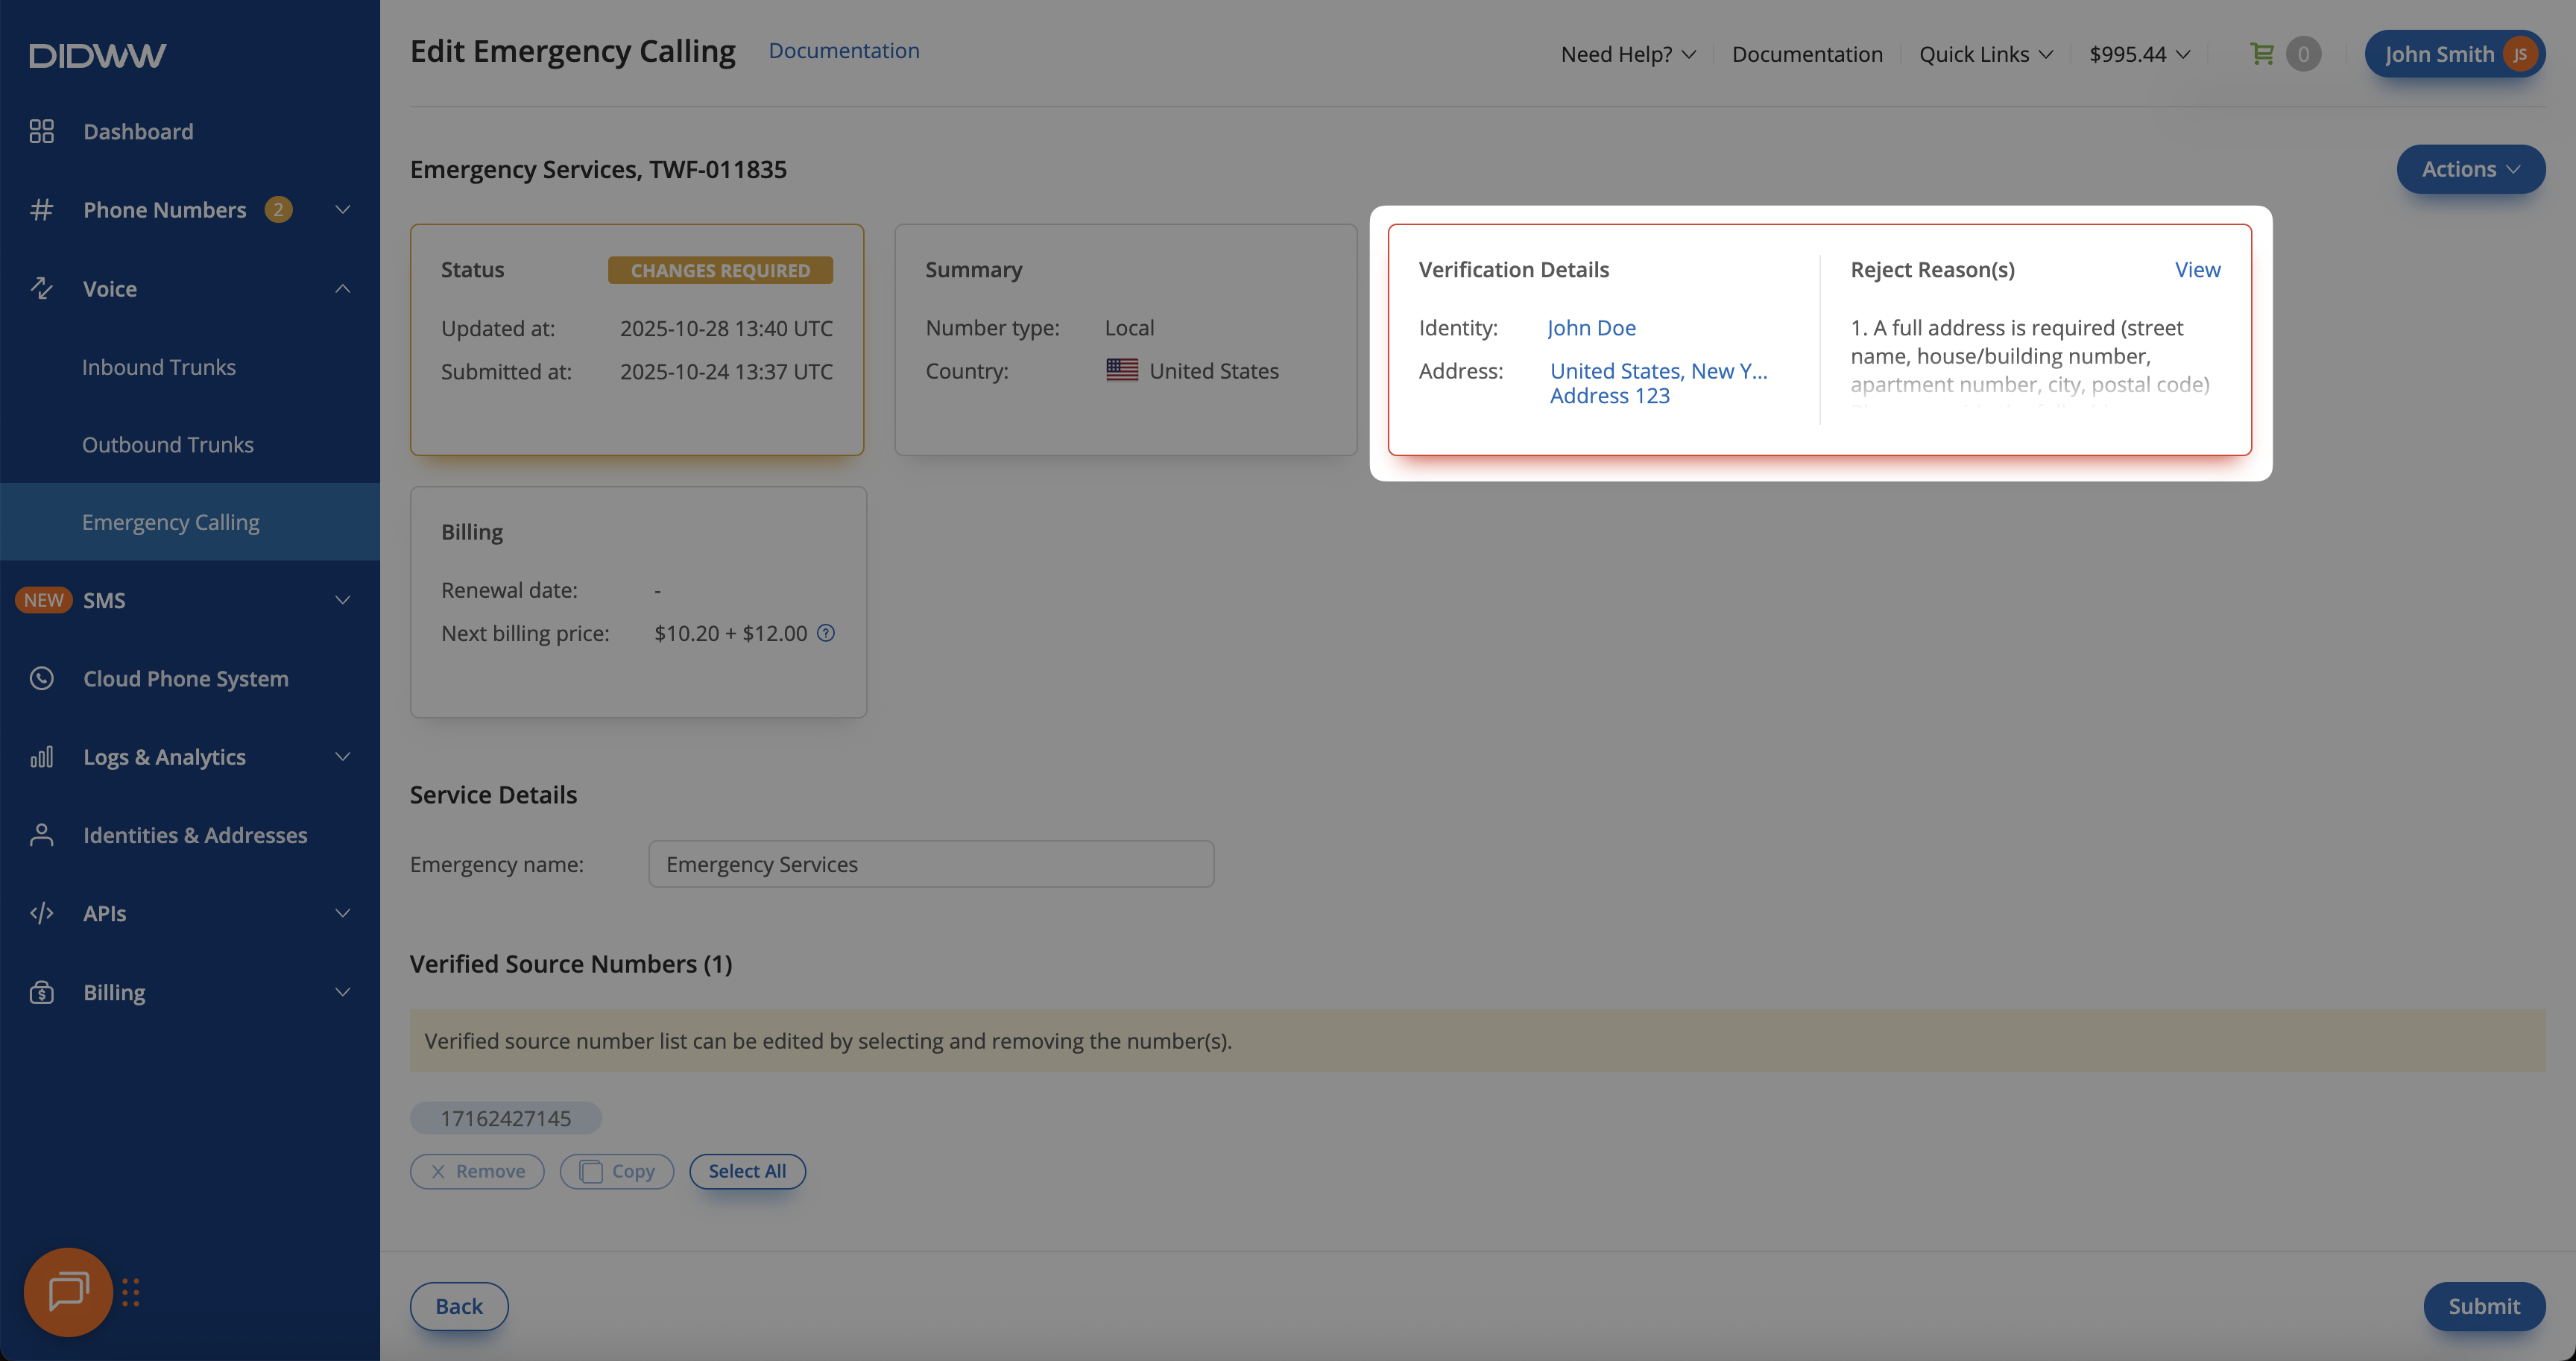
Fig. 5. Emergency calling verification details and rejection reasons for the porting request.#
Step 4. Update Verification Details#
Important
If the rejection reason requires changing the Identity information, or if any identity or address fields are locked from editing, it is recommended to cancel the request and create a new Emergency Calling Service request instead of resubmitting it, unless the rejection is related to document updates.
If the Address information is missing or incorrect (except for document updates), create a new address for the identity and select it when resubmitting the request.
Depending on the rejection reason(s), you may be required to update either the Identity details, the Address details, or both. For example, this may happen if the provided information is outdated, incomplete, or does not match the verification documents.
In the Verification Details block, click the Identity or Address names to open the corresponding edit page.
Update the required fields — for example, upload a new document or add missing information.
Step 5. Resubmit Emergency Service Verification#
After reviewing the rejection reasons and updating the required Identity or Address information assigned to the Emergency Calling Service request, you can resubmit the same request for verification.
Note
If you are unable to update the Identity information based on the rejection reason, or if the assigned Address cannot be modified, create a new address or cancel the emergency request instead.
To resubmit emergency calling service request, click Actions → Resubmit.
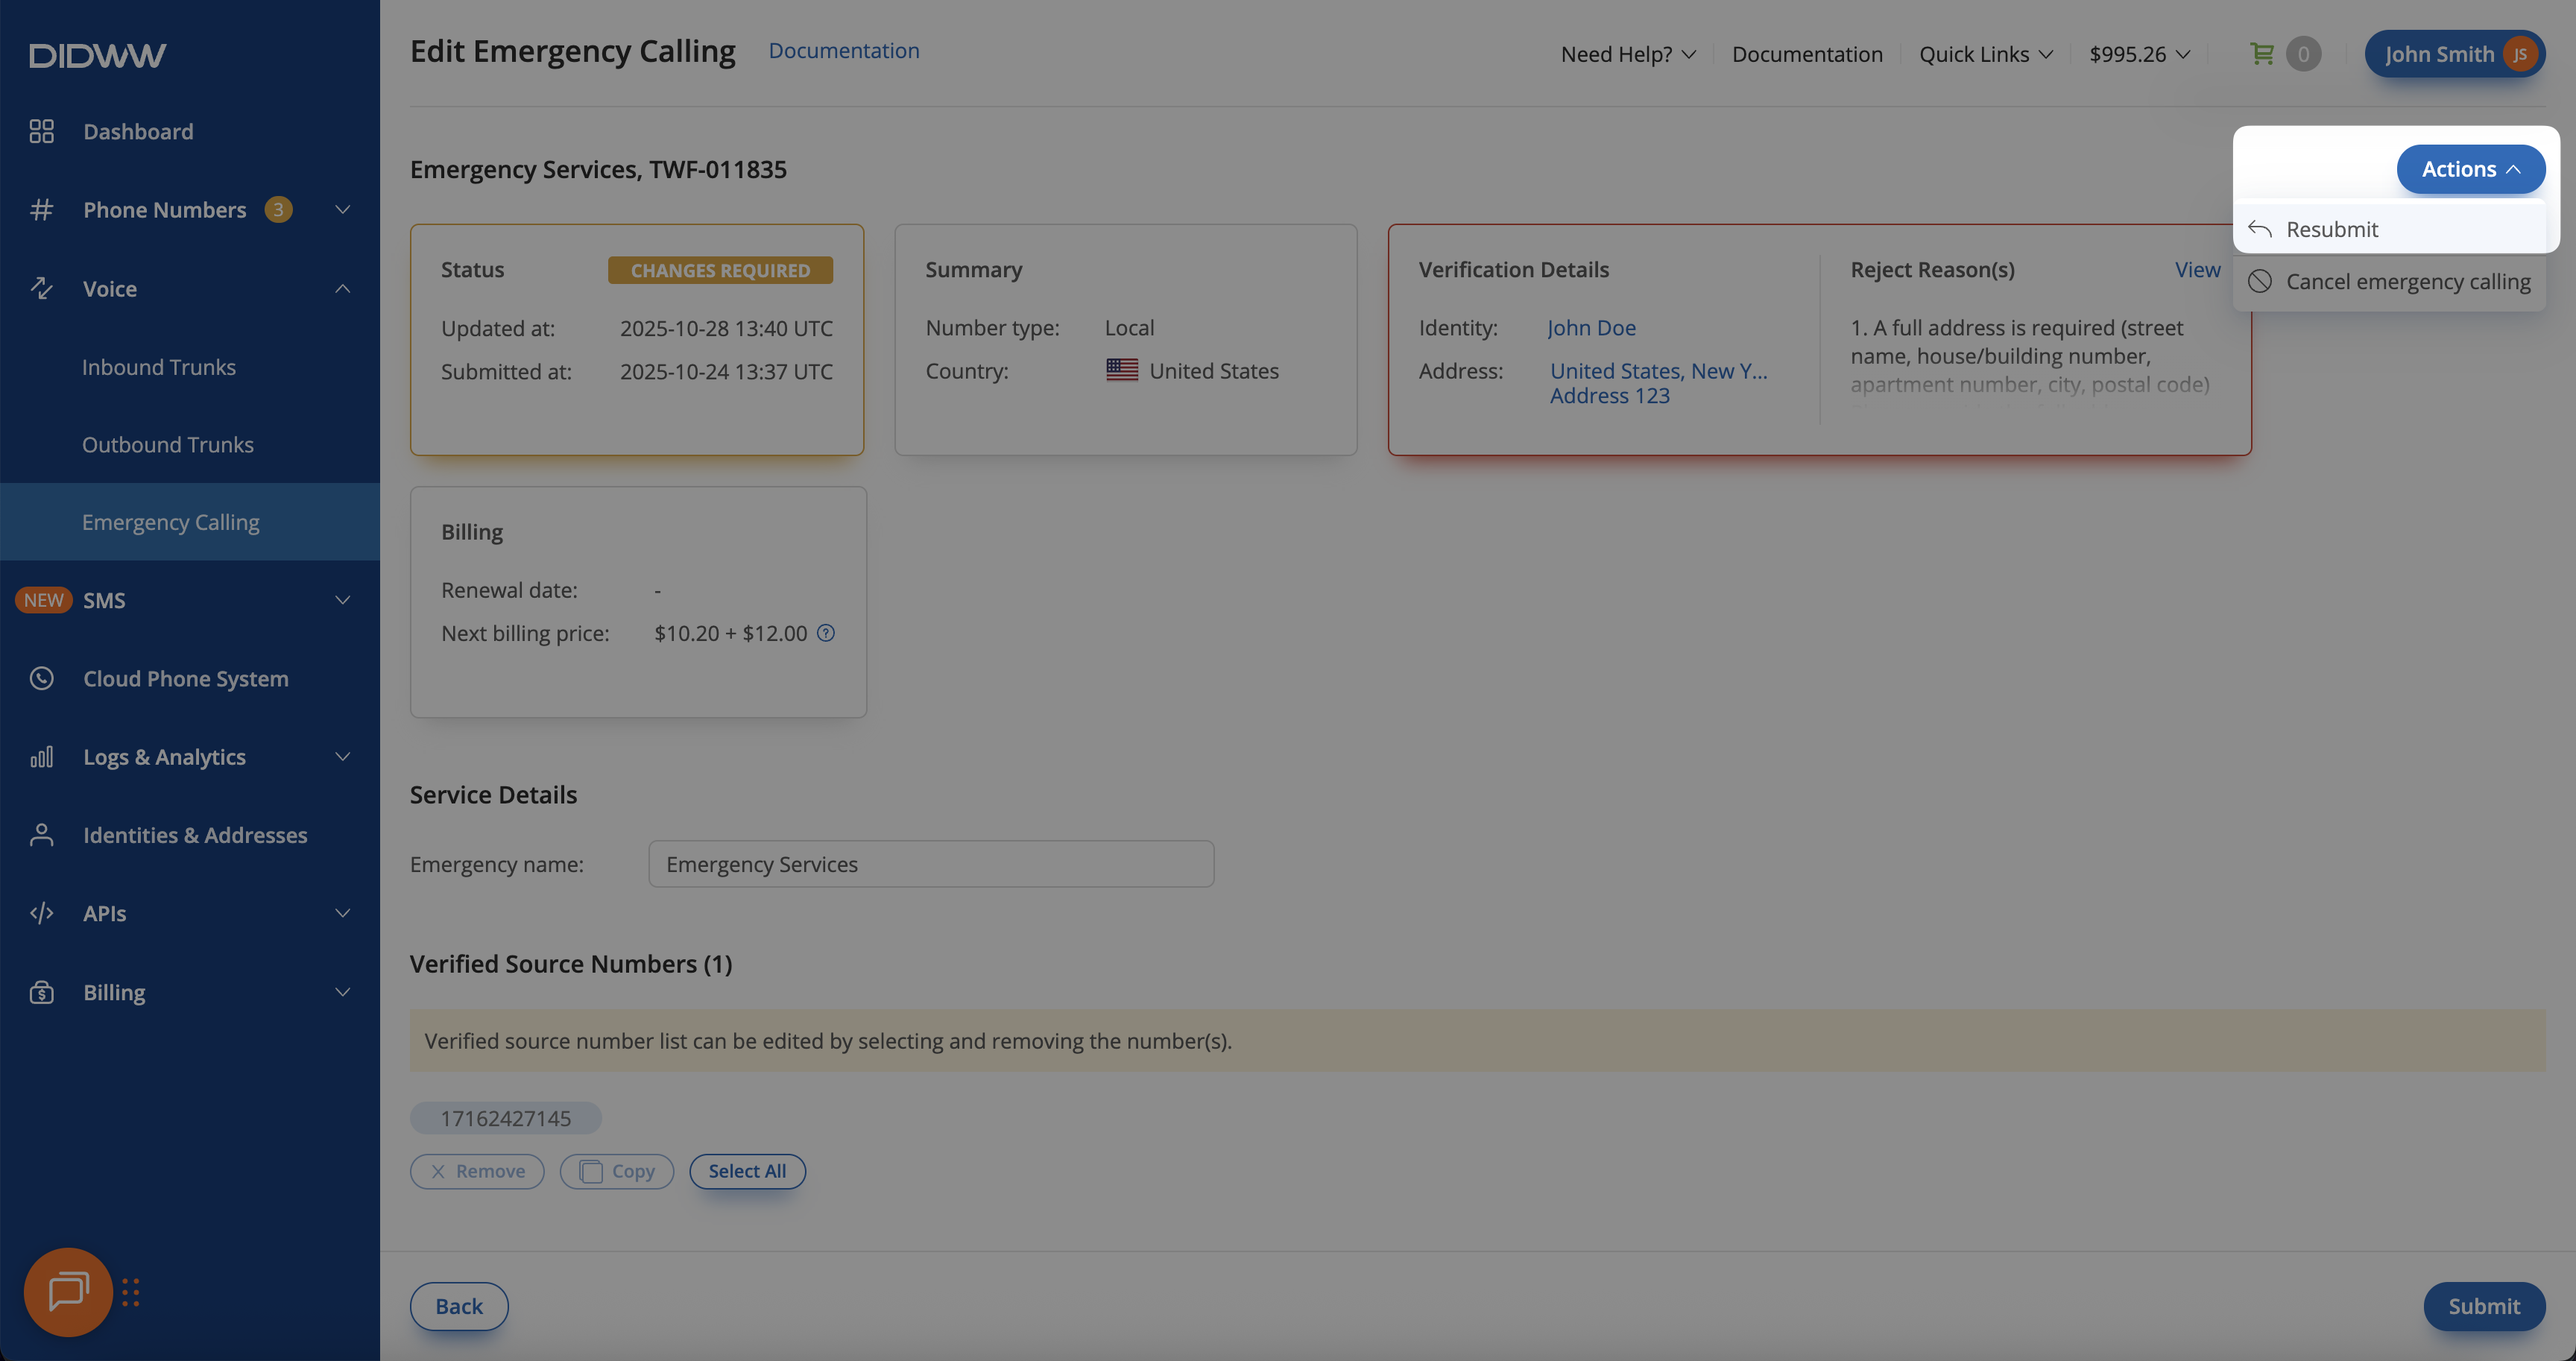
Fig. 6. Resubmitting the Emergency Calling Service request with updated verification details.#
A Resubmit Emergency Service Verification pop-up window will appear, showing a banner with the rejection reason and any additional comments from staff (if provided).
Note
The Identity field in the Resubmit Emergency Service Verification window cannot be changed or reselected.
Select the updated or new Address from the dropdown menu (or click Create New Address if the existing fields are disabled when updating the required address information).
Click Submit to resubmit your Emergency Calling Service request for verification.
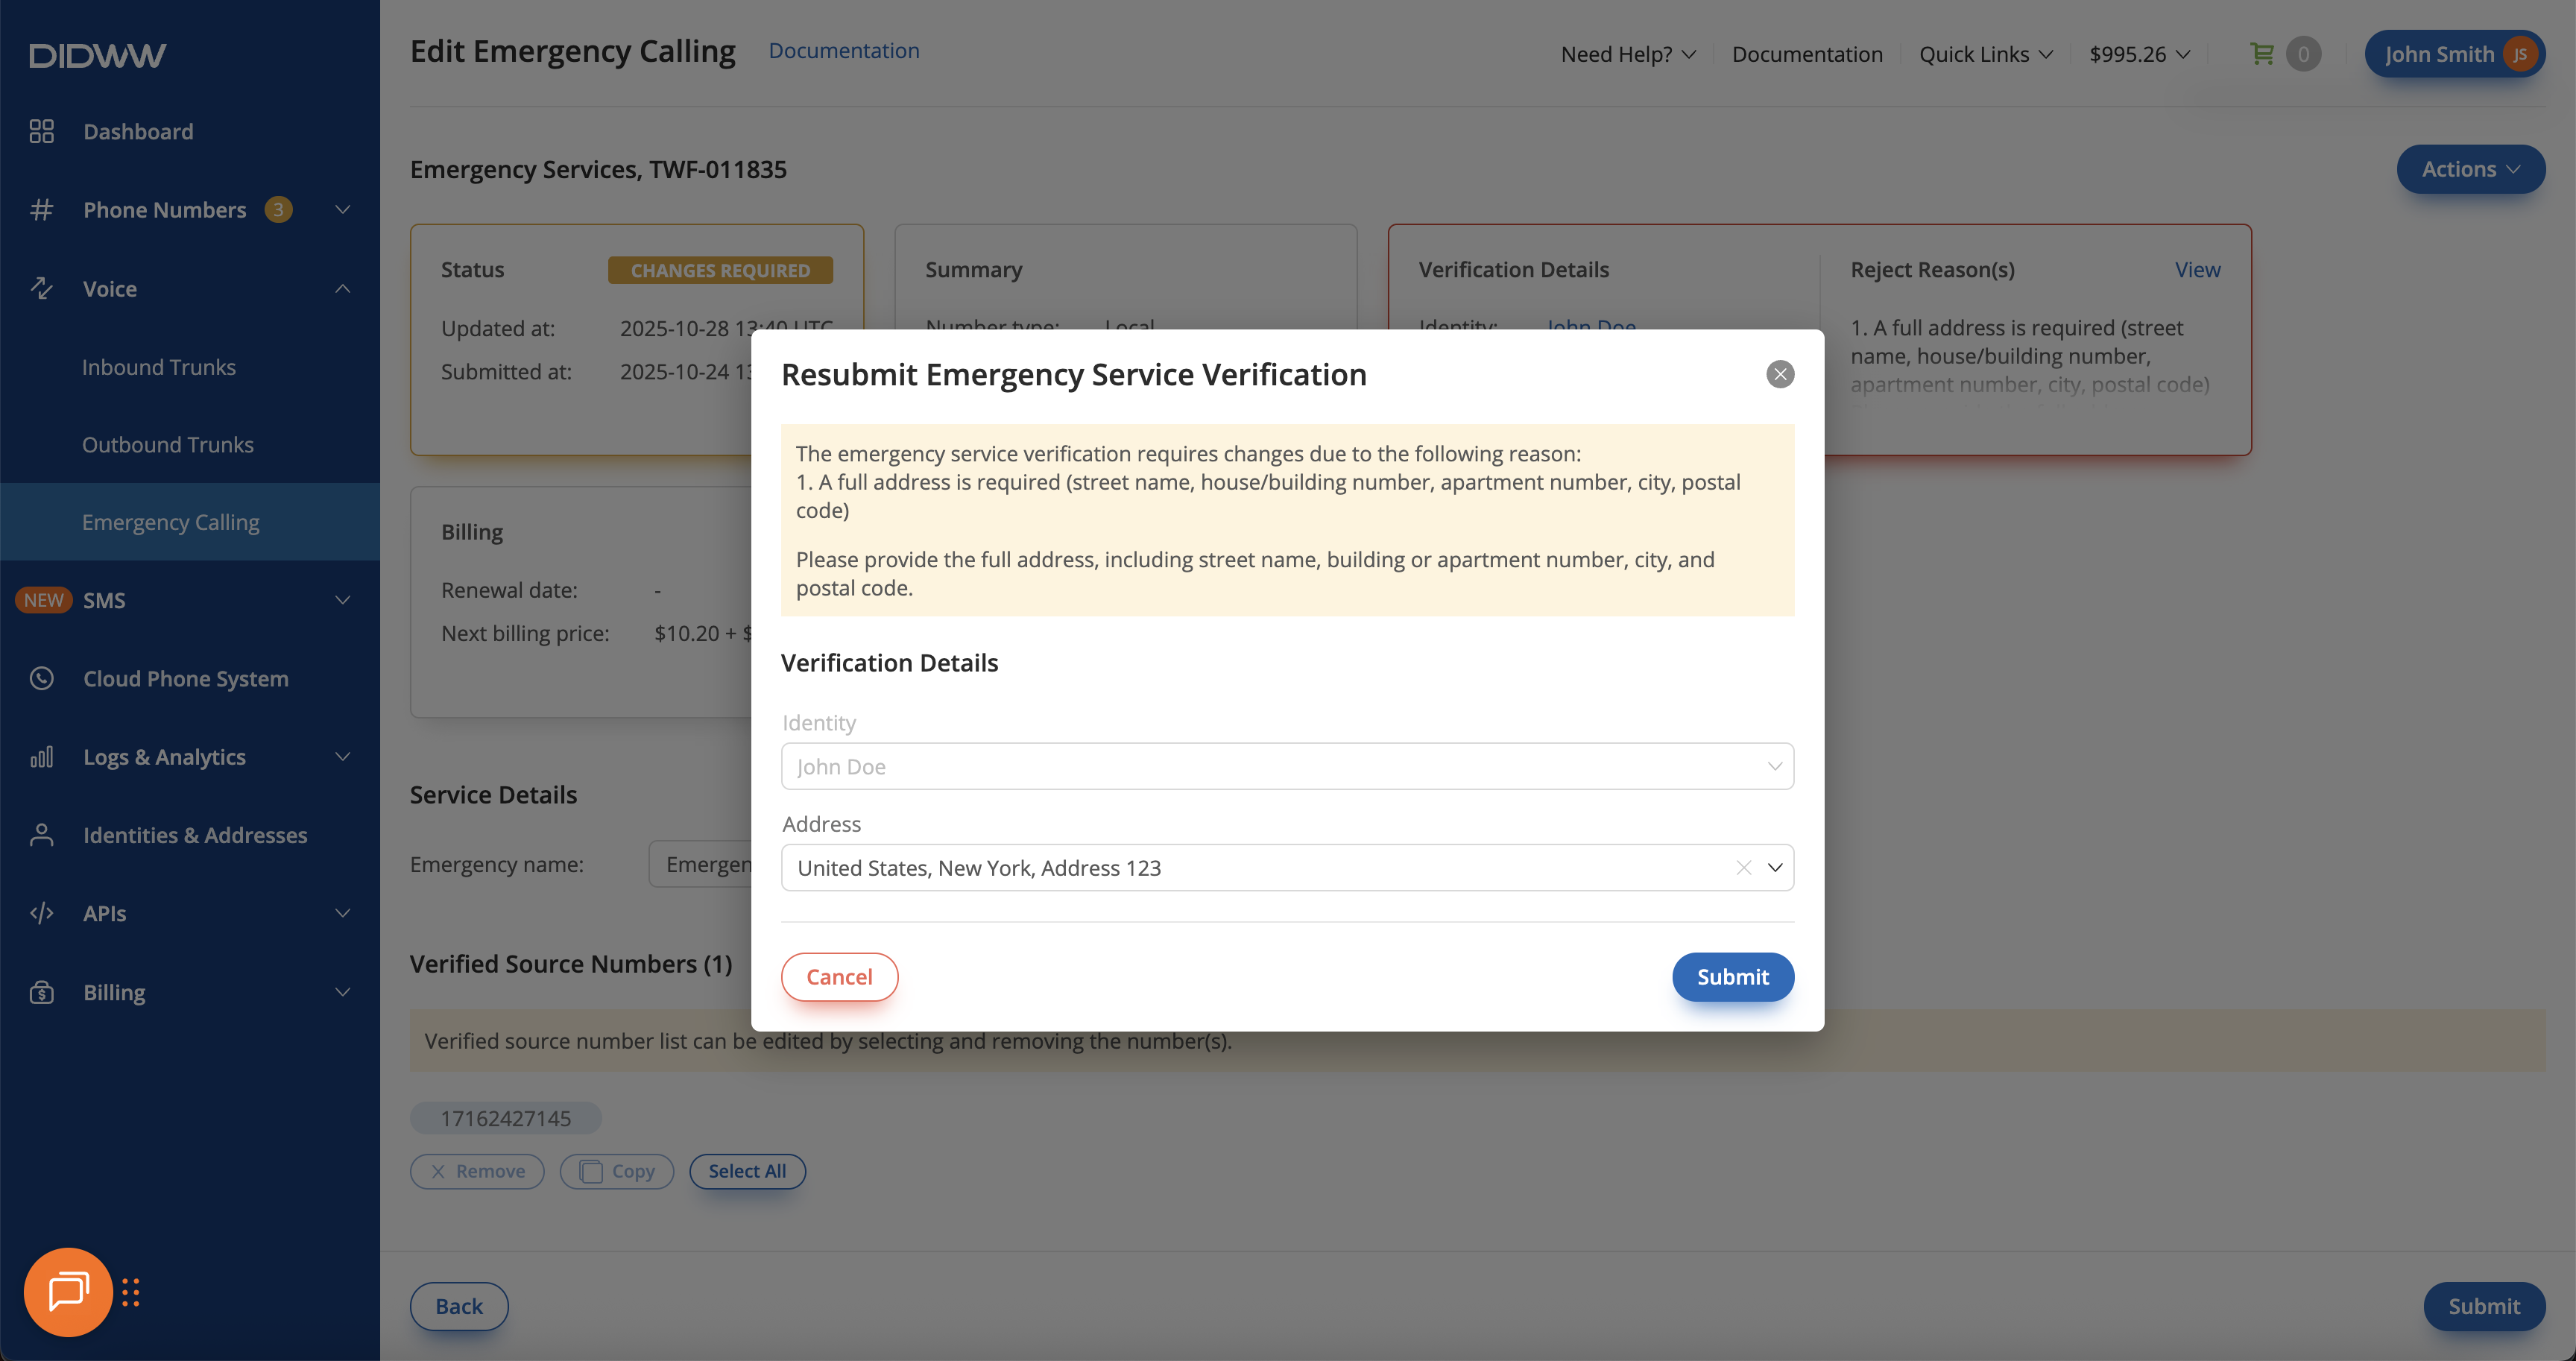
Fig. 7. Resubmitting the Emergency Calling Service request after updating verification details.#
Step 5. Emergency Calling Service Request Returns to In Process Status#
After successfully resubmitting the request, the Emergency Calling Service status changes to In Process. This indicates that the verification has been resubmitted.
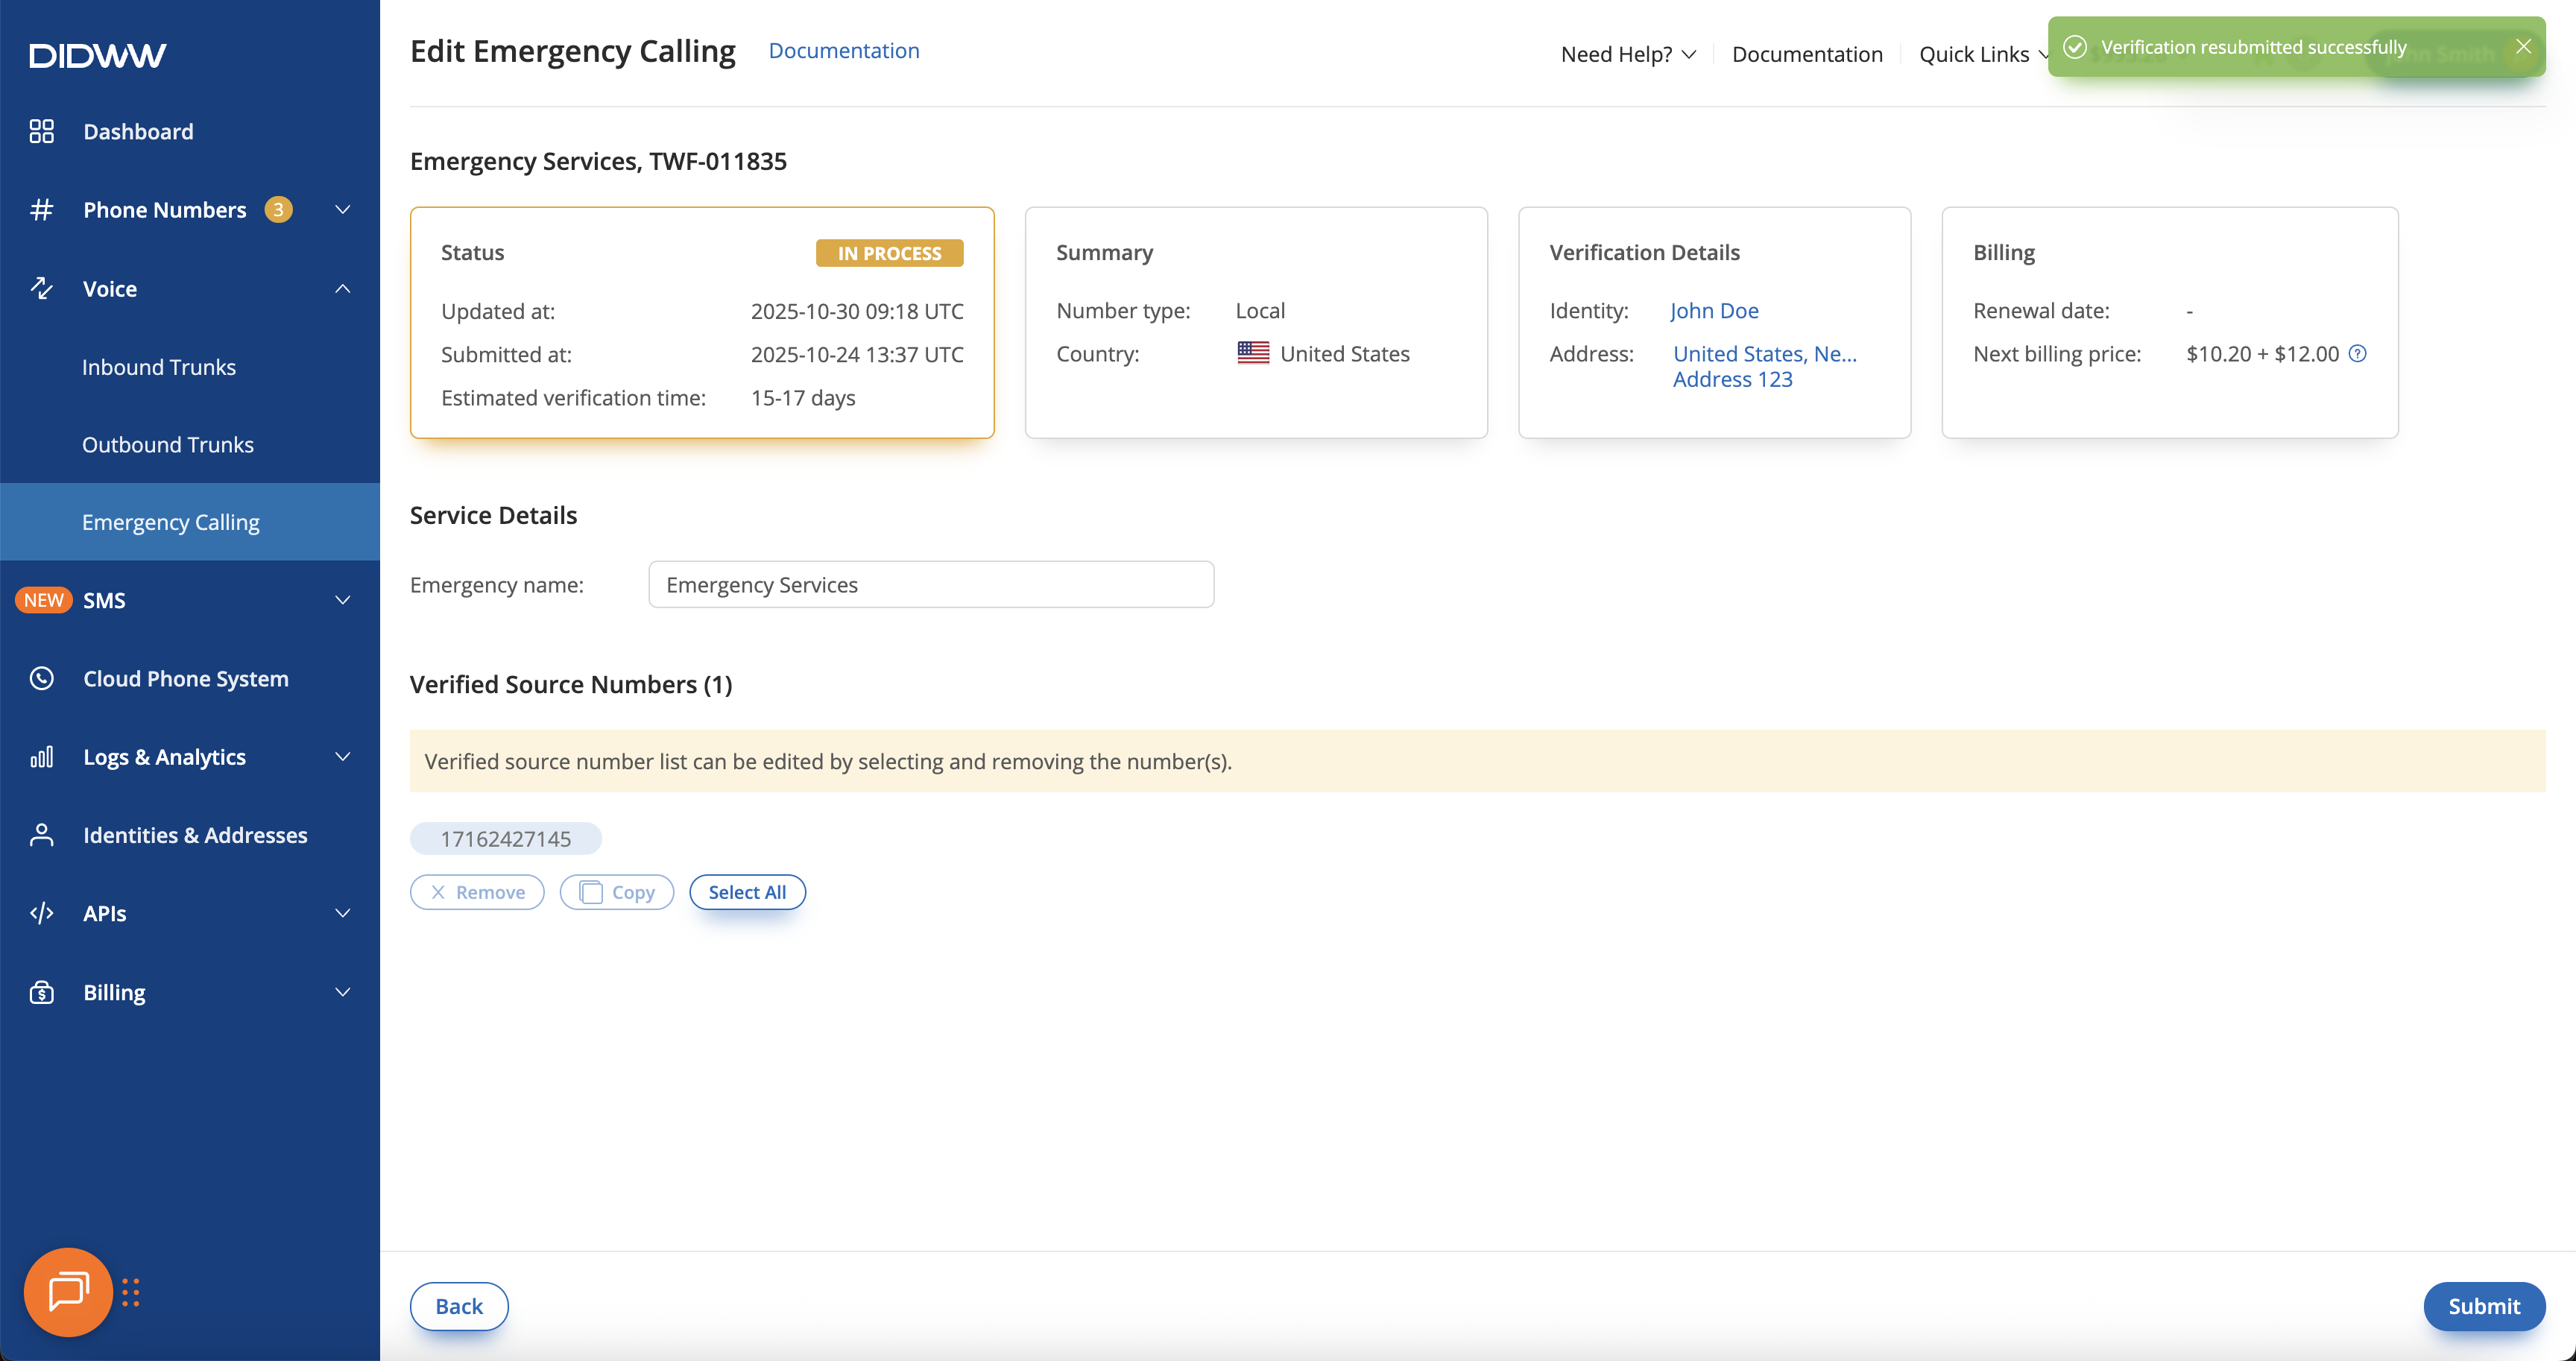
Fig. 8. Confirmation message indicating successful reassignment of end user details.#
Remove Source Numbers from Emergency Calling#
You can remove verified source numbers from an existing Emergency Calling Service request at any time if they are no longer needed.
Important
When the Emergency Calling Service is Active, removing a number instantly disables its ability to place calls to supported emergency numbers.
If a number is removed while the request is in New, Changes Required, or In Process status, it will not be activated for emergency calling.
Step 1. Open Emergency Calling Service Edit Page#
In the DIDWW User Panel, go to Voice → Emergency Calling.
Click the Actions (⋯) button next to the Emergency Calling Service request.
Select Edit from the dropdown menu.
Note
You can also click the Name / Ref. ID of the Emergency Calling Service request to open the edit page directly.
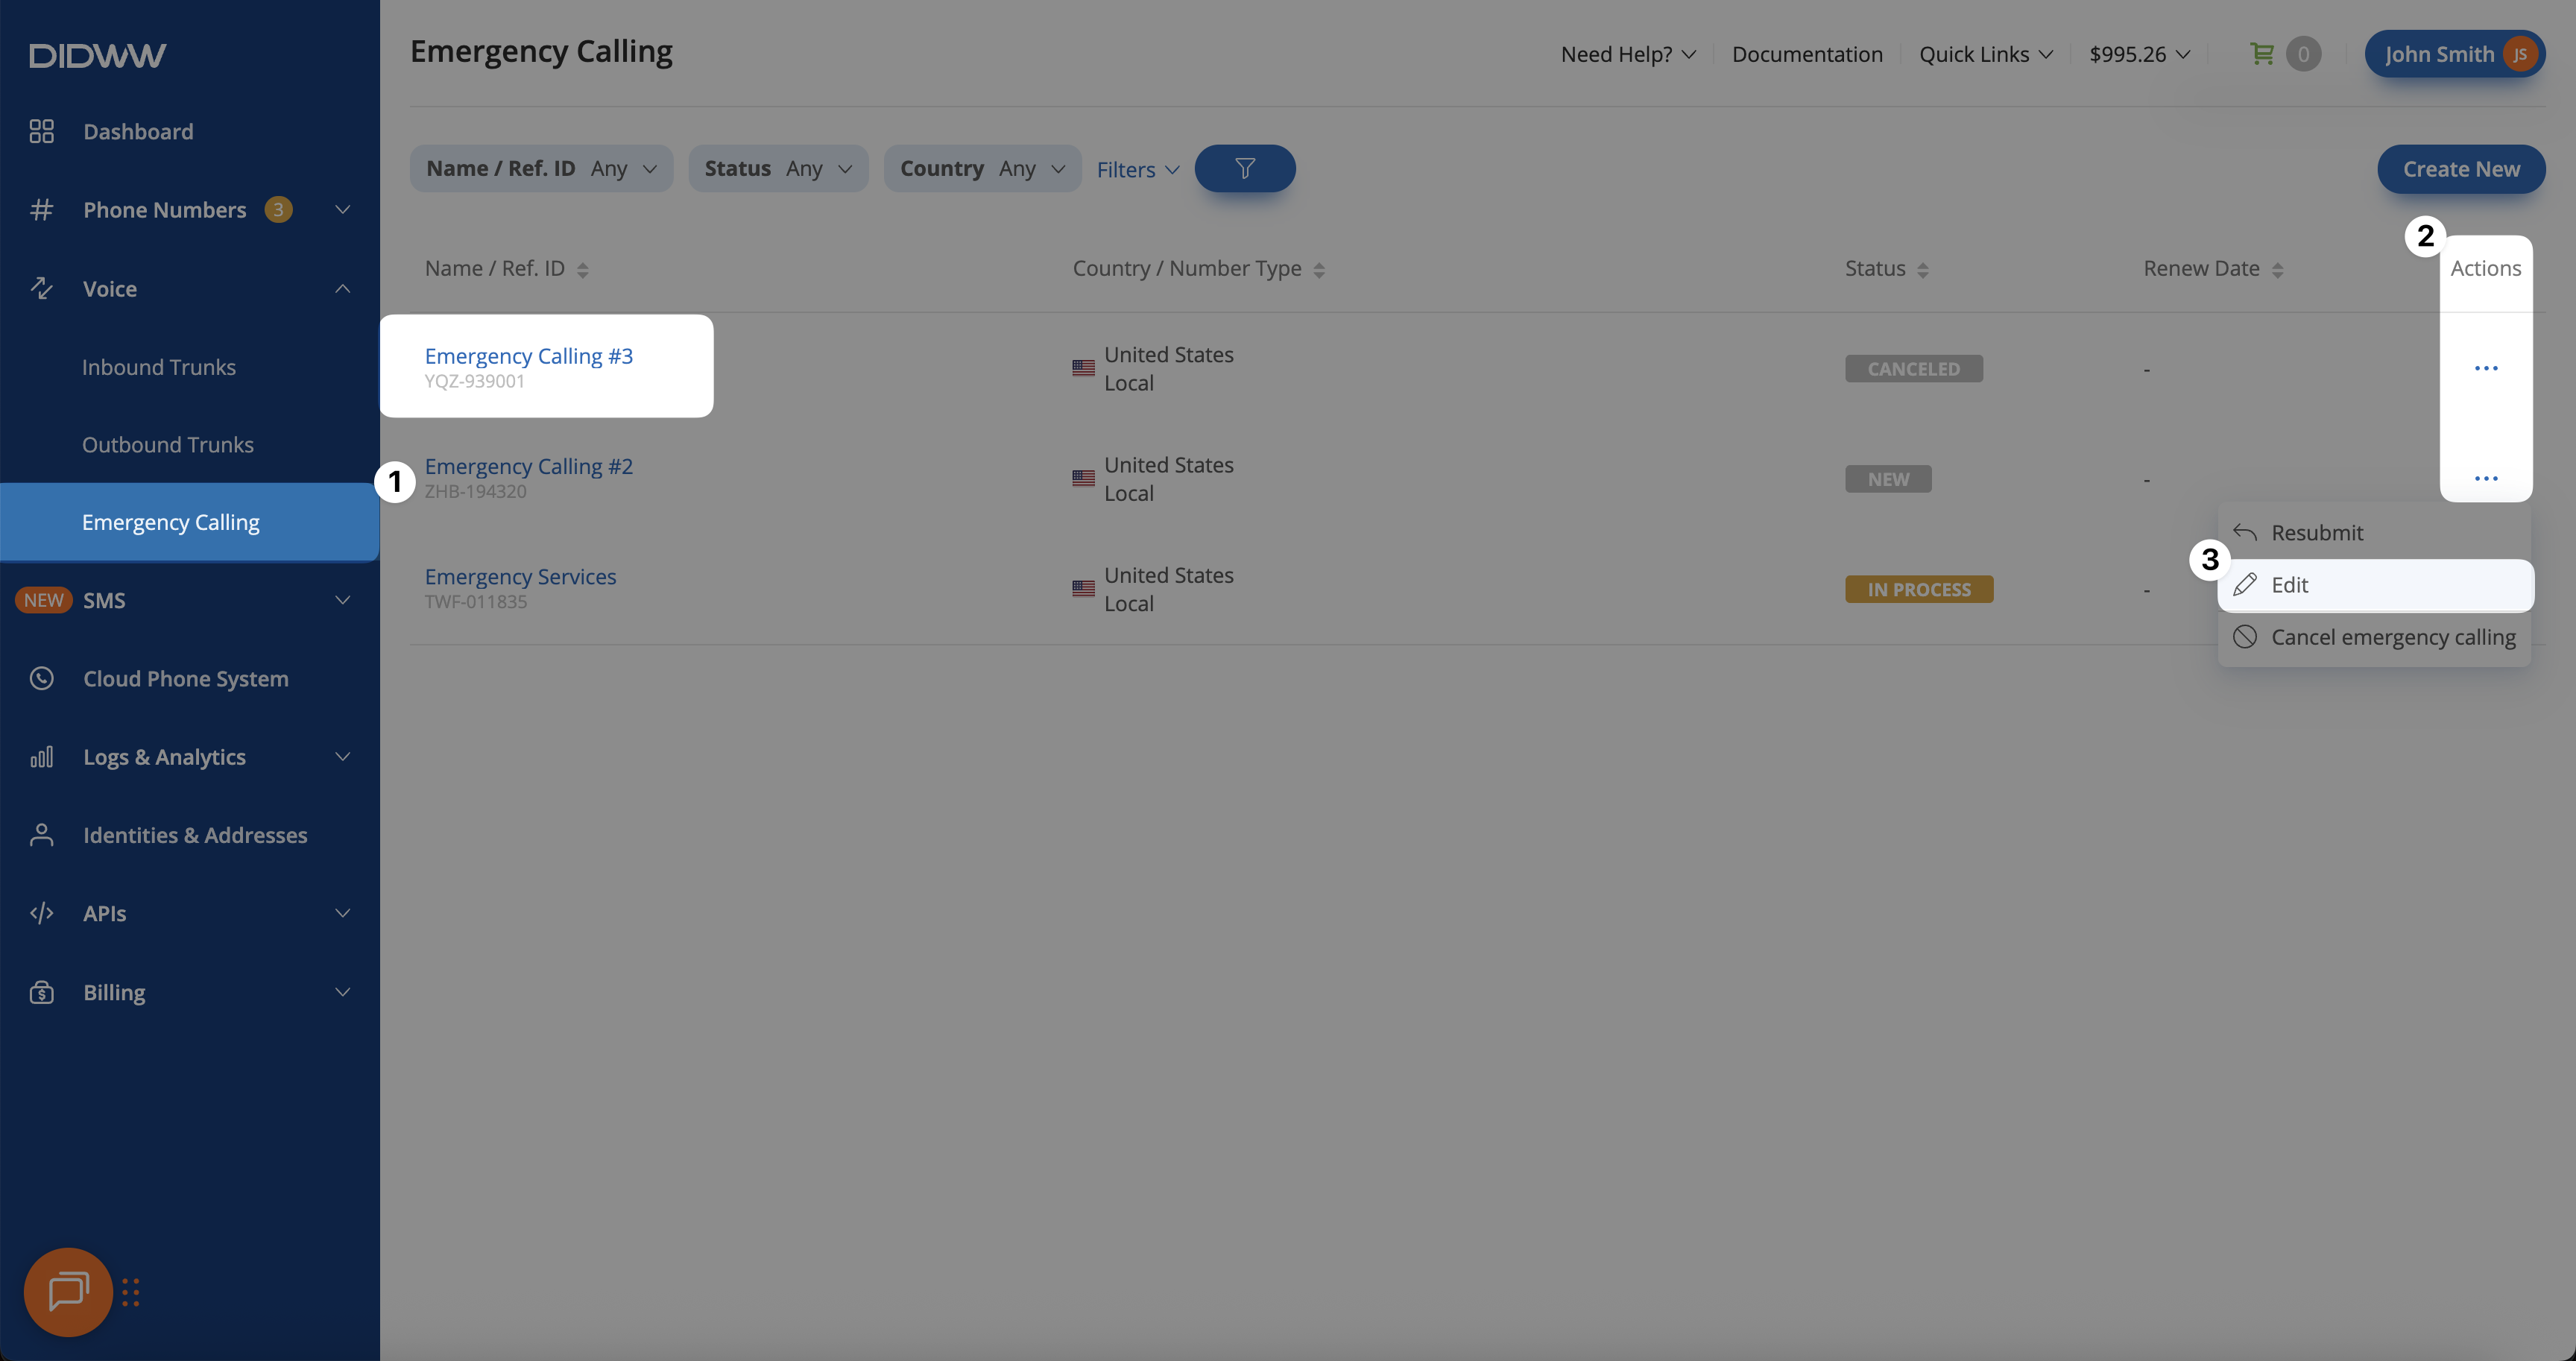
Fig. 9. Opening the Emergency Calling Service Edit Page.#
Step 2. Select Verified Source Numbers to Remove#
In the Verified Source Numbers section, select the DID number you want to remove.
Once the number is selected, click Remove.
Note
The Remove button is disabled until at least one number is selected. After selecting a number, the button becomes active and can be clicked to proceed with removal.
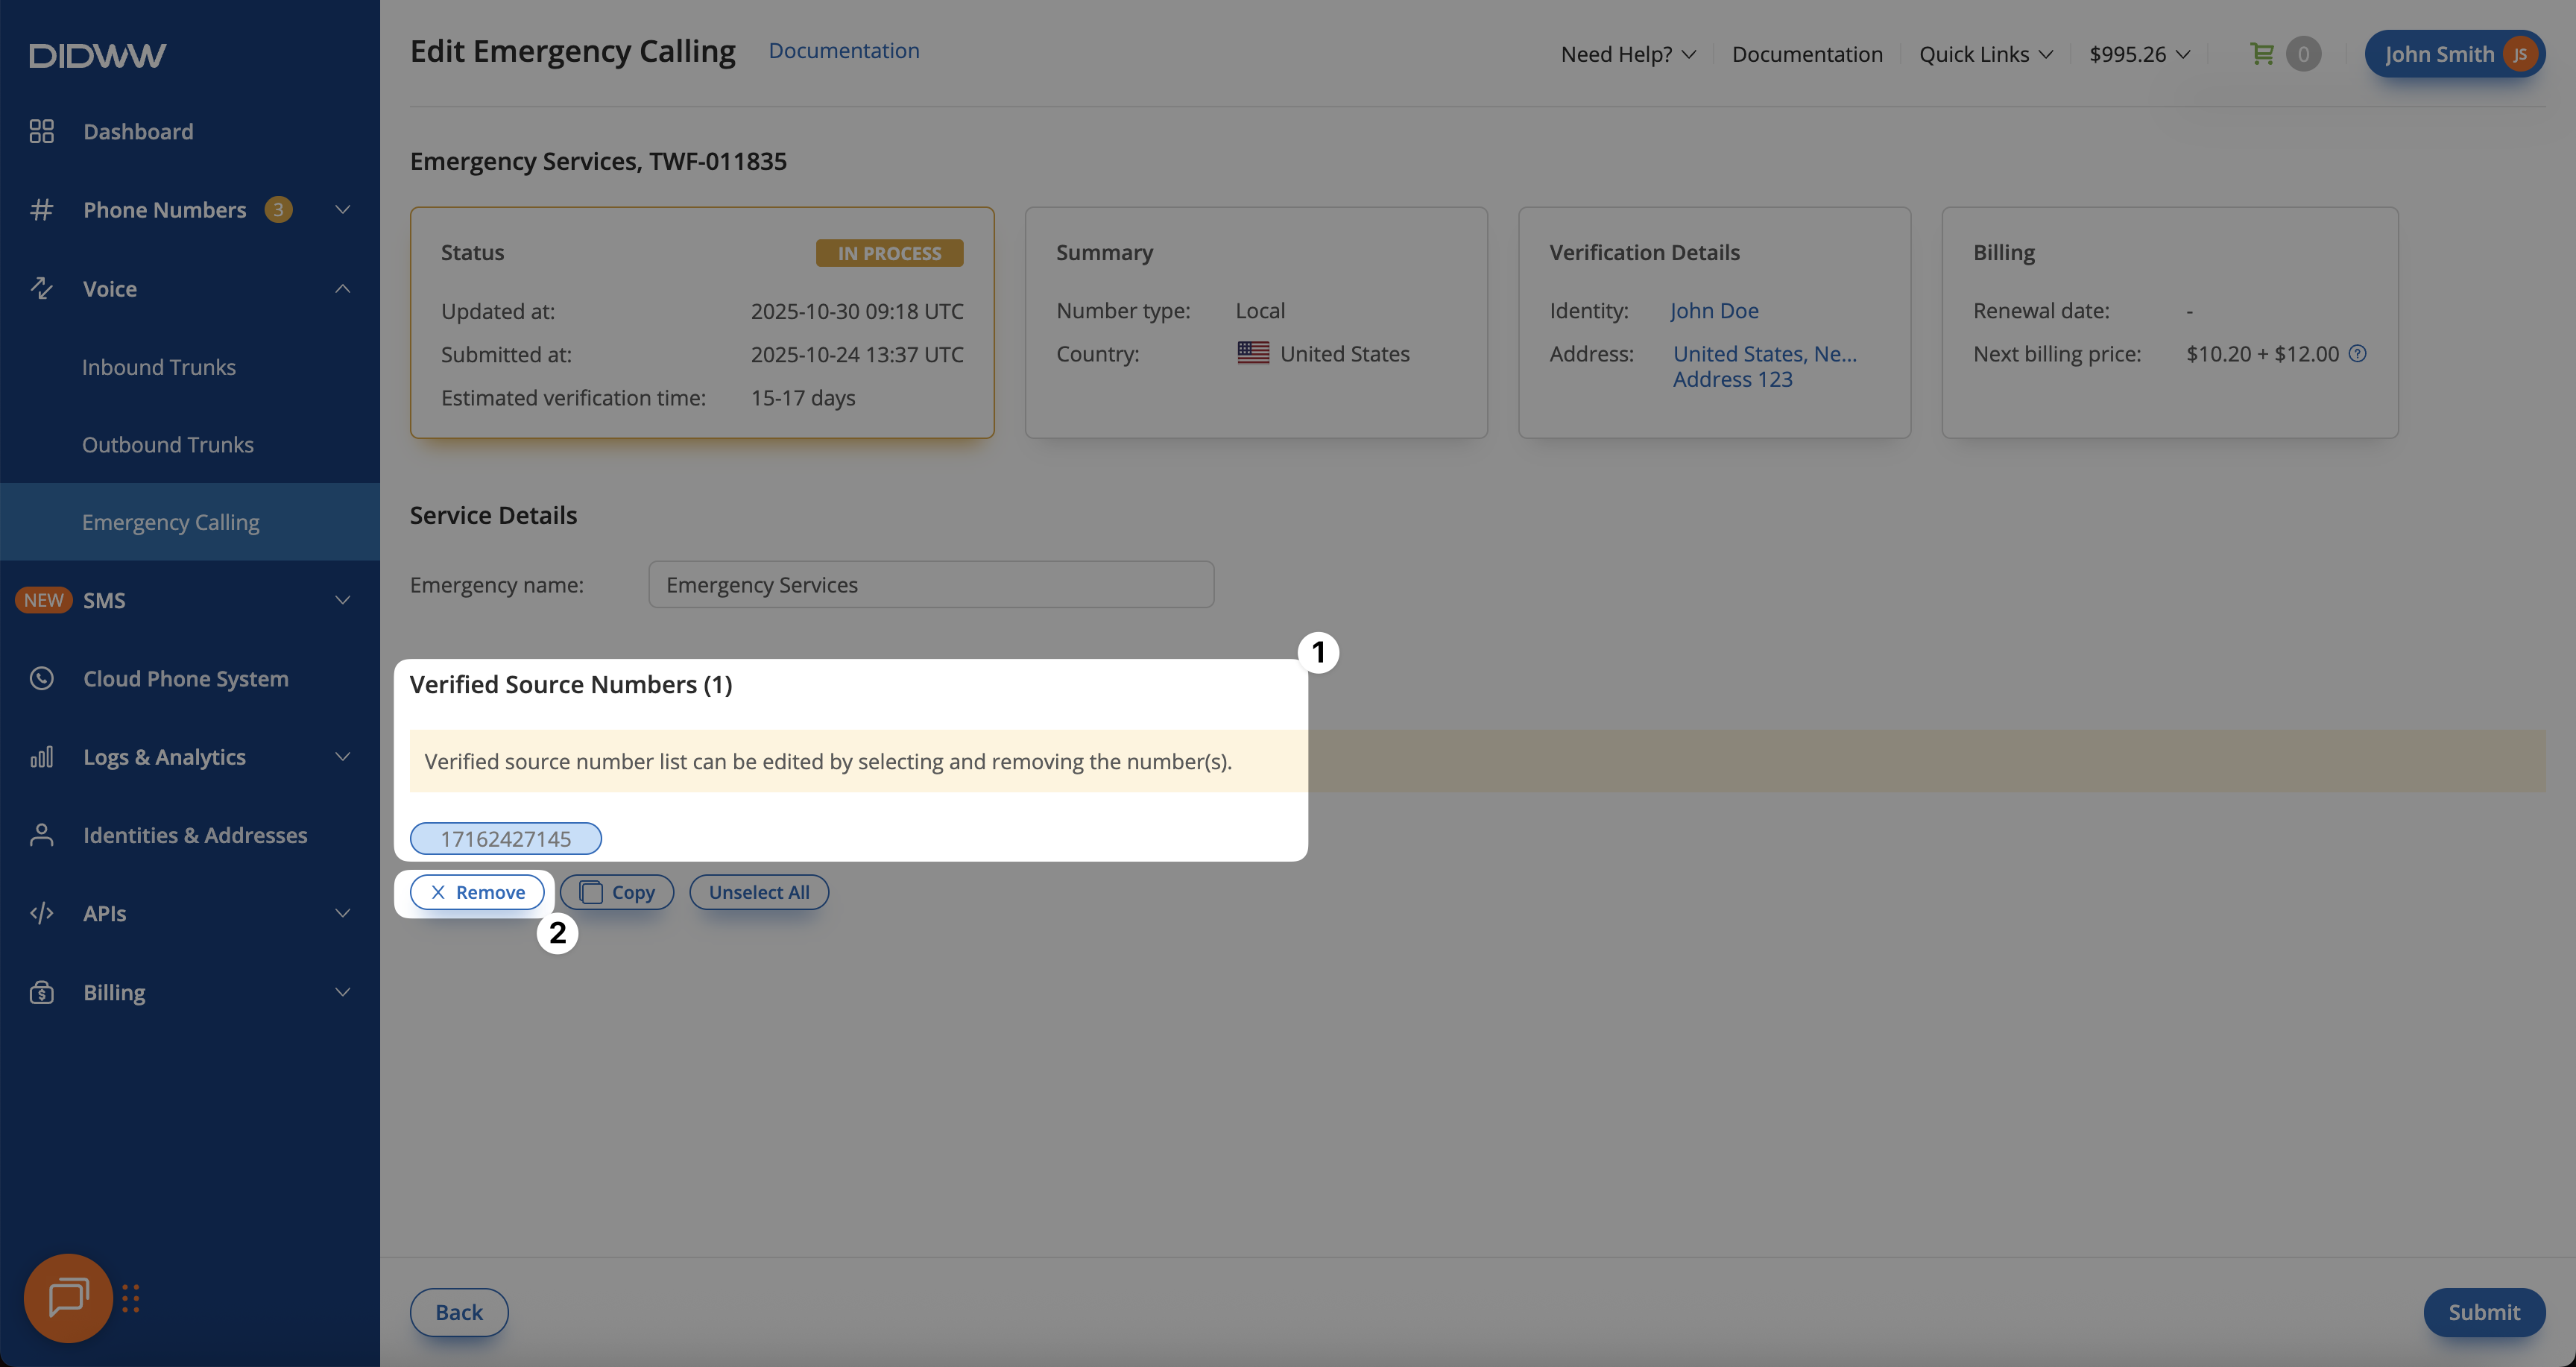
Fig. 10. Selecting verified source numbers for removal.#
Step 3. Confirm Number Removal#
A Remove Source Number(s) confirmation window will appear. Review the message, then click Remove to confirm.
Note
The selected source number(s) will be removed immediately, and the emergency service for those numbers will be canceled. No refund will be issued for the remaining service time.
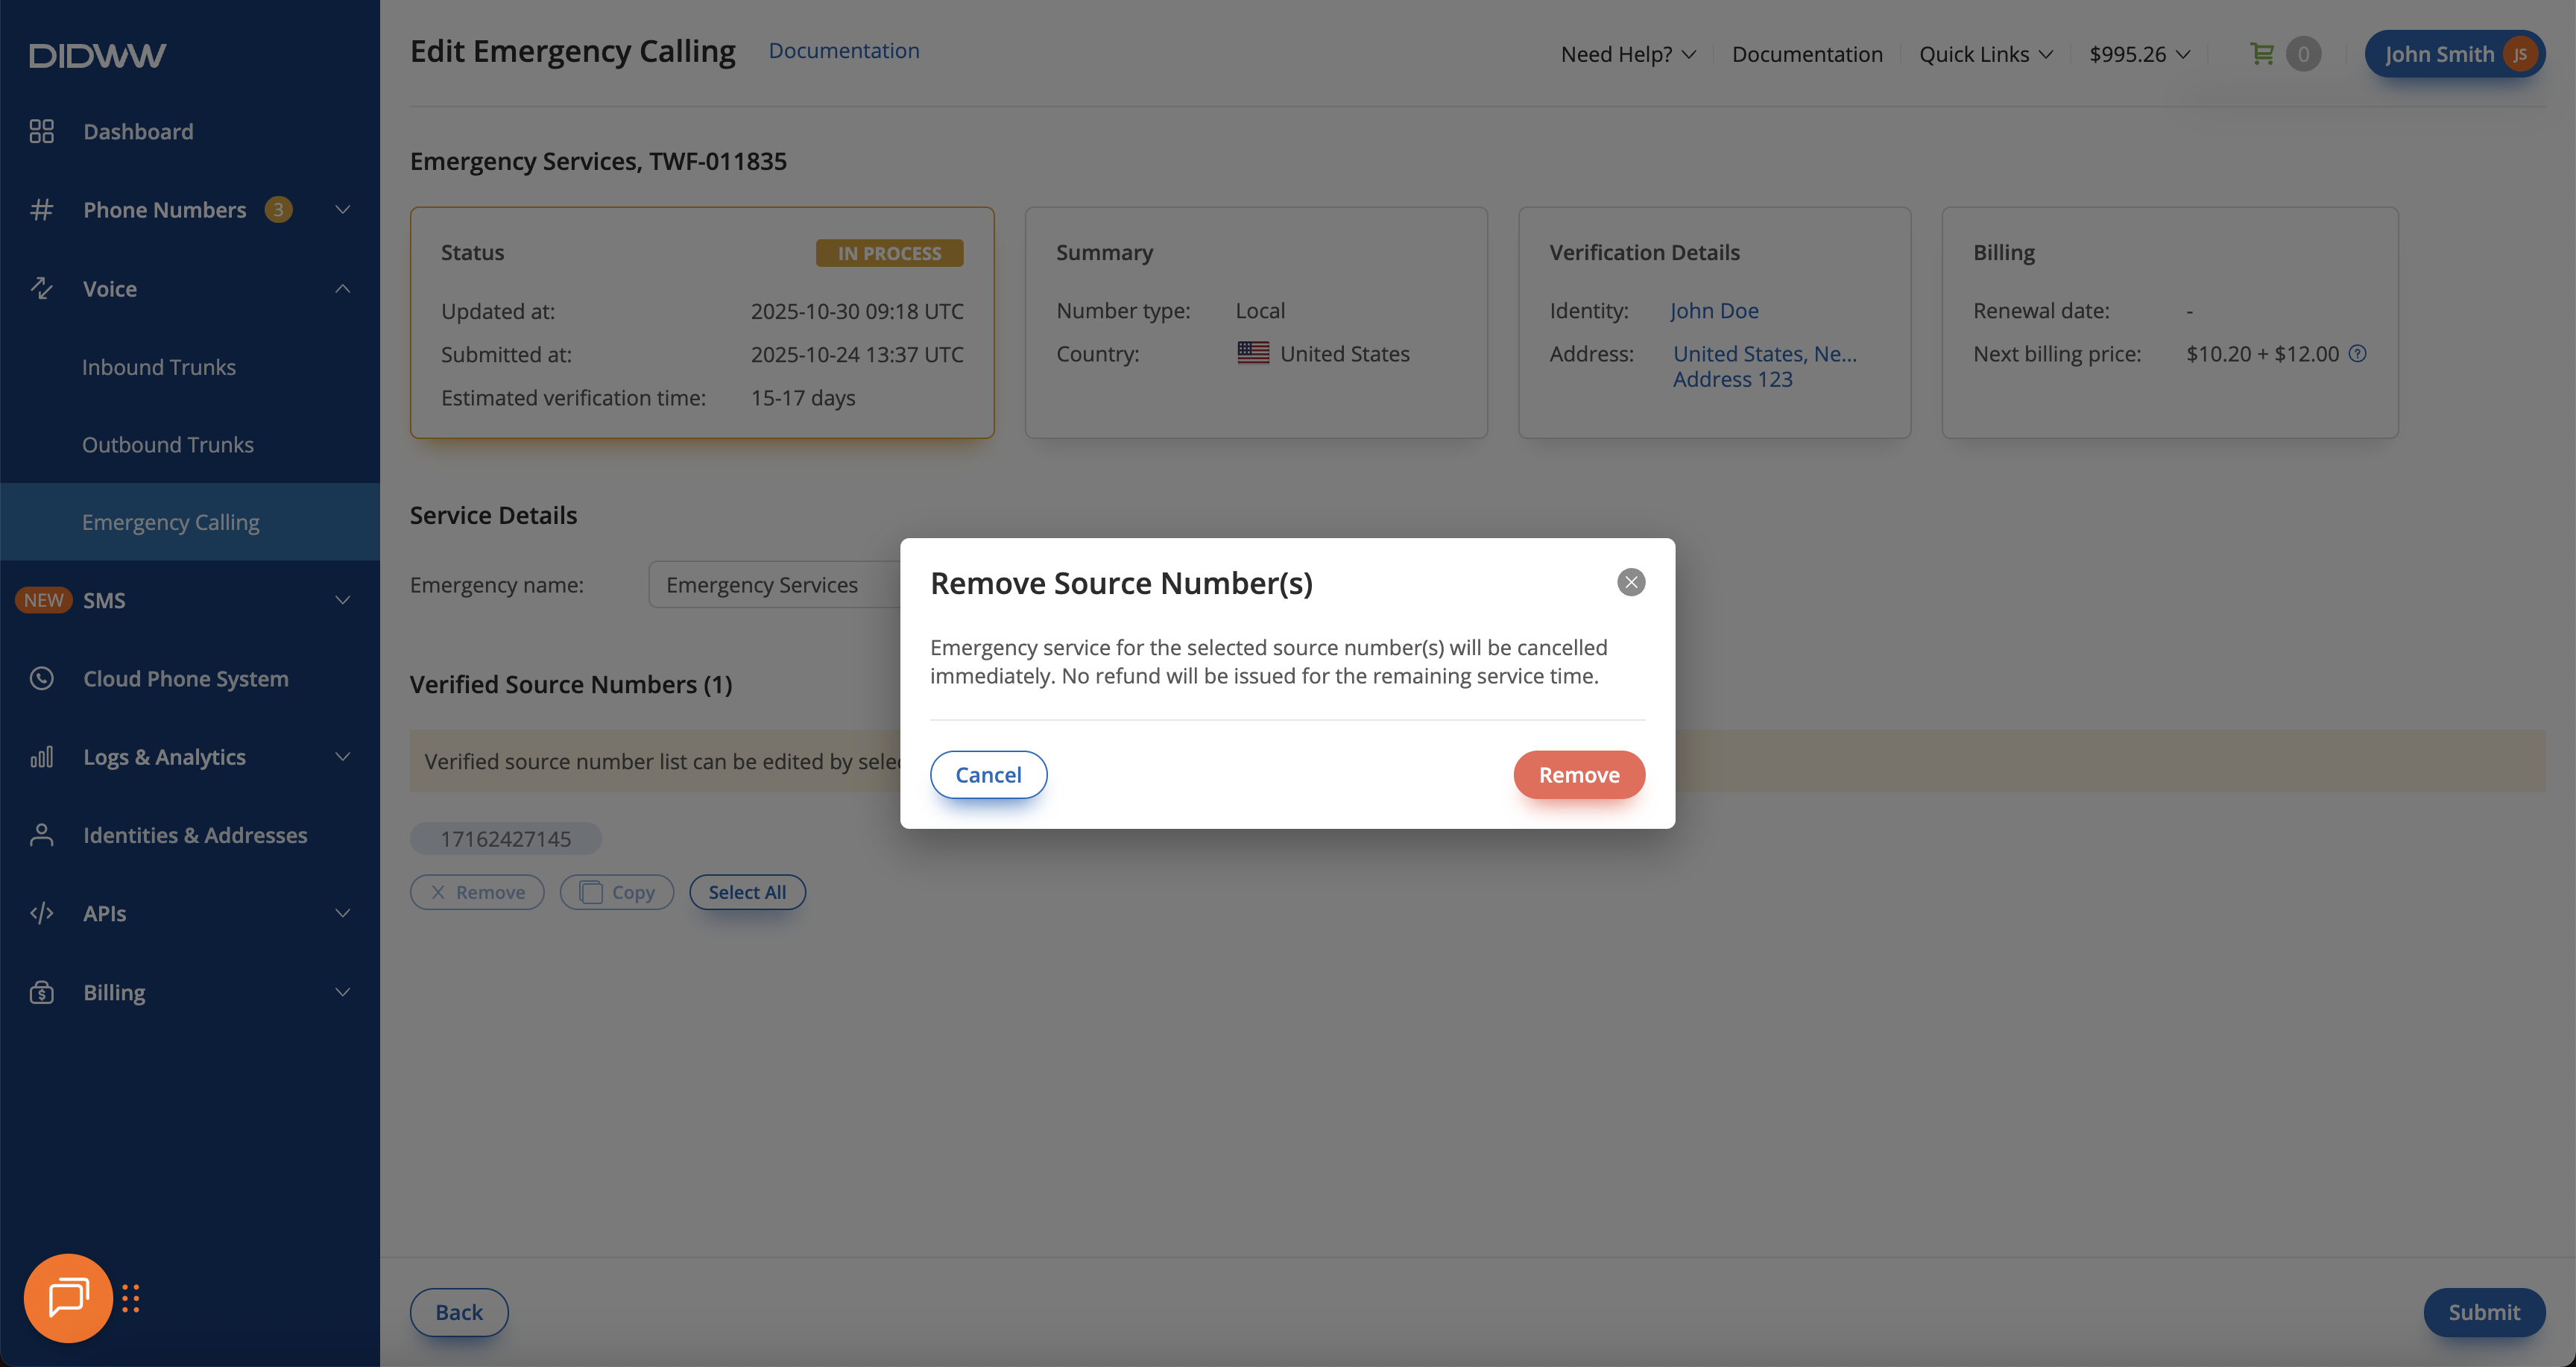
Fig. 11. Confirming the removal of verified source numbers.#
Cancel Emergency Calling Service#
You can cancel an Emergency Calling Service request while it is in New, Changes Required, or Active status. Canceling the request immediately deactivates the verified emergency source numbers assigned to the service, preventing them from making emergency calls. The Emergency Calling Service will be removed right away and will not renew in the next billing cycle.
In the DIDWW User Panel, go to Voice → Emergency Calling.
Click Actions (⋯) next to the Emergency Calling Service request you want to cancel.
Select Cancel Emergency Calling from the dropdown menu.
Note
Emergency Calling Service requests that are currently In Process cannot be canceled.
However, you can remove individual verified source numbers at any time, regardless of status, if updates are needed for the numbers used to place emergency calls through outbound trunking.
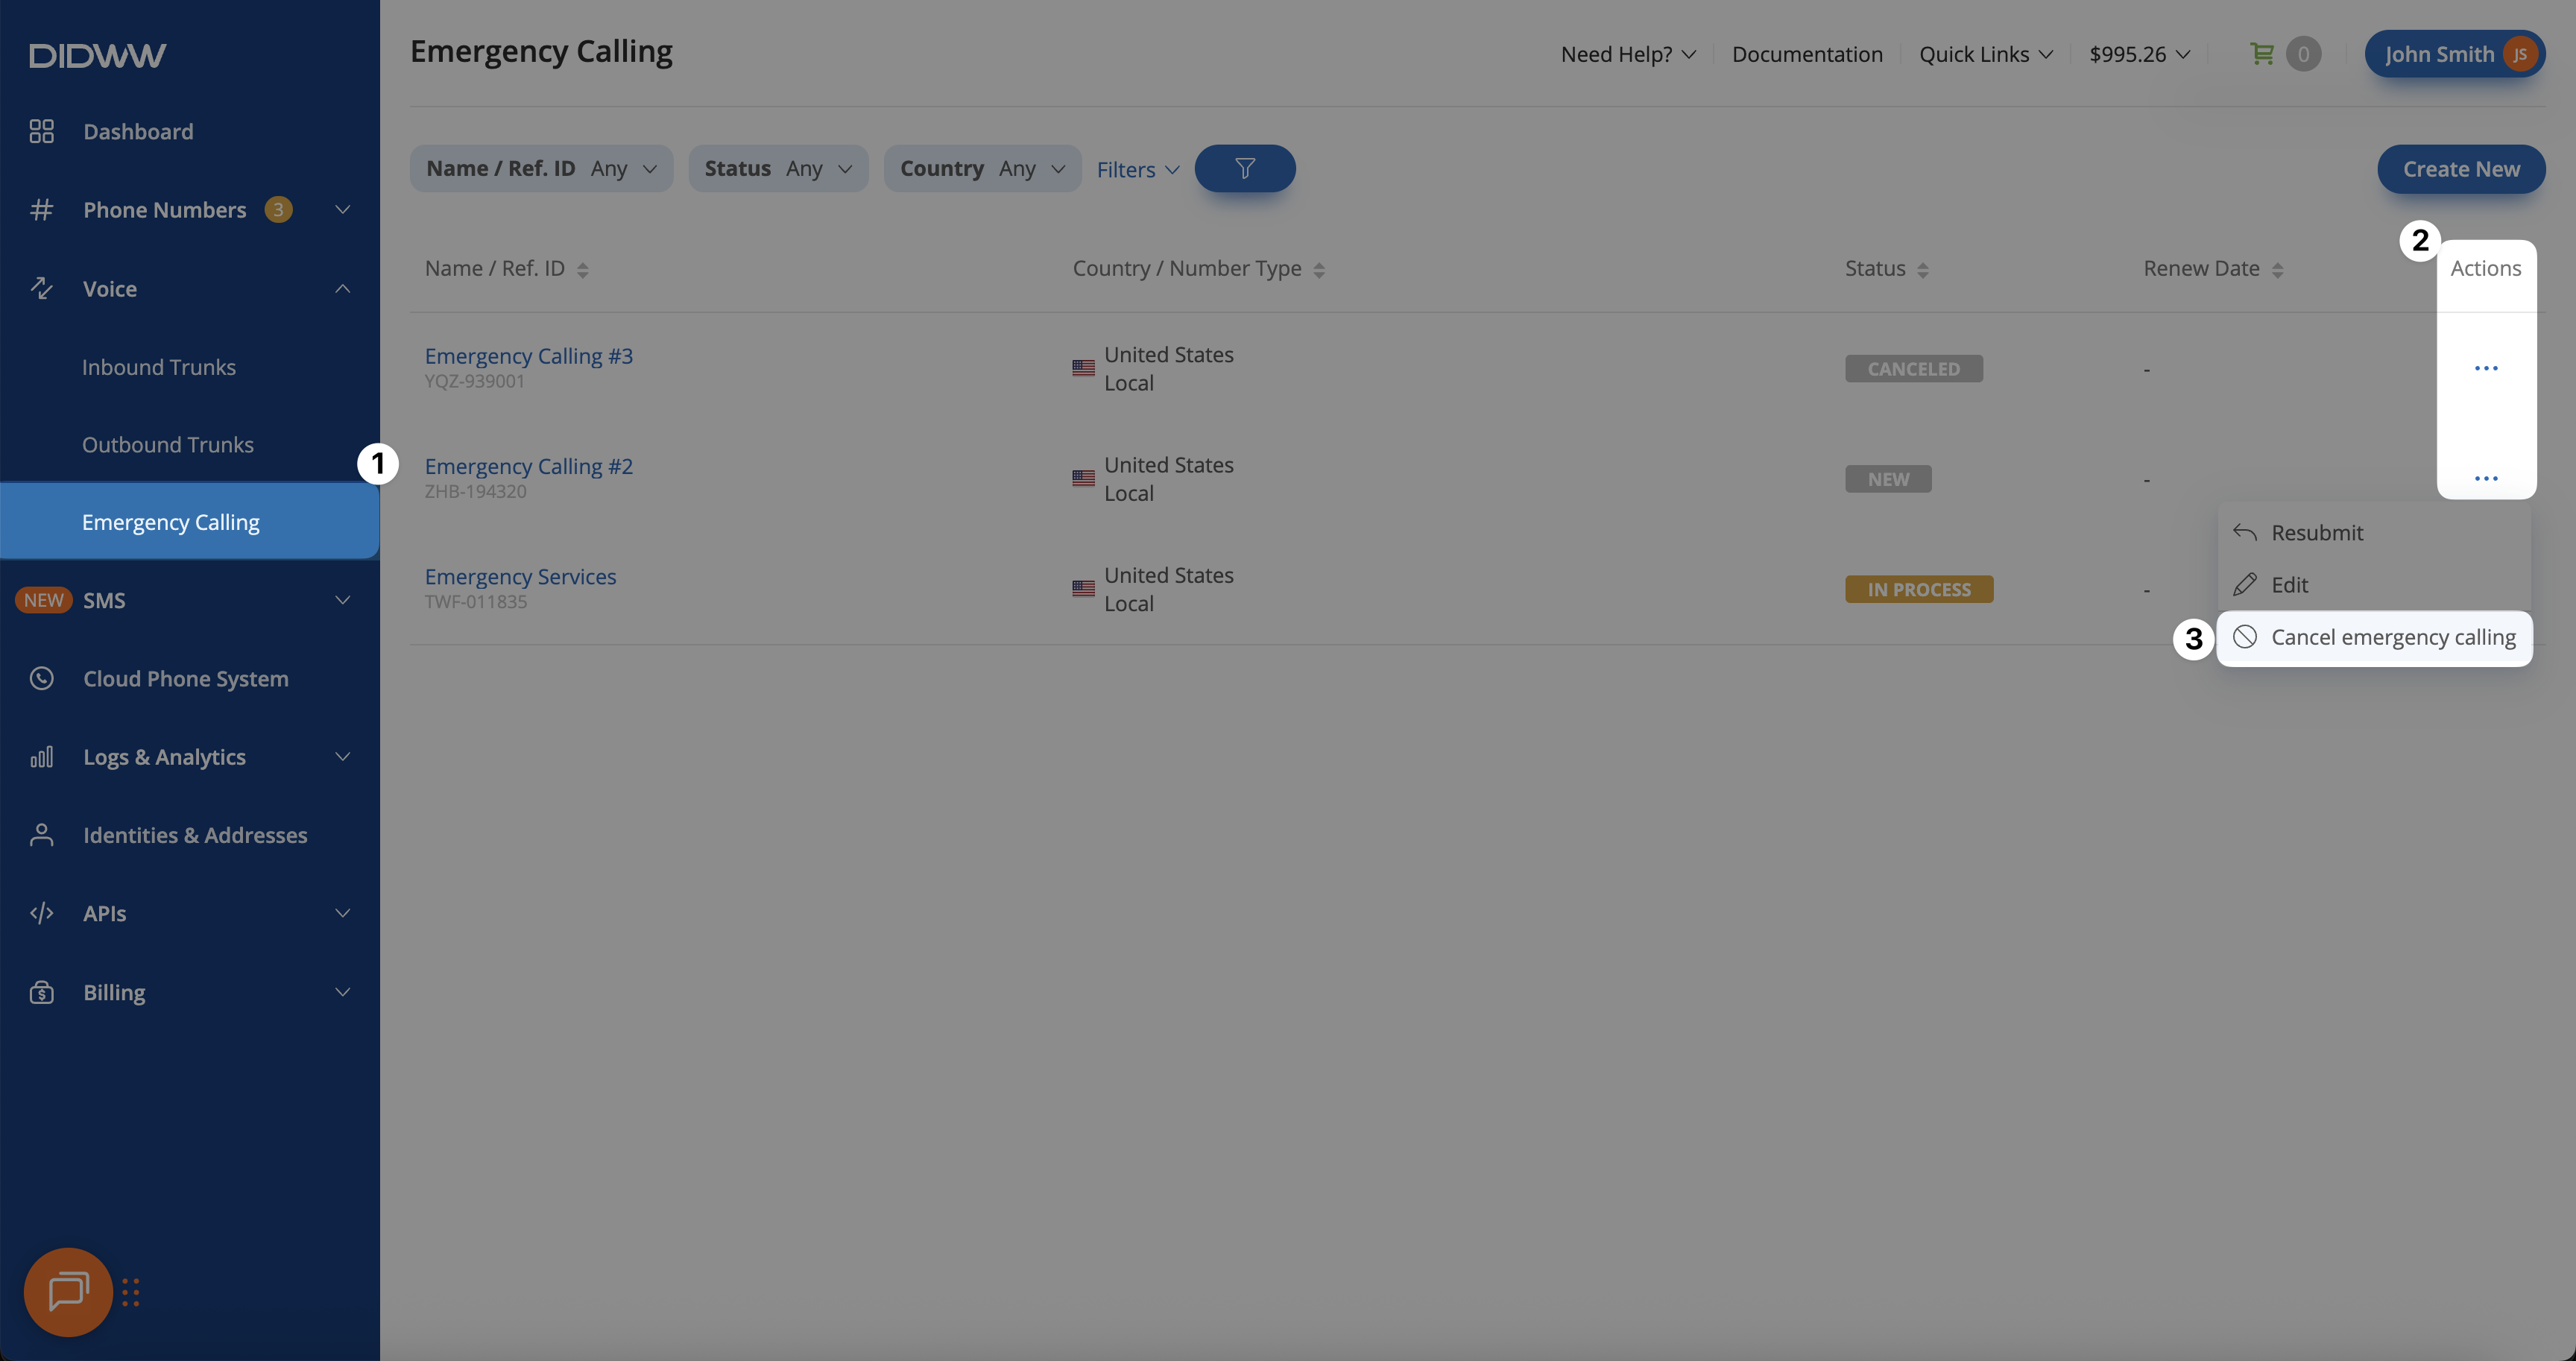
Fig. 12. Canceling an Emergency Calling Service request using the Actions menu.#