PSTN Trunk#
PSTN trunks allow you to forward incoming calls through Direct Inward Dialing (DID) to the Public Switched Telephone Network (PSTN).
Note
Incoming calls forwarded to a PSTN trunk are charged per minute. The rate and availability depend on the destination PSTN phone number.
Create PSTN Trunk#
To create an inbound PSTN trunk, follow these steps:
Navigate to the Voice section in the left-hand menu.
Select Inbound Trunks from the submenu.
Click the Create New button in the top-right corner of the screen.
From the dropdown menu, select PSTN Trunk.
Fig. 1. Creating a new PSTN Trunk#
Step 1: Configure General Settings & Check Rate#
Enter a unique Friendly name to identify the trunk.
In the PSTN phone number field, enter the destination number to which calls will be forwarded.
Set the Capacity limit to Unlimited, or specify the maximum number of simultaneous calls allowed (optional).
In the CLI number list field, assign a Number List to control which Caller ID values may be used when forwarding calls. For more information on creating and managing number lists, see Number List.

Fig. 2. Basic PSTN trunk configuration#
Step 2: Review Rate & Create#
If the destination is reachable, the Per minute rate card will appear on the right side of the screen.
Review the Per minute rate displayed.
If the rate is acceptable, click Create to finalize the PSTN trunk setup.
After the trunk is created, assign it to your DID number(s). For detailed instructions, see Assign a voice trunk.
Note
The per-minute rate depends on the destination phone number. For detailed pricing information, contact customer.care@didww.com .
Fig. 3. Per-minute rate displayed and trunk ready to be created#
Edit PSTN Trunk#

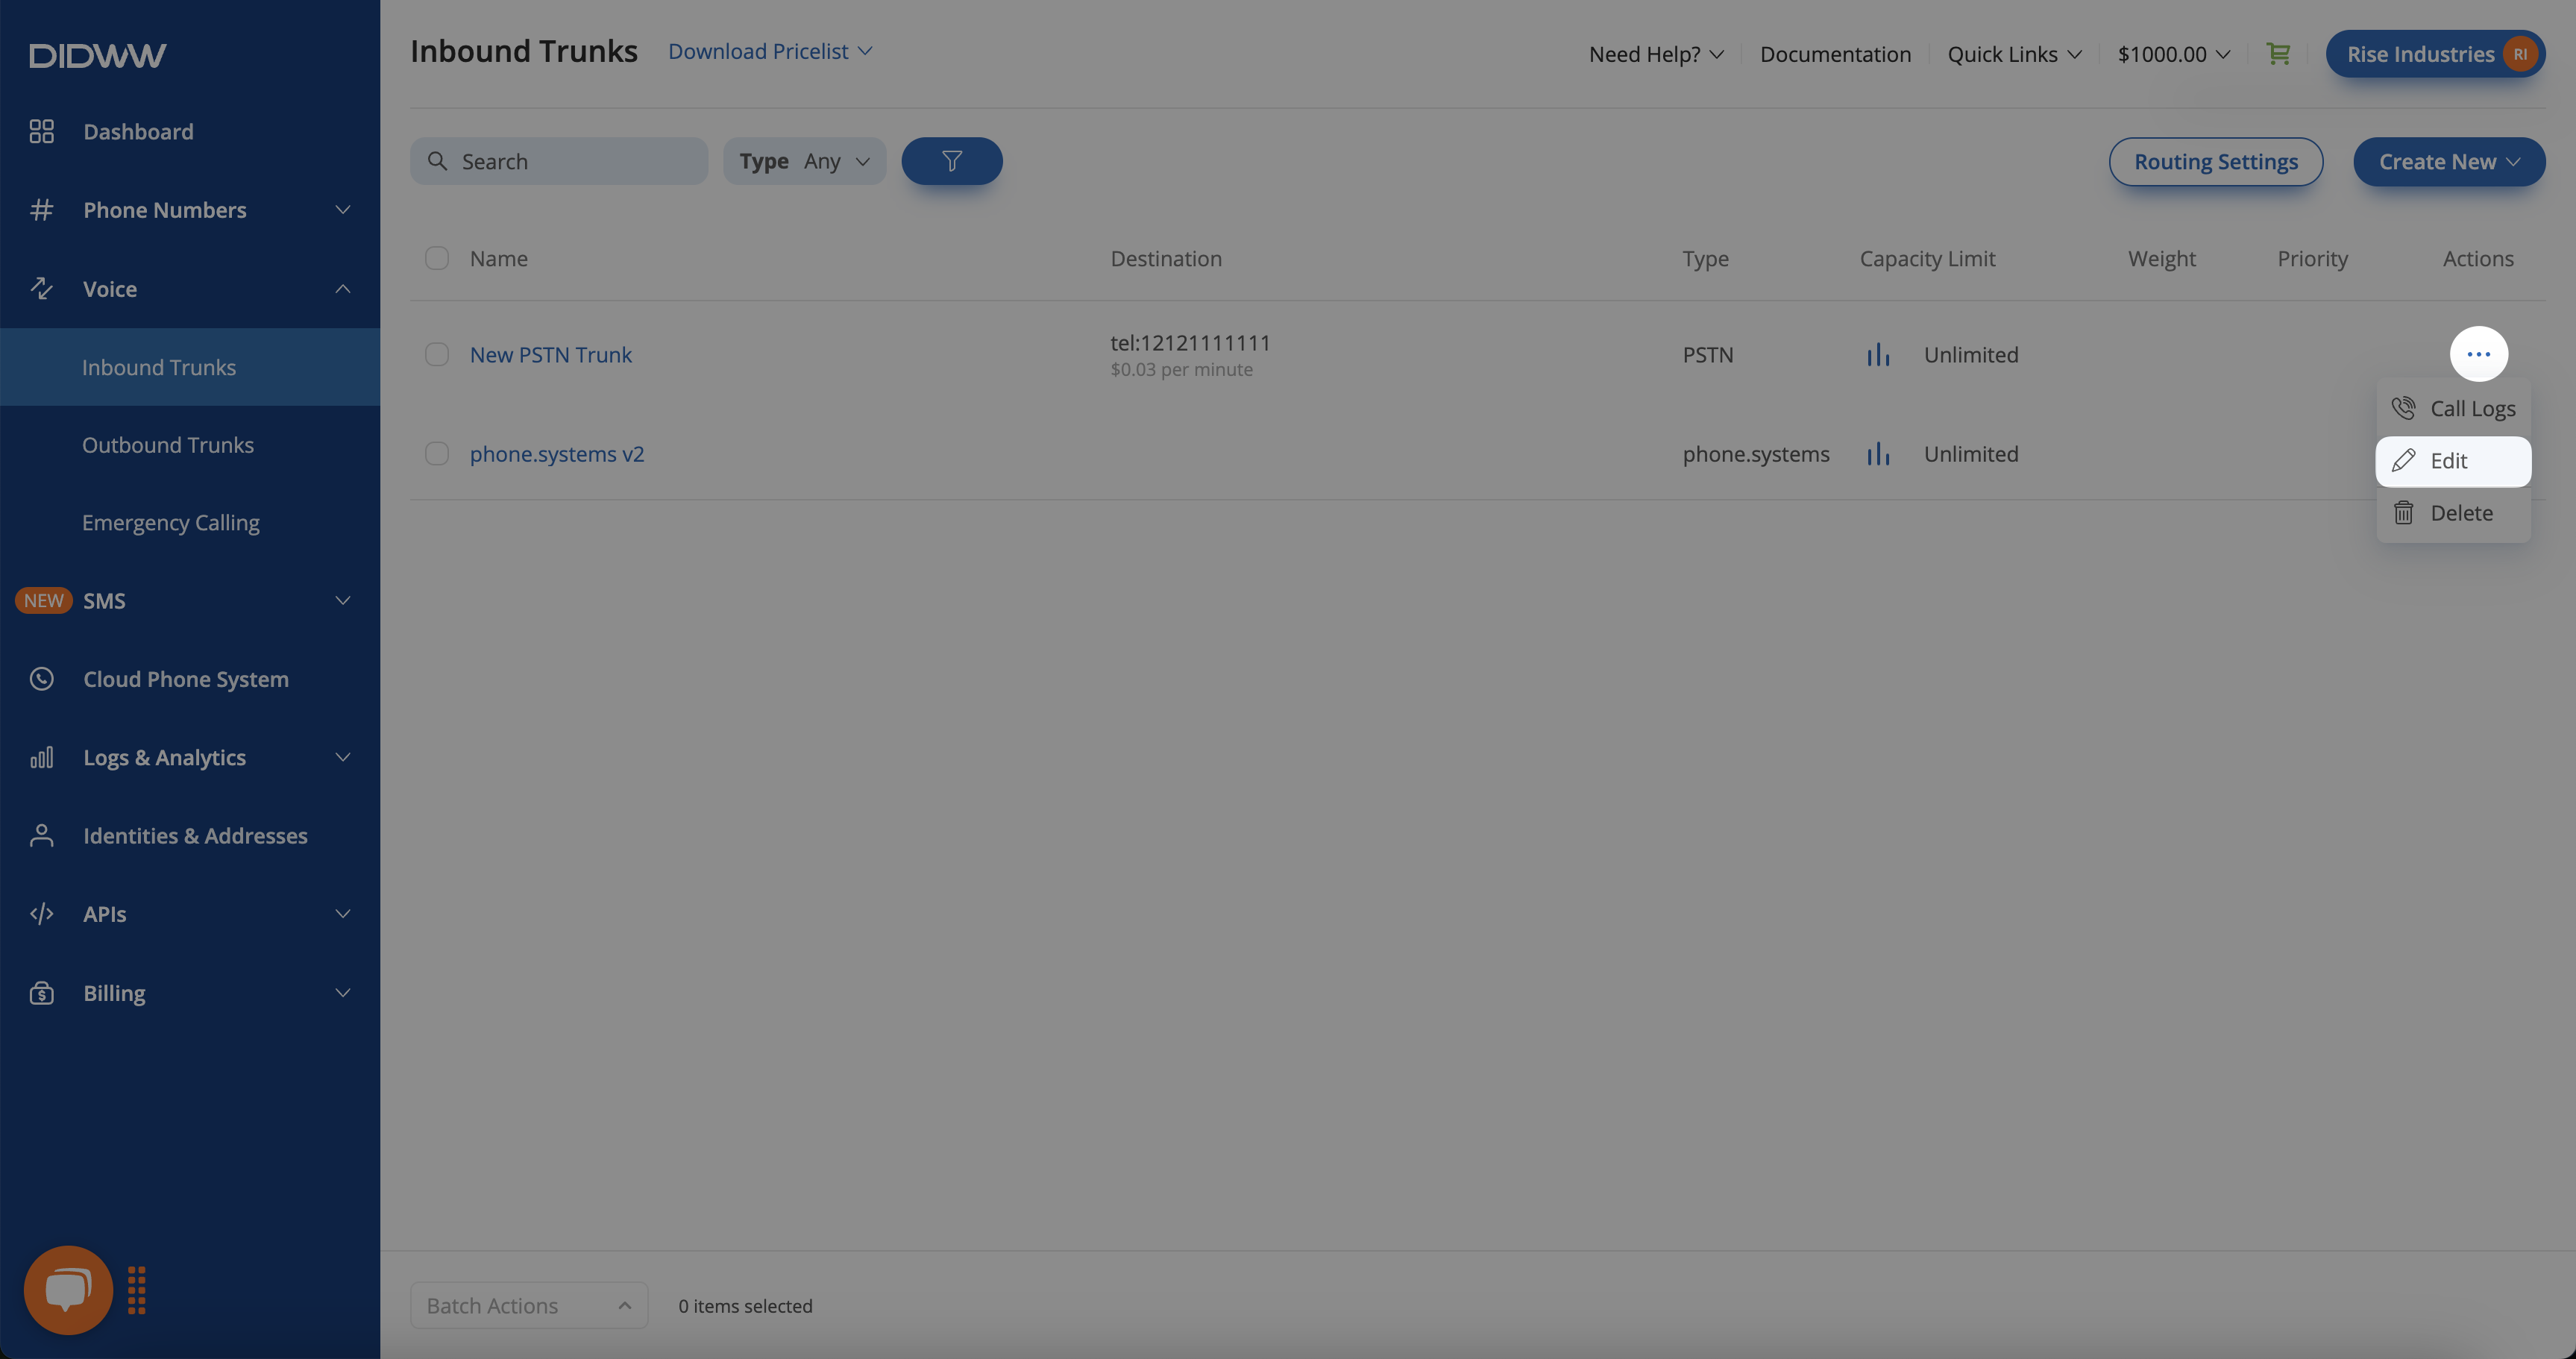
Fig. 4. Actions button#
Delete PSTN Trunk(s)#
You can either delete a single PSTN trunk or delete multiple PSTN trunks by using batch actions.
Note
Trunks assigned to DID numbers or in use cannot be deleted.
Delete a Single PSTN Trunk#
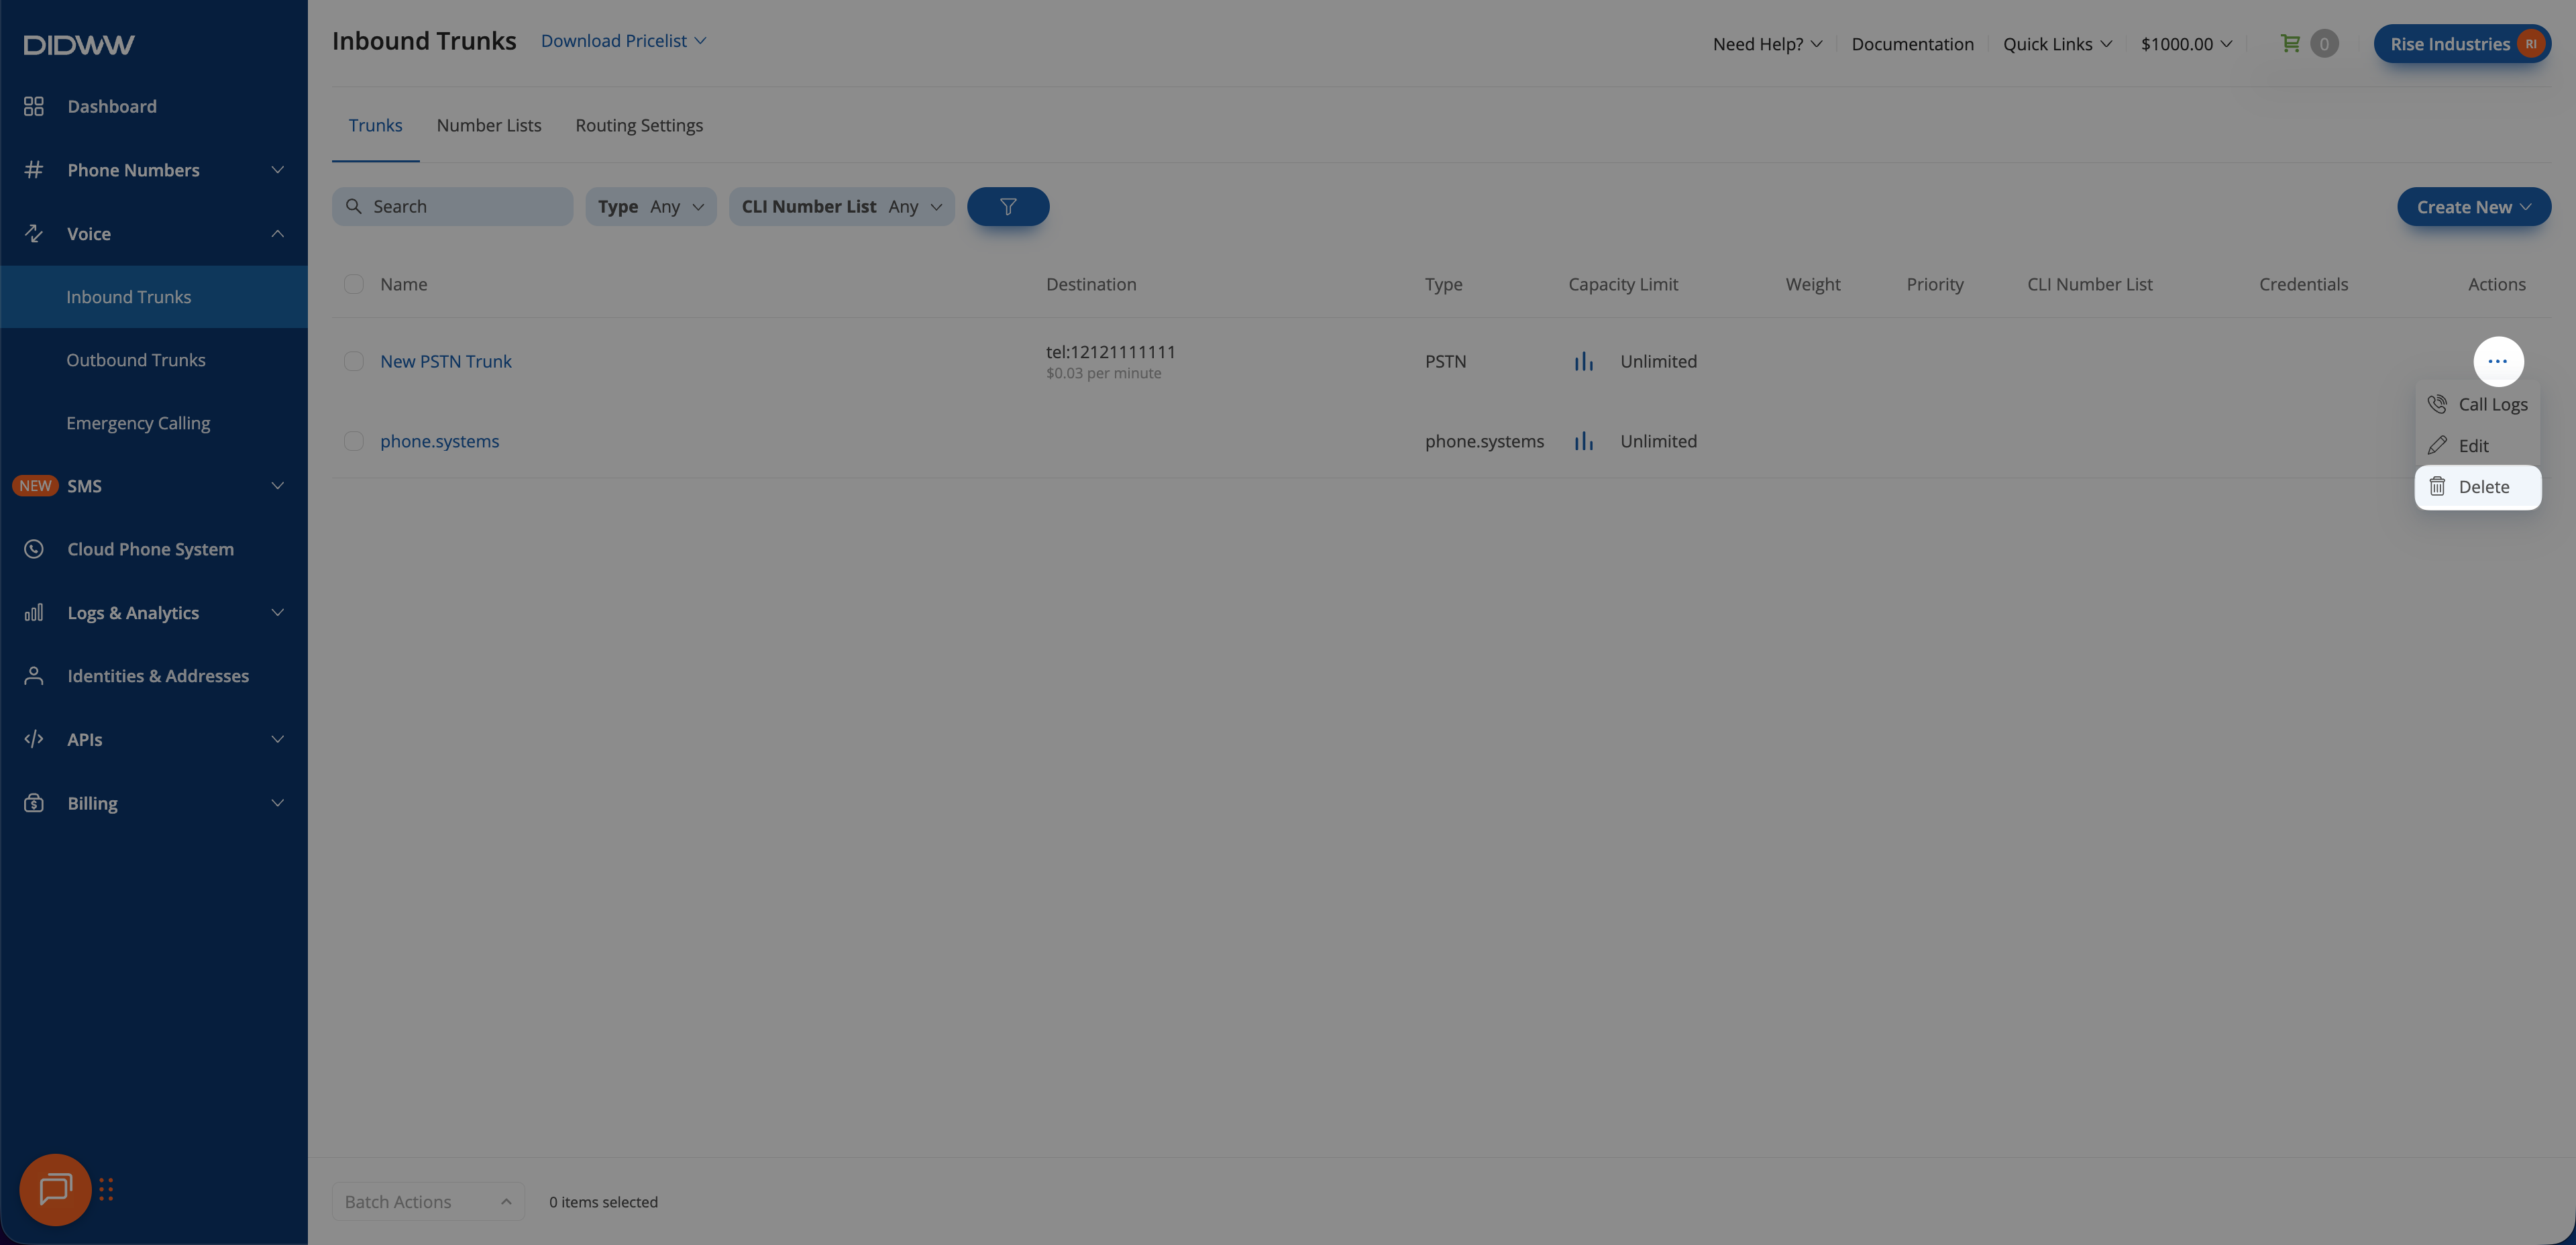
Fig. 6. Deleting a single PSTN trunk#
Delete Multiple PSTN Trunks#
Navigate to the Voice section in the left-hand menu.
Select Inbound Trunks from the submenu.
Select the PSTN trunks you want to delete.
Click Batch Actions and then select Delete Trunk(s).
In the Delete Trunk(s) confirmation pop-up, click Delete to remove the selected trunks that are not assigned to DID numbers.
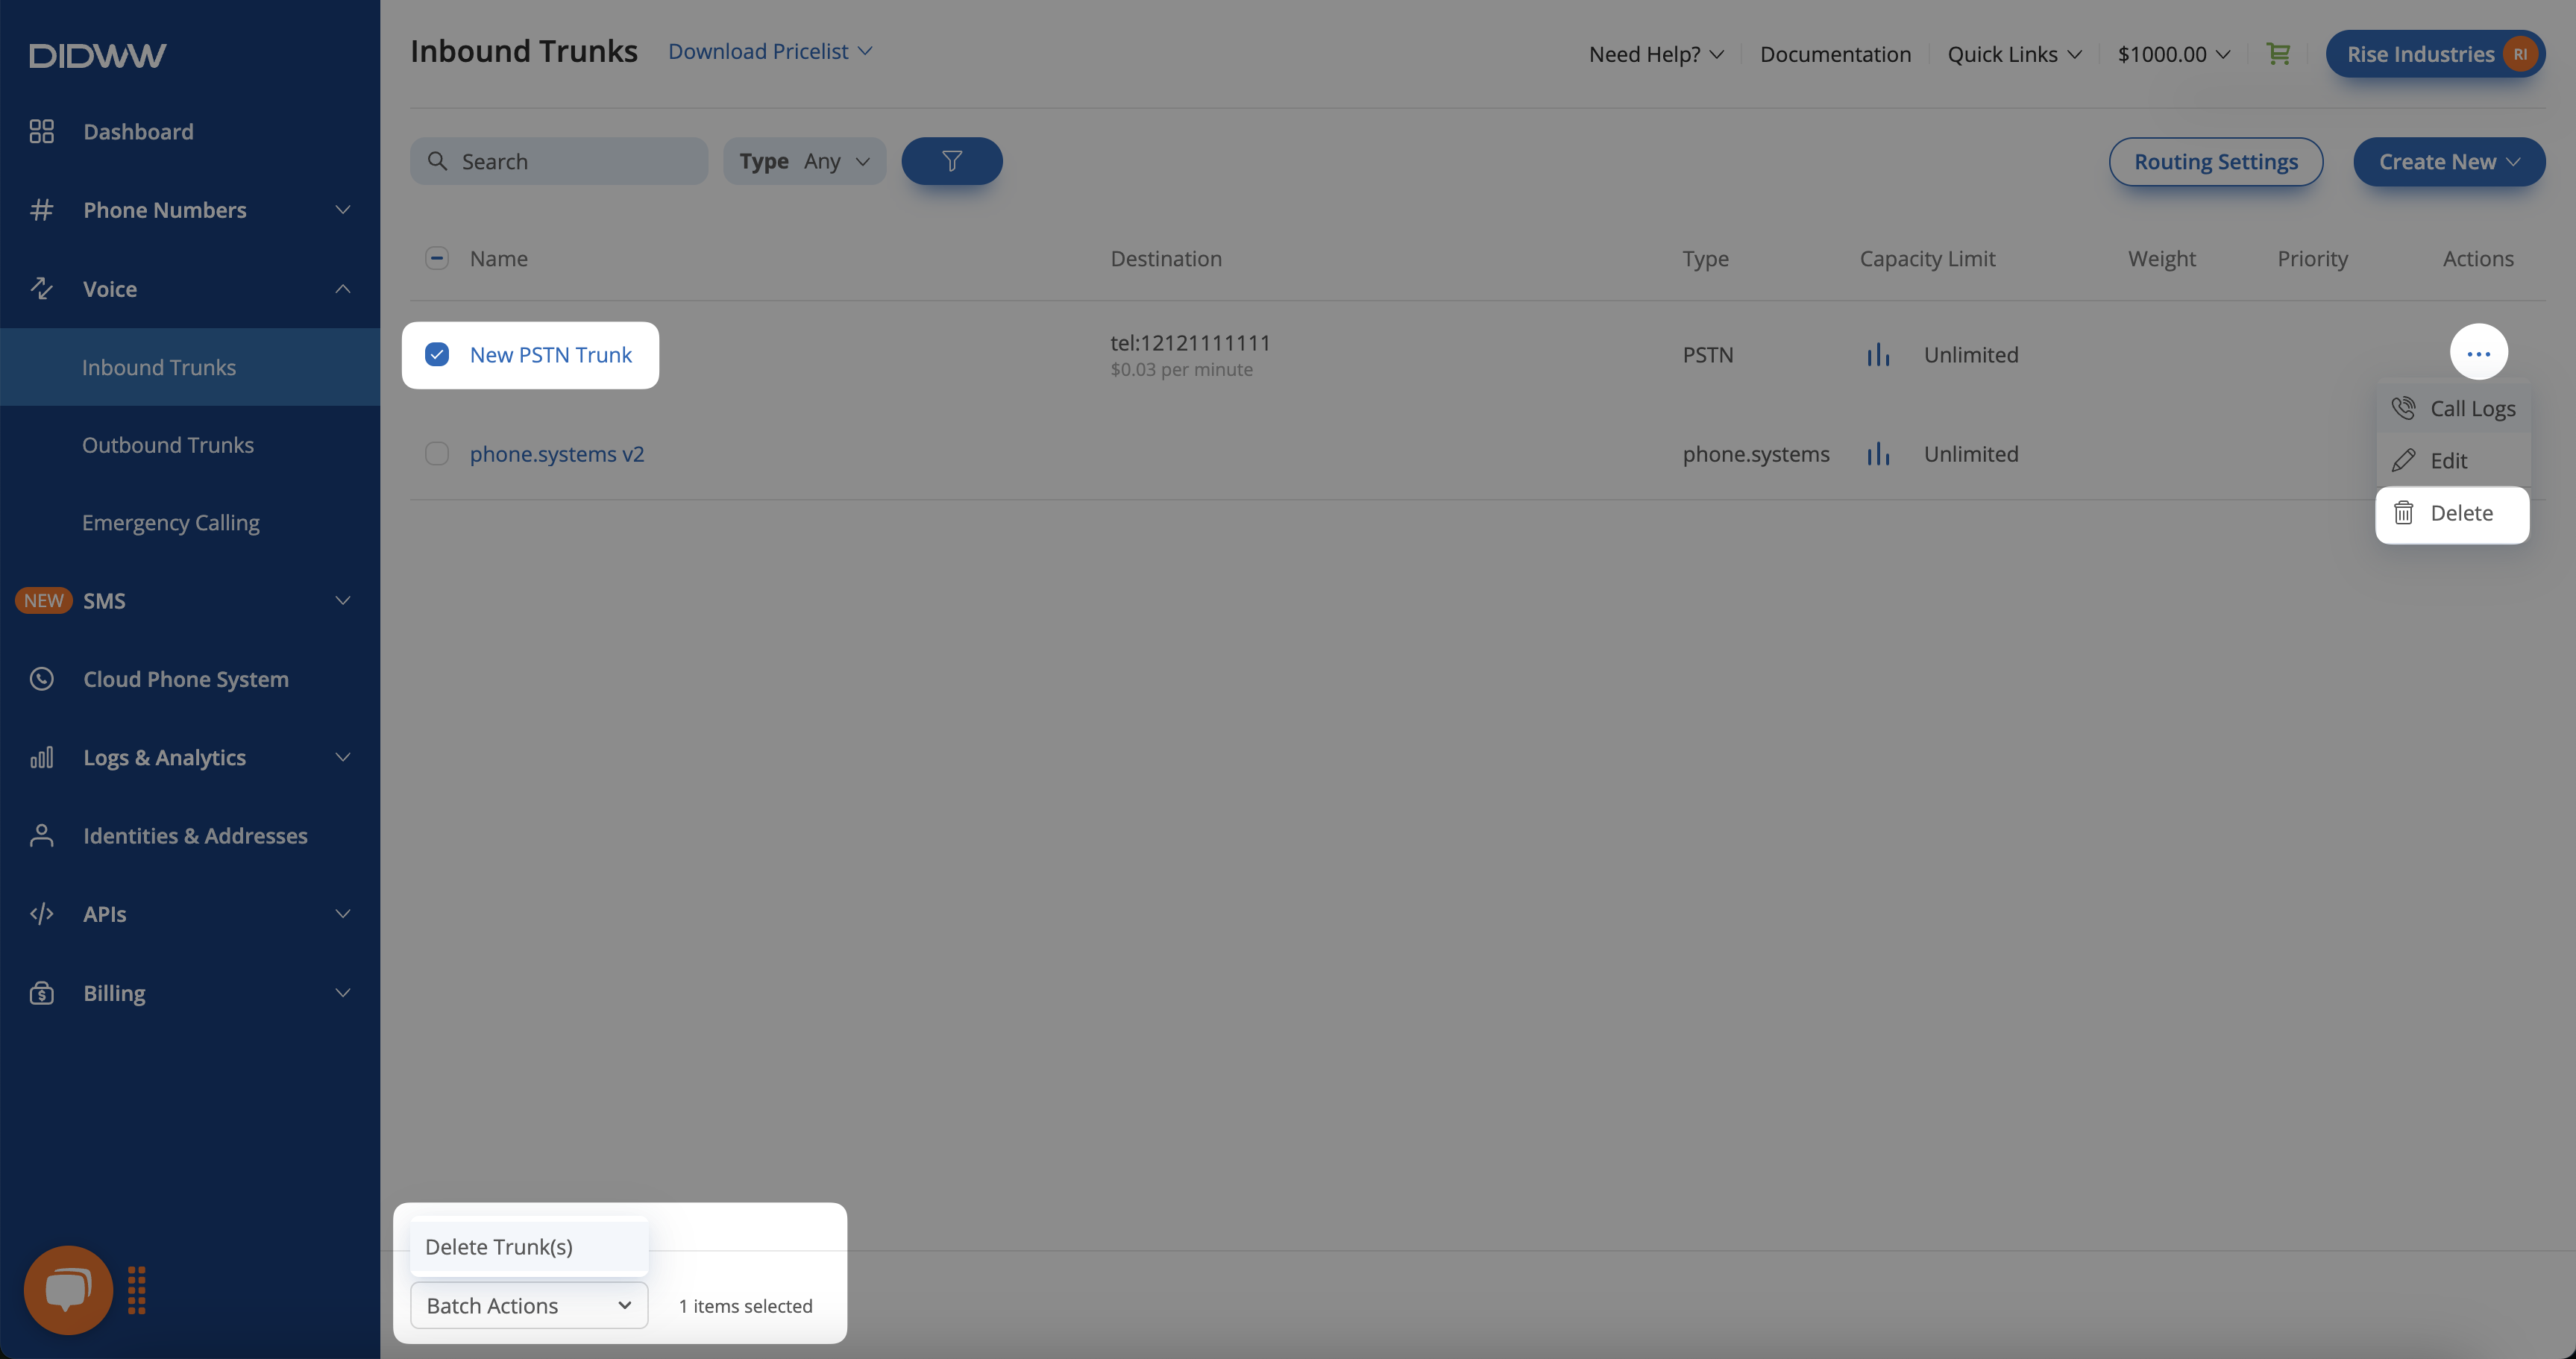
Fig. 7. Deleting multiple PSTN trunks#
Additional Information#
Learn how to configure DID numbers with trunks and trunk groups for routing inbound calls.
Create and configure SIP trunks for inbound calls, set transport protocols, authentication, media options, and more.