A2P (Application-to-Person) Campaigns allow you to register and manage SMS messaging campaigns in the DIDWW User Panel. These campaigns are used to send messages such as alerts, notifications, and customer service responses to users.
Each campaign includes sender ID details, business identity verification, and SMS trunk configuration to ensure compliant and reliable message delivery.
Choose an option below to get started:
Create A2P Campaign
Start a campaign by verifying, setting the sender ID, and choosing an SMS trunk.
Before creating an A2P SMS Campaign, ensure the following requirements are met:
Business Identity and Address – Required for A2P Campaign registration, based on your destination country’s regulations. You can create a business identity in the Identities section.
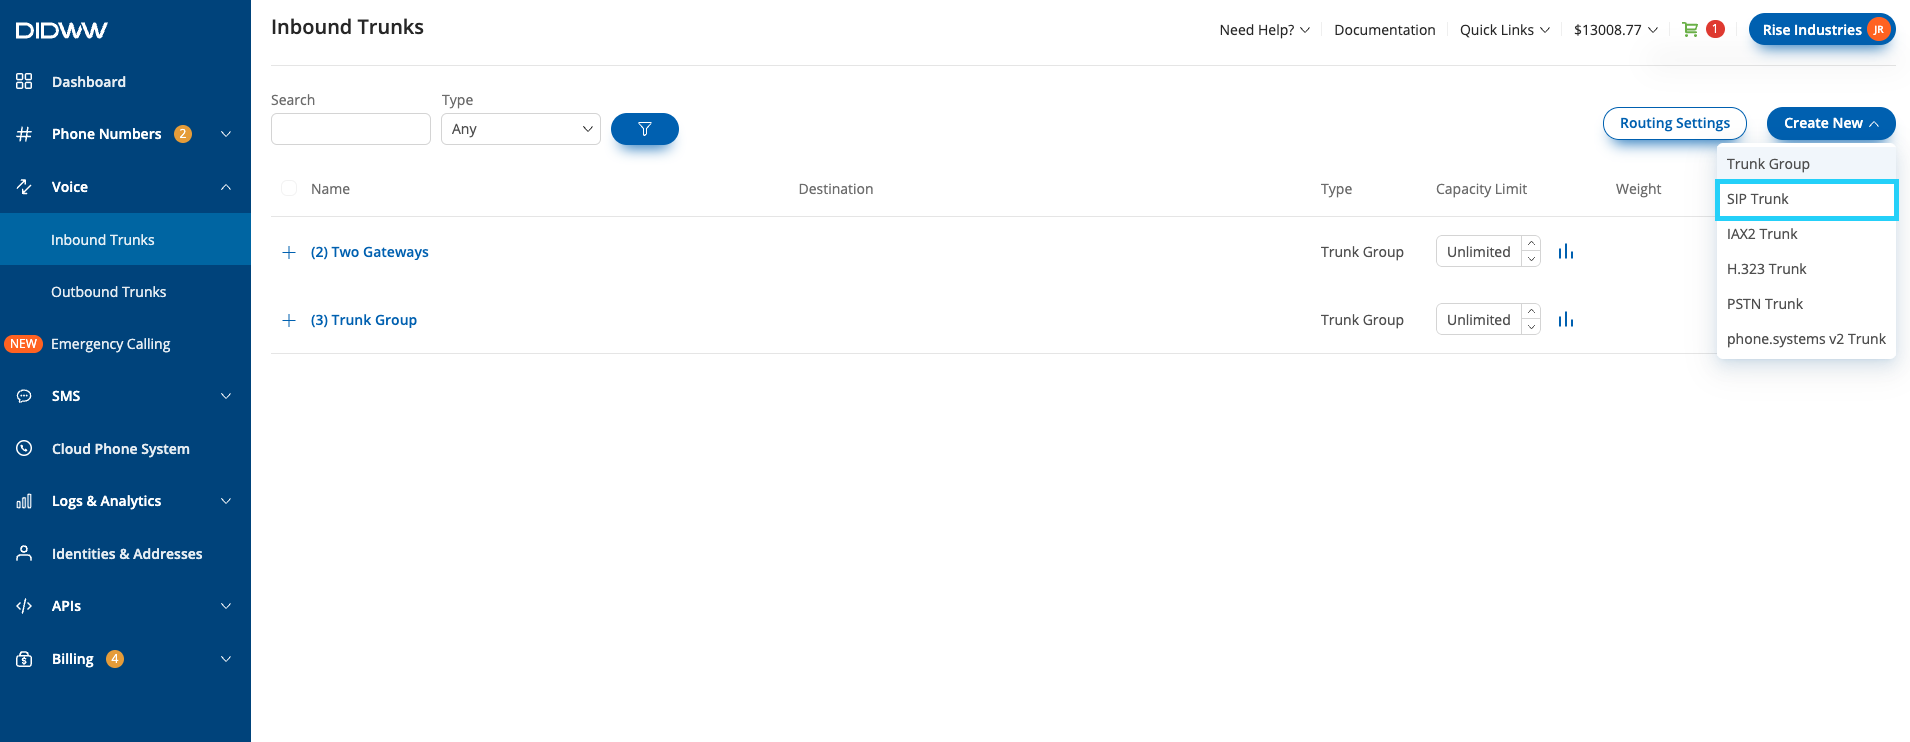
Outbound SMS Trunk – Required to send SMS messages but optional during campaign creation. For the campaign to function correctly, you’ll need to assign a trunk either during setup or after creation. If you haven’t configured one yet, see the setup guide for your desired trunk type: HTTP OUT Trunk, SMPP ESME Trunk, or SMPP SMSC Trunk.
Note
You can use a DID number with A2P SMS service for campaigns in countries that support Long-code or Toll-free Sender IDs. To check availability or purchase an A2P SMS number, visit the Coverage page .
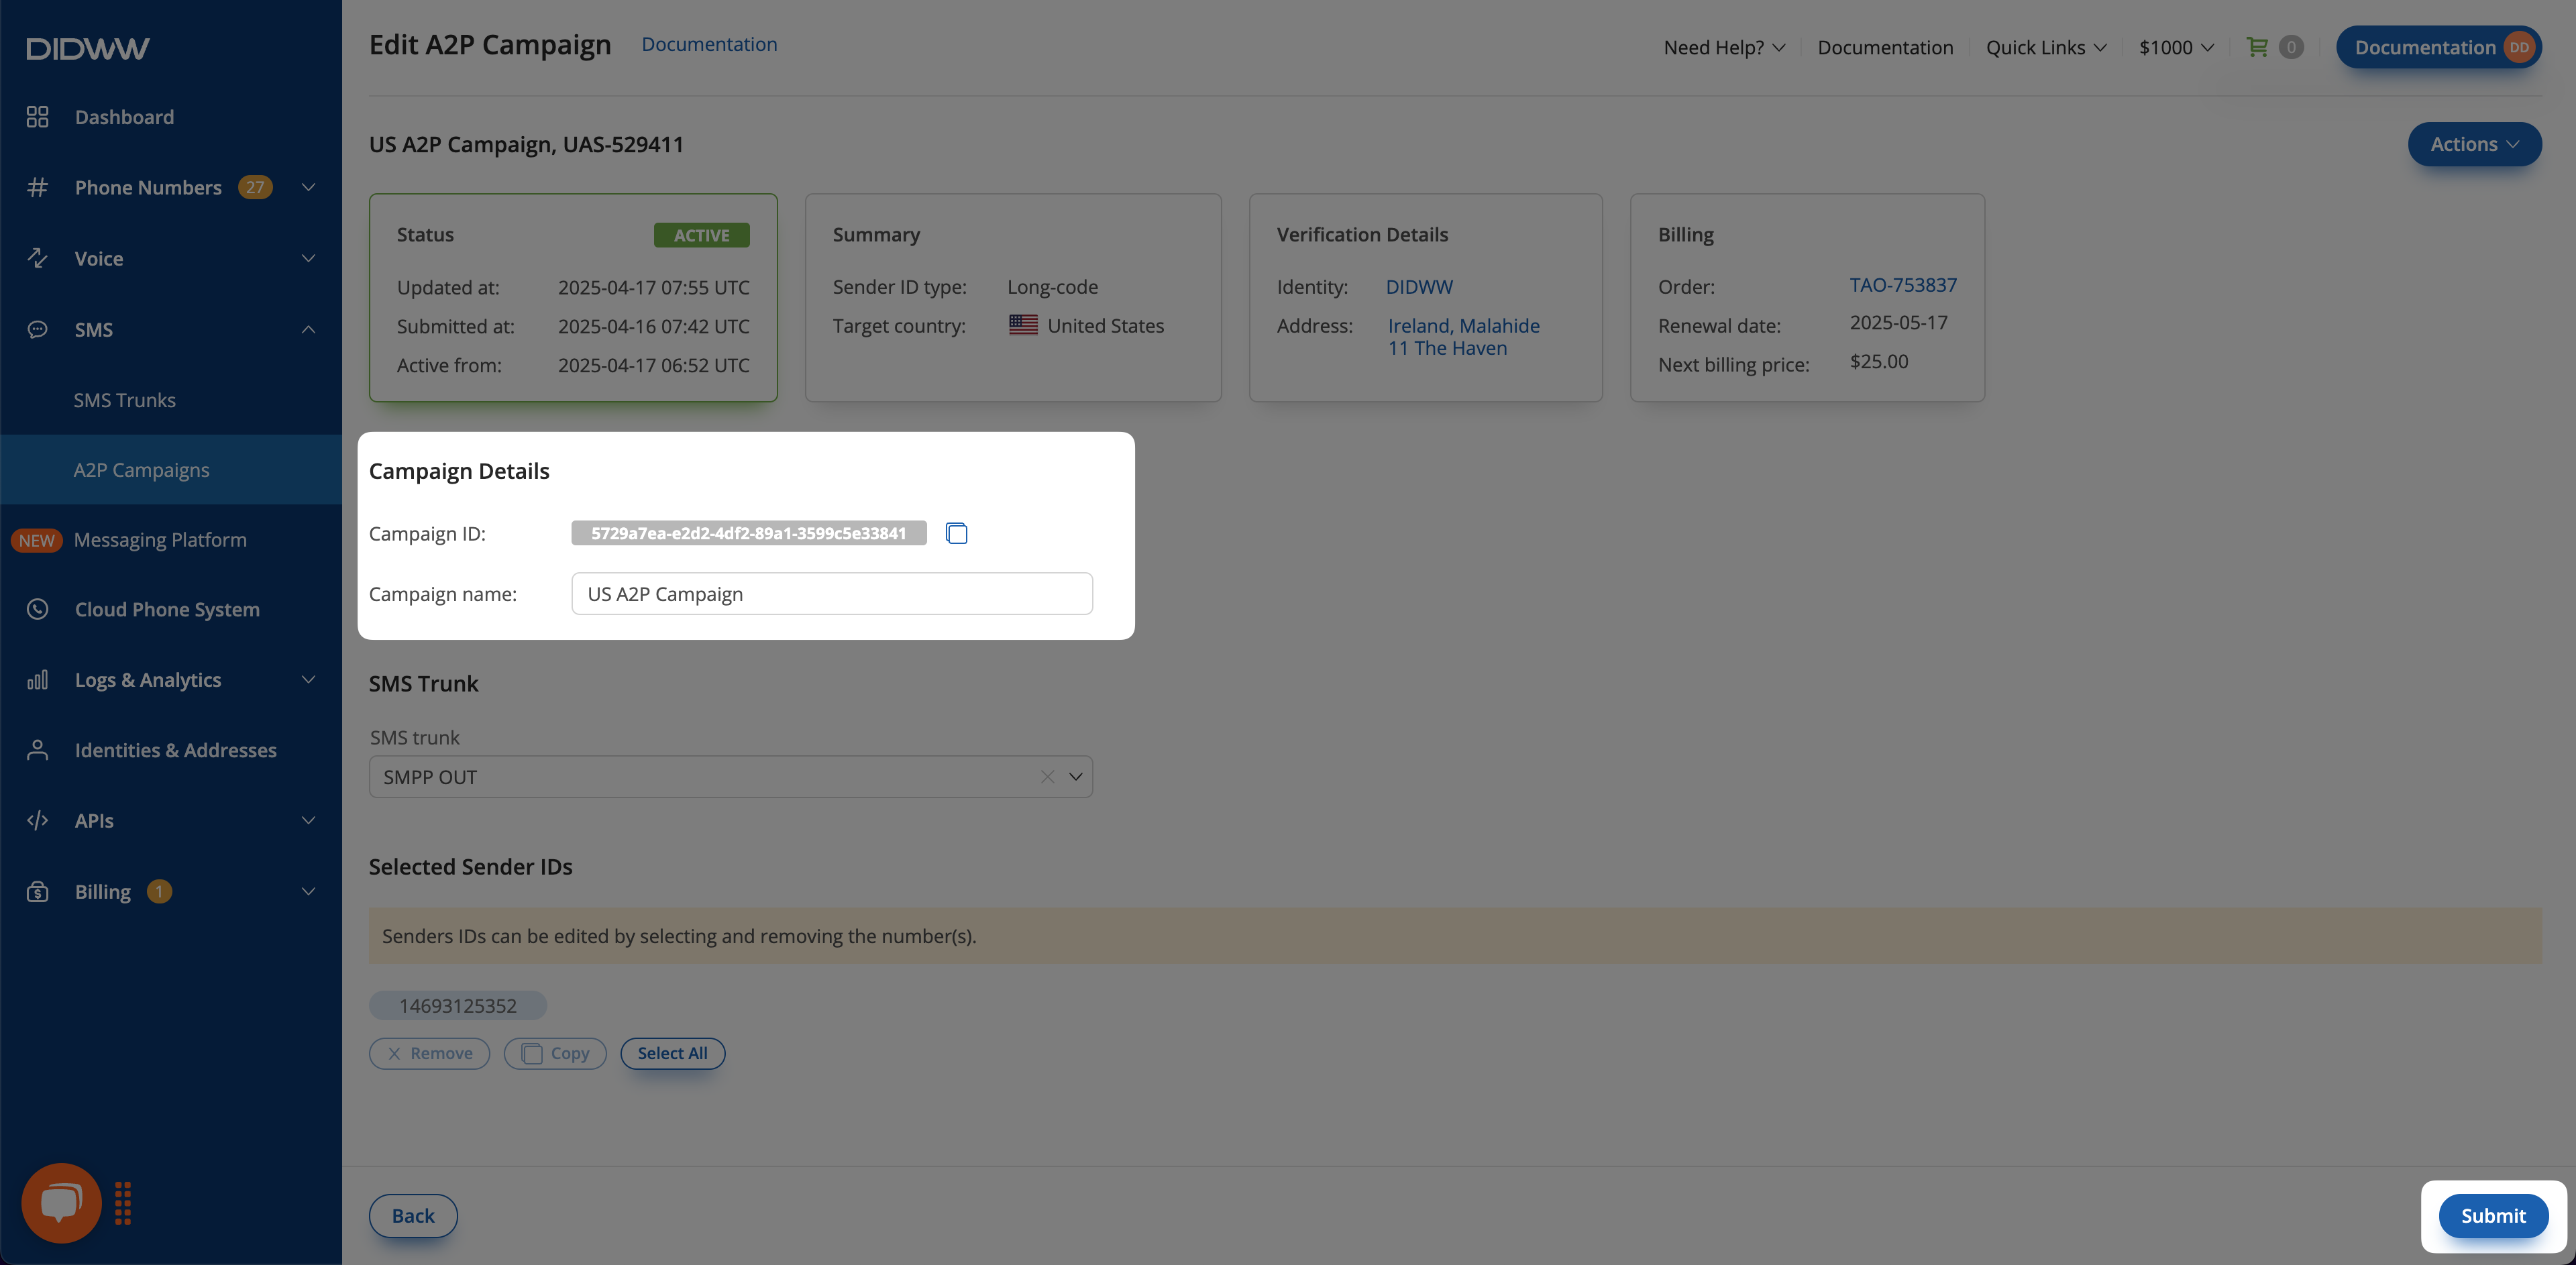
In the create A2P Campaign form, the first step is to complete the campaign details section:
Campaign Name – Provide a descriptive name to help identify your campaign.
Campaign Target Country – Select the country where SMS messages will be delivered.
Sender ID Type – Choose one of the following options:
Long-code – Used for two-way messaging. Requires a DID number enabled for A2P SMS (e.g., 14155552671).
Toll-free – Ideal for customer support. Requires a toll-free DID number with A2P SMS capability (e.g., 18001234567).
Alphanumeric – Suitable for branded one-way messaging. Supports letters and digits (e.g., MyBrand).
Dynamic – Automatically replaces your Alphanumeric Sender ID with a numeric Long-Code or Short-code, based on local network rules (e.g., MyBrand → 551144501111).
Short-code – Uses a registered Short-code assigned to your campaign (e.g., 12345). Short-code registration may take up to one month.
Review the requirements, verification time, and pricing specific to the selected target country and Sender ID type. This information will help you prepare the necessary details for the next step.
Click Next to proceed to the verification details step.
In the verification details step, provide brand identity information and submit a completed SMS campaign form:
Select your registered Business Identity and corresponding Address.
Note
If you don’t have a business identity or address yet, click Create New. Make sure the provided information matches the requirements displayed on the right side, which are based on the selected target country and Sender ID type.
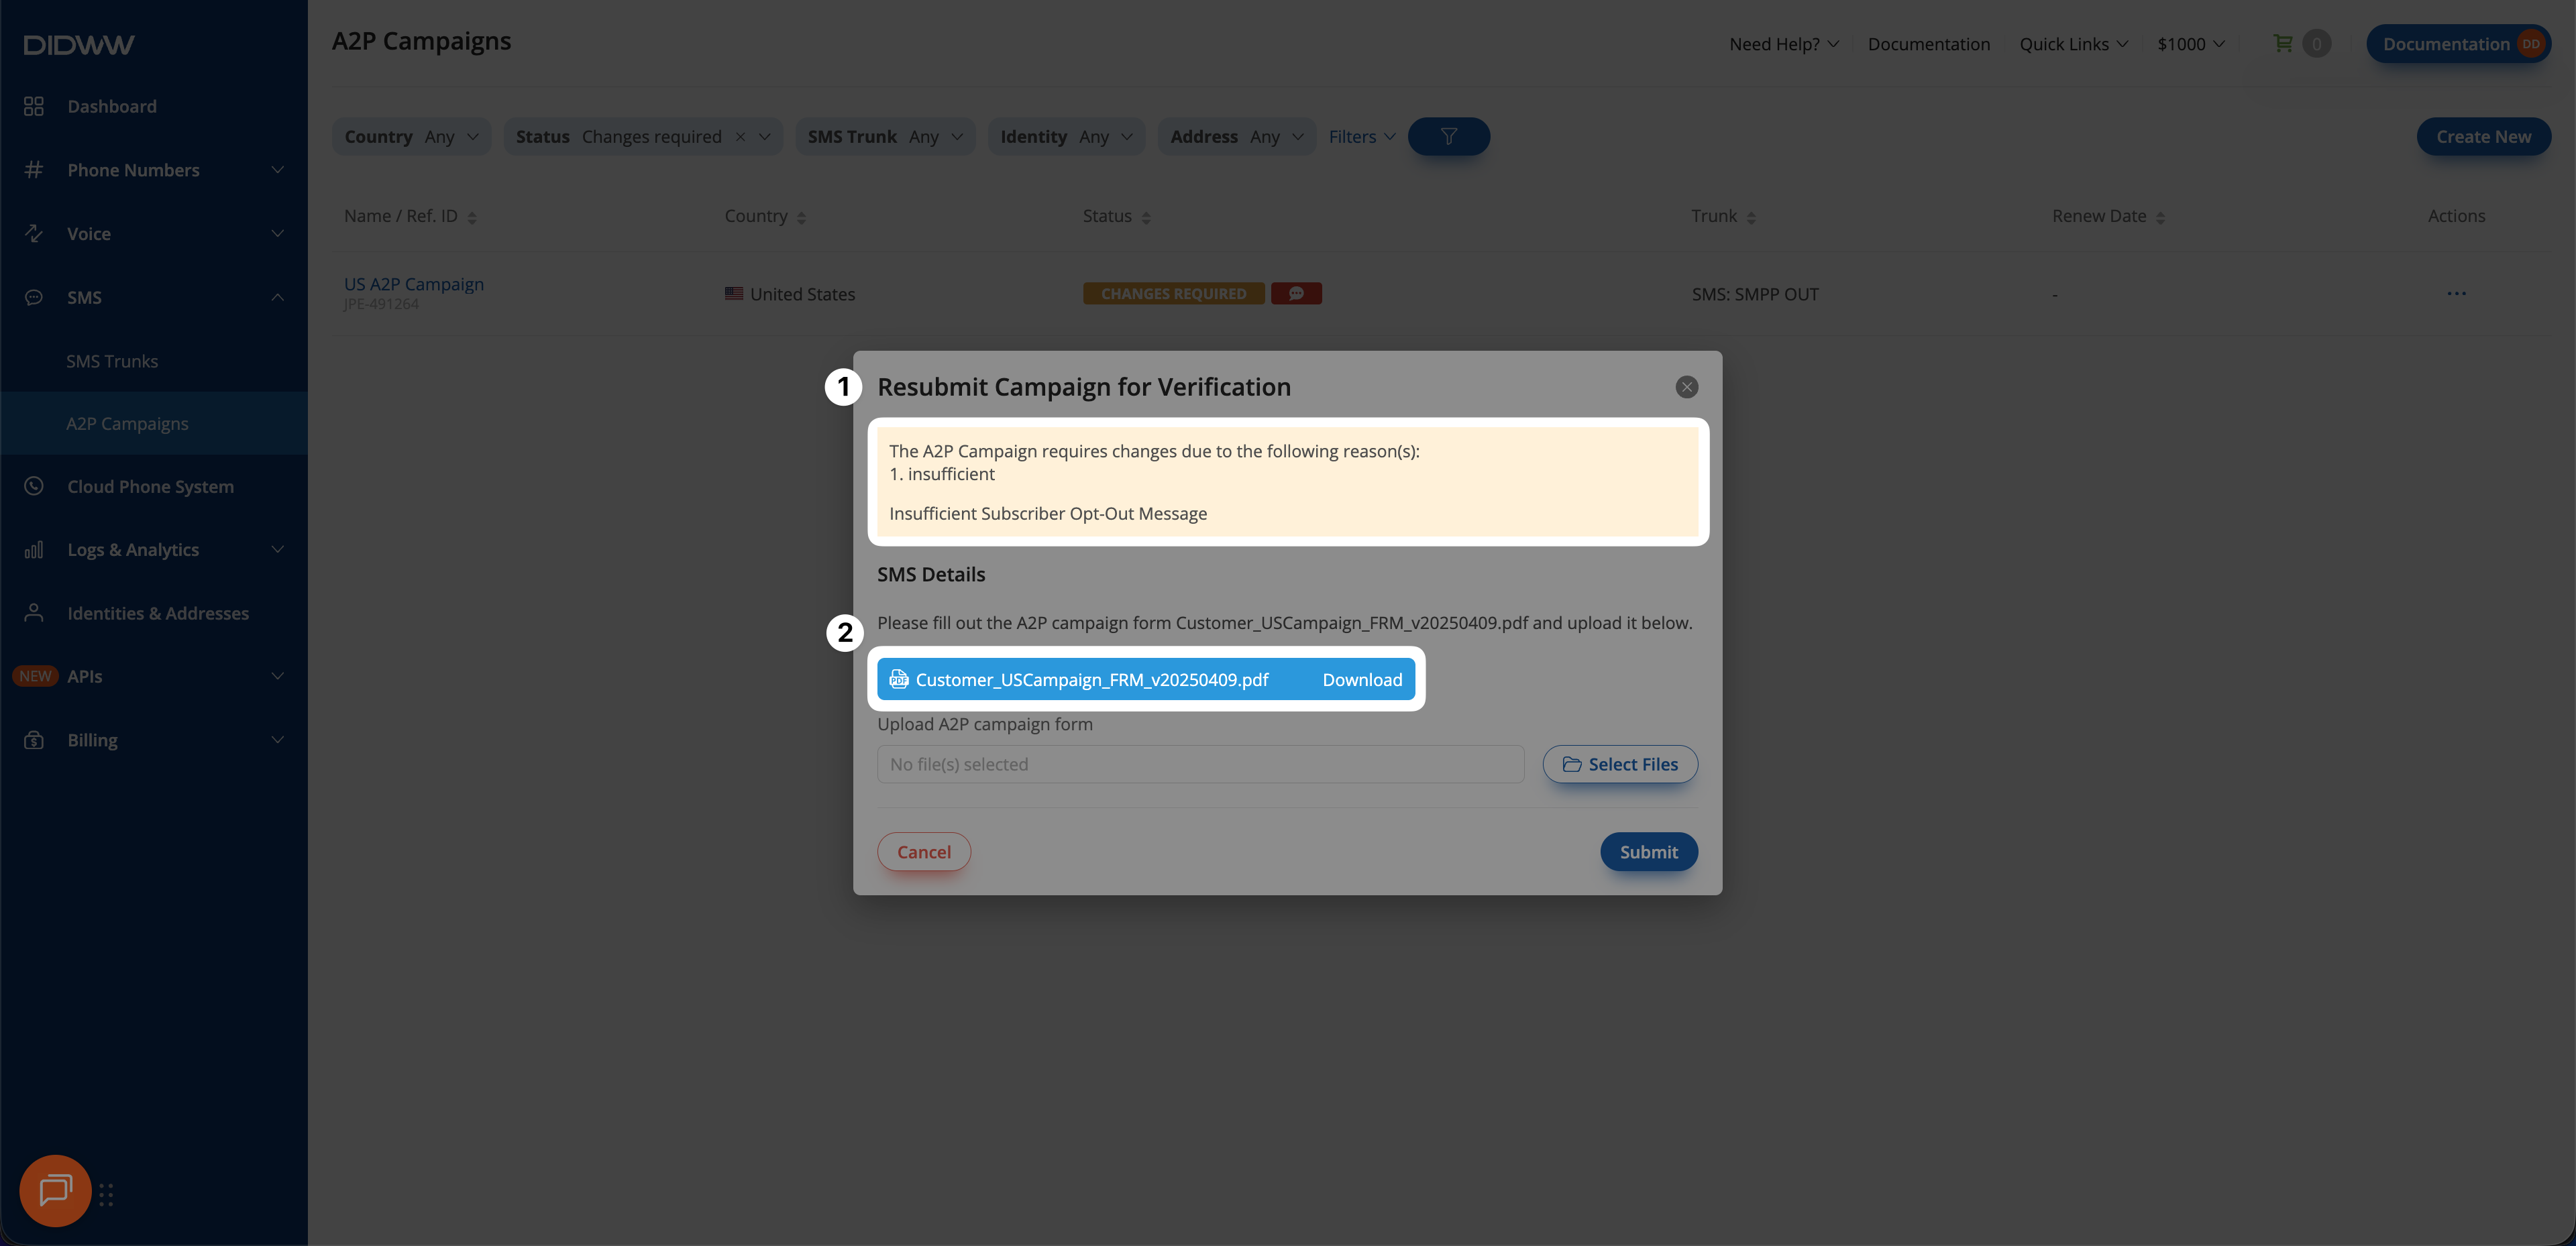
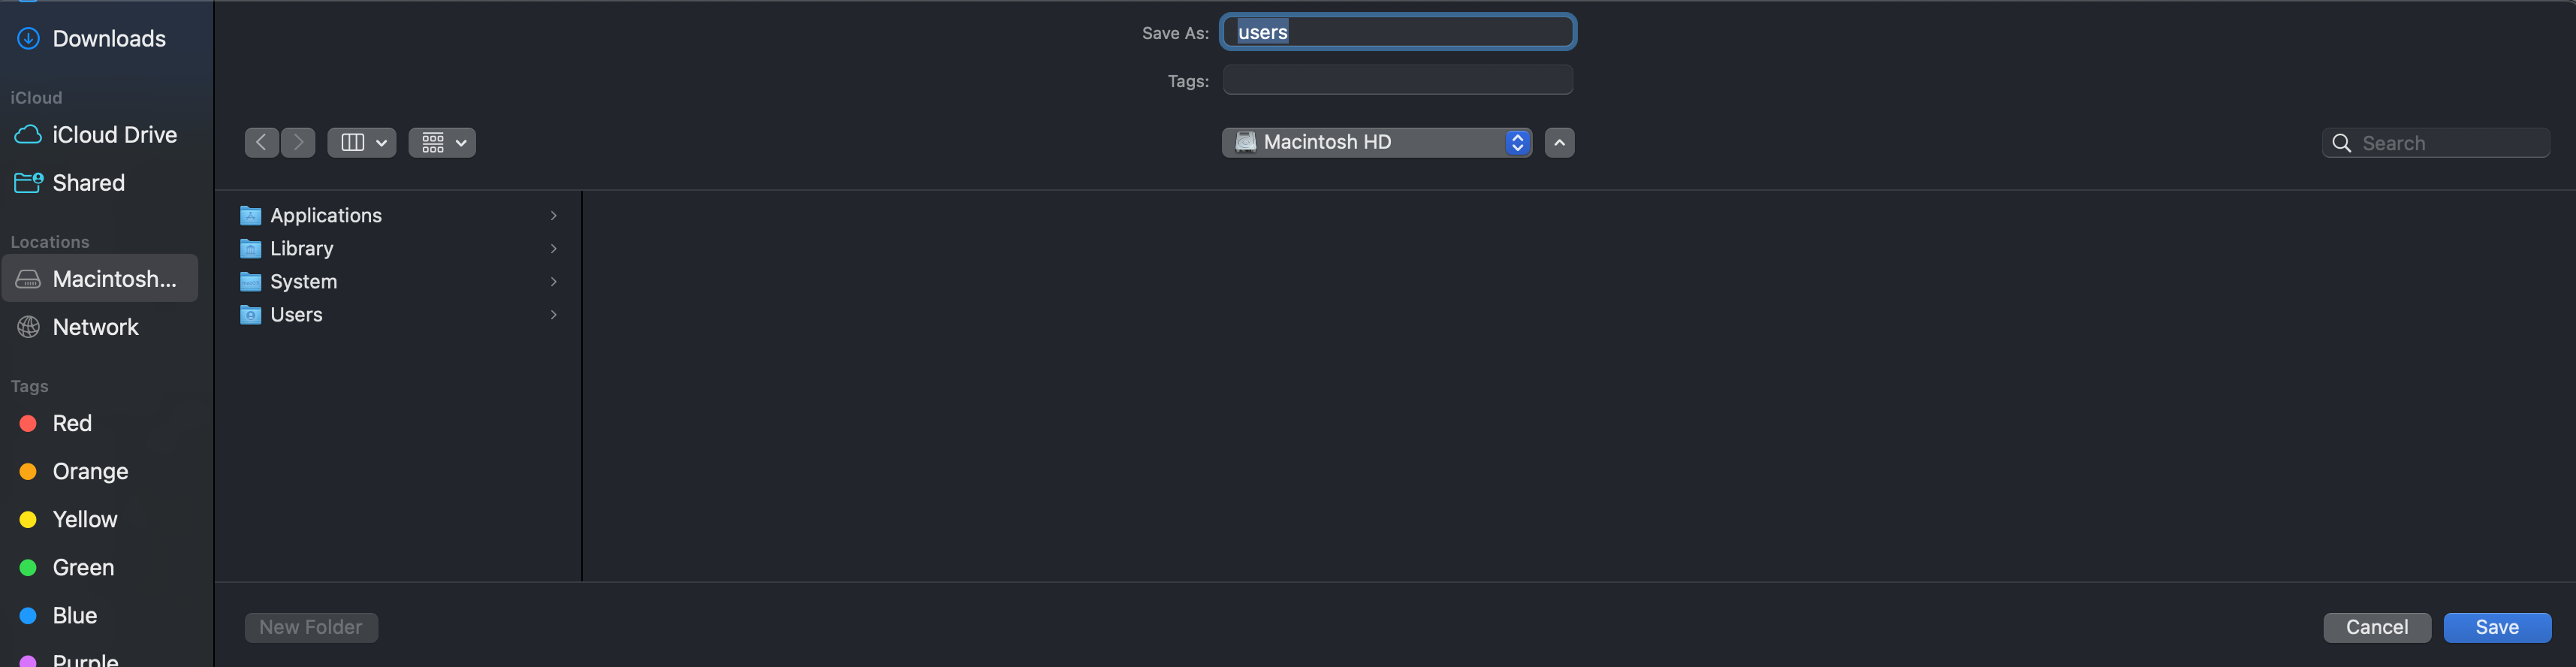
Download the SMS Campaign Form and complete all required fields.
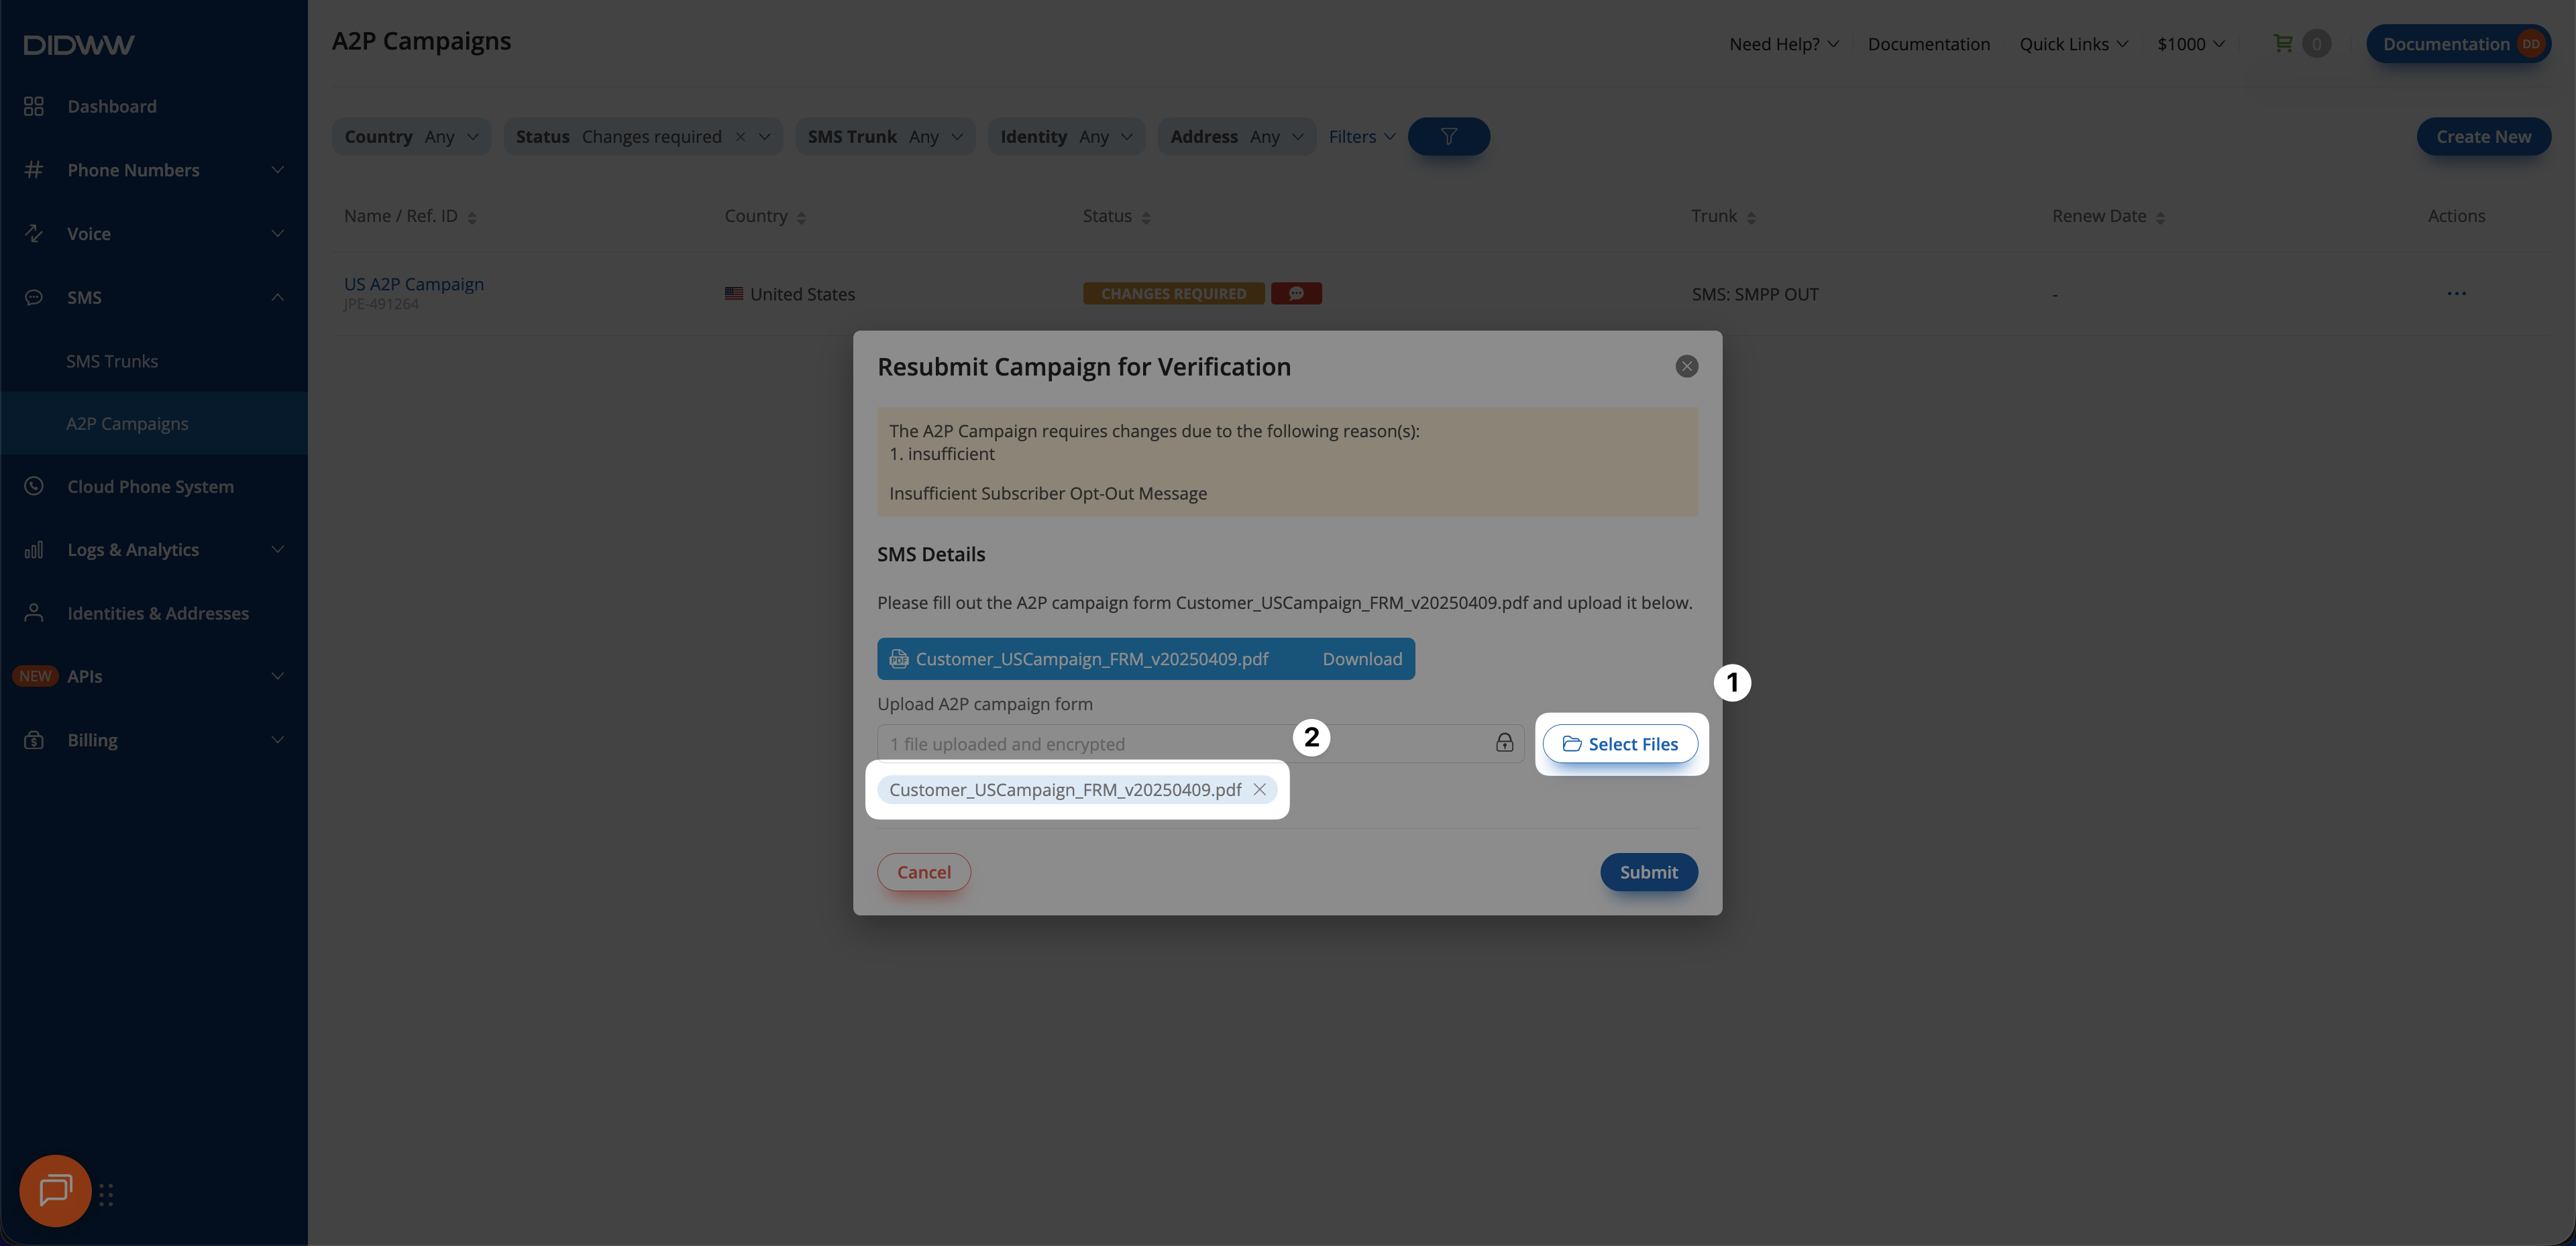
Upload the completed form by clicking the Select Files button.
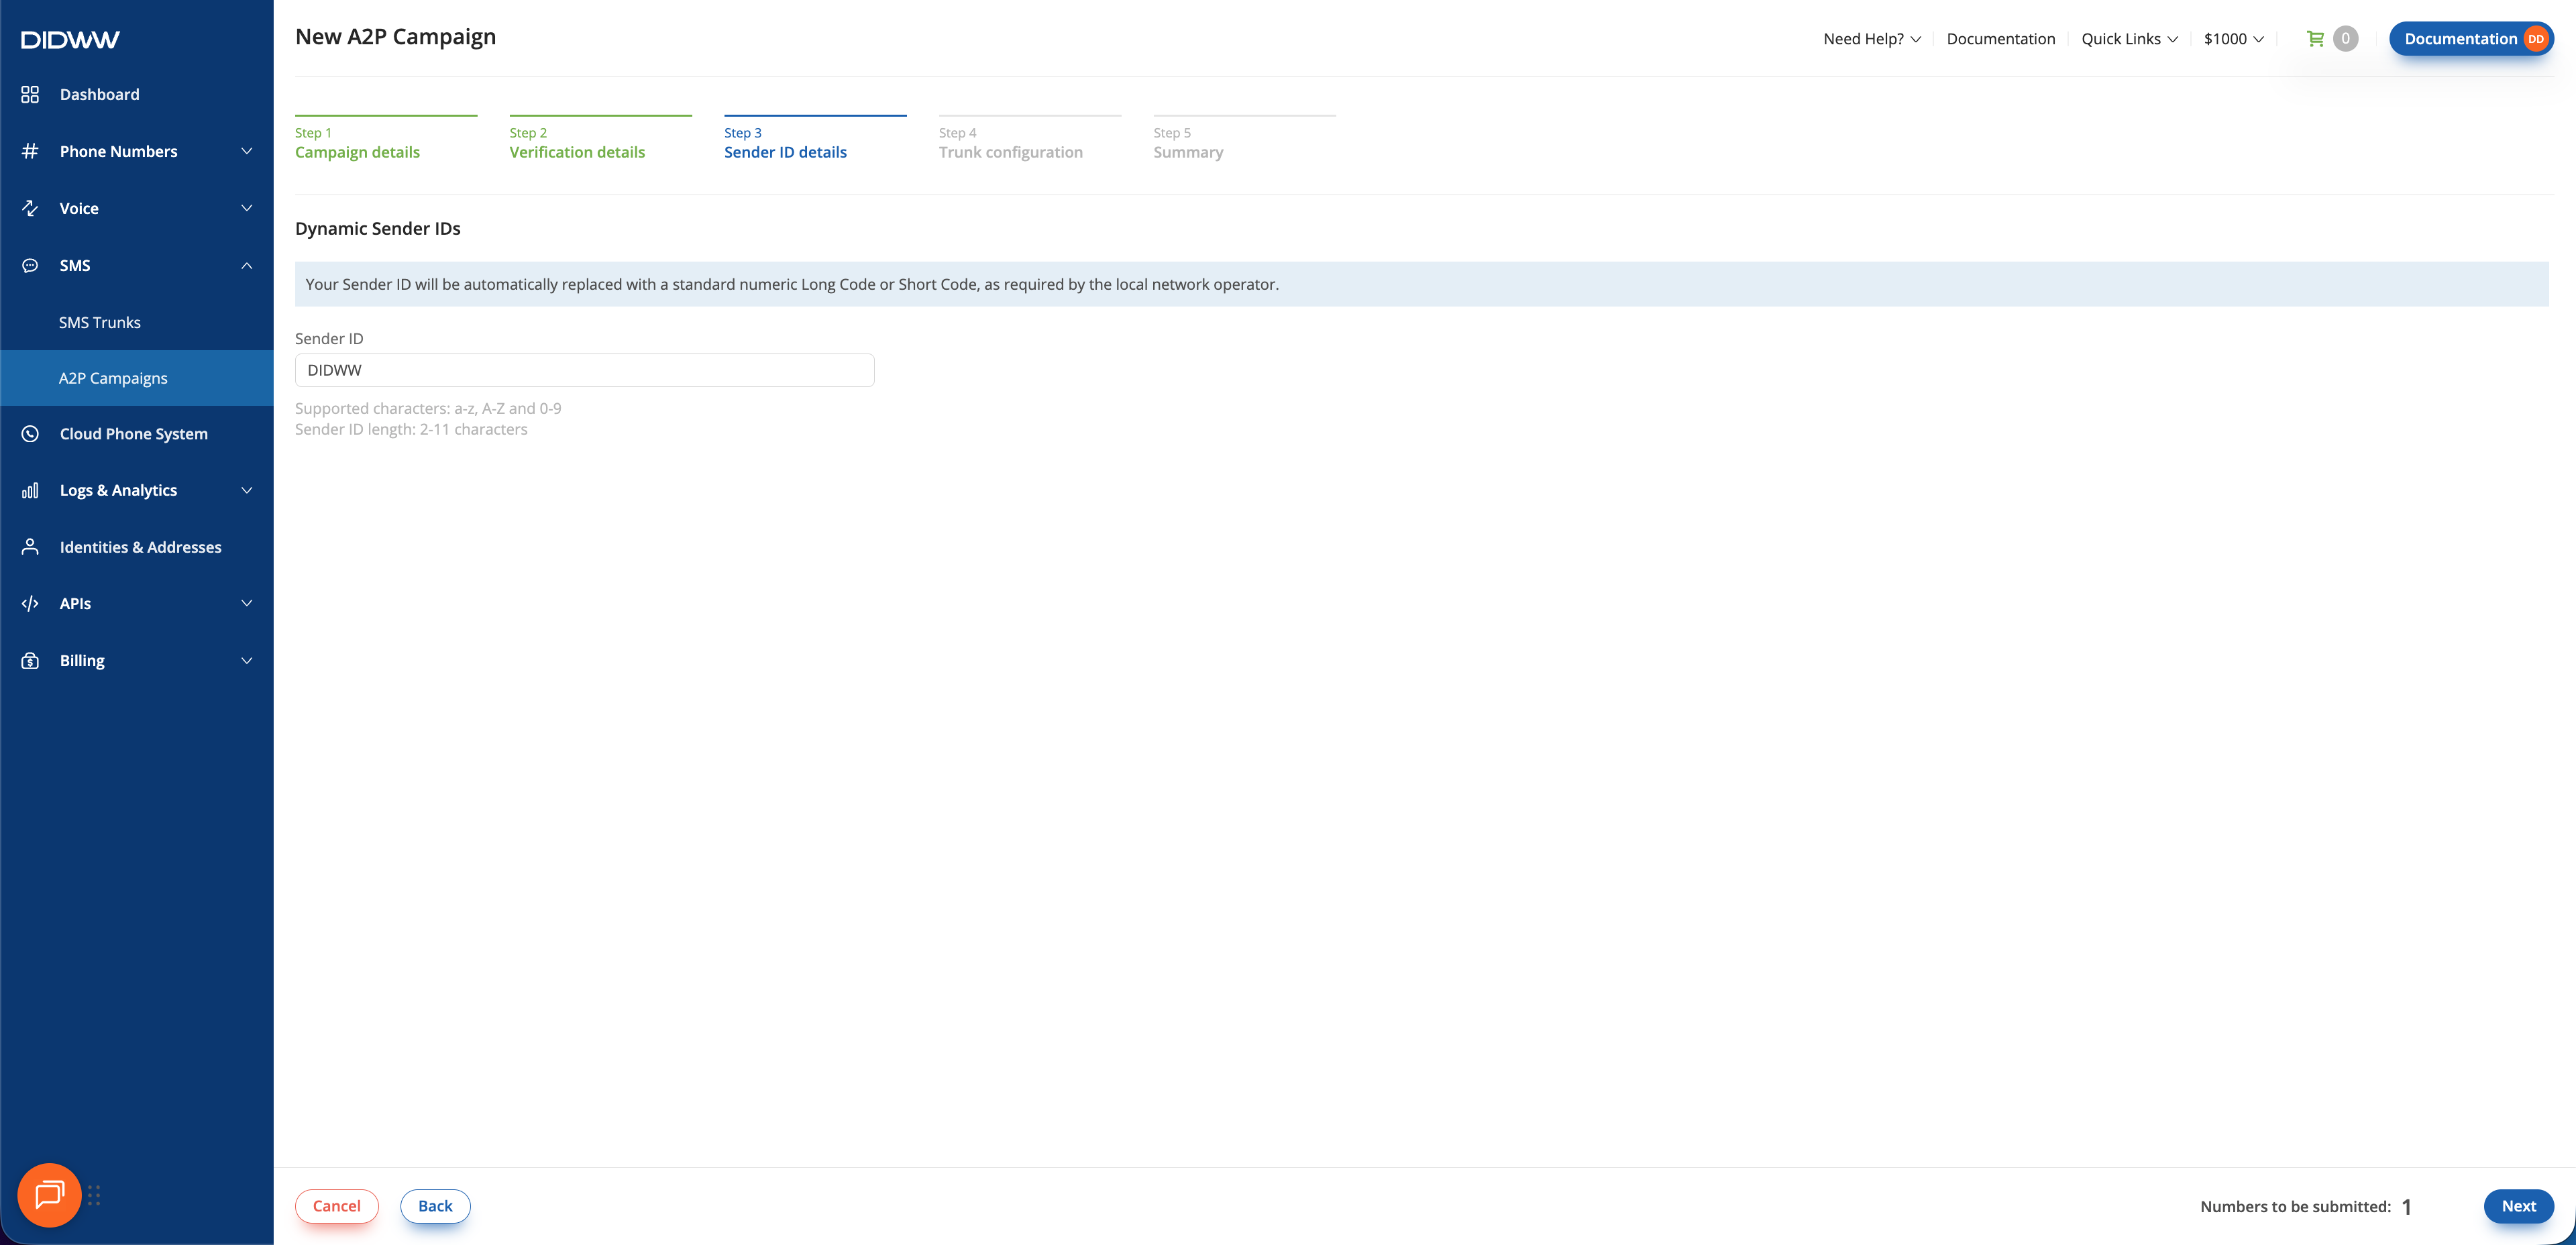
In this step, provide the Sender ID information based on the type selected in Step 1: Campaign Details. Depending on the selected option, you will either select DID numbers or enter the required Sender ID details for your chosen Sender ID type.
Note
A single A2P campaign can include up to 49 Sender IDs.
Select the DID numbers that will be used for this campaign.
Note
Active DID numbers with A2P SMS service will be displayed in the available source numbers section.
If a DID is already assigned to an existing A2P Campaign, it cannot be used for another campaign.
Only DIDs associated with the selected identity will appear as available source numbers.
Move the selected DIDs to the Selected source numbers list using the left and right arrow buttons to include them in the campaign.
Enter the Alphanumeric Sender ID that will be presented to your users (2–11 characters long, containing only a–z, A–Z, or 0–9).
Click Next to continue.
Note
Sender ID cannot be modified after campaign submission.
Your Sender ID will be automatically replaced with a standard numeric Long-code or Short-code, as required by the local network operator and destination country regulations. This option is designed for markets where A2P registration is mandatory and numeric senders must comply with local rules.
Review the information displayed for Short-code Sender IDs.
Click Next to continue.
Note
Short-code number registration may take up to one month. Once the registration is complete, the assigned Short-code will be sent to you via email and configured on your account.
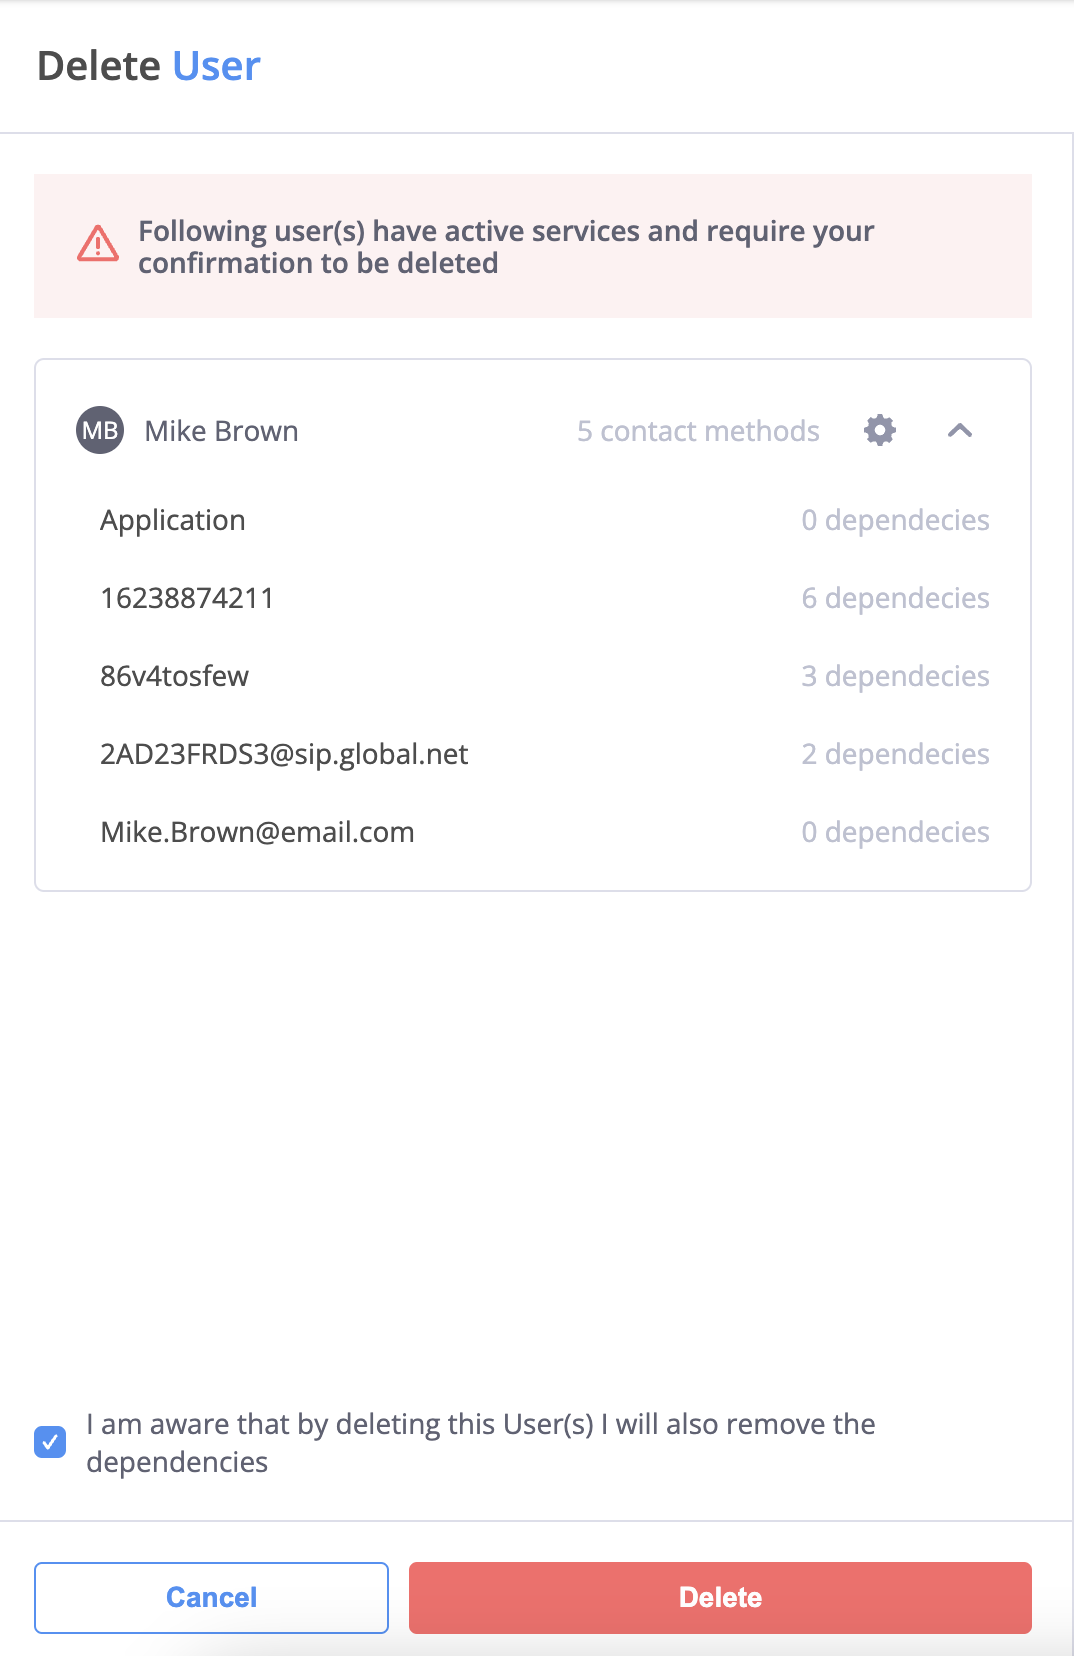
In the Remove Sender IDs section, you can remove Sender IDs that have been assigned for A2P messaging. To delete one or more Sender IDs, follow these steps:
Select individual Sender IDs or click Select All.
Click Remove to delete the selected entries.
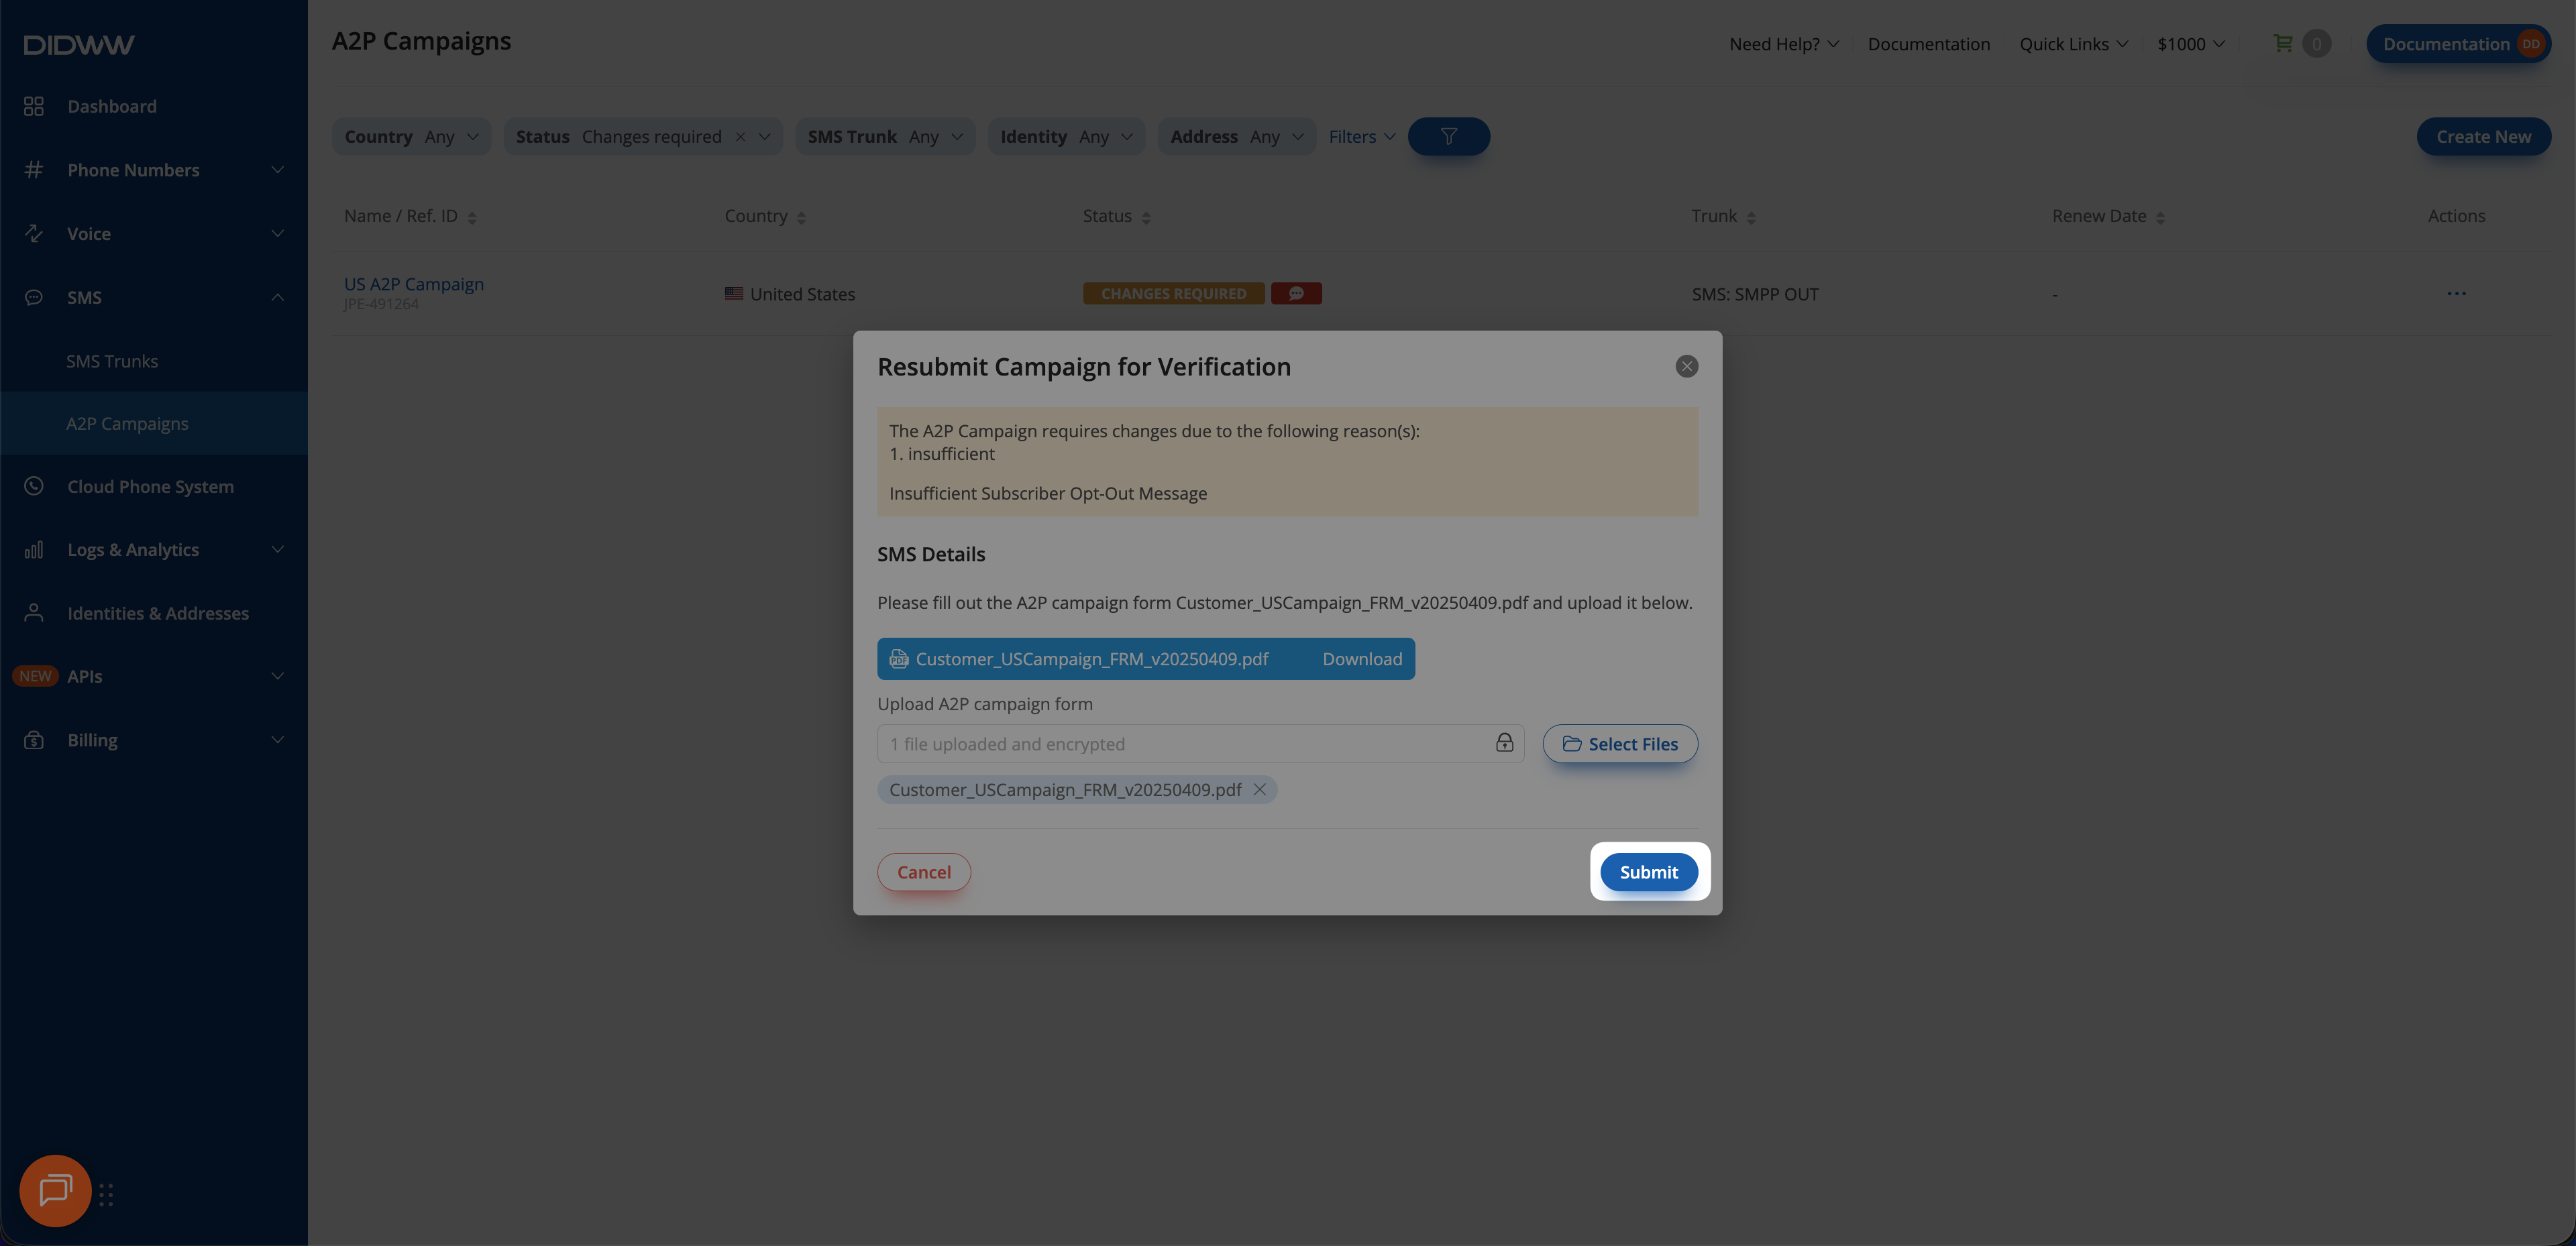
Click Submit to apply the changes.
Note
To change Sender IDs for Dynamic or Short-code A2P campaigns, contact sales@didww.com .
Before an A2P campaign can be approved, it must pass a verification stage to ensure that all submitted details and documents meet regulatory requirements.
If the campaign does not pass verification, its status changes to Changes Required, and you must update and resubmit the campaign form.
When the campaign is in Changes Required status, the resubmission window displays the rejection reason and any additional comments to help you correct and resubmit the campaign.
Note
If no changes are submitted within 10 days after the campaign enters Changes Required status, the campaign is automatically terminated.
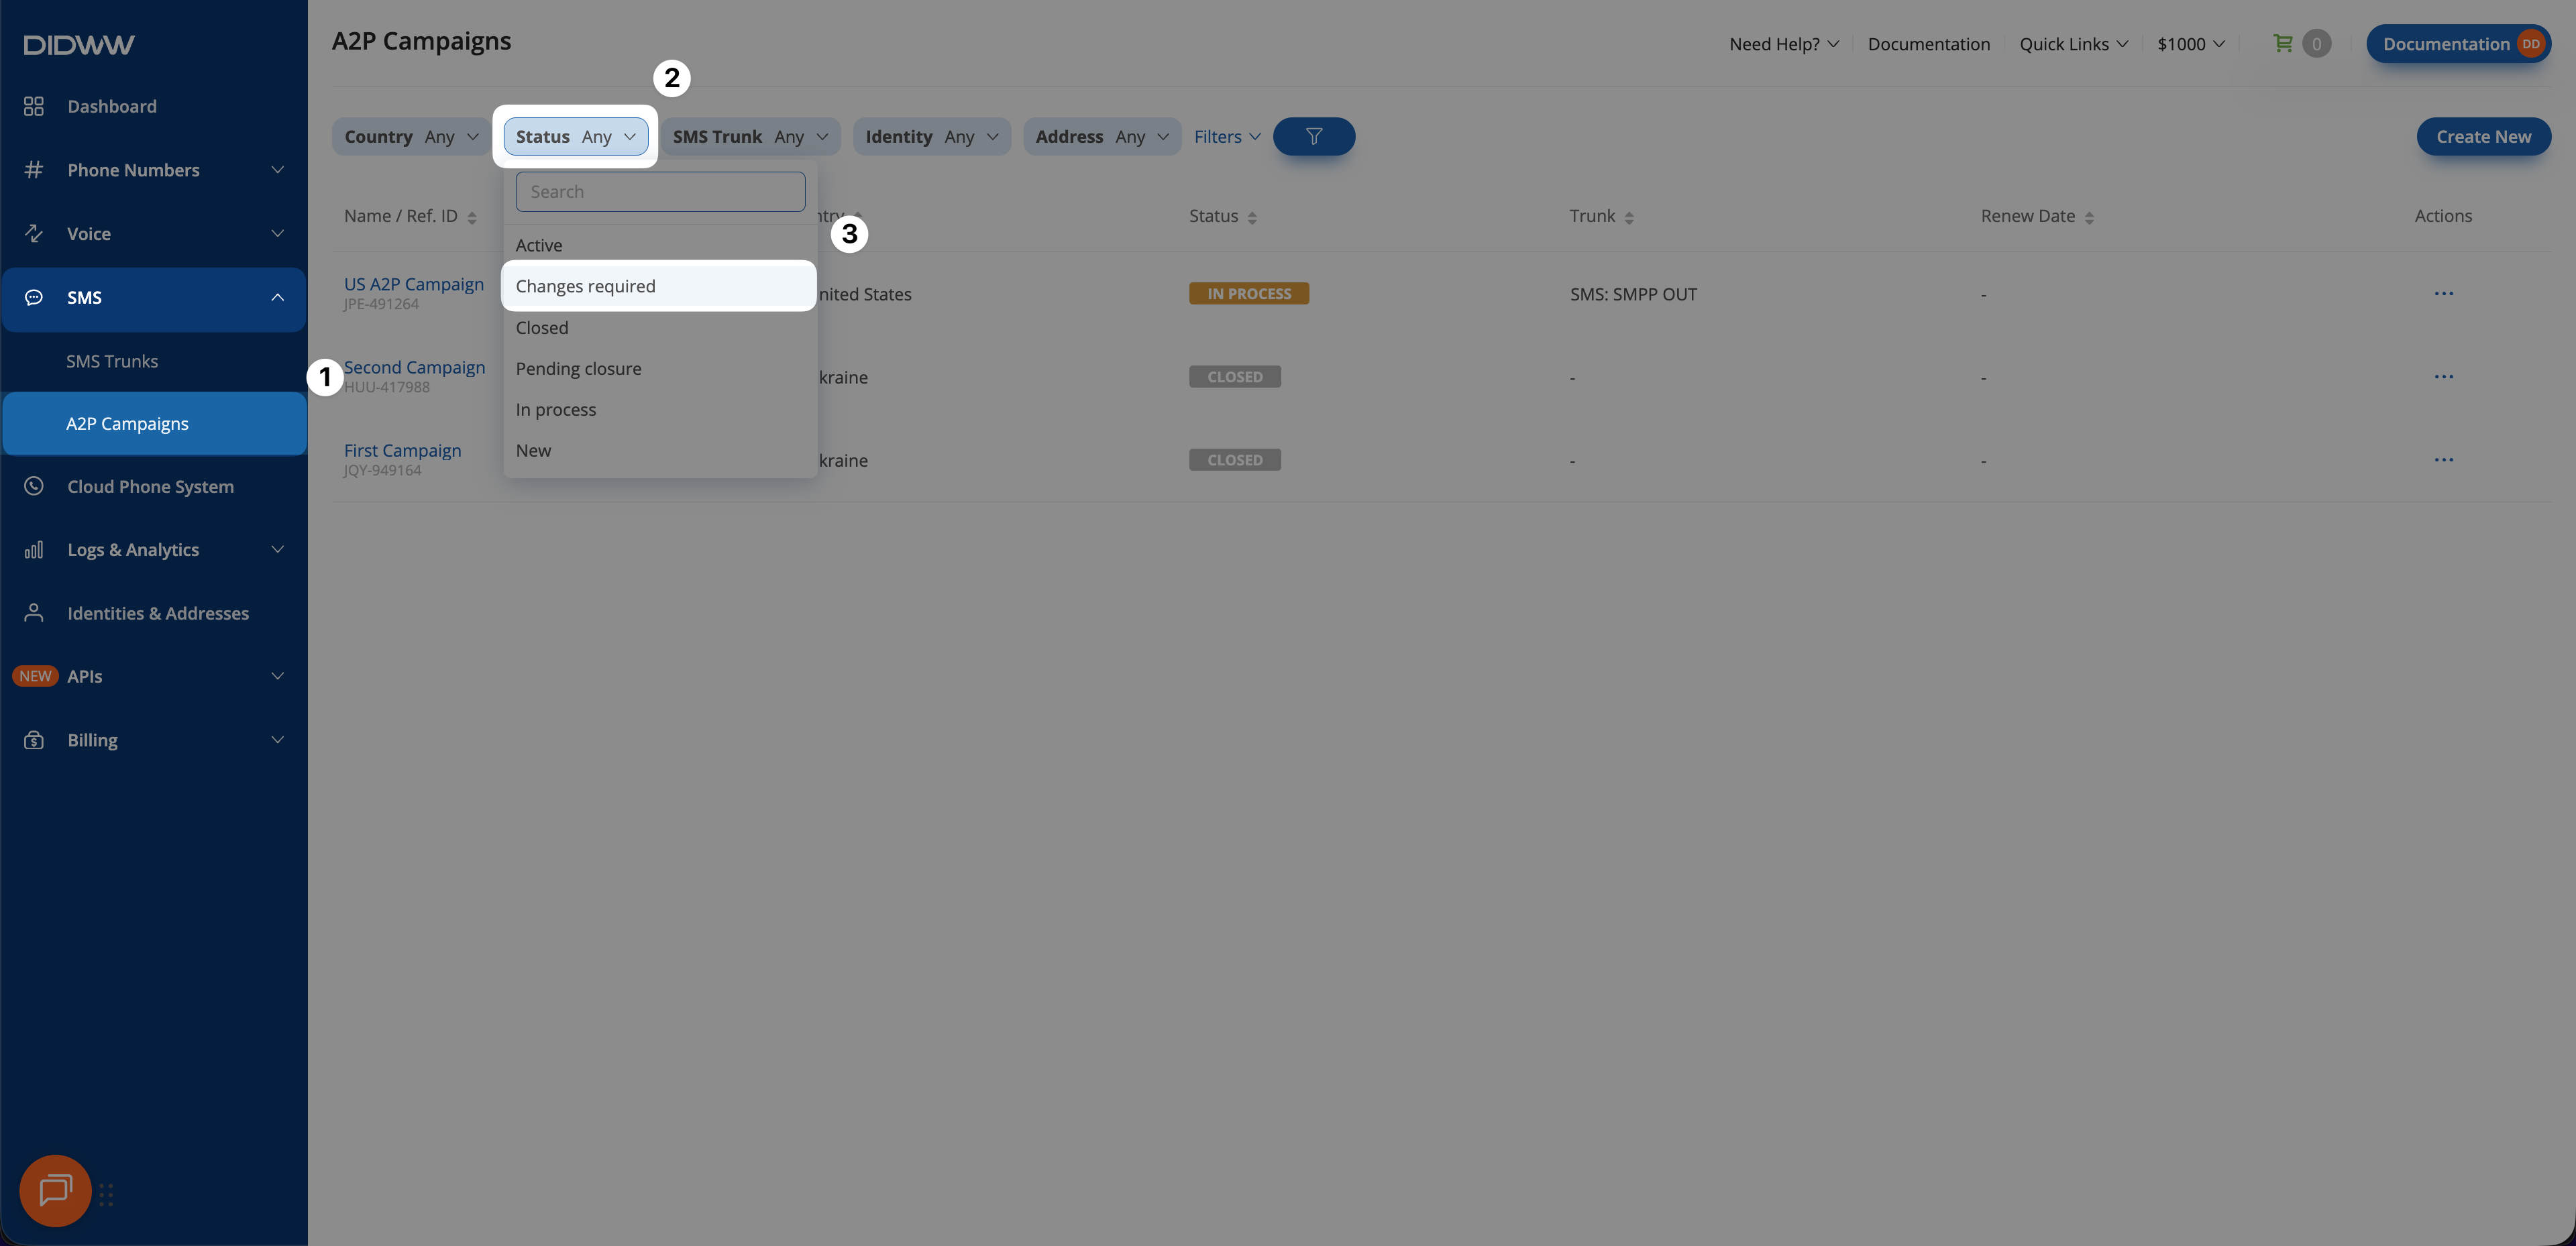
Step 1. Filter Campaigns by Status: Changes Required (Optional)#
In the DIDWW User Panel, go to SMS > A2P Campaigns.
Open the Status filter.
Select Changes required to display the relevant campaigns.
Fig. 14. Filtering A2P campaigns in Changes required status.#
This feature is only available for active A2P campaigns using an HTTP OUT Trunk. If the SMS trunk is configured as an SMPP ESME Trunk or SMPP SMSC Trunk, the Send SMS option will not be available.
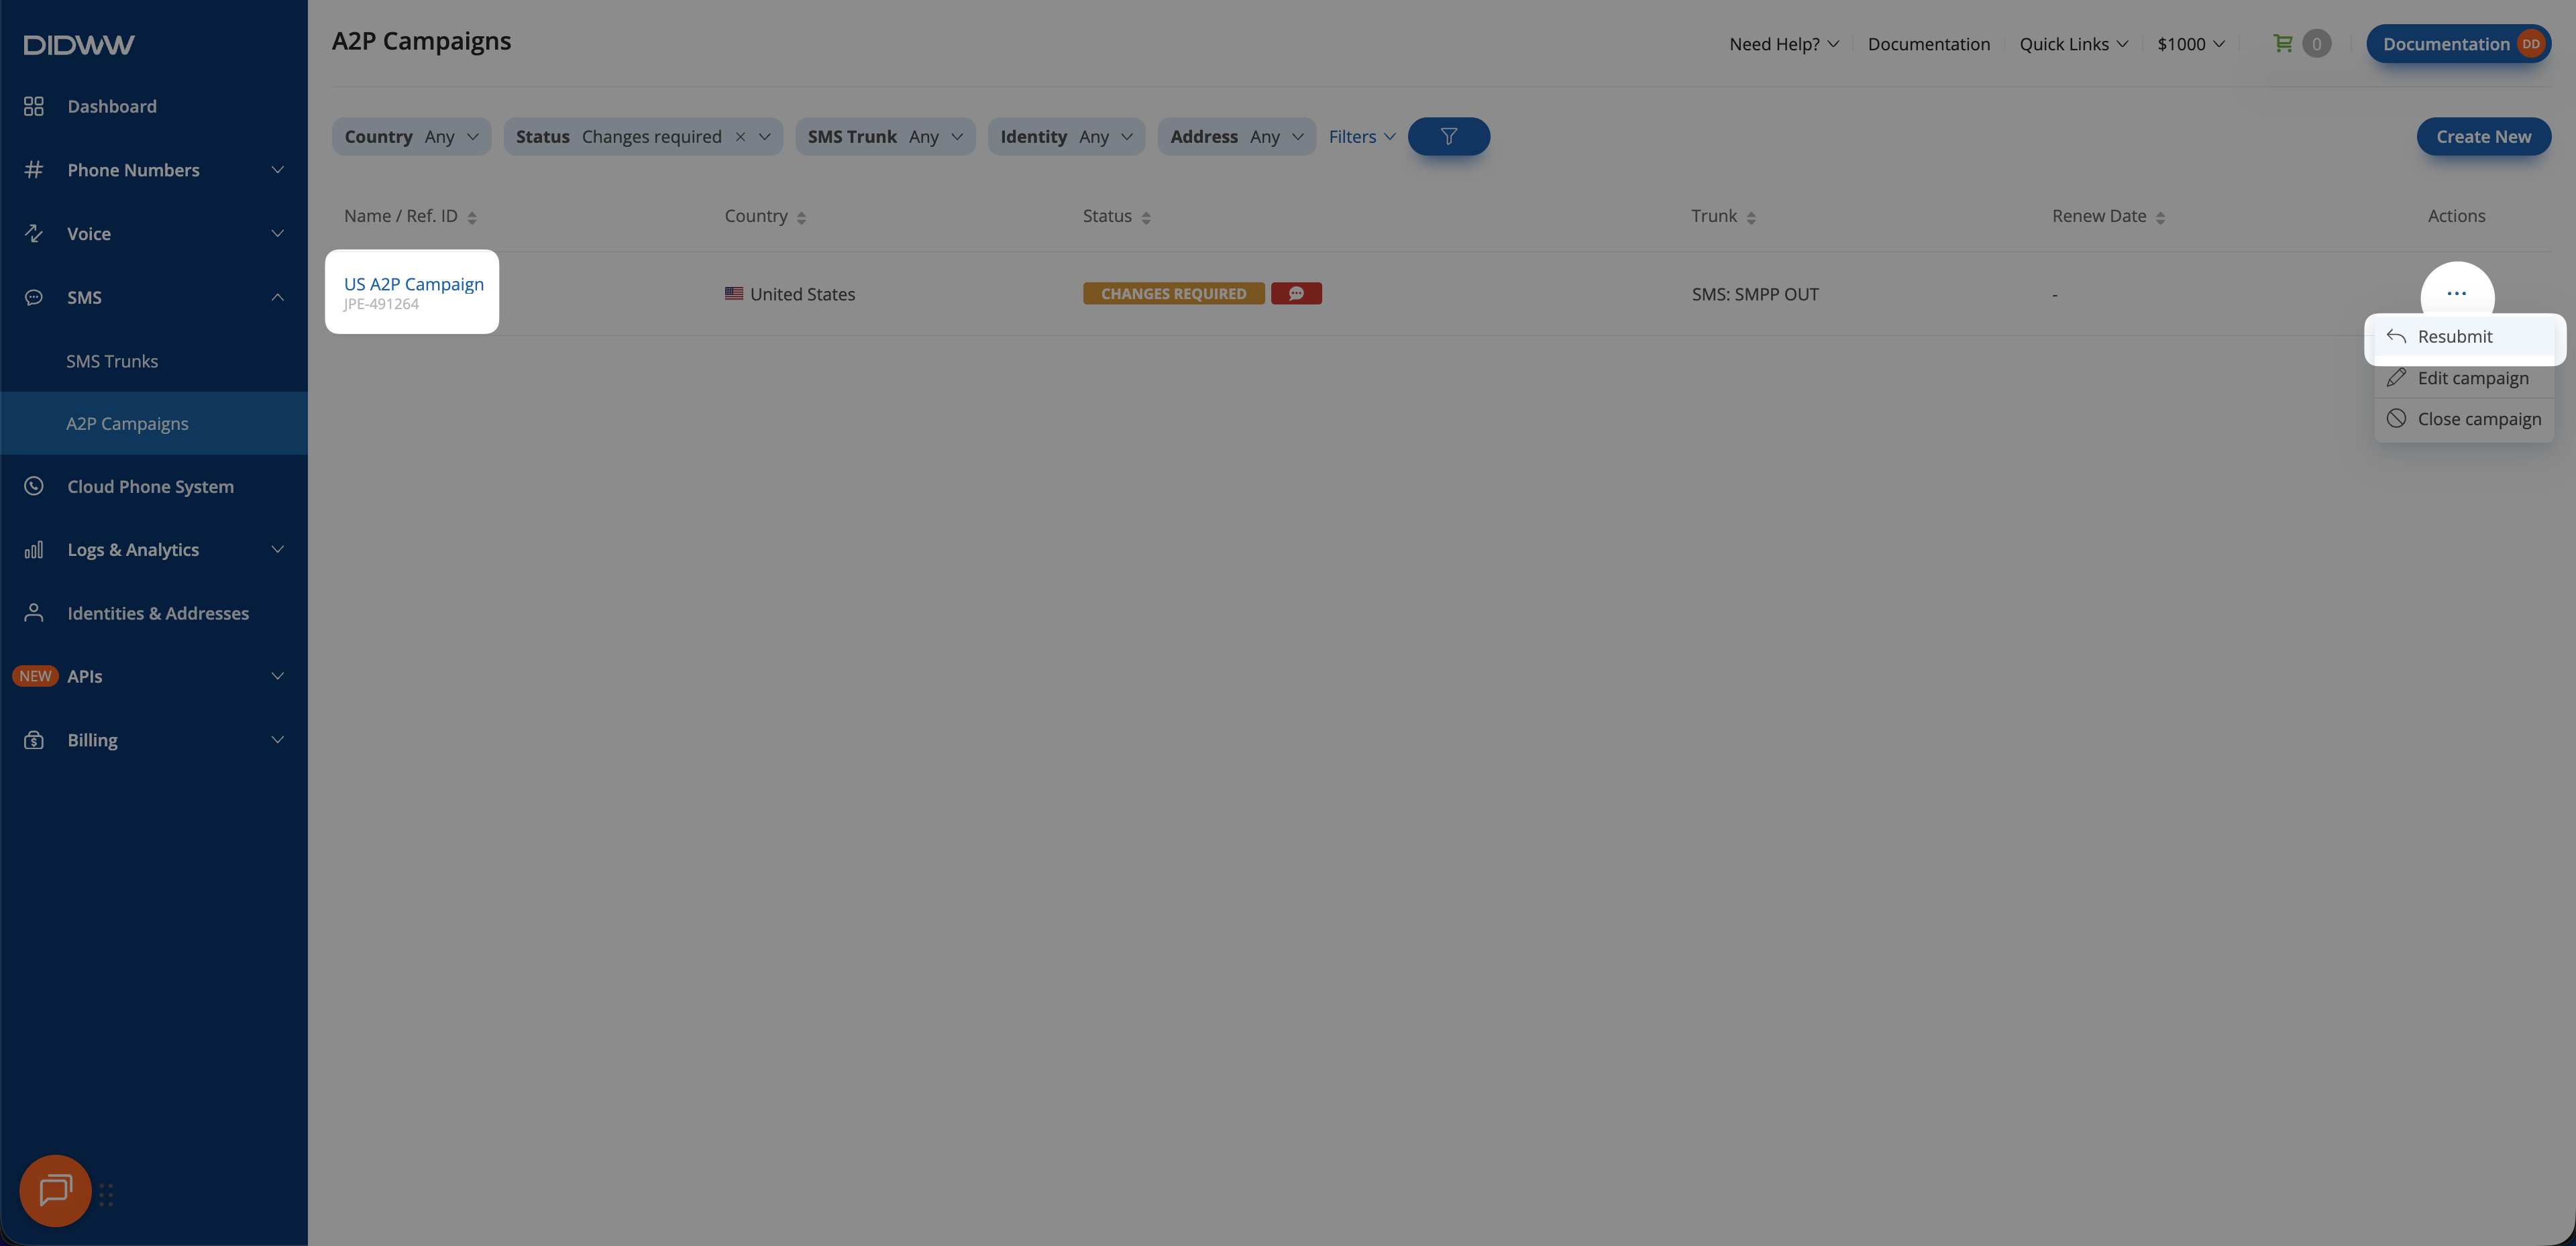
To send an individual SMS message directly from the A2P Campaigns page, typically for testing purposes, follow the steps below:
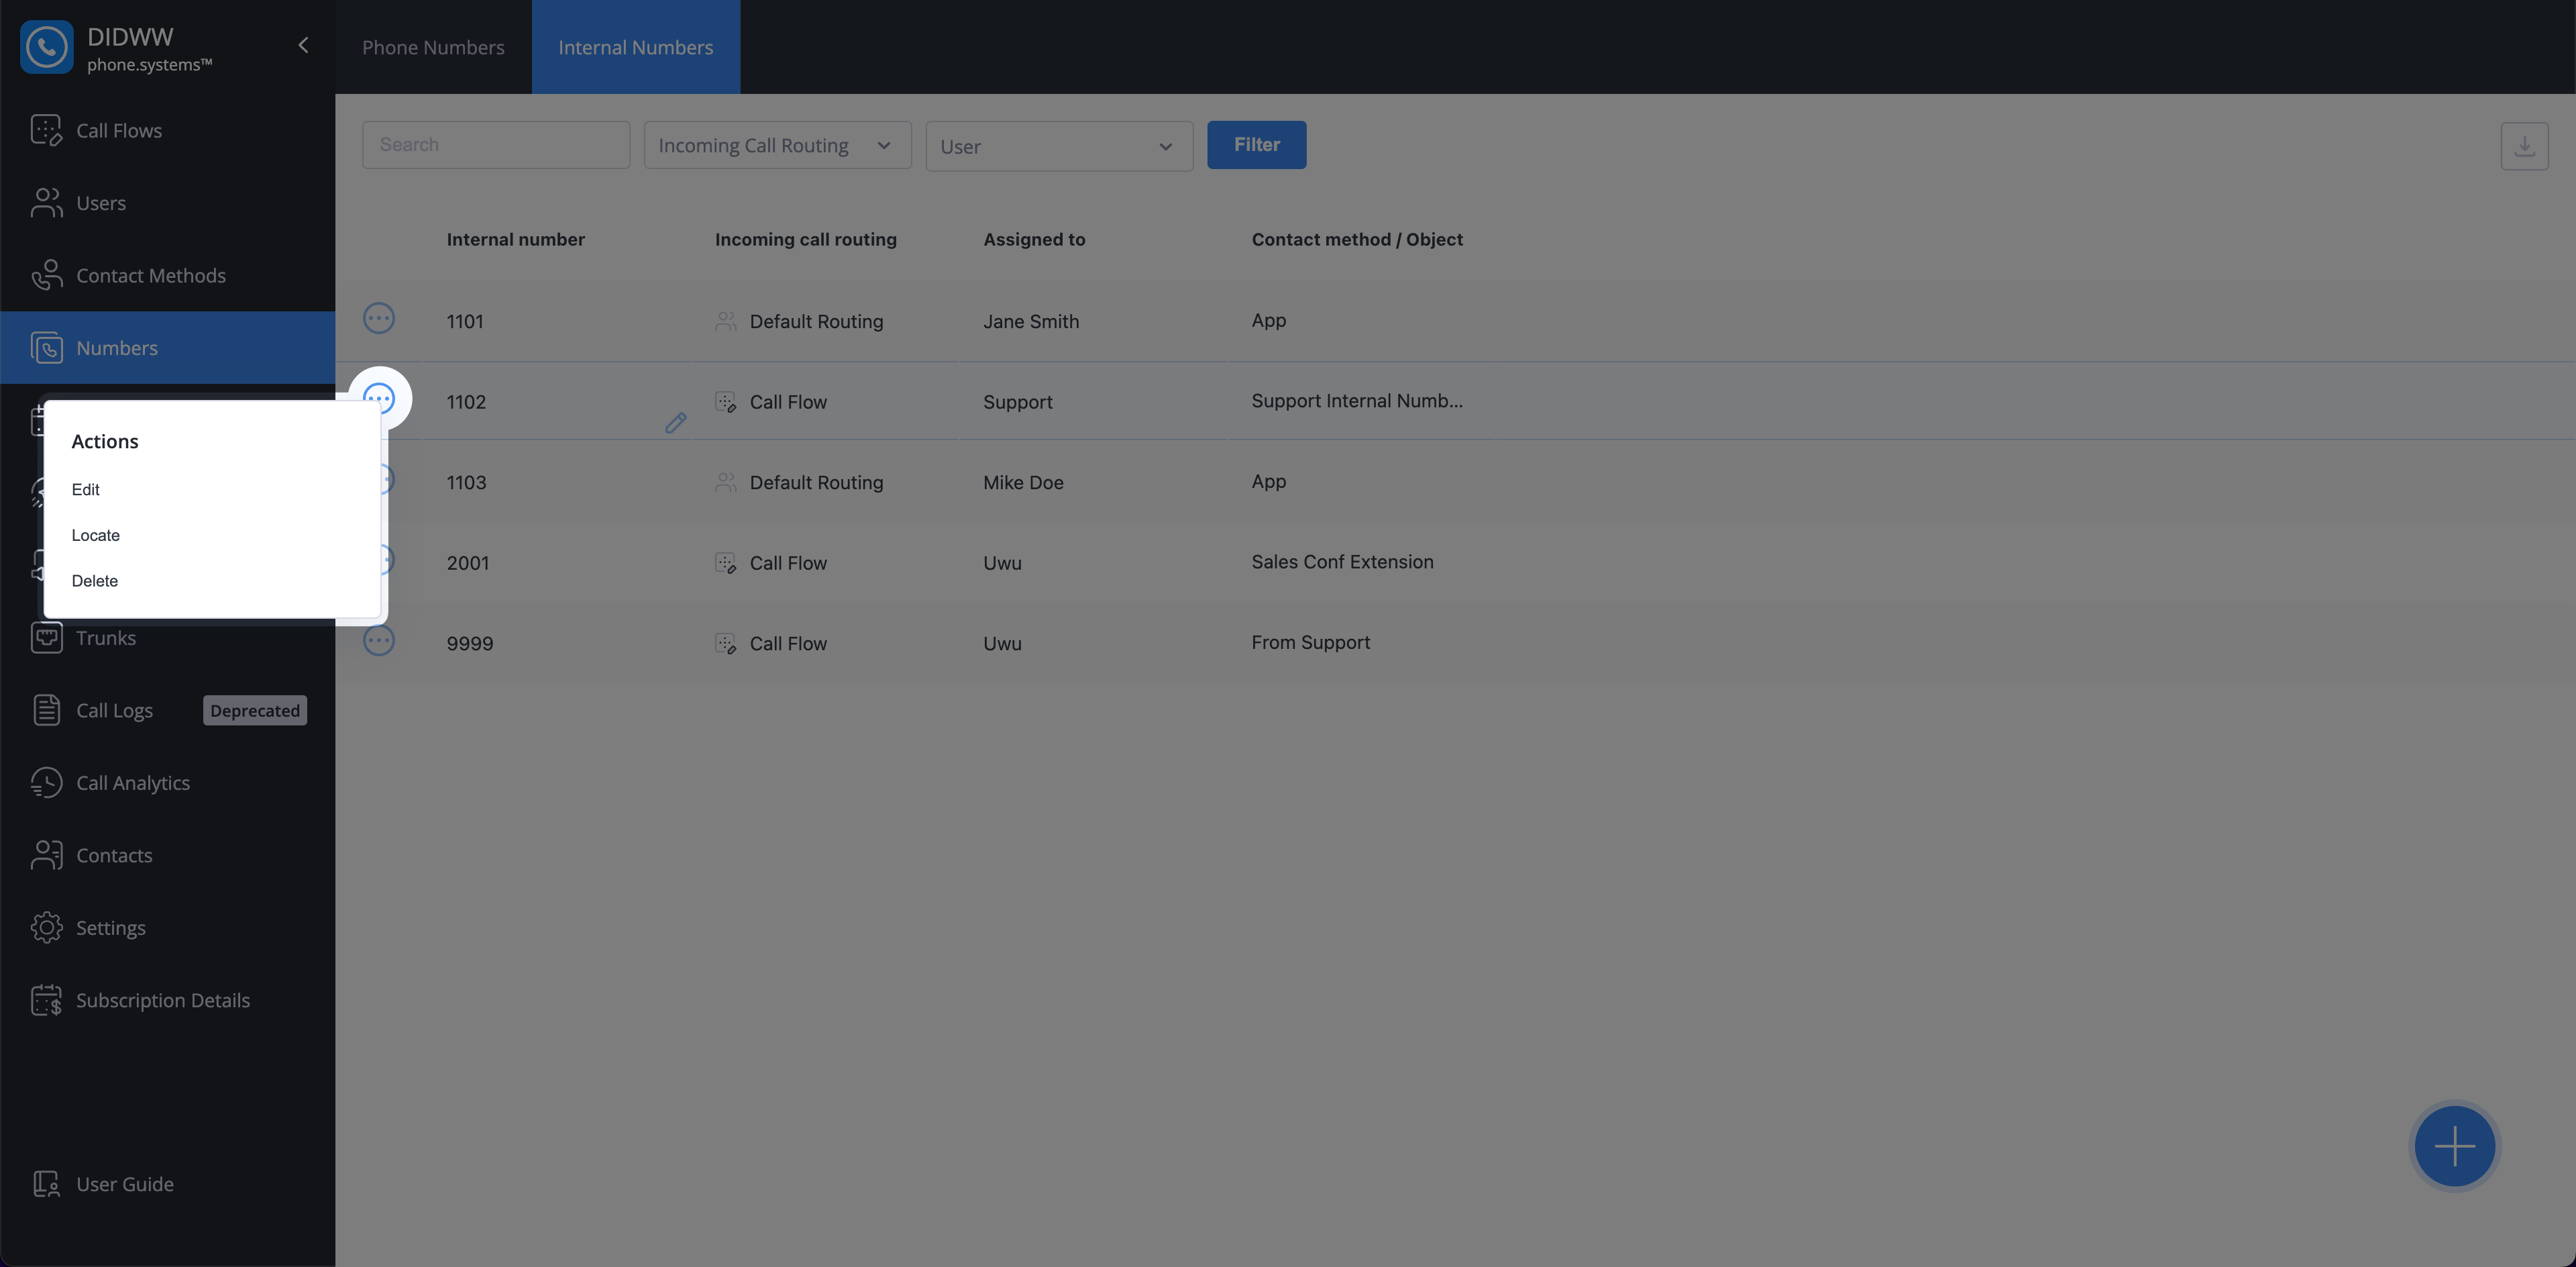
Go to SMS > A2P Campaigns in the DIDWW User Panel.
Locate your campaign and click the actions
button.
Review prohibited campaign content, disallowed A2P use cases, required consent practices, and messaging requirements before submitting an A2P campaign.


button.