Configure Call Transfers#
Transfer inbound calls to a new destination (PSTN number or SIP URI) using either a 30x Redirect SIP response or an in-dialog SIP REFER request. This enables call routing decisions to be made dynamically during call handling rather than being fixed in advance.
Transfers are typically triggered by a SIP system such as a PBX, IVR, AI agent, or custom application when a call needs to be forwarded, escalated, or handed off to another destination. In this case, the system sends a 30x response or a REFER request, and a new outbound call is initiated to the target destination using the configured Outbound Trunk.
To use call transfers, both Inbound and Outbound SIP trunks must be configured, and the platform must be capable of generating valid SIP signaling for the selected transfer method.
Note
For protocol-level details, examples, and diagrams, see Inbound Call Redirection Methods.
Create the outbound trunk DIDWW will use to place the redirected or transferred call.
Create the inbound trunk, enable the required transfer method, and link it to the outbound trunk using the same credentials.
Configure your platform to transfer calls using SIP 30x Redirect or SIP REFER.
1. Create Outbound SIP Trunk#
To enable call transfers, the outbound SIP trunk must be configured to accept signaling from DIDWW Inbound SIP IPs. This allows a new outbound call to be initiated to the transfer destination when a 30x Redirect or SIP REFER request is received.
The outbound trunk must use Credentials & IP-Based authentication, and the same credentials are reused by the inbound trunk to authorize transfer-related signaling.
Before You Begin#
Access to DIDWW outbound trunks is required. See Get Access to DIDWW Outbound Termination.
Step 1: Open Outbound Trunks and Start Creation#
In the DIDWW User Panel , go to Voice > Outbound Trunks.
Click Create New.
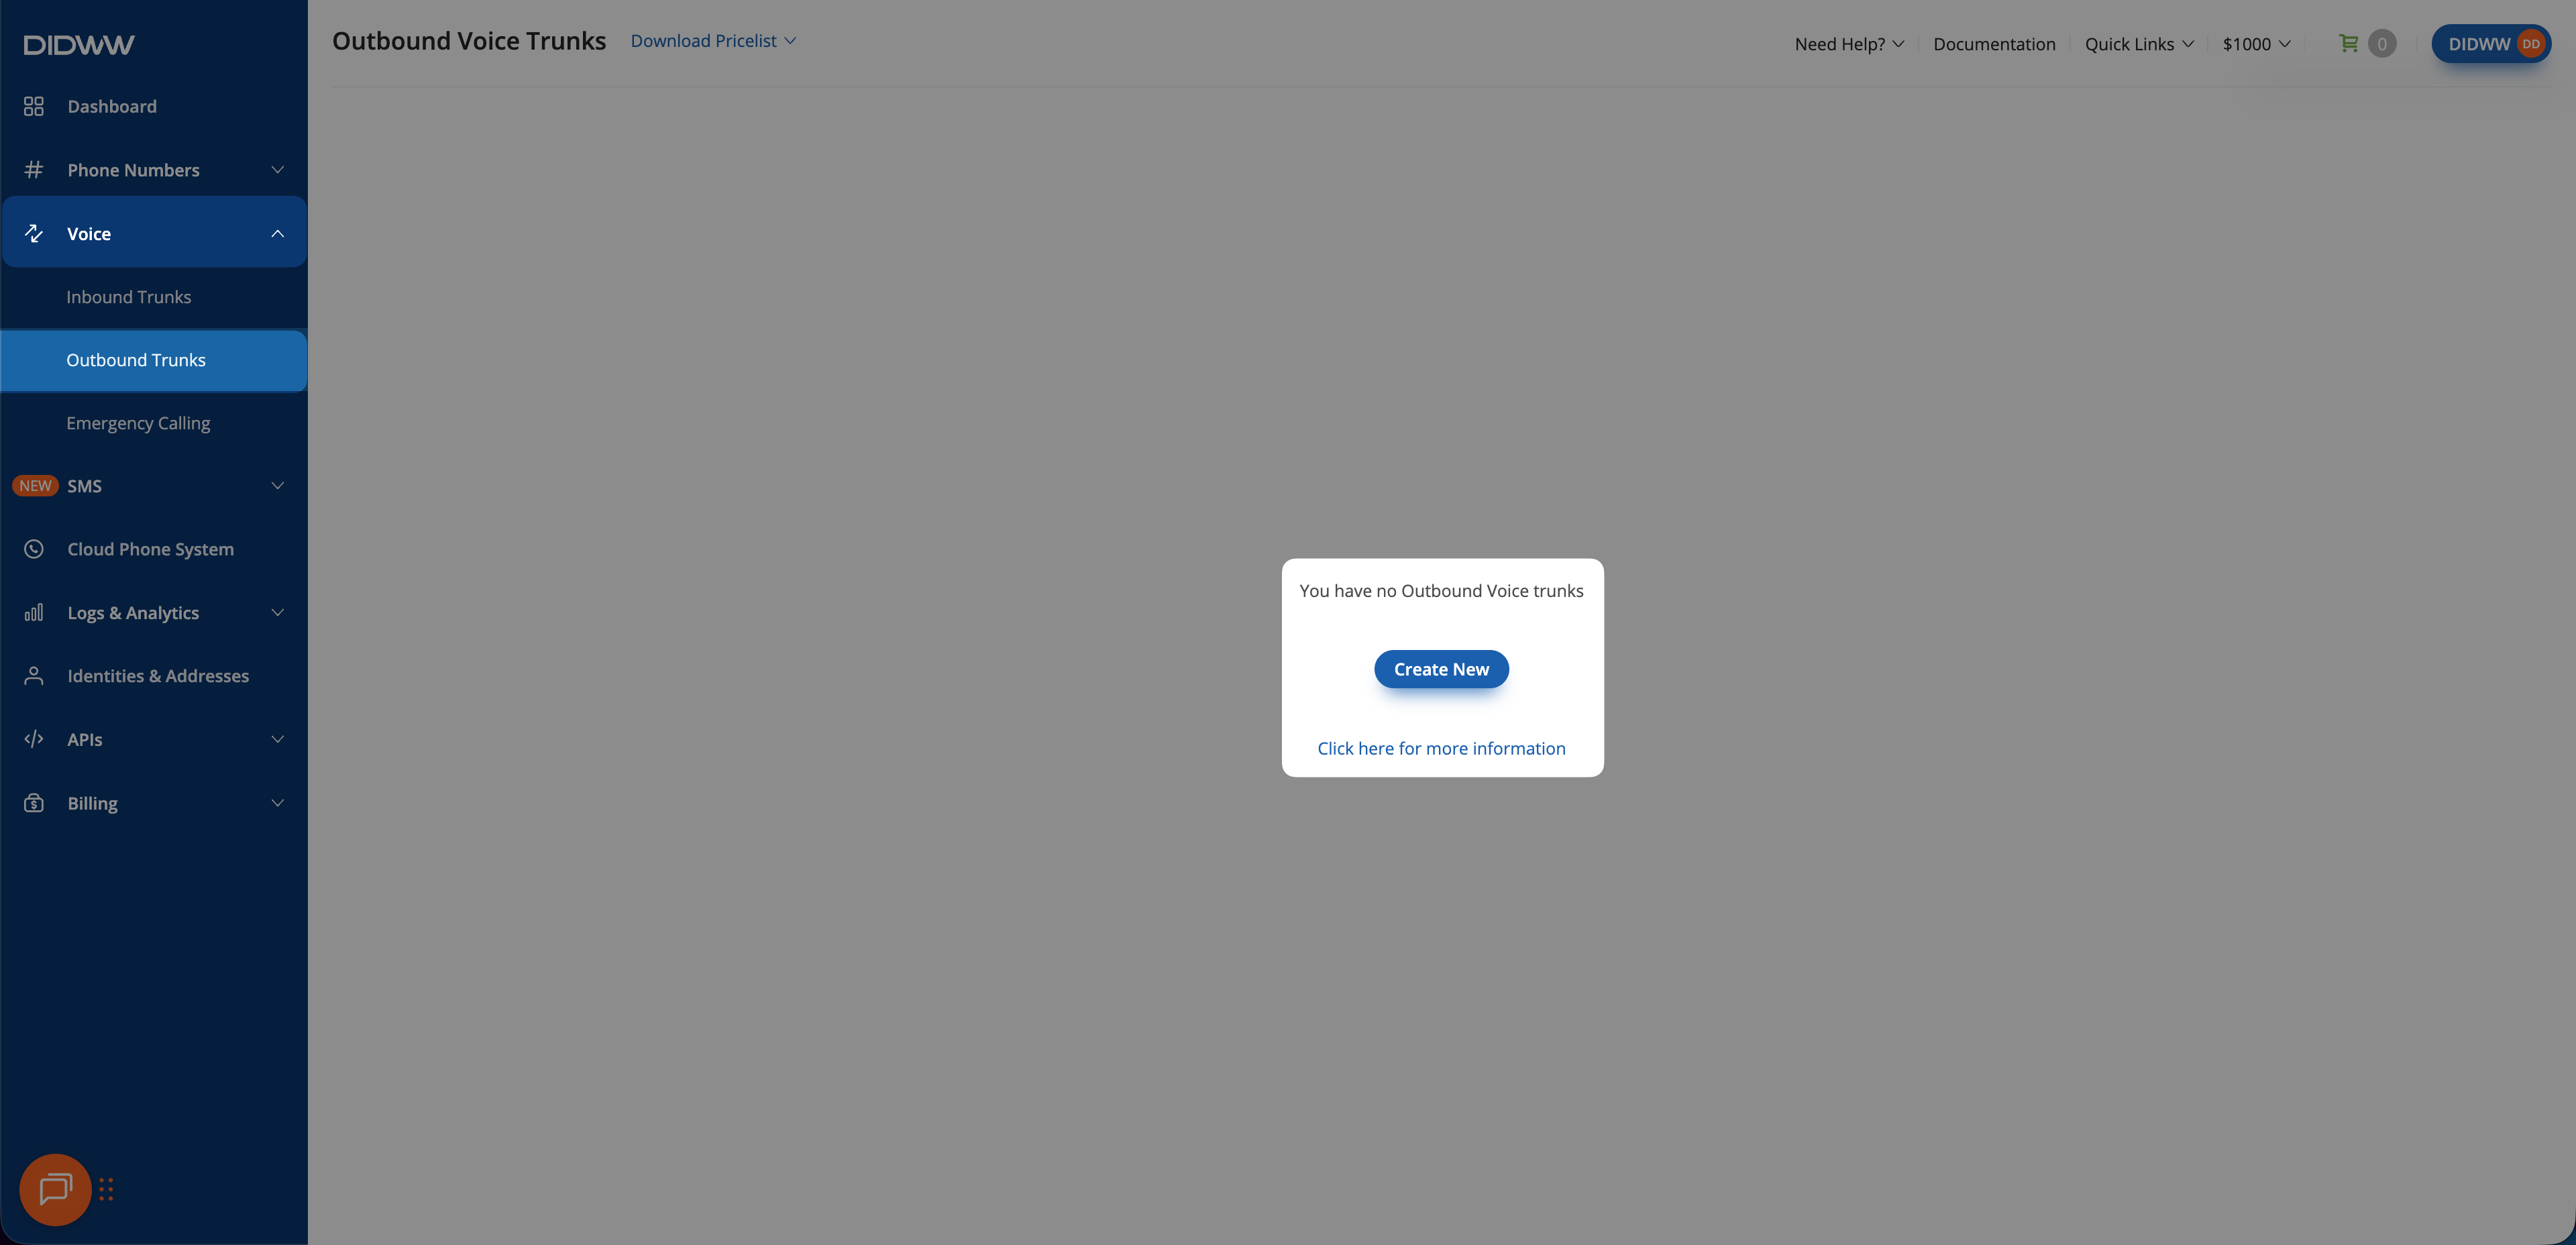
Fig. 1. Opening Outbound Trunks and starting outbound trunk creation#
Step 2: Configure and Create the Outbound SIP Trunk#
Enter a descriptive Friendly Name (for example,
Call Transfers).Keep Credentials & IP-Based authentication selected.
In Allowed SIP IP addresses, allow:
Your SIP platform’s outbound SIP signaling IPs, if your system uses fixed IP addresses
The DIDWW inbound SIP IPs, required for call redirection and transfers
Copy the full DIDWW inbound SIP IP list below, based on your IP version:
46.19.209.14 46.19.210.14 46.19.212.14 46.19.213.14 46.19.214.14 46.19.215.14 185.238.173.14
2a01:ad00:1:14::14 2a01:ad00:2:14::14 2a01:ad00:4:14::14 2a01:ad00:5:14::14 2a01:ad00:6:14::14 2a01:ad00:7:14::14 2a01:ad00:8:14::14
Click Create to save the trunk.
Warning
You can allow all traffic by adding
0.0.0.0/0, which removes all IP restrictions. Although SIP Digest Authentication will still verify requests using valid credentials, this configuration is not recommended. Always restrict access to known signaling IPs whenever possible.For advanced outbound SIP trunk configuration, see Outbound SIP Trunk Guide.
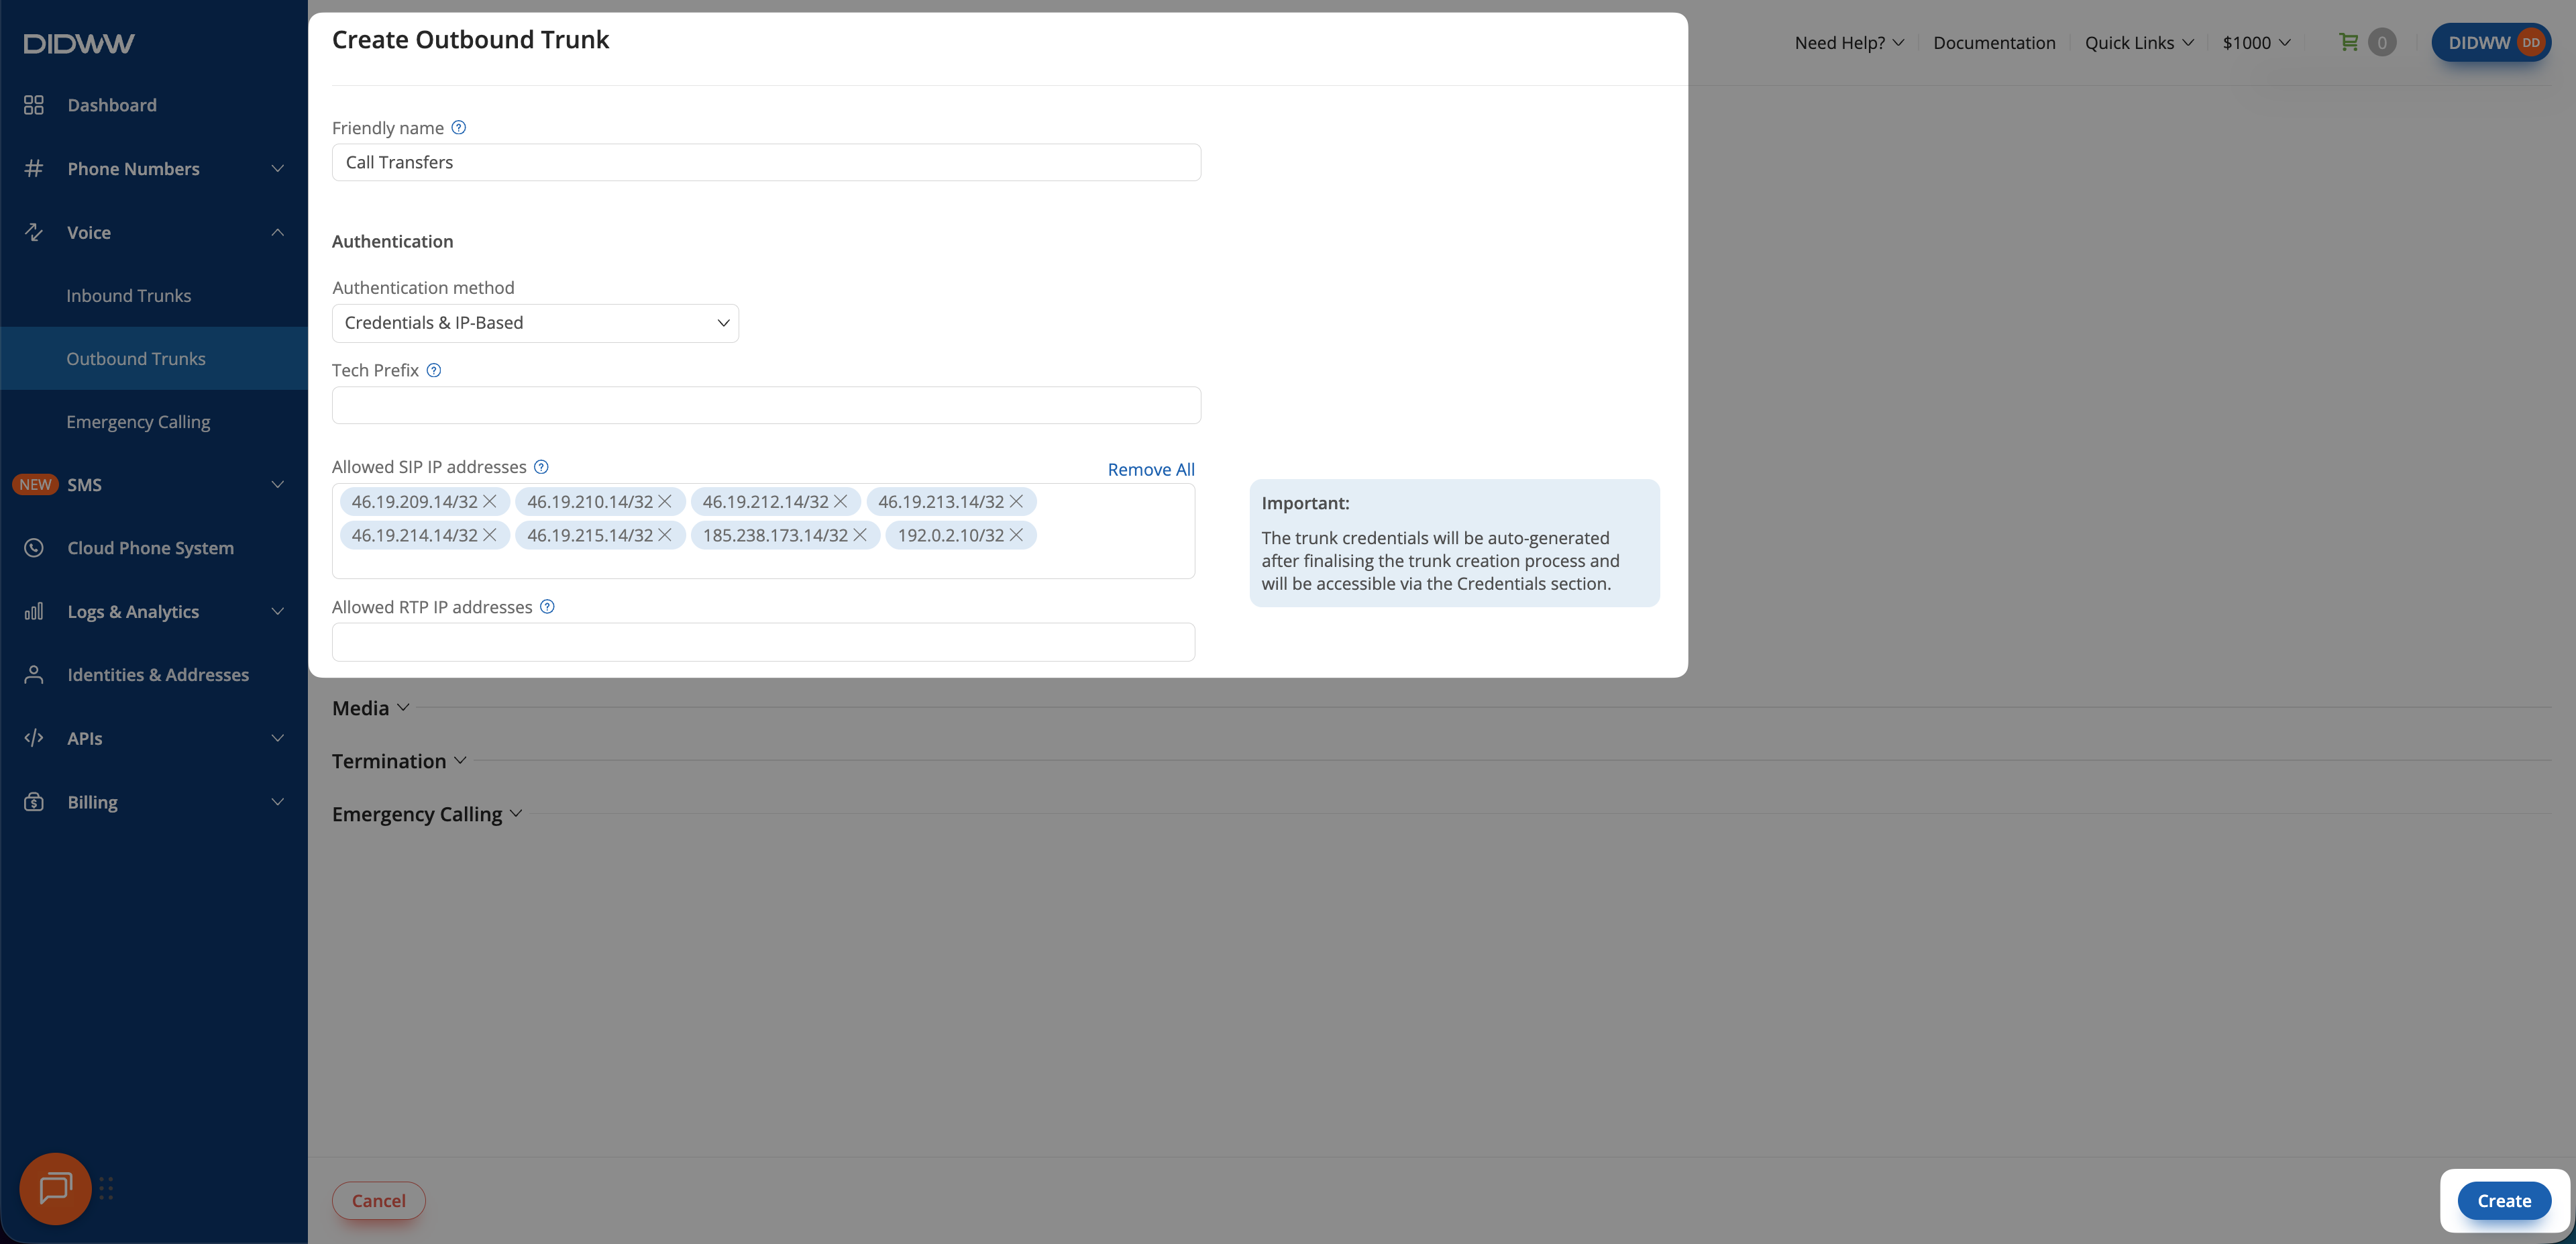
Fig. 2. Configuring and creating the outbound SIP trunk for call transfers#
Step 3: View Outbound Trunk Credentials#
When outbound trunk is created you can view its credentials by selecting the key icon in the Credentials column on the Outbound Trunks page.
Go to Voice > Outbound Trunks.
Locate your outbound trunk and click the key icon in the Credentials column.
The trunk credentials will appear, showing the Username and Password (click the eye icon to reveal the password).
Note
These credentials will be reused in the Authentication section of the inbound SIP trunk to authorize call redirection and transfers via the outbound trunk.
The same credentials must also be used by your SIP platform for outbound SIP authentication.
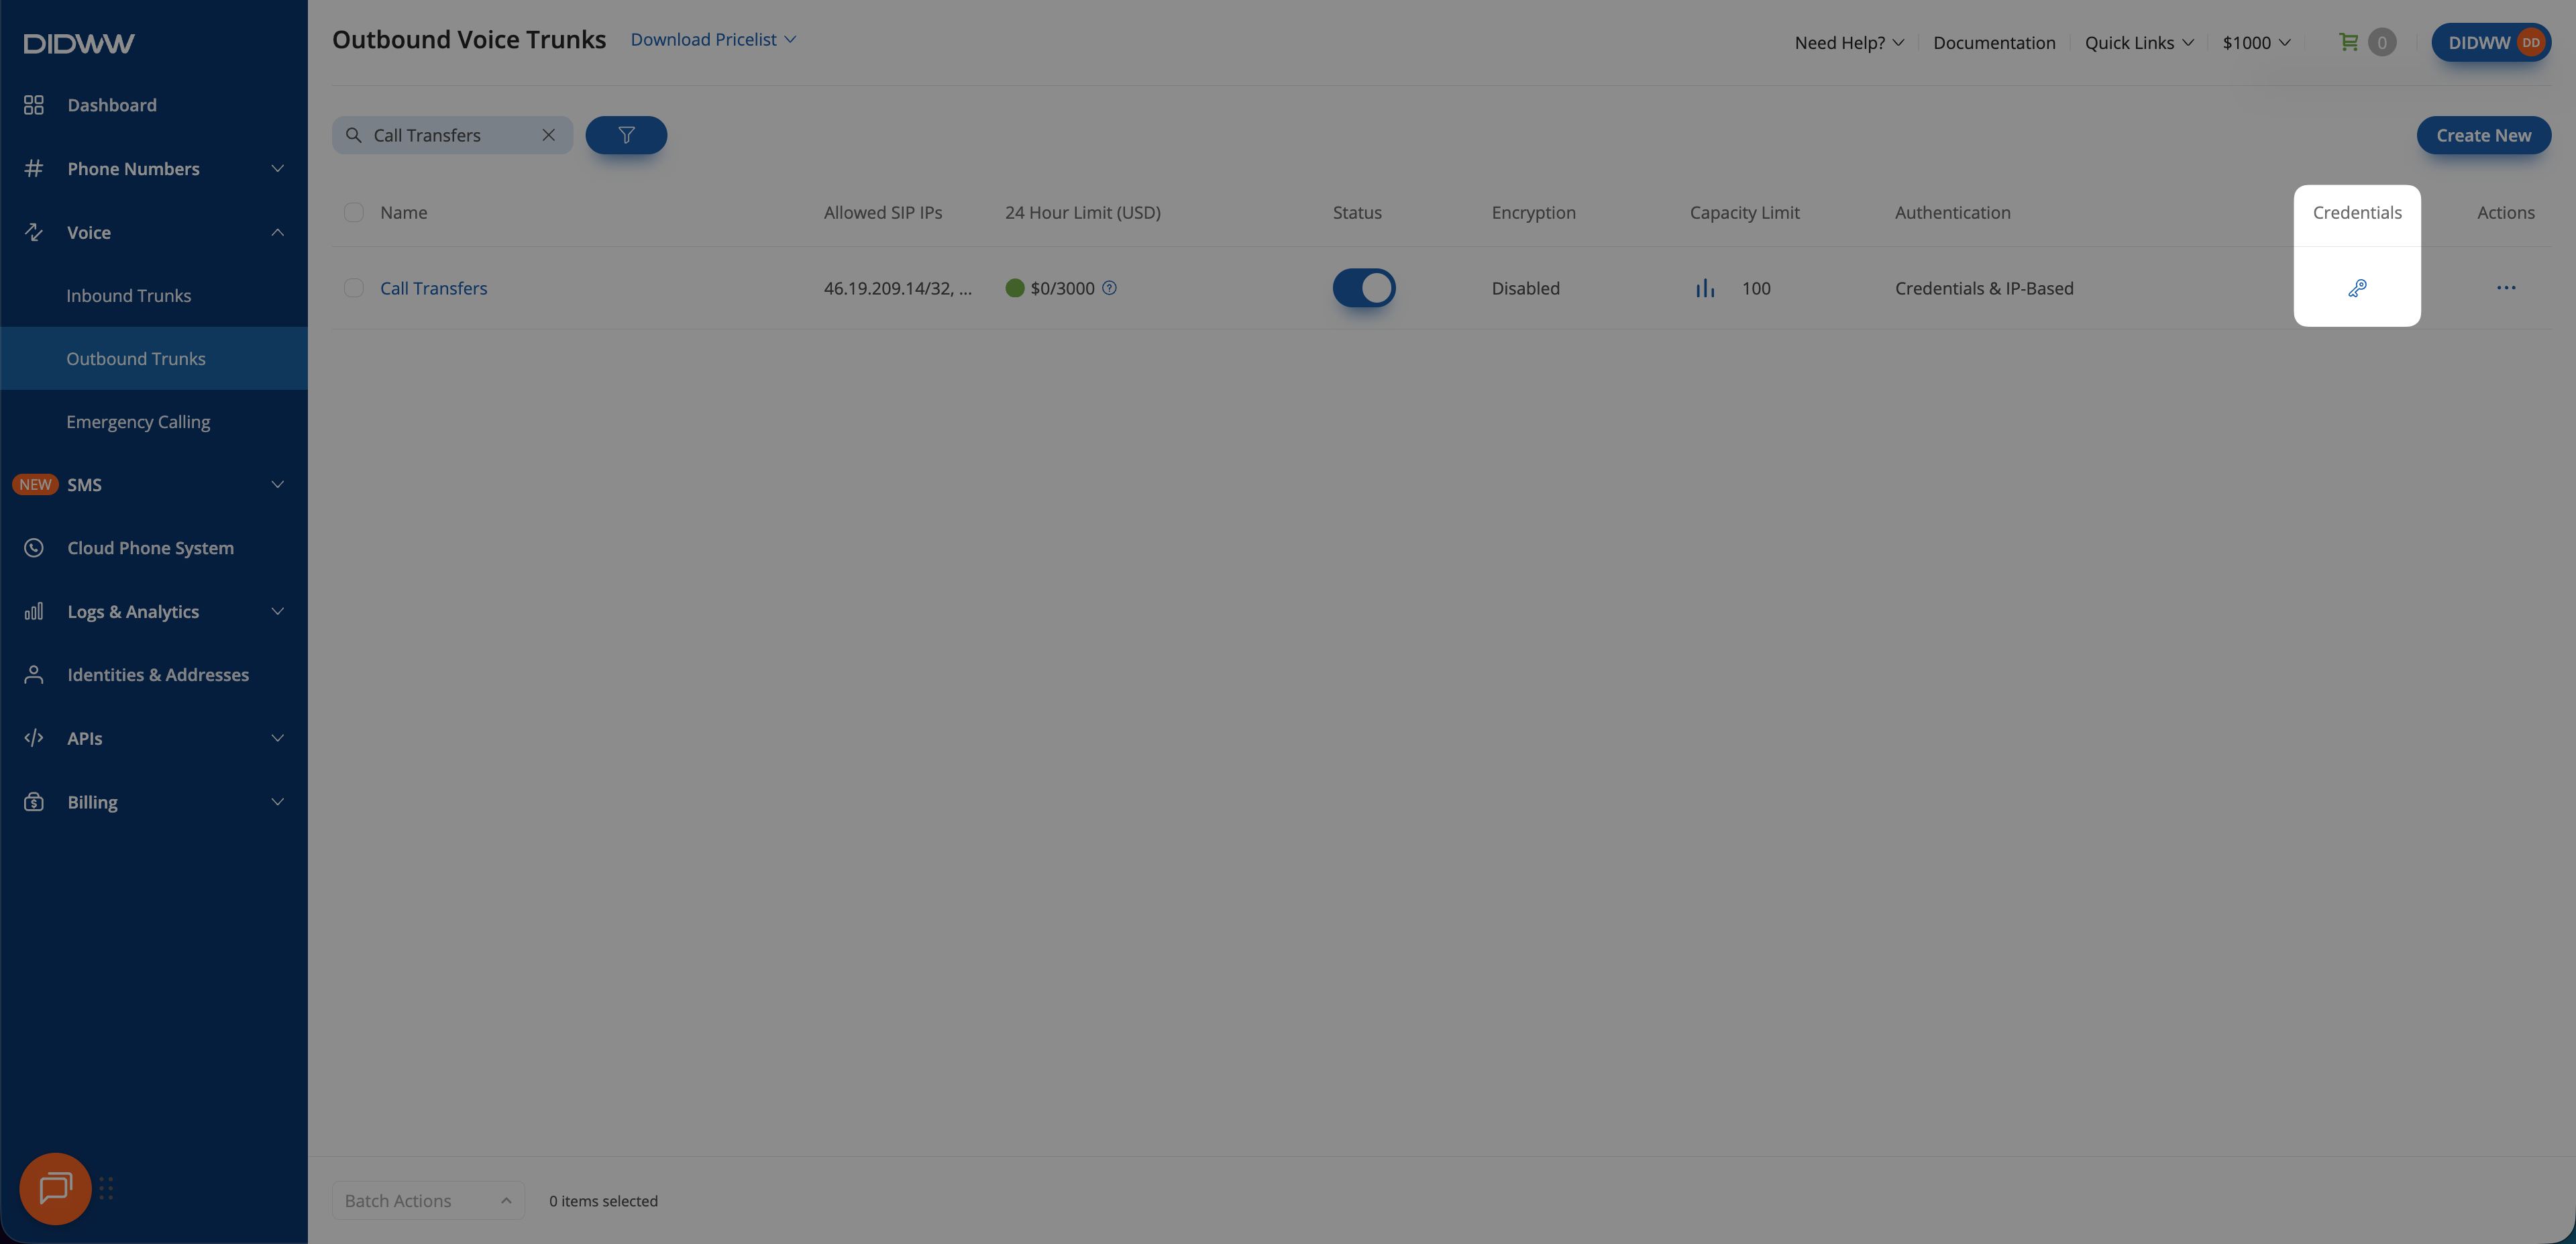
Fig. 3. Viewing outbound trunk credentials for reuse on the inbound trunk#
2. Create Inbound SIP Trunk#
To process call transfer requests, the inbound SIP trunk must be configured to authorize 30x Redirect responses or SIP REFER requests generated during call handling. This ensures that transfer signaling is accepted and validated before a new outbound call is initiated.
The inbound trunk must use the same IP version (IPv4 or IPv6) as the outbound trunk, have Authorization enabled, and reuse the same credentials configured on the outbound SIP trunk. The required transfer method (30x Redirect or SIP REFER) must also be enabled.
Before You Begin#
At least one DID number is required to receive inbound calls.
You need the outbound trunk Username and Password from Step 3.
Step 1: Open Inbound Trunks and Start Creation#
In the DIDWW User Panel , go to Voice > Inbound Trunks.
Click Create New > SIP Trunk.

Fig. 4. Opening Inbound Trunks and starting inbound SIP trunk creation#
Step 2: Configure General settings#
Enter a descriptive Friendly Name (for example,
Call Transfers).Configure your platform destination (hostname/IP), transport, and port as required by your platform.
In Network protocol, select the IP version that matches the outbound trunk configuration.
Important
The Network protocol on the inbound trunk must match the IP addresses allowed on the outbound trunk.
If the outbound trunk allows IPv4 addresses, set the inbound trunk to IPv4 only
If the outbound trunk allows IPv6 addresses, set the inbound trunk to IPv6 only
A mismatch between IP versions will prevent call transfers from completing successfully
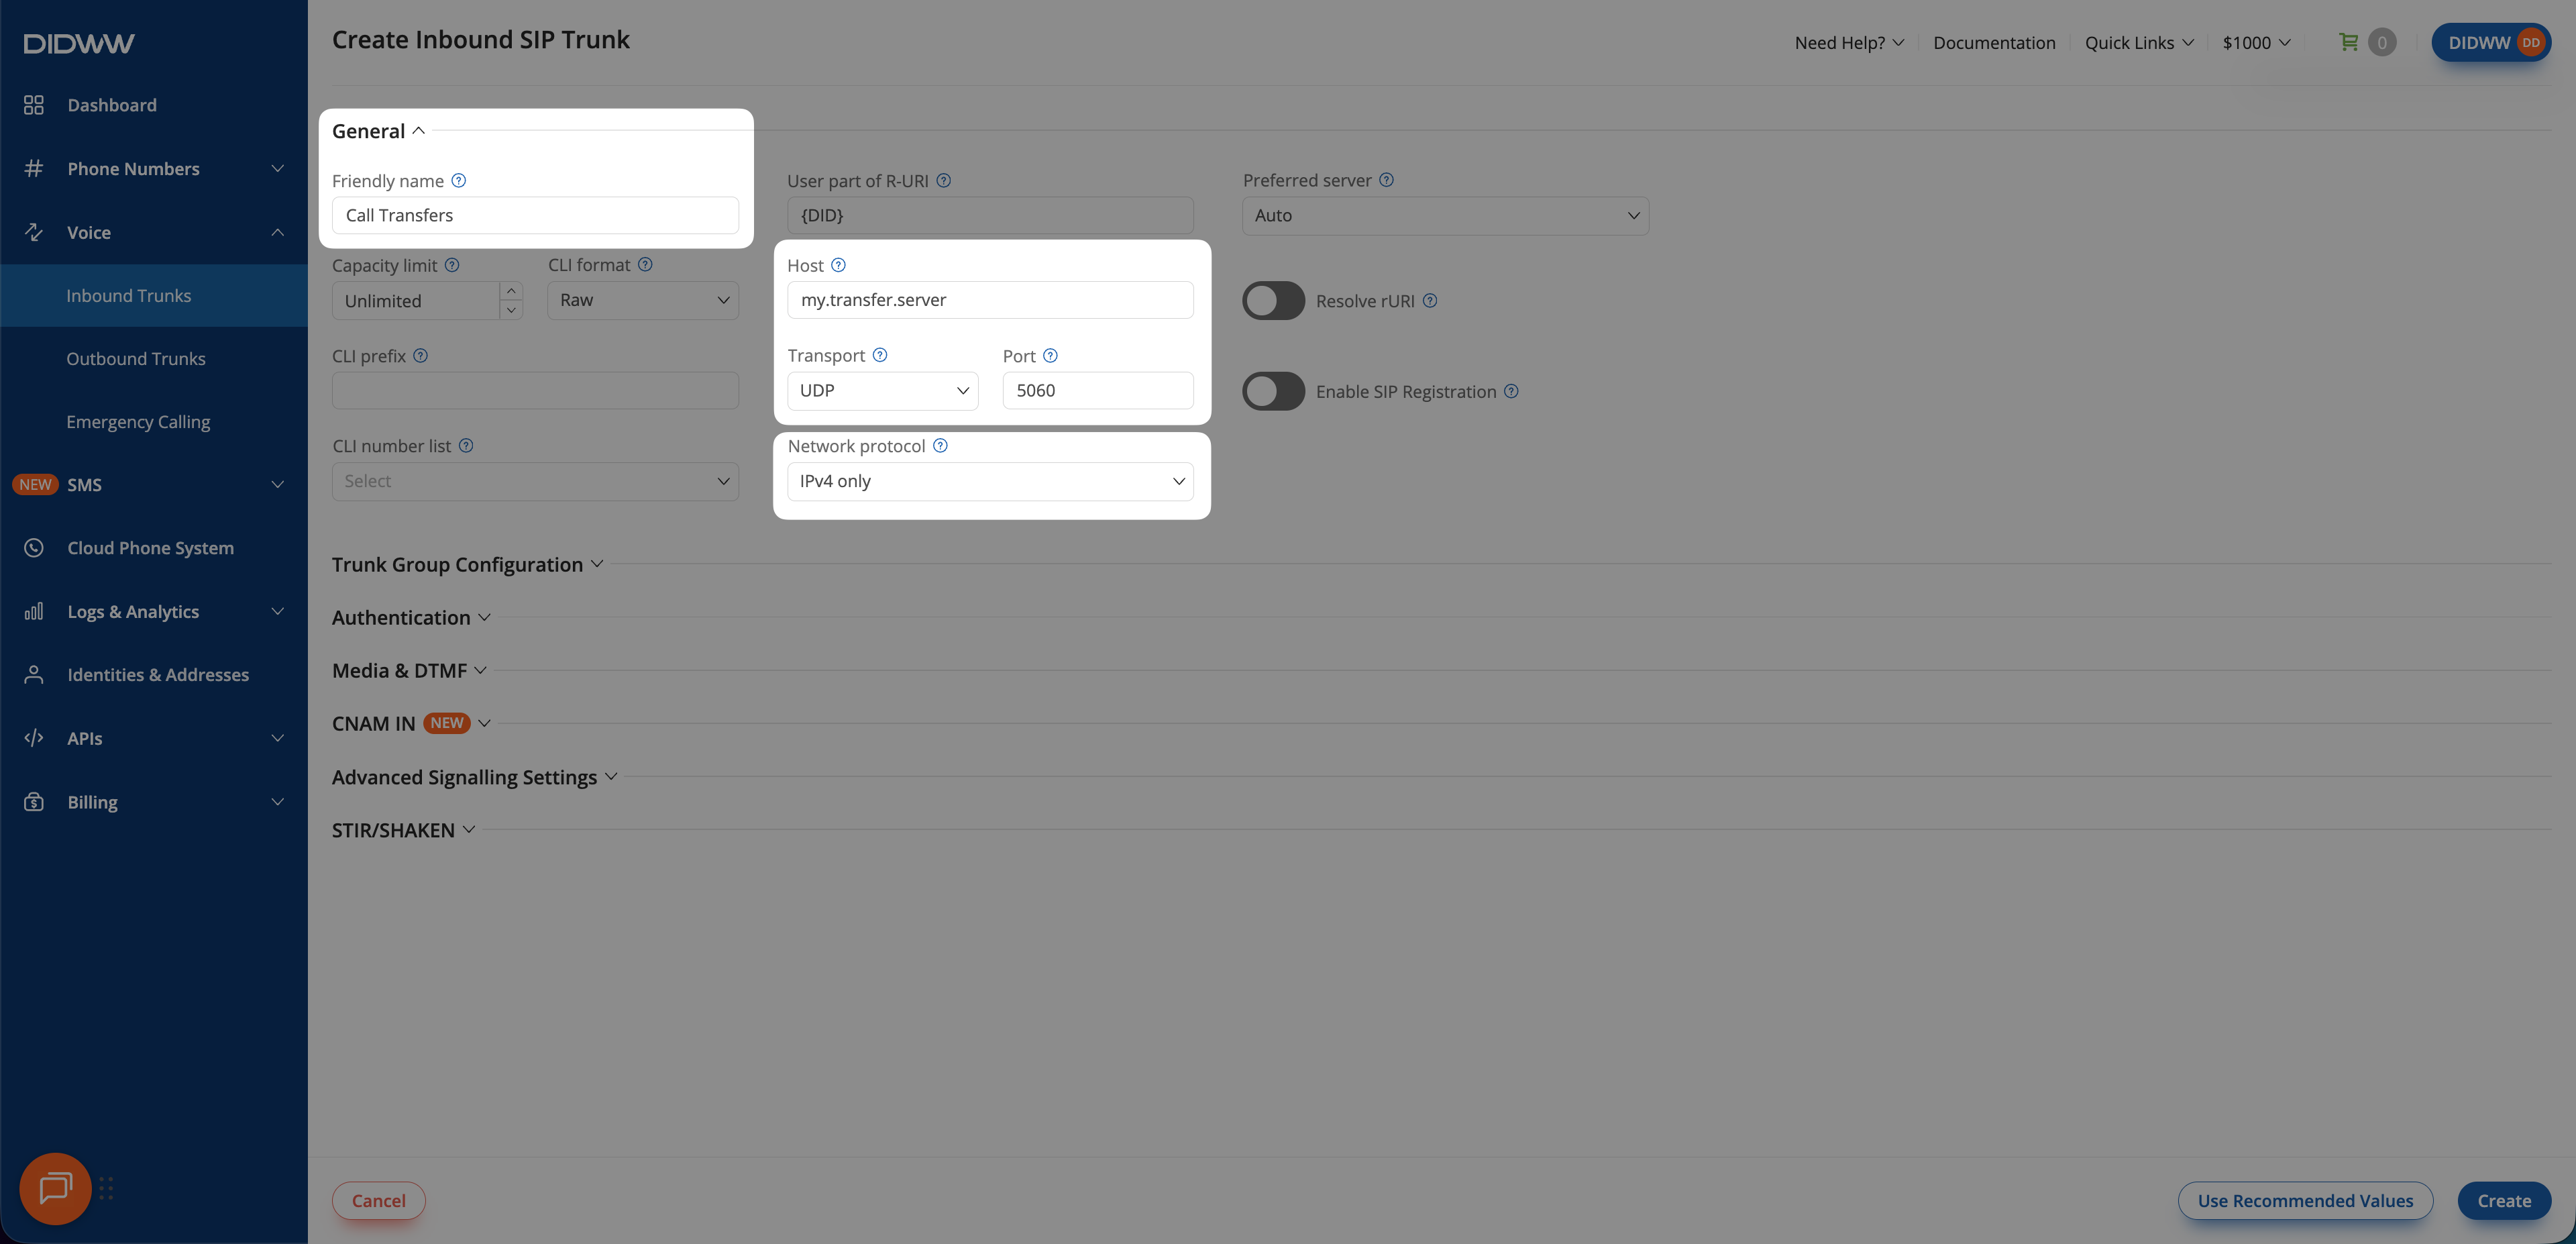
Fig. 5. Configuring inbound trunk general settings and network protocol#
Step 3: Enable and Configure Authentication Settings#
To authorize redirect/transfer requests, inbound trunk authentication must be enabled using the same credentials as the outbound trunk.
Expand the Authentication section.
Toggle Enable authorization to the Enabled position.
Paste the Auth user and Auth password values copied from the outbound trunk credentials (see View Outbound Trunk Credentials).
Note
DIDWW uses these credentials to authenticate the outbound leg initiated after a redirect or transfer request.
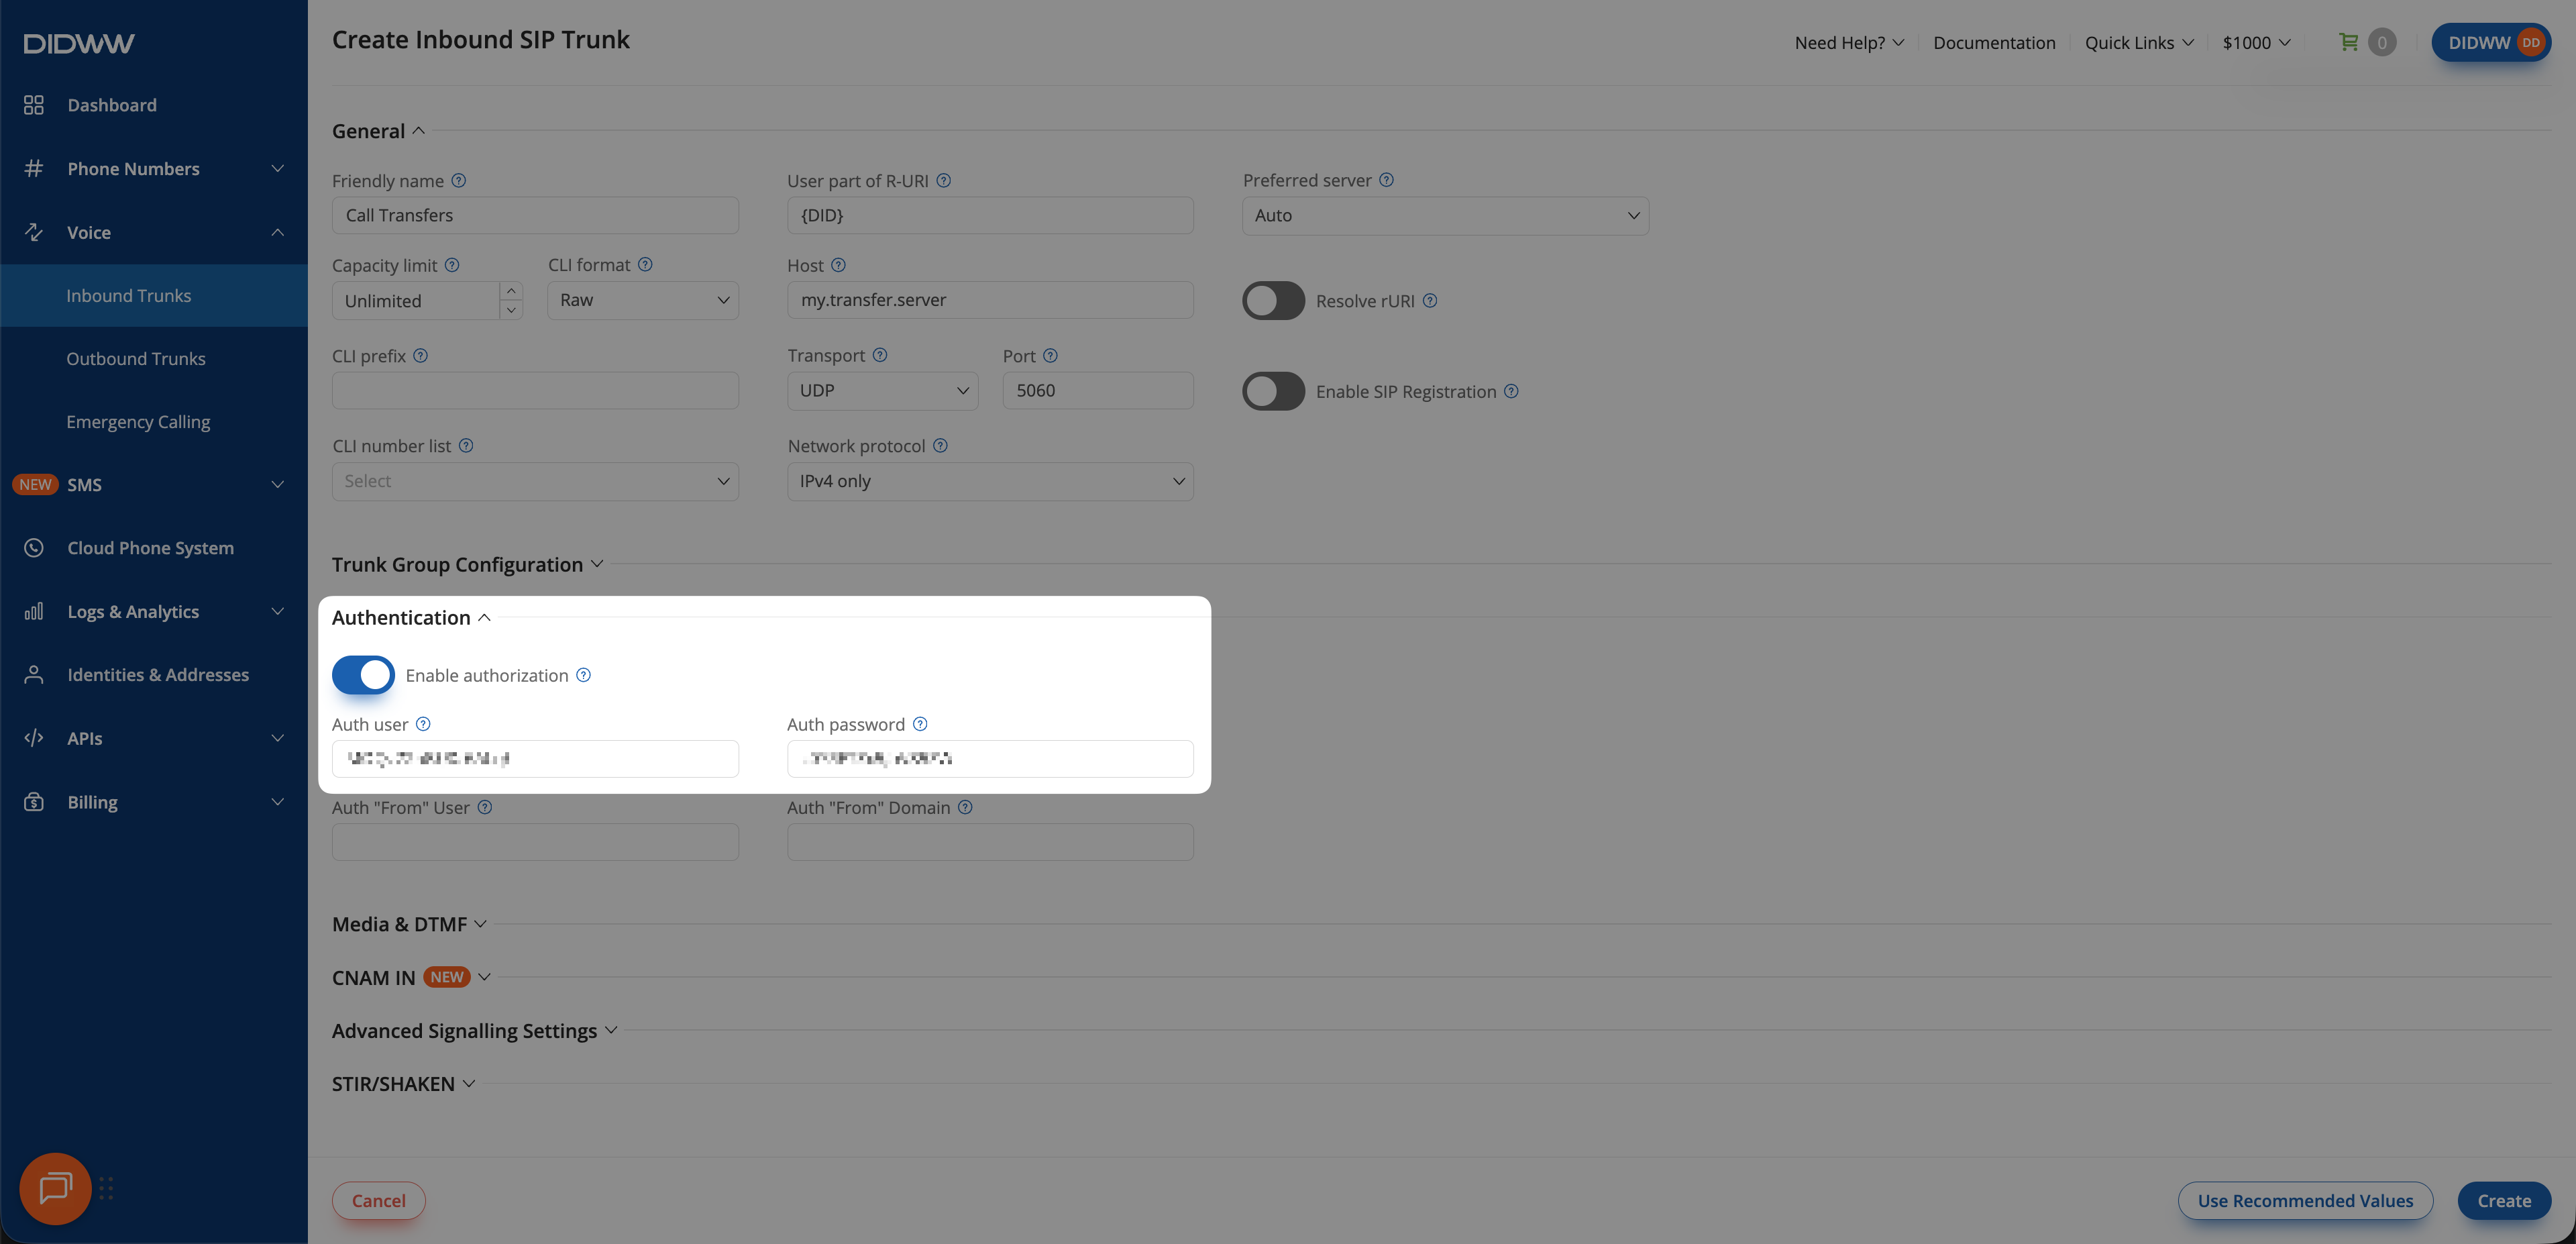
Fig. 6. Enabling authorization and pasting outbound trunk credentials on the inbound trunk#
Step 4: Enable Call Transfer Method#
Configure signaling limits based on the transfer method you plan to use.
Enable support for in-dialog SIP REFER transfers.
Expand the Advanced Signaling Settings section.
Set Max transfers to 1 or higher.
Important
If Max transfers is set to 0, SIP REFER requests will be rejected.
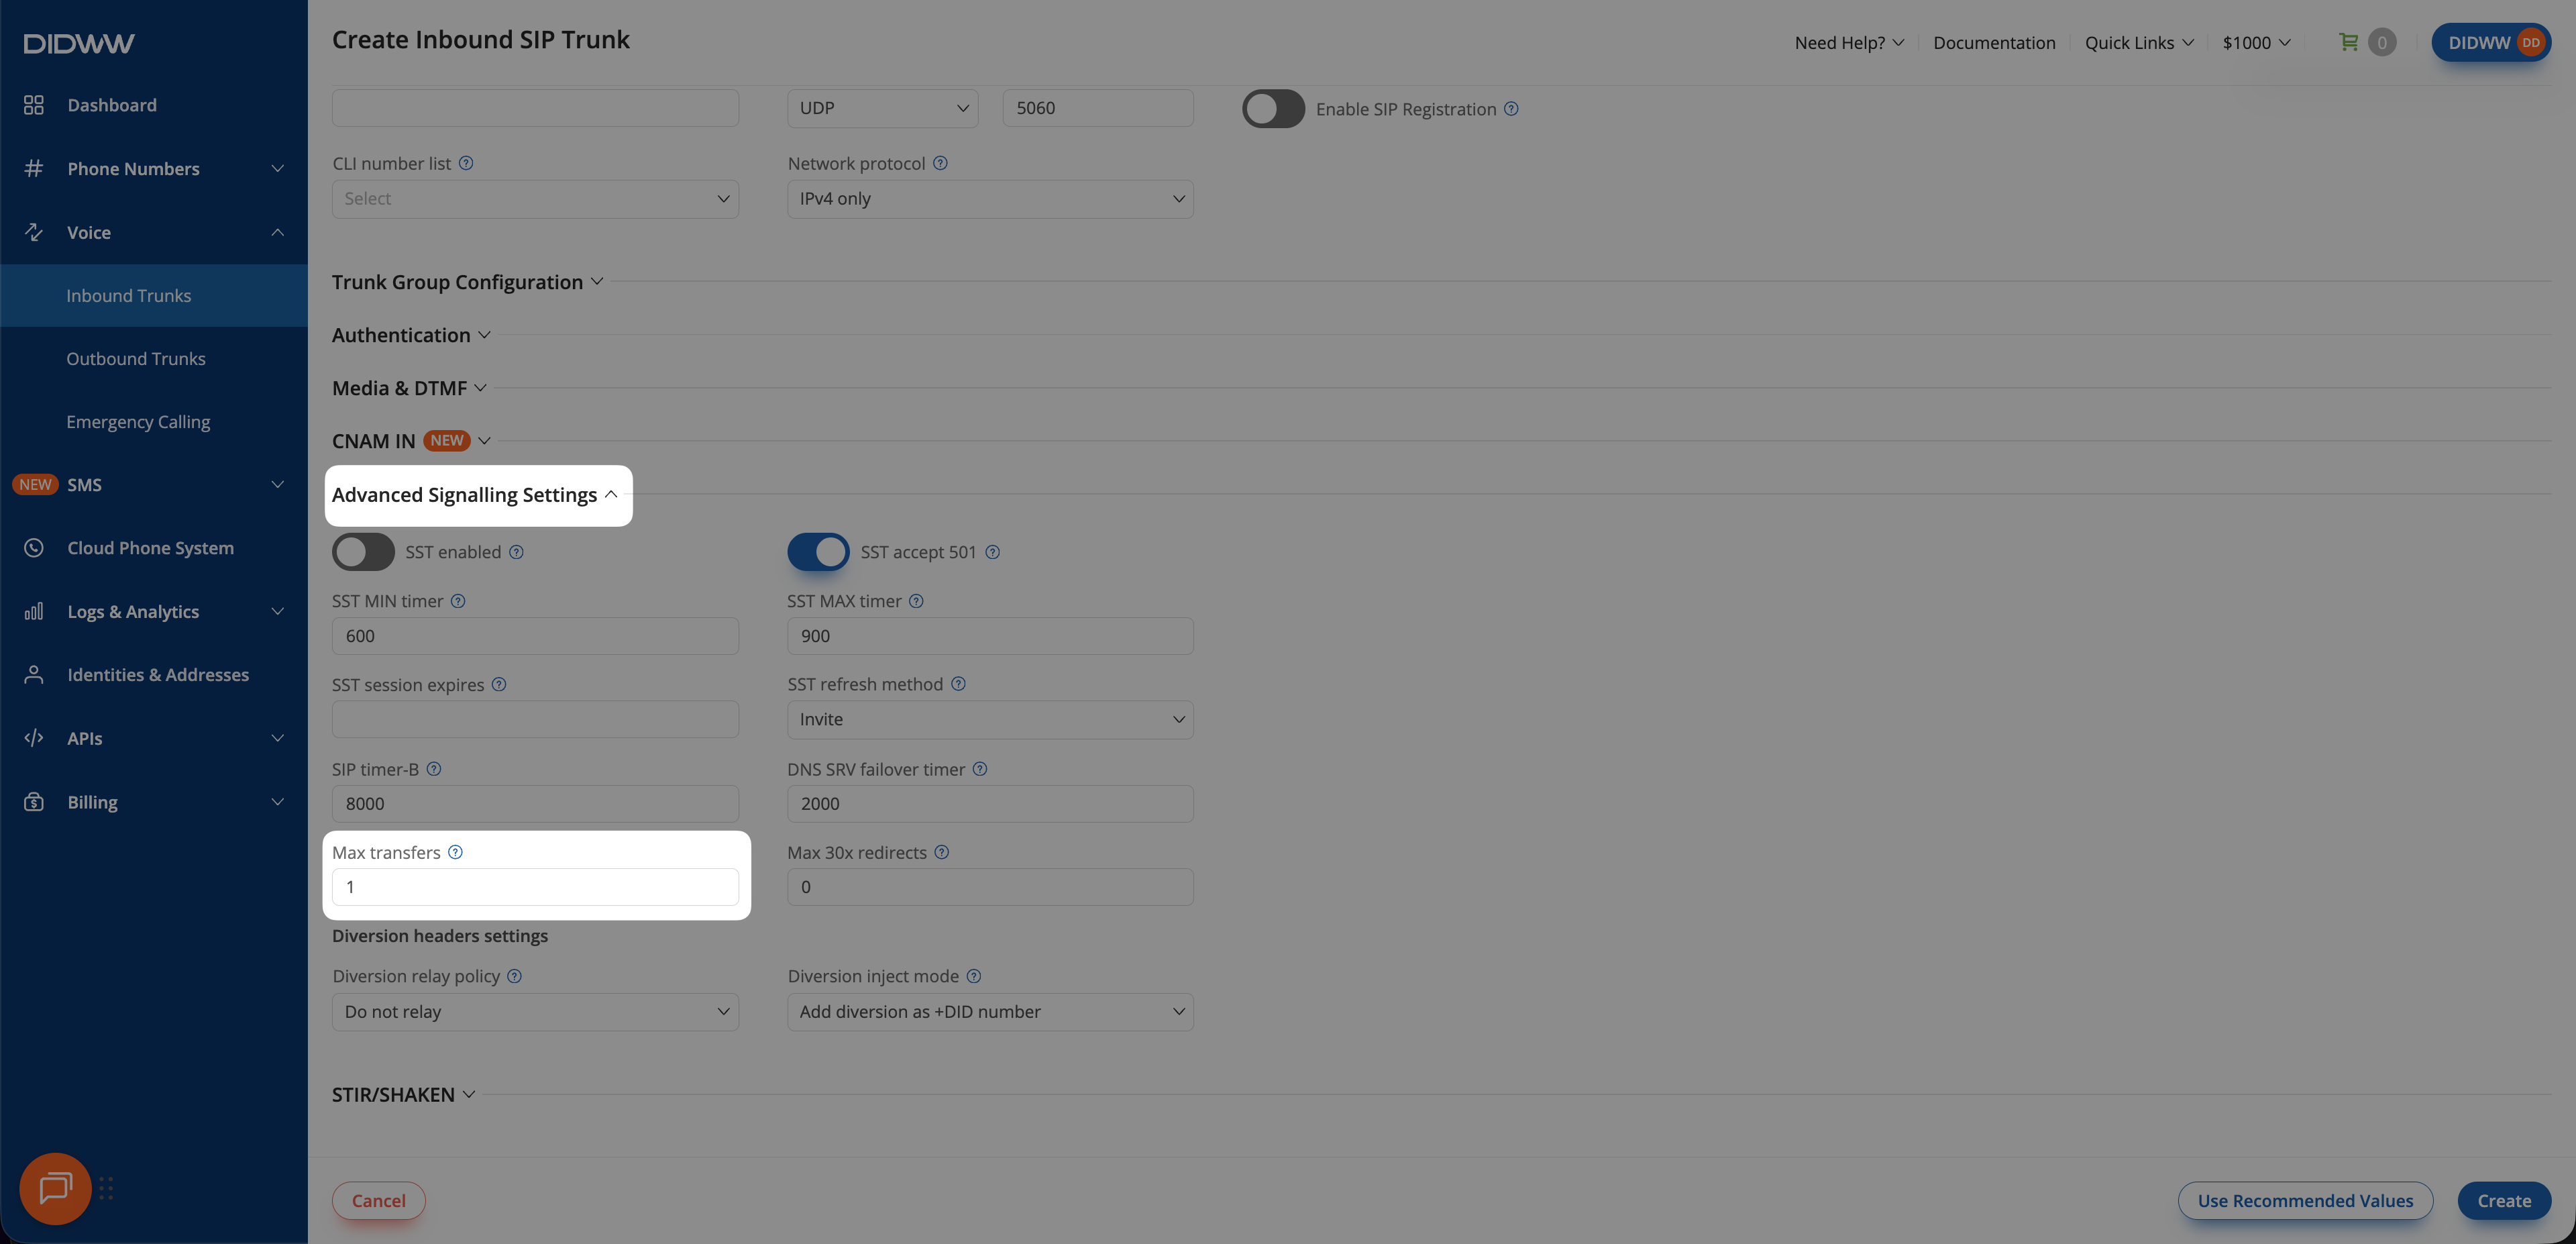
Fig. 7. Enabling Max transfers for SIP REFER on the inbound SIP trunk#
Enable support for SIP 3xx redirect responses.
Expand the Advanced Signaling Settings section.
Set Max 30x Redirects to 1 or higher.
Important
If Max 30x Redirects is set to 0, SIP redirect responses will be rejected.
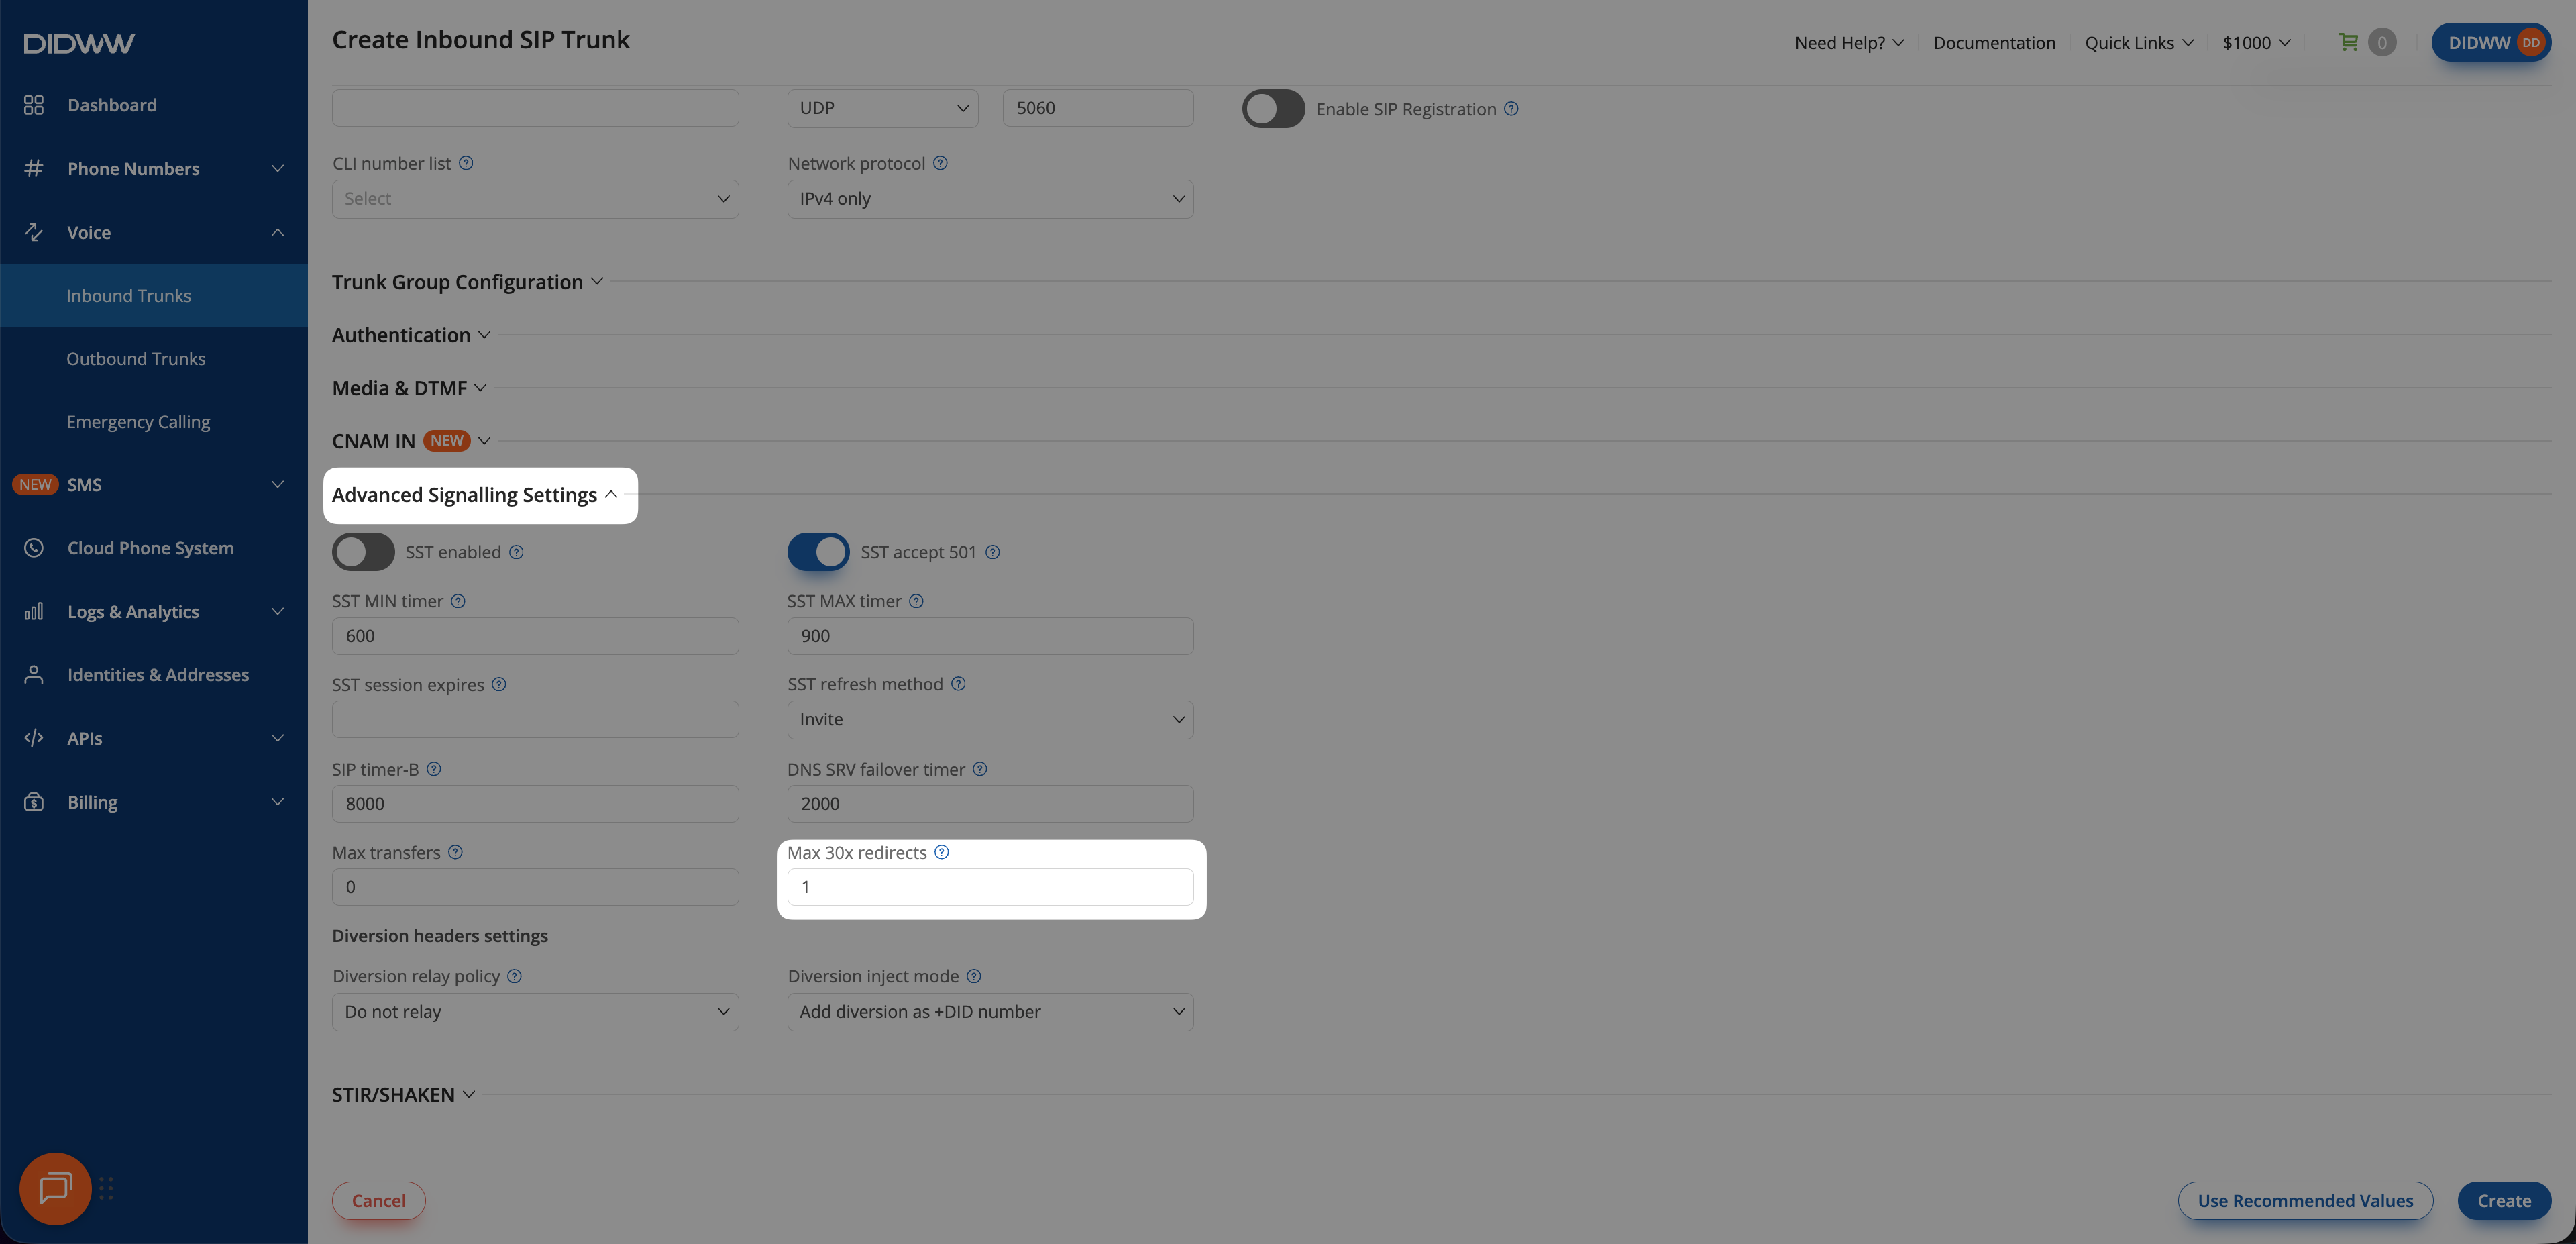
Fig. 8. Enabling Max 30x Redirects on the inbound SIP trunk#
Step 5: Create the Trunk#
Click Create to save the inbound SIP trunk.
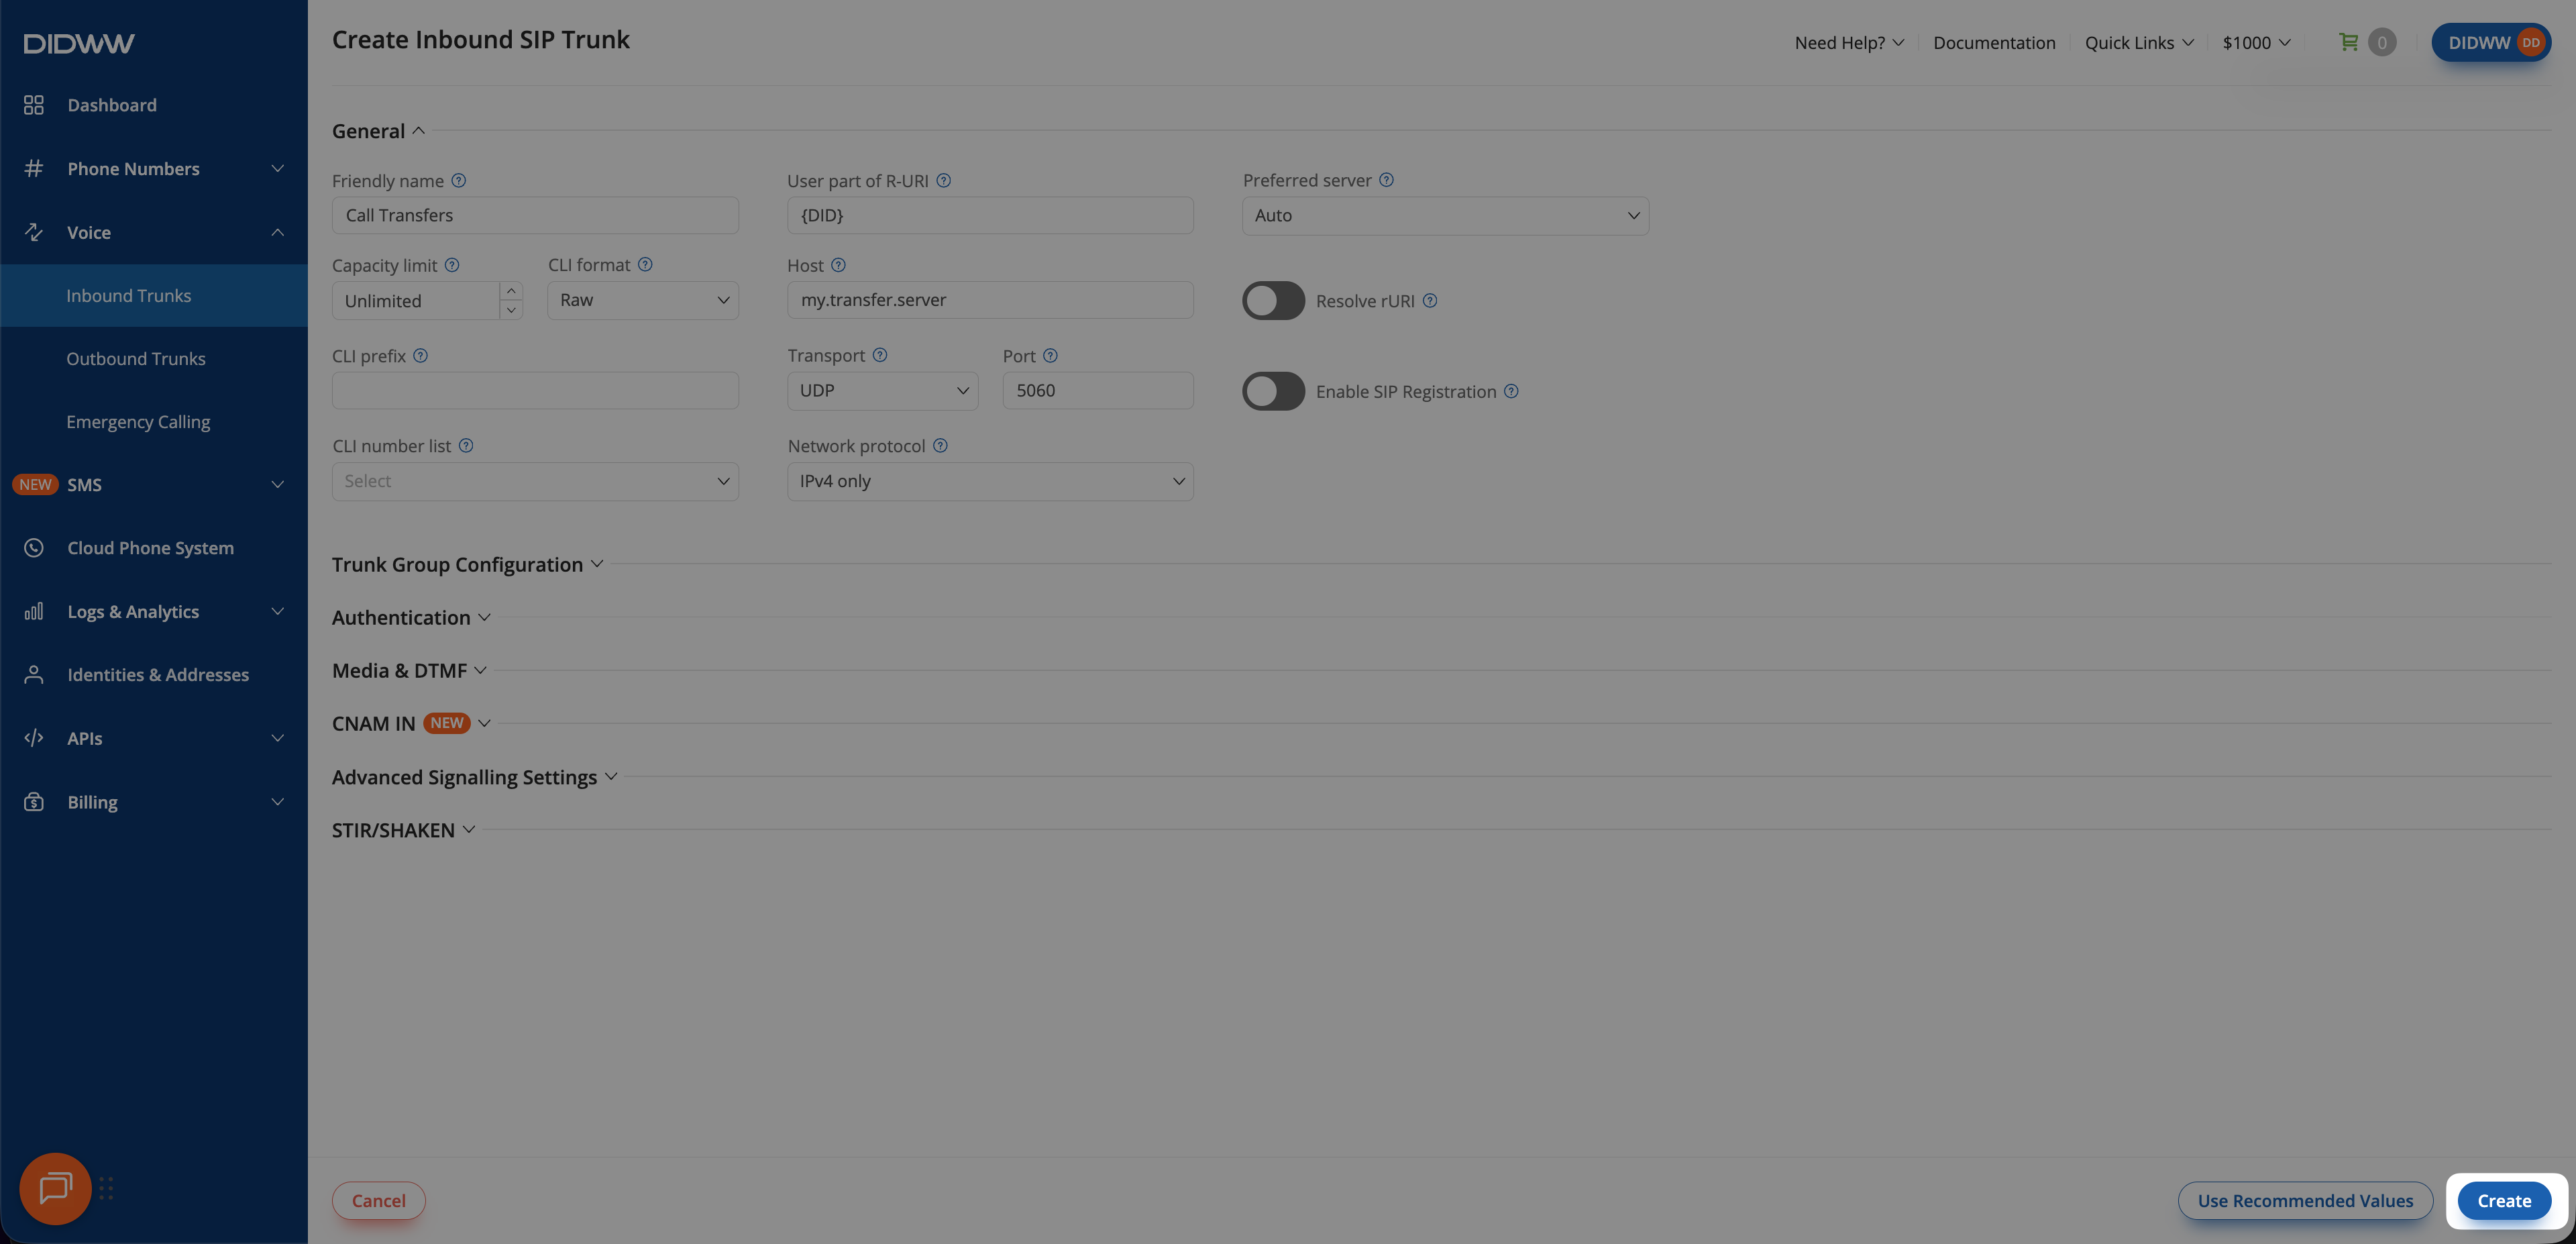
Fig. 9. Creating the inbound SIP trunk for call transfers#
Step 6: Assign the Inbound SIP Trunk to Your DID Numbers#
Inbound calls can be redirected/transferred only after the DID number is routed to the inbound trunk.
In the DIDWW User Panel, go to Phone Numbers > My Numbers.
Select the DID number(s) you want to assign to the inbound SIP trunk.
At the bottom of the page, click Batch Actions > Update Trunks.
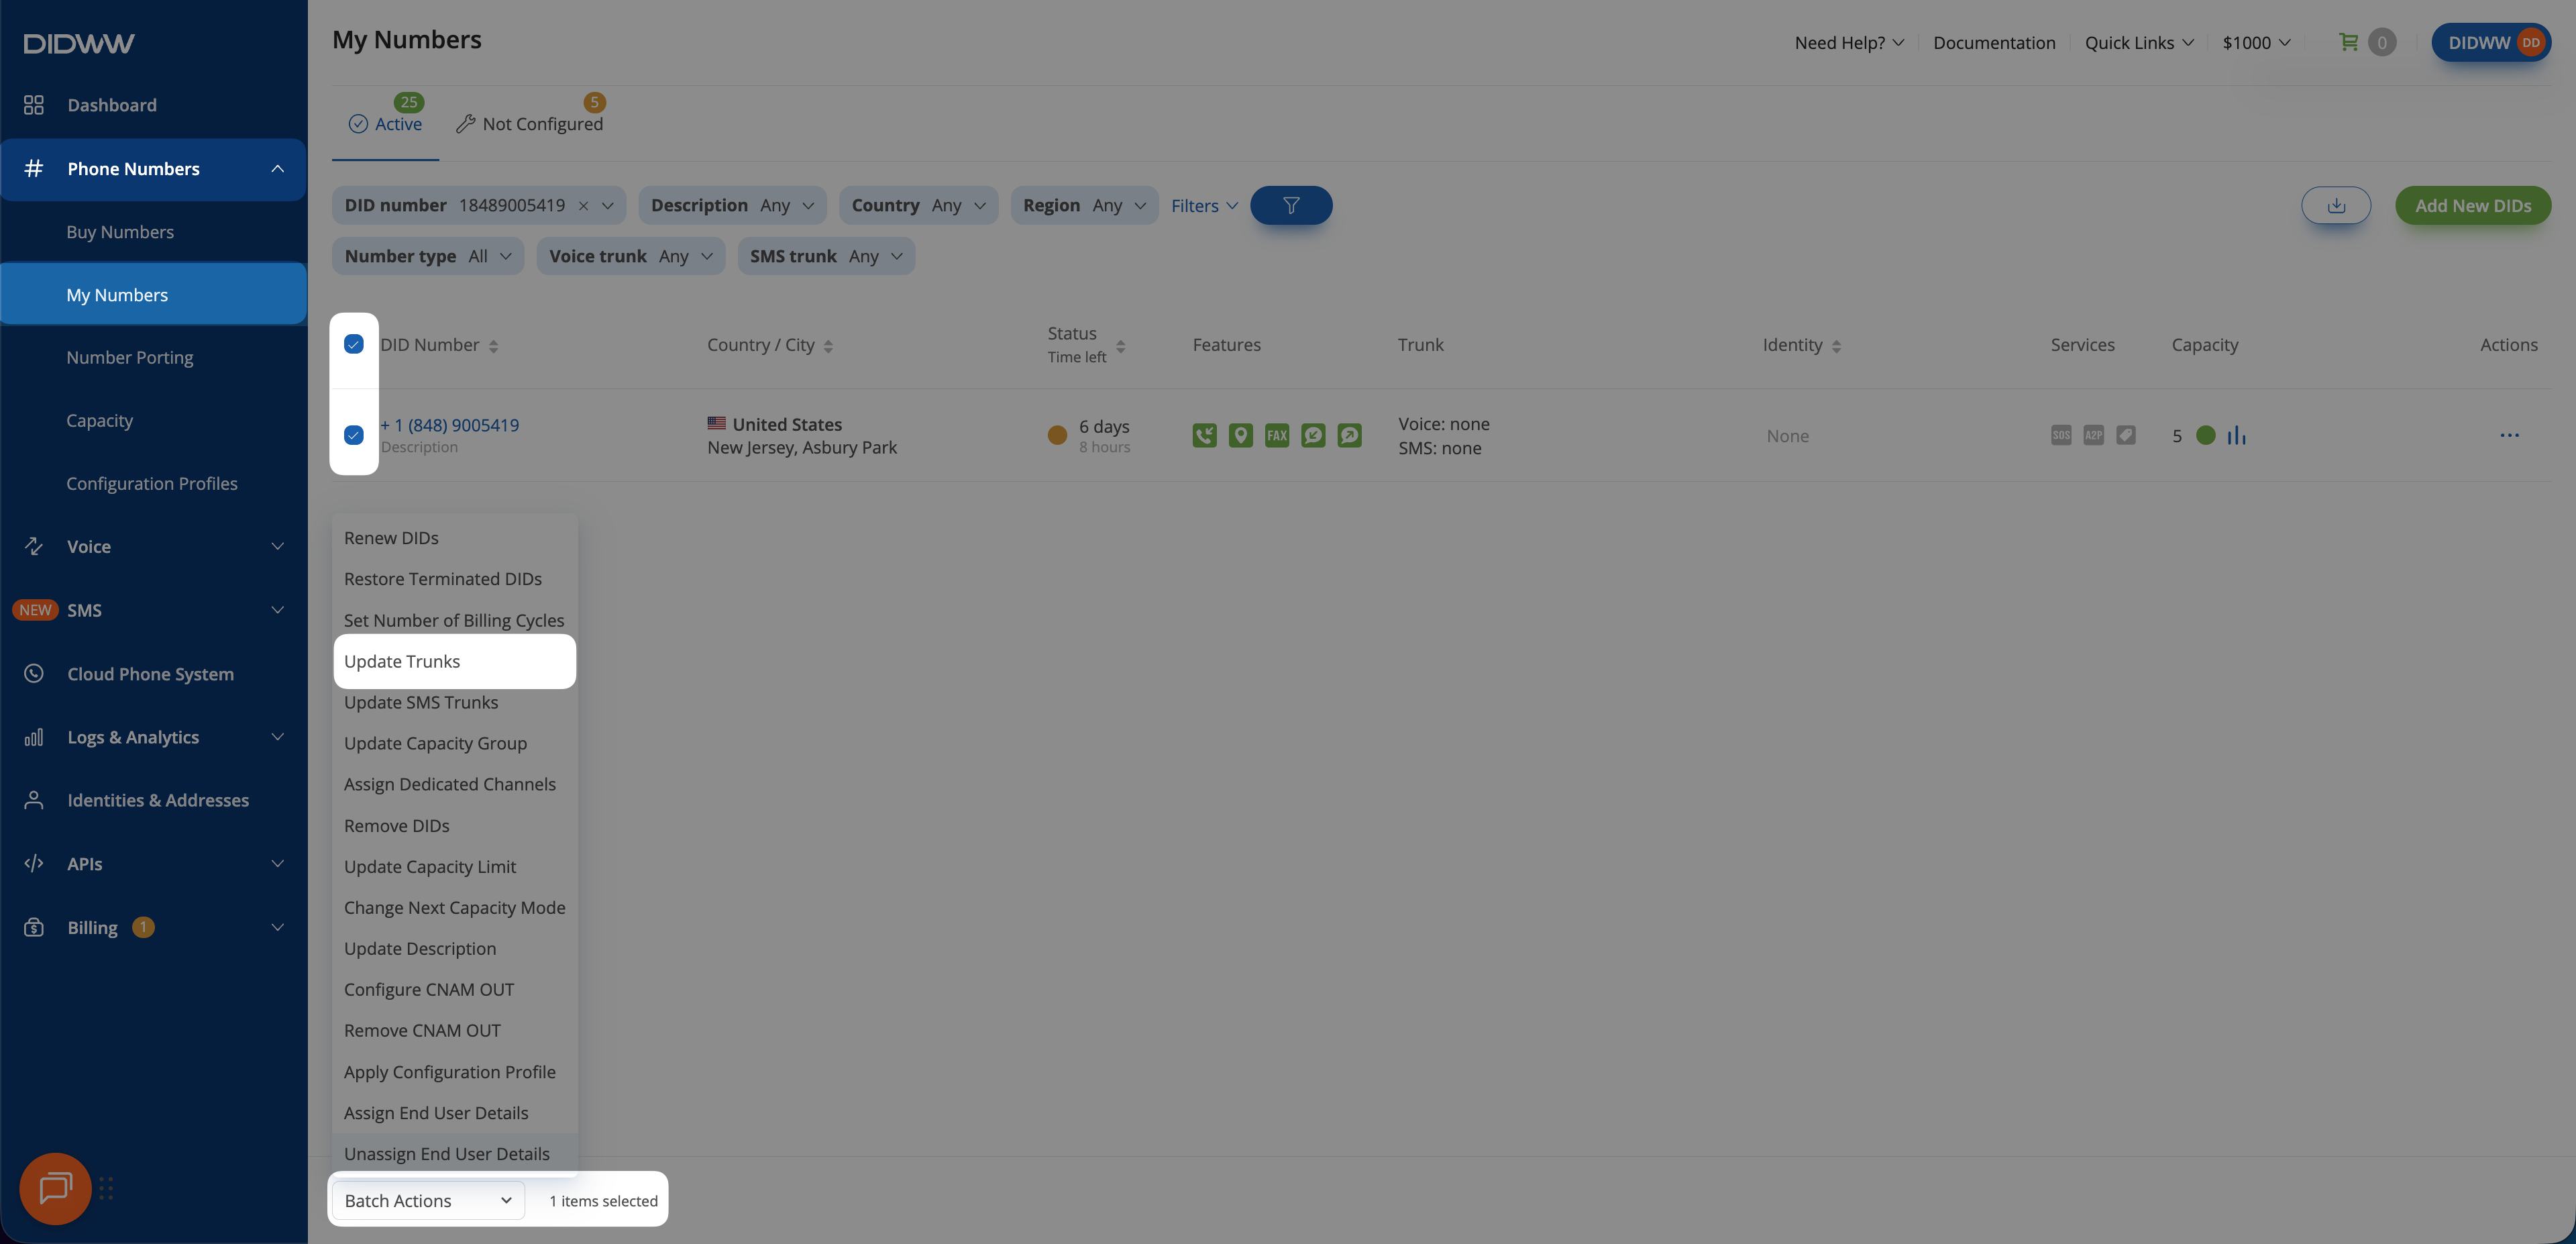
Fig. 10. Selecting Update Trunks from the Batch Actions menu#
From the dropdown menu, choose the Call Transfers trunk you created earlier.
Click Confirm to apply the changes.

Fig. 11. Assigning the newly created SIP trunk to the selected DID(s)#
3. Configure Your SIP Platform#
Configure your SIP platform (PBX, IVR, AI agent, or custom SIP application) to instruct DIDWW to redirect or transfer inbound calls.
Before You Begin#
Identify the appropriate DIDWW outbound signaling endpoint to use (e.g.,
fra.eu.out.didww.com). See Signaling Endpoints.Ensure your SIP platform supports generating SIP 30x responses or in-dialog SIP REFER requests.
Step 1: Build the Destination SIP URI#
Your SIP platform must construct the transfer destination as a SIP URI in the following format:
sip:NEW_PSTN_NUMBER@<outbound_endpoint>
Where:
NEW_PSTN_NUMBERis the destination number in E.164 format<outbound_endpoint>is a DIDWW outbound signaling endpoint (for example,fra.eu.out.didww.com)
Note
This SIP URI must be included in the Contact header for SIP 30x redirects, or in the Refer-To header for SIP REFER transfers.
Step 2: Configure Call Transfers#
During inbound call handling, your SIP platform must trigger the transfer by sending the appropriate SIP signaling request or response to DIDWW.
Use this method when the call must be answered first before performing the call transfer.
Answer the inbound call to establish a SIP dialog.
Send an in-dialog SIP REFER request to DIDWW.
Include the destination SIP URI in the Refer-To header:
Refer-To: <sip:1234567890@fra.eu.out.didww.com>
Wait for DIDWW to respond with
200 OKor202 Accepted.
DIDWW then initiates a new outbound call using your Outbound SIP Trunk.
For protocol details and examples, see REFER Transfer Method.
Use this method when the transfer destination can be determined before answering the call.
Receive the inbound SIP
INVITEfrom DIDWW.Do not answer the call.
Respond with a SIP 3xx response (for example,
302 Moved Temporarily).Include the destination SIP URI in the Contact header:
Contact: <sip:1234567890@fra.eu.out.didww.com>
DIDWW validates the redirect and initiates a new outbound call using your Outbound SIP Trunk.
For protocol details and examples, see 30x Redirect Method.
Step 3: Make a Test Call and Verify Call Transfer#
Verify that call transfers work as expected based on the method used.
Place a call to your DIDWW number routed to your SIP platform.
Ensure the call is answered to establish a SIP dialog.
Trigger a SIP REFER transfer from your platform.
Confirm the original call leg ends and a new outbound call is established.
Place a call to your DIDWW number routed to your SIP platform.
Ensure the call is not answered by your platform.
Confirm a SIP 3xx response is sent.
Verify the call is redirected and two-way audio is established with the destination.
Note
Review the Inbound and Outbound CDR Logs to verify call flow details and confirm that the outbound leg was initiated successfully.
If you encounter issues during testing, contact DIDWW Support at support@didww.com .