Caller Name Delivery (CNAM) is a telecommunication feature that provides the calling party’s name information to the recipient. While CNAM services are predominantly used in the United States, their availability and implementation can vary across different countries and operators.
DIDWW offers CNAM services categorized into two types:
CNAM IN: Delivers the caller’s name to the customer’s endpoint specified in trunk settings.
CNAM OUT: Assigns a caller’s name to the DID number, which is displayed to the receiving party during the call, provided the destination operator performs a CNAM lookup.
Note
The effectiveness of CNAM OUT depends on the destination operator. If the destination operator performs a CNAM lookup and retrieves the value from the CNAM database, the assigned caller name will be displayed to the called party.
Use the following options to manage your CNAM:
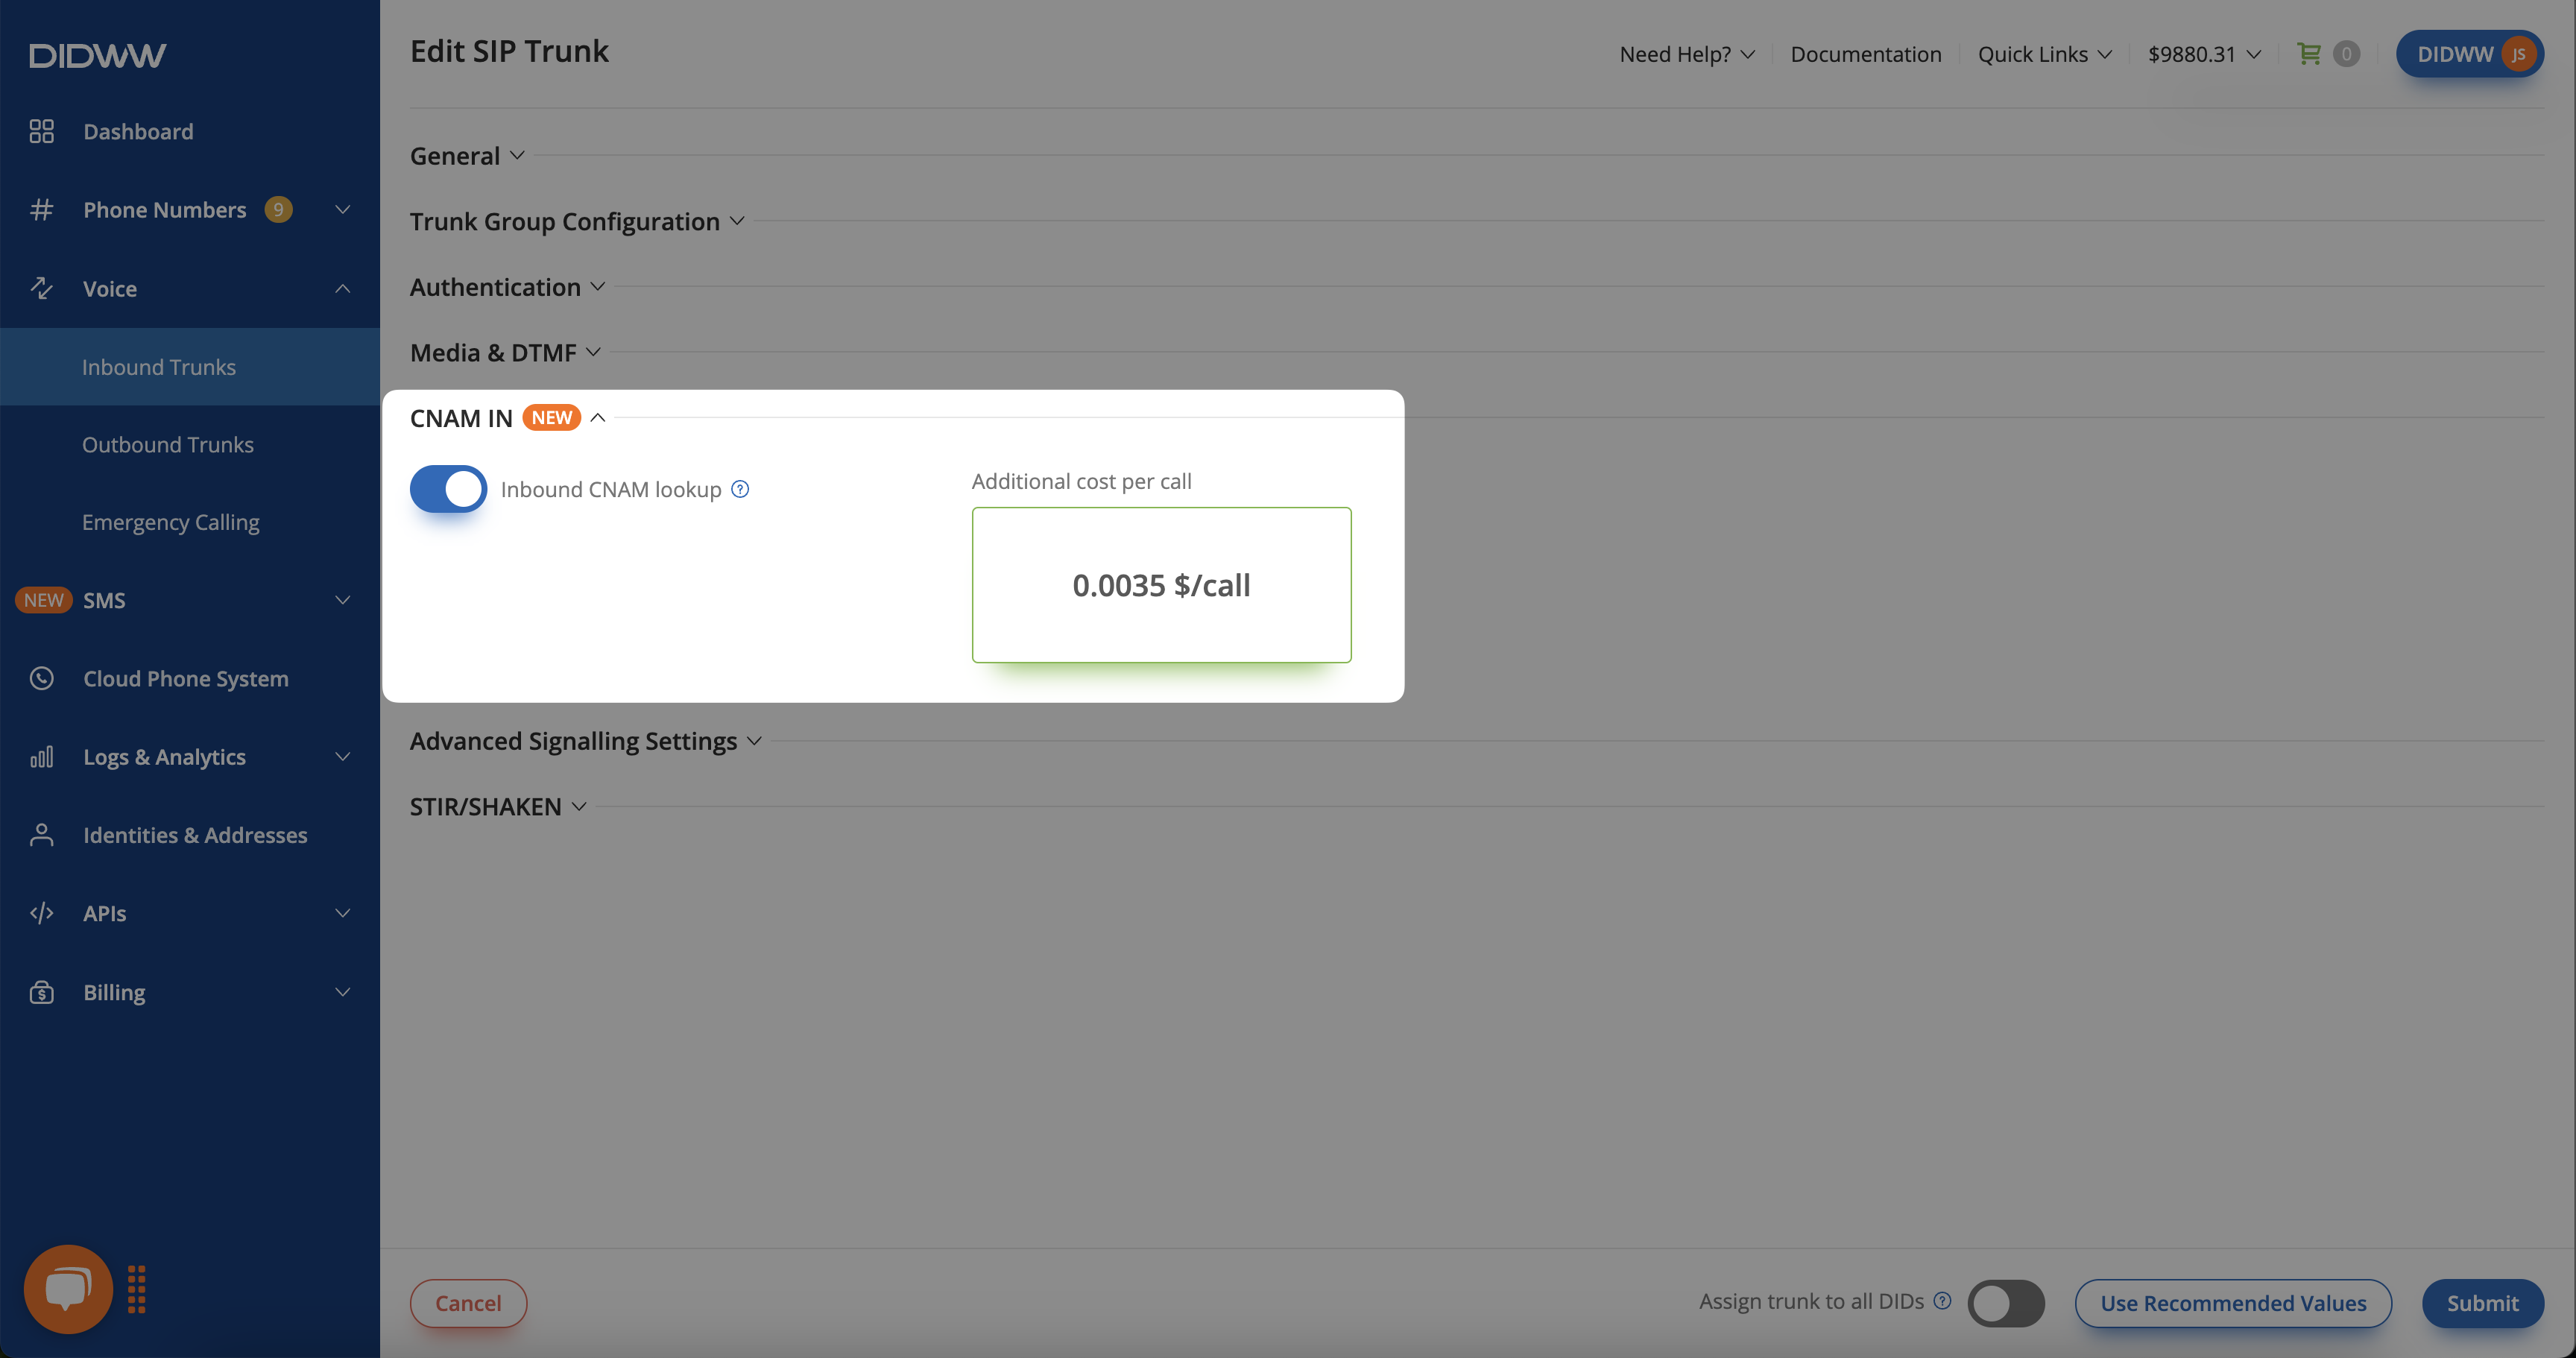
Enable CNAM IN
Learn how to enable CNAM IN for your inbound SIP trunk.
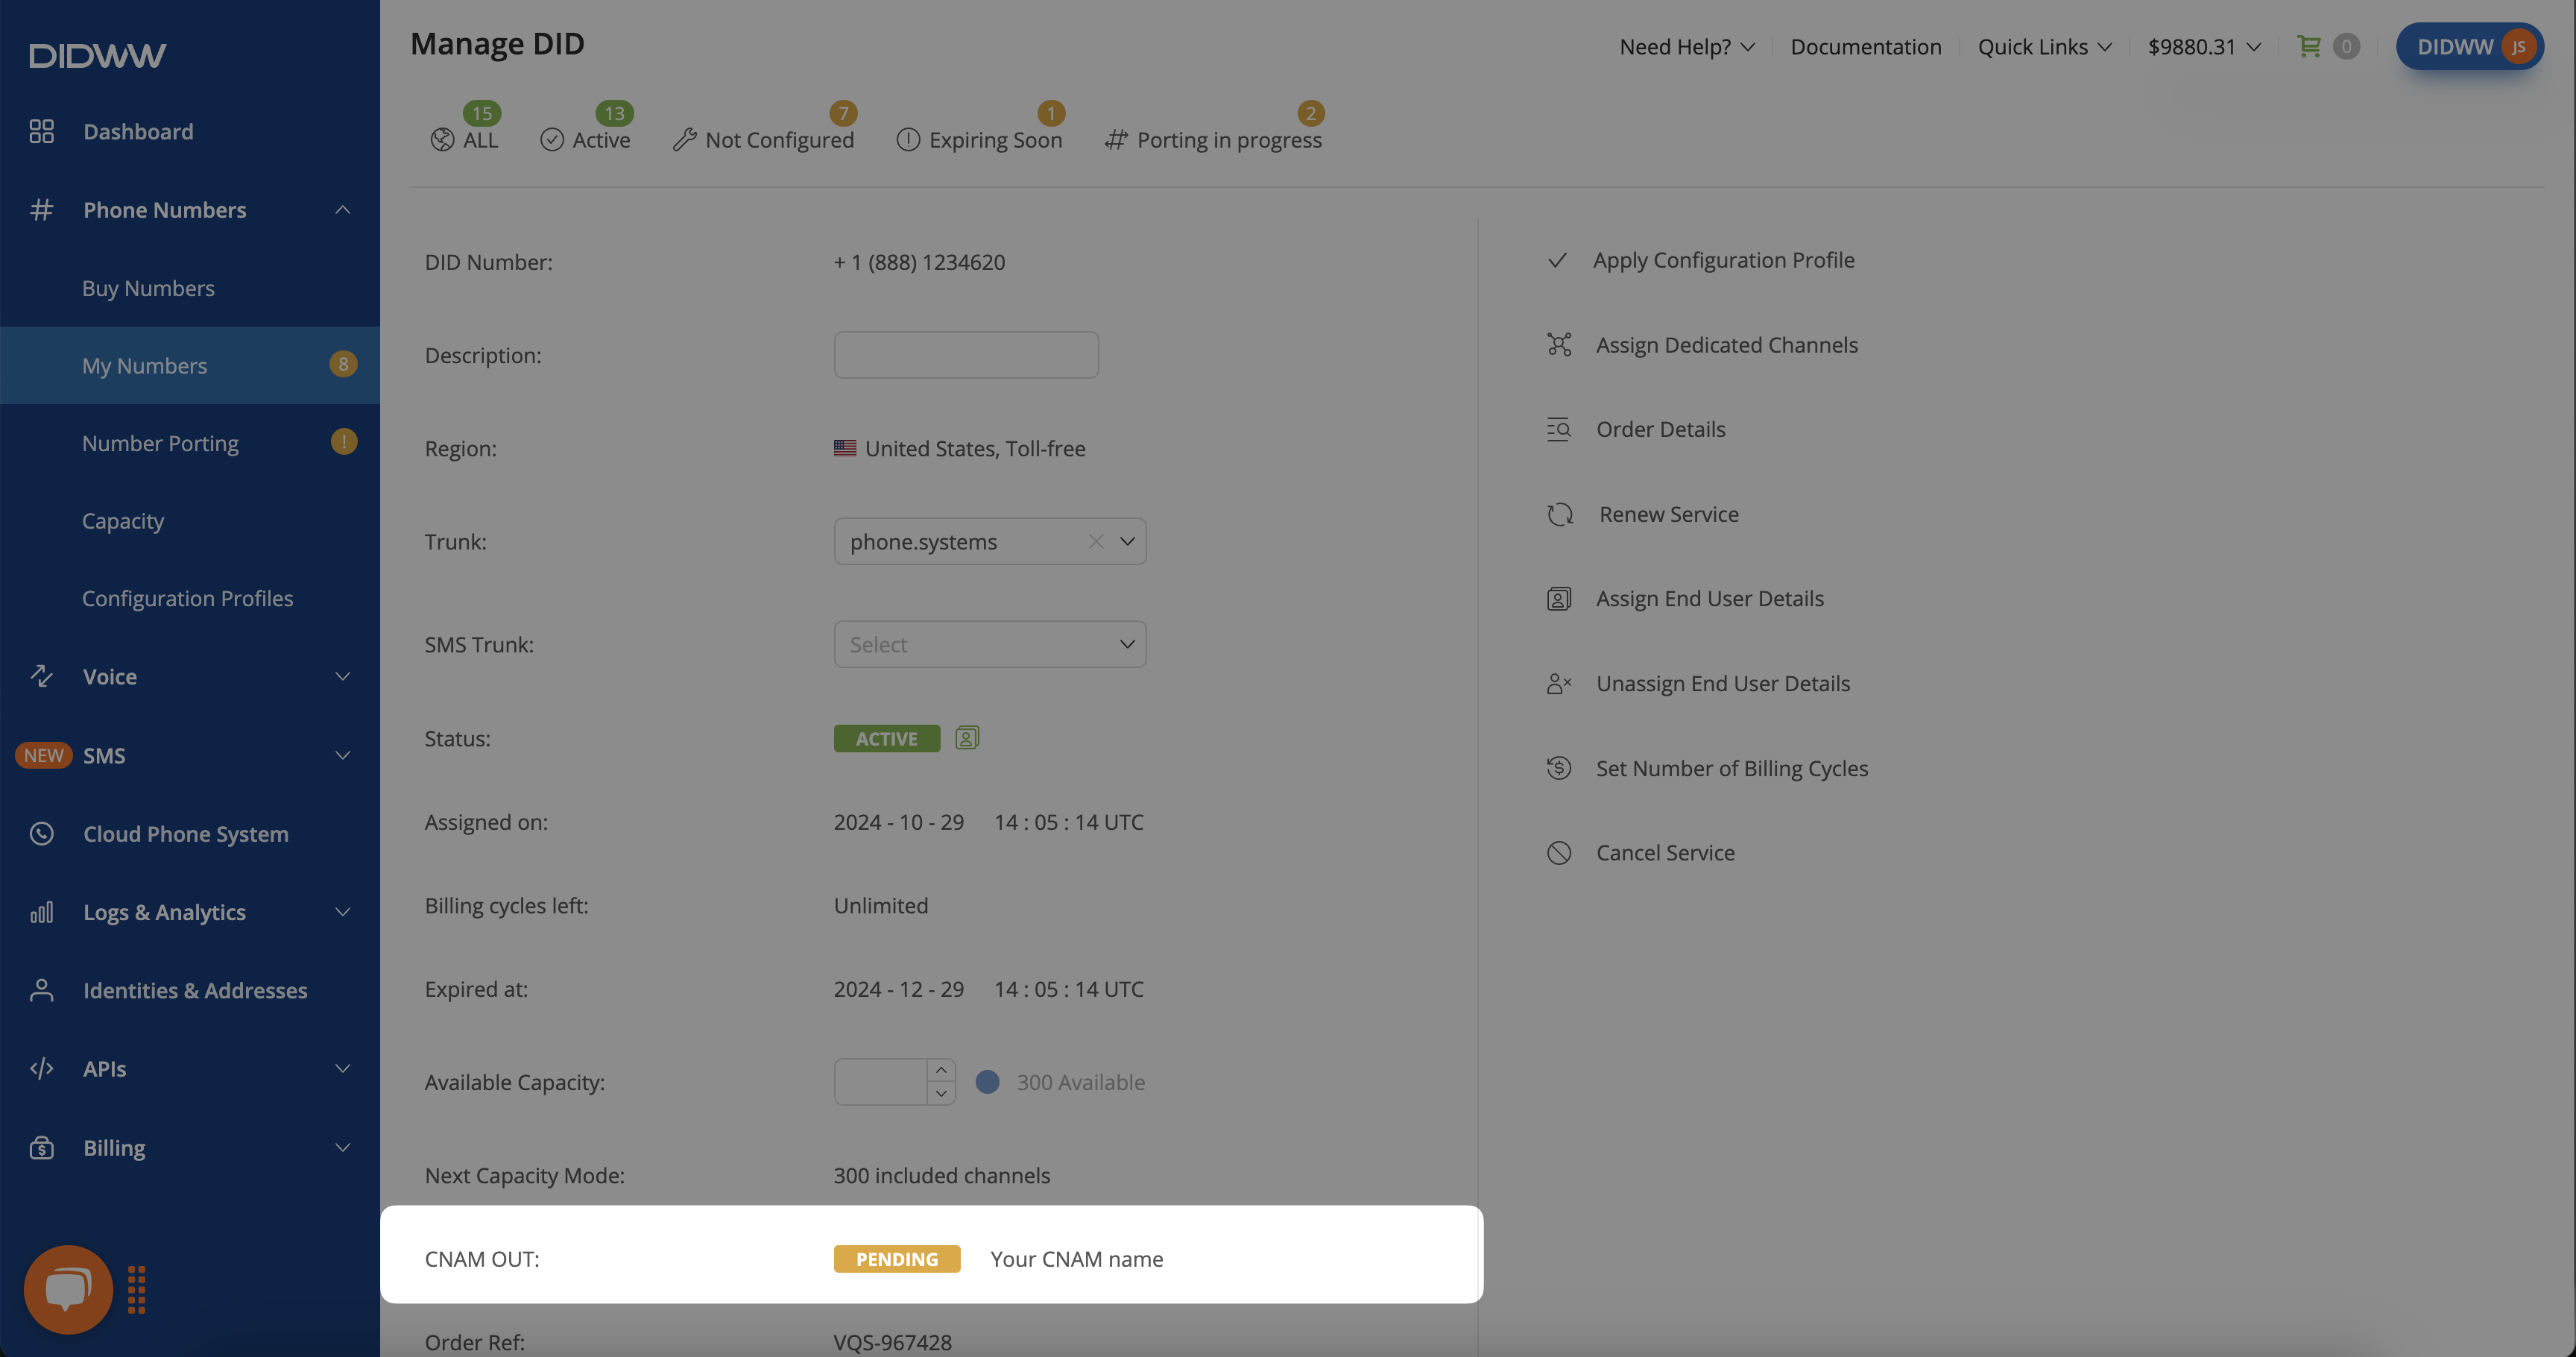
CNAM OUT can be enabled in the Phone Numbers section on the My Numbers page for DID numbers that support the CNAM OUT feature.
Note
This CNAM activation process is only available for DIDWW US DID Numbers.
When a CNAM OUT configuration request is submitted, the global CNAM database is updated with the customer’s specified CNAM OUT value.
The display of CNAM OUT depends on the destination operator. If the destination operator performs a CNAM lookup and retrieves the value from the CNAM database, it will be displayed for the destination number.
Steps to Enable CNAM OUT:
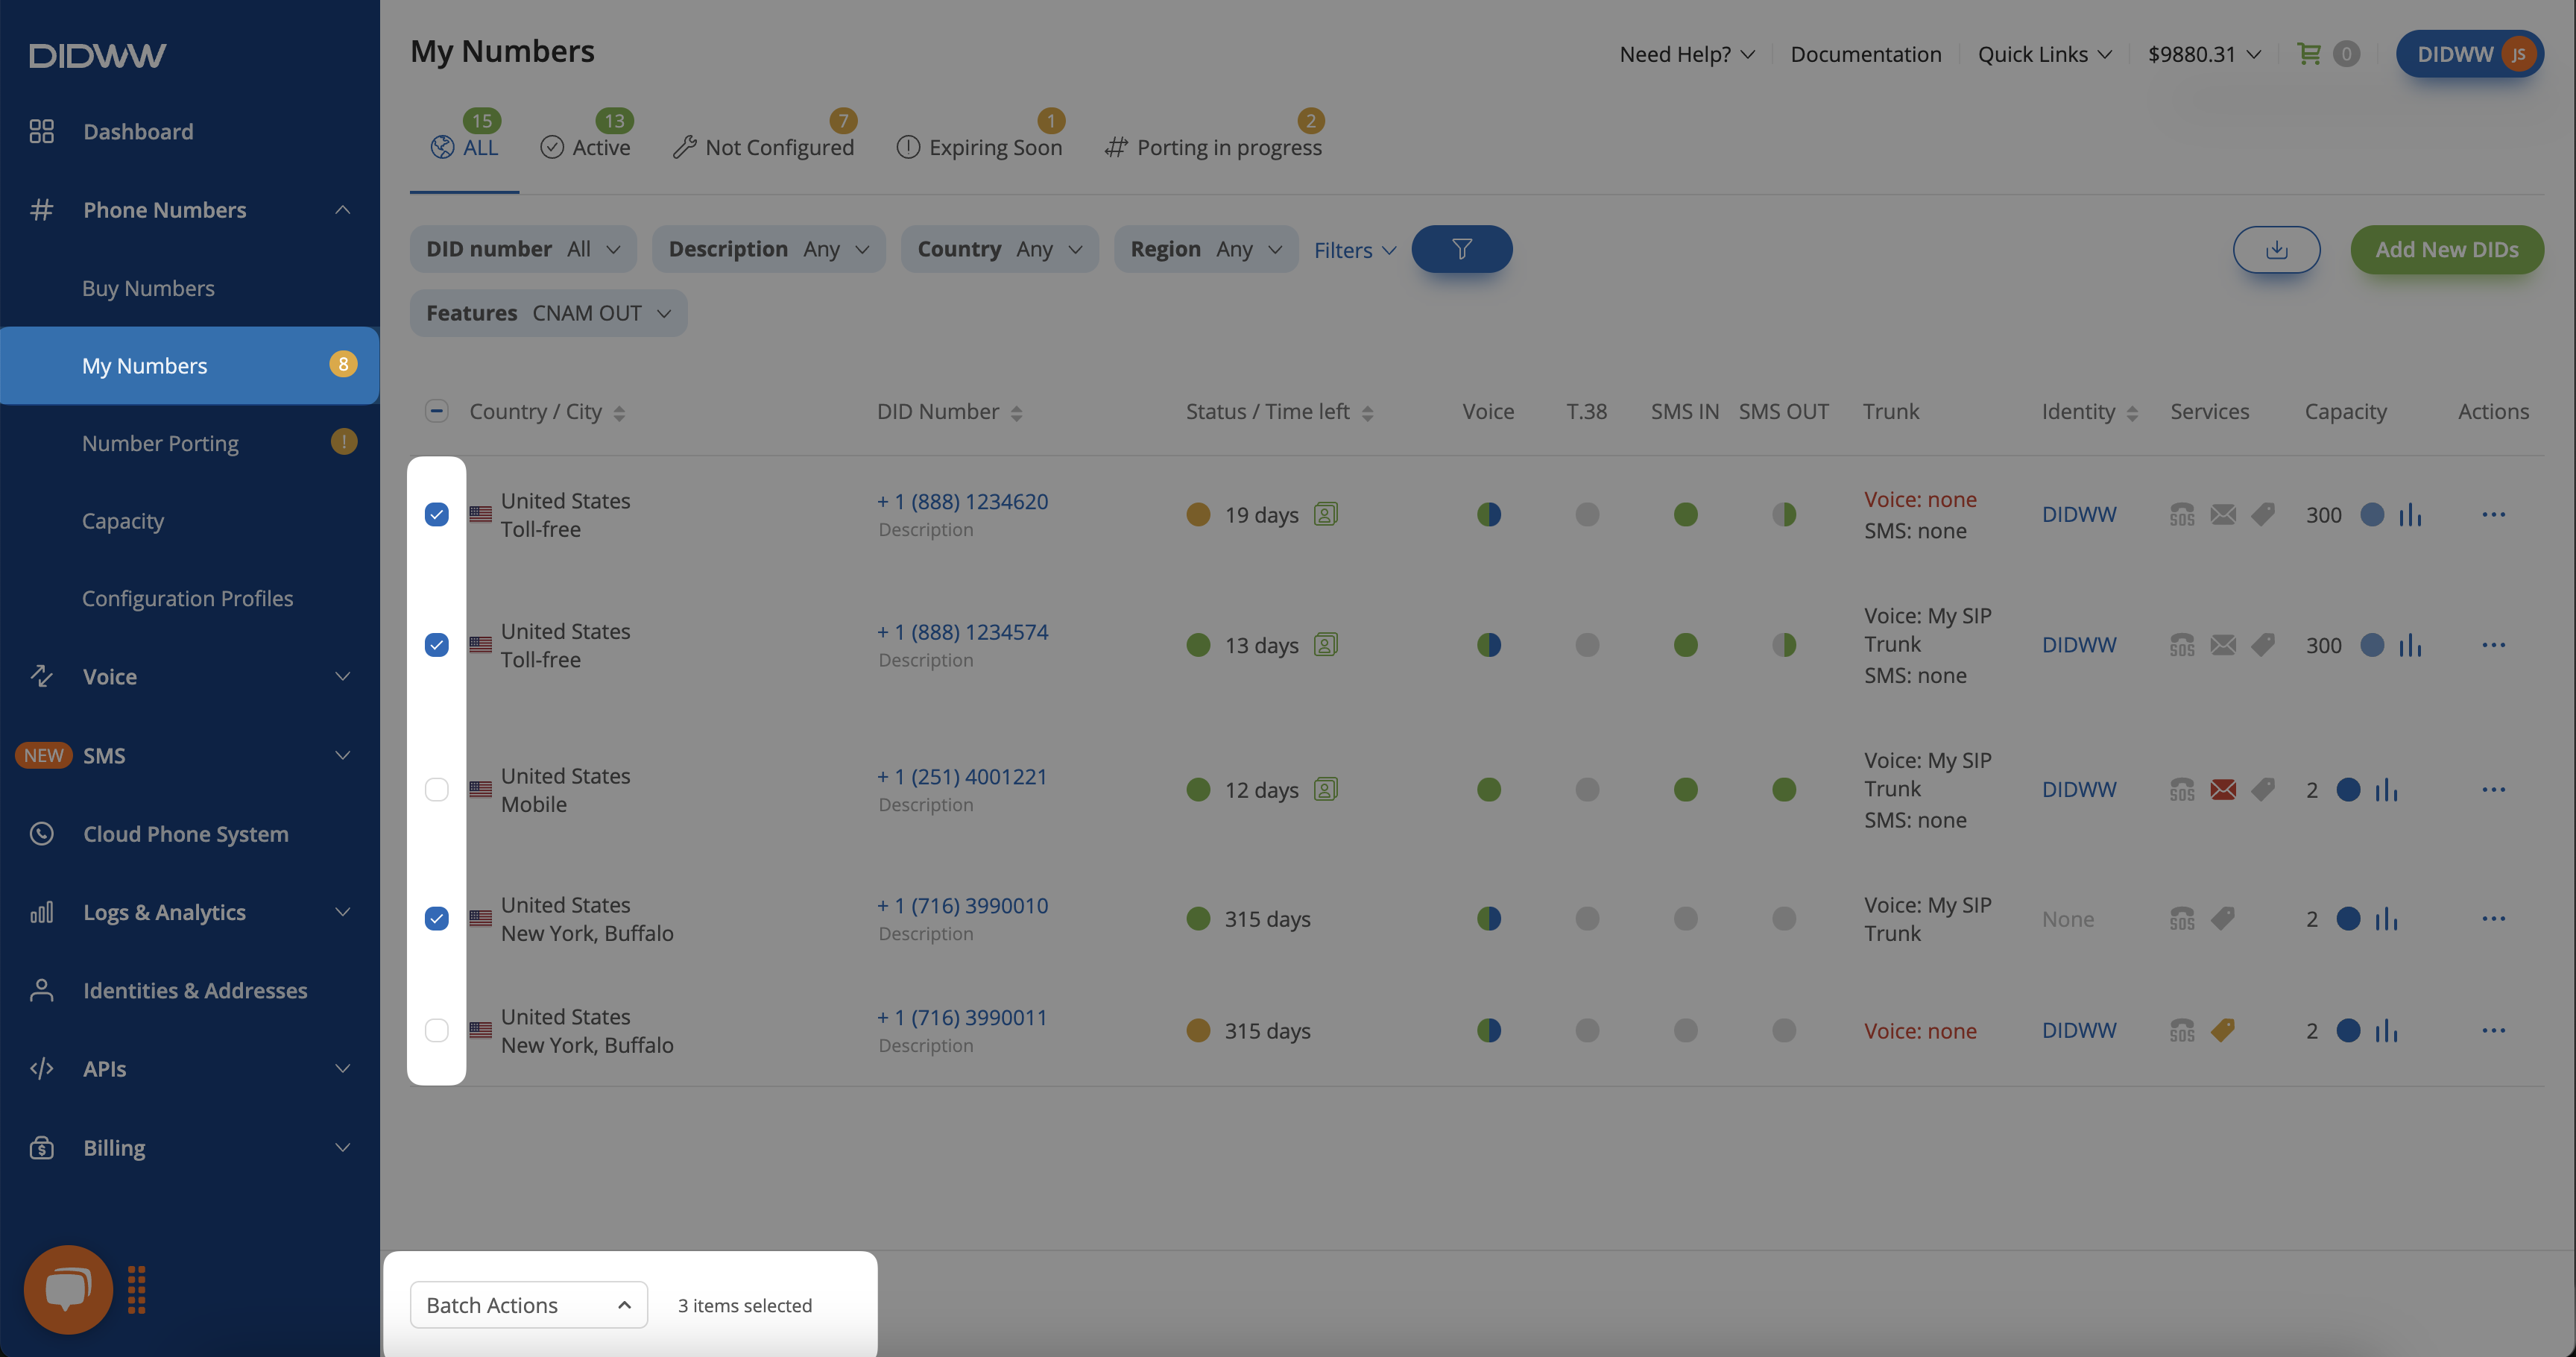
In the menu sidebar, expand the Phone Numbers section and select My Numbers.
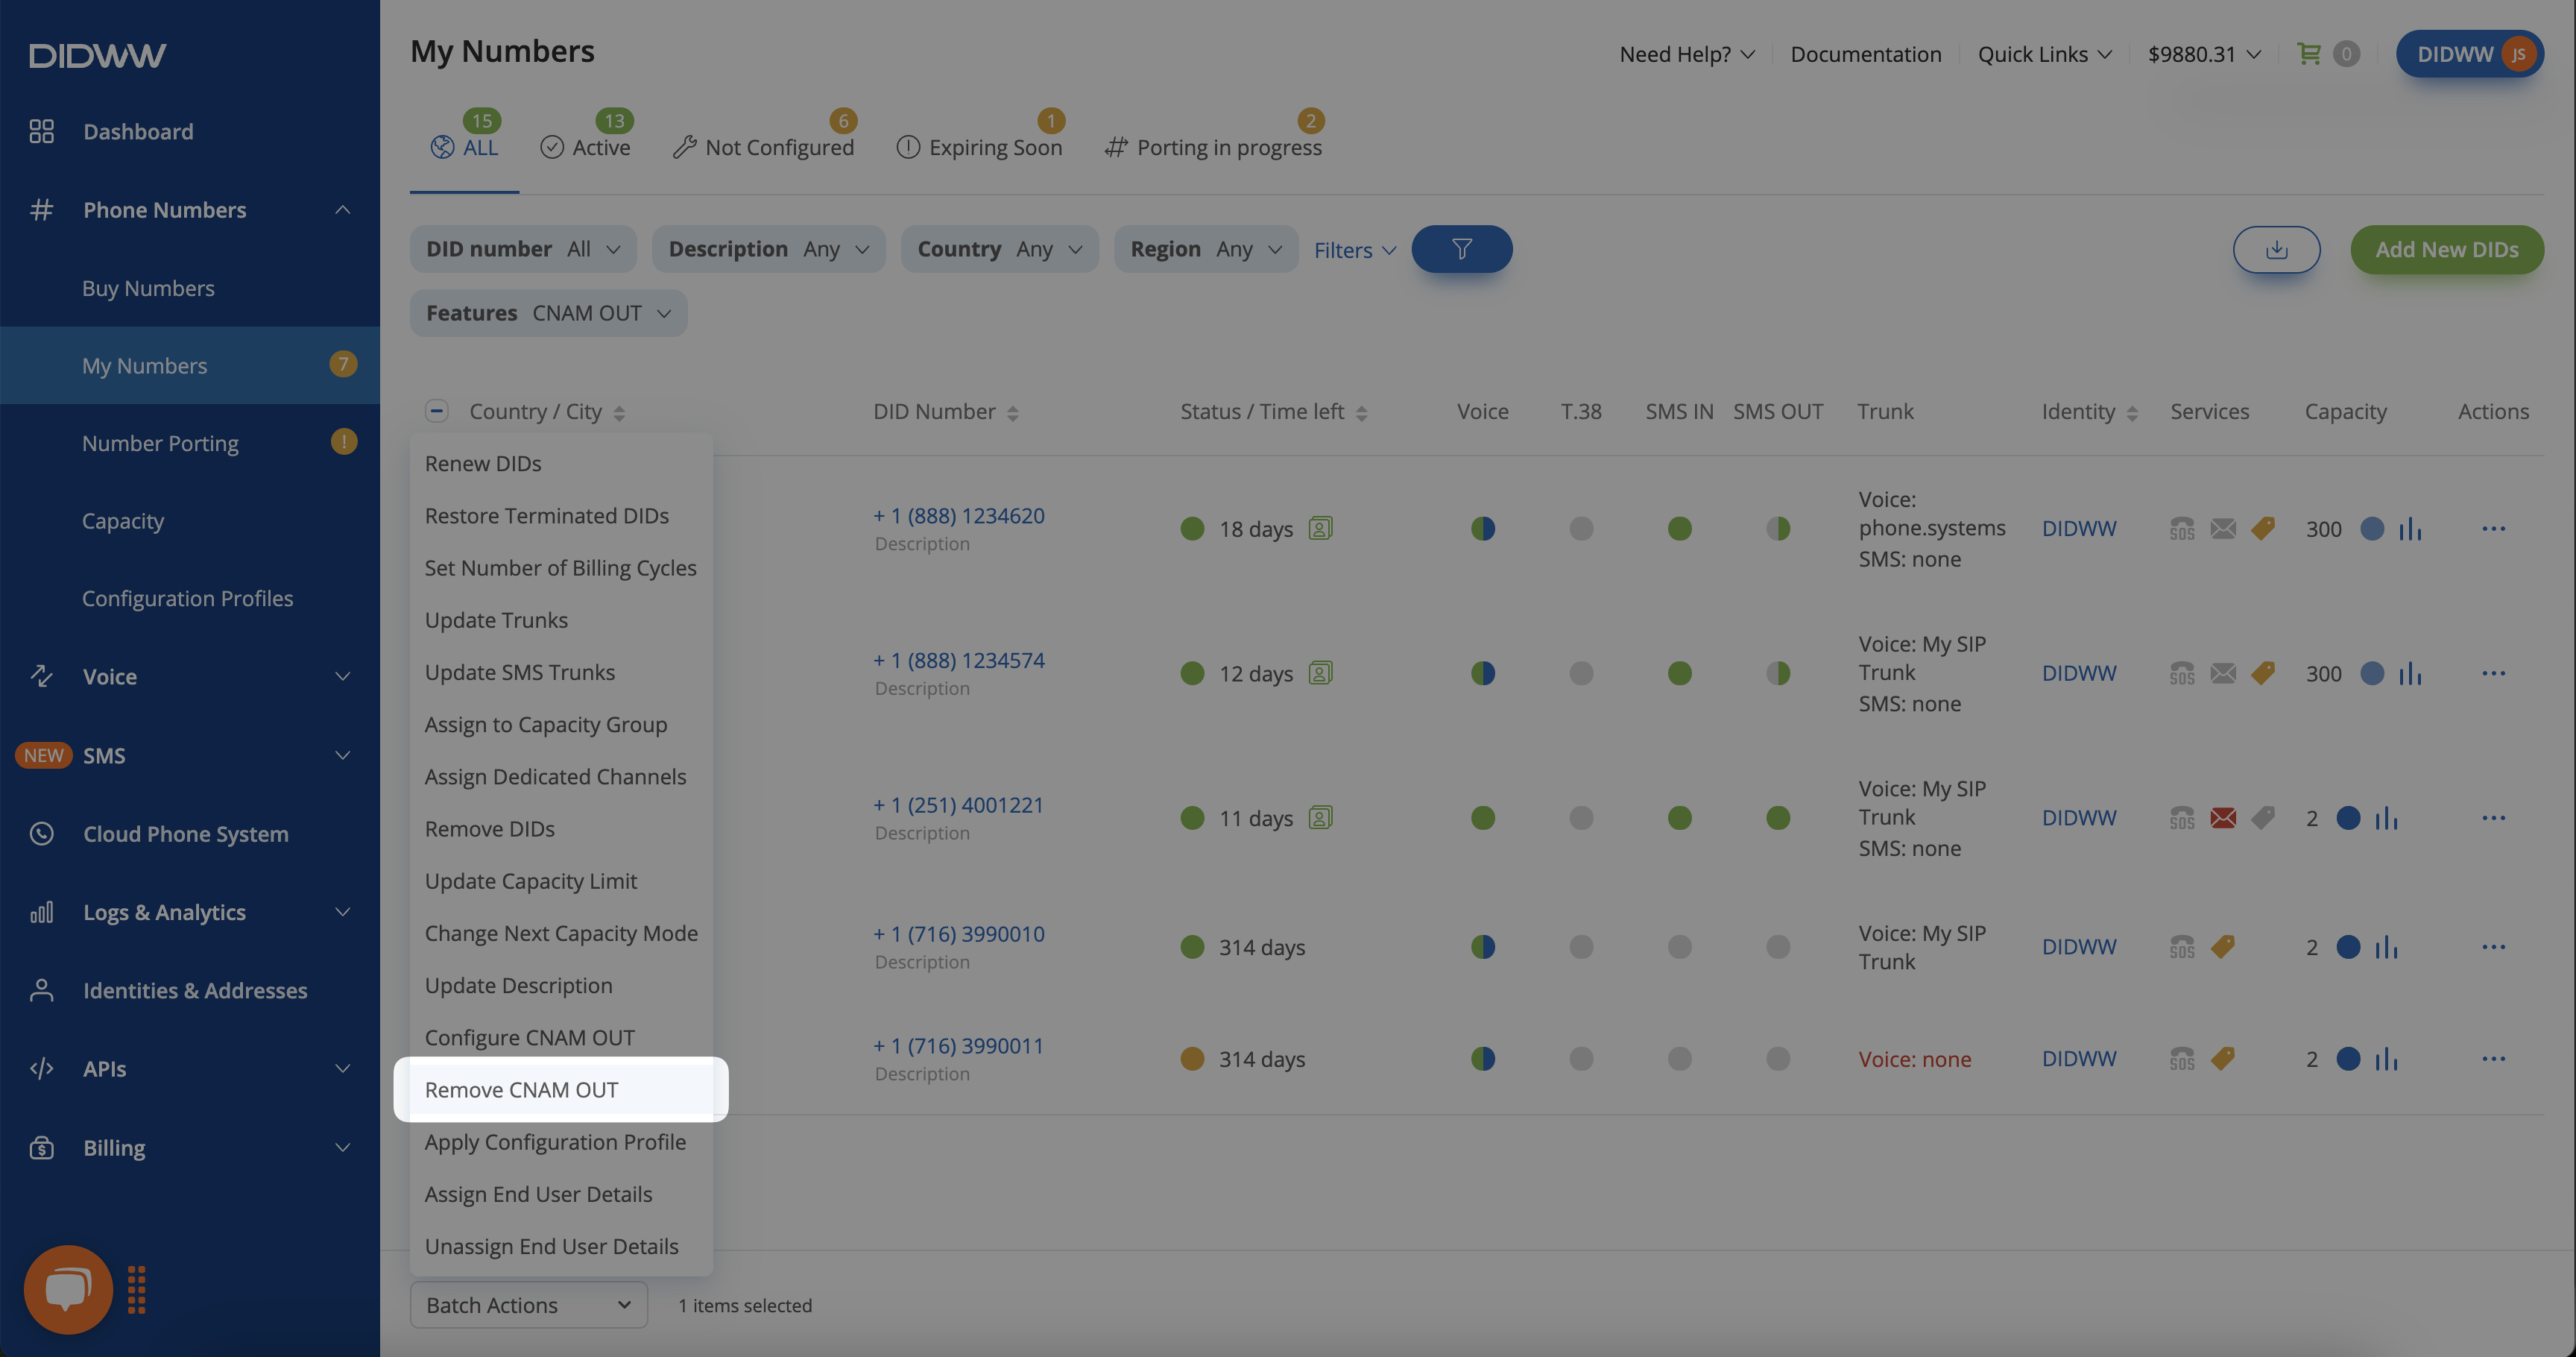
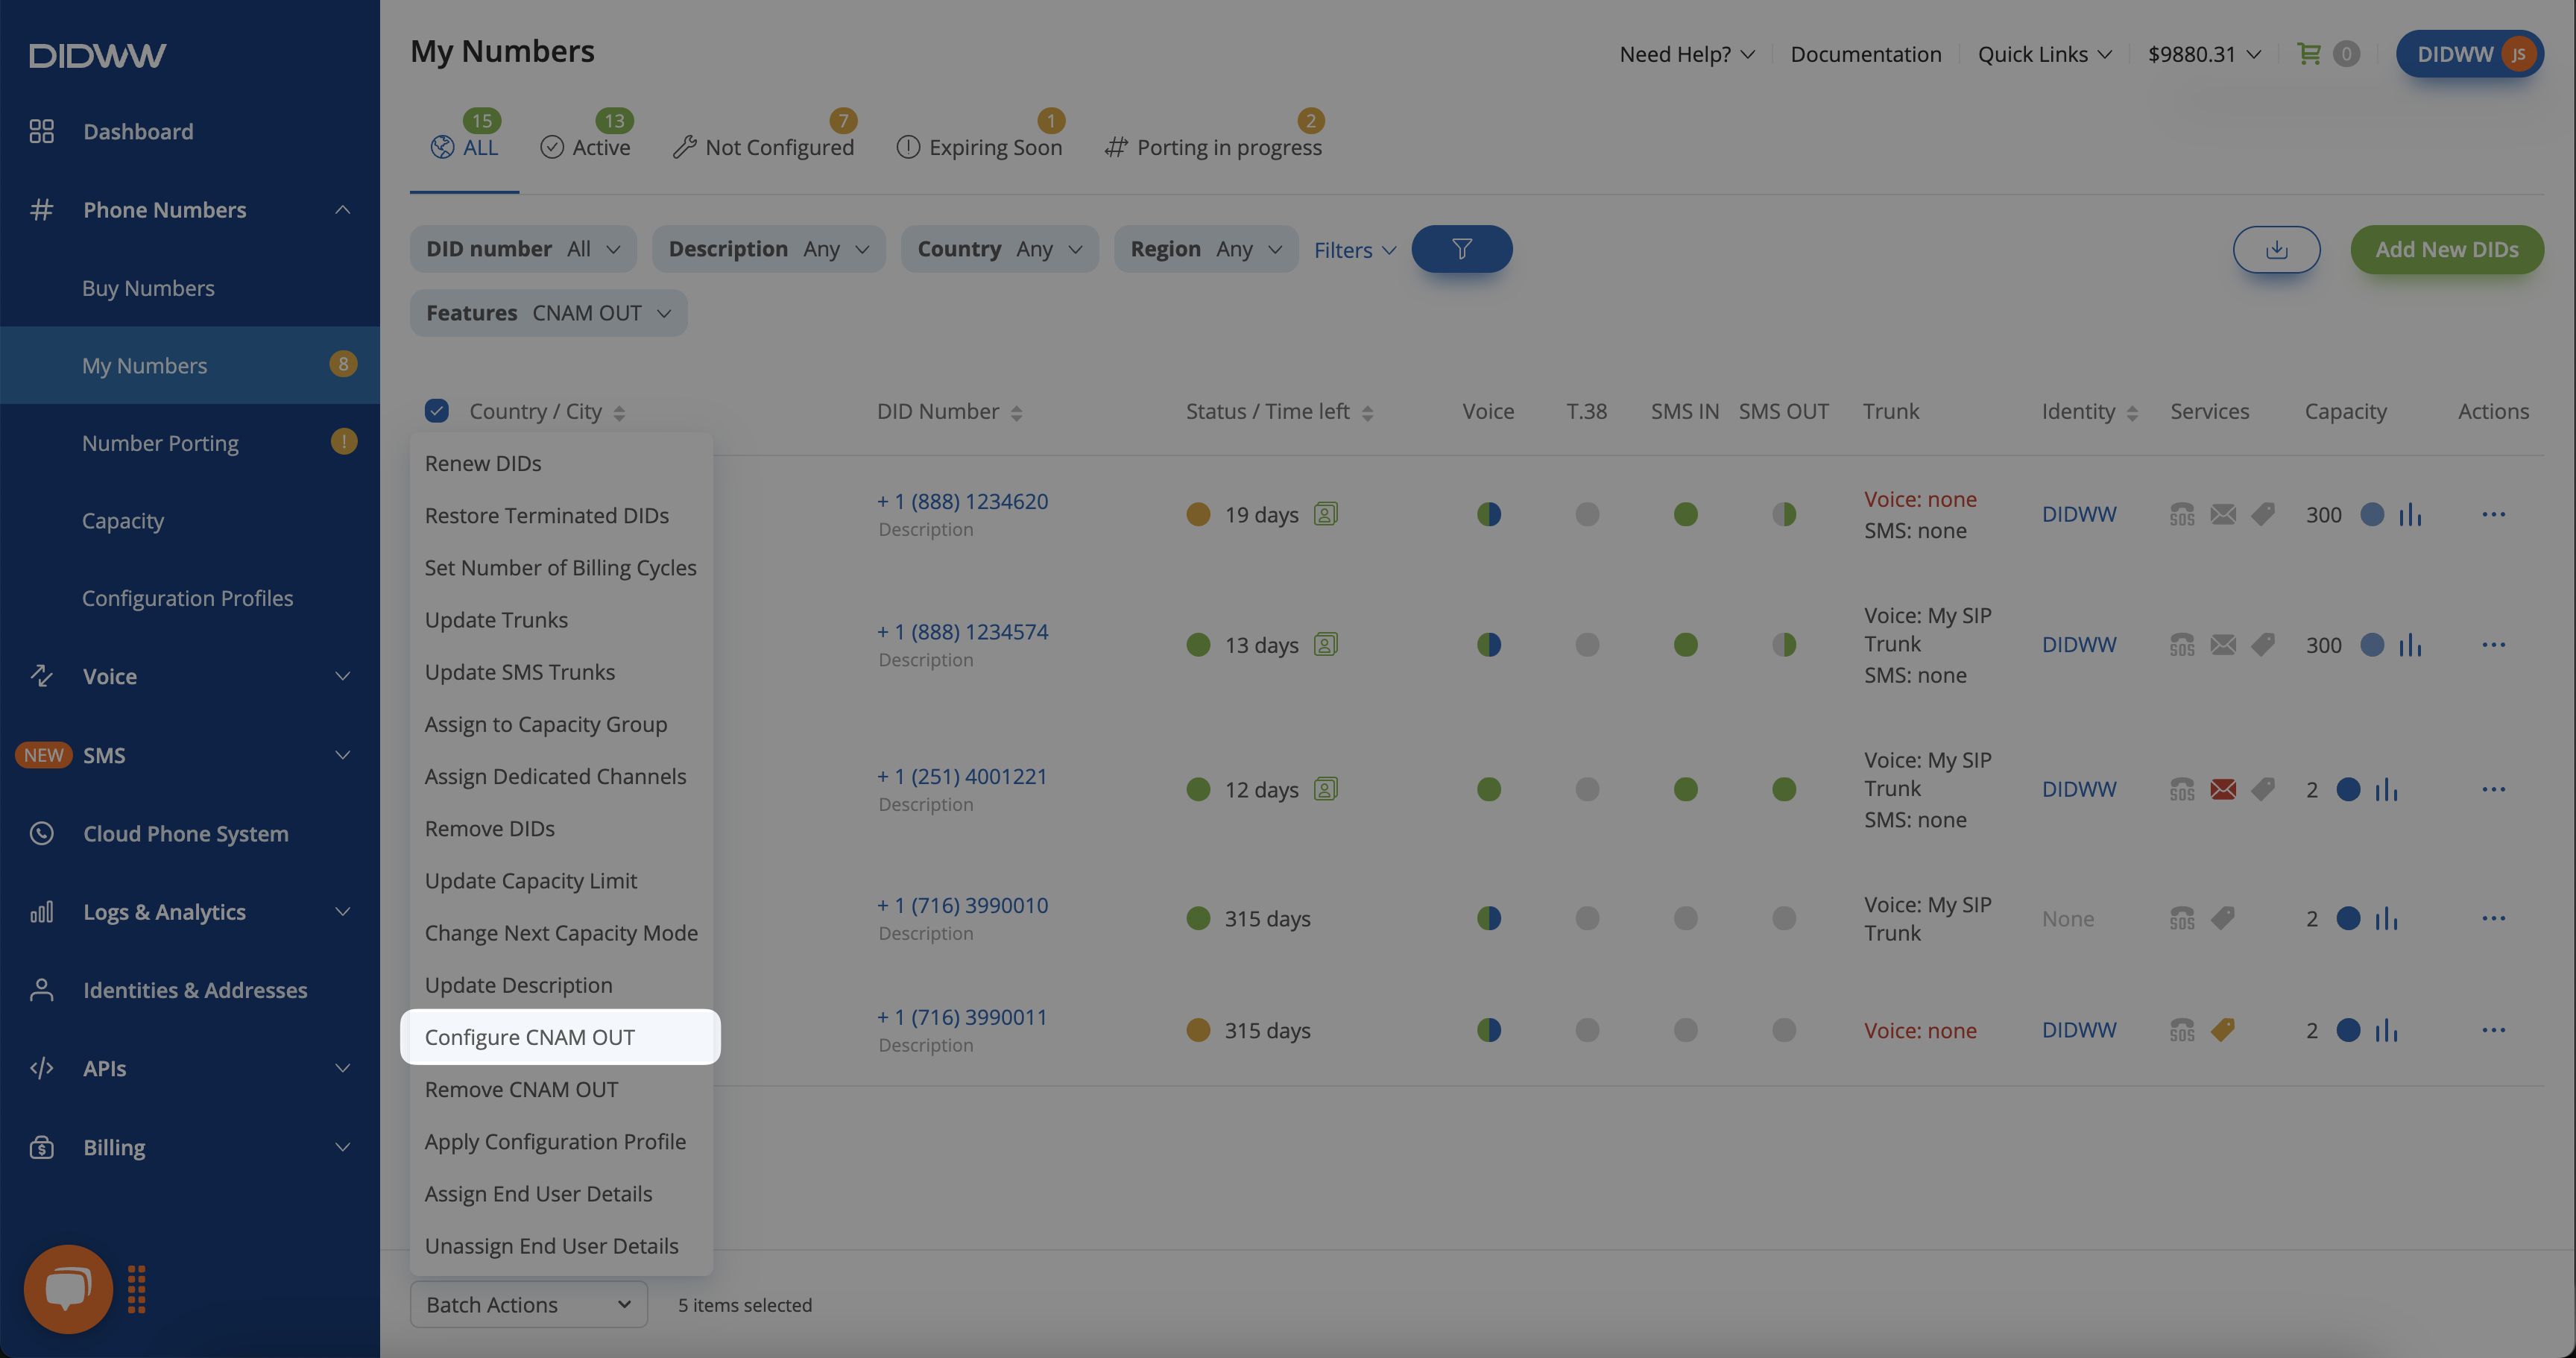
Select the DID Numbers for which CNAM should be set and click on Batch Actions.
Note
Filter the DID numbers that support the CNAM OUT feature.
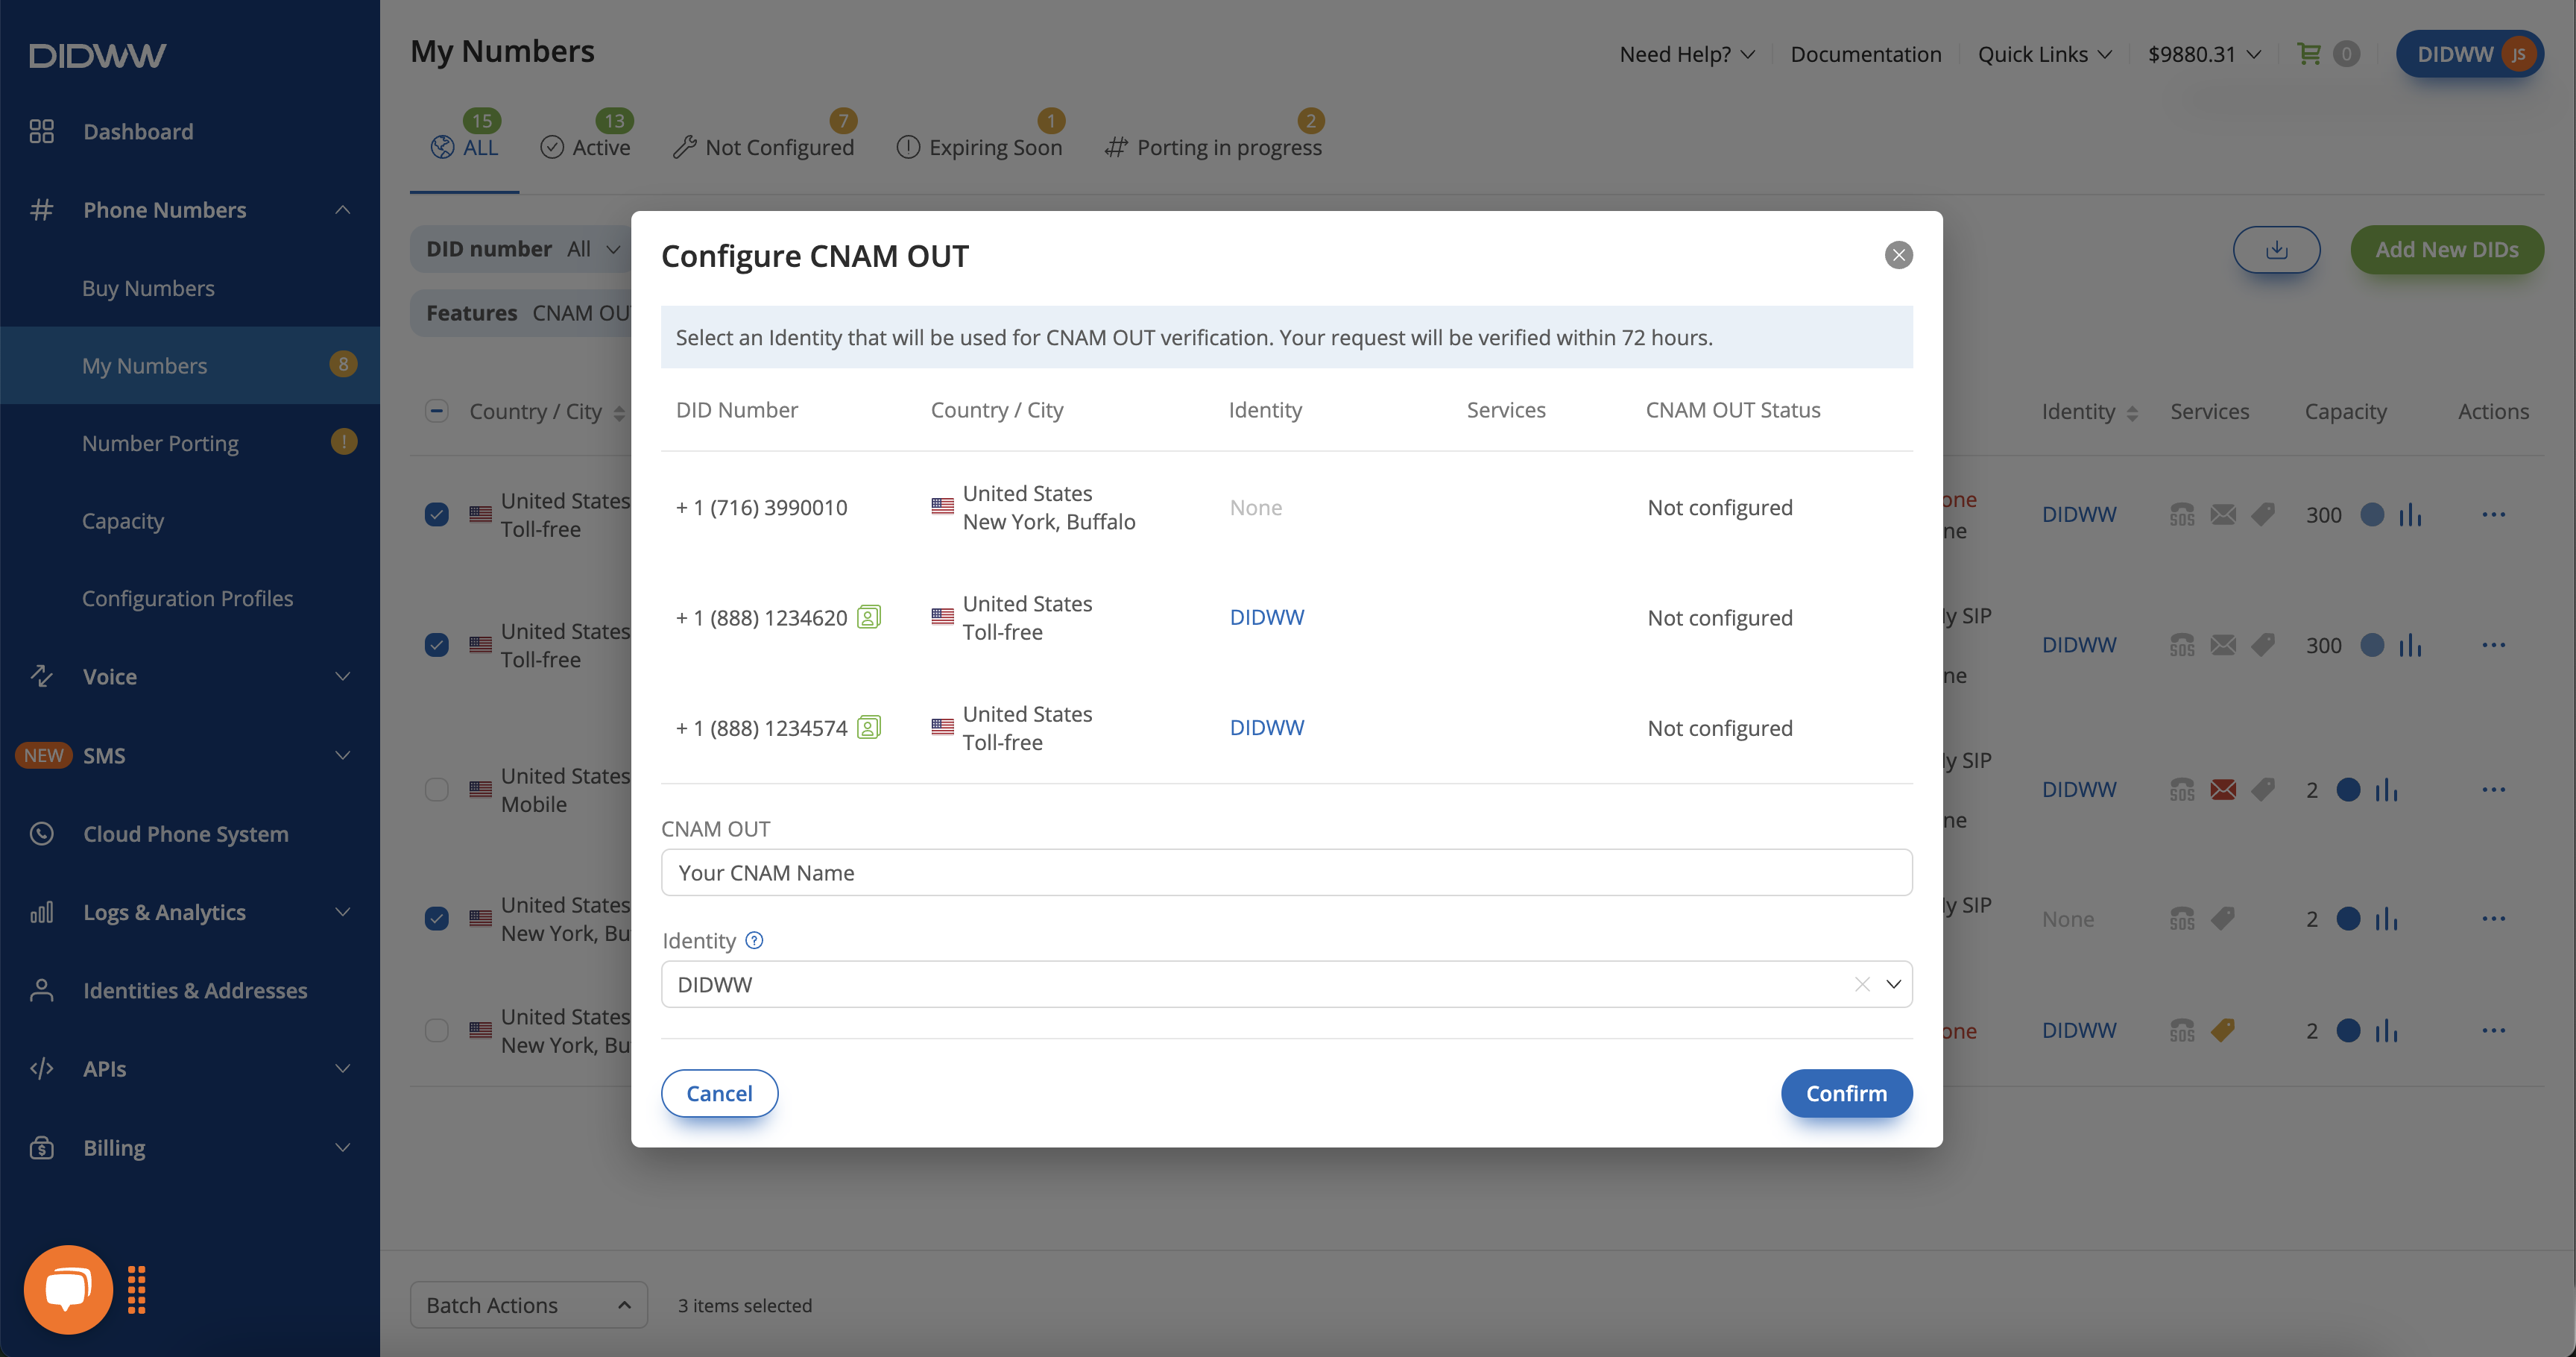
Provide the following information and click Confirm.
CNAM OUT: Enter the desired CNAM, up to 15 characters.
Identity: Select an existing identity or create a new one.
Note
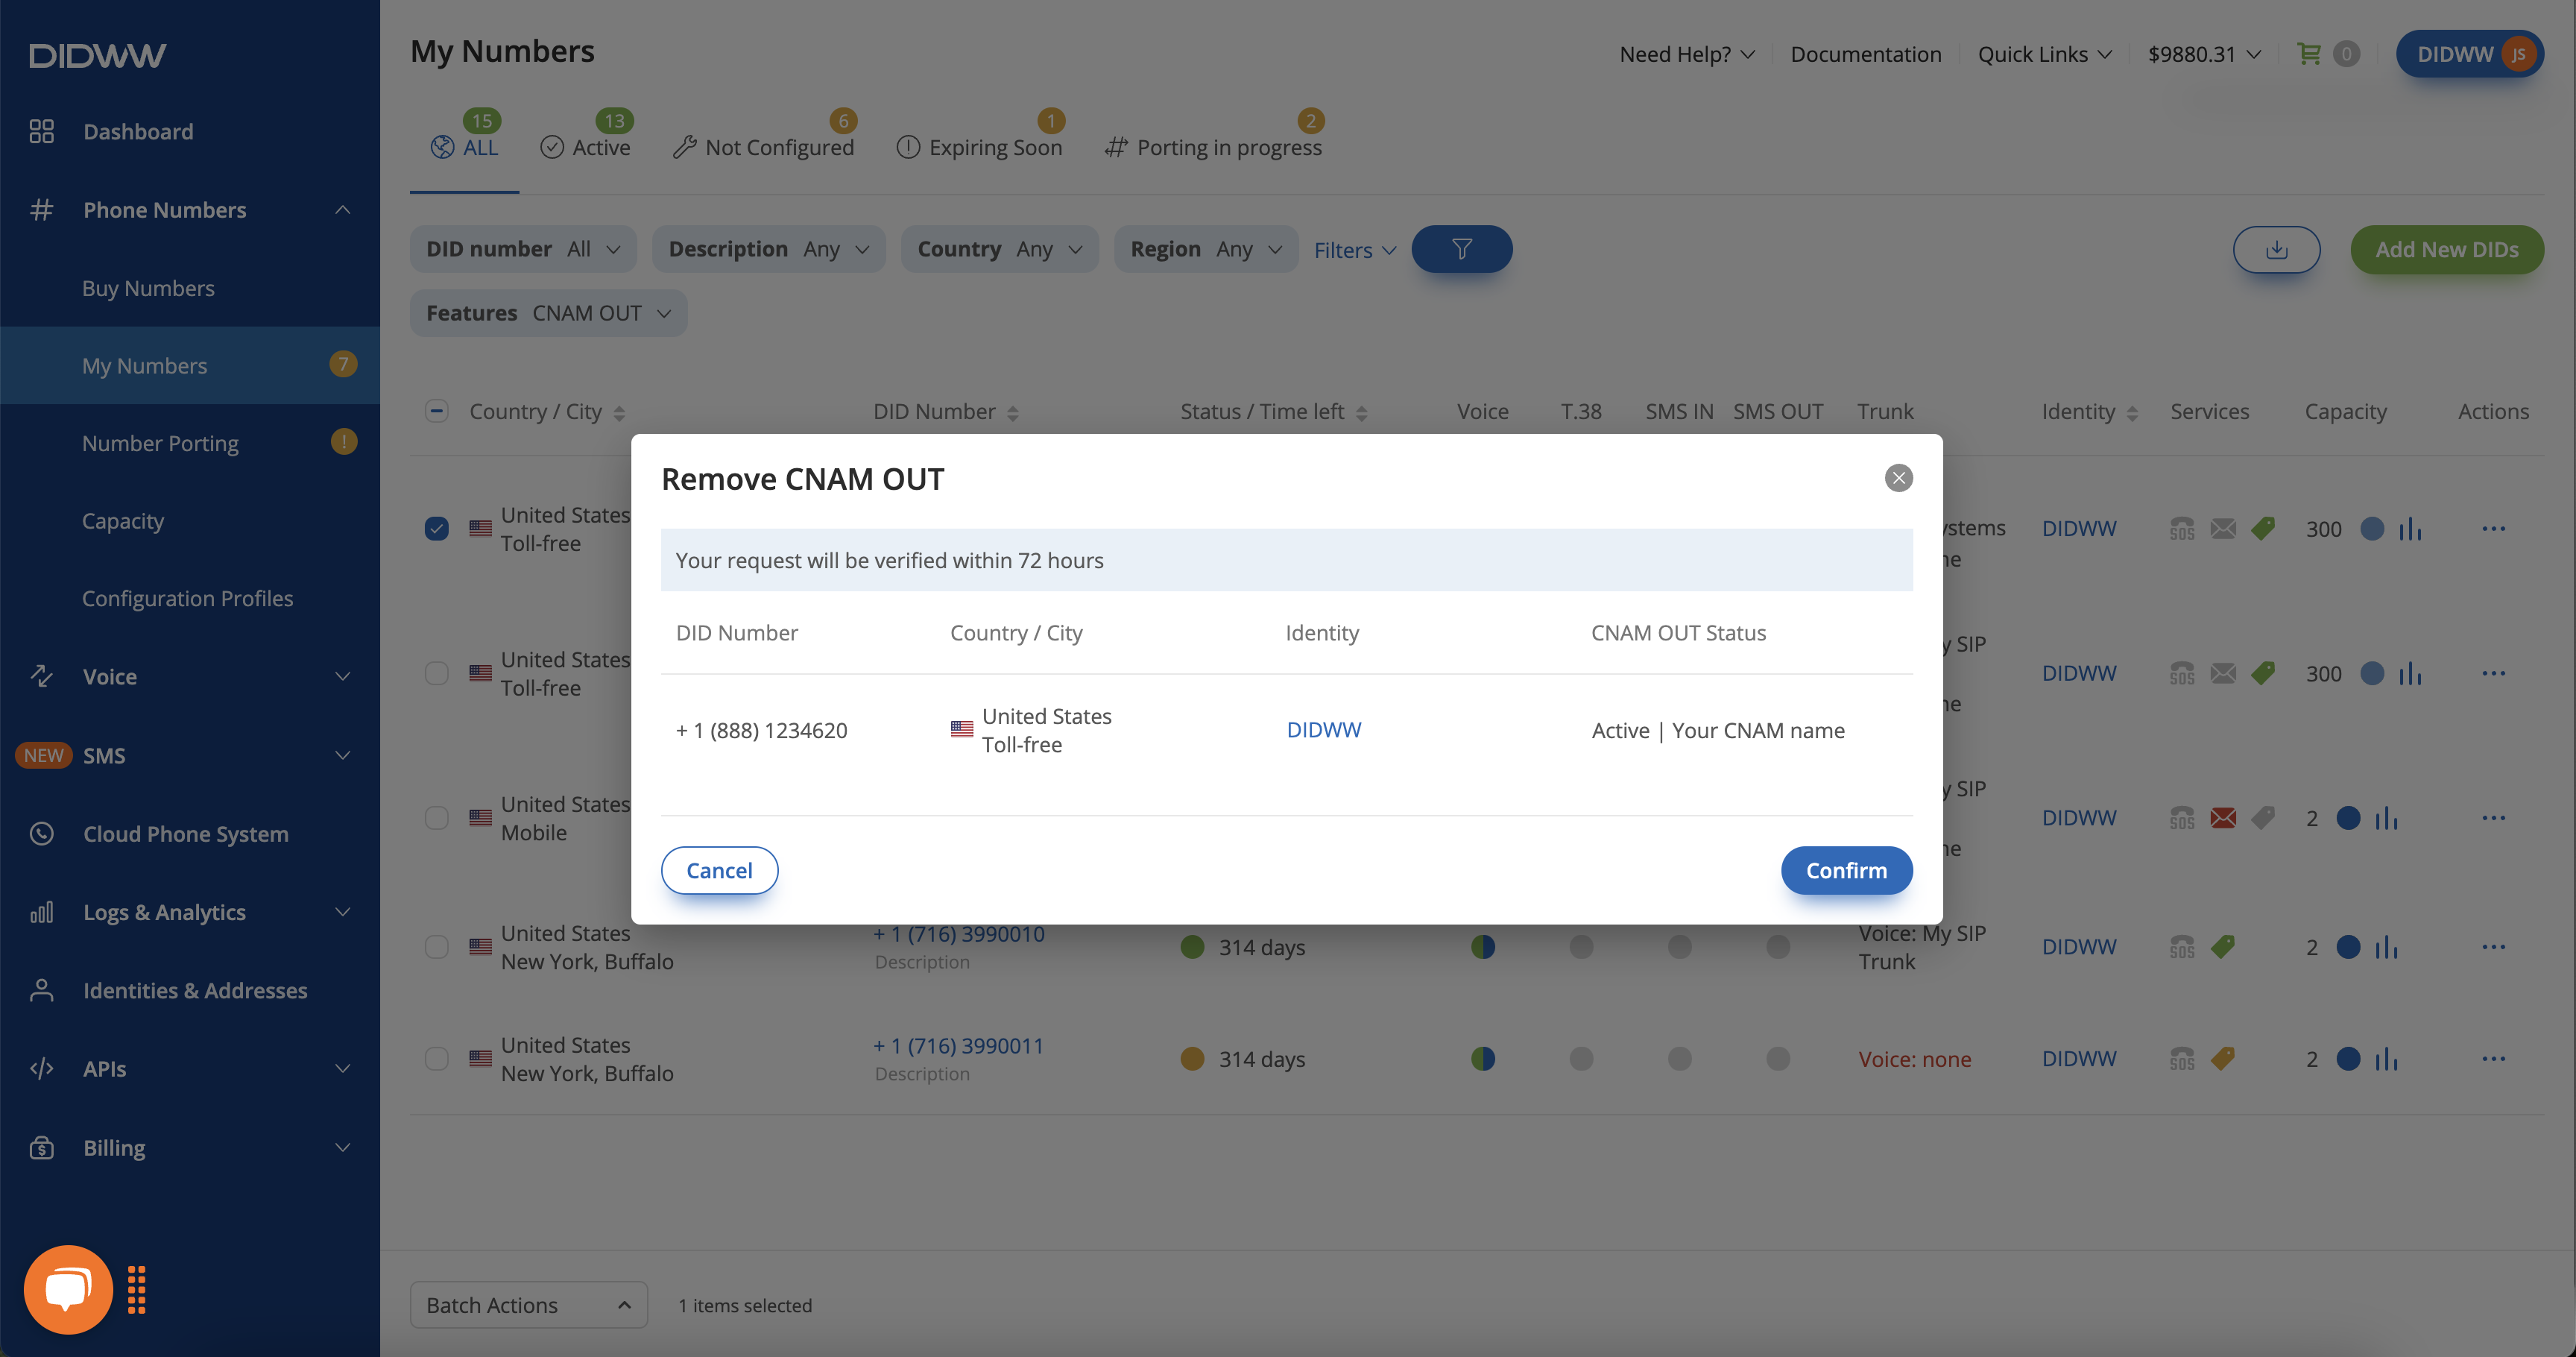
After the CNAM OUT request is submitted, it will be verified within 48-72 hours.
An email with the subject DIDWW: CNAM Request Submitted will be sent upon submission. Once the CNAM OUT is successfully activated, another email with the subject DIDWW: CNAM Activated will be sent to confirm the activation.
You can send a CNAM value by including it in the From header of a SIP Invite sent to DIDWW’s outbound IP or domain when making an outbound call. DIDWW will relay this CNAM value to downstream carriers, subject to their support for this feature.
This method is useful in scenarios where:
Per-call customization of CNAM is required.
The caller ID is a non-US DIDWW or third-party number that cannot be registered in the CNAM database.
Note
The delivery and display of CNAM are dependent on downstream carrier behavior and can not be guaranteed by DIDWW.
The CNAM should follow these rules:
The CNAM string should not exceed 15 characters.
Avoid using special characters that may be altered or stripped by intermediate SIP proxies.
To send a CNAM value with an outbound SIP call, include the desired CNAM string in the From header of your SIP INVITE request. This value should appear as a quoted display name preceding the SIP URI.
“John Doe”: This is the CNAM value (Caller Name) that will be transmitted. It is placed in the display name field and must not exceed 15 characters.
12345678901: The caller ID formatted in E.164, representing the phone number making the call.
out.didww.com: The SIP domain used as DIDWW’s outbound signaling endpoint. This must match the destination defined in your outbound trunk configuration.
CNAM OUT can be removed for selected DID numbers that have an active CNAM service (indicated by the green CNAM service icon
in the Service column) using the Batch Actions menu.
Steps to Remove CNAM OUT:
In the menu sidebar, expand the Phone Numbers section and select My Numbers.
Select the DID numbers where CNAM OUT is active (indicated by the CNAM Active Icon
in the Service column) and needs to be removed, then click on Batch Actions.
From the Batch Actions menu, select Remove CNAM OUT.
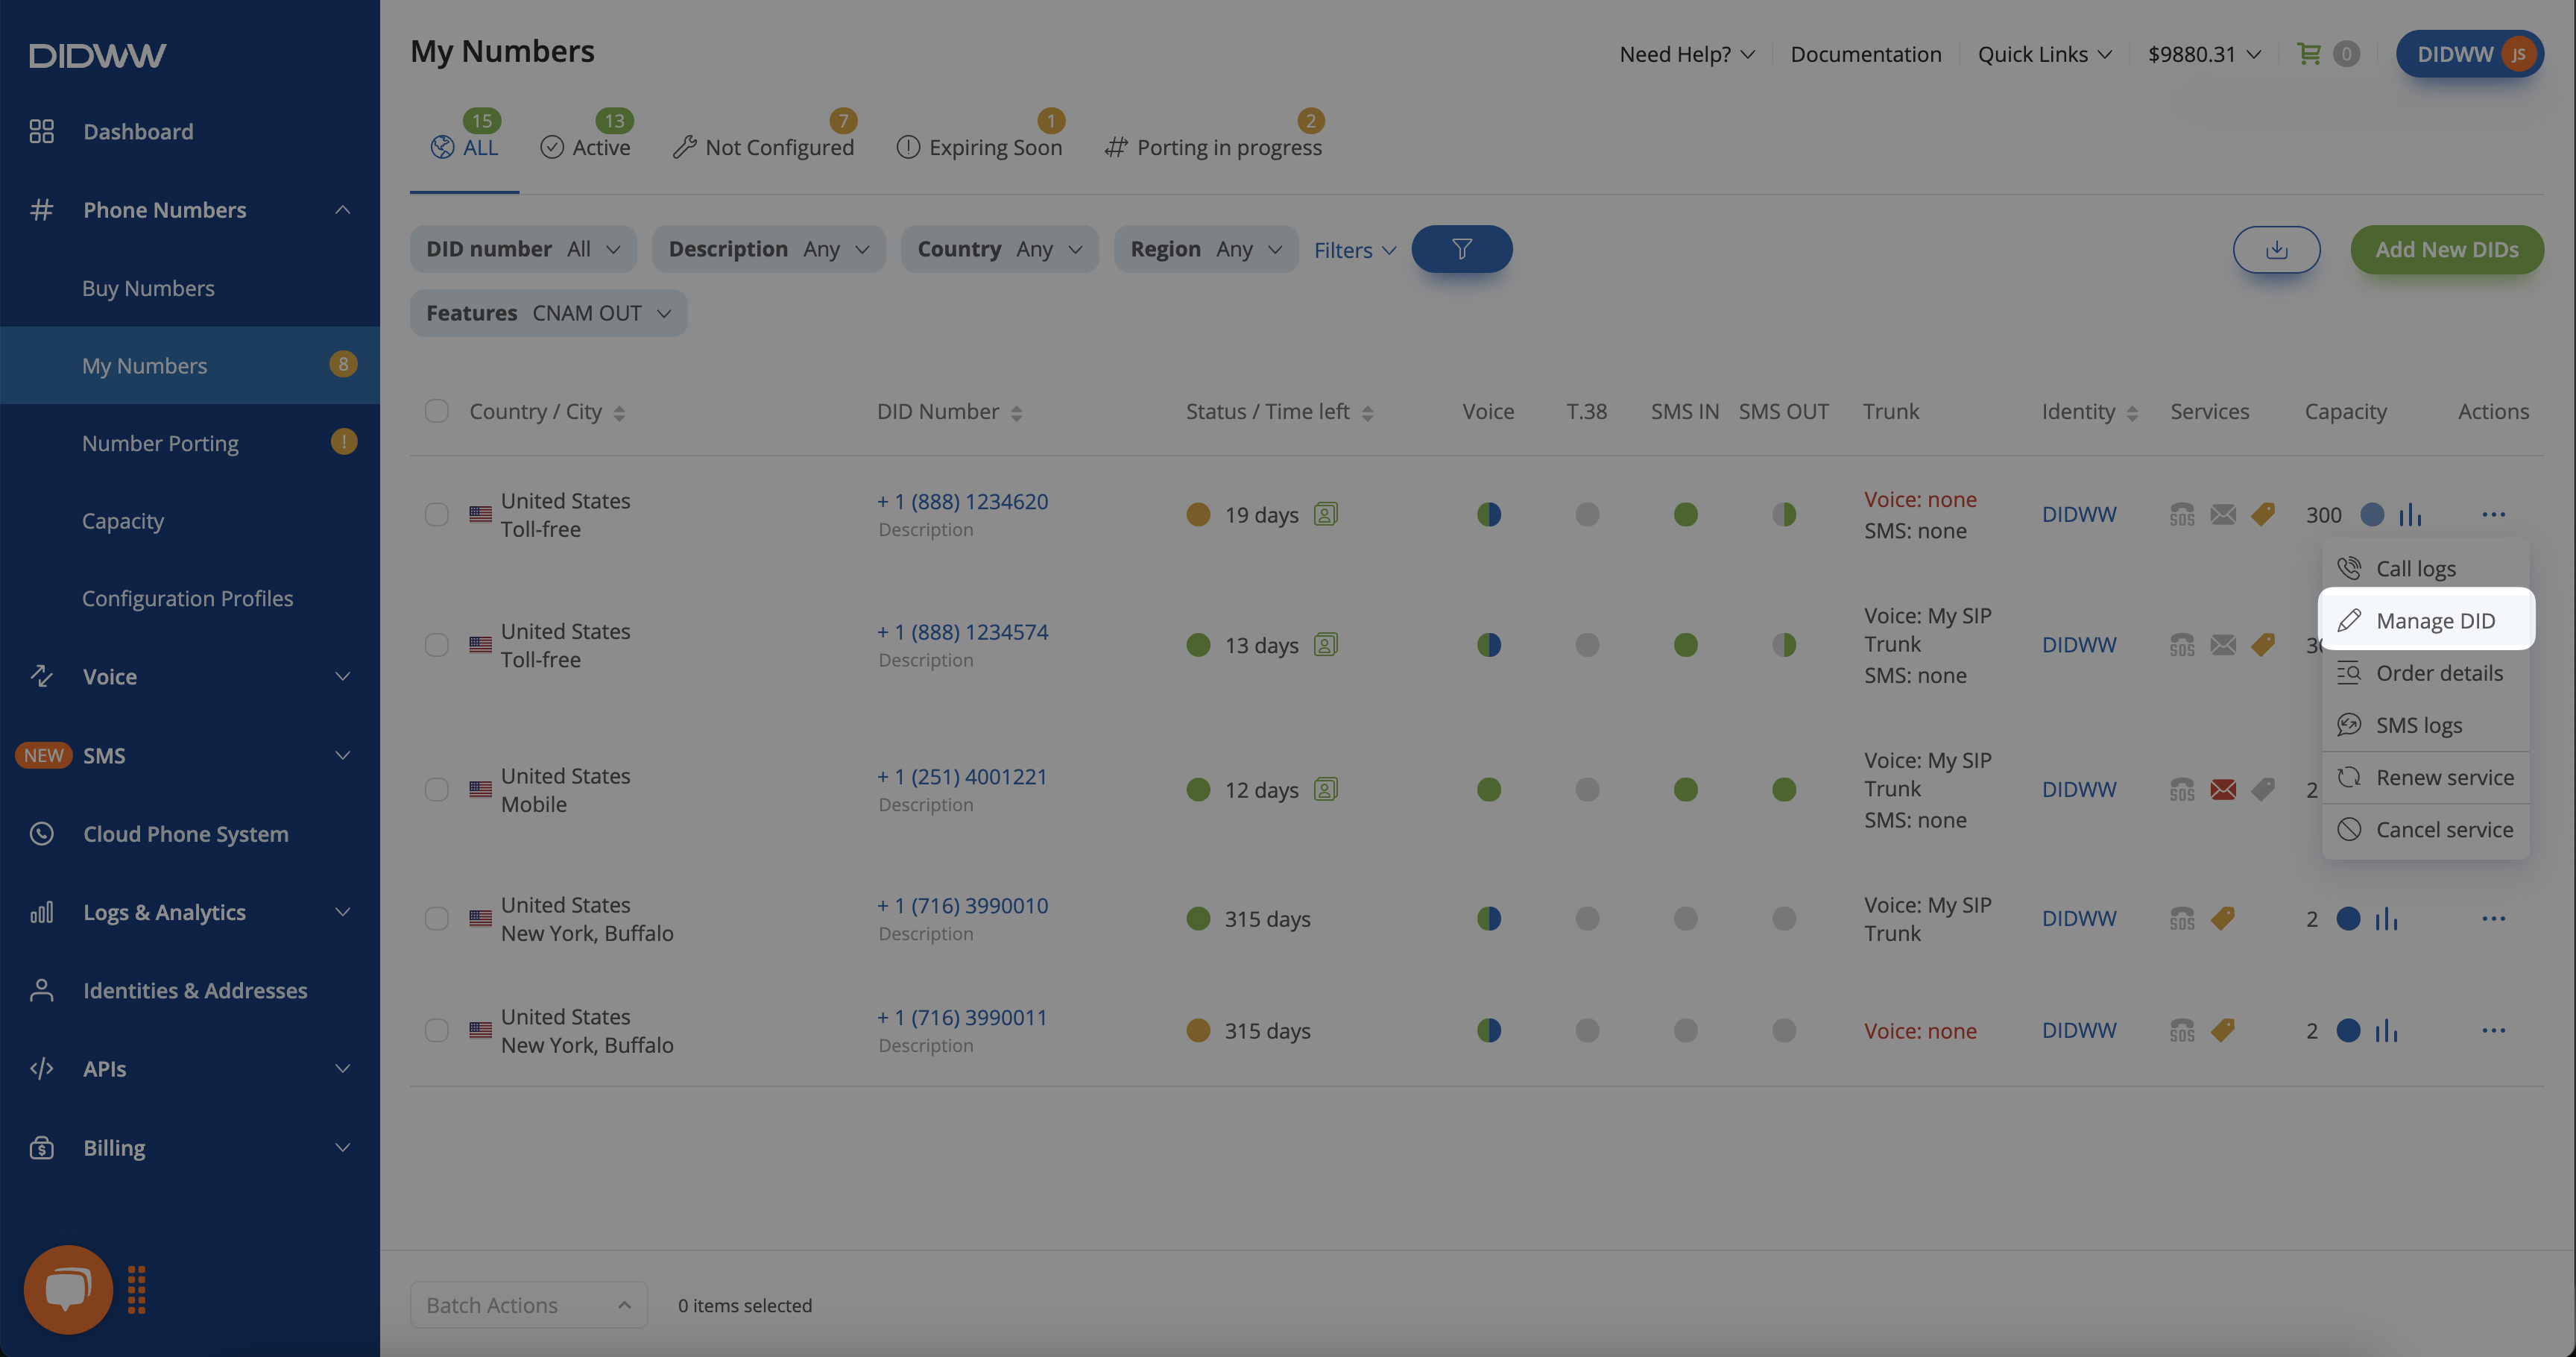
Open the Manage DID page to check the status of the CNAM OUT removal task. The status will show as Cancellation Pending until the request is verified.
Note
After Remove CNAM OUT request is submitted, it will be verified within 48-72 hours.
When a CNAM removal request is submitted, an email with the subject DIDWW: CNAM Cancelation Request will be sent. After the CNAM removal is completed, another email with the subject CNAM Canceled will be sent to confirm the completion of the request.
CNAM cannot be modified or reapplied while the removal task is pending.
under the Actions column, then select Edit.
in the Service column) and needs to be removed, then click on Batch Actions.