Configure Outbound Trunks for Emergency Calling#
Configure outbound trunks to route emergency calls through DIDWW using verified DID numbers with active Emergency Calling Services, even if Outbound Termination is not enabled on your account.
Note
By default, all existing outbound trunks are set to Allow all available DID(s) for emergency calling once the Emergency Calling Service has been activated.
Set up an outbound trunk using all verified DIDs for emergency calling.
Update an outbound trunk to allow selected verified DIDs for emergency calling.
Create Outbound Trunk & Allow All DIDs For Emergency Calling#
You can create an Outbound Trunk even if Outbound Termination is not enabled on your account. Once at least one Emergency Calling Service is activated for a DID number with the Emergency Calling feature, outbound trunks become available for emergency call routing.
Important
If Outbound Termination is not activated, outbound trunks can be used only for emergency calls from verified DID source numbers.
Voice termination to local and international destinations will remain restricted until Outbound Termination is enabled.
To activate outbound termination services, see Get Access to Local and International Voice Termination.
Step 1: Open the Outbound Trunks Section#
In the DIDWW User Panel, go to Voice → Outbound Trunks.
If no outbound trunks exist, click Create New.
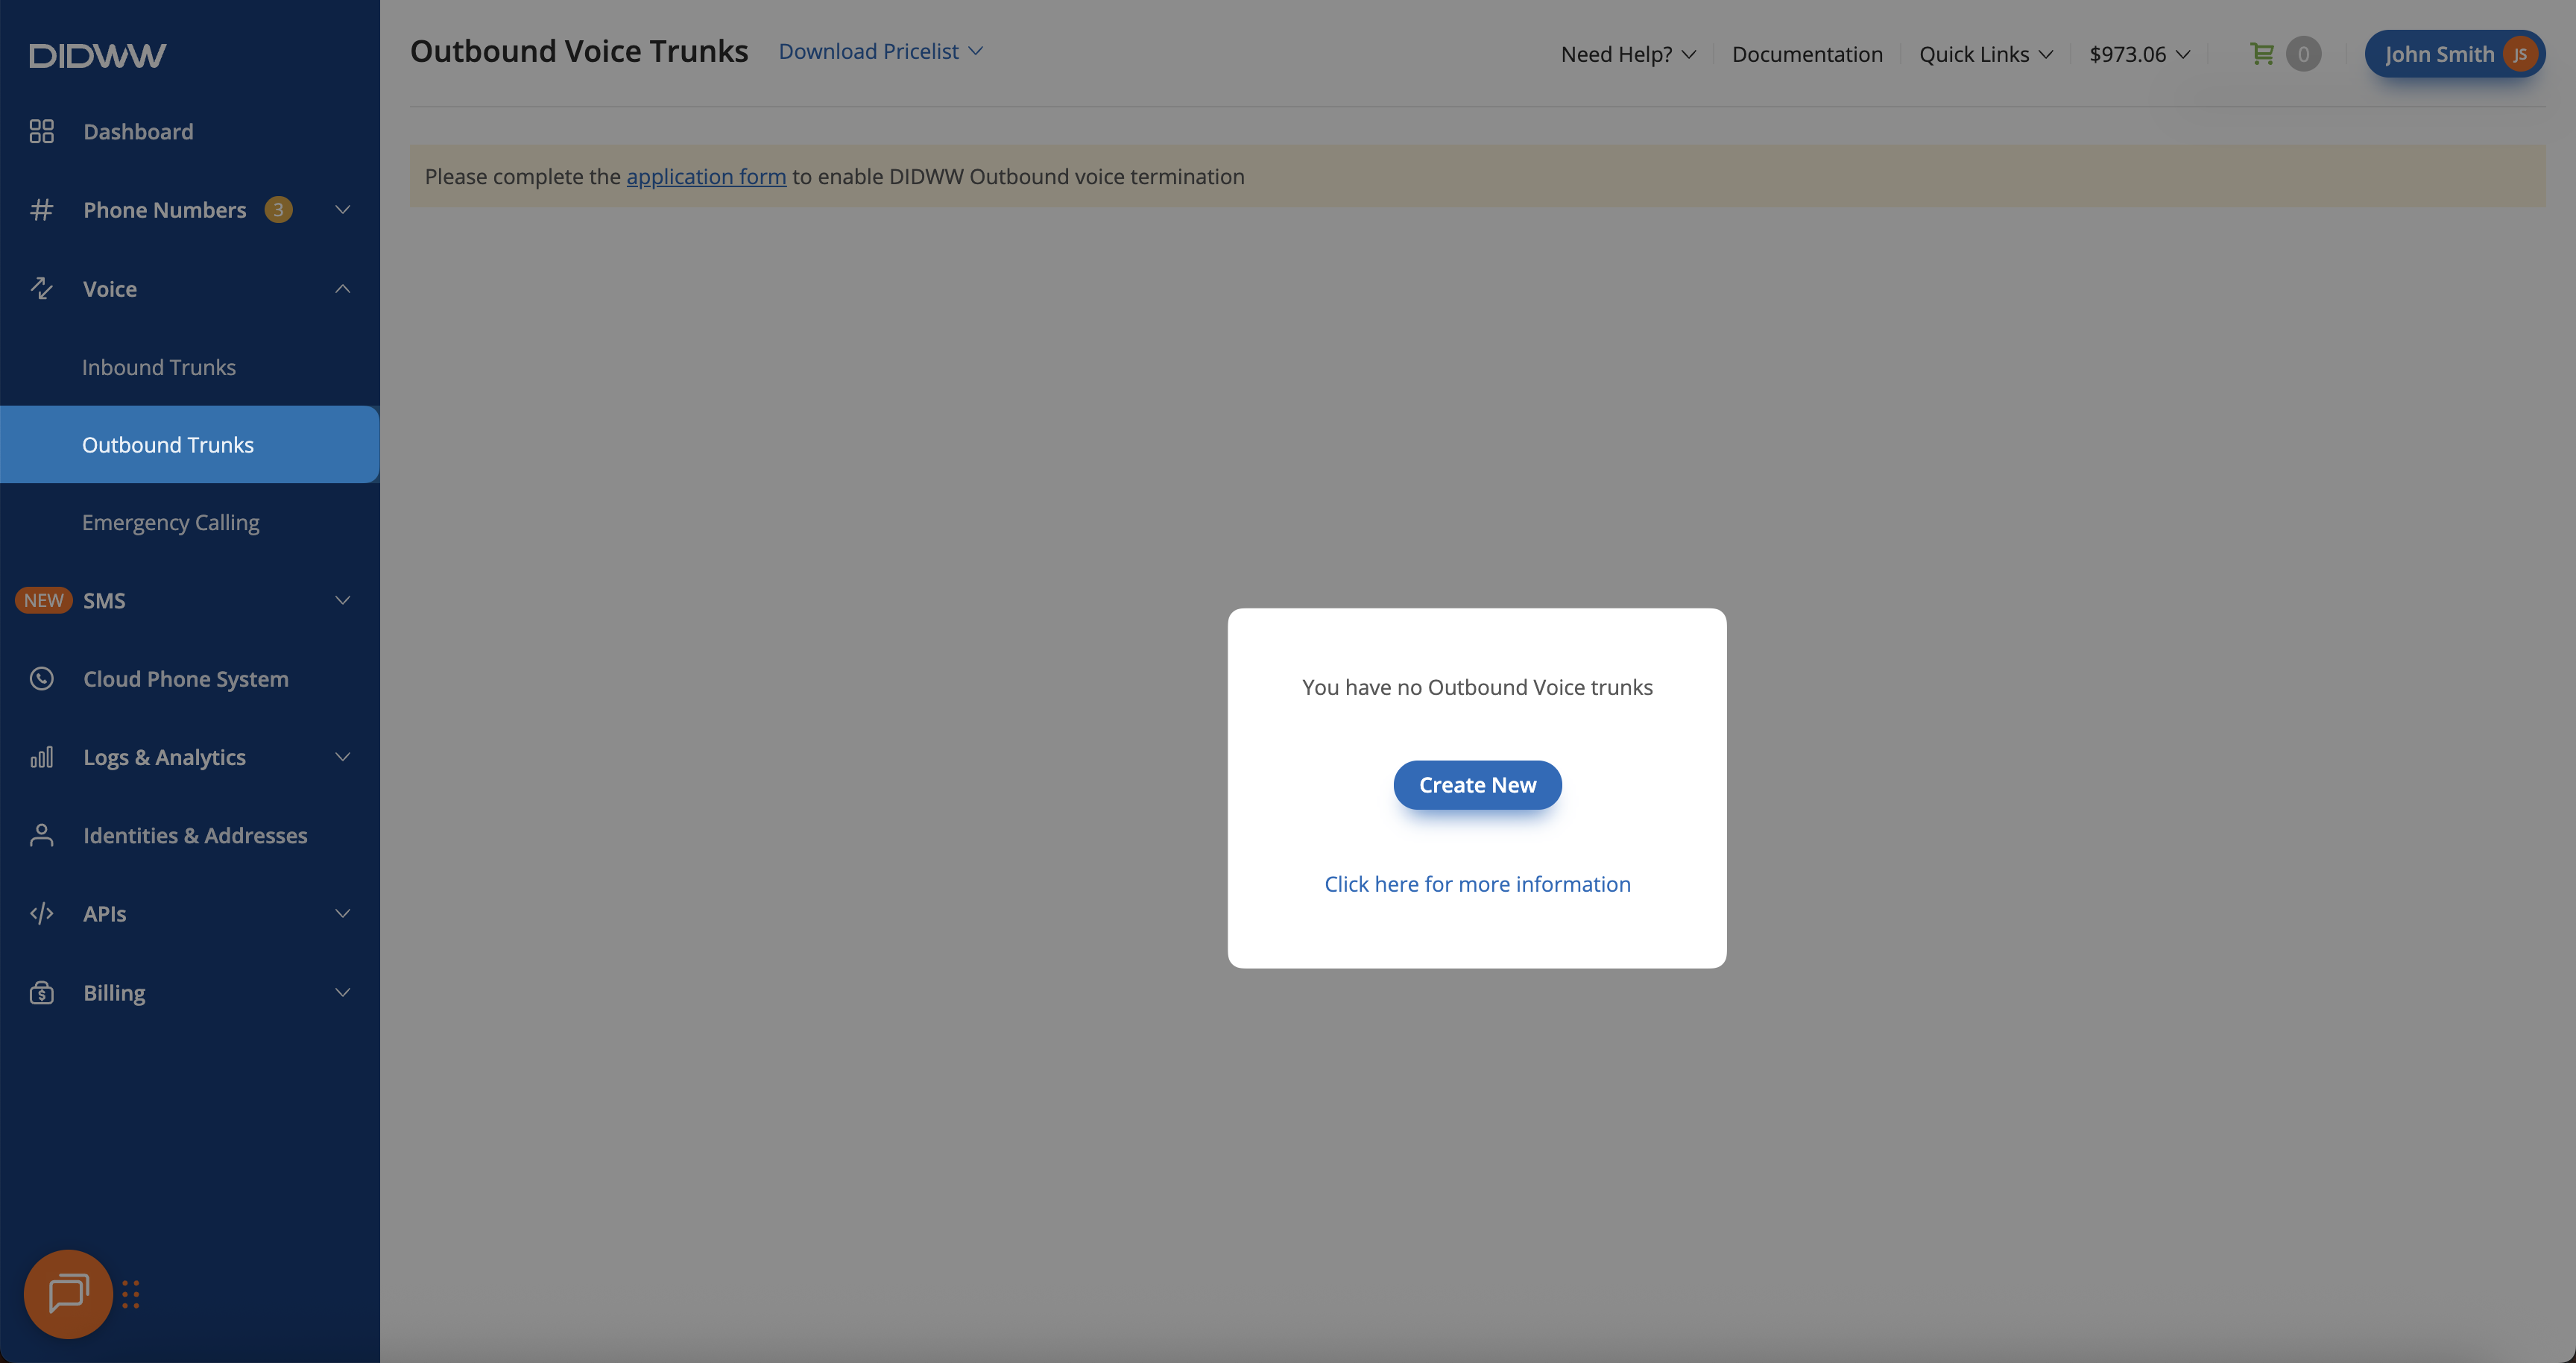
Fig. 1. Creating a new outbound trunk.#
Step 2: Configure the Outbound Trunk#
Enter a Friendly Name for the trunk.
Choose an Authentication Method Credentials & IP-Based.
Add one or more Allowed SIP IP addresses.
Expand the Emergency Calling section. The toggle Allow all available DID(s) for emergency calling is enabled by default, automatically including all verified source numbers with active Emergency Calling Services.
Click Create to finalize and generate the outbound trunk.
Note
To use a specific DID number as the caller ID for emergency calls, disable the Allow all available DID(s) for emergency calling toggle. Then, select the desired DID number from the Available CLI(s) list and click the right arrow ( > ) to move it to the Allowed CLI(s) section.
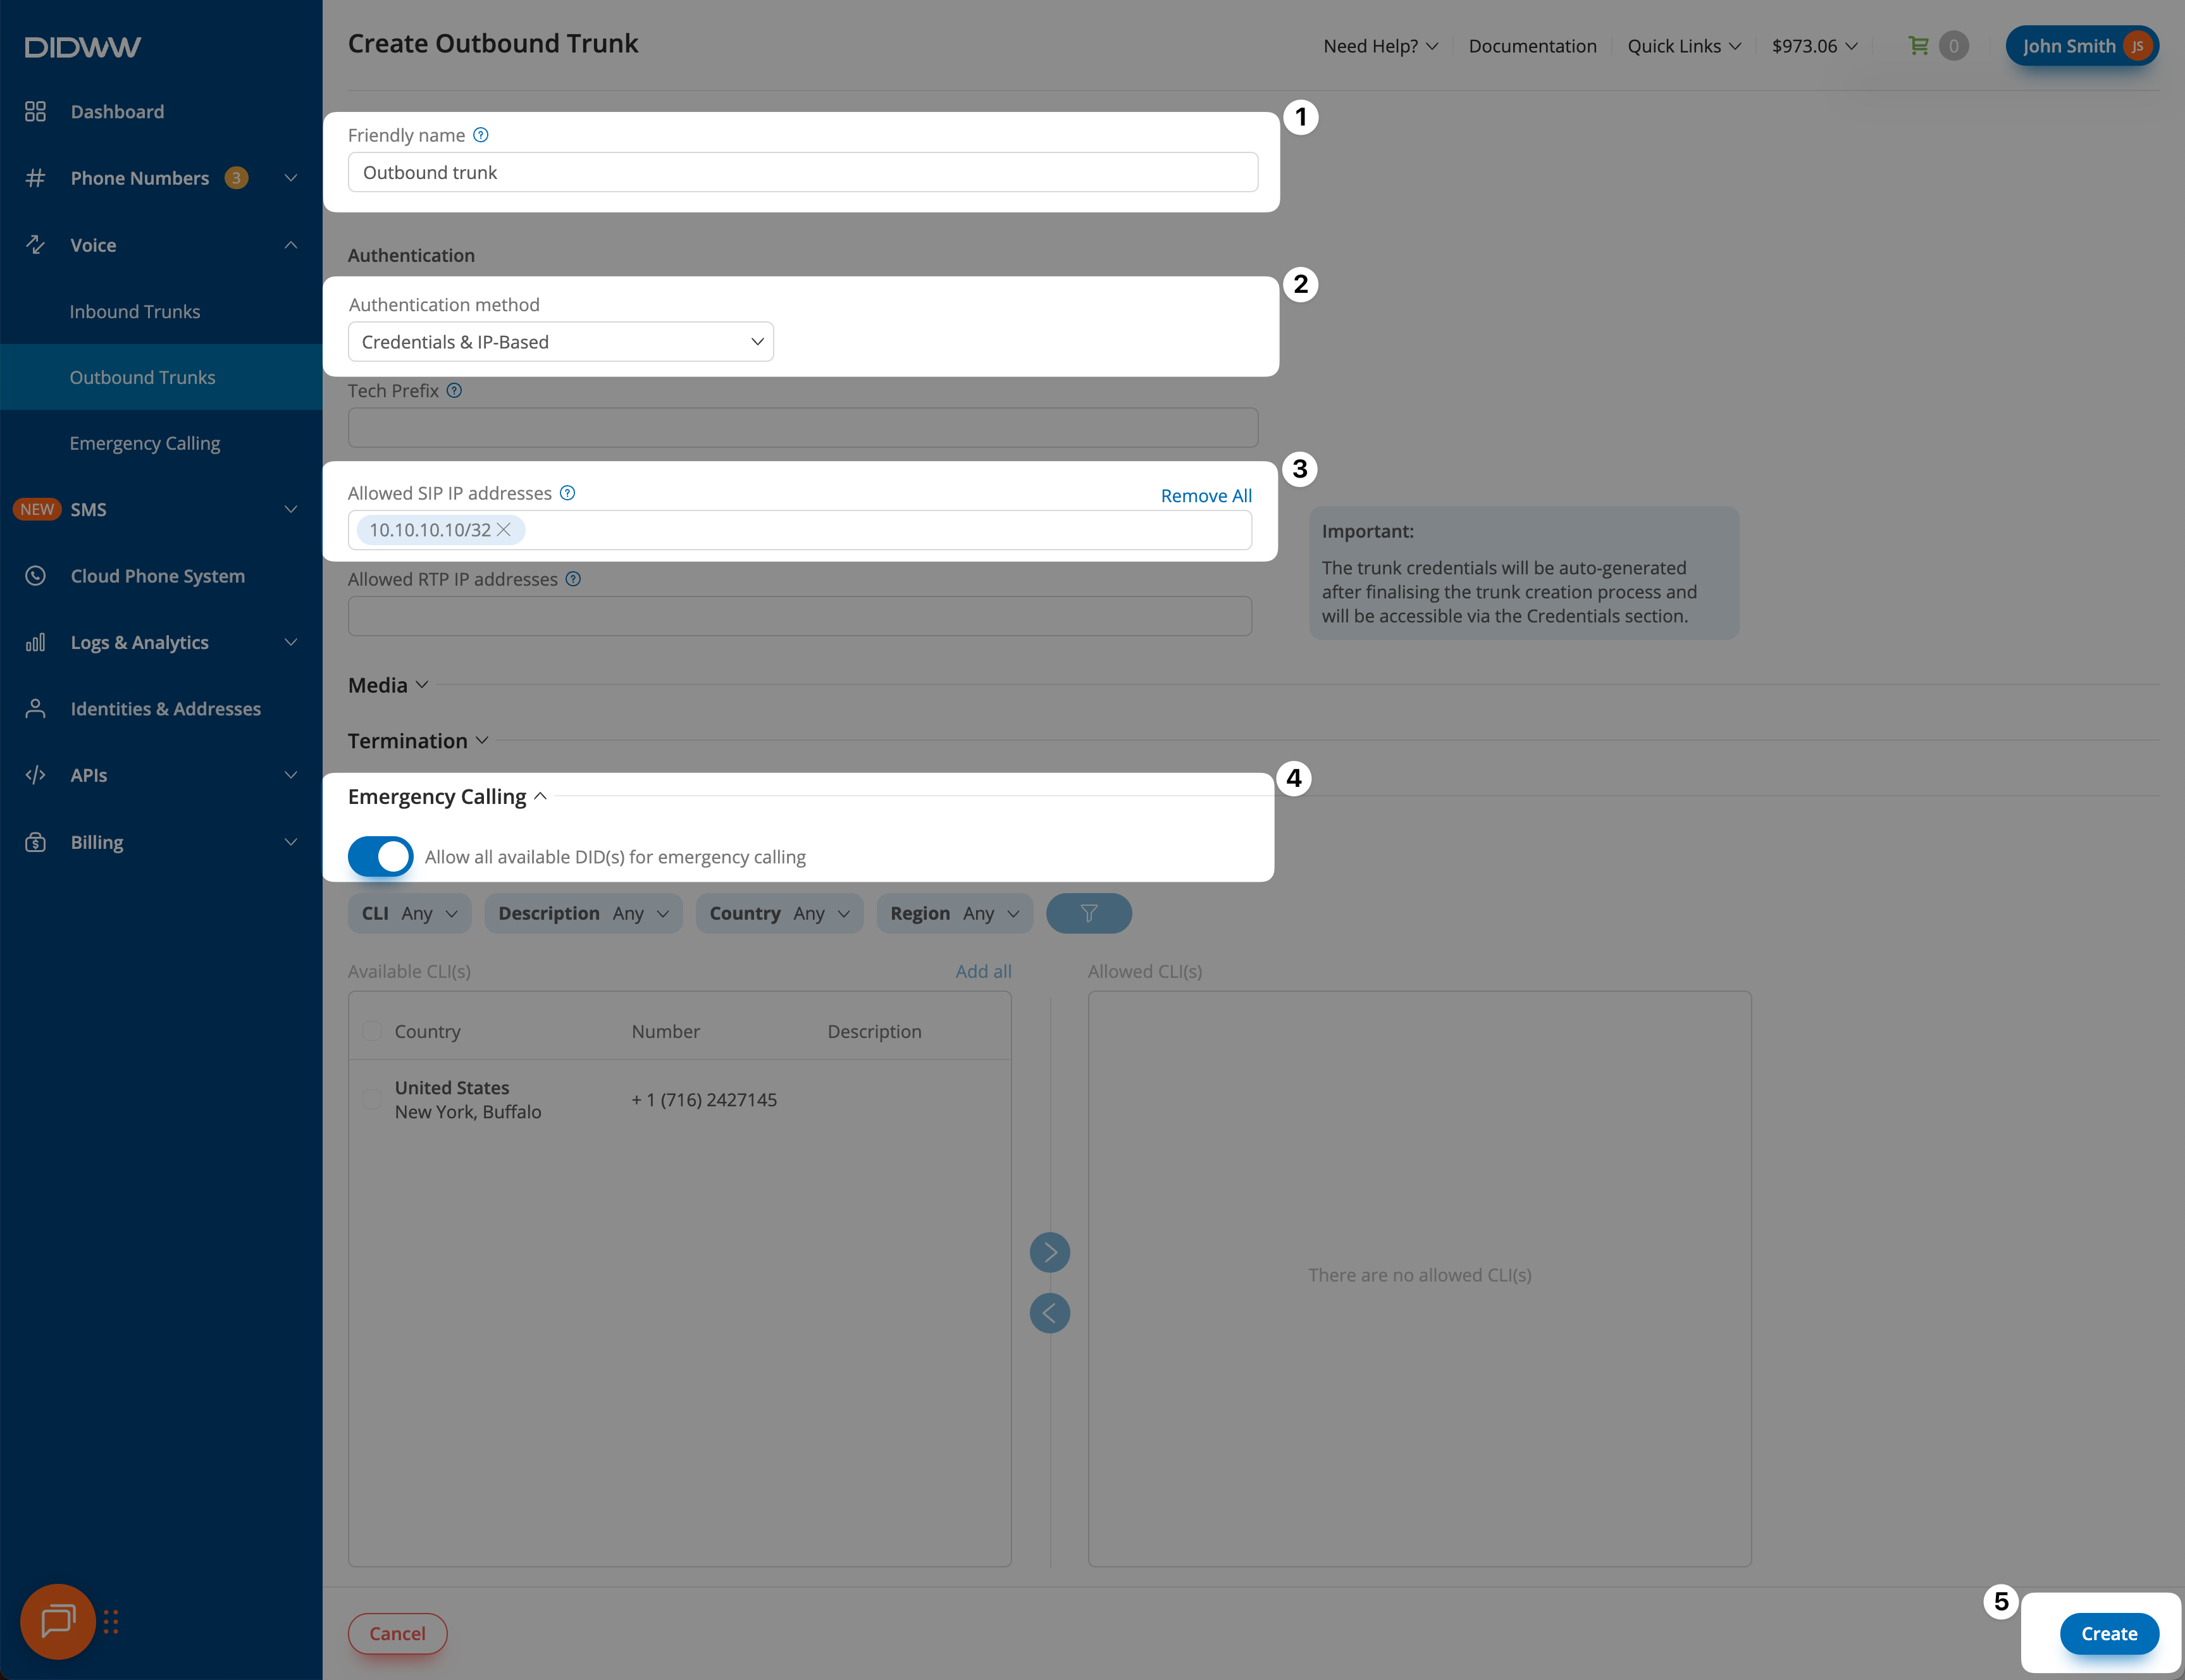
Fig. 2. Configuring the outbound trunk with emergency calling enabled.#
Step 3: View Outbound Trunk Credentials#
After creating the outbound trunk, you will be redirected back to the Outbound Trunks page. A confirmation message will appear once the trunk is successfully created.
To view the trunk credentials click the key icon in the Credentials column.
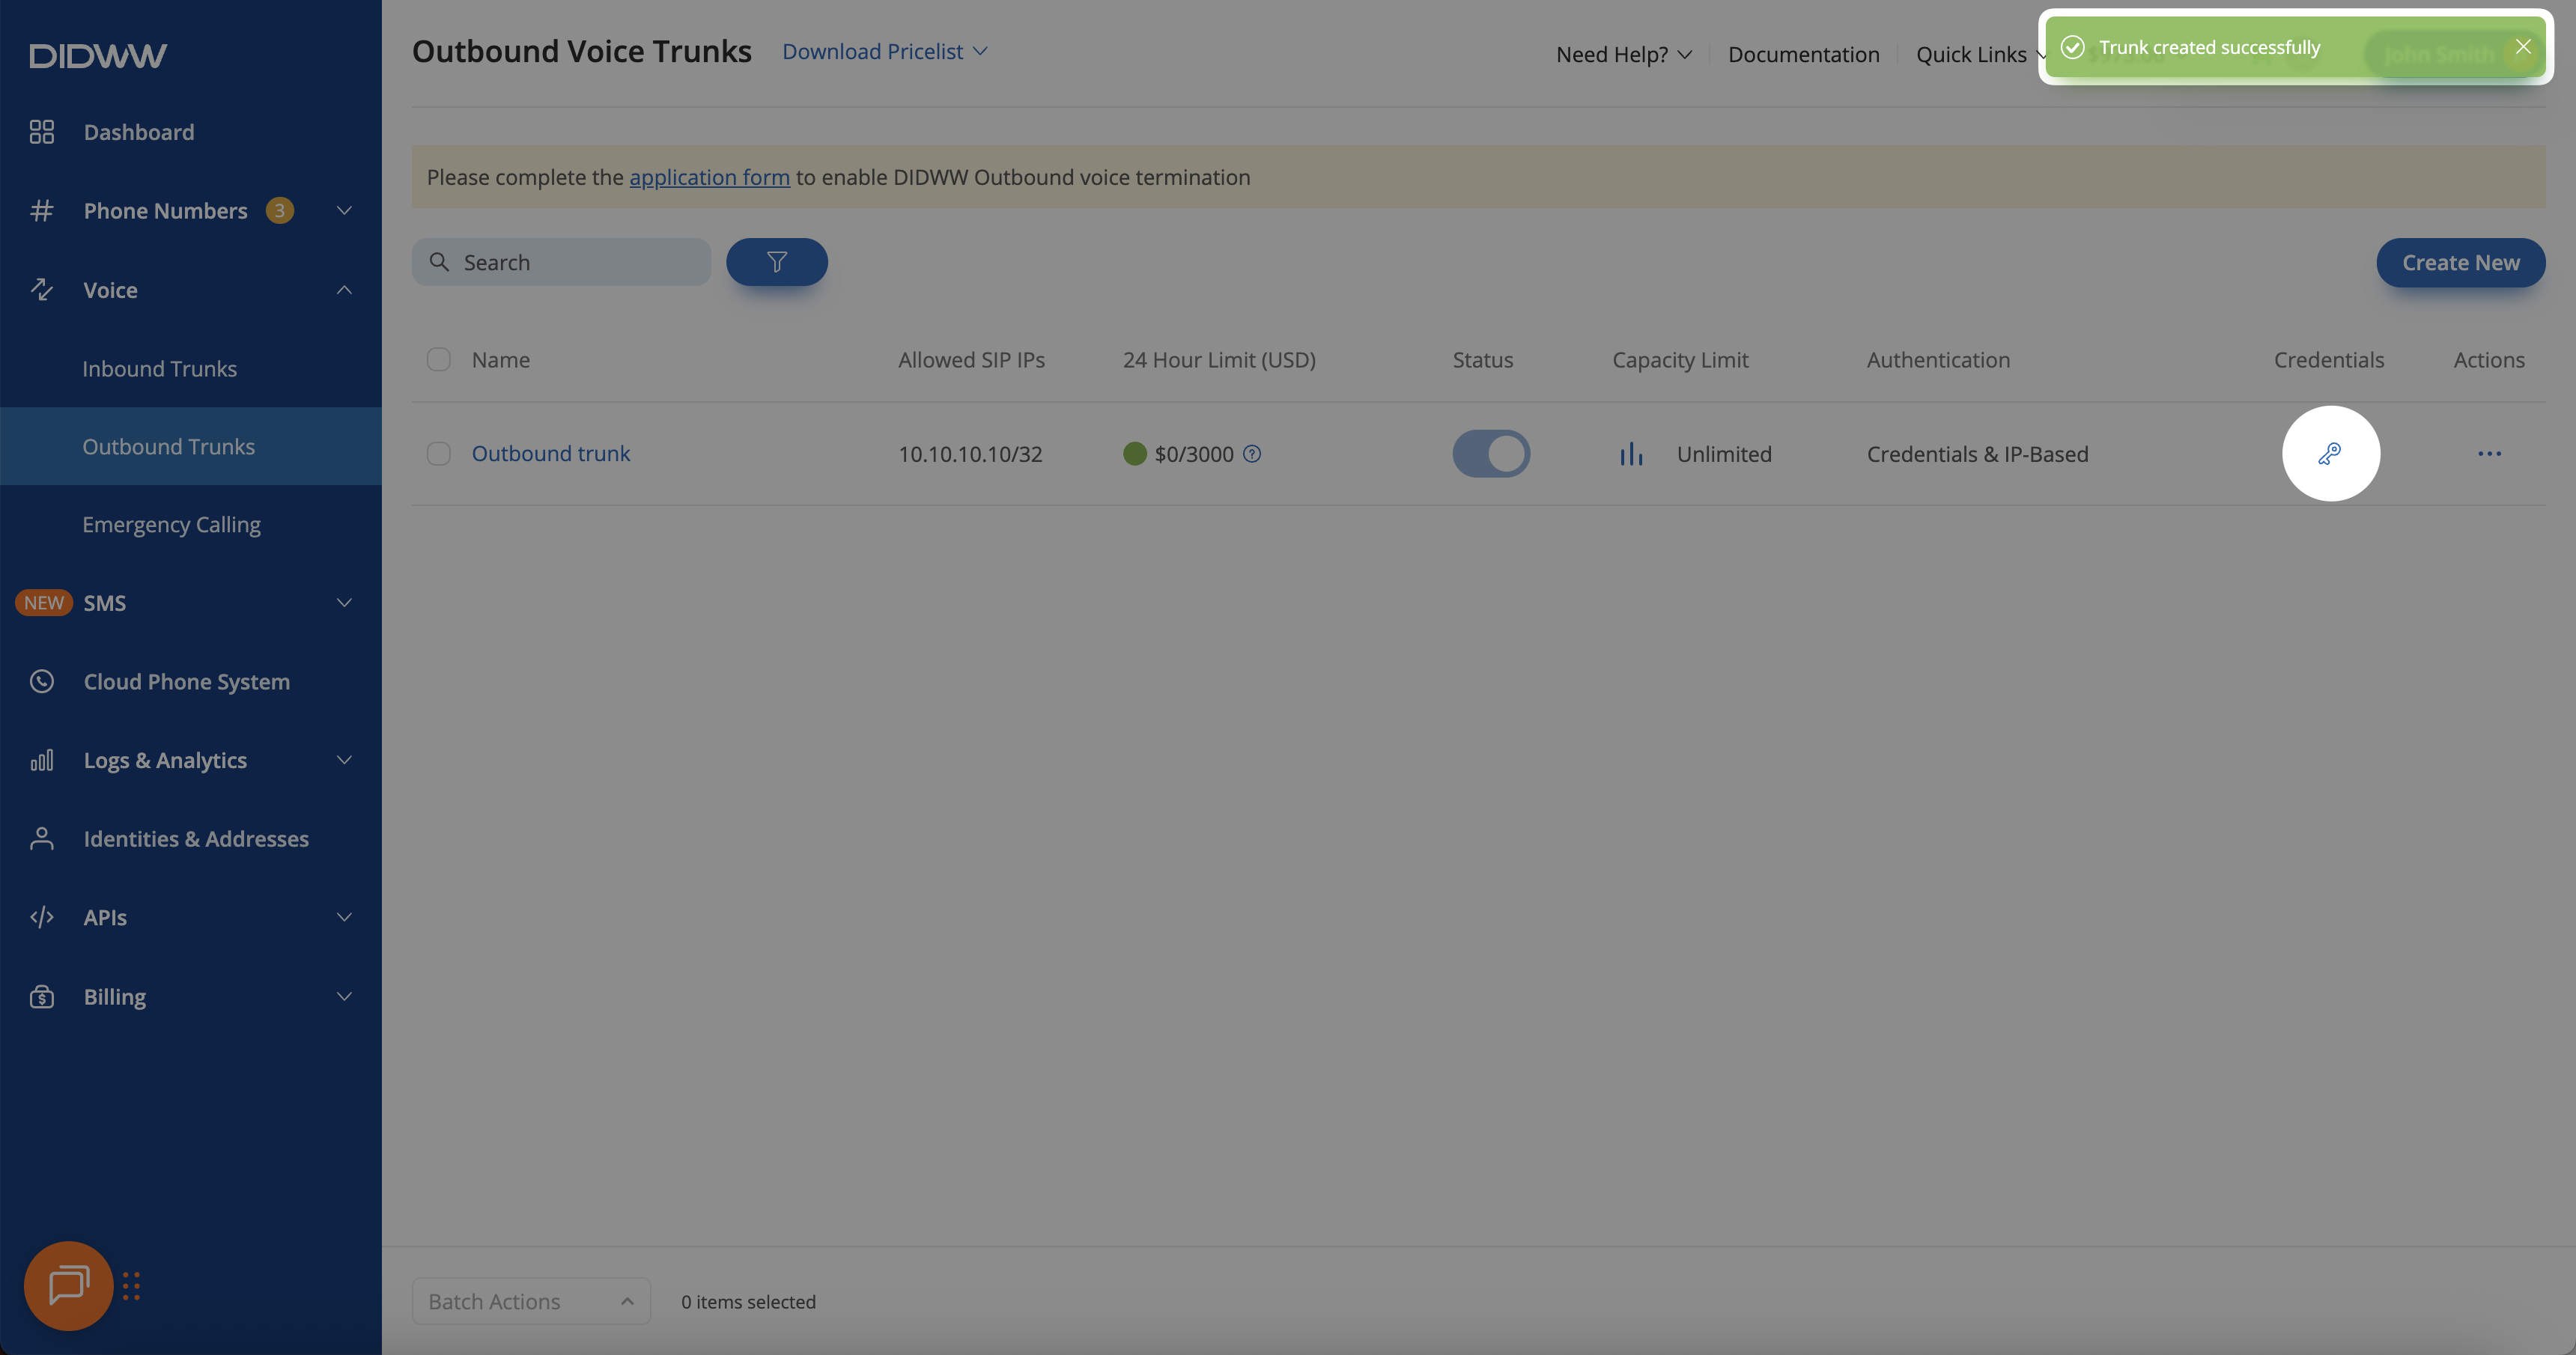
Fig. 3. Viewing outbound trunk credentials and allowed Emergency Calling CLI(s).#
Step 4: Verify Emergency Calling CLI(s)#
The Outbound Trunk Credentials pop-up will appear, displaying the username, password, and other connection details.
In the Emergency Calling CLI(s) field, you will see either a list of allowed numbers or Any, which indicates that all DIDs with active Emergency Calling Services can be used for emergency calls.
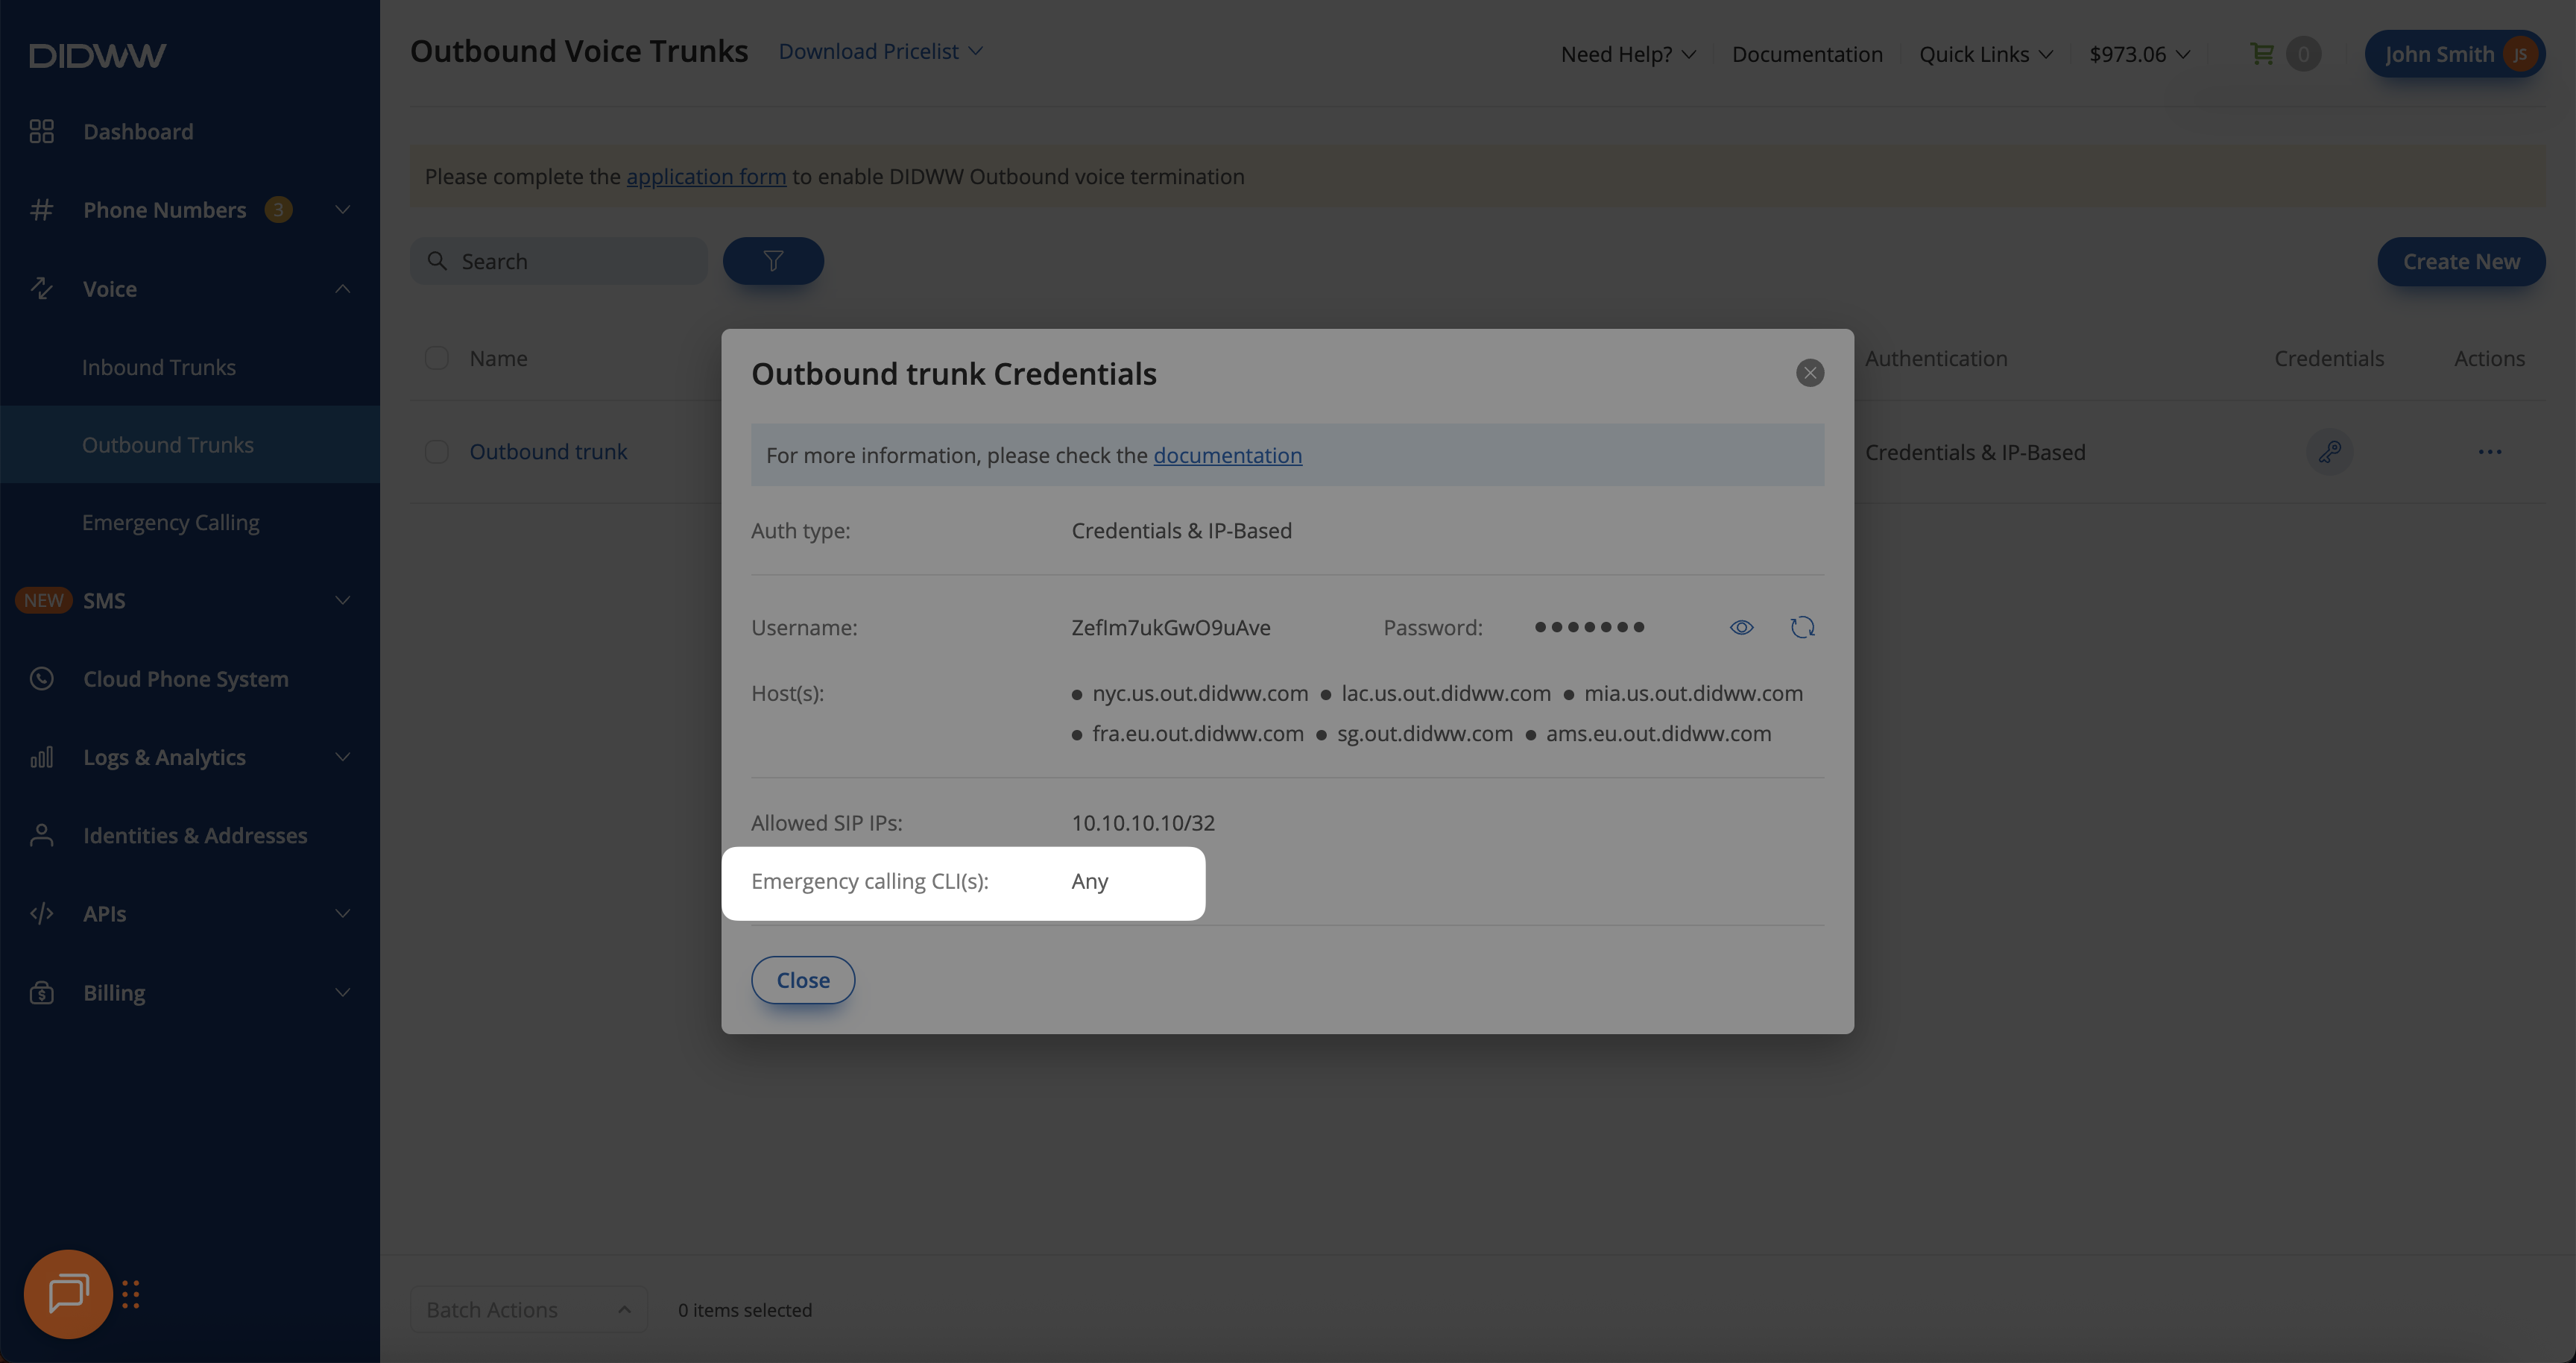
Fig. 4. Viewing and verifying Emergency Calling CLI(s) for the outbound trunk.#
Edit Outbound Trunk & Allow Selected DIDs For Emergency Calling#
You can edit an existing Outbound Trunk to specify which DID numbers are permitted for emergency calling. By default, all verified DIDs with active Emergency Calling Services are allowed, but you can limit this to selected numbers if needed.
Step 1: Edit the Outbound Trunk#
In the DIDWW User Panel, go to Voice → Outbound Trunks.
Click Actions (⋯) next to the trunk you want to update.
Select Edit from the dropdown menu.
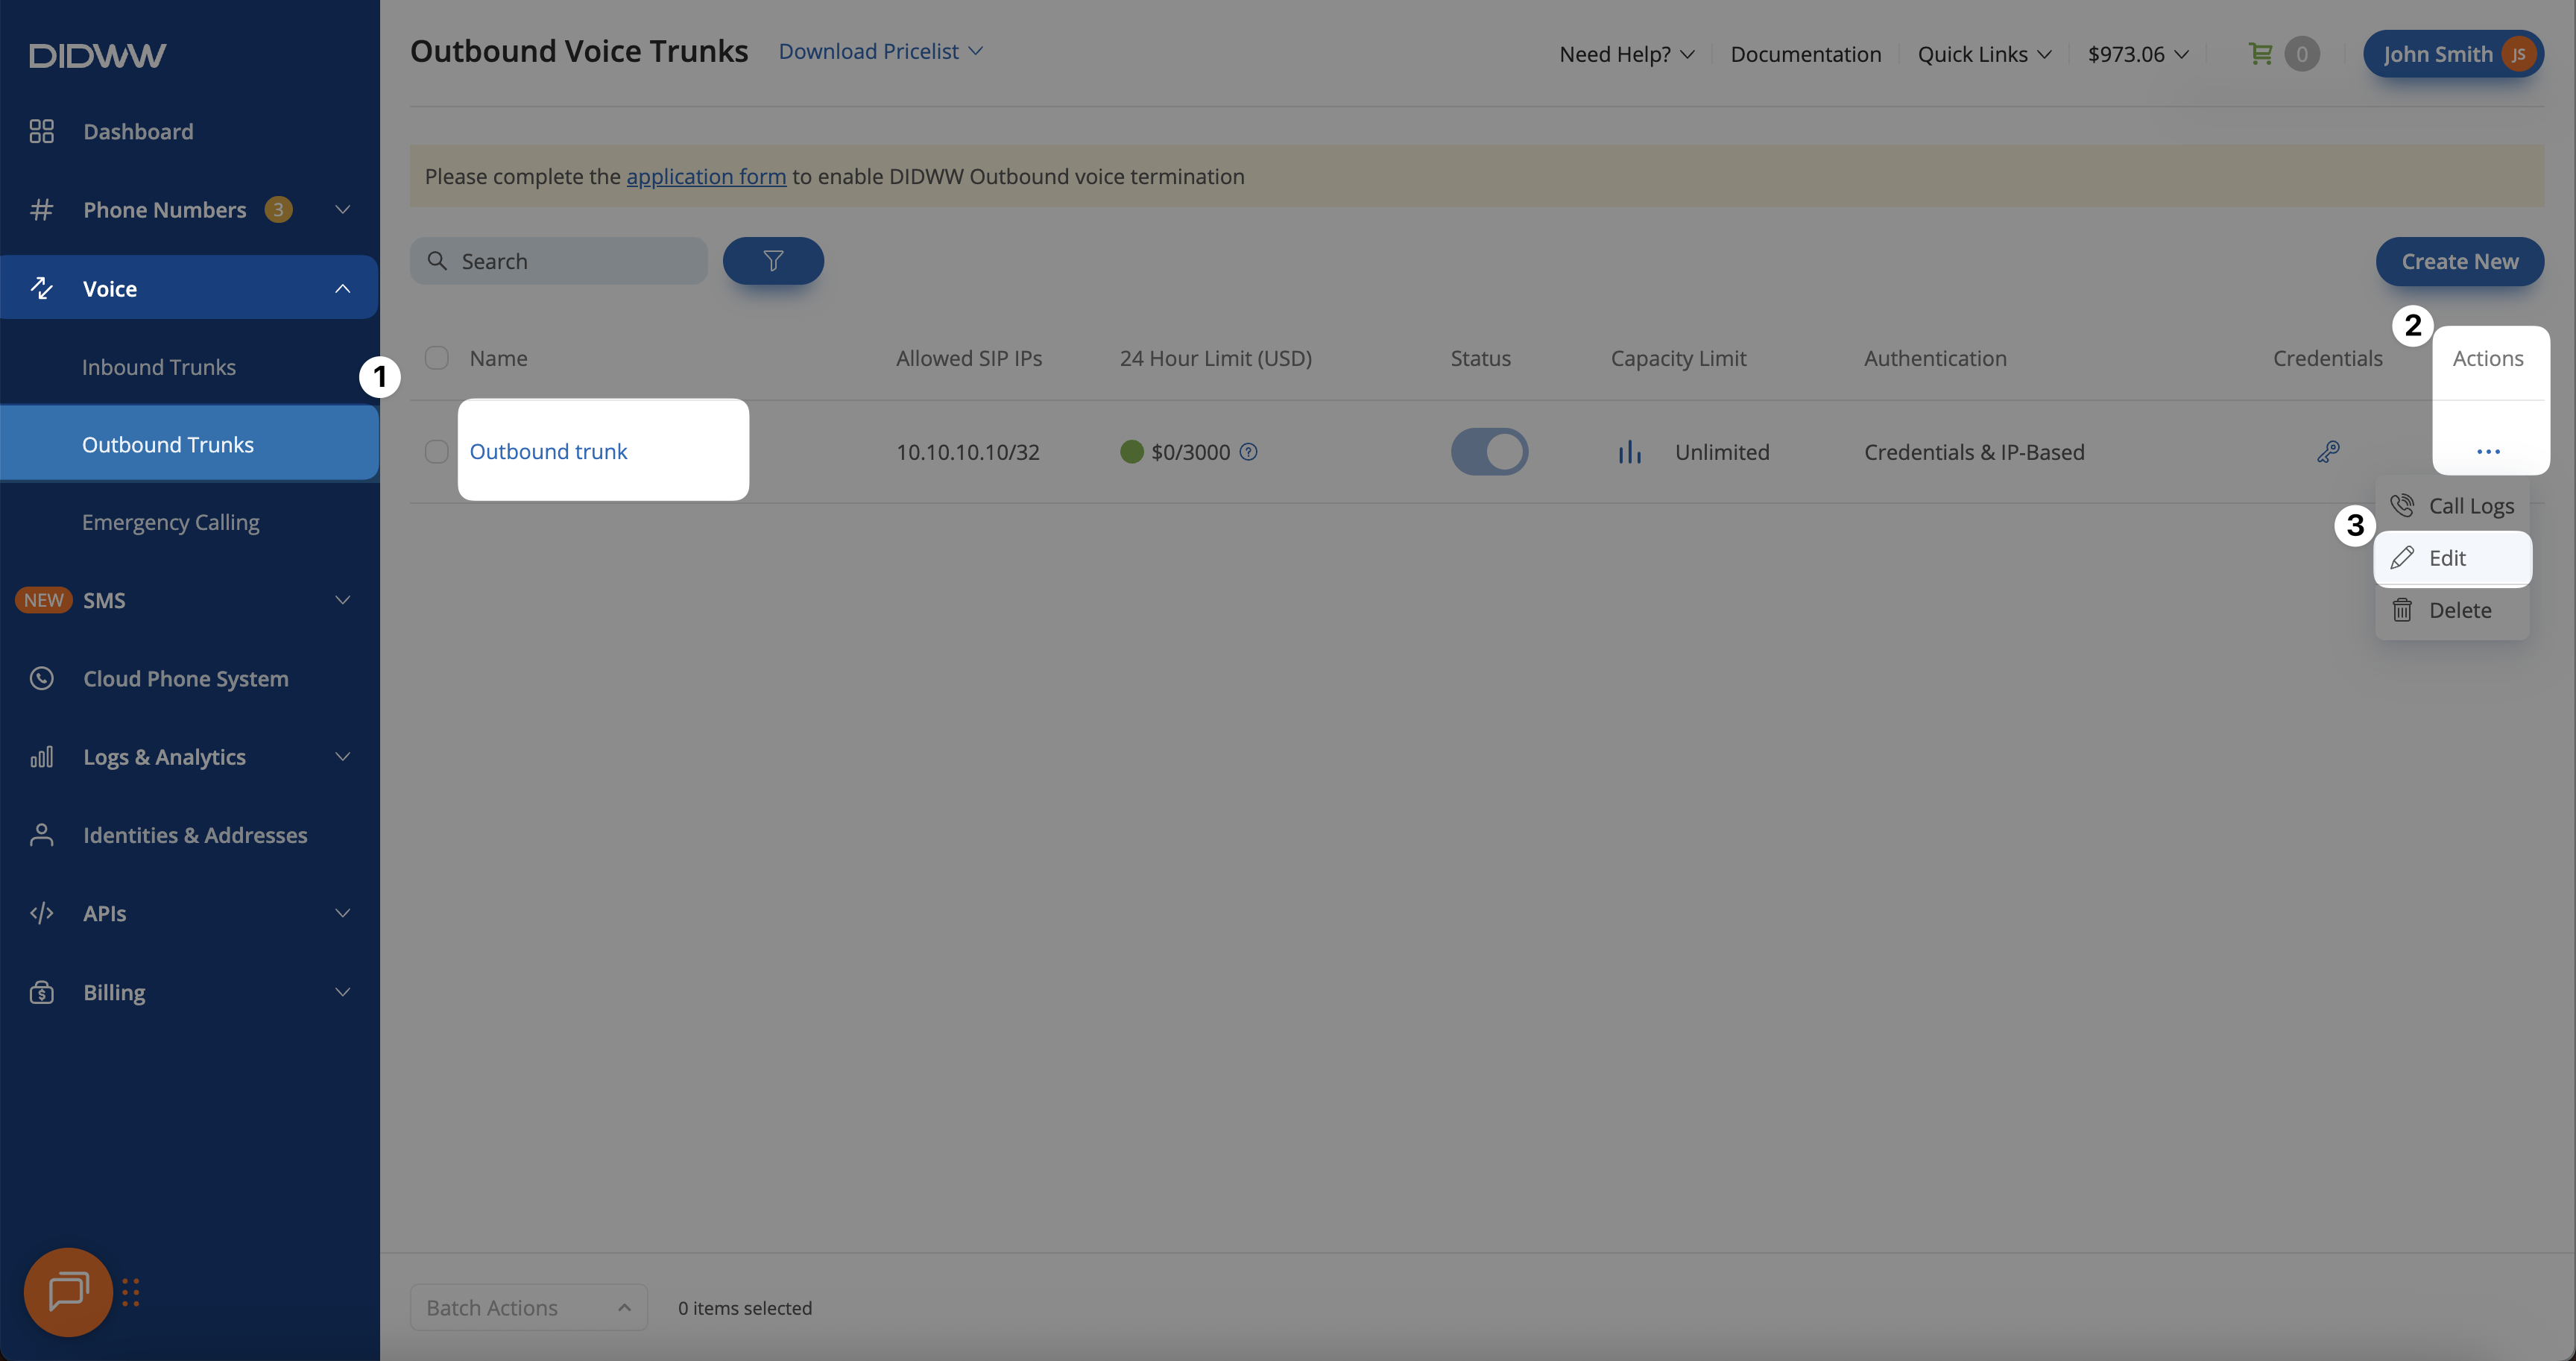
Fig. 5. Opening the Edit page for an existing outbound trunk.#
Step 2: Allow Selected DIDs for Emergency Calling#
Expand the Emergency Calling section.
Disable the Allow all available DID(s) for emergency calling toggle to choose specific numbers manually.
Use the filters or search options in the Available CLI(s) section to find the desired DID number(s).
Select the DID(s) and click the right arrow ( > ) button to move them to the Allowed CLI(s) section.
Click Submit to save your configuration.
Important
The Available CLI(s) list displays only DID numbers with an active Emergency Calling Service.
Fig. 6. Selecting and allowing specific DIDs for emergency calling.#