DIDWW outbound trunks enable routing of voice traffic to external destinations via DIDWW termination routes. This section describes how to create, configure, and manage outbound trunks, including authentication, media settings, and termination routes for efficient call management.
Create Outbound Trunk
Step-by-step guide for creating and configuring a new outbound trunk.
This method is selected by default when creating an outbound trunk. It uses trunk credentials and allowed IP addresses to authenticate outbound calls.
Field
Description
Tech Prefix
Optional code added before the dialed number to help identify and route calls through your trunk.
Specification
Maximum length: 8 characters.
Allowed symbols: digits (0–9) and the # symbol only.
The DST field in the Call Logs shows the full dialed destination, including the tech prefix.
Example
If you set the tech prefix to 123#, it must be added before the dialed number.
For example:
Dialed number: 123#442012345678
Shown in CDR: 123#442012345678
Routed destination: 442012345678
Emergency calls must also include the prefix, e.g. 123#112.
Allowed IP addresses
Your system’s IP address from which calls are sent to DIDWW.
Allowed RTP IP addresses
Your RTP addresses from which audio packets will be relayed to DIDWW.
Note
The maximum number of allowed SIP and RTP IPs and subnets is 60.
By default, a trunk cannot be created without adding at least one Allowed SIP IP address. To allow any IP address (not recommended for security reasons), you can add 0.0.0.0/0.
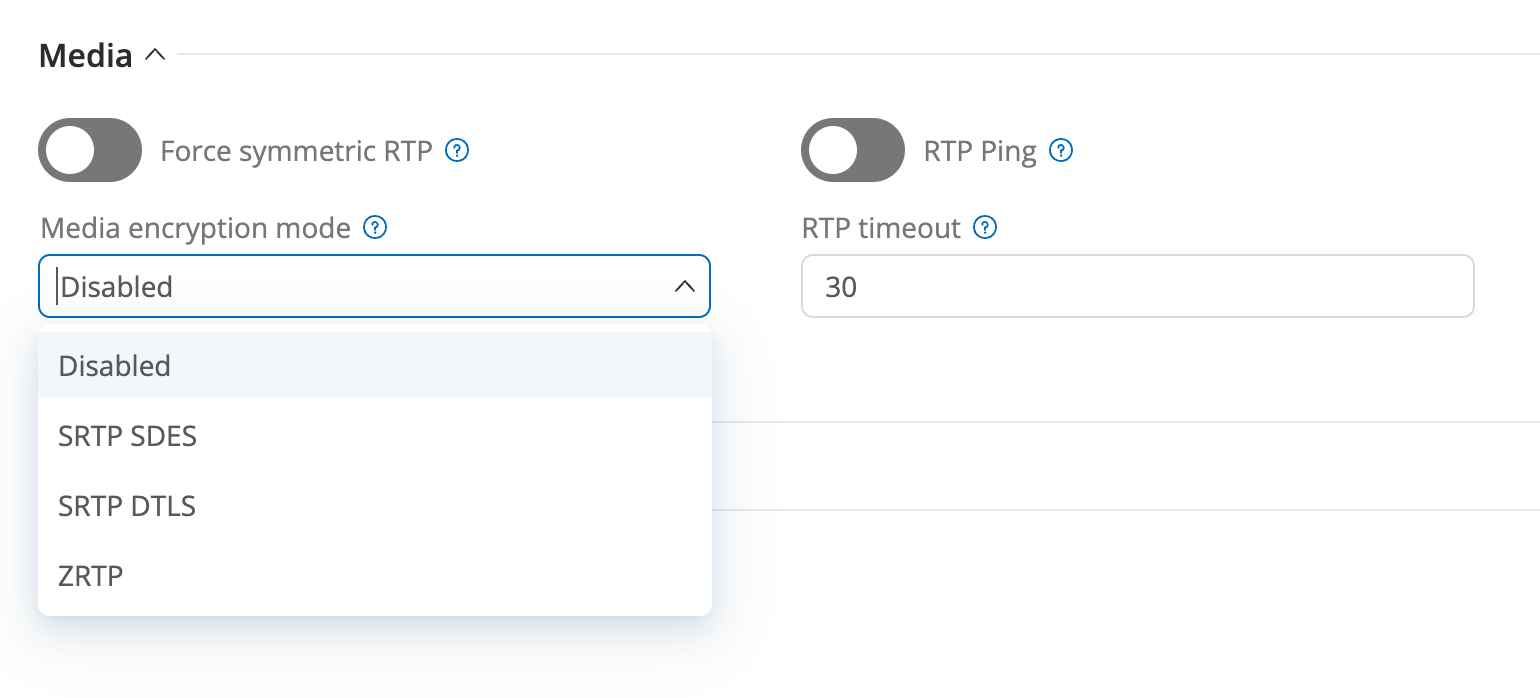
The Media section provides options to configure how media (audio packets) is handled for outbound trunks. These settings ensure compatibility and enhance security during call setup and transmission.
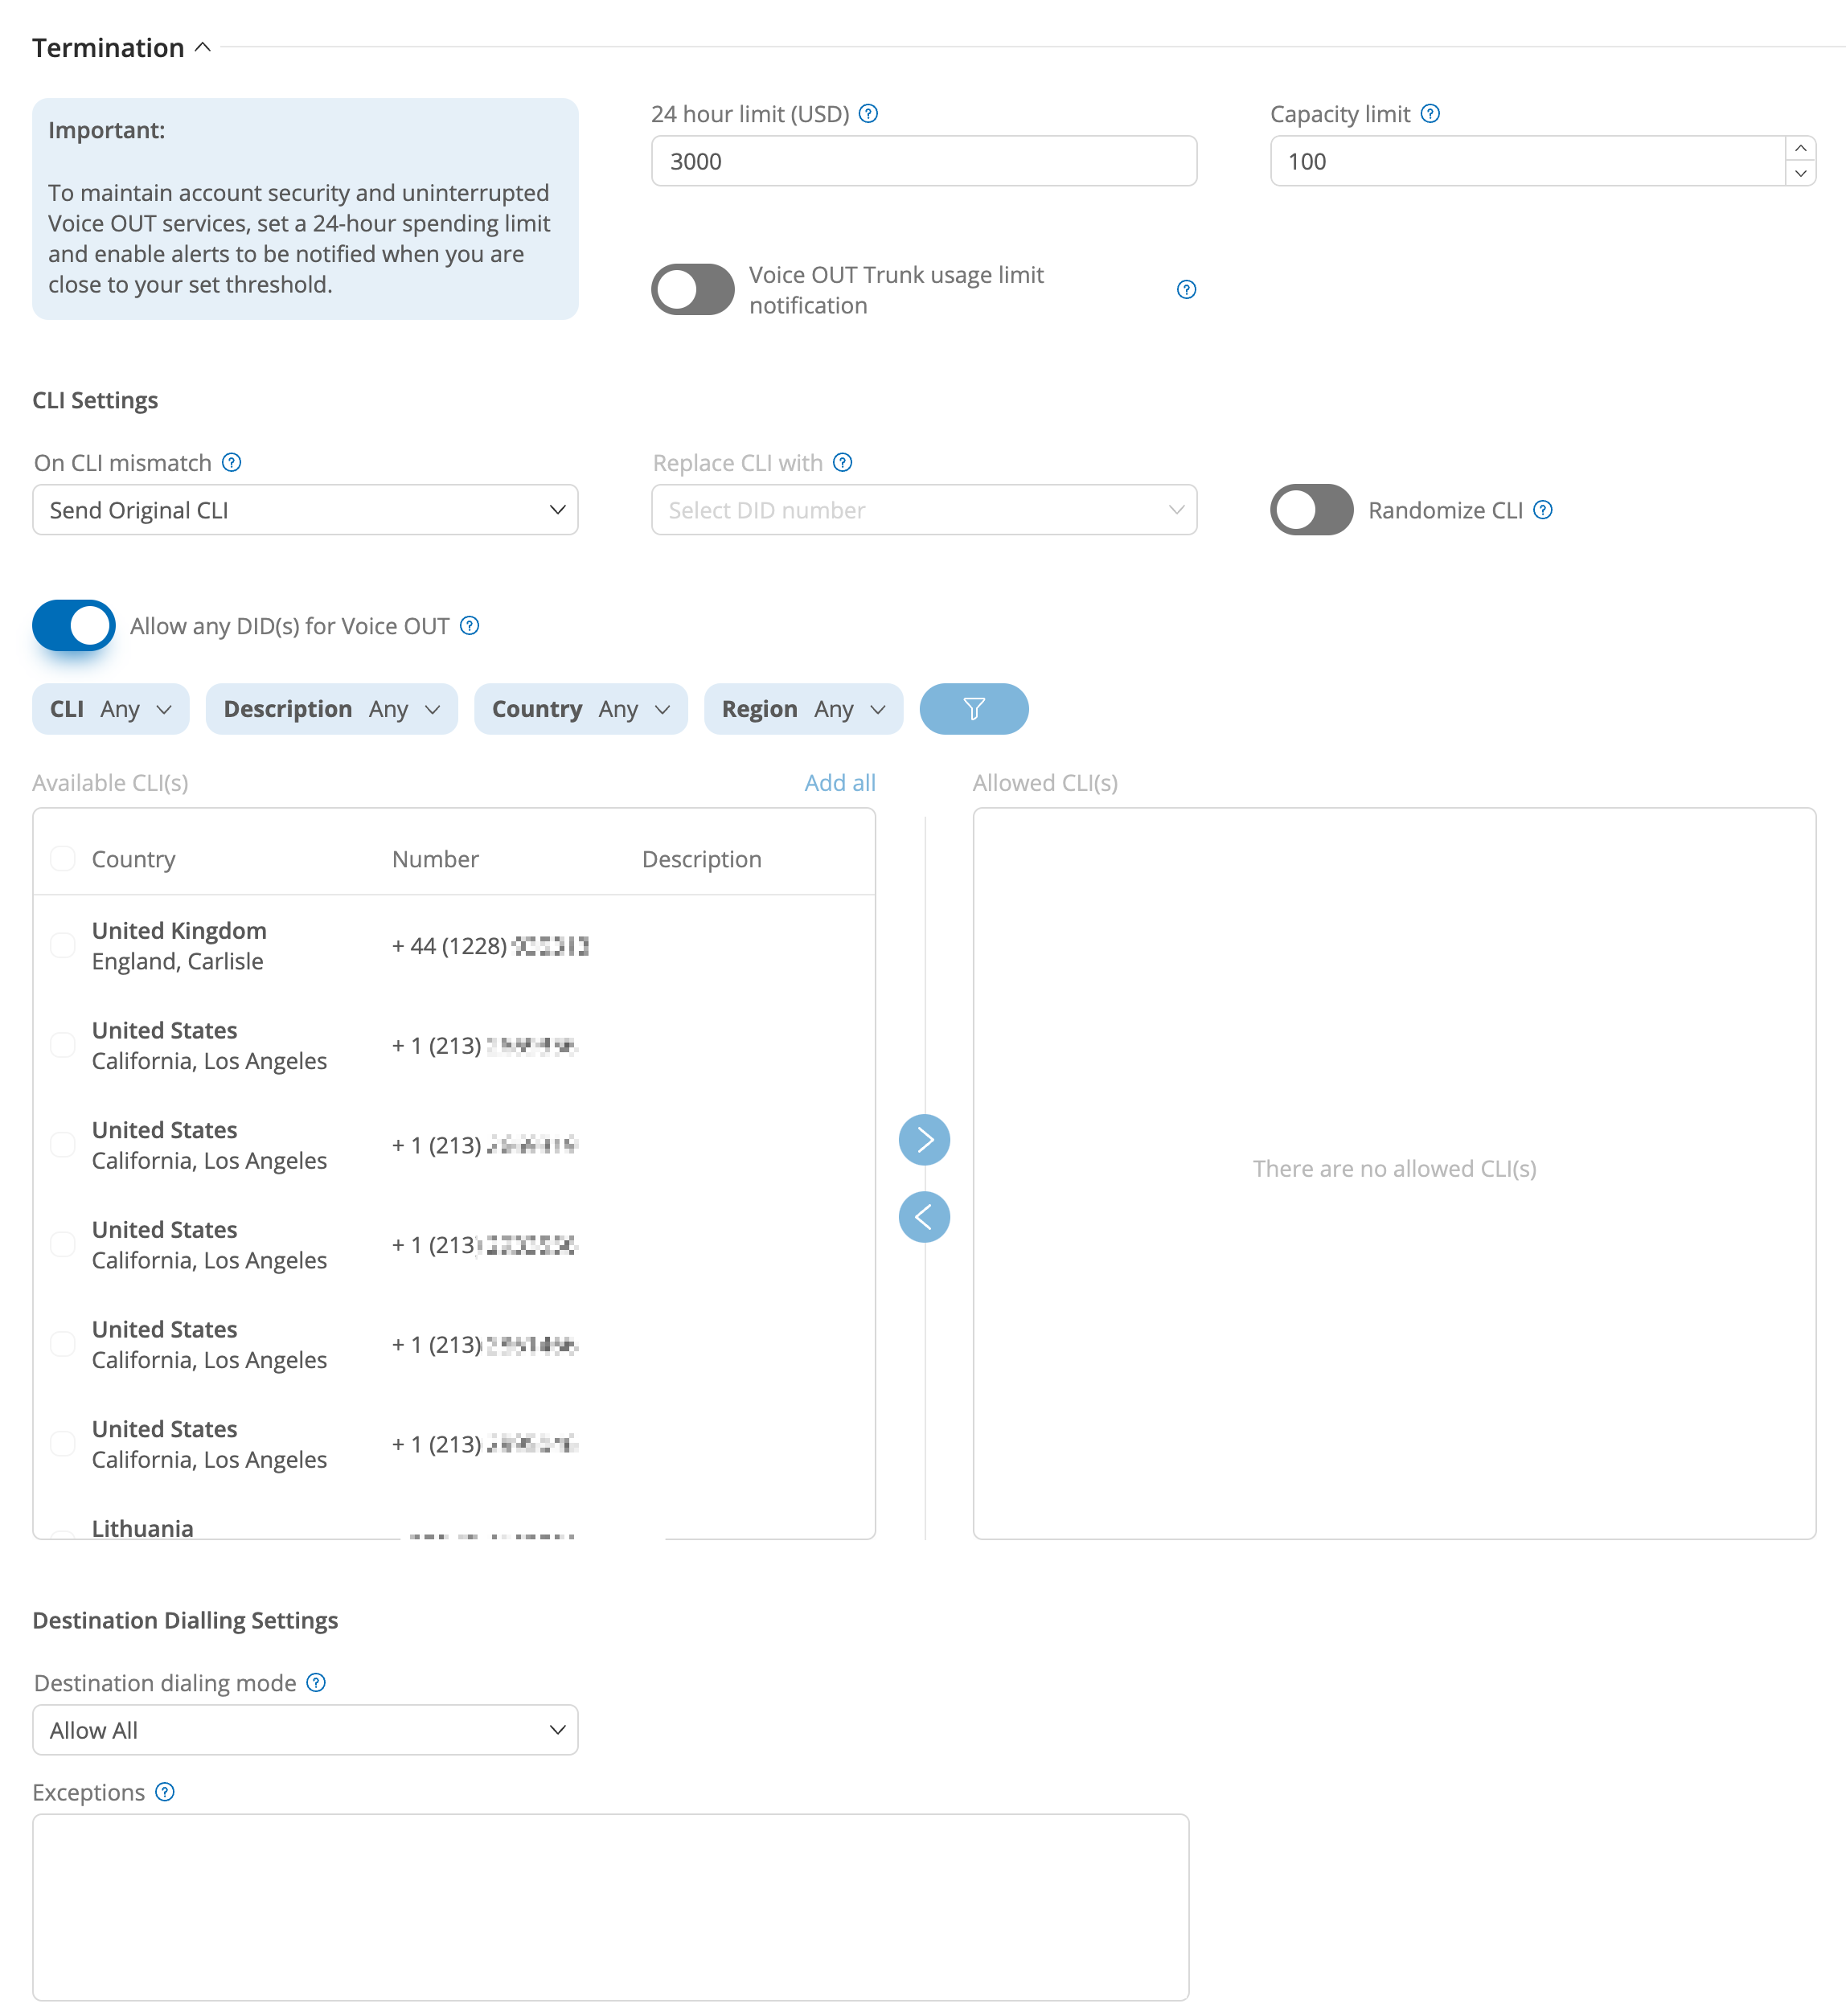
The Termination section allows you to configure Limits and Notifications for outbound trunk usage, as well as manage CLI Settings and Destination Dialing Settings.
Sets the maximum amount of funds allowed per trunk over a rolling 24-hour period. When this limit is reached, traffic on the trunk is blocked and active calls will be disconnected shortly.
Capacity limit
Specifies the maximum number of simultaneous calls allowed per trunk.
Voice OUT Trunk usage limit notification
Sends an email notification when 80% of the 24-hour limit is reached.
Notifications are sent once every 12 hours.
Note
The default 24-hour limit is $3000. The minimum limit is $50, and the maximum limit is $10000.
A CLI mismatch happens when numbers from other providers are used as the CLI, or when the CLI does not match any numbers acquired via DIDWW.
Send Original CLI – Passes the “From” header value from your system to the PSTN gateway without modification.
Reject Call – Rejects the call if the “From” header value does not match any DID numbers allowed in the CLI Settings list.
Allow any DID(s) as CLI for Voice OUT
When this toggle is enabled, all supported numbers are automatically allowed as CLI by default.
Allow specific DIDs as CLI for Voice OUT
When this toggle is disabled, only numbers added to the Allowed CLI(s) list can be used as CLI.
Note
The Available CLI(s) list displays only DID numbers that support the Voice OUT feature with local termination. DIDs with the Voice OUT global routes feature are not included in this list.
To use the emergency calling service with an outbound trunk, you must first have a DID number that supports emergency services and has emergency service activated.
1. Create Emergency Calling Service
Follow this guide to check your DID eligibility and activate emergency services.
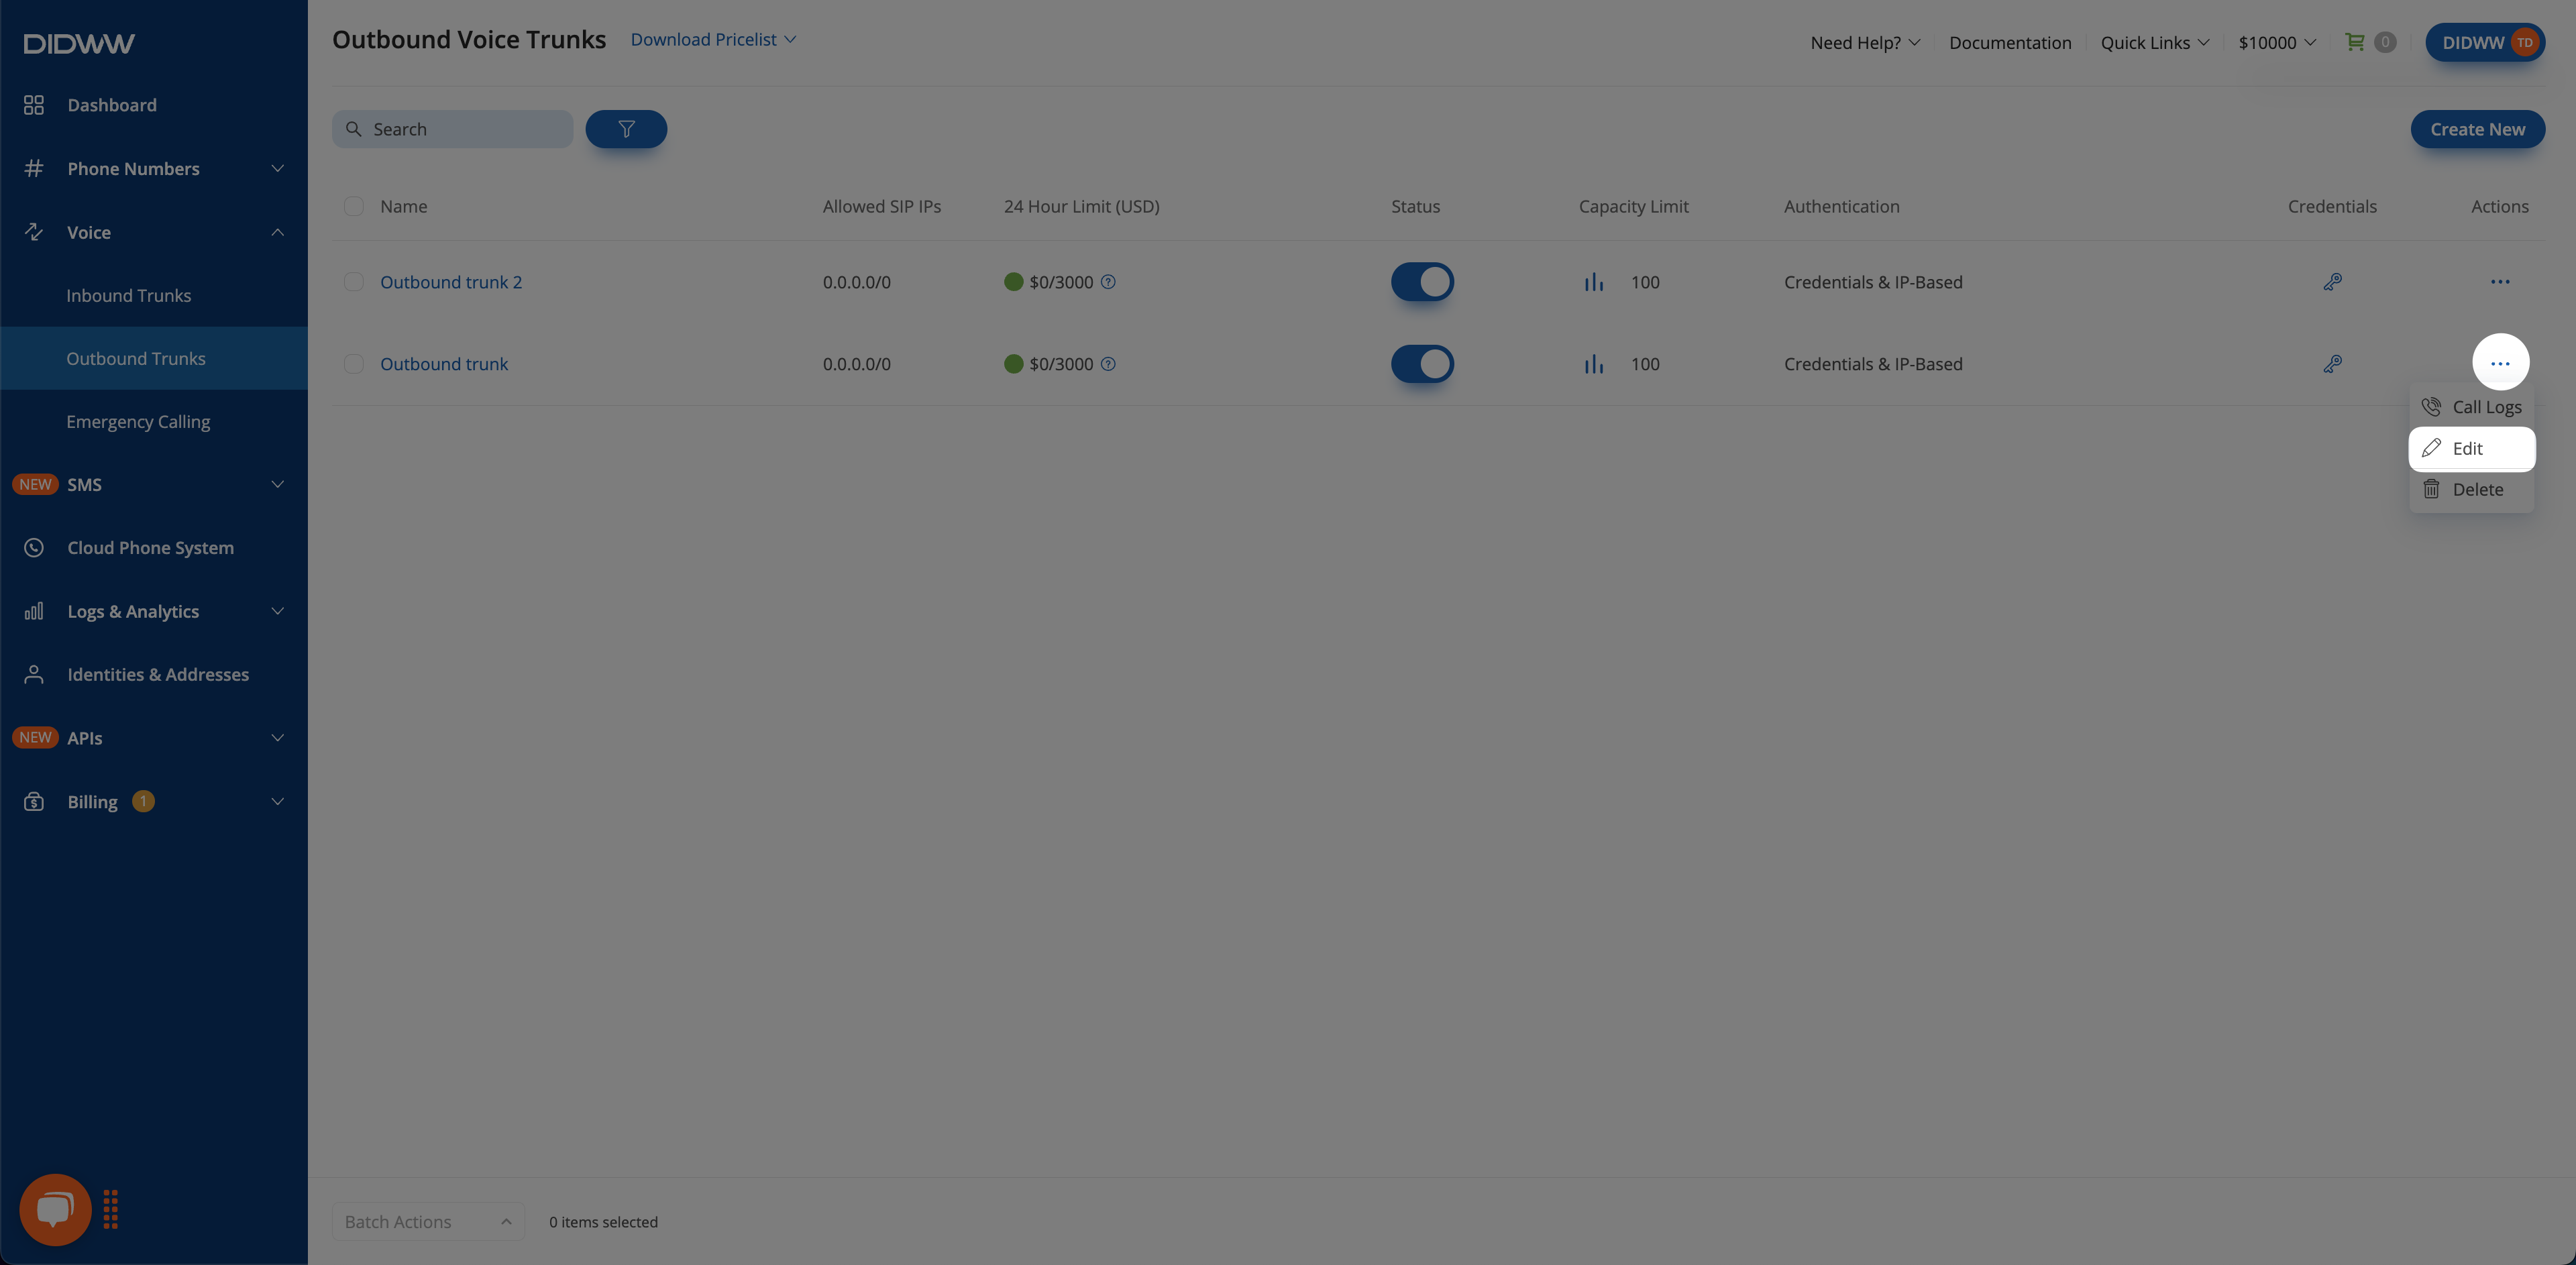
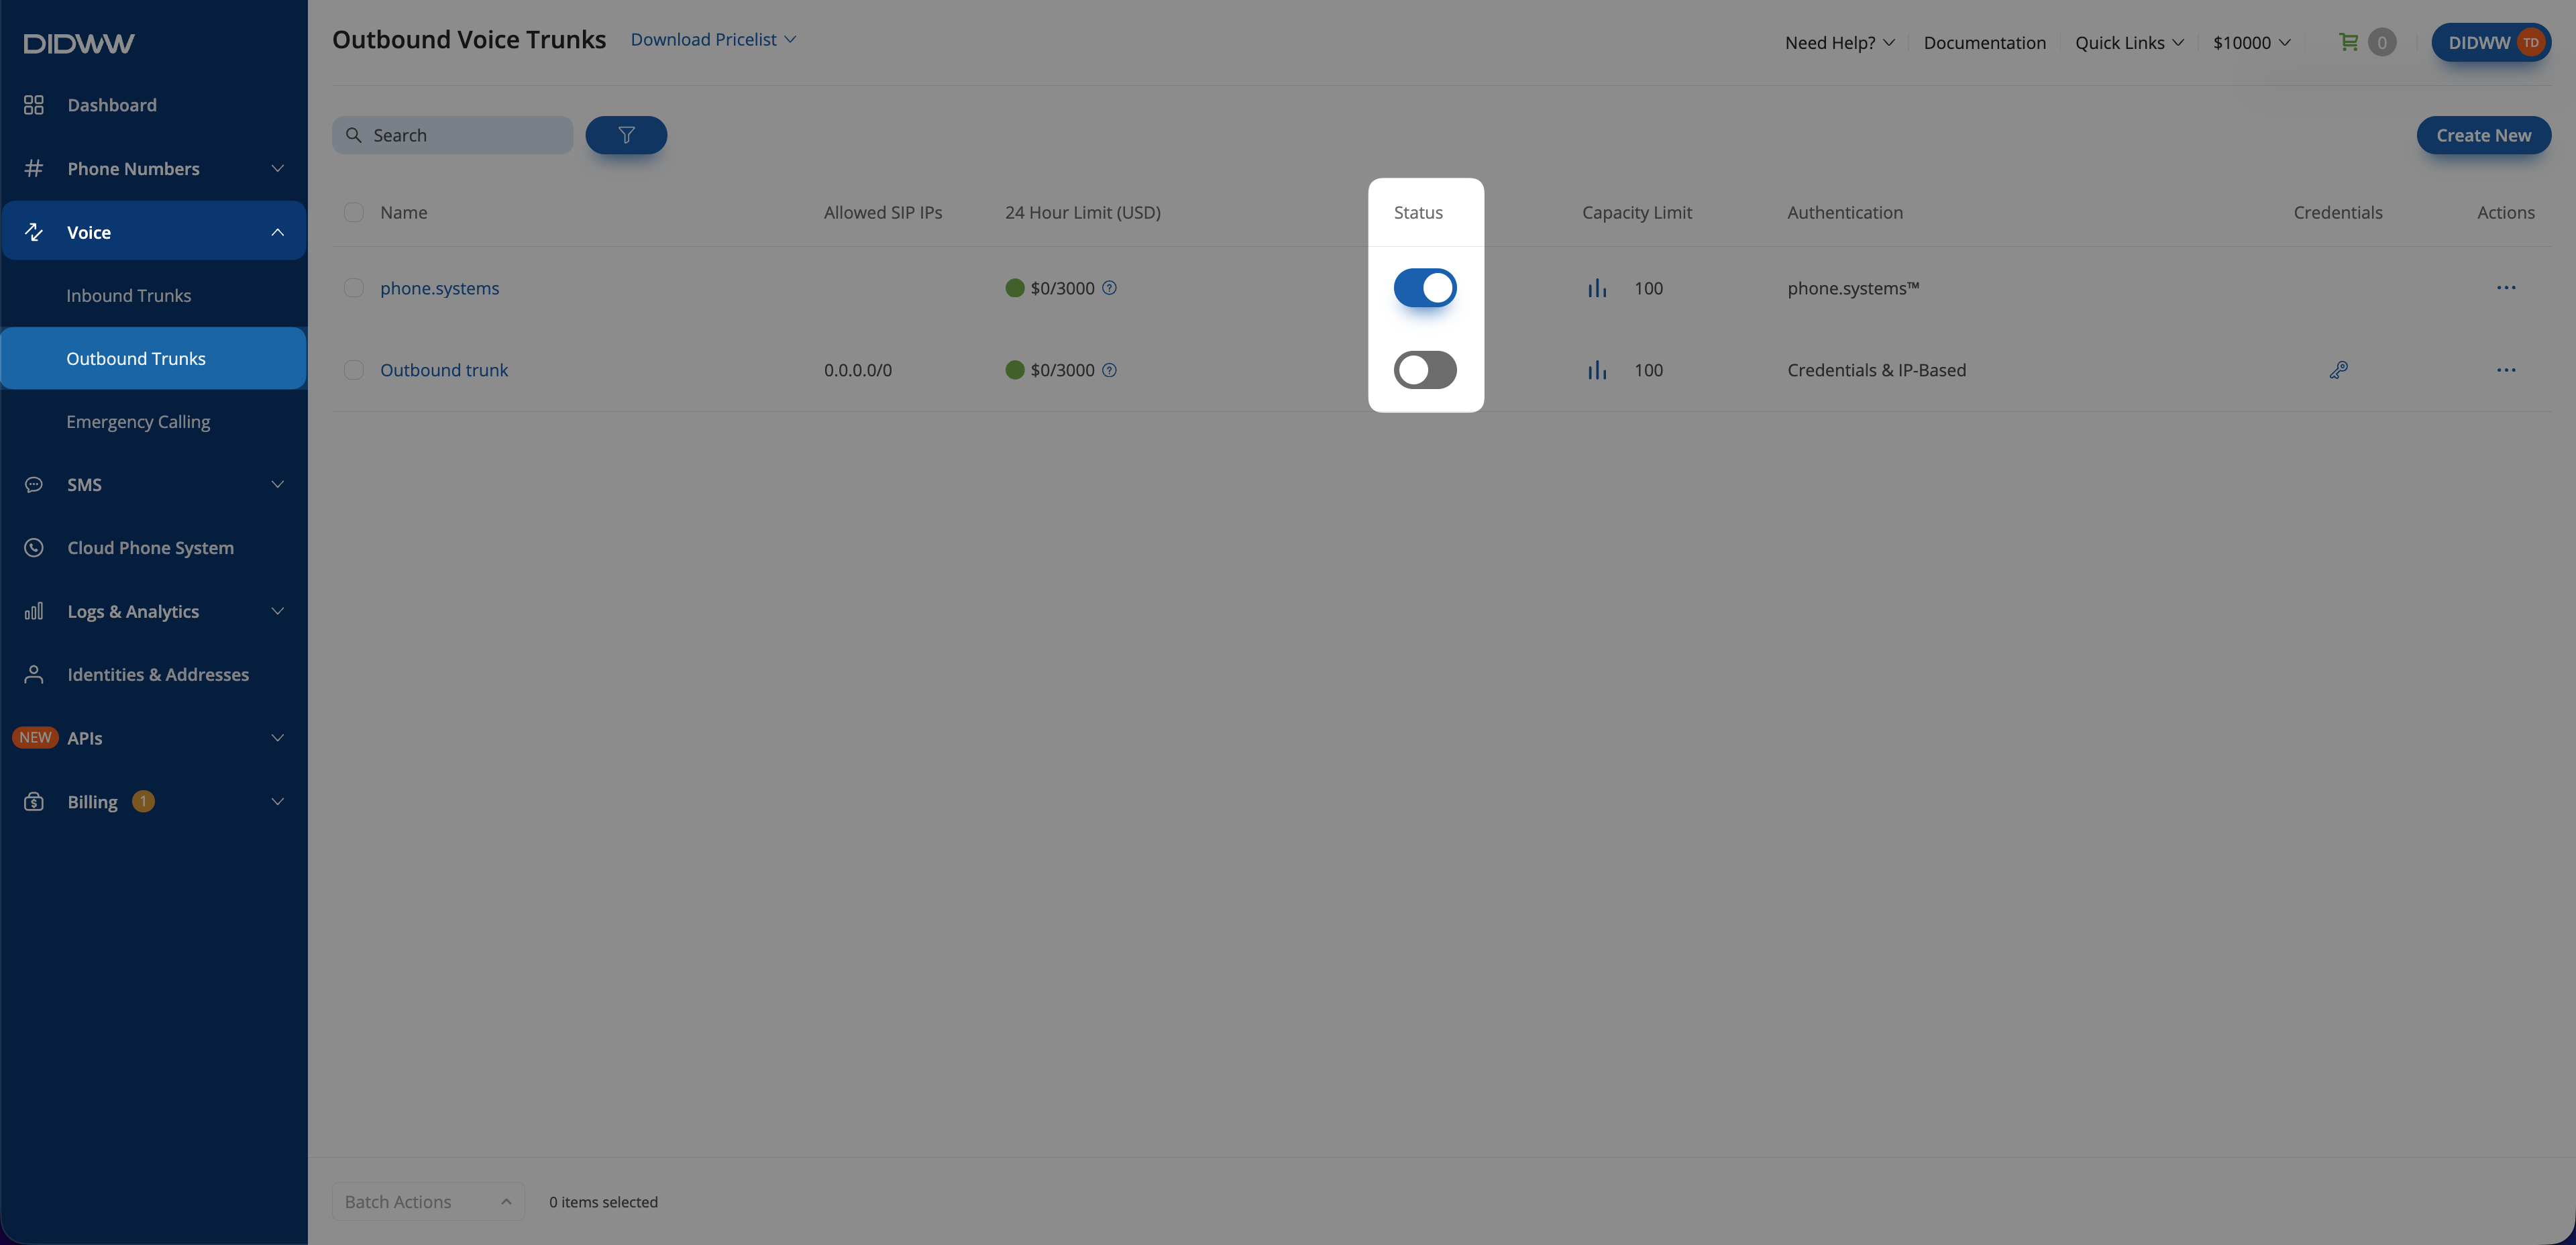
If your outbound trunk uses the Credentials & IP-based authentication method, you can view its credentials by selecting the key icon in the Credentials column on the Outbound Trunks page.
Outbound trunks include a Status toggle that allows you to enable or disable a trunk. This control can be used to temporarily stop or resume outbound traffic without modifying the trunk configuration.
Outbound trunks can also be automatically disabled when the configured 24-hour limit (USD) is exceeded. This limit is configured in the Limits and Notification section when creating or editing a trunk.
When the limit is exceeded:
New outbound calls via the trunk are blocked.
Calls already in progress are disconnected shortly after.
The trunk status is automatically disabled.
The trunk remains disabled until you manually enable it again using the Status toggle.
Note
The 24-hour limit is calculated using a rolling 24-hour usage period for the trunk.
Explore technical specifications and detailed information on termination services, including supported network protocols, signaling endpoints, encryption options, codecs, and other SIP protocol details.

button.