Number List Examples & Use Cases

This section provides real-world examples of how to use Number Lists to manage inbound call filtering. You’ll learn how to add numbers and set rules to allow or block calls based on specific criteria.

With Number Lists, you can:

  • Block unwanted calls from specific prefixes or numbers.

  • Allow calls from specific prefixes or numbers, while blocking all other calls.

  • Load Balance your traffic based on the incoming CLI.

Choose one of the following examples:

1. Block Calls from a Specific Prefix

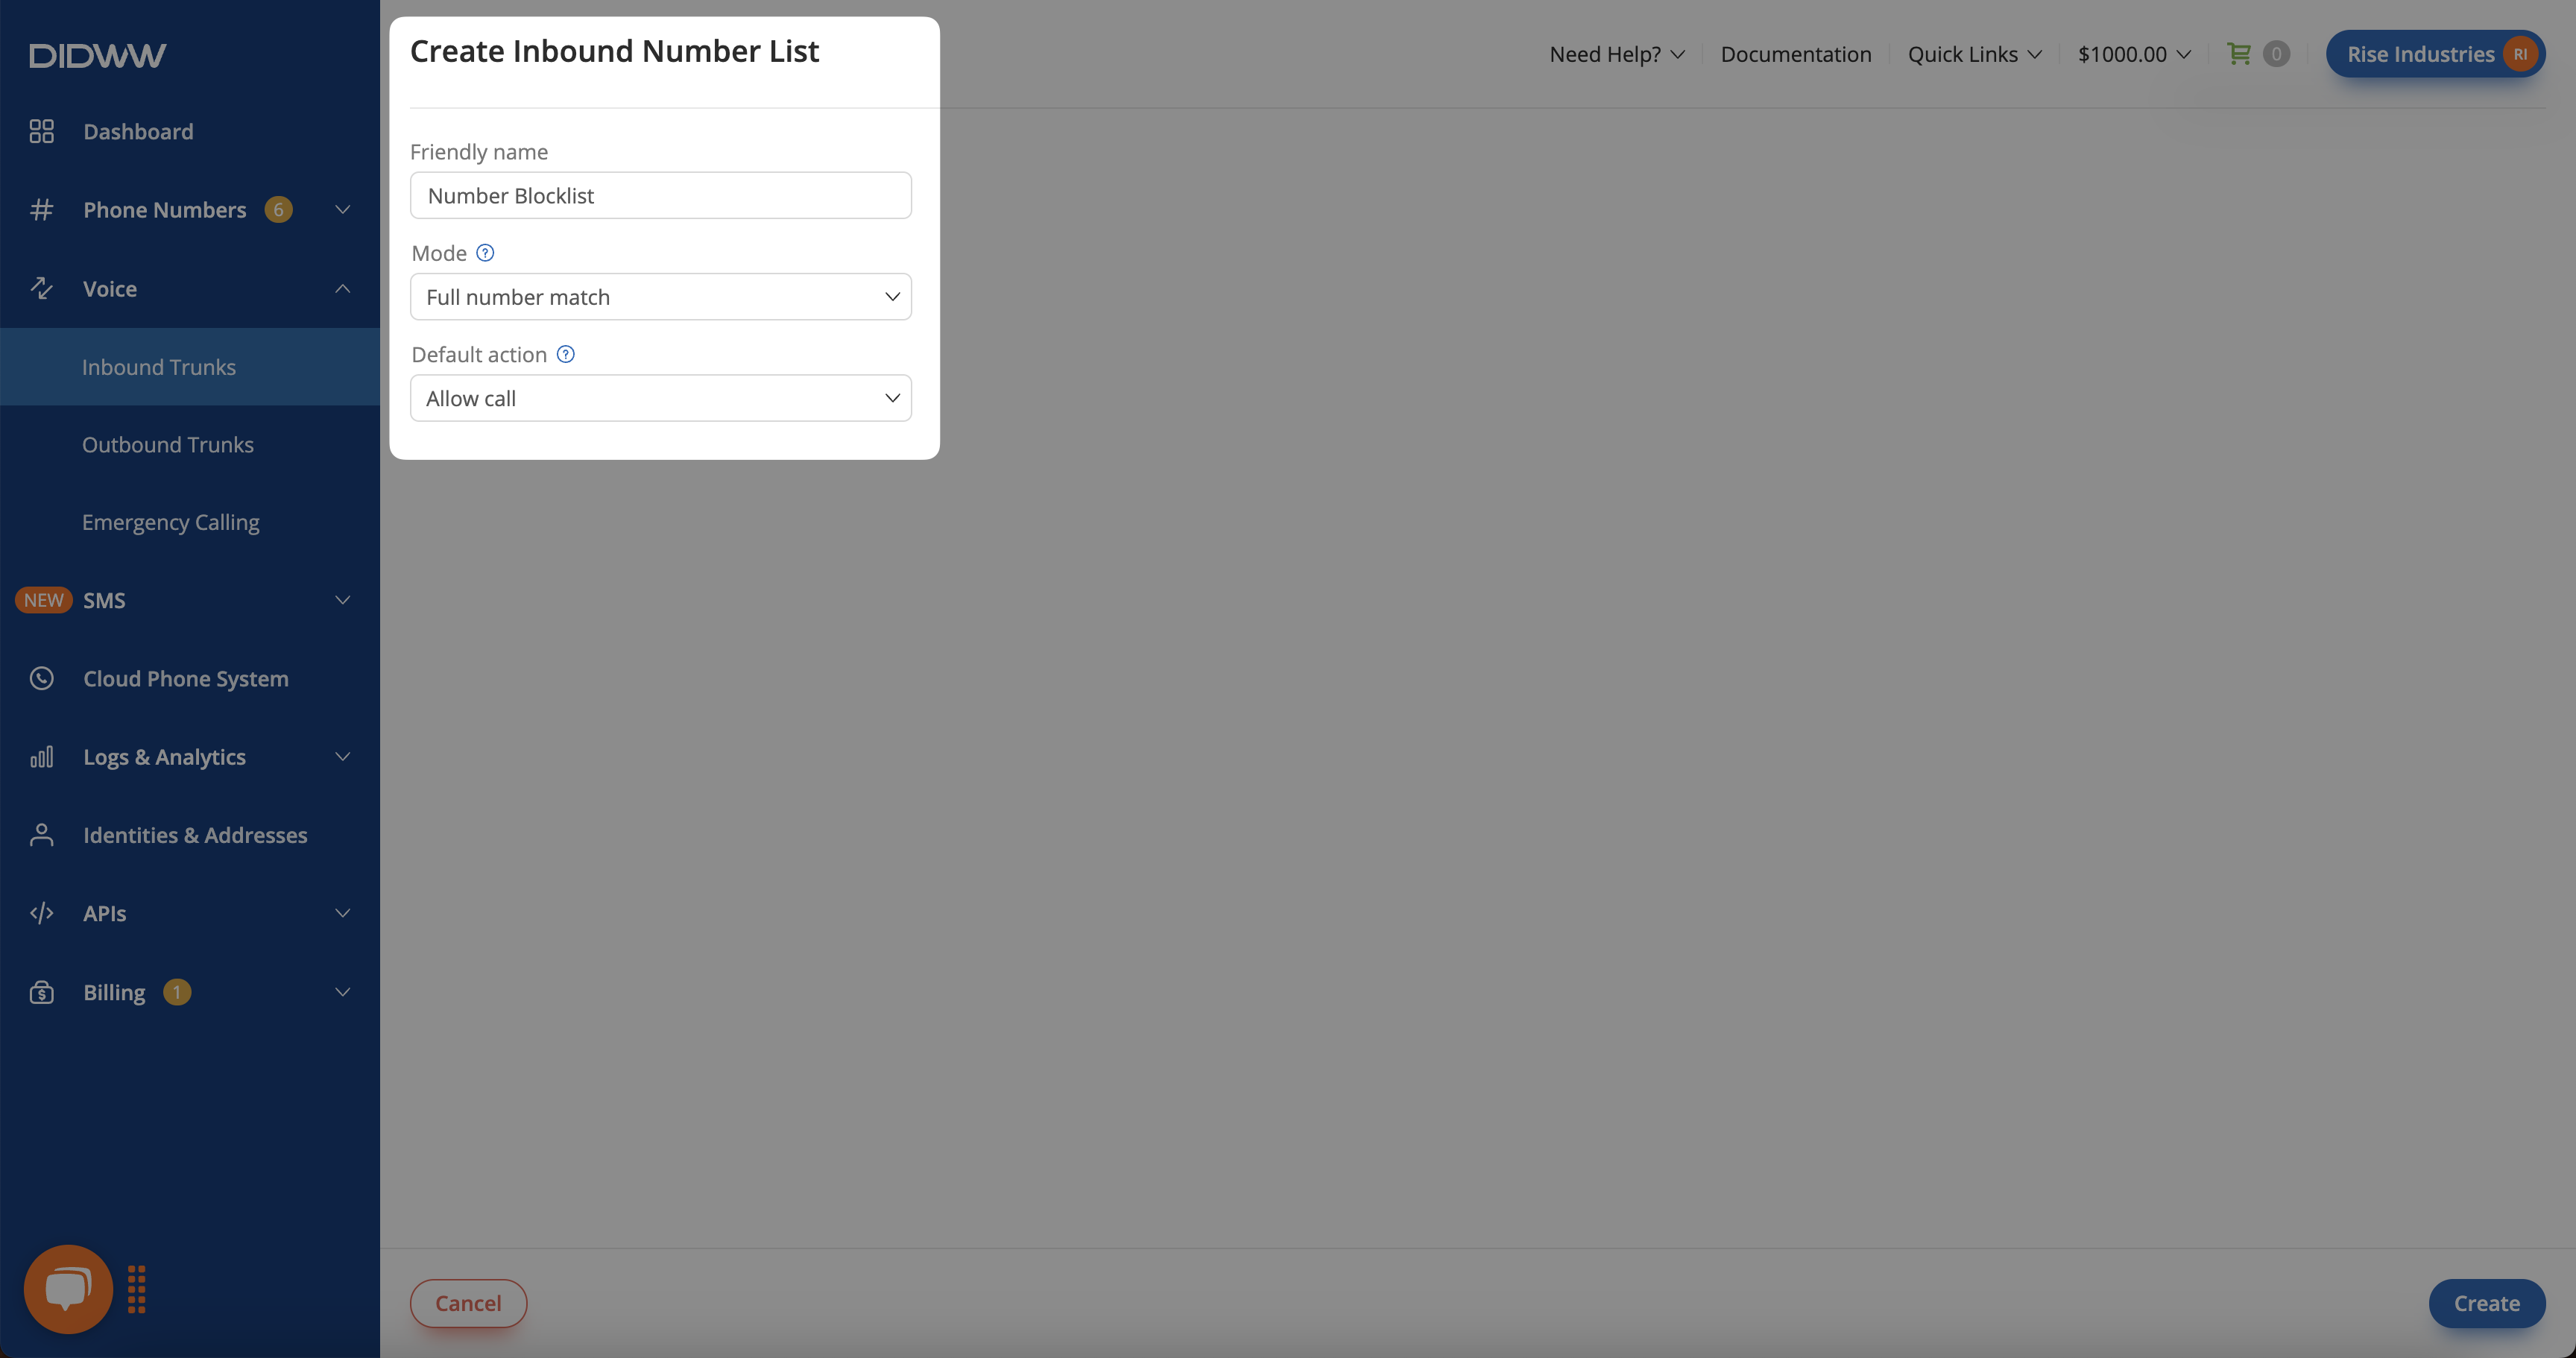
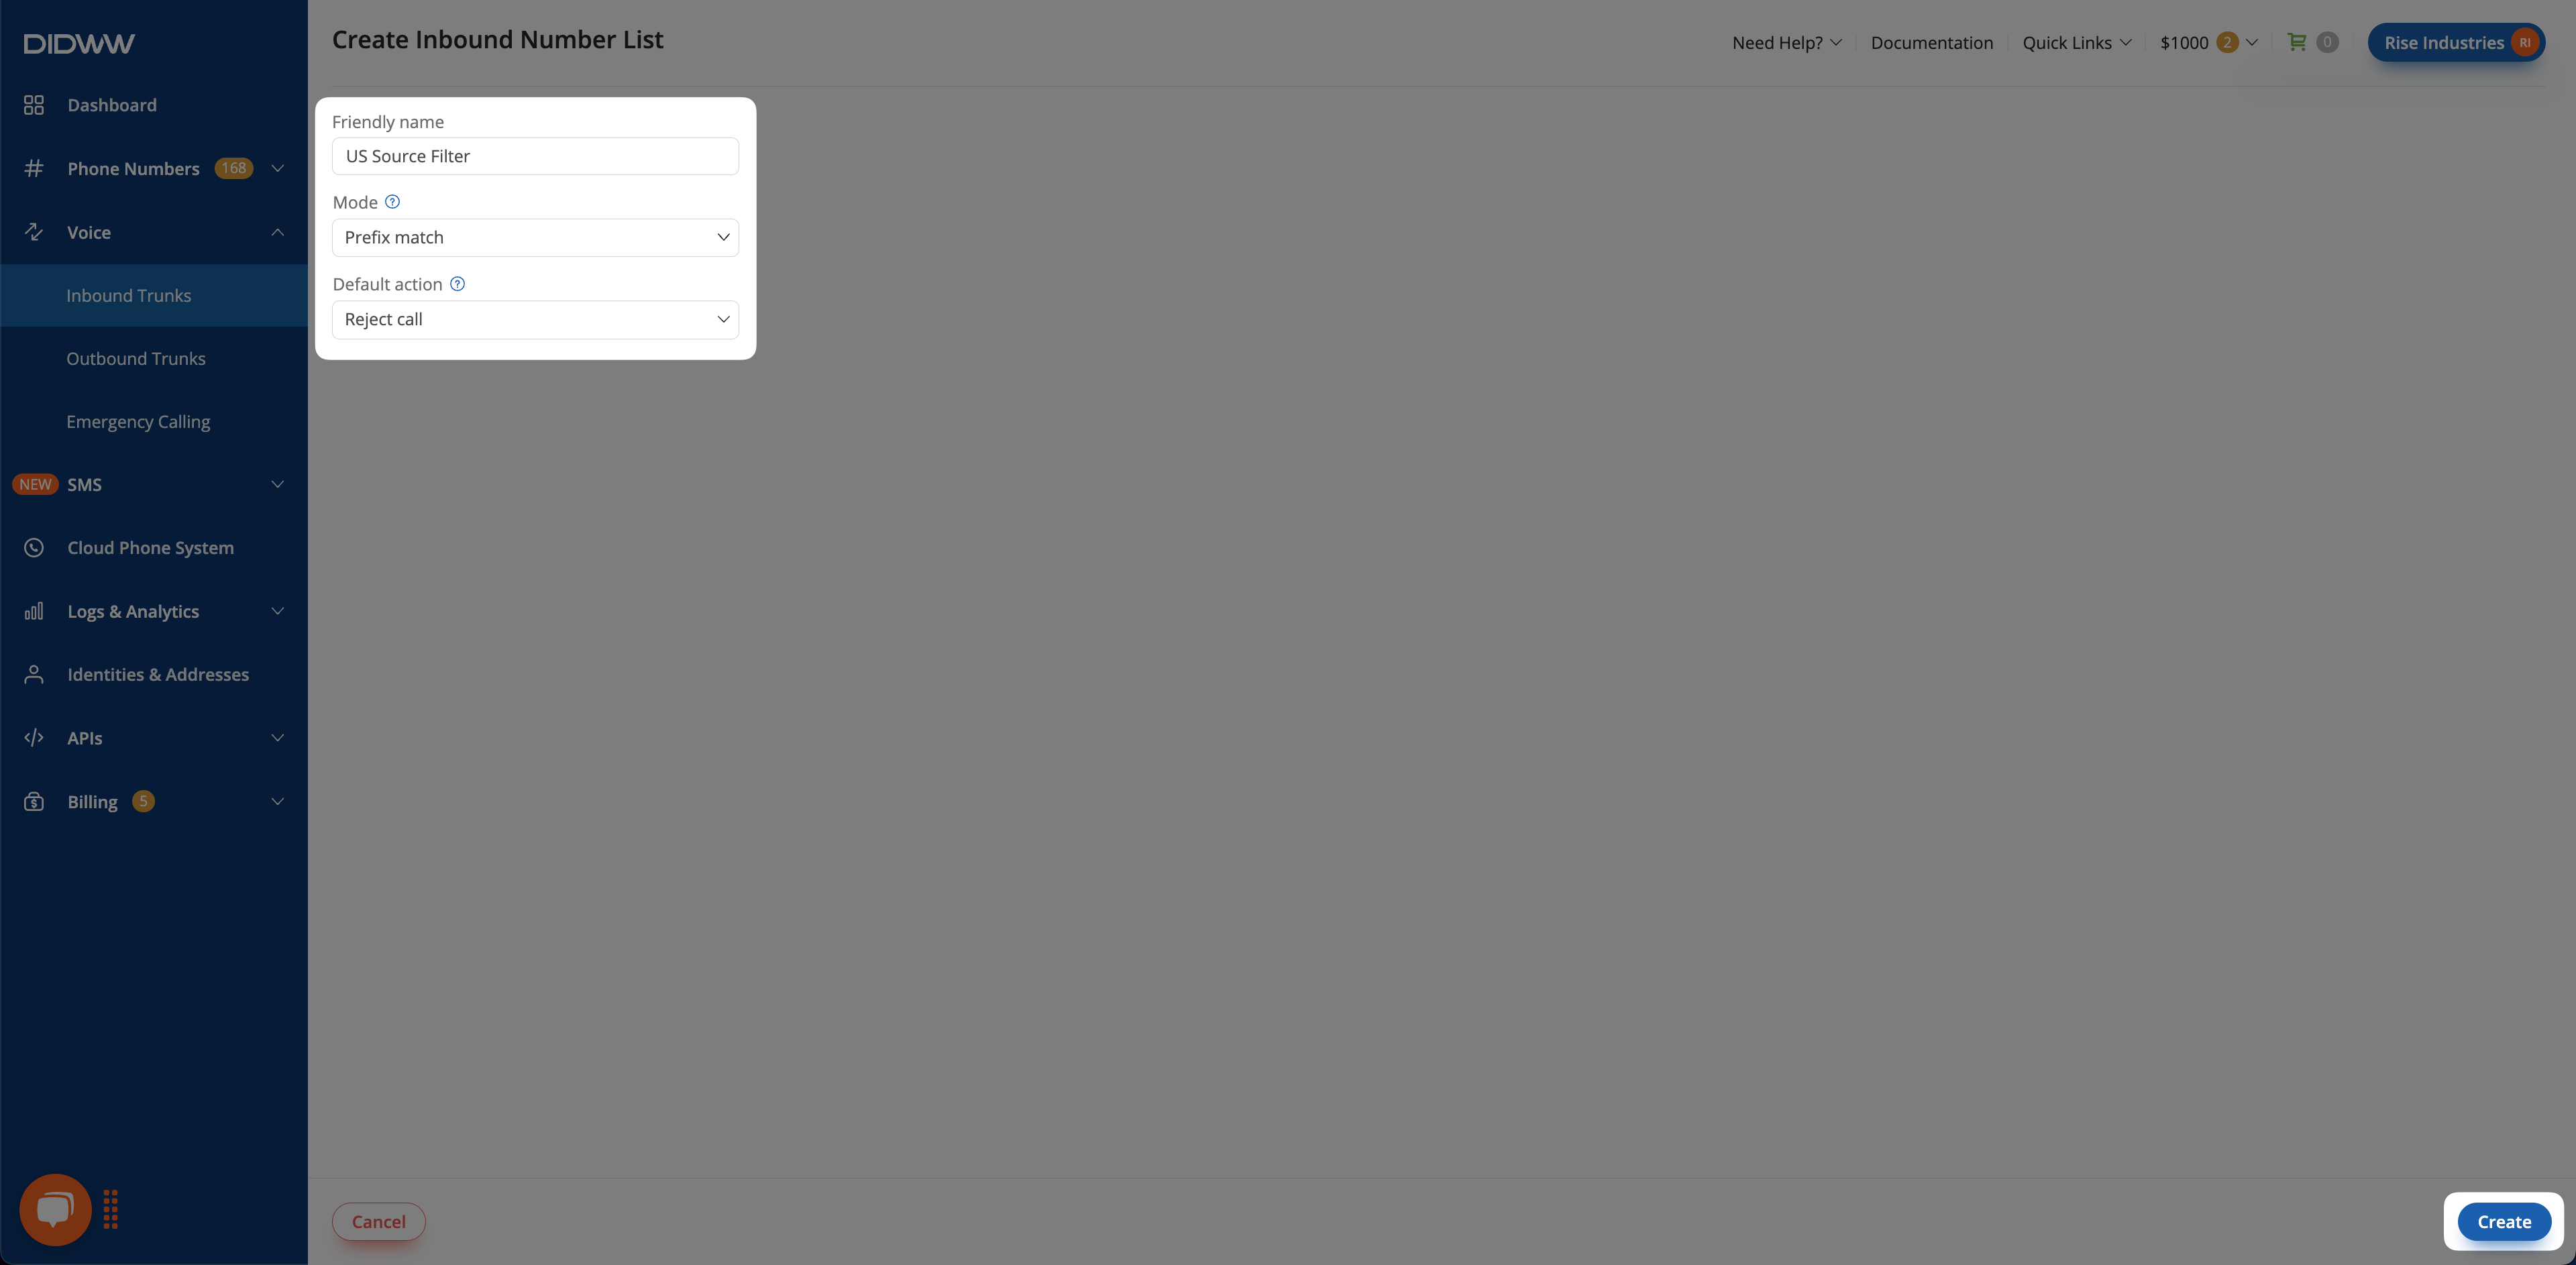
Learn how to create a number list, which blocks calls from a specific prefix.

Example 1: Block Calls from a Specific Prefix
2. Block a Specific Phone Number

Learn how to create a number list, which blocks calls from a specific phone number.

Example 2: Block a Specific Phone Number
3. Allow Calls from Specific Countries and Block Others

Learn how to create a number list, which allows calls from a specific prefix, but blocks others.

Example 3: Allow Calls from Specific Countries and Block Others
4. Use Number Lists for Load Balancing

Learn how to use number lists as a load balancing tool for different SIP endpoints.

Example 4: Use Number Lists for Load Balancing

Note

After setting up your Number List, make sure to assign it to an Inbound SIP Trunk so the call filtering rules take effect. For more details, see the Assign a Number List to a SIP Trunk guide.


Example 1: Block Calls from a Specific Prefix

Scenario: A company receives frequent spam calls from numbers starting with 1234, disrupting operations. To block these calls follow the steps:

Step 1: Create a Number List

  1. Navigate to Inbound Trunks > Number Lists.

  2. Click Create New and enter a friendly name (e.g., Spam Blocklist).

  3. Set the Mode to Prefix Match.

  4. Set the Default Action to Allow Call.

  5. Click Create.

Creating a Number List

Fig. 1. Creating a Number List

Step 2: Add the Prefix to the Number List

  1. Click the Actions button button next to the newly created Number List.

  2. Select Manage Numbers.

  3. Click Add Numbers.

  4. Enter 1234 in the input field (this blocks all calls starting with 1234) and set the action to Reject Call.

  5. Click Submit.

Adding a Prefix to Block Calls

Fig. 2. Adding a Prefix to Block Calls


Example 2: Block a Specific Phone Number

Scenario: A customer service agent reports that 15551234567 is making repeated nuisance calls and should be blocked.

Step 1: Create a Number List

  1. Navigate to Inbound Trunks > Number Lists.

  2. Click Create New and enter a friendly name (e.g., Number Blocklist).

  3. Set the Mode to Full Numbers Match.

  4. Set the Default Action to Allow Call.

  5. Click Create.

Creating a Number List for Blocking Specific Numbers

Fig. 3. Creating a Number List for Blocking Specific Numbers

Step 2: Add the Number to the List

  1. Click the Actions button button next to the Number List.

  2. Select Manage Numbers.

  3. Click Add Numbers.

  4. Enter 15551234567 in the input field and set the action to Reject Call.

  5. Click Submit.

Adding a Number to Block Calls

Fig. 4. Adding a Number to Block Calls


Example 3: Allow Calls from Specific Countries and Block Others

Scenario: A company wants to accept calls only from UK-based (44) and German (49) customers while blocking all other inbound calls.

Step 1: Create a Number List

  1. Navigate to Inbound Trunks > Number Lists.

  2. Click Create New and enter a friendly name (e.g., UK & Germany Only).

  3. Set the Mode to Prefix Match.

  4. Set the Default Action to Reject Call.

  5. Click Create.

Creating a Number List for Country-Based Filtering

Fig. 5. Creating a Number List for Country-Based Filtering

Step 2: Add the Allowed Prefixes

  1. Click the Actions button button next to the Number List.

  2. Select Manage Numbers.

  3. Click Add Numbers.

  4. Enter 44, 49 in the input field (this allows calls from the UK and Germany) and set the action to Allow Call.

  5. Click Submit.

Adding Country Codes to Allow Calls

Fig. 6. Adding Country Codes to Allow Calls


Example 4: Use Number Lists for Load Balancing

Scenario: A global service provider needs to route incoming calls based on the caller’s country code (CLI prefix), while using a single DID number.

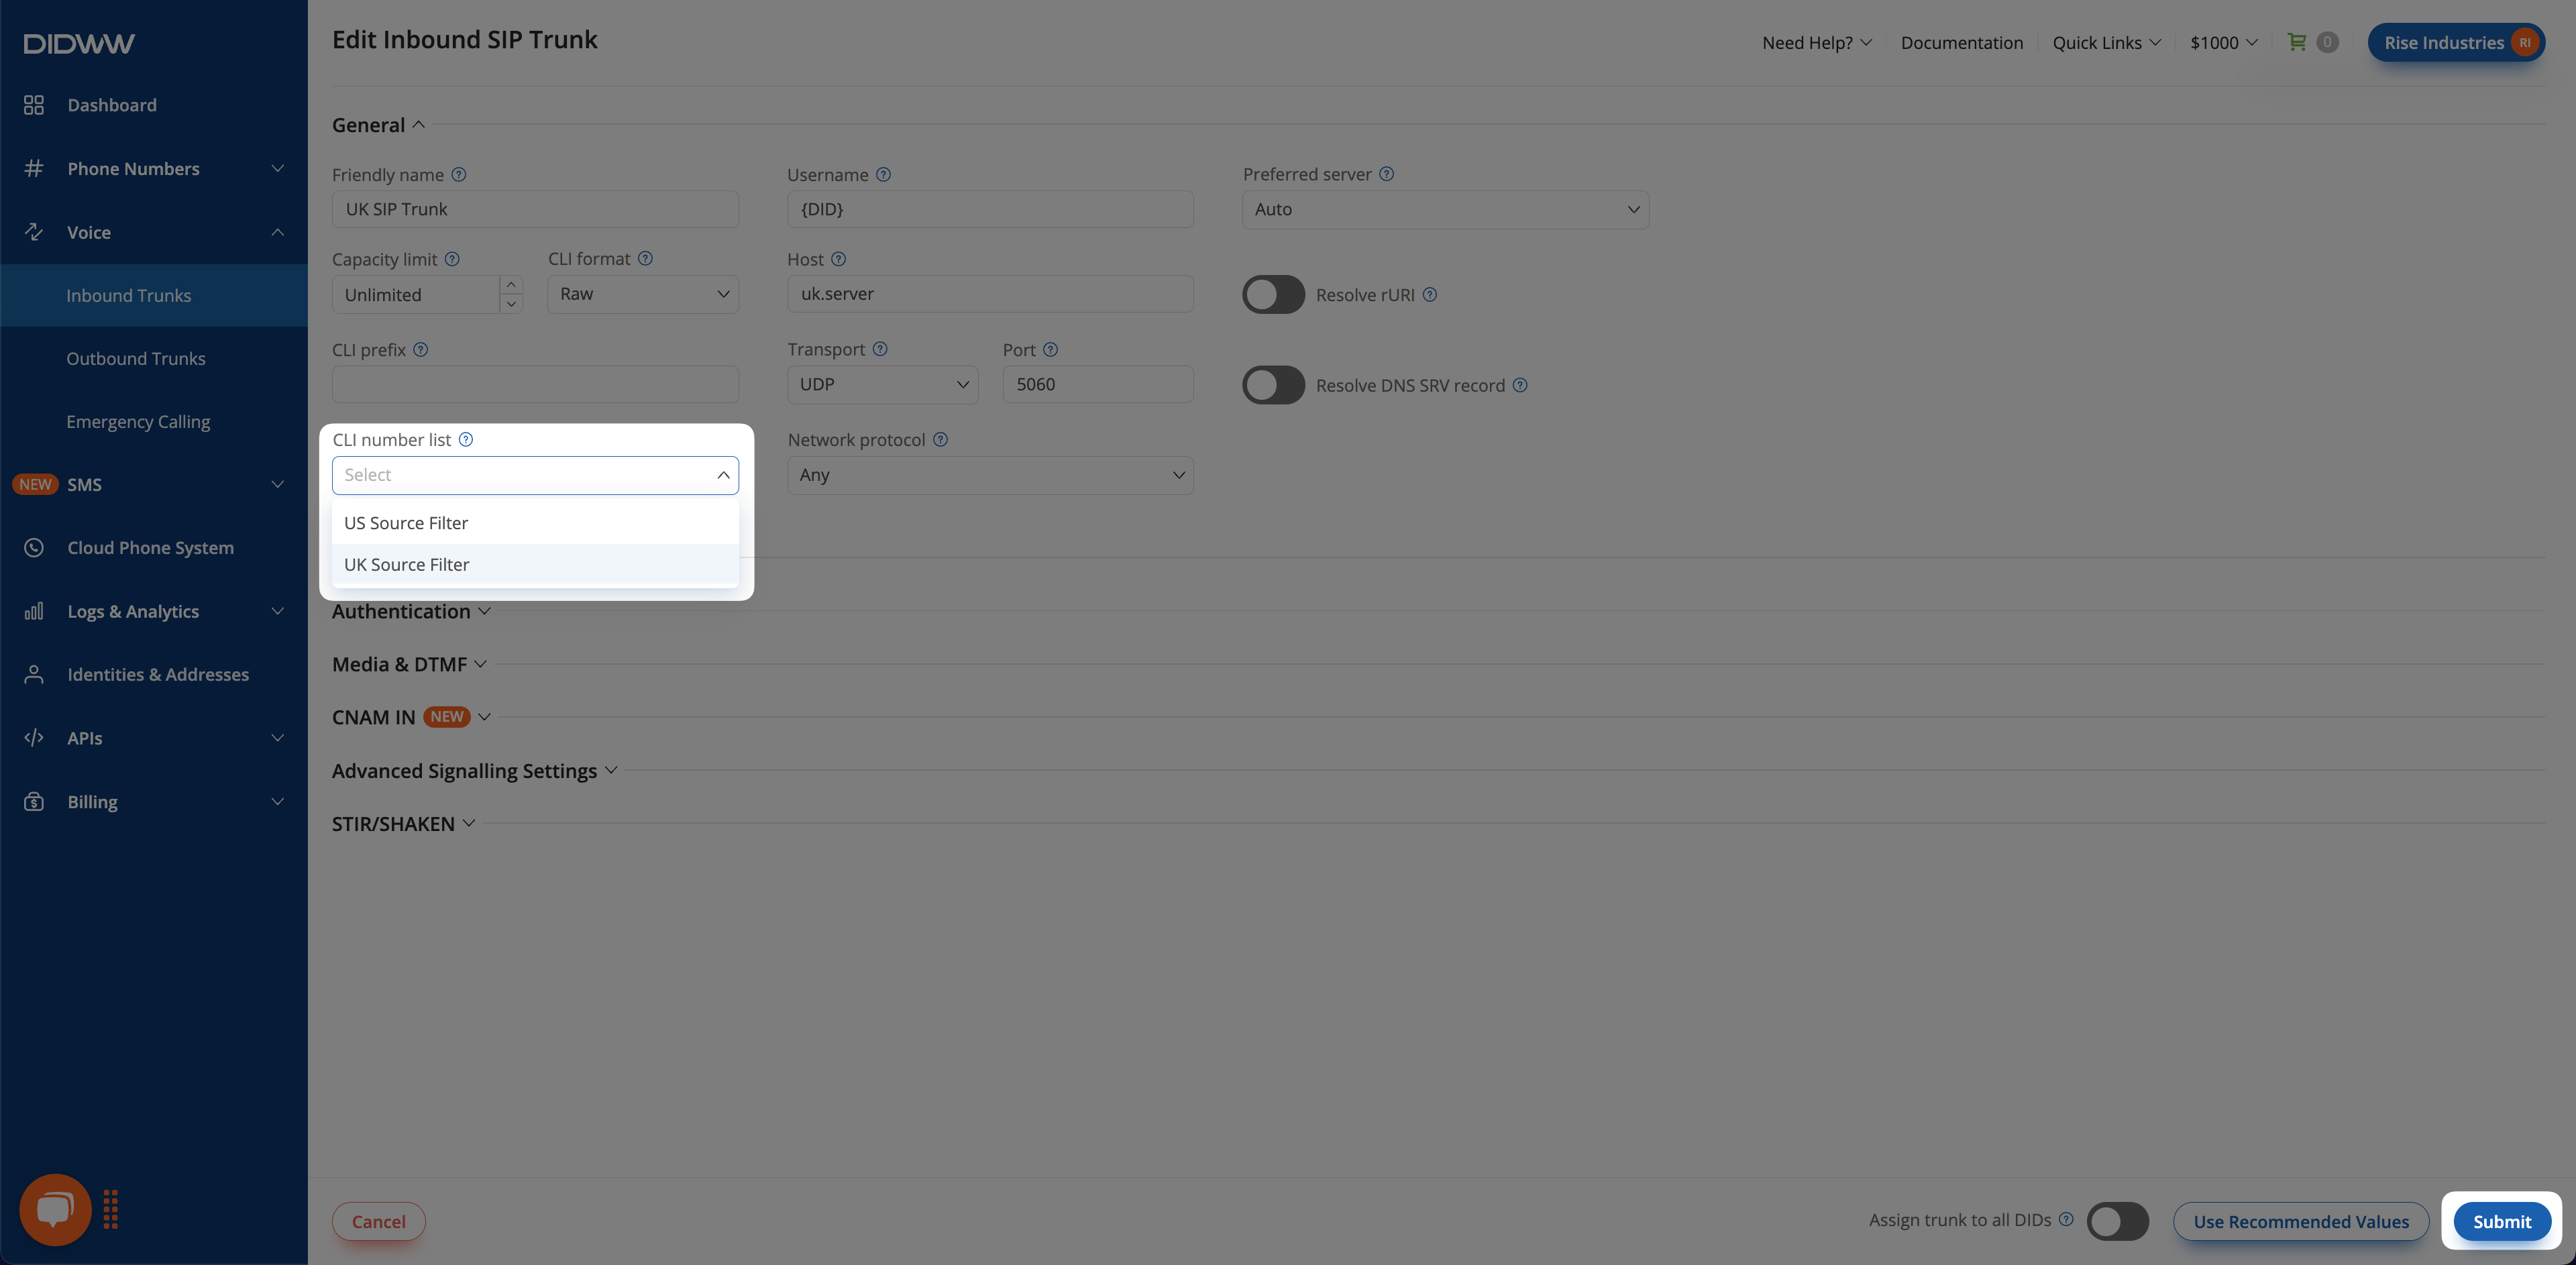
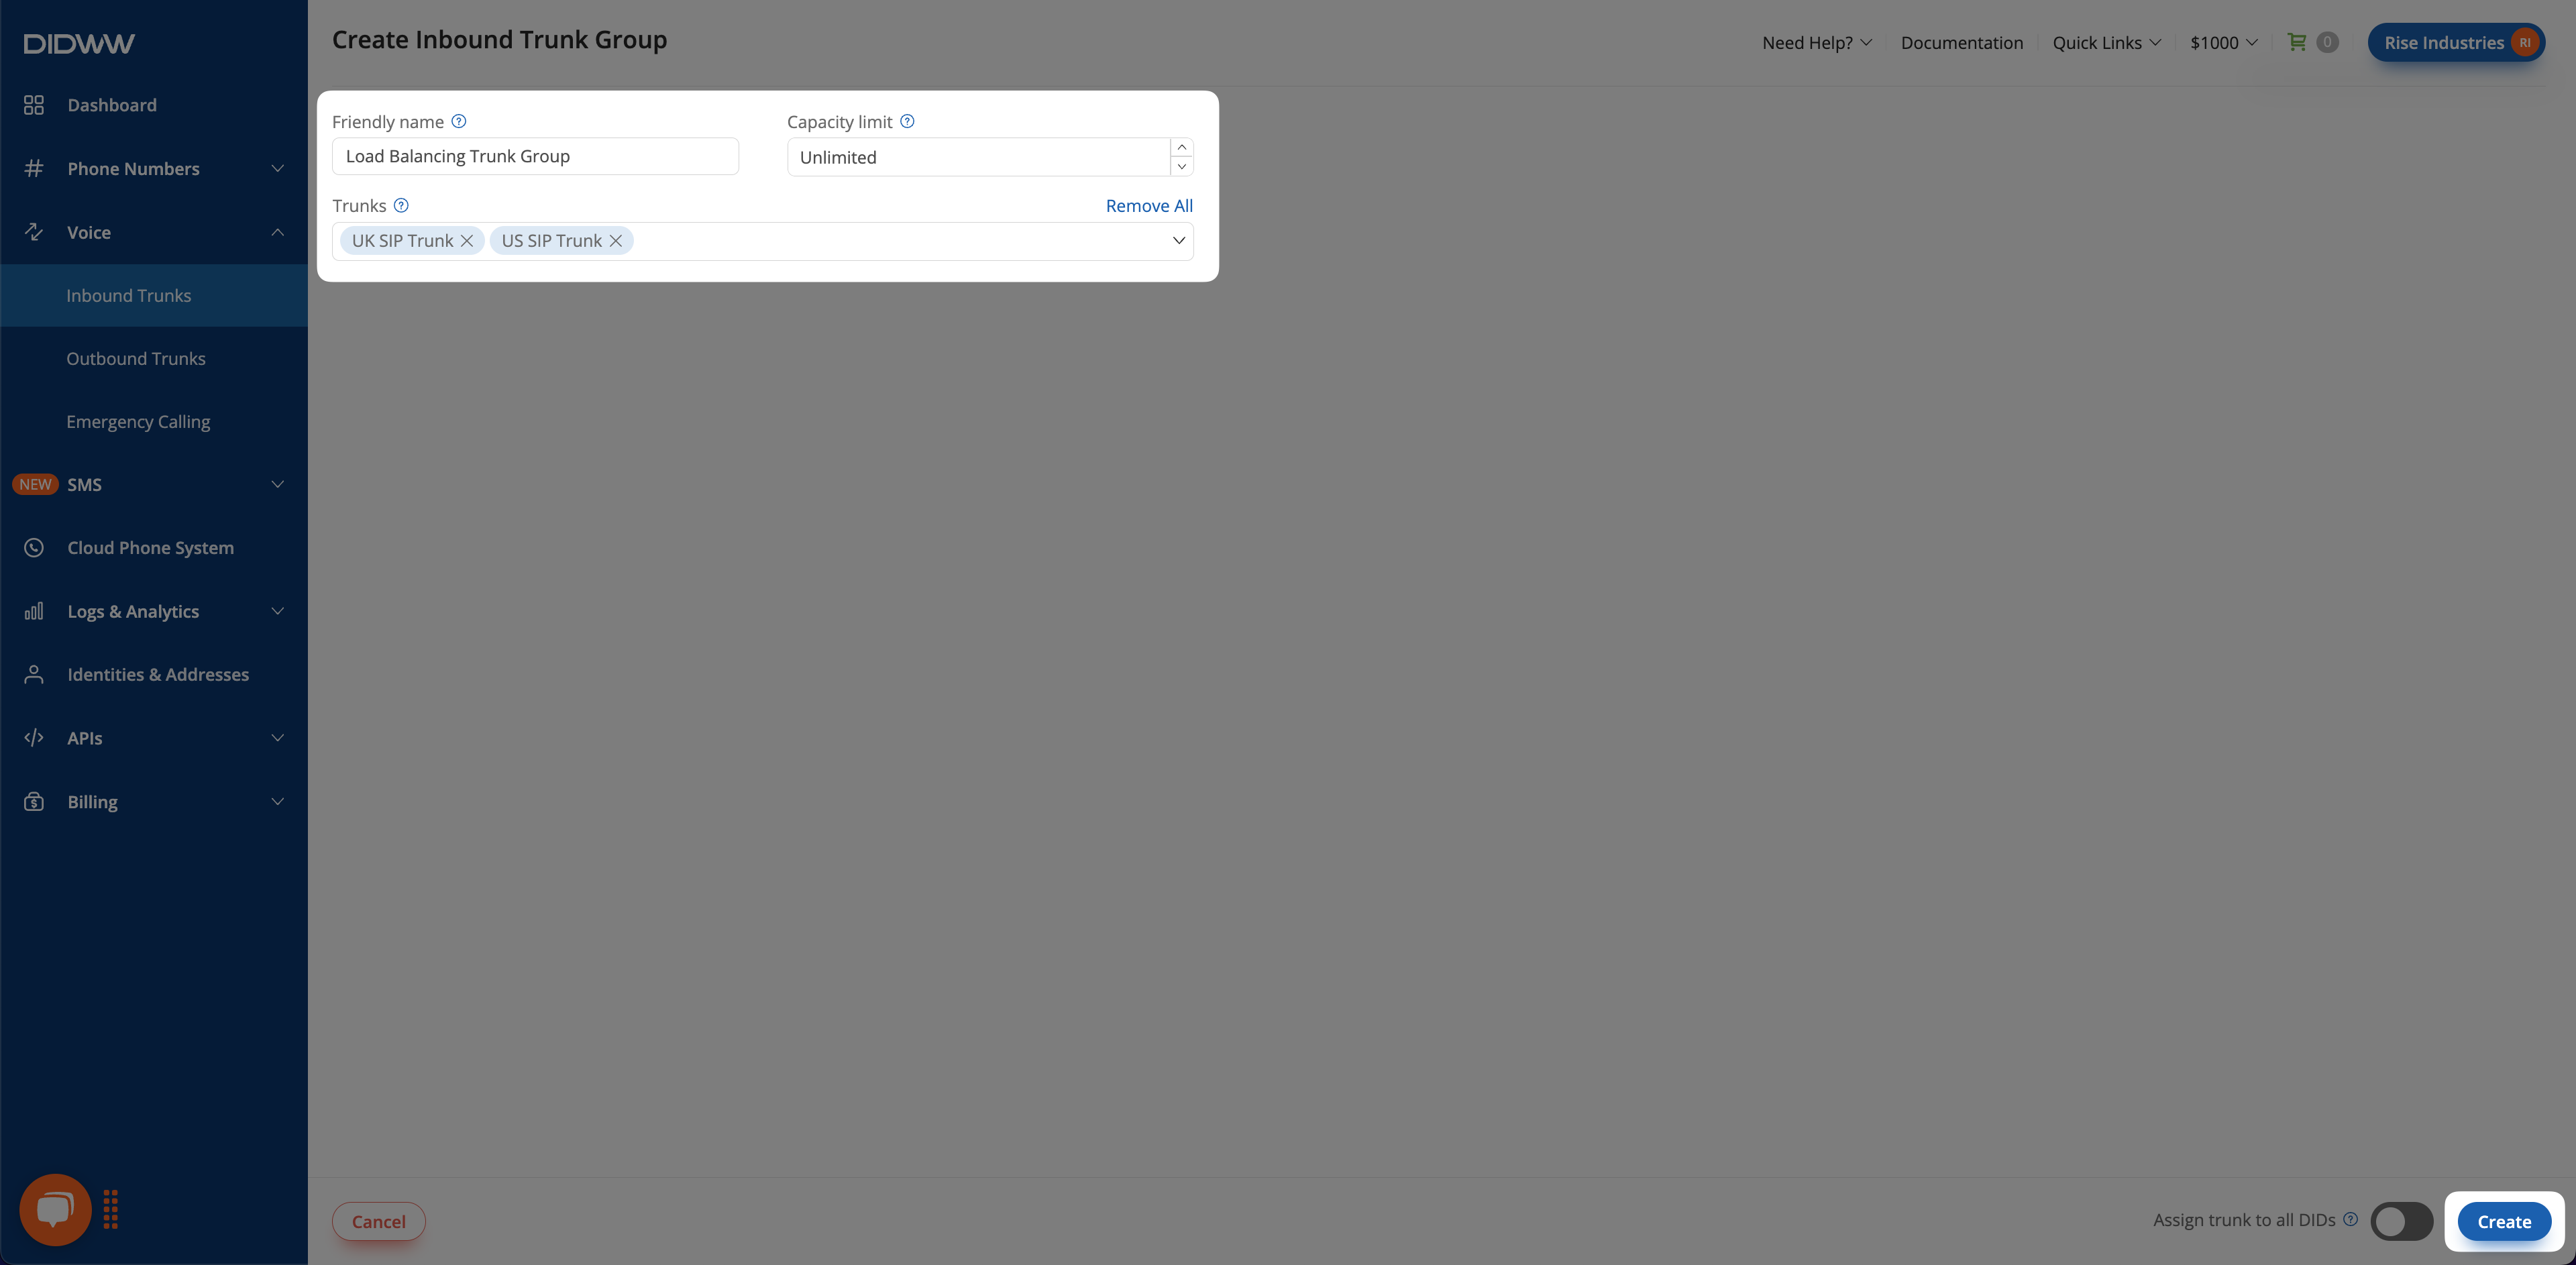
Solution: To manage this, the provider assigns specific number lists to trunks within a trunk group. The system uses the CLI prefix to match the call to the correct number list and selects the appropriate trunk for routing.
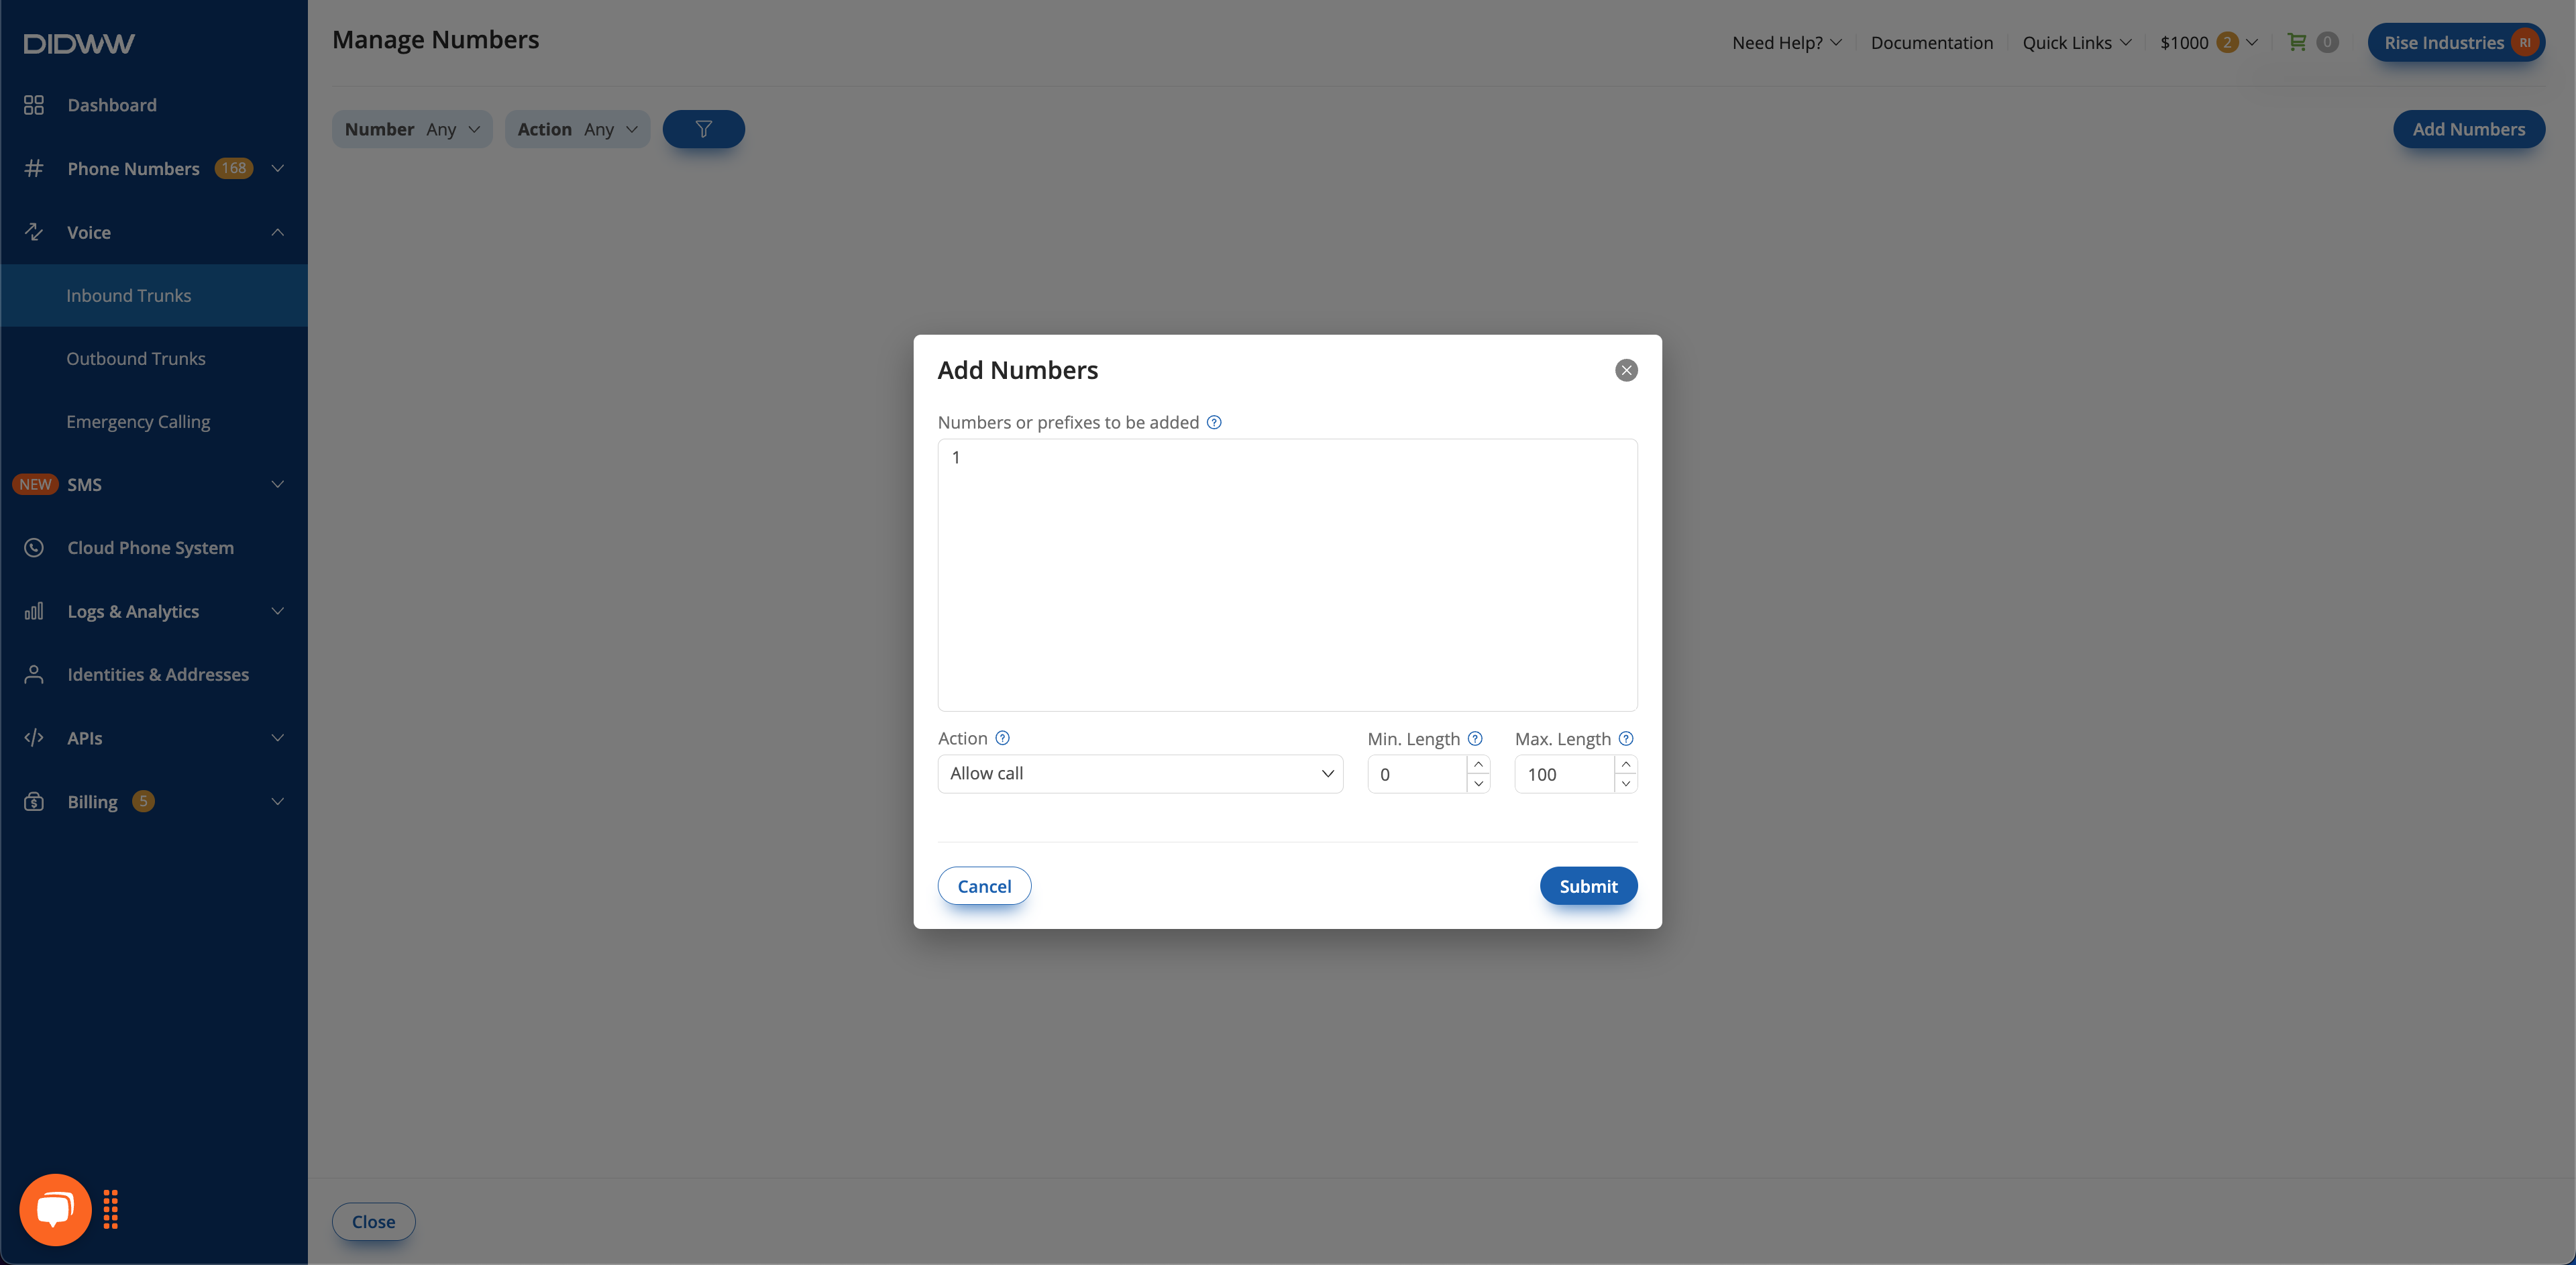
For example:

  • Calls from the United States (prefix 1) are routed to a US-based trunk.

  • Calls from the United Kingdom (prefix 44) are routed to a UK-based trunk.

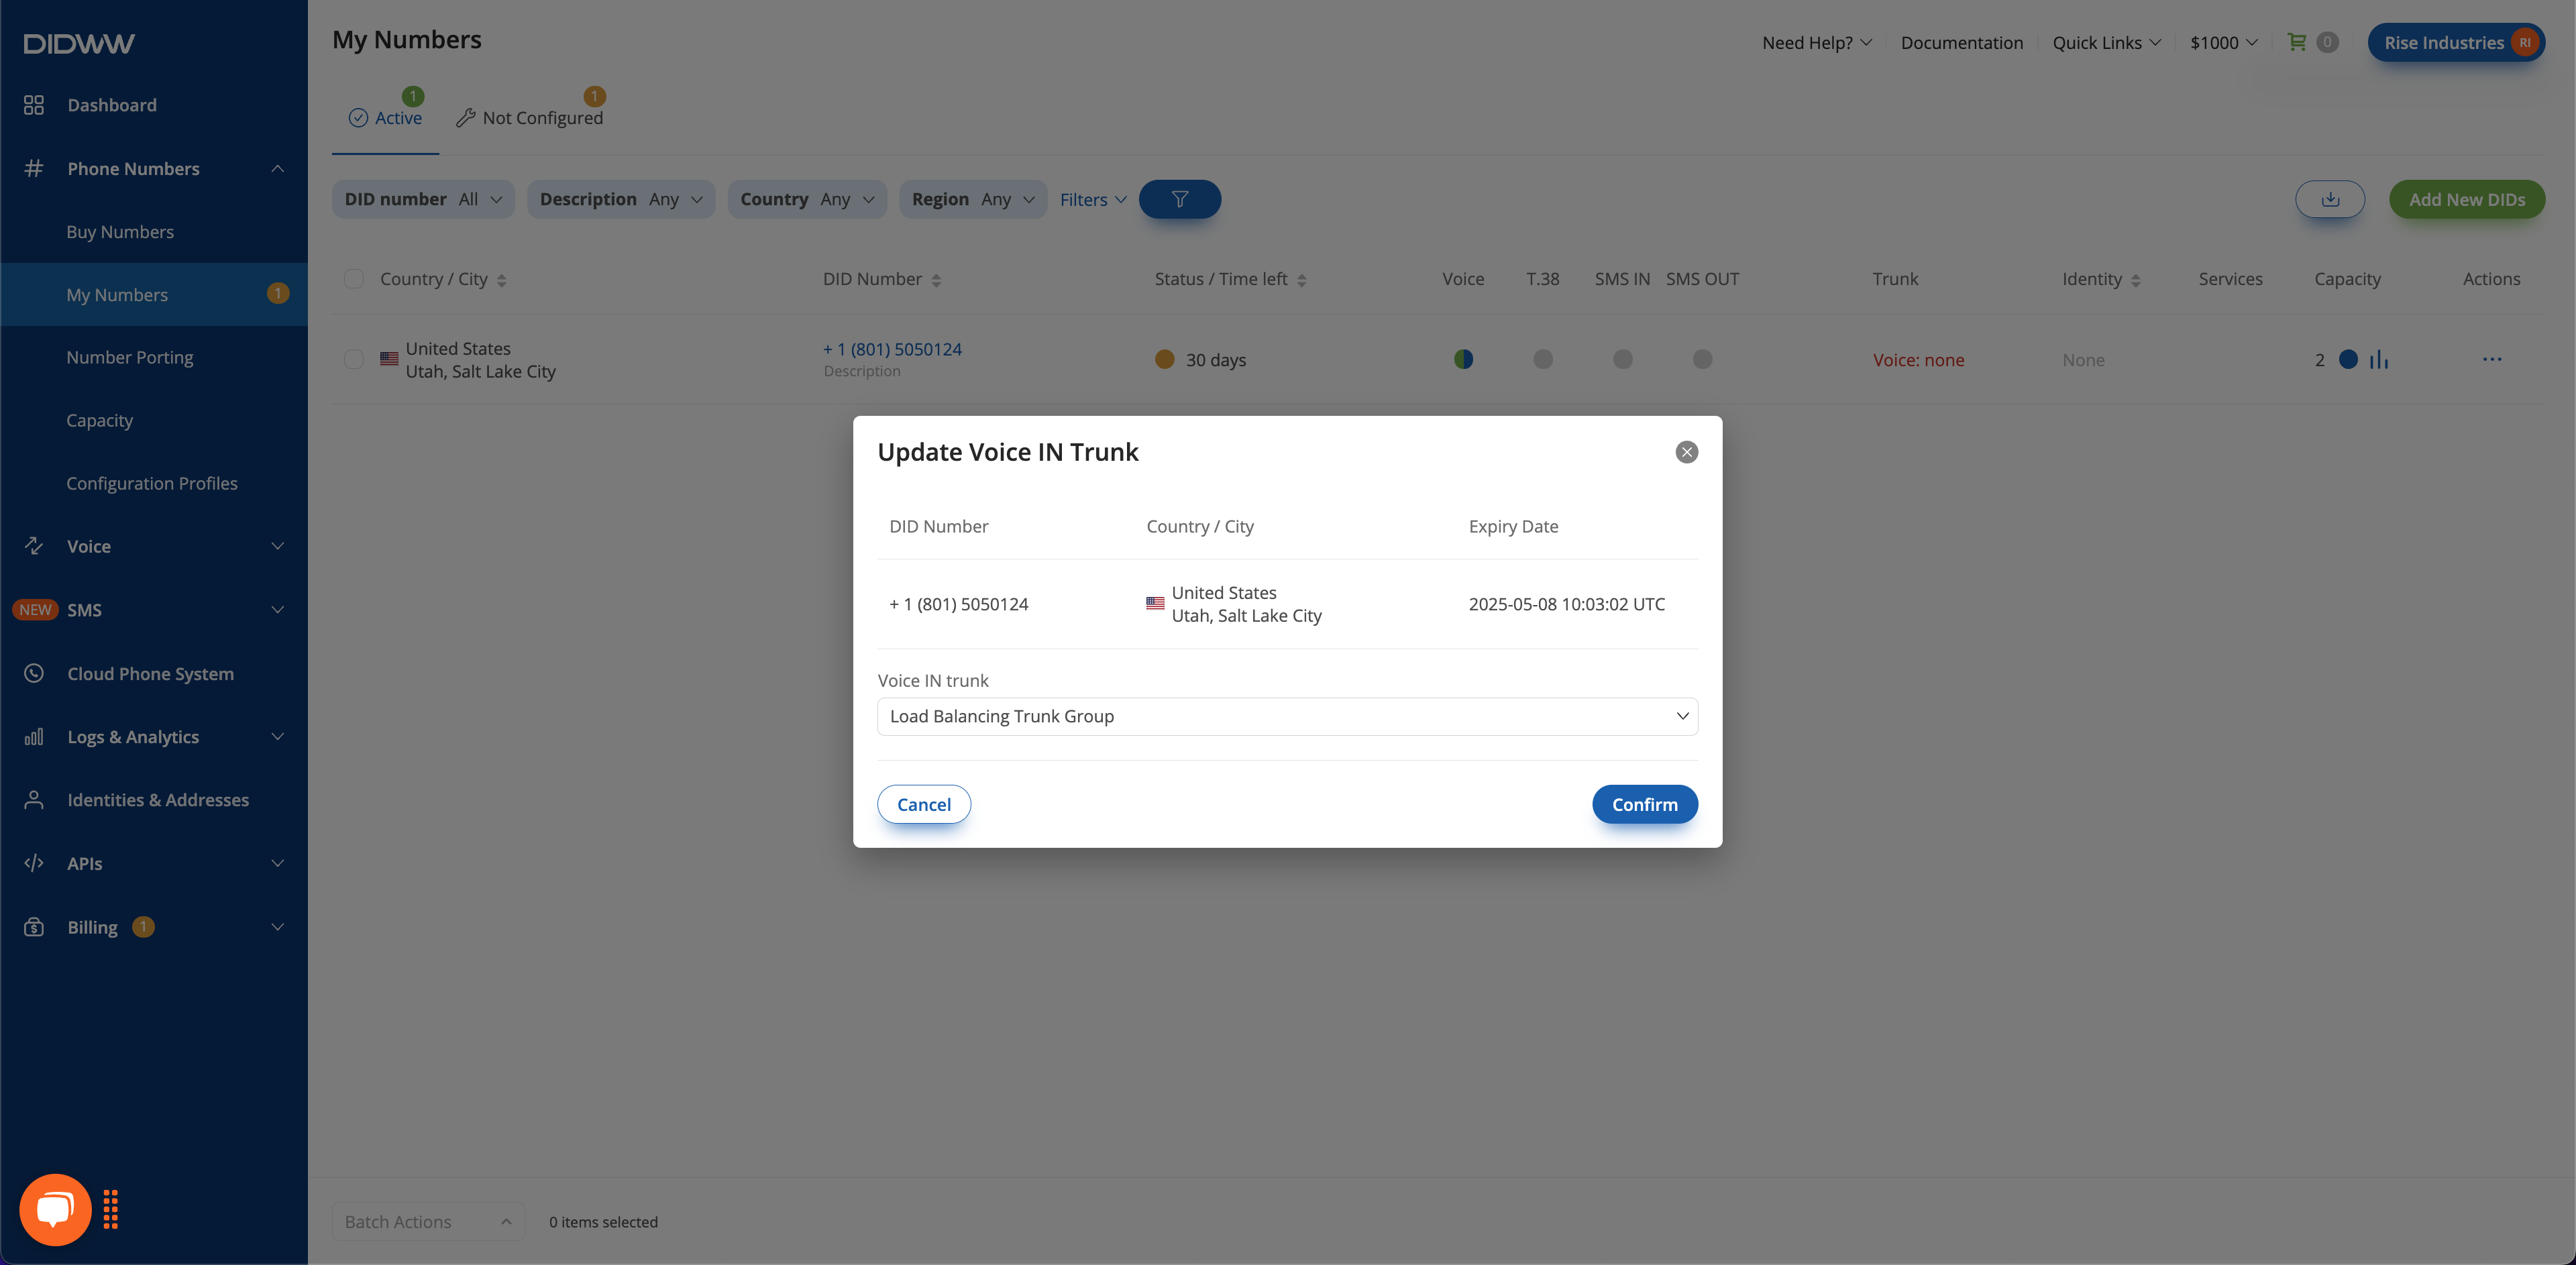
This setup enables efficient load balancing and region-specific routing while maintaining a single DID.

Step 1: Create Number Lists

  1. Go to Inbound Trunks > Number Lists.

  2. Click Create New and enter a friendly name (e.g., US Source Filter).

  3. Set the Mode to Prefix Match.

  4. Set the Default Action to Reject Call.

  5. Click Create.

Creating a Number List for Load Balancing - US

Fig. 7. Creating a Number List for Load Balancing (US)

  1. Click the Actions button button next to the US Source Filter Number List.

  2. Select Manage Numbers.

  3. Click Add Numbers.

  4. Enter 1 and set the action to Allow Call.

  5. Click Submit.

Adding US Prefix

Fig. 8. Adding 1 Prefix for US

  1. Repeat the steps above to create a second list named UK Source Filter and add prefix 44.

UK and US Source Filter Number Lists

Fig. 9. UK and US Source Filter Number Lists

Step 2: Assign Number Lists to Trunks

To assign the number lists to trunks see the Assign a Number List to a SIP Trunk guide or follow these steps:

  1. Go to Voice > Inbound Trunks

  2. Edit an existing trunk or create a new trunk.

  3. In the General settings, locate the CLI Number List field.

  4. Select the Number List you want to assign and click Submit to save the changes.

  5. Repeat the steps above for both trunks.

Assign the Number Lists to Trunks

Fig. 9. Assign the Number Lists to Trunks

Step 3: Create a Trunk Group

To create a trunk group see the create a trunk group guide or follow these steps:

  1. Go to Voice IN > Inbound Trunks.

  2. Click Create New and select Trunk Group.

  3. Enter trunk group name

  4. Add US SIP Trunk and UK SIP Trunk trunks to the group and click Create.

Create a Trunk Group

Fig. 11. Create a Trunk Group.

Step 4: Assign the Trunk Group to a DID Number

  1. Navigate to Phone Numbers > My Numbers.

  2. Select the desired DID number and click on the voice trunk field.

Note

If the DID has no trunks assigned, the trunk field will display Voice: none.

  1. Assign the Load Balancing Trunk Group and click Confirm.

Assigning the Trunk Group to a DID Number.

Fig. 12. Assigning the Trunk Group to a DID Number

Result

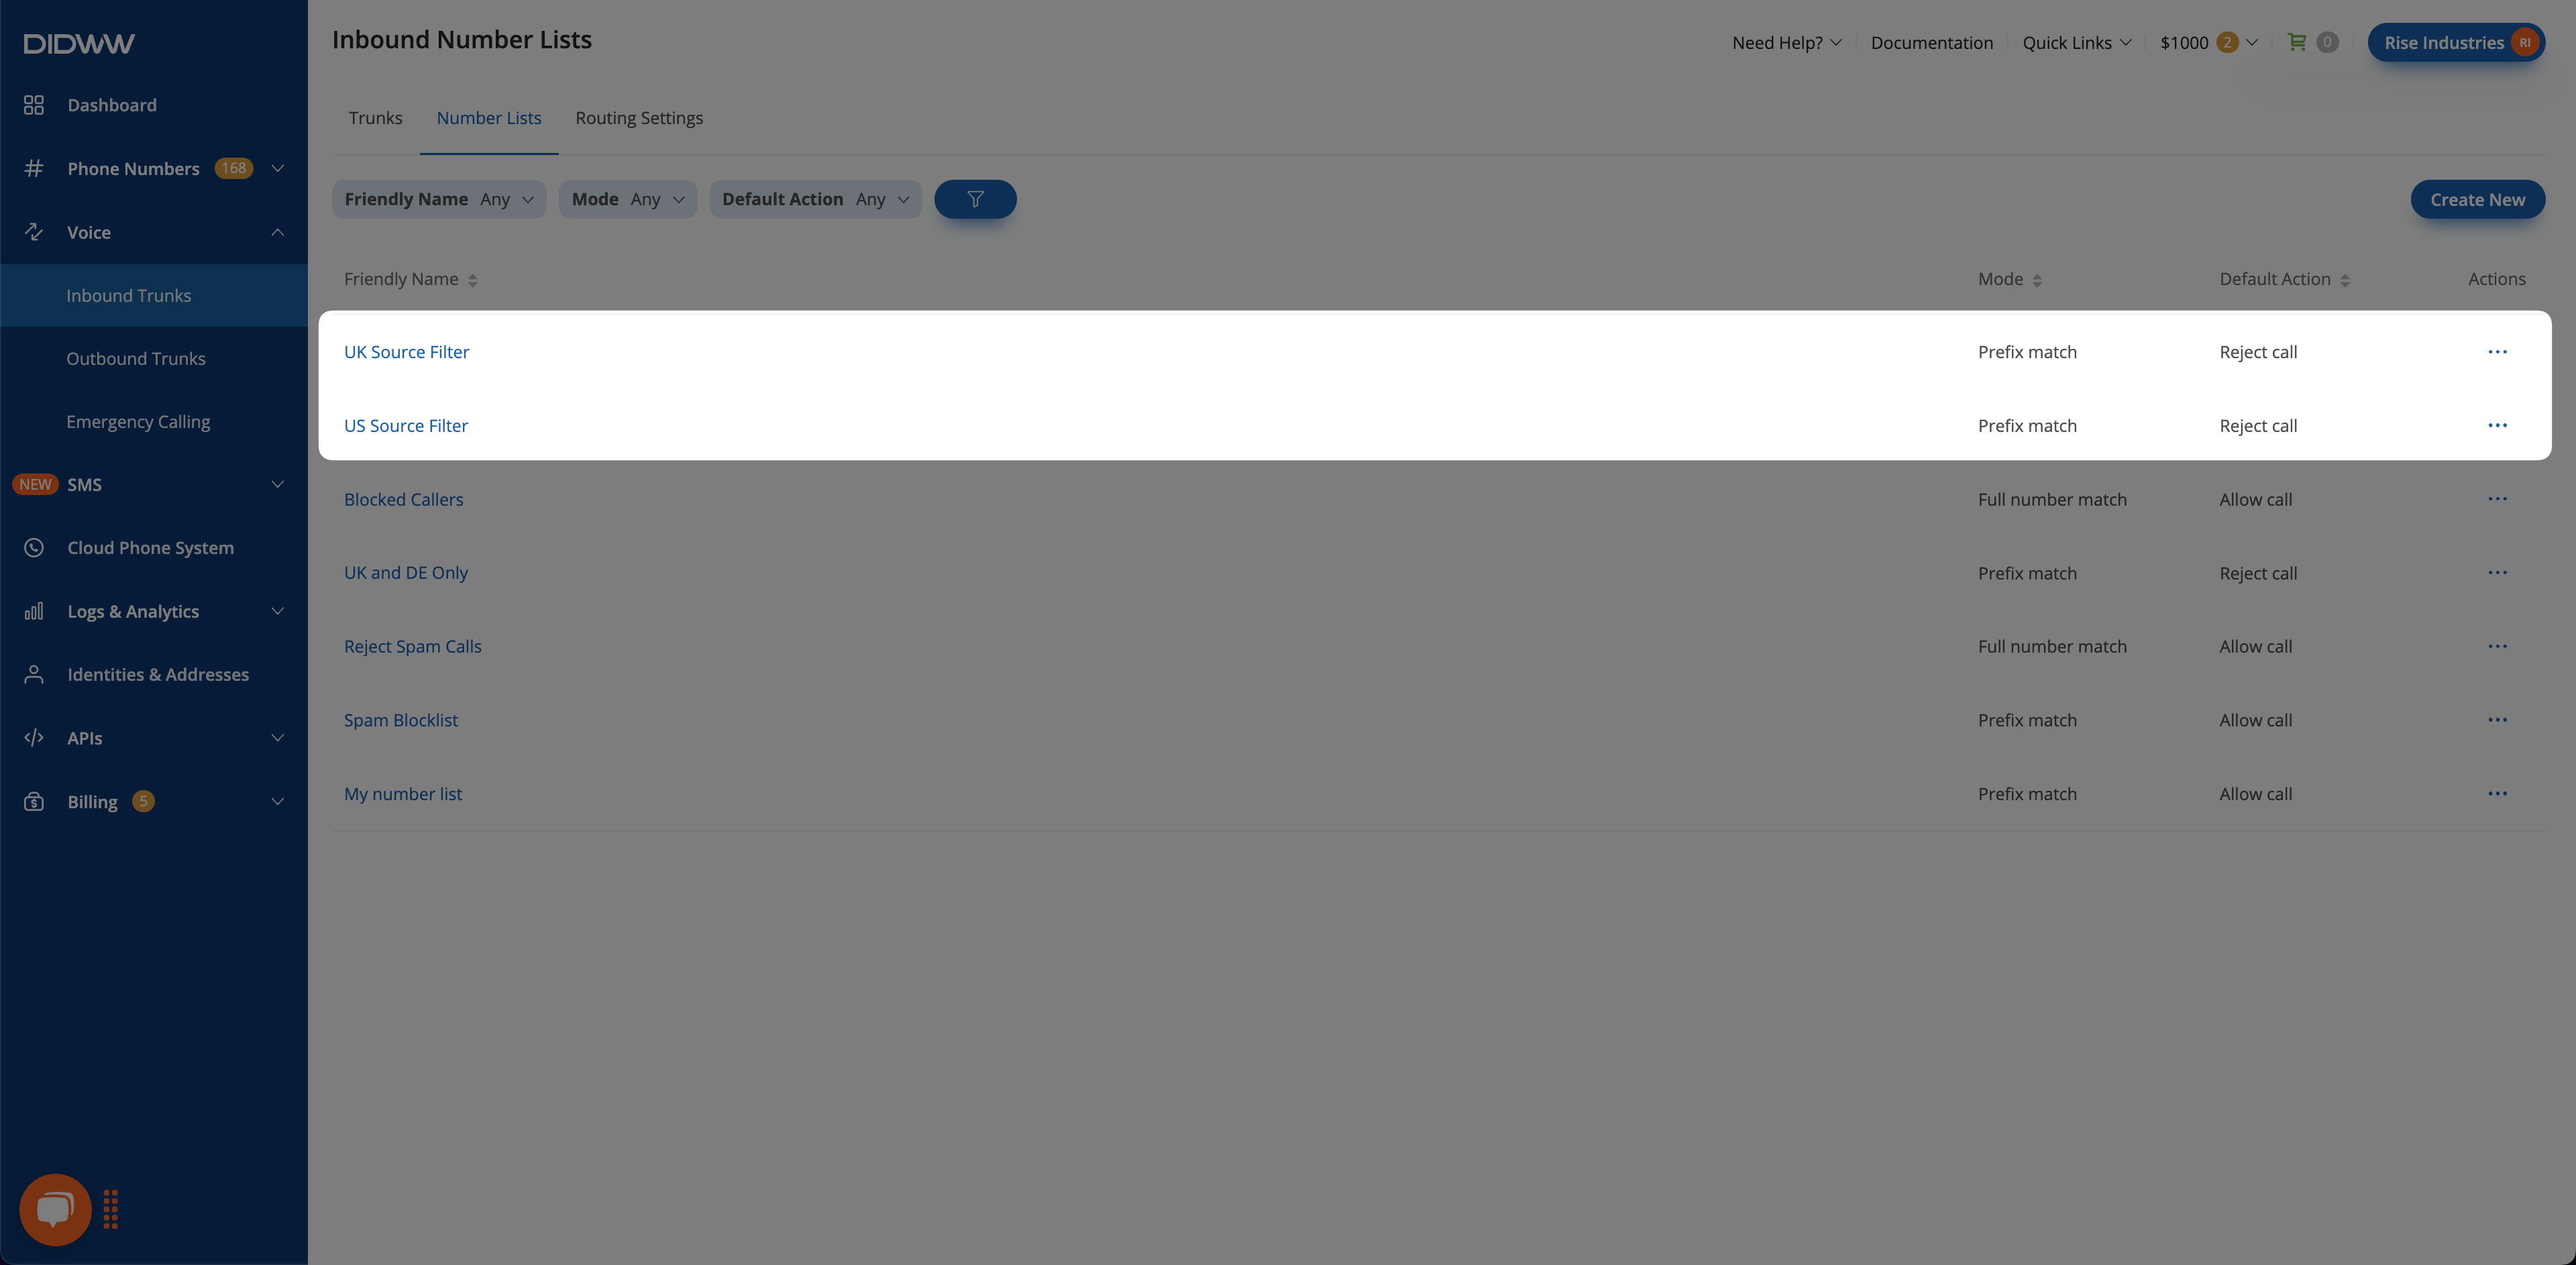
  • Calls with prefix 1 (US) are routed to US SIP Trunk.

  • Calls with prefix 44 (UK) are routed to UK SIP Trunk.

  • All other calls are rejected by default.

This setup allows a single DID number to intelligently route incoming traffic to country-specific trunks, improving routing efficiency and regional control.

Tip

Scale the trunk group to include as many trunks and number lists as needed to achieve traffic load balancing in expected countries or regions.


Additional Resources

Inbound Number List

Learn how to create, configure, and manage Number Lists to filter inbound calls by allowing or rejecting specific numbers or prefixes linked to SIP trunks.

Inbound Number Lists
Create a SIP trunk

Create and configure SIP trunks for inbound calls, set transport protocols, authentication, media options, and more.

SIP Trunk
Create a Trunk Group

Discover how to create and configure a trunk group for failover and load balancing purposes.

Trunk Groups