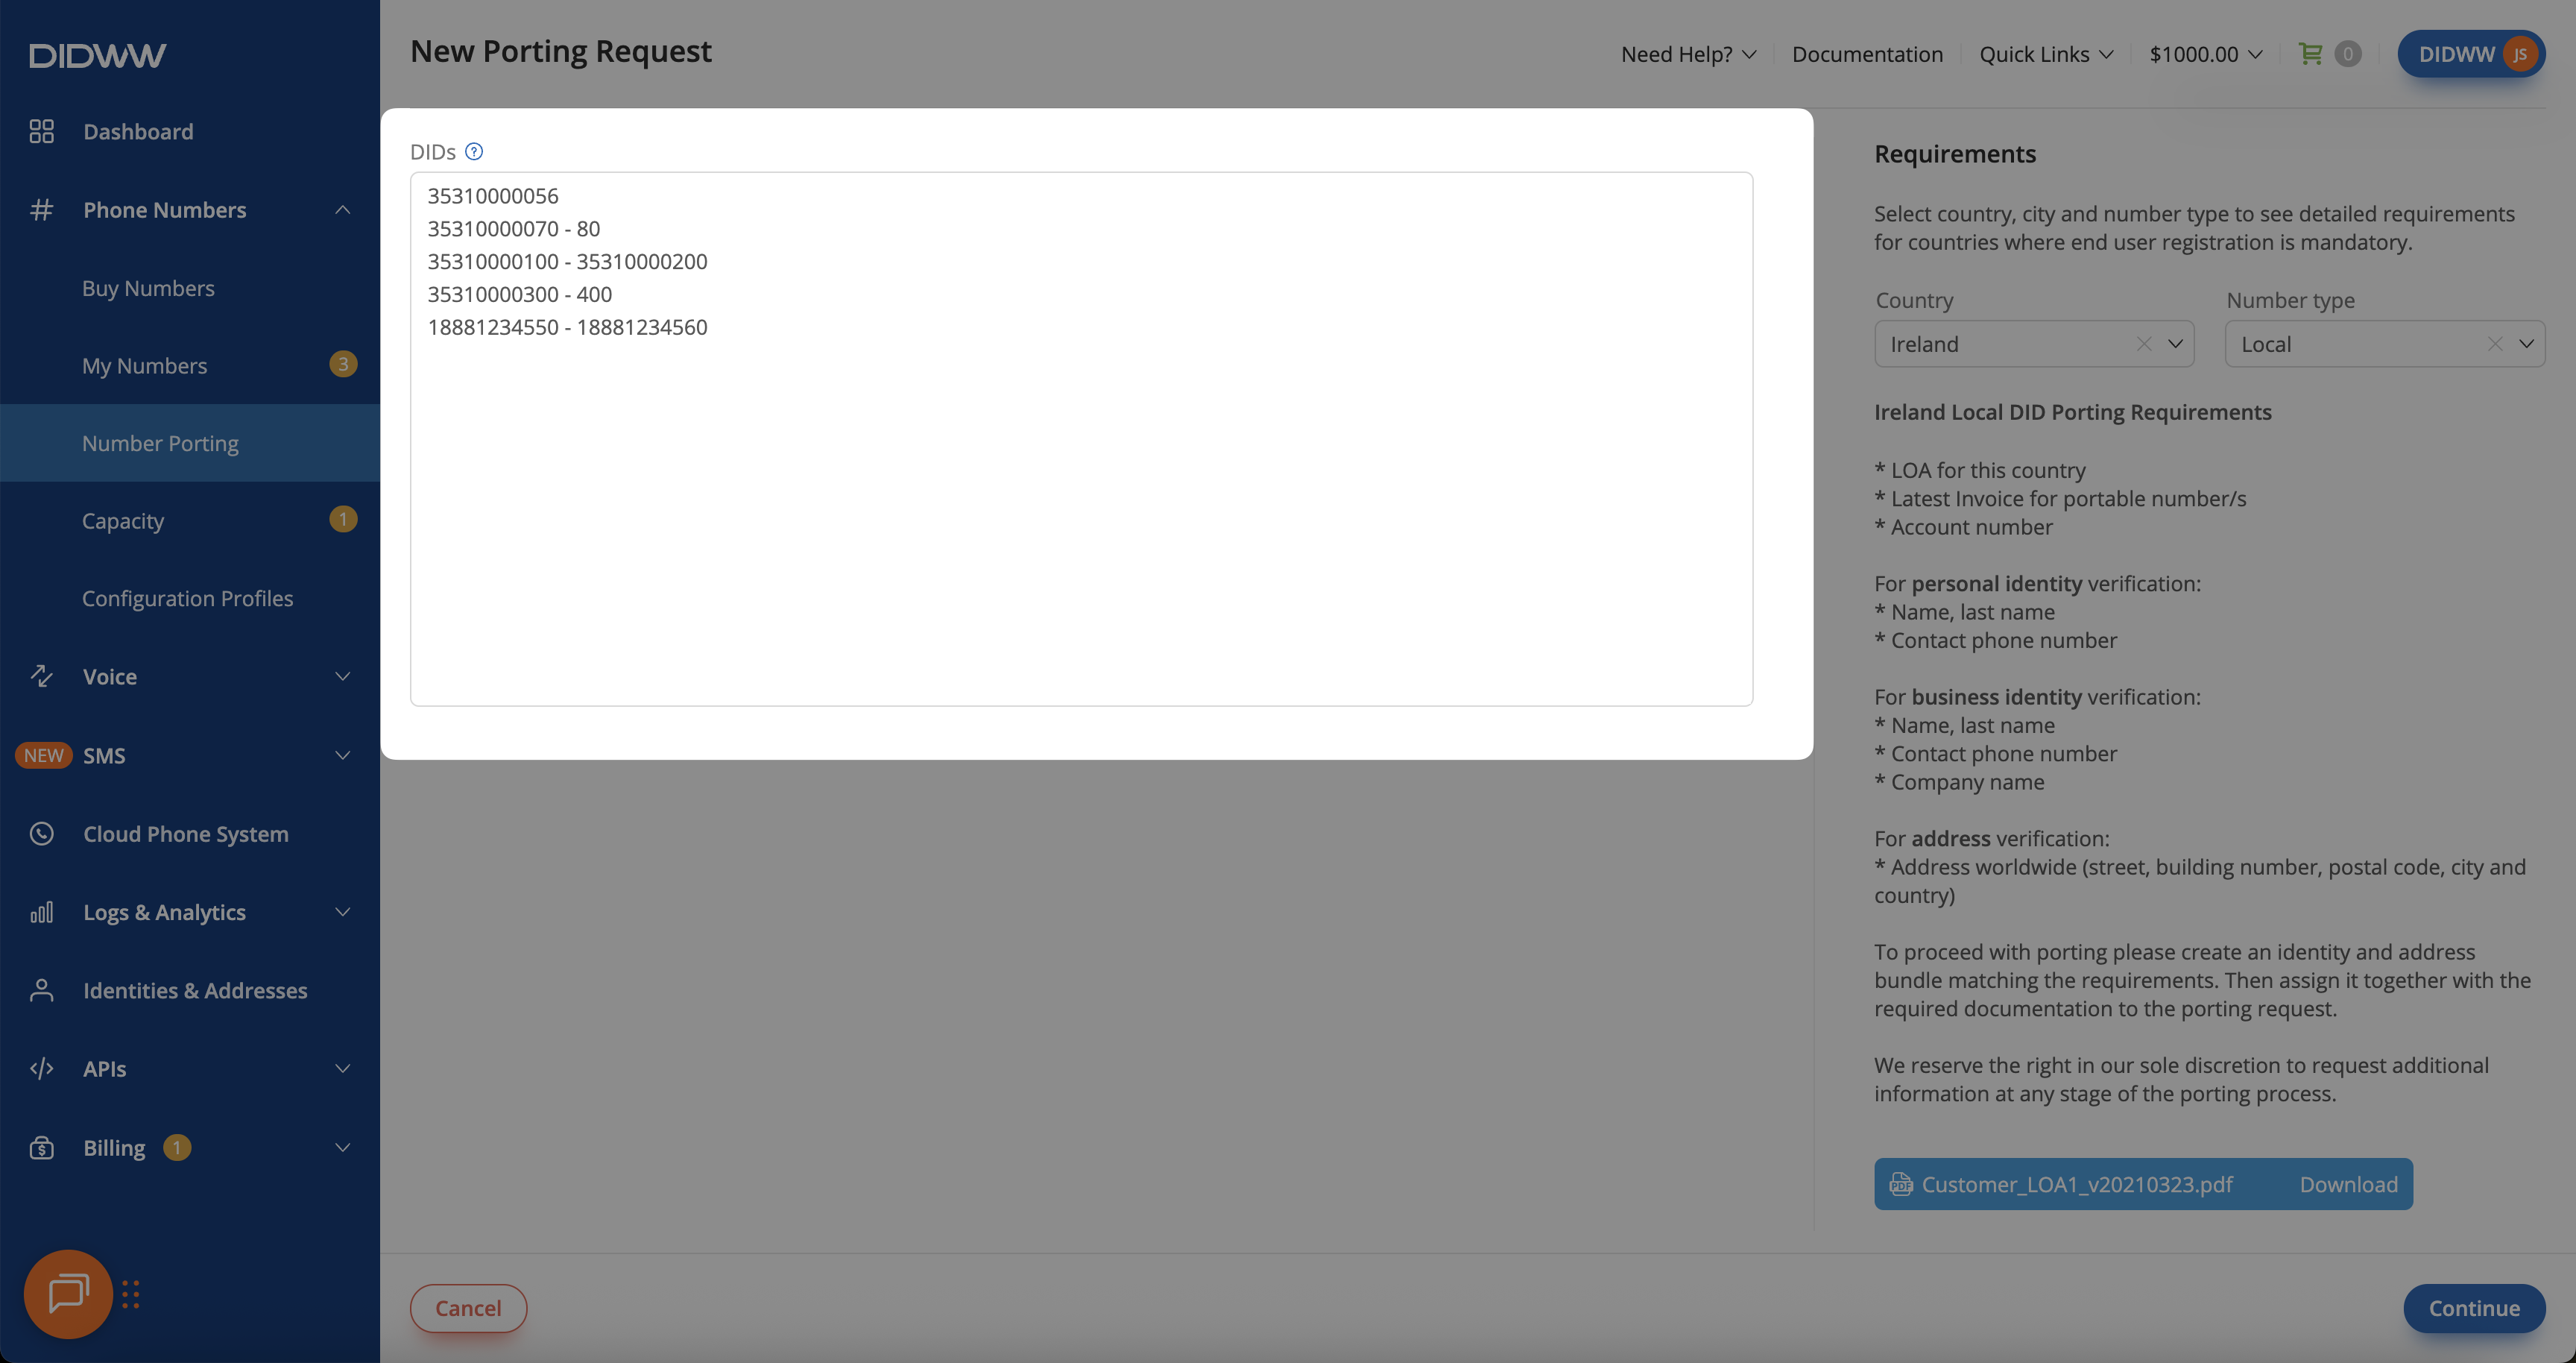
To complete a porting request, you must meet the regulatory requirements for the selected country and number type. These requirements ensure that the numbers can be legally transferred.
On the right side of the page, select the Country and Number type.
Review the listed porting requirements for identity, business, or address verification.
Download the Letter of Authorization (LOA) template.
Complete all fields in the LOA template before submitting.
Fig. 3 Porting requirements displayed for United States local numbers#
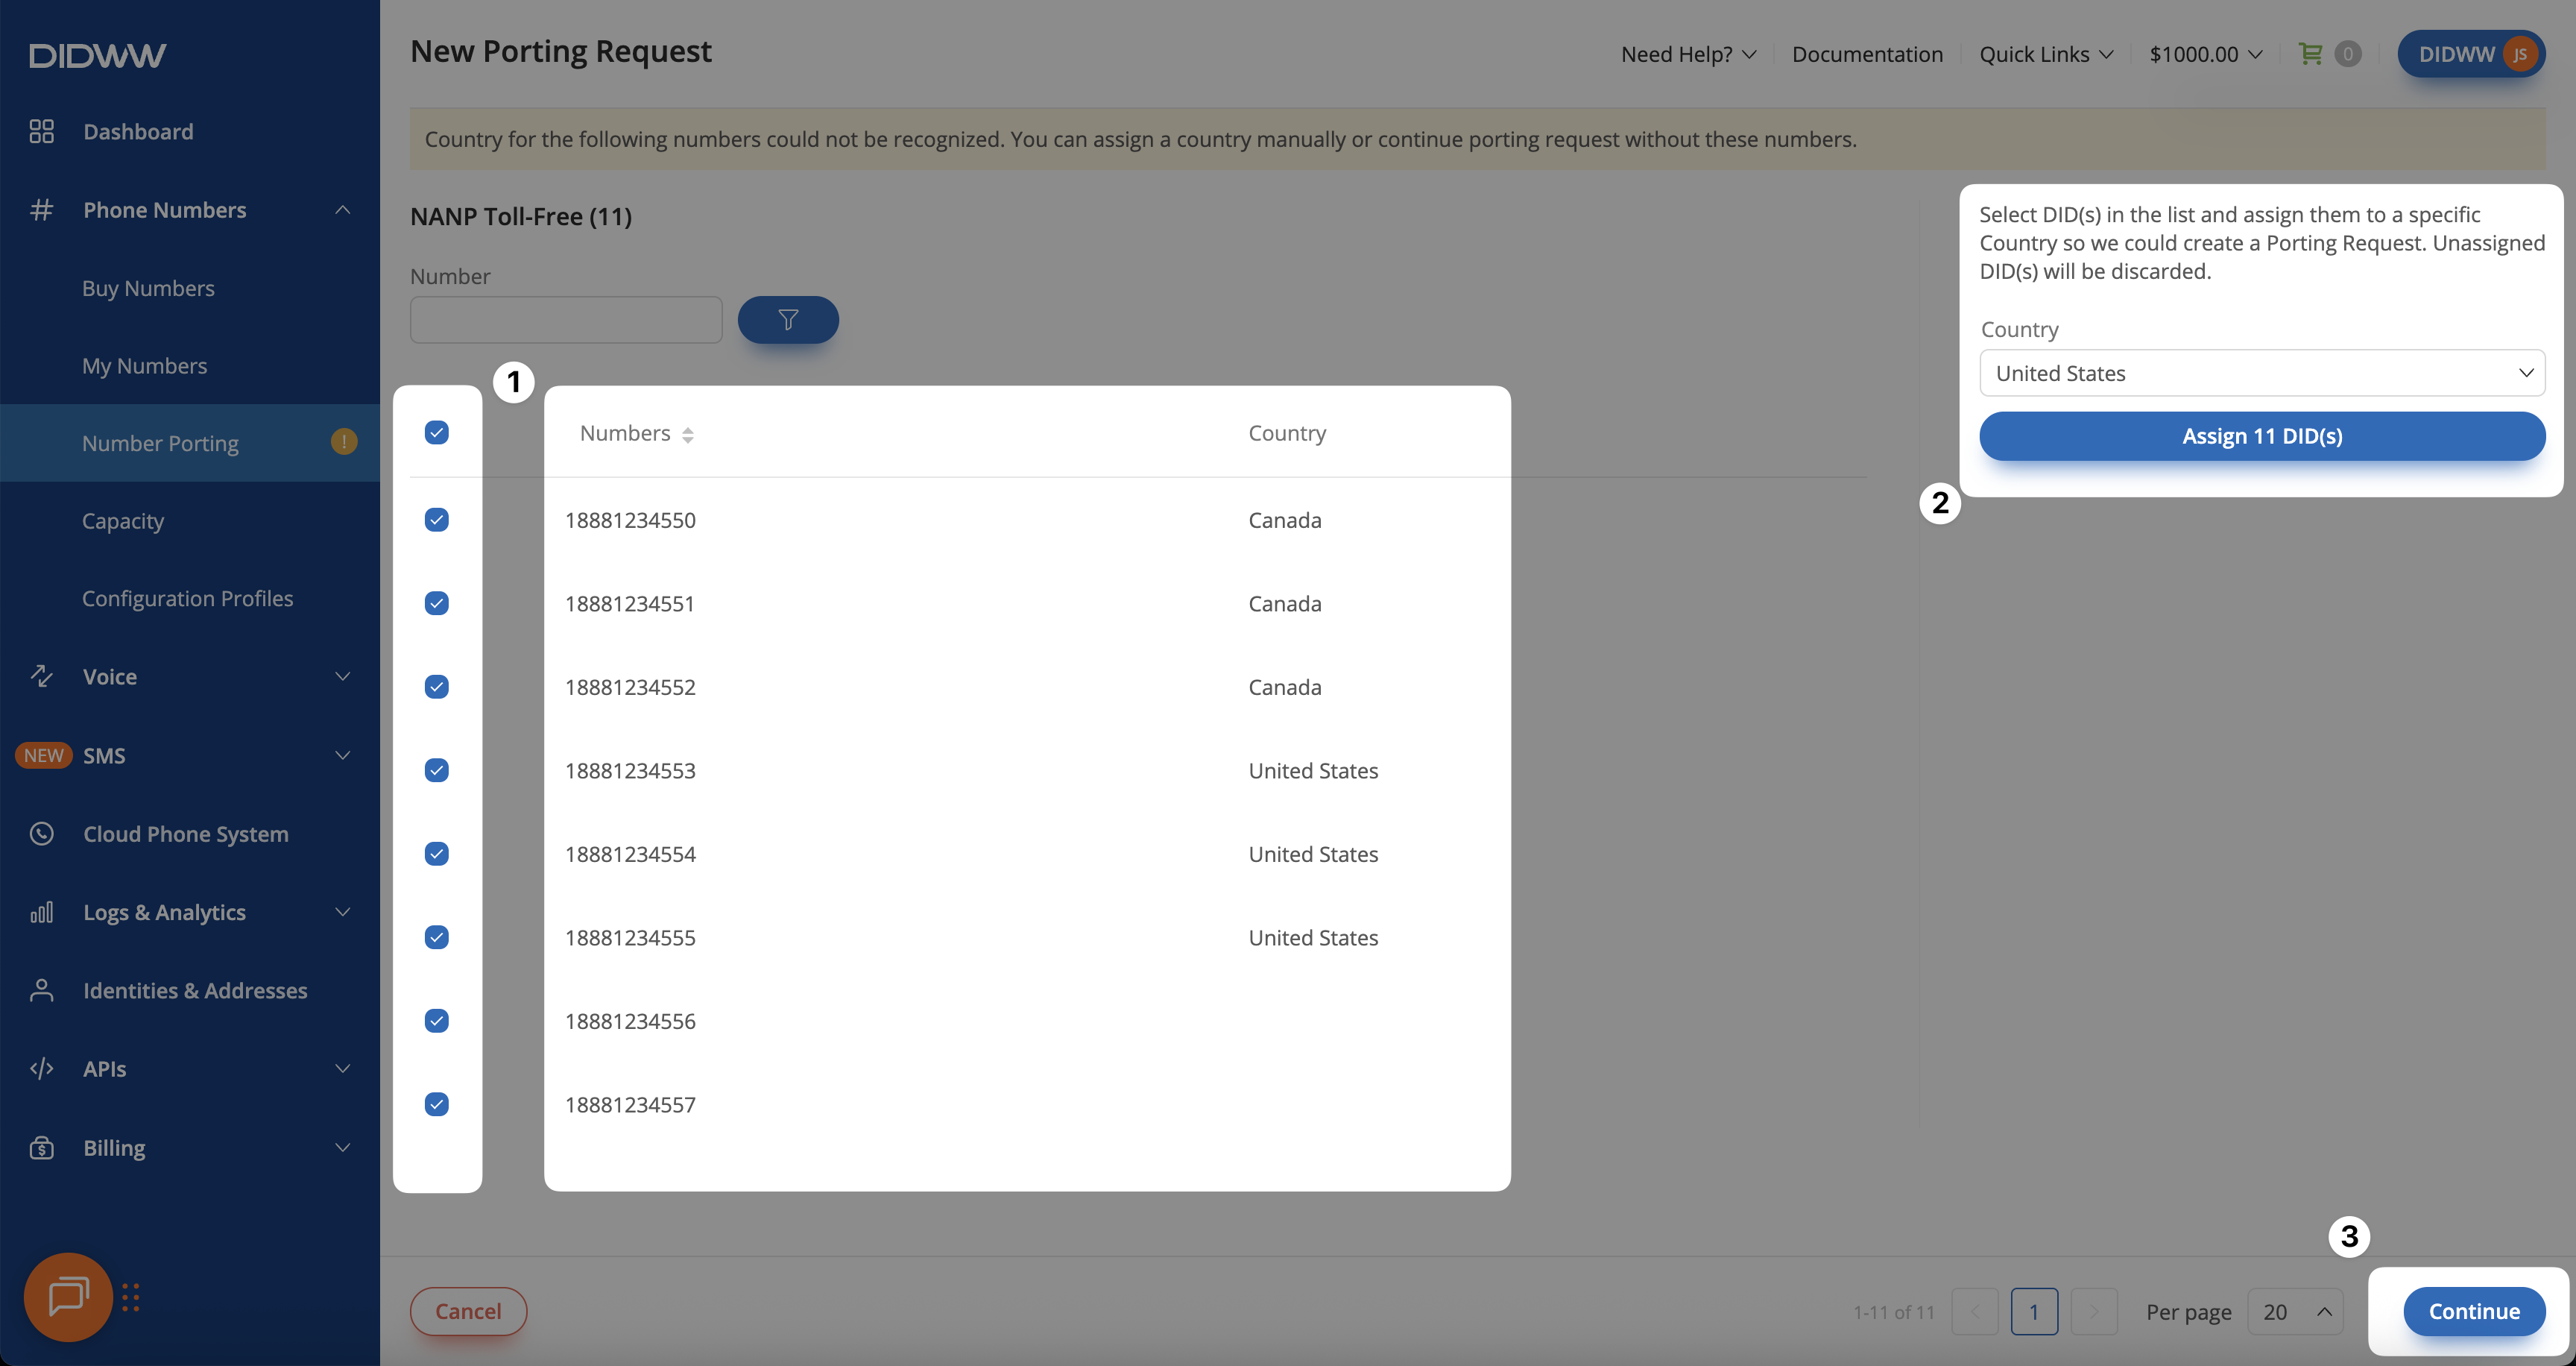
Step 4: Assign Country for Unrecognized NANP Toll-Free Numbers#
Note
NANP (North American Numbering Plan) covers phone numbers in the Canada and United States toll-free numbers starting with 800, 888, 877, and similar codes.
If you are not porting these numbers, this step will not be visible and can be skipped.
To continue the porting request without these unrecognized NANP Toll-Free numbers, select Cancel.
When porting toll-free numbers in the United States or Canada (NANP Toll-Free), assign a country for each unrecognized number.
In the list of unrecognized NANP Toll-Free numbers, select the checkboxes for the numbers you want to assign.
From the Country dropdown, select the correct country, and then select Assign DID(s).
After all numbers have been assigned a country, select Continue to proceed.
Fig. 4 Numbers with unrecognized country requiring manual assignment#
After entering the numbers, review the list to confirm which ones will be submitted for porting.
Important
The system automatically saves your progress for the new porting request with the numbers you entered at this stage.
If you don’t finish the porting request, you can return later and continue where you left off by opening Create New and selecting Continue Previous Session.
Your work remains saved until you complete the porting request for the selected country and number type, or cancel it manually.
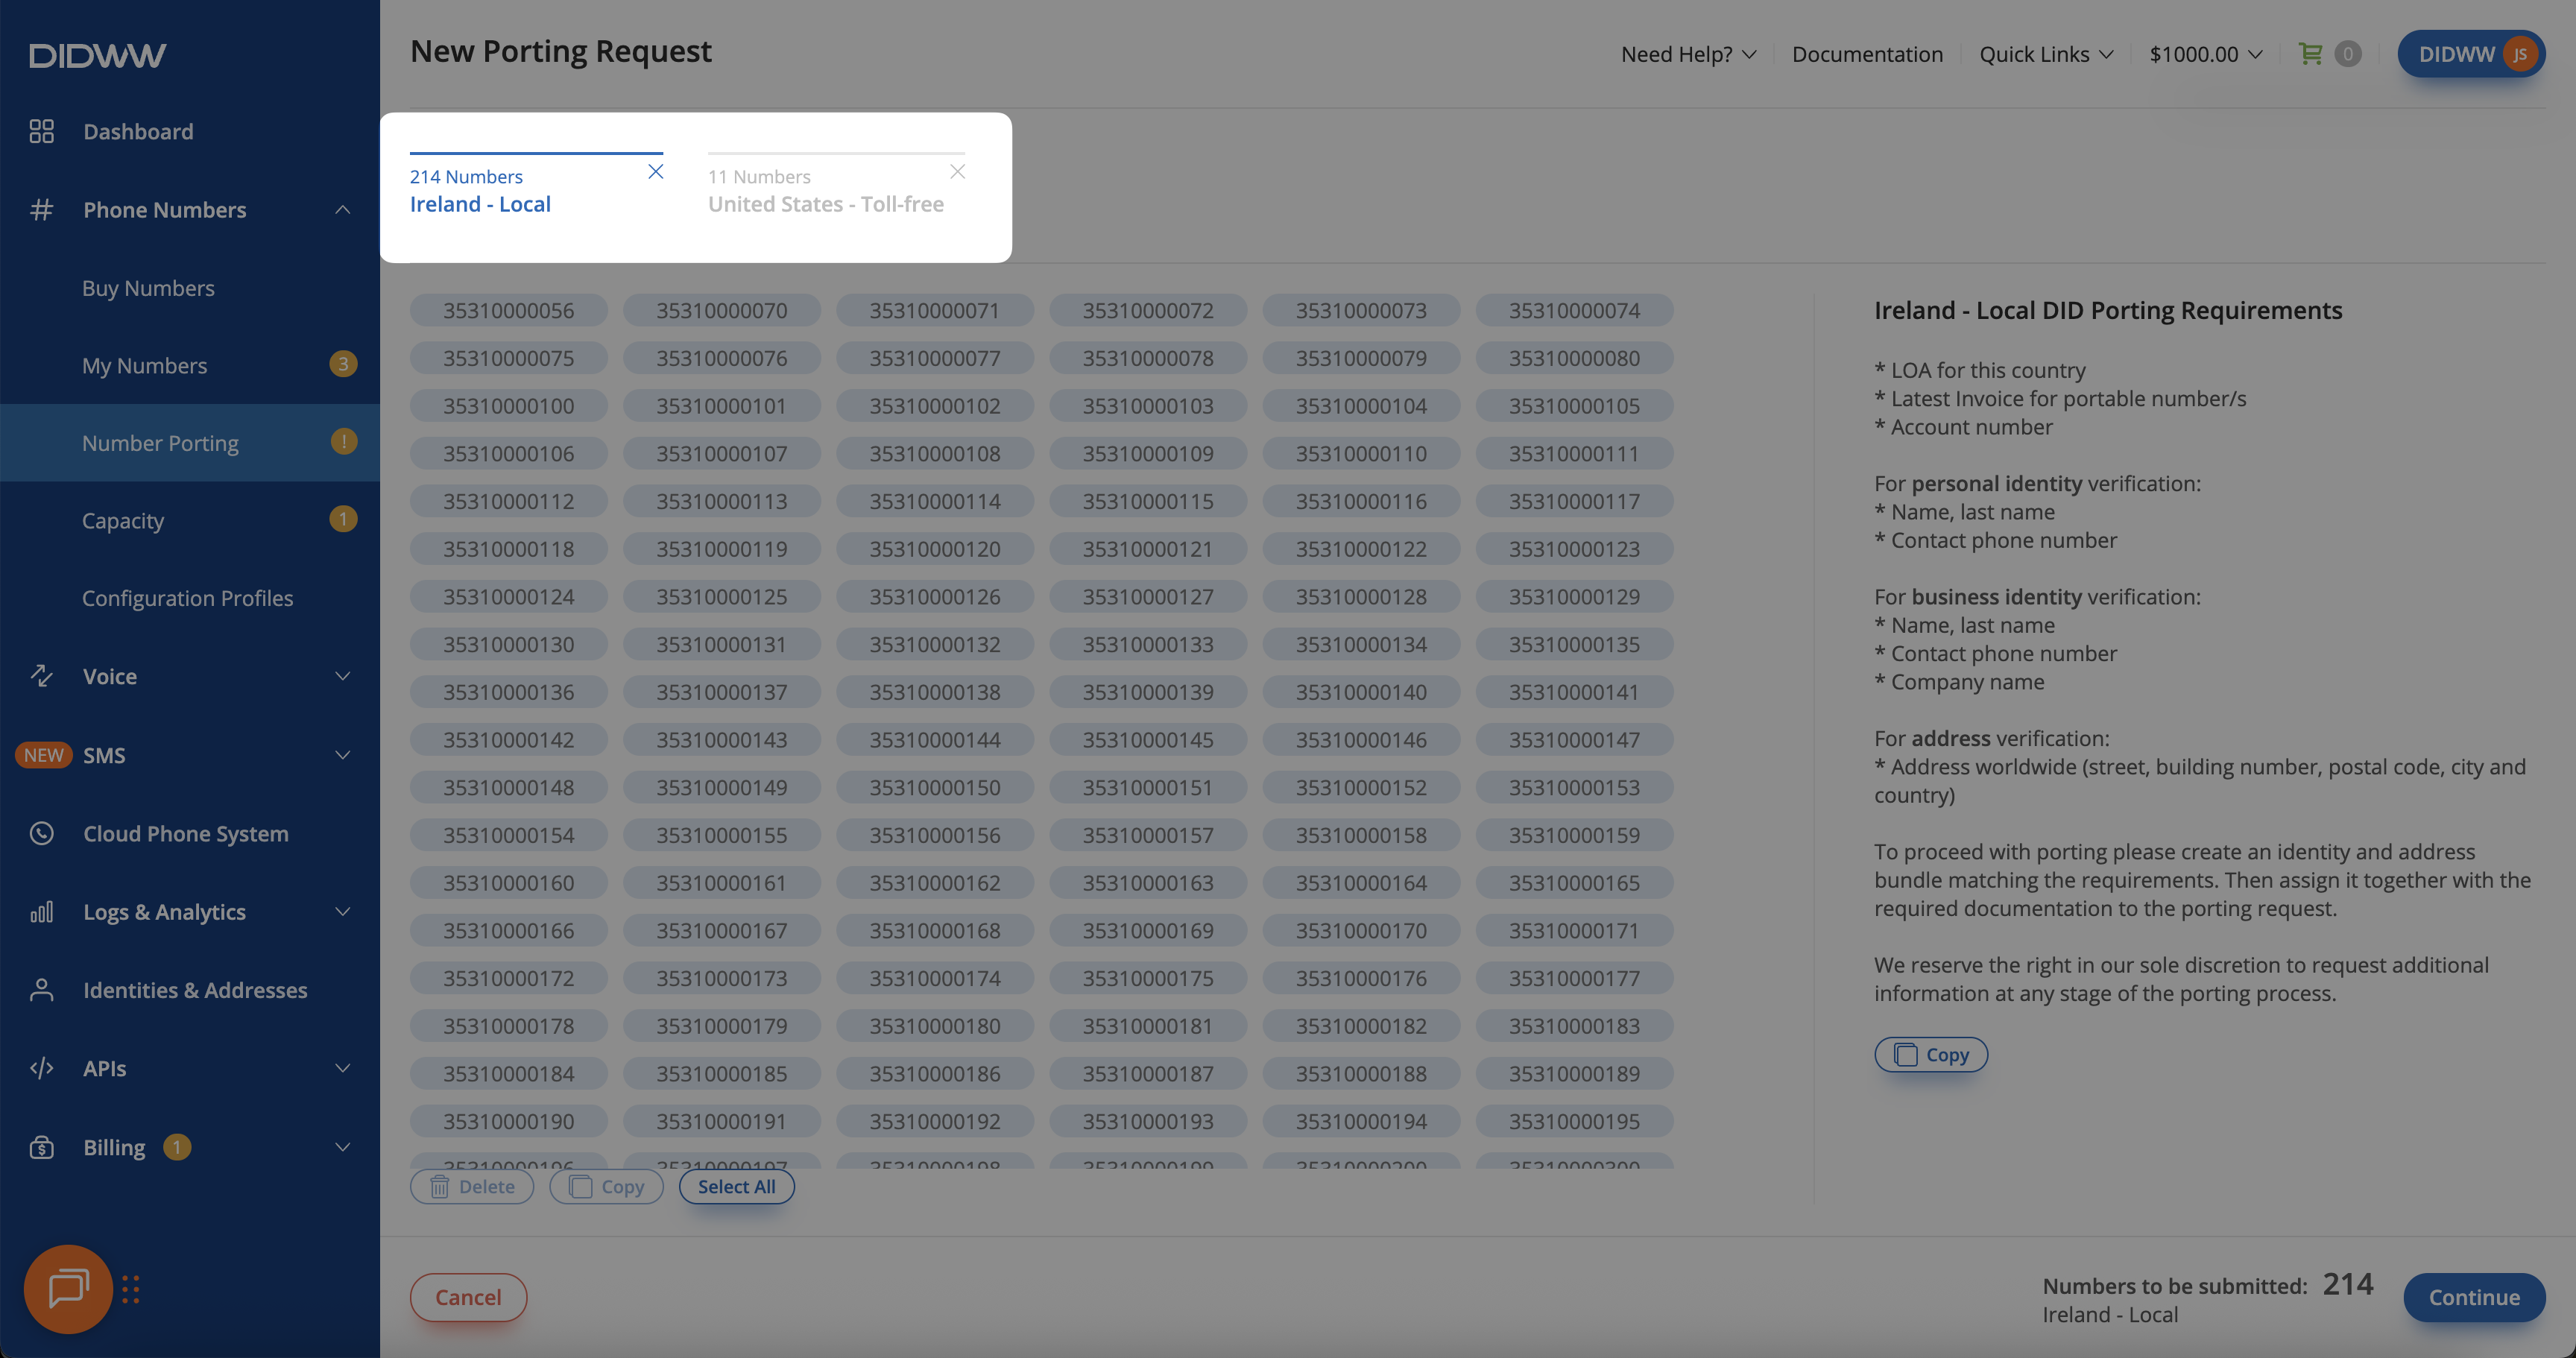
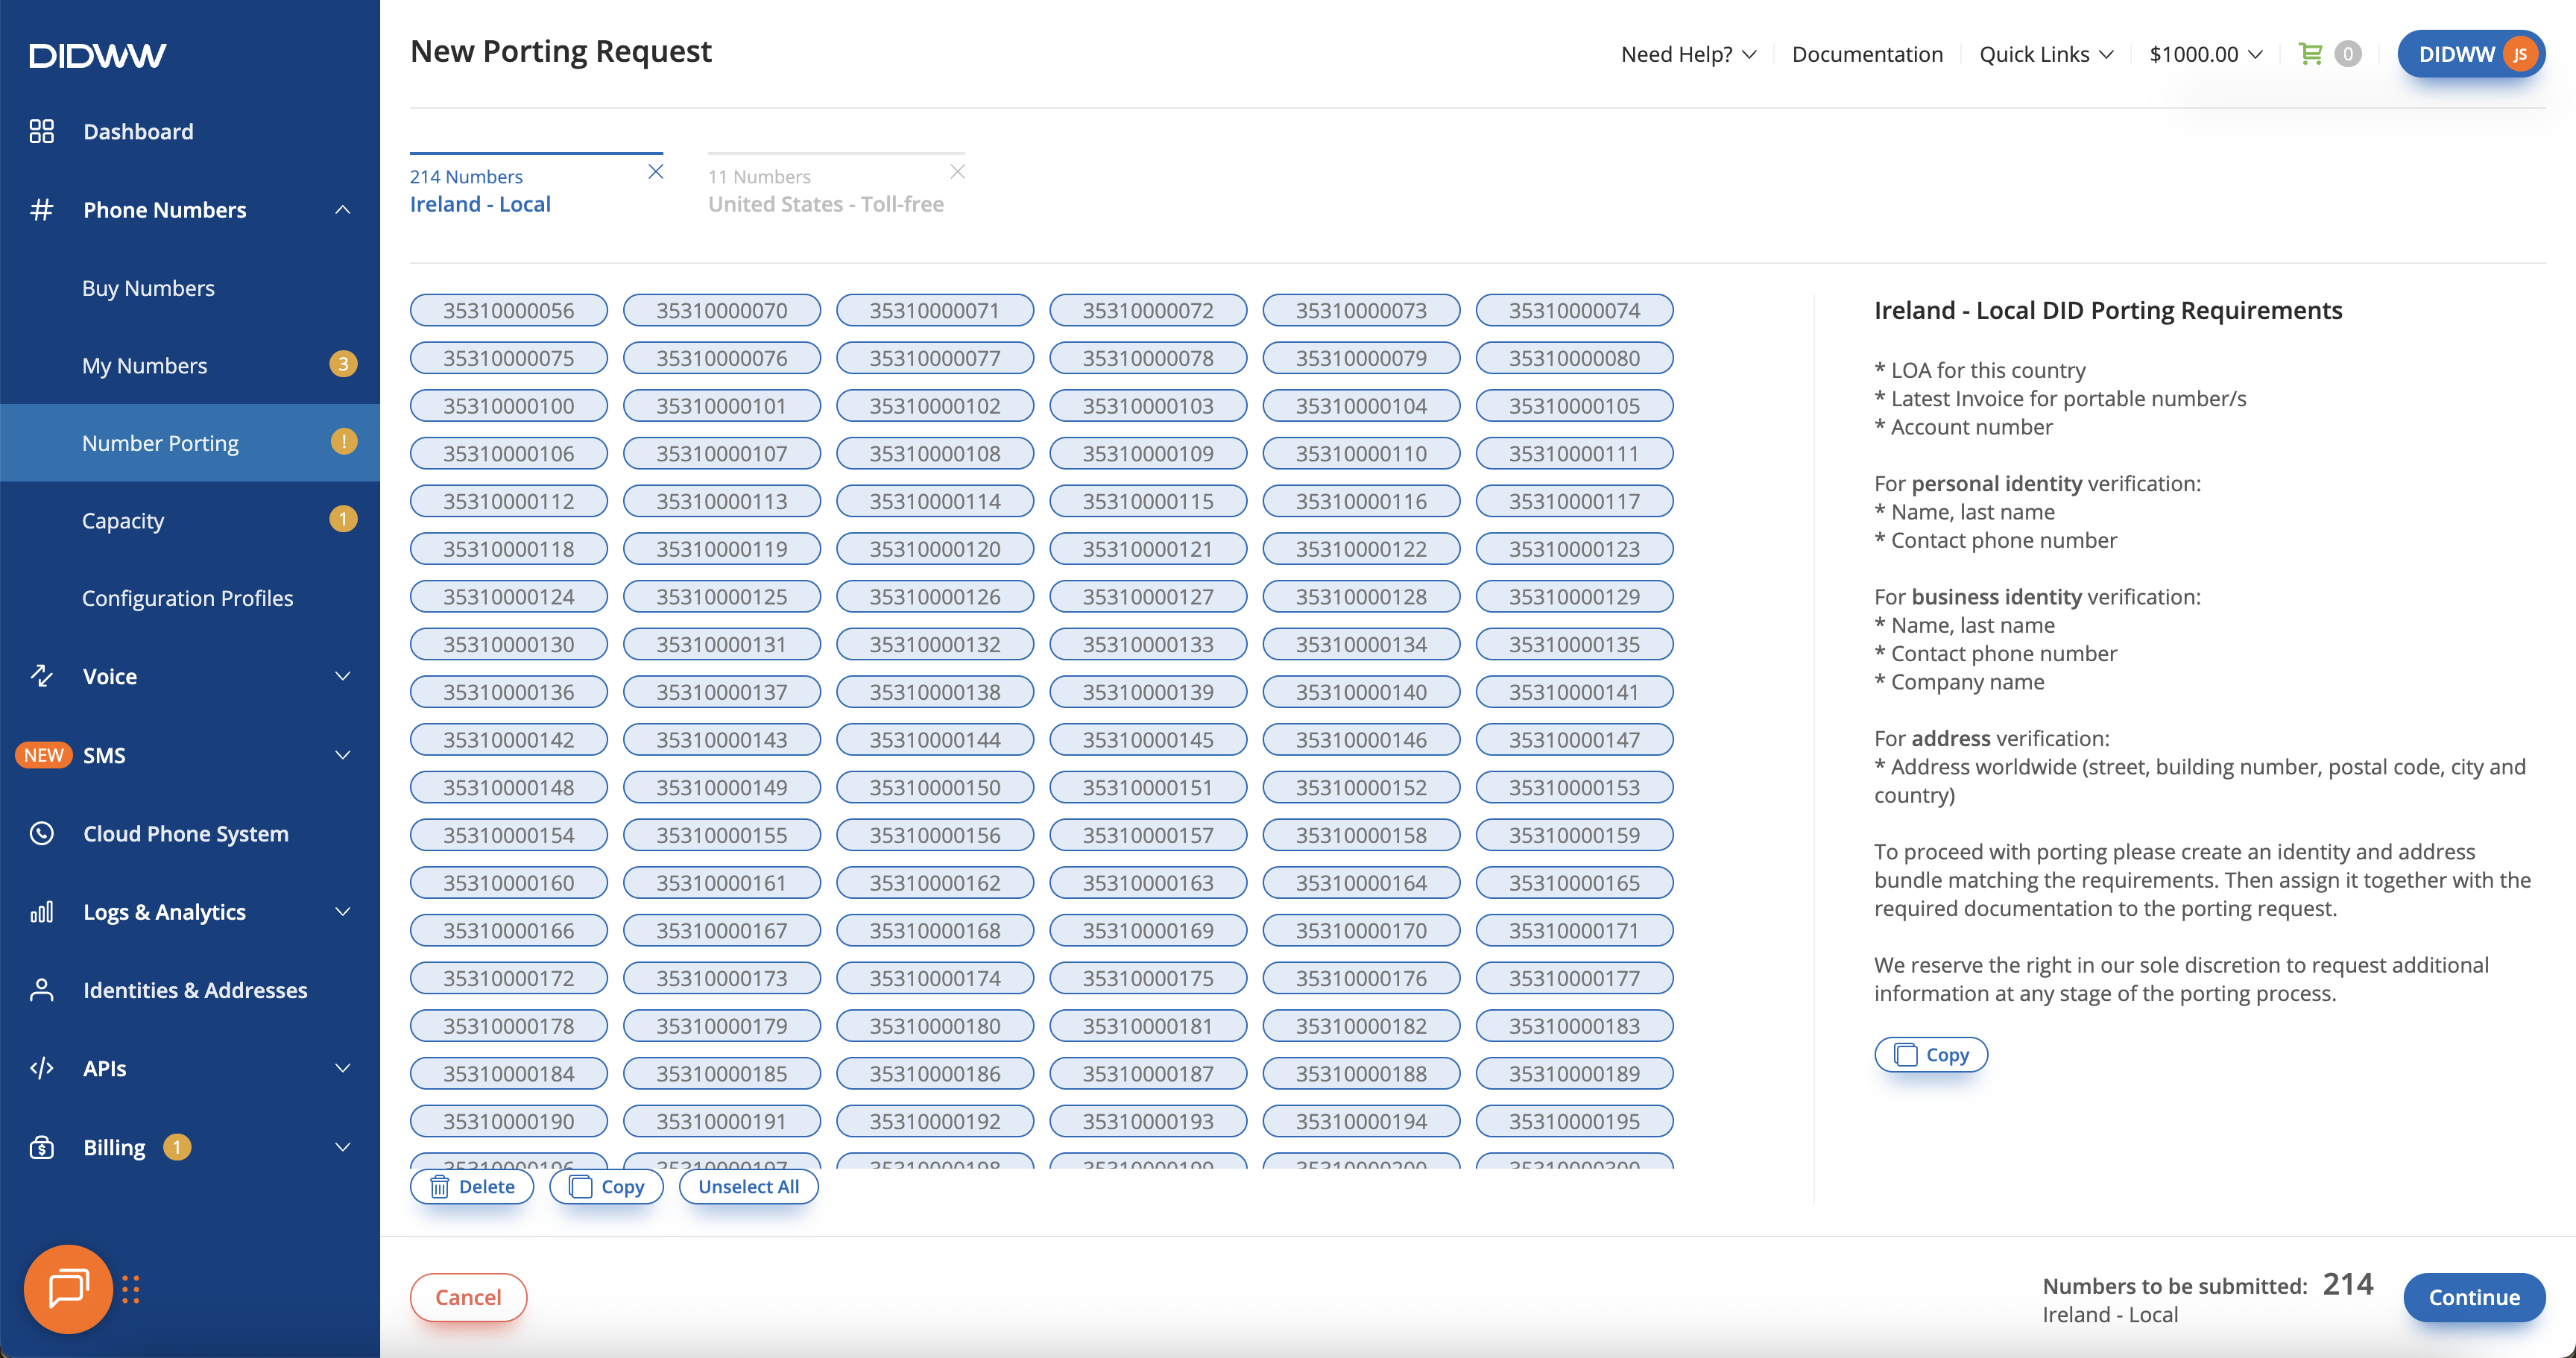
Numbers are grouped into tabs by country, number type, and requirements, each showing the total count of numbers. You can switch between tabs to view the numbers in each group, then select, copy, or delete them from the porting request.
Note
A separate porting request is created for each tab.
To discard numbers while continuing with the porting request from other tabs, select the tab, click the X icon, and confirm the action.
Fig. 5 Reviewing and managing selected numbers before submitting a porting request#
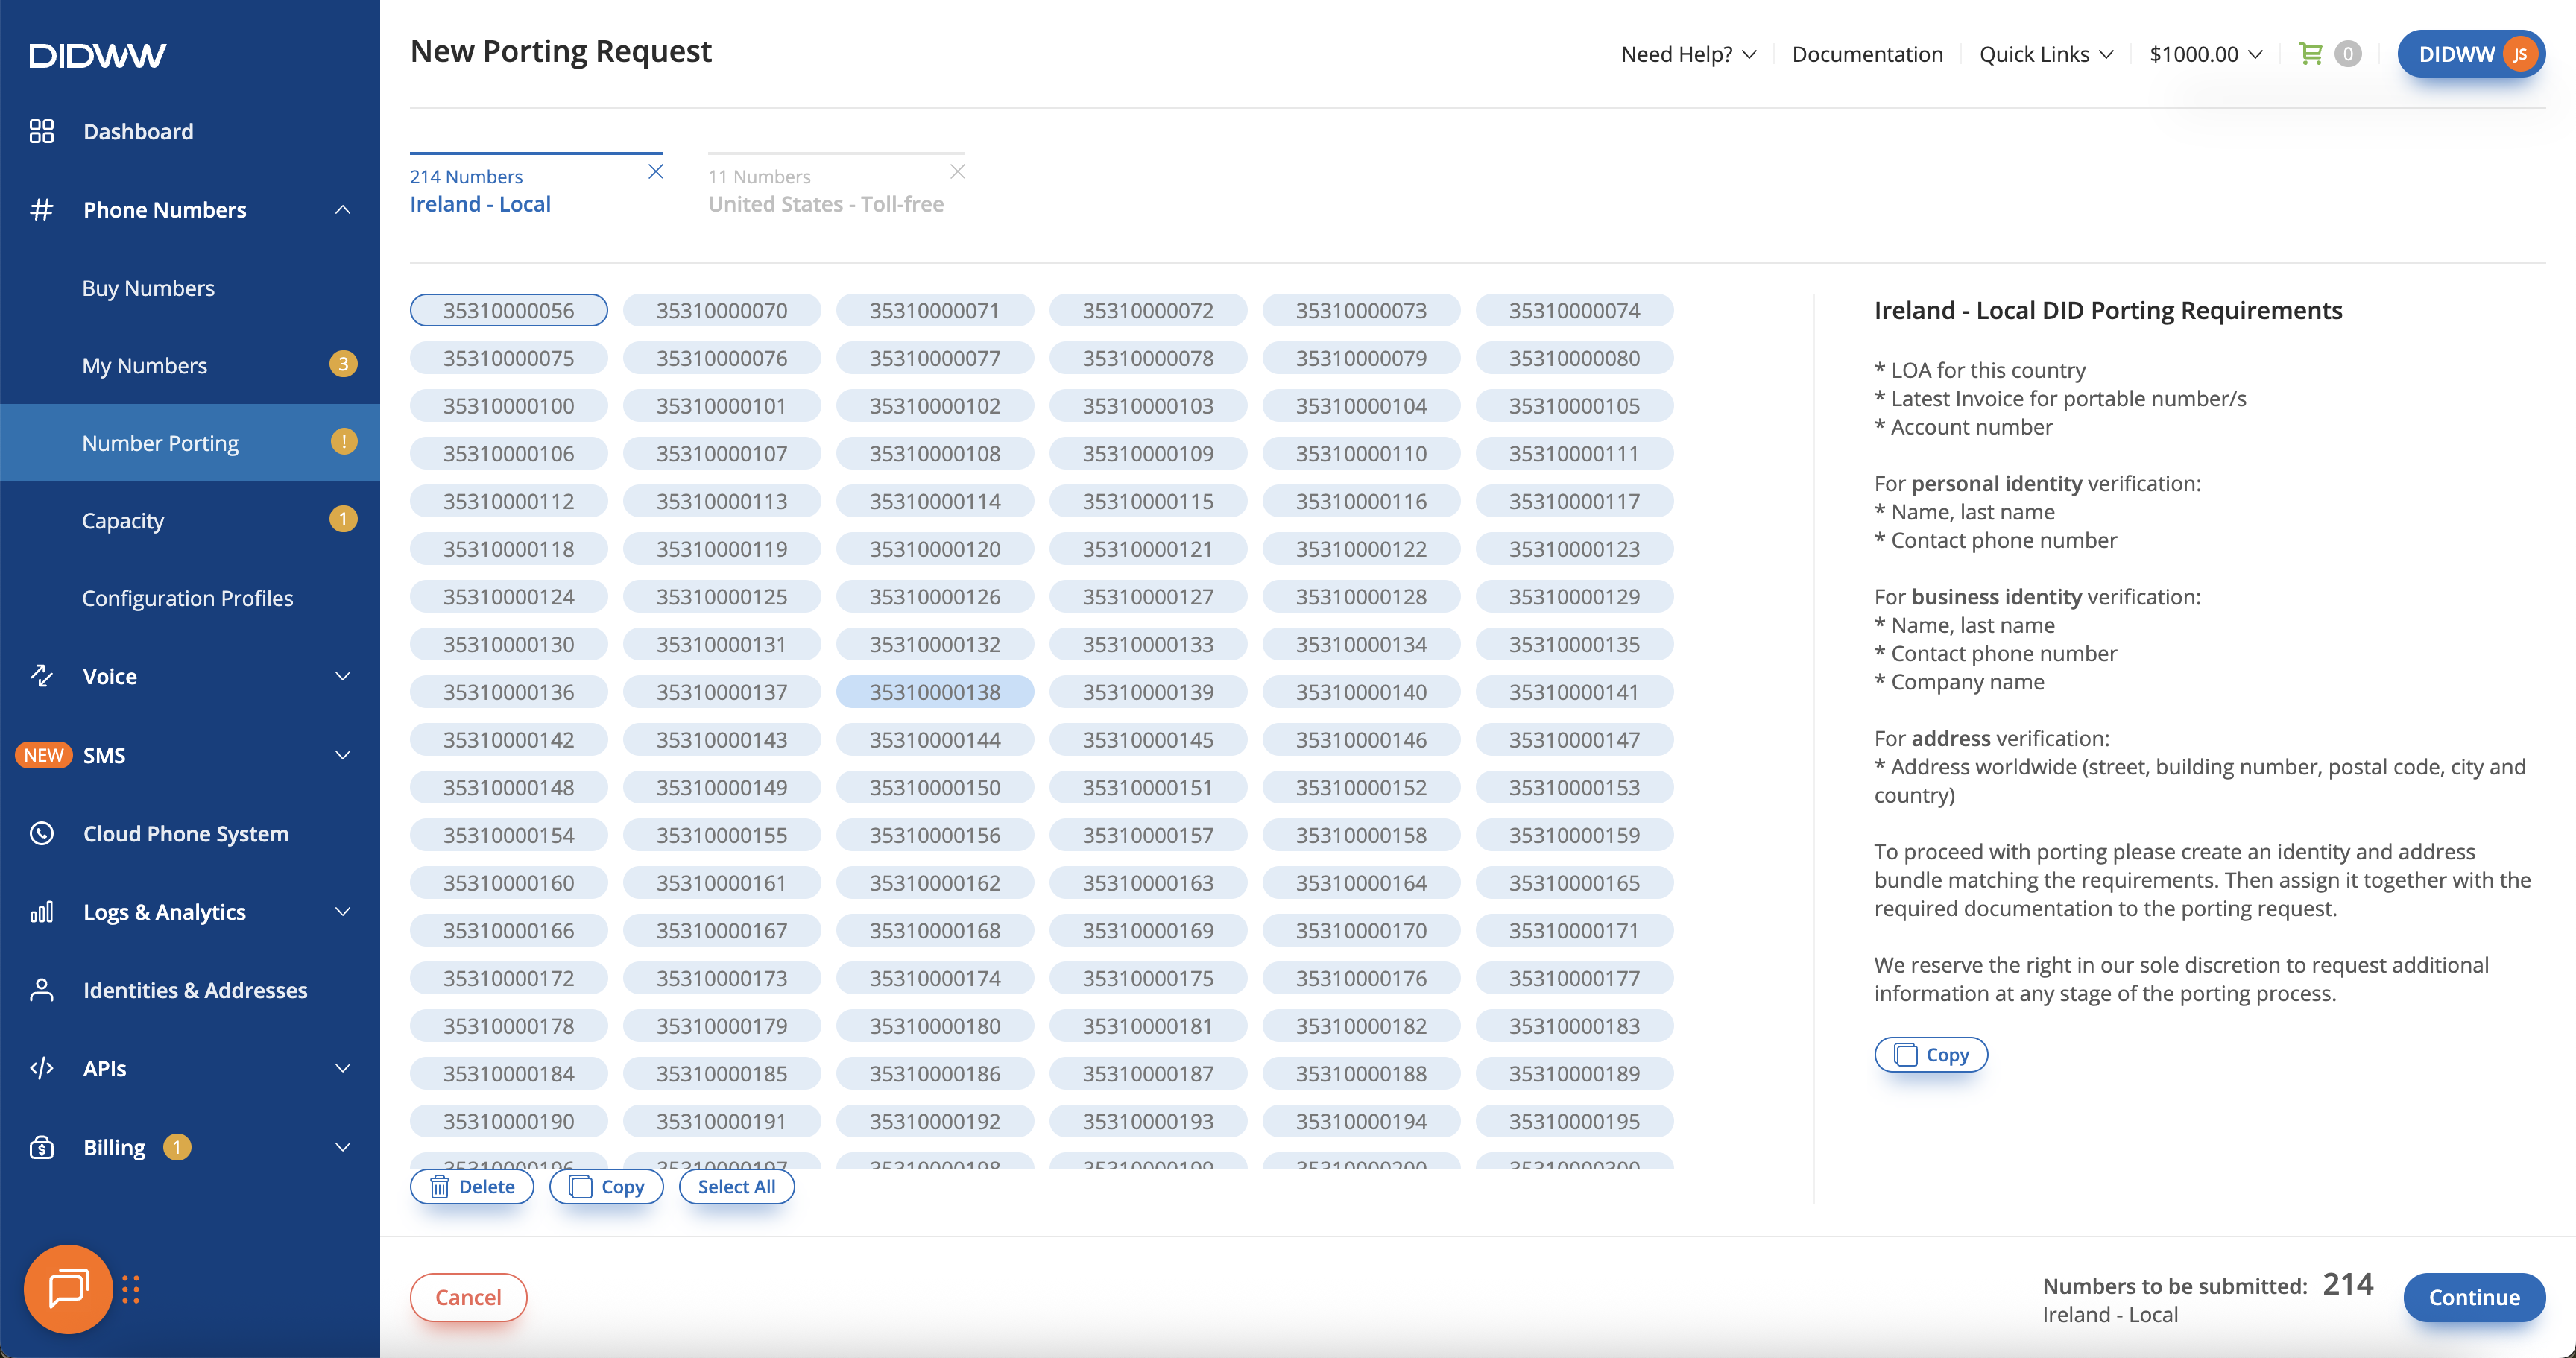
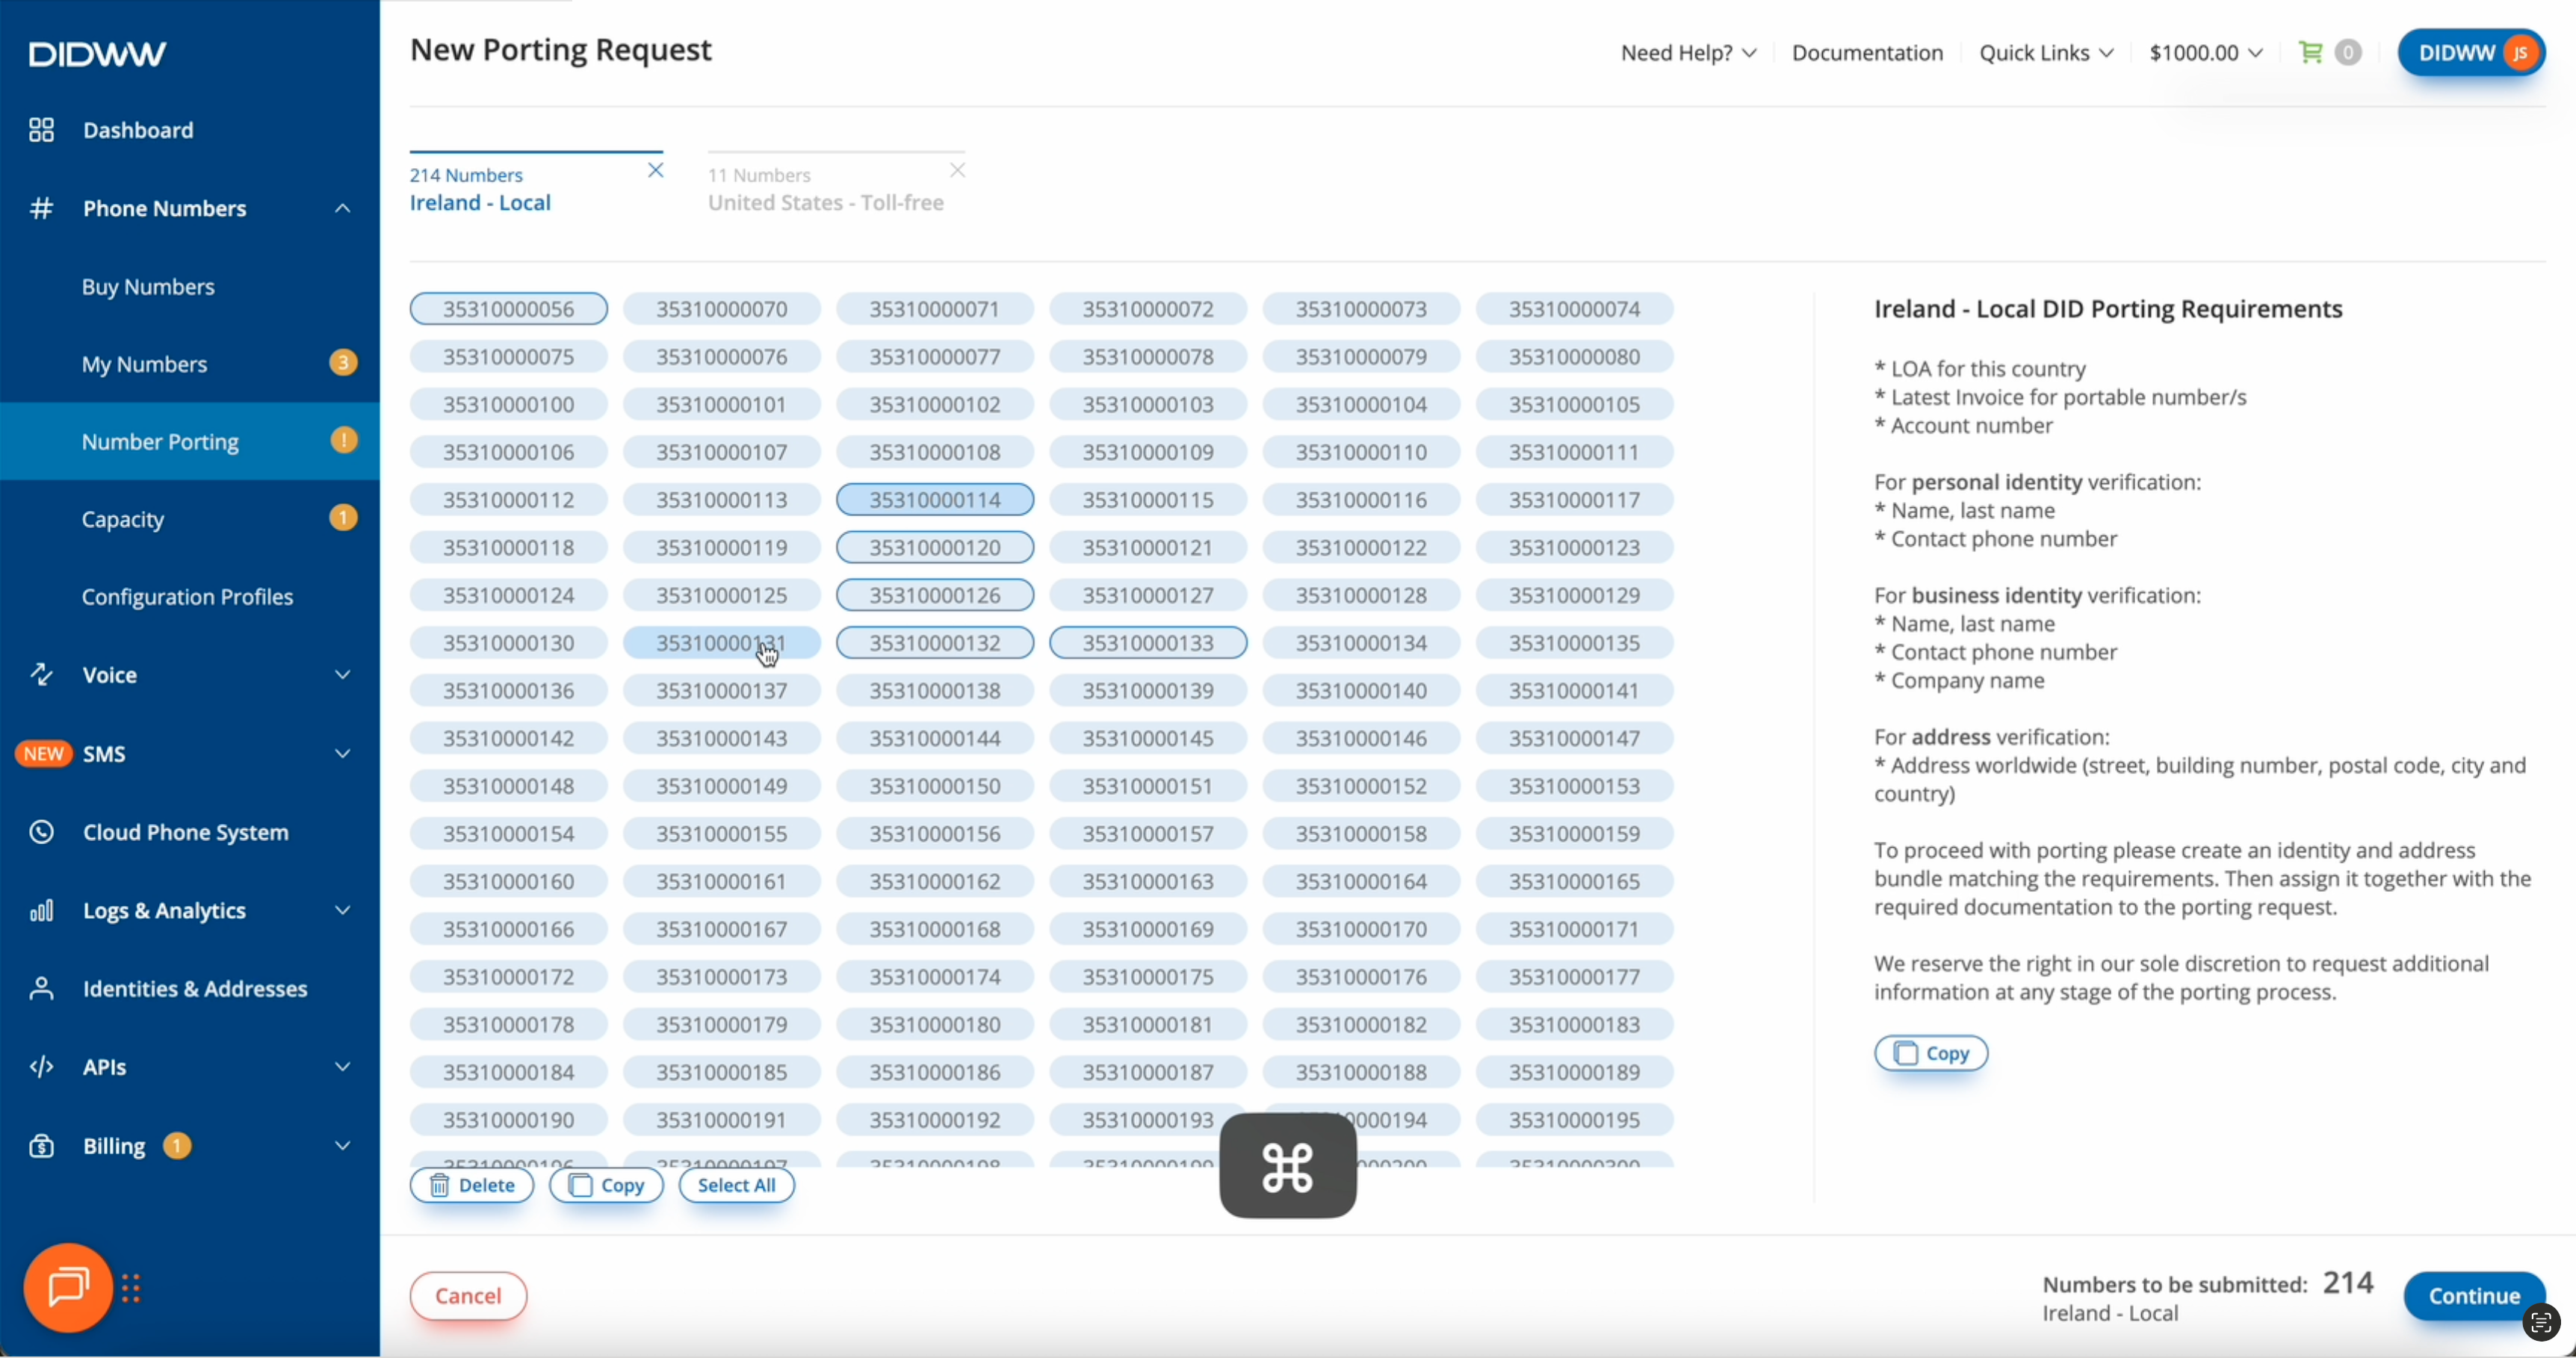
The numbers accepted for the porting request are listed so you can verify that all numbers you want to port are included. Select all, single, or multiple numbers to copy them for your records or delete any you don’t want to include in the porting request.
Click a number to select a single DID.
The selected DID will be highlighted.
Click Select All at the bottom of the list to highlight every number in the group. When all numbers are selected, the button changes to Unselect All so you can clear the selection.
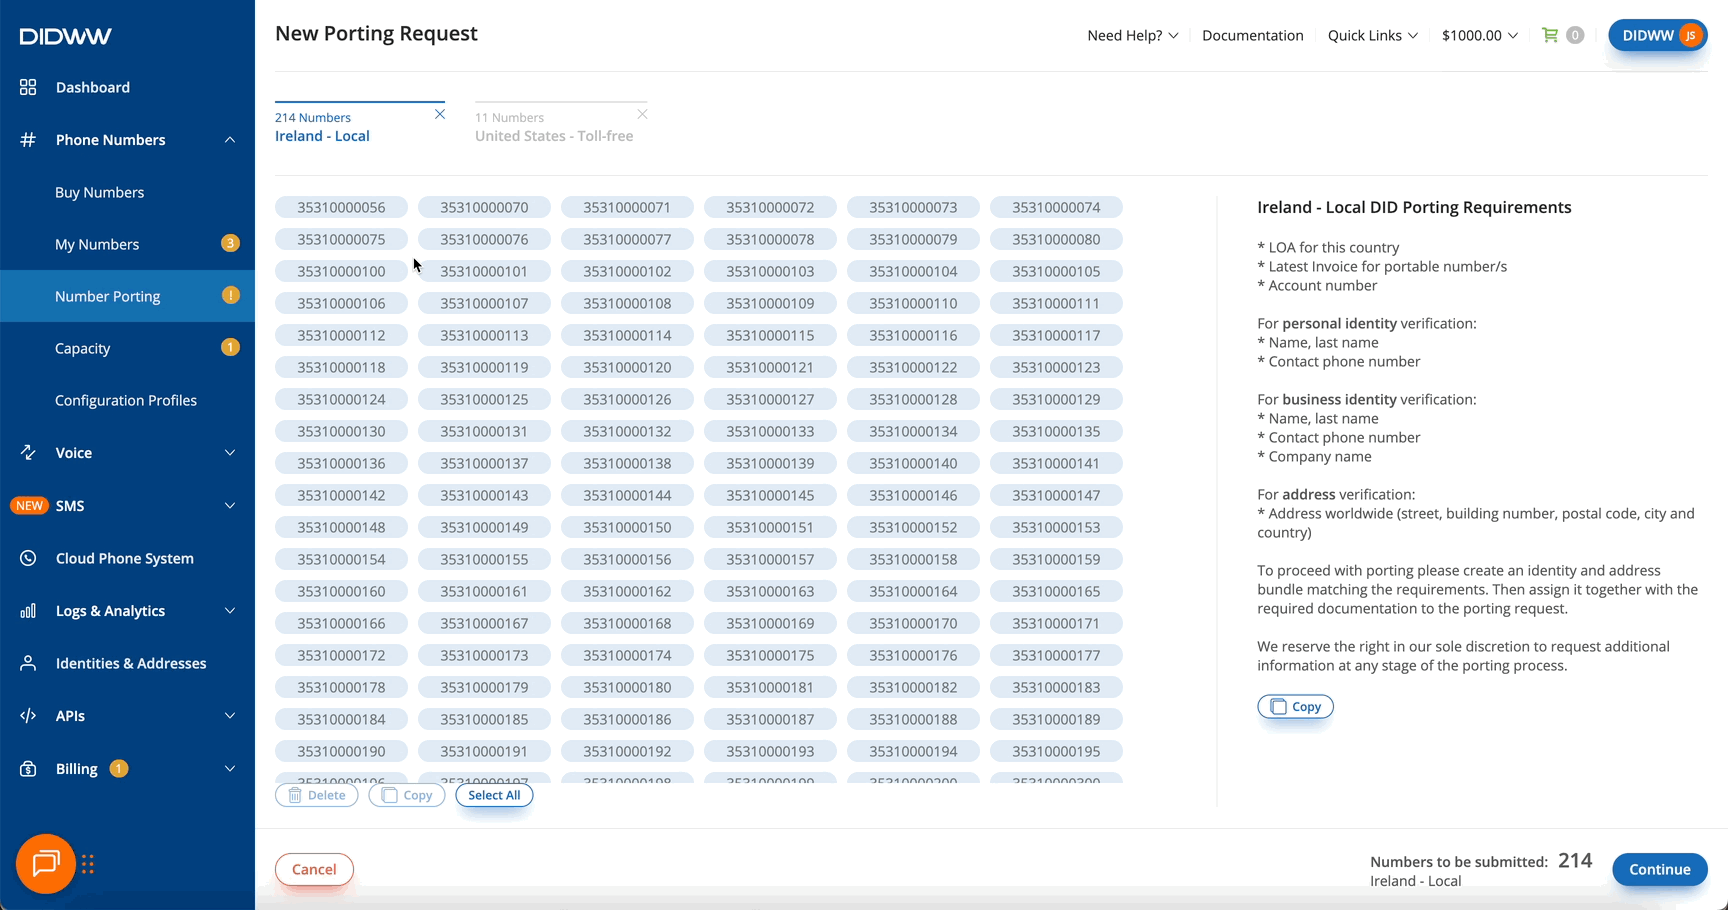
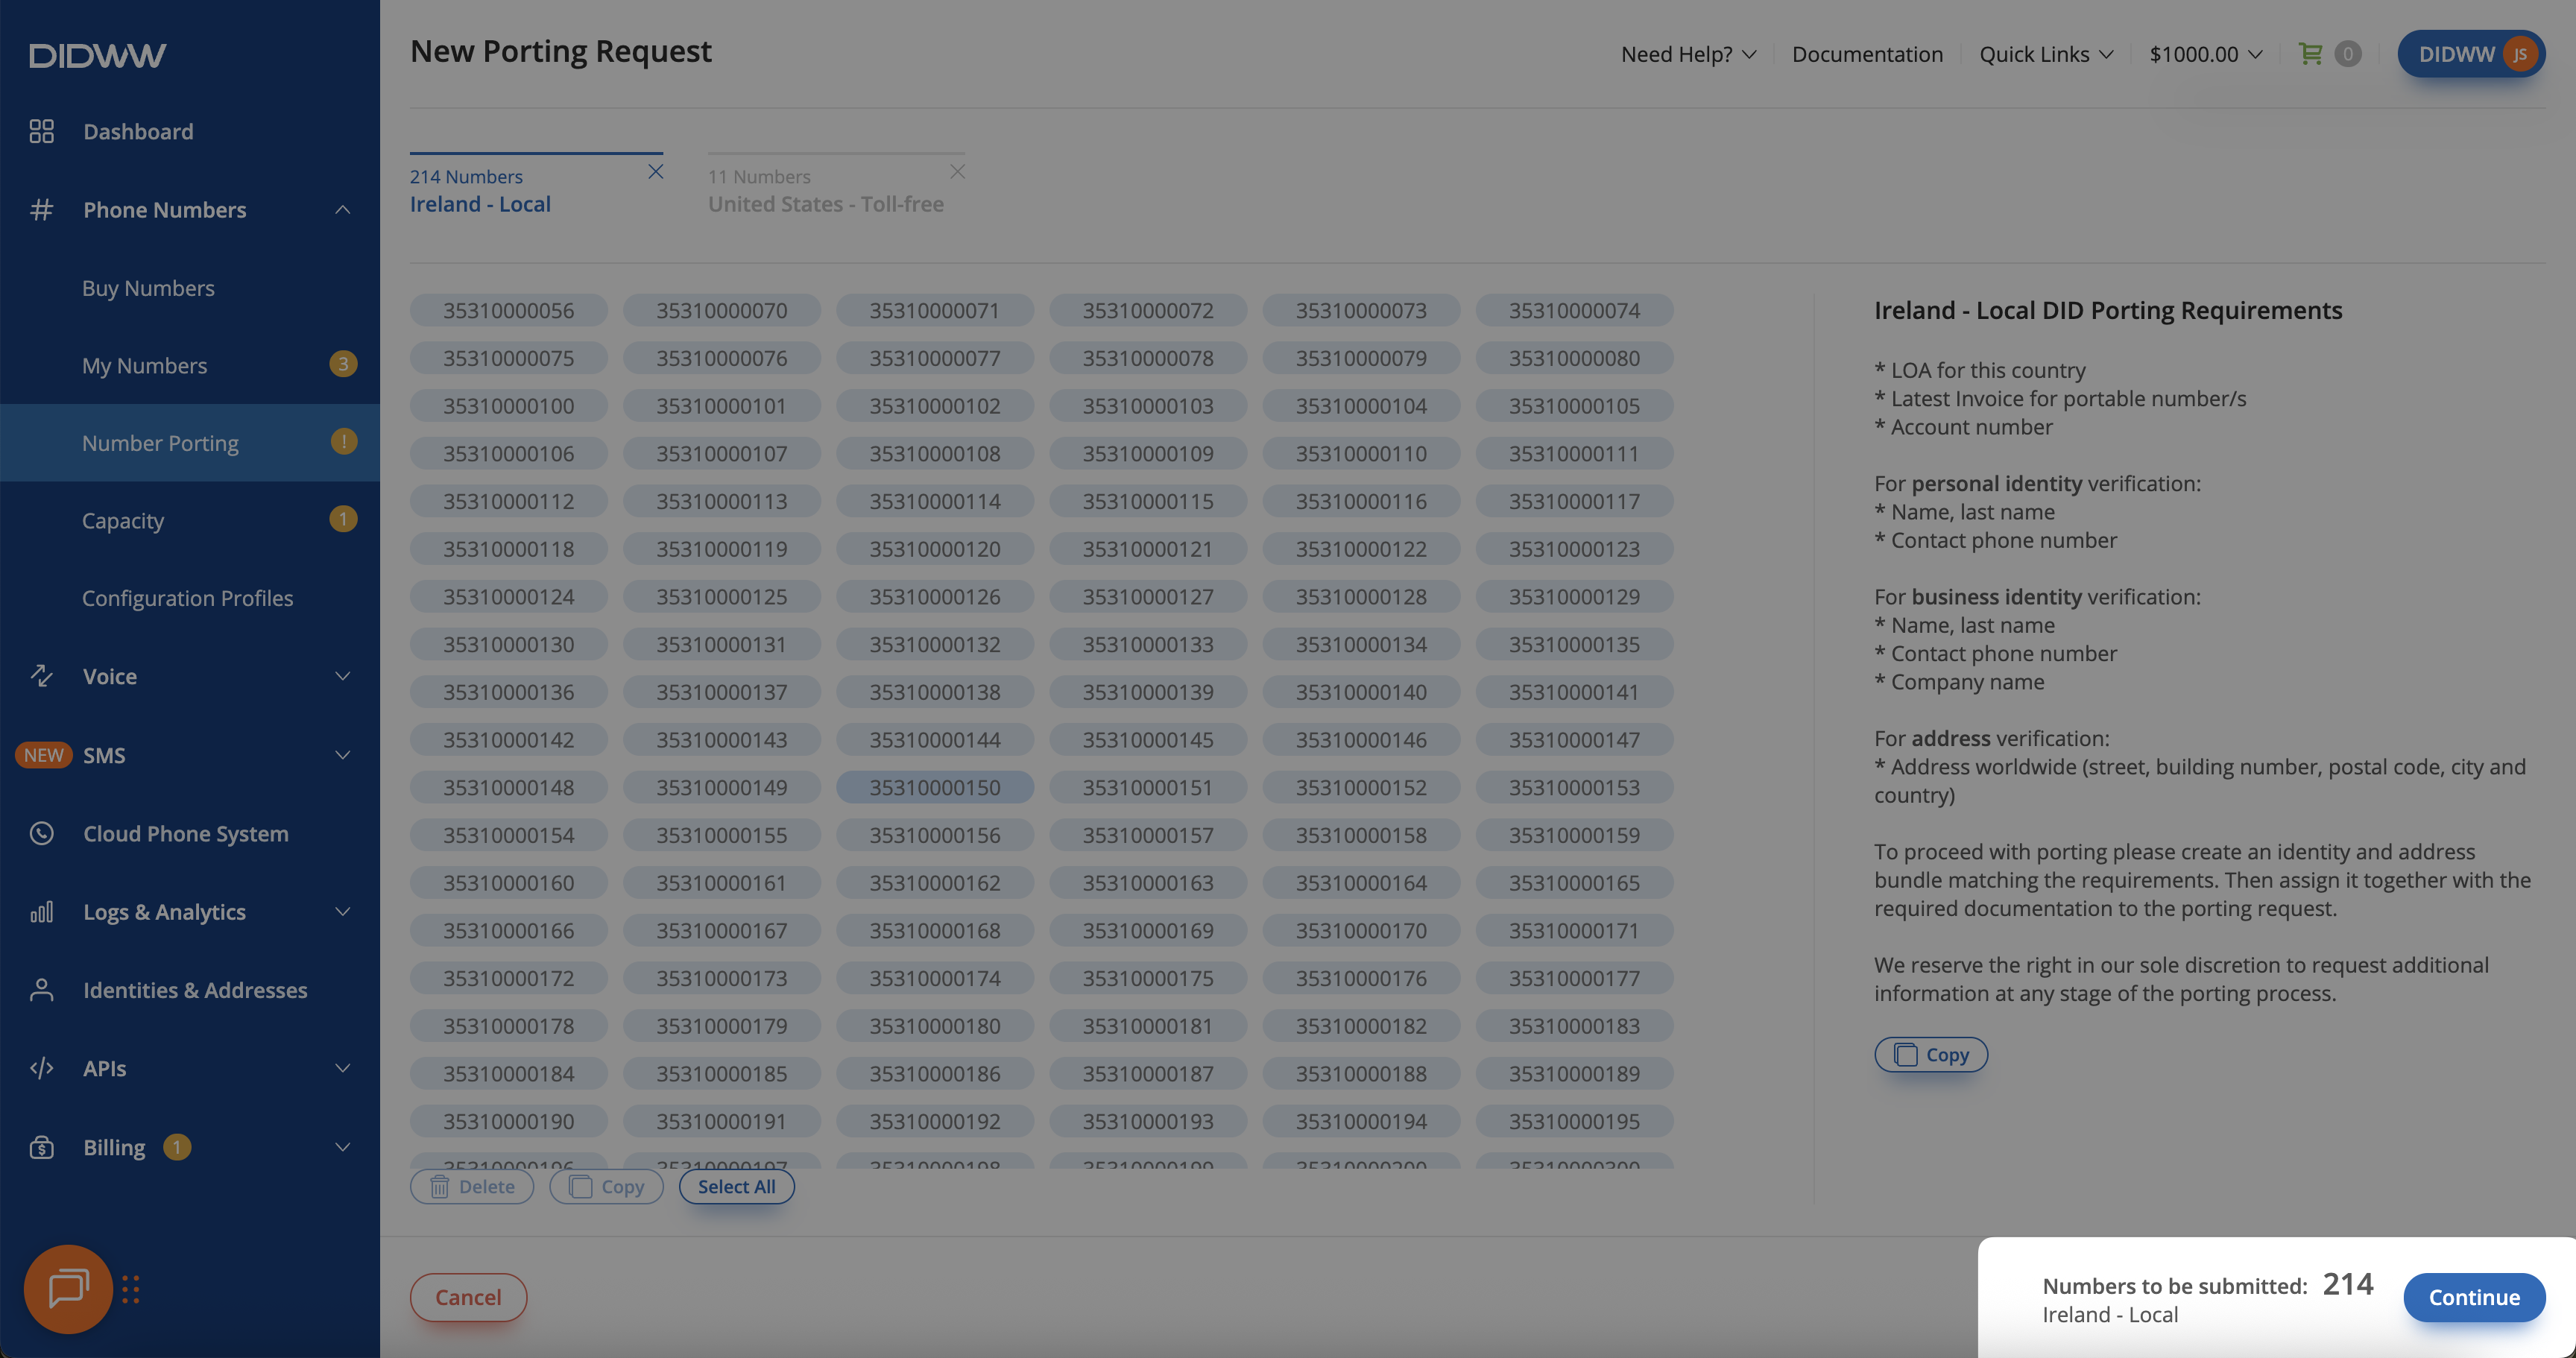
After reviewing the grouped numbers by country, number type, and regulatory requirements, select the correct tab and click Continue to proceed to the next step.
Fig. 5 Click continue to proceed to the end user details step#
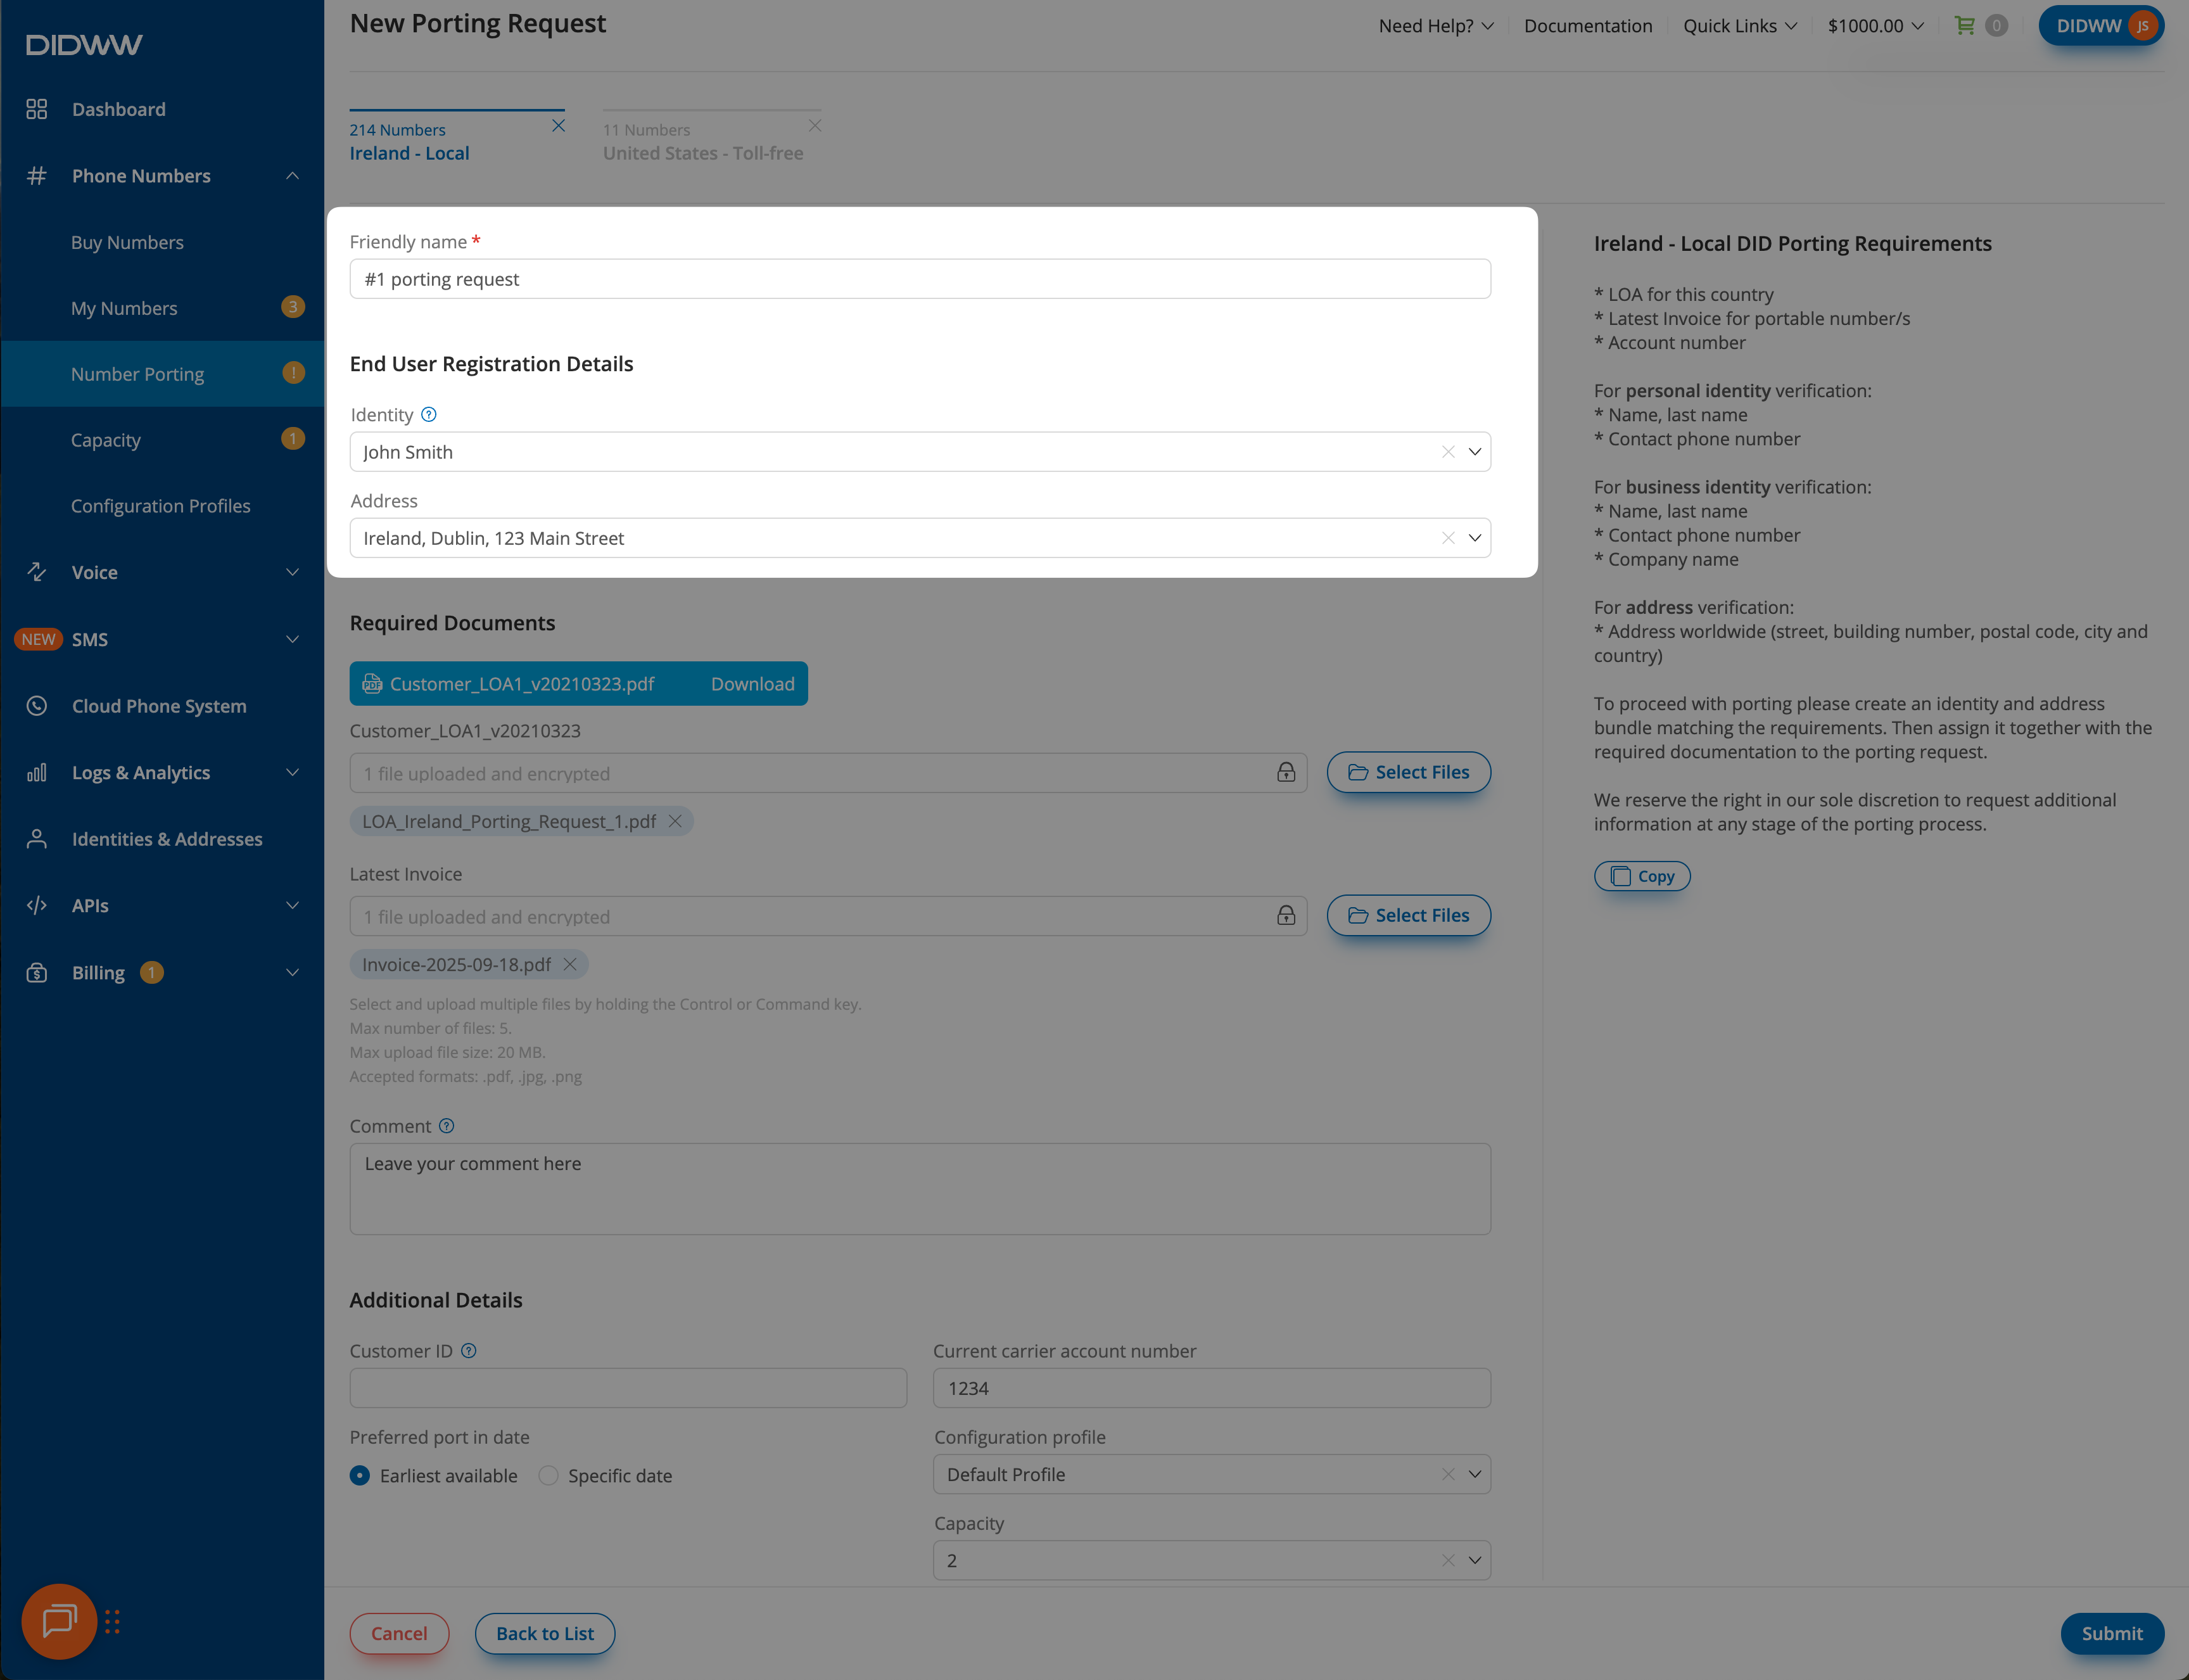
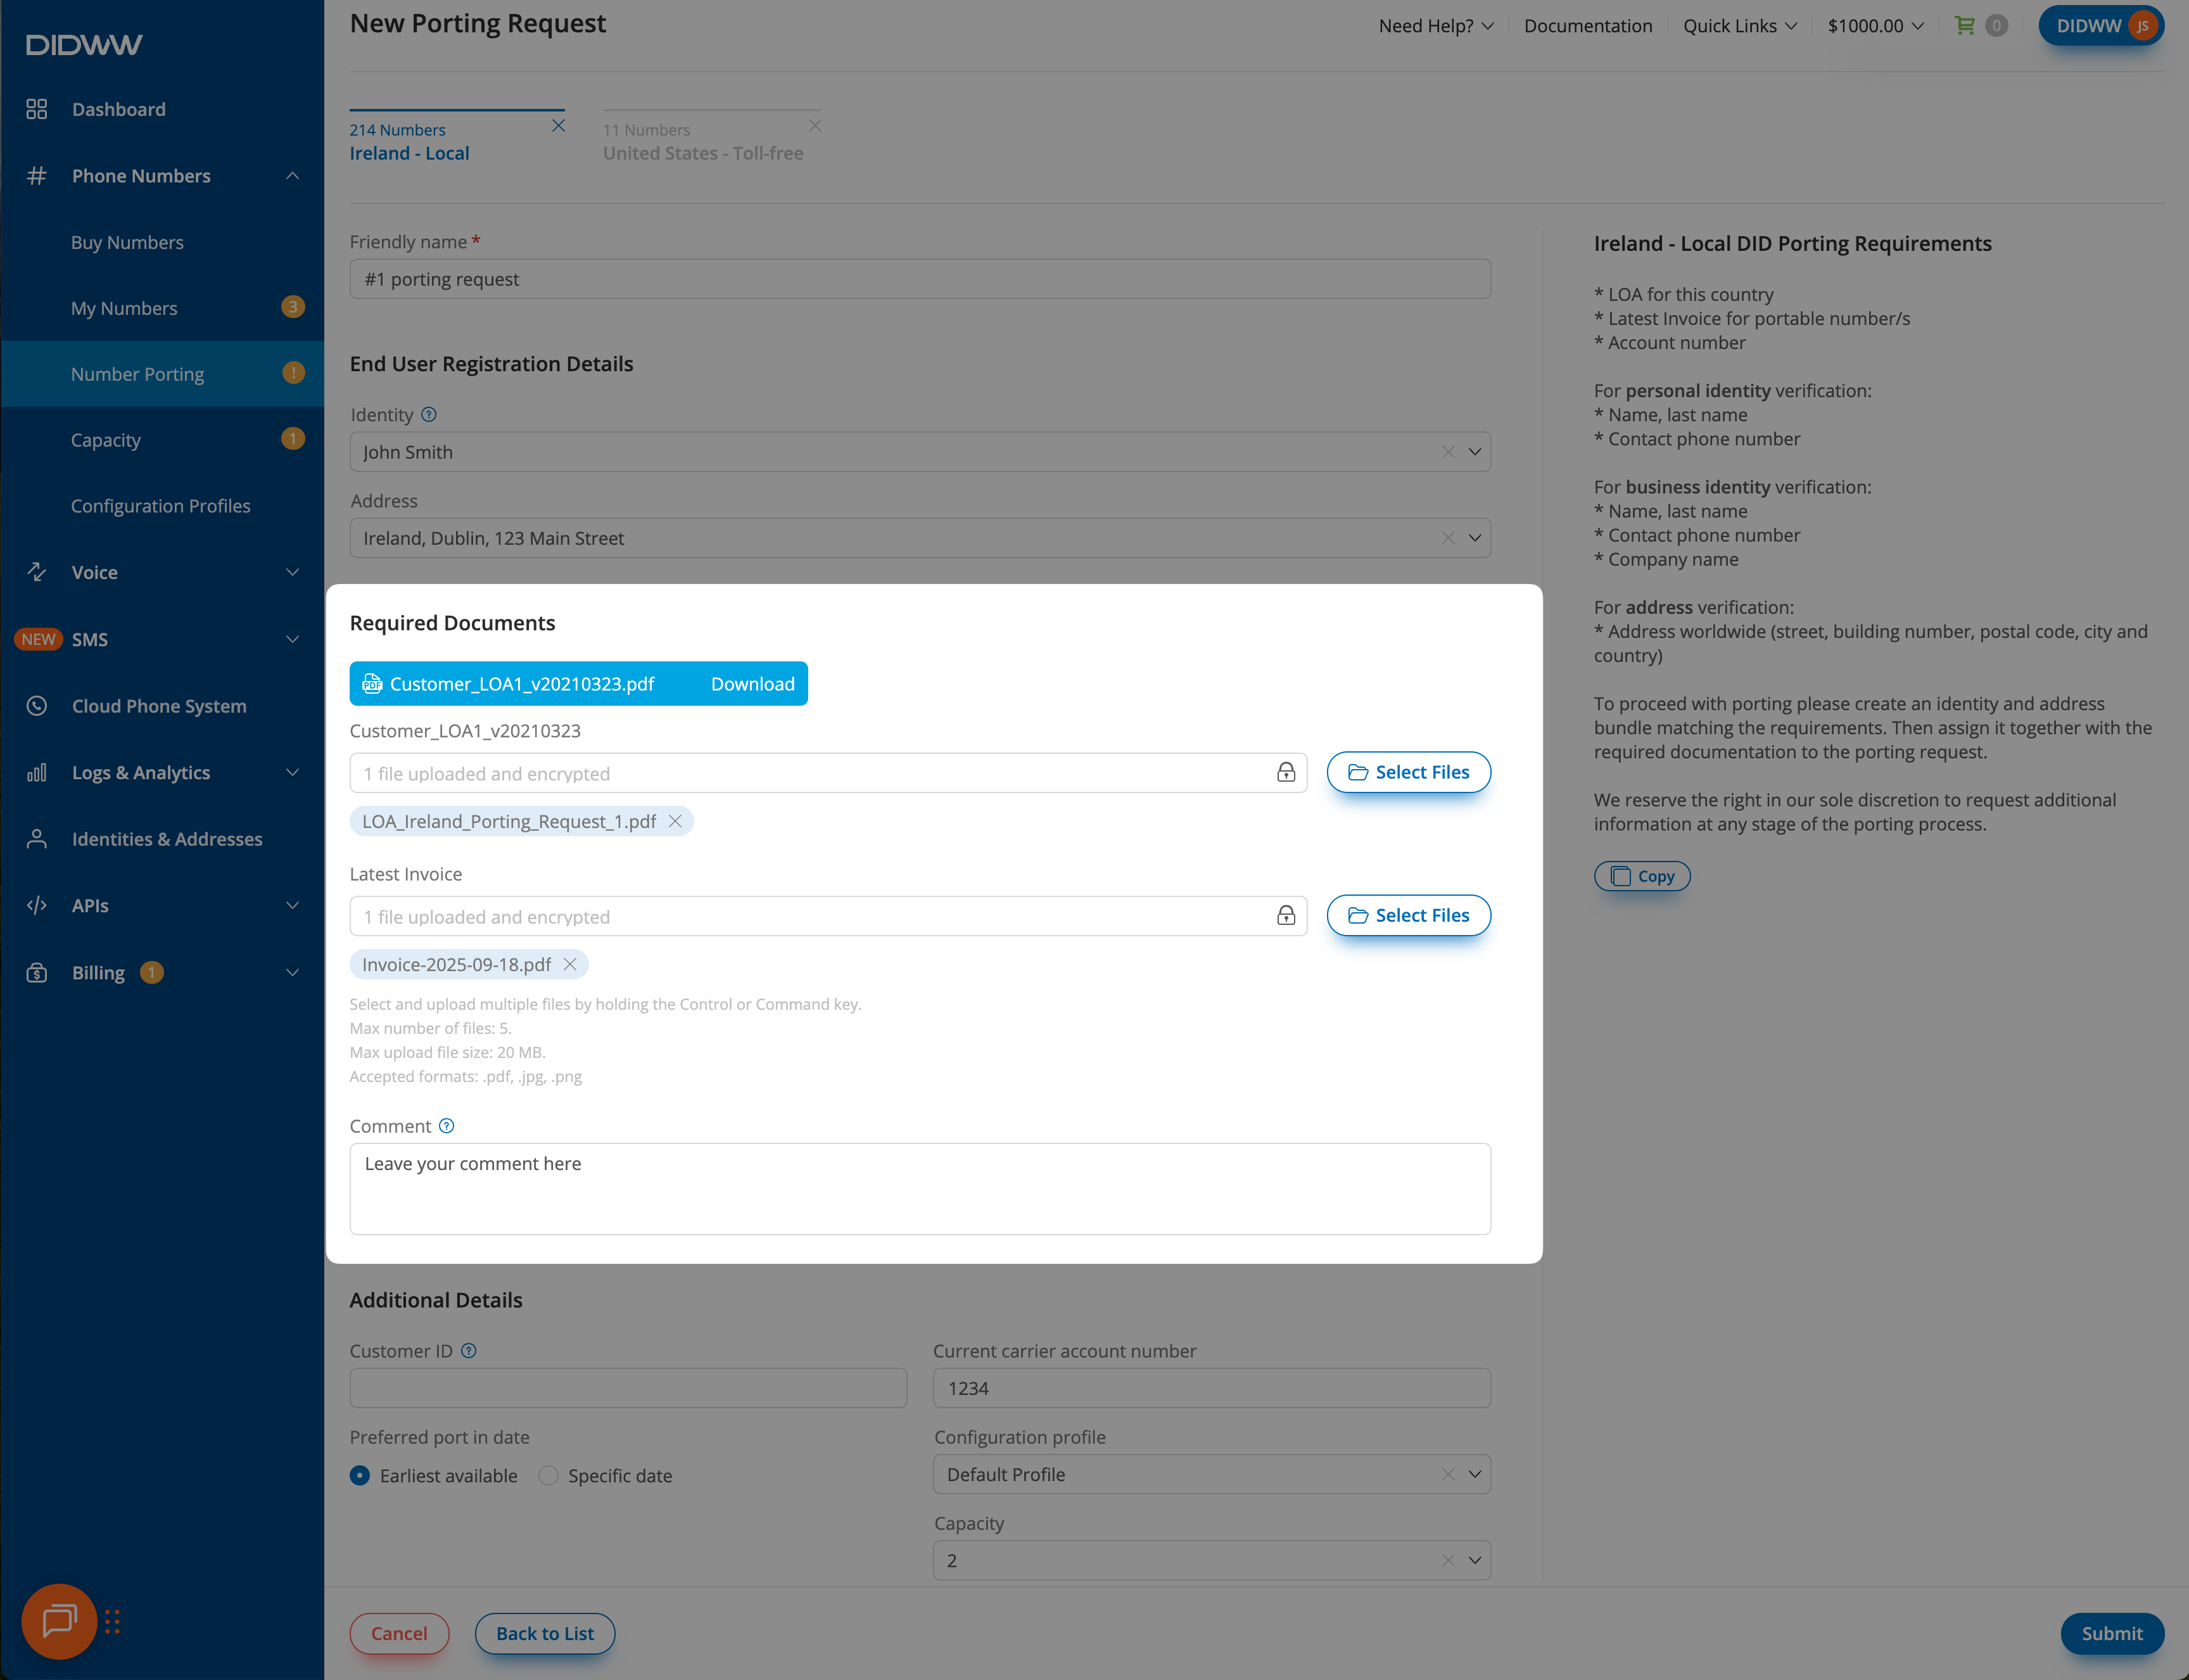
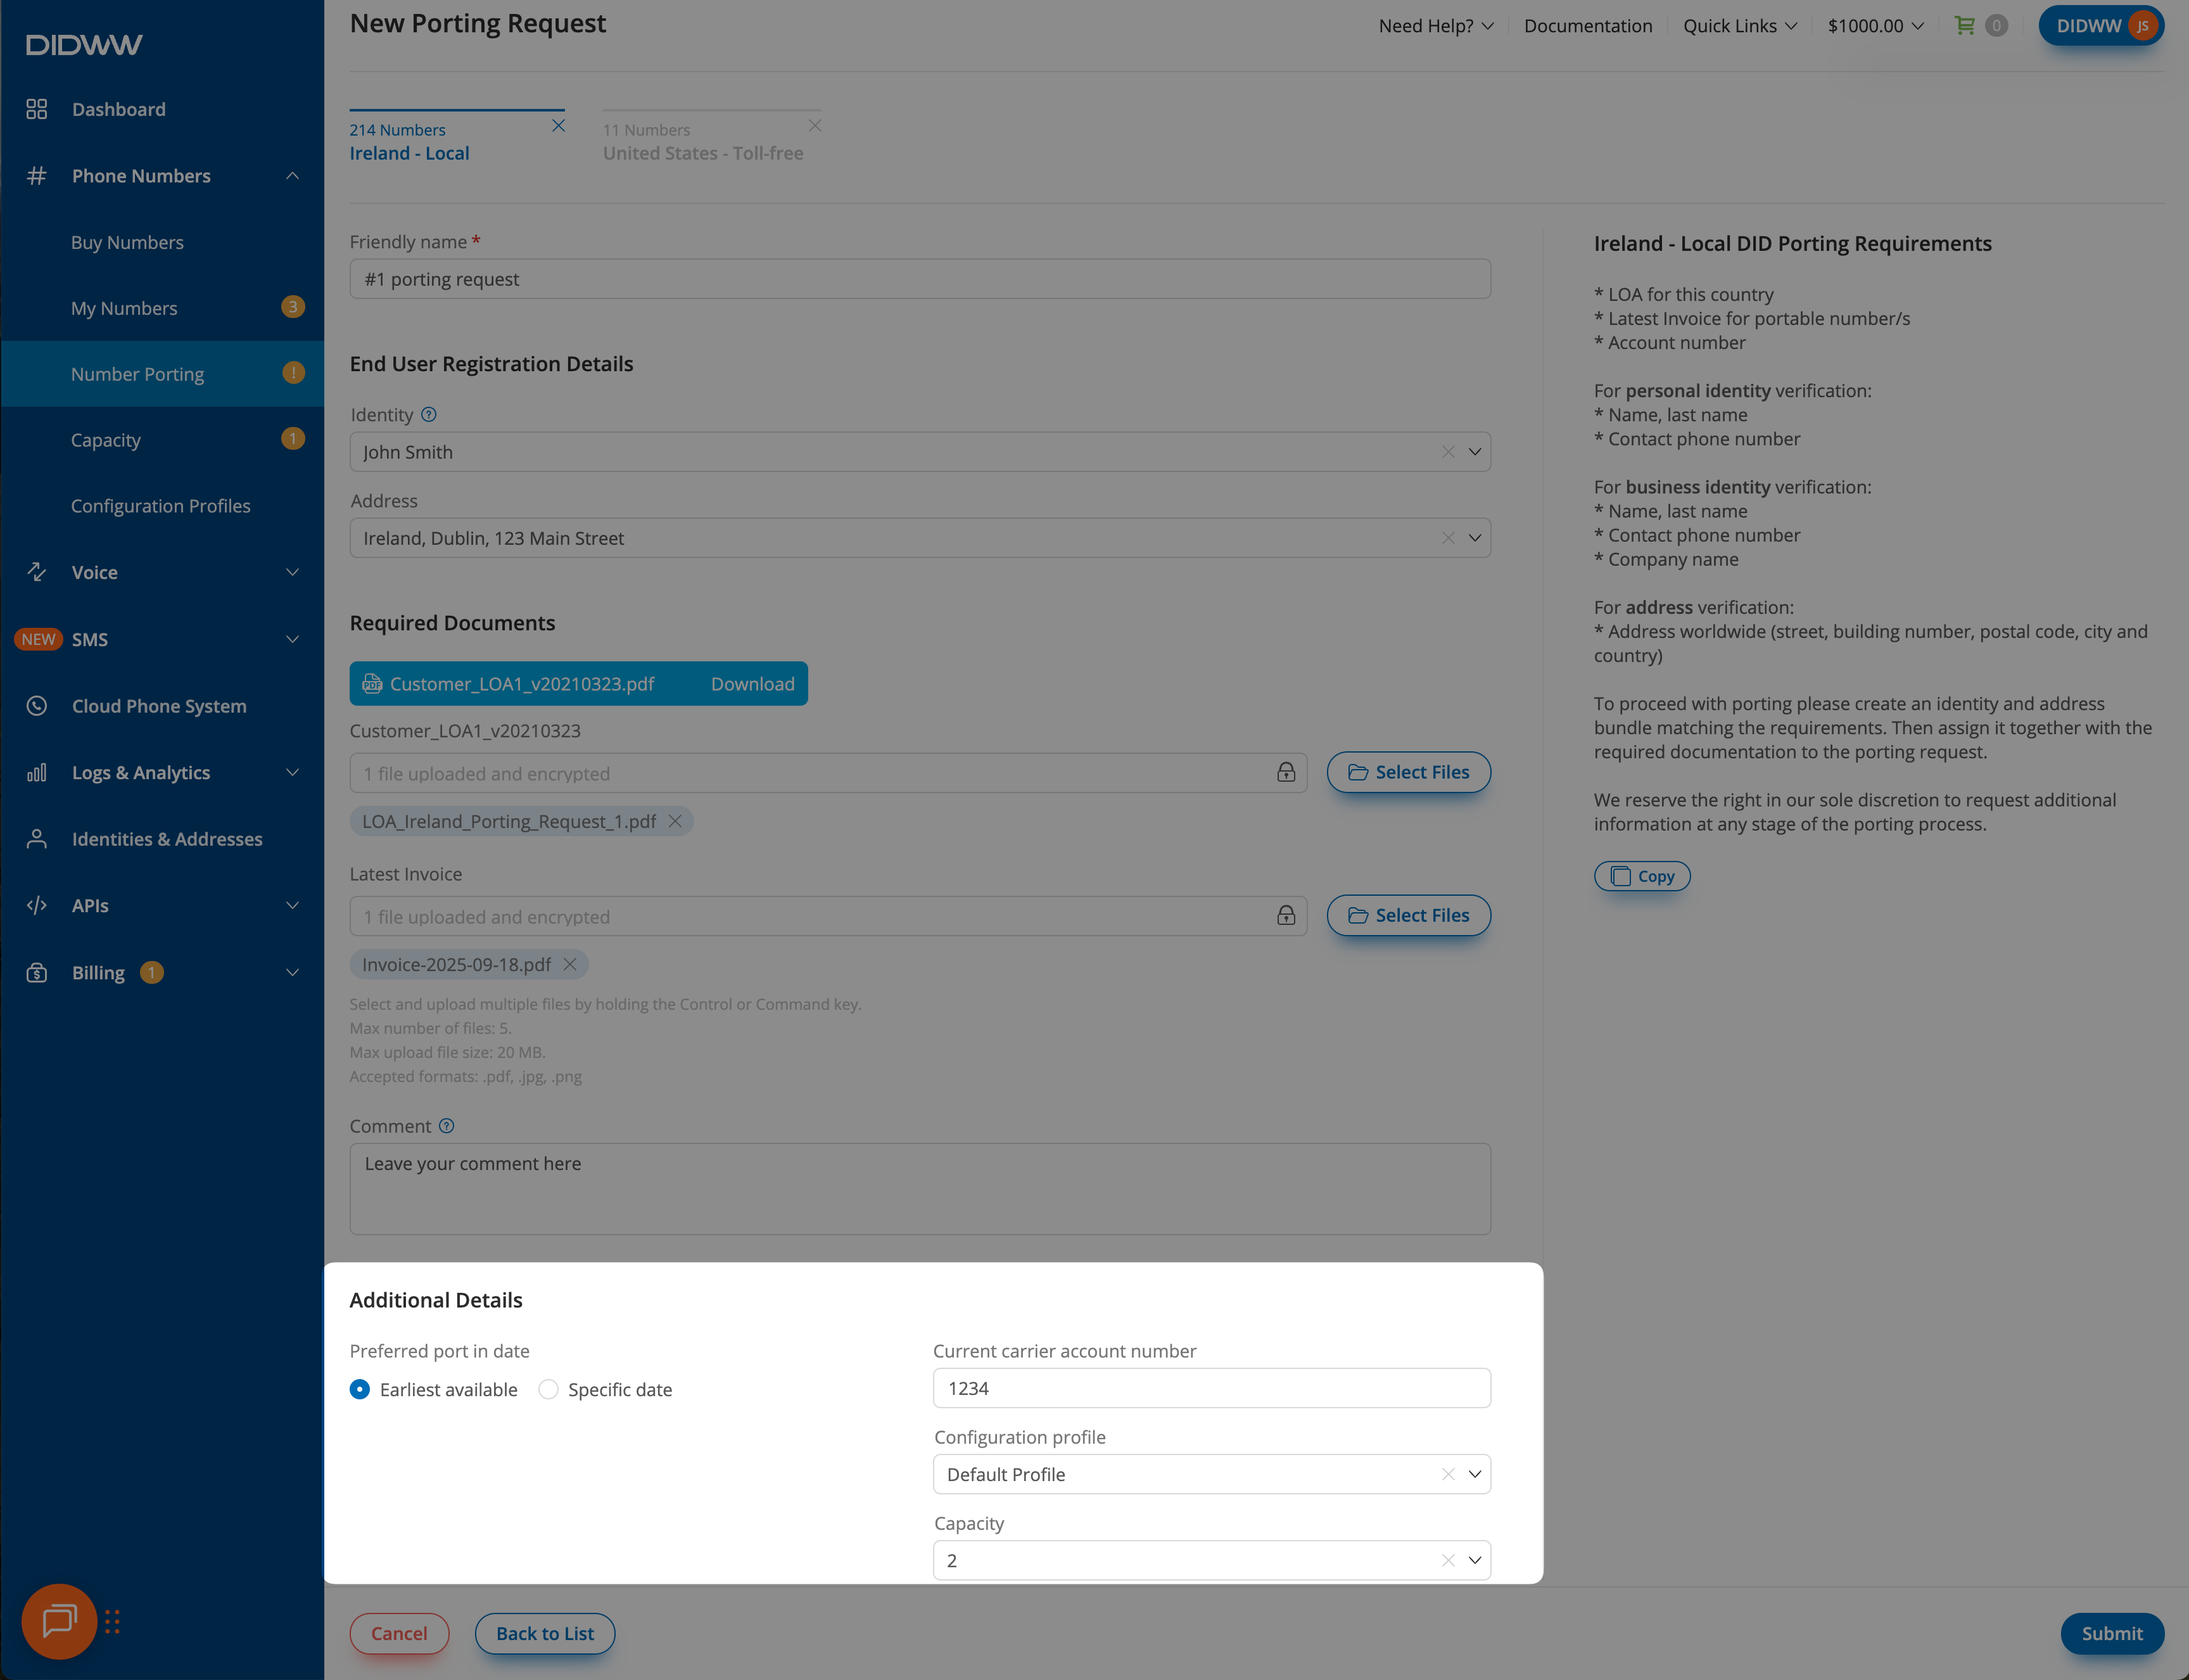
After reviewing and confirming the numbers, a form opens where you must enter a Friendly Name for the porting request, select the required End User Registration Details, upload the Required Documents, and provide any Additional Details for the porting request.
Note
Return to the number list at any time by selecting Back to List at the bottom left of the page.
From the Identity dropdown, select an existing identity or create a new one.
The associated Address for that identity will appear in the dropdown. Select the address, or click Create New to add a new address for the chosen identity.
Fig. 5 Click continue to proceed to the end user details step#