Profiles
Configuration profiles are reusable templates that apply your chosen settings in a single action, such as voice trunks, SMS trunks, capacity, and descriptions. You can assign profiles manually to existing phone numbers using Batch Actions, or automatically to newly purchased numbers through Rules.
Create a new configuration profile with voice, SMS, and capacity settings.
Apply a configuration profile manually to existing DIDs.
Update configuration profile settings.
Delete a configuration profile that’s no longer in use.
Create Configuration Profile
Create a new configuration profile by entering the required details, setting up voice and SMS routing, and assigning additional capacity.
Before You Begin
At least one Inbound Voice Trunk is required to select inbound voice trunk.
At least one Inbound SMS Trunk is required to select inbound SMS trunk.
A Capacity Group is required to assign additional capacity.
Step 1: Create New Profile
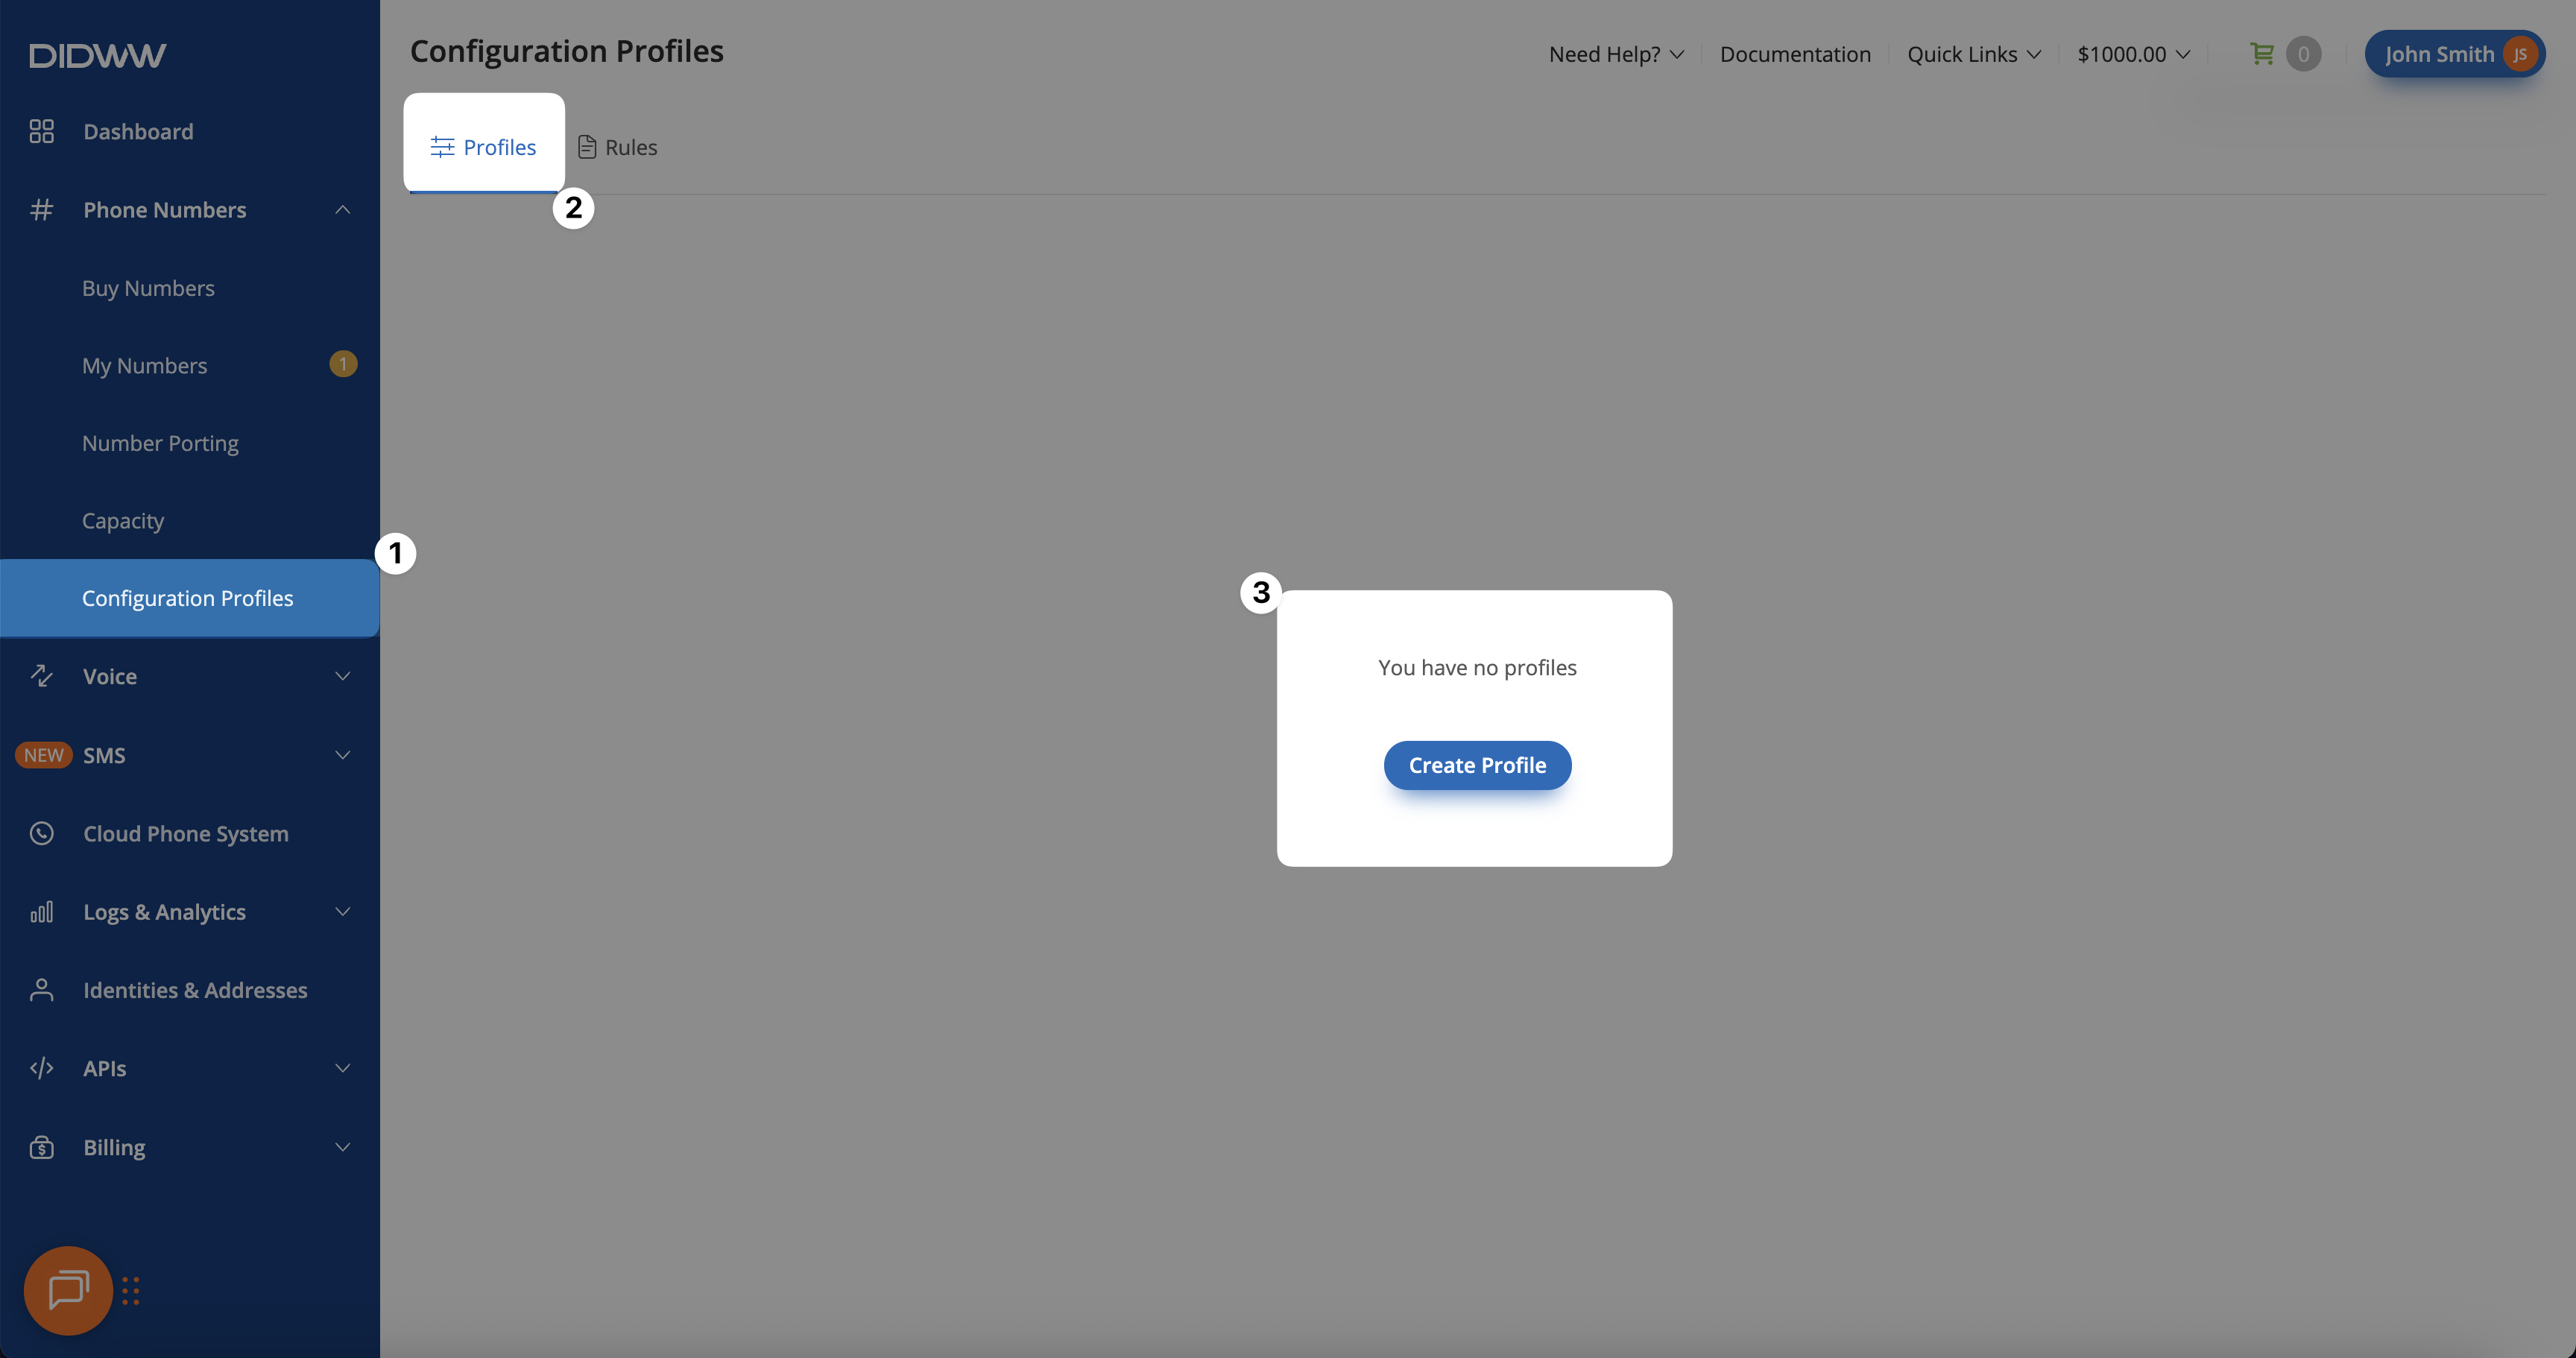
In the DIDWW User Panel, go to Phone Numbers → Configuration Profiles.
Select the Profiles tab at the top of the page.
Click Create Profile to open the profile creation form.

Fig. 1. Create a Configuration Profile
Step 2: Select Profile Settings
In the Create Profile form, enter the required details and select the settings that define how this configuration profile will work. Once all fields are set, click Create to complete the profile setup.
Field |
Description |
|---|---|
Name |
A friendly name to help identify the configuration profile. |
Capacity Group |
Defines how many concurrent inbound calls are available across all numbers using this group. |
Capacity Limit |
Sets a per-DID limit on concurrent inbound calls, applied regardless of the assigned capacity group. |
Trunk |
The inbound voice trunk used to route calls for numbers assigned to this profile. |
SMS Trunk |
The inbound SMS trunk used to route messages for numbers assigned to this profile. |
Description |
A personal note to help identify the DID number on the My Numbers page. |
Note
At least one configuration must be selected to apply the profile to a number.

Fig. 2. Configure the Profile
Apply Configuration Profile
Apply a configuration profile manually to existing DID numbers in a single action. This allows you to quickly configure voice, SMS, and capacity settings without creating rules.
Before You Begin
At least one active DID number is required to apply configuration profile.
At least one configuration profile is required.
Step 1: Select DID(s) and Open Batch Actions
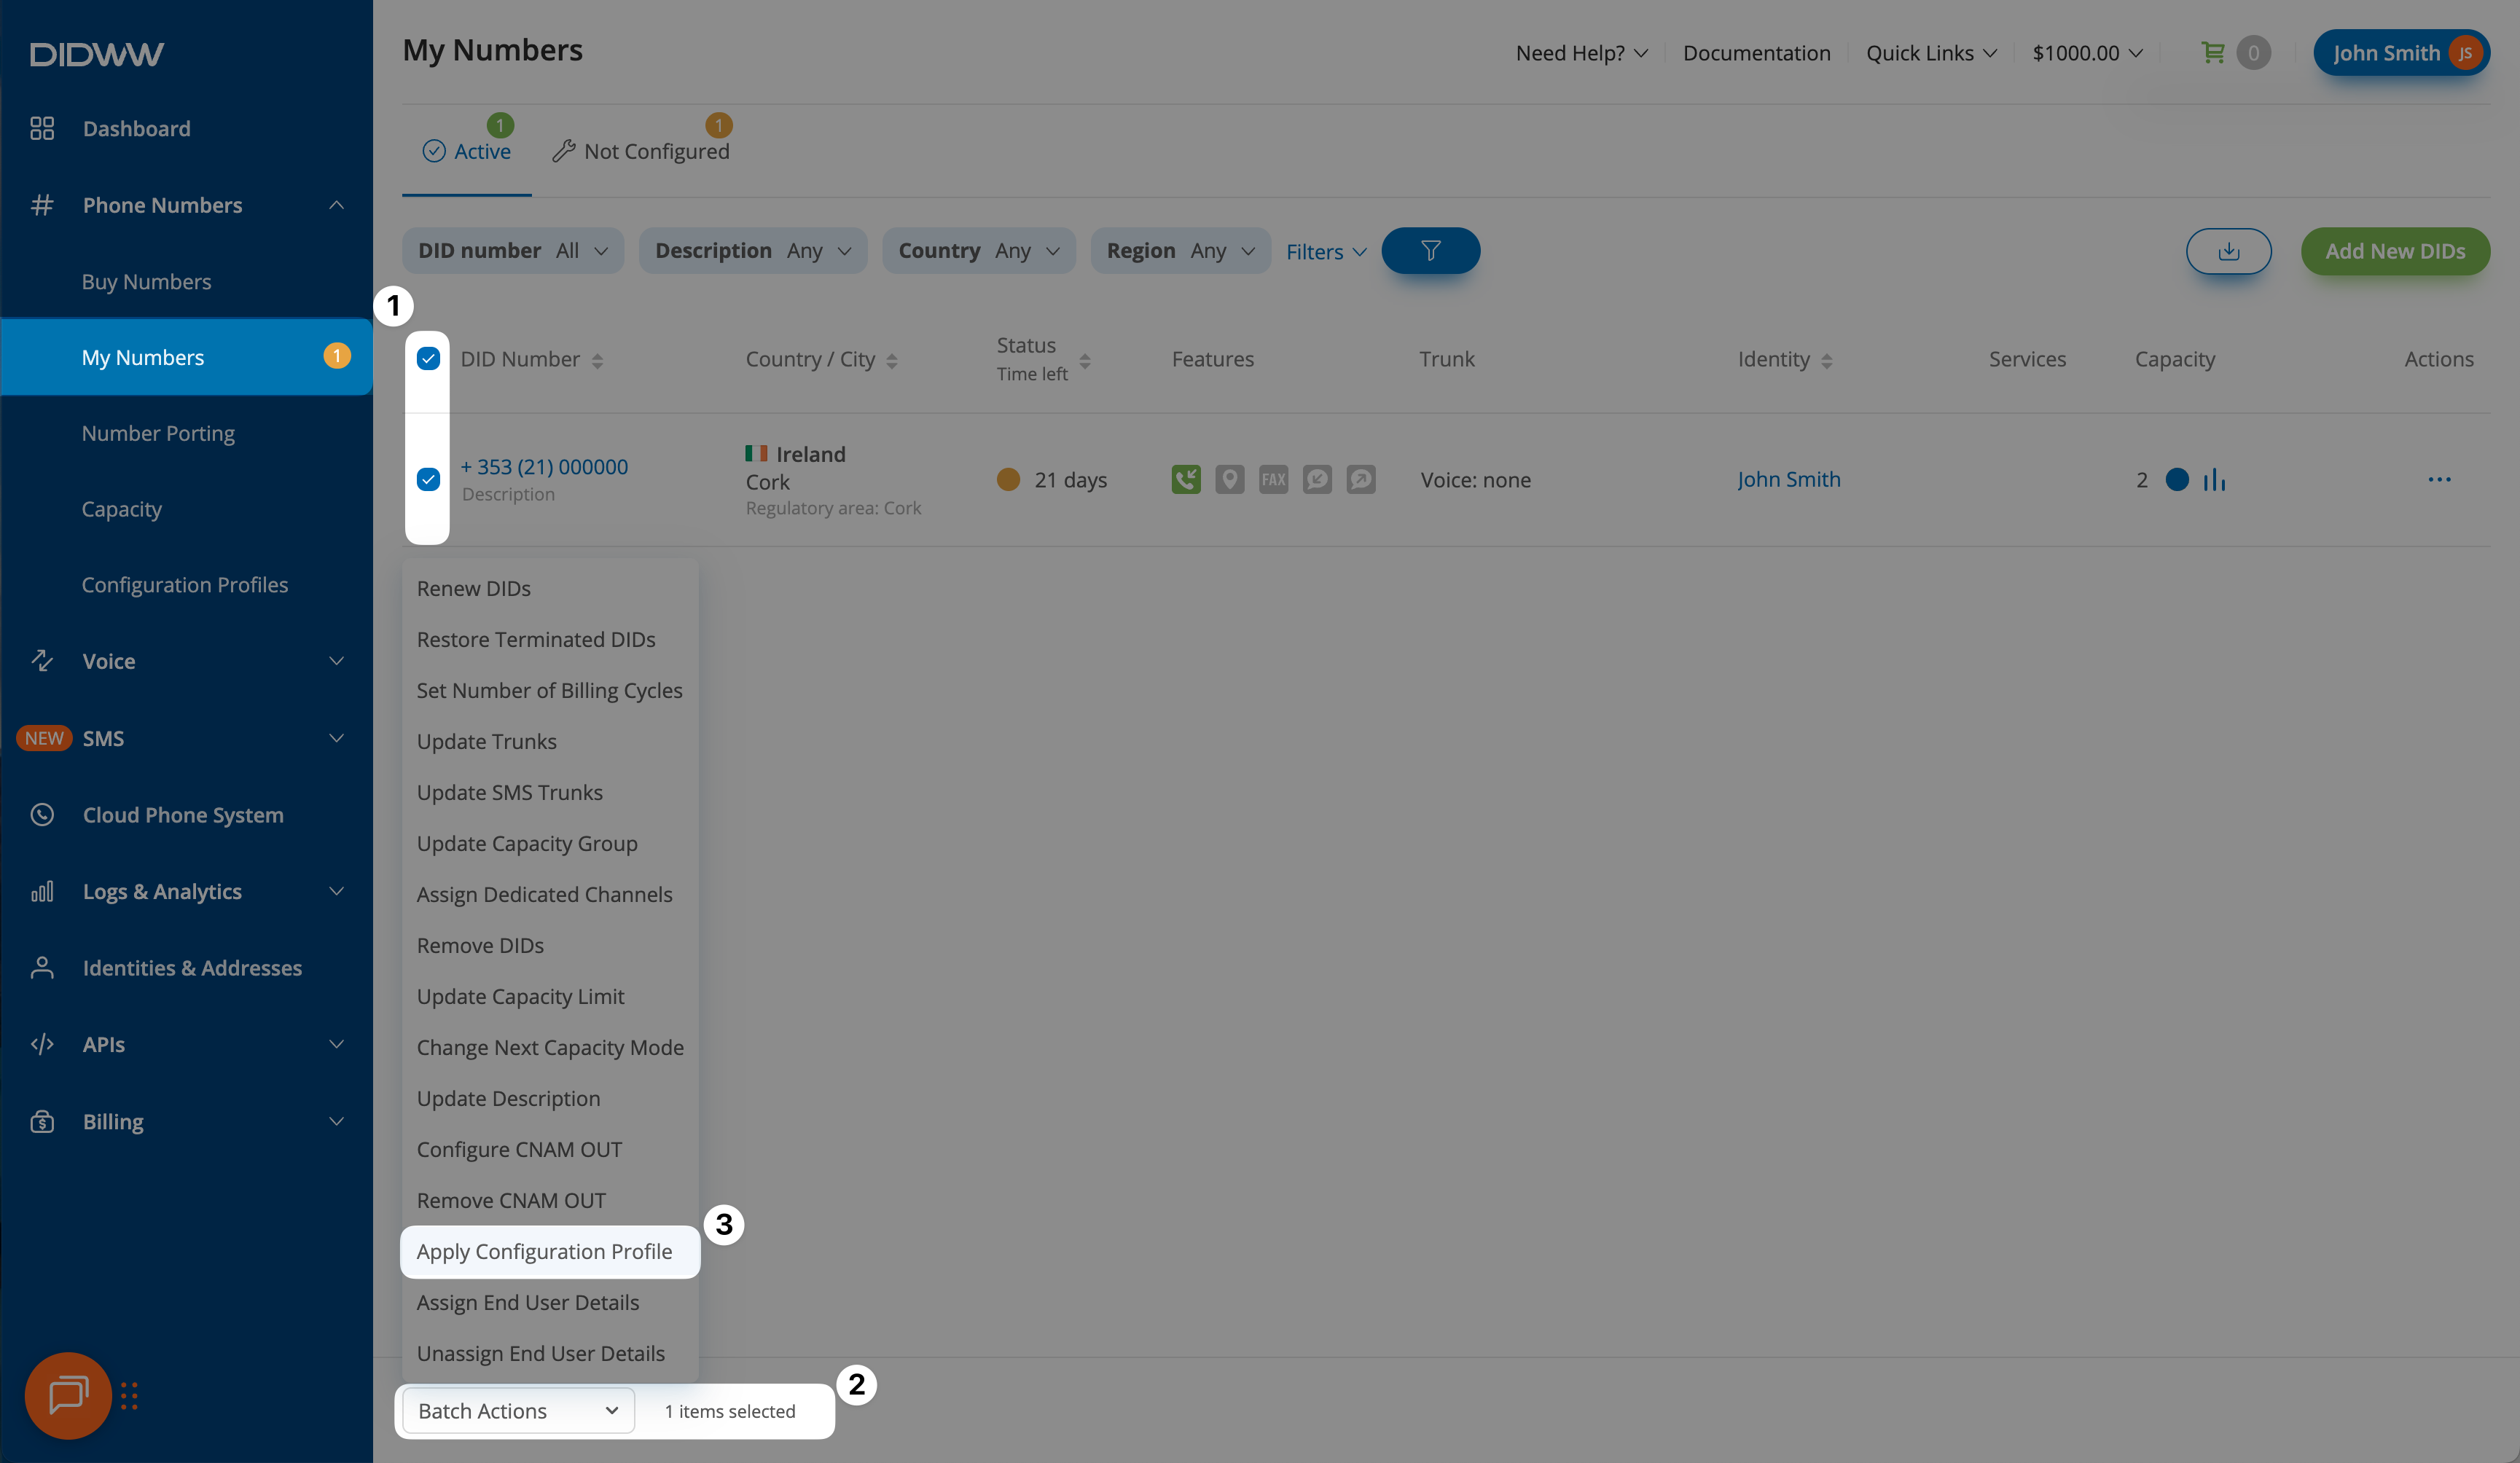
In the Phone Numbers > My Numbers section, select one or more DIDs you want to configure.
At the bottom of the page, open the Batch Actions menu.
Choose Apply Configuration Profile from the list.

Fig. 3. Selecting DID(s) and opening Batch Actions to apply a configuration profile
Step 2: Apply Configuration Profile
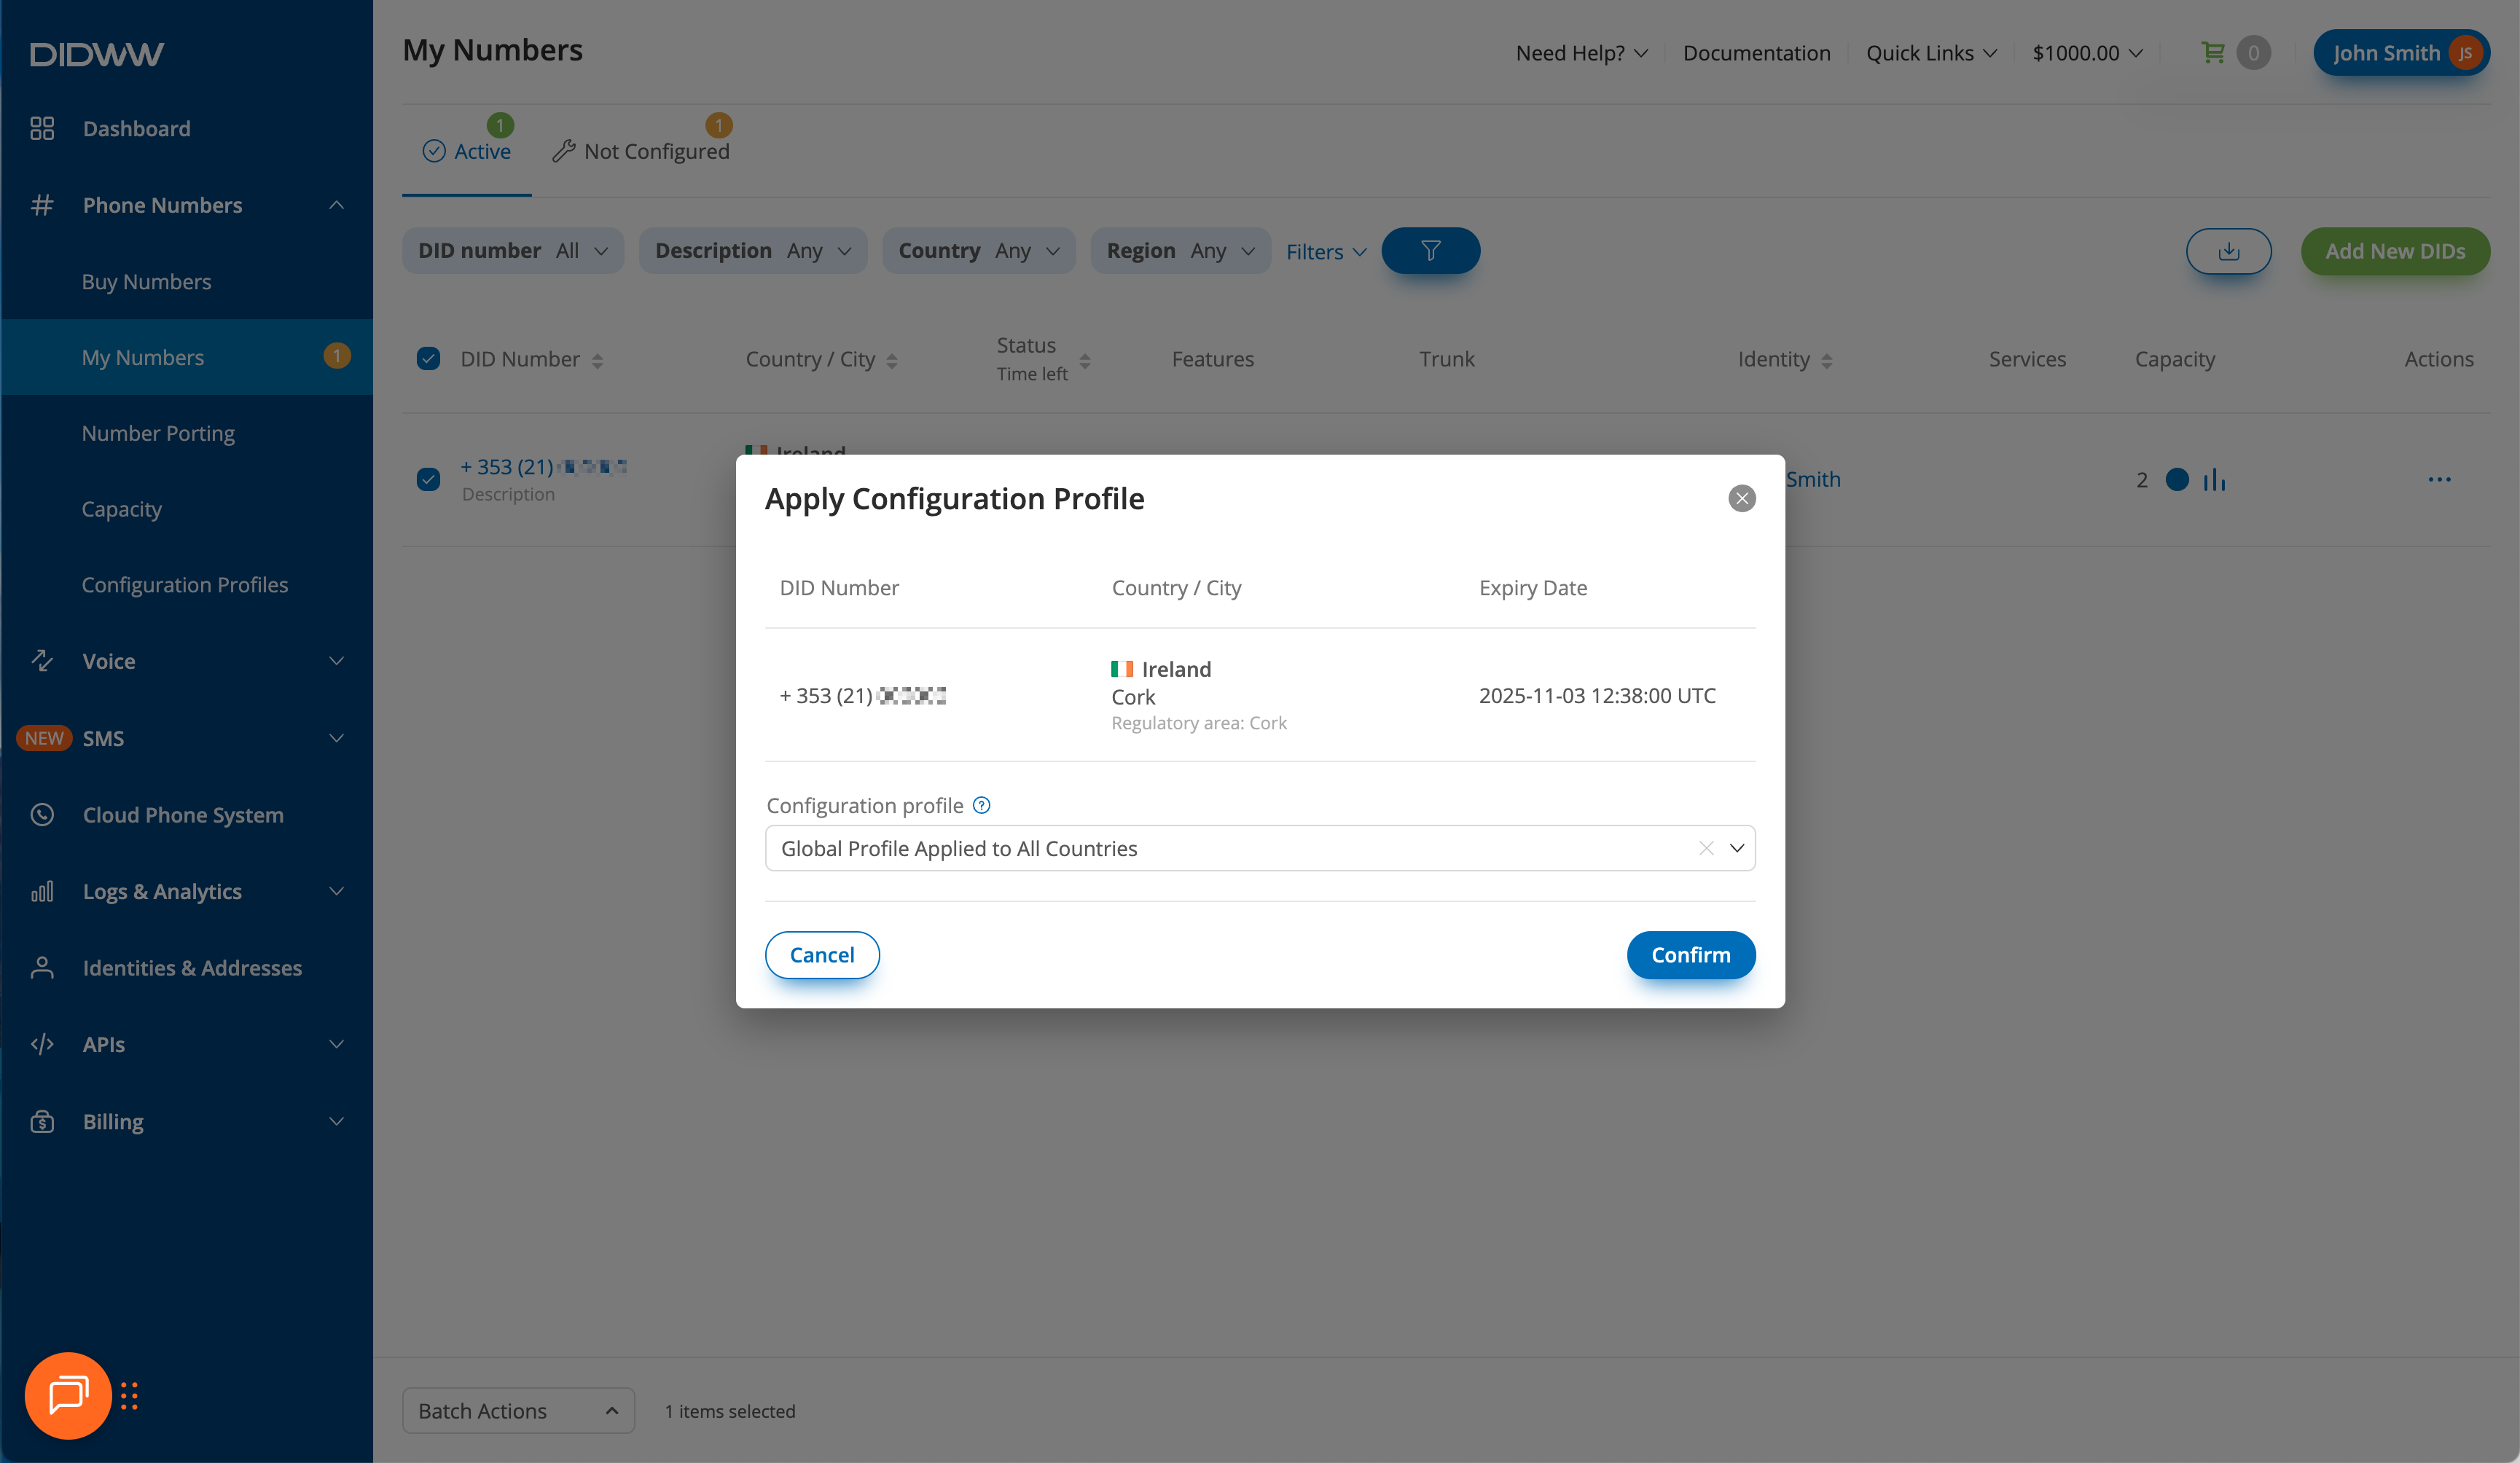
In the Apply Configuration Profile pop-up, review the selected DID number(s).
From the Configuration Profile dropdown, select the profile you want to apply.
Click Confirm to apply the settings to all selected numbers.

Fig. 4. Applying a configuration profile to selected DID numbers
Edit Configuration Profile
Navigate to the Phone Numbers > Configuration Profiles menu.
Find the profile you wish to update and click the actions
 button on the right.
Select Edit from the dropdown menu to open the edit configuration profile window.
Make your changes and click Submit to apply the changes.

Fig. 5. Editing a Configuration Profile
Delete Configuration Profile
Warning
Deleting a configuration profile will also delete any rules assigned to it.
Navigate to the Phone Numbers > Configuration Profiles menu.
Find the profile you wish to update and click the actions
 button on the right.
Select Delete from the dropdown menu to open the edit configuration profile window.
A confirmation pop-up will appear. Click Delete to permanently delete the configuration profile.

Fig. 6. Deleting a Configuration Profile