Change Next Capacity Mode
For local, national, and mobile numbers, you can choose between two virtual number capacity modes. A capacity mode defines how many inbound voice channels are included in the service price for each DID:
DID+2 — Includes 2 dedicated inbound voice channels in the price of the service. Supplemental channels can be added if required at an additional cost.
DID+0 — No dedicated inbound channels are included. To receive calls, the DID must use additional capacity from flat-rate channels, pay-per-minute channels, or a hybrid of both.
You can change the capacity mode for your number after purchase using Change Next Capacity Mode. The update takes effect in the next billing cycle, or you can apply it immediately by renewing the DID for your selected period after changing the mode.
Important
To apply the change immediately, renew the DID number for your selected period. For details, see Renewing DID Numbers.
Before You Begin
At least one active DID number is required.
The DID must support DID+0 and DID+2 capacity modes .
Note
Numbers that do not support additional capacity modes, such as toll-free numbers with 300 default channels, cannot switch modes.
How to Change the Next Capacity Mode
Step 1: Open DID Management
In the User Panel, go to My Numbers.
Find the DID you want to edit.
Click the three dots next to the DID and select Manage DID.
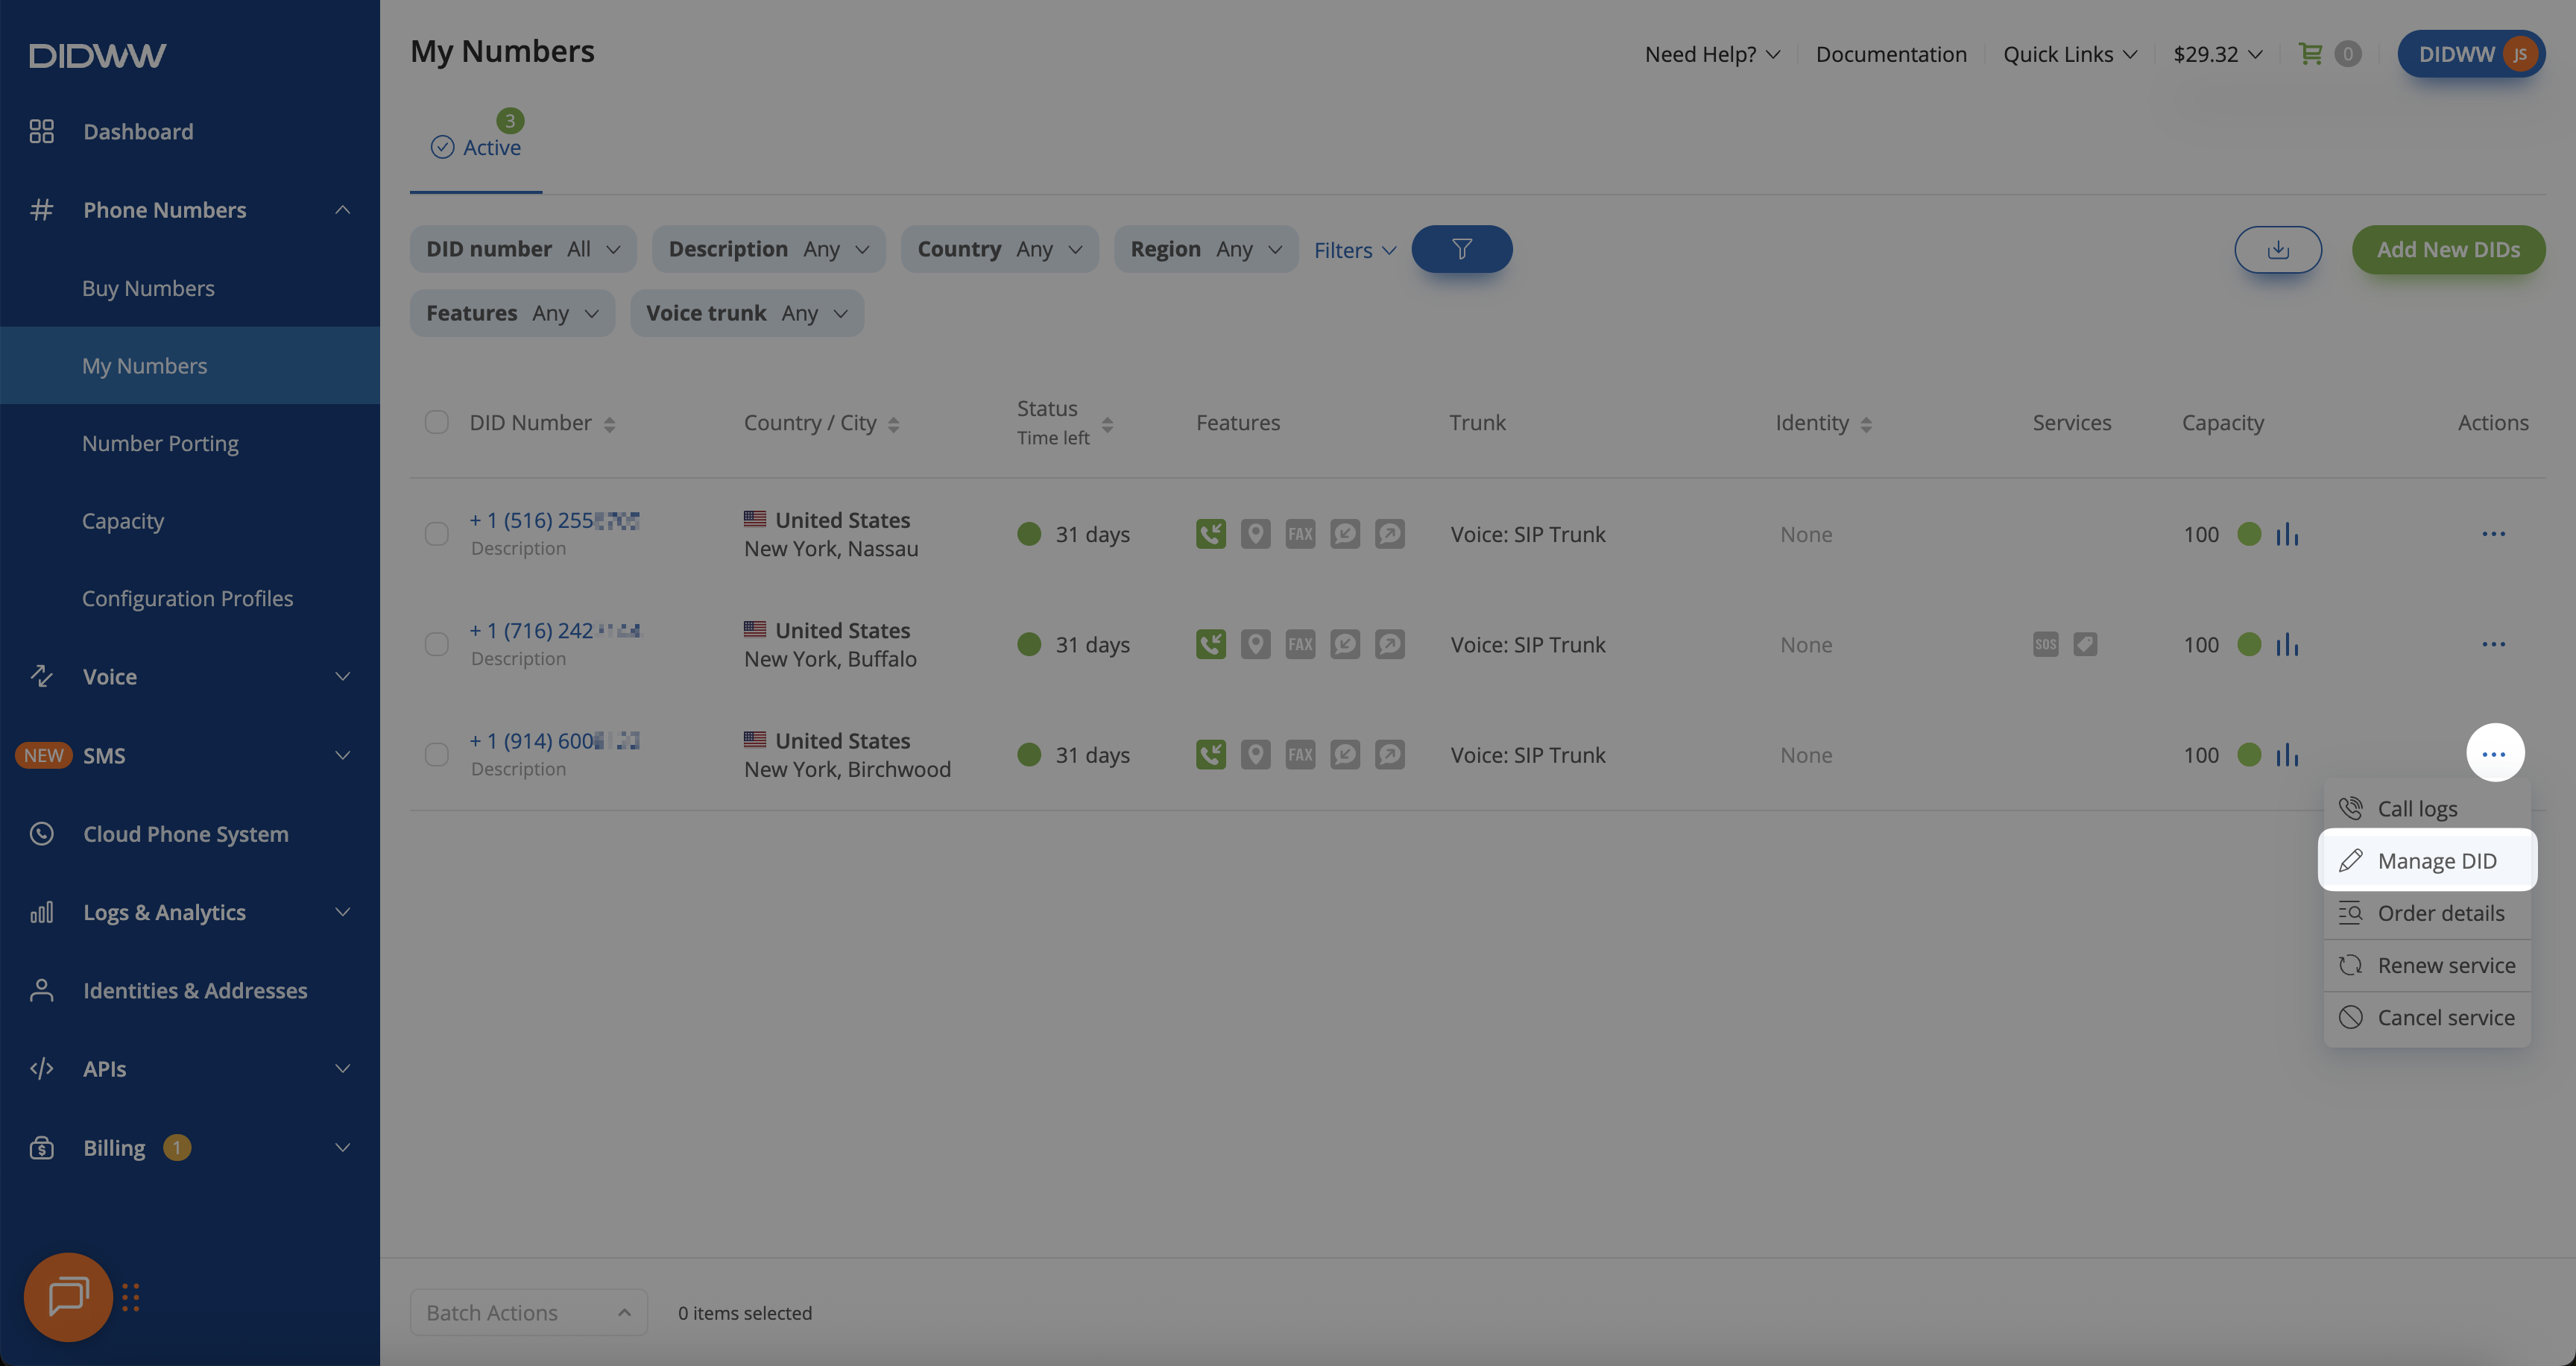
Fig. 1. Accessing DID management
Step 2: Edit Capacity Settings
On the View Details page, click Edit in the Configuration section.
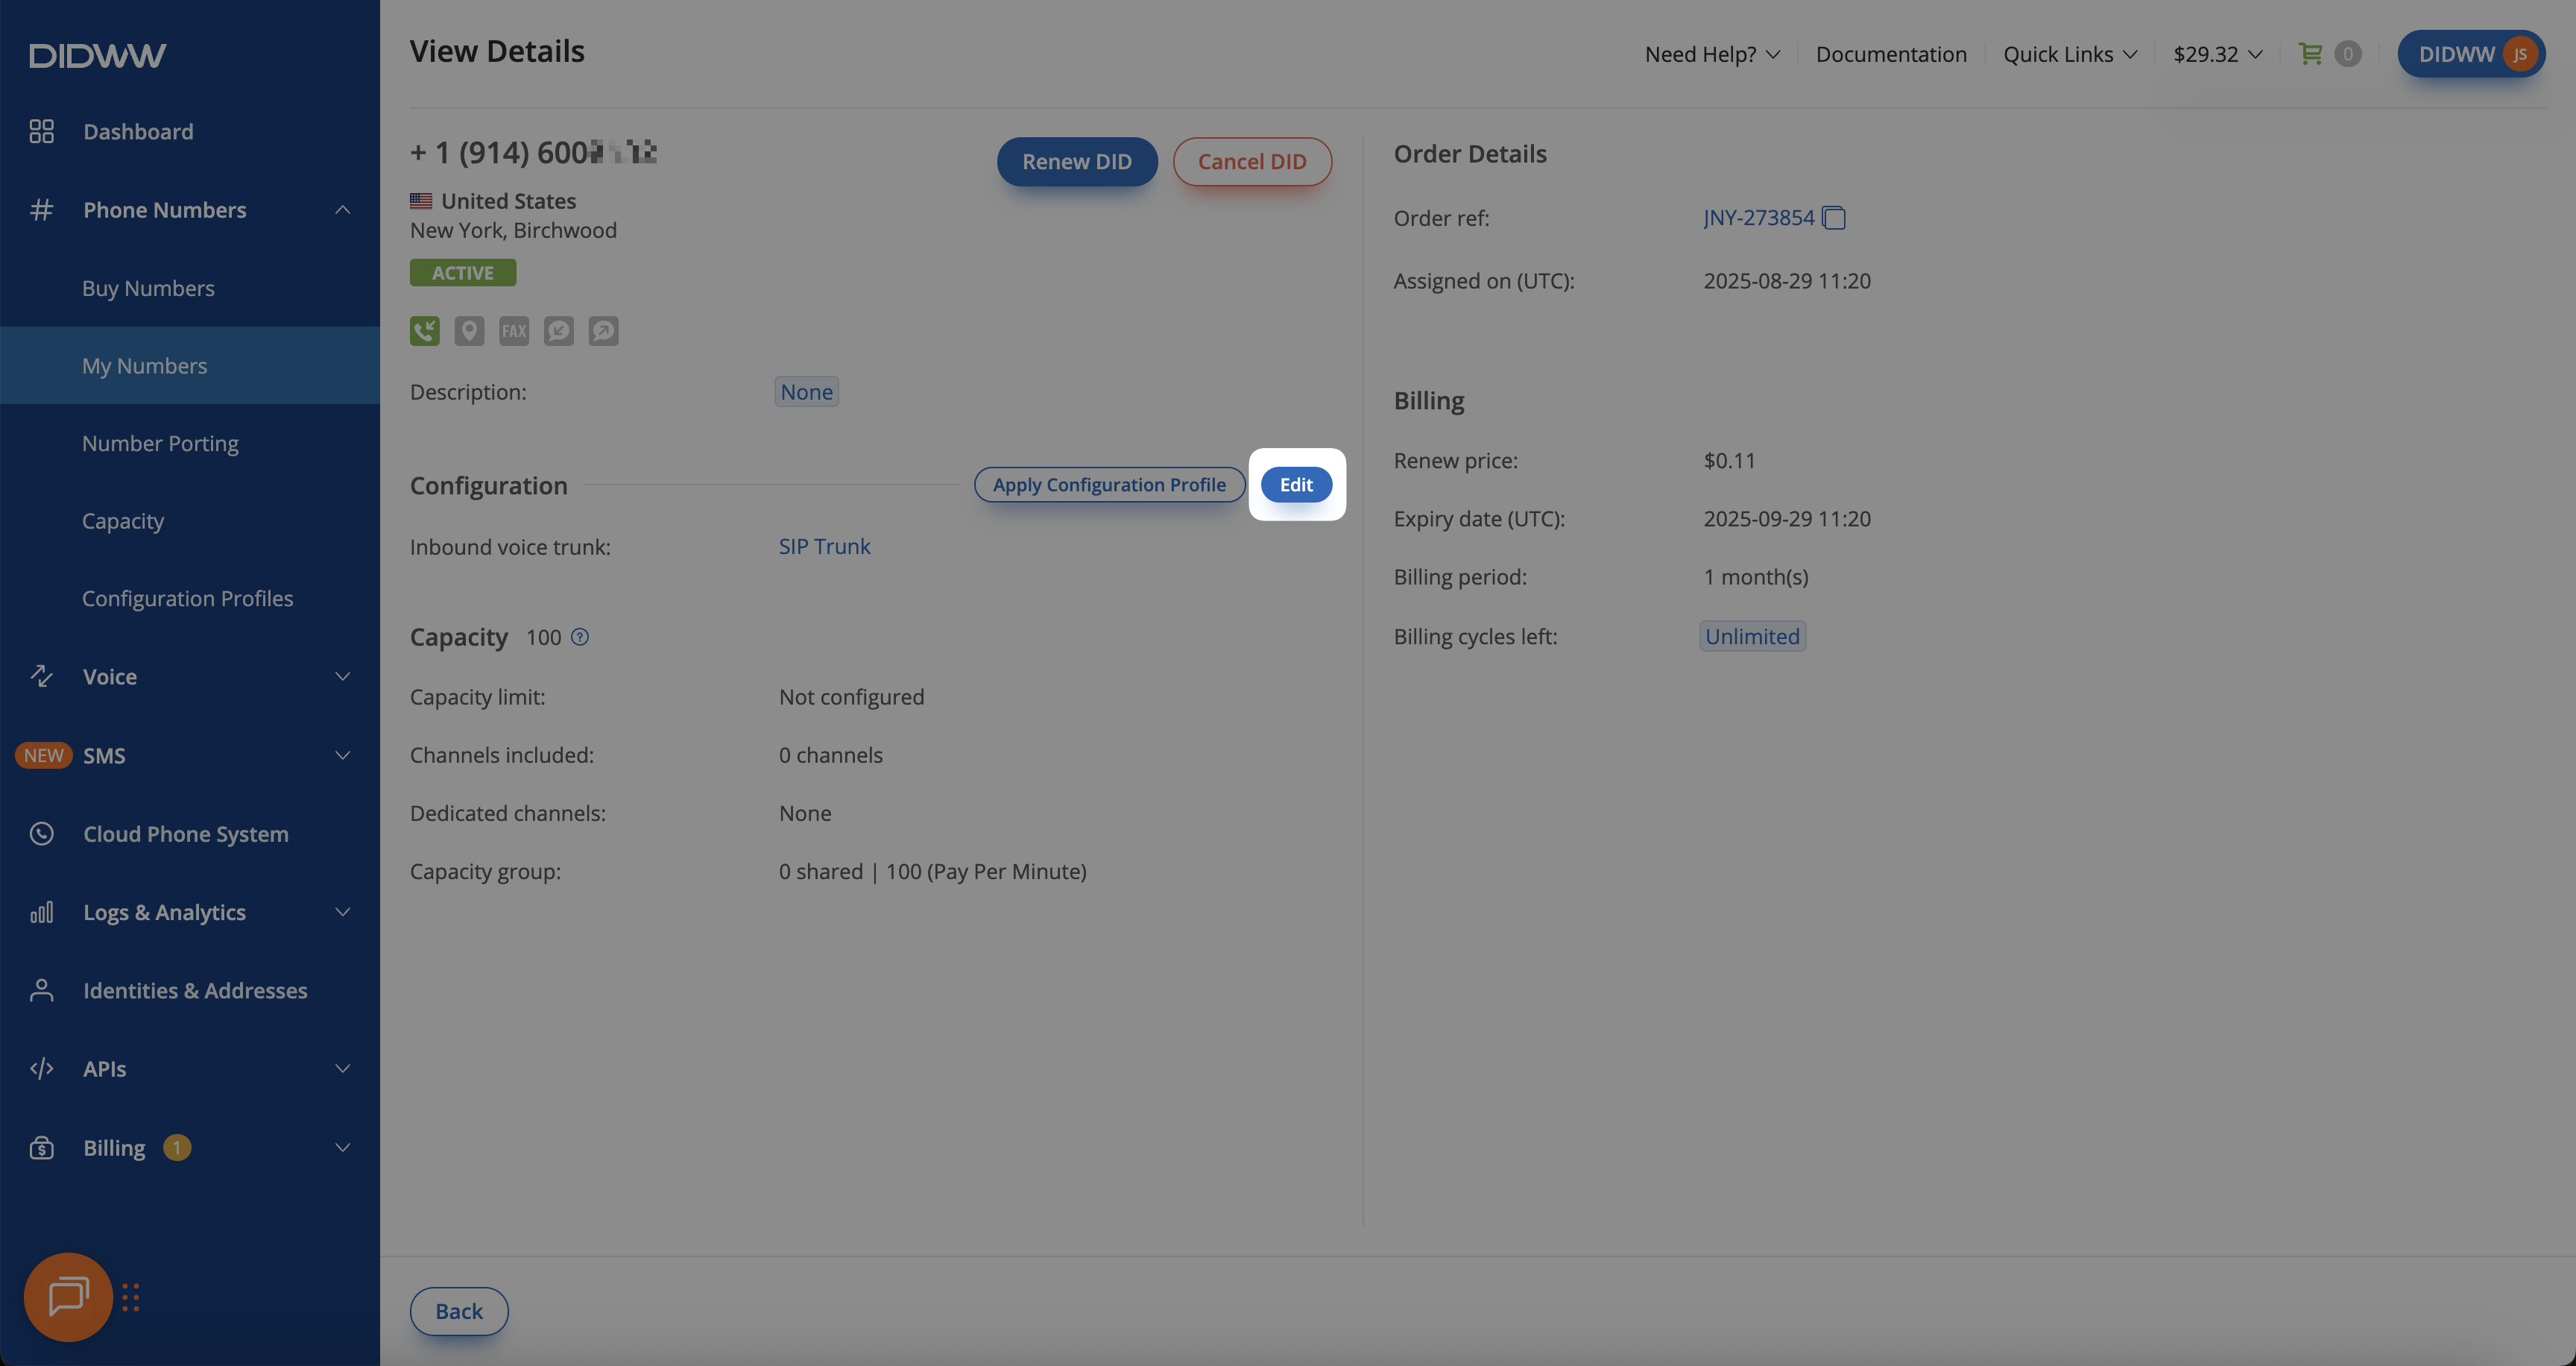
Fig. 2. Editing DID configuration
Step 3: Update Channels Included
In the Edit Configuration window, go to Channels included.
Choose the number of channels from the dropdown list.
Click Submit to save your changes.
Important
- Channels included options:
Clear — Revert all capacity changes if they have not been applied yet.
2 included — 2 dedicated channels will be assigned to each DID in the next billing cycle.
0 included — All dedicated channels will be removed from the DID(s) in the next billing cycle. The number(s) must then be assigned to a capacity group to remain operational.
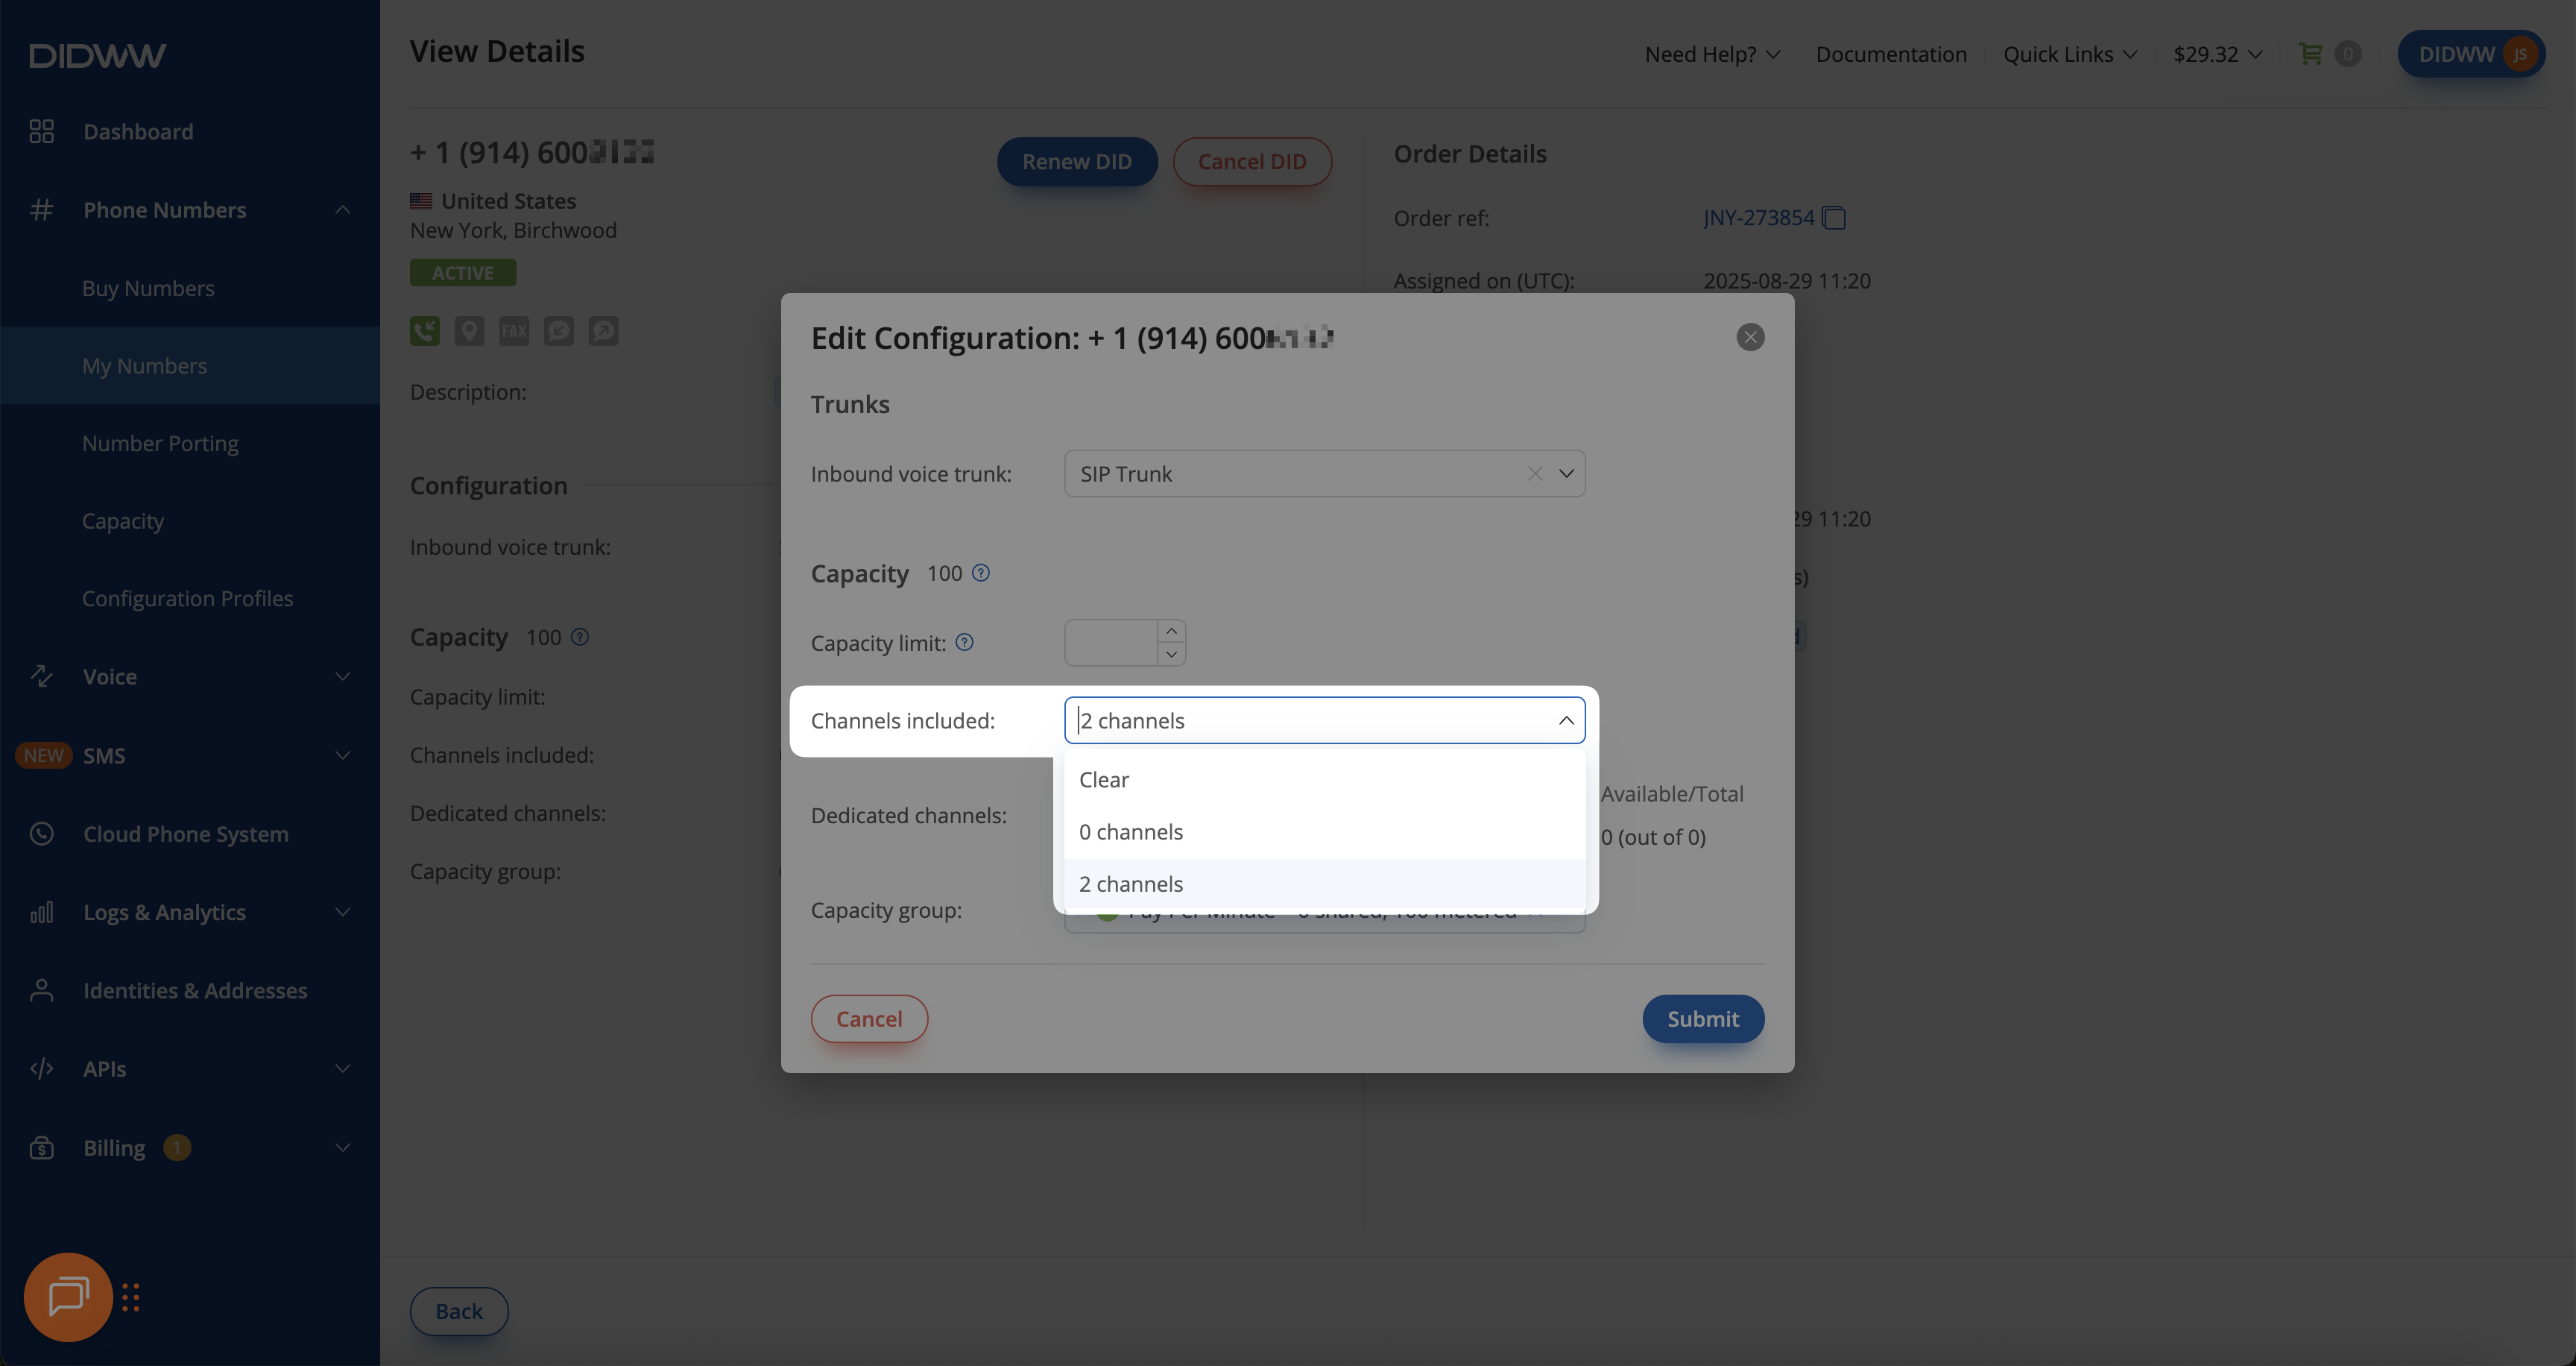
Fig. 3. Selecting the number of included channels
Note
If the Channels included field does not display a dropdown menu, the DID does not support changing between capacity modes.
The selected mode will take effect during the next billing cycle.
In case you want the change to take effect immediately, you can renew the DID number for the selected period and update the channels included right away. For more details, see the renewal guide: Renew DID(s).
Step 1: Select DIDs
In the DIDWW User Panel, go to My Numbers.
Select the DIDs you want to update by checking the boxes next to them.
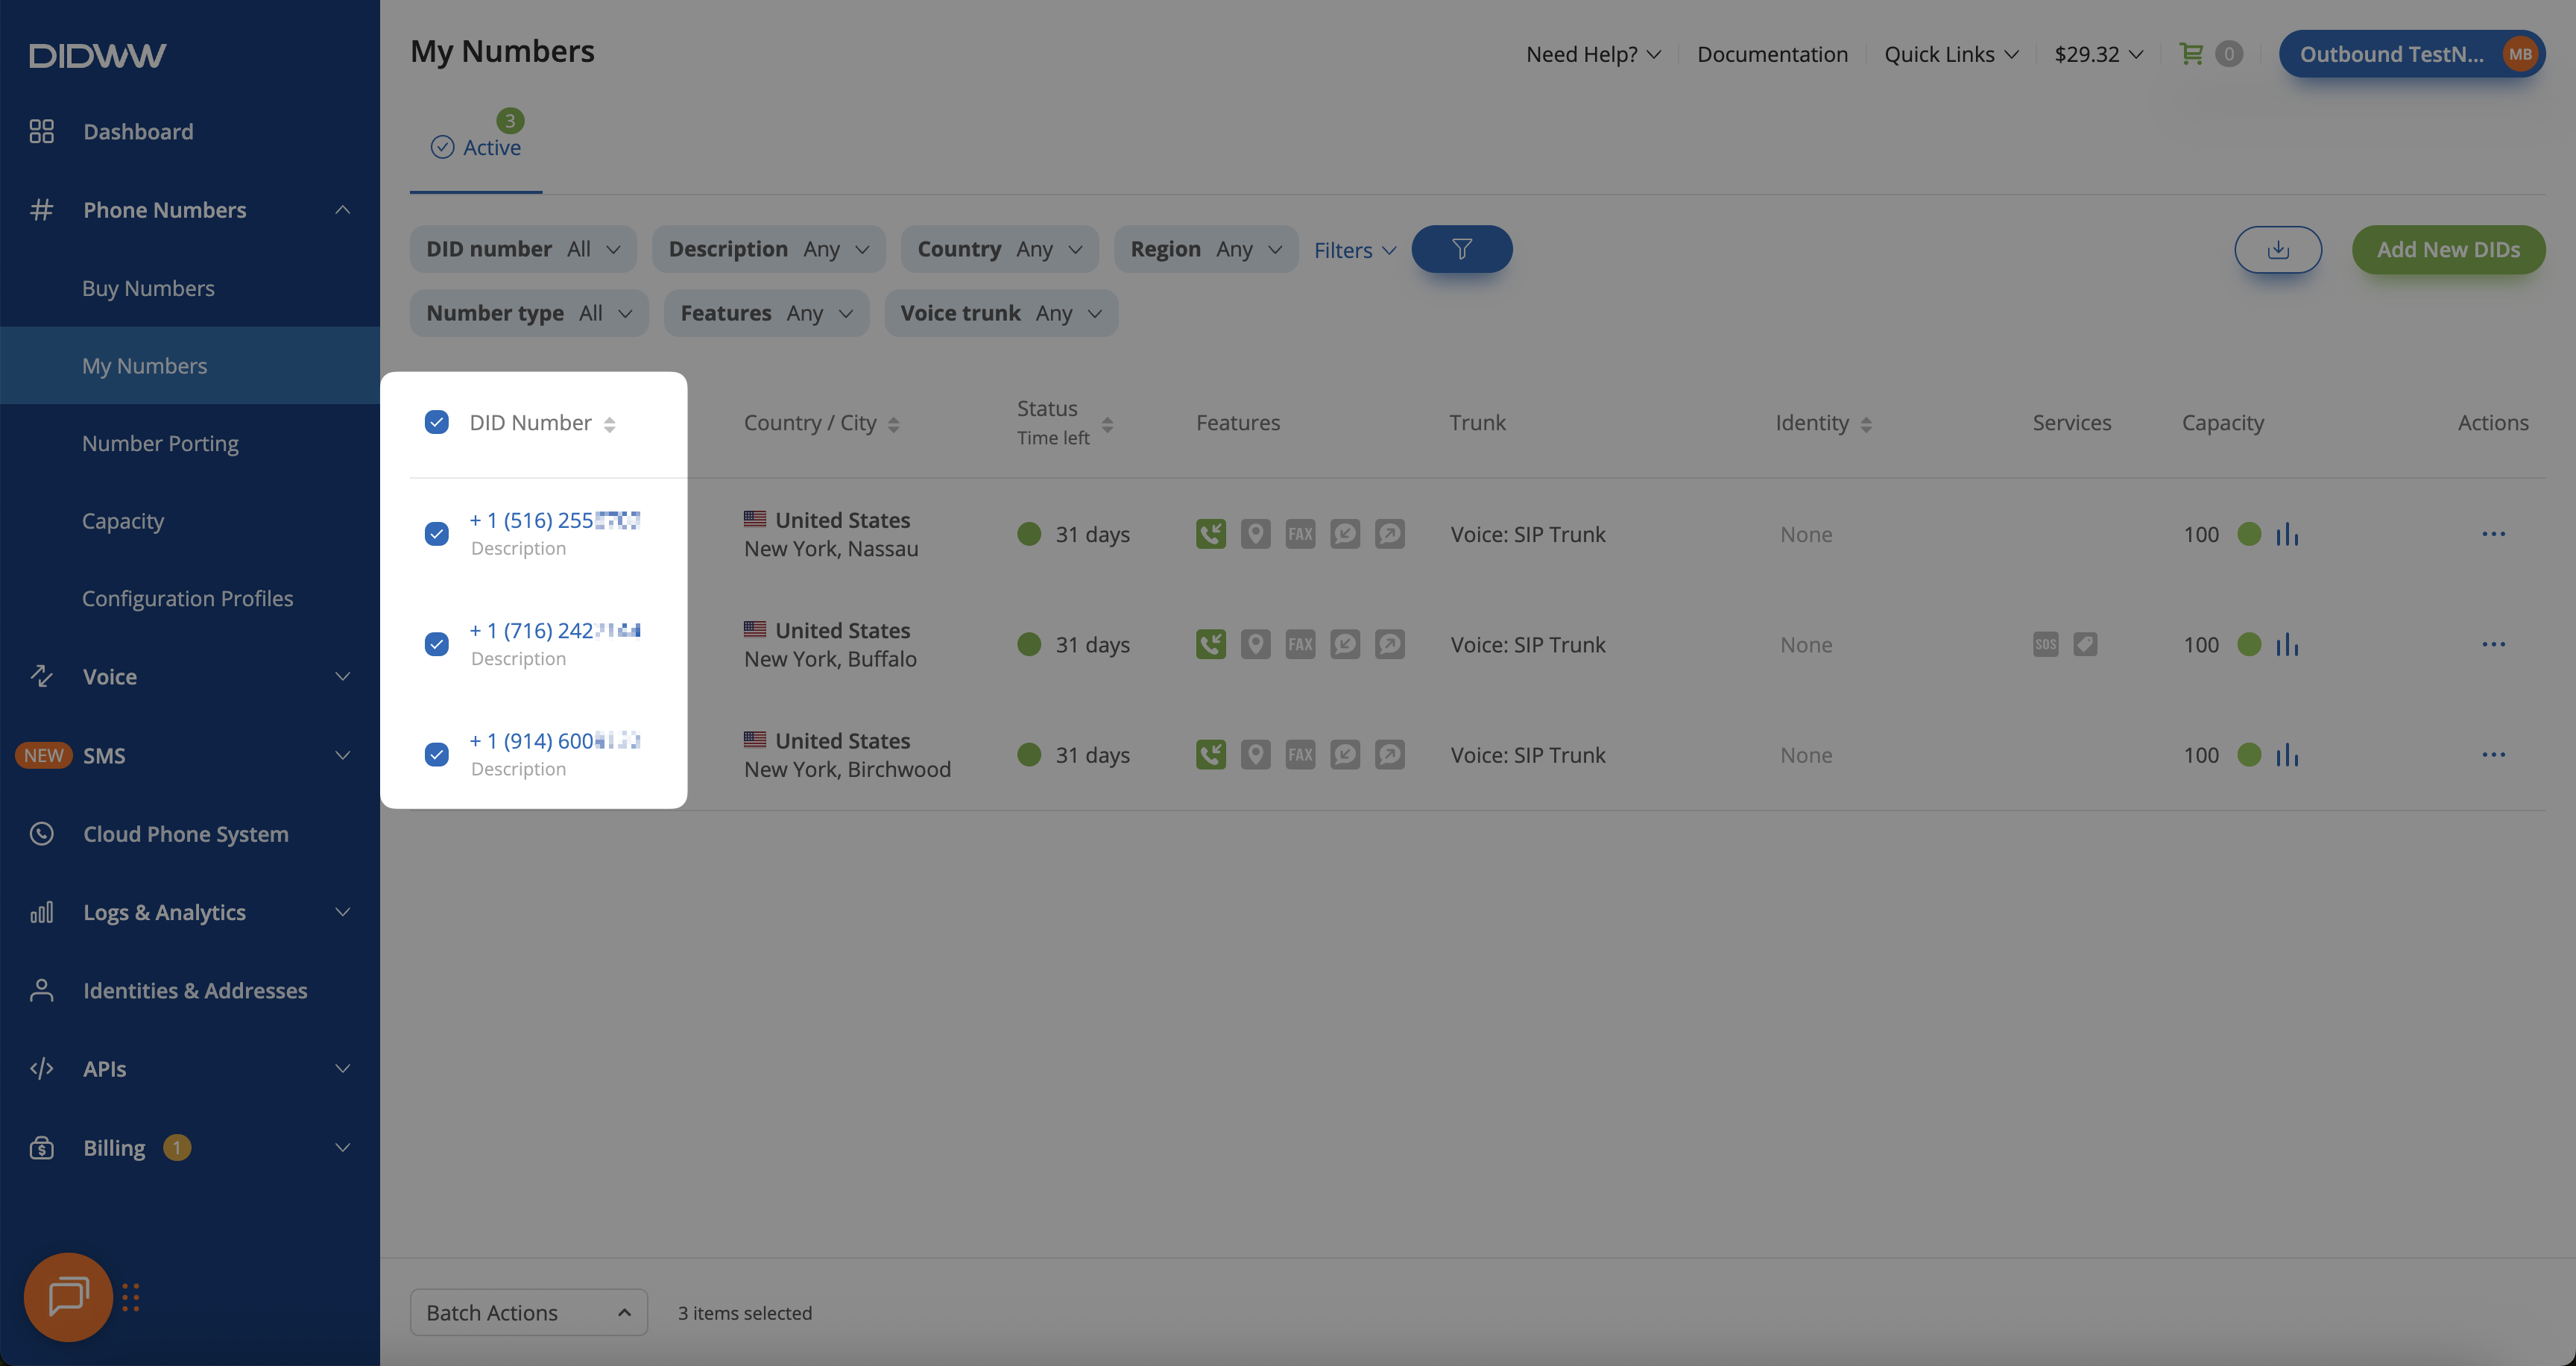
Fig. 1. Selecting multiple DIDs
Step 2: Open Batch Actions
At the bottom of the page, click Batch Actions and choose Change Next Capacity Mode.
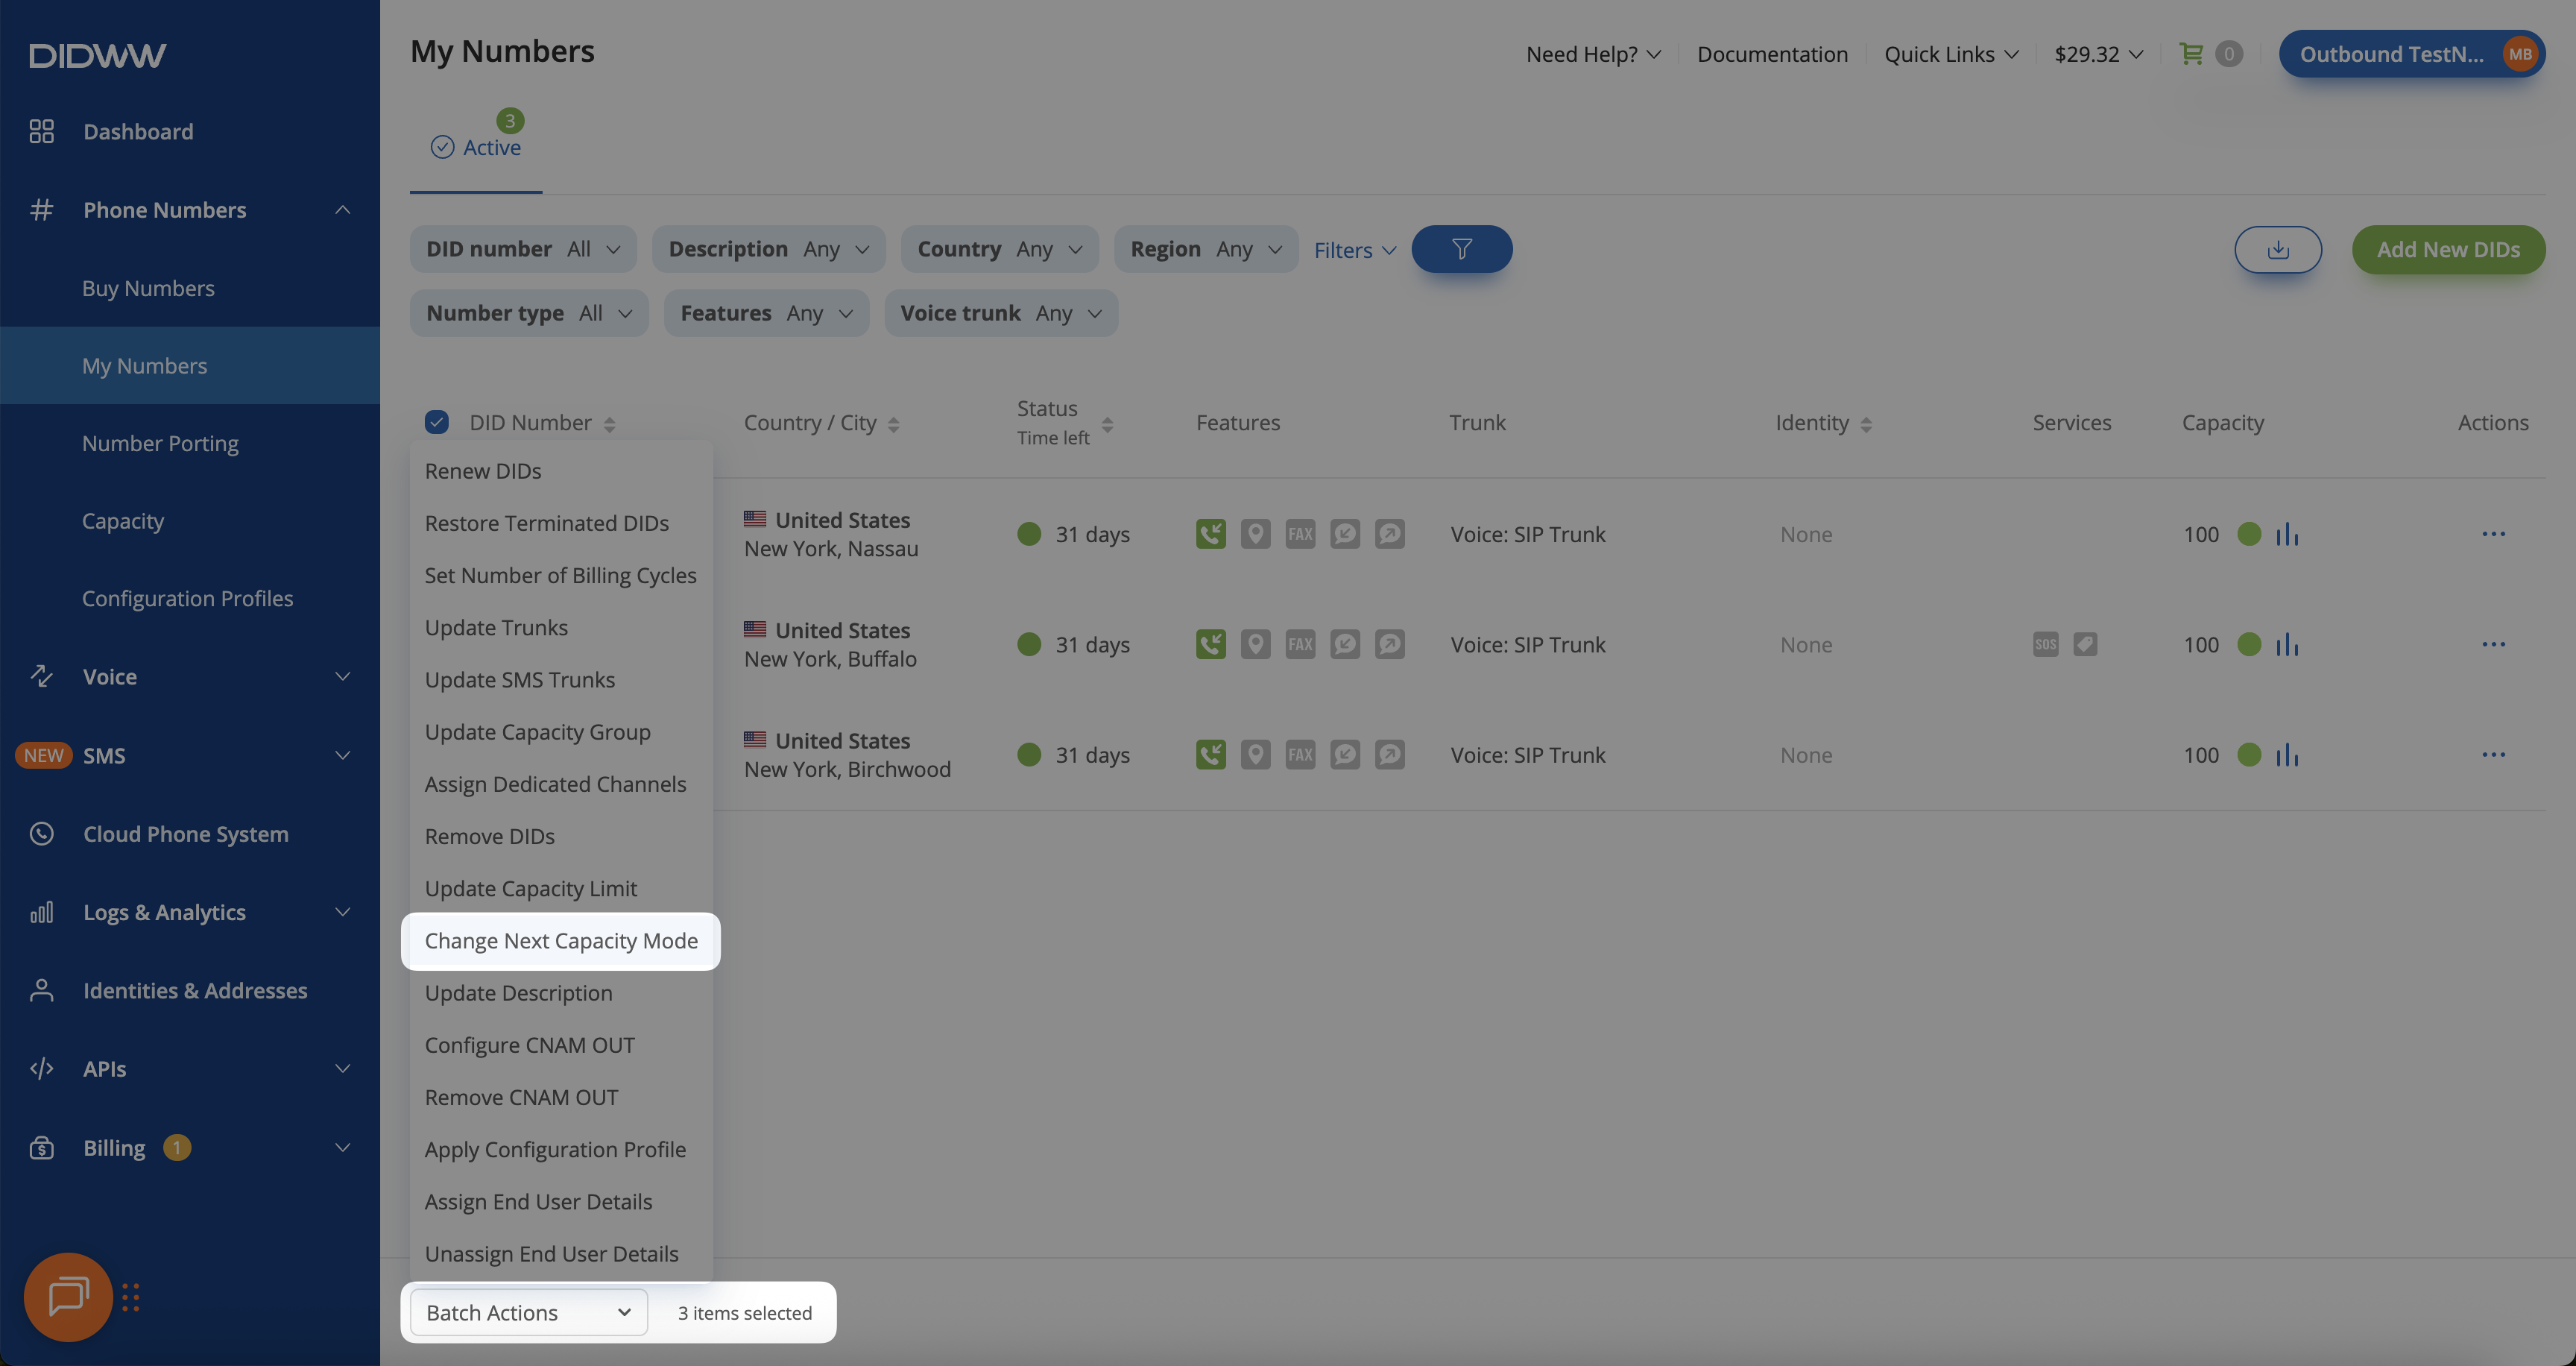
Fig. 2. Using Batch Actions to change the capacity mode
Step 3: Change Next Capacity Mode
In the pop-up window, select the new Next Capacity Mode for each DID.
Click Confirm to save your changes.
Important
- Next Capacity Mode options:
Clear — Revert all capacity changes if they have not been applied yet.
2 included — 2 dedicated channels will be assigned to each DID in the next billing cycle.
0 included — All dedicated channels will be removed from the DID(s) in the next billing cycle. The number(s) must then be assigned to a capacity group to remain operational.
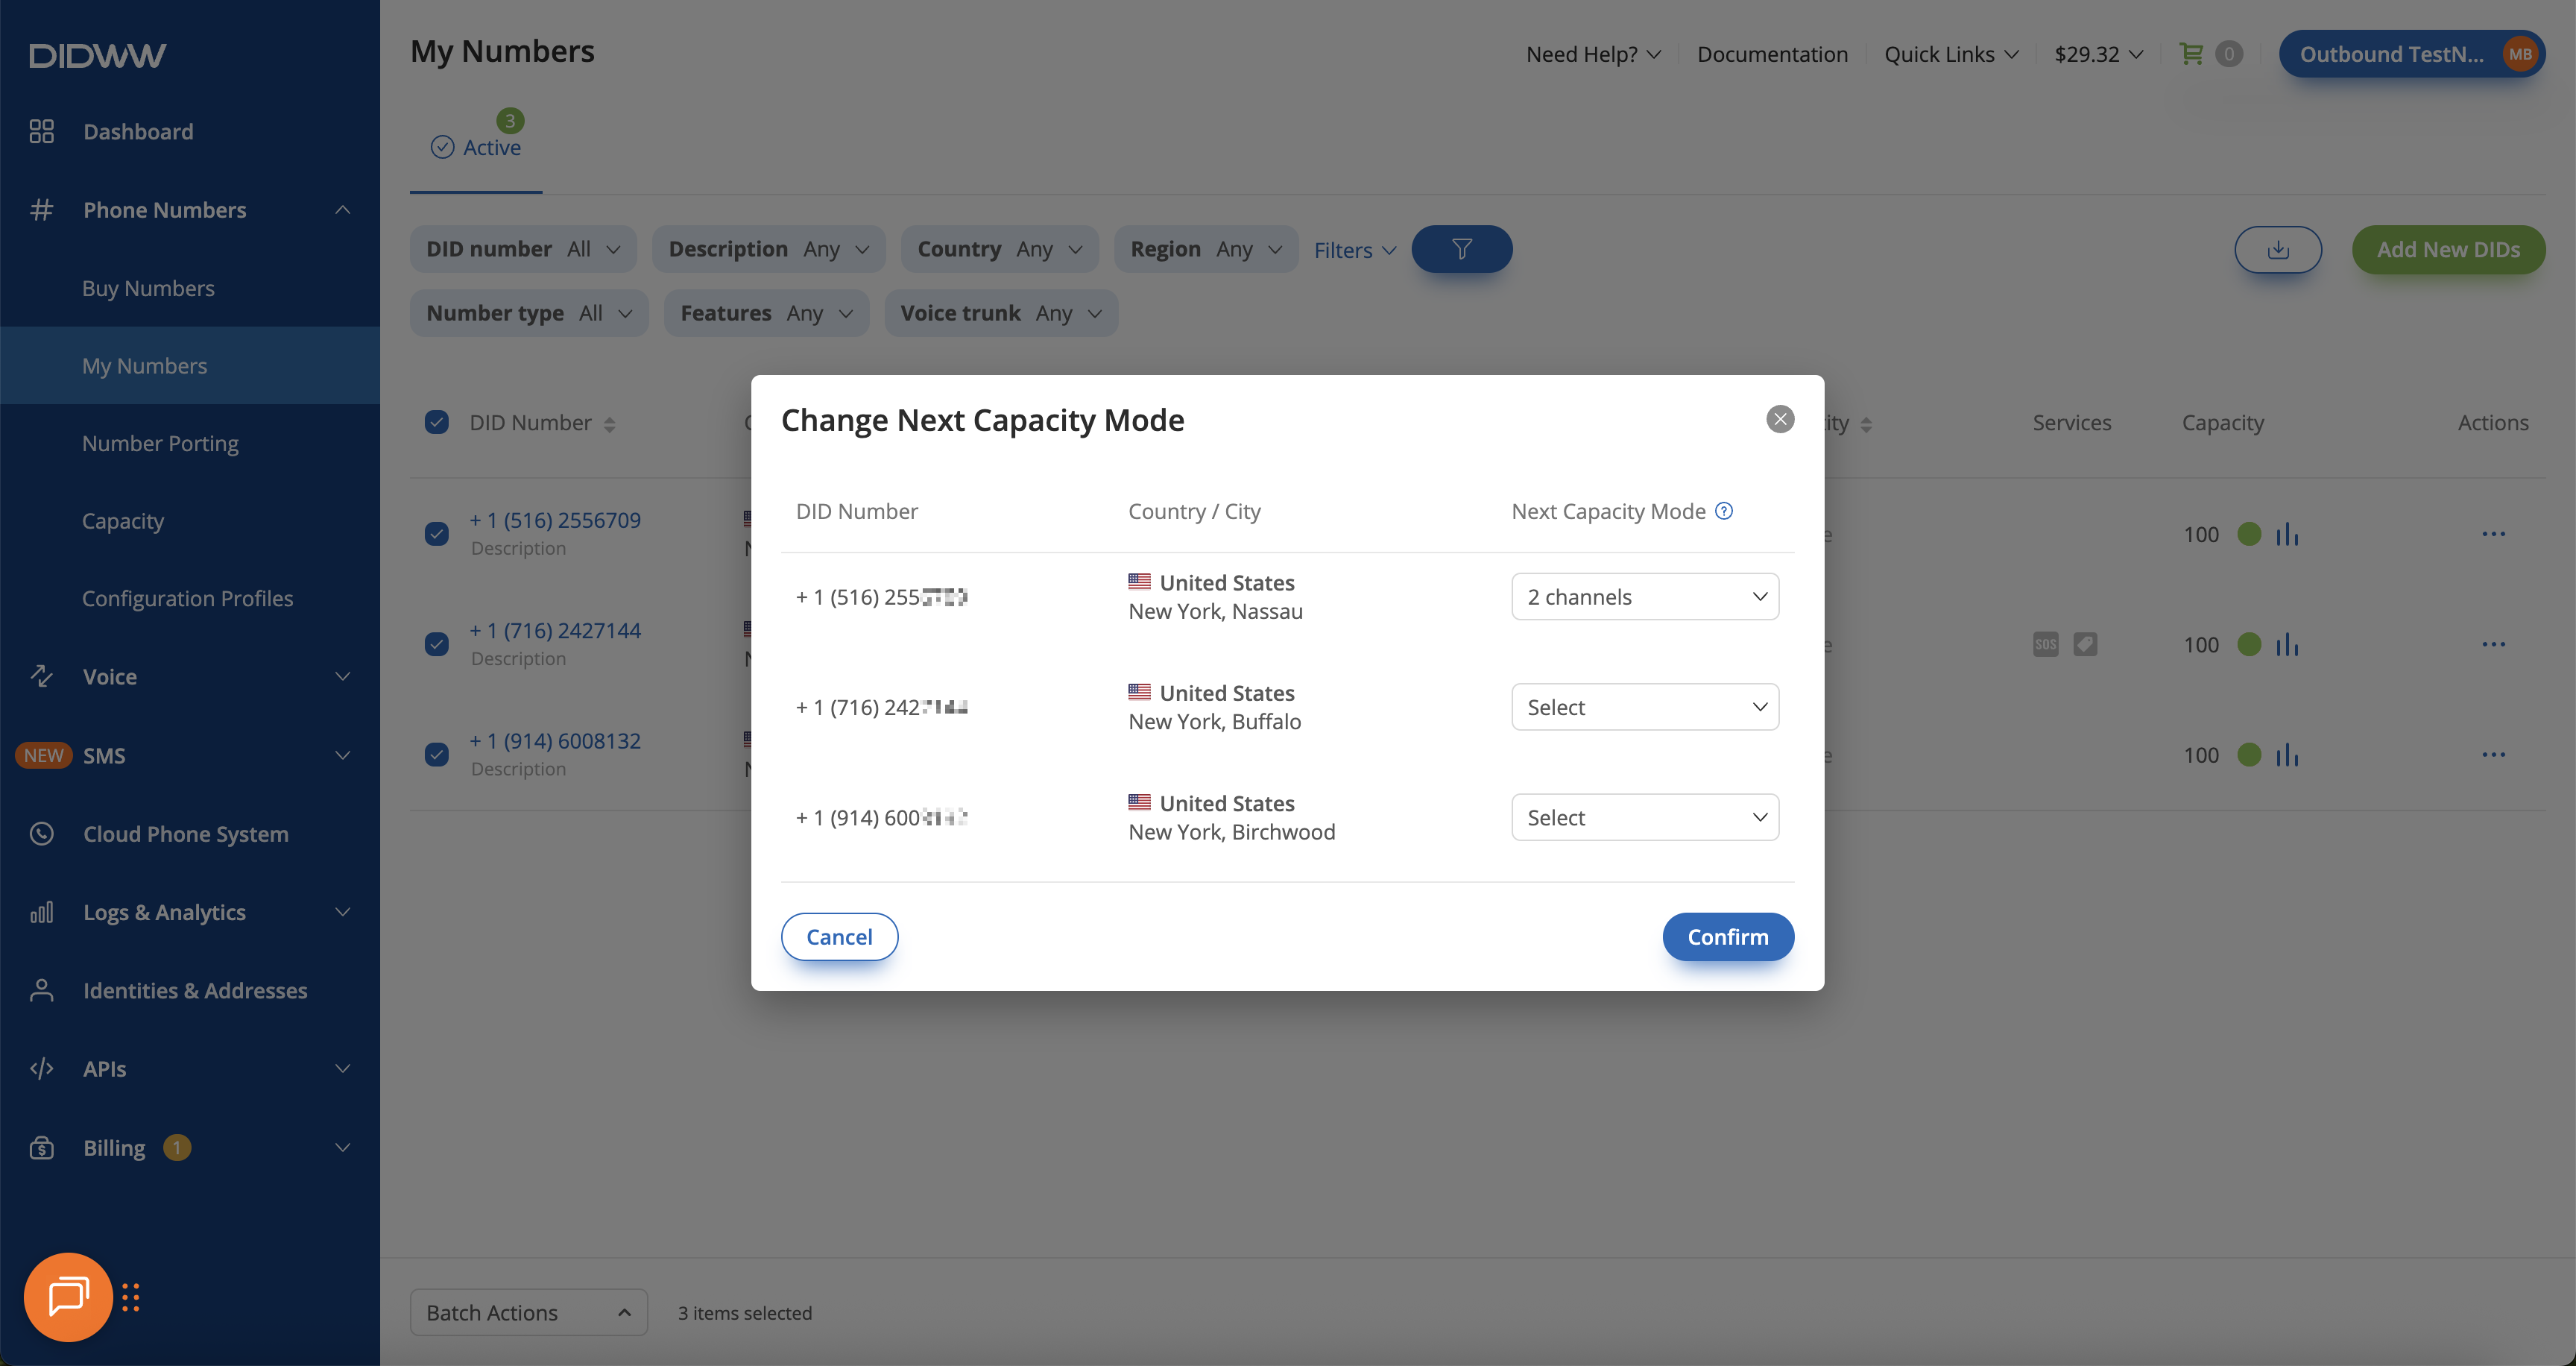
Fig. 3. Selecting the next capacity mode
Note
The selected mode will take effect during the next billing cycle.
In case you want the change to take effect immediately, you can renew the DID number for the selected period and update the channels included right away. For more details, see the renewal guide: Renew DID(s).