

Current HubSpot Integration#
Create and upload a HubSpot developer platform project, then use the generated app credentials to connect HubSpot with phone.systems™.
Note
This integration requires creating a HubSpot developer platform project and uploading it to HubSpot using the HubSpot CLI.
Before you begin#
A HubSpot account with Super Admin permissions is required.
Access to Settings > CRM Integrations in phone.systems™ is required.
Step 1: Download the HubSpot app template#
Download the phone.systems HubSpot app template and extract the archive on the computer that you will use to upload the app to HubSpot:
The extracted phone-systems-hubspot directory contains the complete HubSpot
project.
Note
Do not remove or rename any files in the extracted project directory.
The required project structure:
phone-systems-hubspot/
├── hsproject.json
├── package.json
└── src/app/
    ├── app-hsmeta.json
    └── webhooks/webhooks-hsmeta.json
Open the phone-systems-hubspot directory when running the commands in this
guide. Do not run them from the parent directory or from src.
hsproject.jsonidentifies the directory as a HubSpot project.src/app/app-hsmeta.jsondefines the app, OAuth settings, and permissions.src/app/webhooks/webhooks-hsmeta.jsondefines the webhook subscriptions used to synchronize HubSpot records with phone.systems™.
Step 2: Install Node.js#
The template uses the HubSpot CLI to validate and upload the app. The CLI requires Node.js.
Open a terminal.
Check the installed Node.js version:
node --versionIf the command returns version
v22or later, continue to the next step.If Node.js is unavailable or an earlier version is installed, download and install Node.js 22 or later.
Run
node --versionagain to confirm the installation.
Step 3: Install the HubSpot CLI#
Open a terminal in the extracted phone-systems-hubspot directory. The
commands in this guide must be run from this directory, which contains
hsproject.json.
Install the HubSpot CLI dependency included in the template:
npm install
npx hs --version
npm install installs the HubSpot CLI locally for this project. The
npx hs --version command confirms that the CLI is available. Continue only
after the command returns a version number.
For installation details, see the official HubSpot CLI documentation.
Step 4: Authenticate the HubSpot CLI#
From the
phone-systems-hubspotdirectory, run:npx hs account authIn the browser window opened by the CLI, select the HubSpot account in which the project will be created and click Continue with this account.
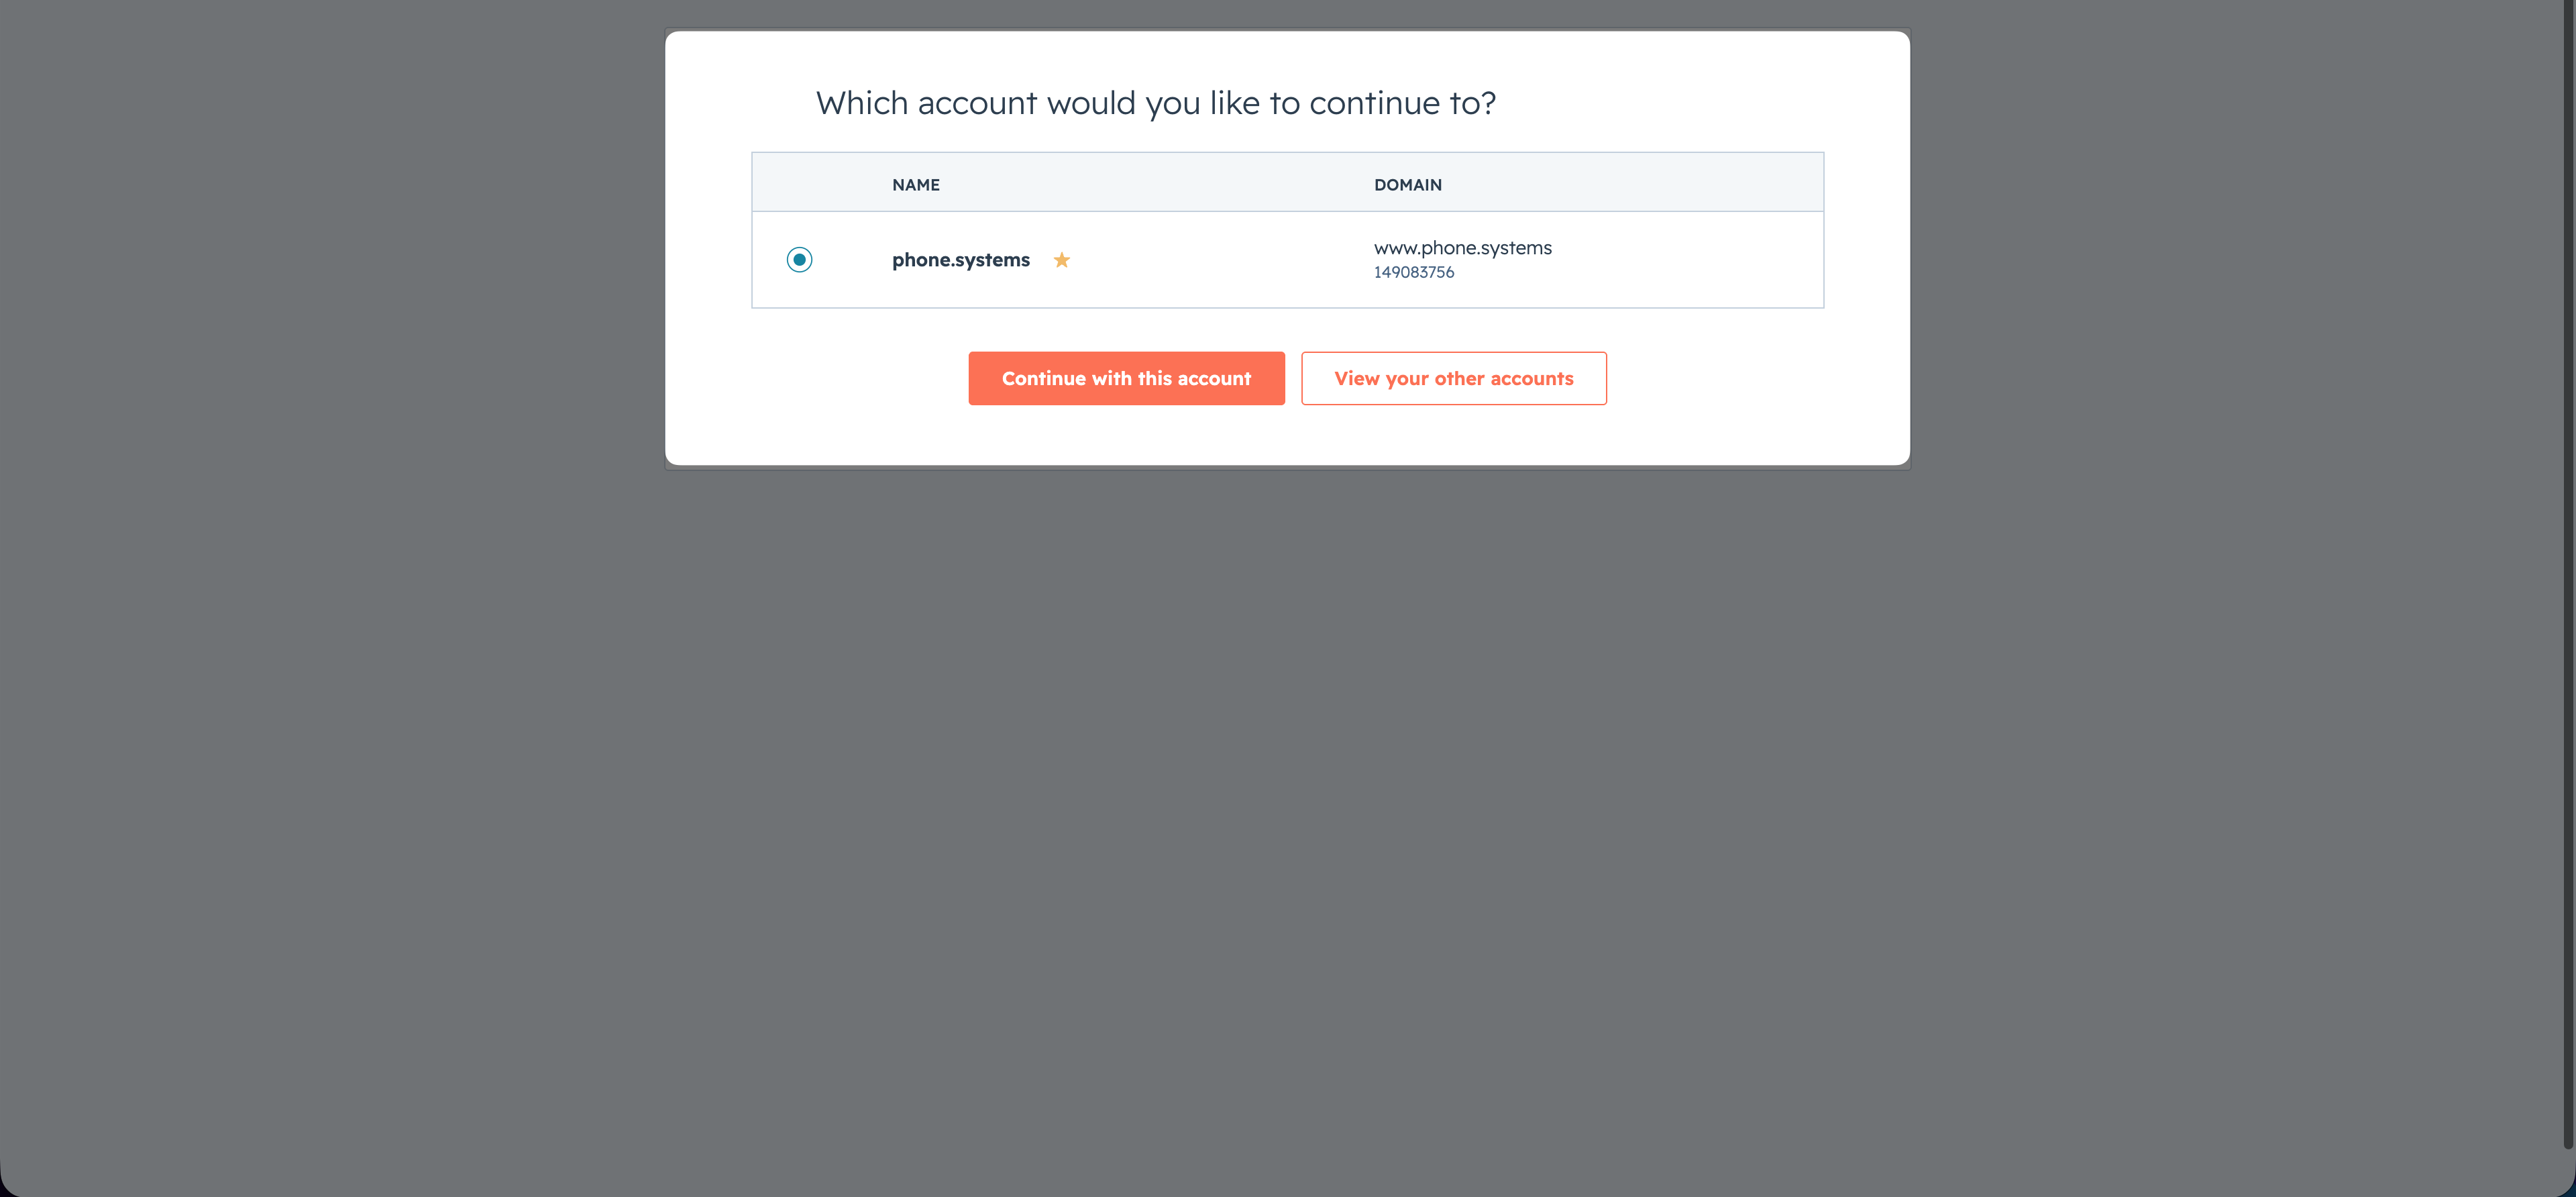
Fig. 1. Select the HubSpot account for the CLI#
Review the permissions requested for the personal access key. Keep the permissions selected by the CLI, including Developer Projects.
Click Generate and send to CLI. HubSpot generates the personal access key and sends it directly to the waiting CLI process.
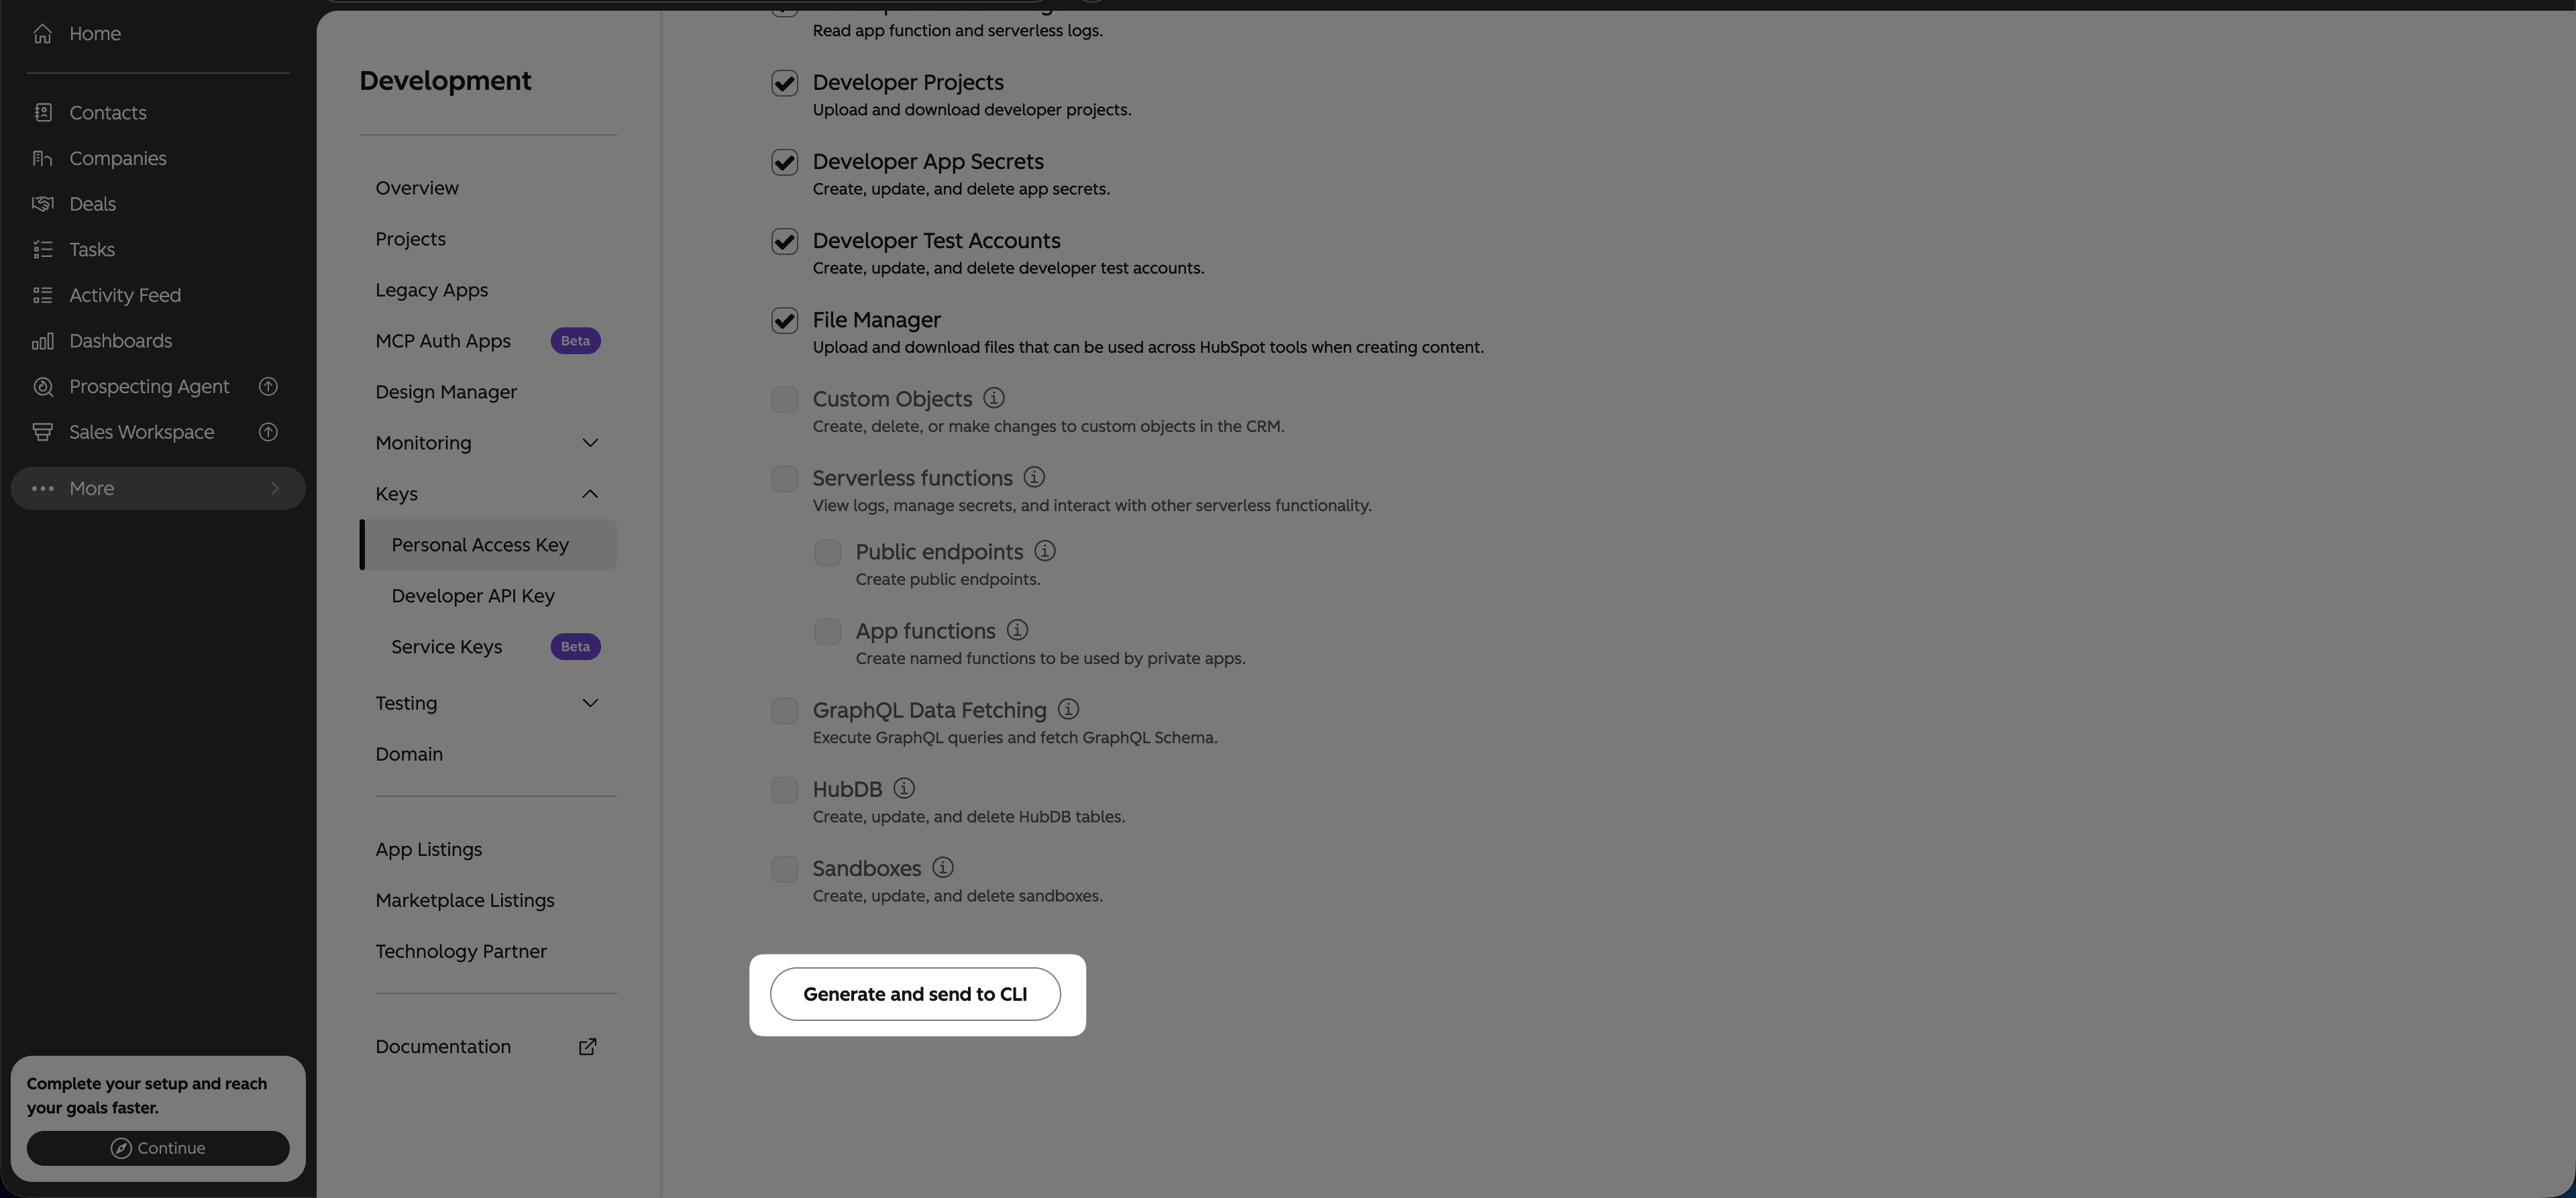
Fig. 2. Generate the personal access key and send it to the CLI#
Return to the terminal and enter a unique name for the HubSpot account when prompted. This name identifies the account in the CLI.
When prompted, enter
Yto set it as the default account.Enter a unique name to reference this account in the CLI: my_phone_systems_integration Set my_phone_systems_integration as your default account? [--default] Yes
Confirm that the account is available to the CLI:
npx hs account list
The personal access key authenticates local HubSpot CLI commands. It is stored on the local computer and is not entered in phone.systems™. For details, see Authenticate the HubSpot CLI.
Step 5: Validate and upload the HubSpot project#
Return to the terminal in the
phone-systems-hubspotdirectory.Validate the project configuration:
npx hs project validateCorrect any validation errors before continuing.
Upload the project:
npx hs project uploadDuring the first upload, enter
Ywhen prompted to create thephone-systems-hubspotproject in the authenticated HubSpot account.The upload creates a project in the authenticated HubSpot account and starts a build. Wait until the CLI reports that the build and deployment have completed successfully. The deployed project contains the OAuth app and its webhook subscriptions.
Open the uploaded project in HubSpot:
npx hs project openConfirm that the latest build and deployment show Succeeded.
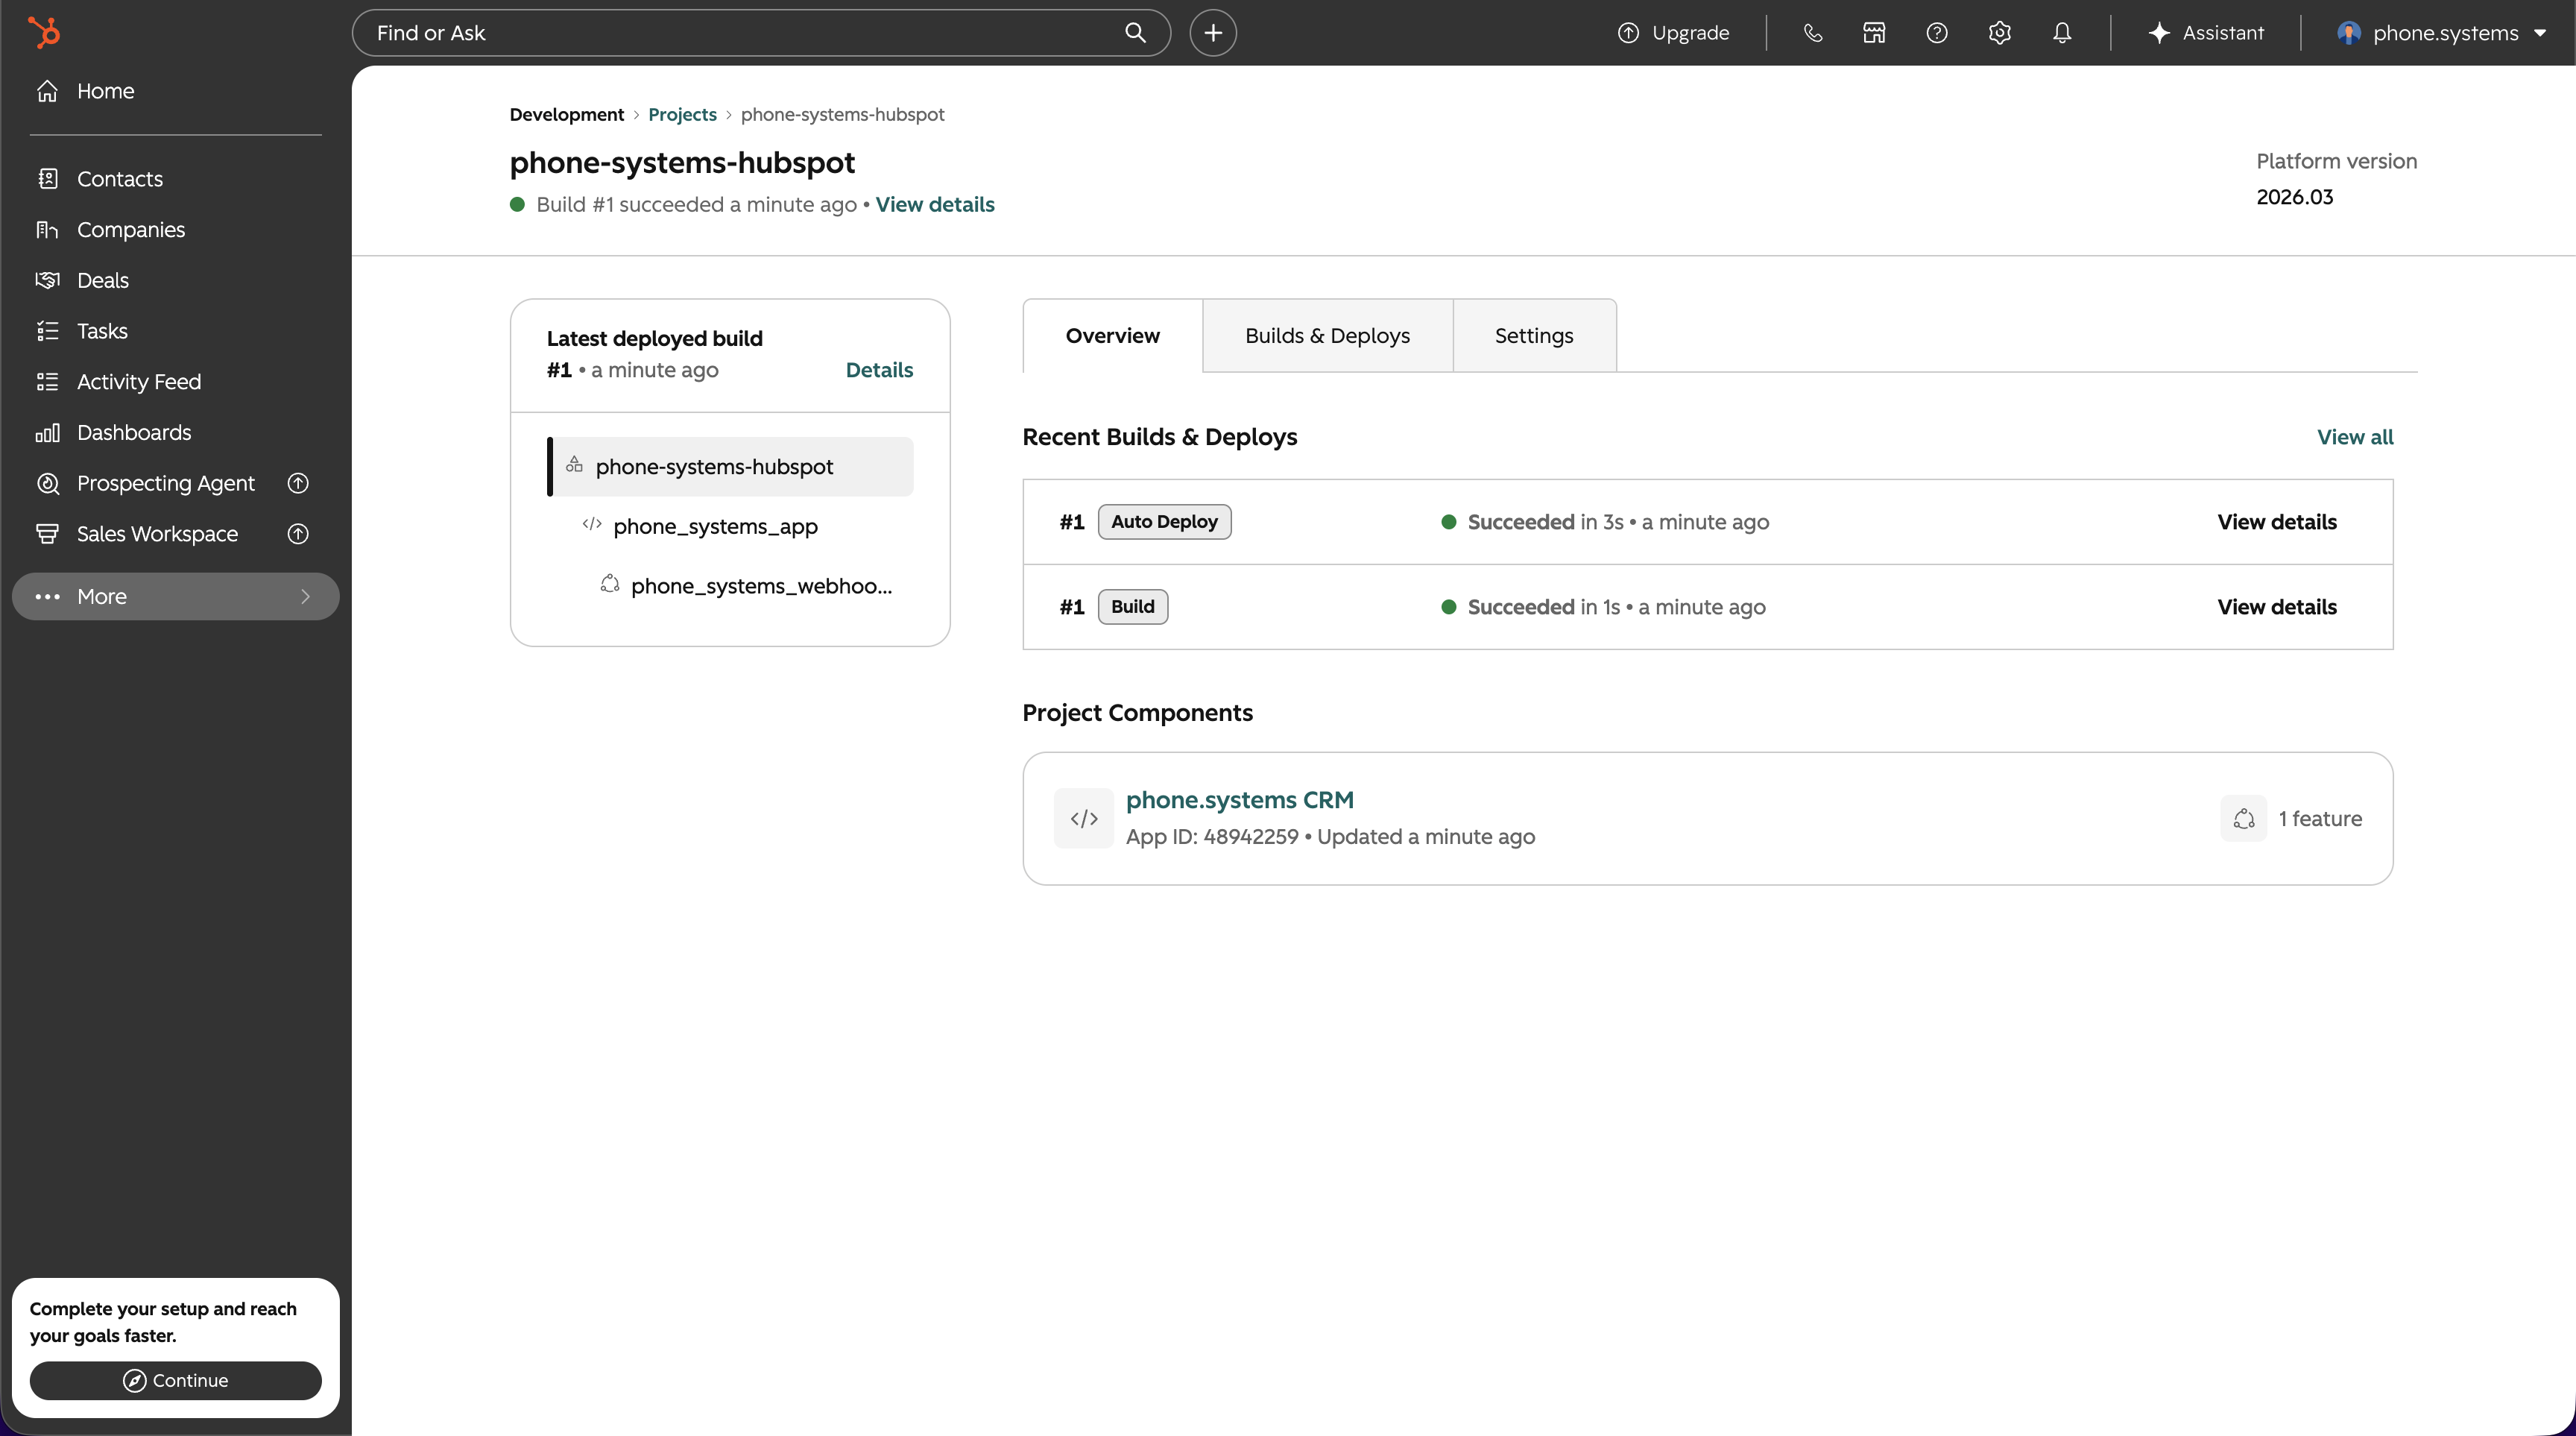
Fig. 3. Confirm successful project deployment#
The HubSpot account used to upload the project is approved automatically for the app installation.
Under Project Components, click phone.systems CRM.
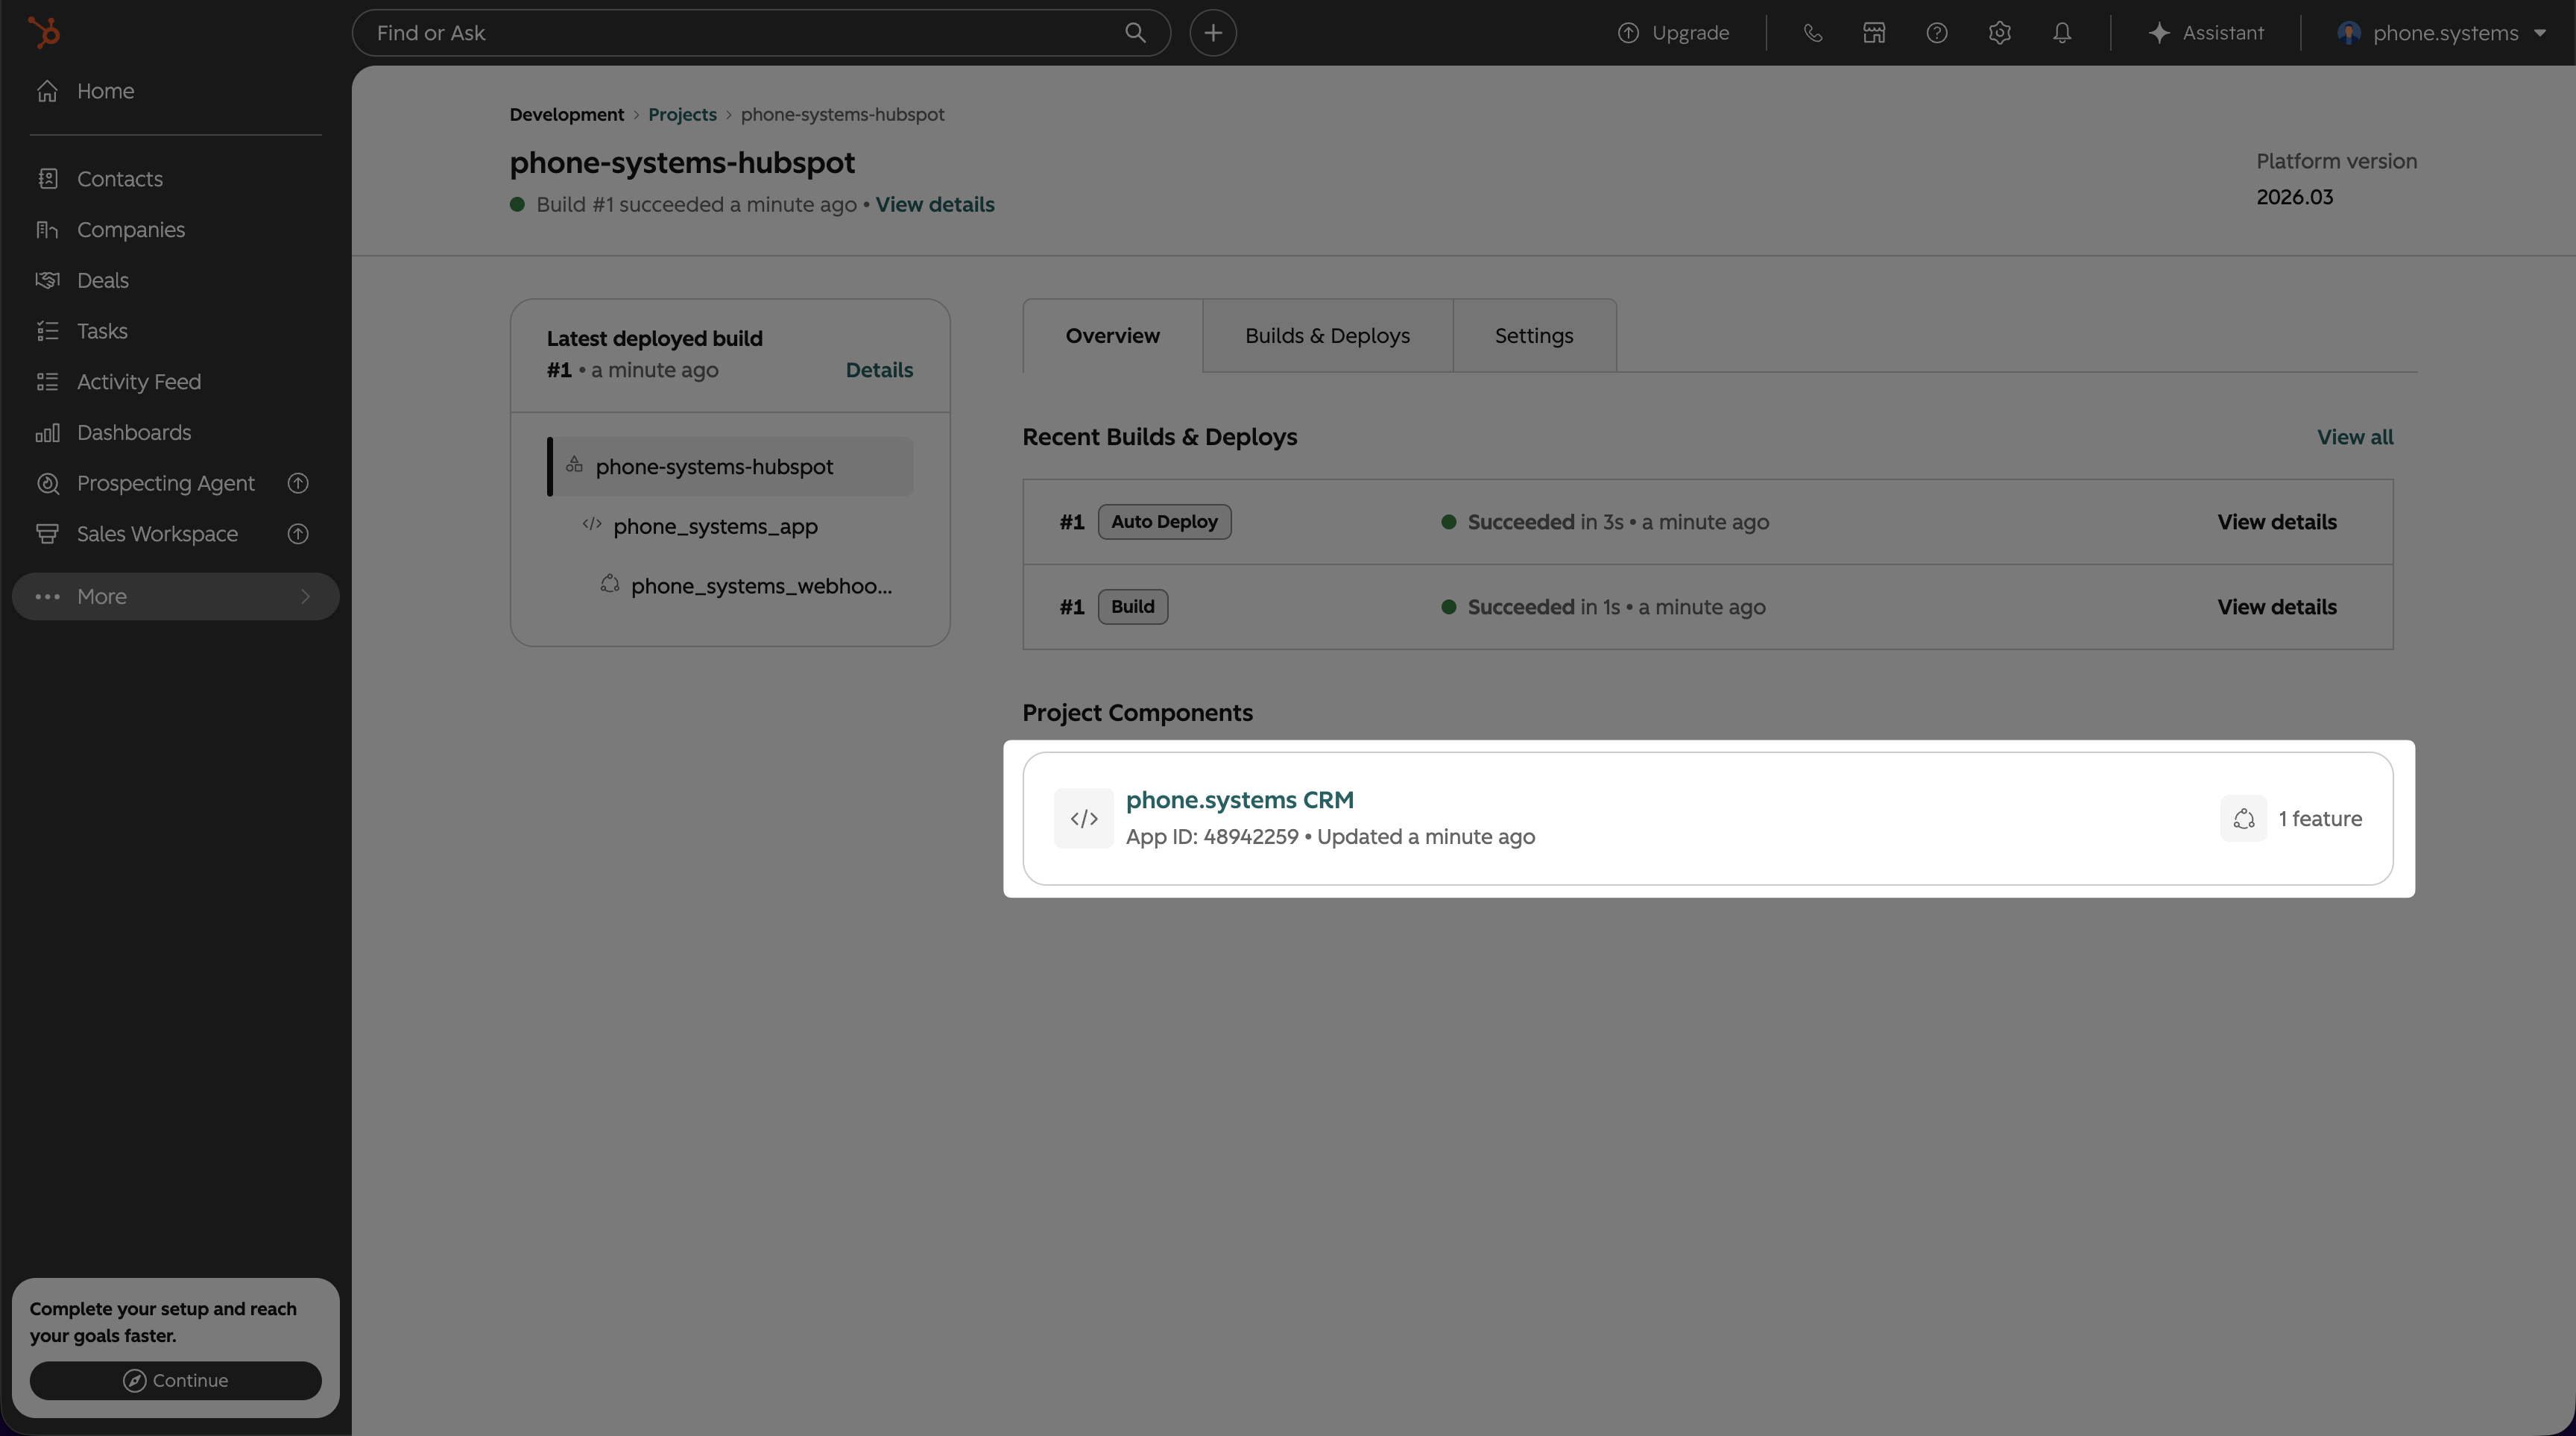
Fig. 4. Open the phone.systems CRM app#
For details about validation, upload, build status, and other commands, see the official HubSpot project commands.
Step 6: Copy the app credentials#
Open the Auth tab.
Under Client credentials, copy the following values:
Client ID
Client secret
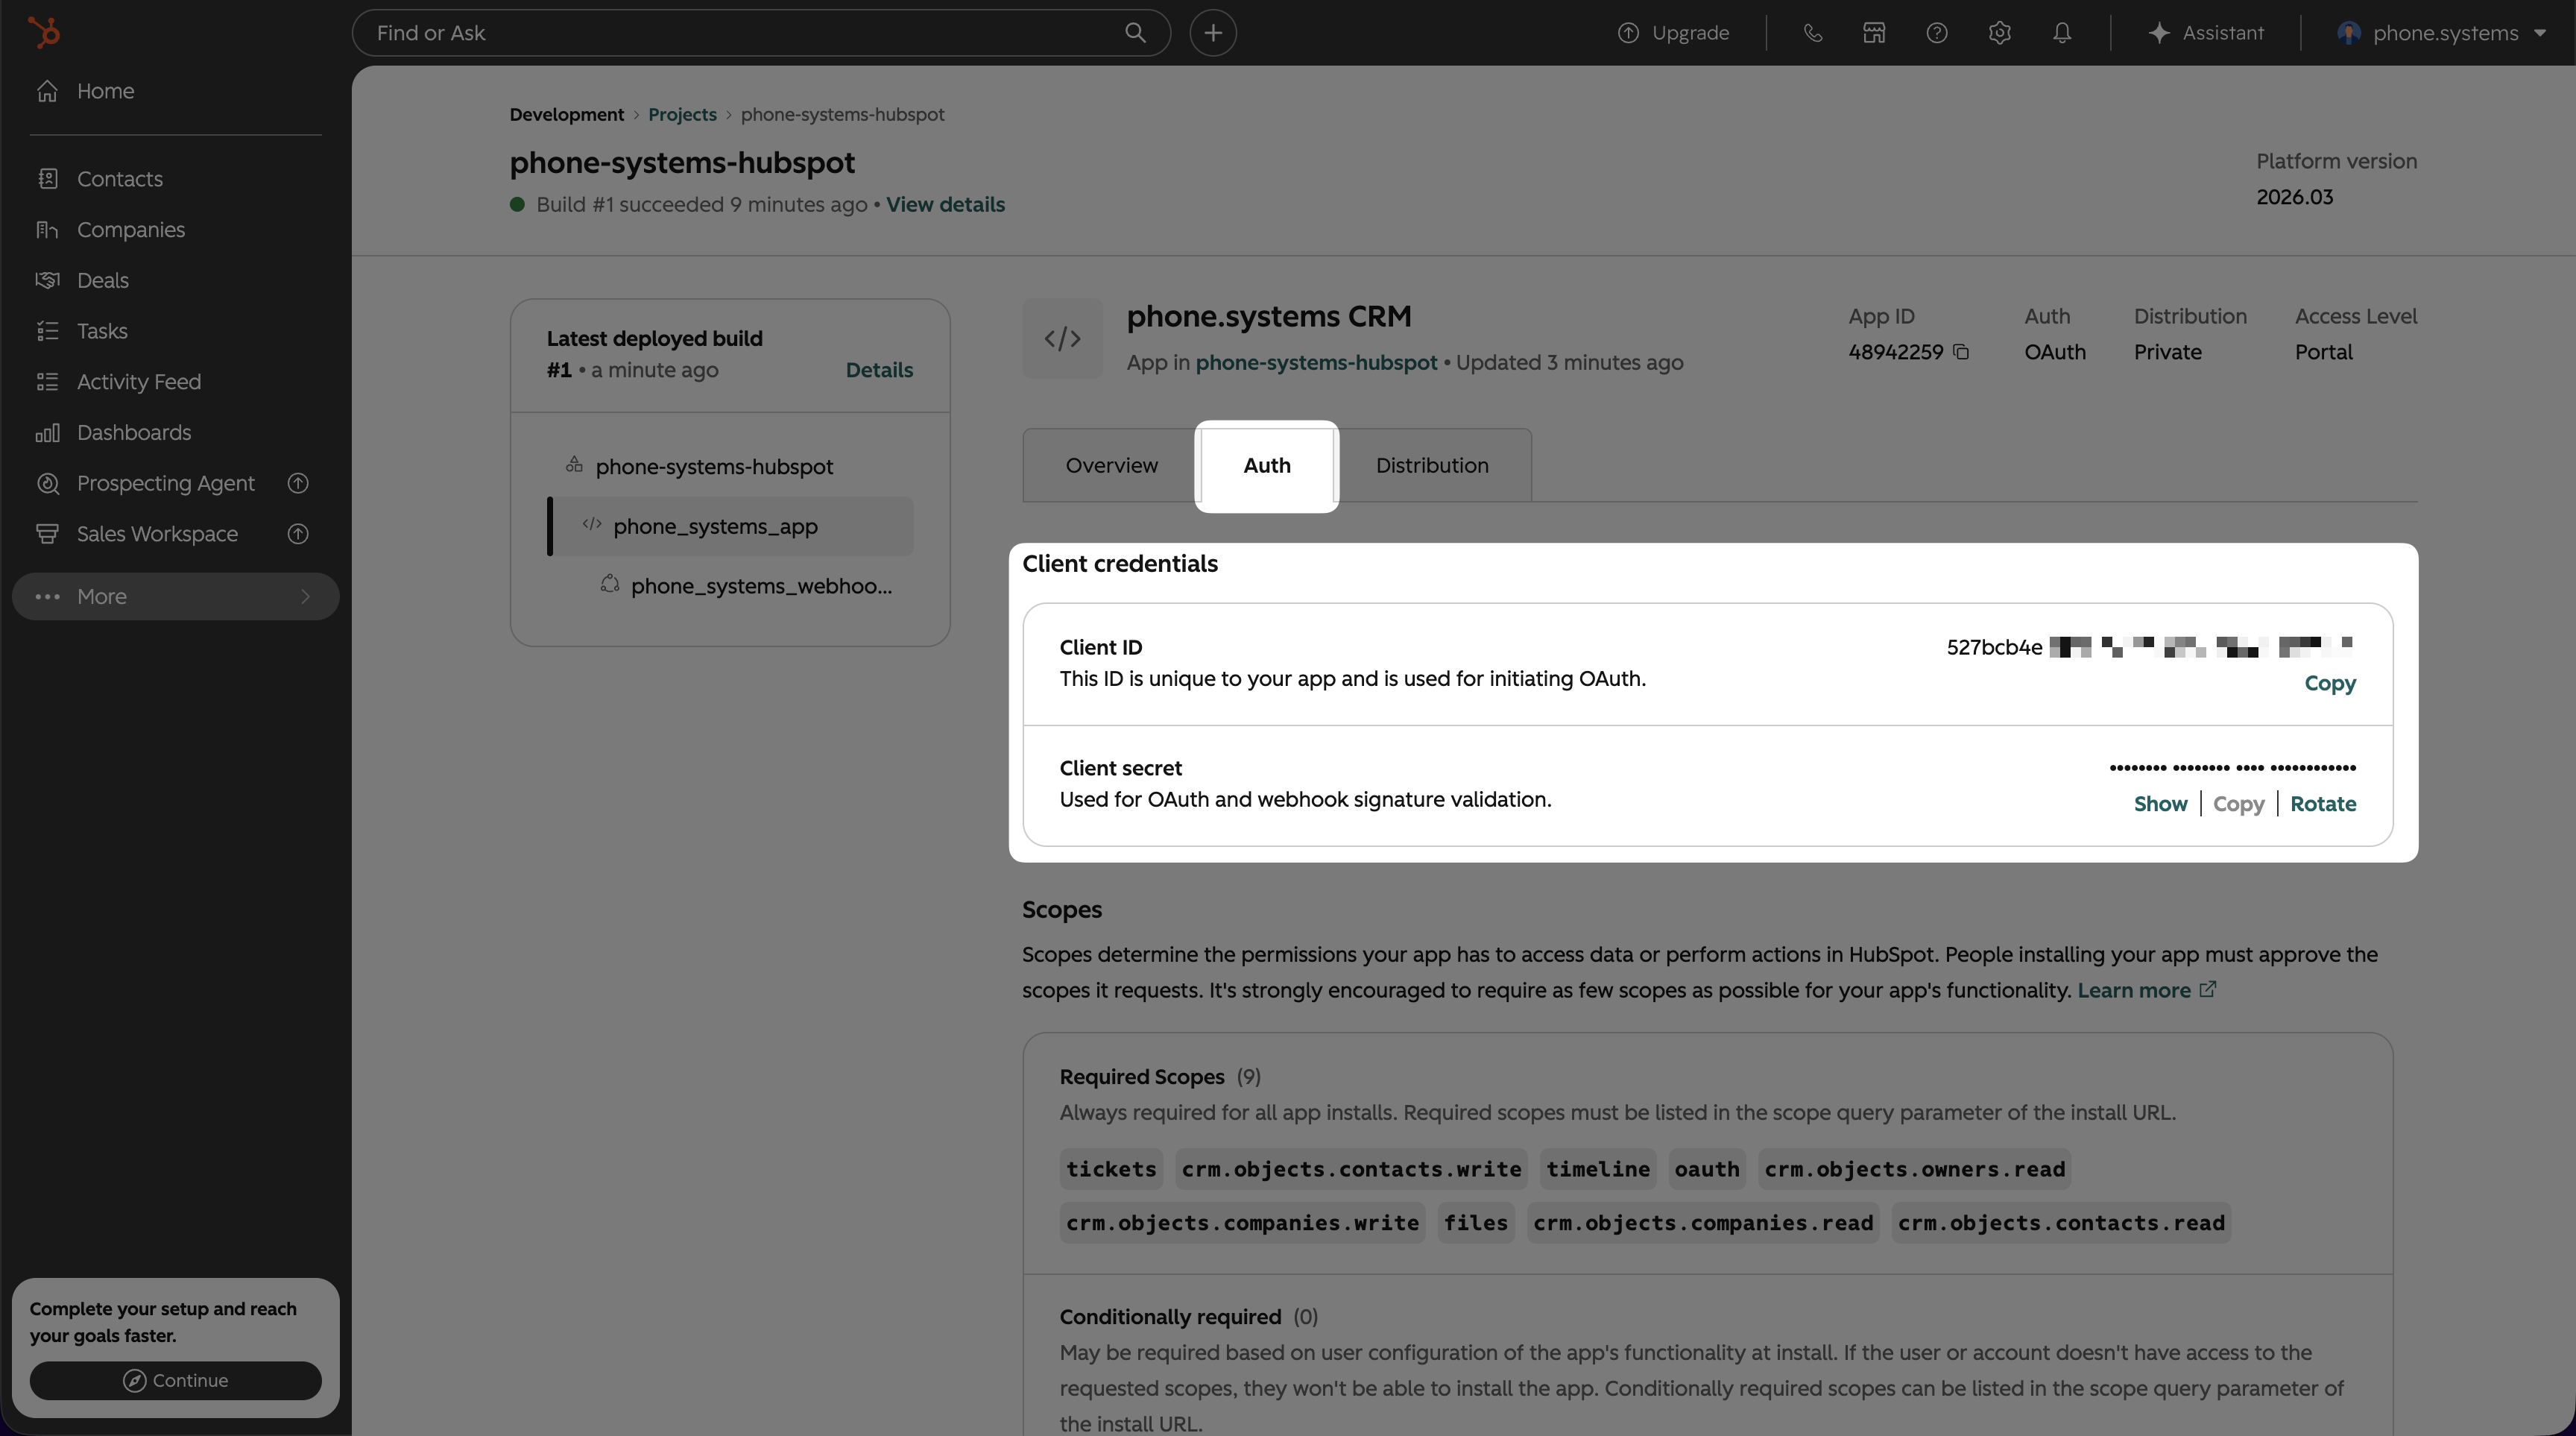
Fig. 5. Copy the app credentials#
Store the client secret securely. Do not expose it in screenshots, tickets, or other shared material. For details about the app management page, see Manage apps in HubSpot.
Step 7: Connect phone.systems™#
In phone.systems™, go to Settings > CRM Integrations.
Click Connect for HubSpot.
Paste the OAuth Client ID and Client secret copied from HubSpot.
Enable Synchronize from contacts, Synchronize from companies, or both to import the selected existing records during connection.
Click Connect.
Note
phone.systems™ manages OAuth token renewal automatically. The webhook subscriptions were created when the project was uploaded; no separate webhook configuration is required in HubSpot.
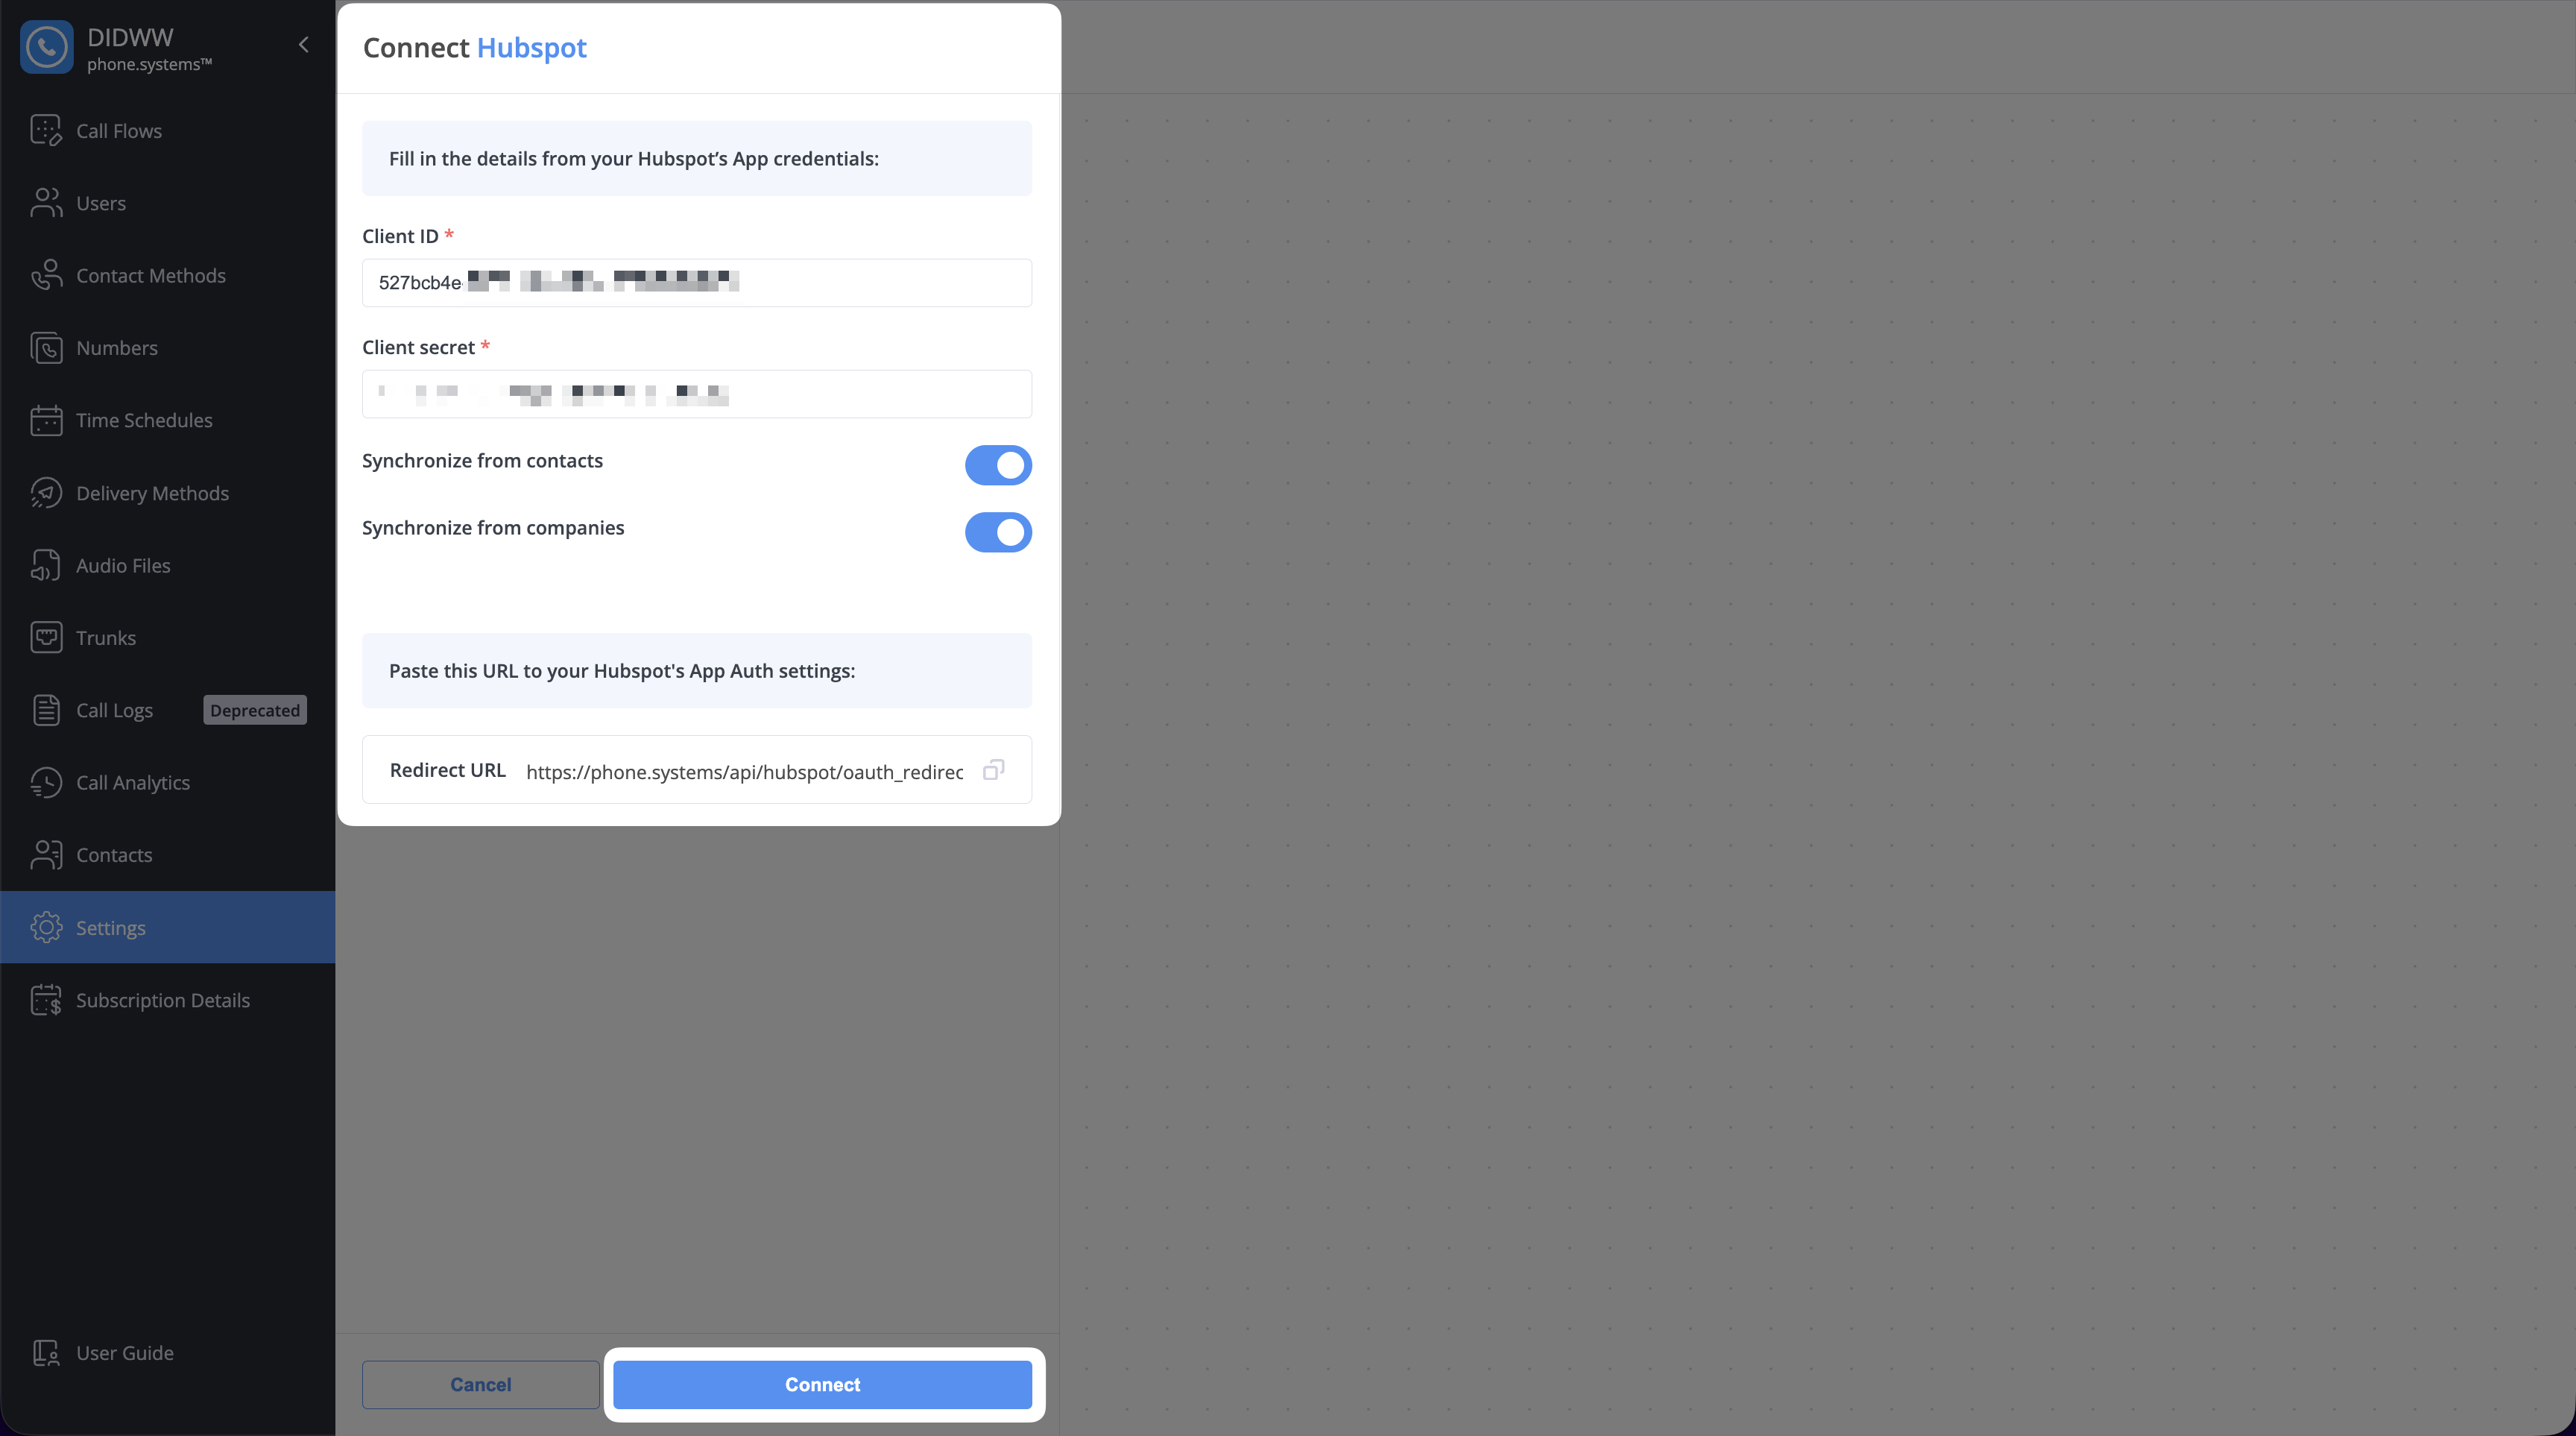
Fig. 6. Enter the HubSpot app credentials and connect#
In the HubSpot authorization window, select the account used to upload the project, then click Choose Account.
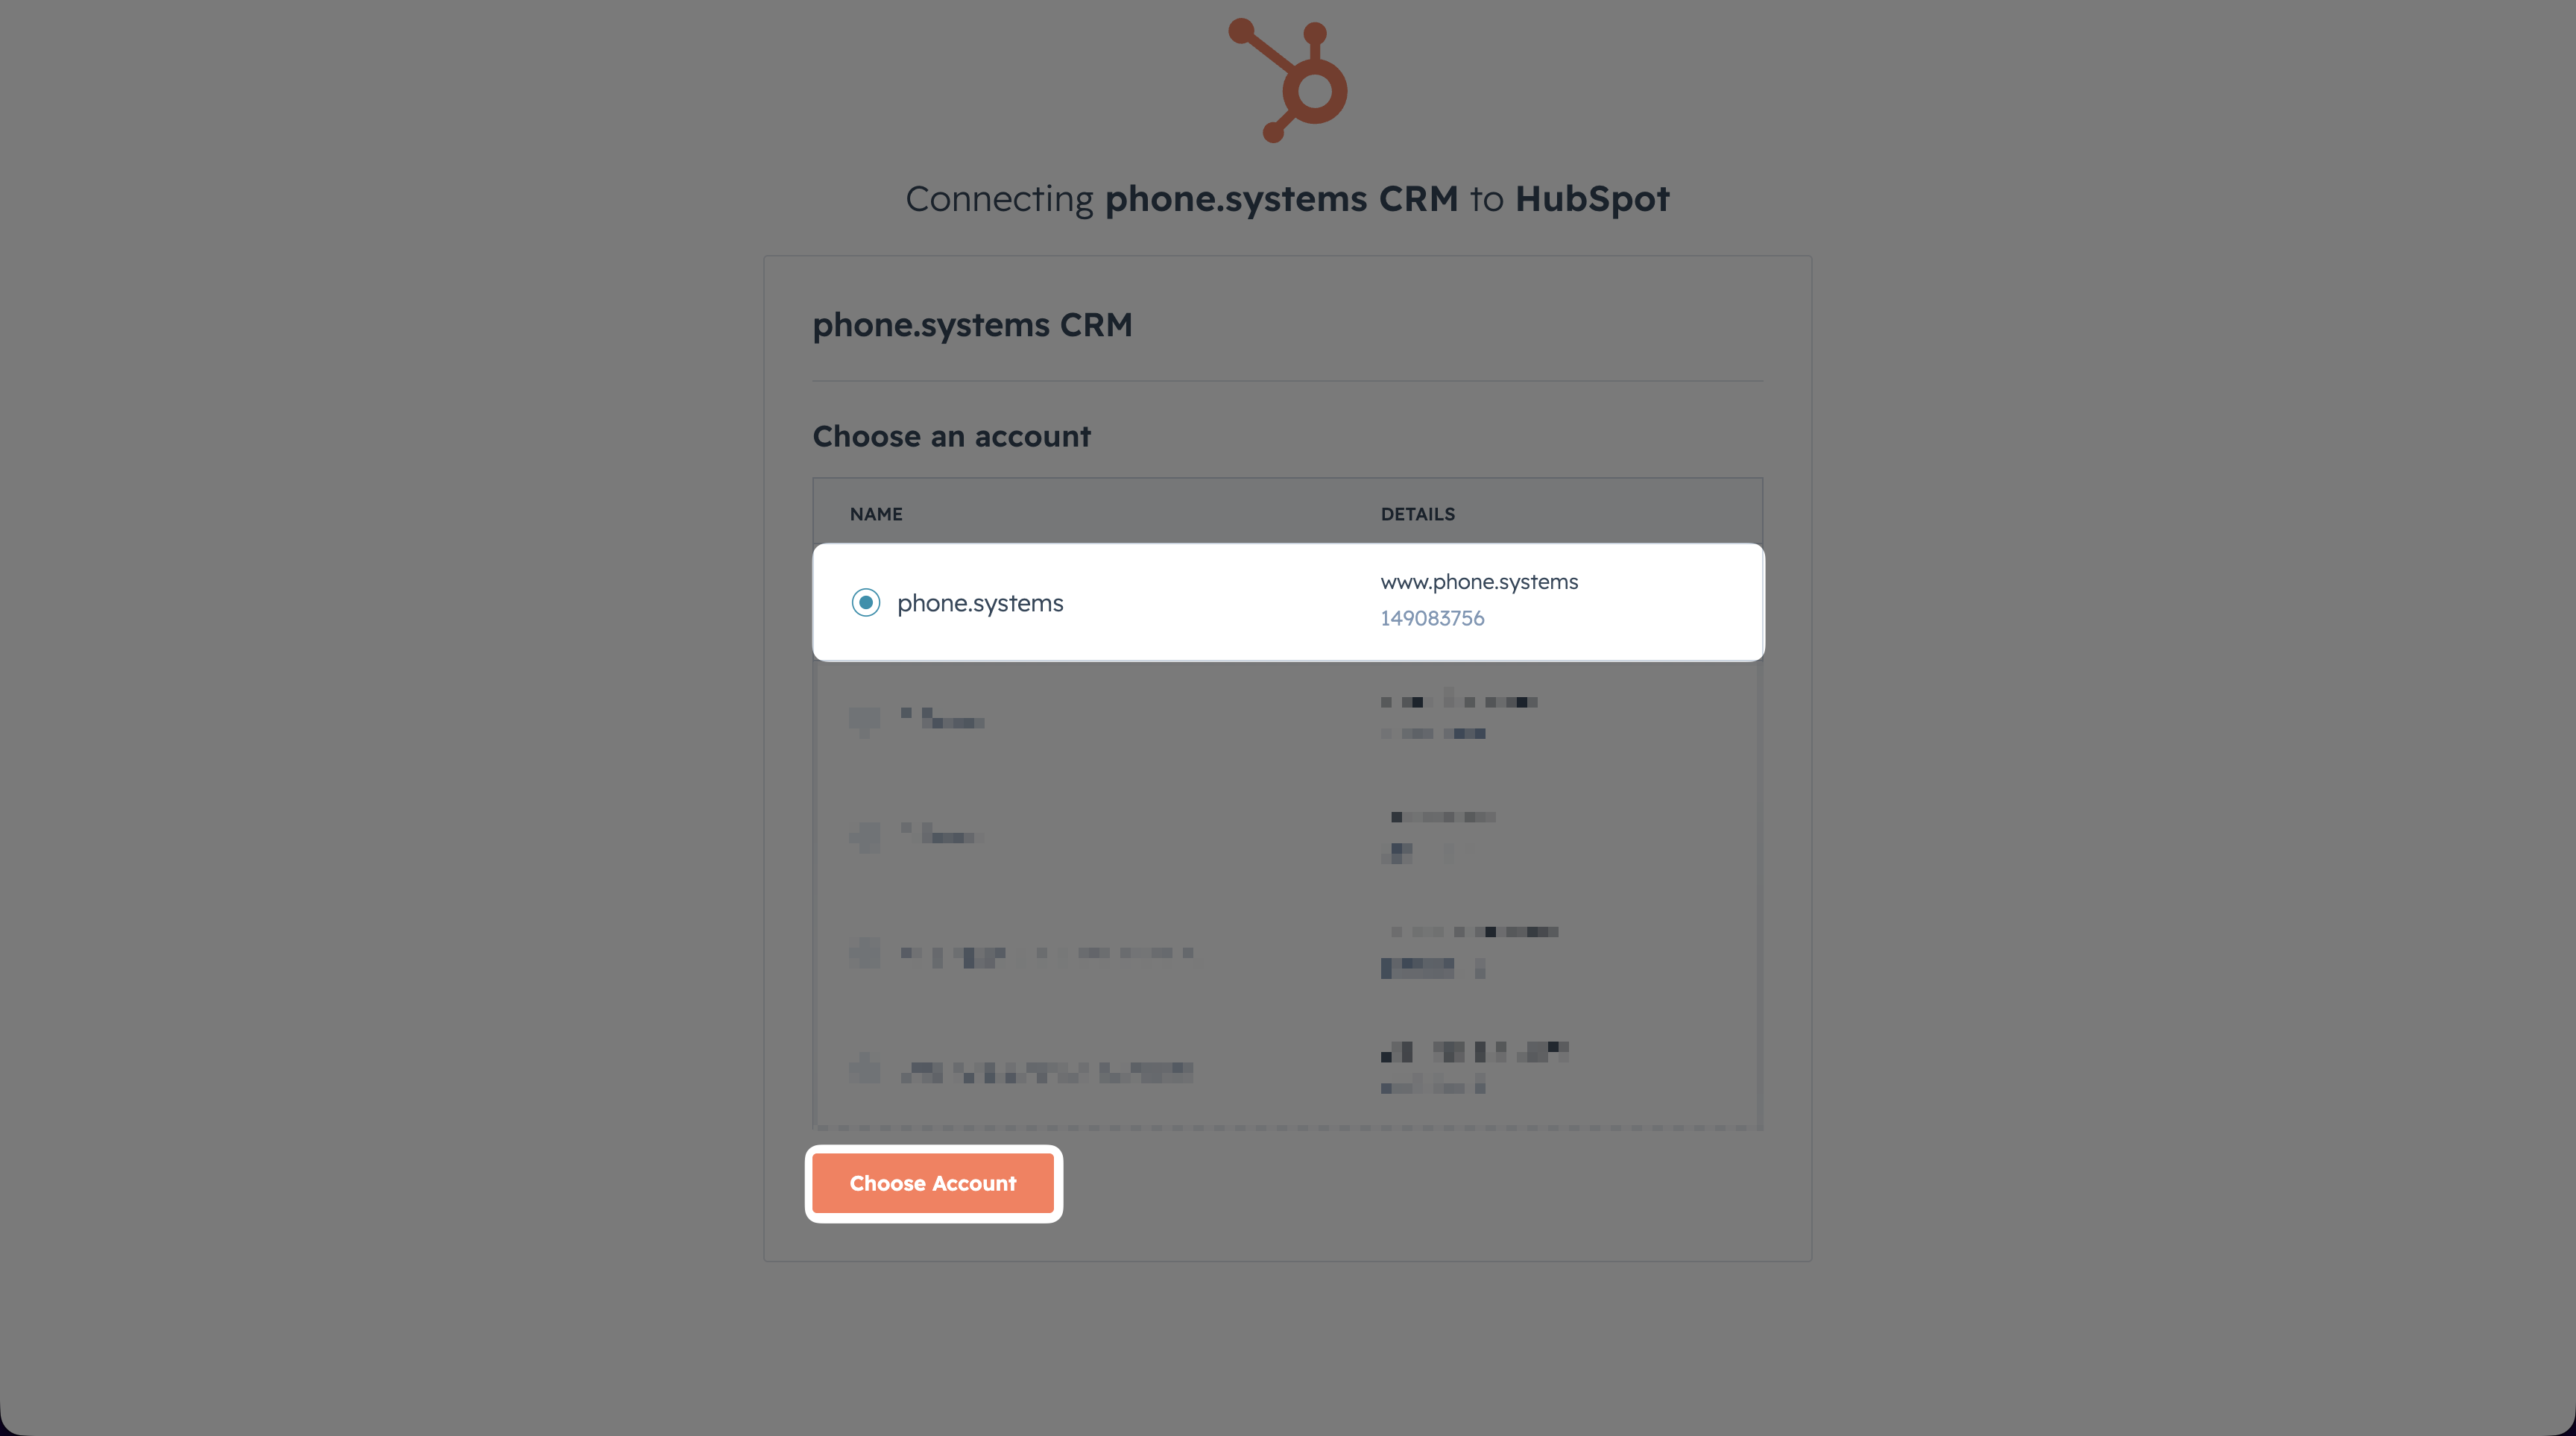
Fig. 7. Choose the HubSpot account#
Review the requested permissions. Select the checkbox acknowledging that the app is unverified, then click Connect app.
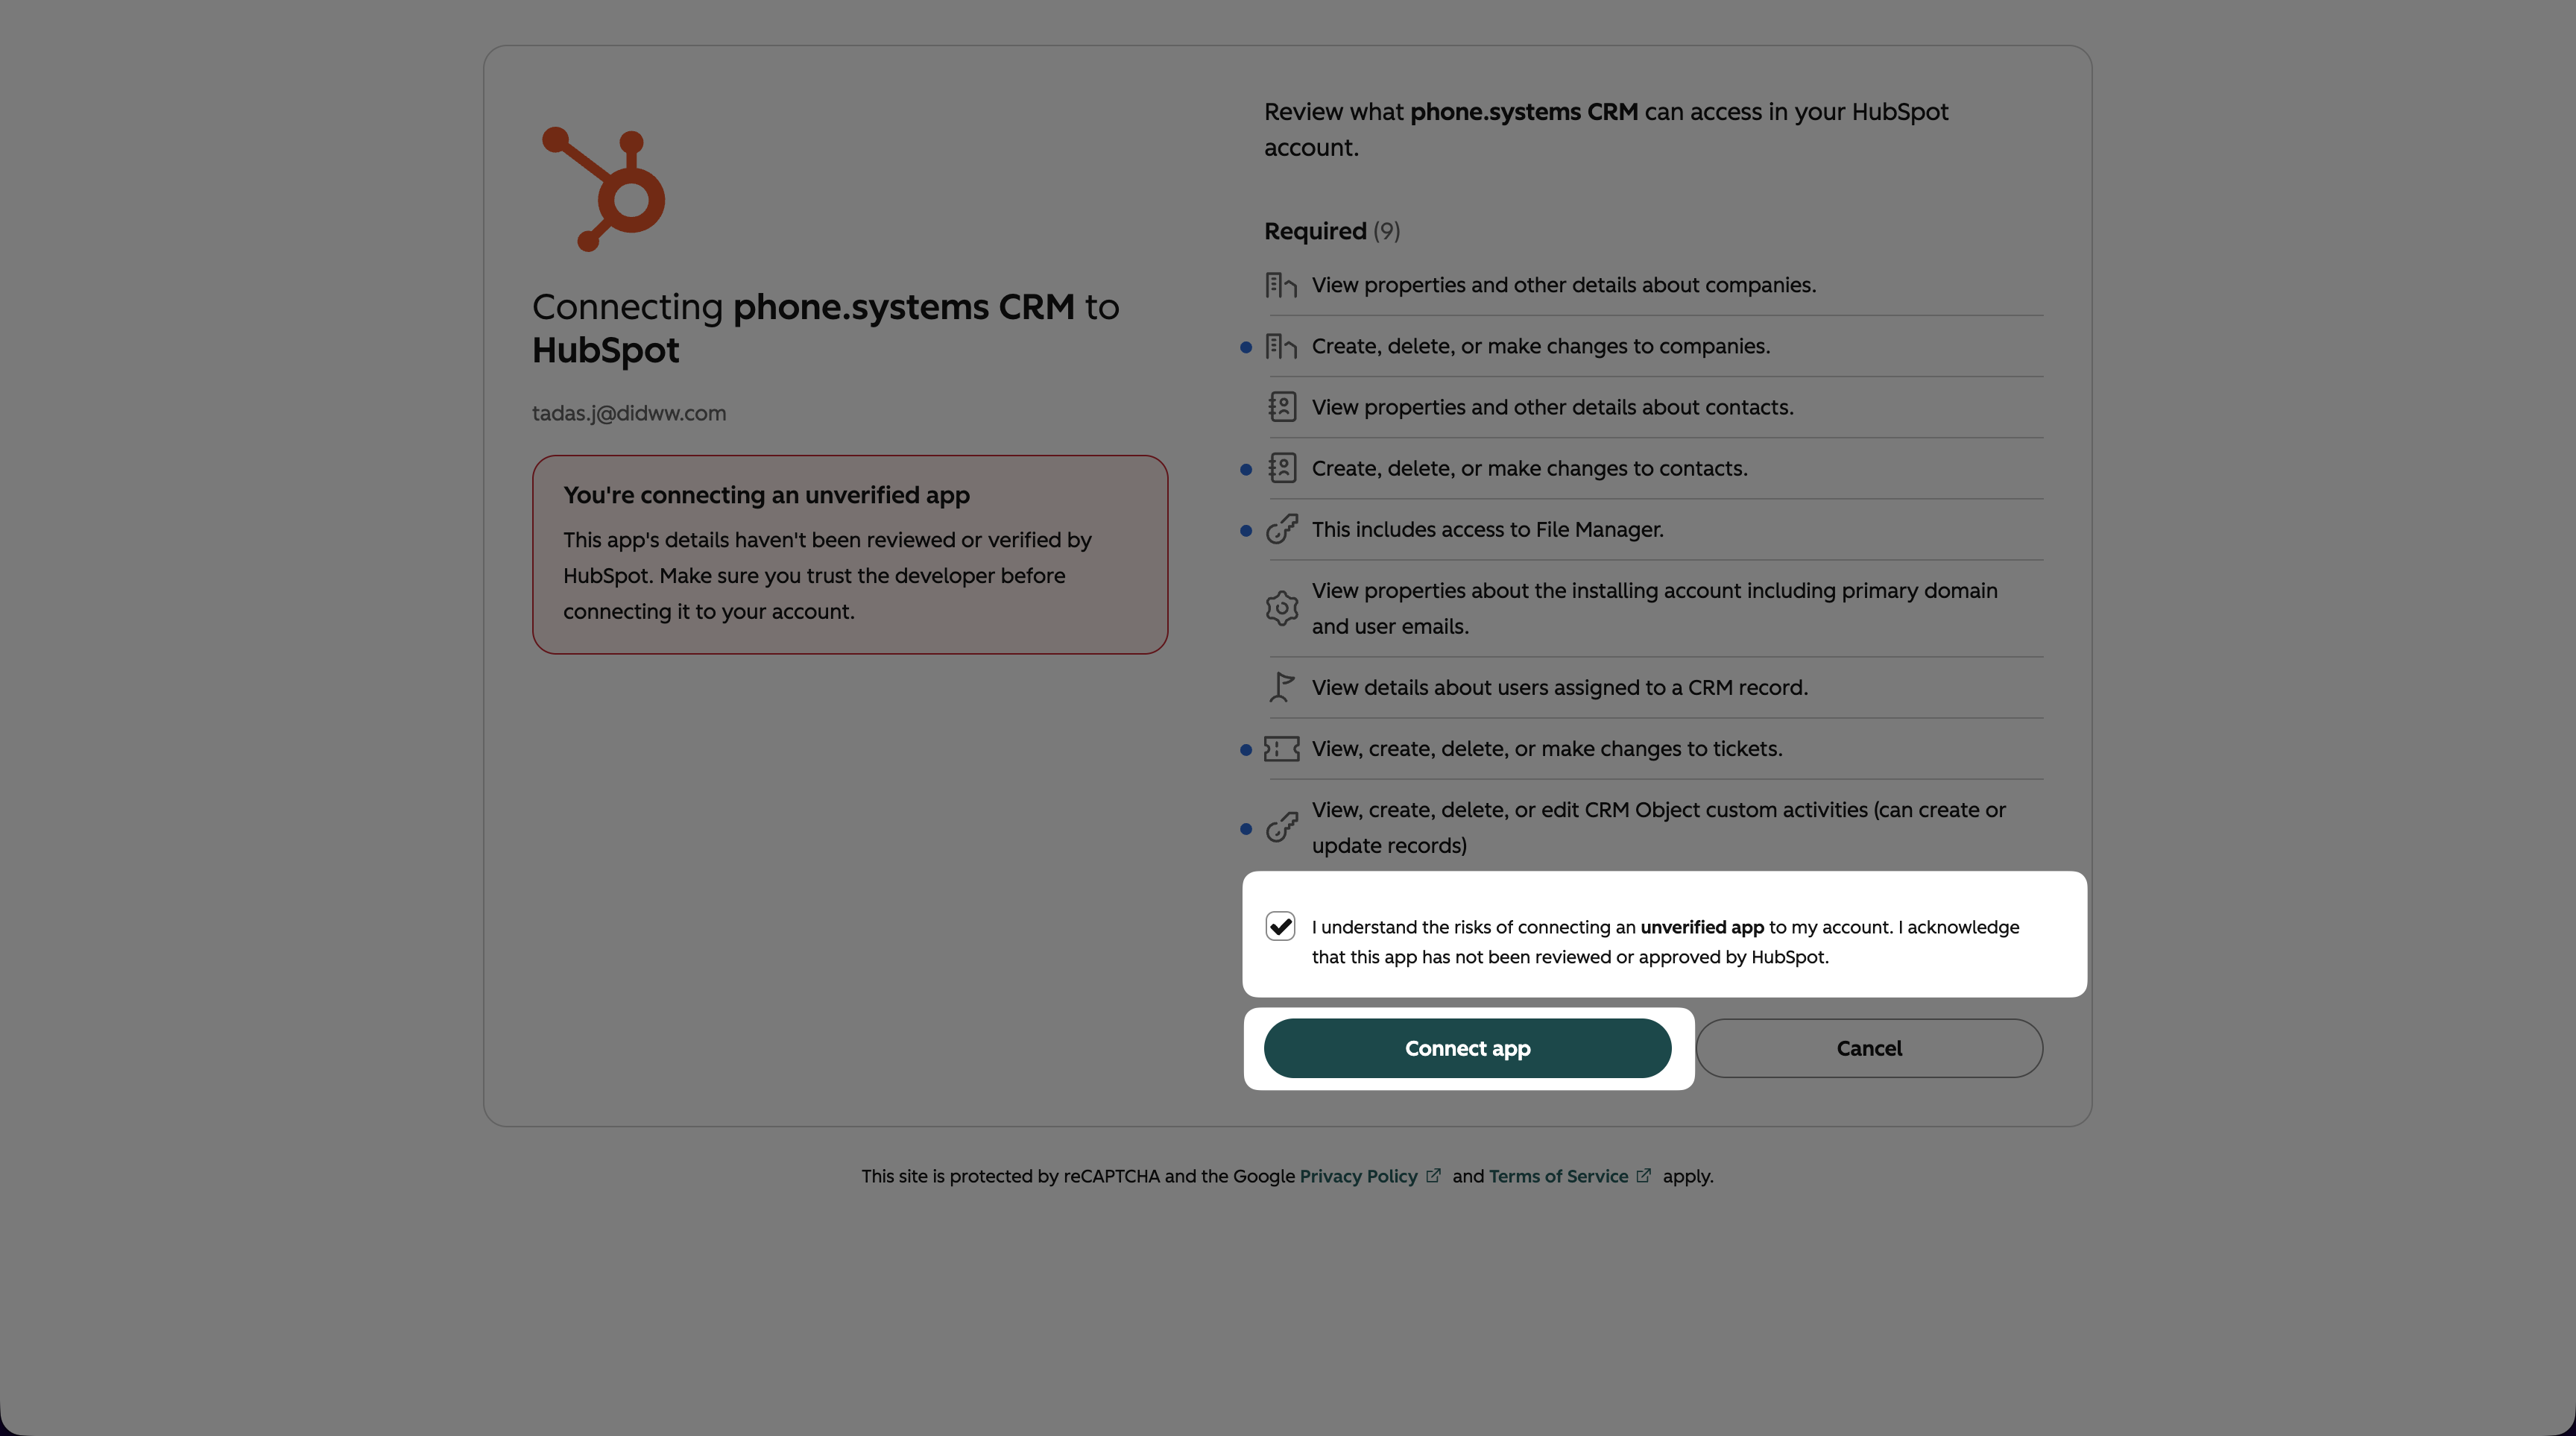
Fig. 8. Review the permissions and connect the app#
Important
A developer test account cannot be used for the phone.systems™ connection.
HubSpot displays the unverified-app notice because this is a privately distributed app created in your account.
HubSpot returns the authorization response to the redirect URL. phone.systems™ then exchanges it for OAuth tokens and the integration status changes to Connected.
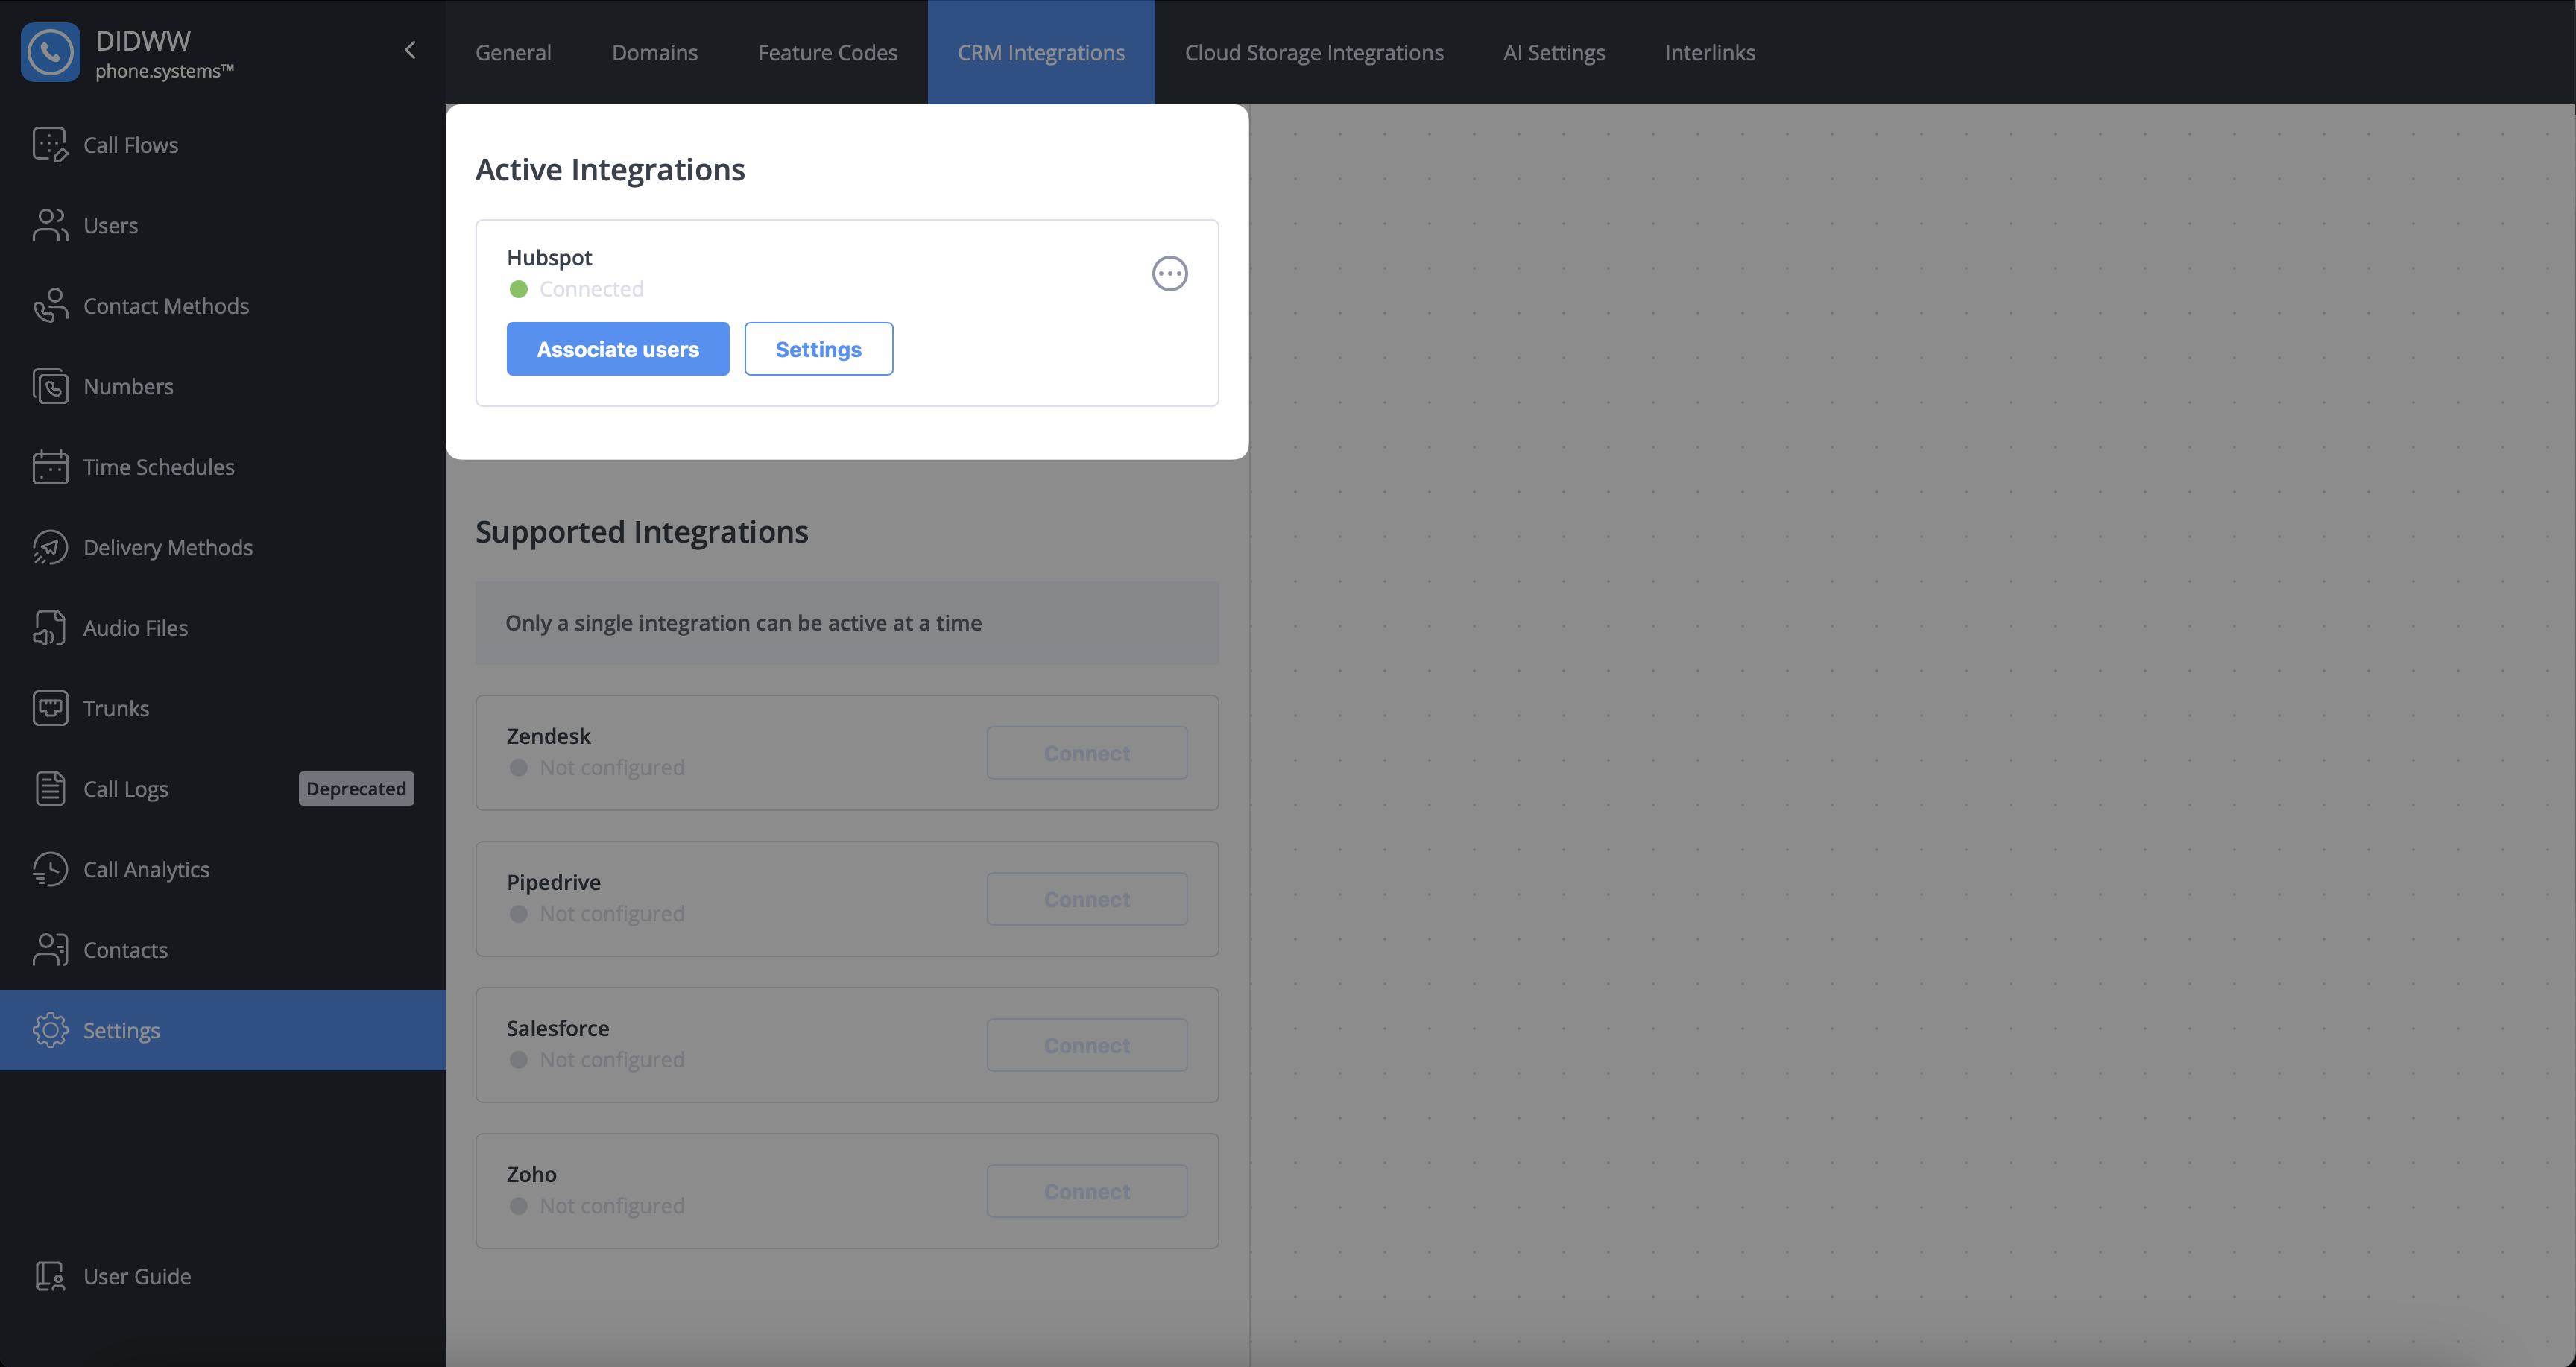
Fig. 9. Connected HubSpot integration#
Associate users for HubSpot#
After the HubSpot integration is successfully connected, you can associate HubSpot users with their corresponding phone.systems™ users.
User association enables call journaling by ensuring that inbound and outbound calls are logged for the correct users in HubSpot. Calls handled by users who are not associated will not receive call details in HubSpot.
Go to phone.systems™ Settings, then open CRM Integrations.
Under Active Integrations at the top of the page, locate HubSpot marked as Connected.
Click Associate users.
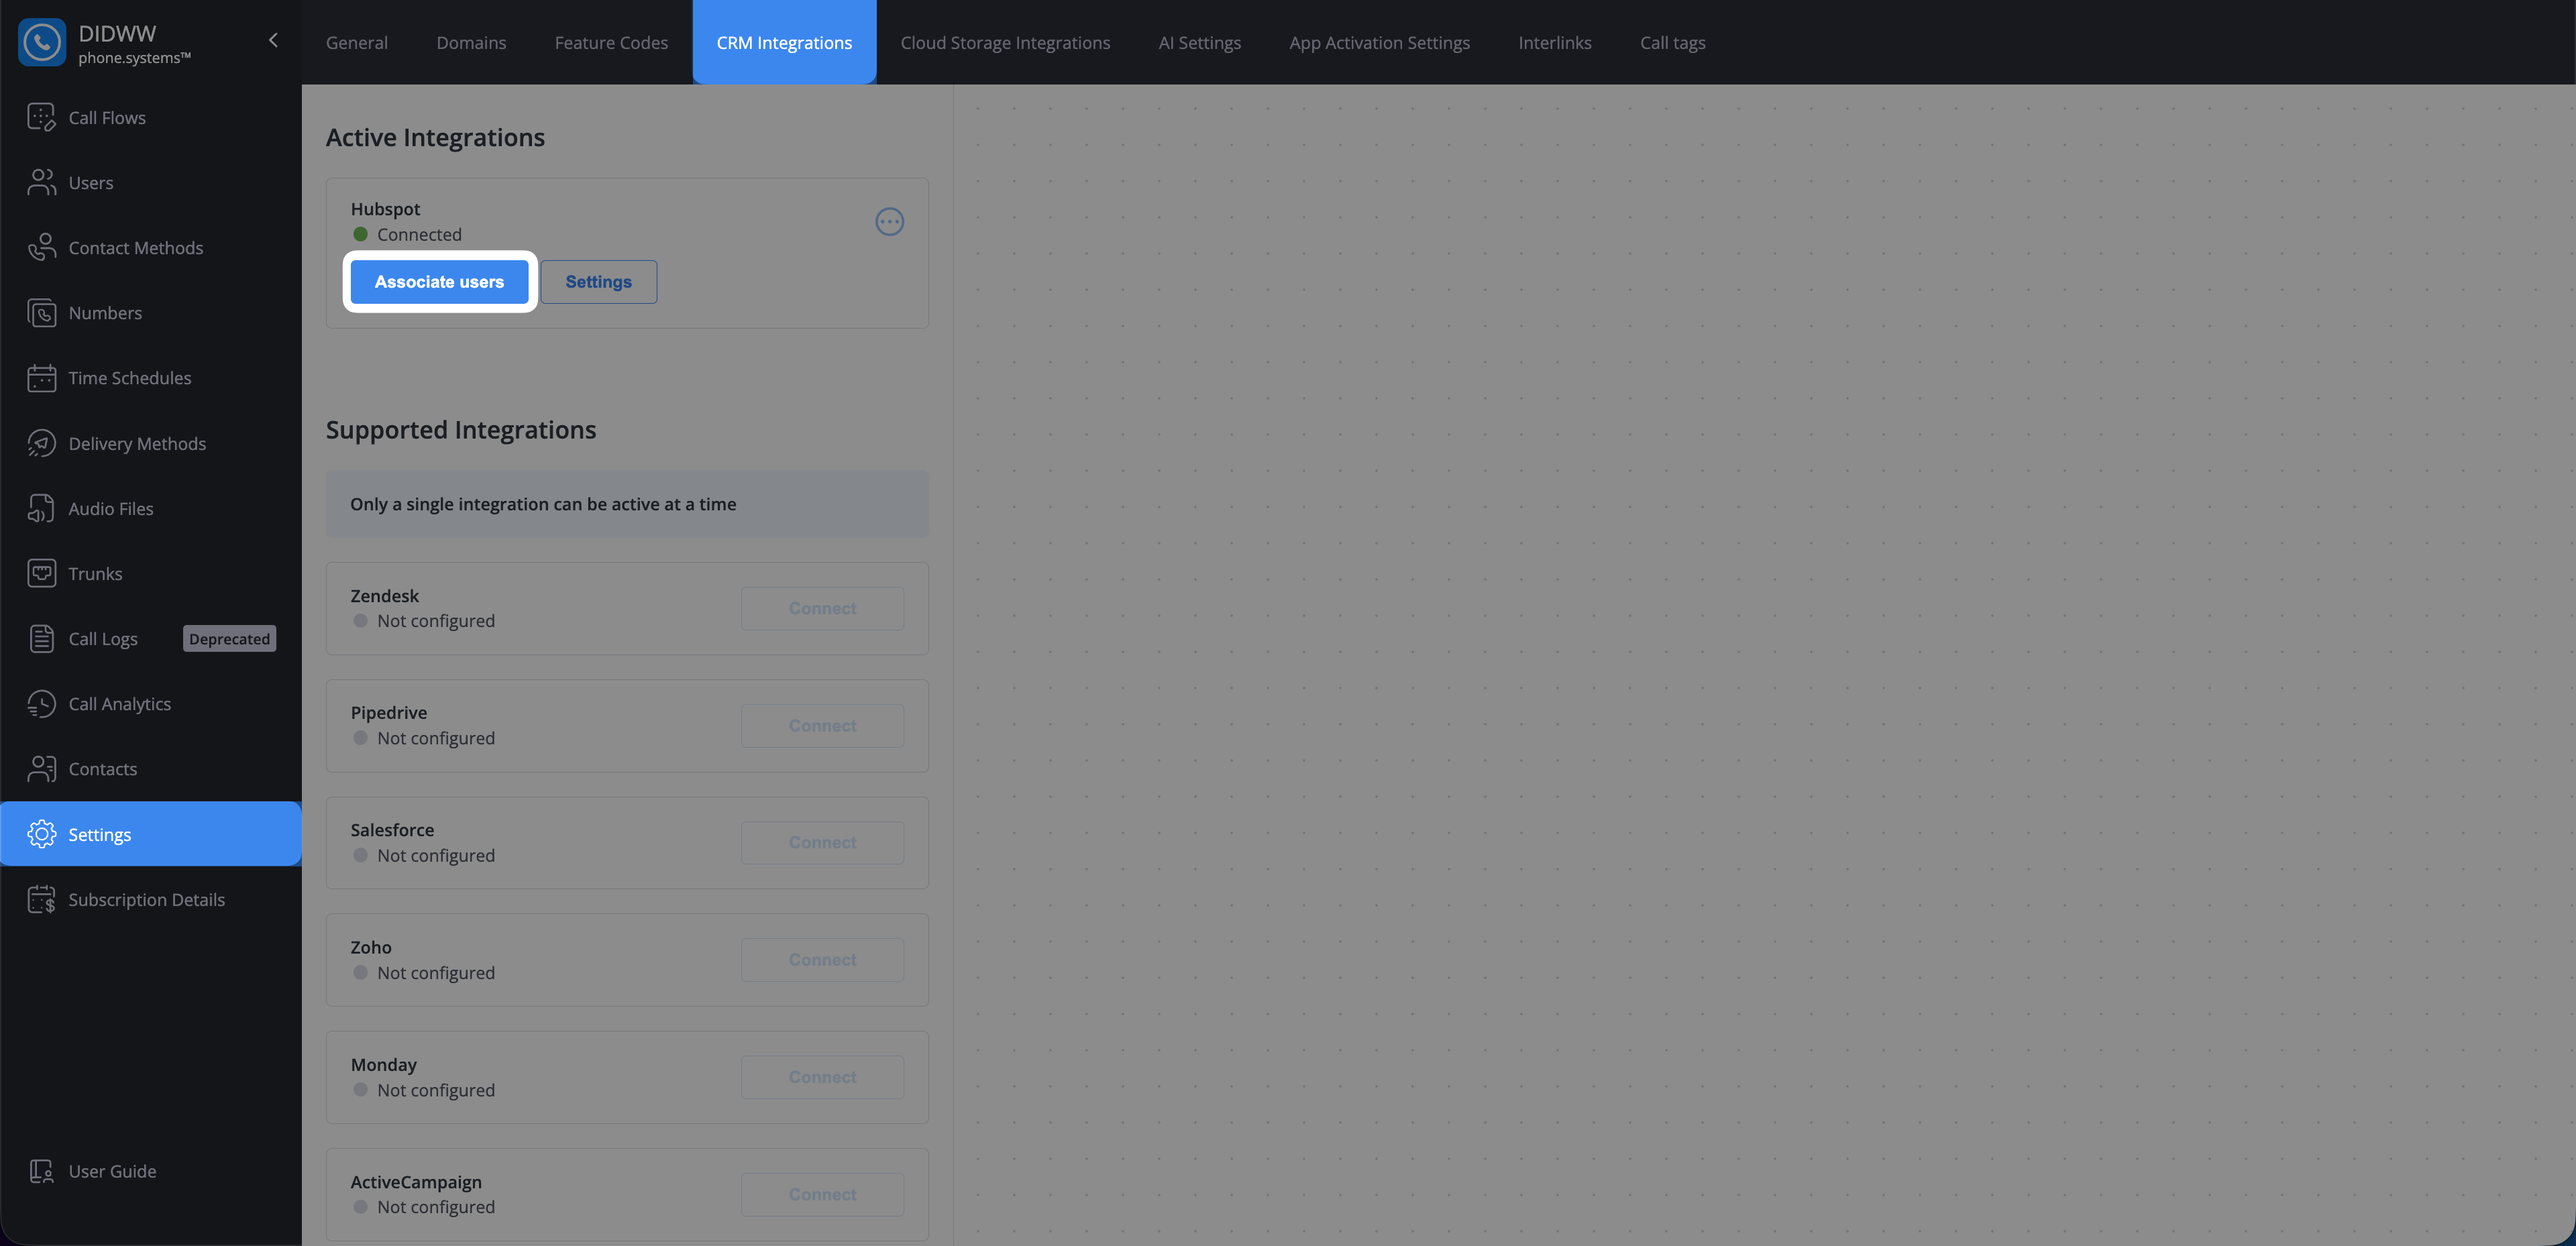
Fig. 10. Associate HubSpot users button#
The Associate HubSpot users page opens, where you can link HubSpot users with corresponding phone.systems™ users.
Match each HubSpot user with the appropriate phone.systems™ user.
Click Save to apply the changes.
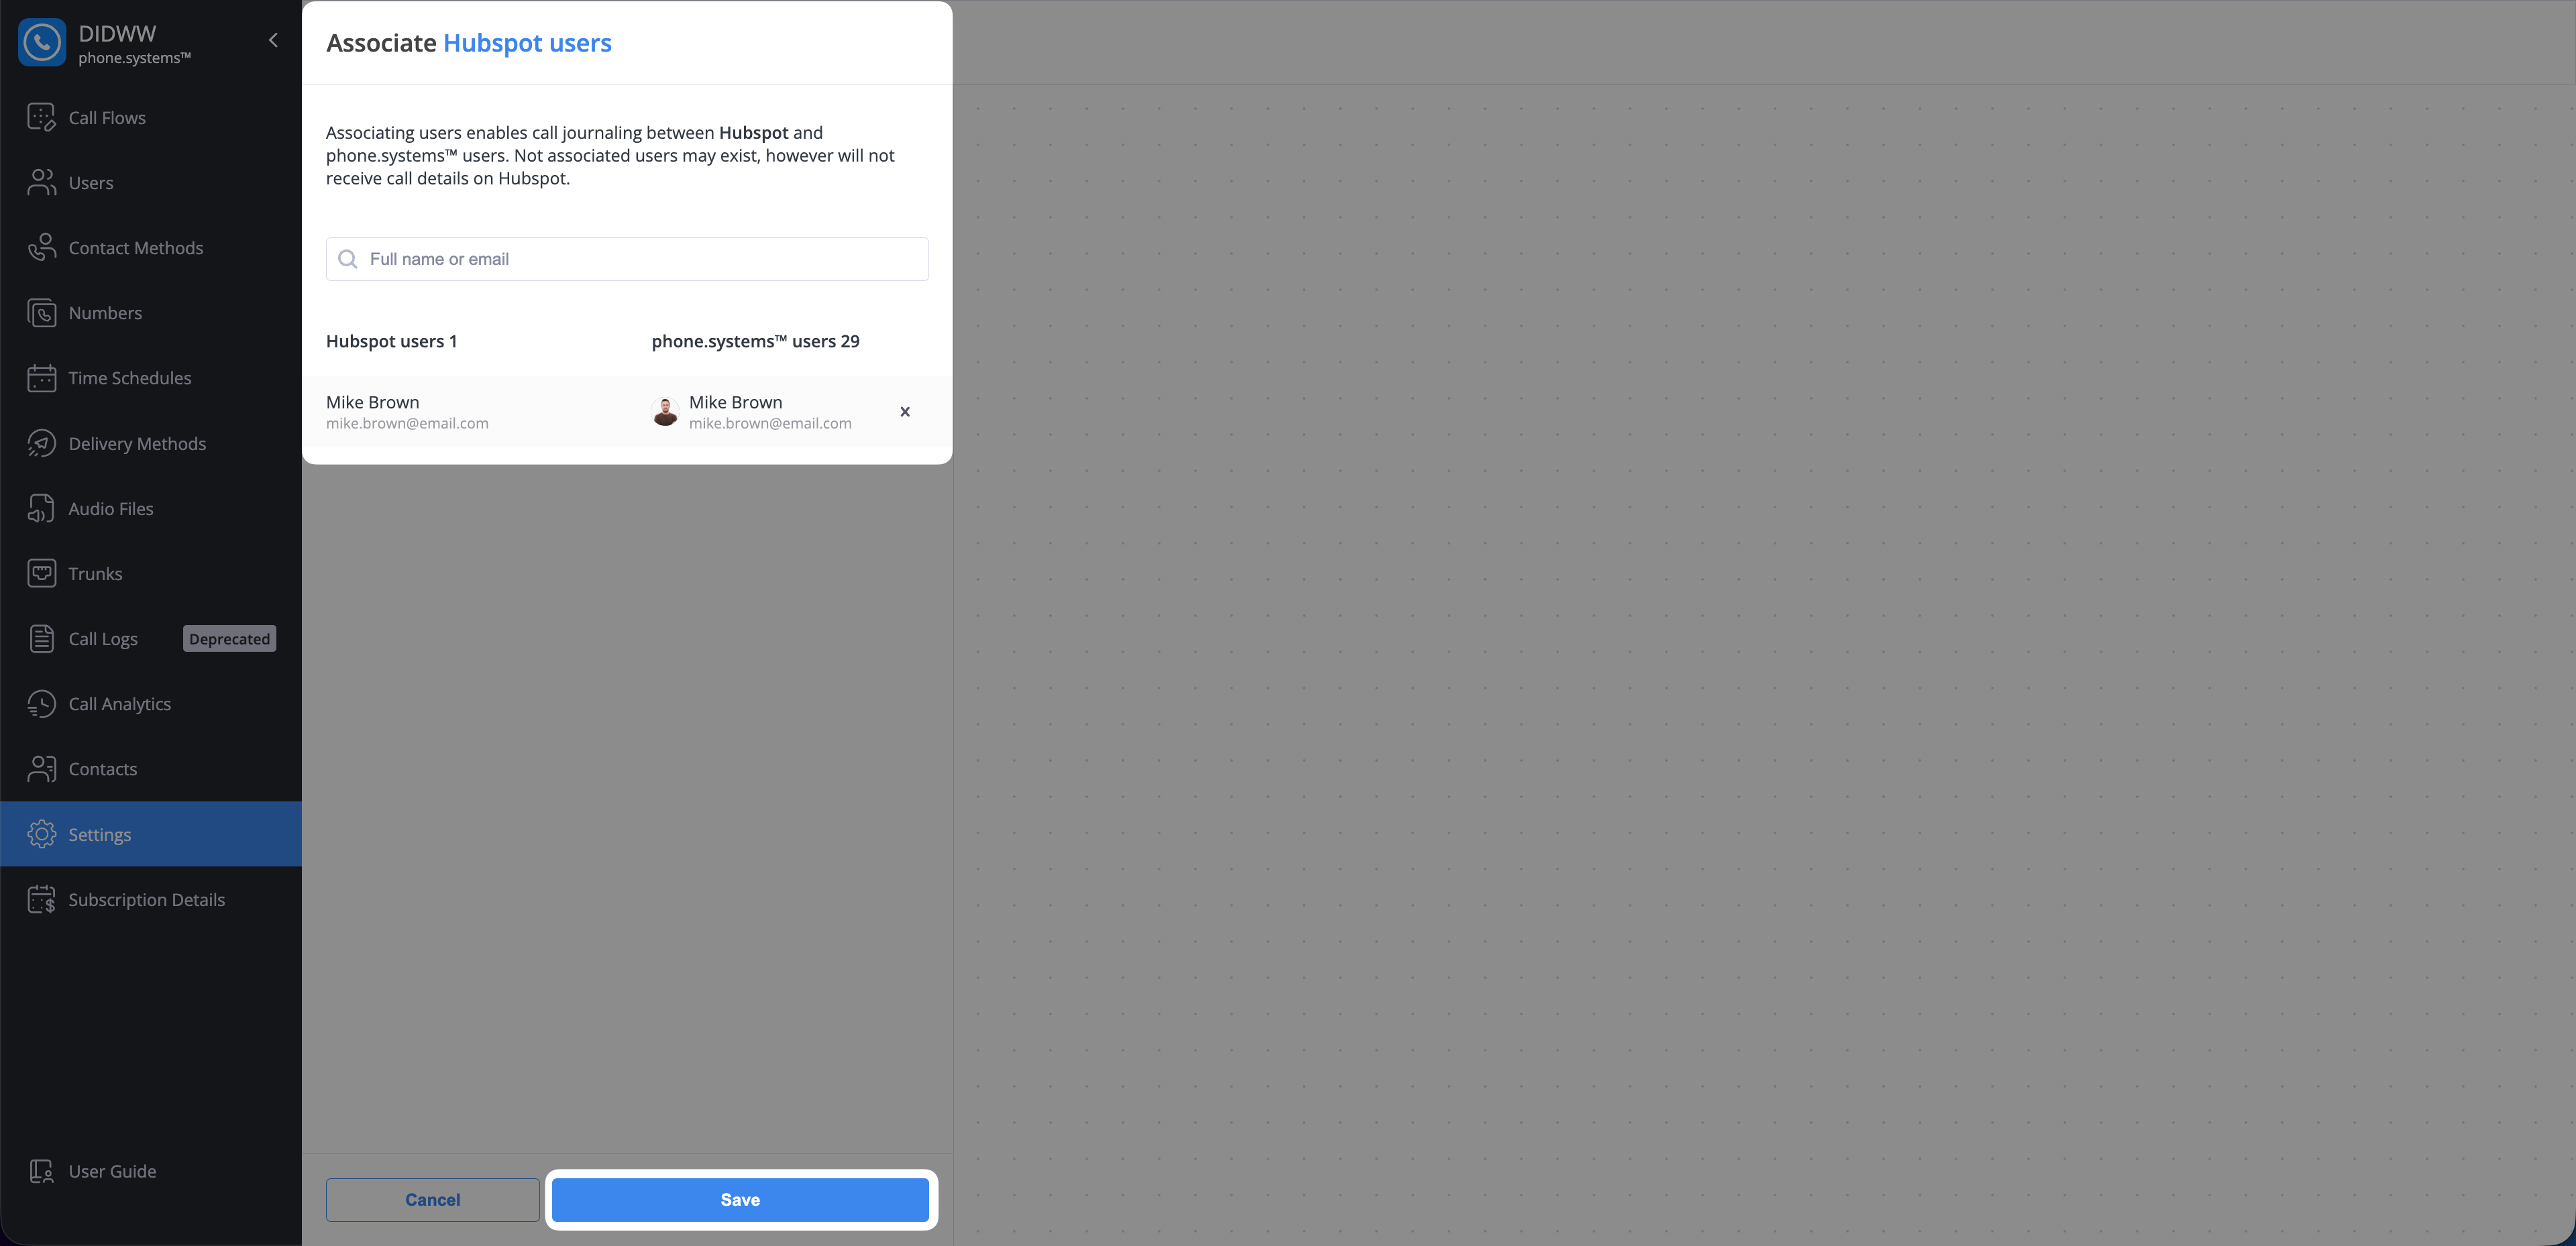
Fig. 11. Associate HubSpot users with phone.systems™ users#
Synchronizing Contacts and Companies#
After connecting, you can perform a one-time synchronization to import your existing contacts and companies from HubSpot into your phone.systems™ address book.
Navigate to Settings > CRM Integrations.
Locate the active HubSpot integration and click the actions menu icon.
Select Change synchronization options from the dropdown menu.
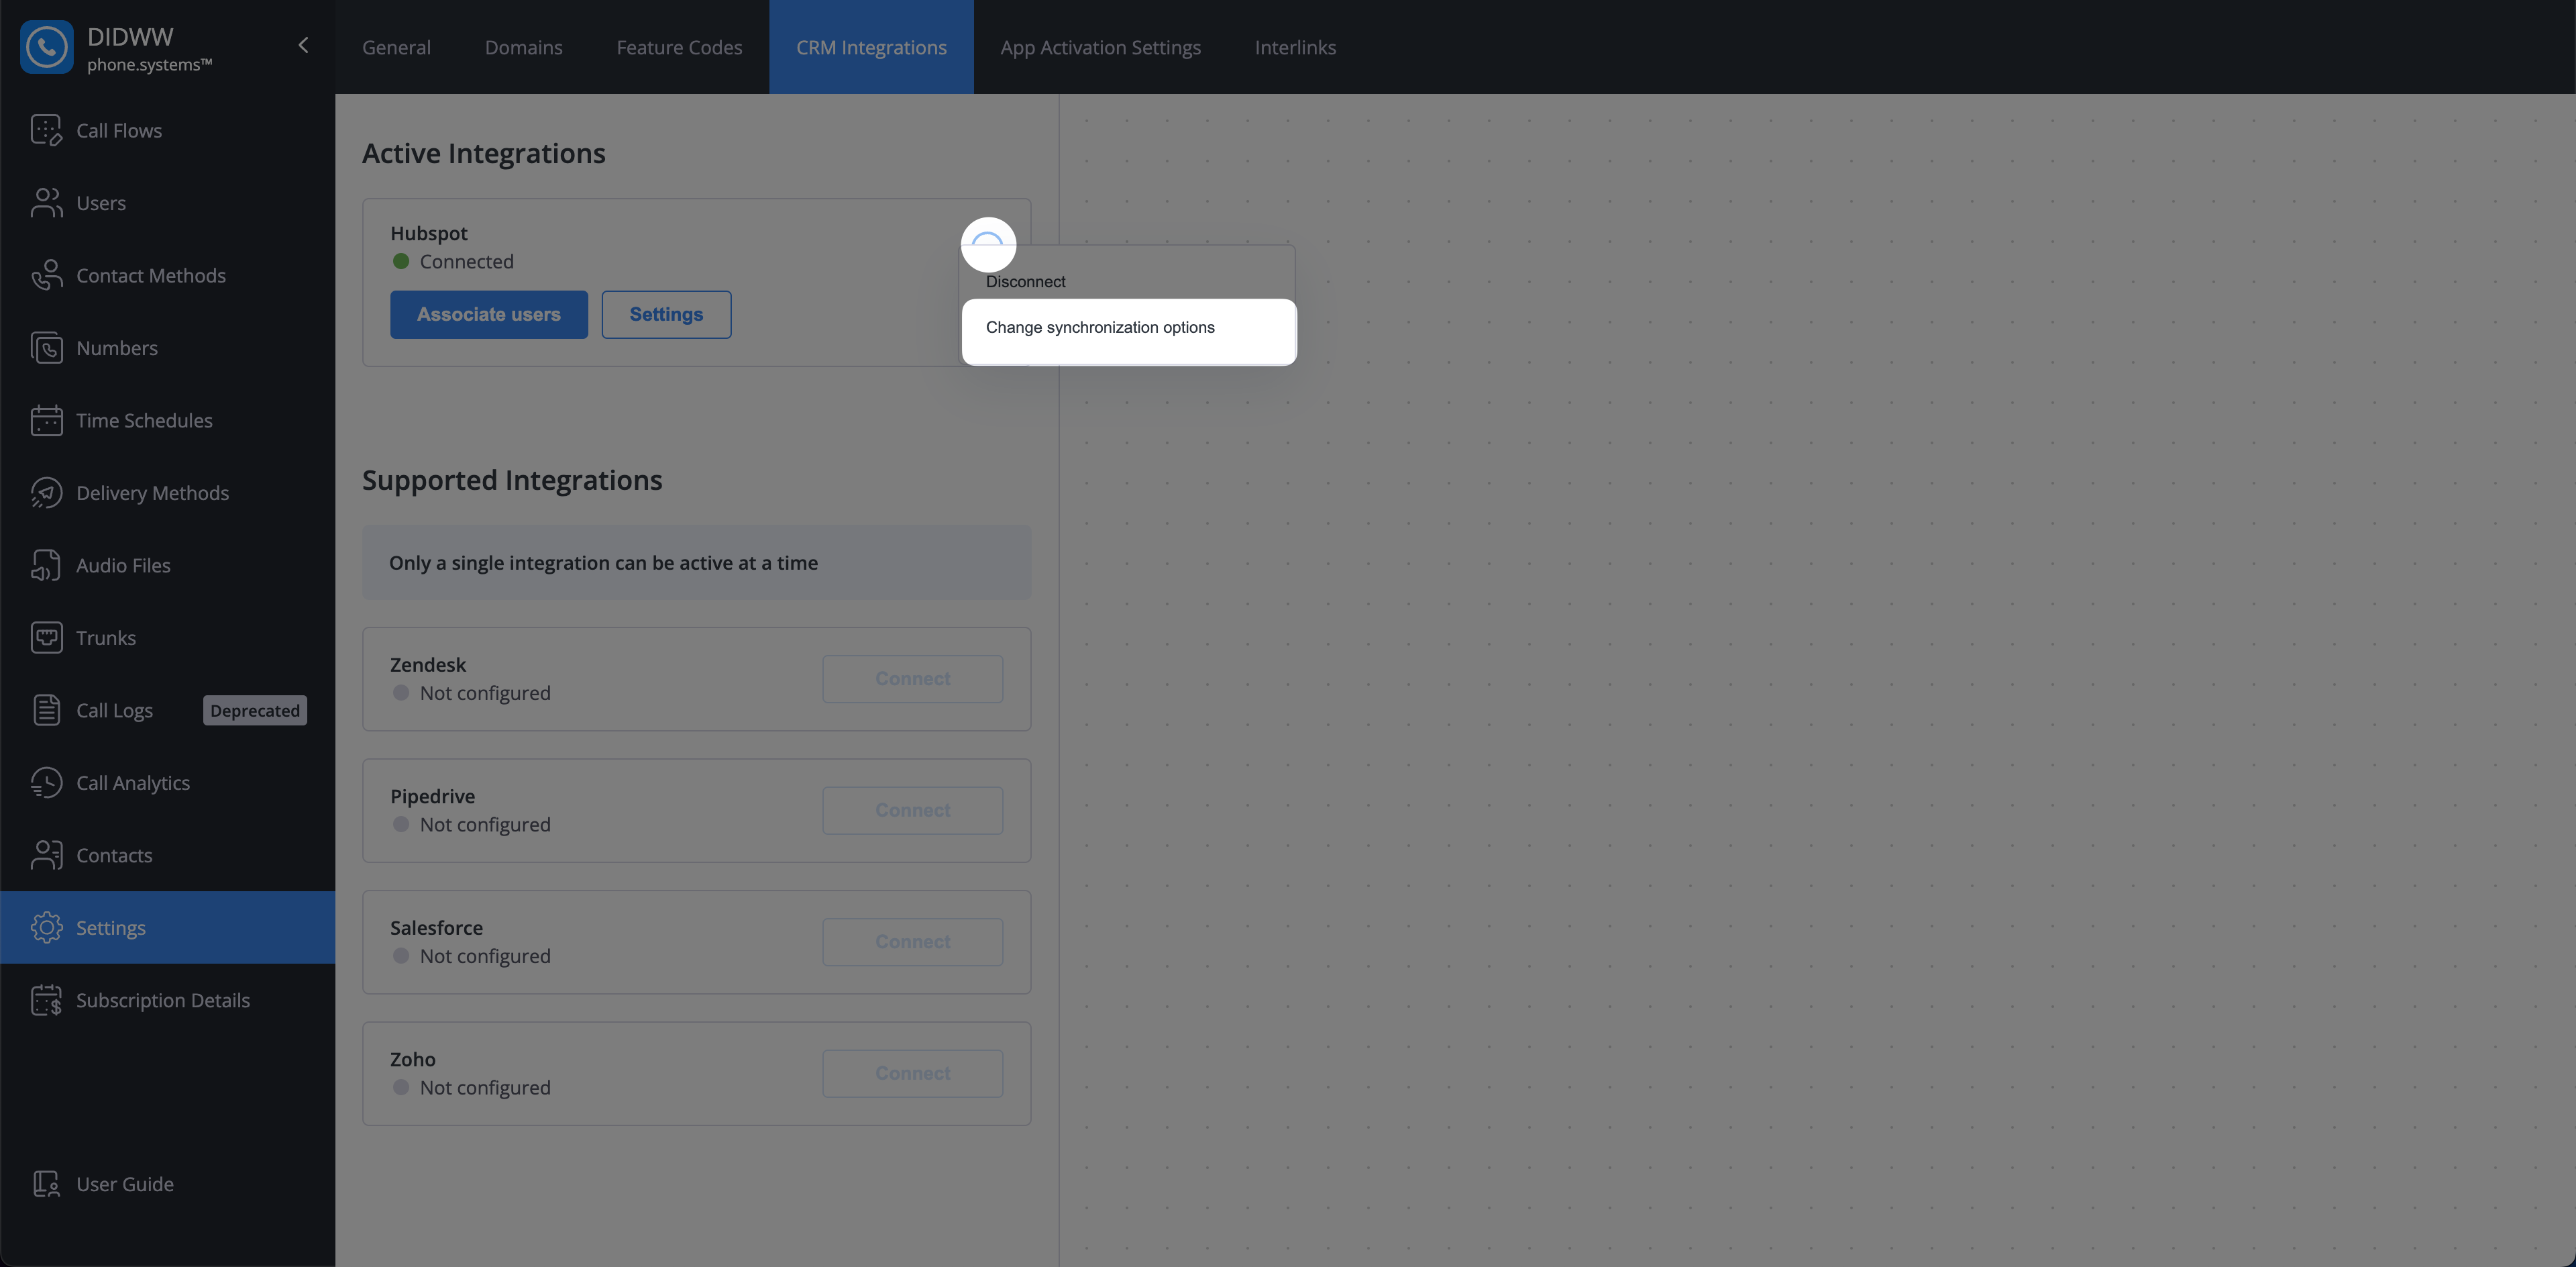
Fig. 12. Synchronization options#
In the Synchronize contacts from window, use the toggles to select whether you want to import Contacts, Companies, or both.
Click Submit to begin the synchronization.
Note
This is a one-time import. For ongoing, automatic creation of new contacts from calls, see the Auto Contact Creation settings below.
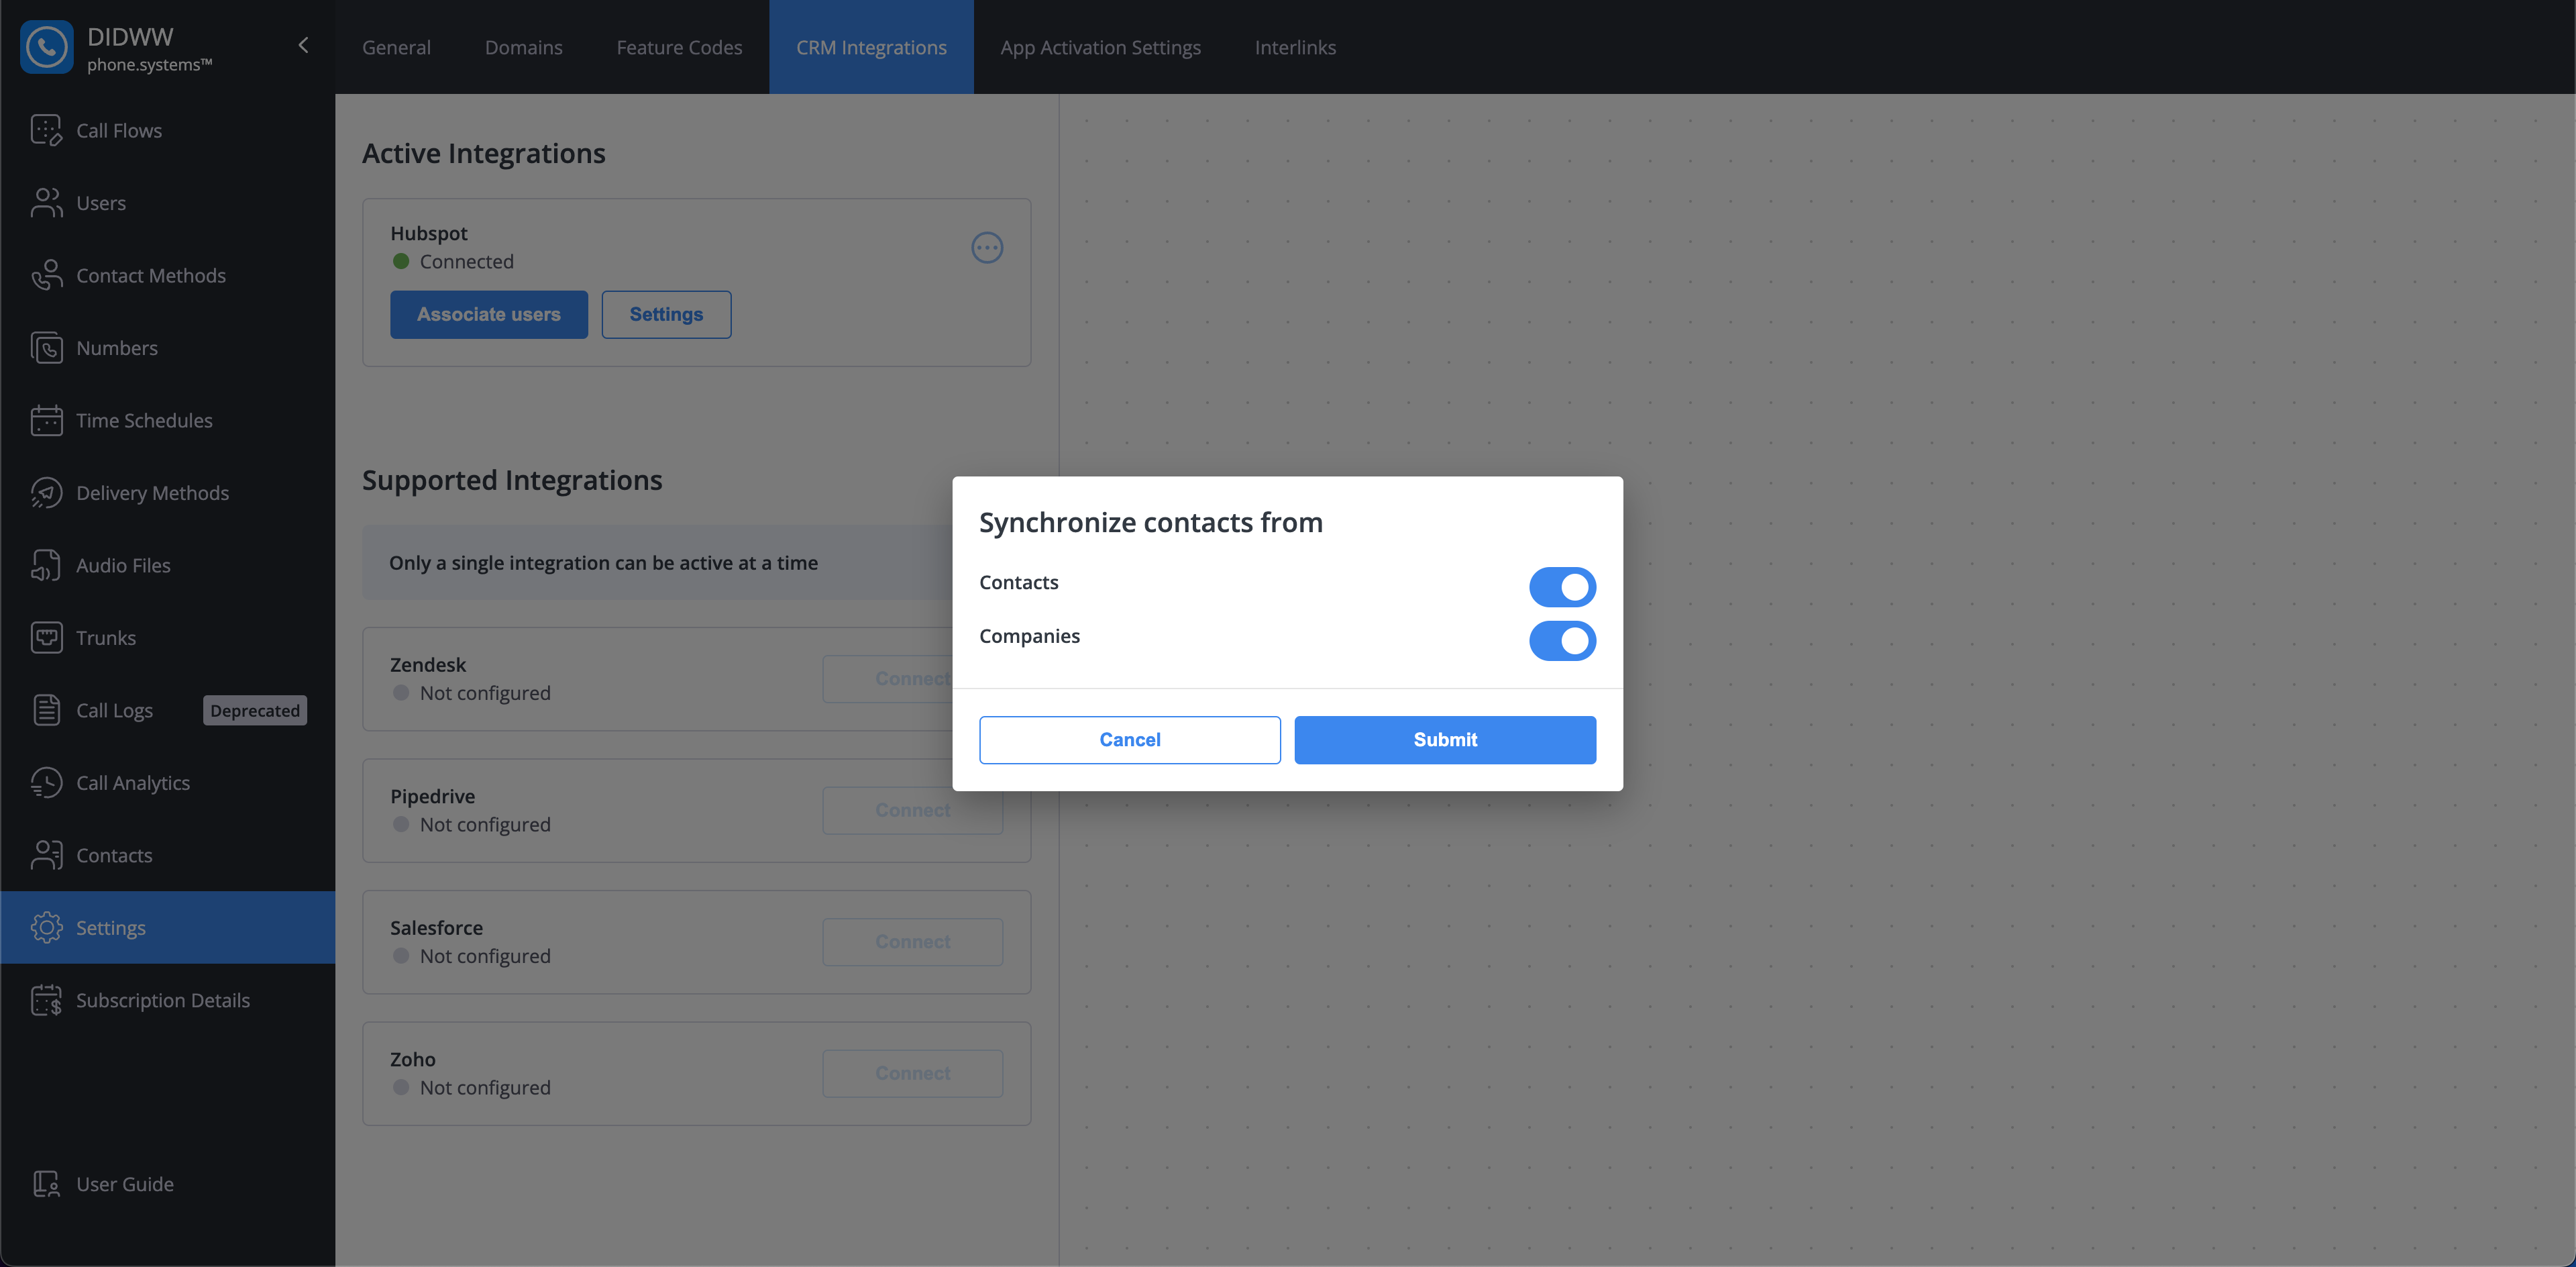
Fig. 13. Synchronization window#
Configuring HubSpot Settings#
Once the integration is active, you can customize how data is synced between phone.systems™ and HubSpot. To access these options, navigate to Settings > CRM Integrations and click the settings icon next to your HubSpot connection.
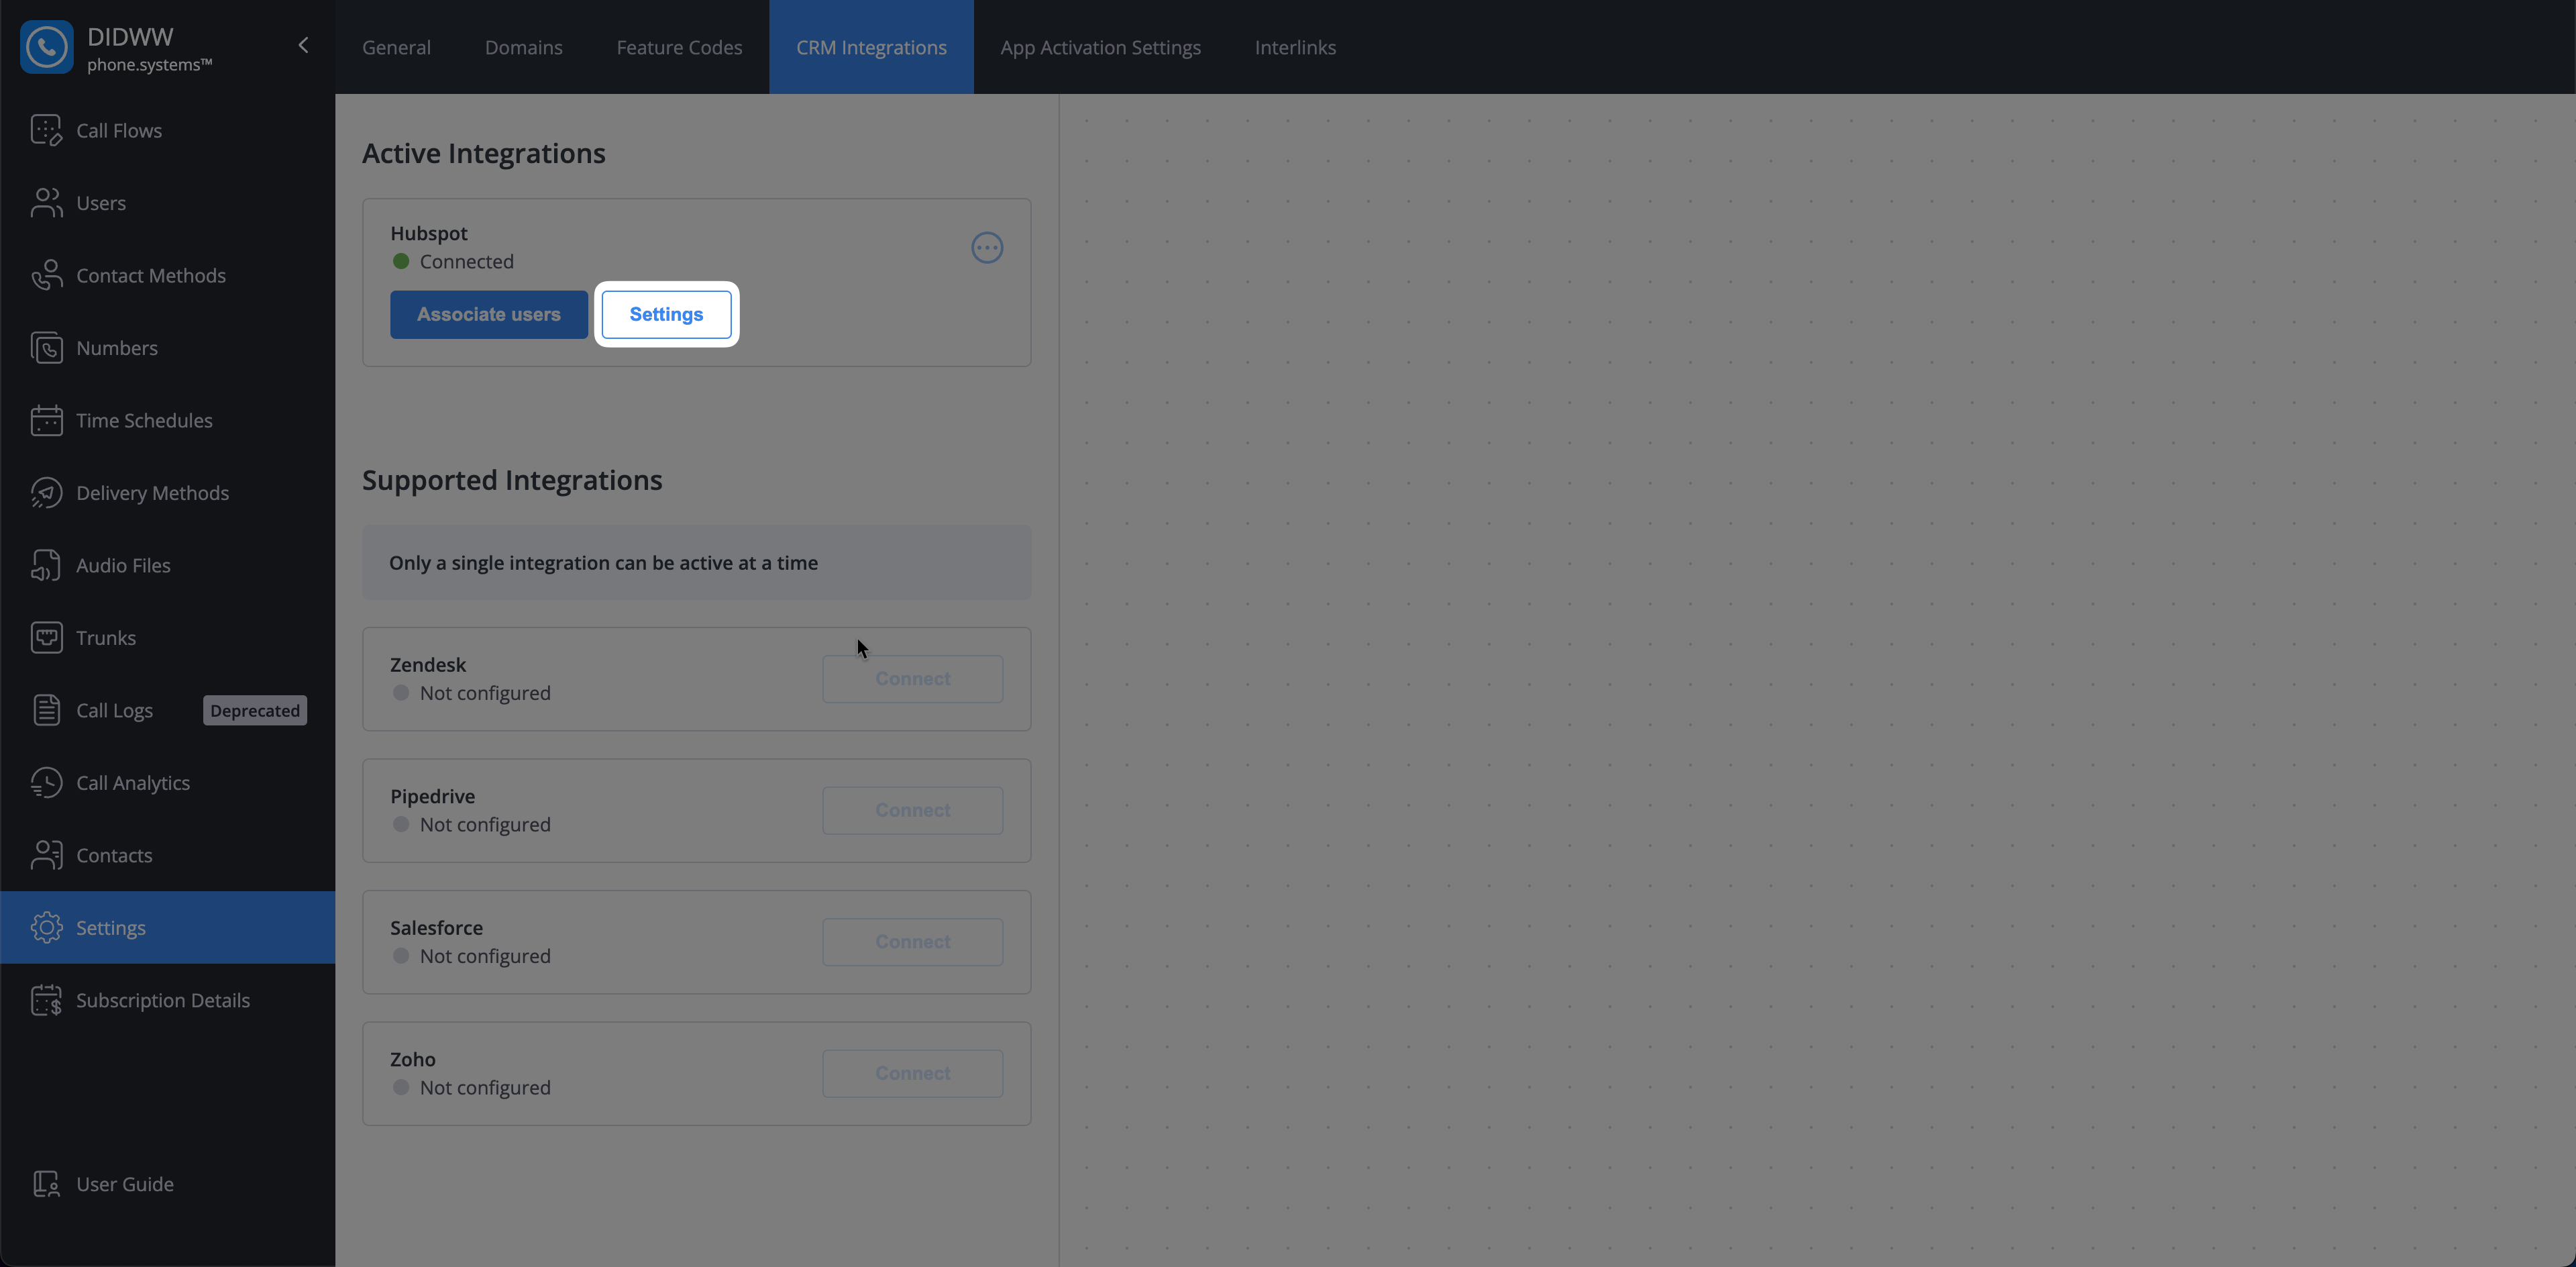
Fig. 14. HubSpot integration settings button#
Important
The following settings apply only to numbers with Call journaling enabled. Call journaling must be configured separately for each number on the Edit phone numbers page.
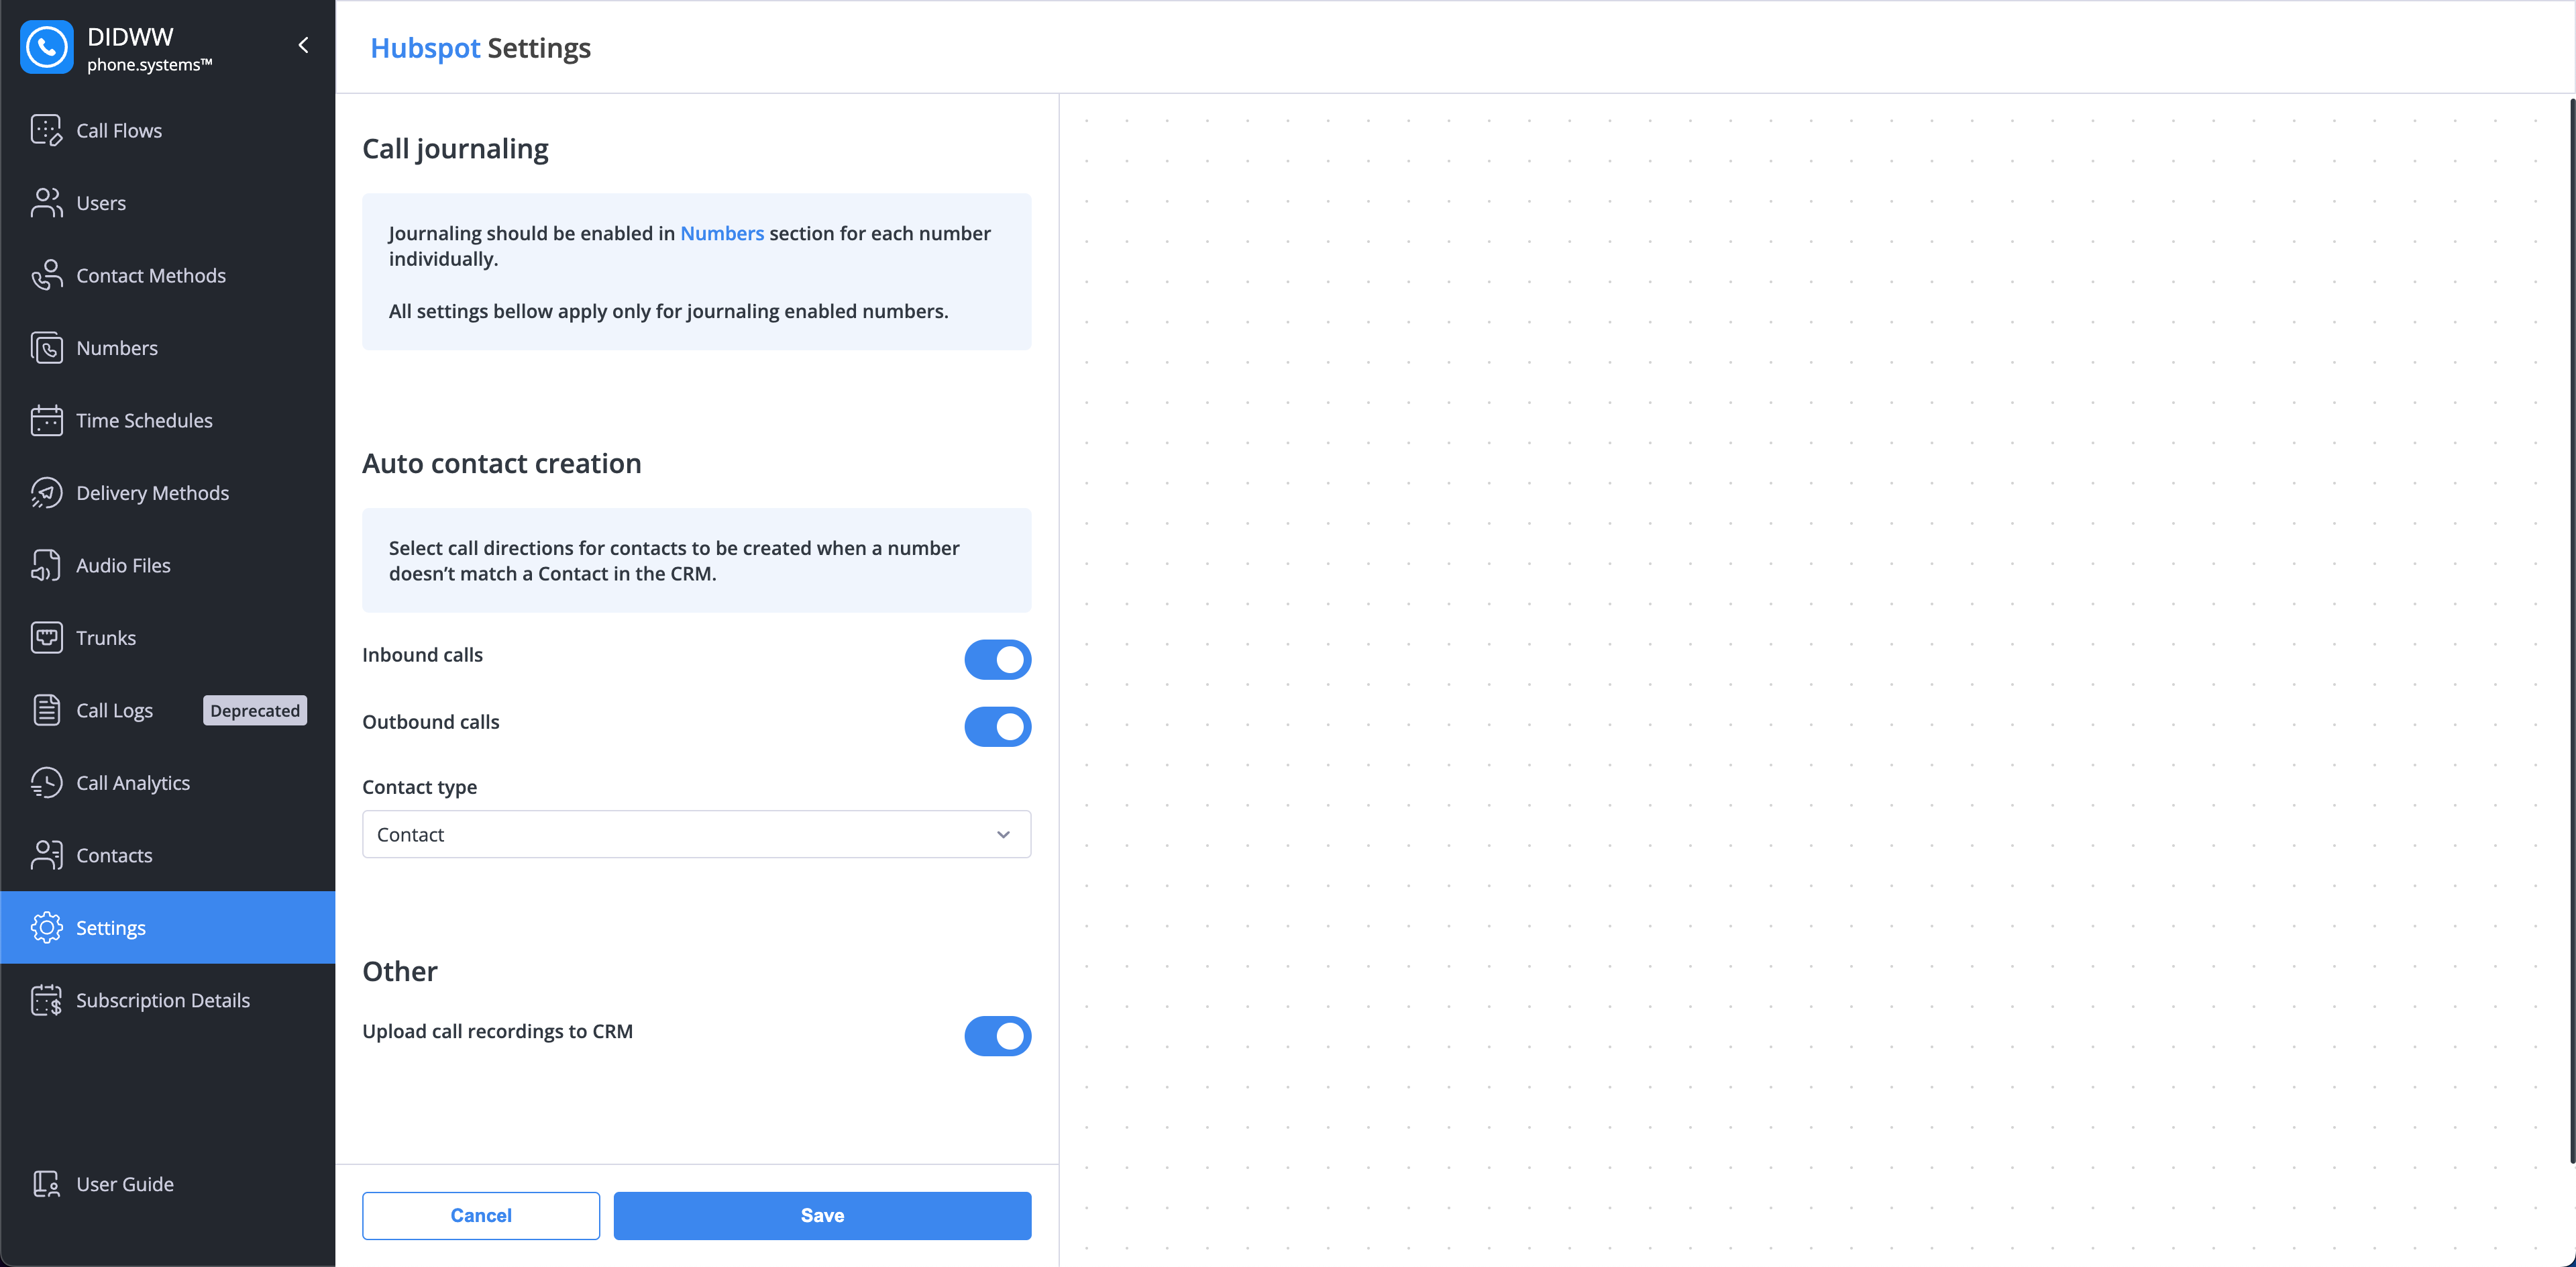
Fig. 15. HubSpot integration settings#
Auto Contact Creation#
This feature automatically creates a new contact in HubSpot when a call is received from or made to a number that does not match an existing contact in your CRM.
Setting |
Description |
|---|---|
Inbound calls |
When enabled, a new contact will be created in HubSpot for all inbound calls from unknown numbers. |
Outbound calls |
When enabled, a new contact will be created in HubSpot for all outbound calls to unknown numbers. |
Contact type |
Select the default HubSpot contact type to be assigned when a new contact is created automatically. |
Call Tags and Notes#
Send the call tags and the call note that agents add to a call to the matching call record in HubSpot.
Setting |
Description |
|---|---|
Send call tags to CRM |
When enabled, the call’s tags are sent to HubSpot. |
Send call notes to CRM |
When enabled, the call note written by the agent is sent to HubSpot. |
Both settings are disabled by default and work independently. They are not part of AI Call Insights and do not require an AI plan.
Tags and notes are sent when the call is logged in HubSpot, and the call record is updated if they change later.
Warning
The call note is free text written by the agent. It is sent to HubSpot exactly as written and is not covered by call recording PII redaction.
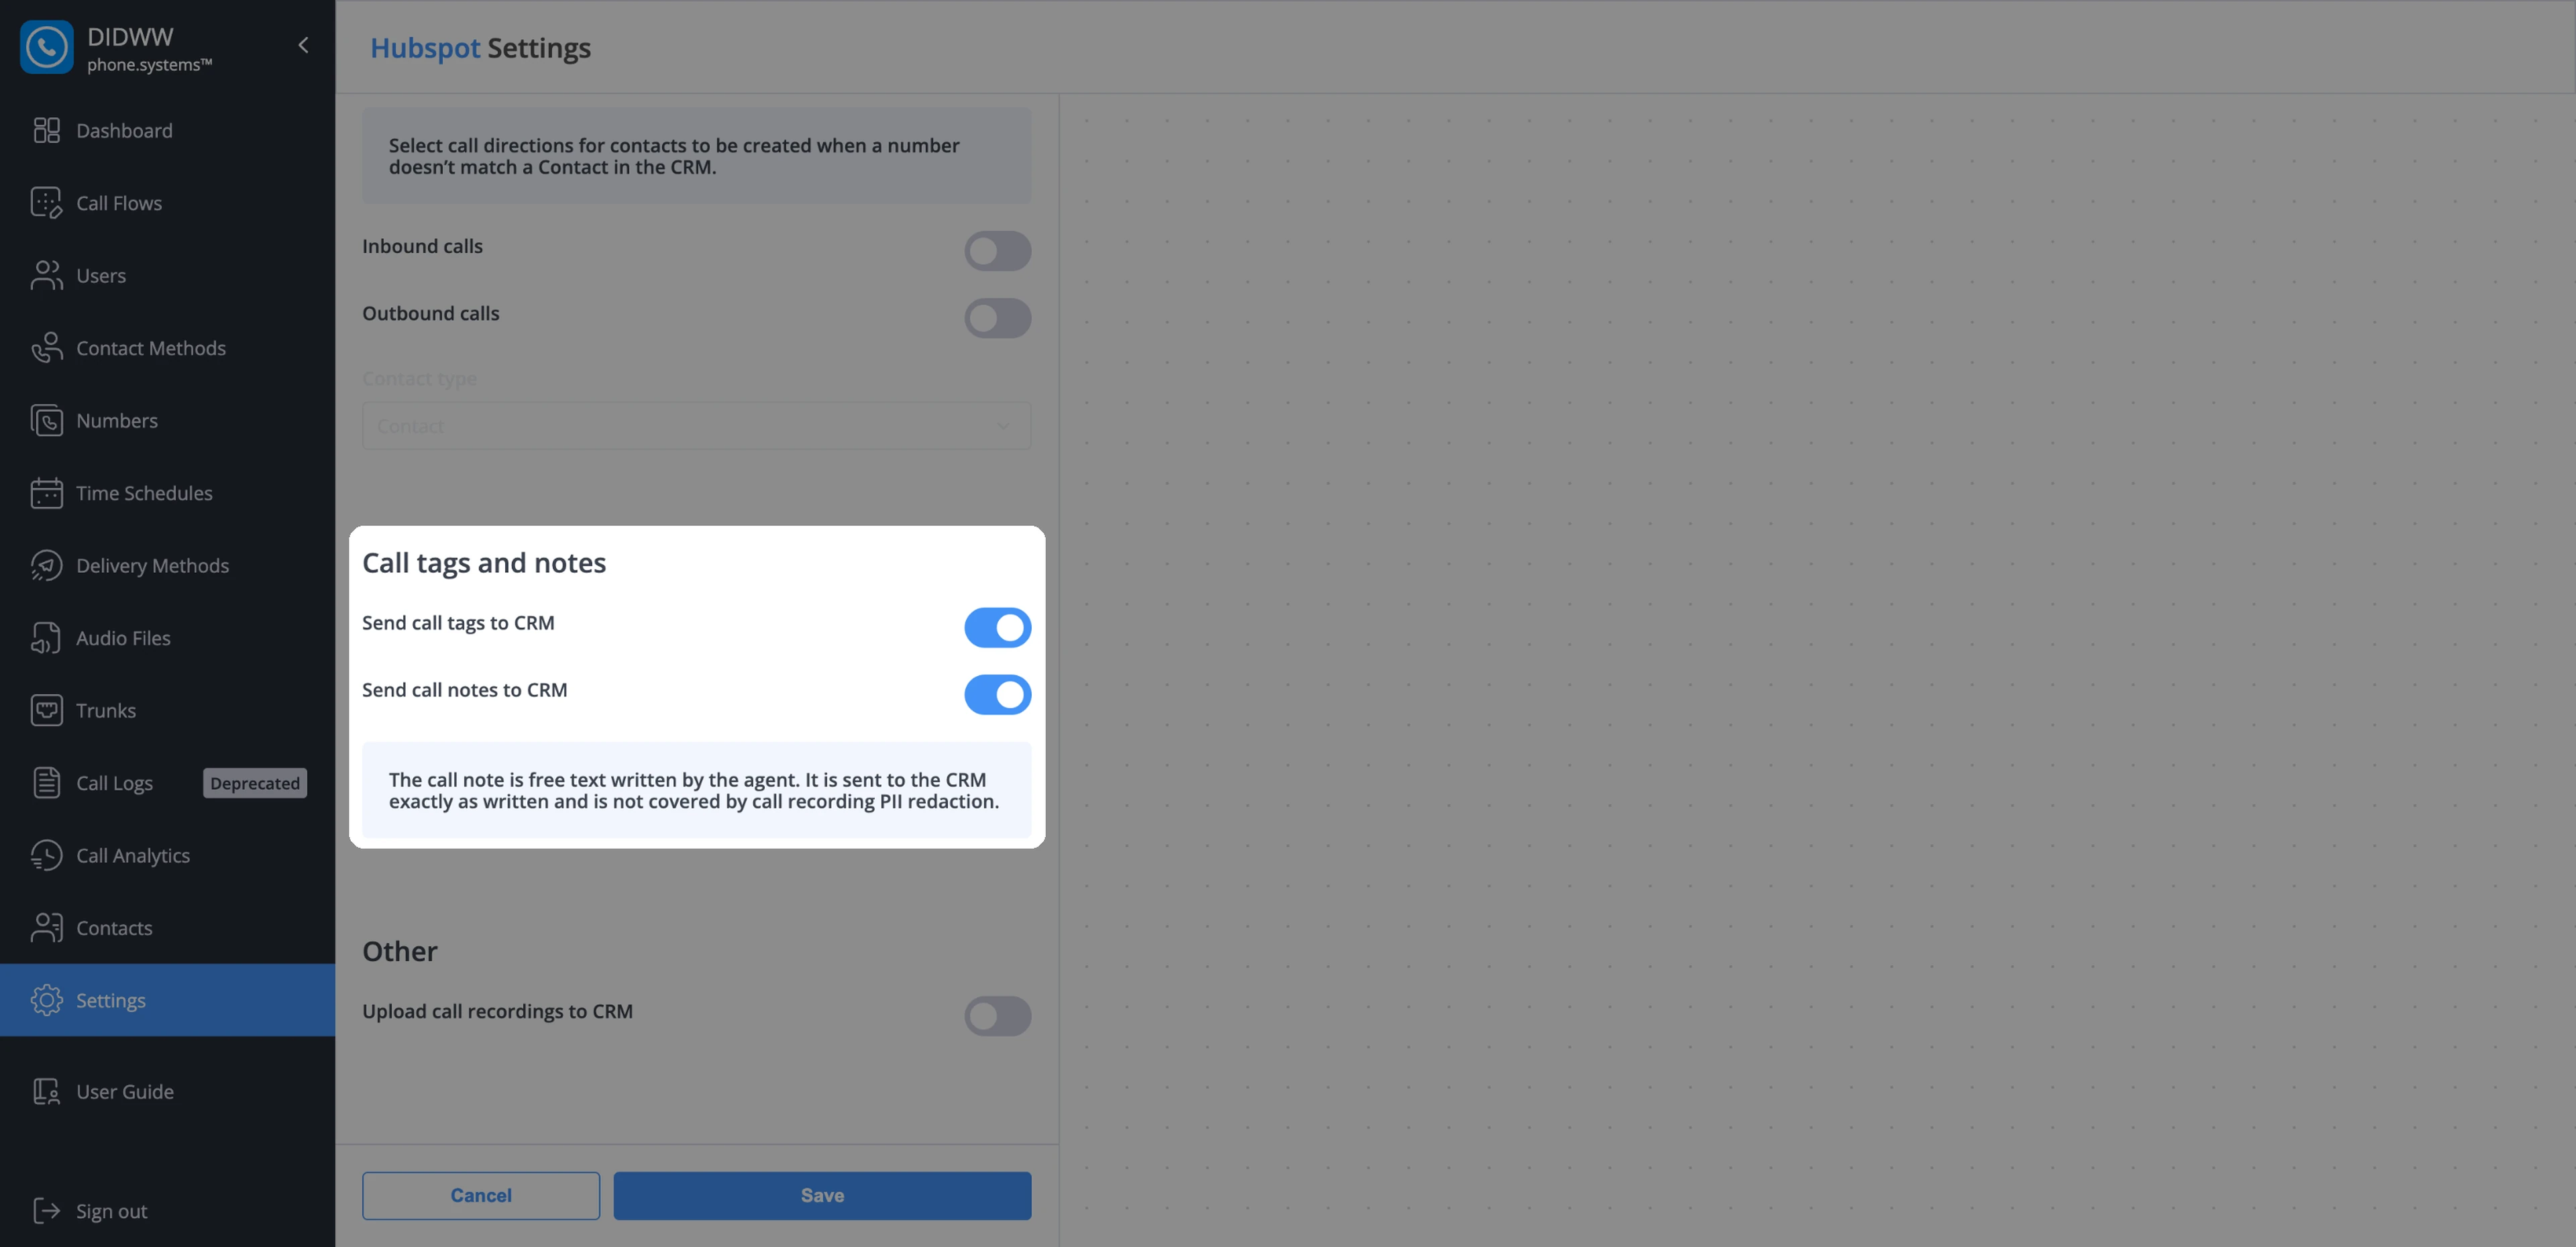
Fig. 16. Call tags and notes settings#
phone.systems™ adds two call properties in HubSpot:
phone.systems tags: A multi-select property with the call’s tags. You can use it to filter calls, build reports, and create workflows.
phone.systems note: A rich-text property with the agent’s call note. The note is not added to the call’s Notes card.
Note
HubSpot does not show new properties by default. To see tags and notes, add phone.systems tags and phone.systems note as columns in the HubSpot Calls view.
Disabling a setting or removing the integration leaves the properties and their values in HubSpot.
Other Settings#
Manage which call-related data is automatically uploaded to your HubSpot contacts’ activity timelines.
Setting |
Description |
|---|---|
Upload call recordings to CRM |
When enabled, a link to the call recording will be automatically added to the call log in HubSpot. Note To utilize this feature, call recording must be enabled for your contact method. |
Upload AI call insights results |
When enabled, detailed analytics from our AI engine will be added to the call log. This can include:
Note To utilize the AI features, AI Call Insights must be enabled. |
After configuring these options, click Save to apply your changes.
Troubleshooting#
Redirect URL mismatch
Confirm that redirectUrls in src/app/app-hsmeta.json exactly
matches the Redirect URL shown in phone.systems™.
Upload the project again after changing the file.
Project validation or upload fails
Run npx hs project validate and npx hs doctor from the directory
containing hsproject.json.
Correct the reported errors and upload the project again.
Connection stops working
Confirm that the HubSpot app remains installed and that its access has not been revoked.
Reauthorize the connection if required.
Permission error
Restore any required scopes removed from app-hsmeta.json.
Upload the project again and reauthorize the connection.
Call tags and notes are not being sent
If the HubSpot settings page shows the warning Call tags and notes are not being sent to the CRM, phone.systems™ could not create or update the phone.systems tags or phone.systems note property in HubSpot. Calls are still logged, without their tags or note.
Turn Send call tags to CRM and Send call notes to CRM off and on again to retry, or reconnect the integration as a HubSpot administrator. The warning disappears once the properties work again.