Getting Started#
This guide walks you through the essential steps to set up phone.systems™, a cloud-based virtual PBX. It helps you configure the system to make and receive calls quickly and efficiently.
phone.systems™ is ideal for managing inbound and outbound communications, routing calls through custom flows, and integrating multiple devices or applications. With a visual interface and advanced control features, it enables consistent and scalable telephony for teams of all sizes.
Before You Begin#
Before setting up phone.systems™, ensure you have the following:
A DIDWW Account – Required to access and manage services. If you don’t have one, register here .
At Least One DID Number – Required to set up call routing. To purchase a number, visit the Coverage page .
An Active phone.systems™ Subscription – Required to launch and configure your PBX environment. If you haven’t subscribed yet, go to the phone.systems™ page .
Assign phone.systems™ Trunk in the DIDWW User Panel#
To ensure calls are routed to your phone.systems™ PBX, assign the phone.systems™ trunk in the DIDWW User Panel to your DID numbers.
Go to Phone Numbers > My Numbers from the main menu.
In the Trunk column for your selected DID, click the current trunk name (Voice: none if none assigned).
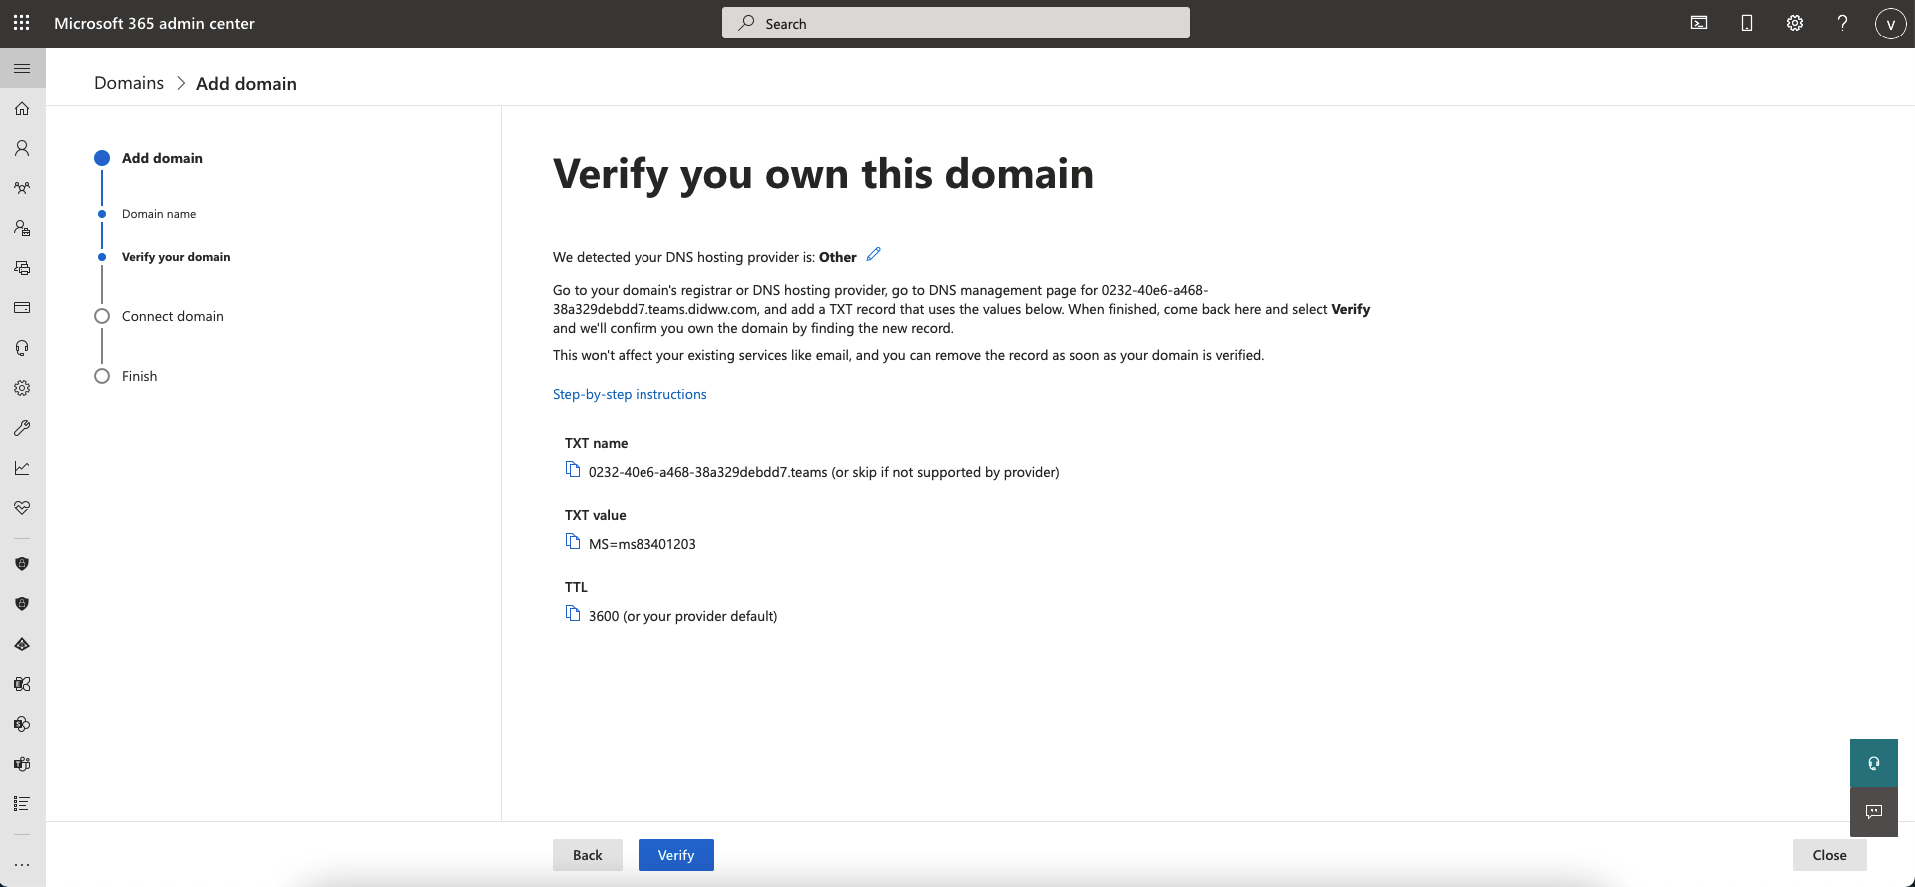
Fig. 1. Accessing the trunk assignment options for a DID.#
In the Update Voice IN Trunk window, click the dropdown menu and select the phone.systems trunk.
Click Confirm to assign the trunk.
Note
Repeat these steps for any other DID numbers you want to route through your phone.systems™ PBX.
If you want to assign the phone.systems™ trunk to multiple DID numbers at once, you can use batch actions. To learn more, see Assign the trunk for multiple DID numbers.
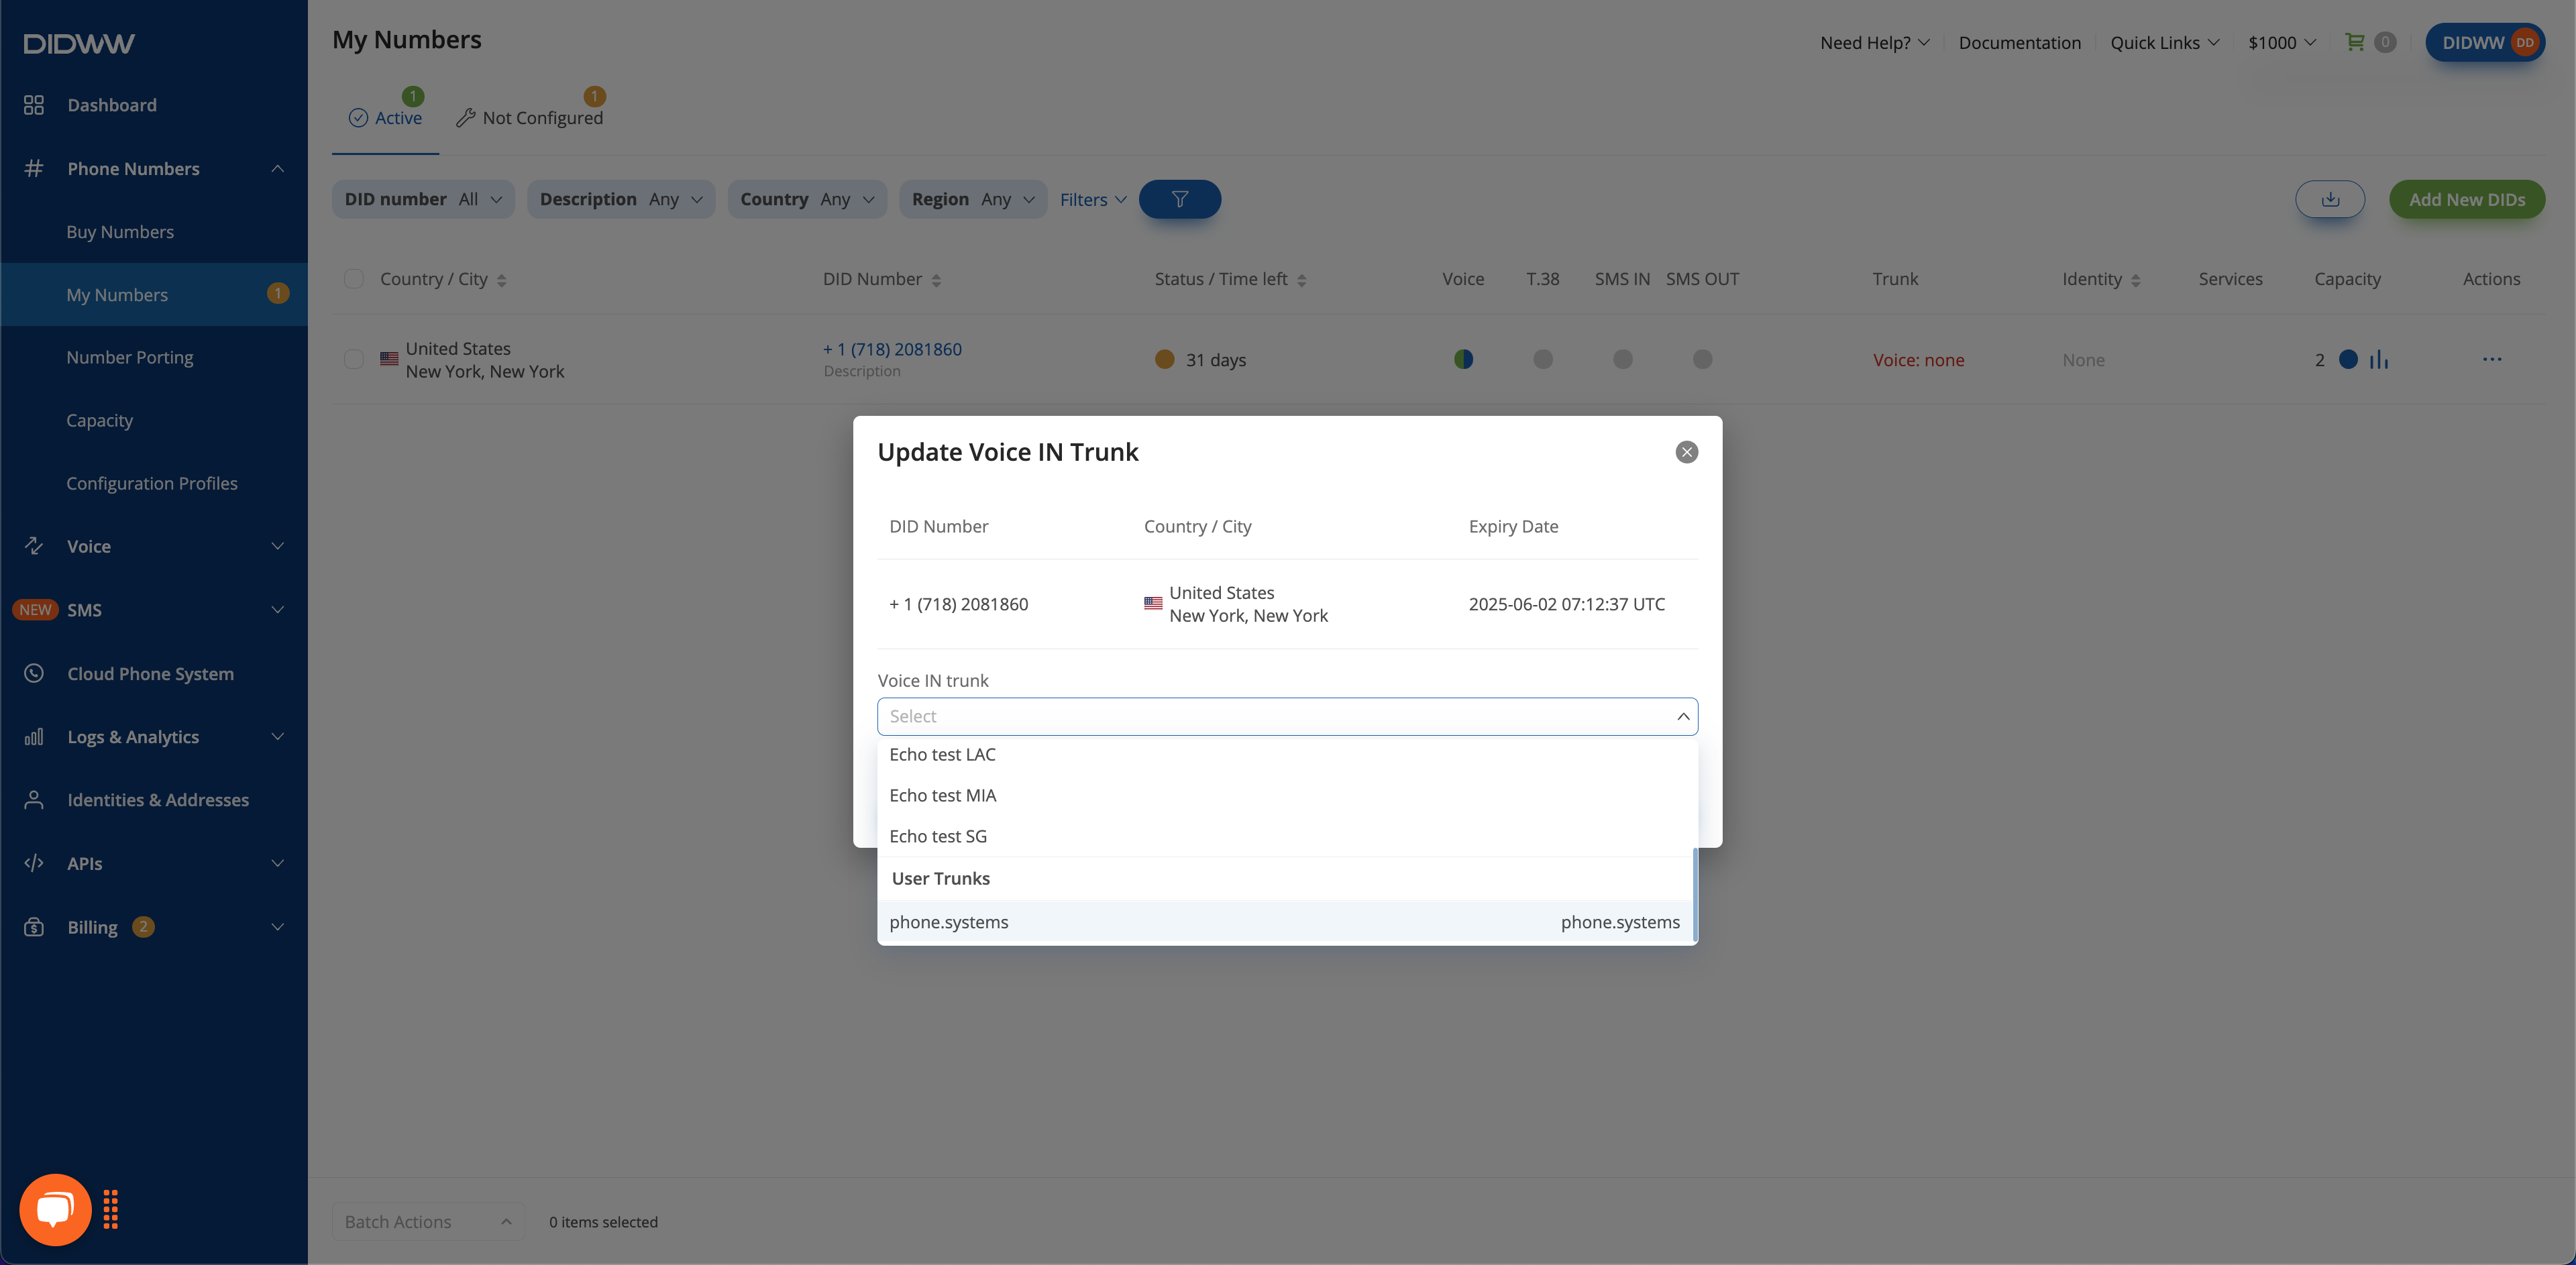
Fig. 2. Selecting and confirming the phone.systems™ trunk.#
Launch and Configure phone.systems™#
After completing the configuration in the DIDWW User Panel, you can launch the phone.systems™ platform to begin setting up your call flows, users, and devices.
Step 1: Launch the phone.systems™ Platform#
In the DIDWW User Panel, go to Cloud Phone System from the main menu.
Make sure your phone.systems™ subscription is active.
Click Launch to open the phone.systems™ management interface in a new browser tab.
Fig. 3. Launching the phone.systems™ platform.#
Step 2: Choose Your Configuration Method#
Once inside the phone.systems™ interface, you’ll need to configure how you want to receive incoming calls and make outbound calls. Choose one of the following options to continue your setup:
Configure your account using the dedicated phone.systems™ application (recommended for ease of use).
Set up a SIP account within phone.systems™ and configure it on a compatible third-party softphone or device.