Inbound Trunks in phone.systems™#
Note
The instructions below apply specifically to phone.systems™ inbound trunks, which are separate from the Inbound Trunks in the main DIDWW user panel — the feature set and setup steps differ.
phone.systems™ Inbound Trunks receive SIP traffic from third-party VoIP providers and deliver incoming calls into the phone.systems™ environment for further processing. Multiple providers can be used, with DIDWW preconfigured as the default.
To access and manage your inbound trunks, click Trunks in the sidebar menu and select the Inbound Trunks tab.
Fig. 1. Inbound Trunks#
Inbound Call Forwarding to phone.systems™#
When you receive calls from an external VoIP provider, those calls must be forwarded into your phone.systems™ workspace. To make this possible, phone.systems™ automatically creates a default inbound trunk named Default. You can edit, delete, or create additional inbound trunks as needed.
Your VoIP provider must forward SIP traffic to this domain using a SIP URI such as:
phonenumber@xxxxxxxxxxxxx.in.phone.systems
This SIP URI consists of two components:
Phone Number in E.164 format – The phone number receiving the call (for example,
14169233346for Toronto or442034116446for London). This number must also be added to your phone.systems™ workspace so that incoming calls can be properly identified and processed.Inbound trunk domain – The unique domain assigned to your inbound trunk (for example,
abcd123456.in.phone.systems). This domain specifies the destination where phone.systems™ expects to receive inbound SIP traffic.
Together, these elements ensure that your VoIP provider correctly delivers inbound calls into the appropriate inbound trunk within phone.systems™, enabling your call flows, routing logic and extensions to handle the calls.
Note
Consult your VoIP provider for instructions on forwarding your DID numbers to the SIP URIs used by phone.systems™.
View Inbound Call Forwarding Trunk Domain#
Each inbound trunk in phone.systems™ is assigned a unique SIP domain used by your VoIP provider when delivering inbound SIP traffic.
In the Inbound Trunks list, click the Actions button next to the trunk you want to view.
Select Edit to open the Edit Inbound Trunk window.
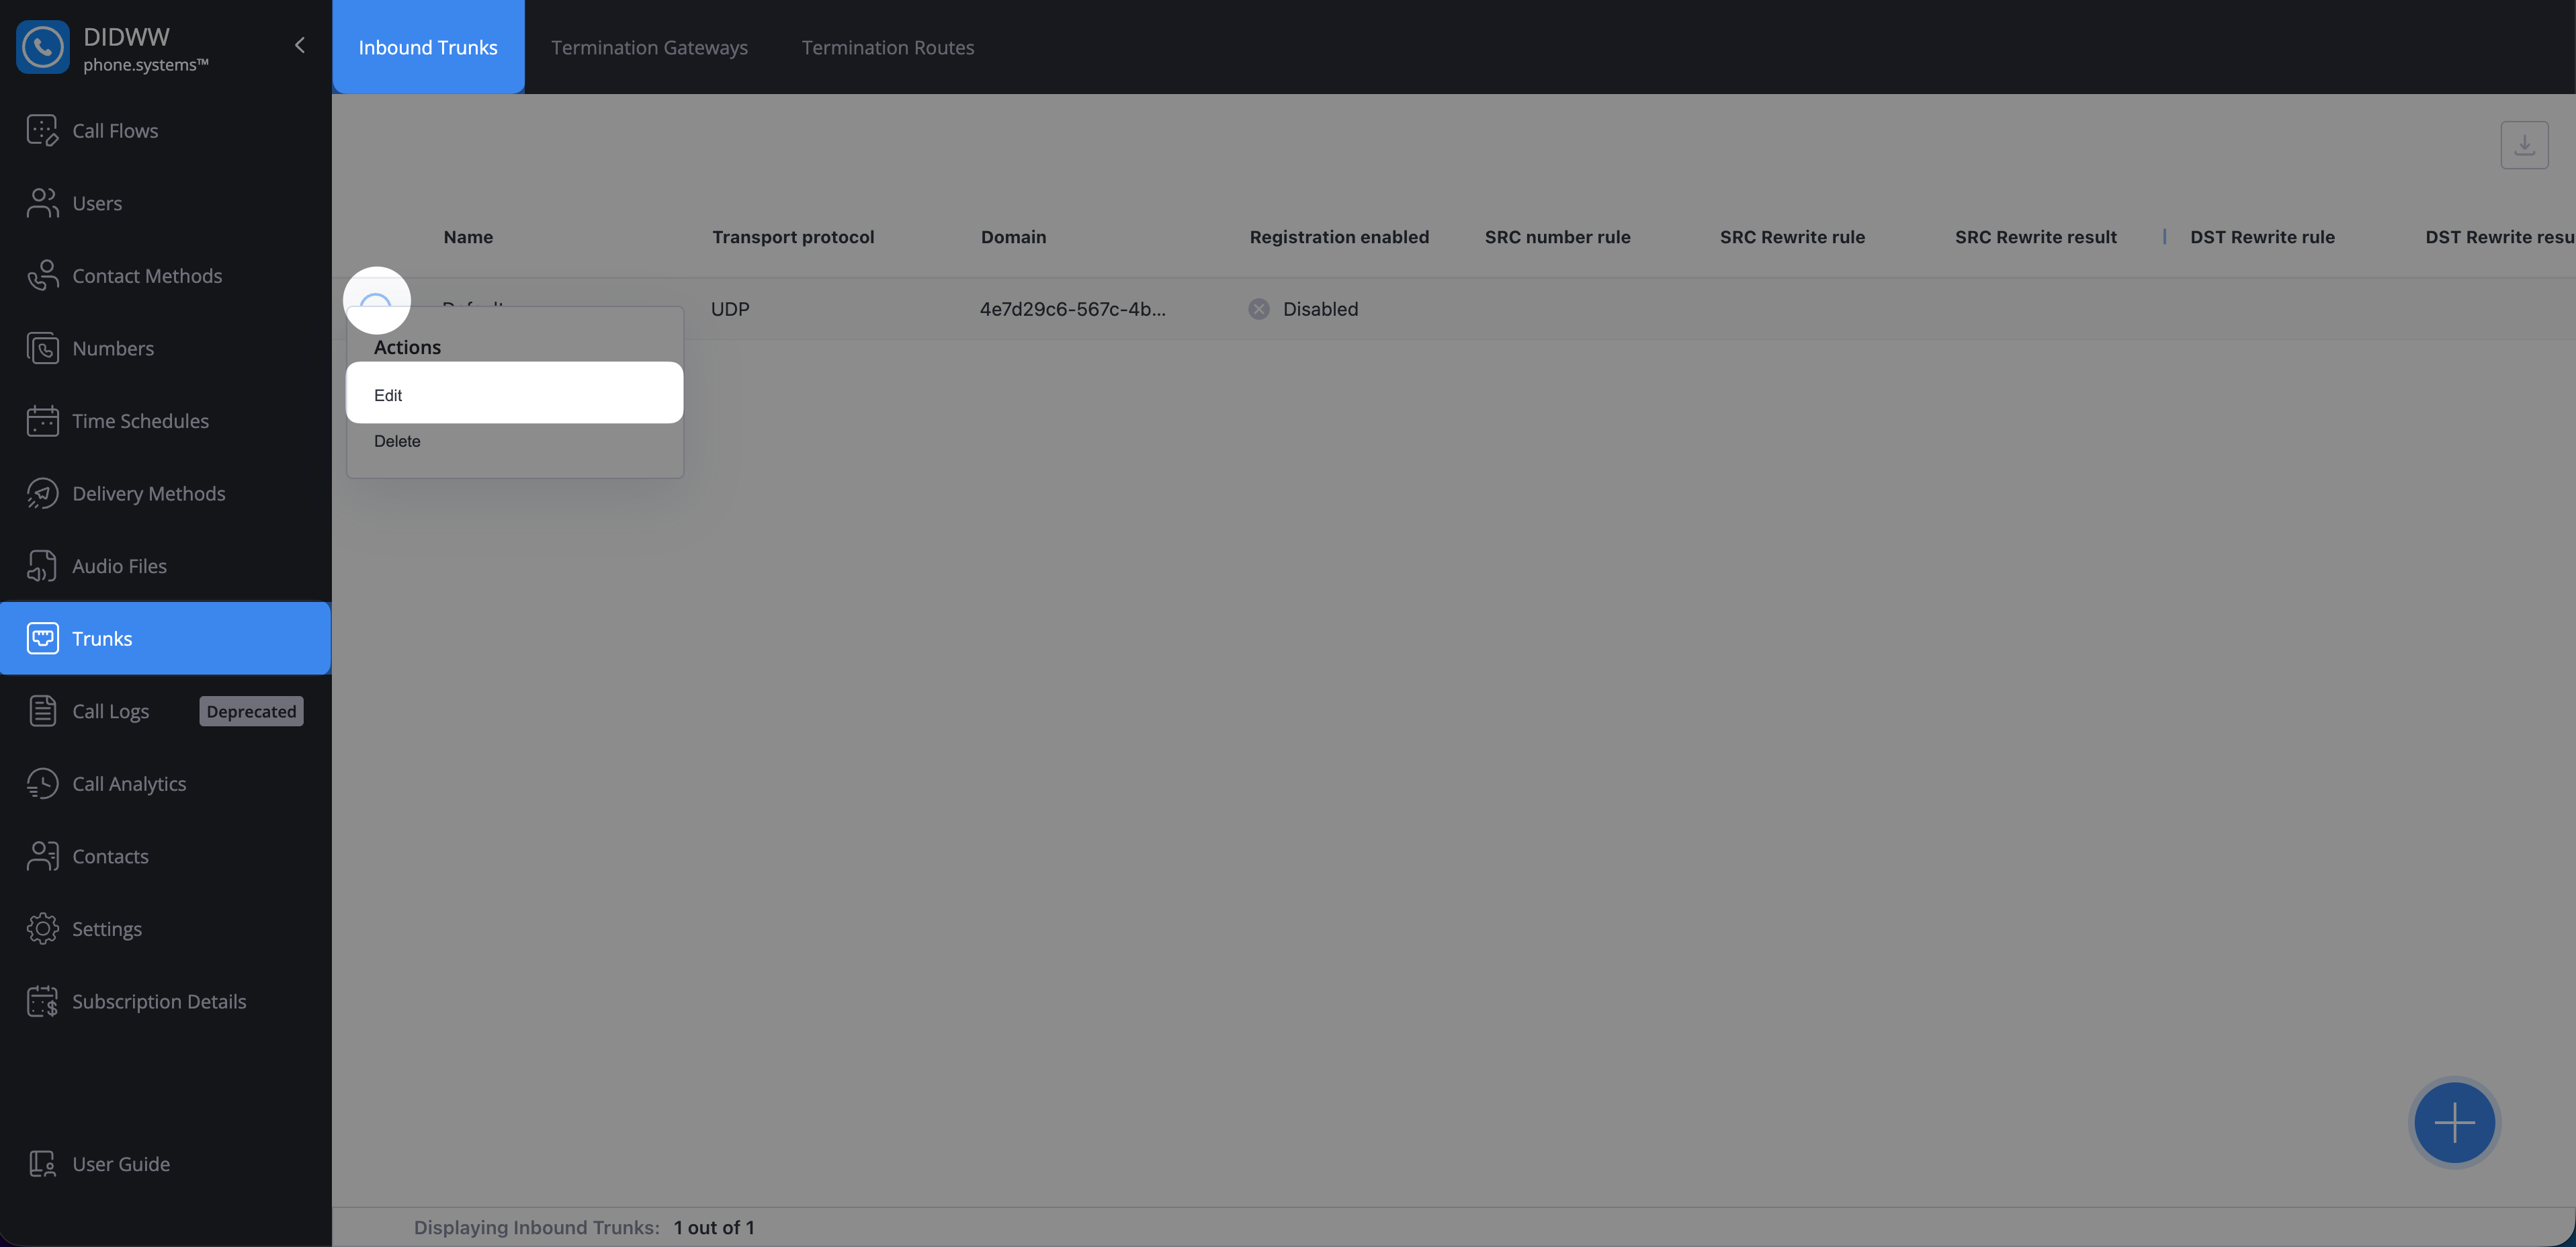
Fig. 2. Opening the Edit window for an inbound trunk#
The Domain appears in the Edit Inbound Trunk form at the top of the General section.
Click the copy icon next to the domain field to copy the value.
Important
This domain must be used by your VoIP provider when routing inbound calls to your phone.systems™ environment.
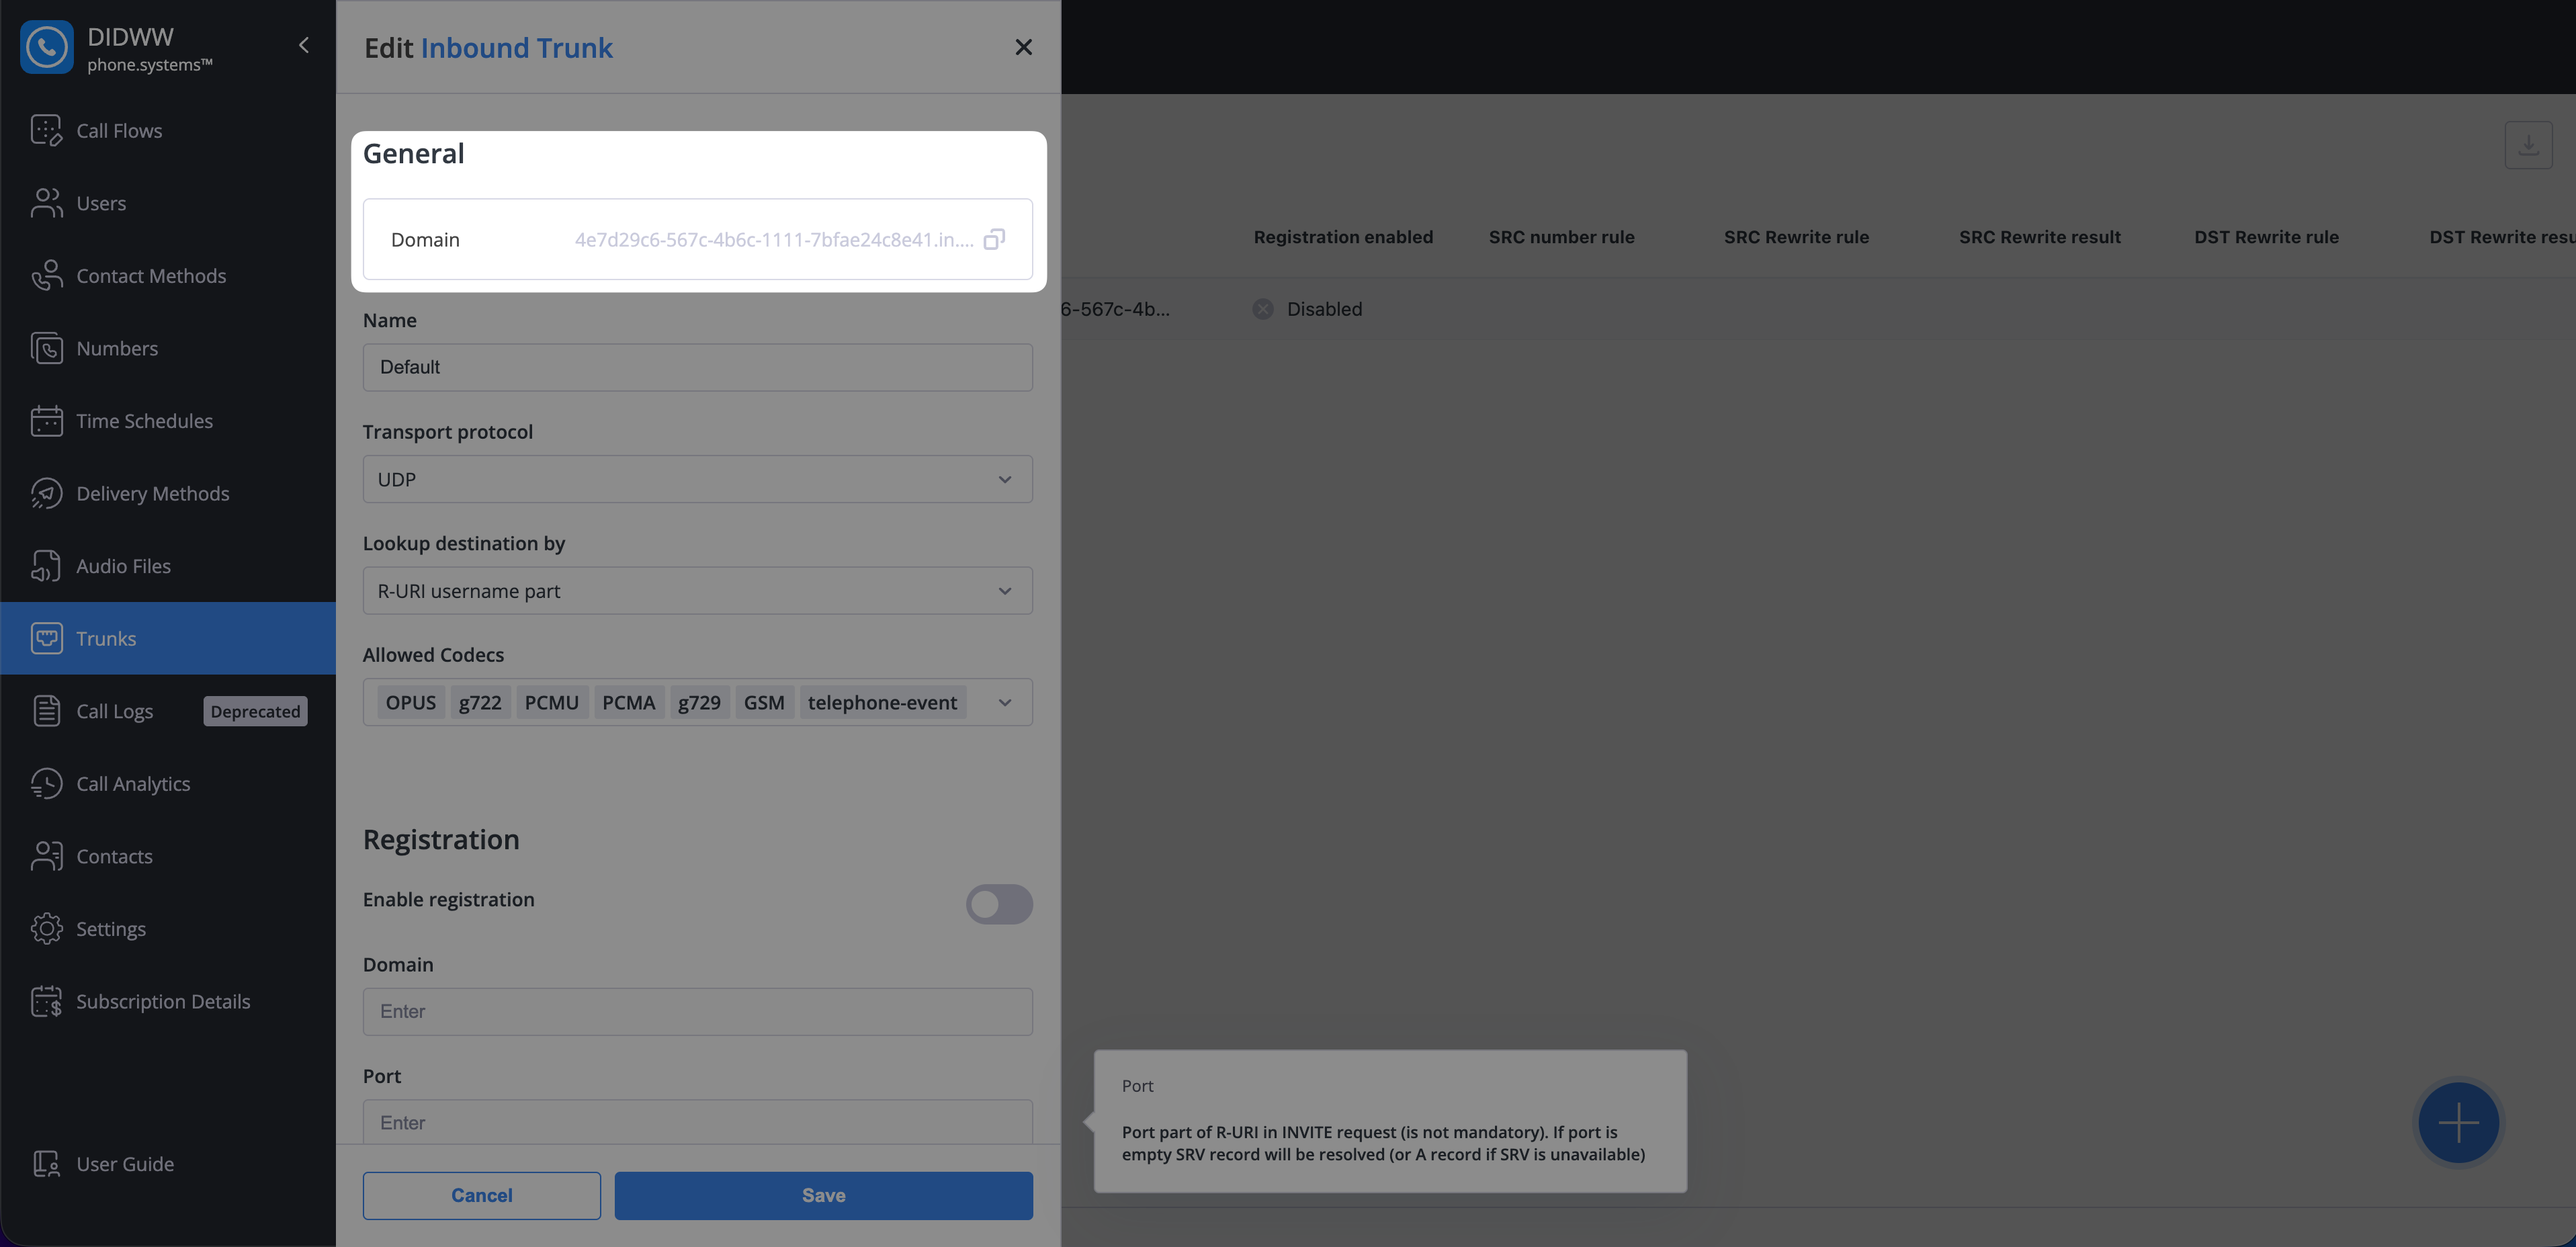
Fig. 3. Copying the inbound trunk domain#
Creating Inbound Trunks#
Use inbound trunks to define how incoming SIP traffic from your providers is received and processed by phone.systems™.
To create a new inbound trunk:
Go to the Inbound Trunks tab under Trunks.
Click the
 button in the lower-right corner to open the Create Inbound Trunk window.

Fig. 4. Creating an inbound trunk#
General Settings#
The General section defines the core behavior of the inbound trunk.
Setting |
Description |
|---|---|
Friendly Name |
A descriptive name for the inbound trunk. |
Transport Protocol |
Specifies the SIP transport method. Available options are:
|
Lookup destination by |
Determines how phone.systems™ identifies the destination for incoming calls. Available options are:
|
Allowed Codecs |
Multiple codecs may be selected for call negotiation. Options include:
|
Note
The codec priority may be rearranged by dragging the listed codecs into the desired order. The left-most codec has the highest priority.
Important
To use DTMF functions such as Interactive Menu navigation or Feature Codes, ensure that telephone-event is included in the Allowed Codecs list.
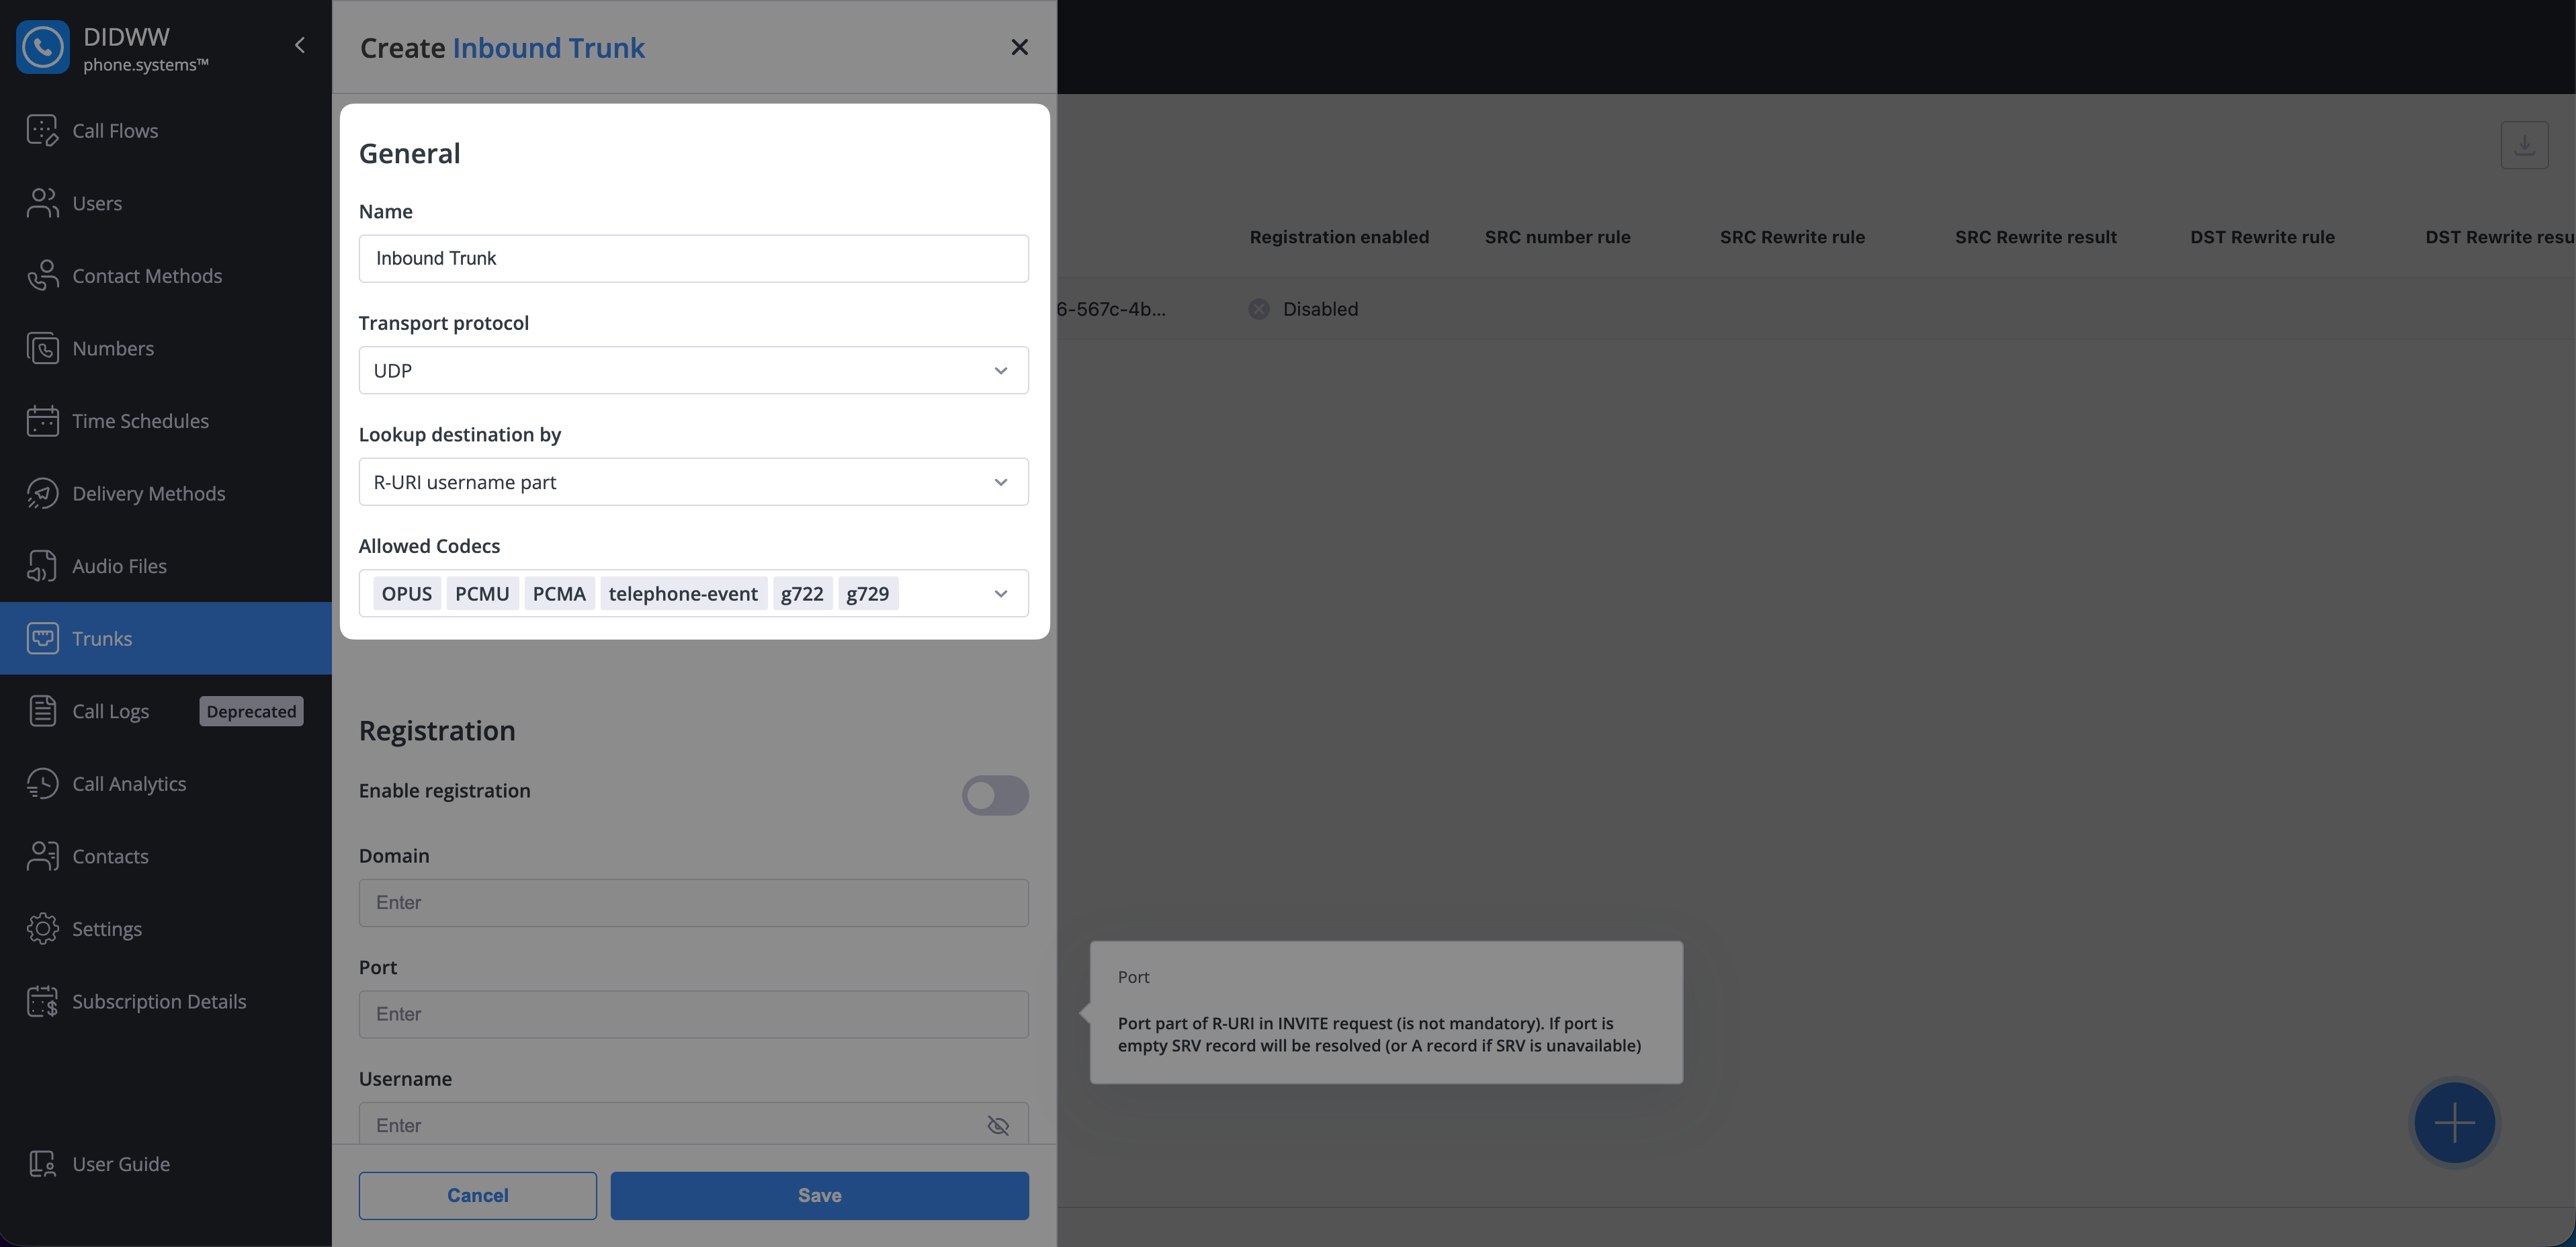
Fig. 5. Inbound trunk general settings#
Registration Settings#
If your provider requires SIP registration, enable Registration and enter the parameters supplied by your service provider or system administrator:
Field |
Description |
|---|---|
Domain |
The SIP registrar domain used for registration. |
Port |
The SIP registrar port. If left empty, the SRV or A record will be used. |
Username |
The SIP username provided by your VoIP service provider. |
Password |
The authentication password for SIP registration. |
Contact User |
The value that will appear in the Contact header’s user part during registration. |
Note
Registration is disabled by default.
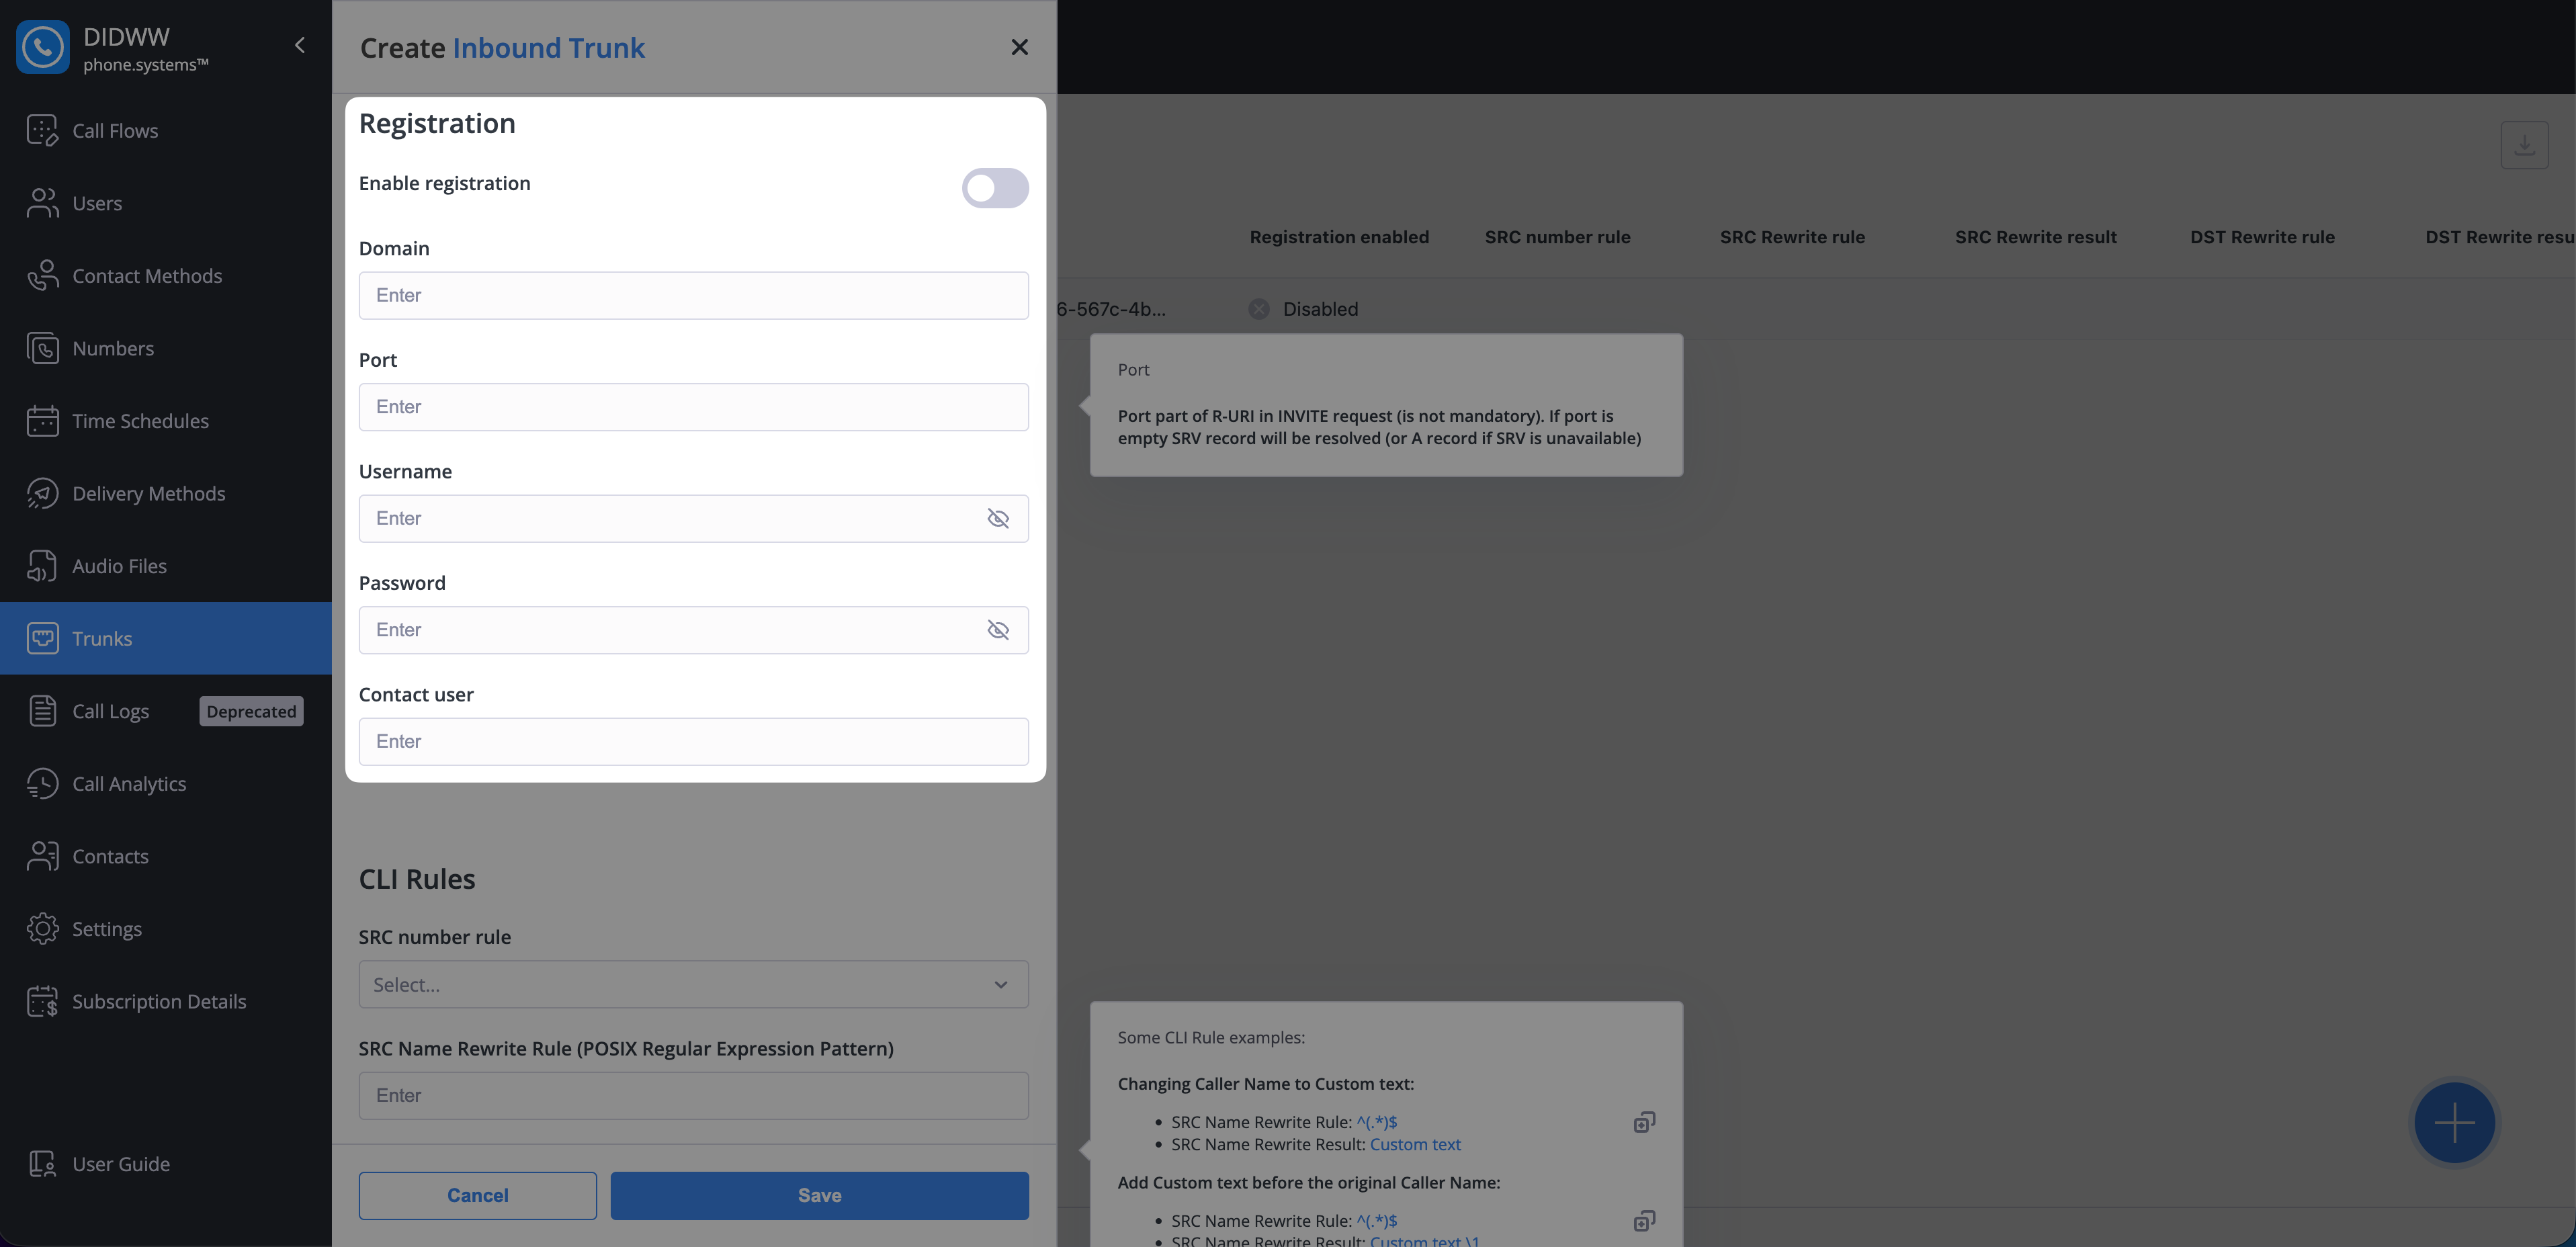
Fig. 6. Registration settings#
CLI Rules#
CLI Rules allow you to override the Source Caller Name or Destination number for calls received on the inbound trunk. This functionality enables flexible number handling and helps you identify which inbound trunk was used to receive a call.
Field |
Description |
|---|---|
SRC number rule |
Select a predefined rule that normalizes the Source Number (CLI):
|
SRC Name Rewrite Rule |
POSIX Regular Expression pattern used to match the Source Caller Name. |
SRC Name Rewrite Result |
Replacement text applied when the Rewrite Rule matches. |
DST Rewrite Rule |
POSIX Regular Expression pattern used to match the destination number. |
DST Rewrite Result |
Replacement text applied when the Rewrite Rule matches. |
Note
Knowledge of POSIX Regular Expressions is required to configure CLI Rules.
After completing the CLI Rules configuration, click Save to create the inbound trunk.
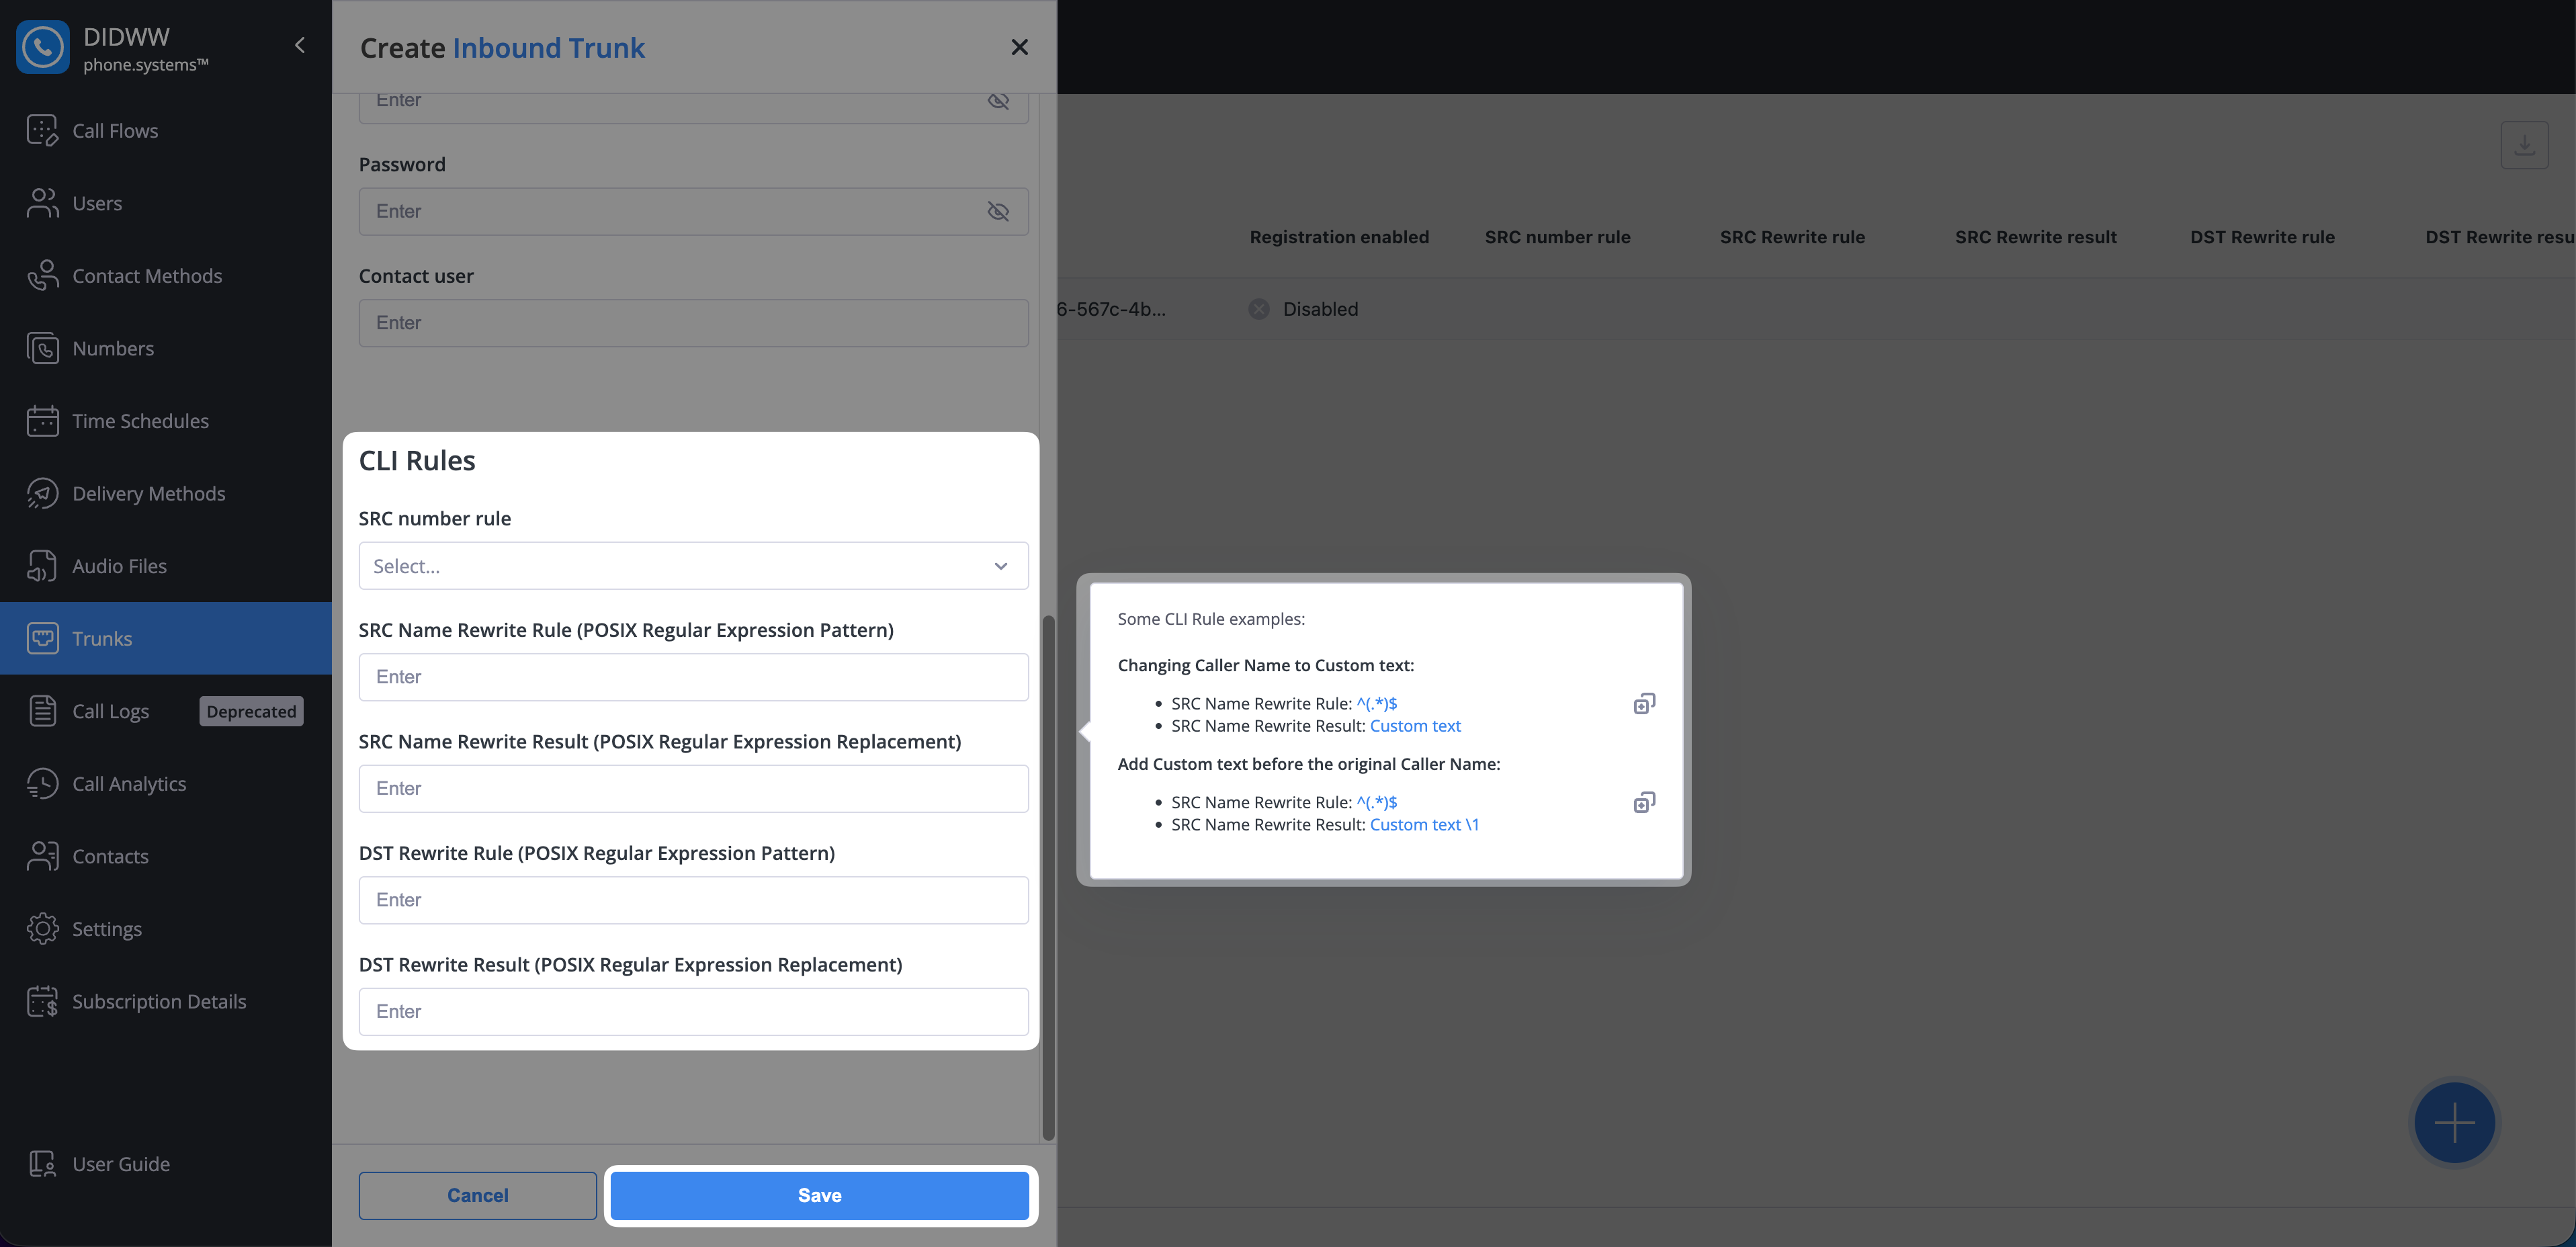
Fig. 7. CLI Rules#
Editing Inbound Trunks#
To update the configuration of an existing inbound trunk:
In the Inbound Trunks list, click the Actions button next to the trunk you want to modify.
Select Edit to open the Edit Inbound Trunk window.
Fig. 8. Opening the Edit window for an inbound trunk#
Adjust the settings in the General, Registration, or CLI Rules sections as required.
Click Save to apply your changes.
Fig. 9. Editing an inbound trunk#
Deleting Inbound Trunks#
To delete an existing inbound trunk:
In the Inbound Trunks list, click the Actions button next to the trunk you want to remove.
Select Delete to open the Delete Inbound Trunk dialog.
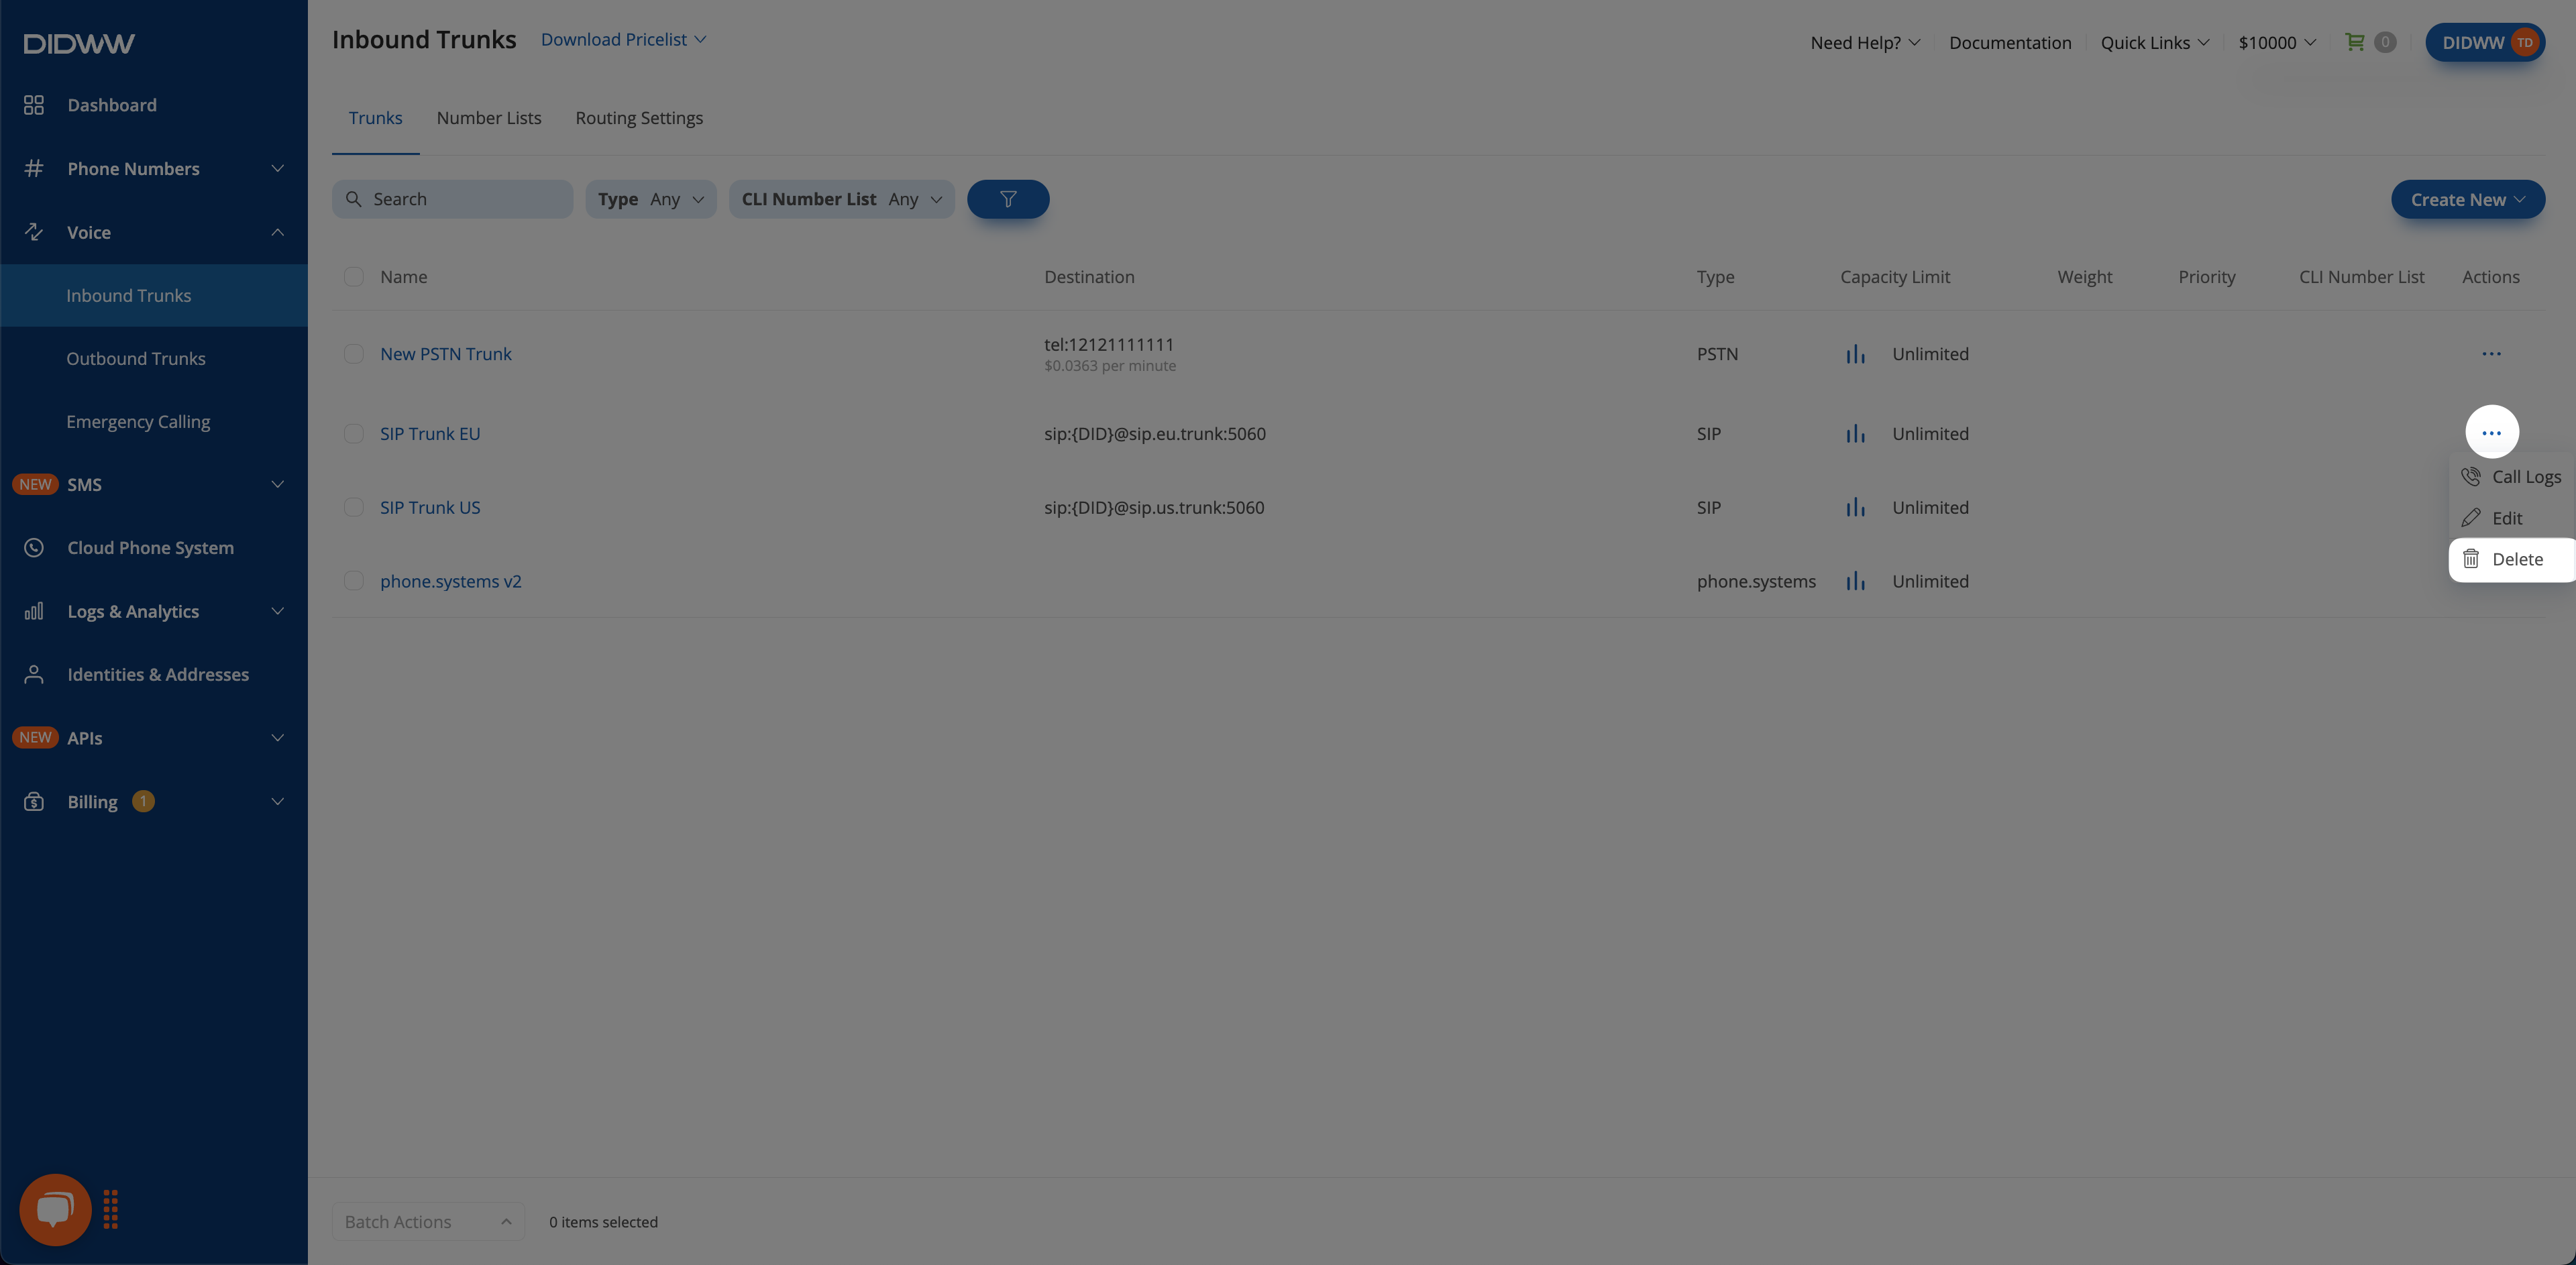
Fig. 10. Opening the Delete dialog for an inbound trunk#
To permanently delete the inbound trunk and unlink its relations, enable the Delete and unlink relations toggle.
Click Delete to confirm.
Note
Deleting an inbound trunk also removes all linked relations. This may disrupt existing call routing or connected services. If you prefer not to proceed, close the dialog and update or remove the related items manually.

Fig. 11. Delete Inbound Trunk dialog#