Zendesk and phone.systems™ Integration#
Connecting phone.systems™ with Zendesk CRM allows you to manage customer calls and track important information. The integration includes the following features:
Sync contacts automatically: Keep customers (end users) updated in phone.systems™.
Call journaling: All incoming and outgoing calls are logged in Zendesk for tracking and reference.
Create new contacts automatically: When an unknown number calls, a new customer (end user) is created in Zendesk automatically.
User association for call journaling: Associating users enables call journaling between phone.systems™ and Zendesk. Unassociated users will not receive call details in Zendesk.
Connecting phone.systems™ with Zendesk#
This guide provides detailed steps on integrating phone.systems™ with Zendesk CRM. Follow the instructions below to complete the setup process.
Note
To connect phone.systems™ with Zendesk, you need Unique Identifier, Secret, and Subdomain. Generate these values by creating a connected app in your Zendesk admin account.
Step 1: Sign In to a Zendesk account#
To get started, go to the Zendesk page and Sign In to access an existing account or create a new one.
Step 2: Create an app in Zendesk#
Once you’re logged in, click the Zendesk products
![]() icon on the right side, then select Admin Center.
icon on the right side, then select Admin Center.
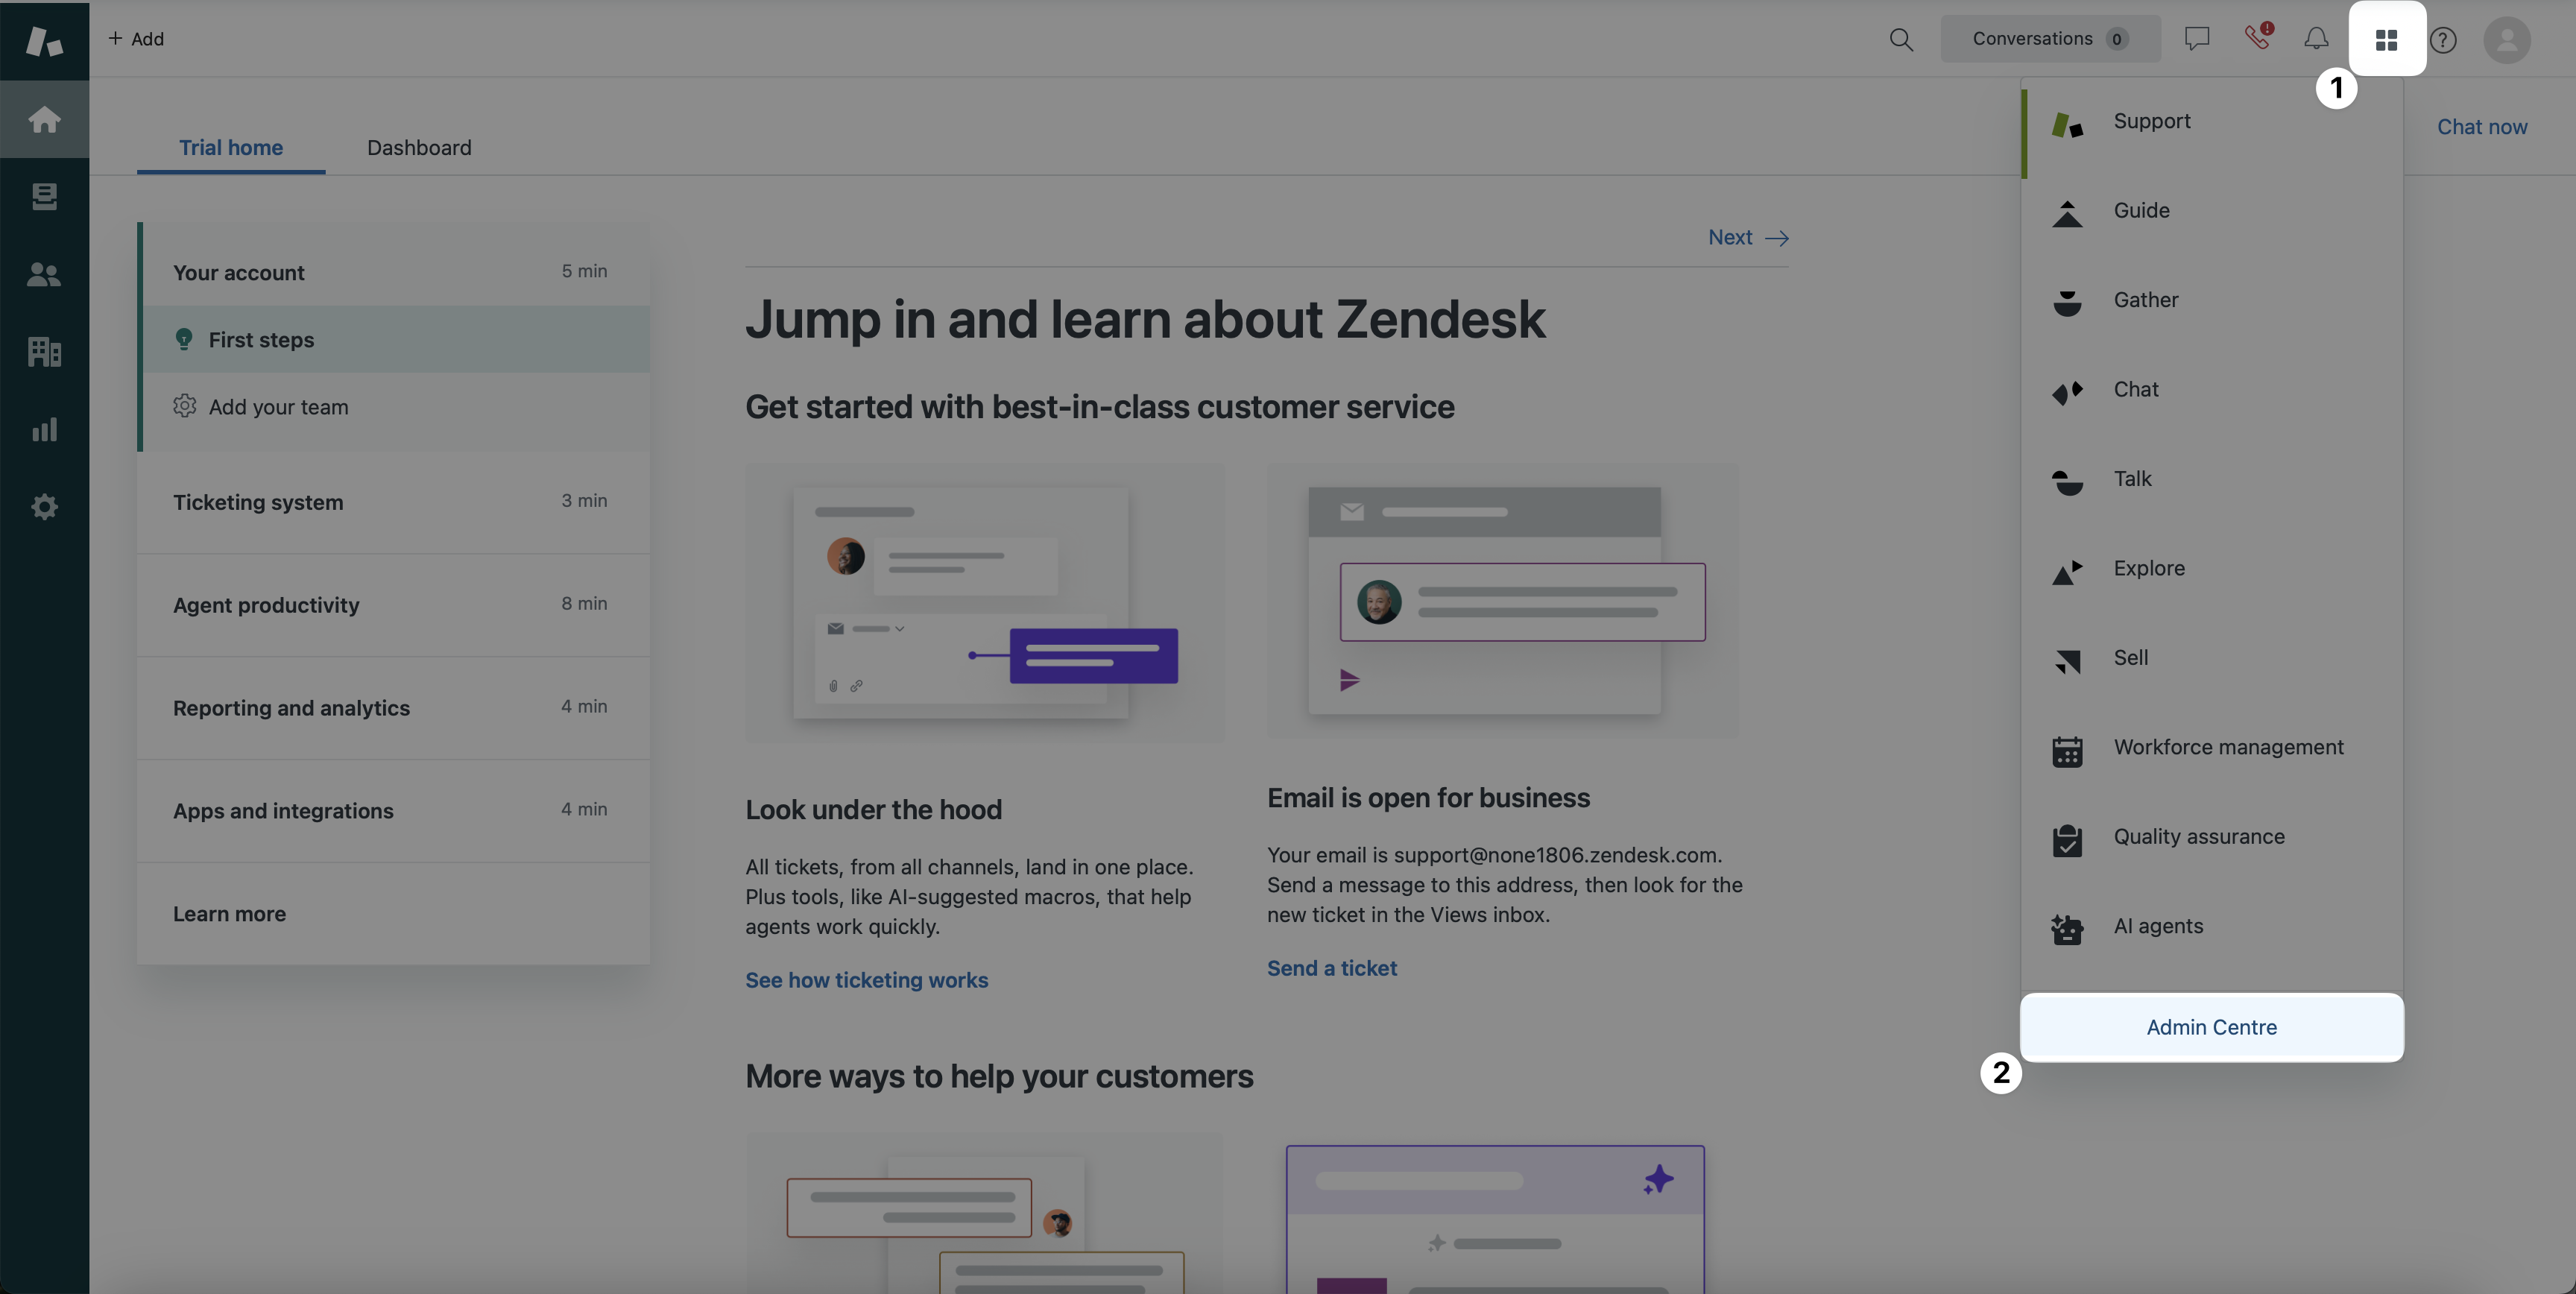
Fig. 1. Open Zendesk Admin Center#
On the new page, go to the left sidebar menu. Expand Apps and integrations and select OAuth clients under the APIs menu. On the custom integration setup page, agree to the Zendesk Terms of Service and Application Development and API License Agreement, and select Get started.
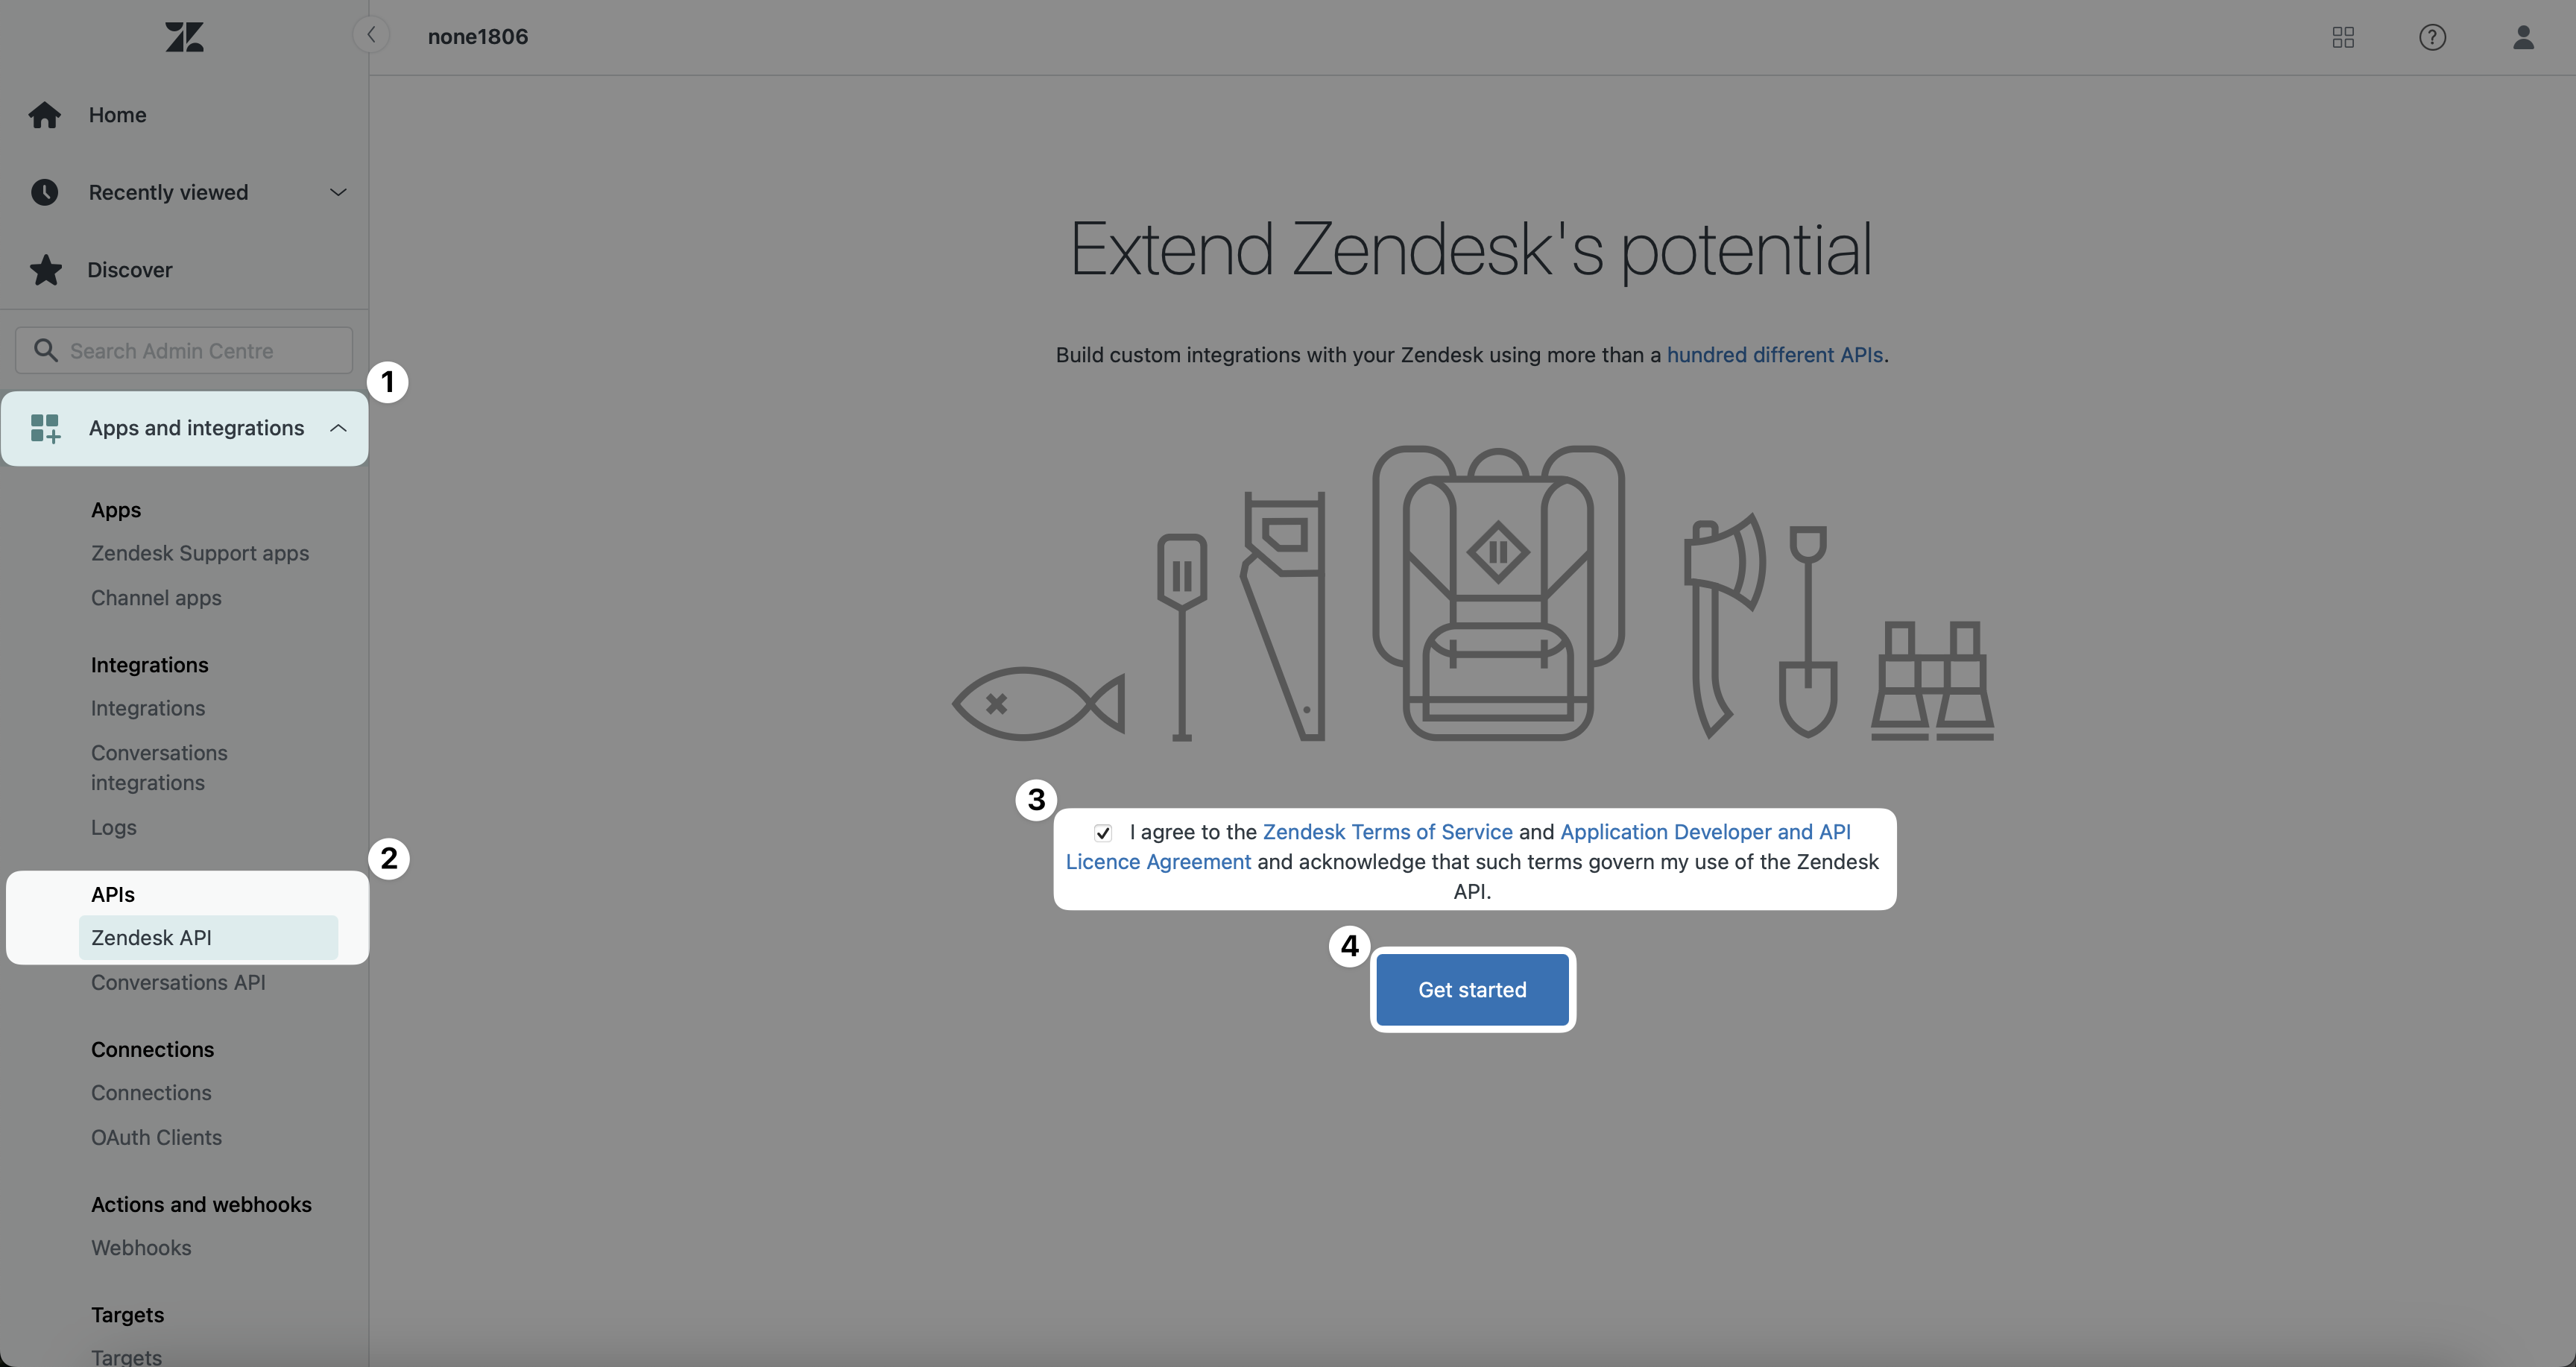
Fig. 2. Start Building Custom Integration#
Click Add OAuth client.
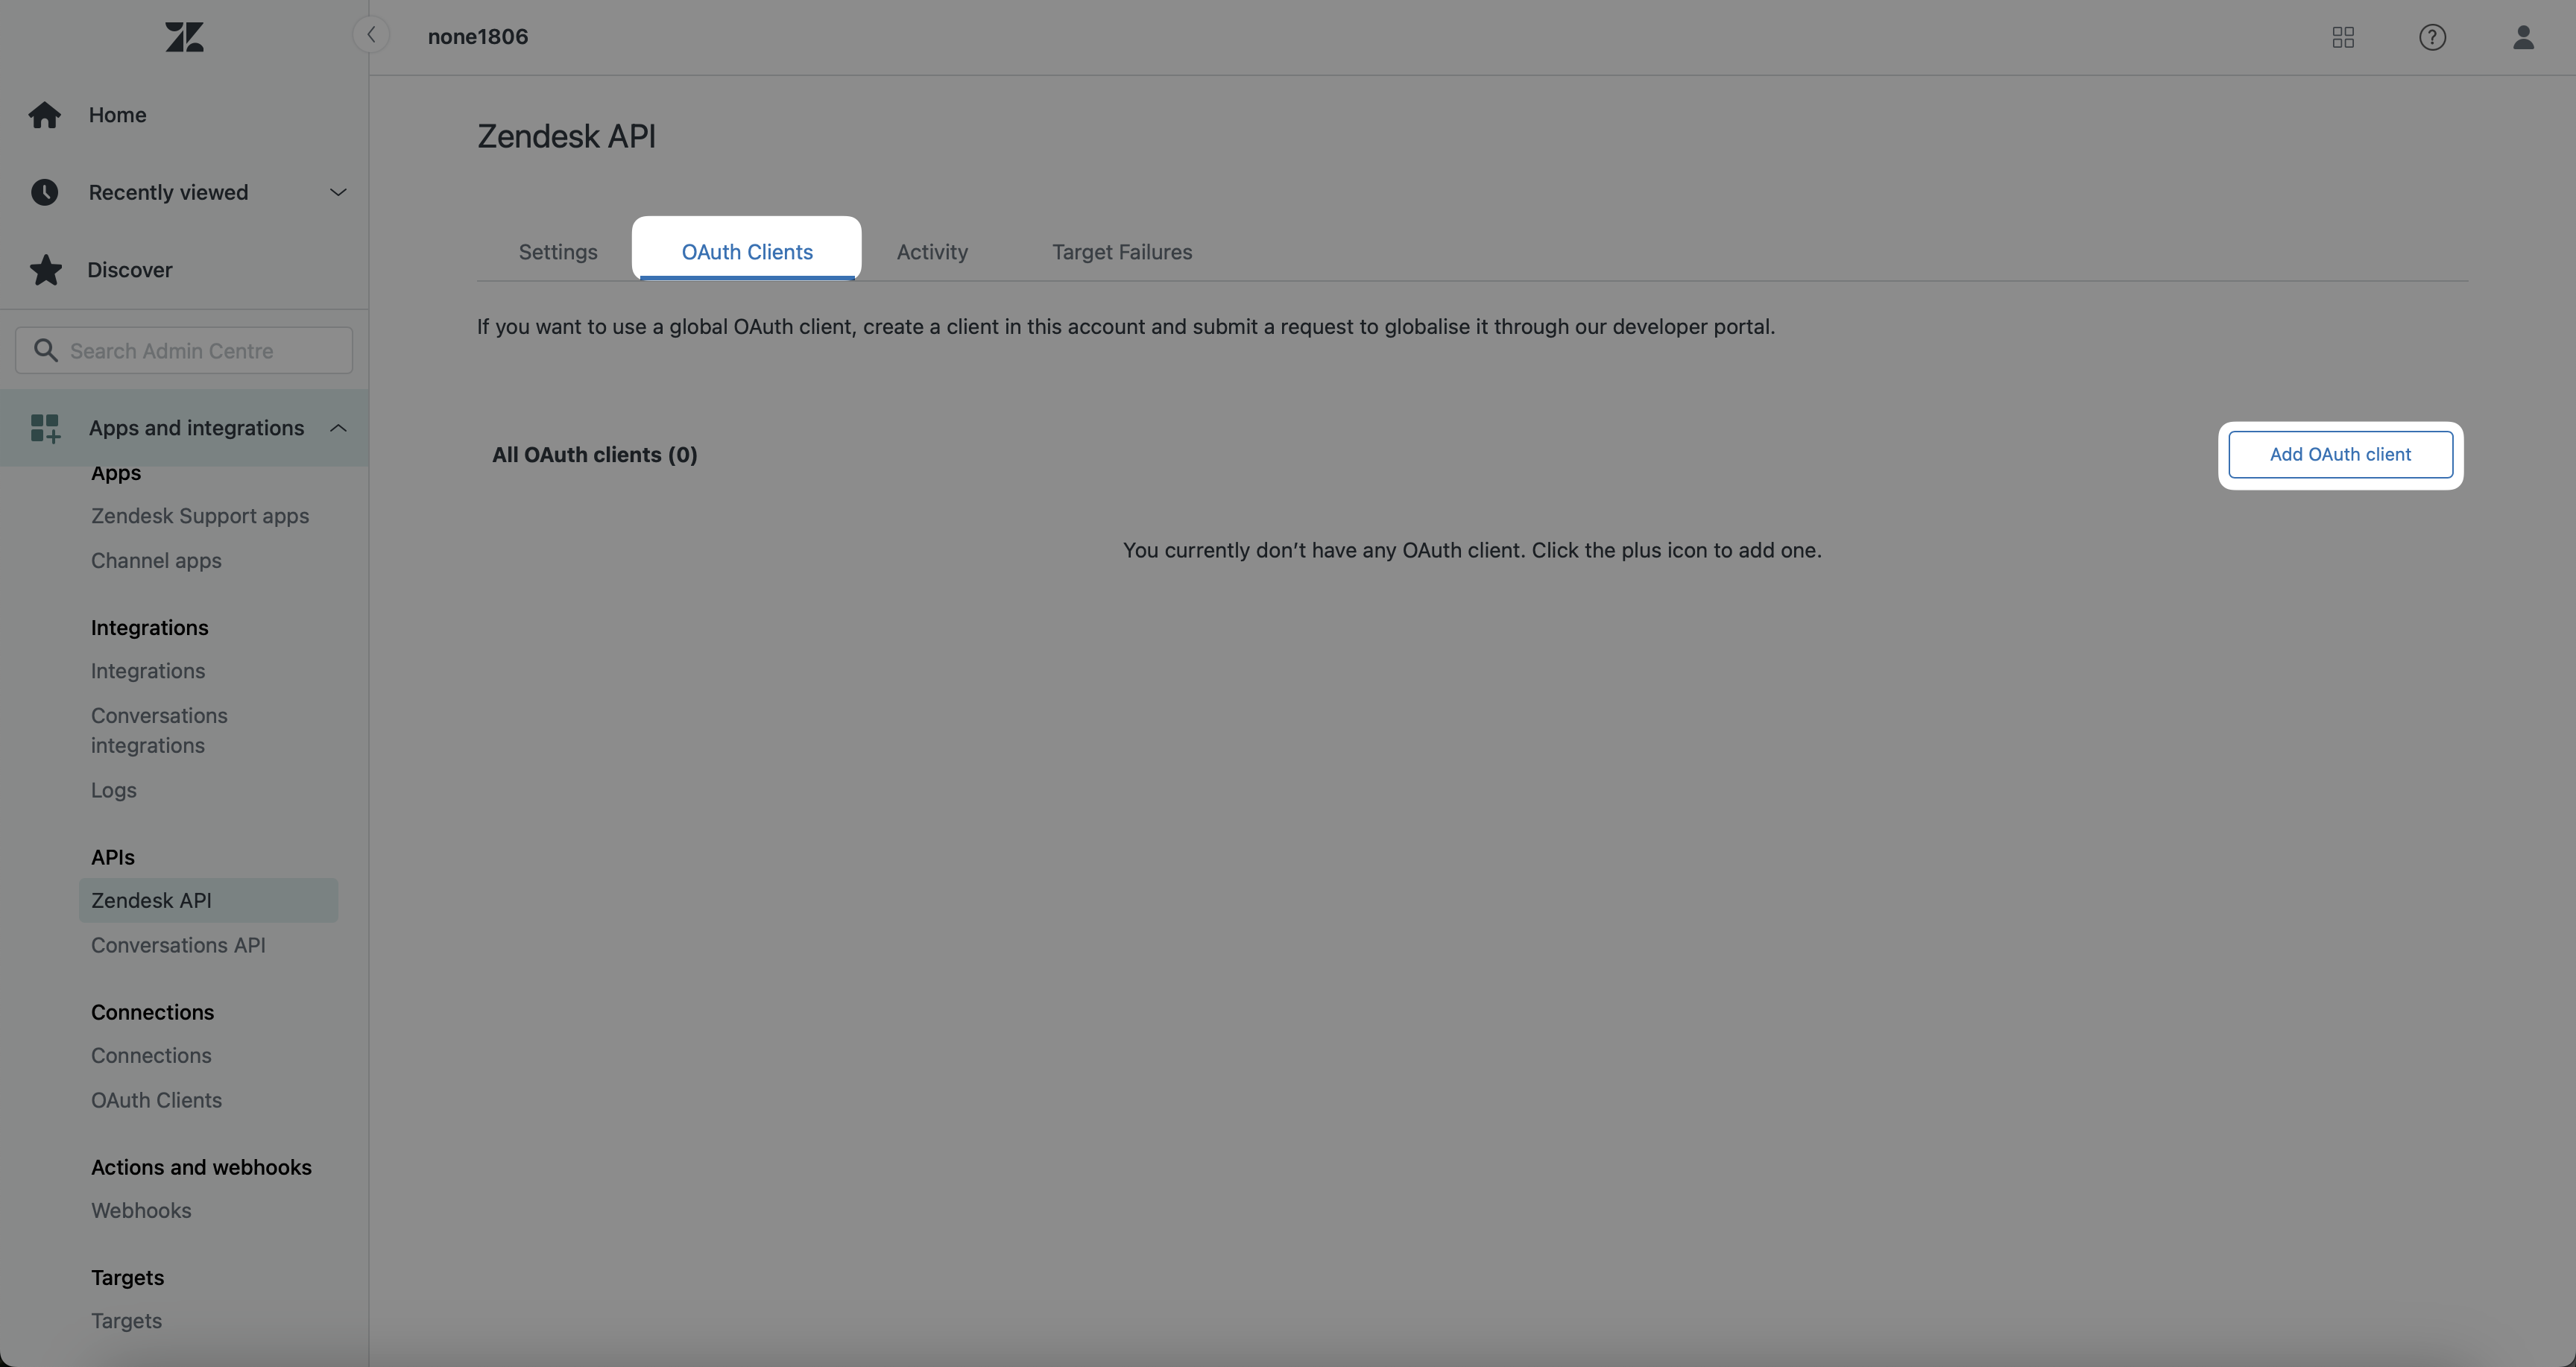
Fig. 3. Add OAuth client#
Step 3: Enter app client basic information#
In the first section, enter the Name, Description and any other optional information you want to include.
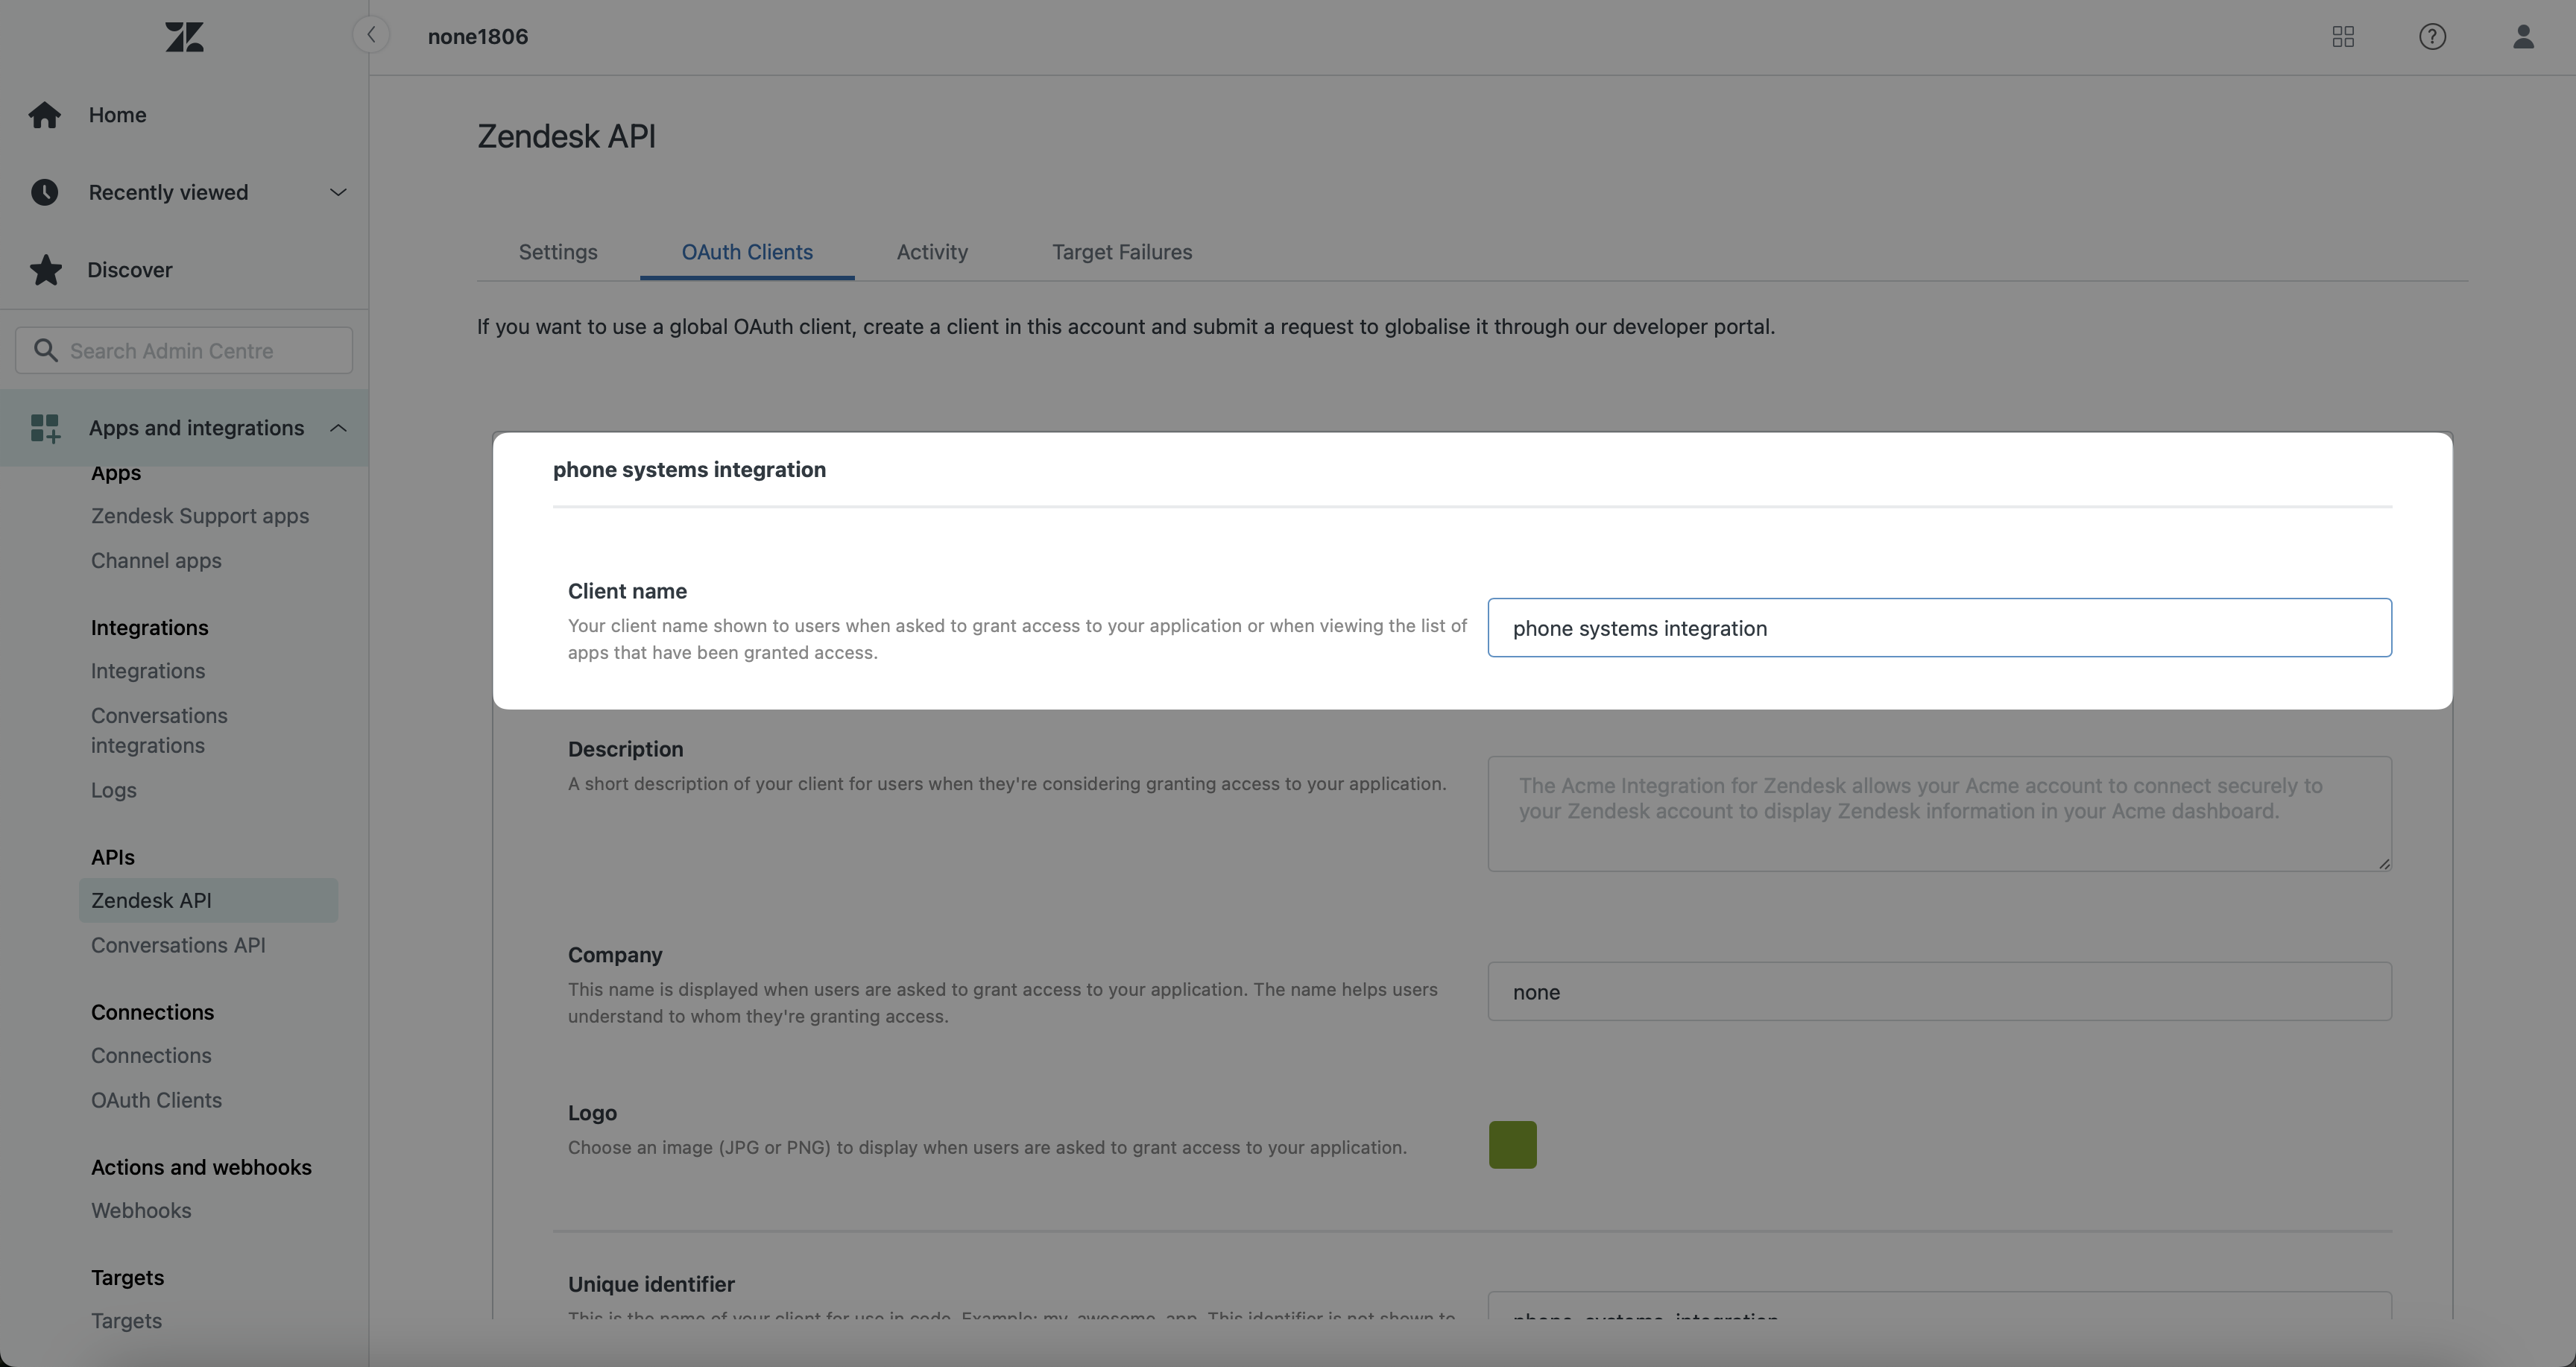
Fig. 4. Enter app basic information#
Step 4: Set the Client kind#
Scroll down until you see the Client kind section. Select Confidential.
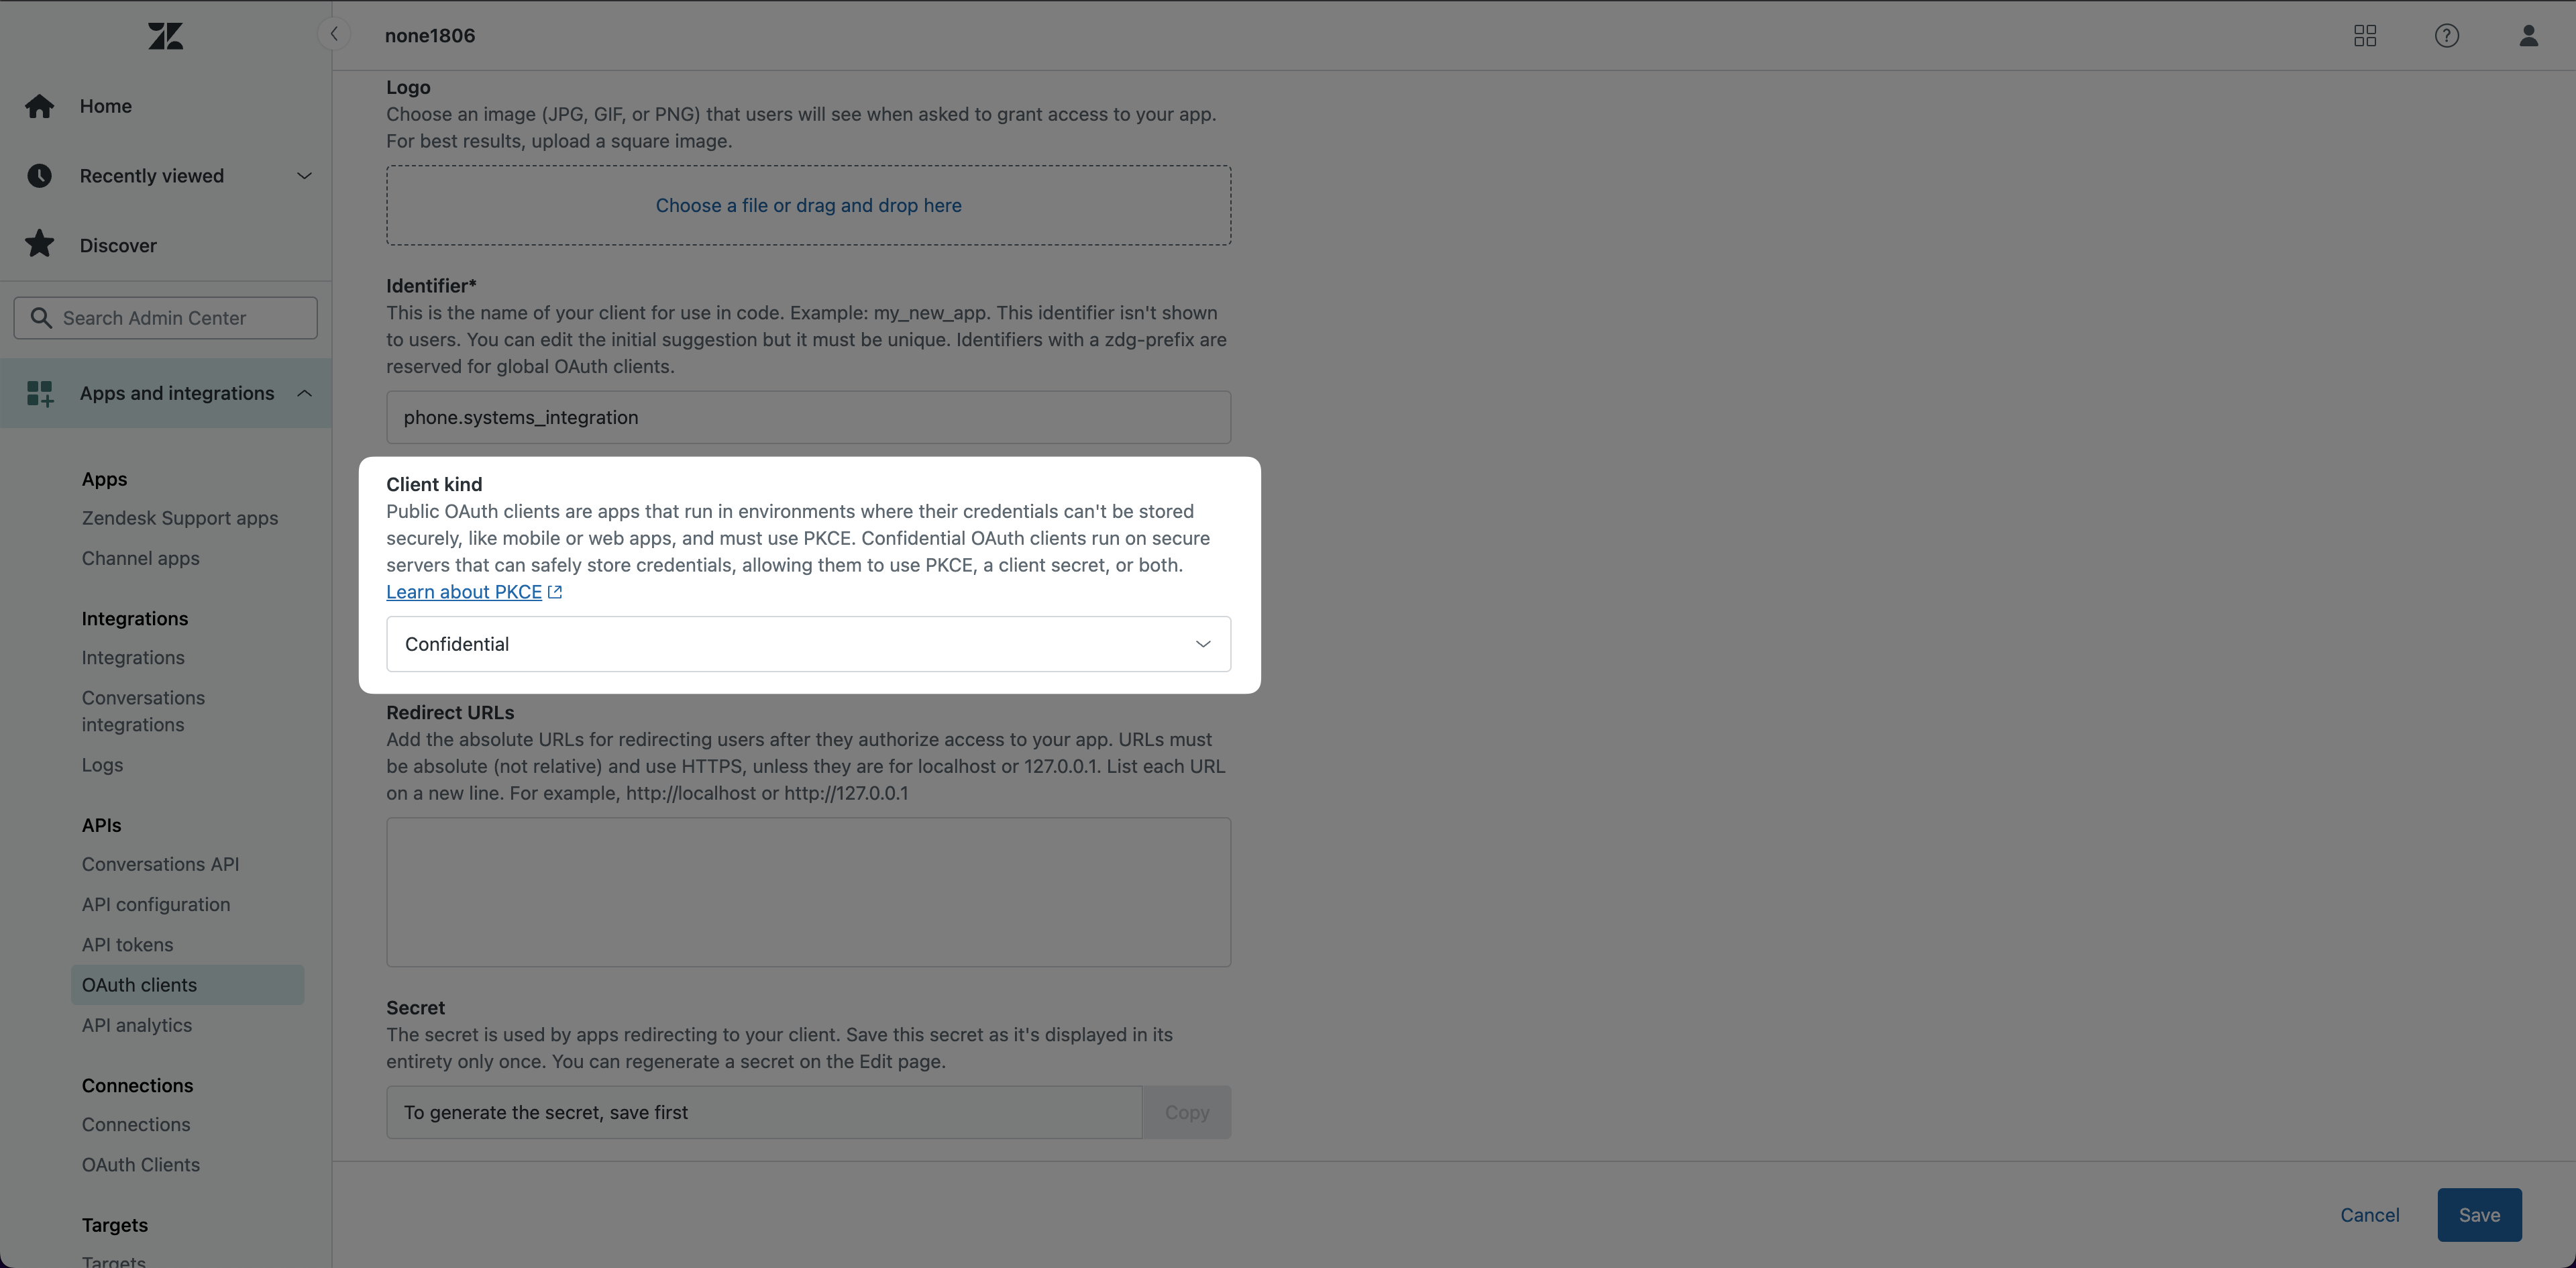
Fig. 5. Set the Client kind#
Step 5: Launch phone.systems™ and create Zendesk connection#
Open a new browser tab, log in to your DIDWW account, and launch phone.systems™ .
In phone.systems™, go to Settings > CRM Integrations.
Click Connect to link Zendesk app with phone.systems™.
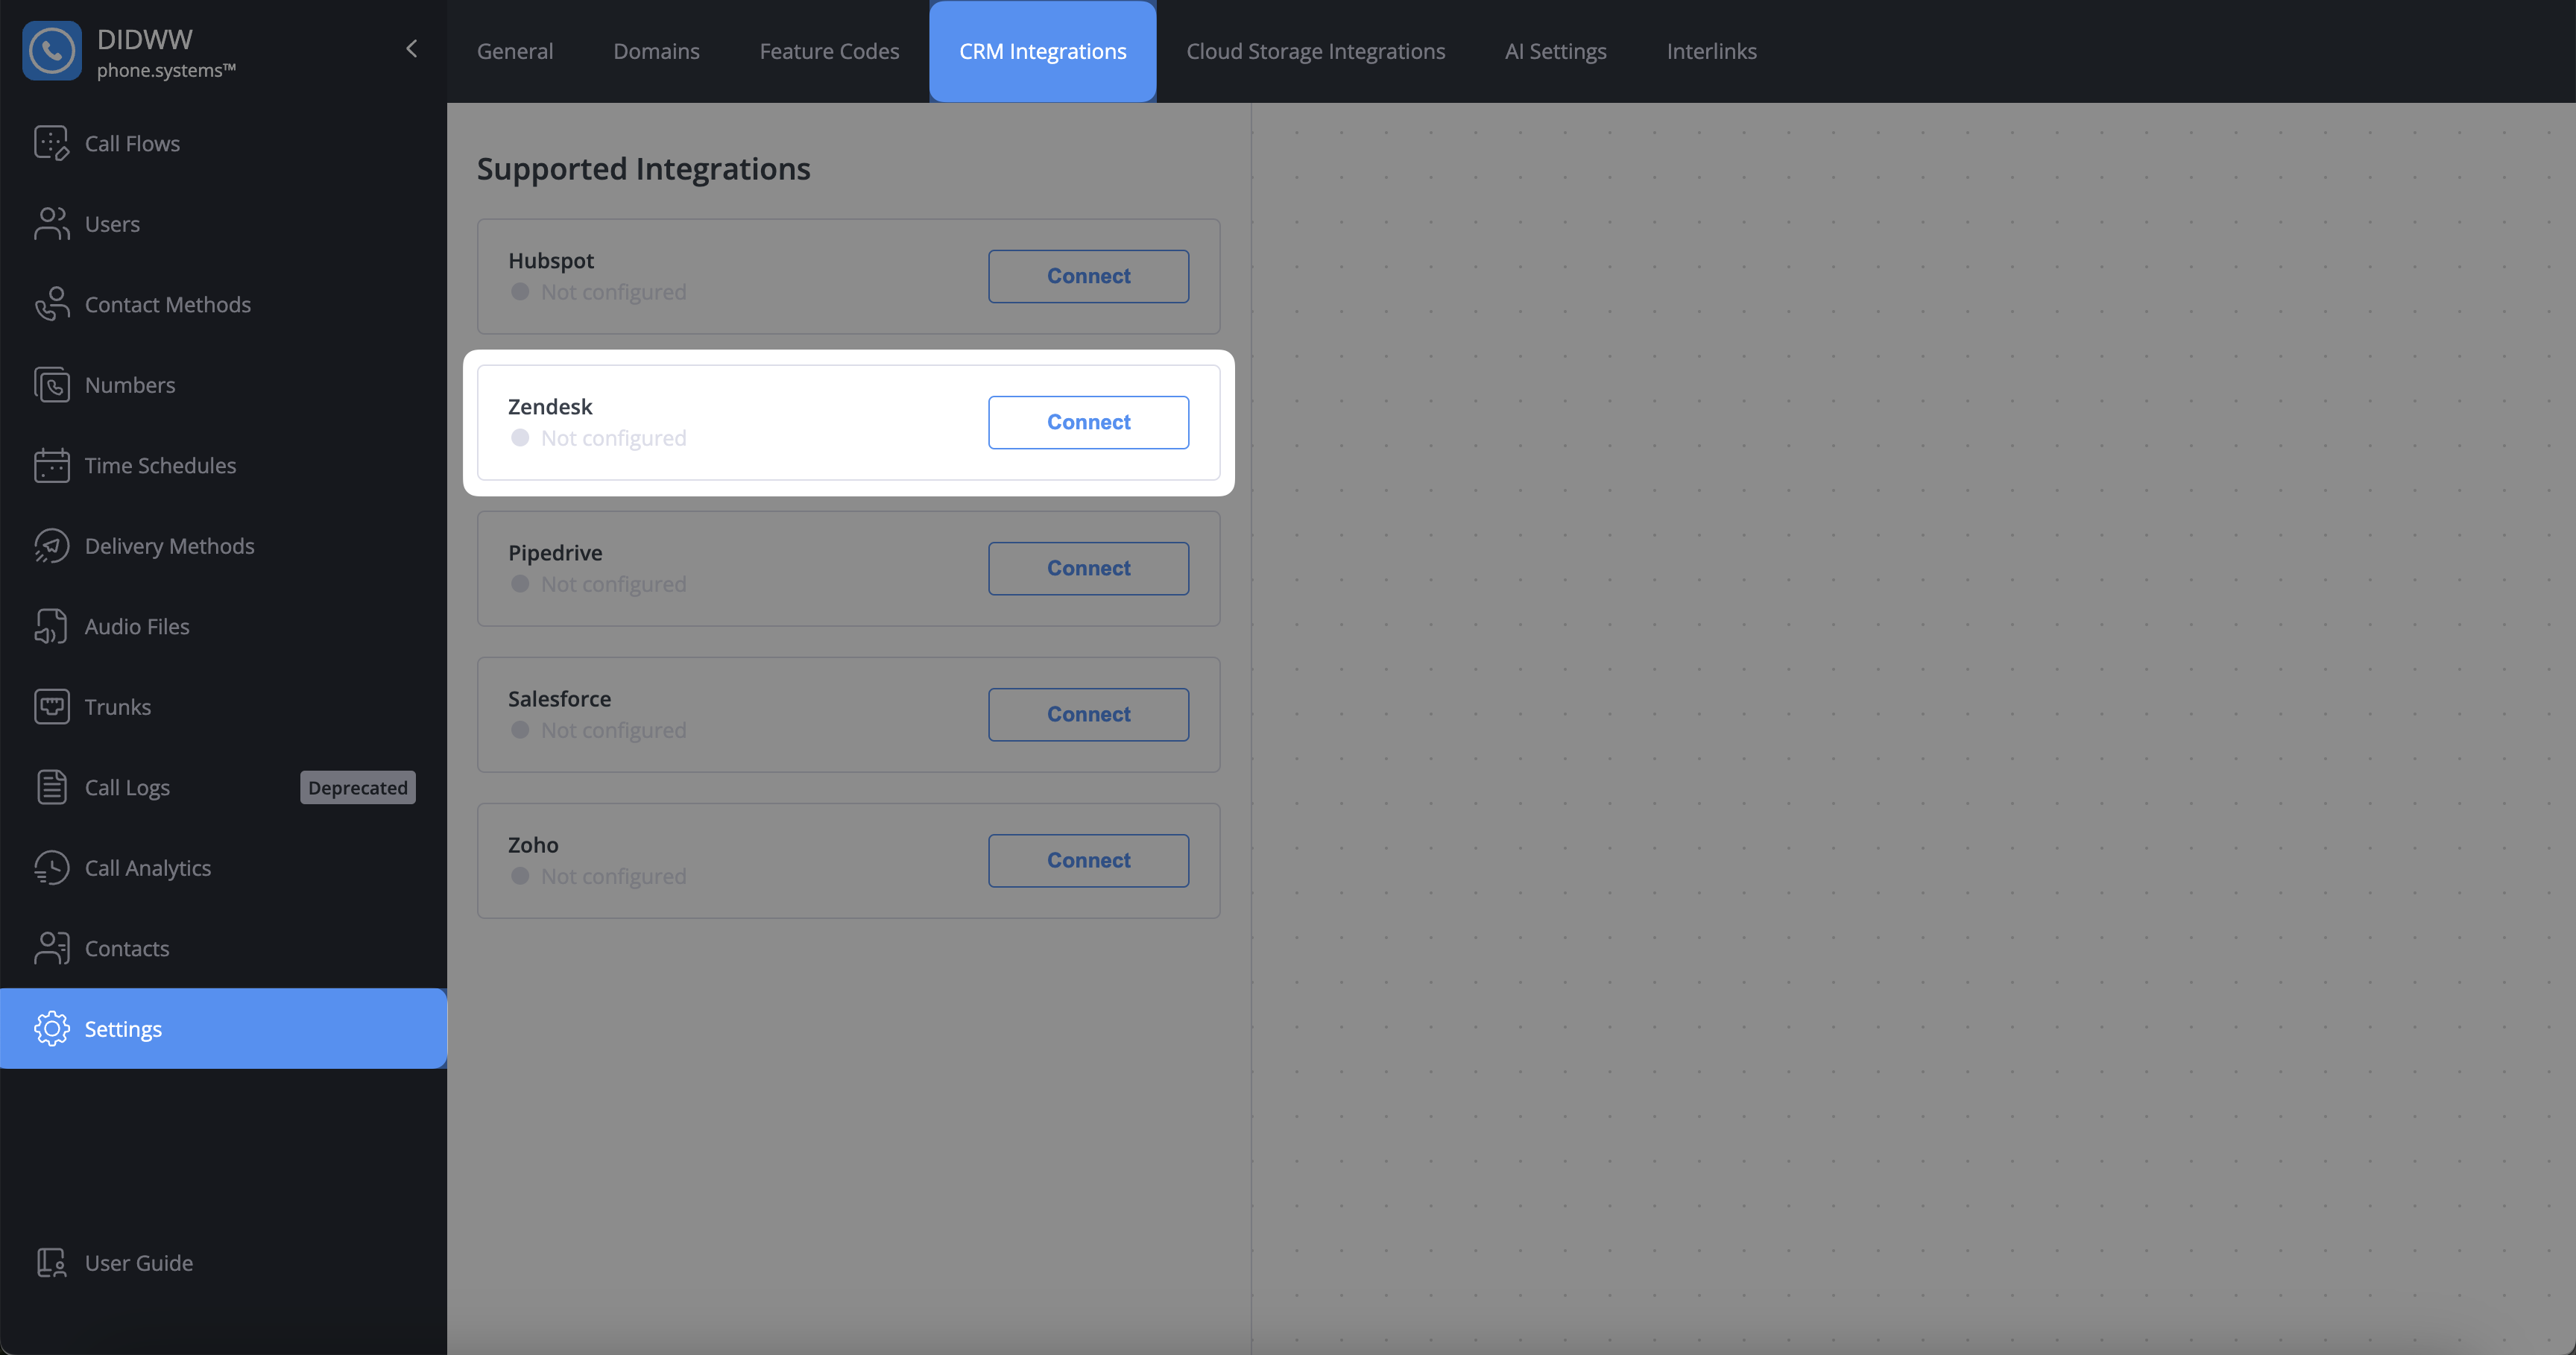
Fig. 6. Create Zendesk connection in phone.systems™#
Step 6: Copy the Redirect URL from phone.systems™ and paste it in Zendesk#
On the phone.systems™ Zendesk connection page, copy the Redirect URL.
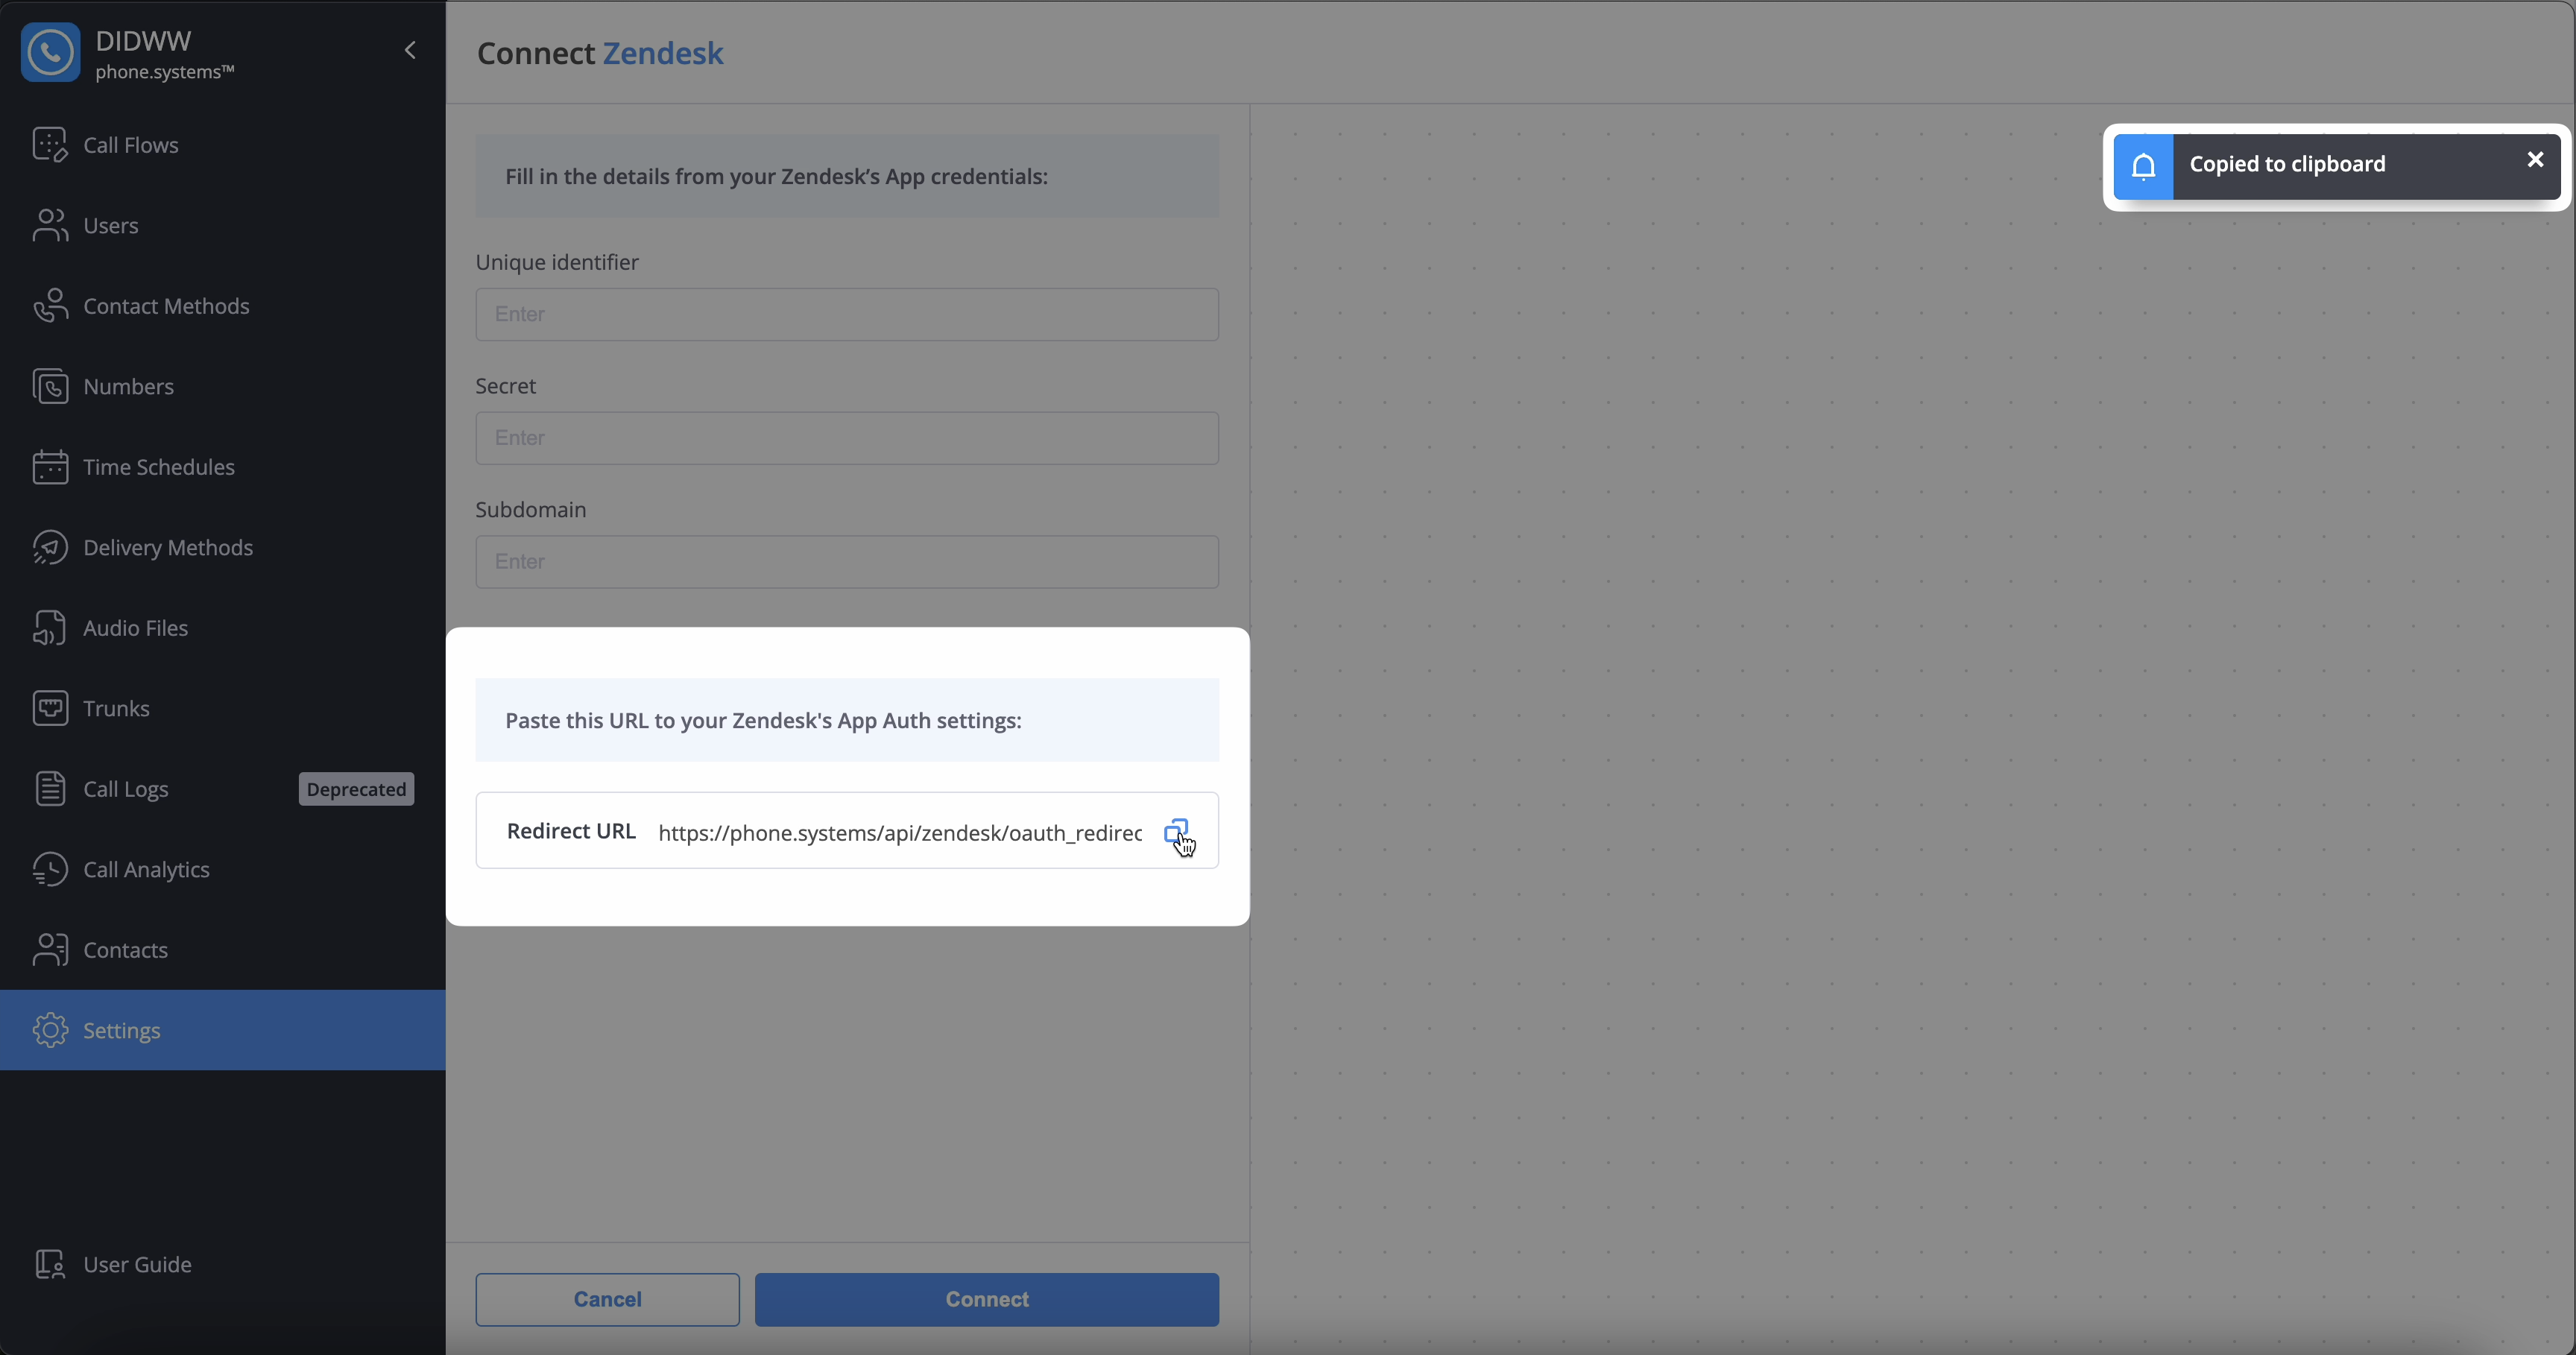
Fig. 7. Copy the Redirect URL#
Open the Zendesk app creation page, scroll to the bottom, paste the Redirect URL, and Save the settings.
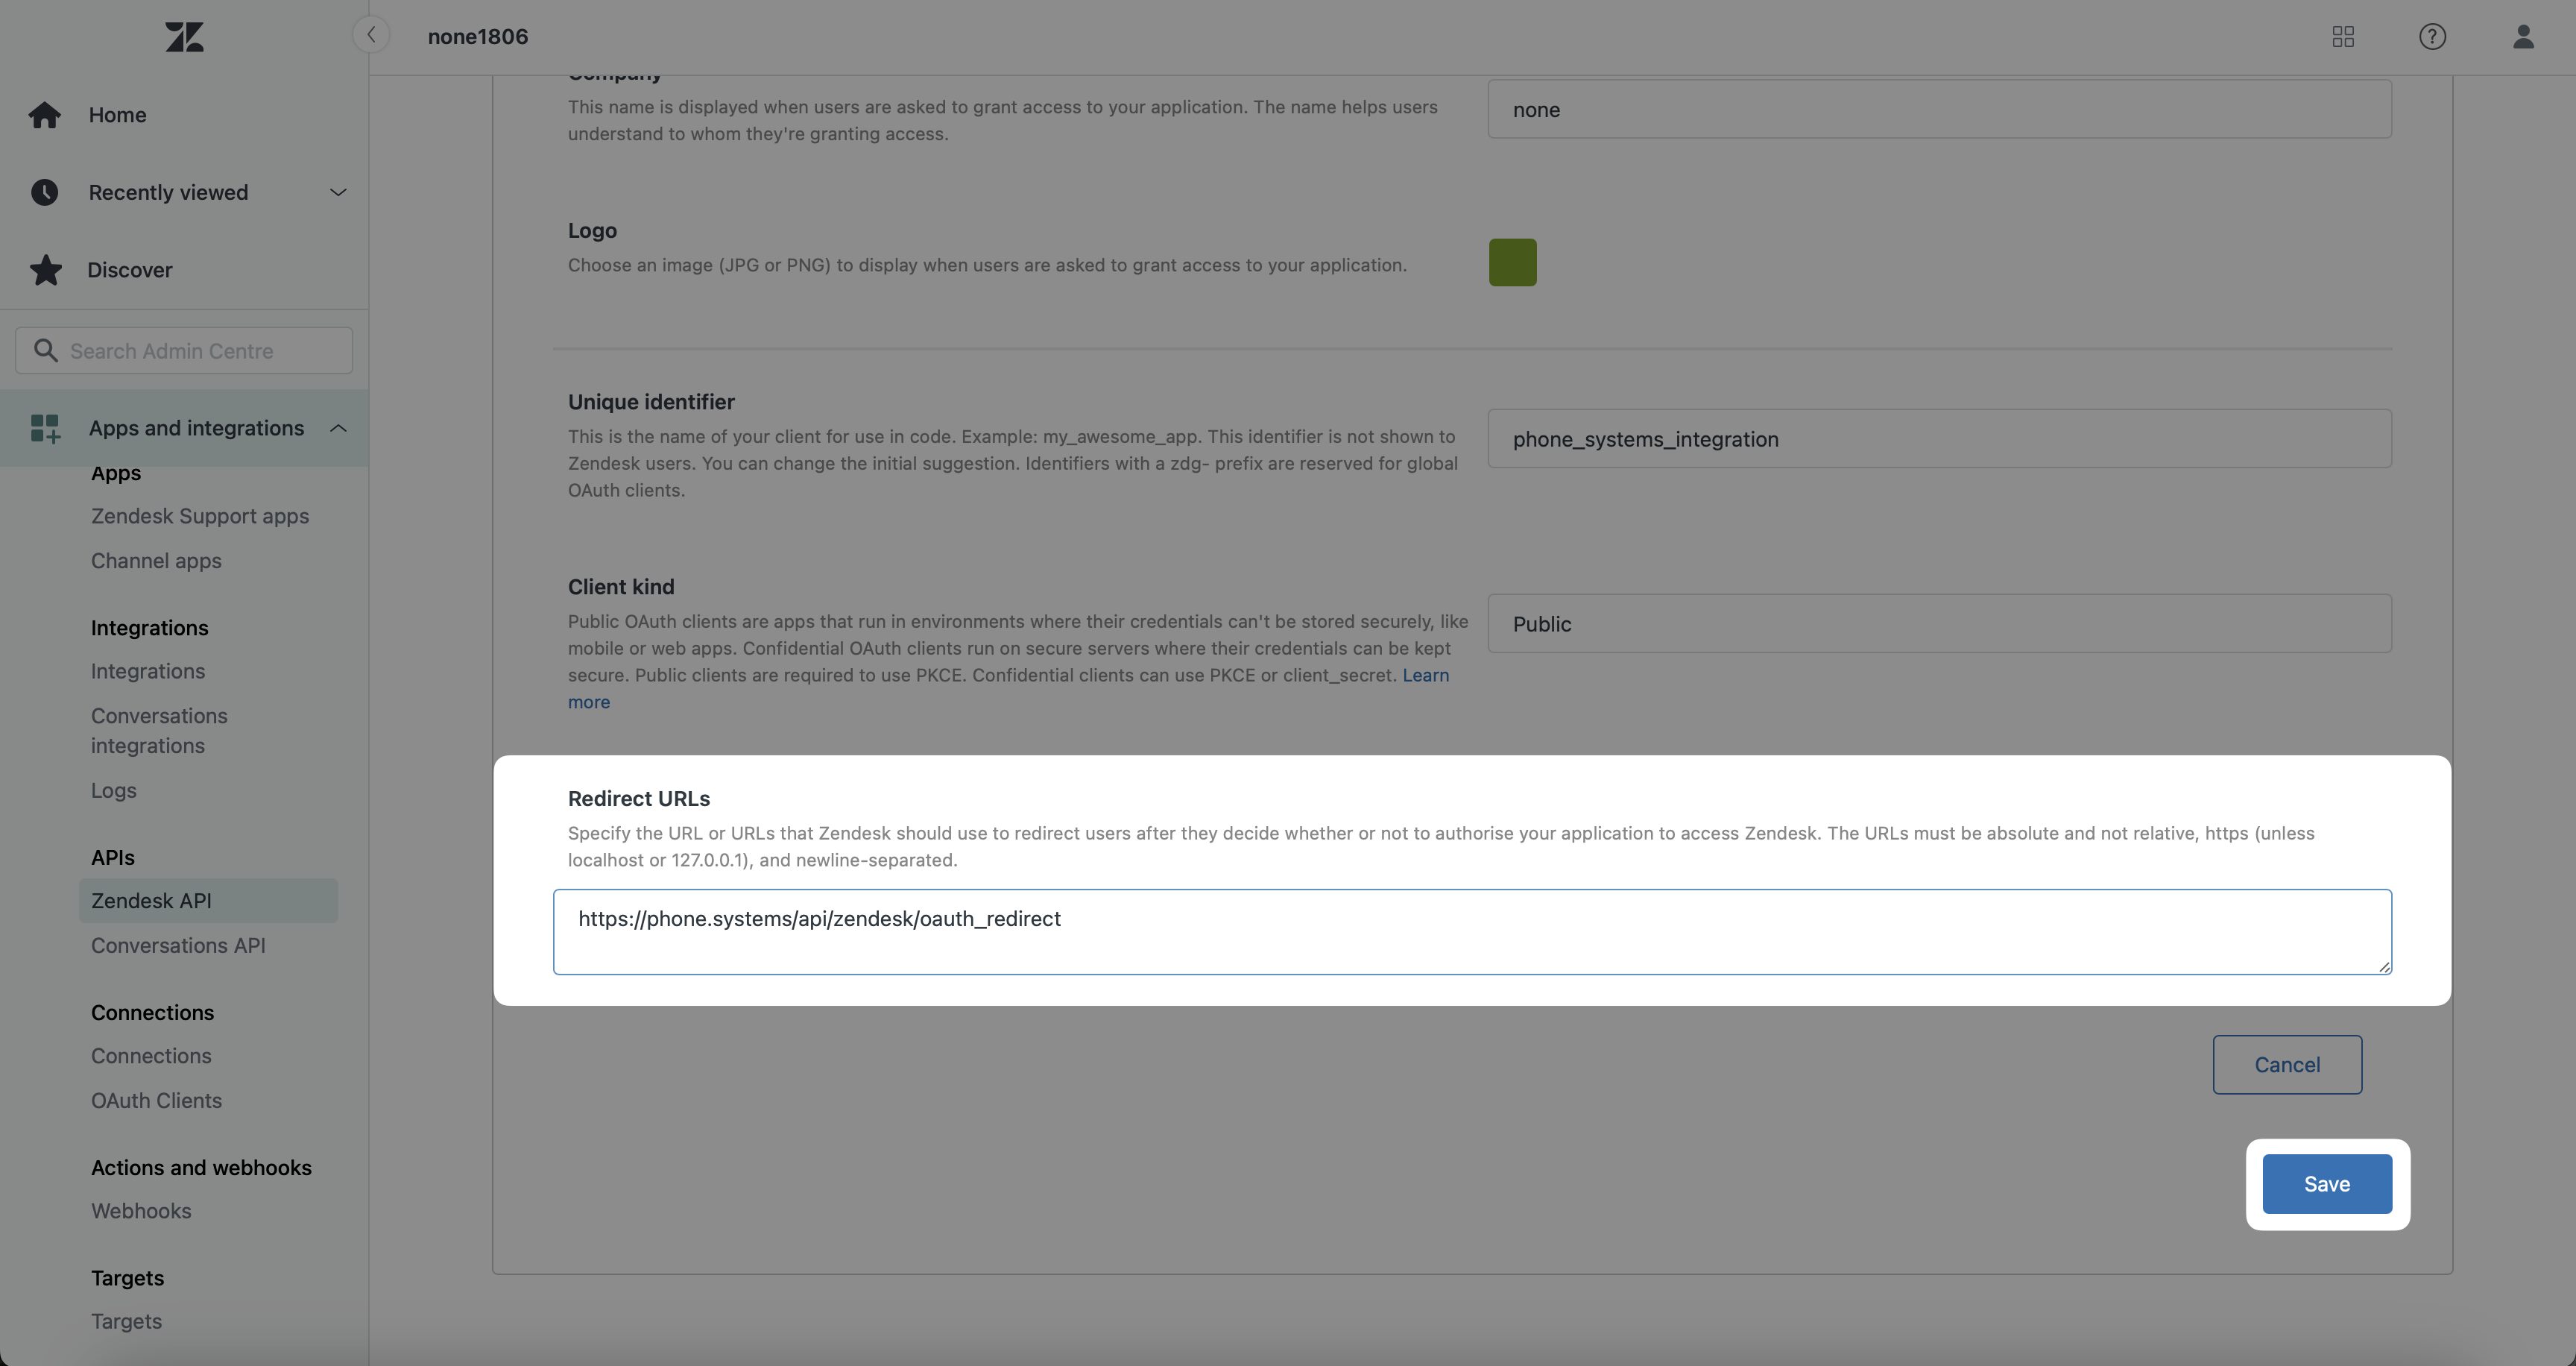
Fig. 8. Paste the Redirect URL#
Step 7: Copy the Unique Identifier and Secret from Zendesk and paste it in phone.systems™#
After saving the basic settings, a Secret will be generated. Copy the Secret immediately, as you will only see it once. If needed, you can generate a new Secret later.
Once the Secret is copied and saved, copy the Identifier.
Warning
Copy and store this secret. It won’t be shown in full again after you click Save or leave this page.
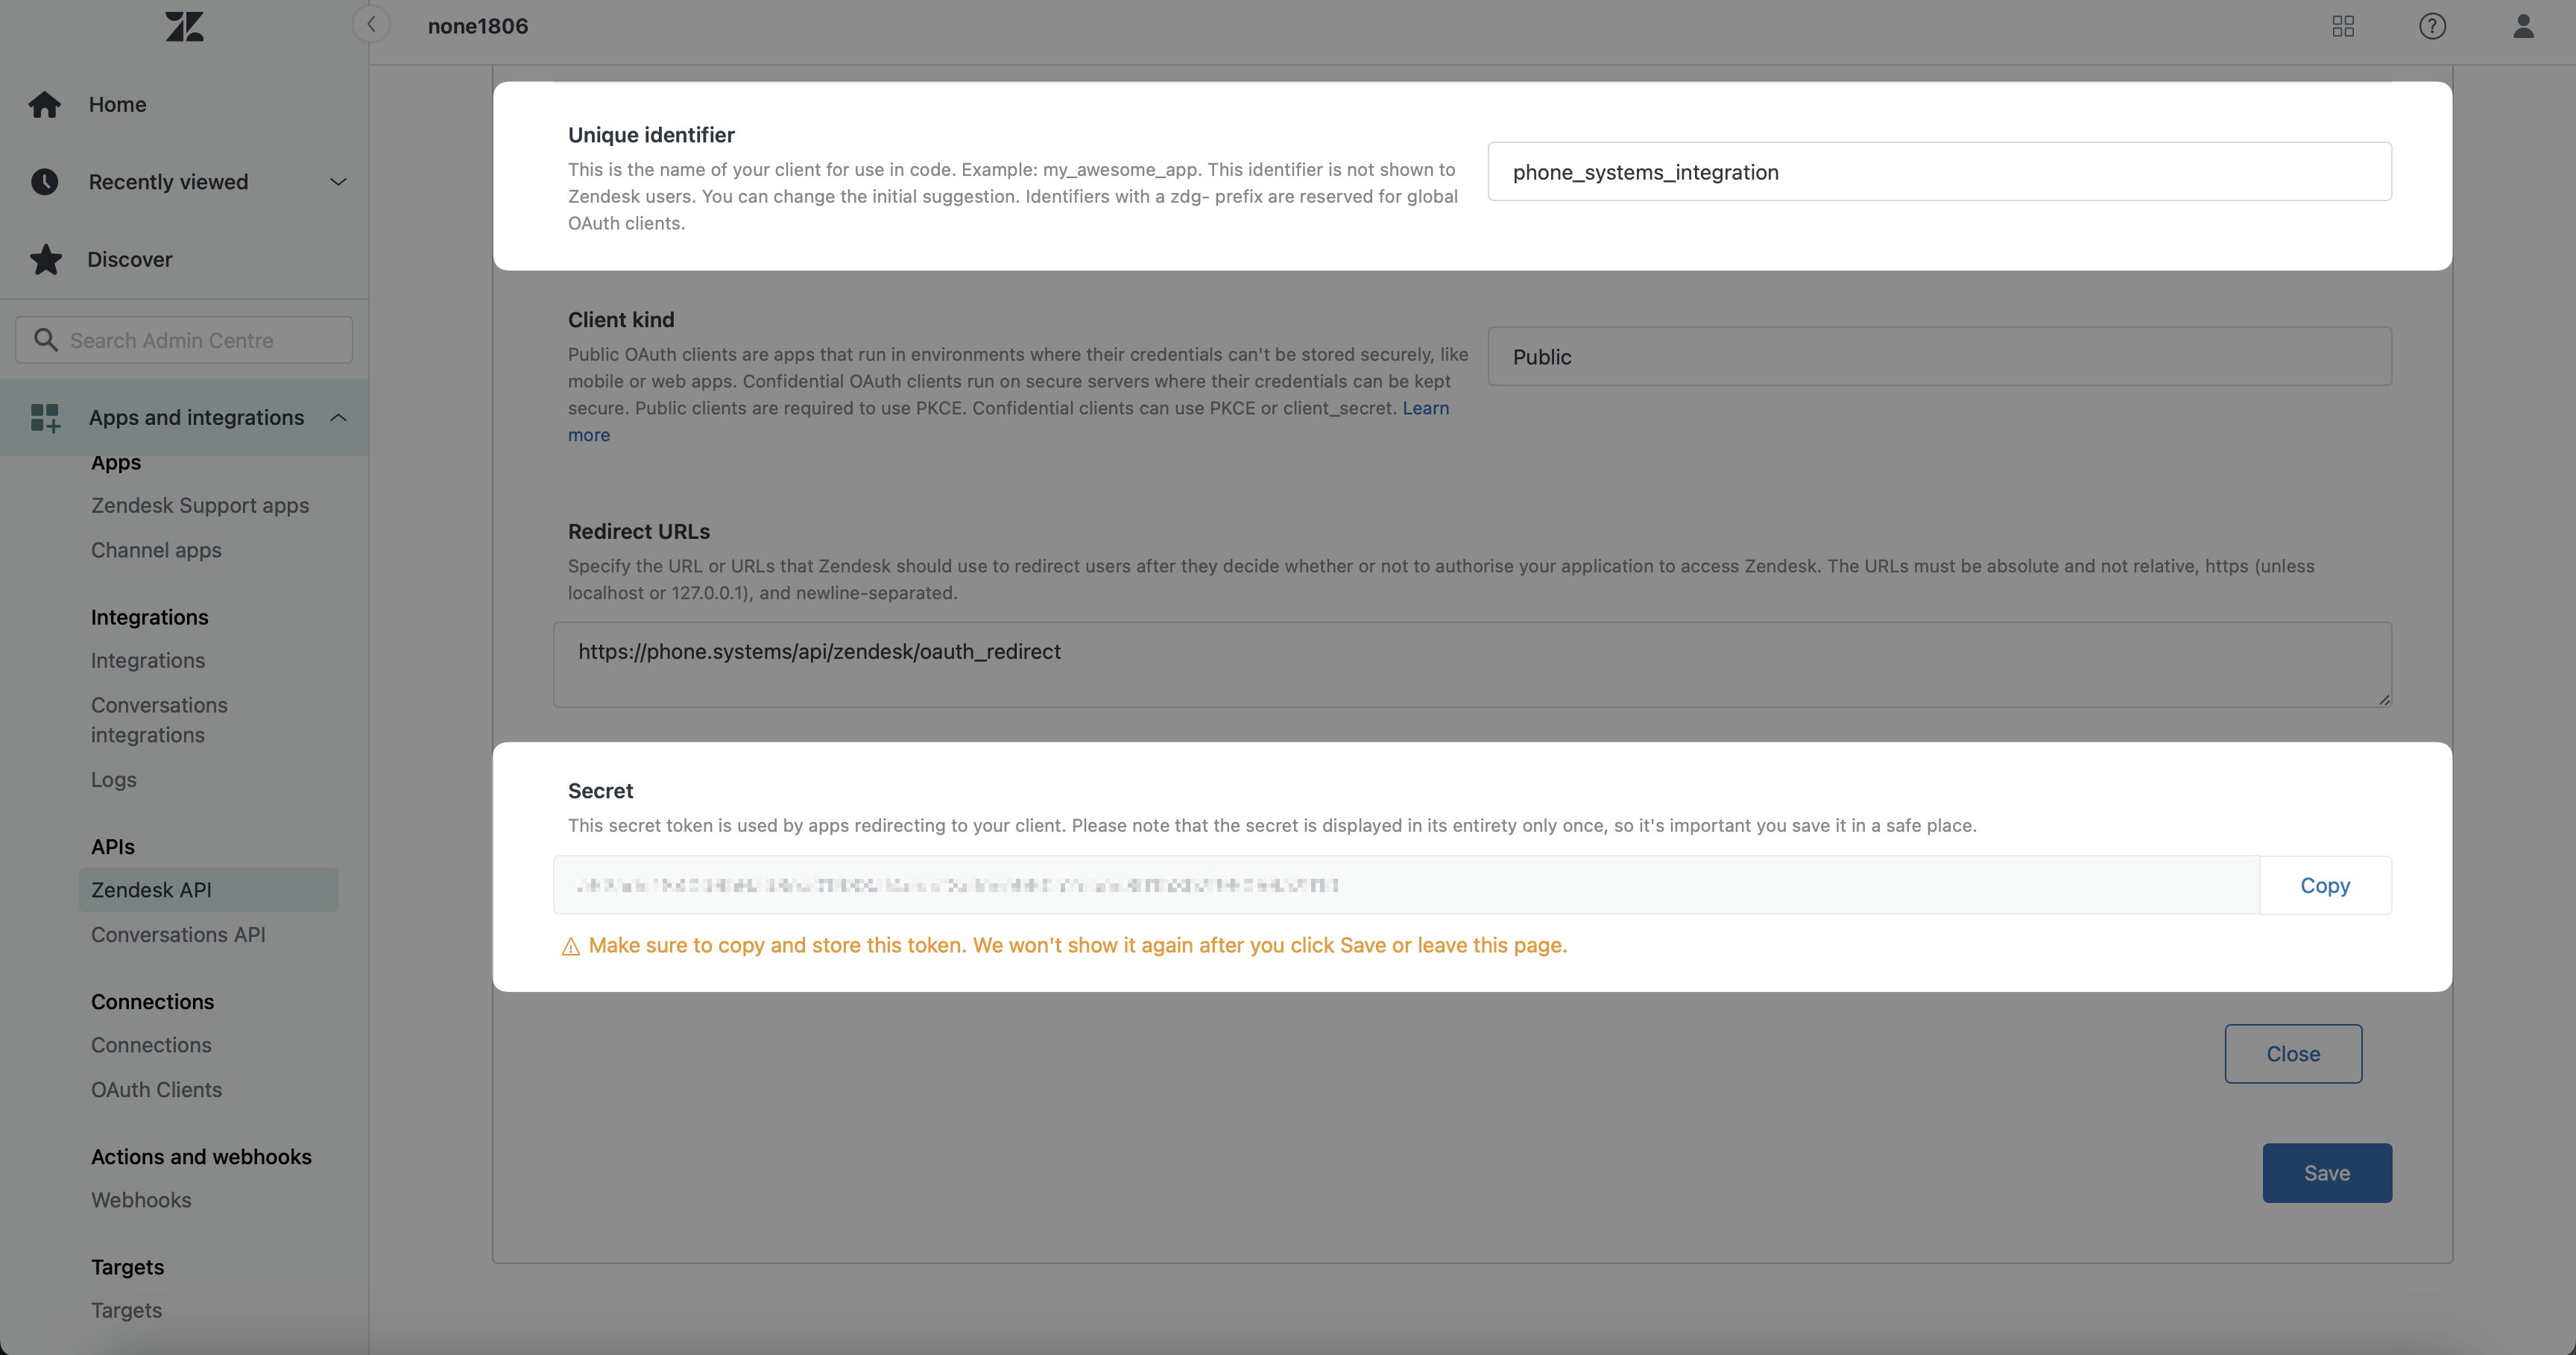
Fig. 9. Copy the Unique Identifier and Secret#
Open the phone.systems™ Zendesk connection page, and paste the Unique Identifier and Secret into the corresponding fields.
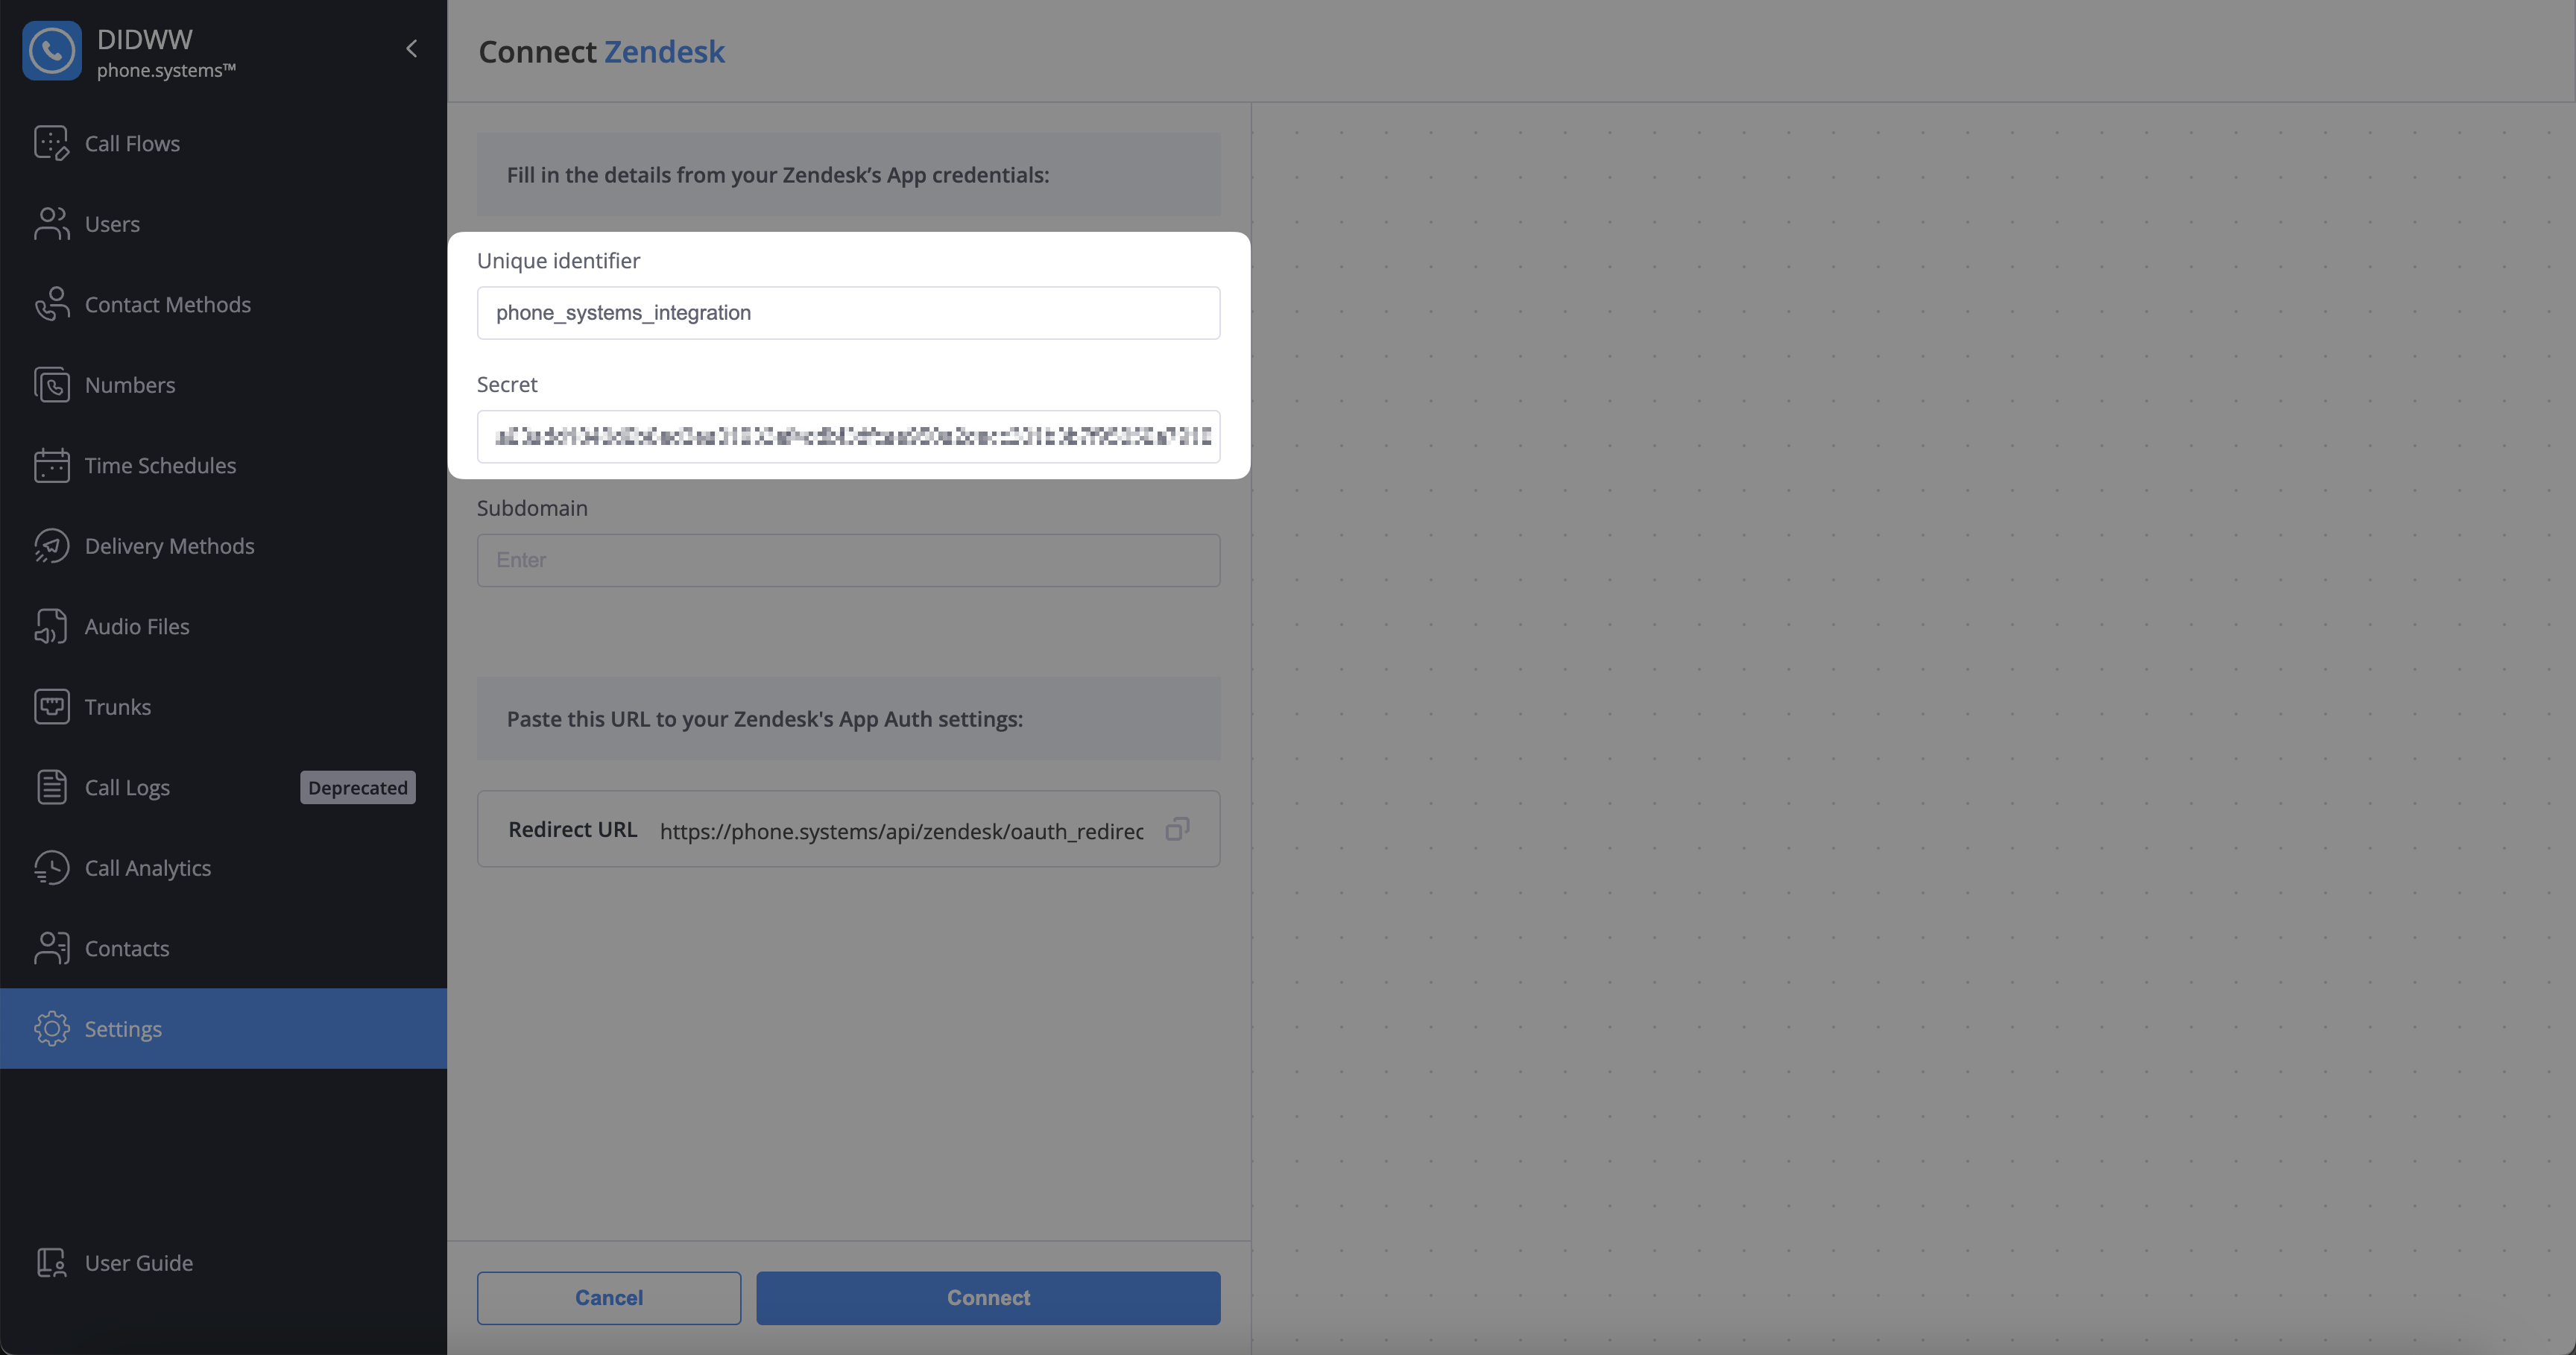
Fig. 10. Paste the Unique Identifier and Secret#
Step 8: Copy the Subdomain from Zendesk and paste it in phone.systems™#
Open the Zendesk app creation page and locate the subdomain name in the top-left corner or in the first part of the website URL, as shown in the figure below.
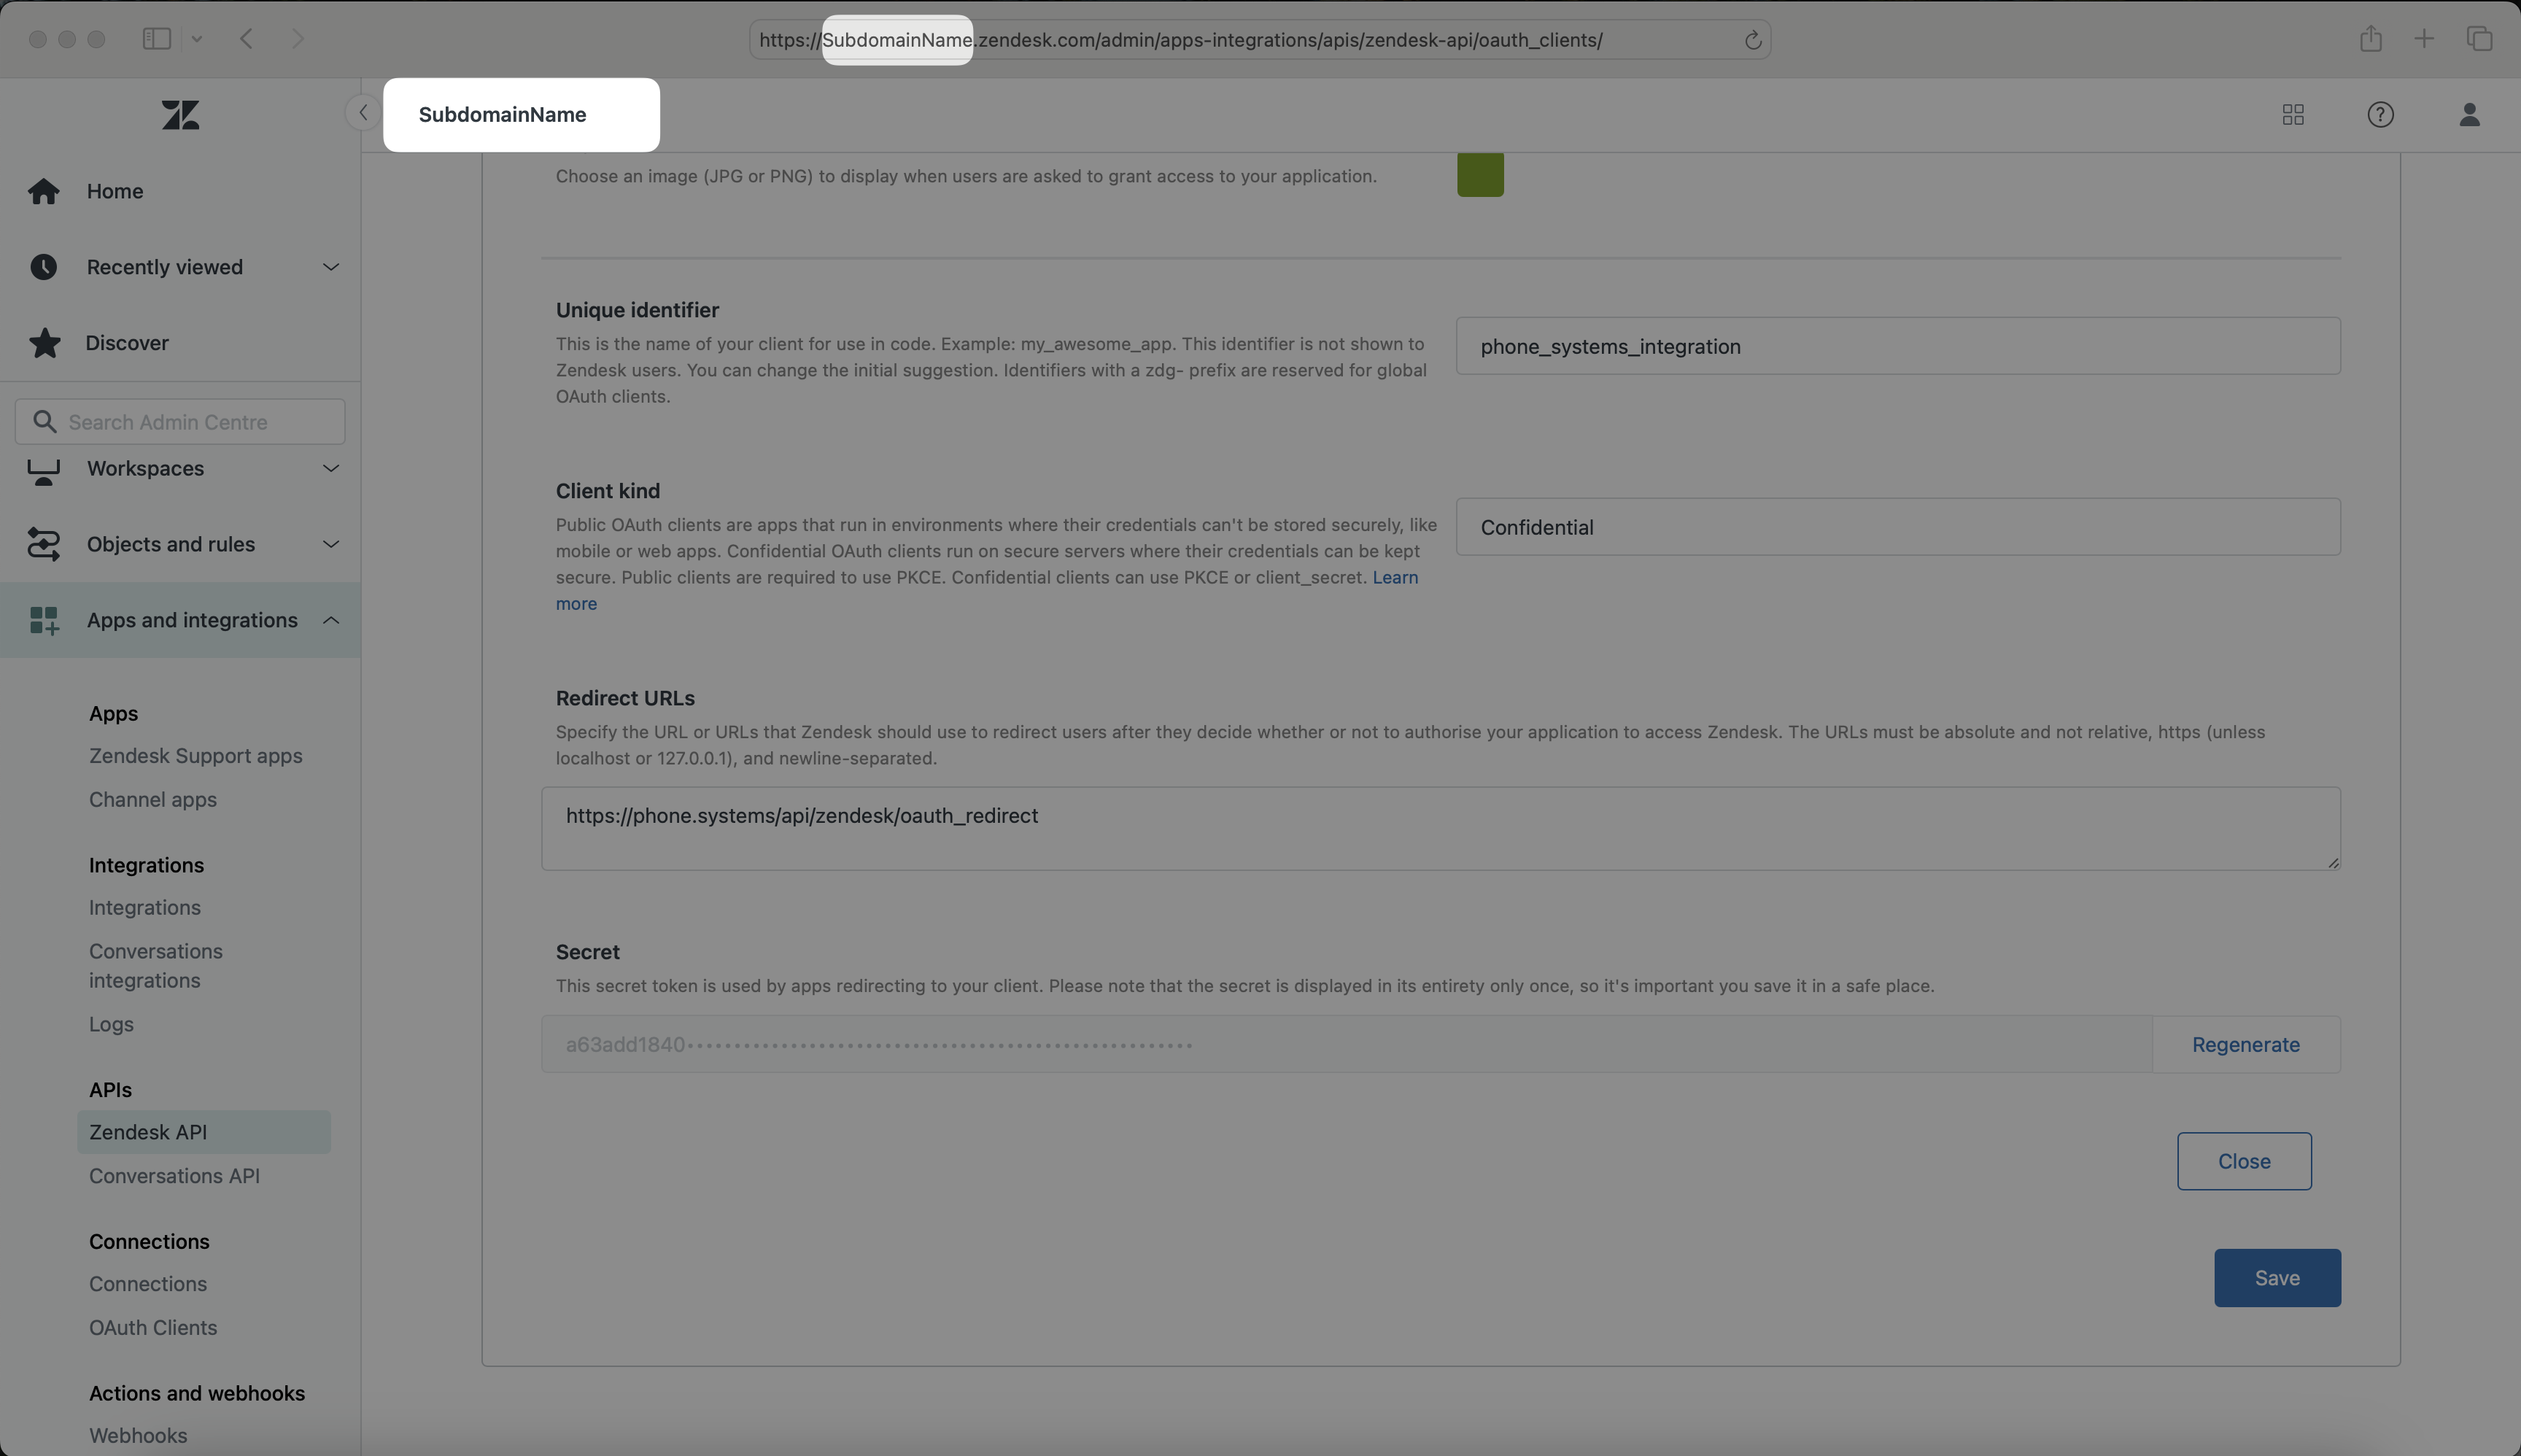
Fig. 11. Copy the Subdomain#
Then, open the phone.systems™ Zendesk connection page and paste the Subdomain into the corresponding field.
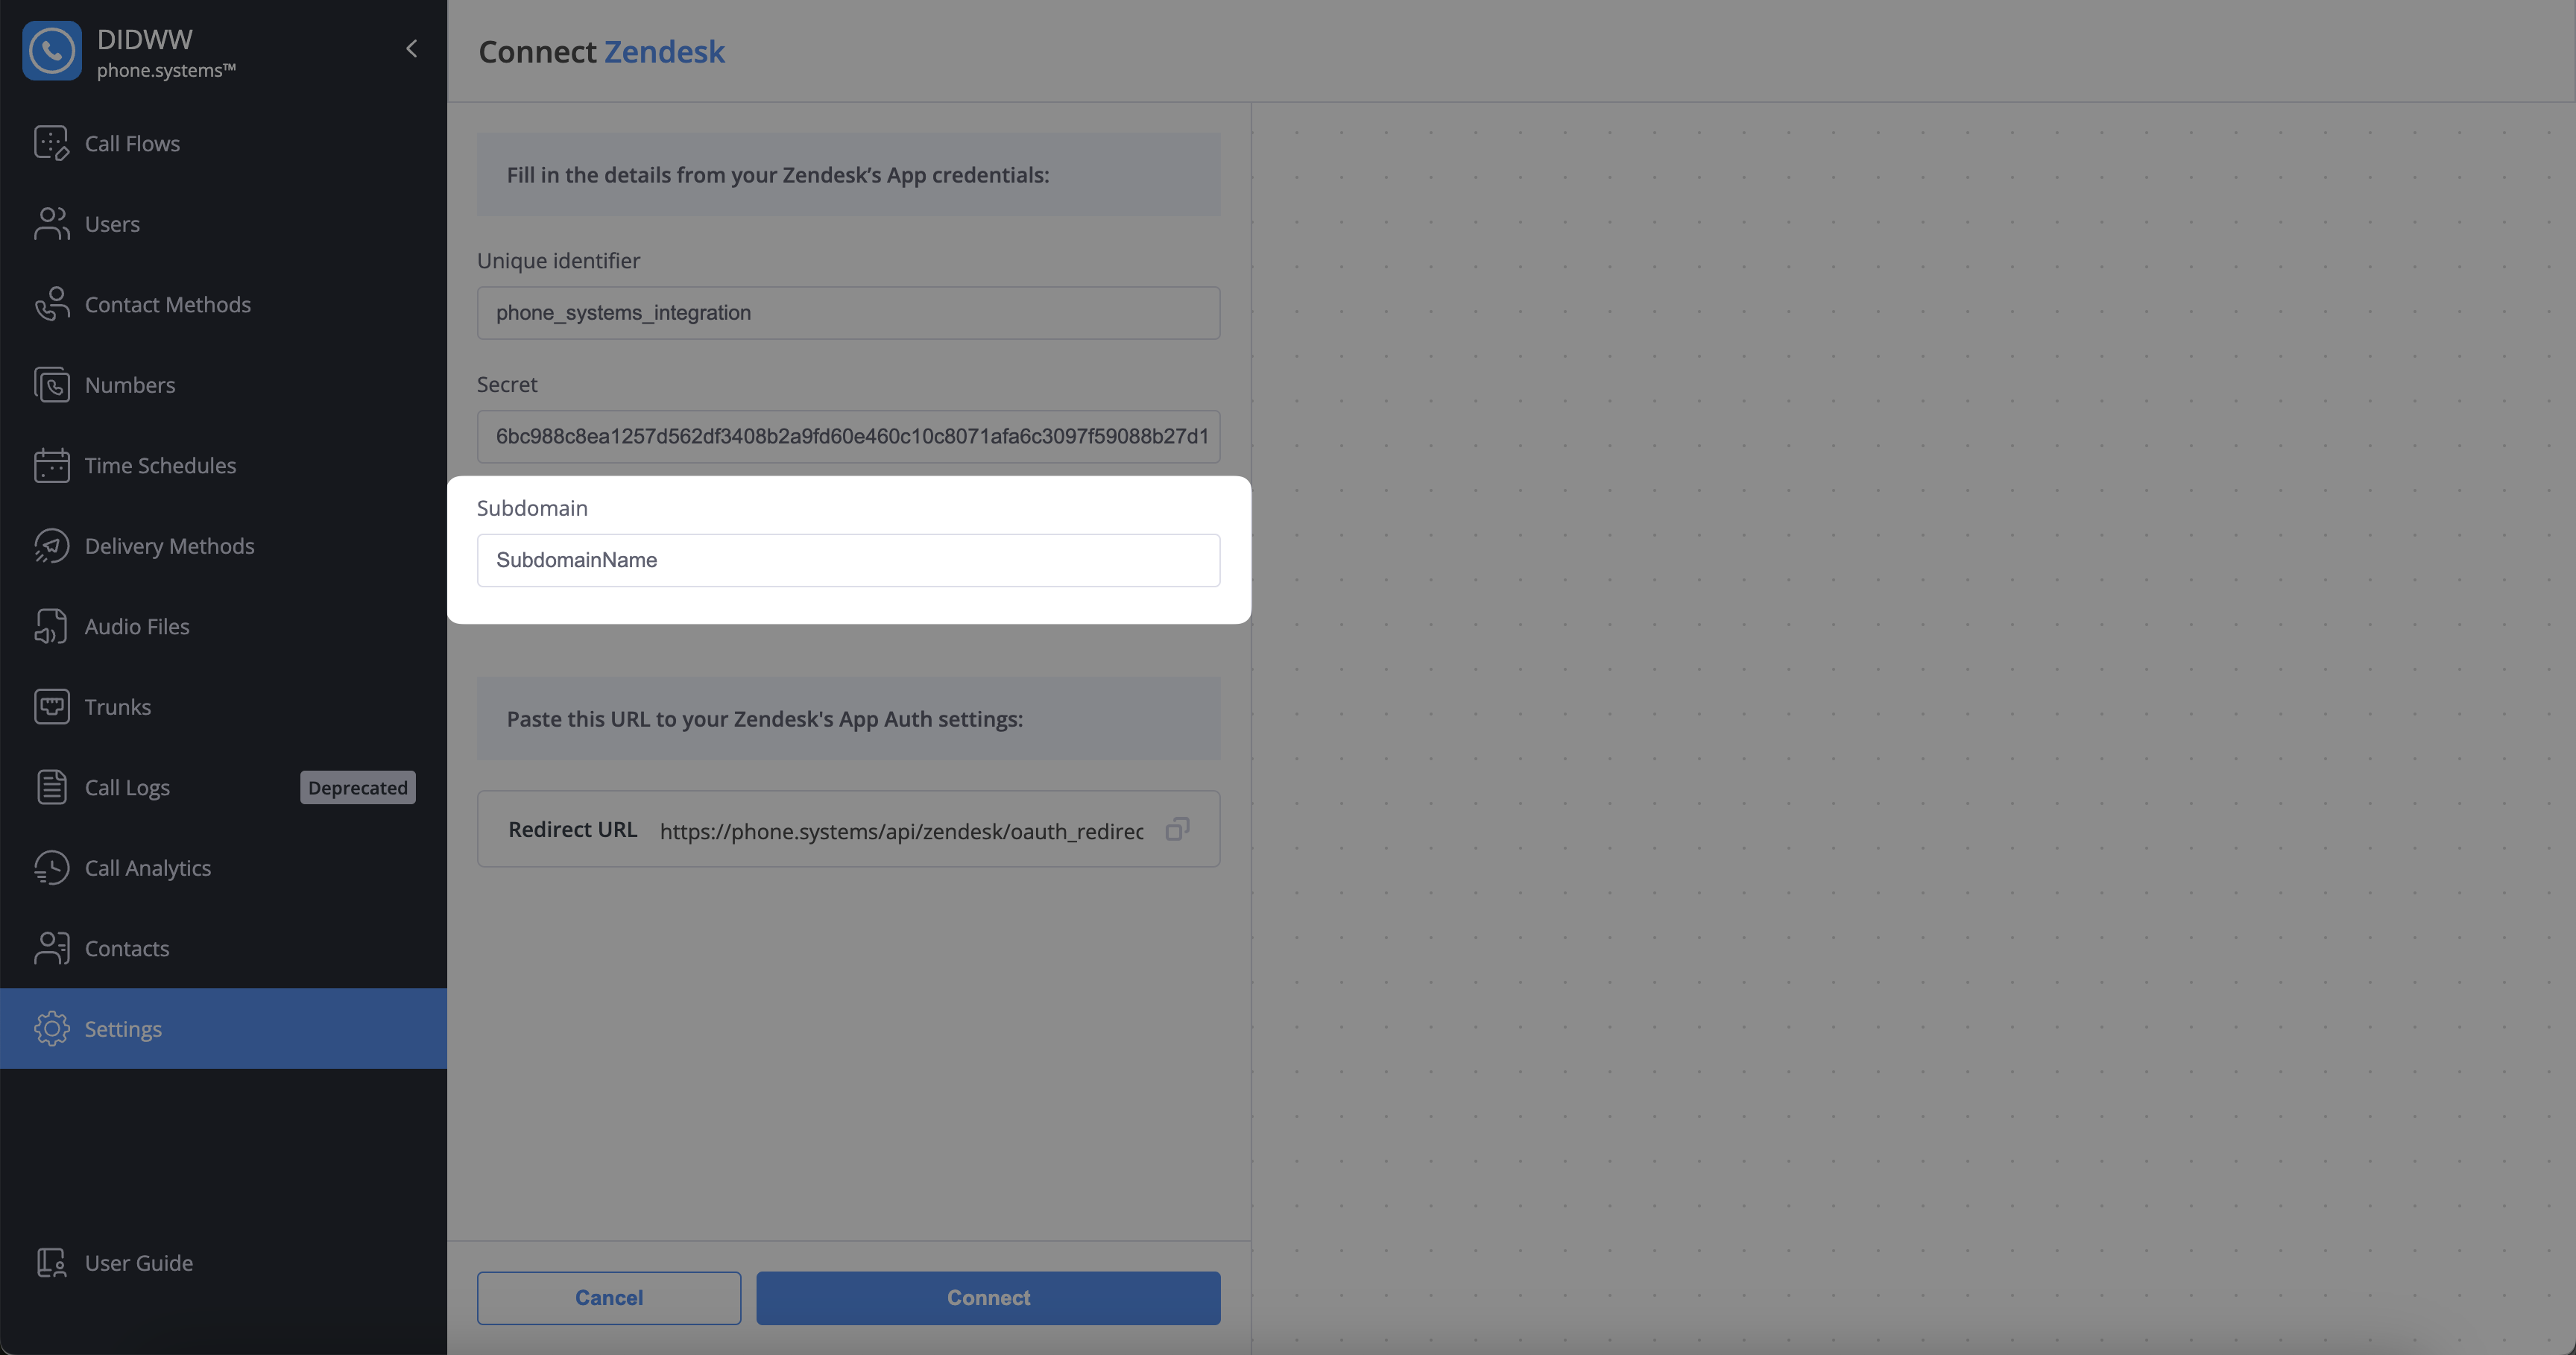
Fig. 12. Paste the Subdomain#
Step 9: Connect the phone.systems™ Zendesk app#
To complete the connection between phone.systems™ and Zendesk, open the phone.systems™ page and click Connect.
When the access permissions page appears, click Allow.

Fig. 13. Allow Access#
After you click Allow, you will be redirected back to the phone.systems™ CRM Integrations page. Zendesk will appear under Active Integrations with the status Connected.
Note
phone.systems™ will automatically synchronize data and establish a connection with your main Zendesk account. The app will also be installed in Zendesk CRM.
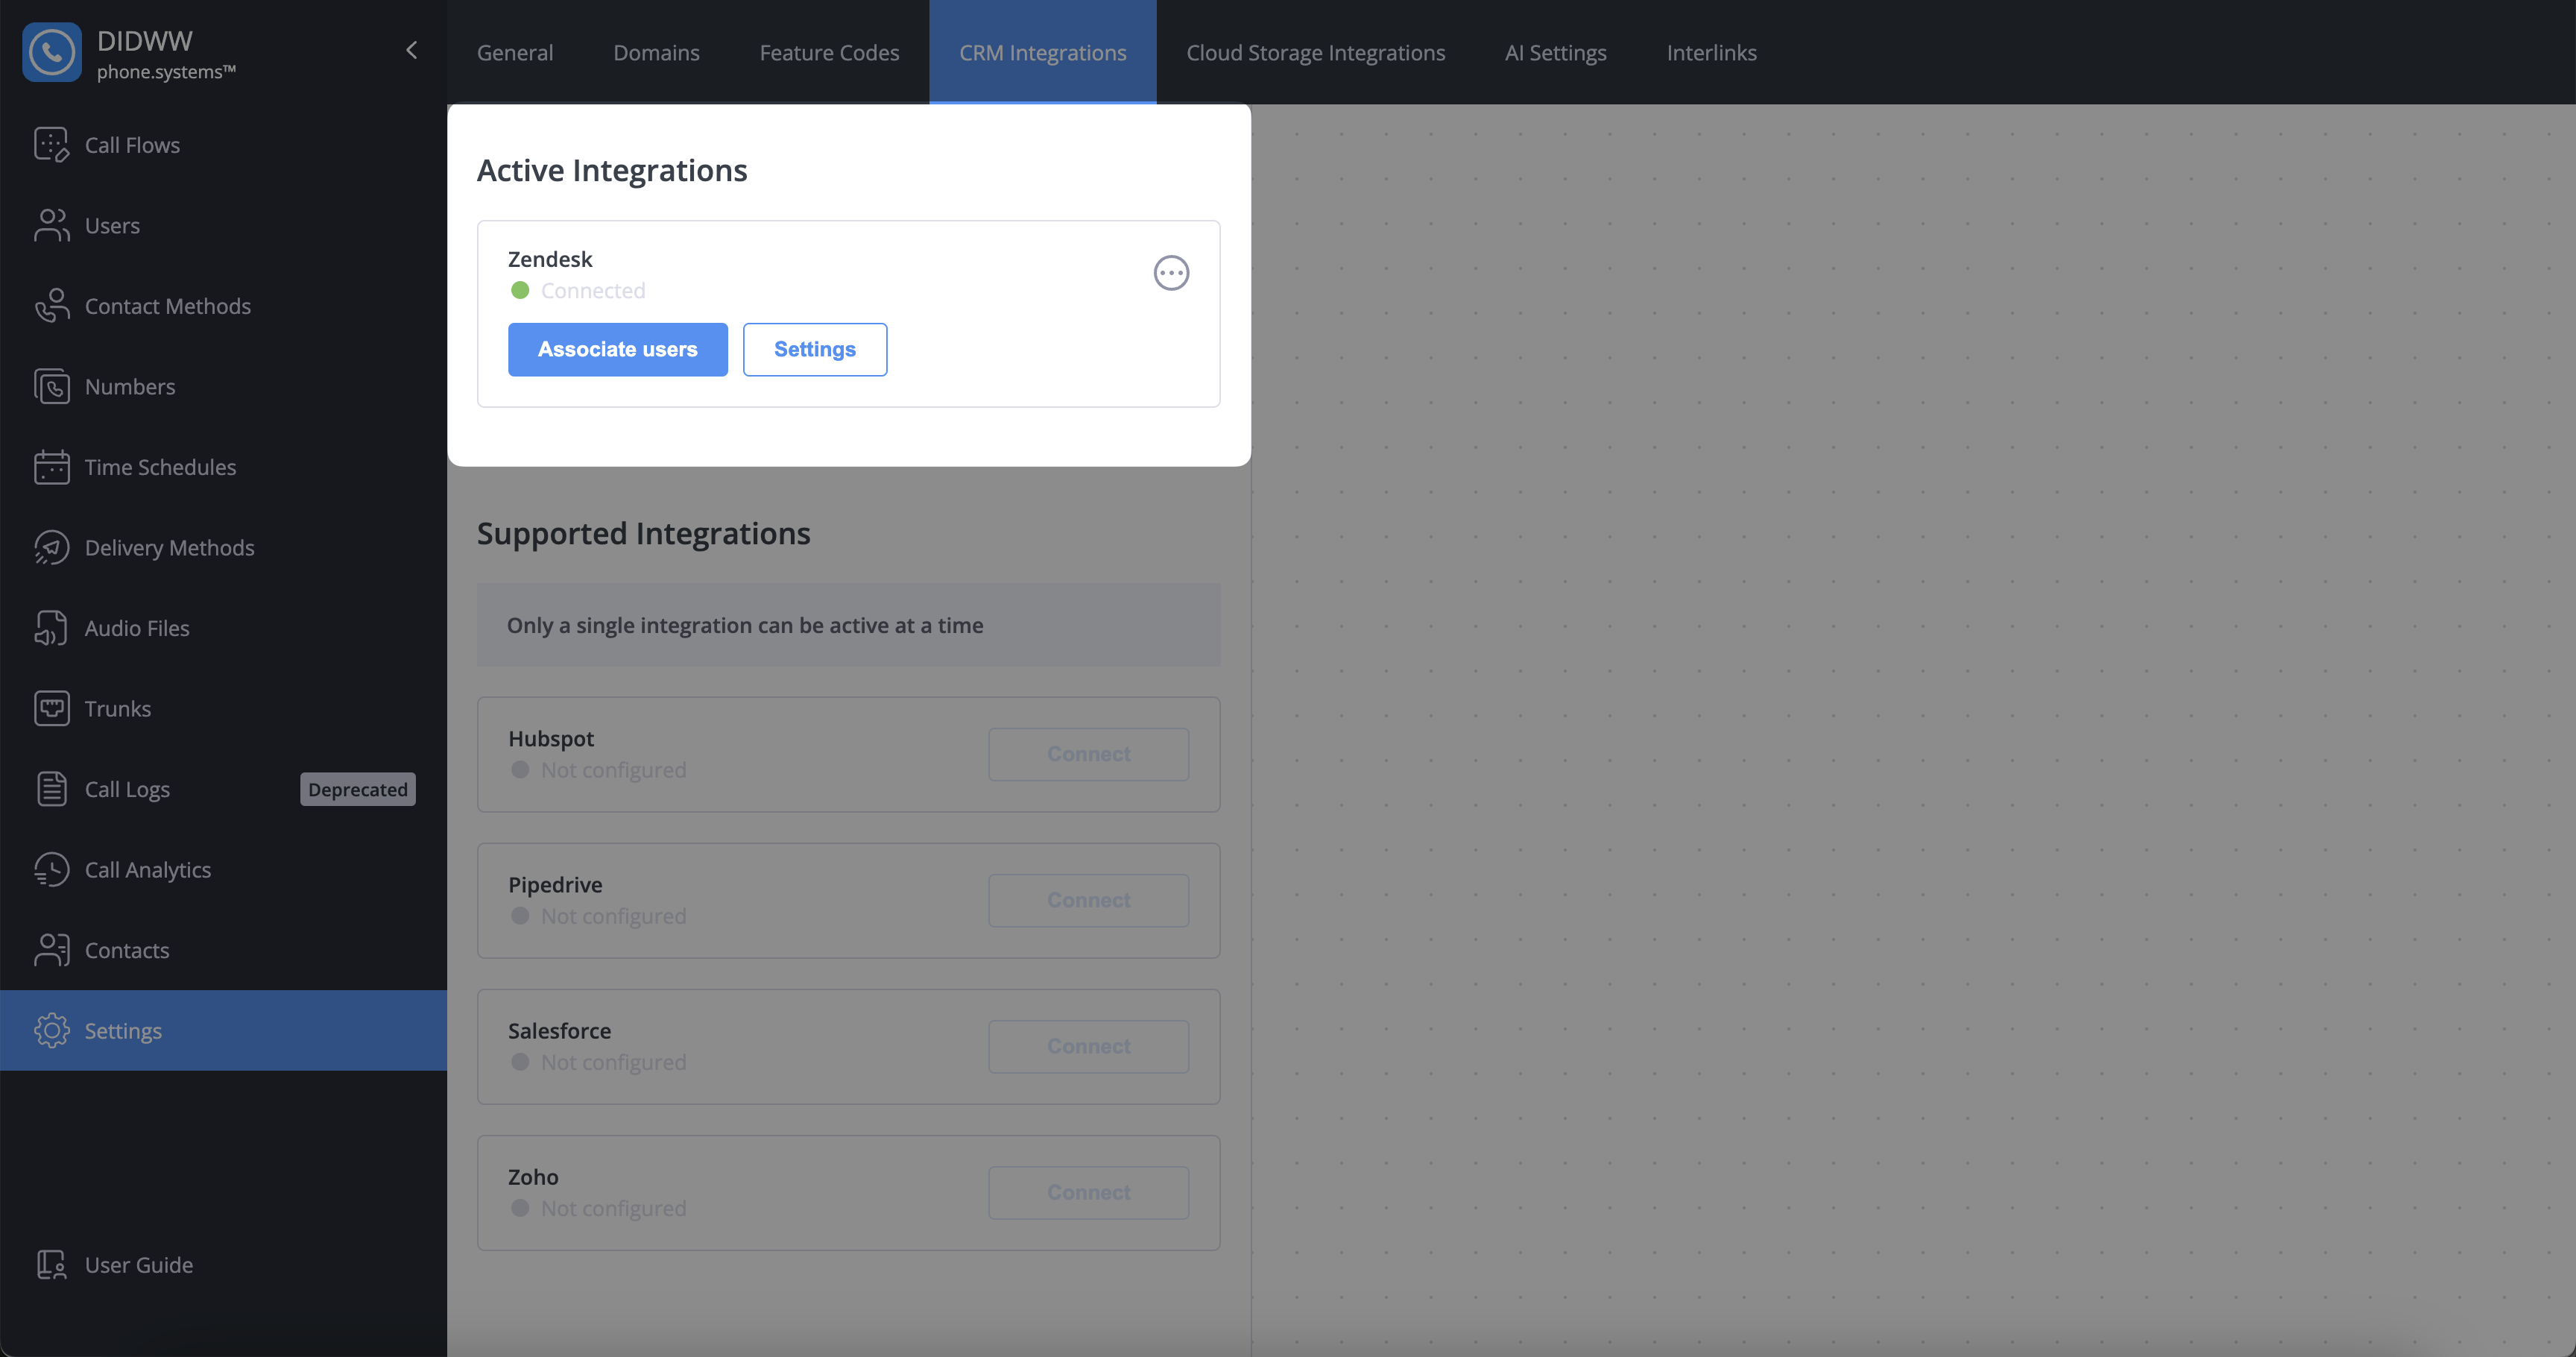
Fig. 14. Active Zendesk connection in phone.systems™#
Configuring Zendesk Settings#
Once the integration is active, you can customize its behavior. To access these options, navigate to Settings > CRM Integrations and click the Settings icon next to your Zendesk connection.
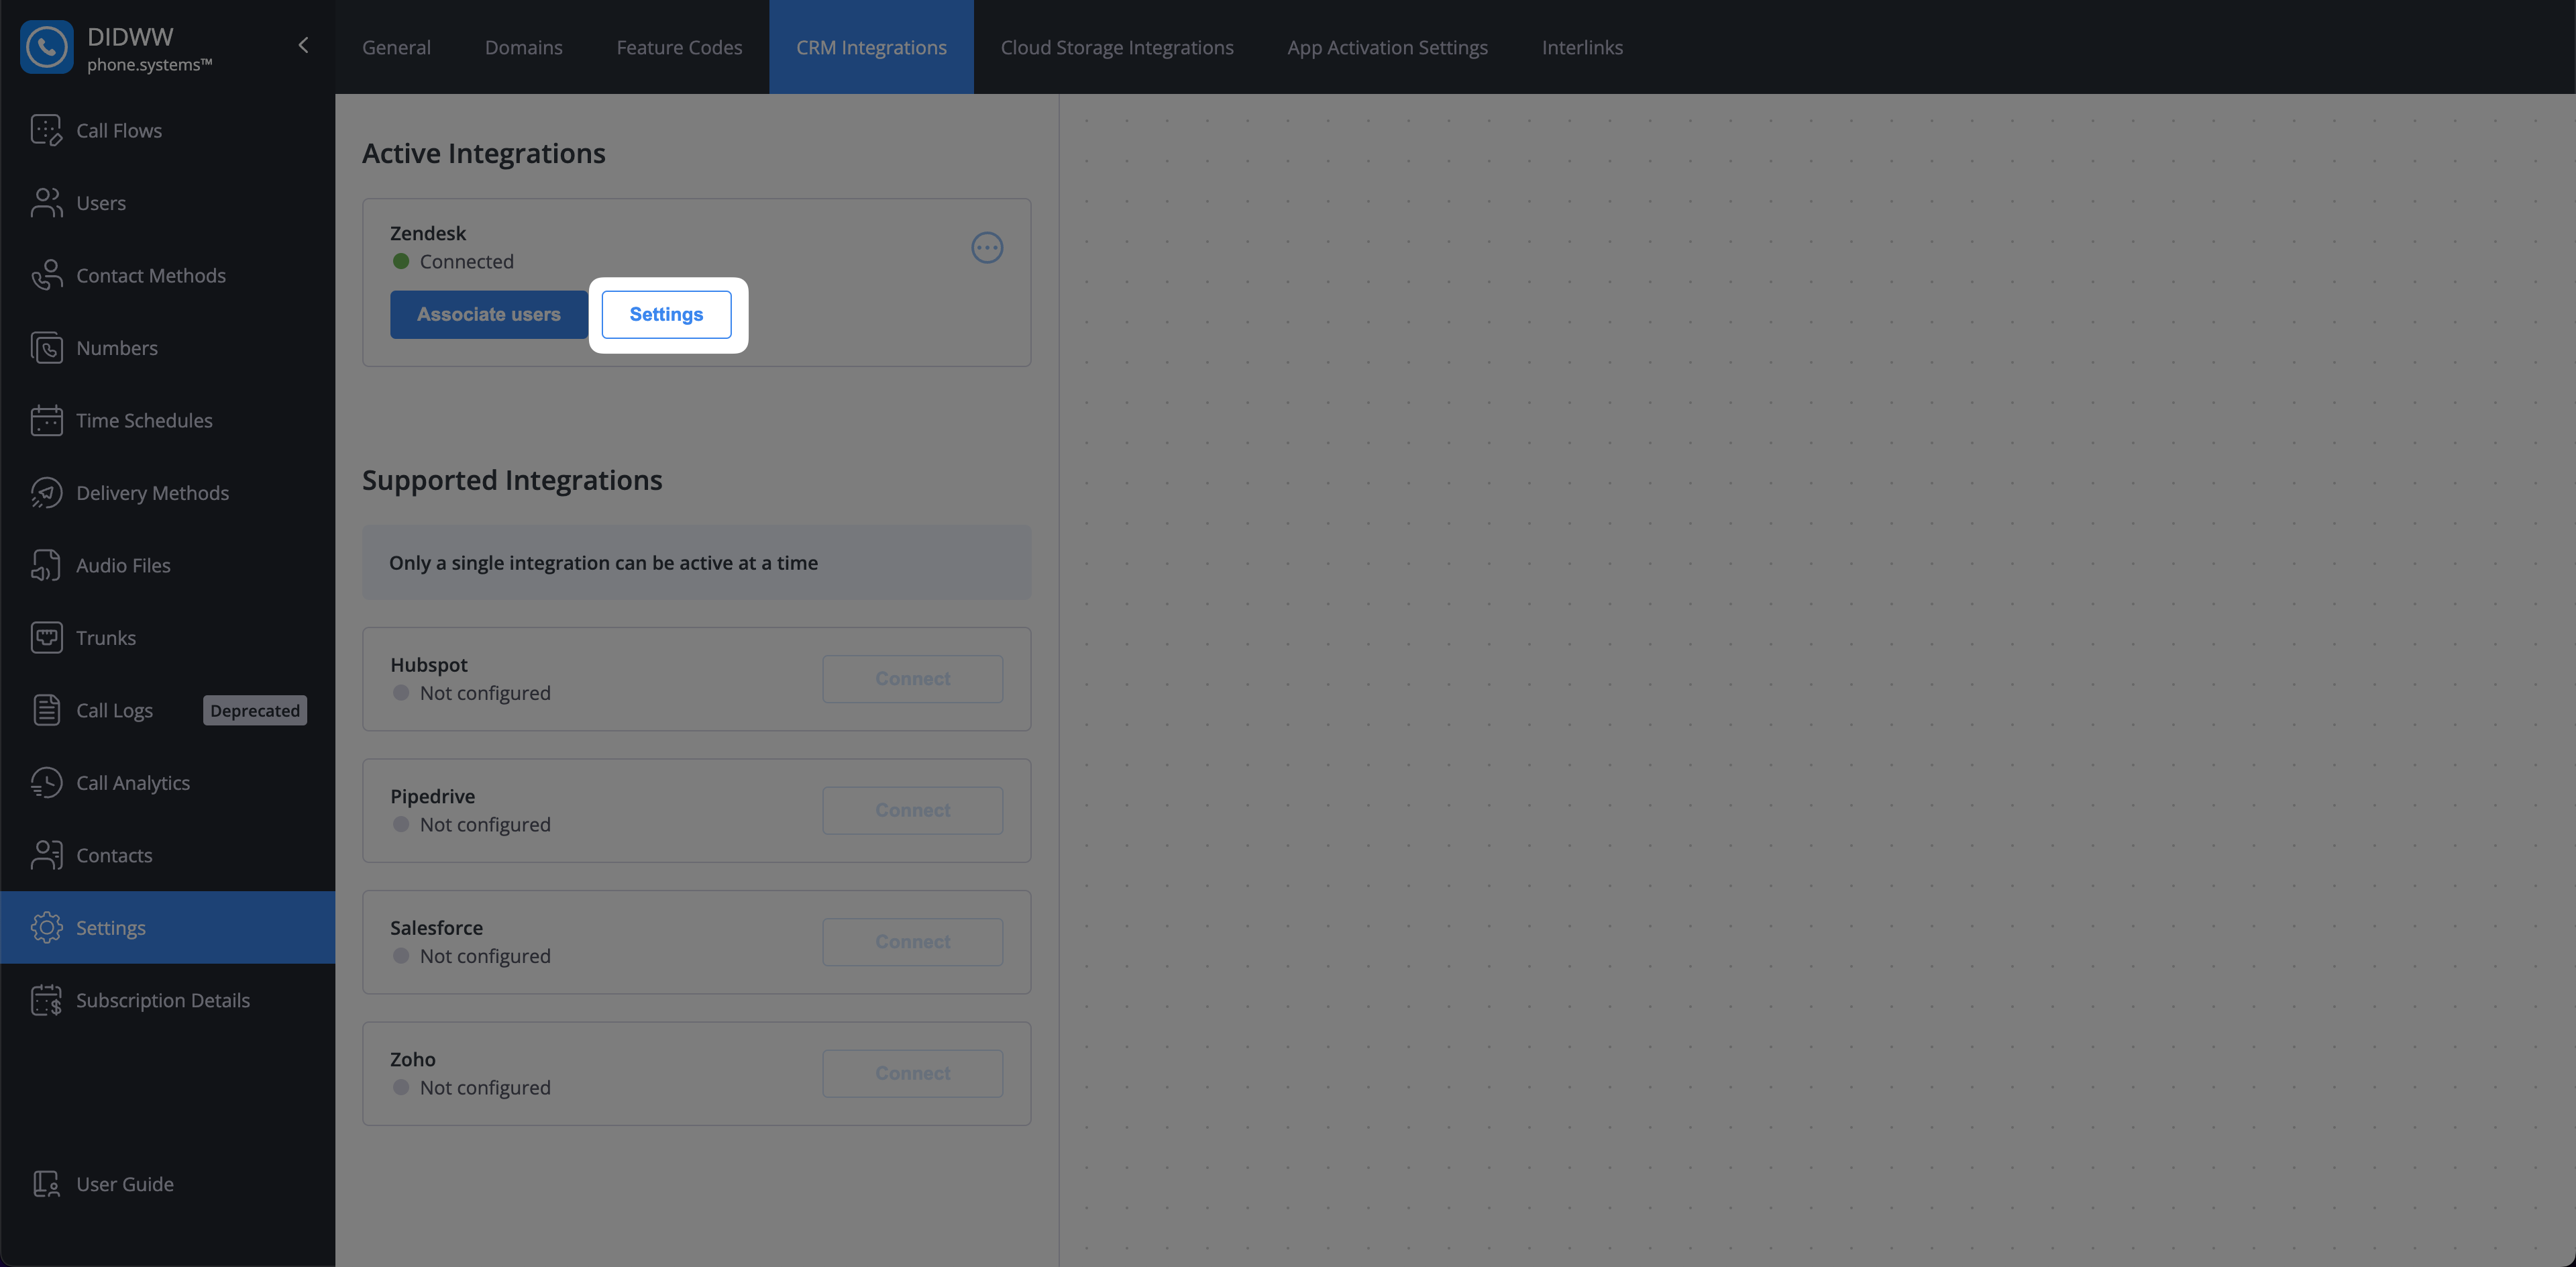
Fig. 15. Zendesk integration settings button.#
Important
The following settings apply only to numbers with Call journaling enabled. Call journaling must be configured separately for each number on the Edit phone numbers page.
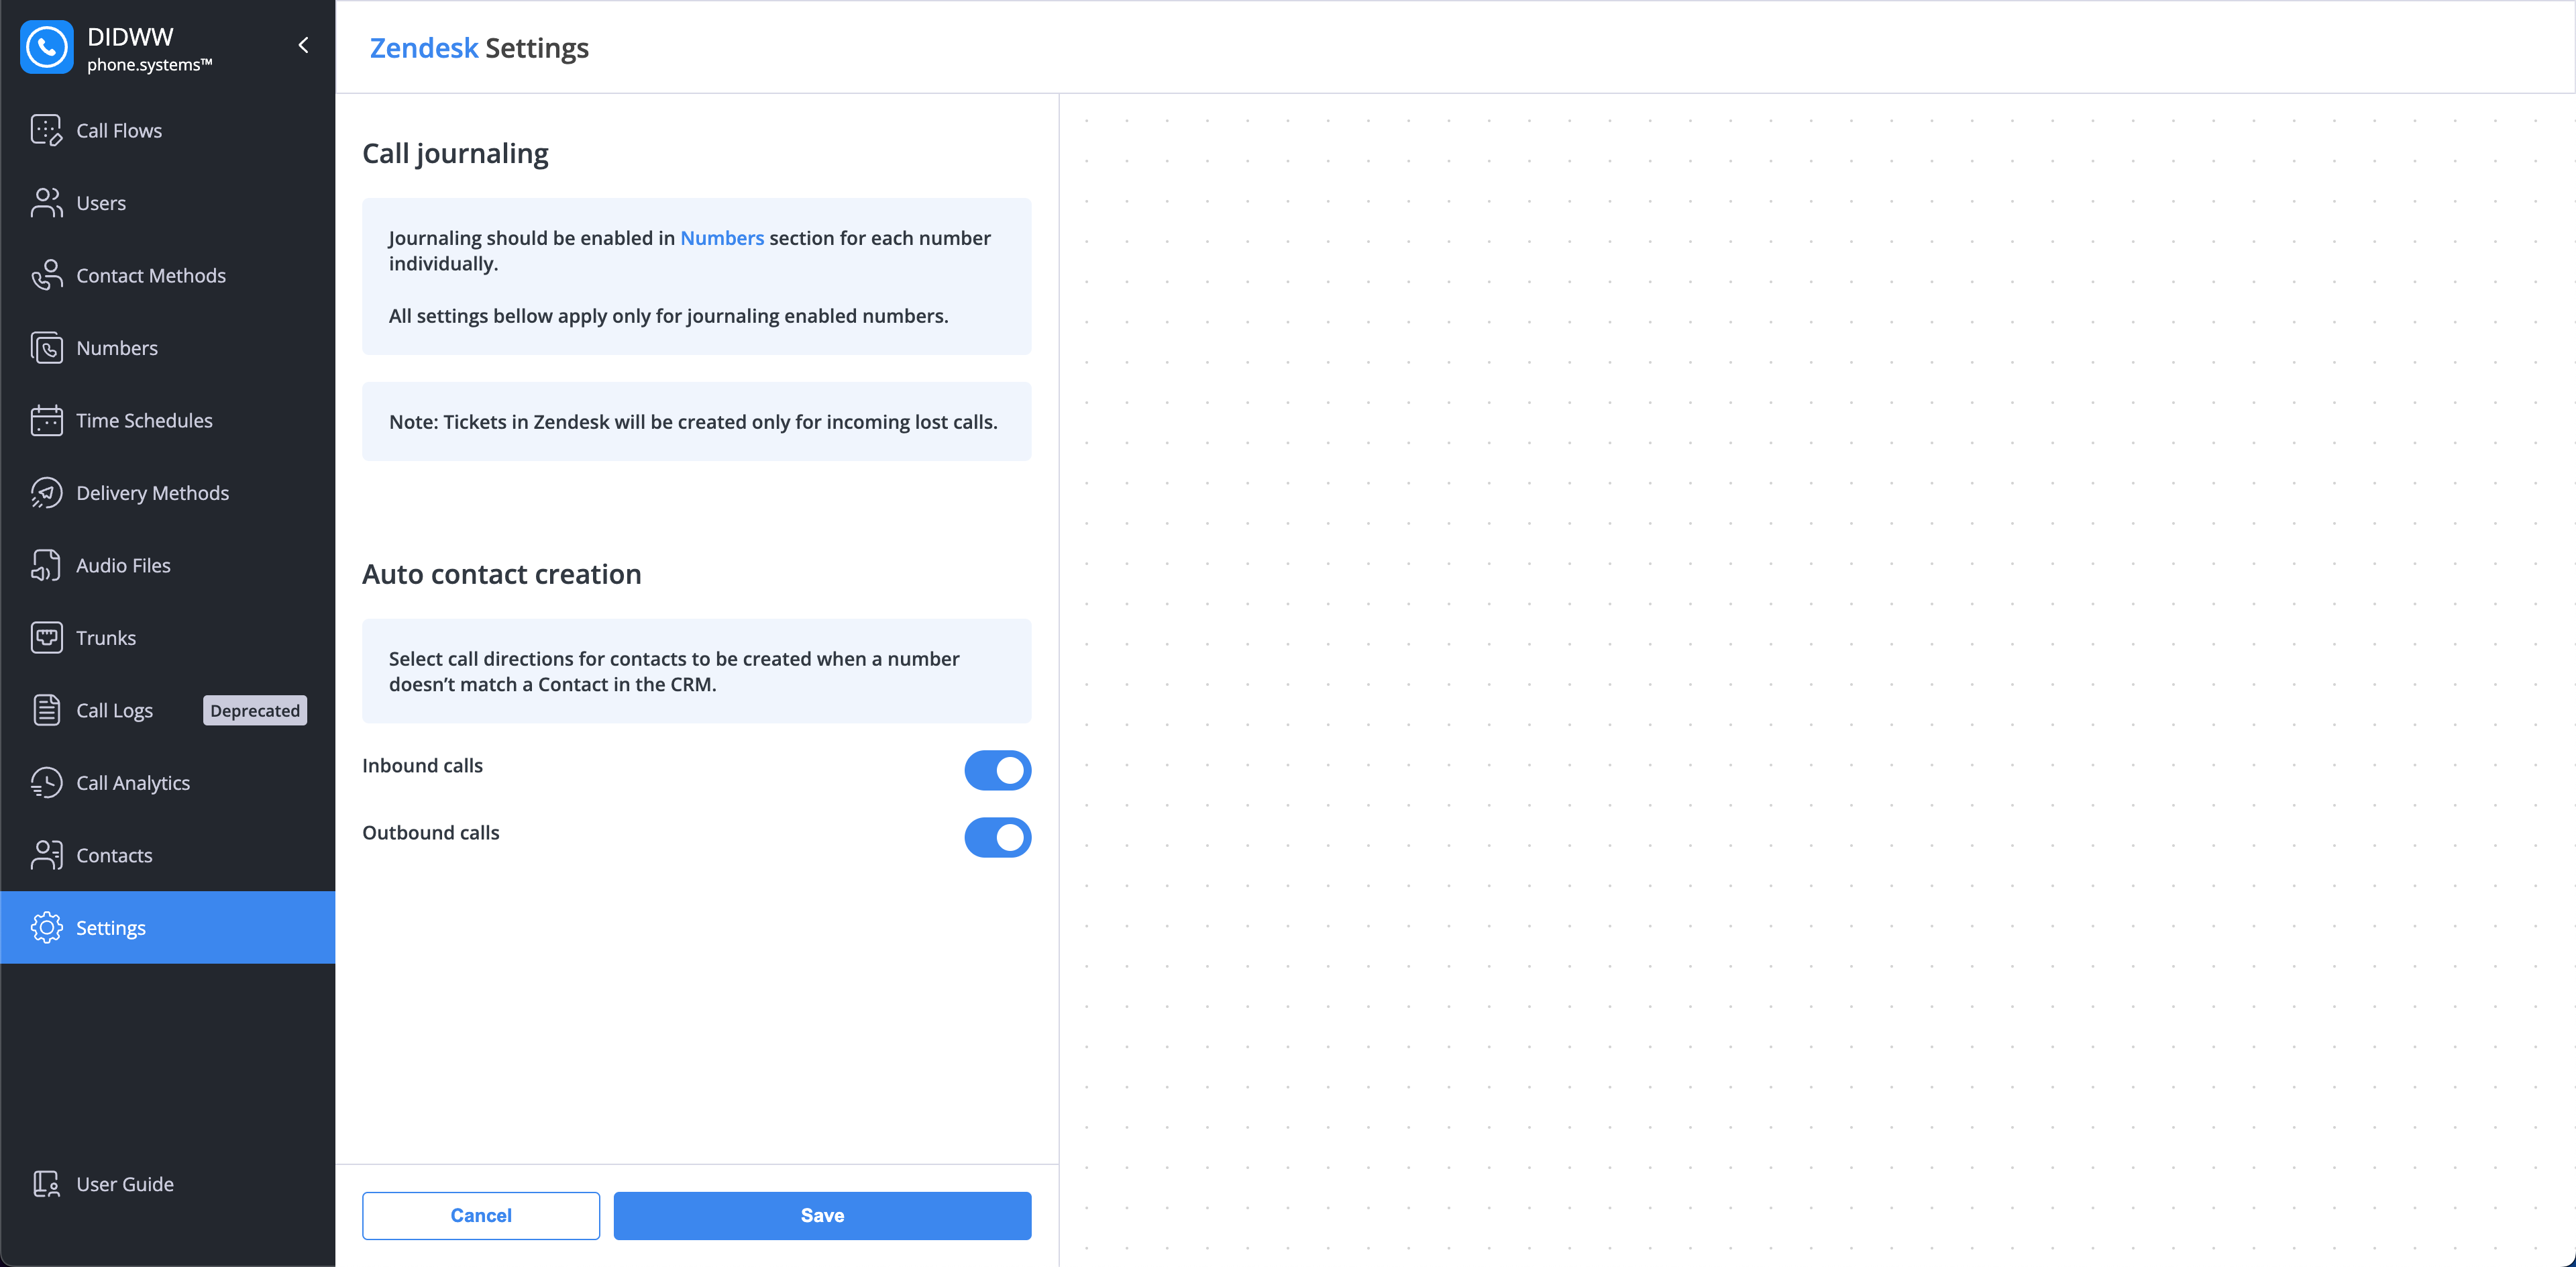
Fig. 16. Zendesk integration settings.#
Call Journaling#
This section provides important information about how calls are logged in Zendesk.
Note
Tickets in Zendesk will be created only for incoming lost calls.
Auto Contact Creation#
This feature automatically creates a new user (end user) in Zendesk when a call is handled from a number that does not match an existing contact in your CRM.
Setting |
Description |
|---|---|
Inbound calls |
When enabled, a new user will be created in Zendesk for all inbound calls from unknown numbers. |
Outbound calls |
When enabled, a new user will be created in Zendesk for all outbound calls to unknown numbers. |
After configuring these options, click Save to apply your changes.