Connecting phone.systems™ with Salesforce CRM allows you to manage customer calls and track important information. The integration includes the following features:
Sync contacts automatically: Keep contacts, leads and company details updated in phone.systems™ and Salesforce.
Call journaling: All incoming and outgoing calls are logged in Salesforce for tracking and reference.
Create new contacts automatically: When an unknown number calls, a new contact, lead or company is created in Salesforce automatically.
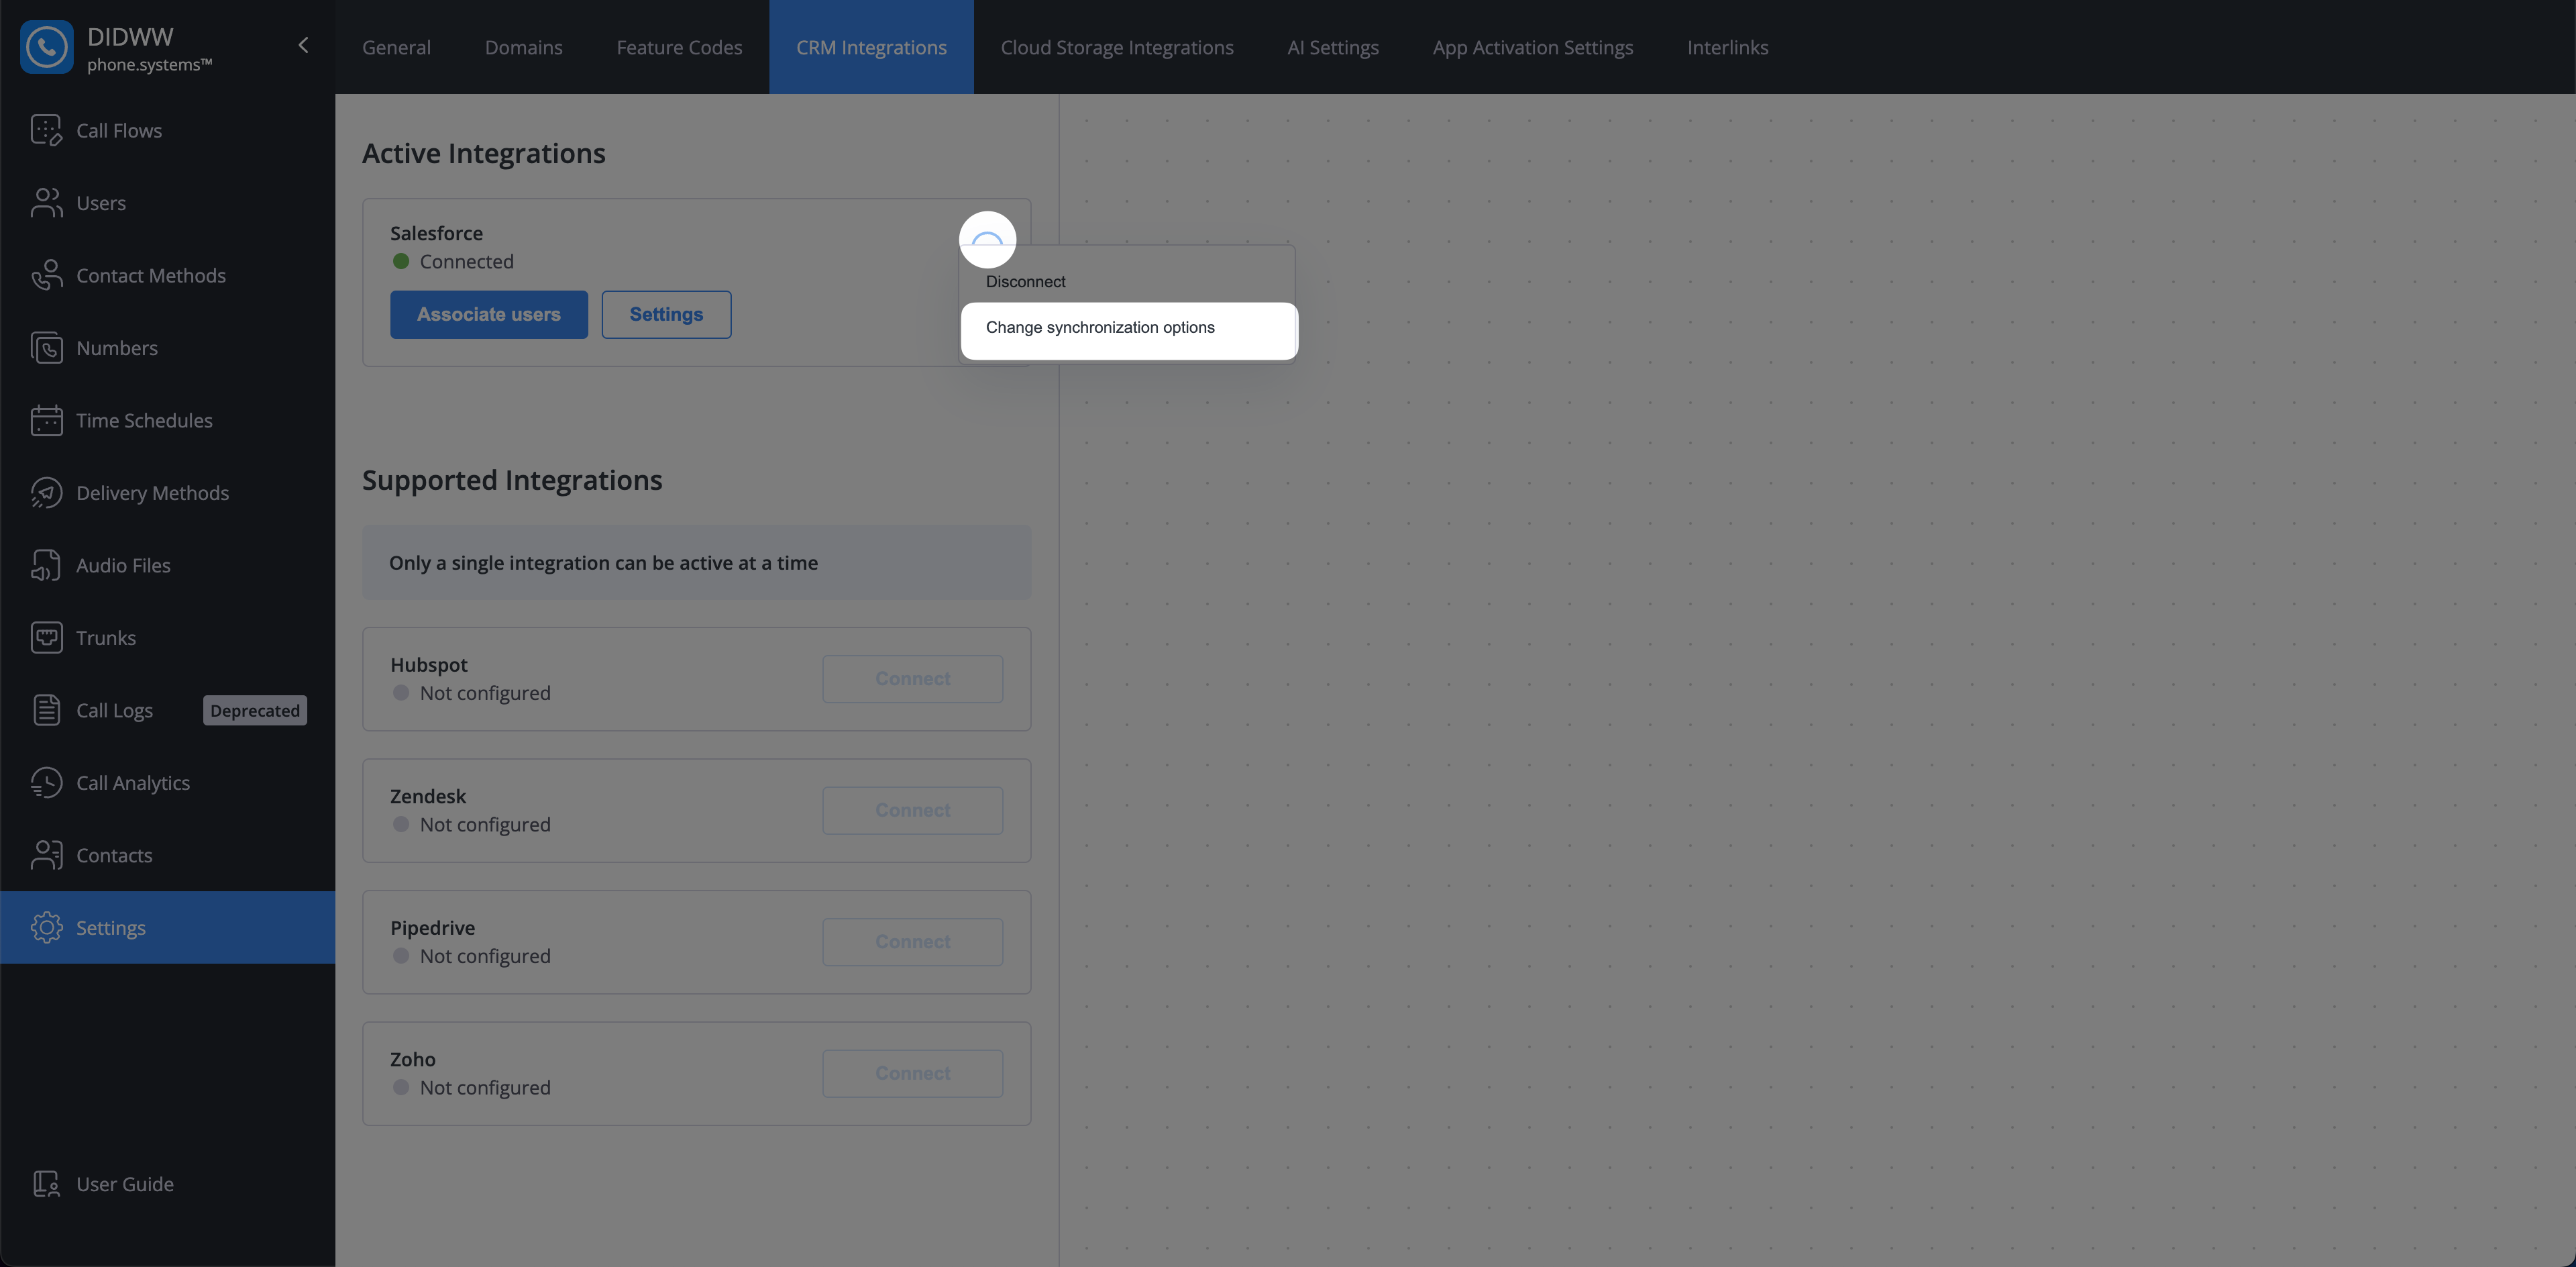
User association for call journaling: Associating users enables call journaling between phone.systems™ and Salesforce. Unassociated users will not receive call details in Salesforce.
This guide provides detailed steps on integrating phone.systems™ with Salesforce CRM. Follow the instructions below to complete the setup process.
Note
To connect phone.systems™ with Salesforce, you need the Consumer Key and Consumer Secret. Generate these values by creating an External Client App in your Salesforce account.
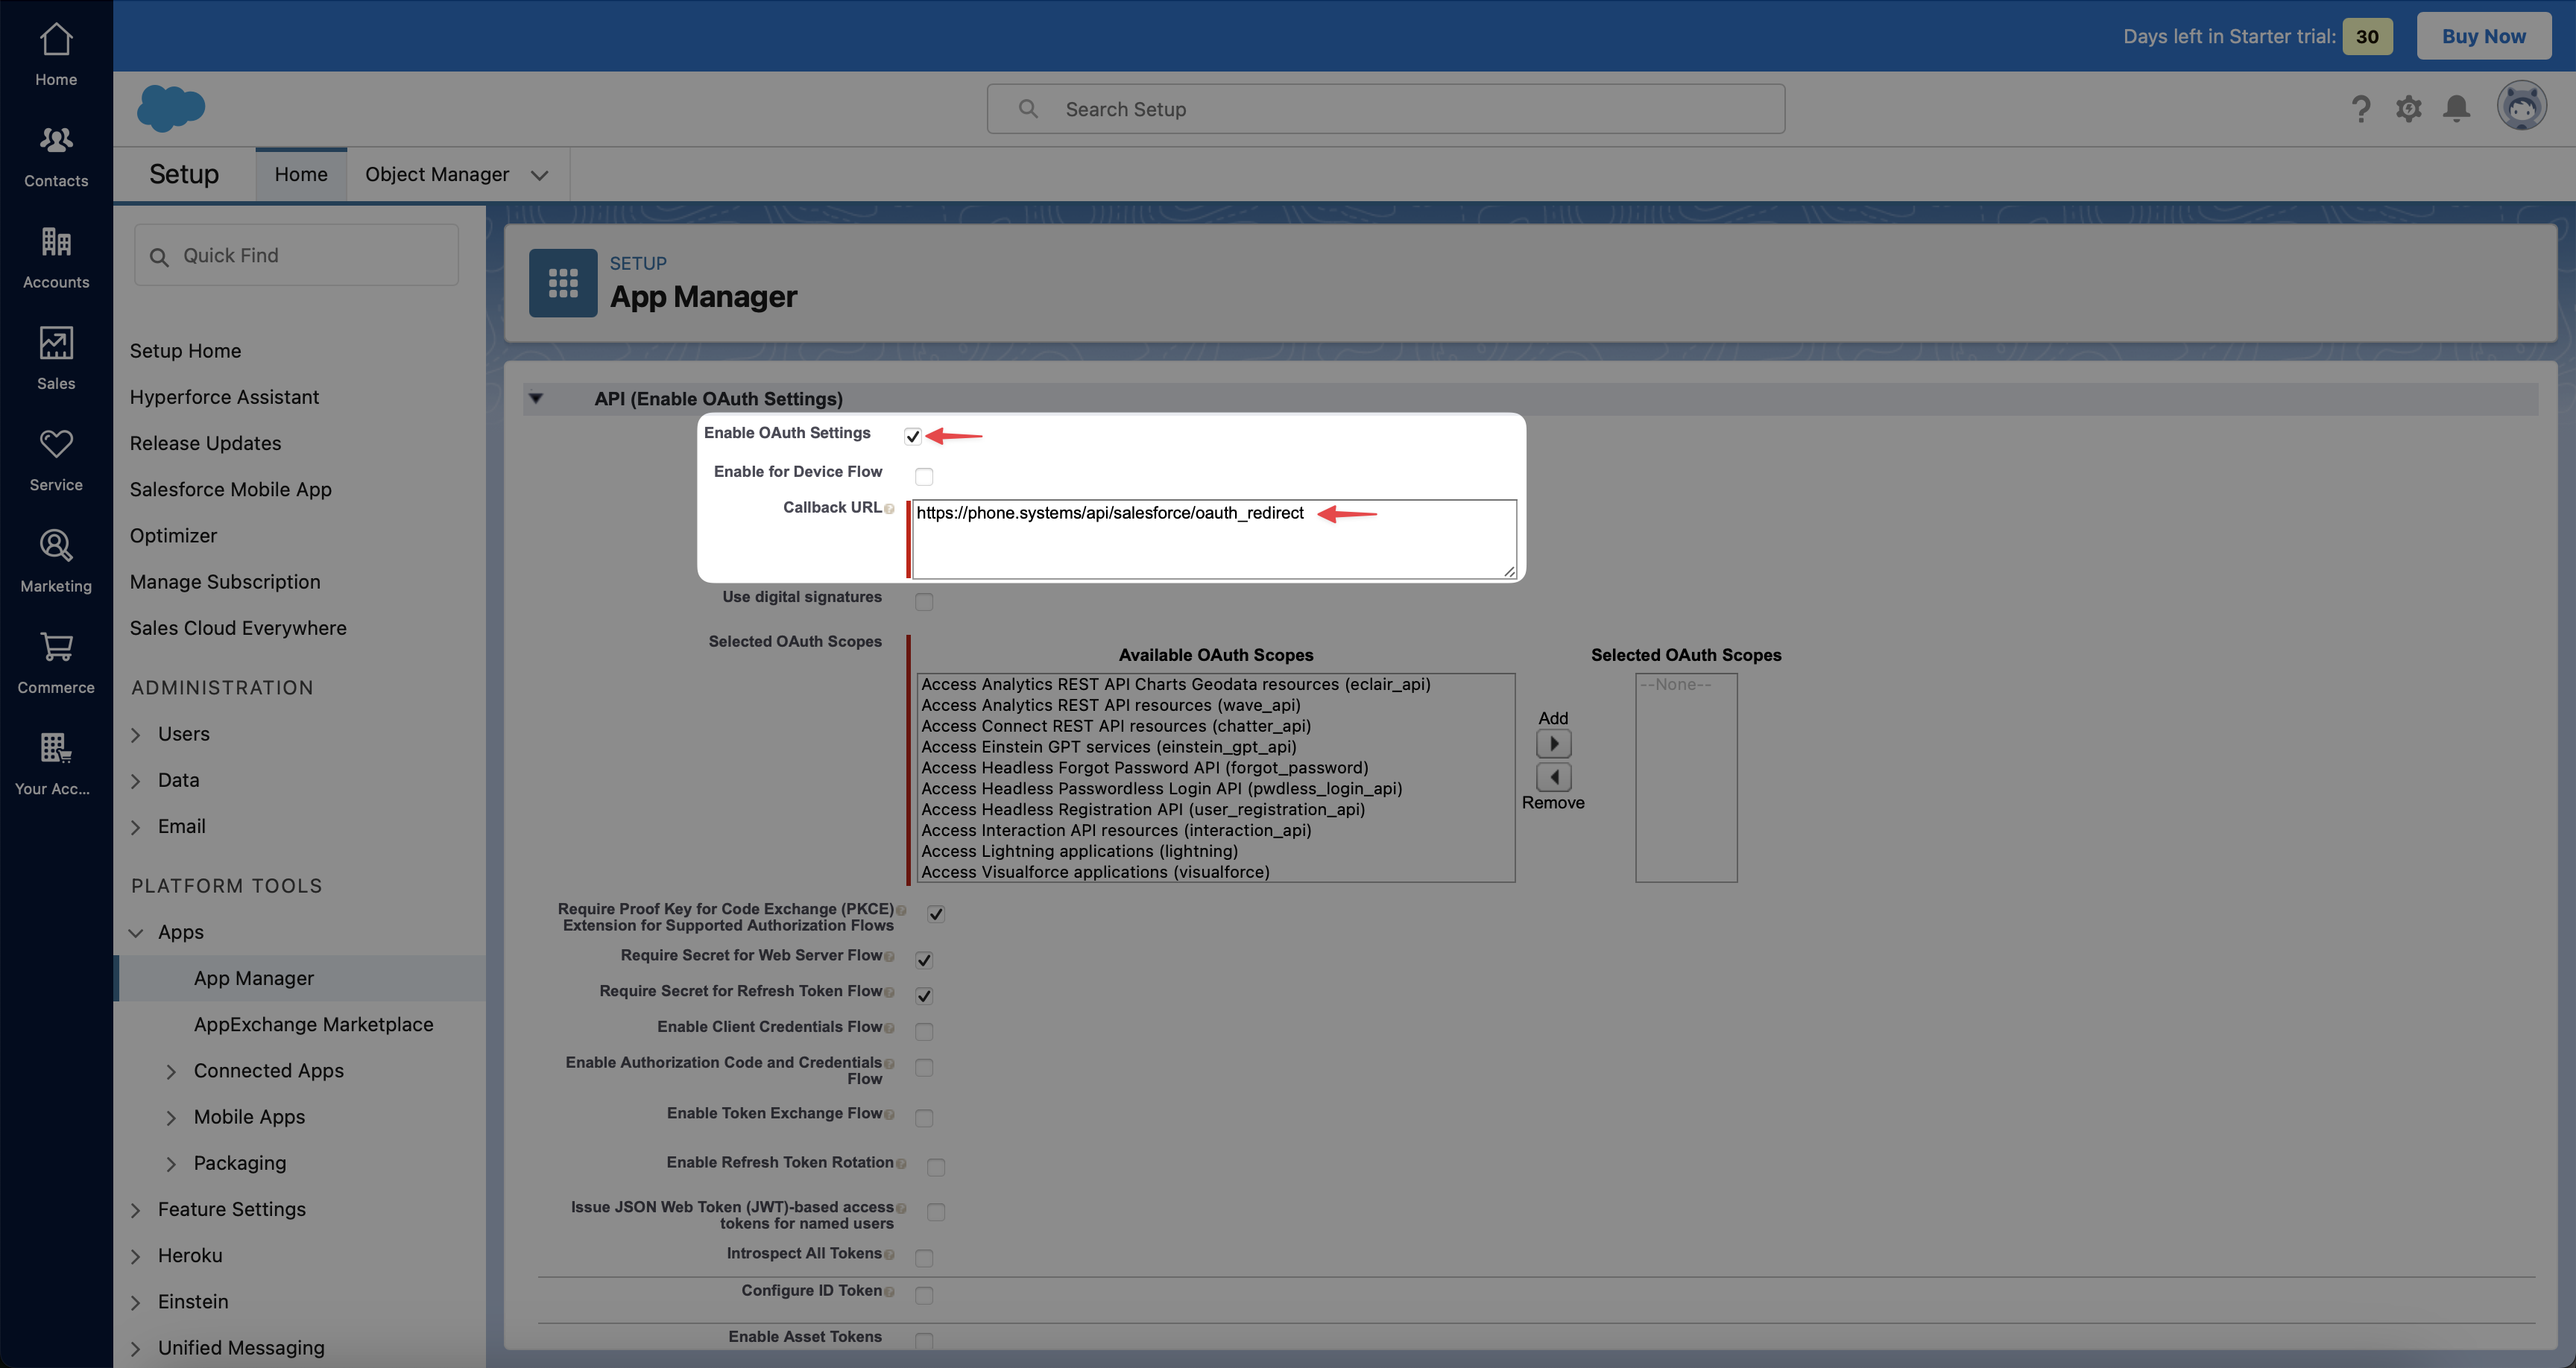
Step 6: Add the OAuth scopes to define app permissions and the app#
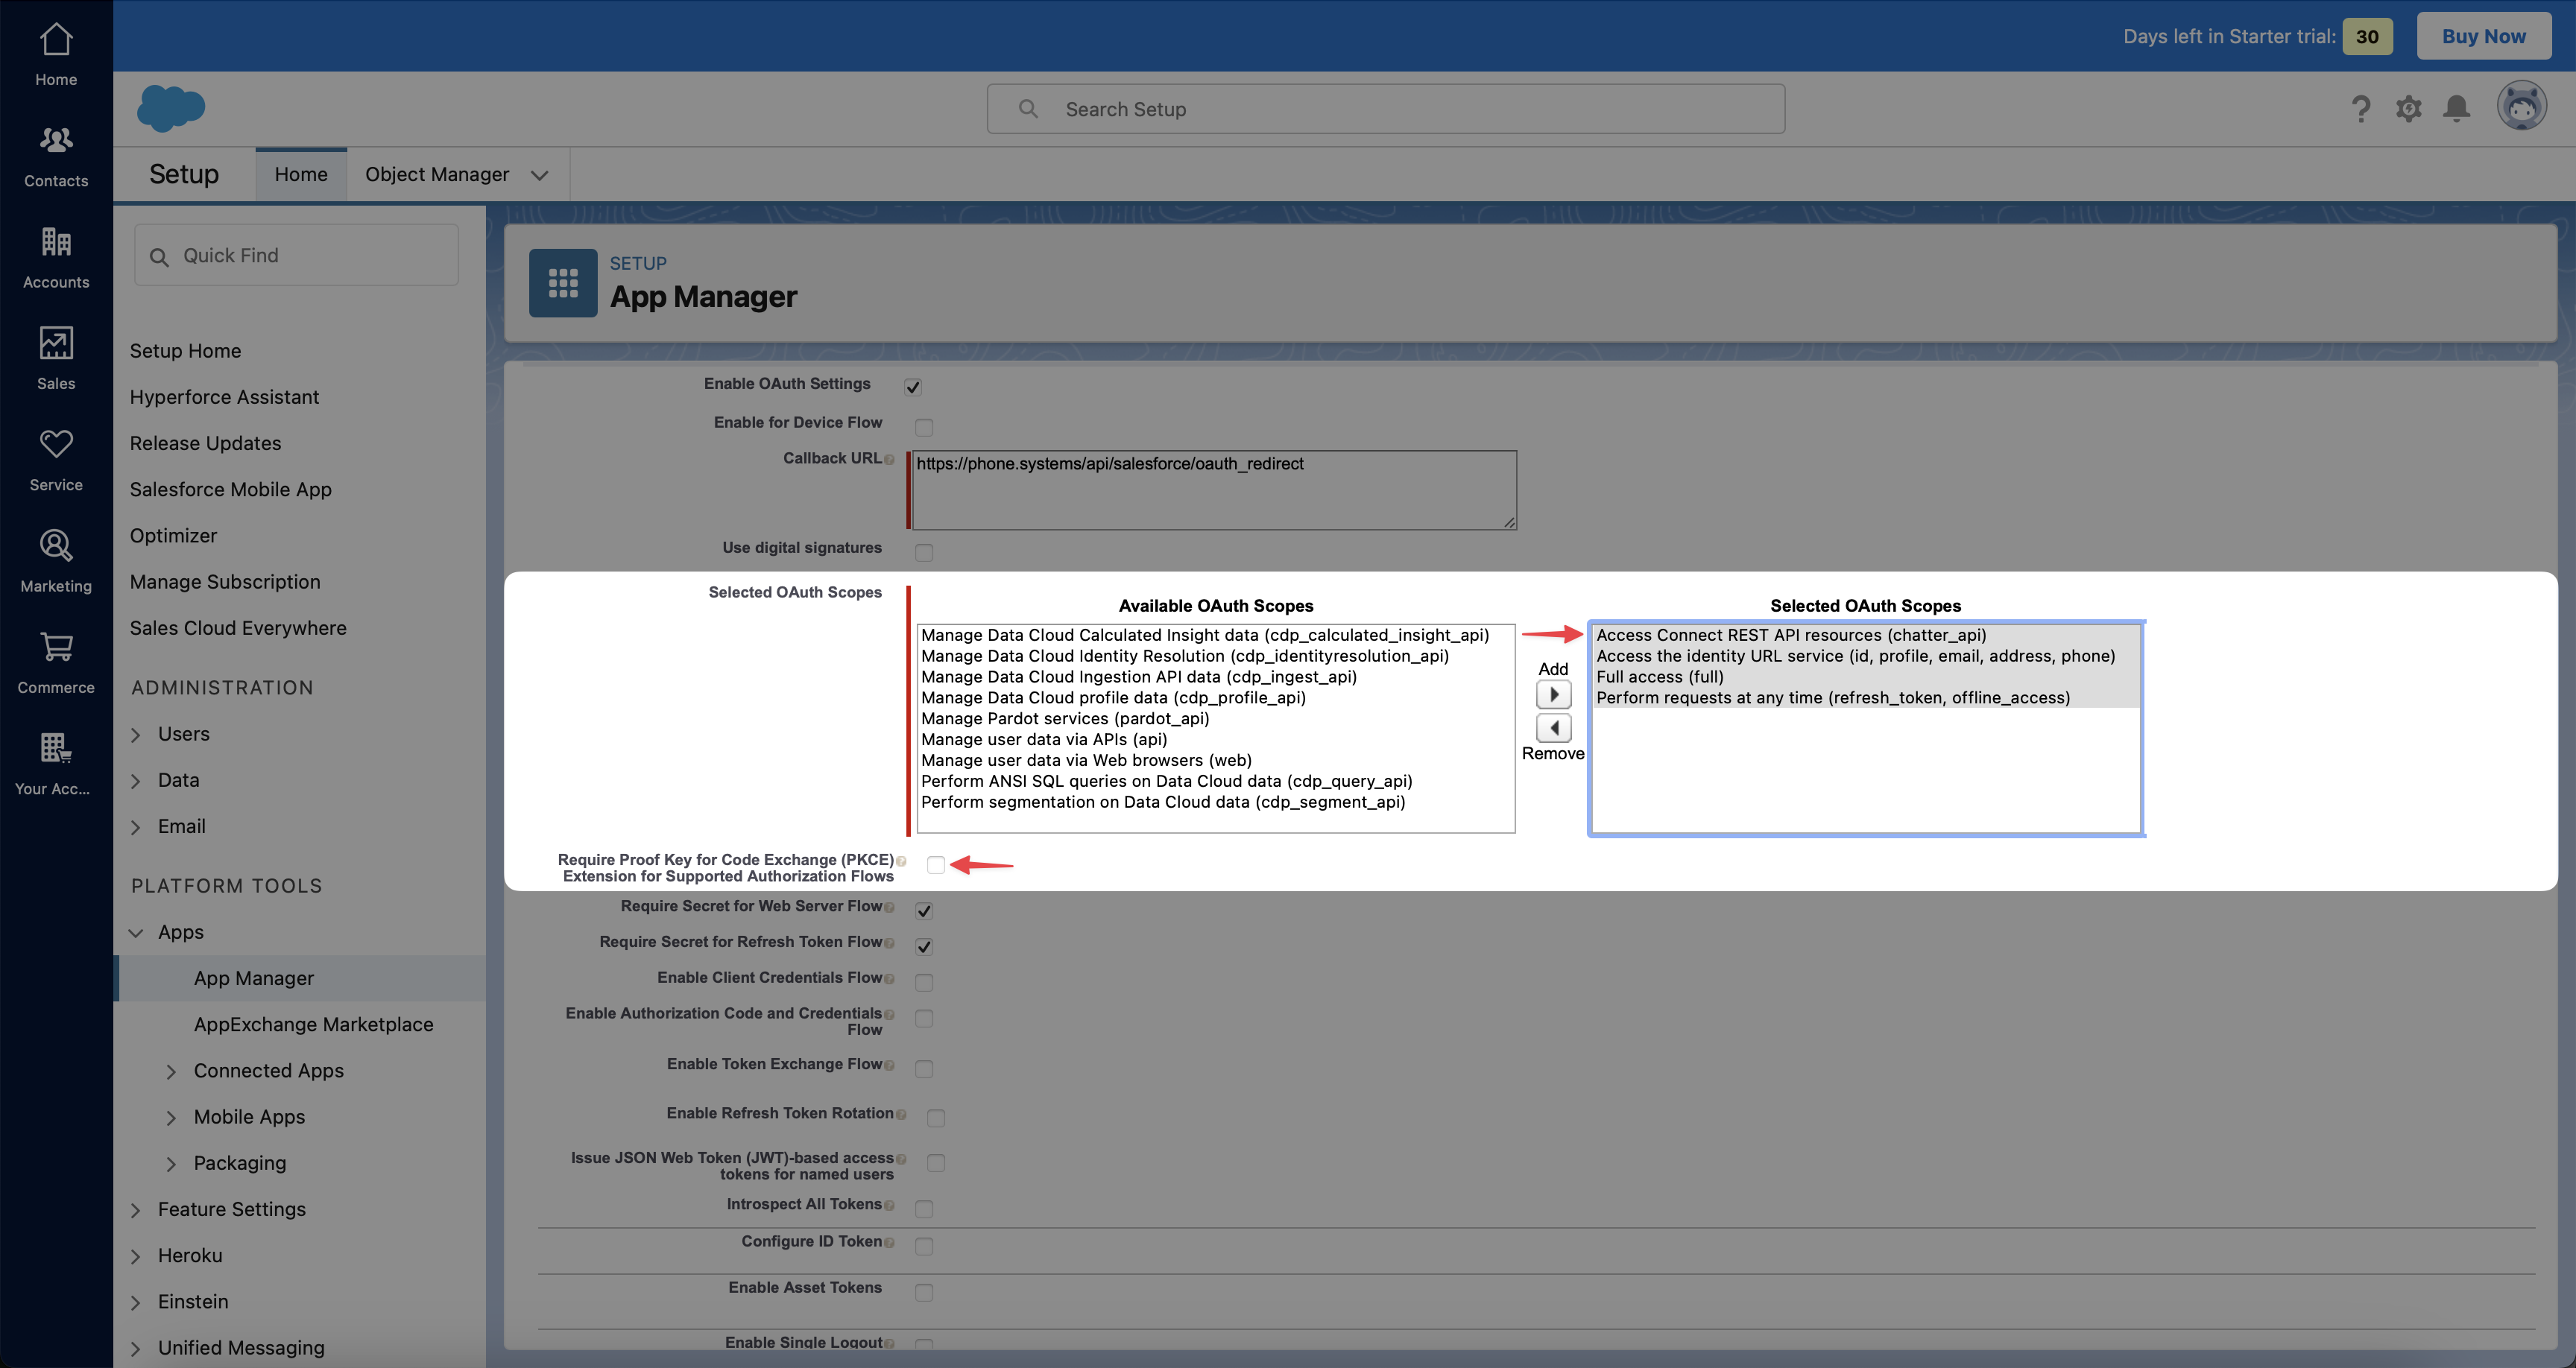
Continue in the Salesforce API (Enable OAuth Settings) section, select the Available OAuth Scopes that determine the permissions your app has to access data or perform actions in Salesforce CRM.
Locate the Available OAuth Scopes permission list and add the following scopes:
Access Connect REST API resources (chatter_api)
Access the identity URL service (id, profile, email, address, phone)
Full access (full)
Perform requests at any time (refresh_token, offline_access)
Note
Selecting the scopes is required to ensure your app has the necessary permissions to function correctly with all supported features.
Uncheck the Require Proof Key for Code Exchange (PKCE) Extension for Supported Authorization Flows.
Note
PKCE must be disabled because phone.systems™ uses a server-to-server OAuth flow that does not support dynamic PKCE code challenges.
Click Create at the bottom of the page to create the application.
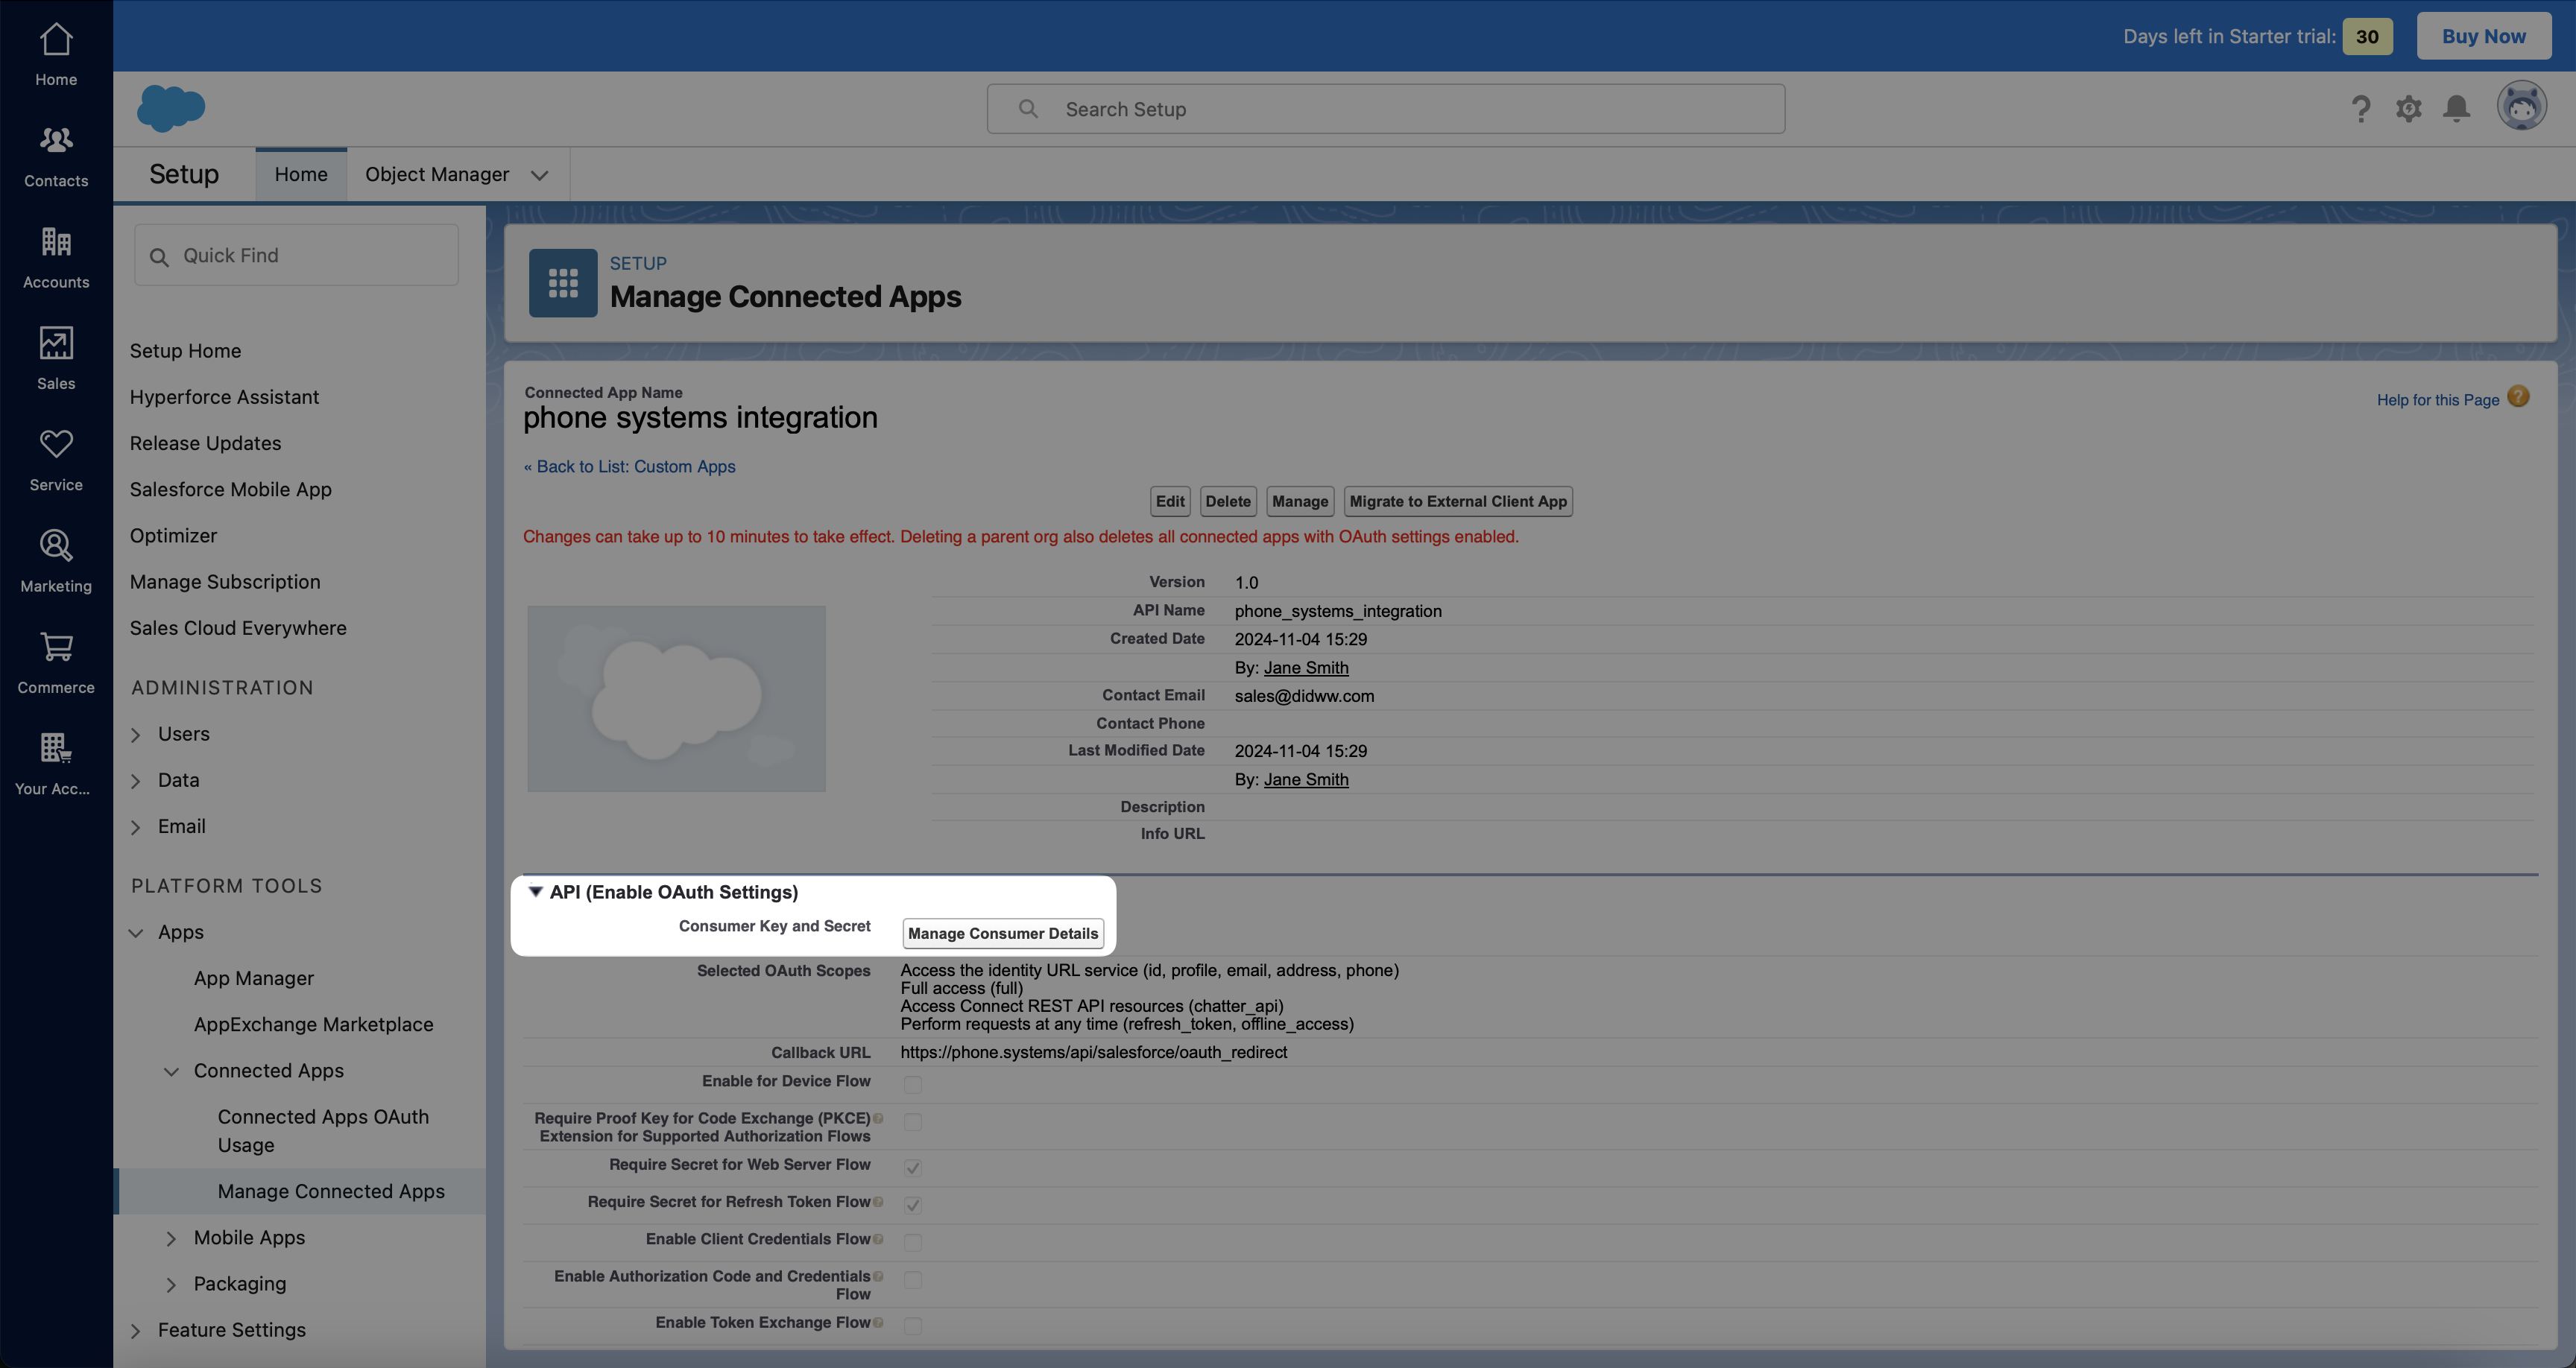
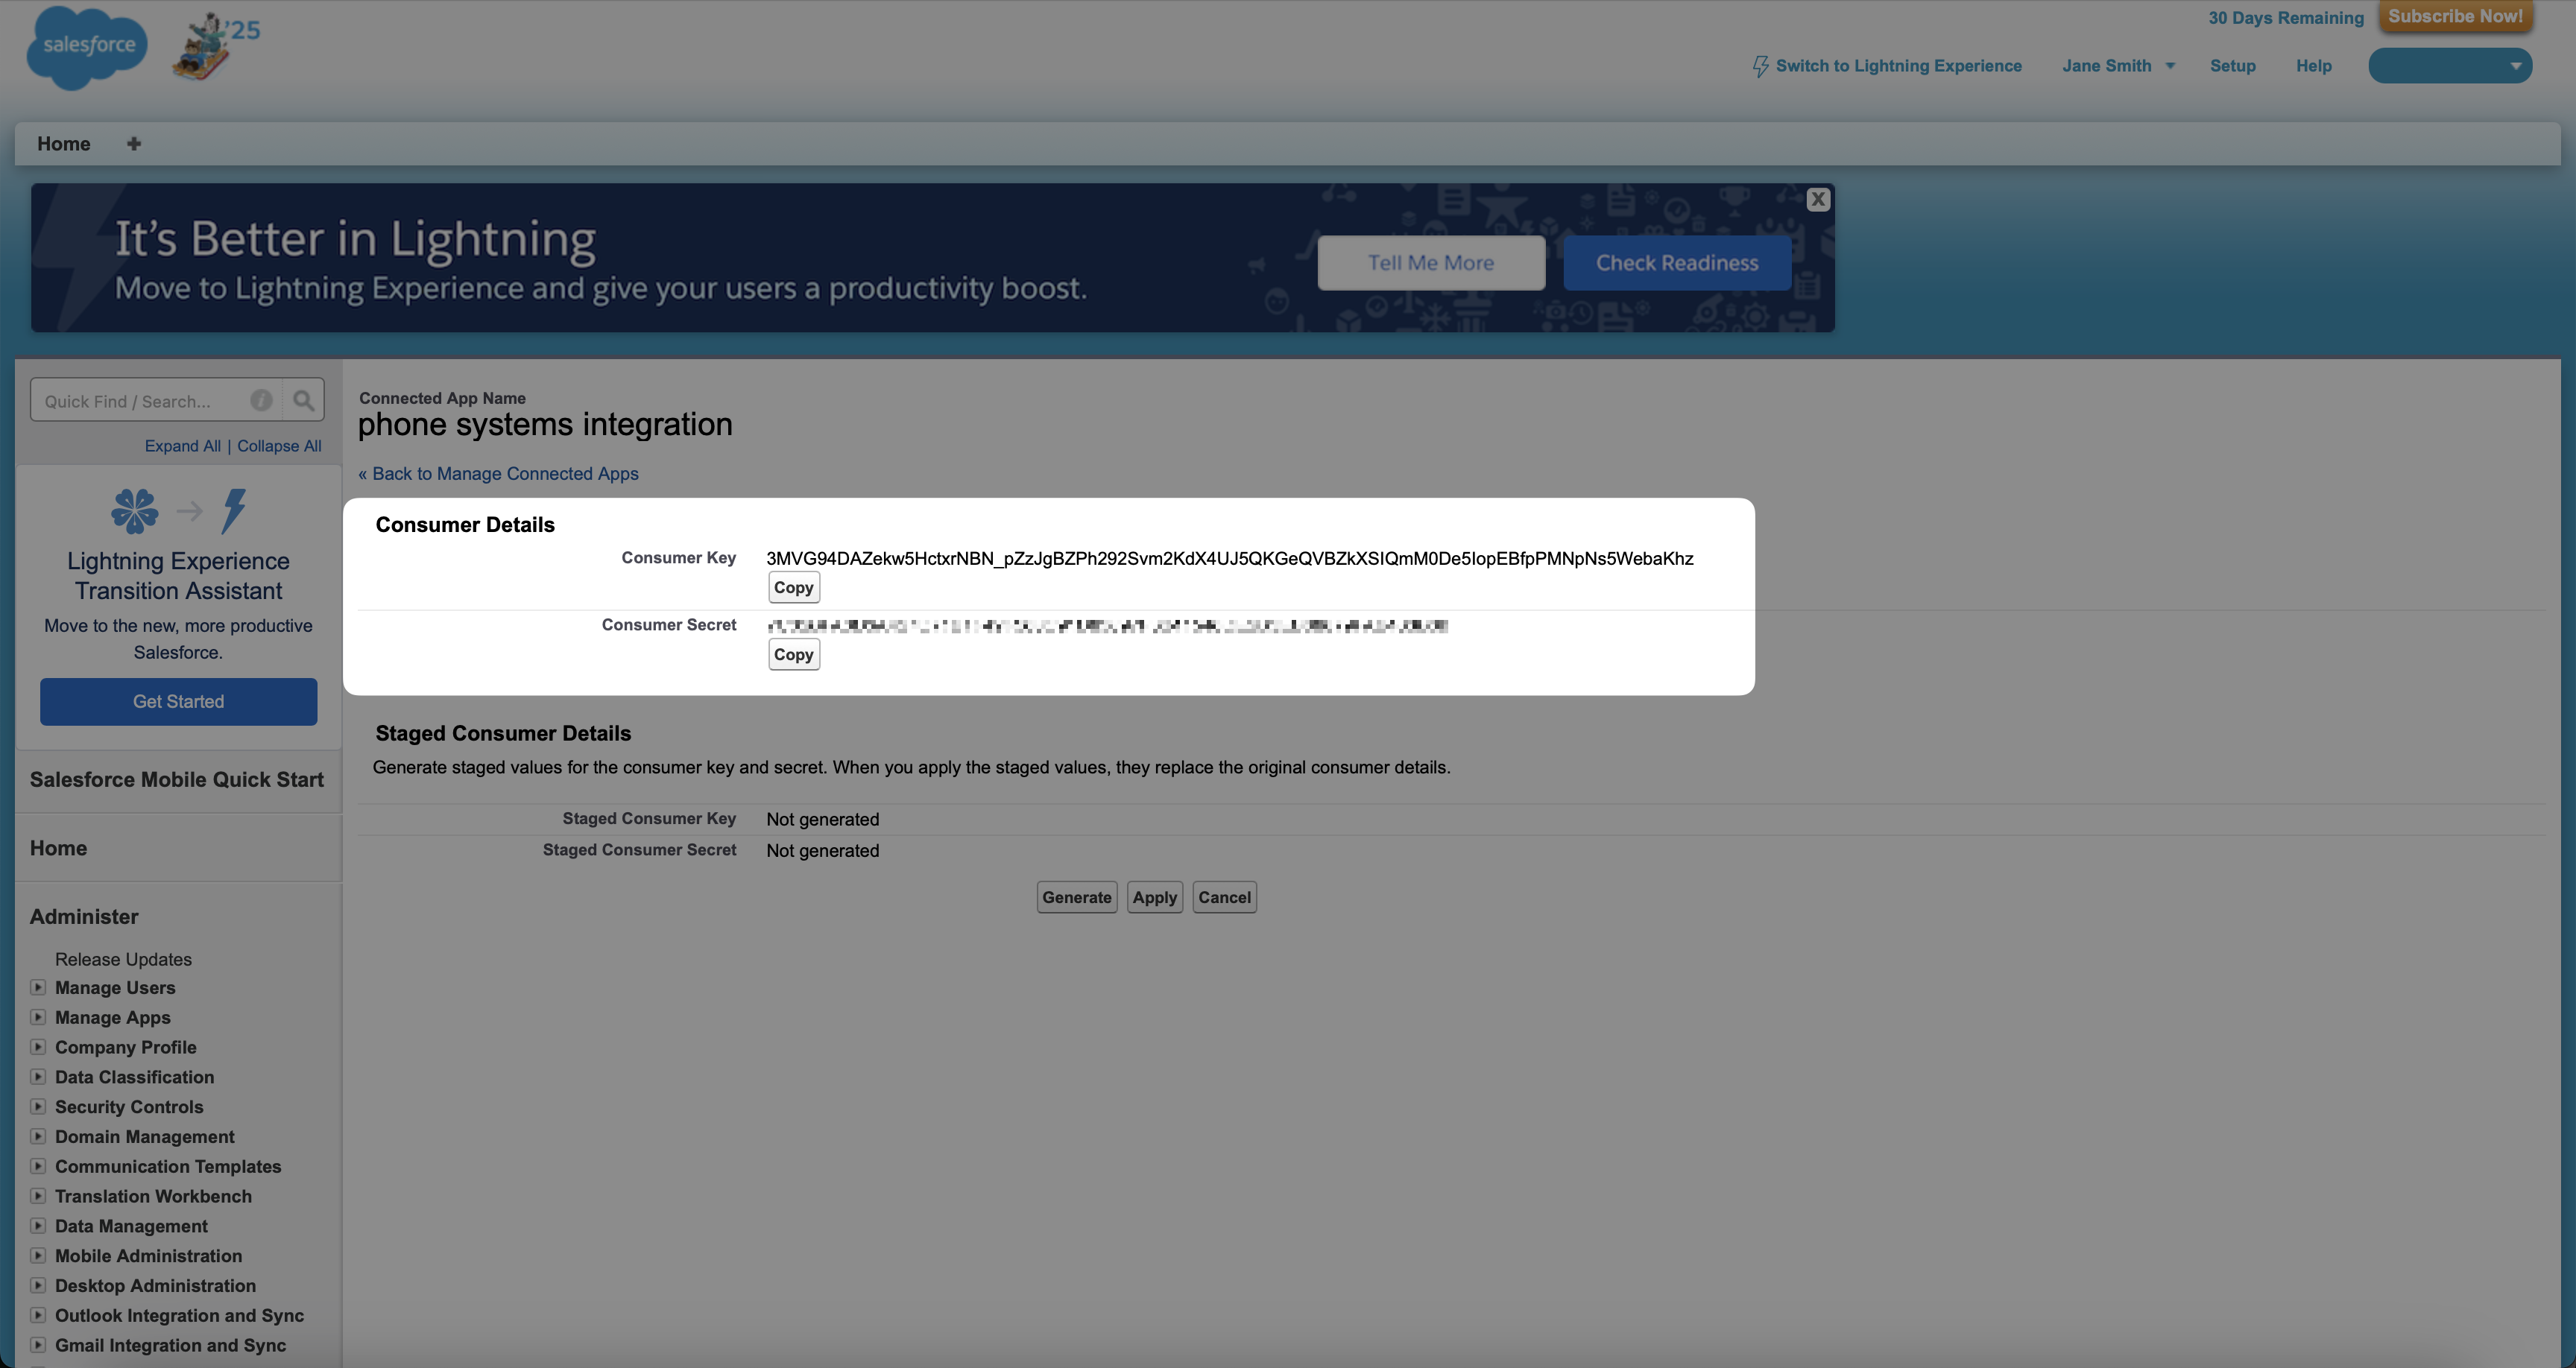
Step 8: Copy the Consumer Key and Consumer Secret from Salesforce and paste it in phone.systems™#
After verifying your identity, you will be redirected to the Consumer Details page. Copy the Consumer Key and Consumer Secret.
Fig. 10. Copy the Consumer Key and Consumer Secret#
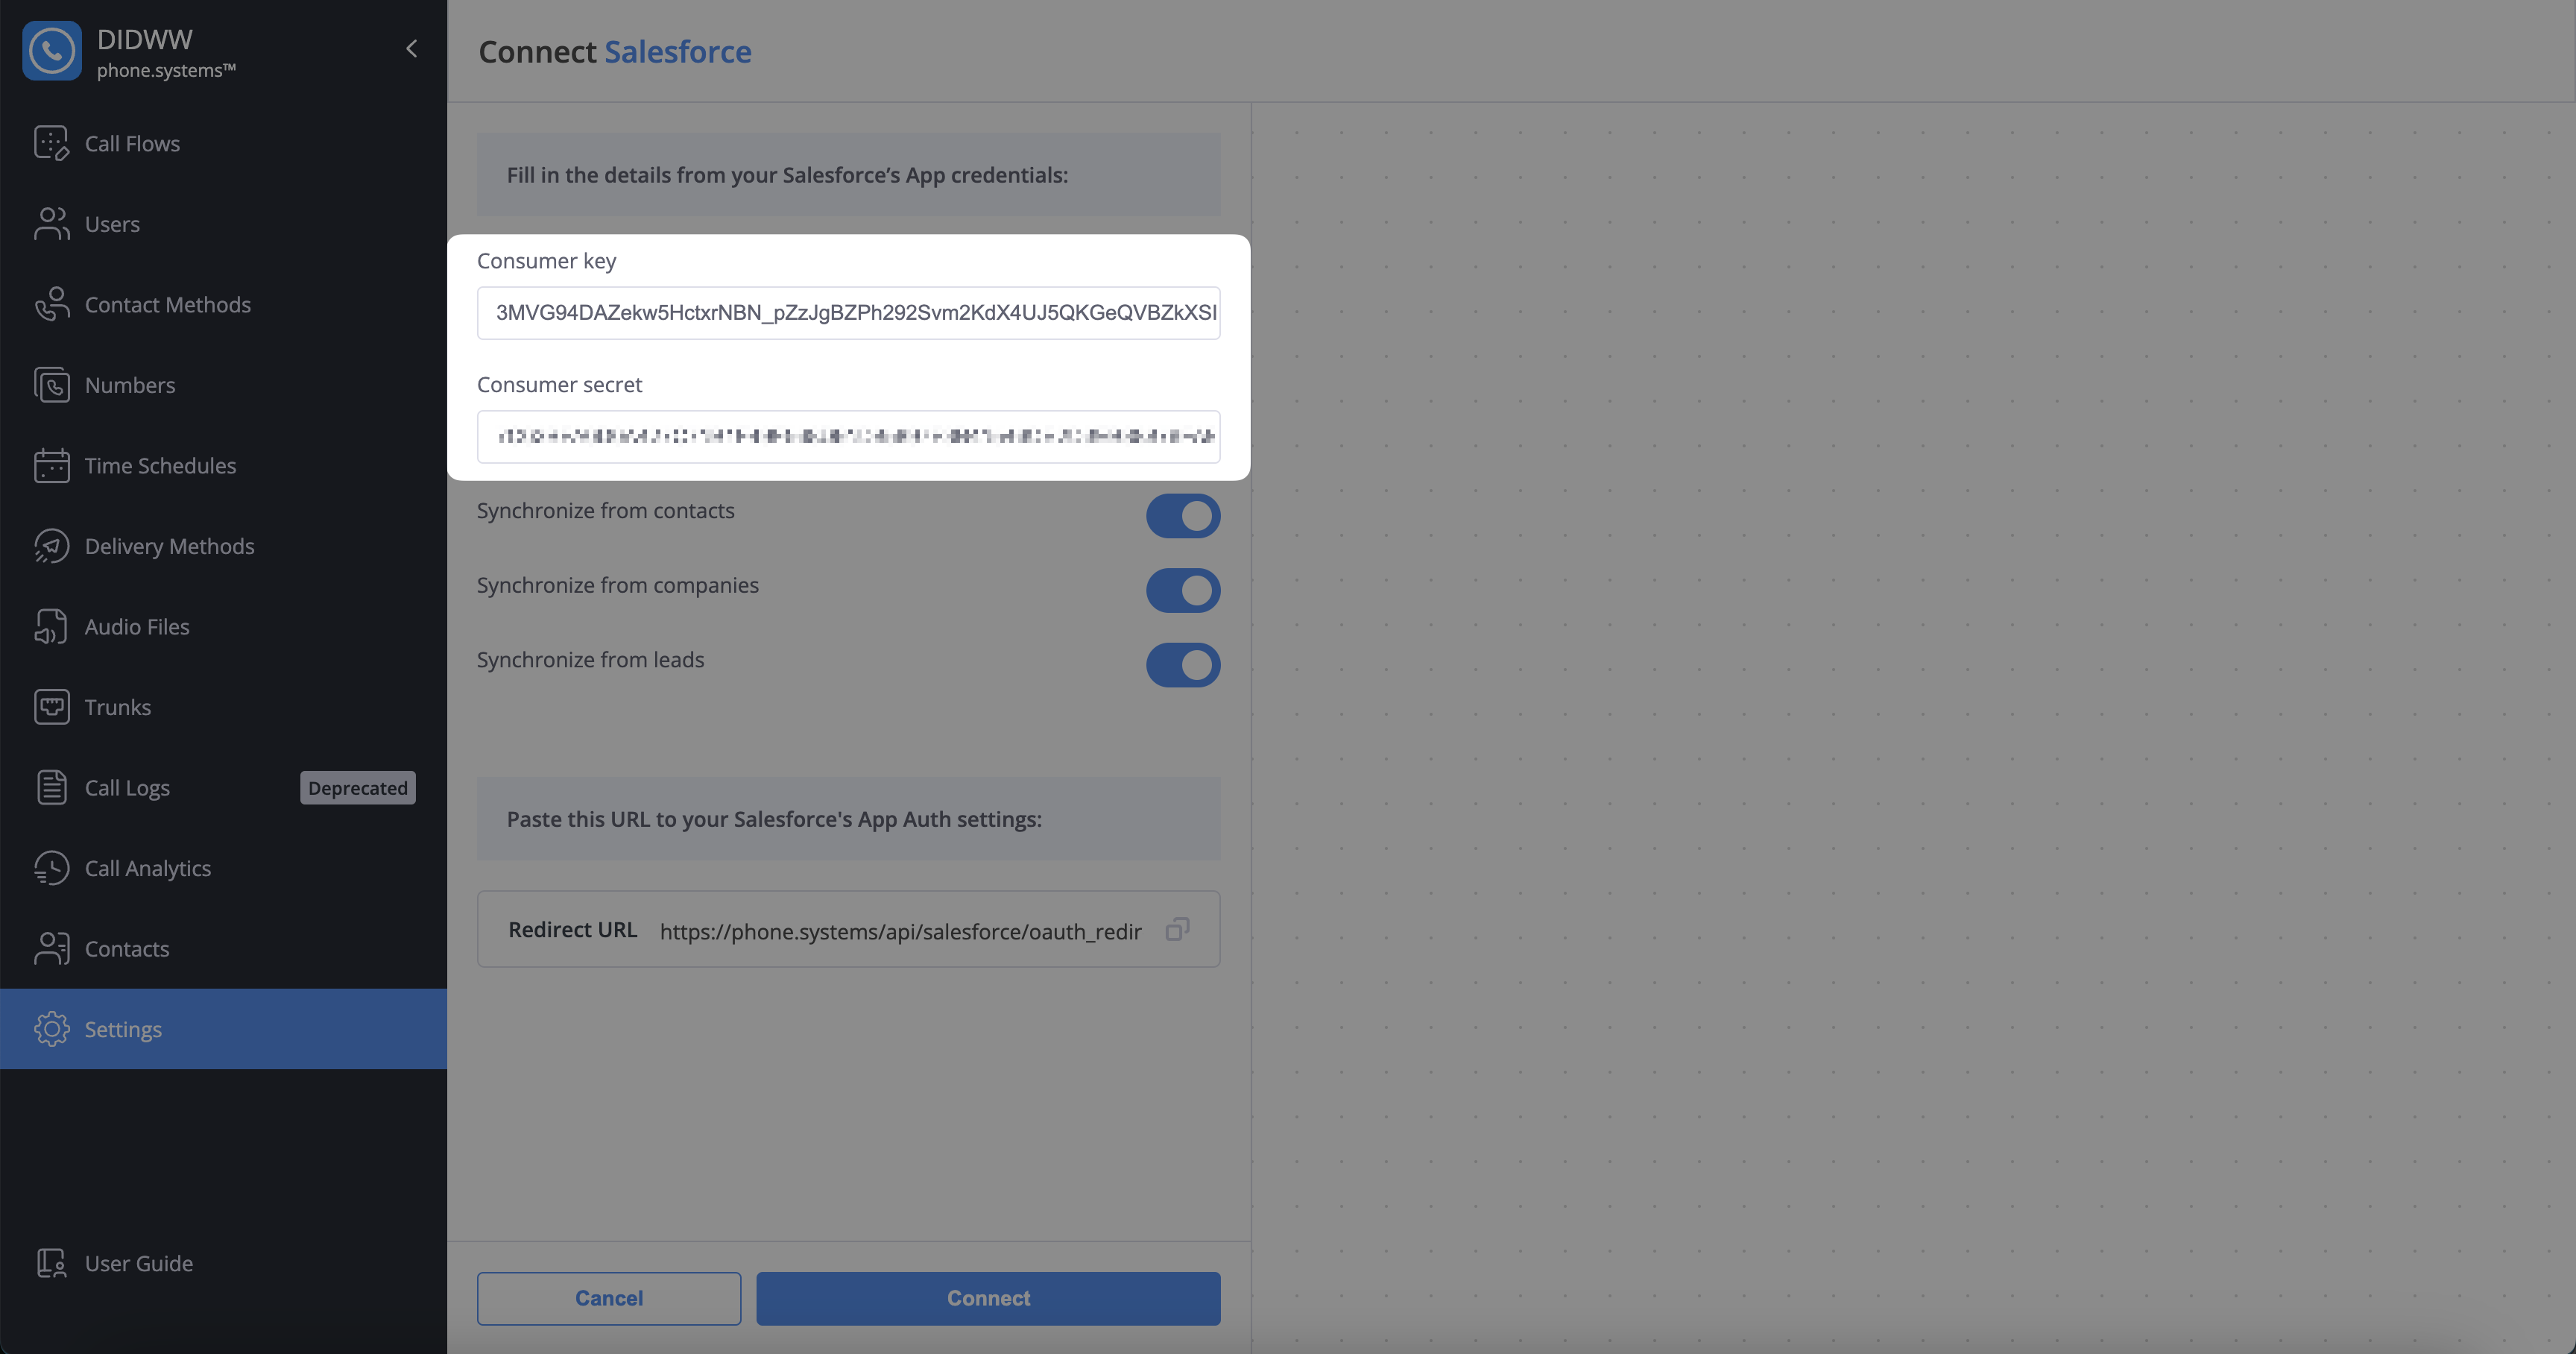
Open the phone.systems™ Salesforce connection page, and paste the Consumer Key and Consumer Secret into the corresponding fields.
Fig. 11. Paste the Consumer Key and Consumer Secret#
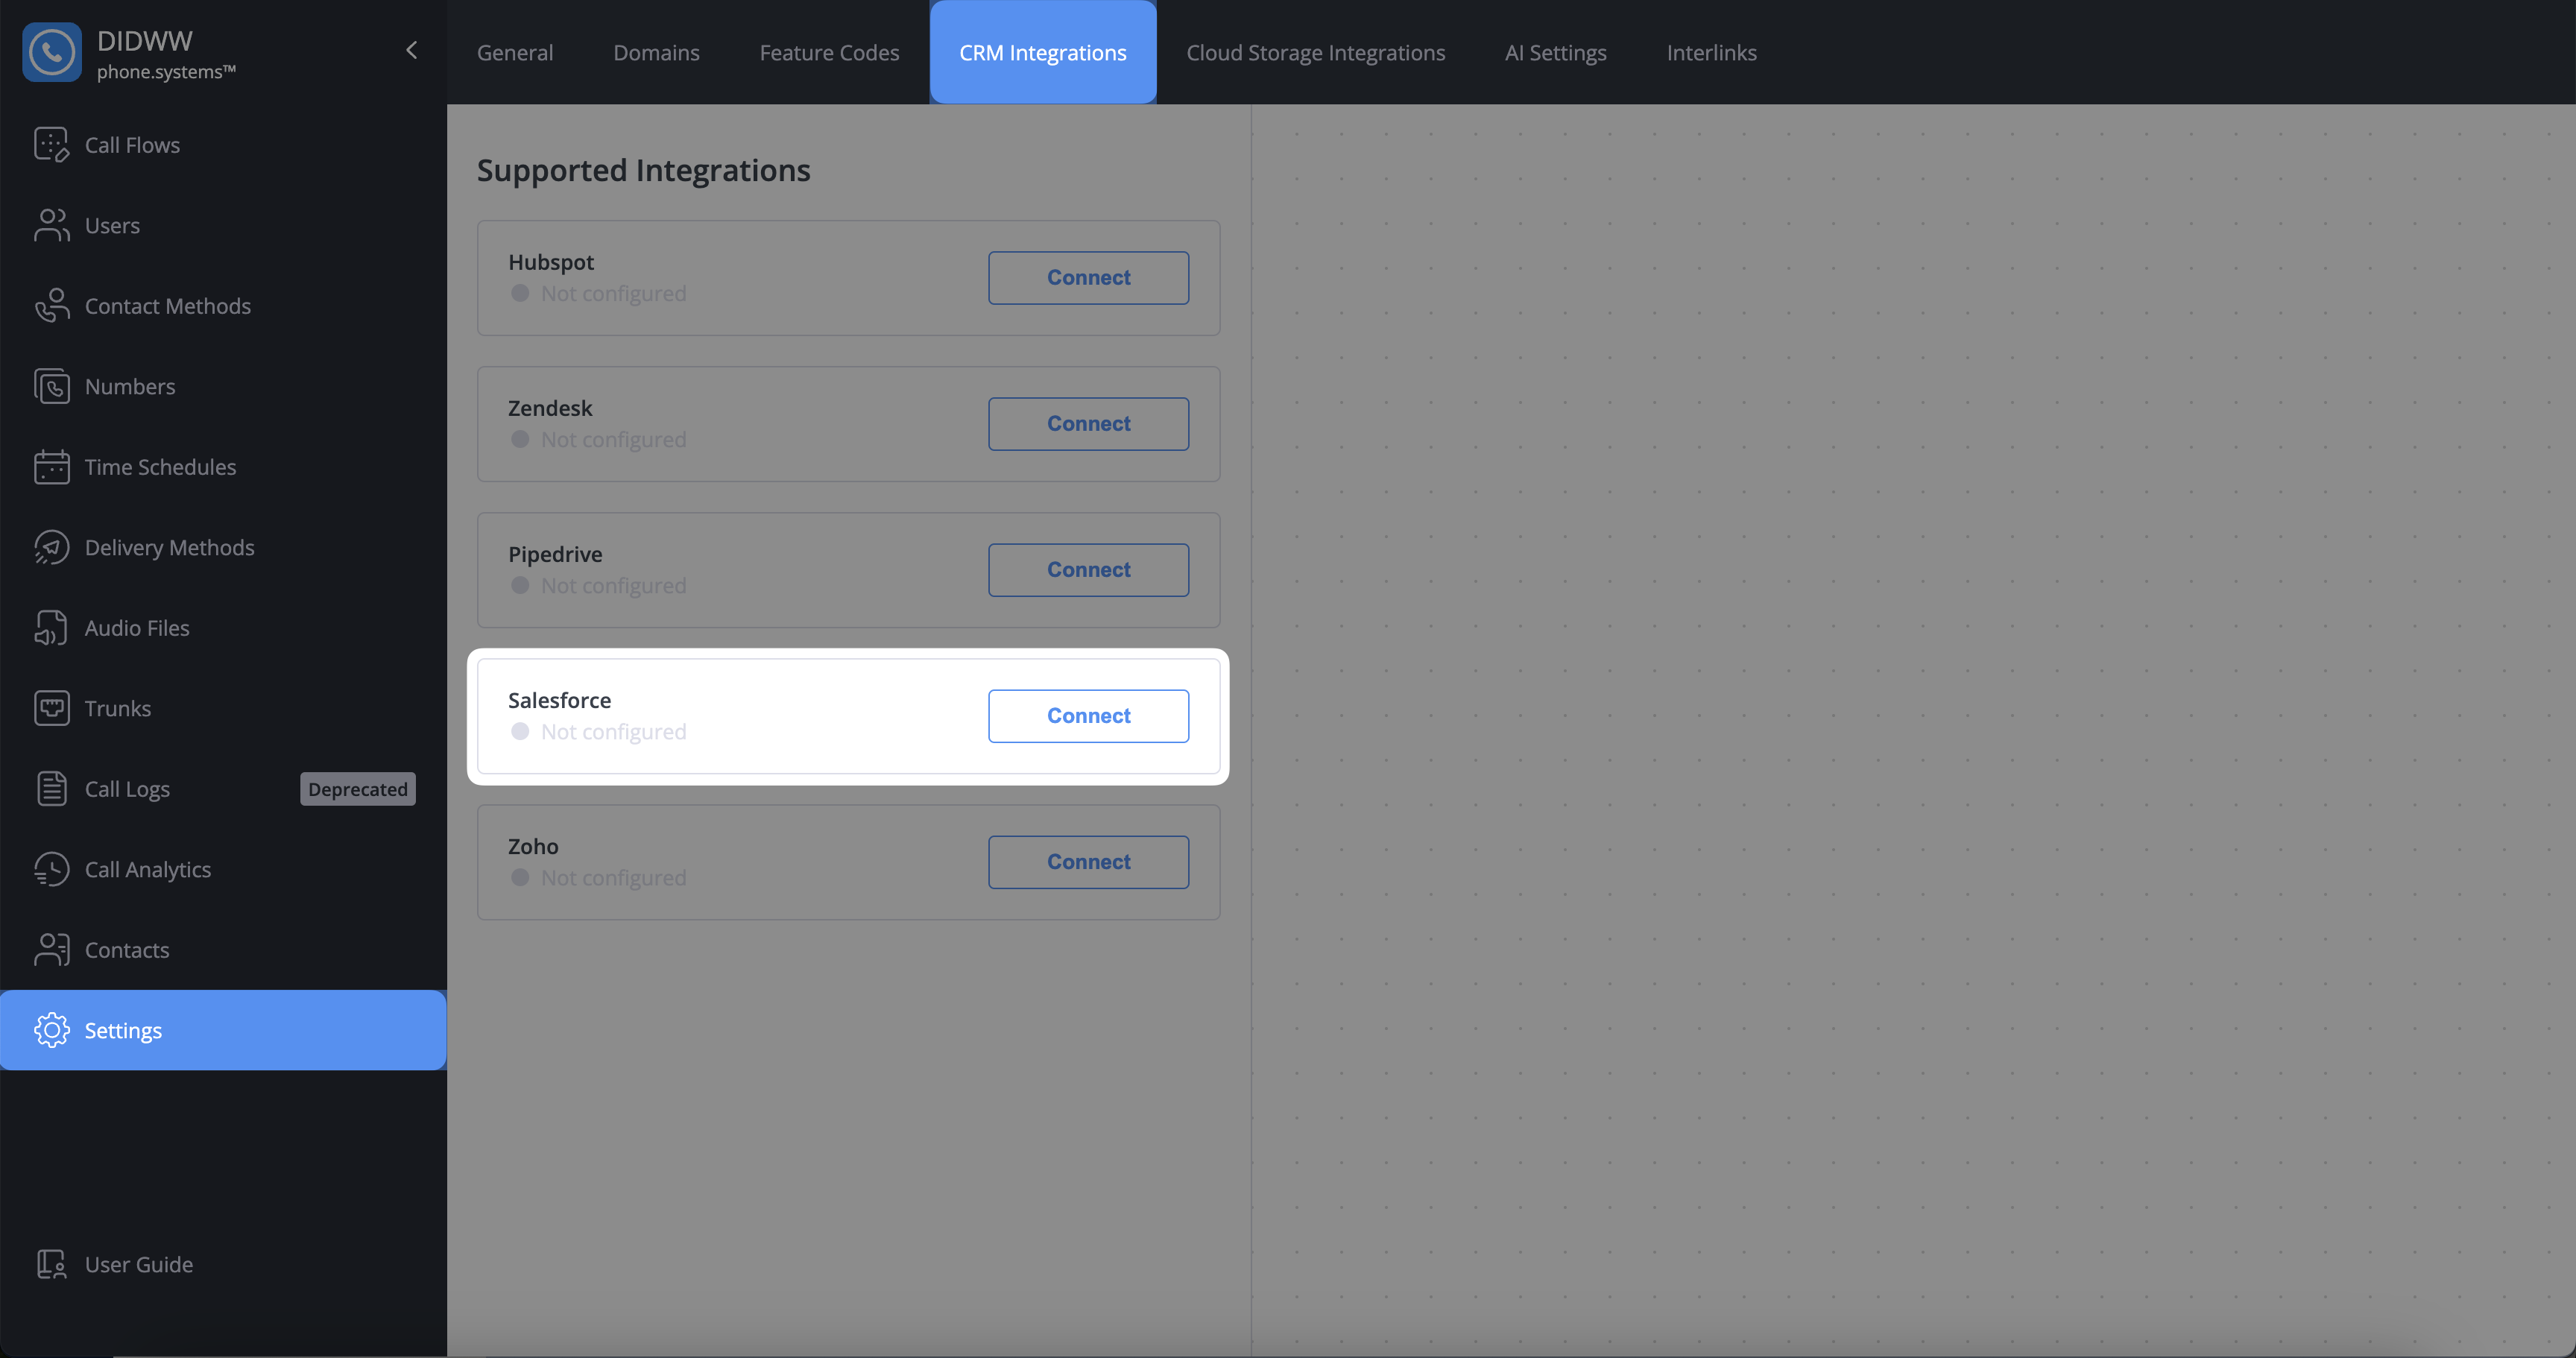
Step 9: Connect the phone.systems™ Salesforce app#
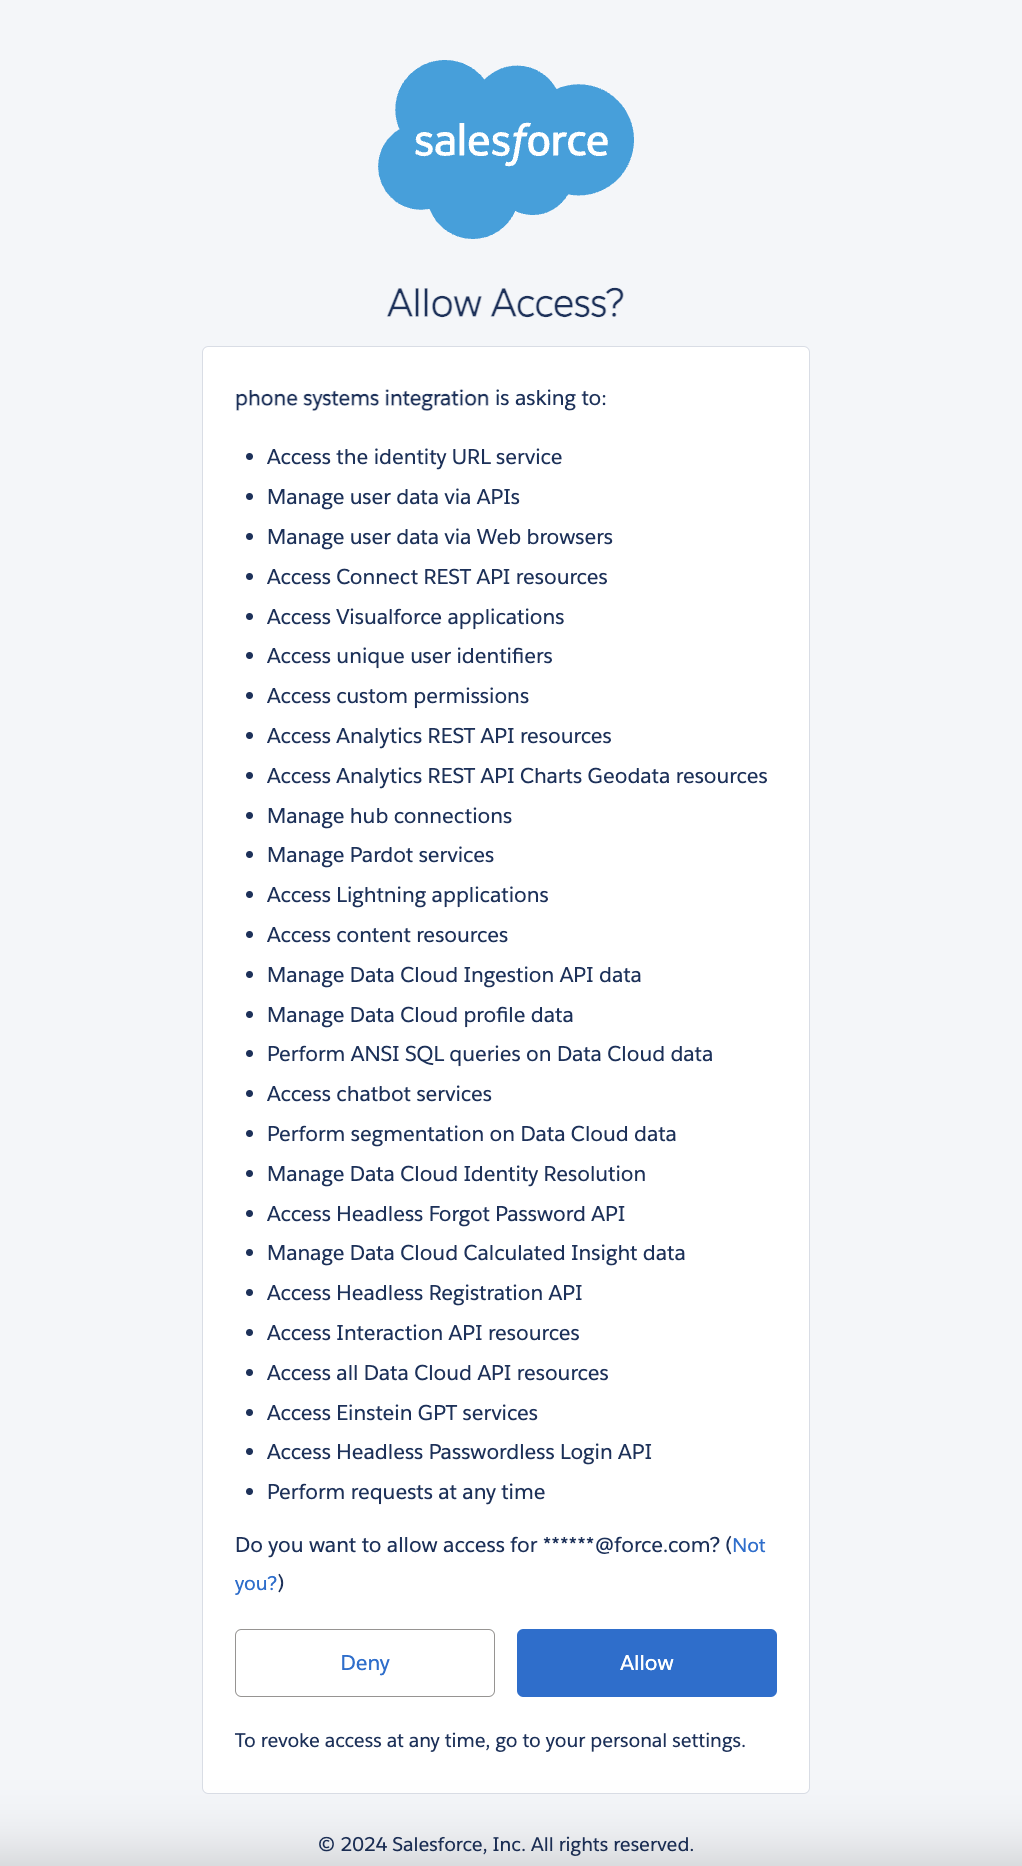
To complete the connection between phone.systems™ and Salesforce, open the phone.systems™ page and click Connect.
Tip
The “invalid_client_id” message may appear shortly after creating the app.
Wait several minutes before attempting to connect again. This allows Salesforce to register the new app credentials.
When the access permissions page appears, click Allow.
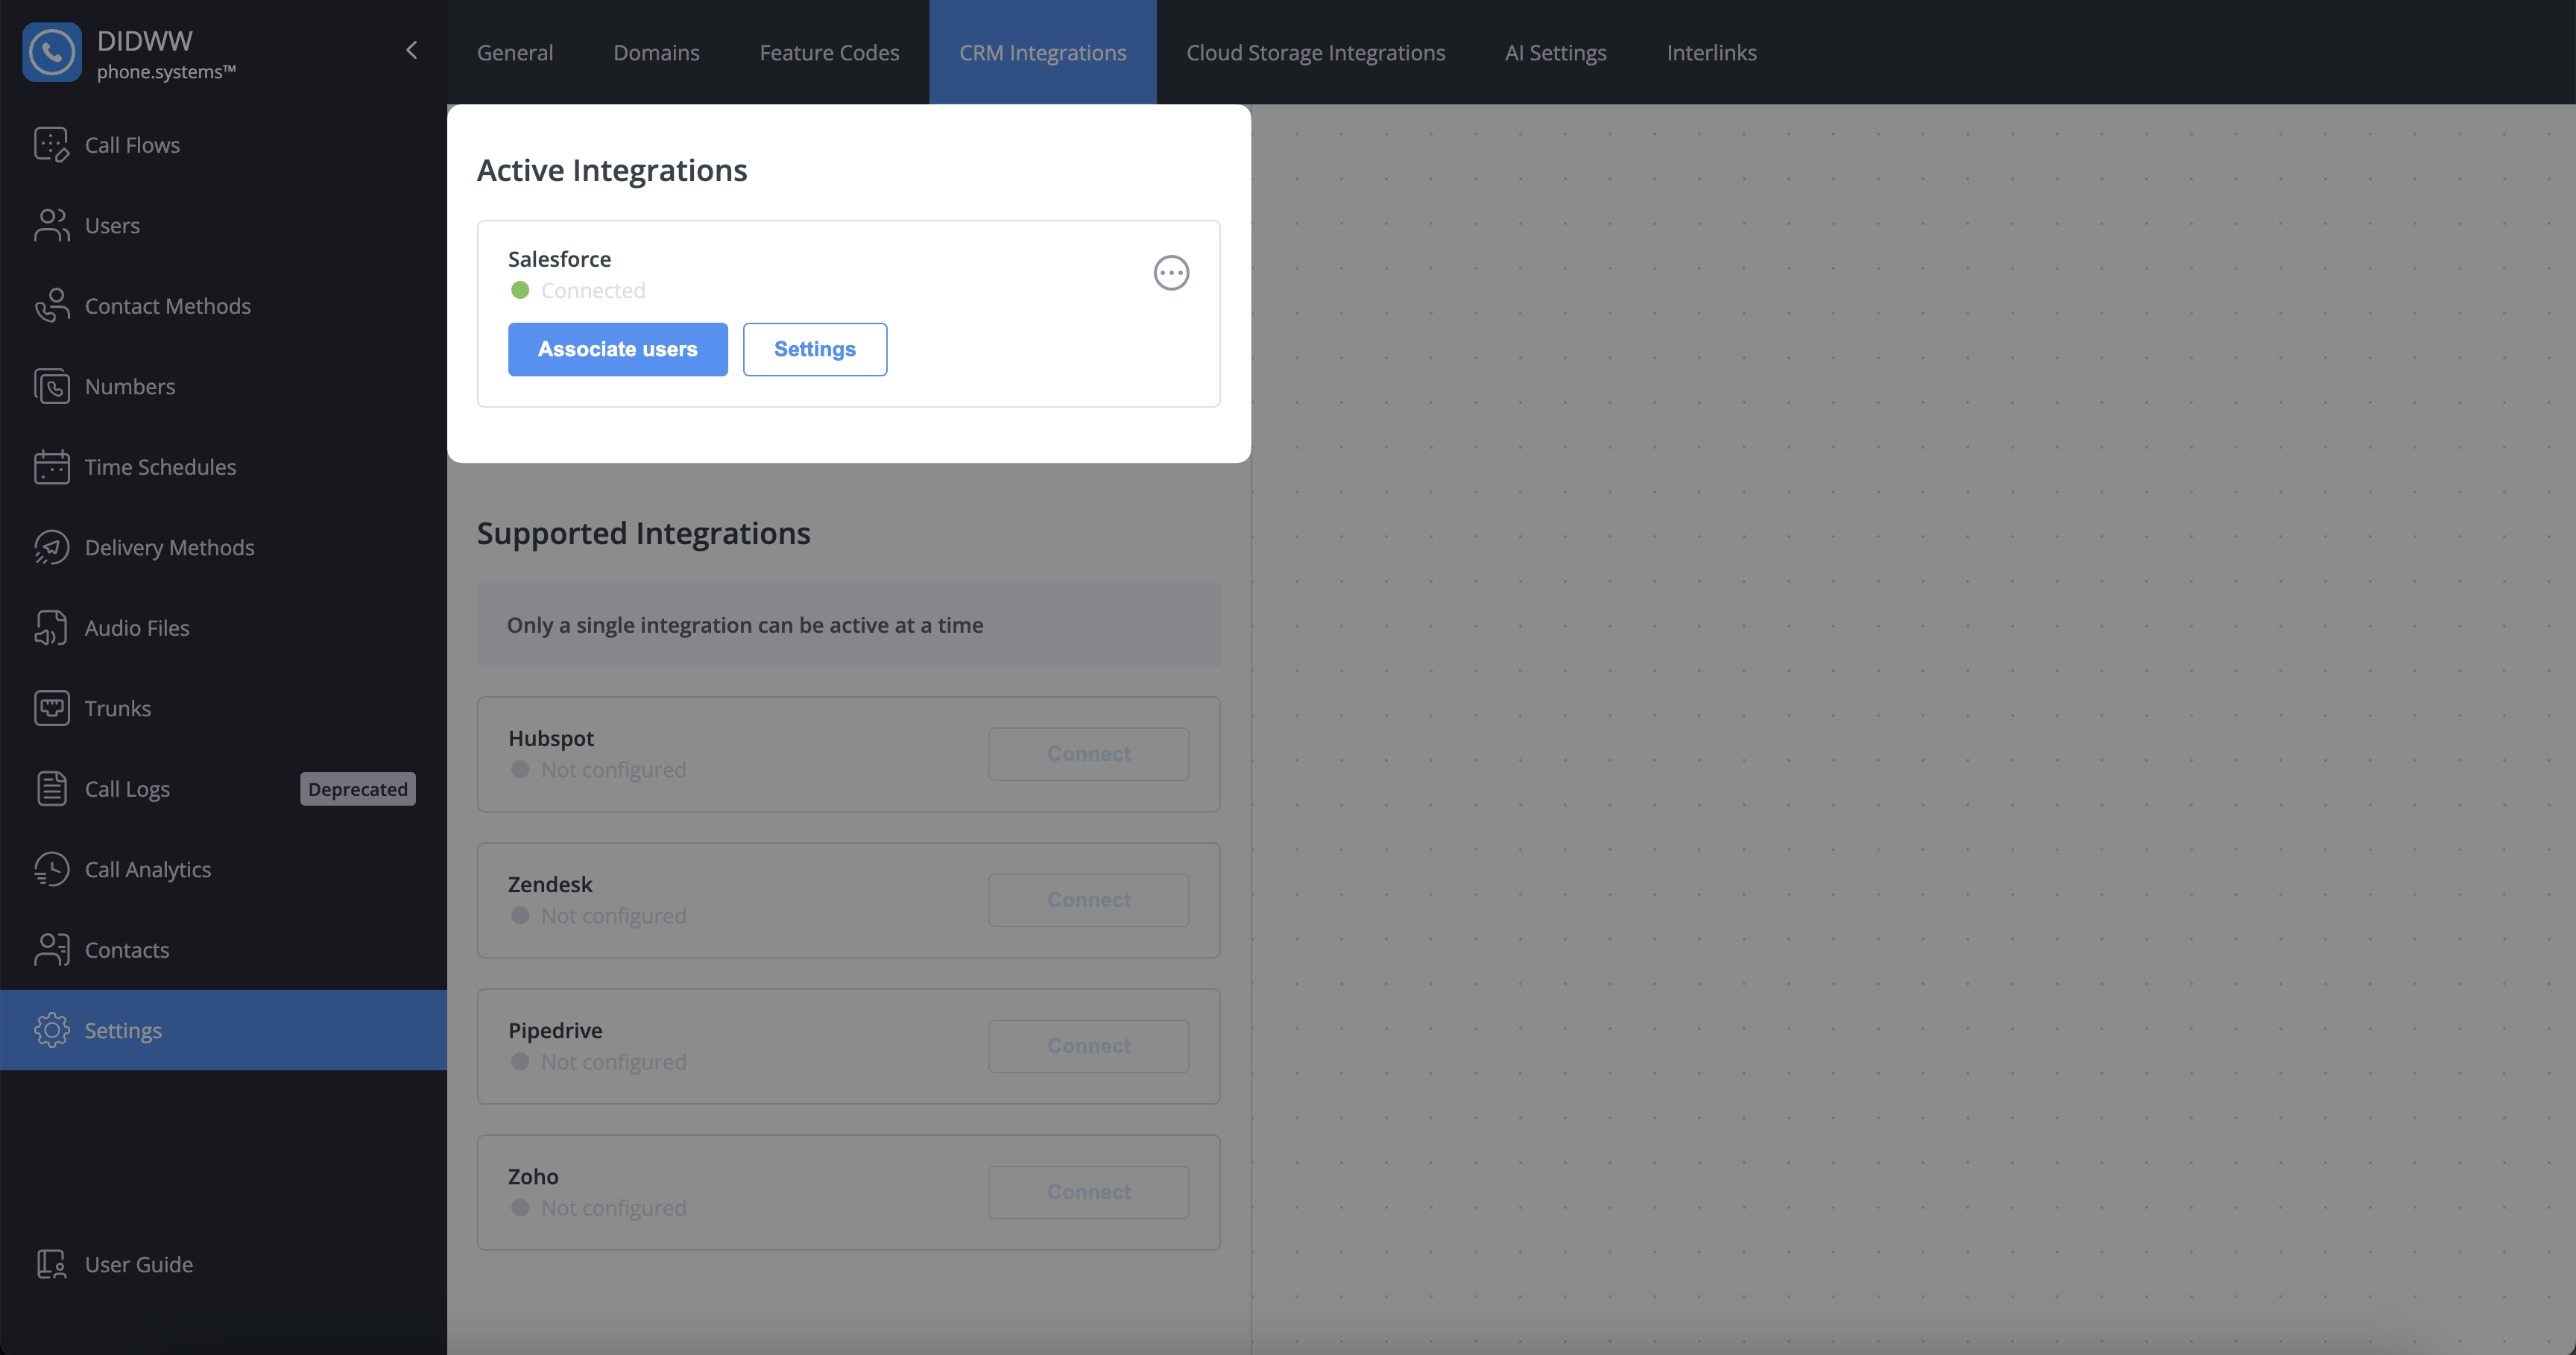
After you click Allow, you will be redirected back to the phone.systems™ CRM Integrations page. Salesforce will appear under Active Integrations with the status Connected.
Note
phone.systems™ will automatically synchronize data and establish a connection with your main Salesforce account. The app will also be installed in Salesforce CRM.
Fig. 13. Active Salesforce connection in phone.systems™#
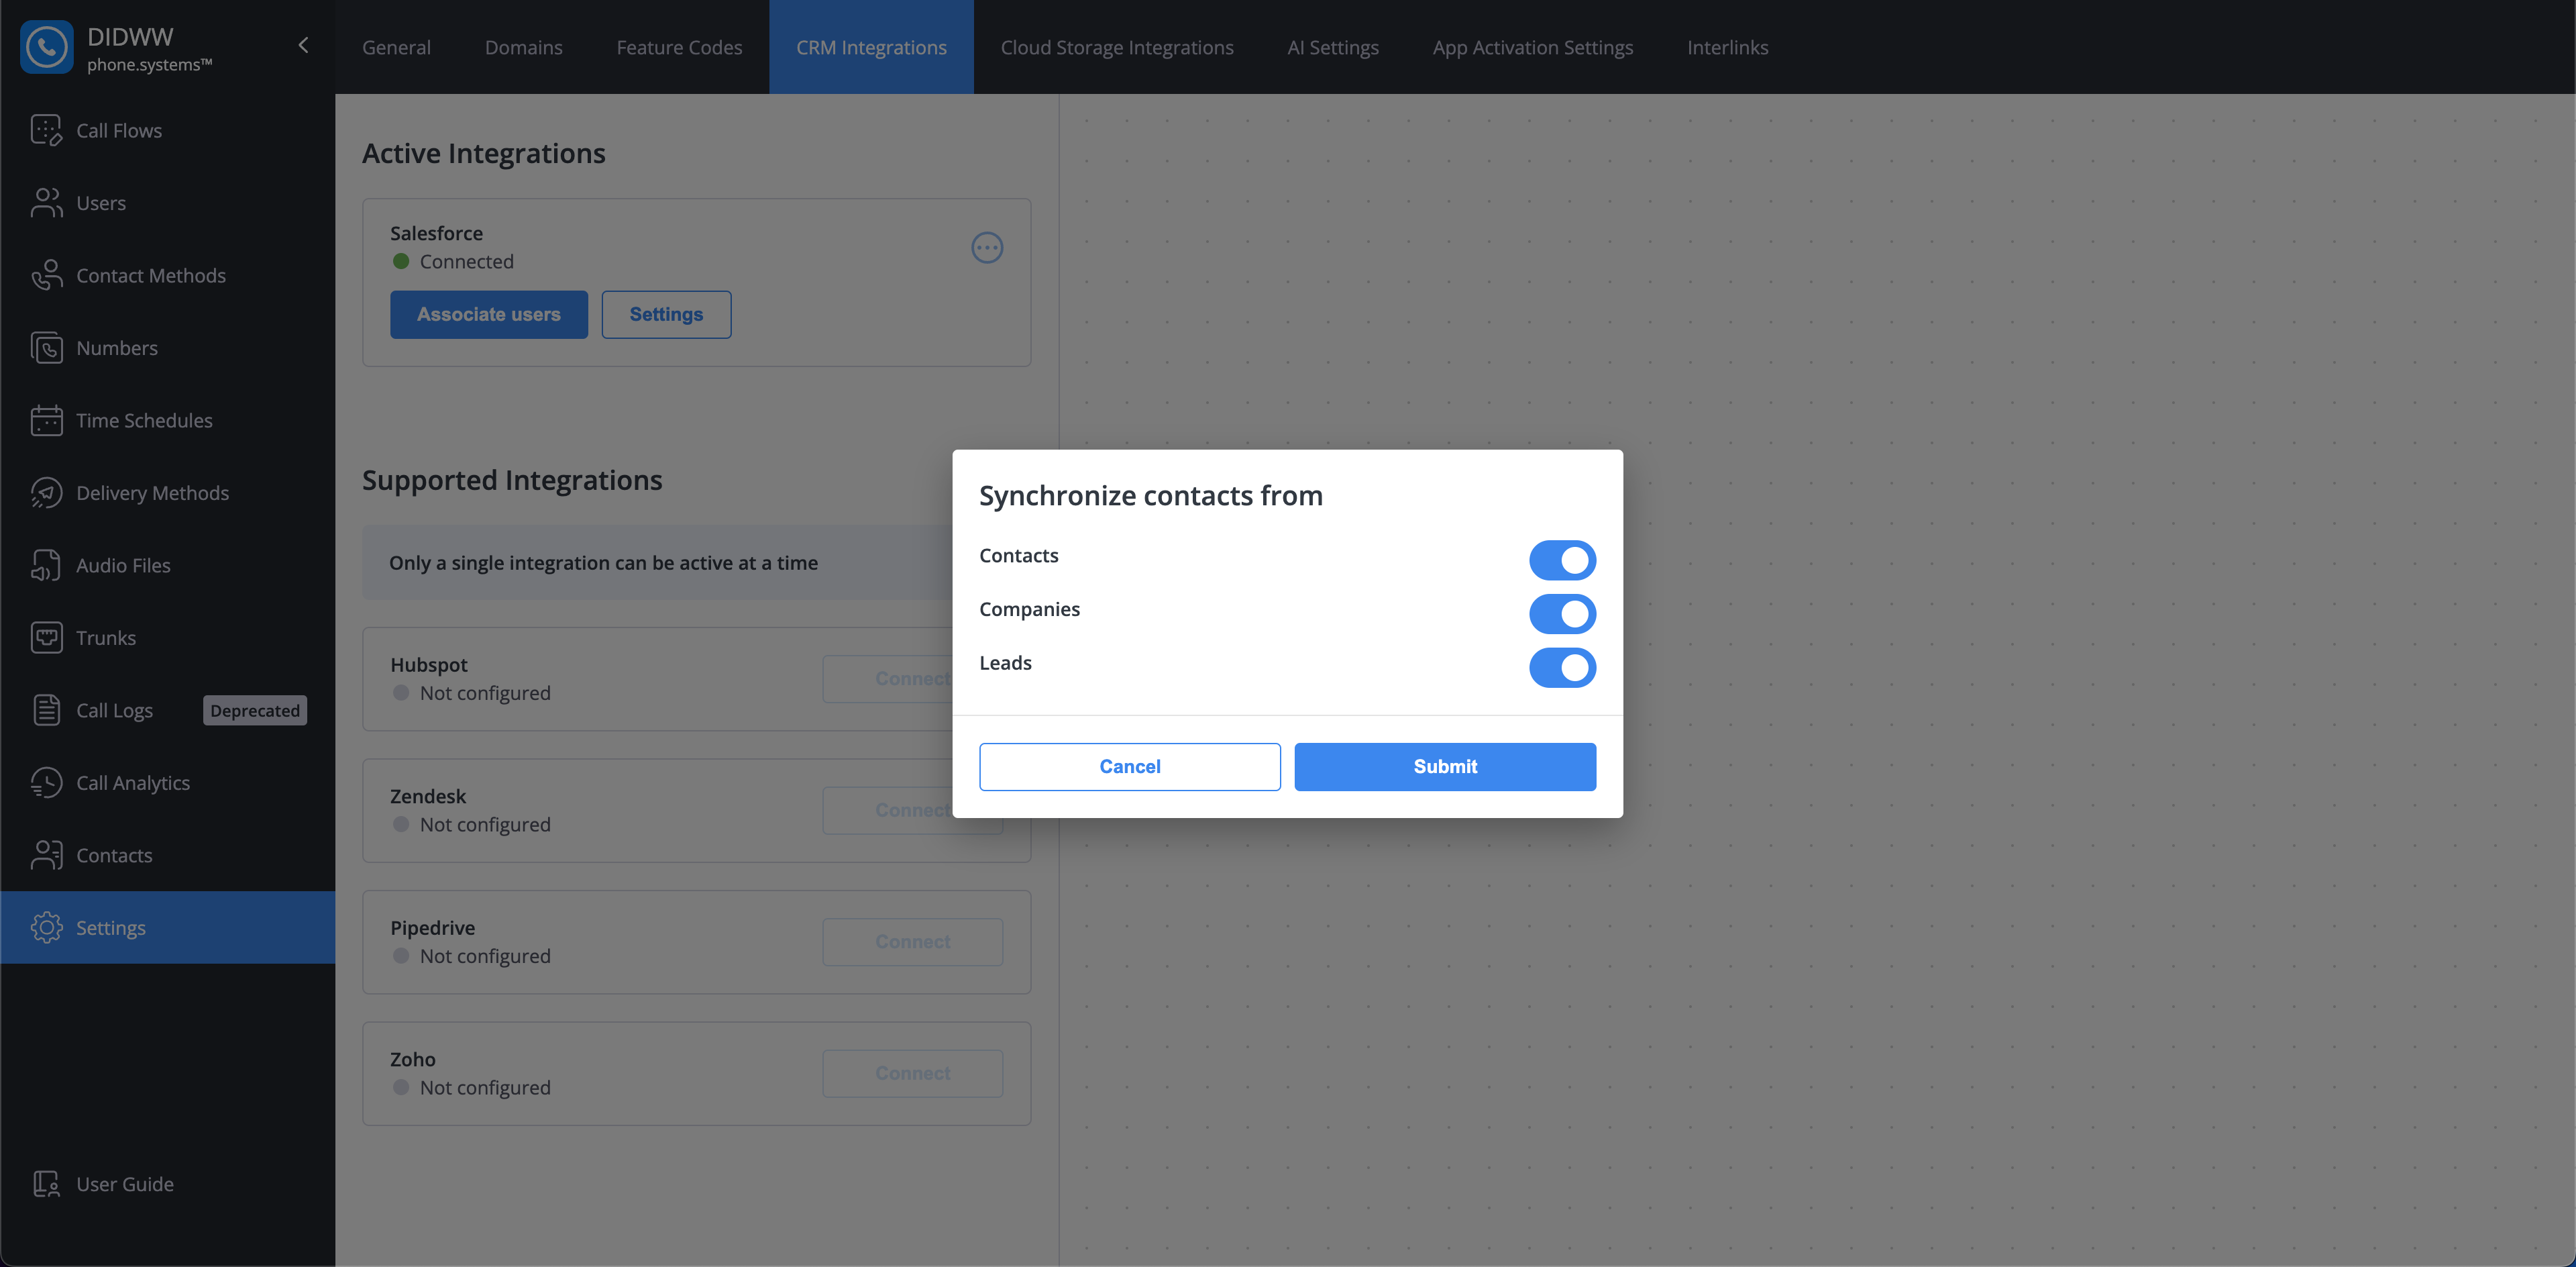
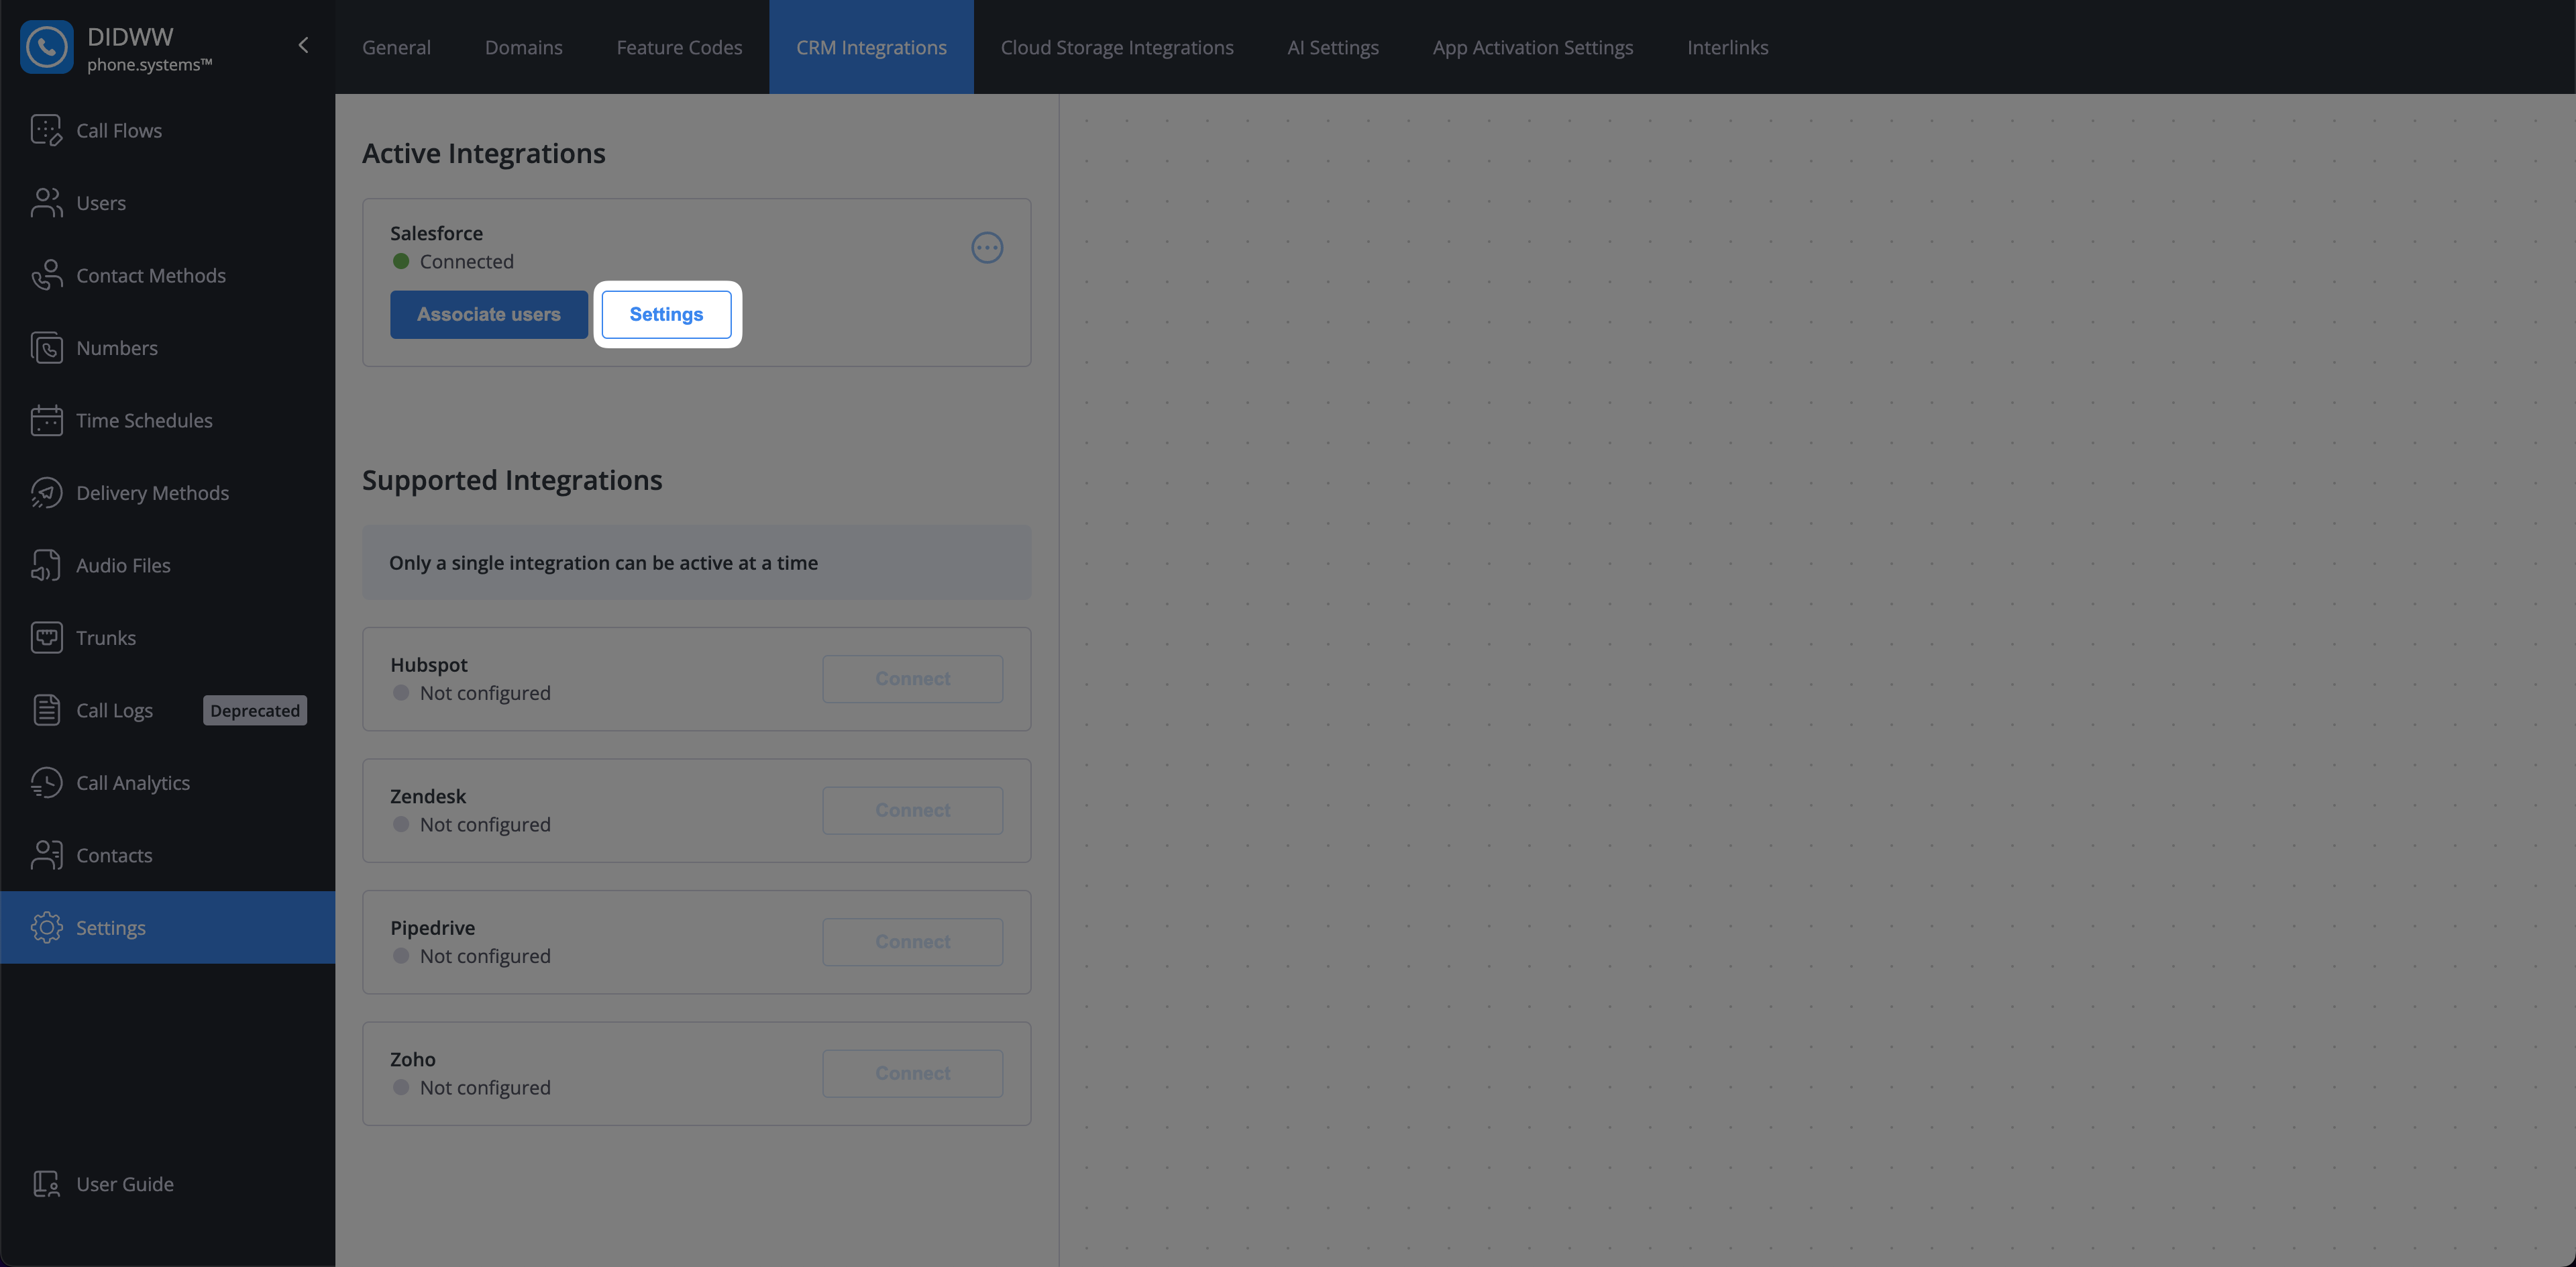
Once the integration is active, you can customize how data is synced between phone.systems™ and Salesforce. To access these options, navigate to Settings > CRM Integrations and click the Settings icon next to your Salesforce connection.
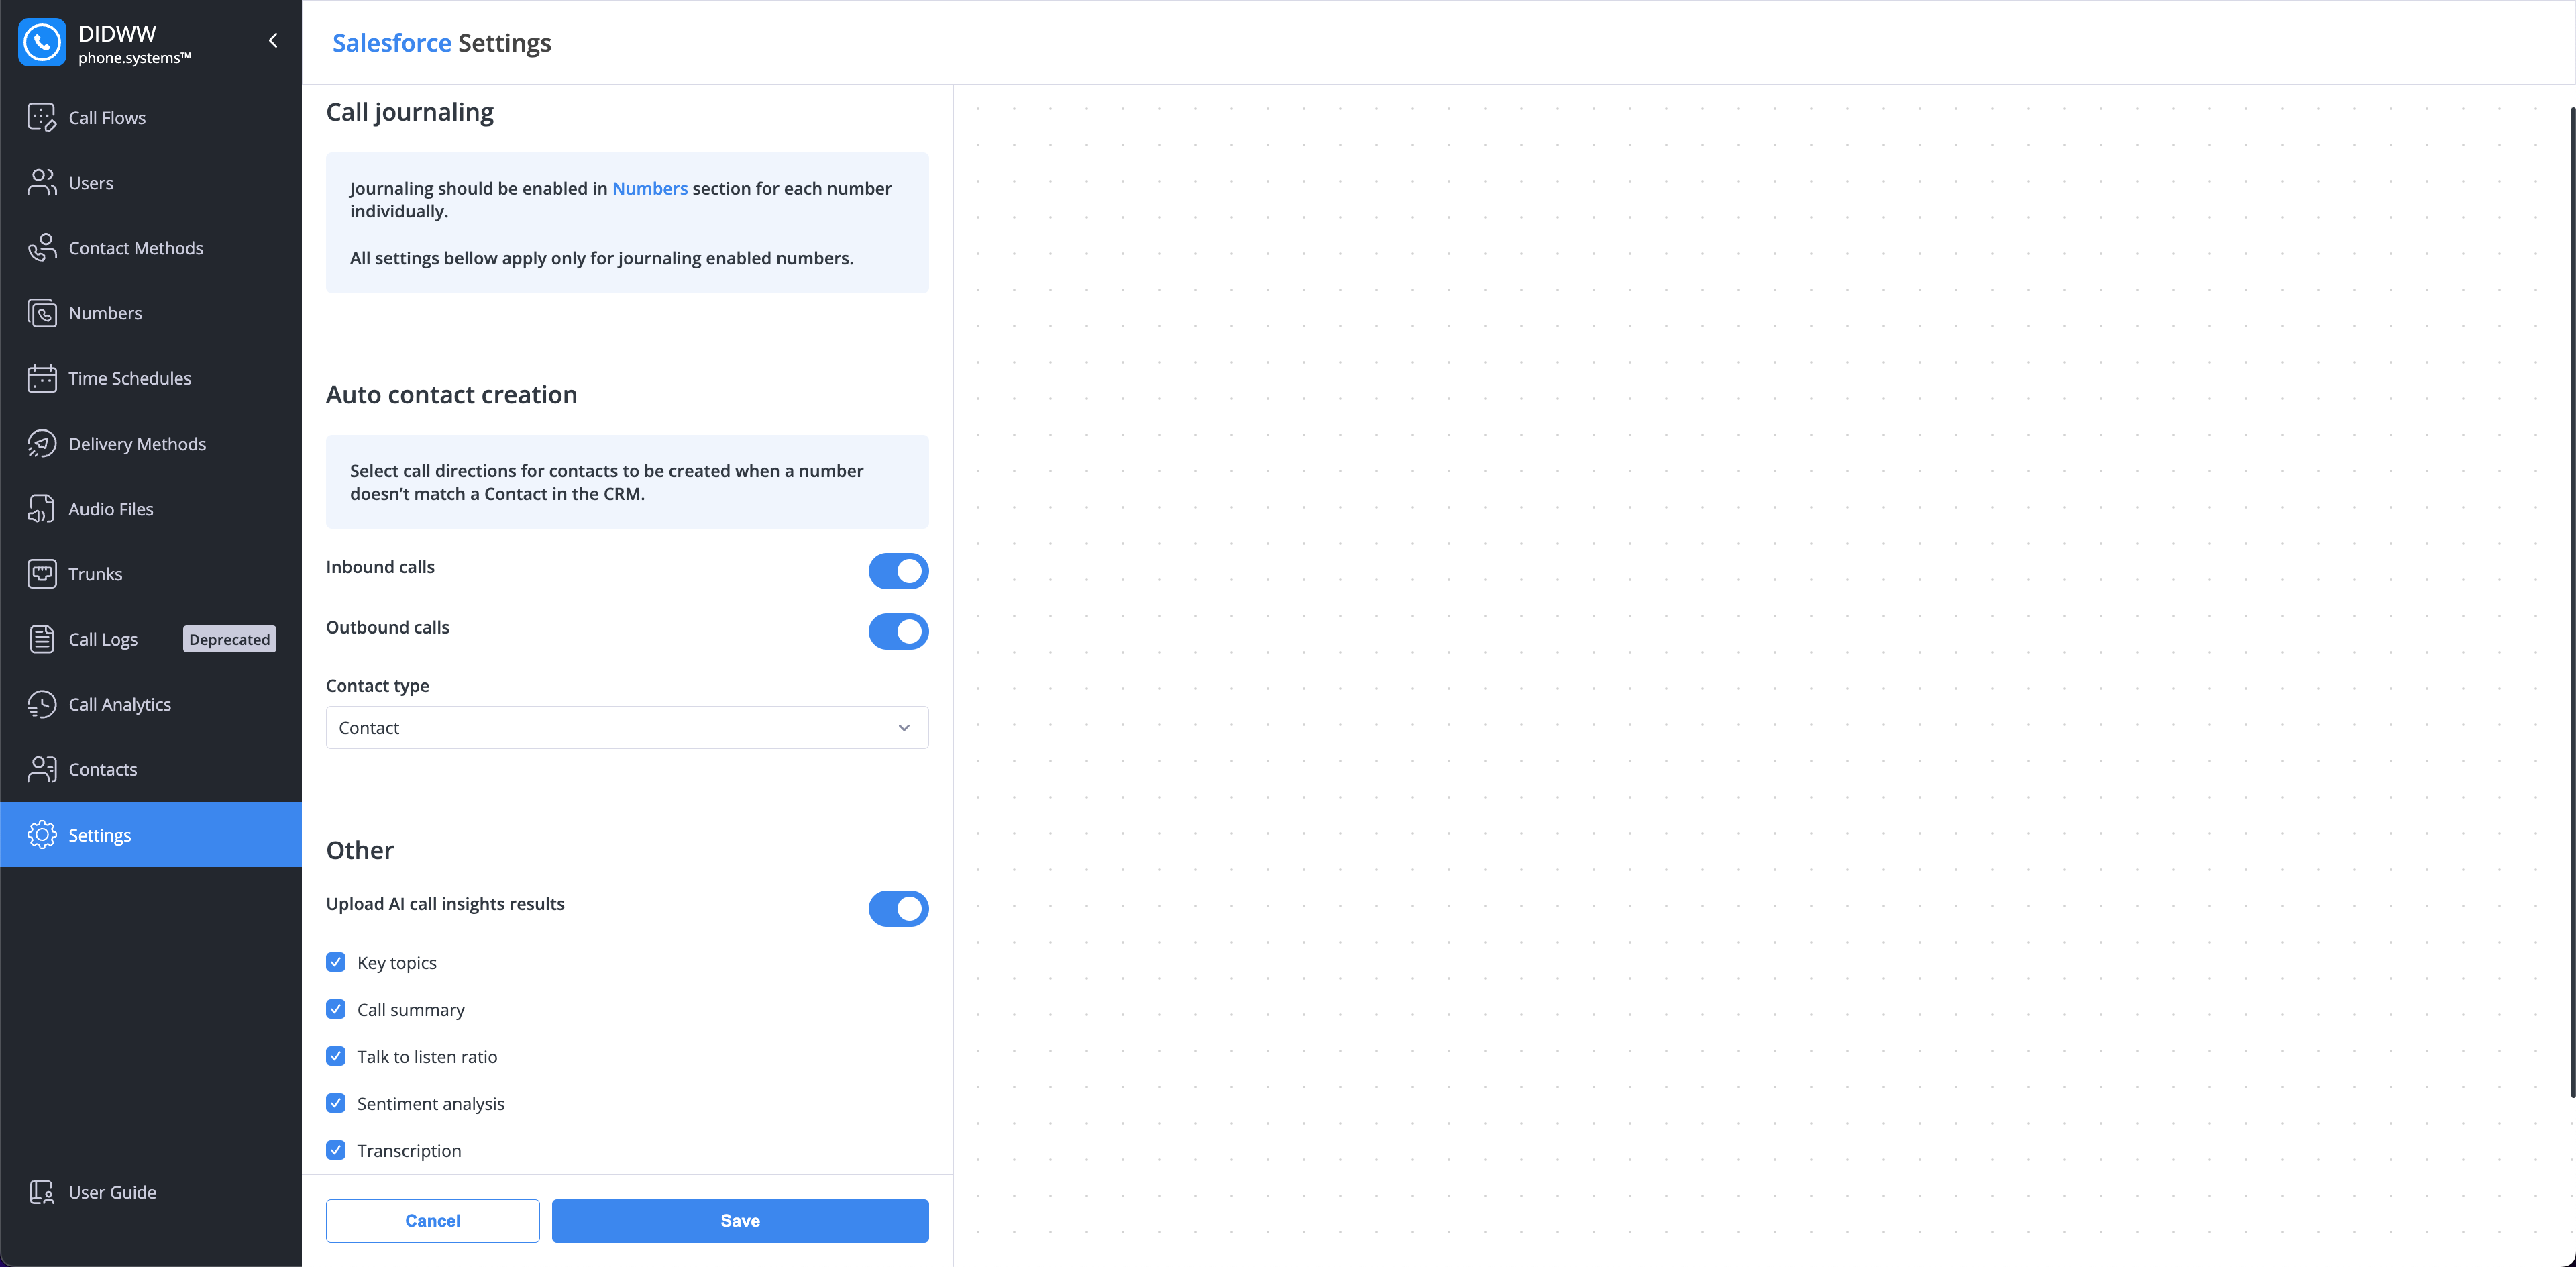
The following settings apply only to numbers with Call journaling enabled. Call journaling must be configured separately for each number on the Edit phone numbers page.
This feature automatically creates a new contact or lead in Salesforce when a call is handled from a number that does not match an existing record in your CRM.
Setting
Description
Inbound calls
When enabled, a new record will be created in Salesforce for all inbound calls from unknown numbers.
Outbound calls
When enabled, a new record will be created in Salesforce for all outbound calls to unknown numbers.
Contact type
Select the default record type (Contact or Lead) to be created automatically.
 icon in the top-right corner