HubSpot and phone.systems™ Integration#
Important
This setup uses a HubSpot Legacy Public App.
HubSpot has discontinued the creation of new Legacy Public Apps. This affects whether you can complete the setup described on this page:
HubSpot accounts created on or after May 26, 2026 cannot create Legacy Public Apps.
HubSpot accounts created before May 26, 2026 can create Legacy Public Apps only until June 23, 2026.
Existing Legacy Public Apps are not affected by this change and continue to work as-is.
If your HubSpot account can no longer create Legacy Public Apps, you cannot complete this setup using the current procedure.
For the latest available HubSpot integration options, contact DIDWW Support at support@didww.com .
See the official HubSpot changelog .
Connecting phone.systems™ with HubSpot CRM allows you to manage customer calls and track important information. The integration includes the following features:
Sync contacts automatically: Keep contacts and company details updated in phone.systems™ and HubSpot.
Call journaling: All incoming and outgoing calls are logged in HubSpot for tracking and reference.
Create new contacts automatically: When an unknown number calls, a new contact or company is created in HubSpot automatically.
Store call recordings: Call recordings are uploaded to HubSpot for easy access and review.
User association for call journaling: Associating users enables call journaling between phone.systems™ and HubSpot. Unassociated users will not receive call details in HubSpot.
Connecting phone.systems™ with HubSpot#
This guide provides detailed steps on integrating phone.systems™ with HubSpot using the HubSpot developer account. Follow the instructions below to complete the setup process.
Note
To connect phone.systems™ with HubSpot, you will need the Client ID, Client Secret, and Developer API Key, which are obtained from a legacy app created in your HubSpot developer account.
Step 1: Sign in or sign up to a HubSpot developer account#
To get started, go to the HubSpot Developer Account page and sign in to an existing developer account or create a new one.
Step 2: Open the Legacy Apps page in HubSpot#
After signing in to HubSpot in the first browser tab:
Open the Development section.
Open the Legacy Apps tab.
Click Create legacy app.
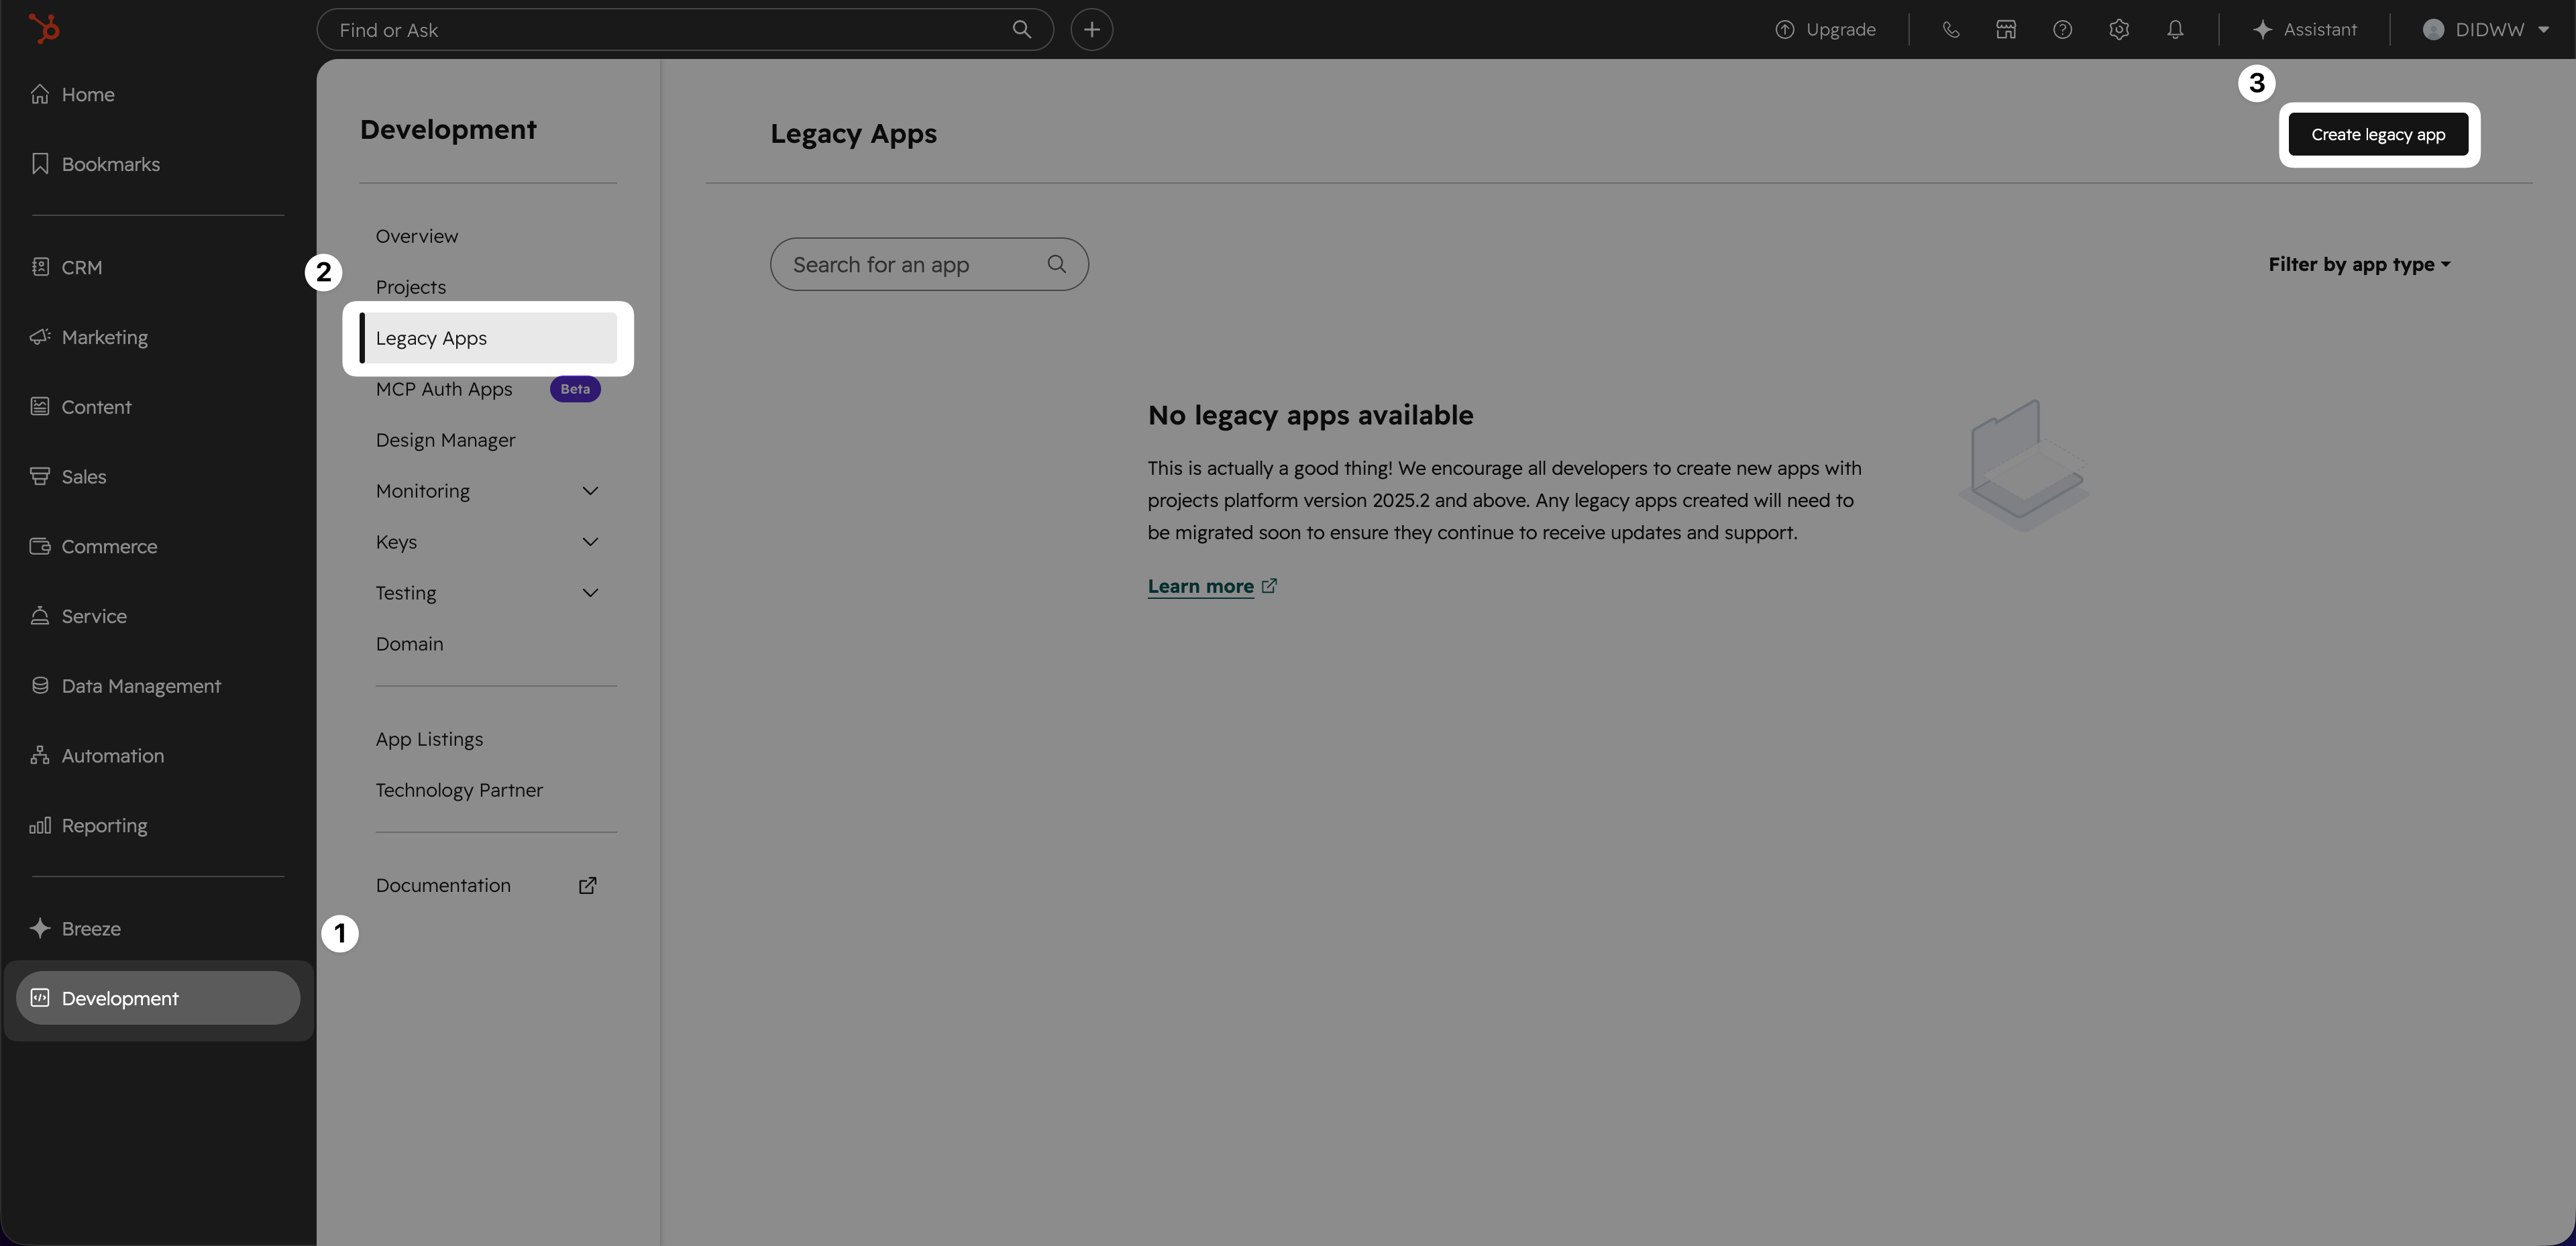
Fig. 1. Open the Legacy Apps page in HubSpot#
Step 3: Create a public legacy app#
In the Create Legacy App pop-up, click Public.
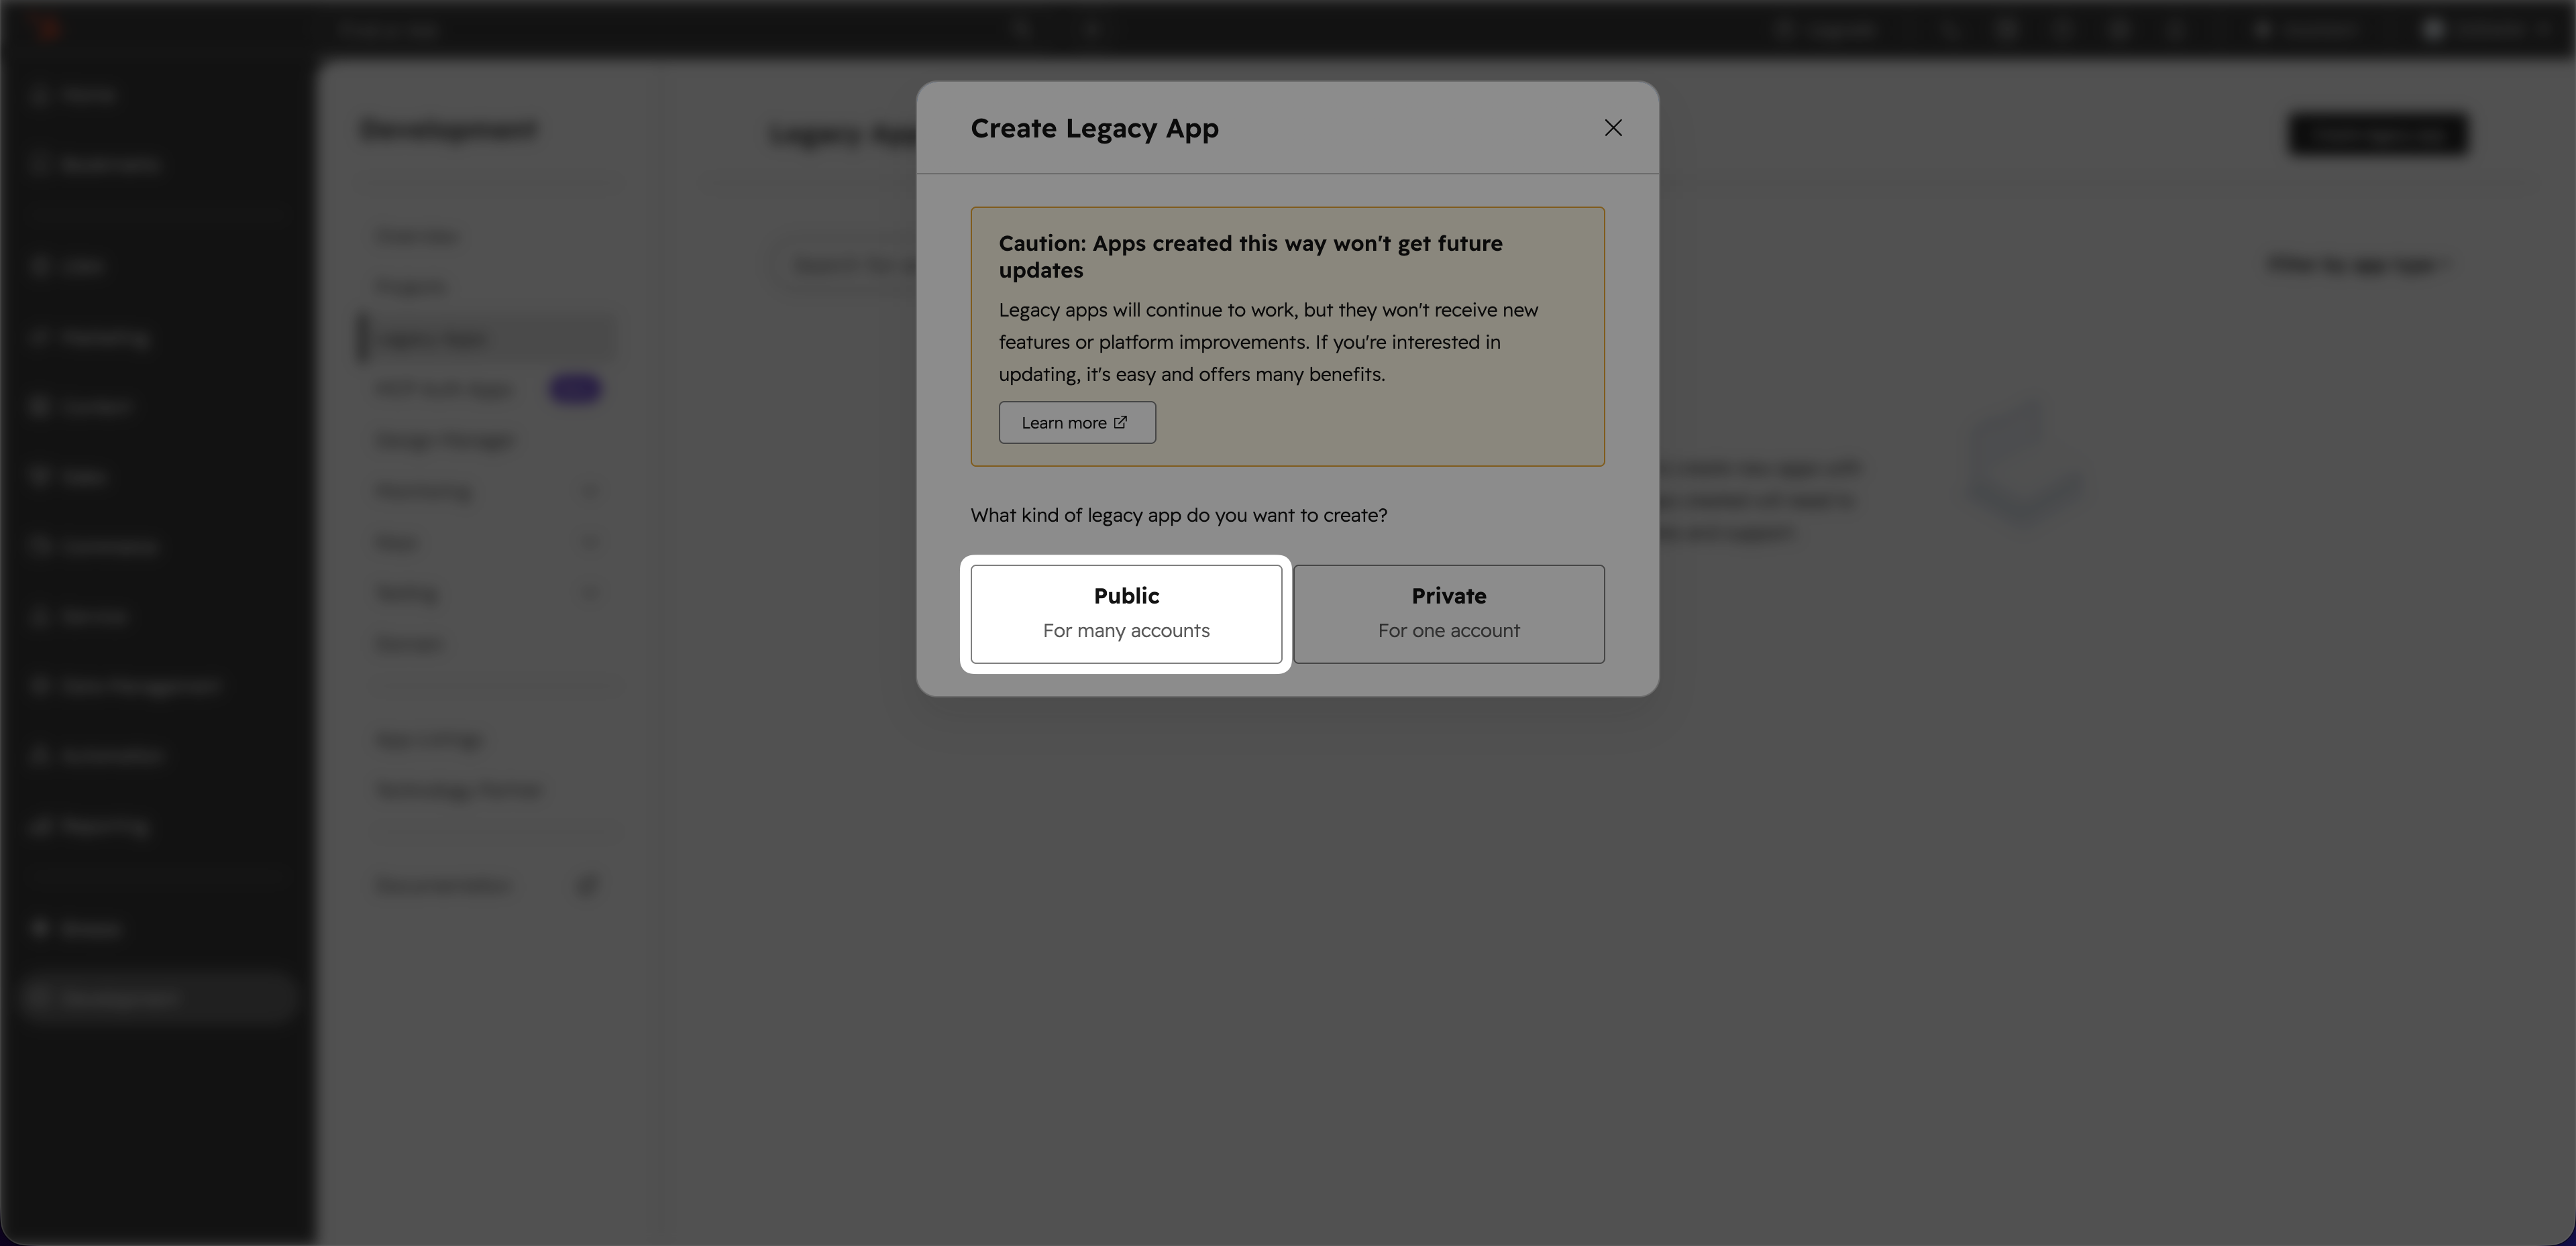
Fig. 2. Create a public legacy app#
Step 4: Enter app information#
On the HubSpot app page:
Enter a name in the Public app name field.
Open the Auth tab.

Fig. 3. Enter app information and open the Auth tab#
Step 5: Launch phone.systems™ and create HubSpot connection#
Open a second browser tab, then create the HubSpot connection form in phone.systems™:
Log in to your DIDWW account and launch phone.systems™ .
Go to Settings > CRM Integrations.
Click Connect to link HubSpot with phone.systems™.
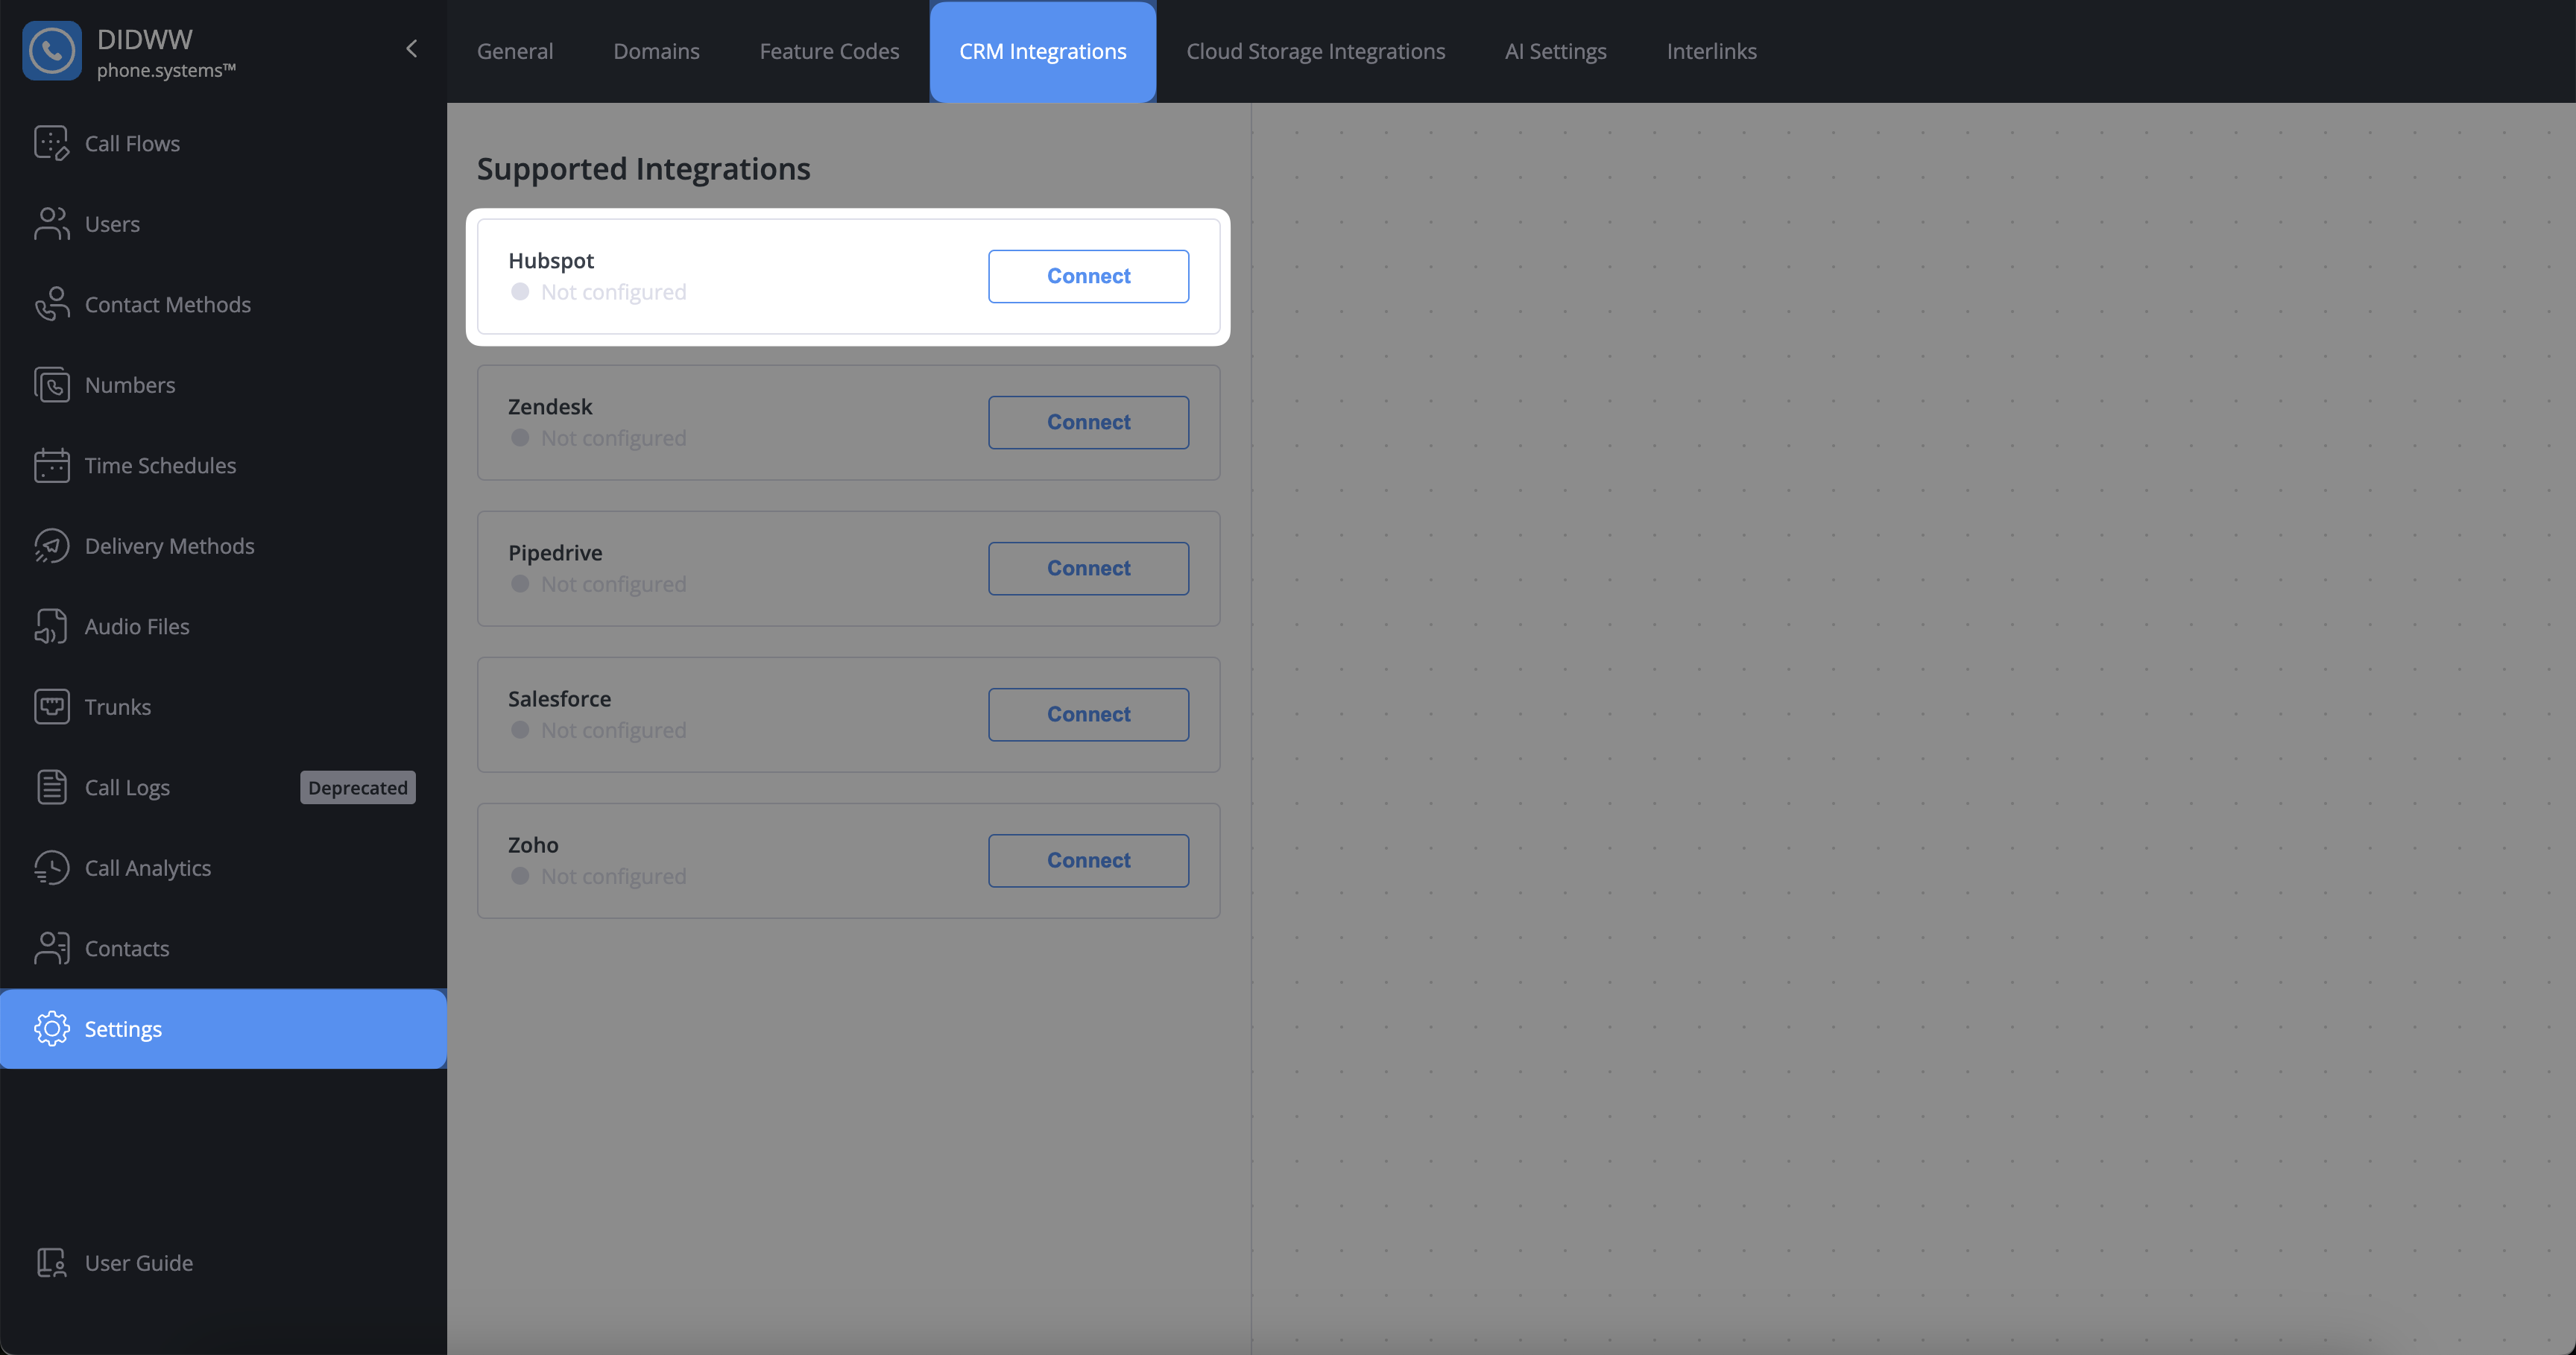
Fig. 4. Create HubSpot connection in phone.systems™#
Step 6: Copy the Redirect URL from phone.systems™ and paste it into HubSpot#
On the Connect HubSpot page in phone.systems™, copy the Redirect URL value.
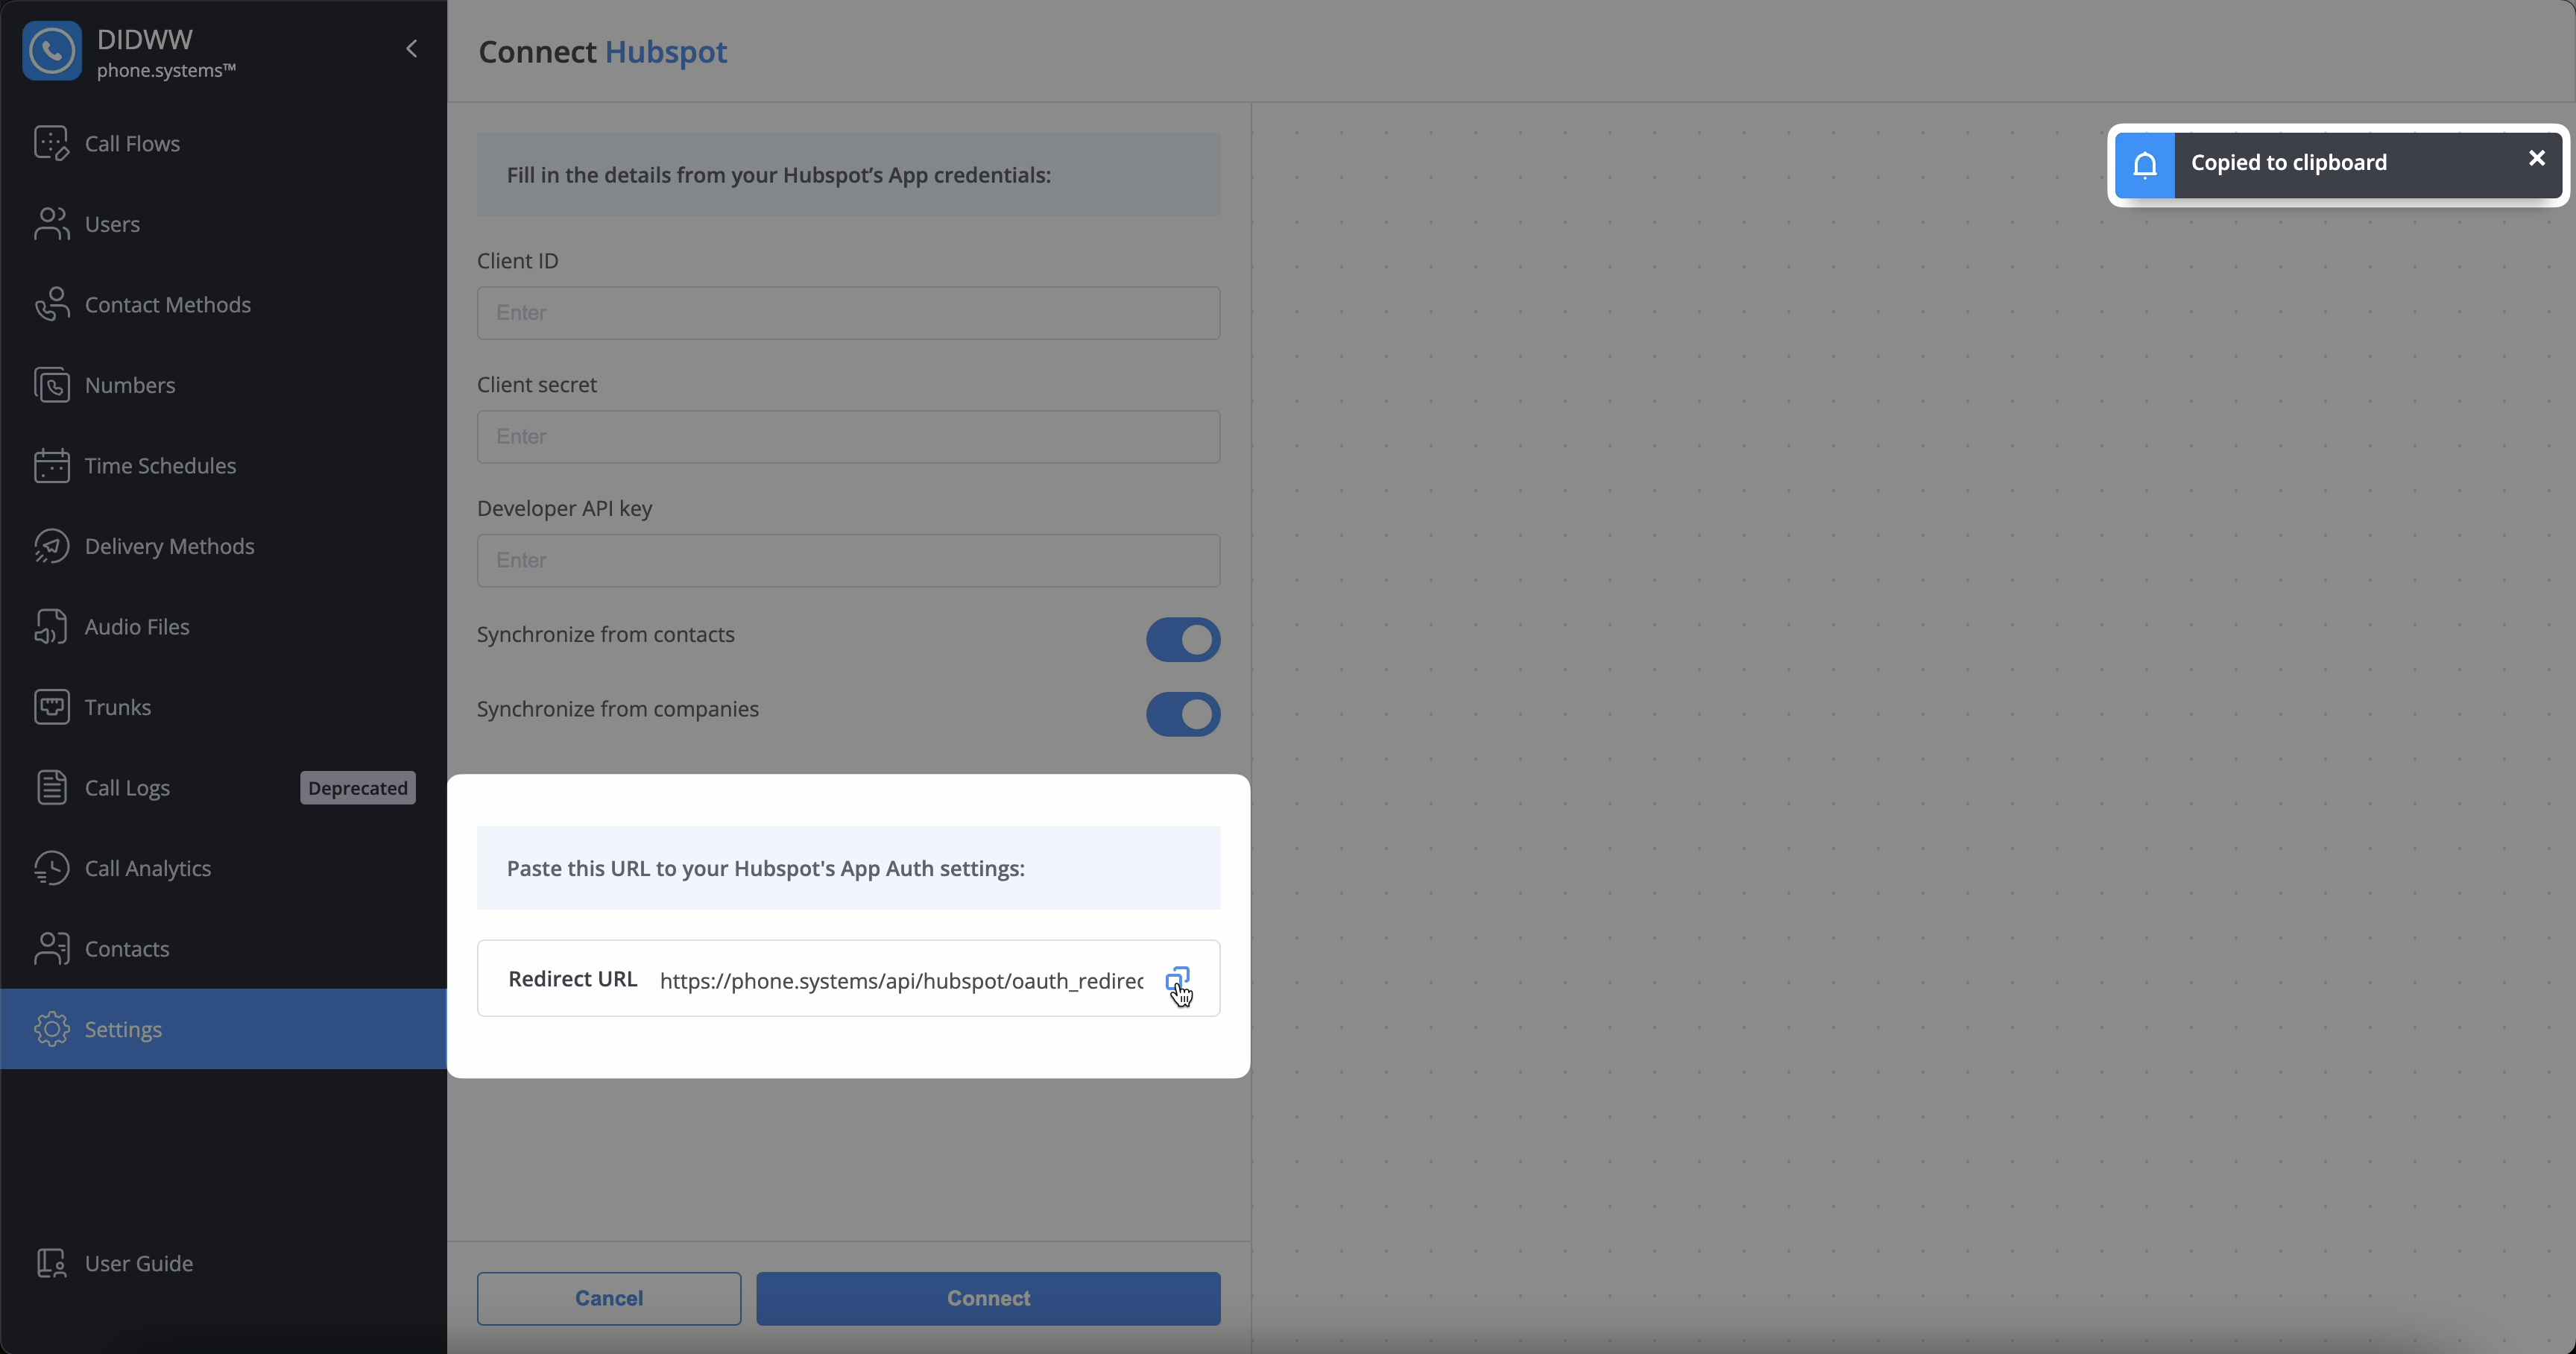
Fig. 5. Copy the redirect URL from phone.systems™#
Return to the first browser tab in HubSpot and paste the copied value into the Redirect URLs field.
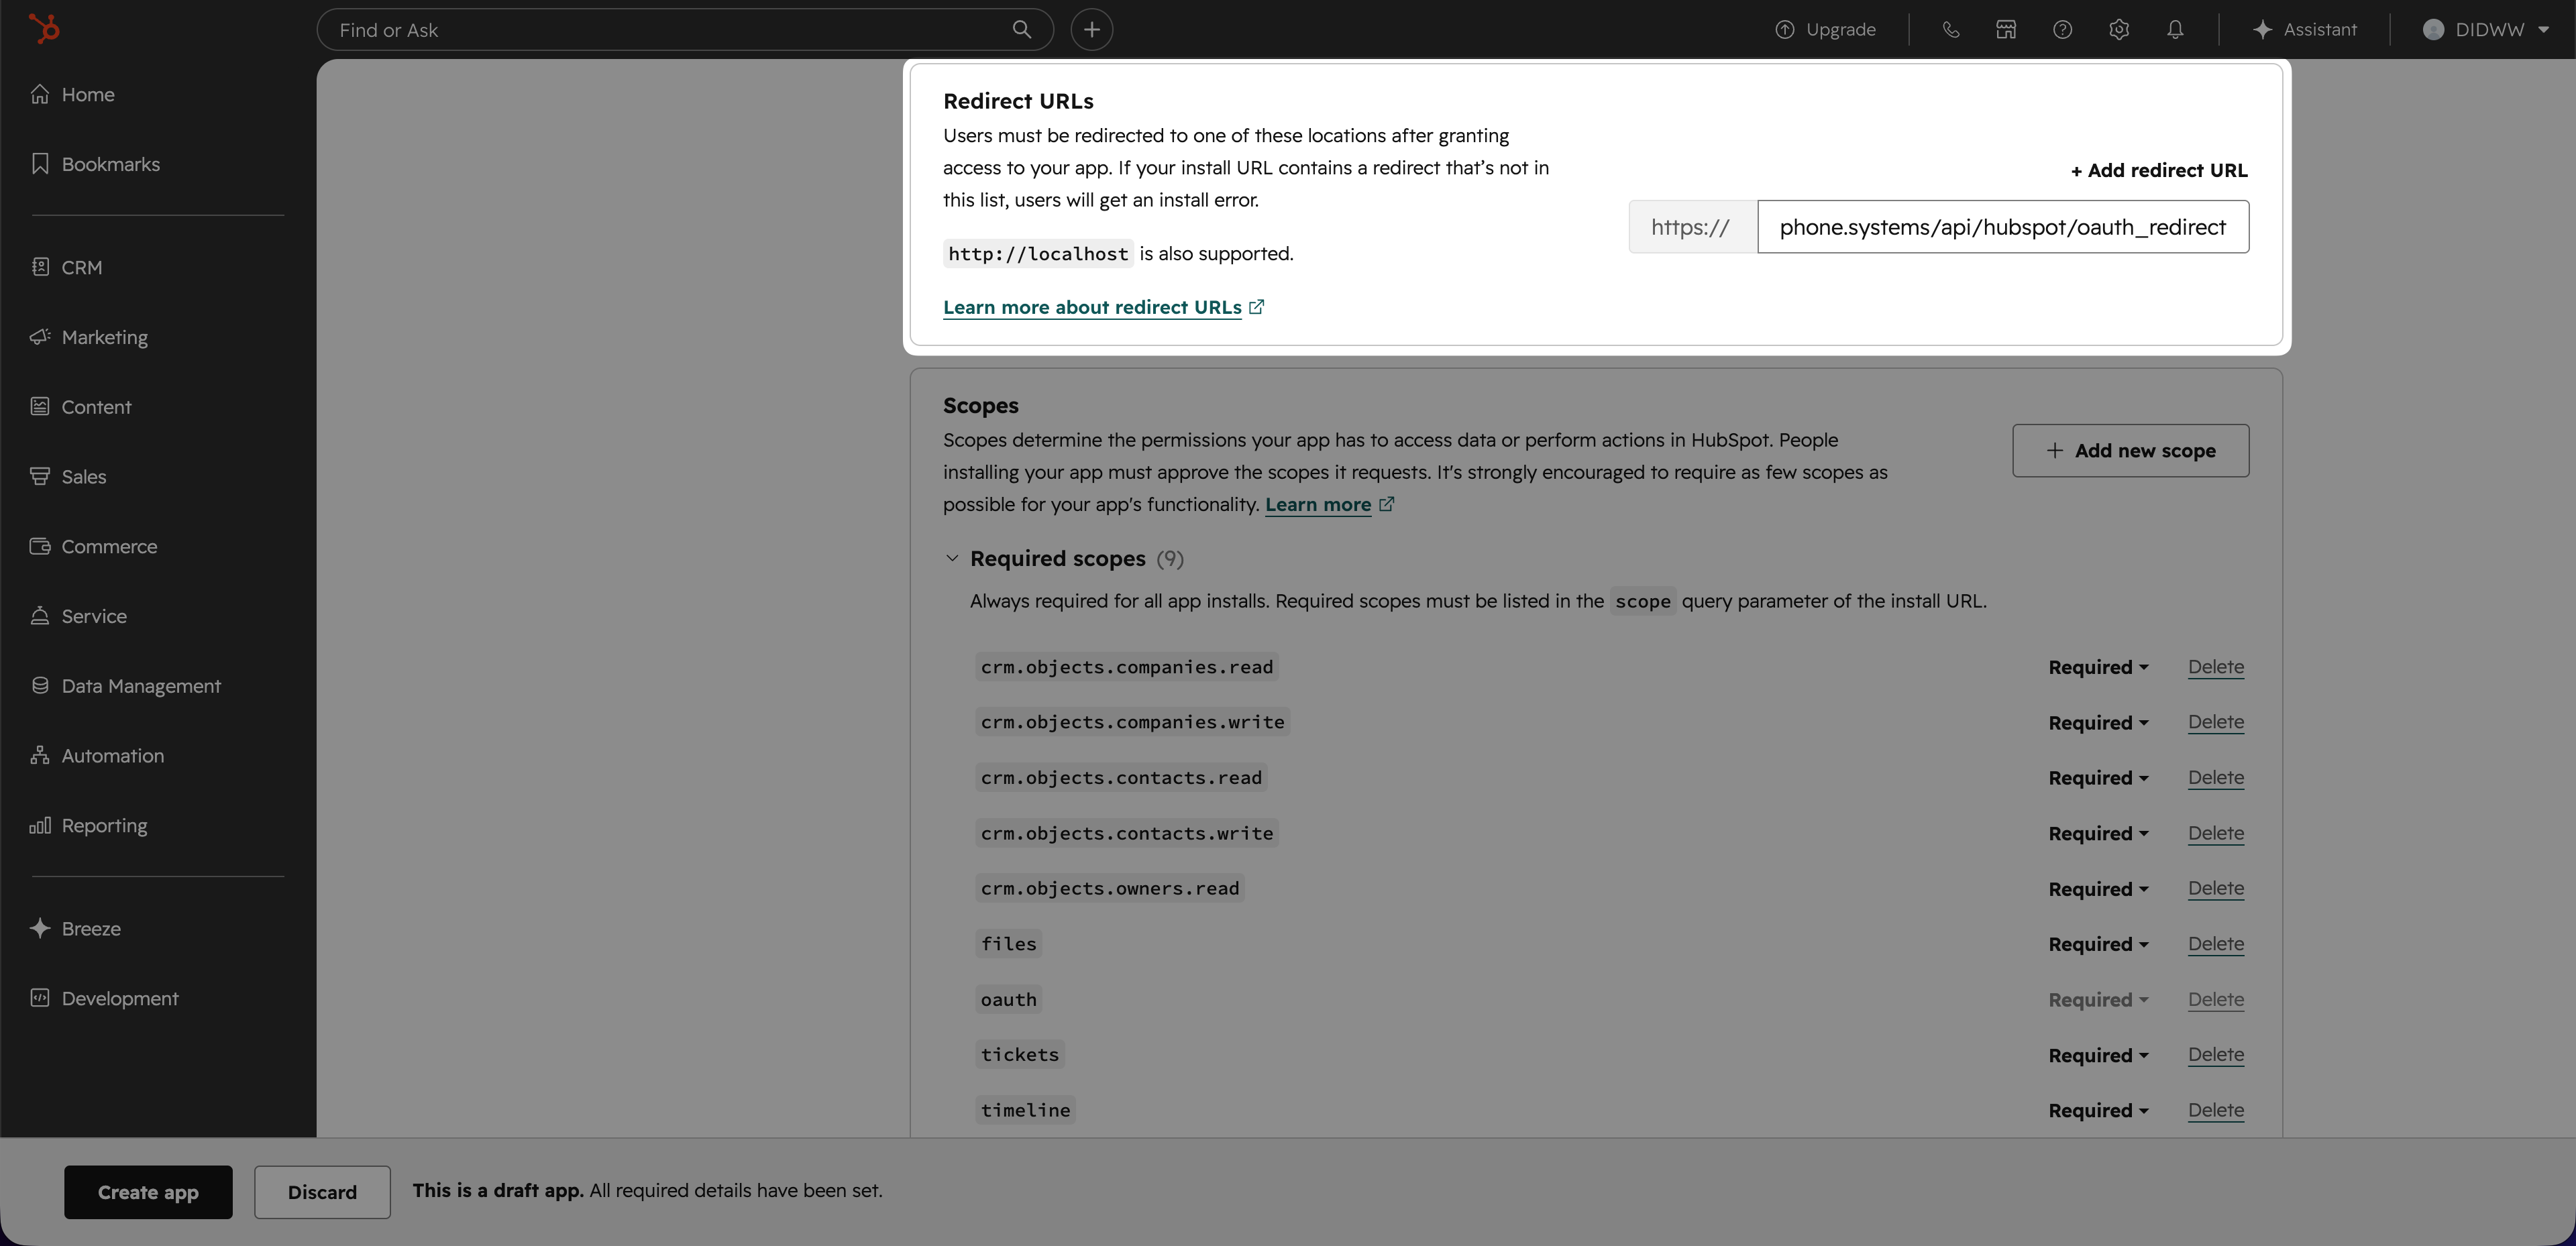
Fig. 6. Paste the redirect URL into HubSpot#
Step 7: Add the required scopes#
Continue in the HubSpot Auth tab to configure the scopes that determine the permissions your app has to access data or perform actions in HubSpot.
In the Scopes block, click + Add new scope to define the required permissions for your app:
oauthticketstimelinefilescrm.objects.owners.readcrm.objects.companies.readcrm.objects.companies.writecrm.objects.contacts.readcrm.objects.contacts.write
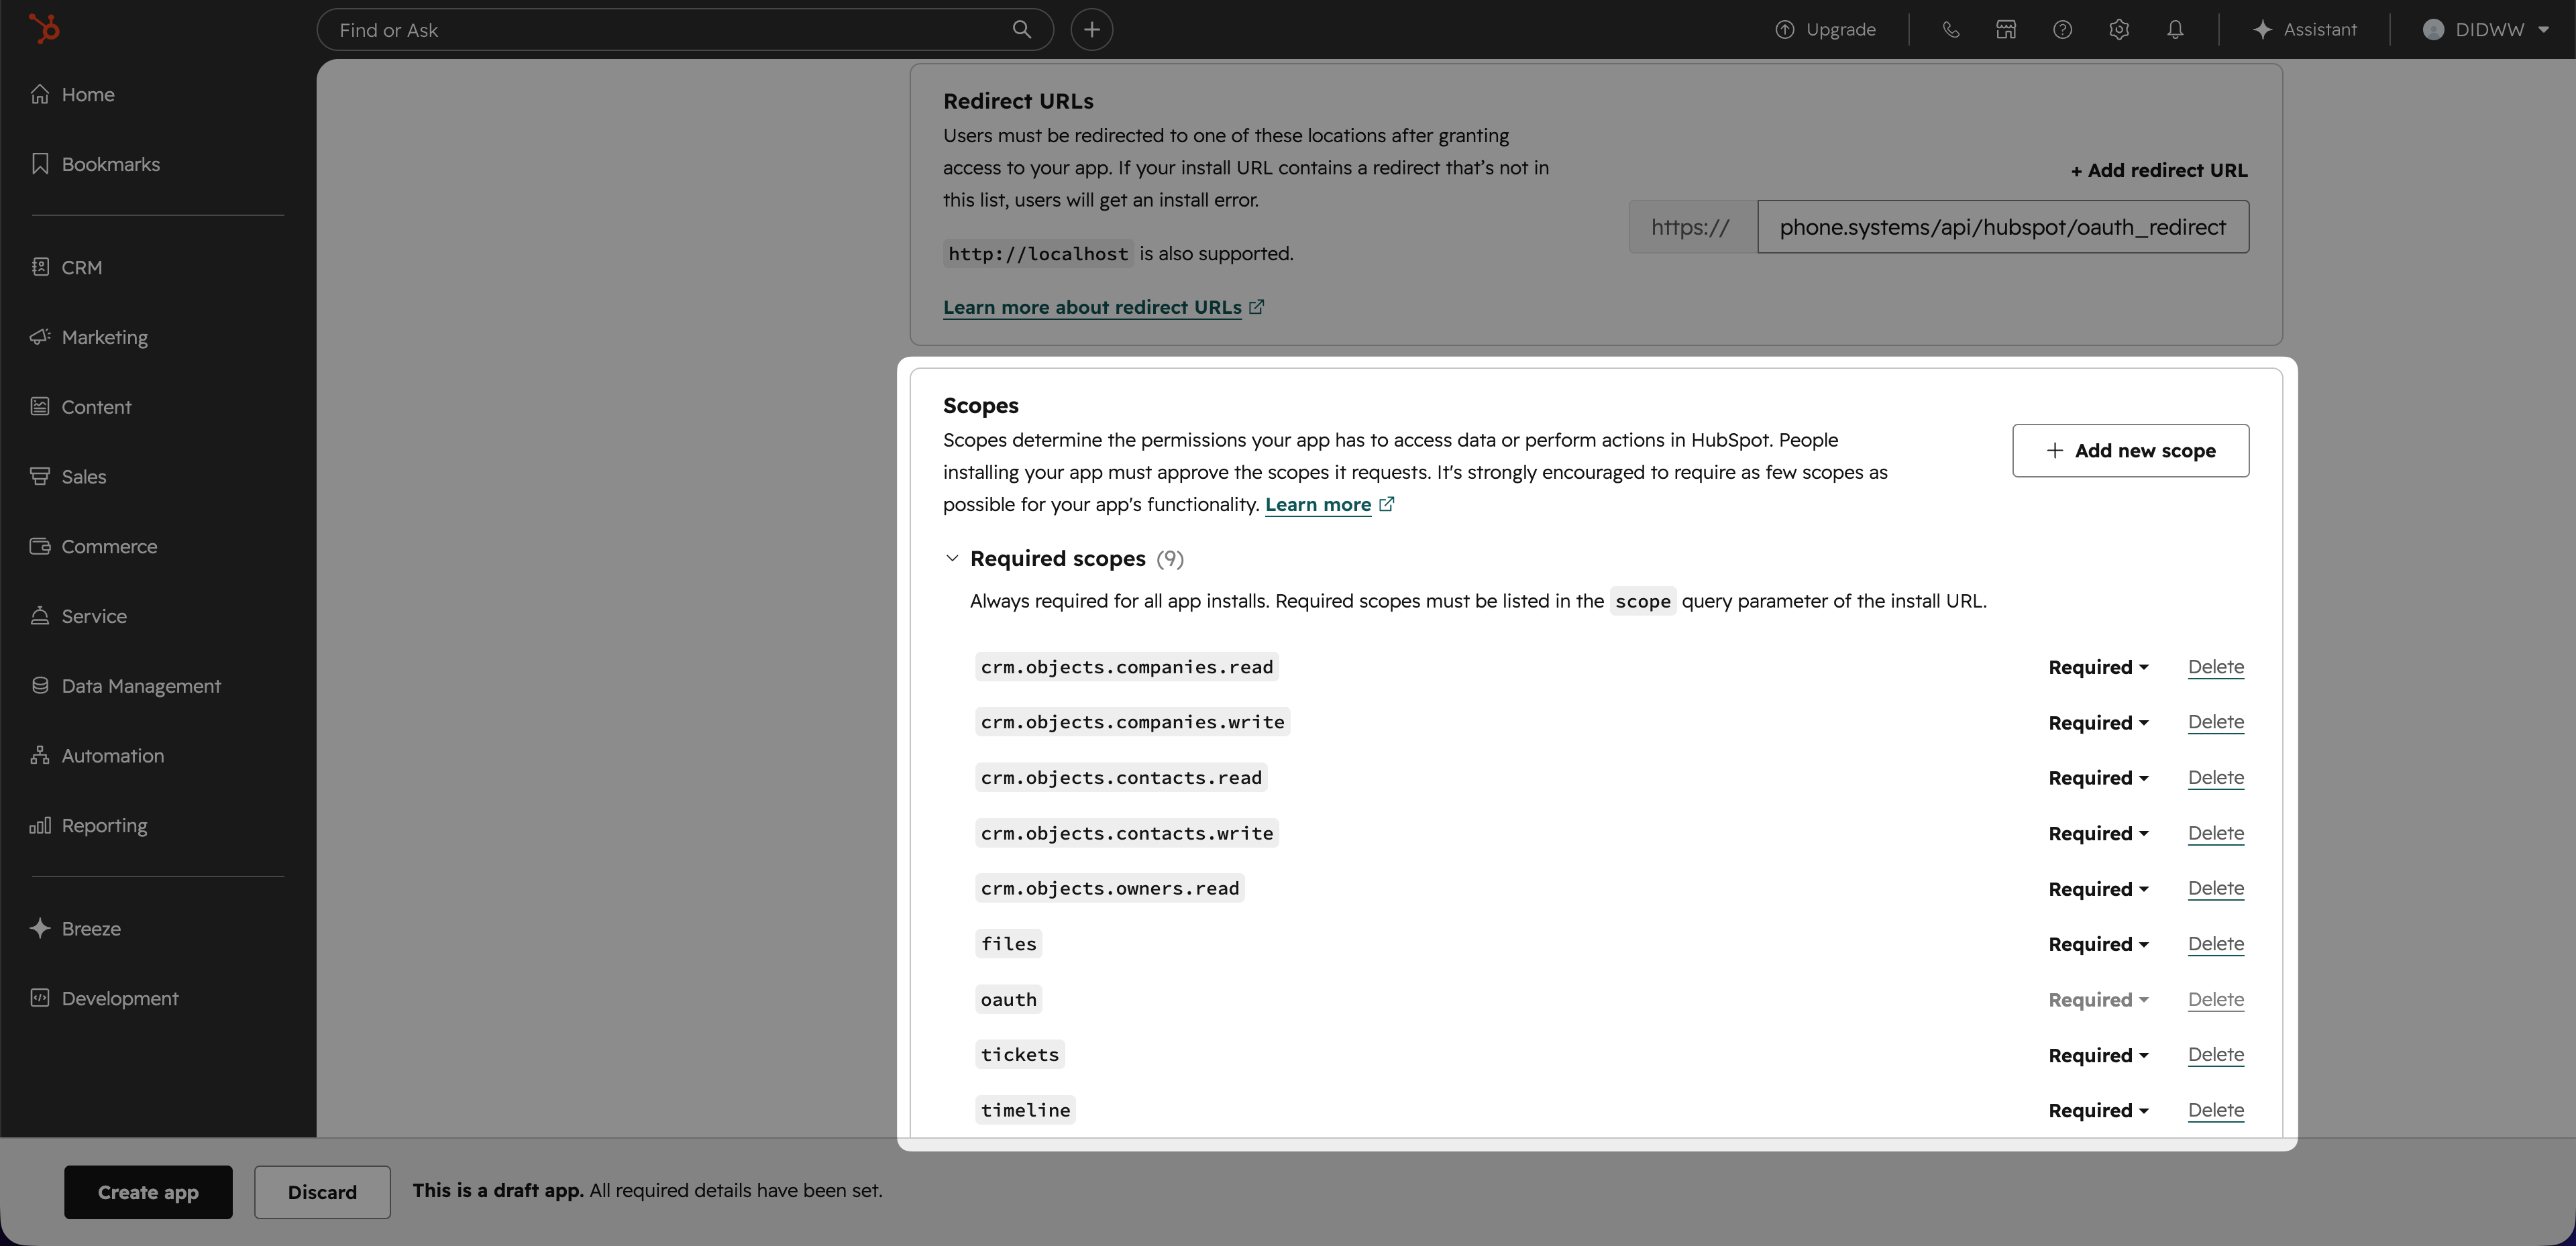
Fig. 7. Add the required scopes#
Step 8: Create the app and copy the Client ID and Client secret#
On the same Auth page click Create app.
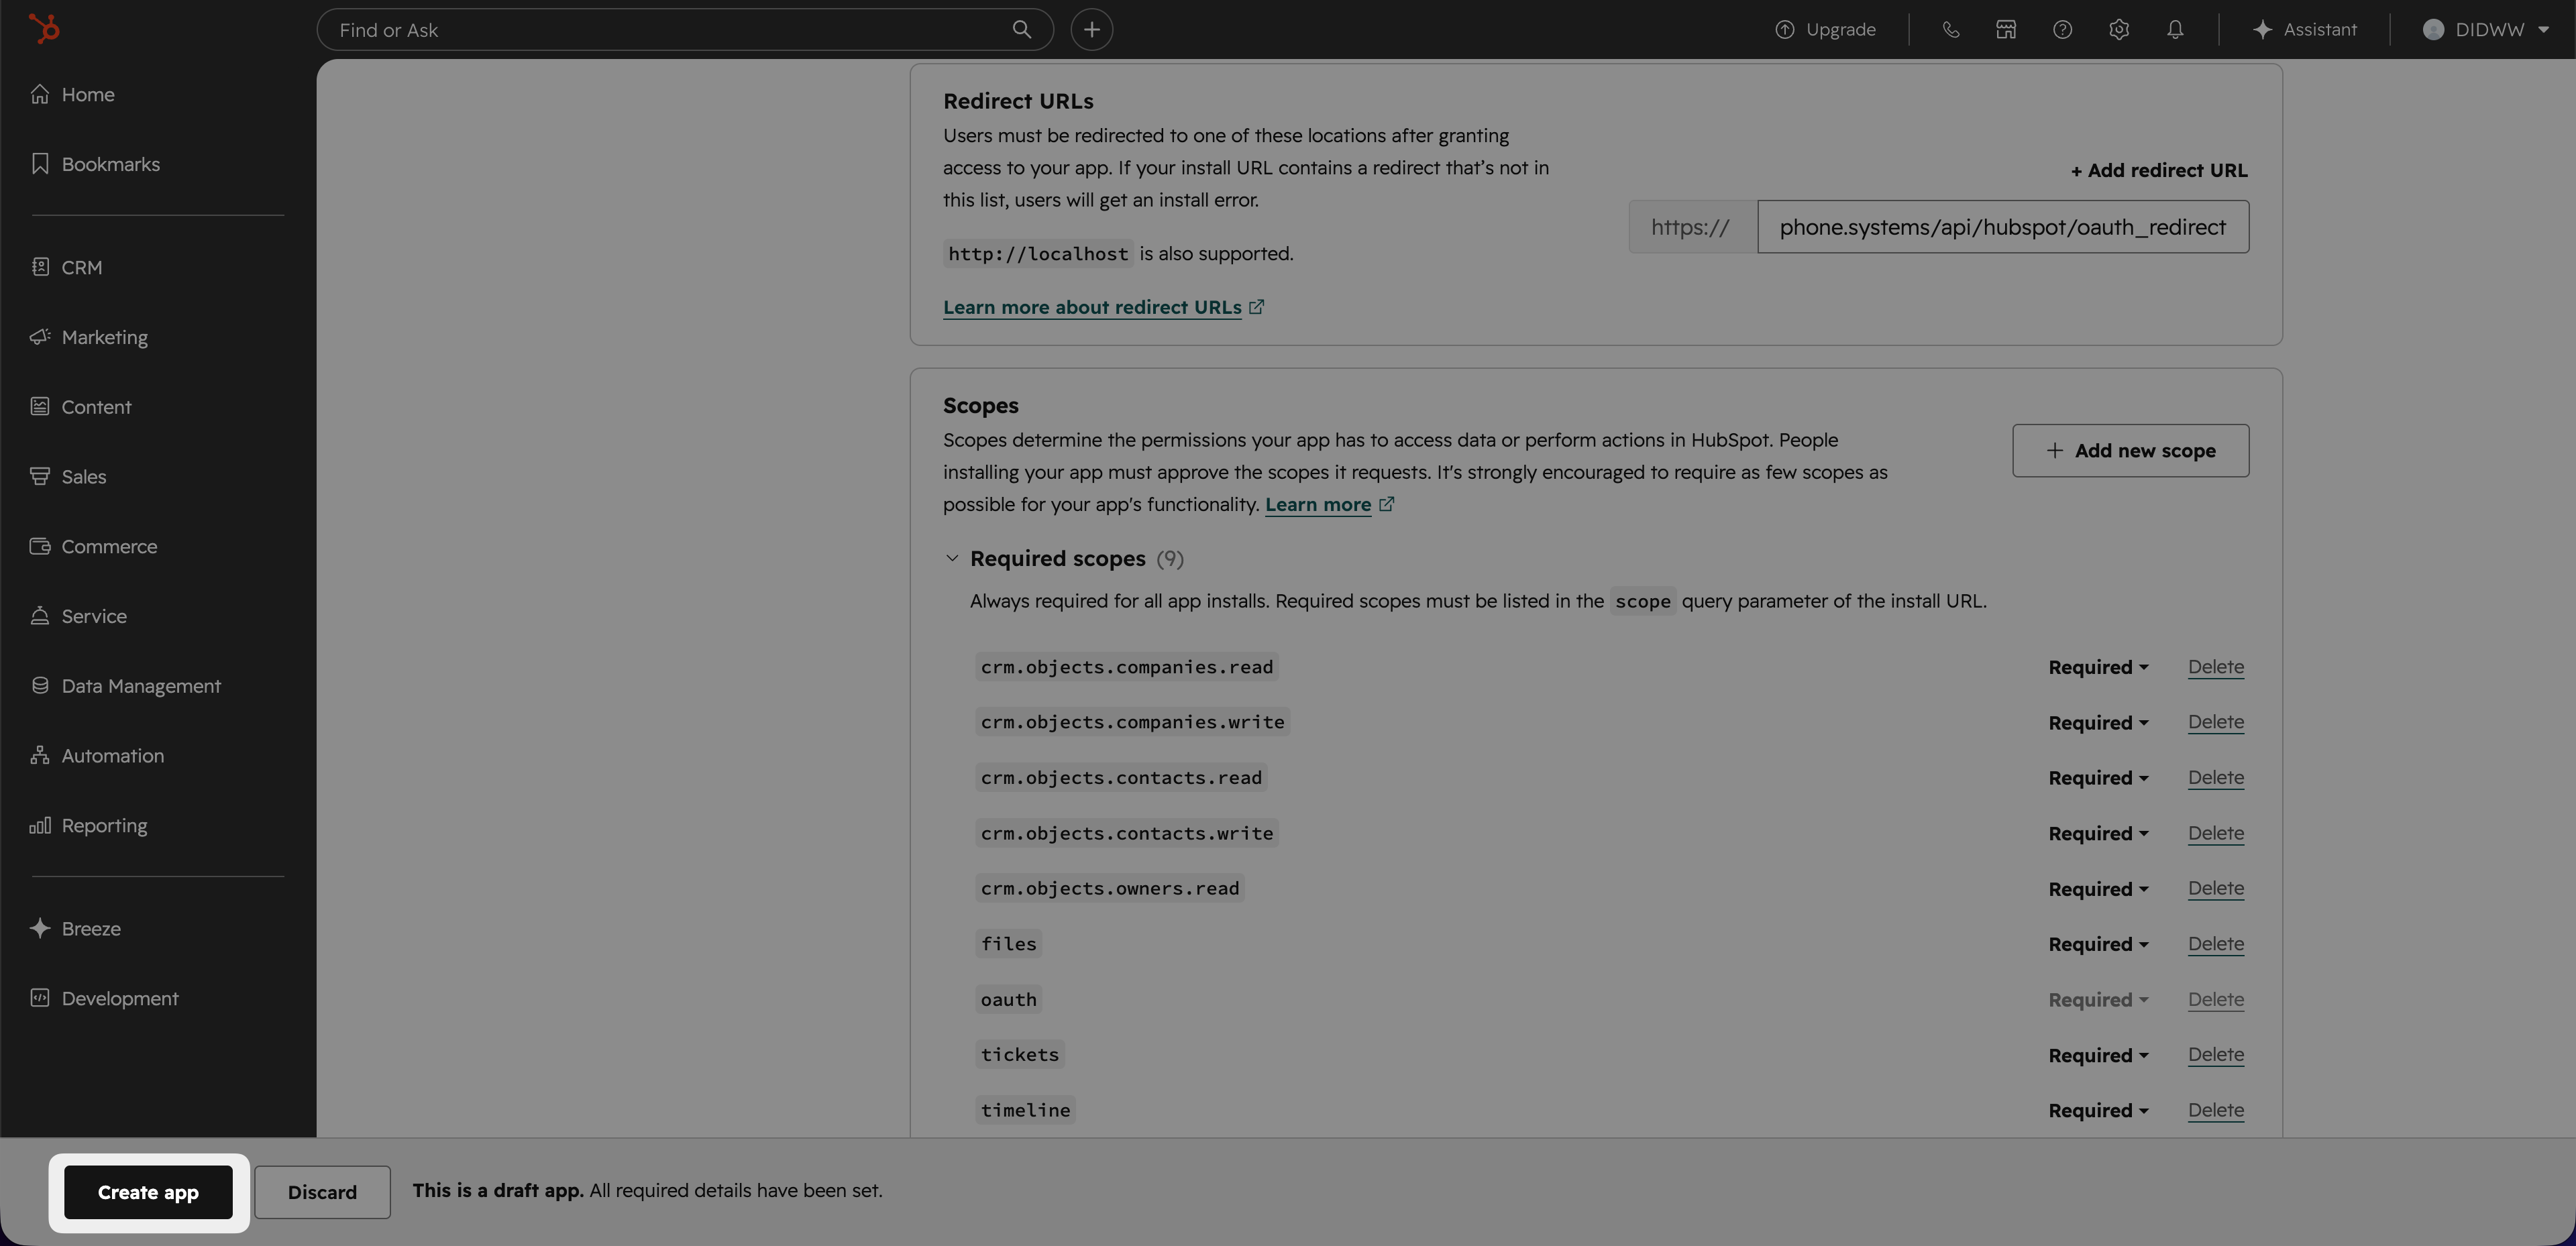
Fig. 8. Create the HubSpot app#
After the app is created, stay on the Auth tab, then copy and save:
Client ID
Client secret
Note
Click Show before copying the Client secret
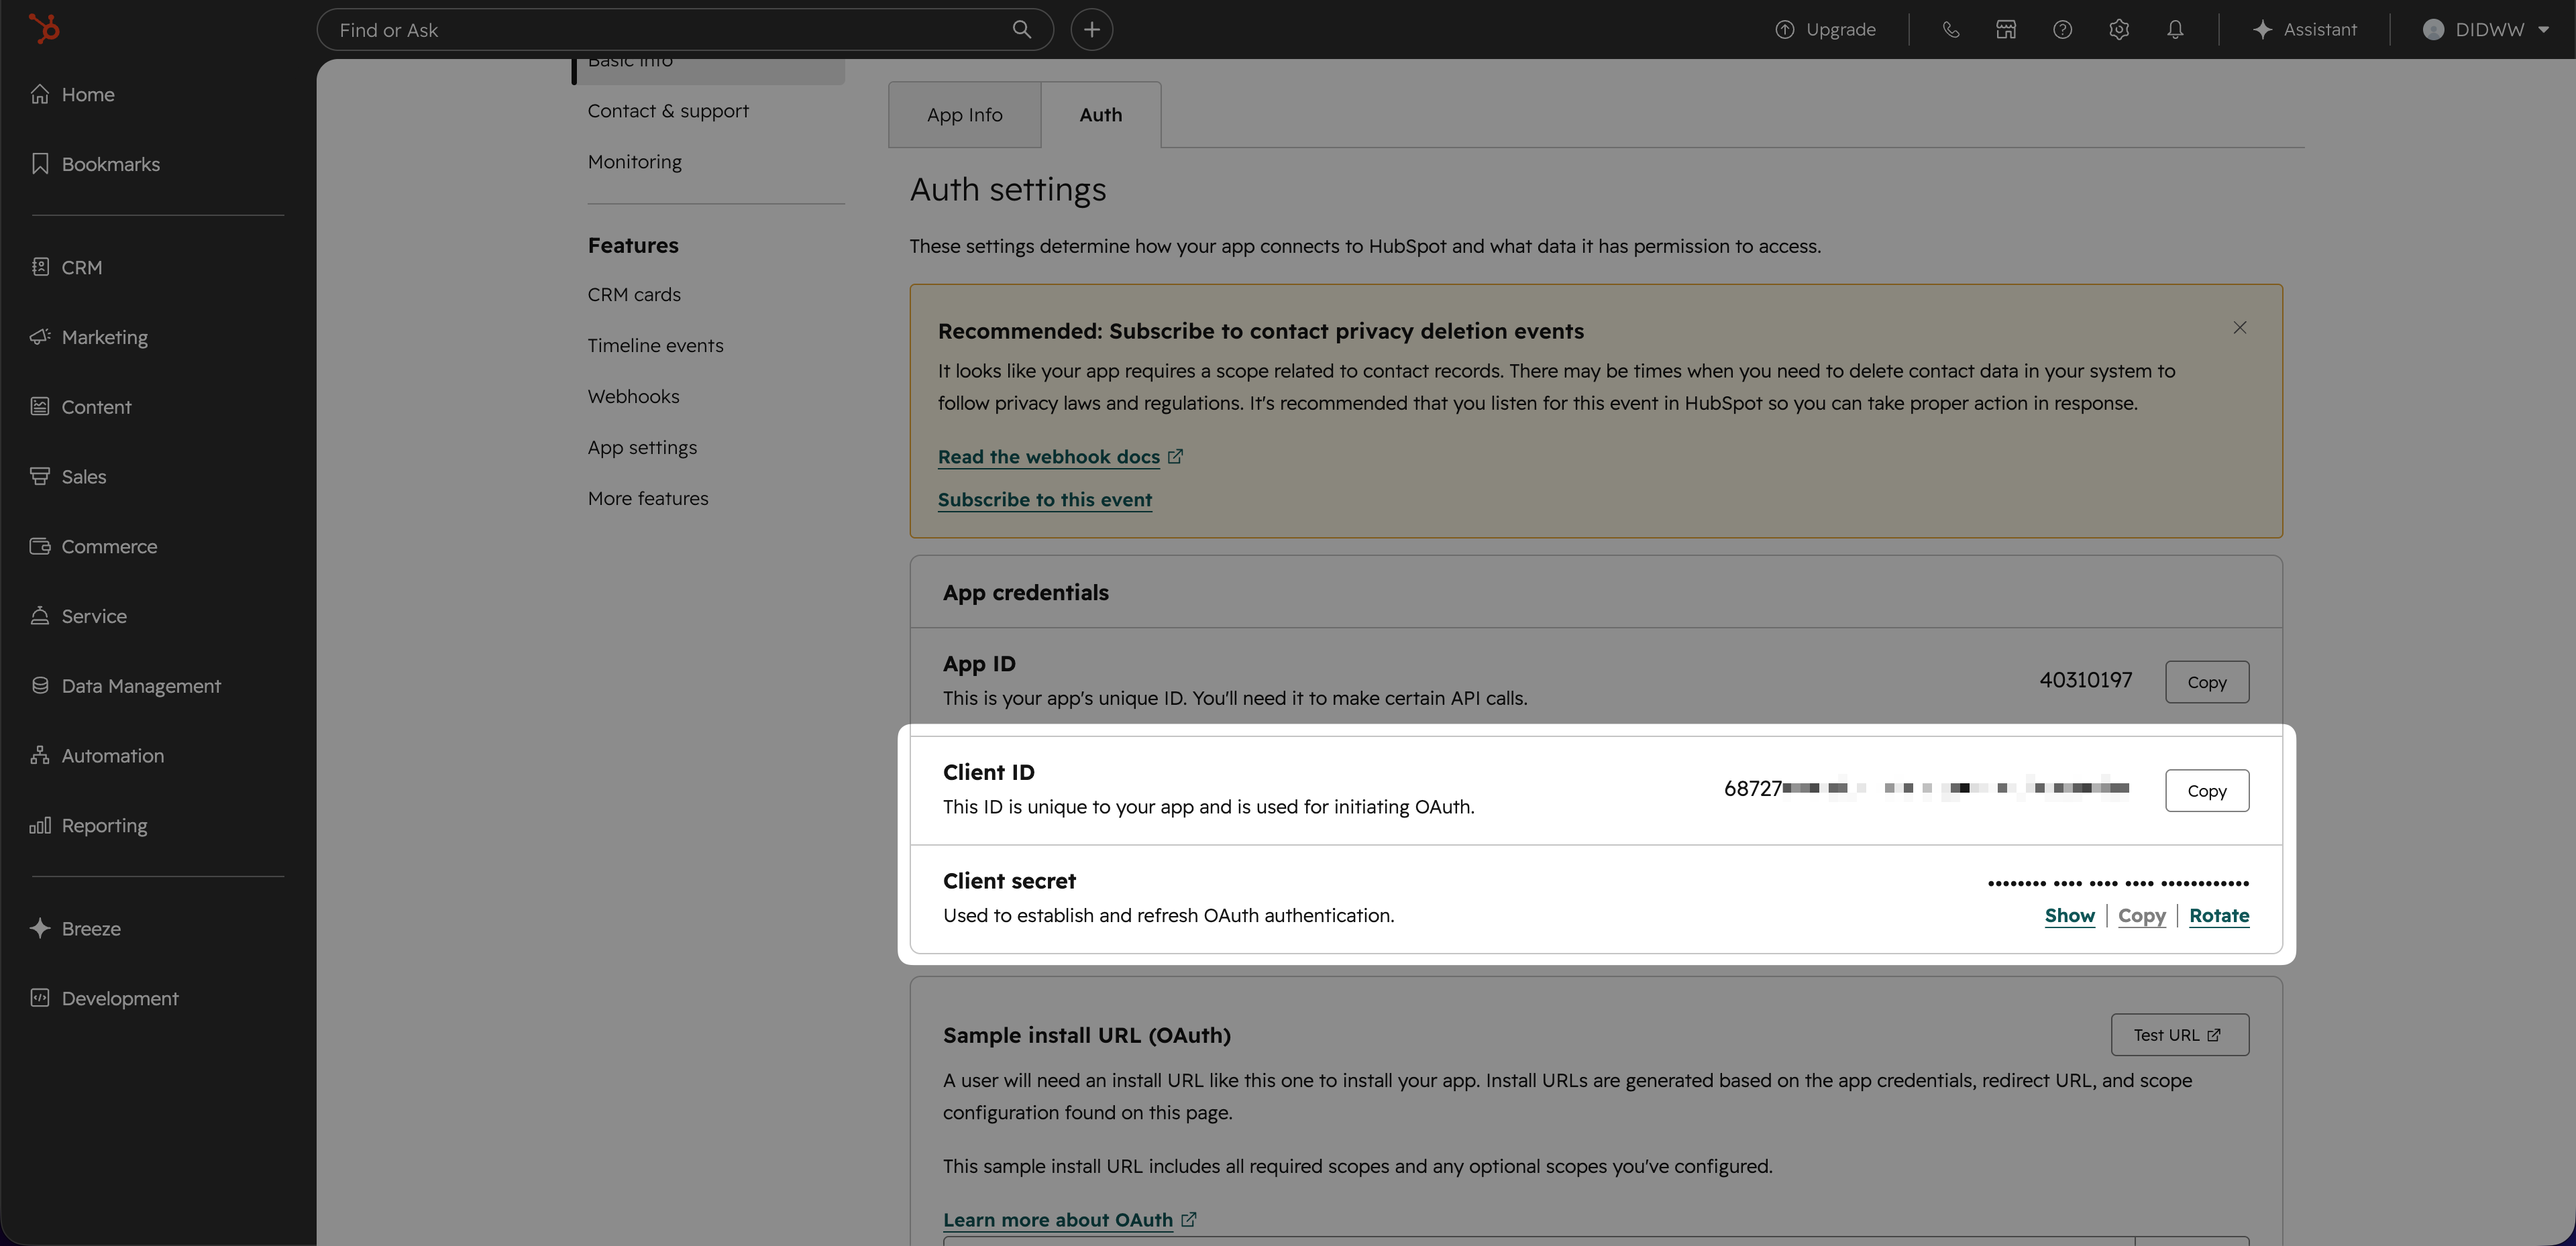
Fig. 9. Copy the app credentials from HubSpot#
Step 9: Create and copy the HubSpot Developer API Key#
Return to the first browser tab in HubSpot. If you do not already have an active developer API key:
Open Keys.
Open Developer API Key and click Create key.

Fig. 10. Open or create the HubSpot Developer API Key#
On the Developer API Key page click Show and Copy in the Active API Key block.
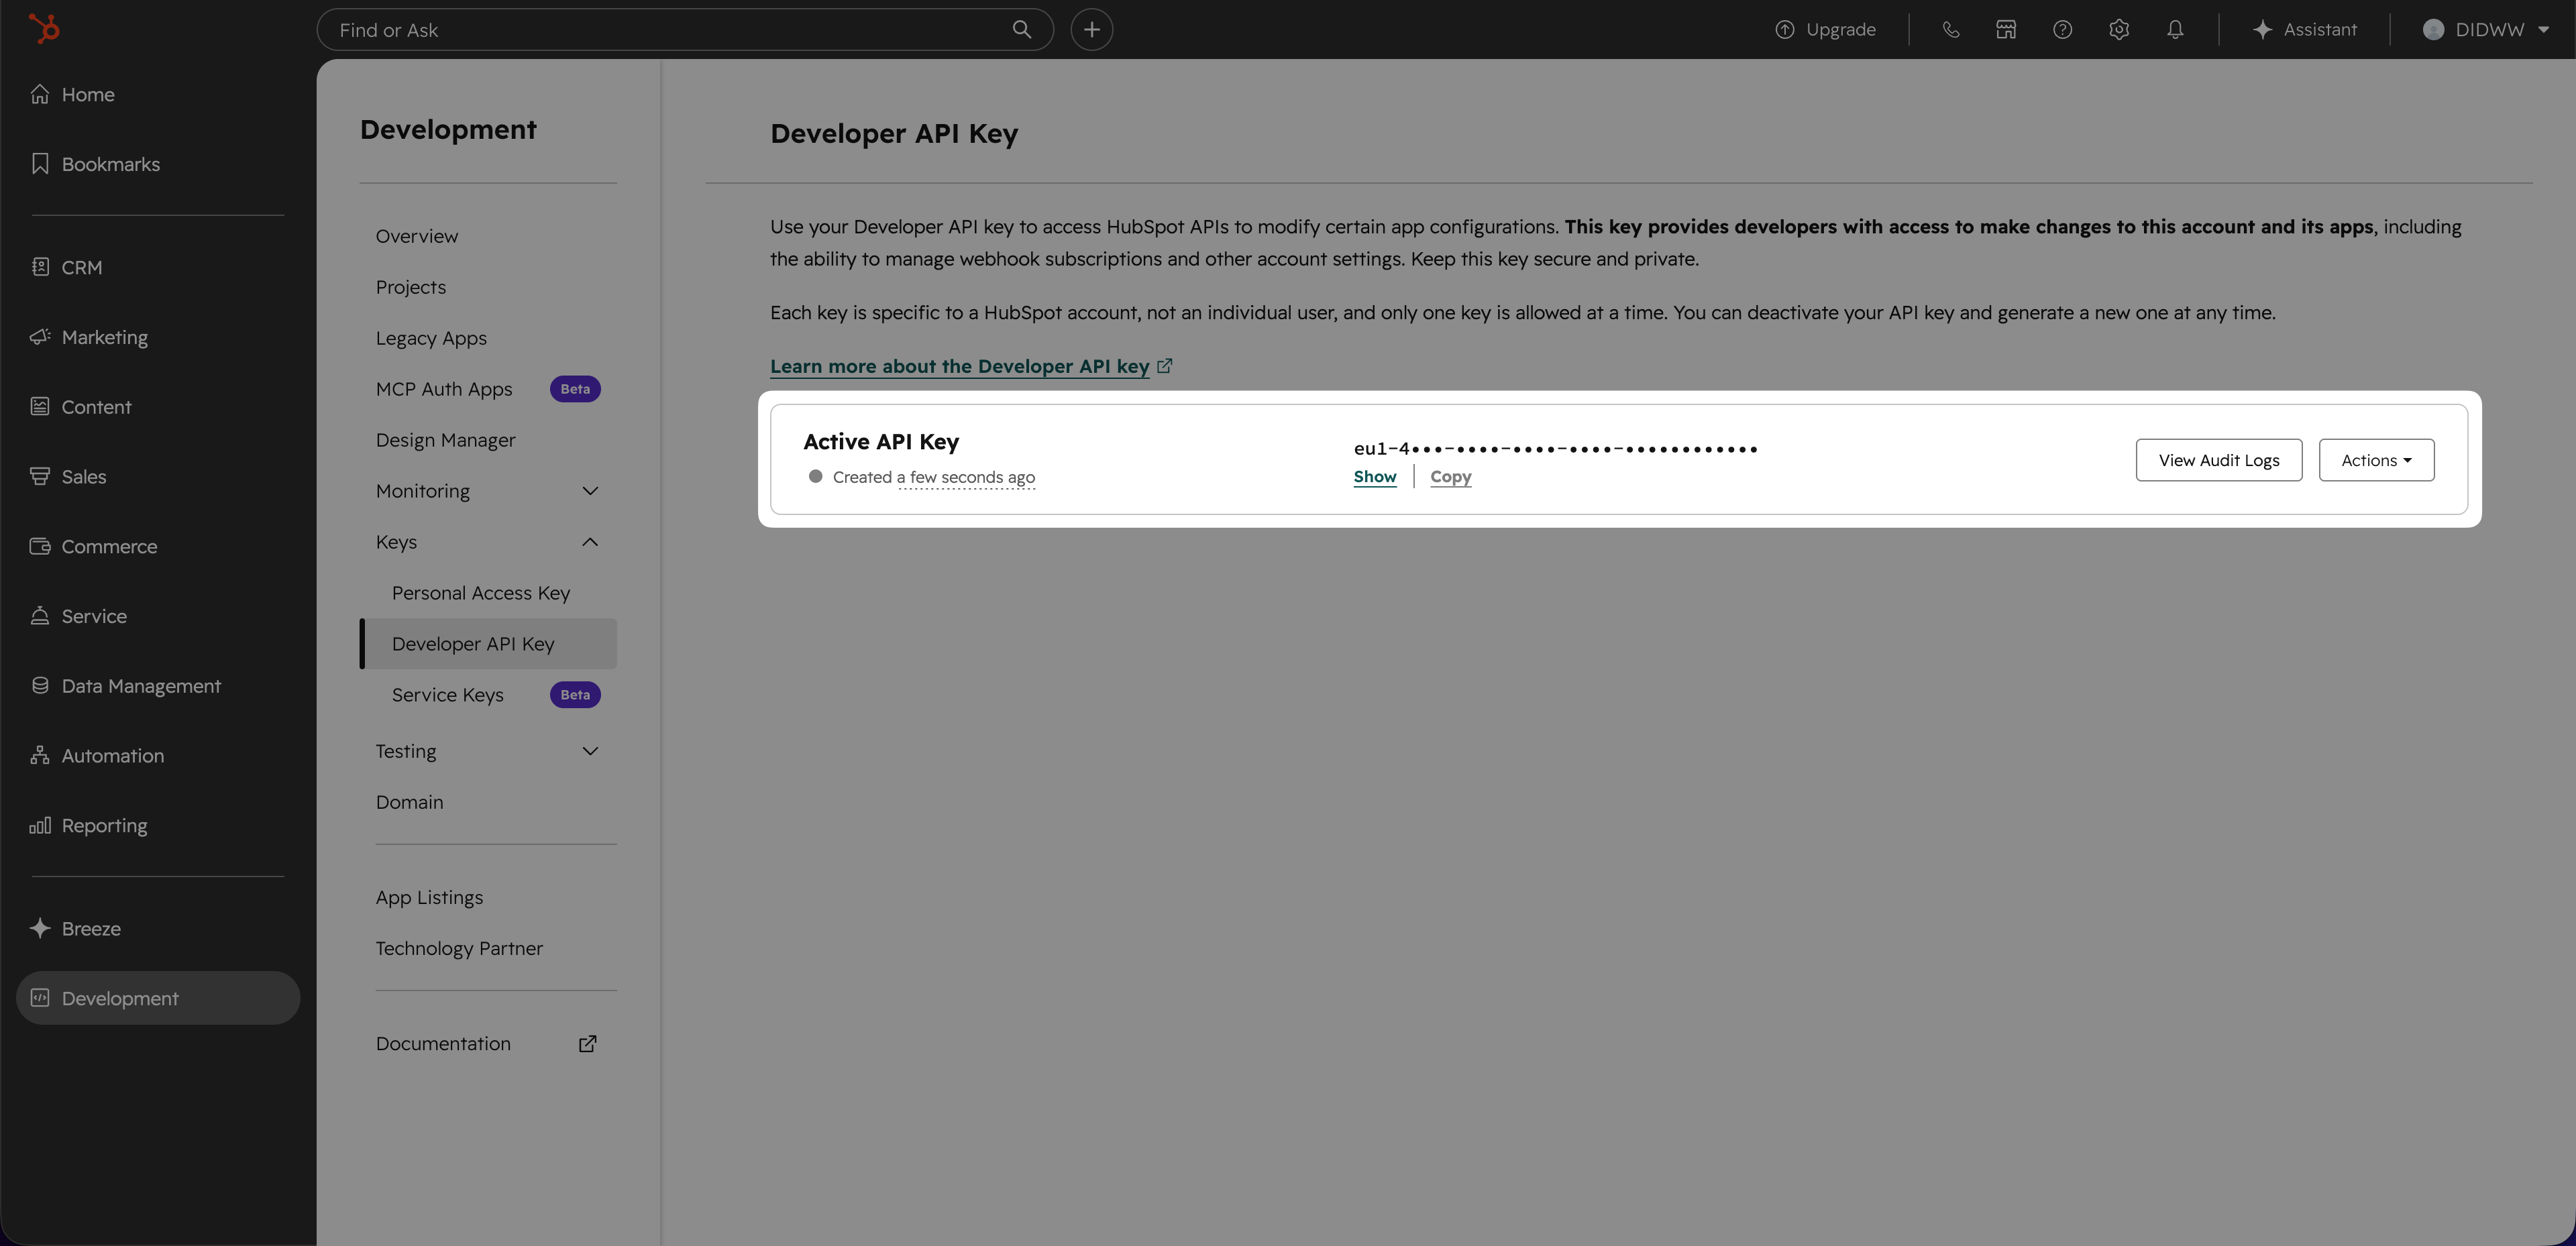
Fig. 11. Show and copy the Developer API Key#
Step 10: Paste the HubSpot app details into phone.systems™#
Return to the phone.systems™ Connect HubSpot page and paste:
Client ID
Client secret
Developer API key
Keep the Synchronize from contacts and Synchronize from companies enabled and click Connect.
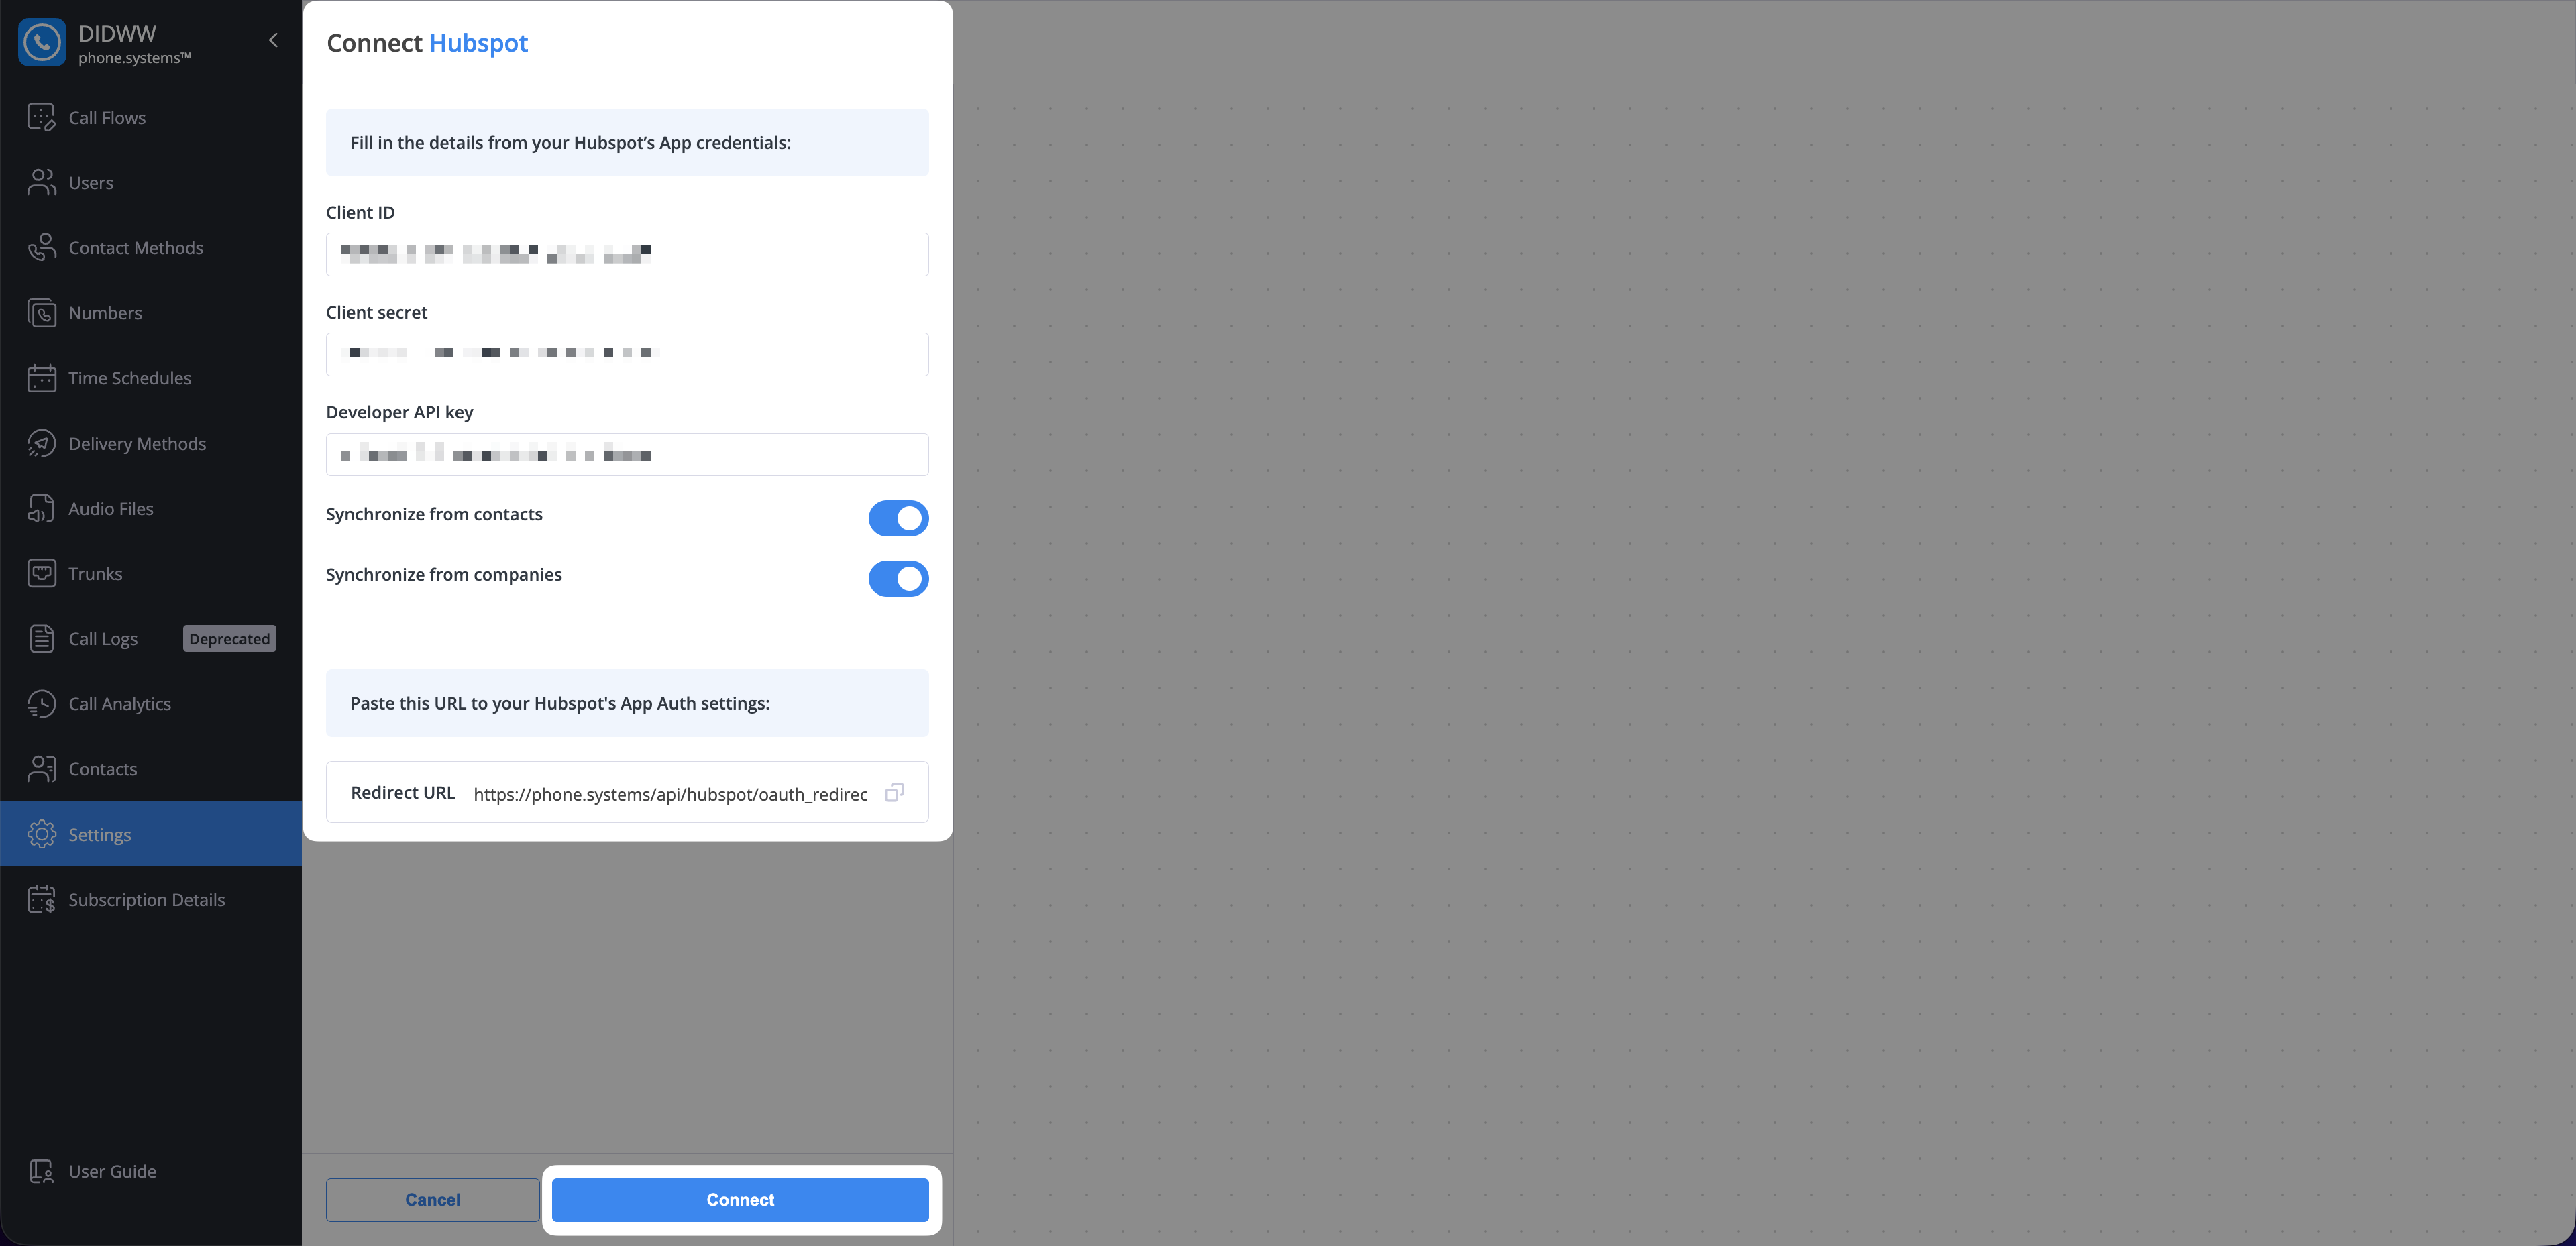
Fig. 12. Paste the HubSpot app details into phone.systems™#
Step 11: Authorize the HubSpot connection#
In the HubSpot pop-up window:
Choose an account and click Choose account.
Important
Developer accounts cannot connect with this app. Select a non-developer HubSpot account when authorizing the integration.
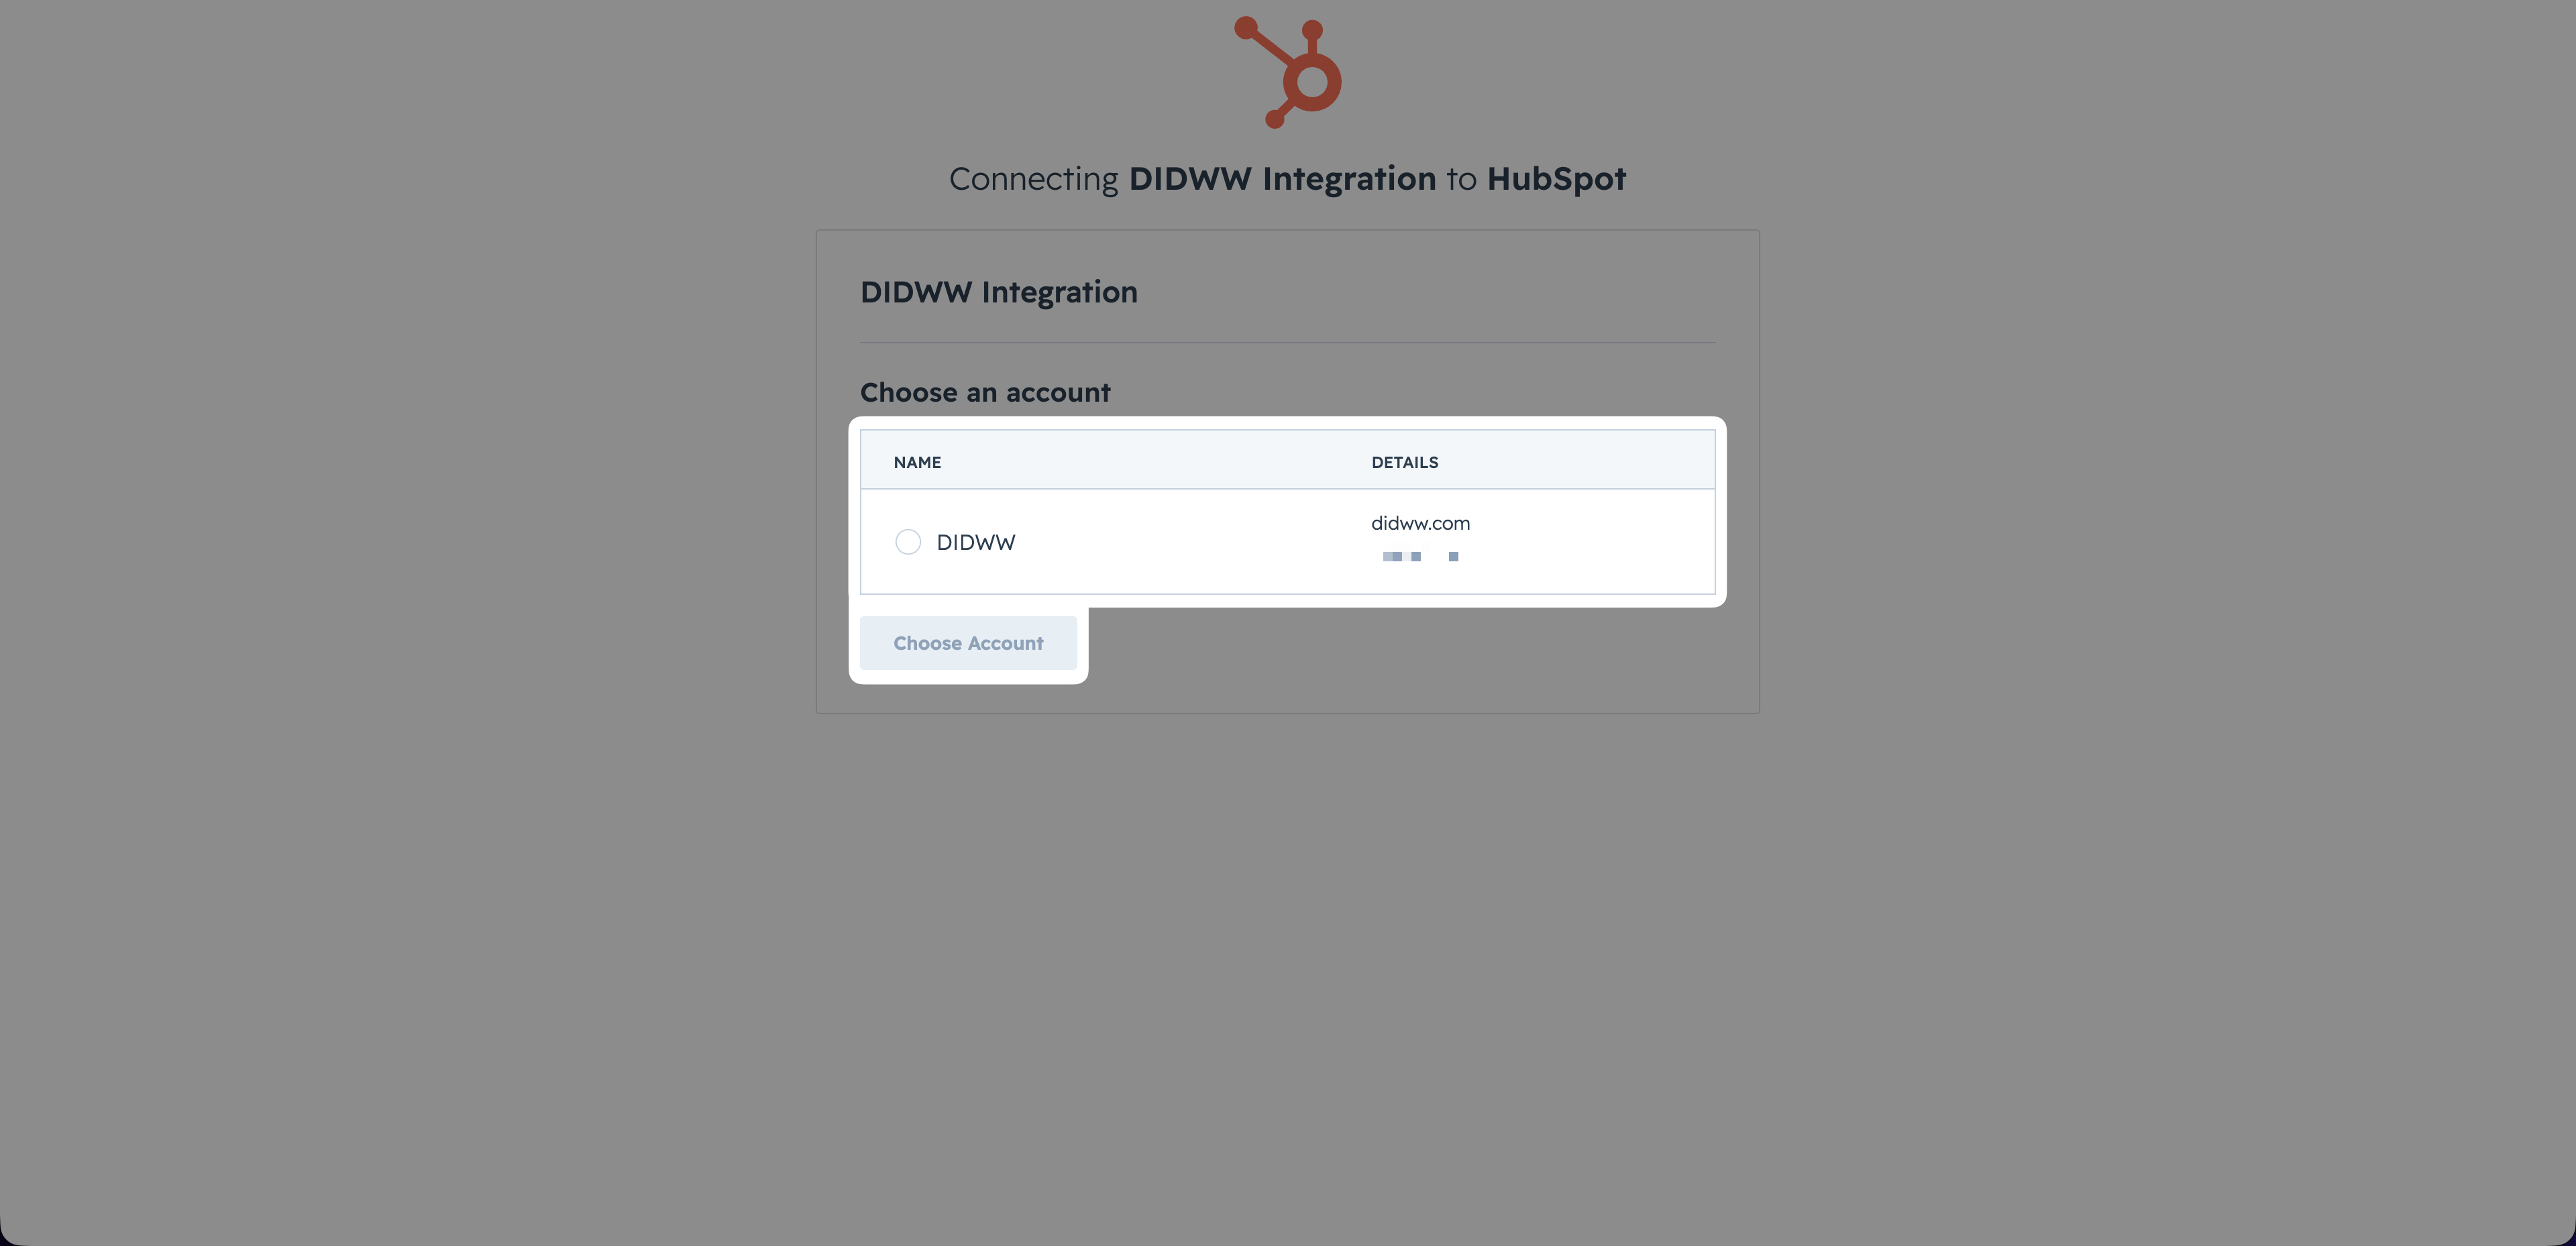
Fig. 13. Choose the HubSpot account#
After selecting your HubSpot account, you will be asked to review and approve access. If you agree, click Connect app.
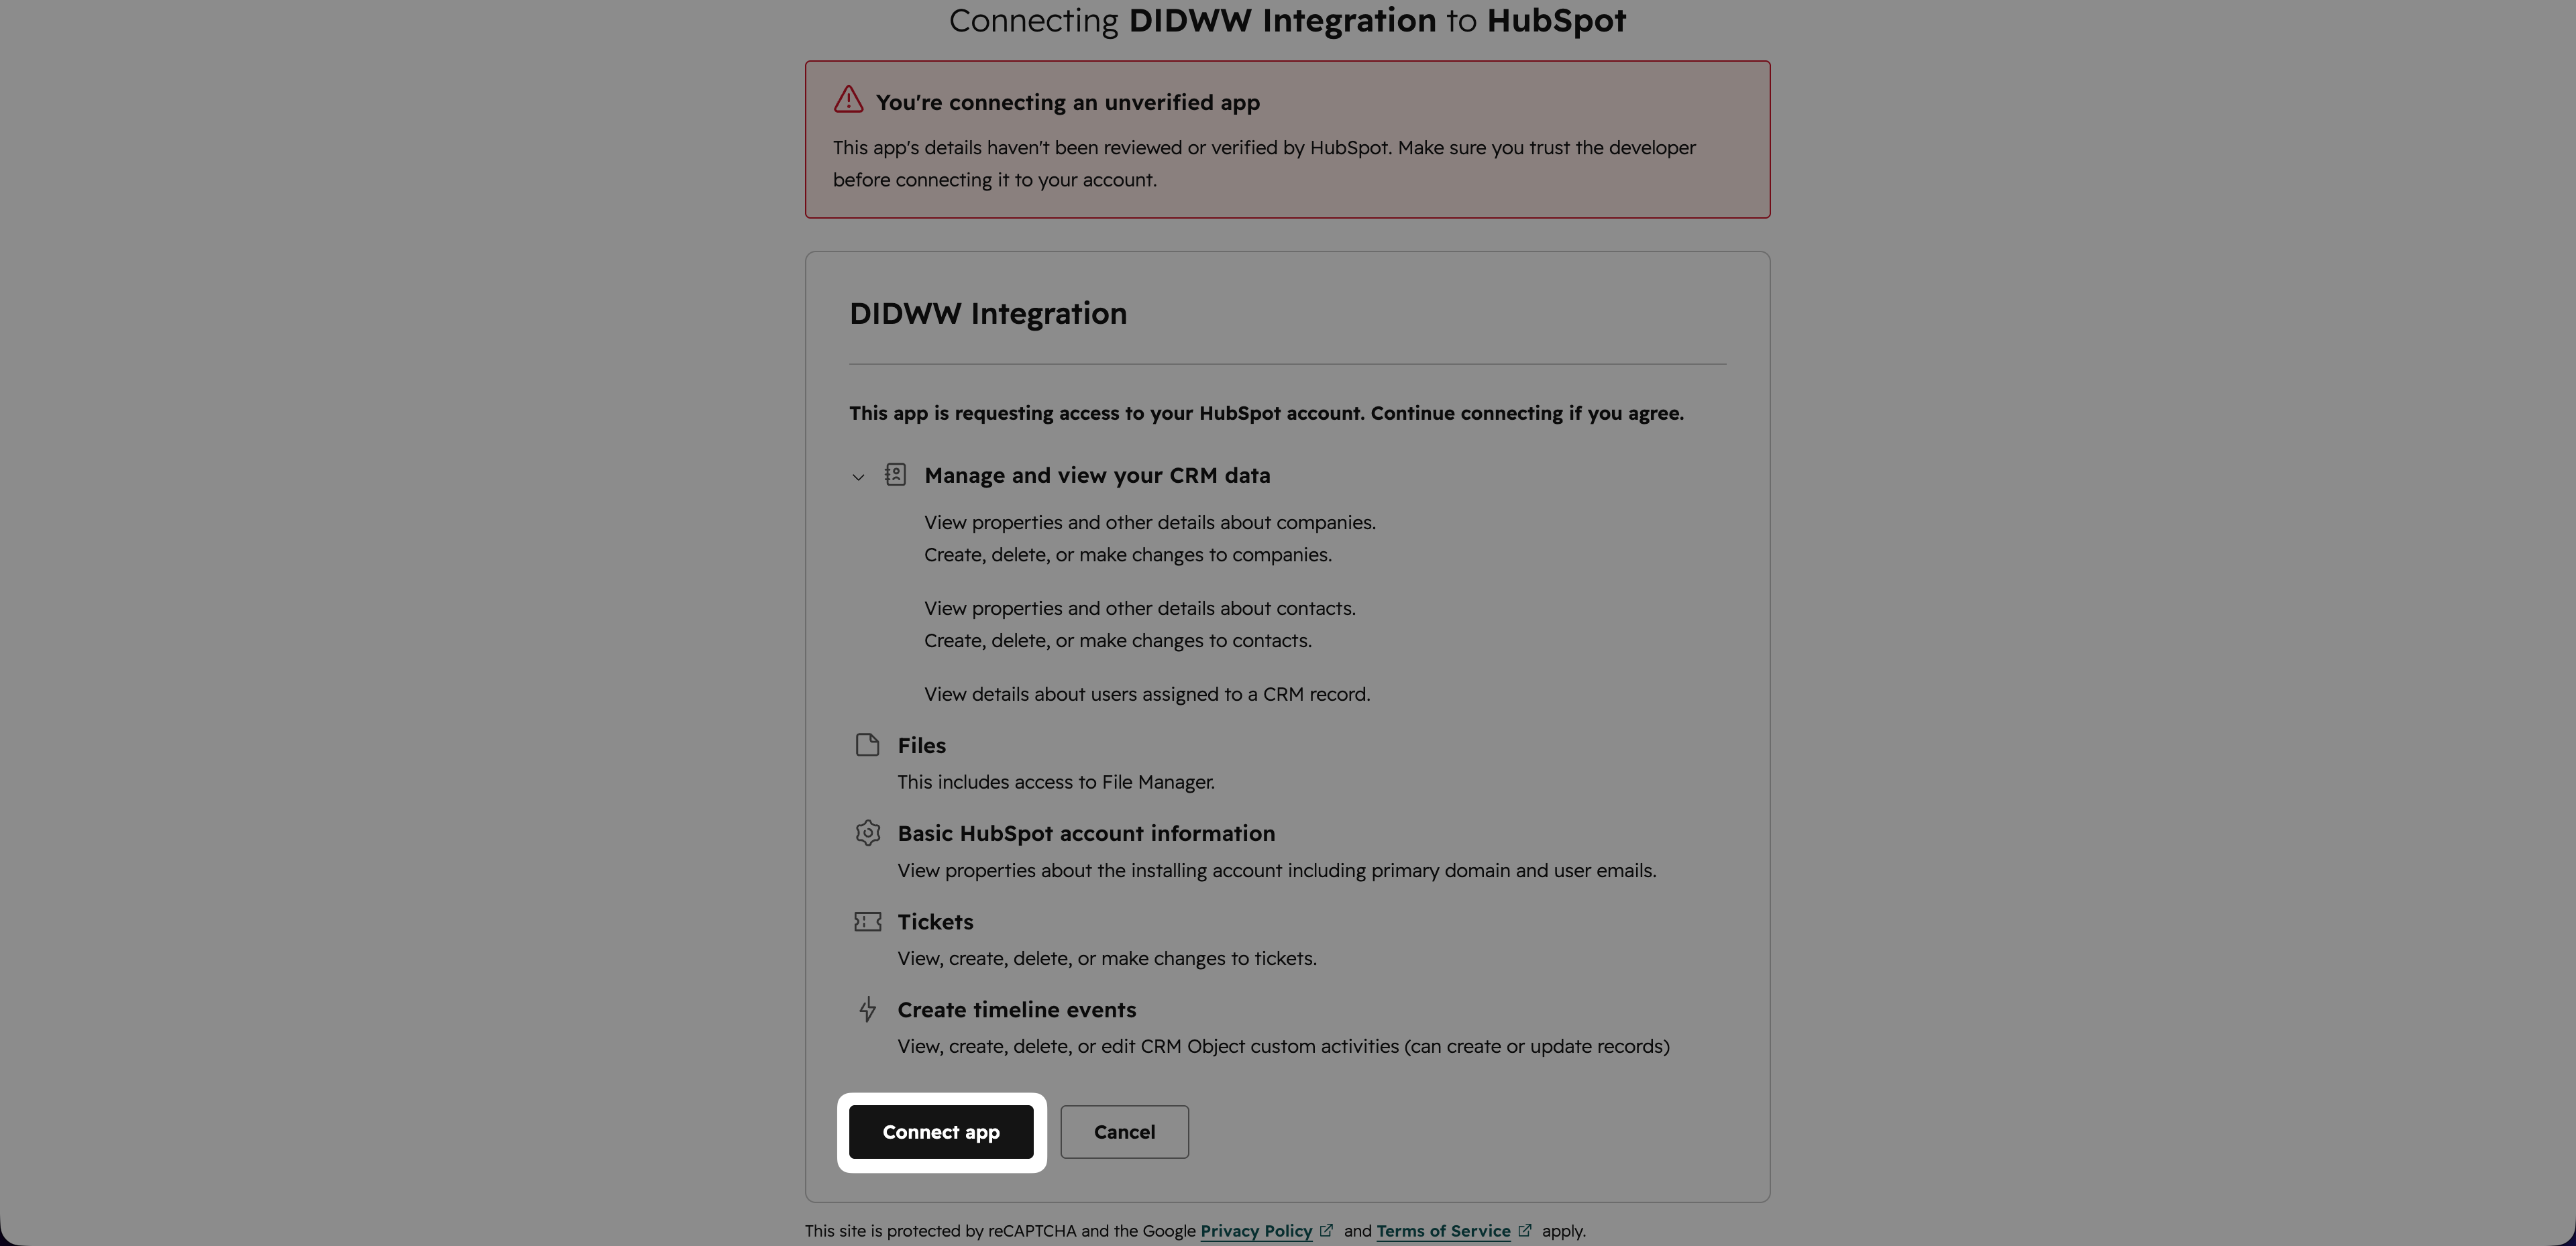
Fig. 14. Click Connect app in HubSpot#
Enter
I accept the riskin the confirmation field and click the active Connect button.
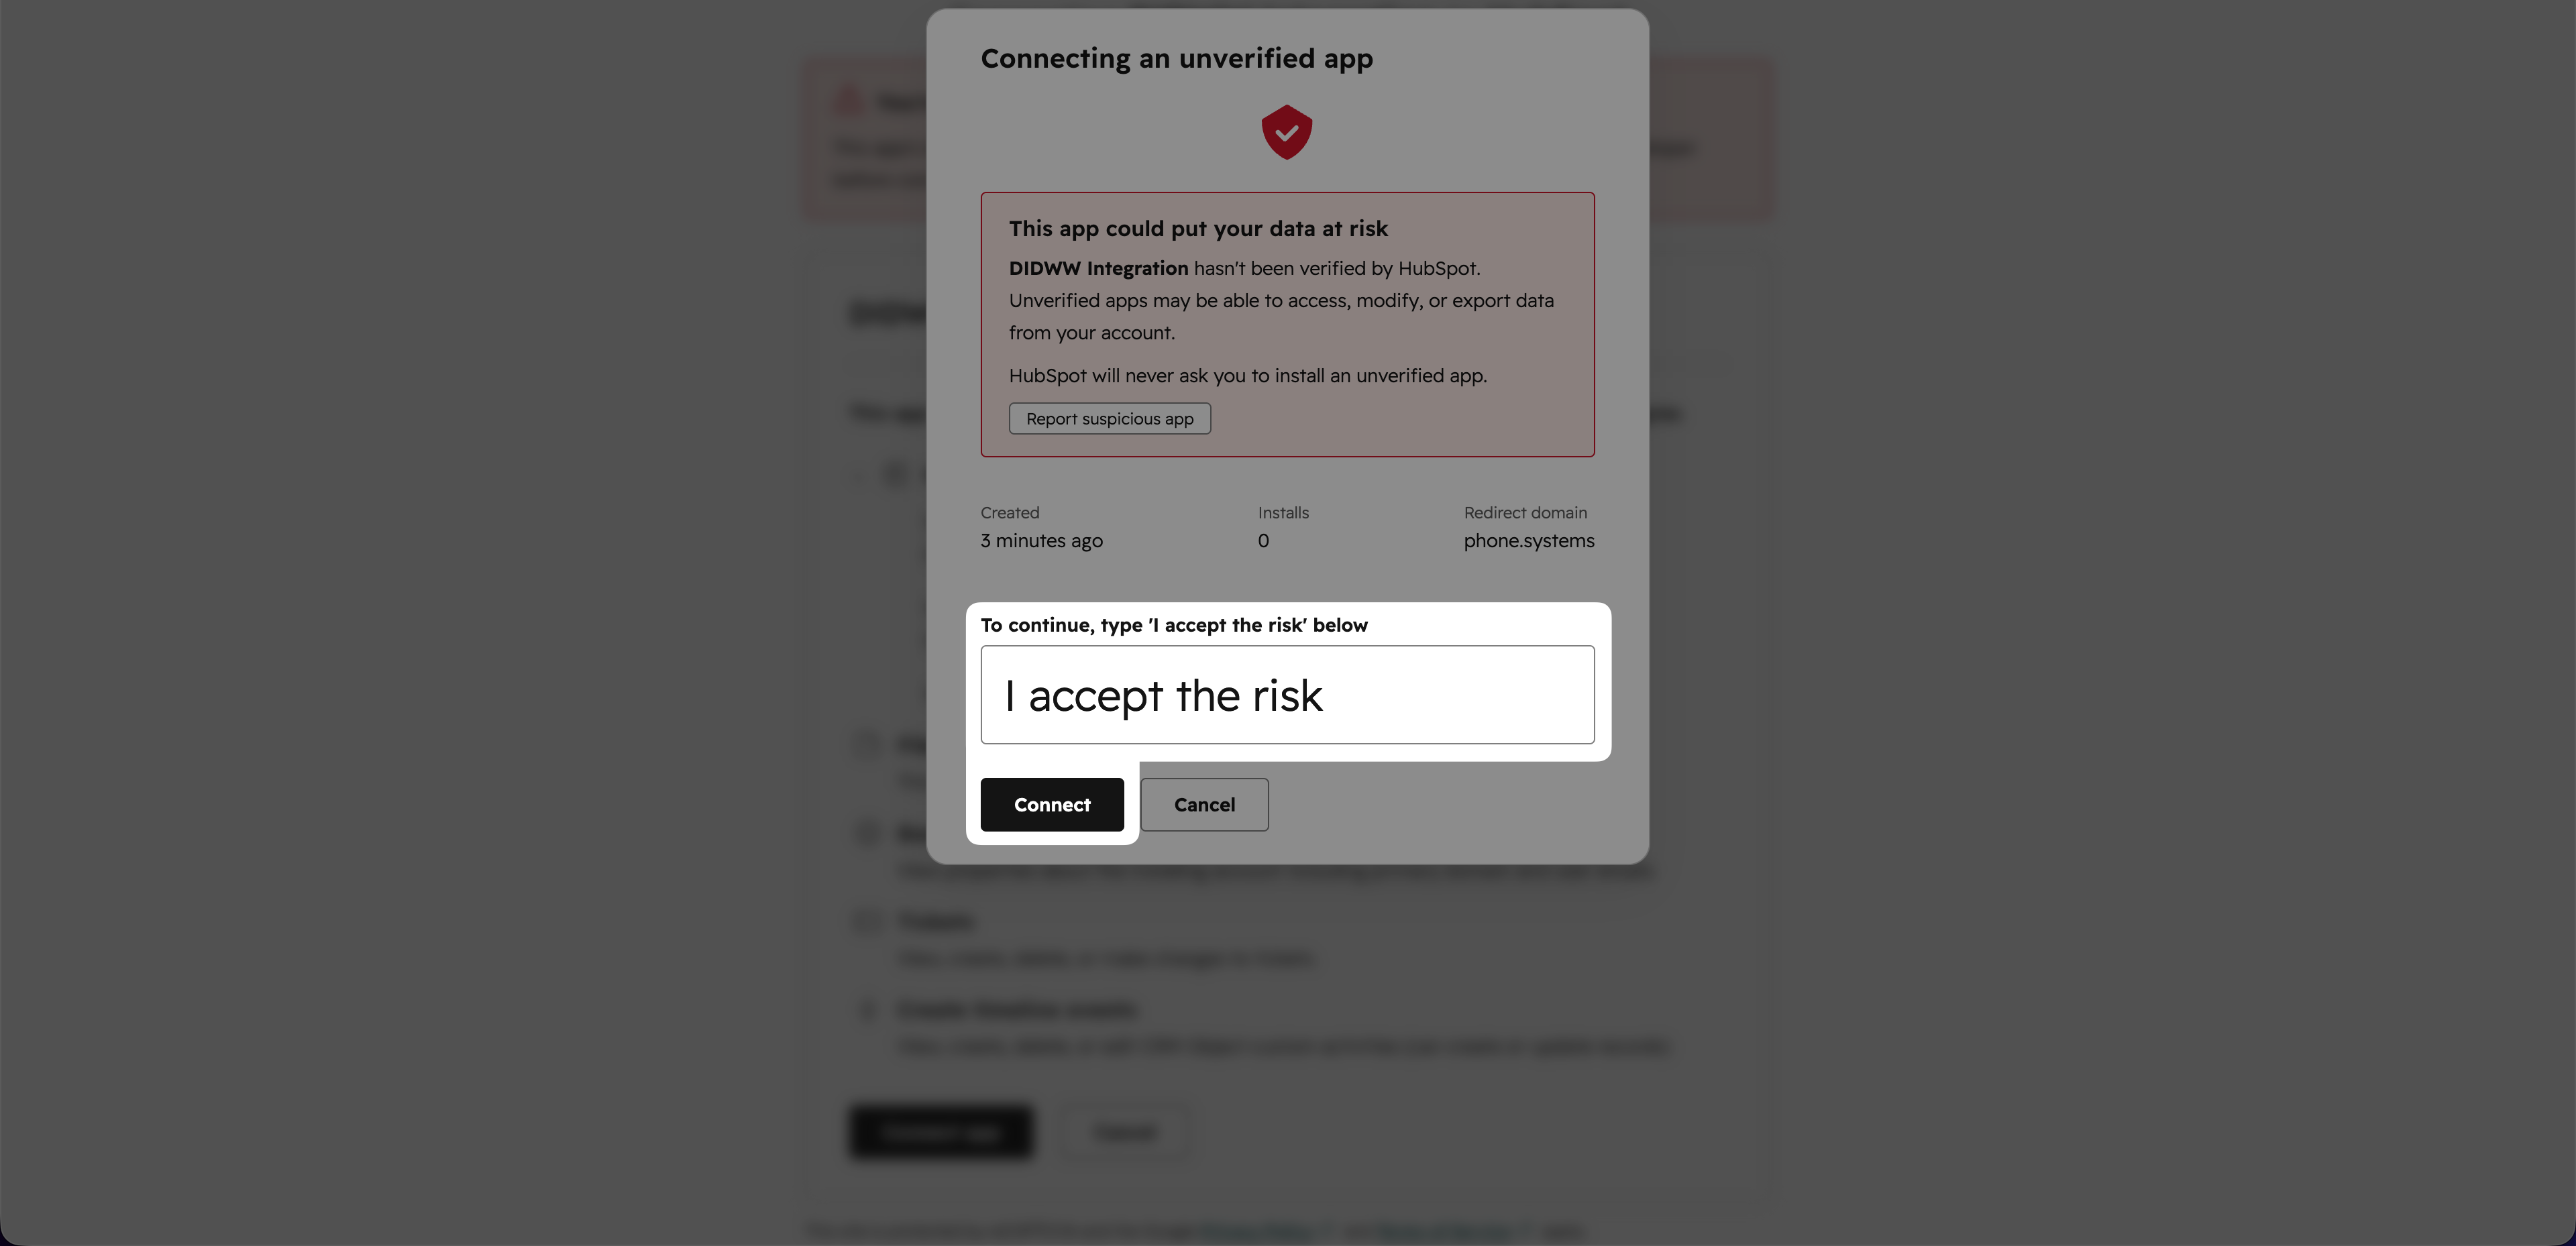
Fig. 15. Confirm the unverified app connection#
After the authorization is complete, the HubSpot integration status in phone.systems™ changes from Waiting authorization to Connected.
Note
phone.systems™ will automatically synchronize data and establish a connection with your main HubSpot account. The app will also be installed in HubSpot CRM.
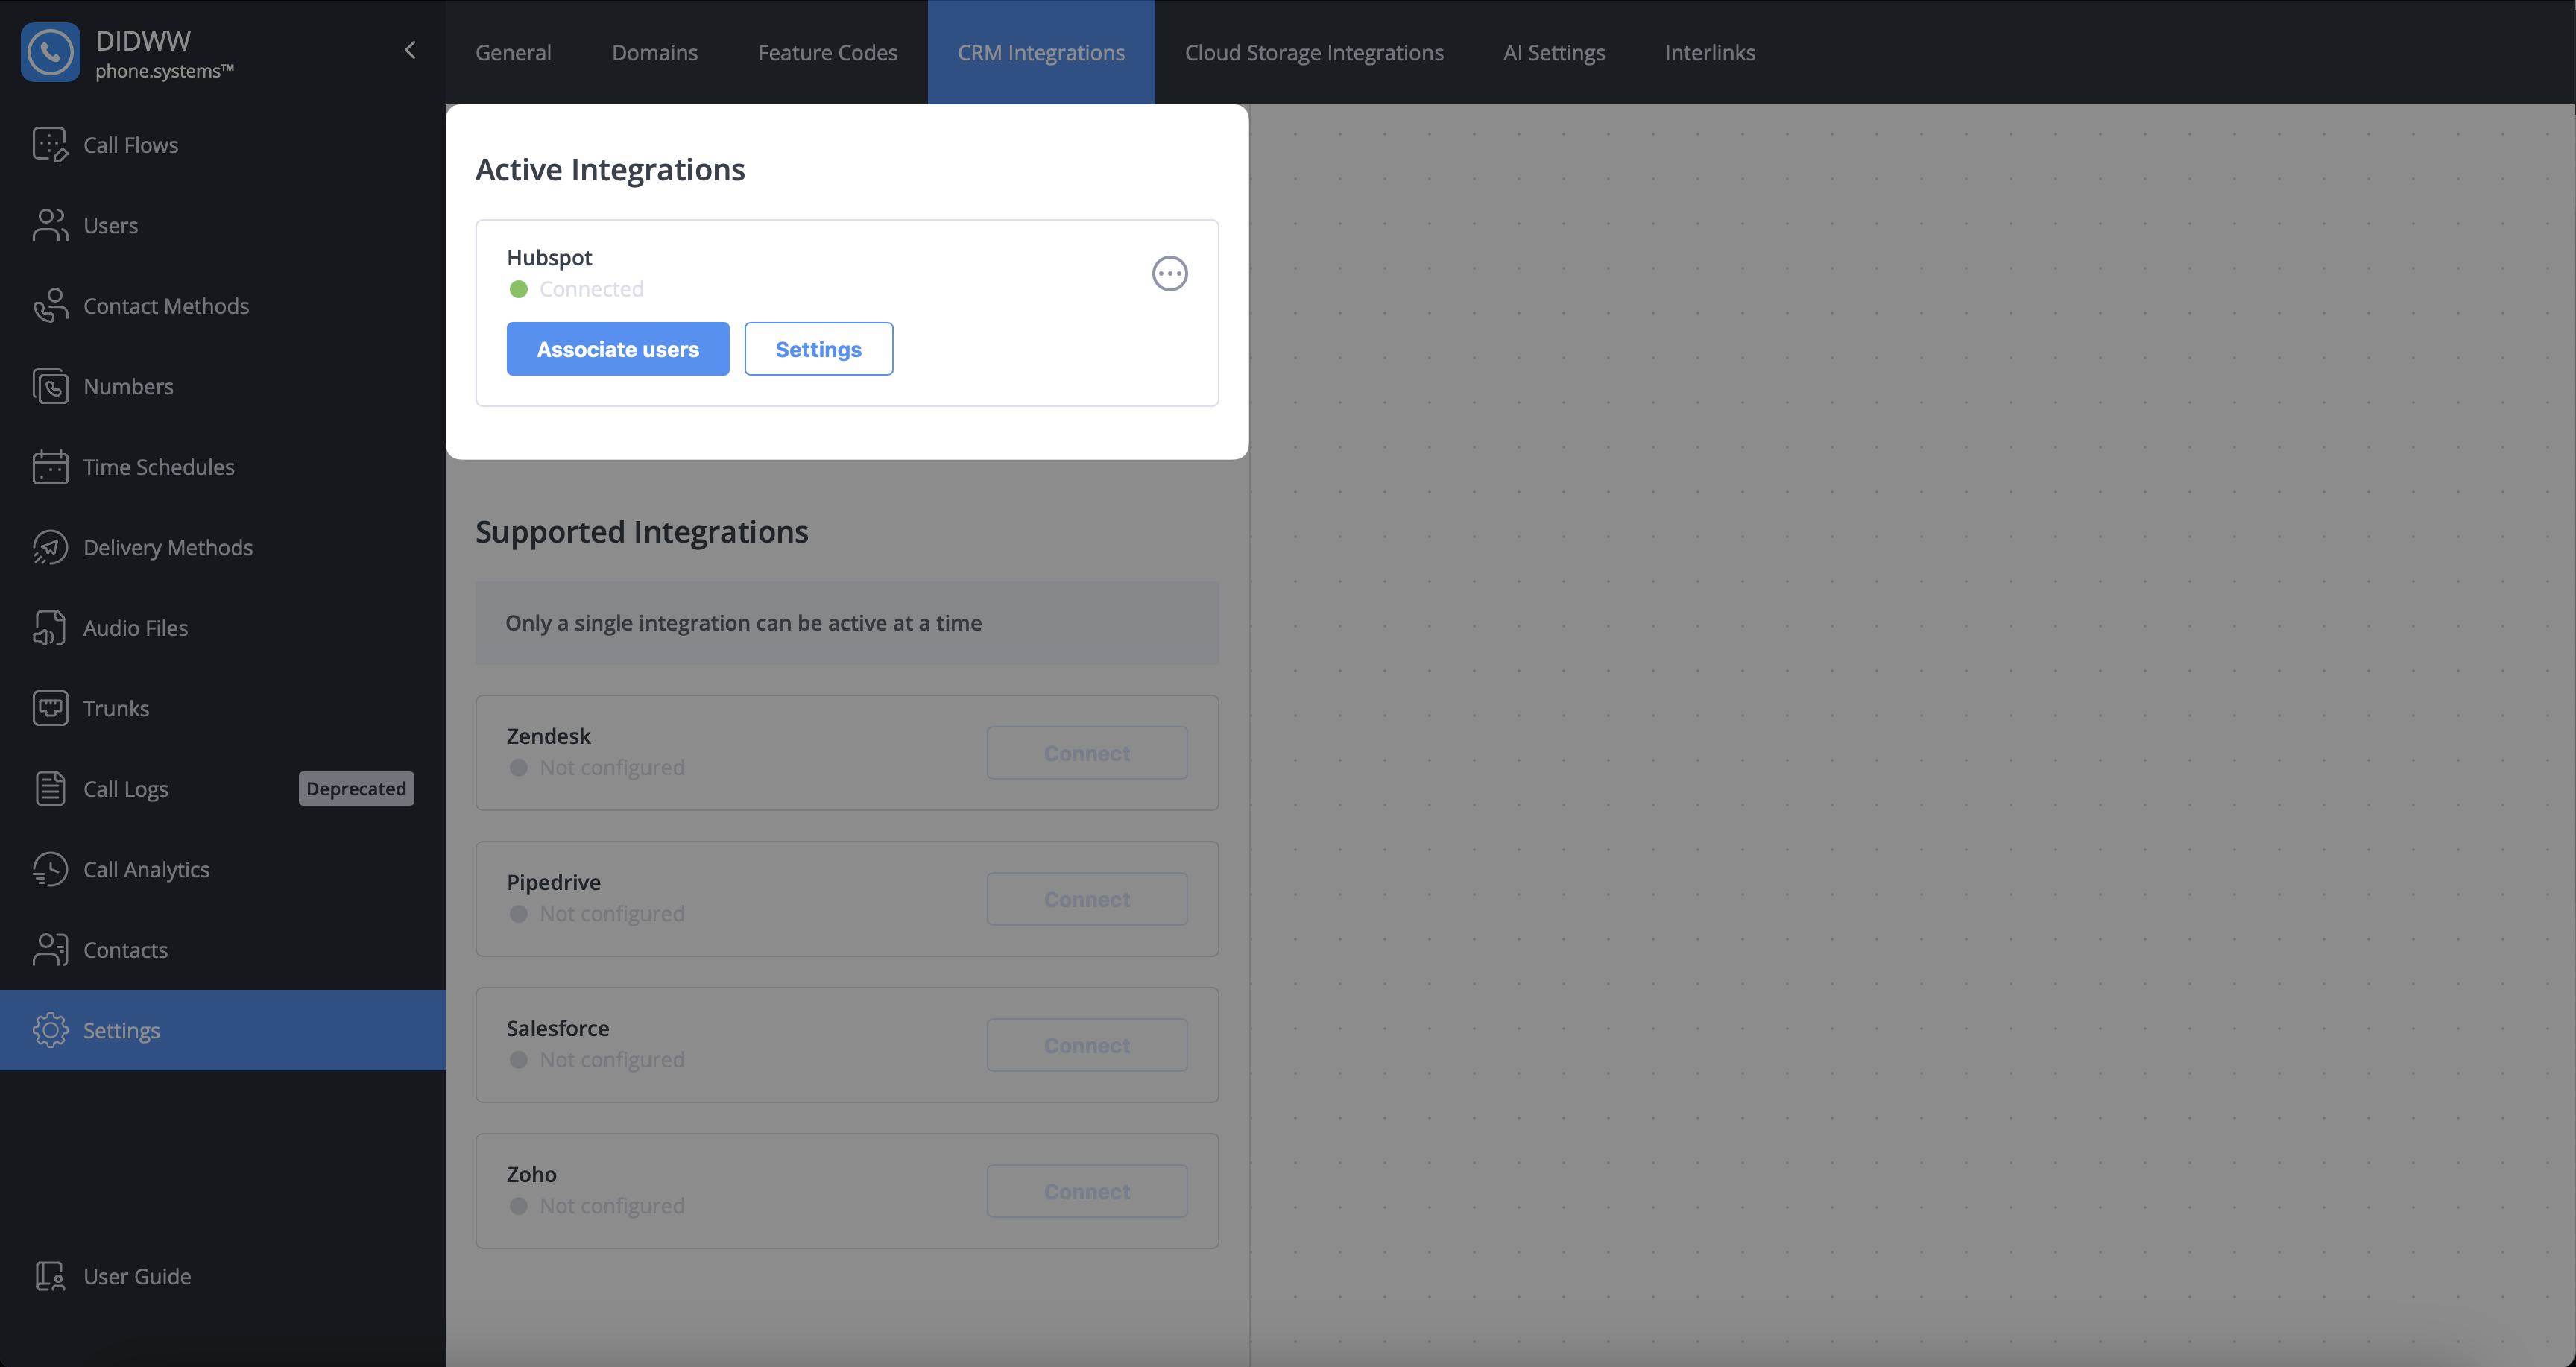
Fig. 16. Active HubSpot connection in phone.systems™#
Associate users for HubSpot#
After the HubSpot integration is successfully connected, you can associate HubSpot users with their corresponding phone.systems™ users.
User association enables call journaling by ensuring that inbound and outbound calls are logged for the correct users in HubSpot. Calls handled by users who are not associated will not receive call details in HubSpot.
Go to phone.systems™ Settings, then open CRM Integrations.
Under Active Integrations at the top of the page, locate HubSpot marked as Connected.
Click Associate users.
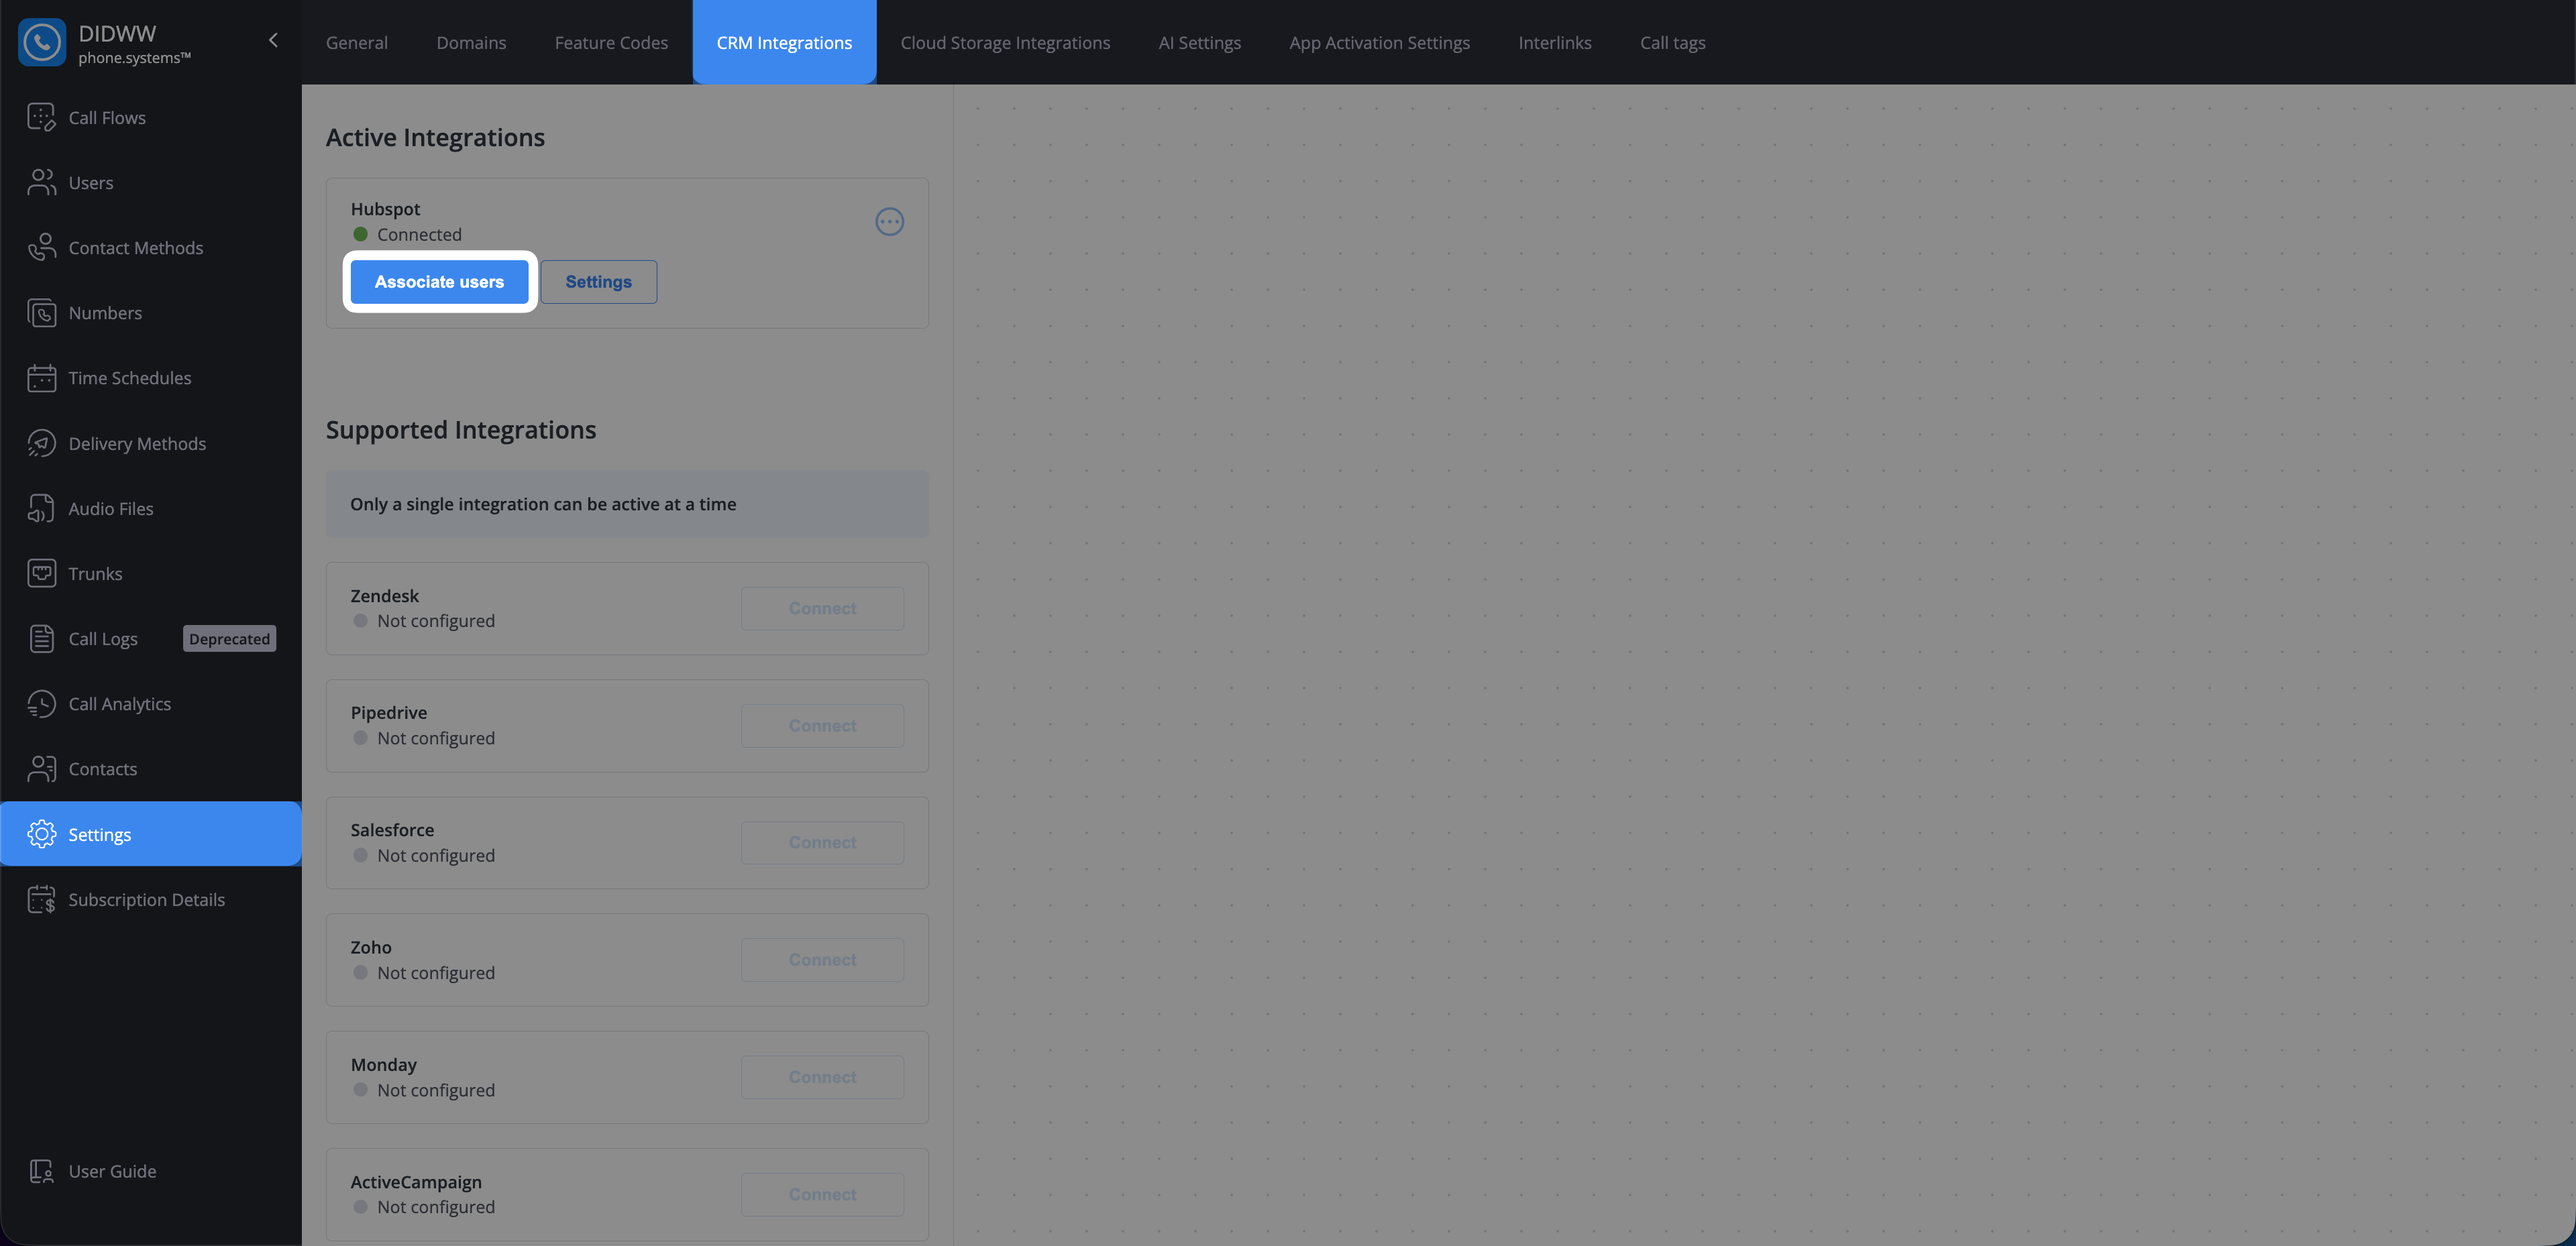
Fig. 17. Associate HubSpot users button#
The Associate HubSpot users page opens, where you can link HubSpot users with corresponding phone.systems™ users.
Match each HubSpot user with the appropriate phone.systems™ user.
Click Save to apply the changes.
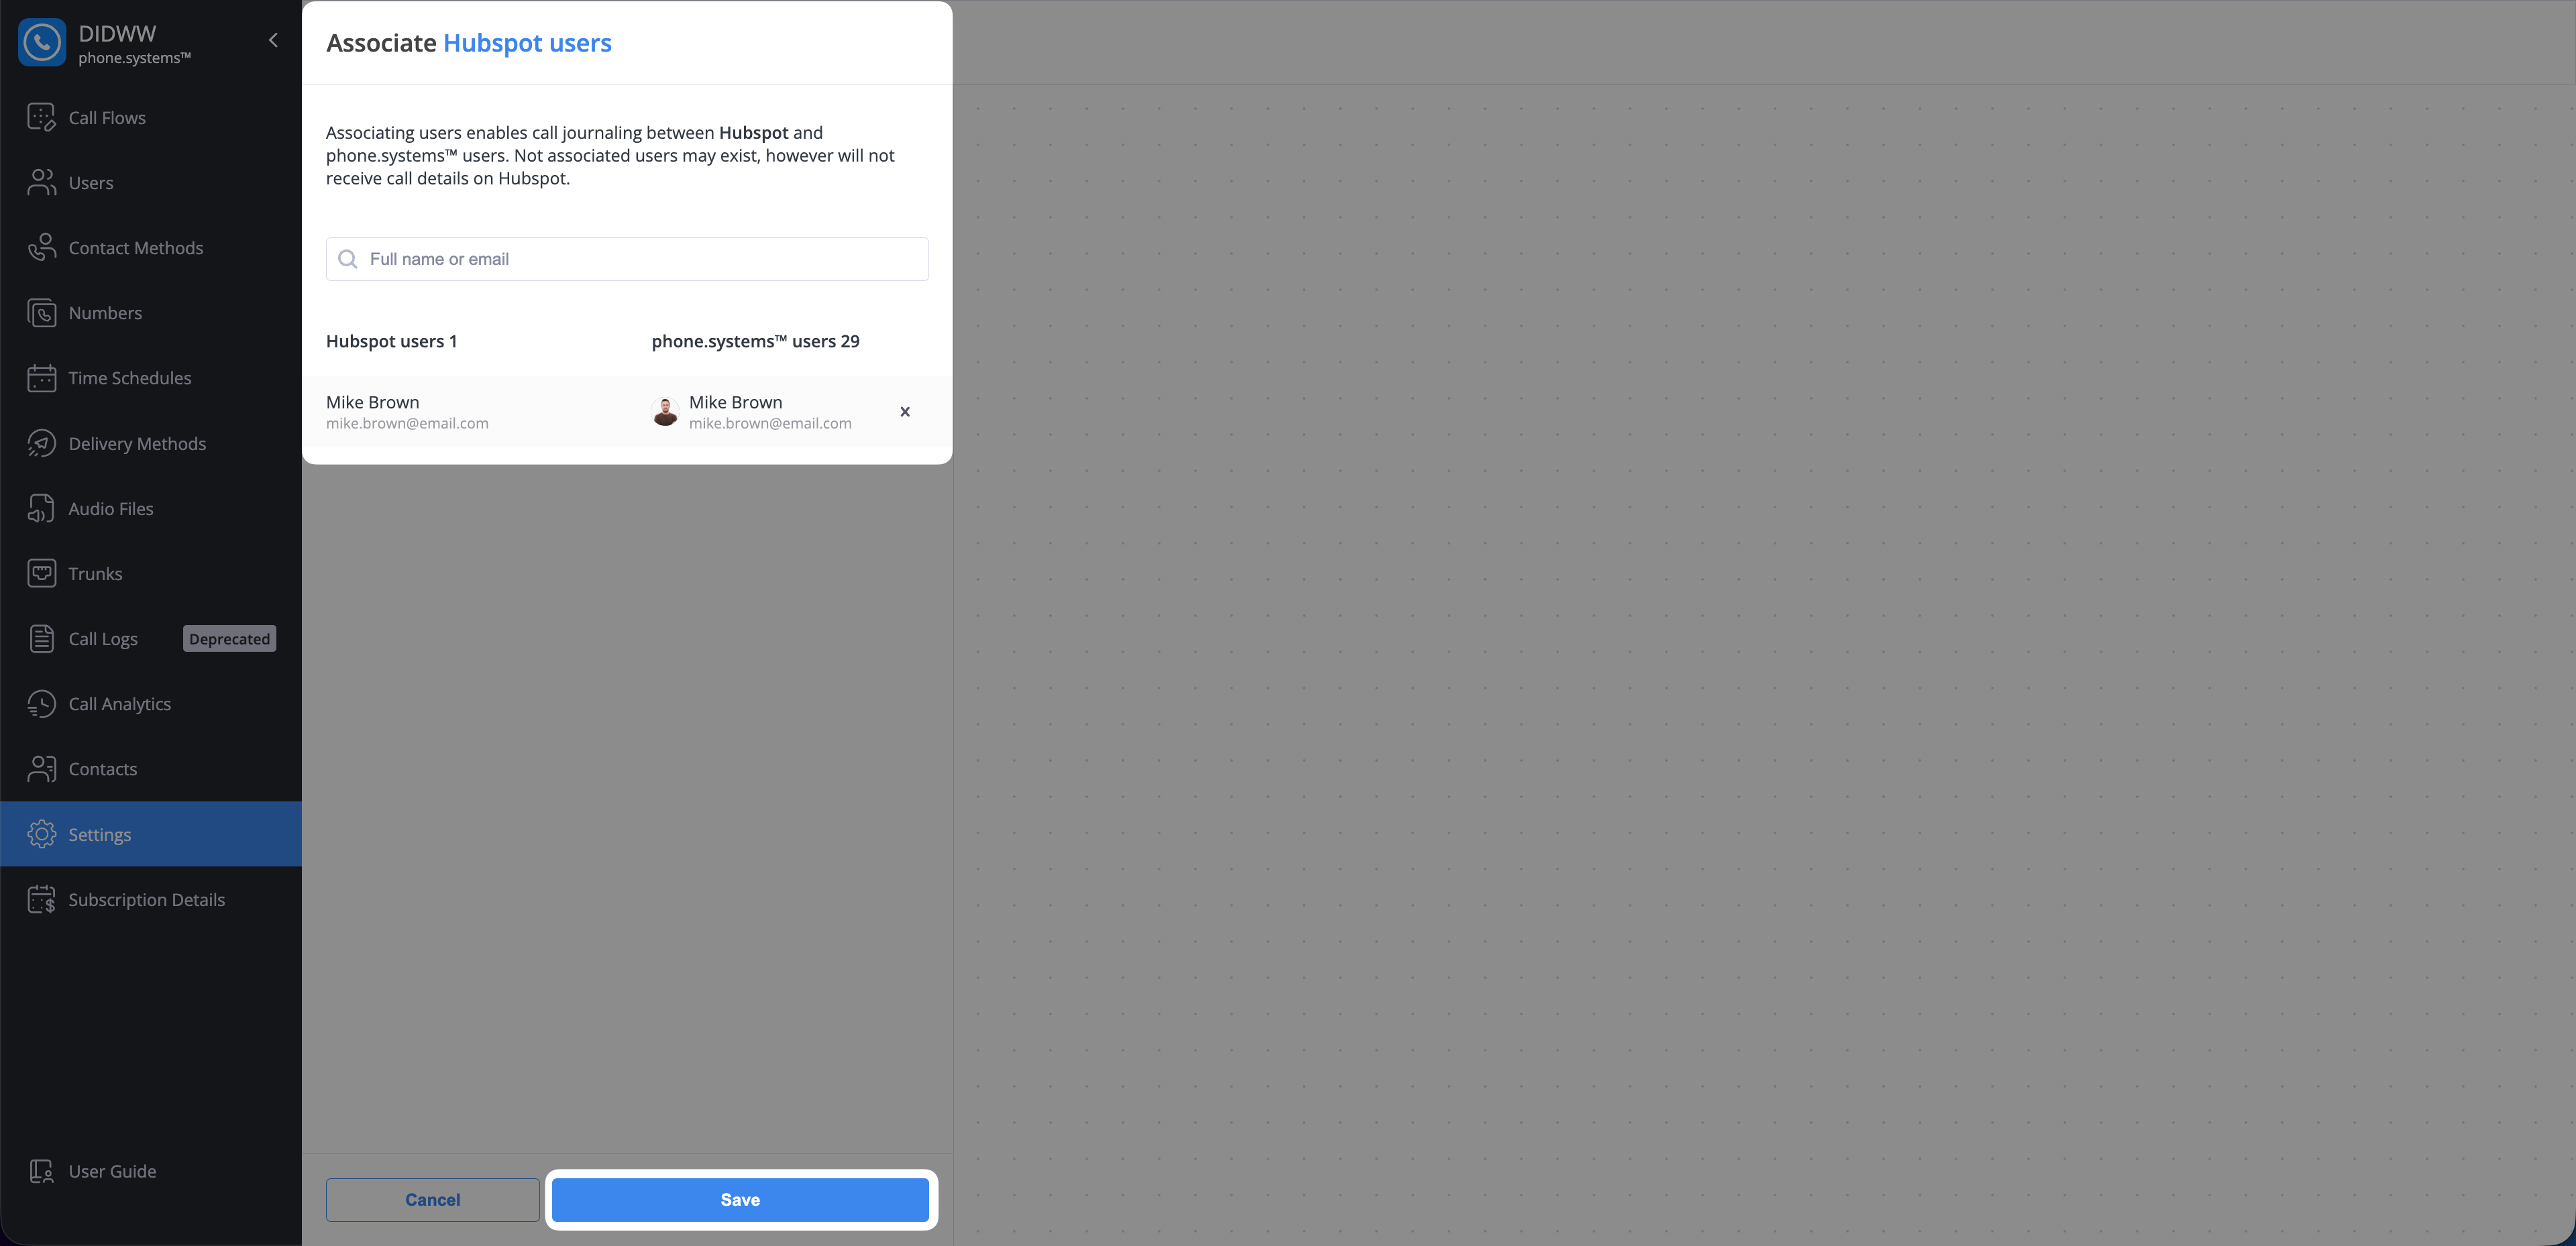
Fig. 18. Associate HubSpot users with phone.systems™ users#
Synchronizing Contacts and Companies#
After connecting, you can perform a one-time synchronization to import your existing contacts and companies from HubSpot into your phone.systems™ address book.
Navigate to Settings > CRM Integrations.
Locate the active HubSpot integration and click the actions menu icon.
Select Change synchronization options from the dropdown menu.
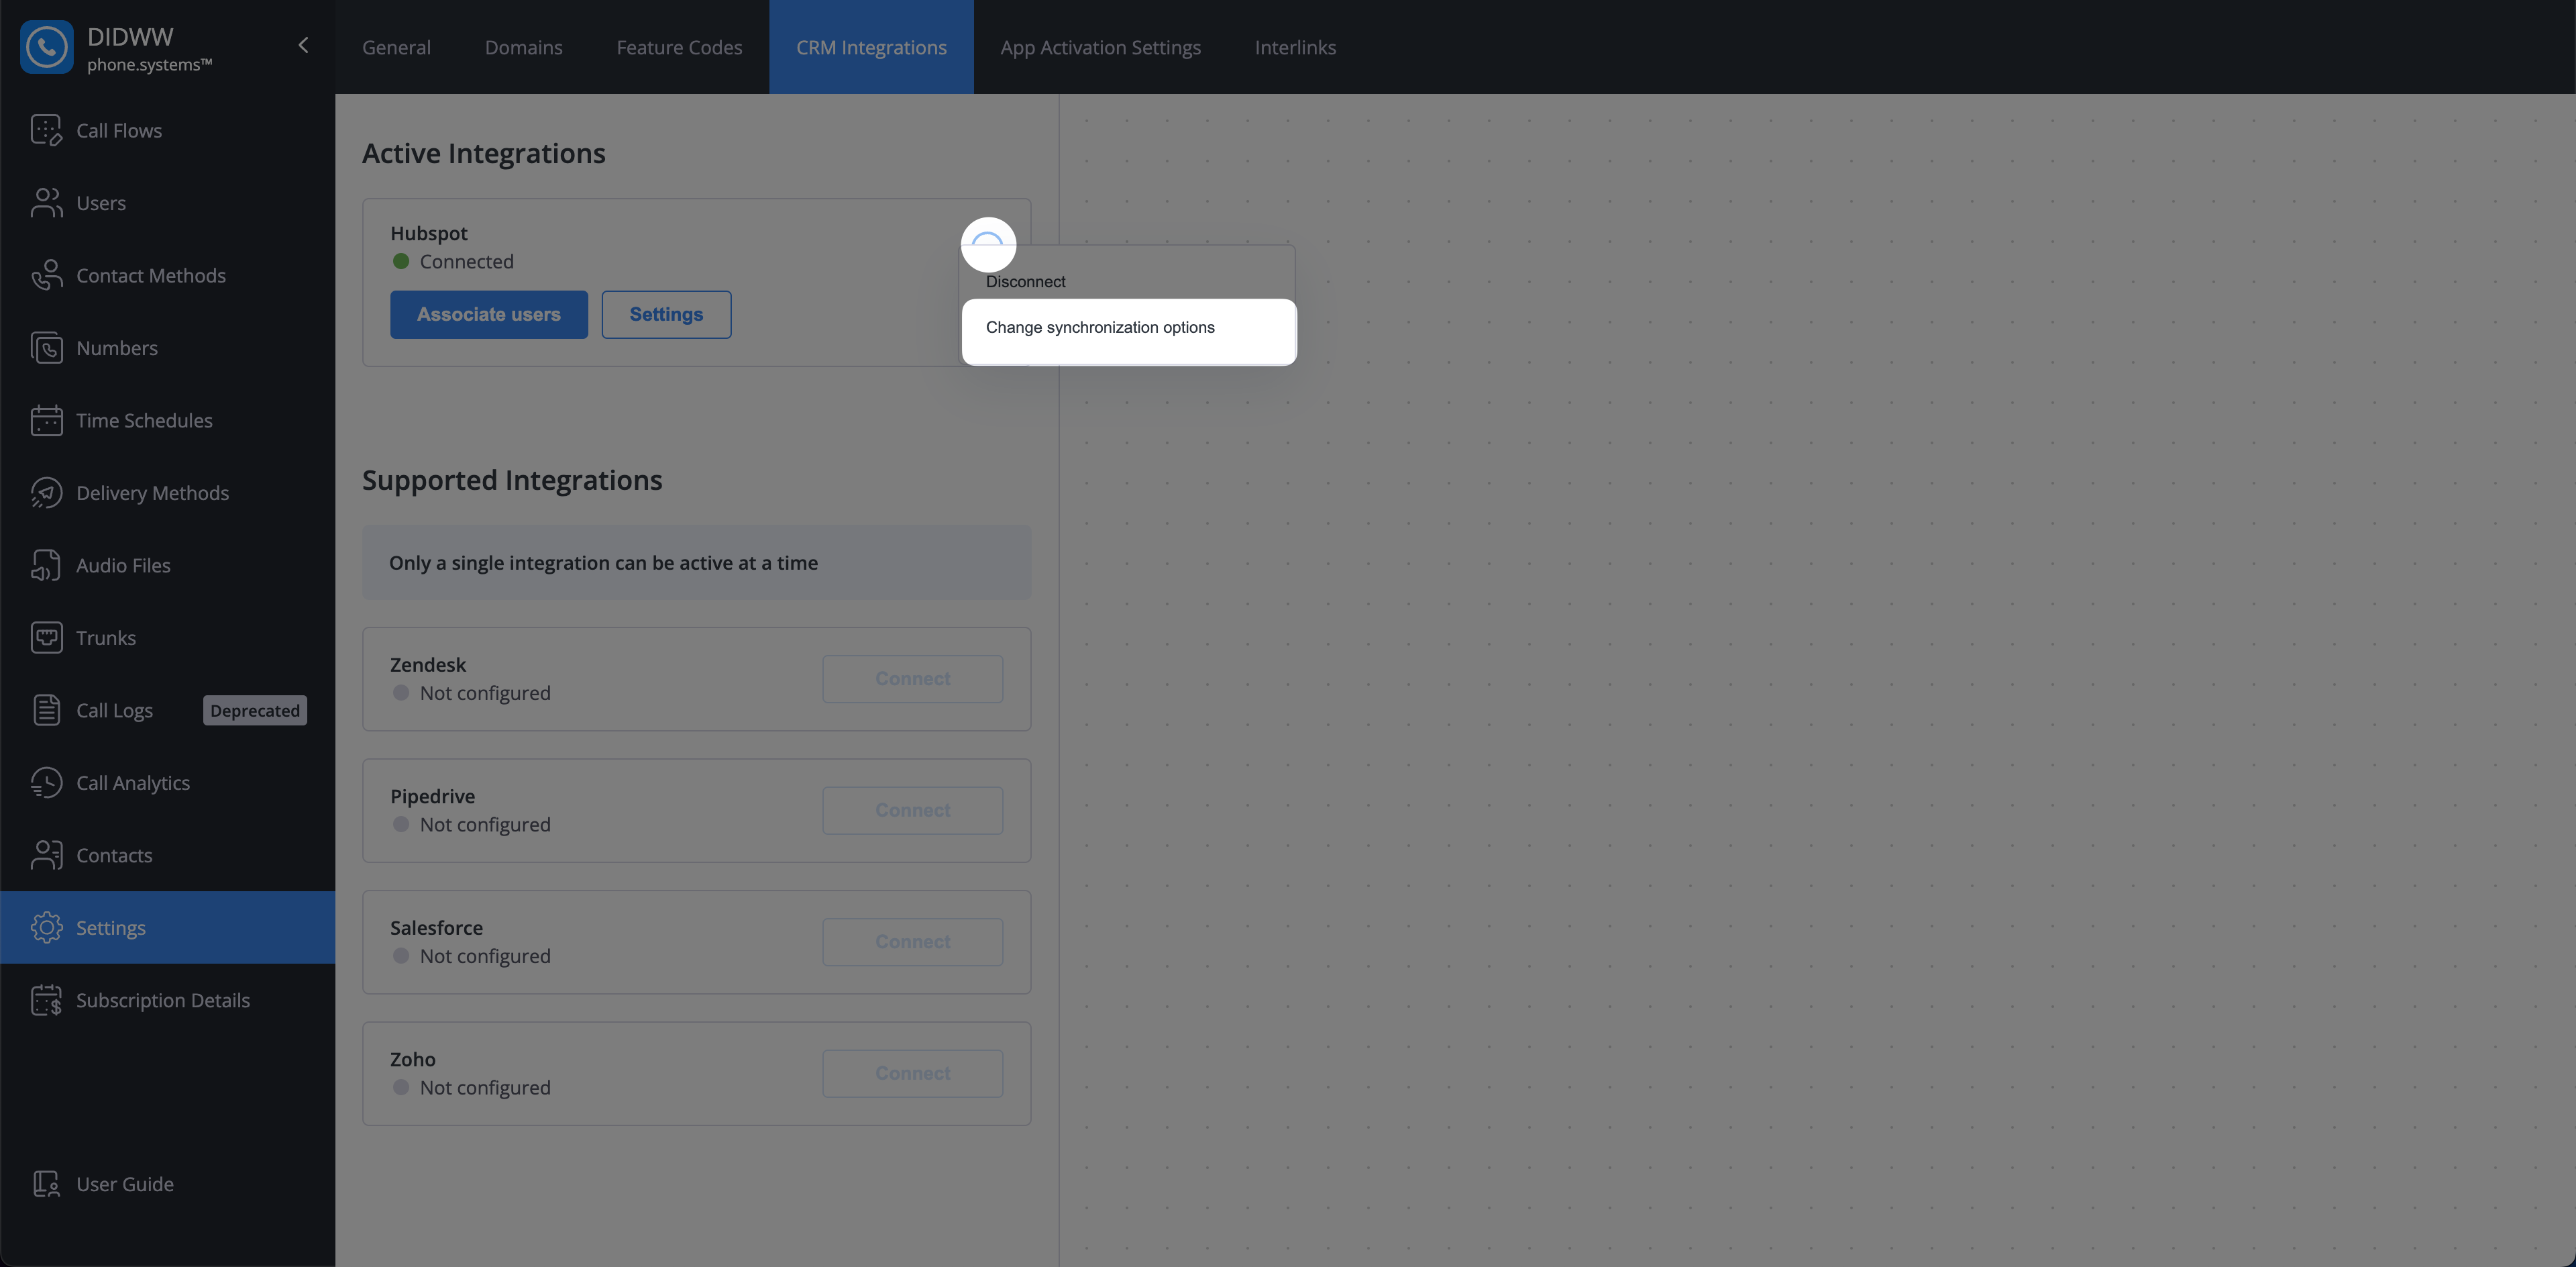
Fig. 19. Synchronization options#
In the Synchronize contacts from window, use the toggles to select whether you want to import Contacts, Companies, or both.
Click Submit to begin the synchronization.
Note
This is a one-time import. For ongoing, automatic creation of new contacts from calls, see the Auto Contact Creation settings below.
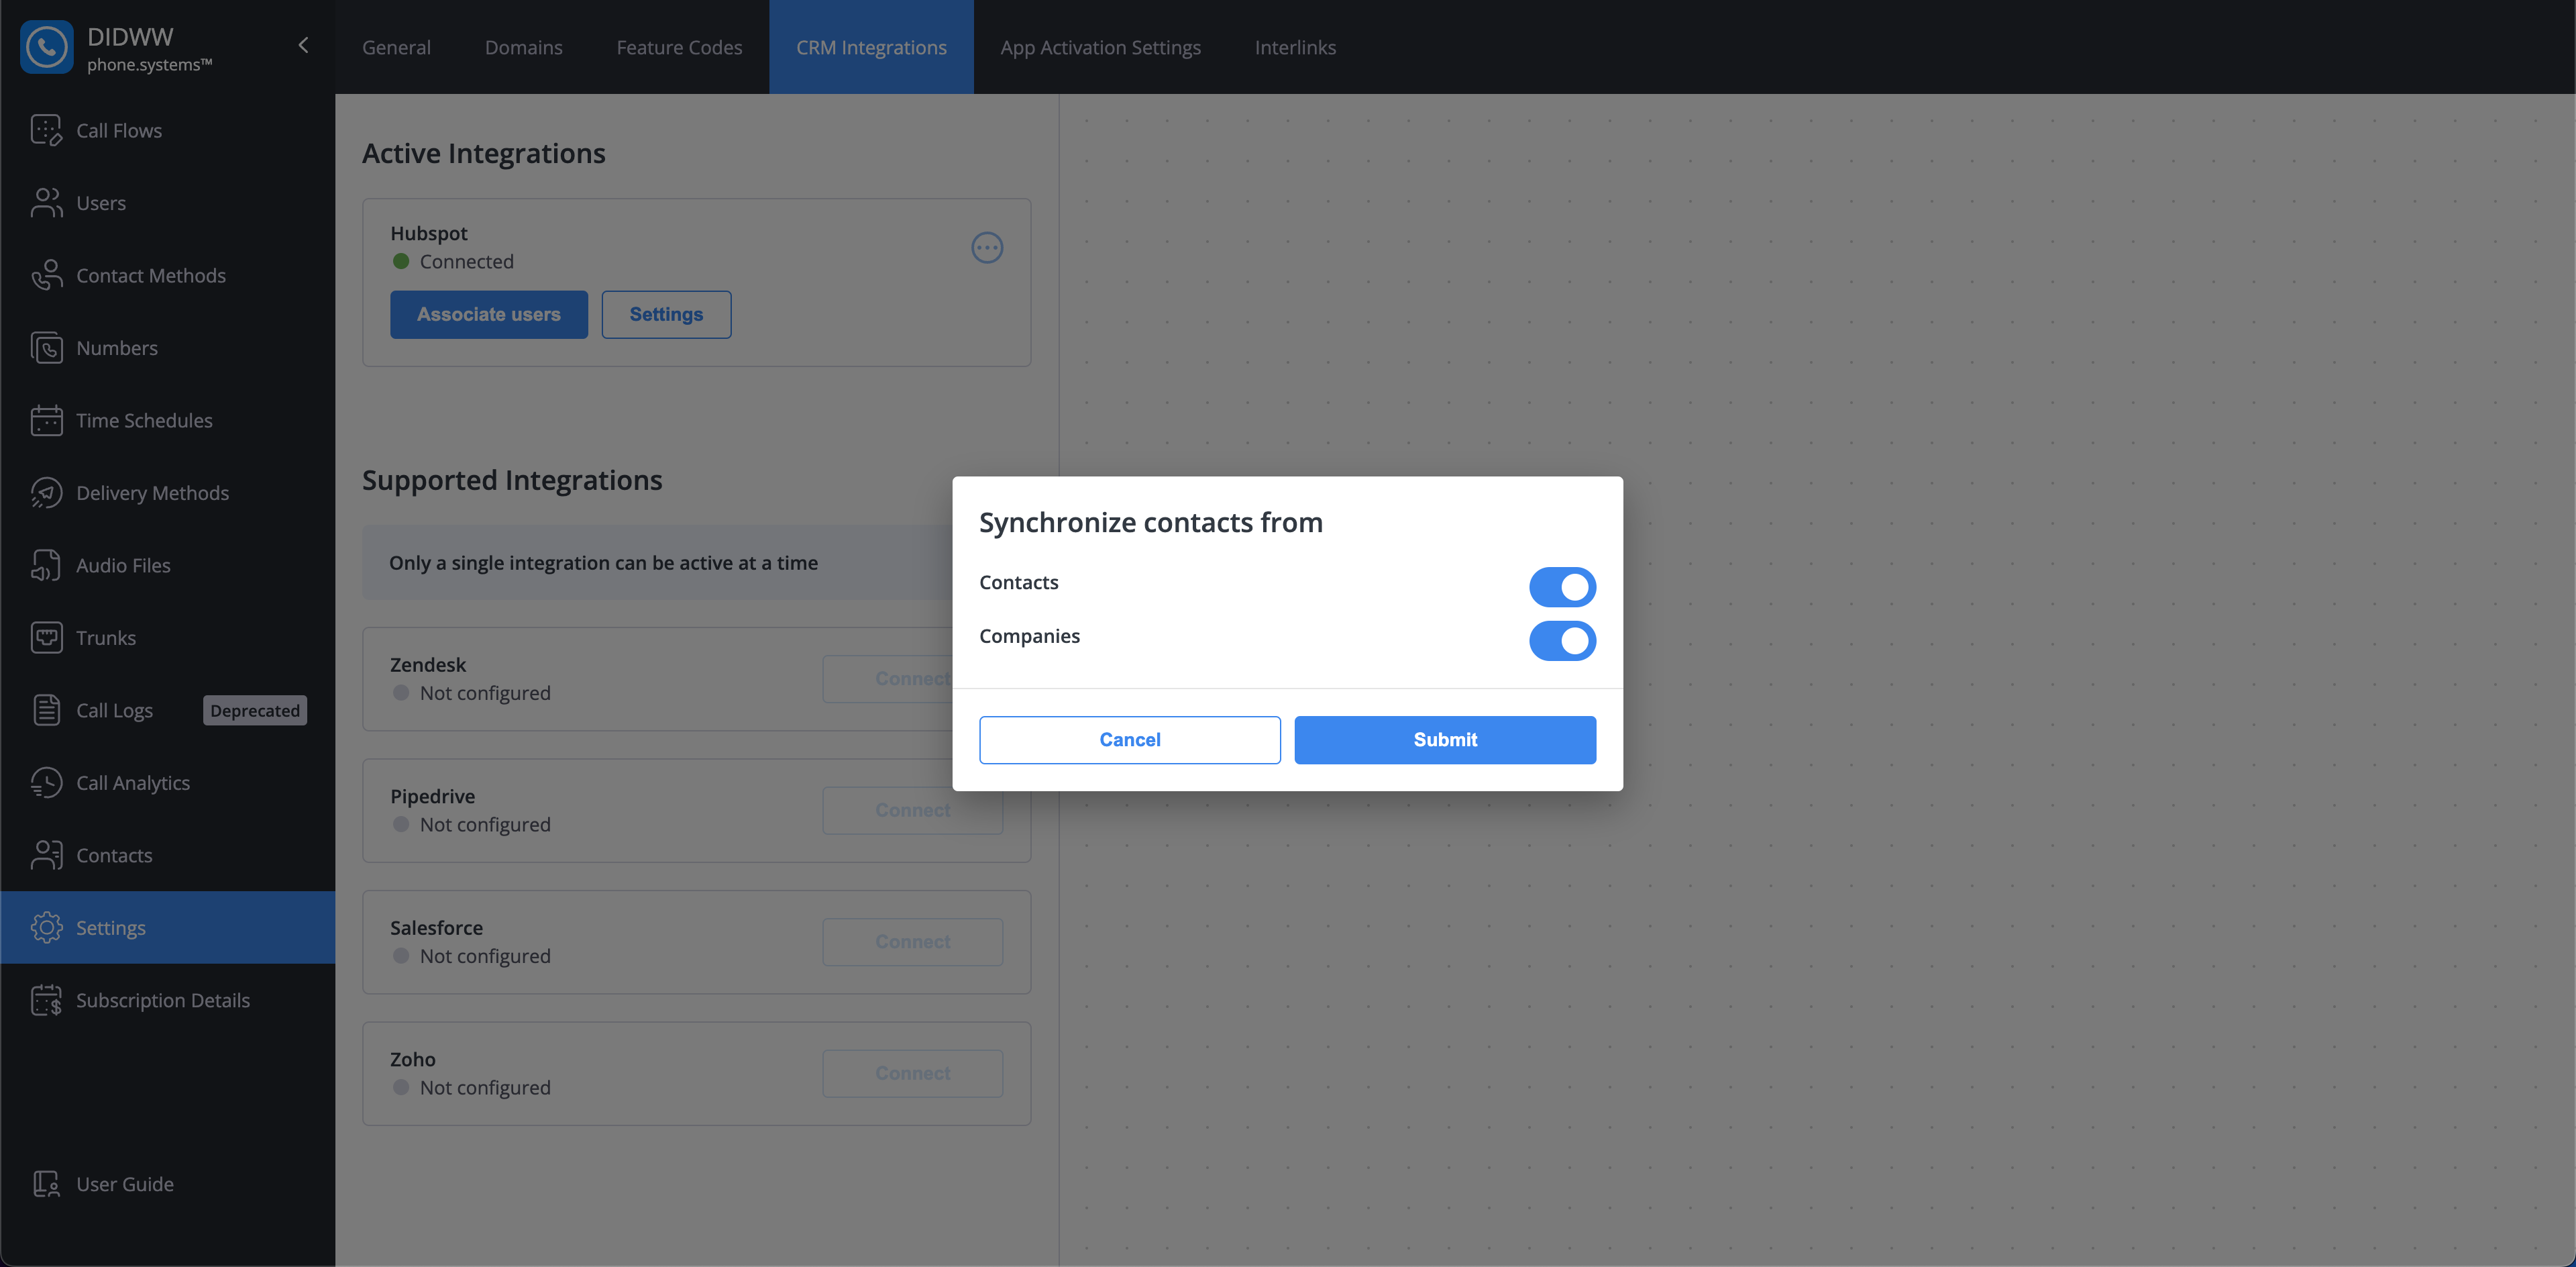
Fig. 20. Synchronization window#
Configuring HubSpot Settings#
Once the integration is active, you can customize how data is synced between phone.systems™ and HubSpot. To access these options, navigate to Settings > CRM Integrations and click the settings icon next to your HubSpot connection.
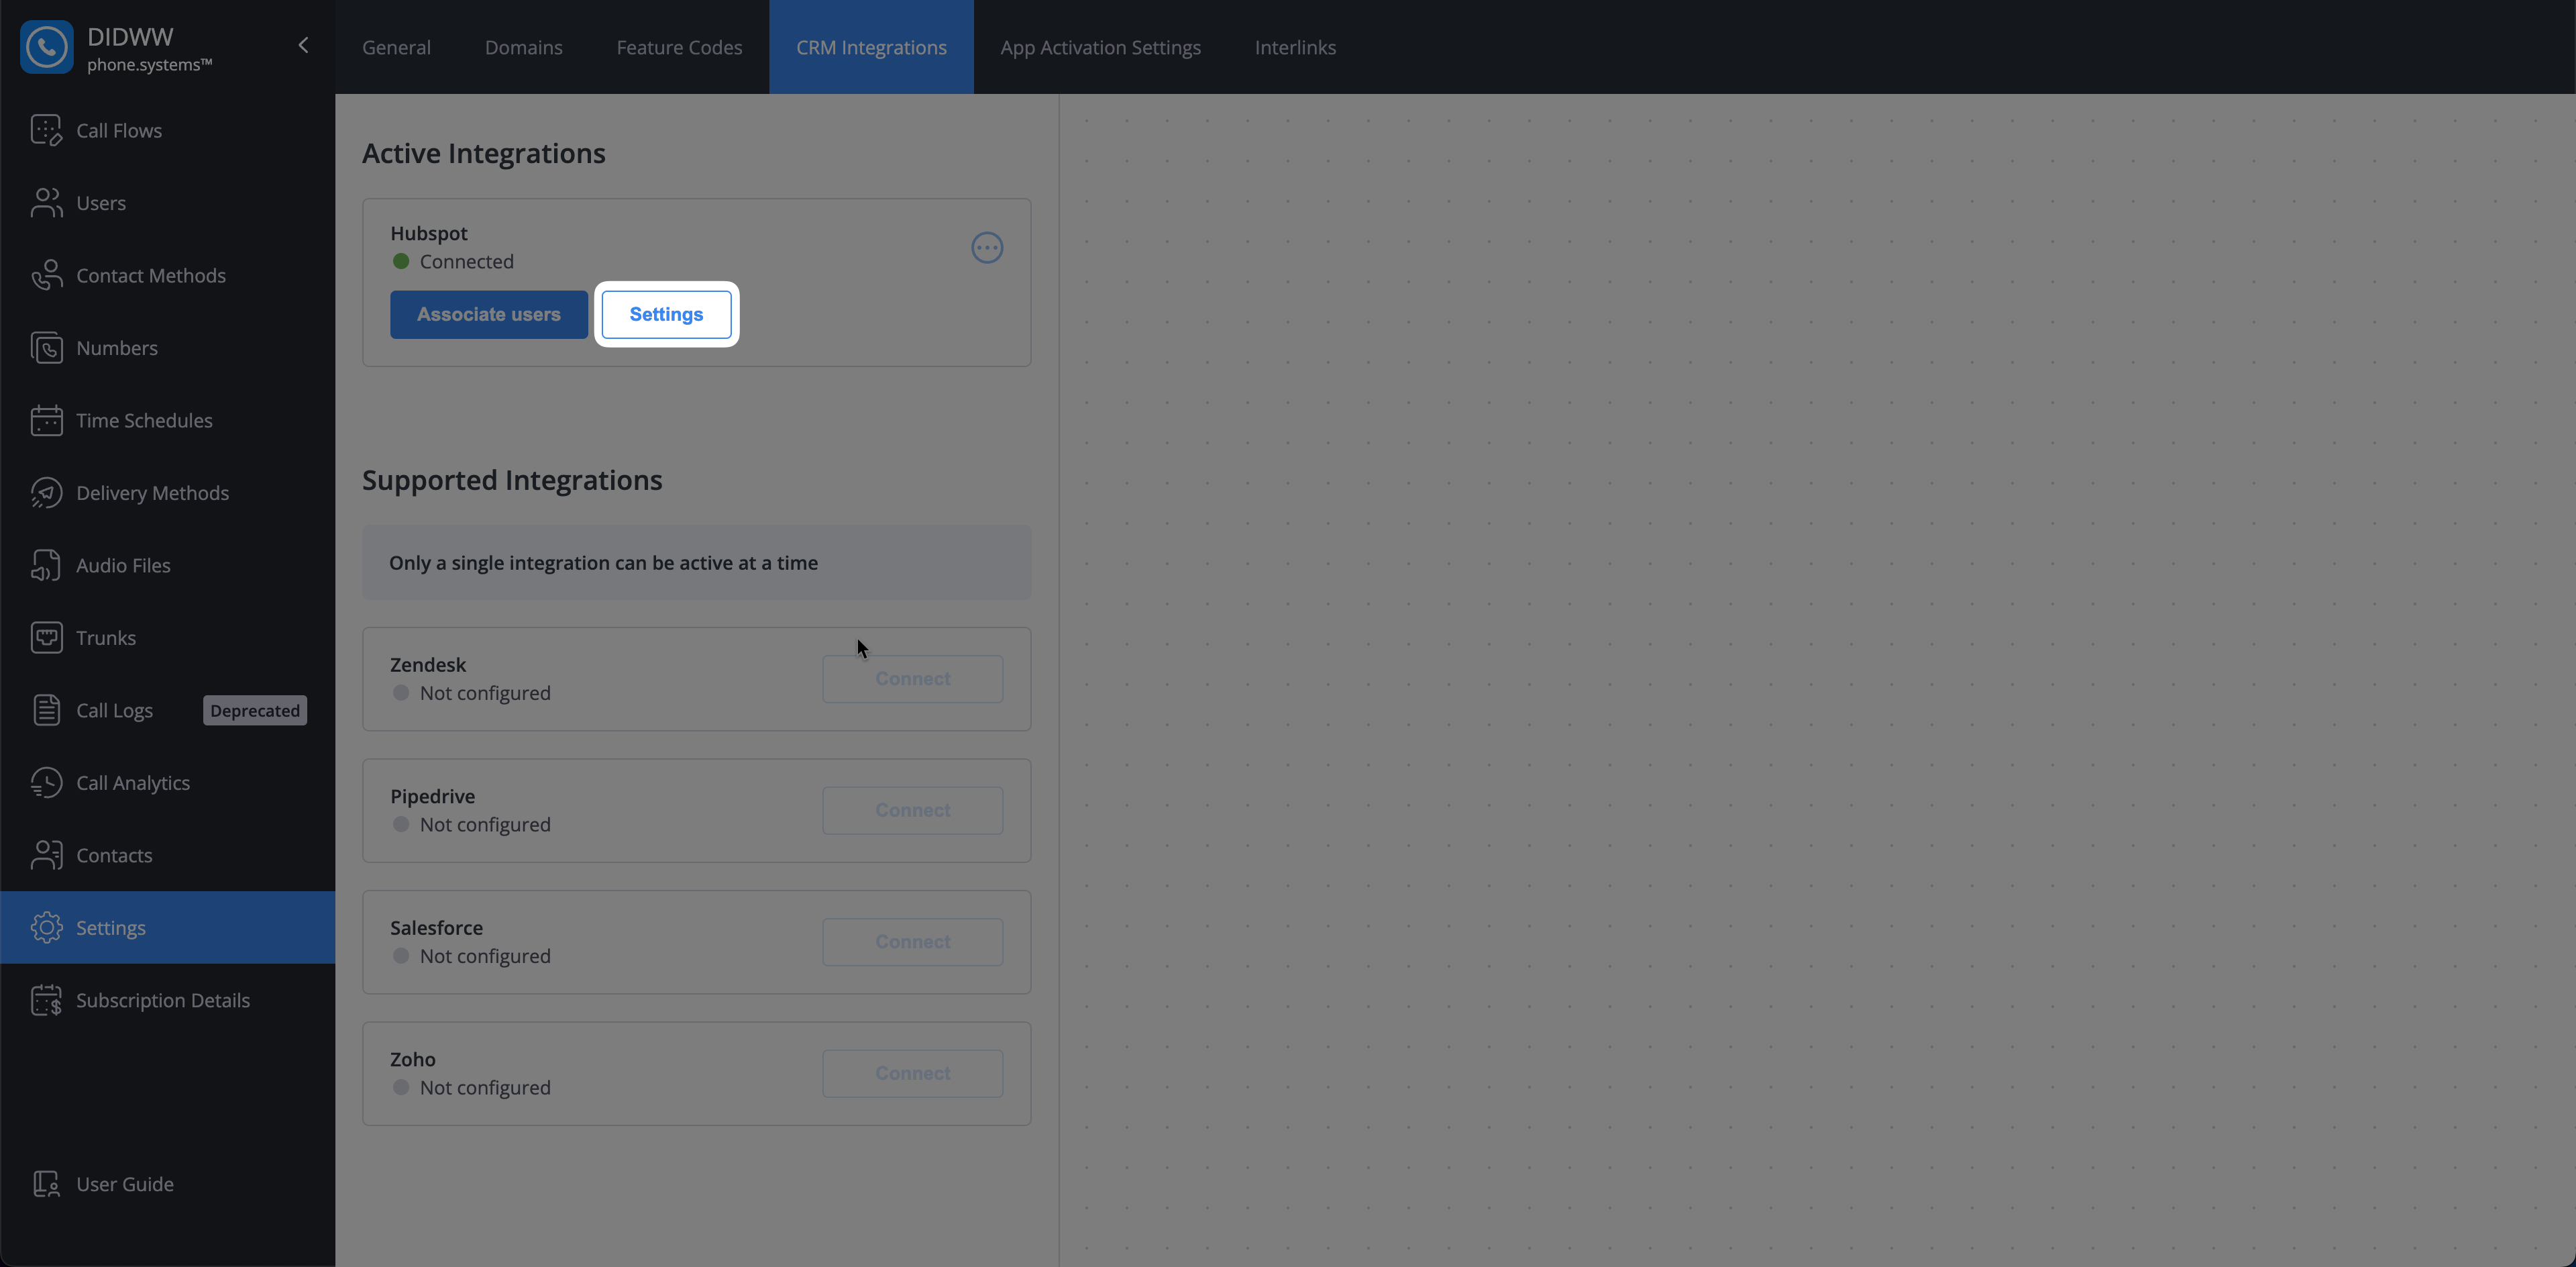
Fig. 21. HubSpot integration settings button#
Important
The following settings apply only to numbers with Call journaling enabled. Call journaling must be configured separately for each number on the Edit phone numbers page.
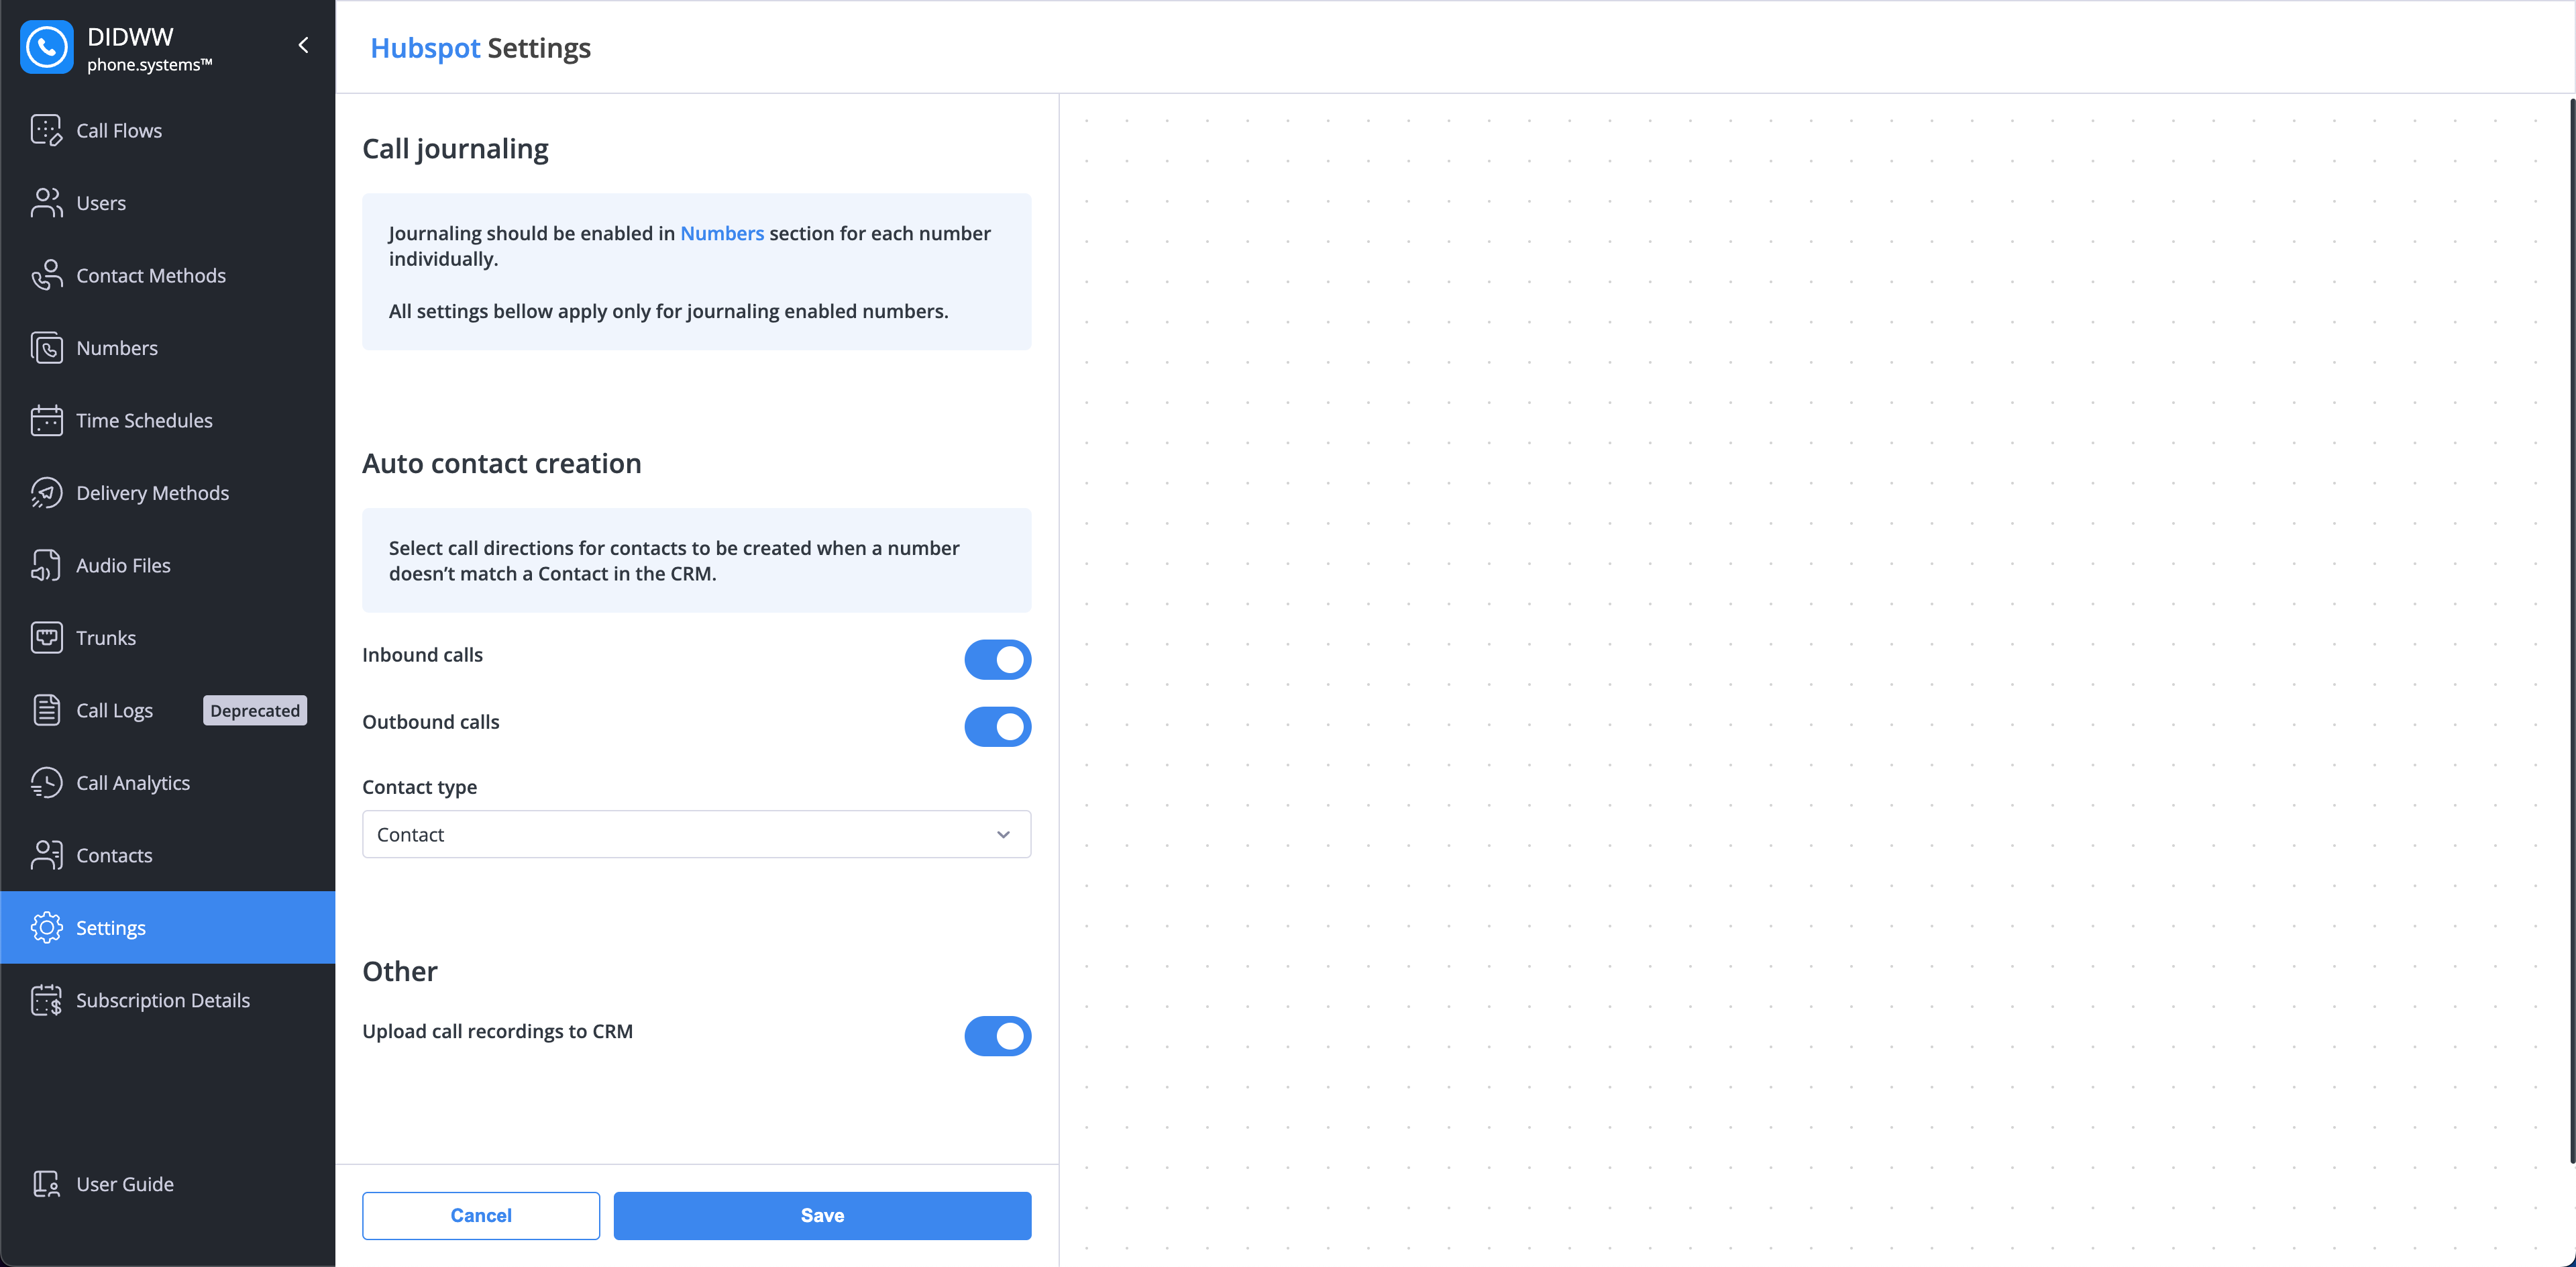
Fig. 22. HubSpot integration settings#
Auto Contact Creation#
This feature automatically creates a new contact in HubSpot when a call is received from or made to a number that does not match an existing contact in your CRM.
Setting |
Description |
|---|---|
Inbound calls |
When enabled, a new contact will be created in HubSpot for all inbound calls from unknown numbers. |
Outbound calls |
When enabled, a new contact will be created in HubSpot for all outbound calls to unknown numbers. |
Contact type |
Select the default HubSpot contact type to be assigned when a new contact is created automatically. |
Other Settings#
Manage which call-related data is automatically uploaded to your HubSpot contacts’ activity timelines.
Setting |
Description |
|---|---|
Upload call recordings to CRM |
When enabled, a link to the call recording will be automatically added to the call log in HubSpot. Note To utilize this feature, call recording must be enabled for your contact method. |
Upload AI call insights results |
When enabled, detailed analytics from our AI engine will be added to the call log. This can include:
Note To utilize the AI features, AI Call Insights must be enabled. |
After configuring these options, click Save to apply your changes.