Playlists#
The Playlists section allows you to organize multiple audio files into playback sequences for use in phone.systems™. Playlists are typically used for music on hold, rotating announcements, or ring group messages. You can easily create, edit, reorder, and delete playlists directly from the phone.systems™ user interface.
Combine multiple audio files into a single playlist for playback or announcements.
Rename, reorder, or update existing playlists and manage included audio files.
View how playlists are linked to Call Flows, Ring Groups, or Queues before editing.
Safely remove a playlist after reviewing any associated relations.
Create Playlist#
You can create a new playlist by combining existing audio files from your Audio Files library.

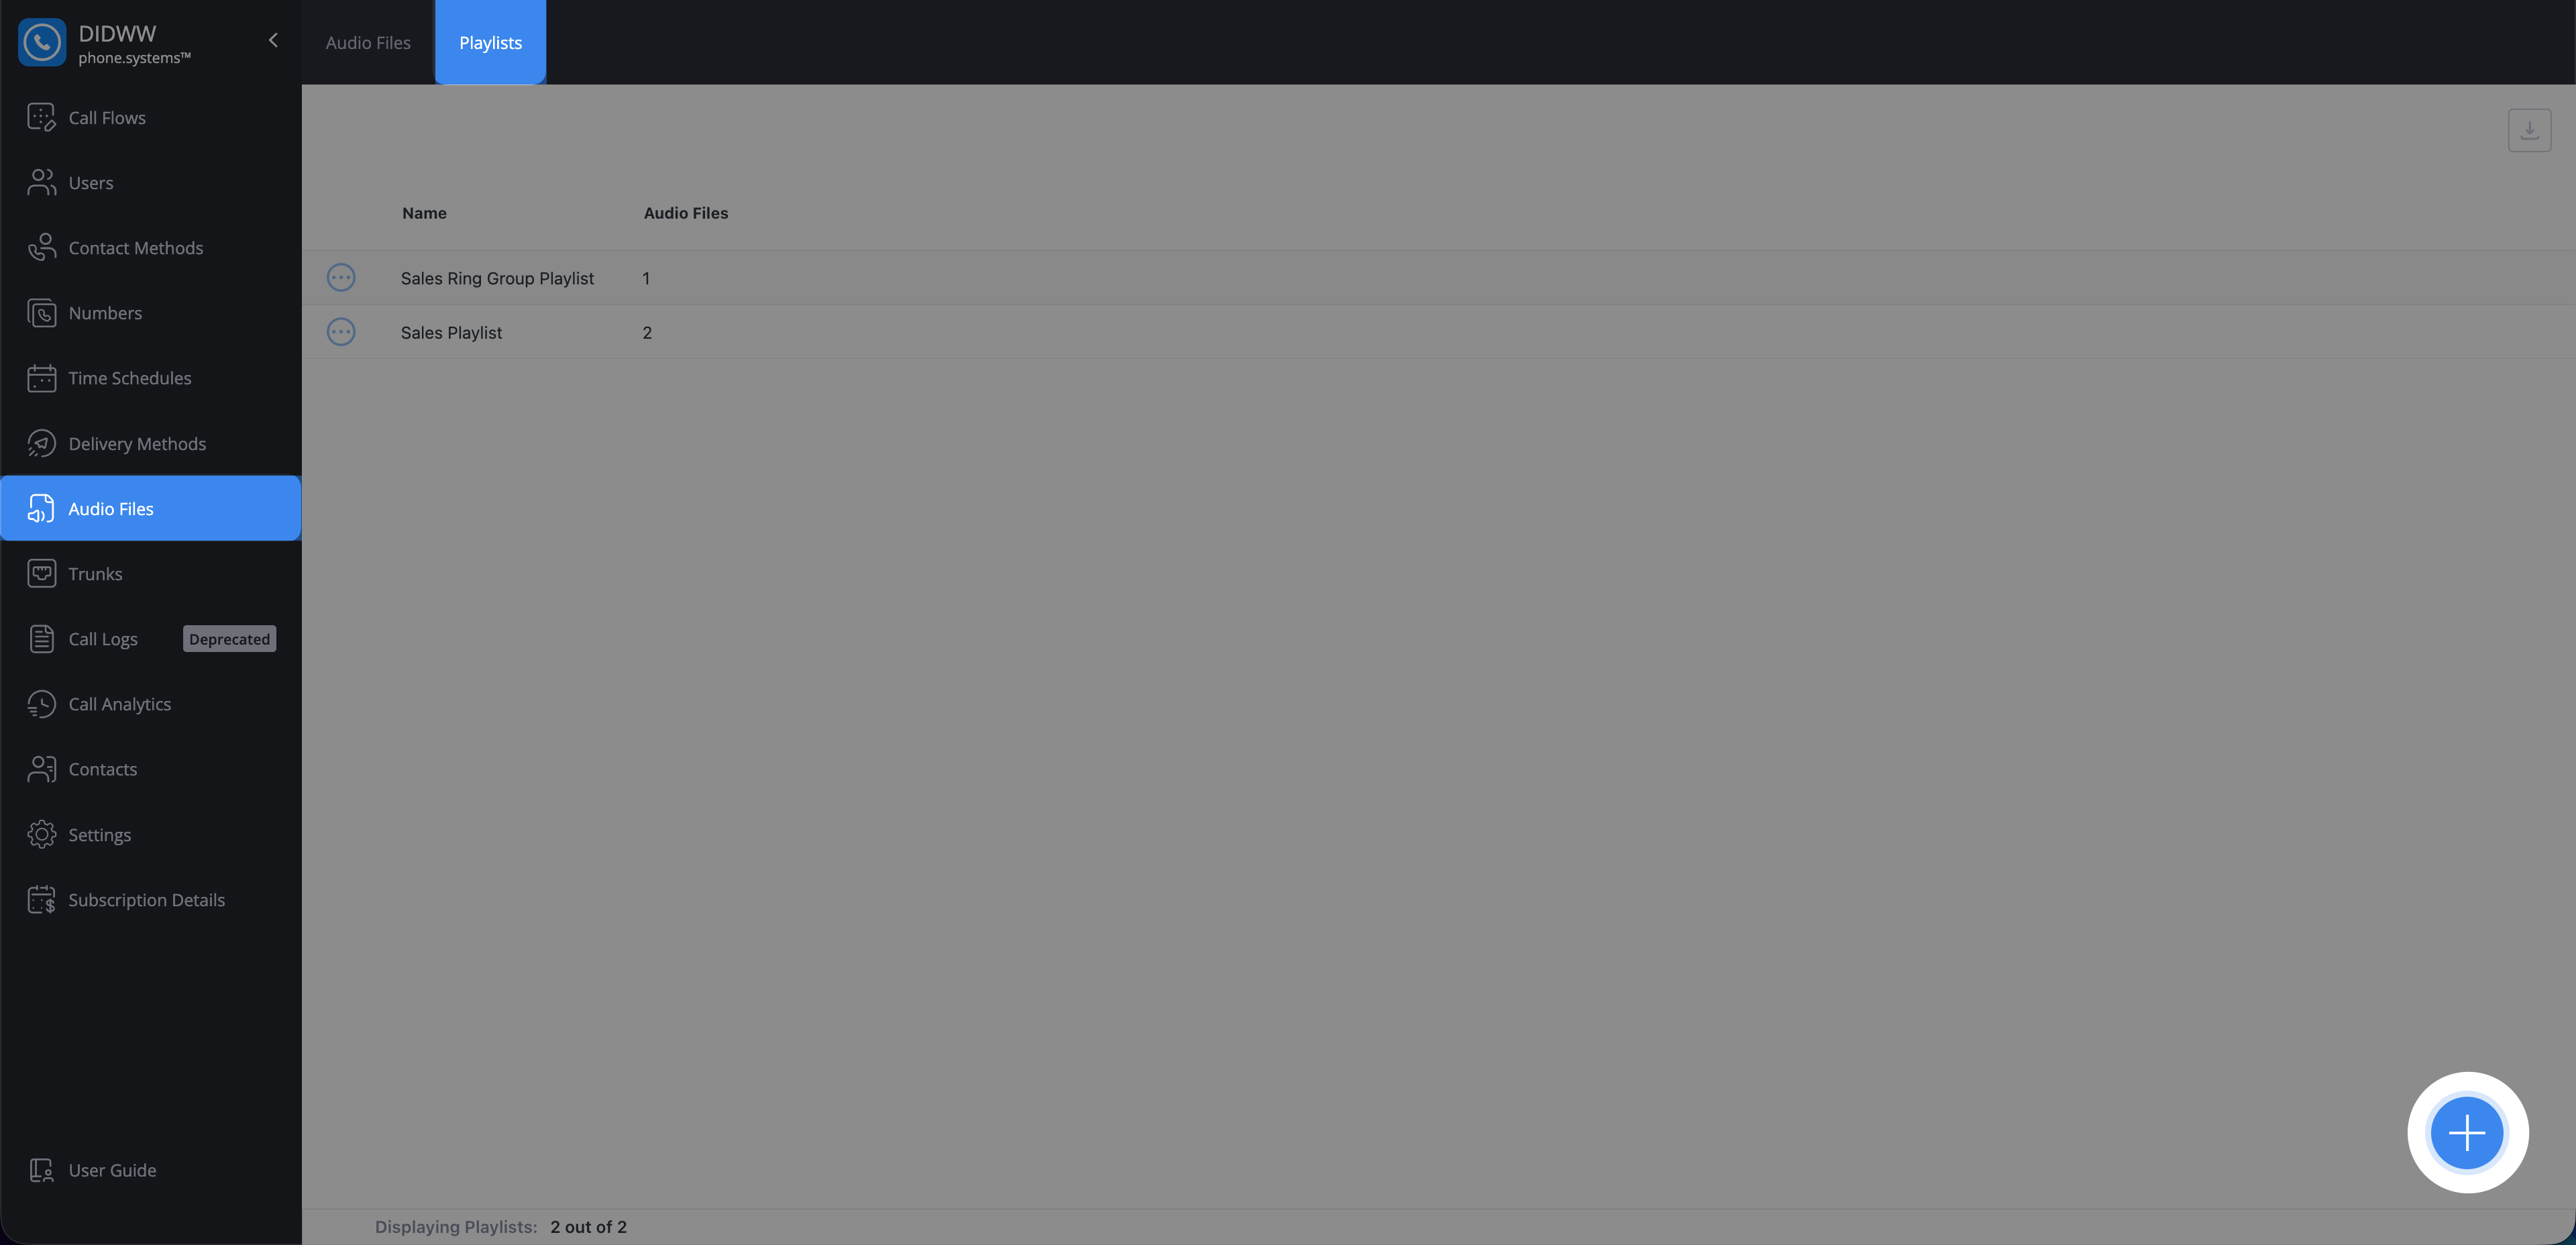
Fig. 1. Add Playlist button#
Enter a Name for your playlist and click Add audio files to include existing files.
Note
Only audio files that already exist in your library can be added to a playlist.

Fig. 2. Adding audio files to a playlist#
(Optional) Drag and drop tracks to change their playback order.
Fig. 3. Reordering playlist tracks#
Once all desired files are added and ordered, click Save to create the playlist.

Fig. 4. Saving a new playlist#
Edit Playlist#
You can rename an existing playlist, modify its contents, or adjust the order of the audio files.
In the Playlists tab, click the Actions button next to the playlist you want to edit.
Select Edit from the dropdown menu.
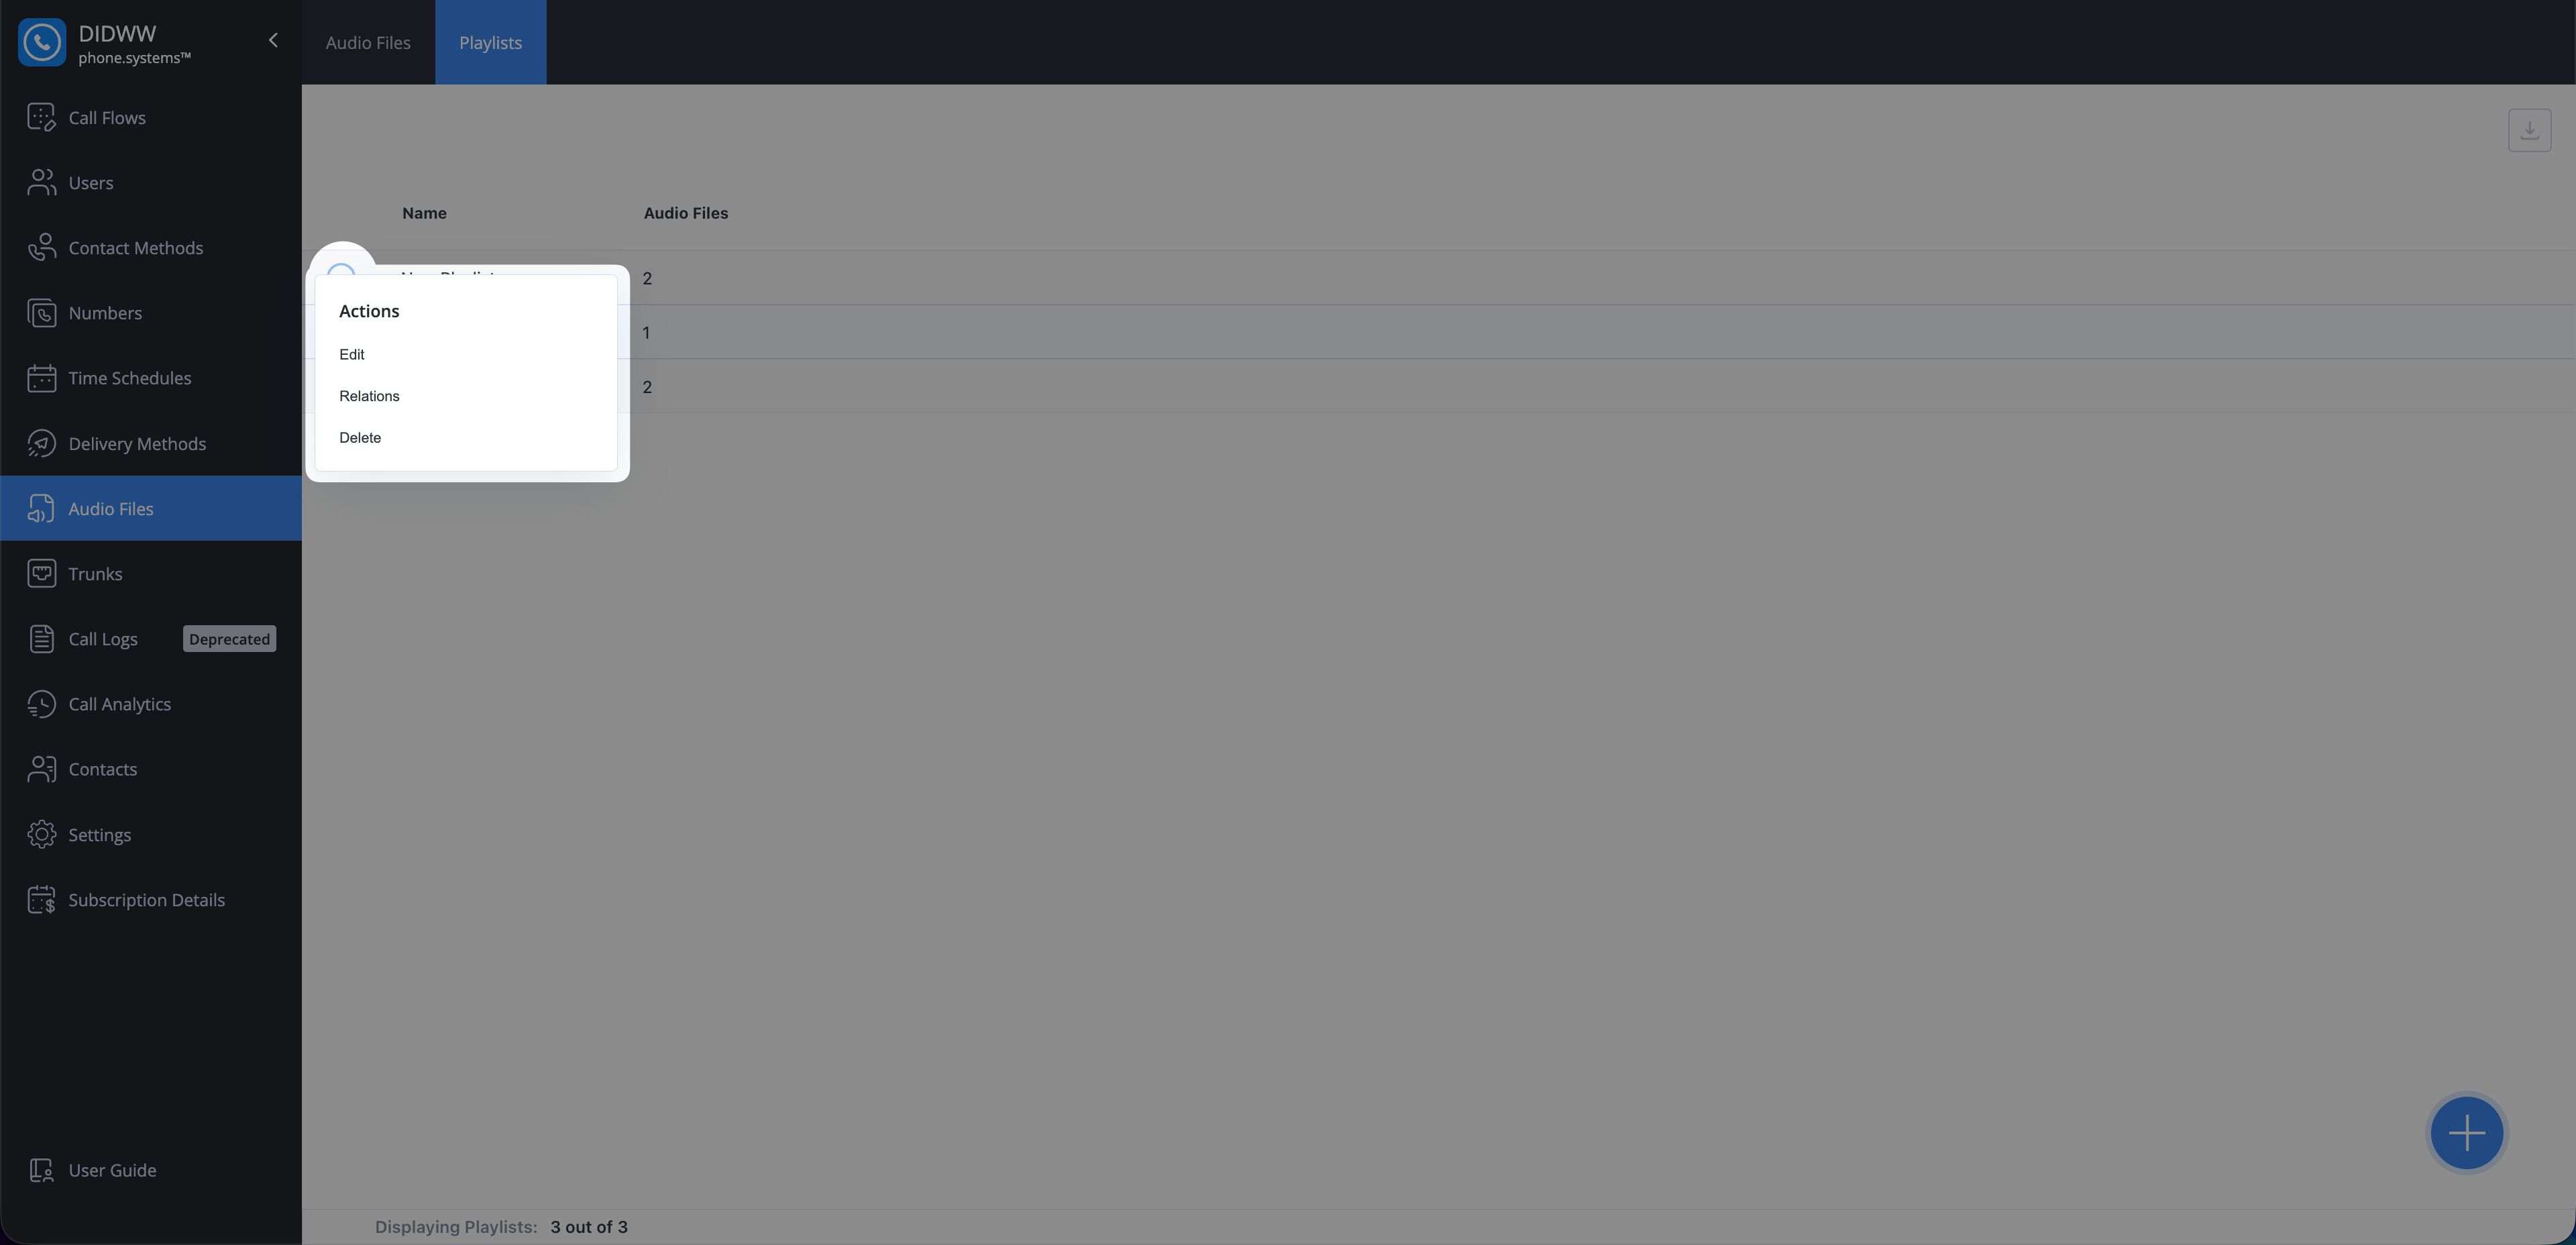
Fig. 5. Actions button in playlist menu#
Update the Name, Add or Remove audio files, or Reorder them.
Click Save to confirm your changes.
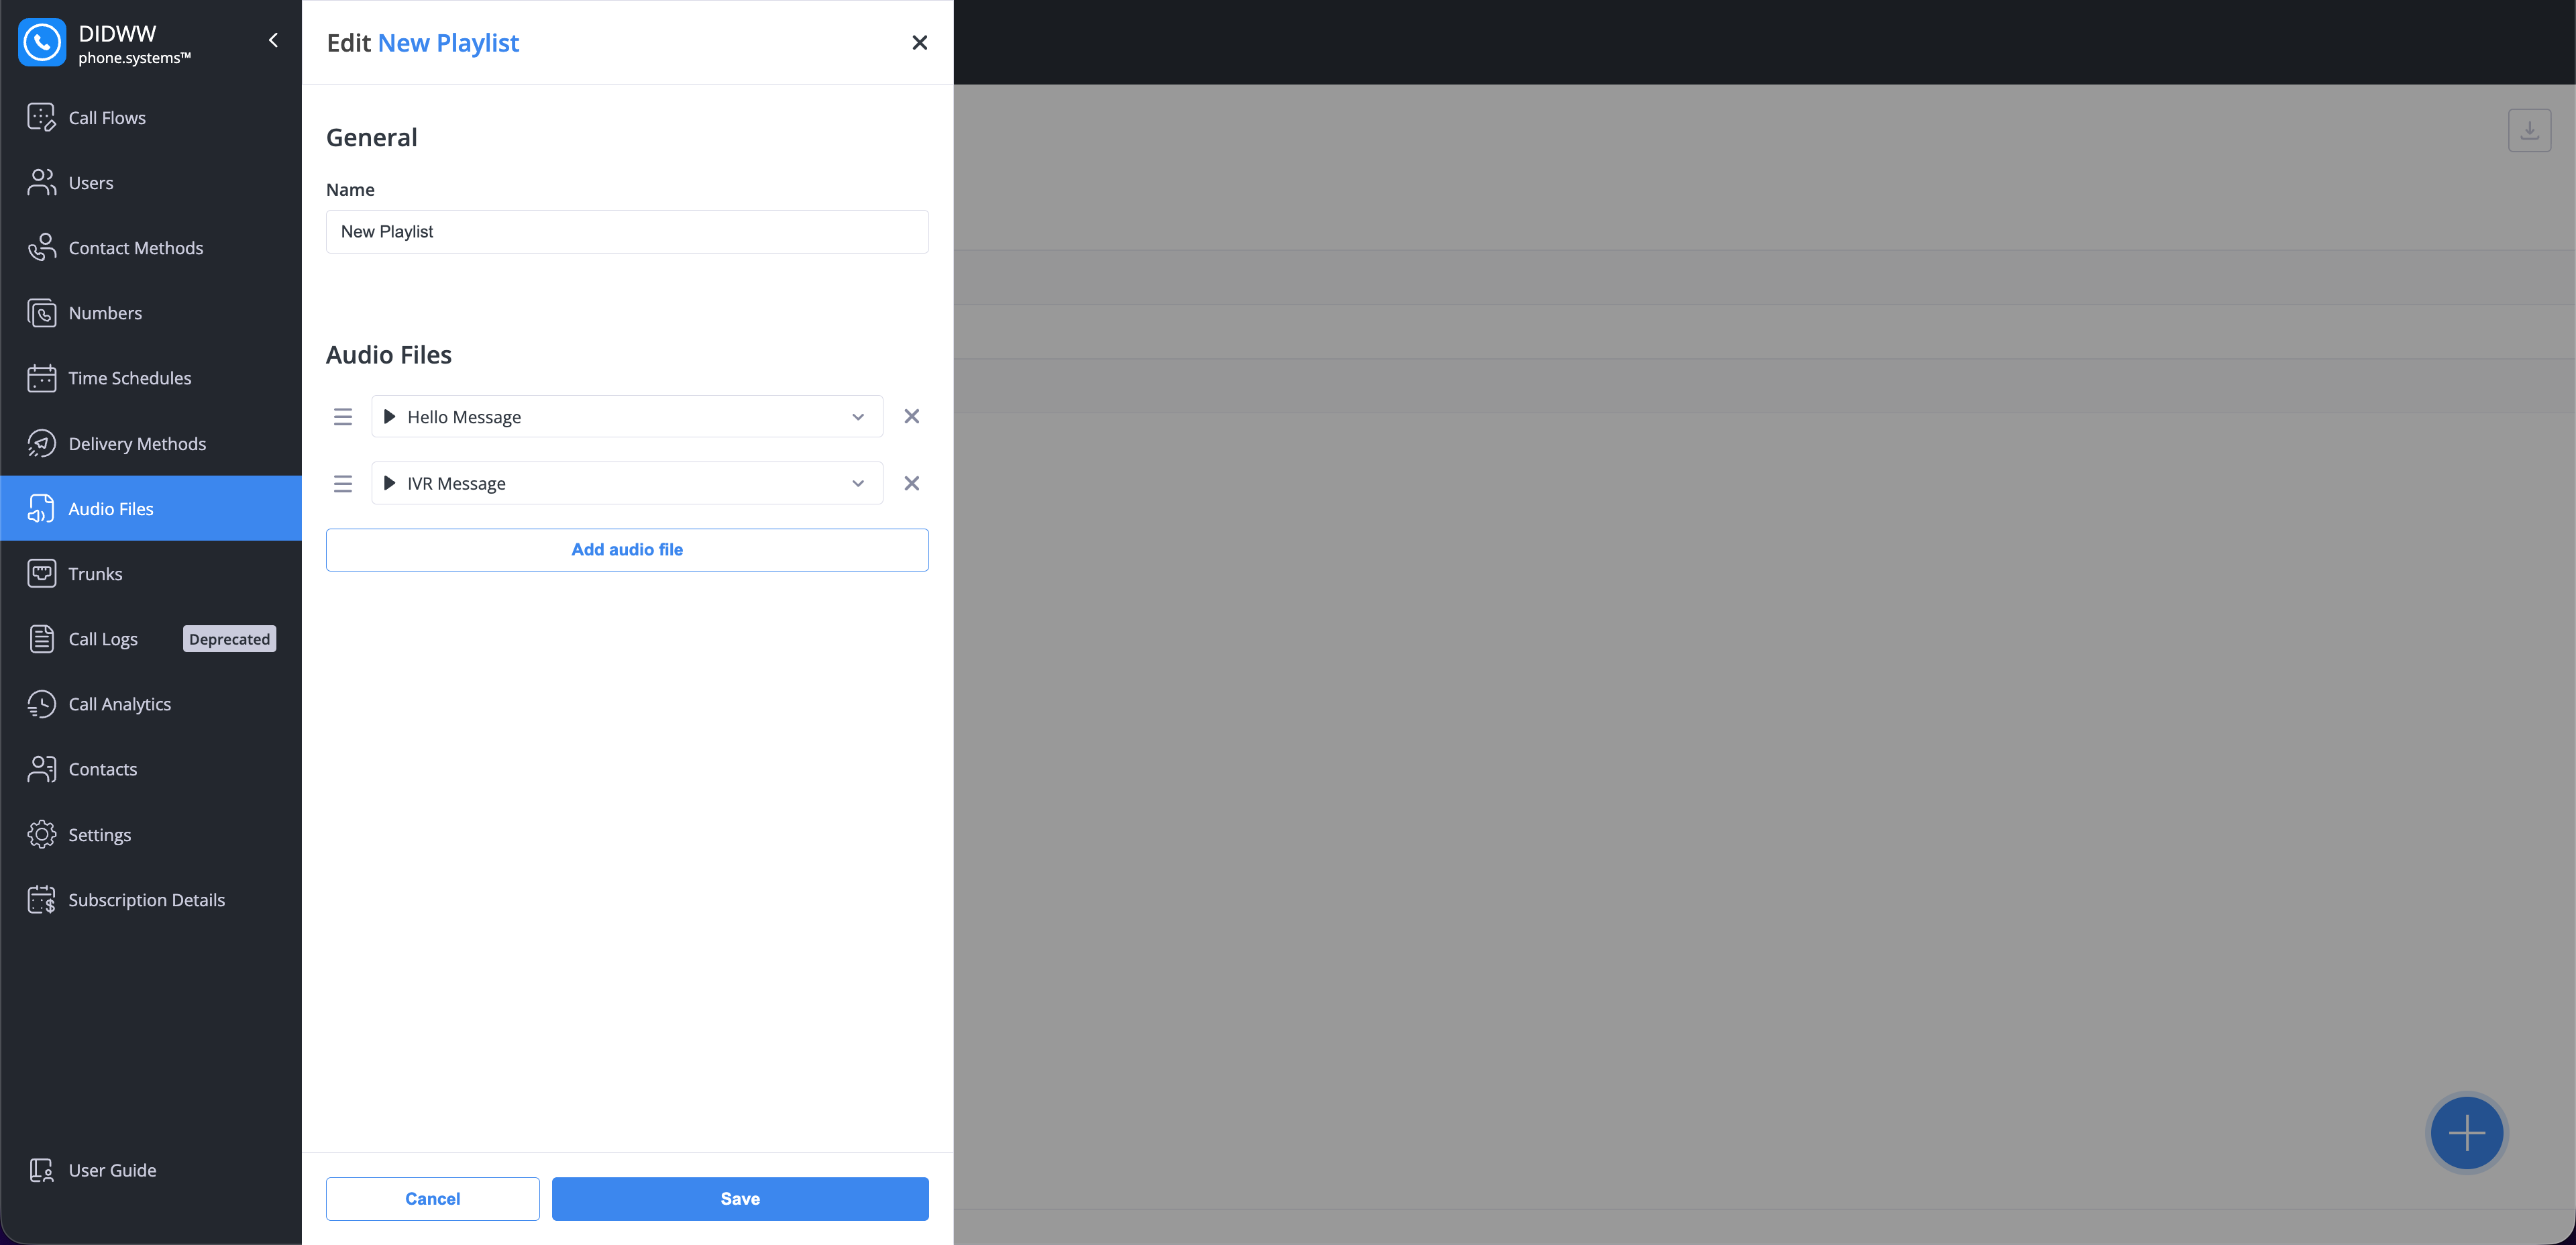
Fig. 6. Edit Playlist Window#
View Playlist Relations#
Each playlist may be linked to other configurations, such as Call Flows, Ring Groups, or Queues. Viewing relations helps ensure you don’t delete or modify a playlist that’s currently in use.
In the Playlists tab, click the Actions button next to a playlist.
Select Relations from the dropdown menu.
Fig. 7. Actions button in playlist menu#
The Relations window displays all related items grouped by category. Click the
 icon next to a relation to navigate directly to its configuration page.
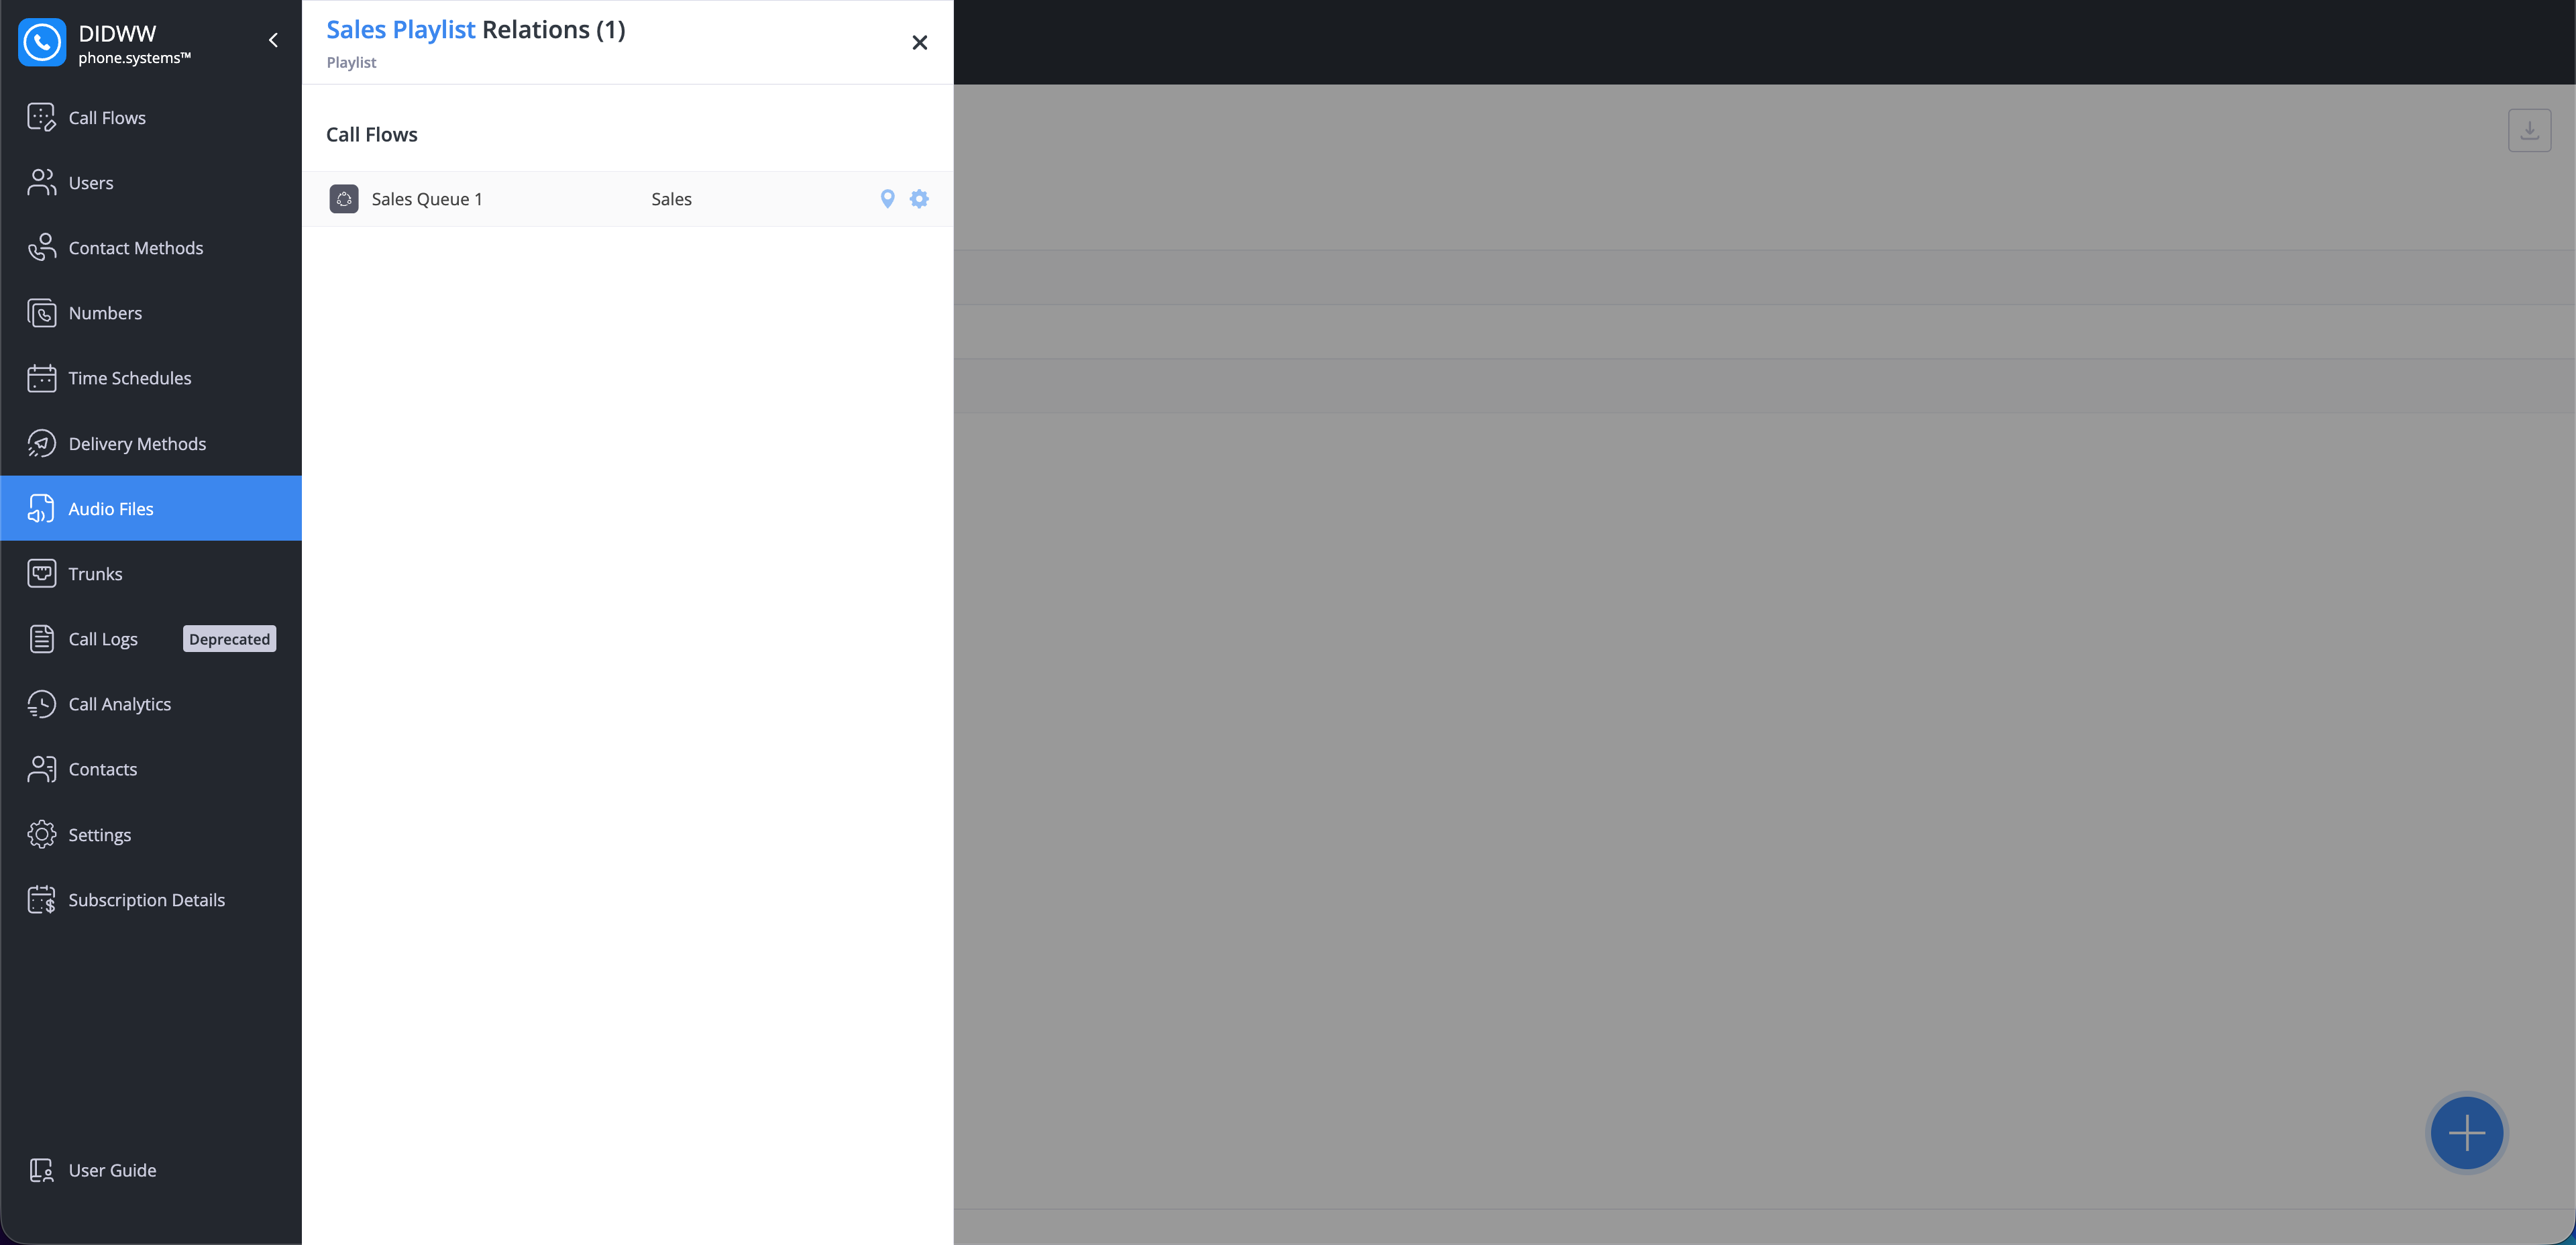
Fig. 8. Playlist relations overview#
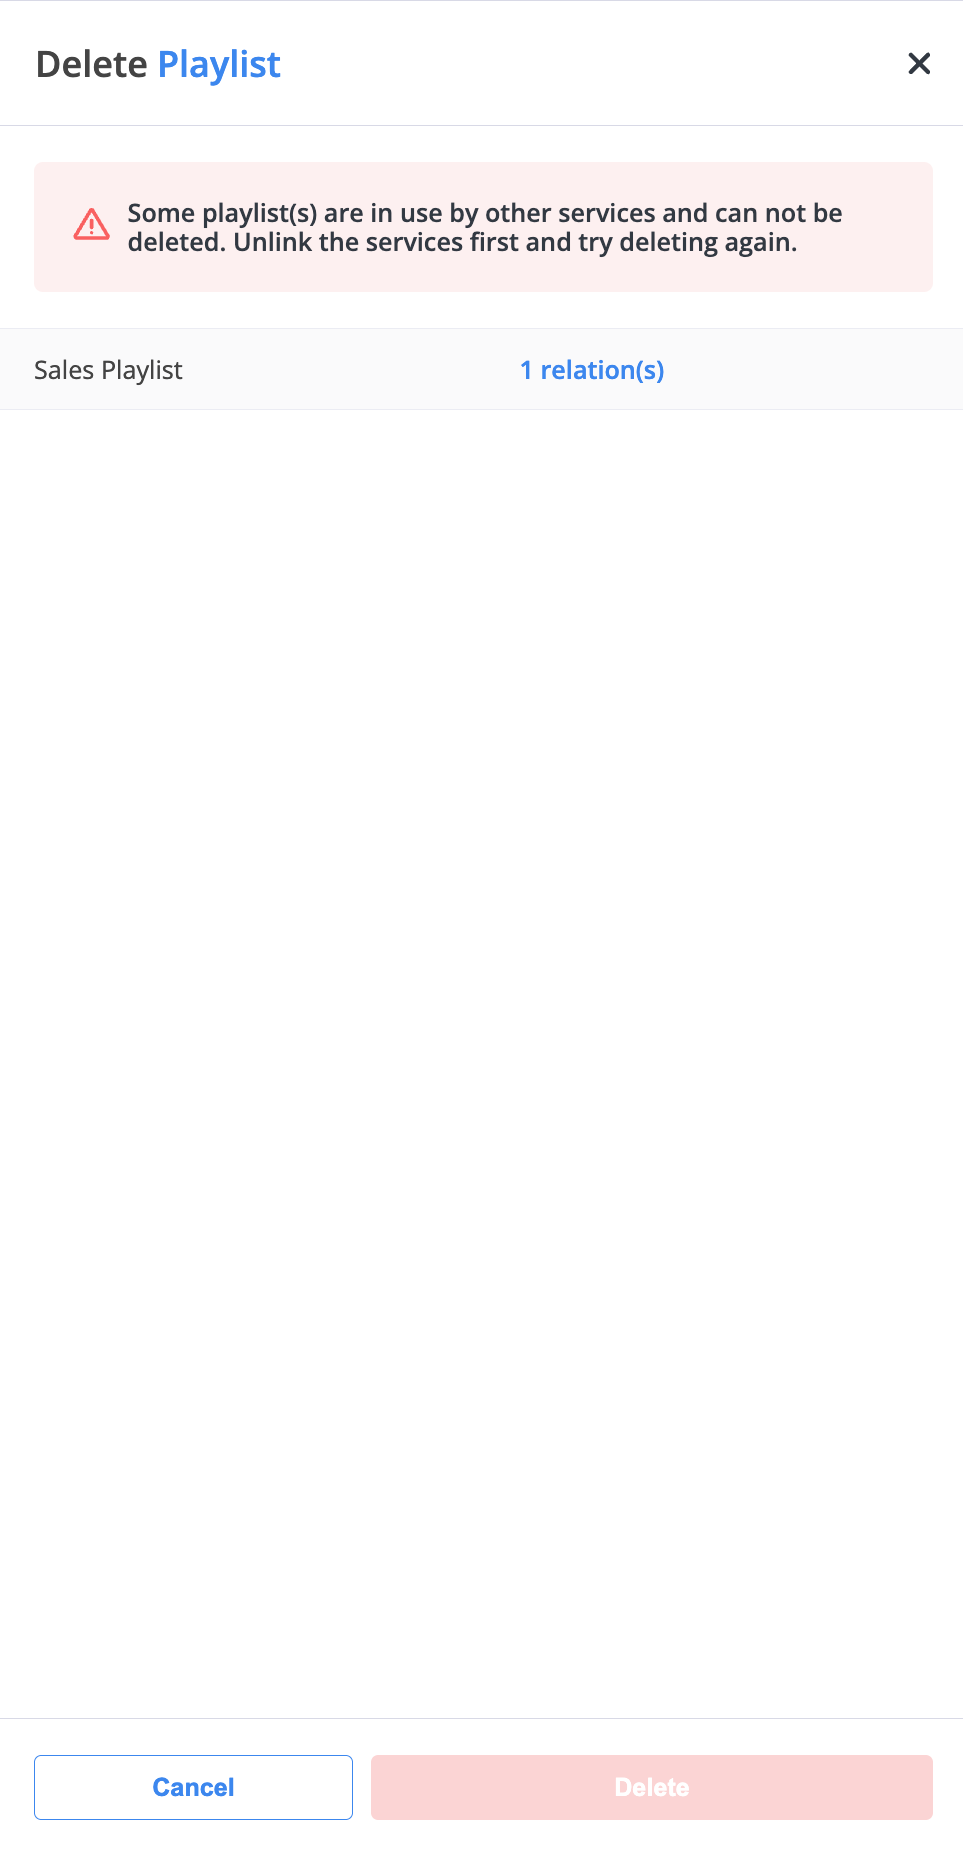
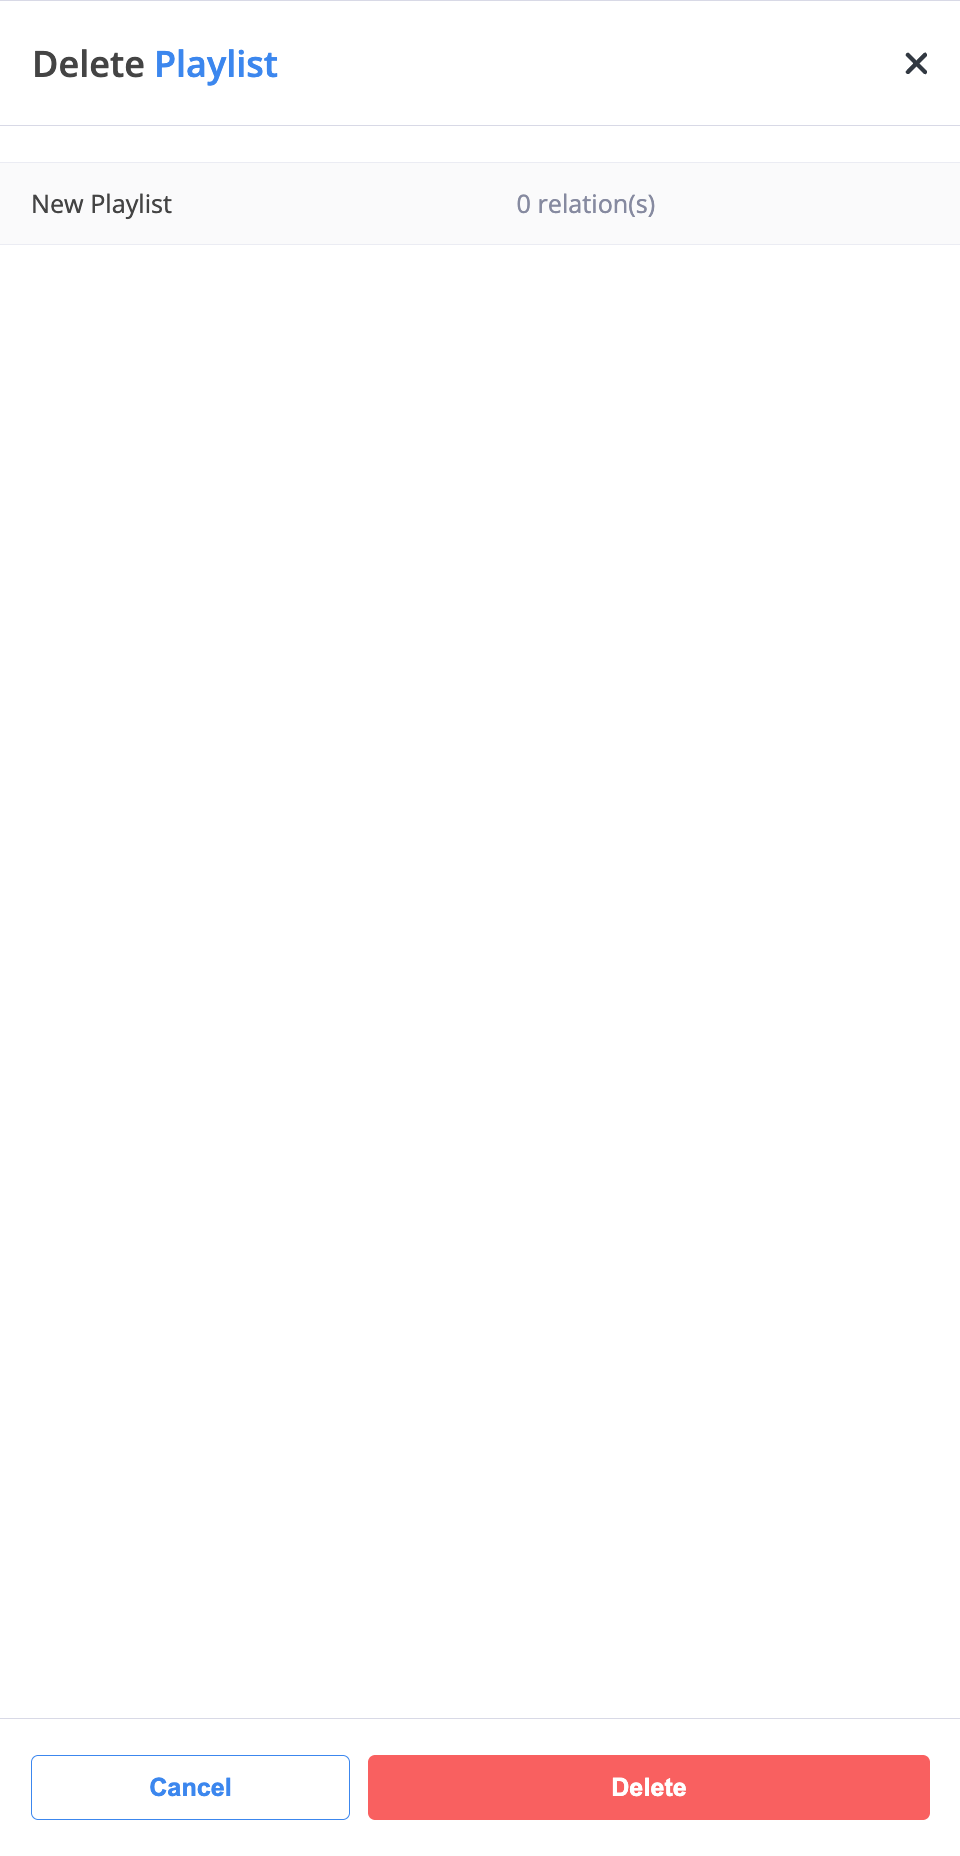
Delete Playlist#
To delete a playlist, click the Actions button and select Delete.
Fig. 9. Actions button in playlist menu#
If the selected playlist has any relations, the Delete Playlist dialog displays a warning banner and a relations counter. Click the counter to view the complete list of related items.
Before deletion can proceed, all related services must be unlinked. Once the relations are removed, click Delete to permanently delete the playlist.