Third-Party Softphone Configuration

This guide explains how to configure phone.systems™ to work with a third-party softphone or SIP device. It covers creating the necessary user and SIP account within phone.systems™, retrieving the credentials, and provides an example of setting up the popular Zoiper5 softphone.


Configure User and SIP Account in phone.systems™

First, you need to set up a user and a dedicated SIP account within the phone.systems™ management interface. This process generates the credentials required by your third-party softphone.

Step 1: Create a New User

Follow these steps to add a new user profile:

  1. Navigate to the Users menu in the phone.systems™ interface.

  2. Click the +-symbol symbol and select Create new.

Create A New User button location.

Fig. 1. Create a New User.

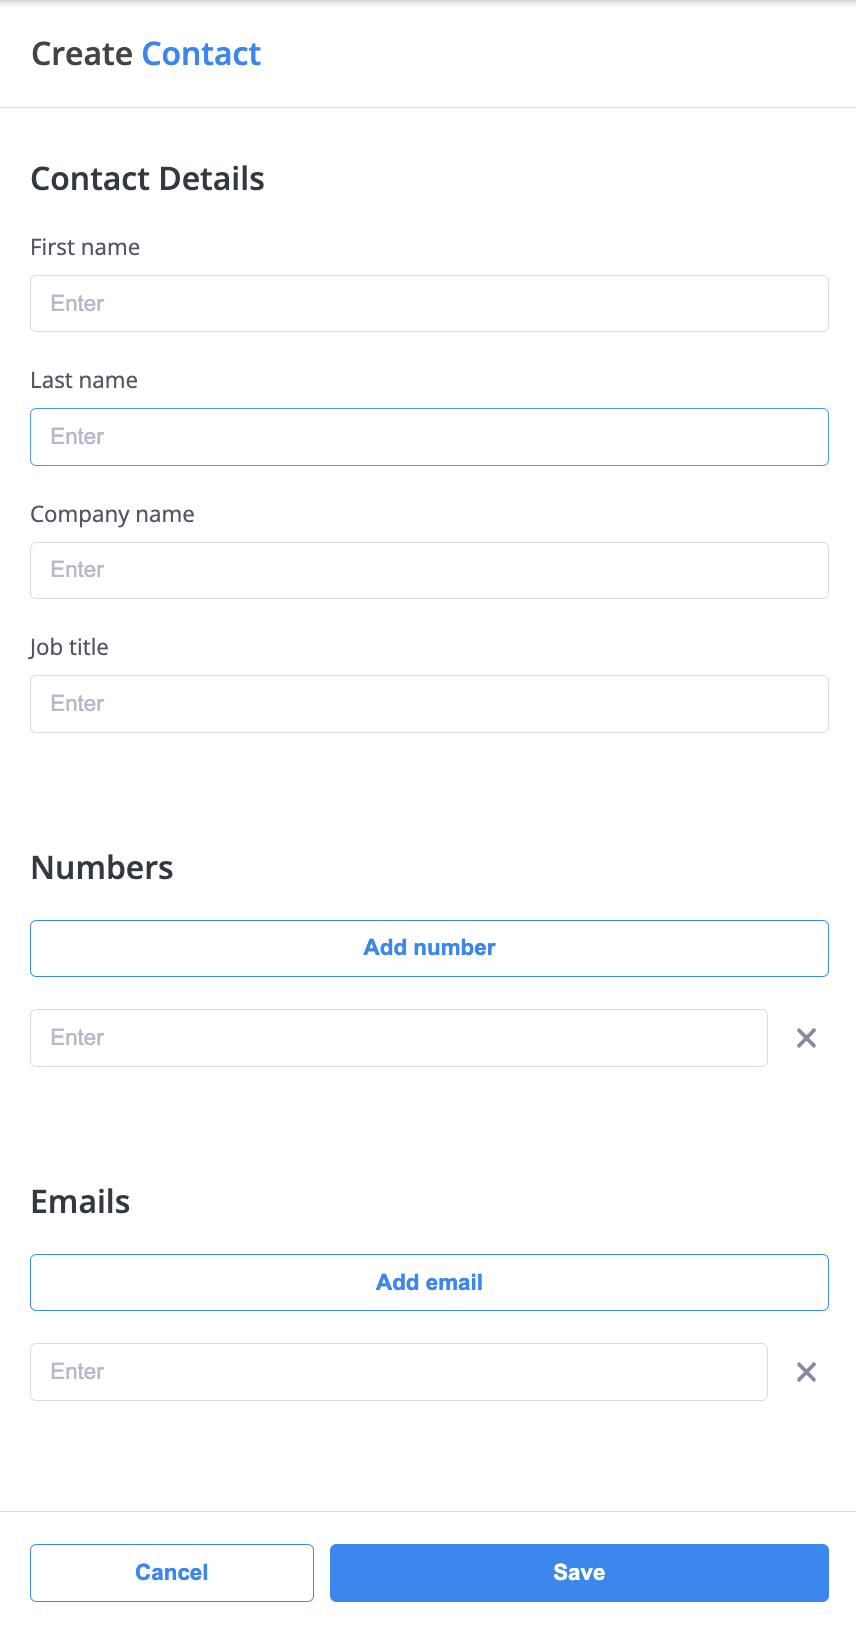
  1. Fill in the user details (First Name, Last Name, Email, etc.).

  2. Click Save to create the new user.

Tip

When configuring a user solely for a third-party softphone, you can skip the application line configuration step that might appear (the toggle shown in the application setup guide is not needed here).

Create User Form fields.

Fig. 2. Create User Form.

Step 2: Create and Configure a SIP Account

Next, create the SIP account that will be linked to this user:

  1. Navigate to the Contact Methods menu.

  2. Select the SIP Accounts tab.

  3. Click the +-symbol symbol to create a new SIP account.

Create SIP Account button location.

Fig. 3. Create SIP Account Button.

  1. In the General section of the new SIP account form, select the User you just created from the dropdown menu.

  2. In the Inbound calls section, select the DID Number that should route calls to this SIP account.

  3. In the Outbound calls section:
    • Check the Enable external outbound calls box.

    • Choose the desired Caller ID(s) from the dropdown.

  4. Click Save to create the SIP account.

Create SIP Account.

Fig. 4. SIP Account Configuration.

Step 3: Retrieve SIP Credentials

Now, retrieve the credentials needed for your softphone:

  1. In the SIP Accounts list (Contact Methods > SIP Accounts), locate the SIP account you just created.

  2. Click the ...action_button actions button next to it and select Edit.

  3. In the General section of the configuration window, find the SIP credentials: Username, Password, and Domain.

  4. Copy these details securely. You will need them to configure your third-party softphone.

Location of SIP Account Credentials (Username, Password, Domain).

Fig. 5. SIP Account Credentials.


Configure Your Third-Party Softphone

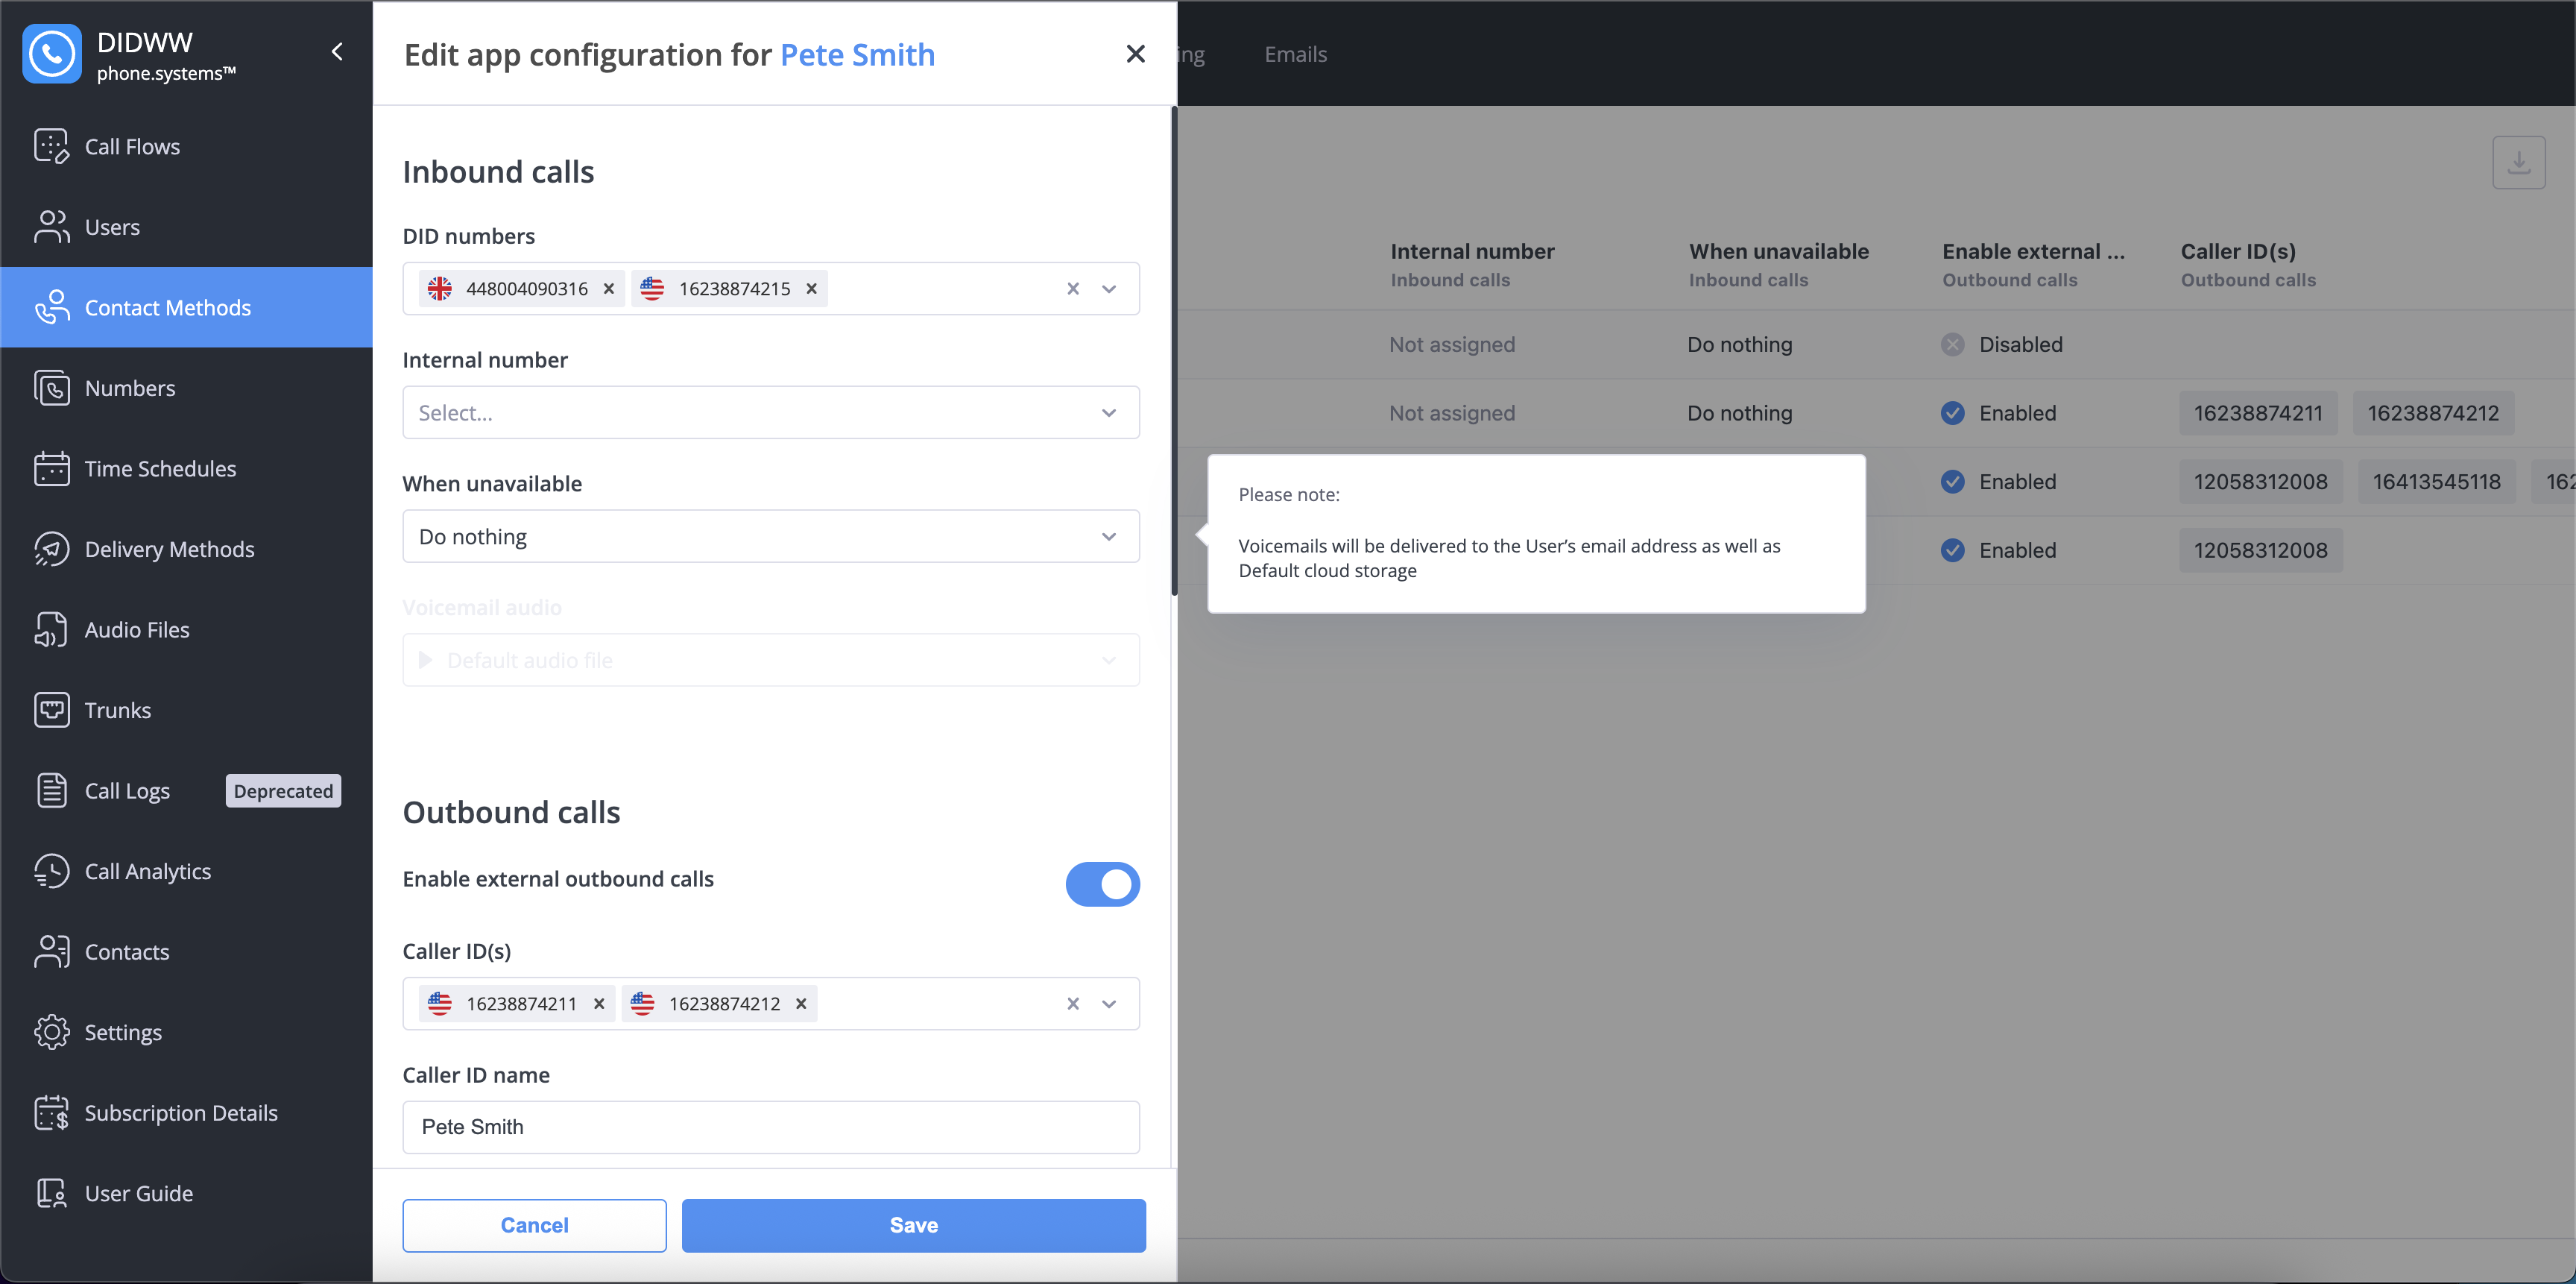
With the SIP credentials obtained, you can now configure your chosen third-party softphone, VoIP device, or system. These applications use the SIP protocol to register with phone.systems™ and handle calls.

Note

  • Incoming Calls: Your softphone must successfully register using the provided SIP credentials to receive incoming calls.

  • Outbound Calls: SIP registration is recommended for outbound calls but not strictly mandatory. Outbound calls can sometimes be made via a direct SIP INVITE if authentication is handled correctly within the request, but registration is the standard method.

Zoiper5

The following steps illustrate how to configure the Zoiper5 softphone using the credentials retrieved earlier. Steps for other softphones will be similar.

  1. Download Zoiper5 from the Zoiper website and install it on your device.

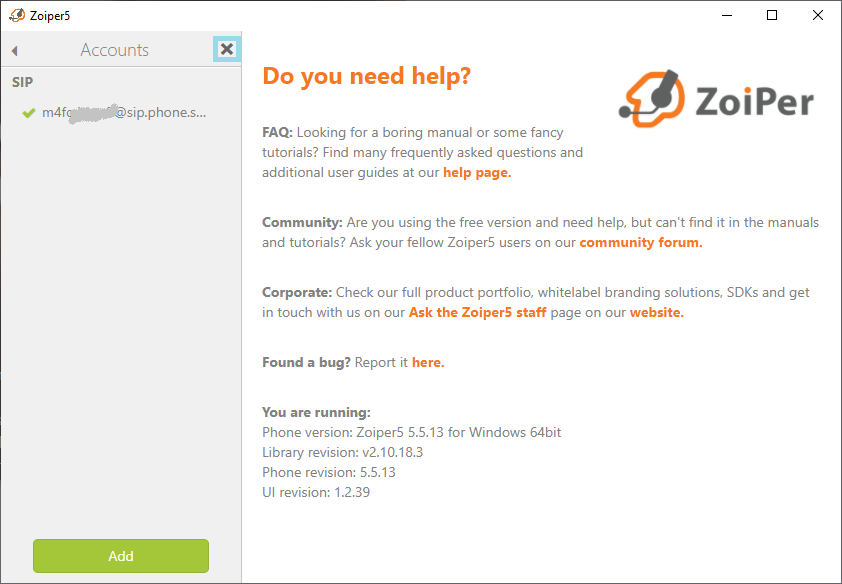
  2. Launch Zoiper5. You will likely be prompted to log in or create an account. Enter the Username and Password you copied from phone.systems™. Click Login to proceed.

Zoiper5 login screen with Username and Password fields.

Fig. 6. Zoiper5 Login - entering SIP credentials.

  1. Enter the Domain sip.phone.systems and click Next to proceed.

Zoiper5 domain entry screen.

Fig. 7. Zoiper5 - Enter Domain.

  1. Zoiper might present optional settings like Authentication Username or Outbound Proxy. These are typically not required for phone.systems™. Click Skip to proceed without entering them.

Zoiper5 optional Authentication and Outbound Proxy screen.

Fig. 8. Zoiper5 - Skip Optional Settings.

  1. Zoiper will test connection methods (e.g., SIP UDP, SIP TCP). Ensure at least one compatible method is found (phone.systems™ supports both SIP UDP and SIP TCP). Click Next.

    Note

    While phone.systems™ also supports secure TLS transport protocol, it is not enabled by default and is only available in the paid Zoiper5 PRO version.

Zoiper5 transport protocol verification screen.

Fig. 9. Zoiper5 - Verify Transport Protocol.

  1. Verify the SIP account connection. Press X to close the window, complete the setup, and return to the main screen.

    Note

    A successful connection is typically indicated by a green status icon next to the account name or URI (e.g., username@sip.phone.systems).

Zoiper5 accounts list showing a successfully configured account.

Fig. 10. Zoiper5 - Account successfully configured.

  1. From the main Zoiper5 screen, locate and tap the dialer icon or equivalent to open the dial pad. Your SIP account is now registered, and you should be able to make and receive calls.

Zoiper5 main screen with dialer icon highlighted.

Fig. 12. Zoiper5 - Open Dial Pad.