Interlinks#
The Interlink feature allows users to link up their instance of phone.systems™ with other phone.systems™ accounts, unifying remote offices into an integrated phone system. An important benefit of this feature is the ability of users to directly dial Internal Numbers on linked PBX accounts.
Interlinks are accessed by navigating to the Settings and clicking on the Interlinks tab.
Fig. 1. Interlinks#
In order to connect to another phone.systems™ account, you may either:
Generate an authorization code, and send that code to the administrator of the remote phone.systems™ account. Once the authorization code has been entered on the remote account, then the two PBX systems will be interconnected.
Enter the authorization code received from the administrator of the remote phone.systems™ account with which you wish to connect.
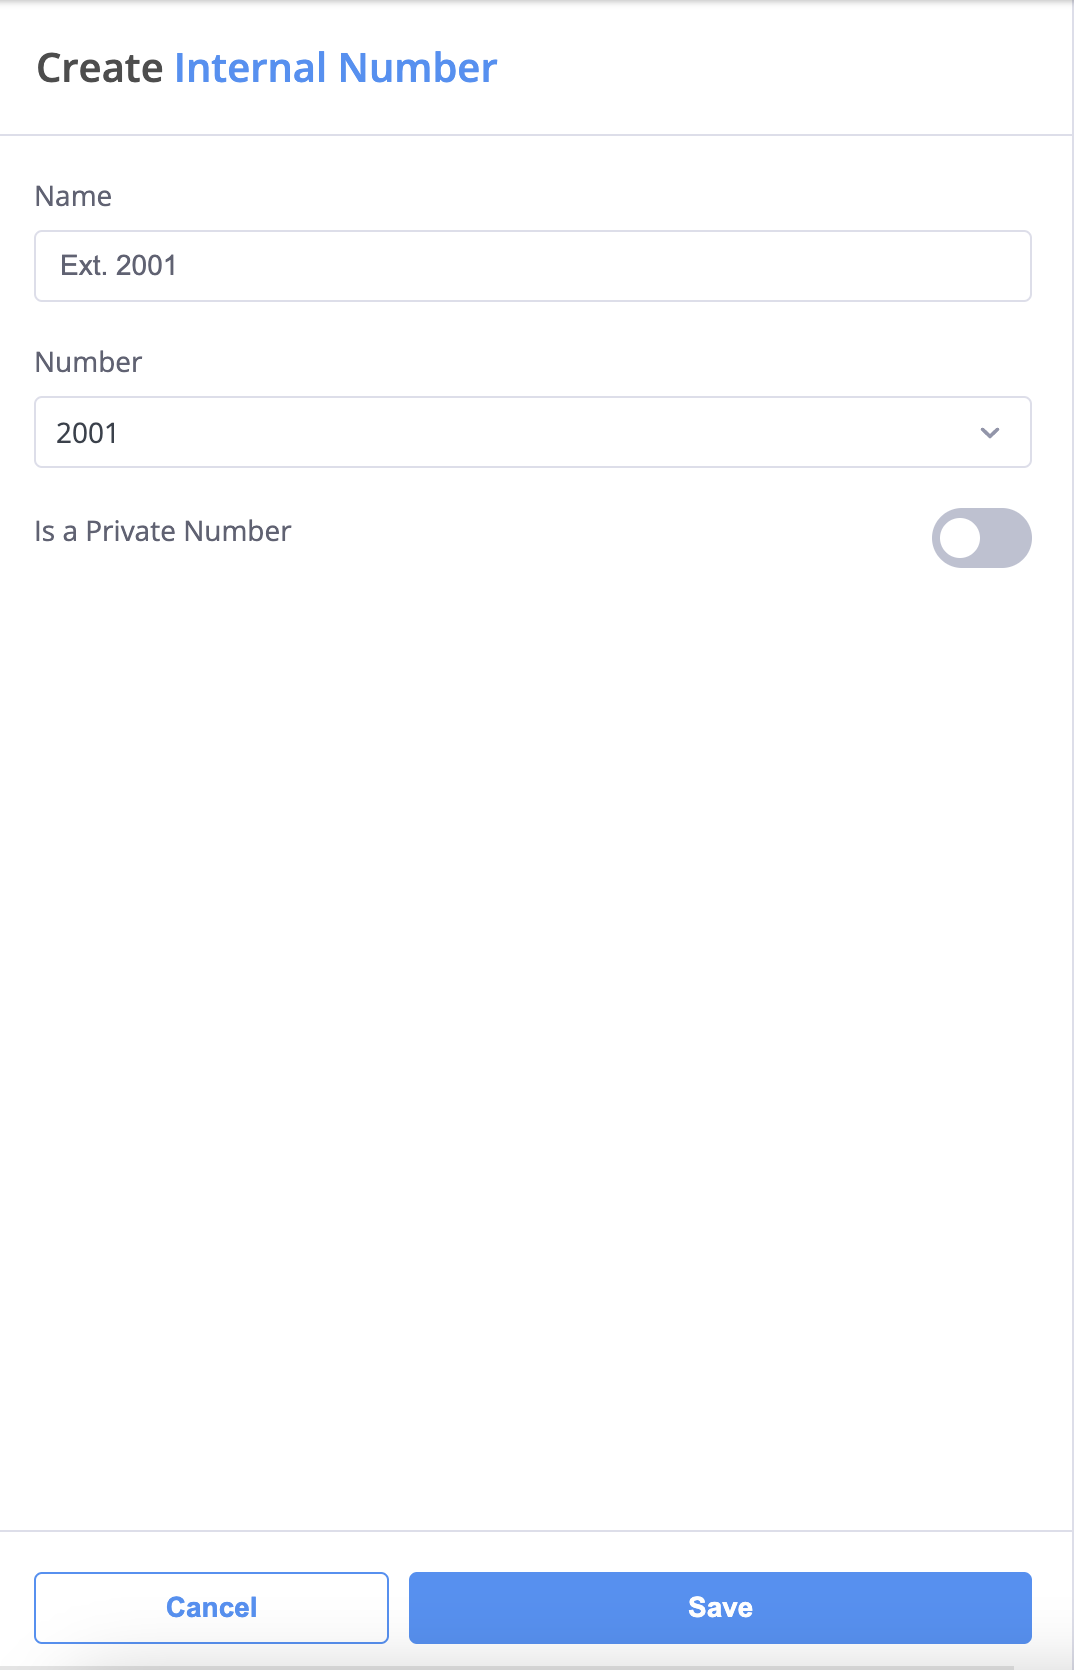
Fig. 2. Interlink Options#
If a key has been generated locally, but interconnection has not yet been established (i.e., the key has not yet been entered by the administrator of the remote phone.systems™ account) , this status will be indicated by a grey circle icon next to the Interlink name. Once interconnection is established, the status will be automatically updated with a green circle icon.
If an Interlink is deleted by any of the two participants, then this listing will be automatically removed from the connection details for both phone.systems™ accounts.
Each authorization key may be used to link only one user account.
Note that only the two phone.systems™ accounts that have been interconnected using a single authorization key will have access to each other’s shared internal resources. In the above example of a phone.systems™ account belonging to “Mike Brown“, the interconnections are between:
“Mike Brown“ and “John Smith”
“Mike Brown“ and “Tim Andrews”
There is no interconnection between the phone.systems™ accounts of “John Smith” and “Tim Andrews”.
Generate a Key#
Click on the Generate new key button. In the next window, enter a name for this connection. Click on the Save button and an authorization key will be generated.
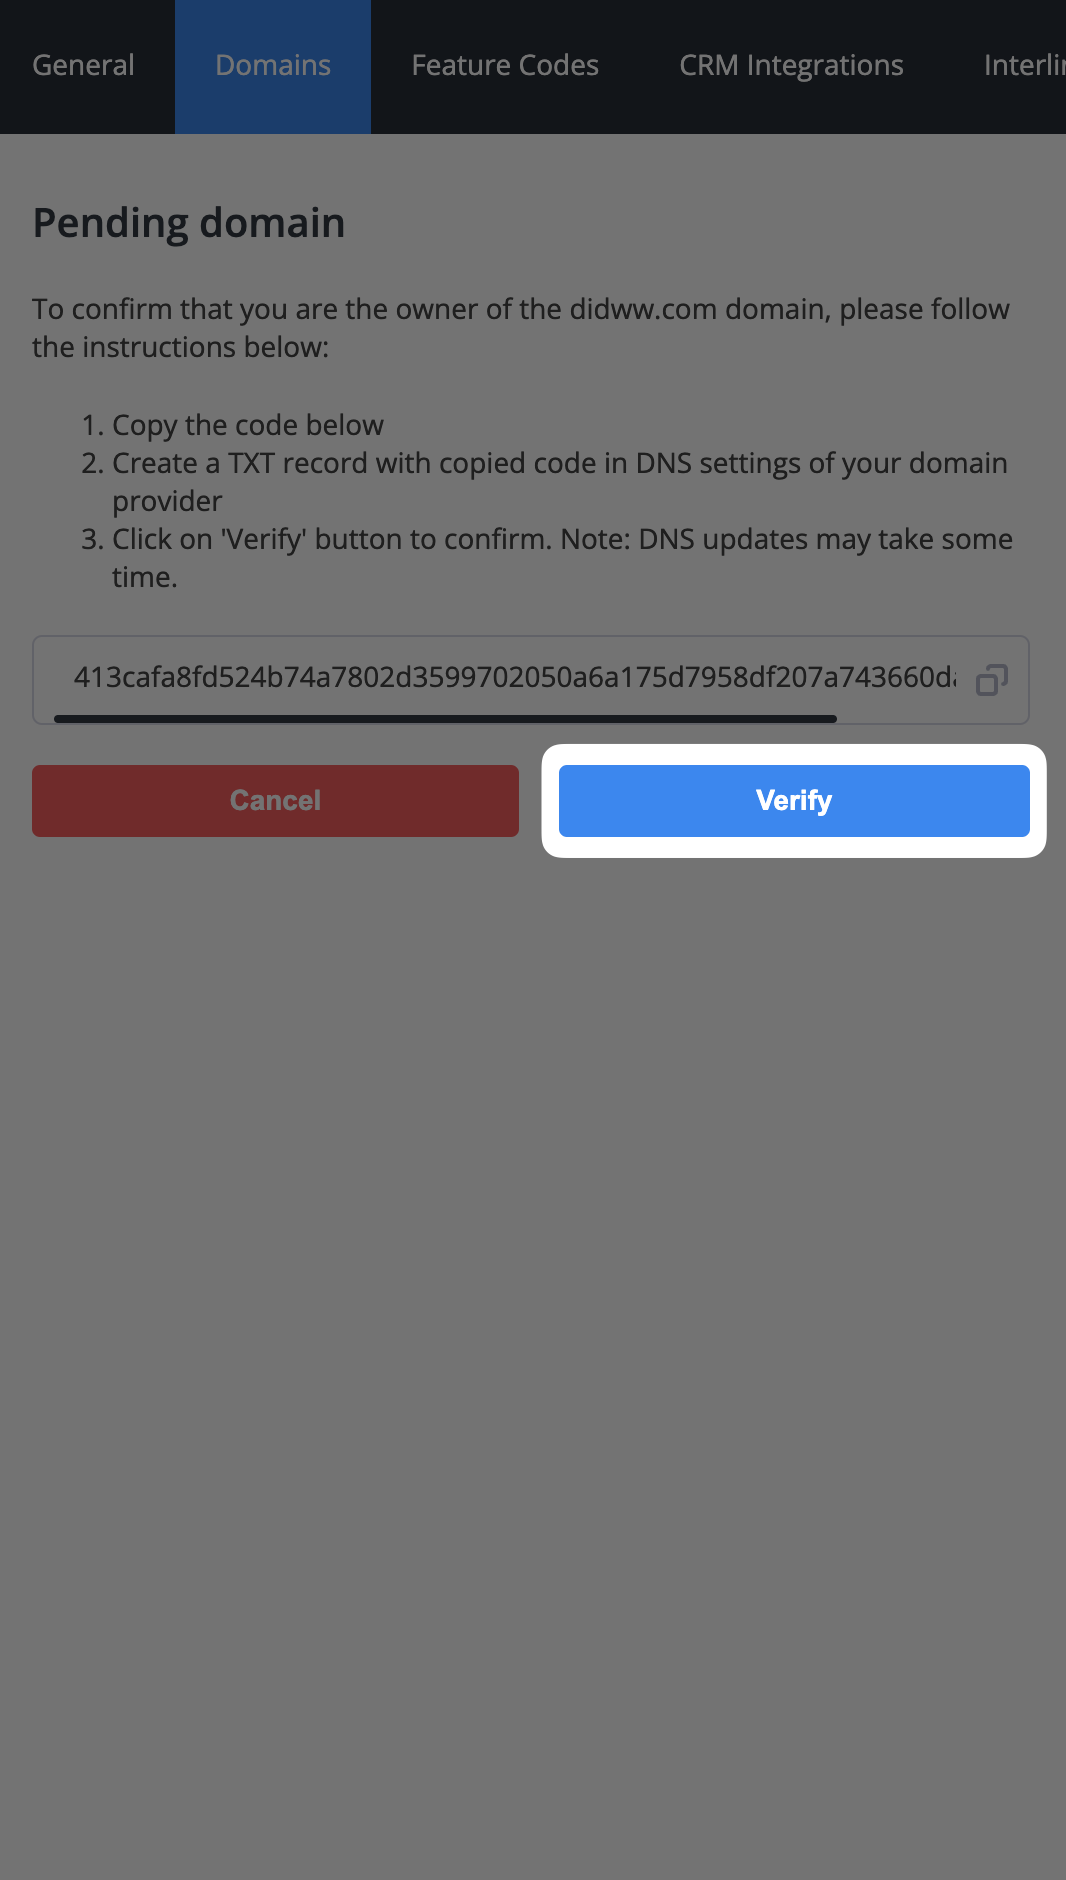
Fig. 1. Generating A Key#
Copy this key by clicking on Copy icon and provide it to the administrator of the remote phone.systems™ account. Clicking on the X symbol will delete a selected interconnection.

Fig. 2. Interlink Connection#
Link to another phone.systems™ account#
Click on the Link to another account button. In the next window, enter a name to identify this interconnection, as well as the authorization key that has been provided by the administrator of the remote phone.systems™ account. Click on the Save button to display the Interlinks summary window.
Fig. 1. Creating An Interlink Connection#
A green circle status icon should appear next to the newly added Interlink, indicating an active connection.

Fig. 2. Successful Interlink Connection#
Clicking on the interlink (shown in fig. 2) will allow you to rename the selected interconnection.
To delete the interlink, click on the X symbol on the right side of the interlink.
Reaching resources via Internal Numbers#
When an interconnection has been established between two phone.systems™ instances, both accounts are able to share resources which have been added and linked via Internal Number objects on both accounts (for more information, refer to Internal Number configurations.
Note the following:
If both phone.systems™ accounts have the same Internal Number configured, then calling those numbers will reach the local Internal Number destination.
- In order to restrict access to selected Internal Number destinations, use the “Private” settings when configuring Internal Number objects:Privacy Disabled (default option) - The Internal Number is accessible to interlinked accounts.Privacy Enabled - The Internal Number is not available to interlinked accounts.

Fig. 1. Privacy Enabled Internal Number#