Use the Yeastar P-Series PBX System with DIDWW SIP Trunking to deliver inbound and outbound voice services over the public telephone network.
DIDWW SIP trunks integrate with Yeastar to bring calls from your DIDs into the PBX, apply Yeastar call control features, and route outbound calls through DIDWW termination.
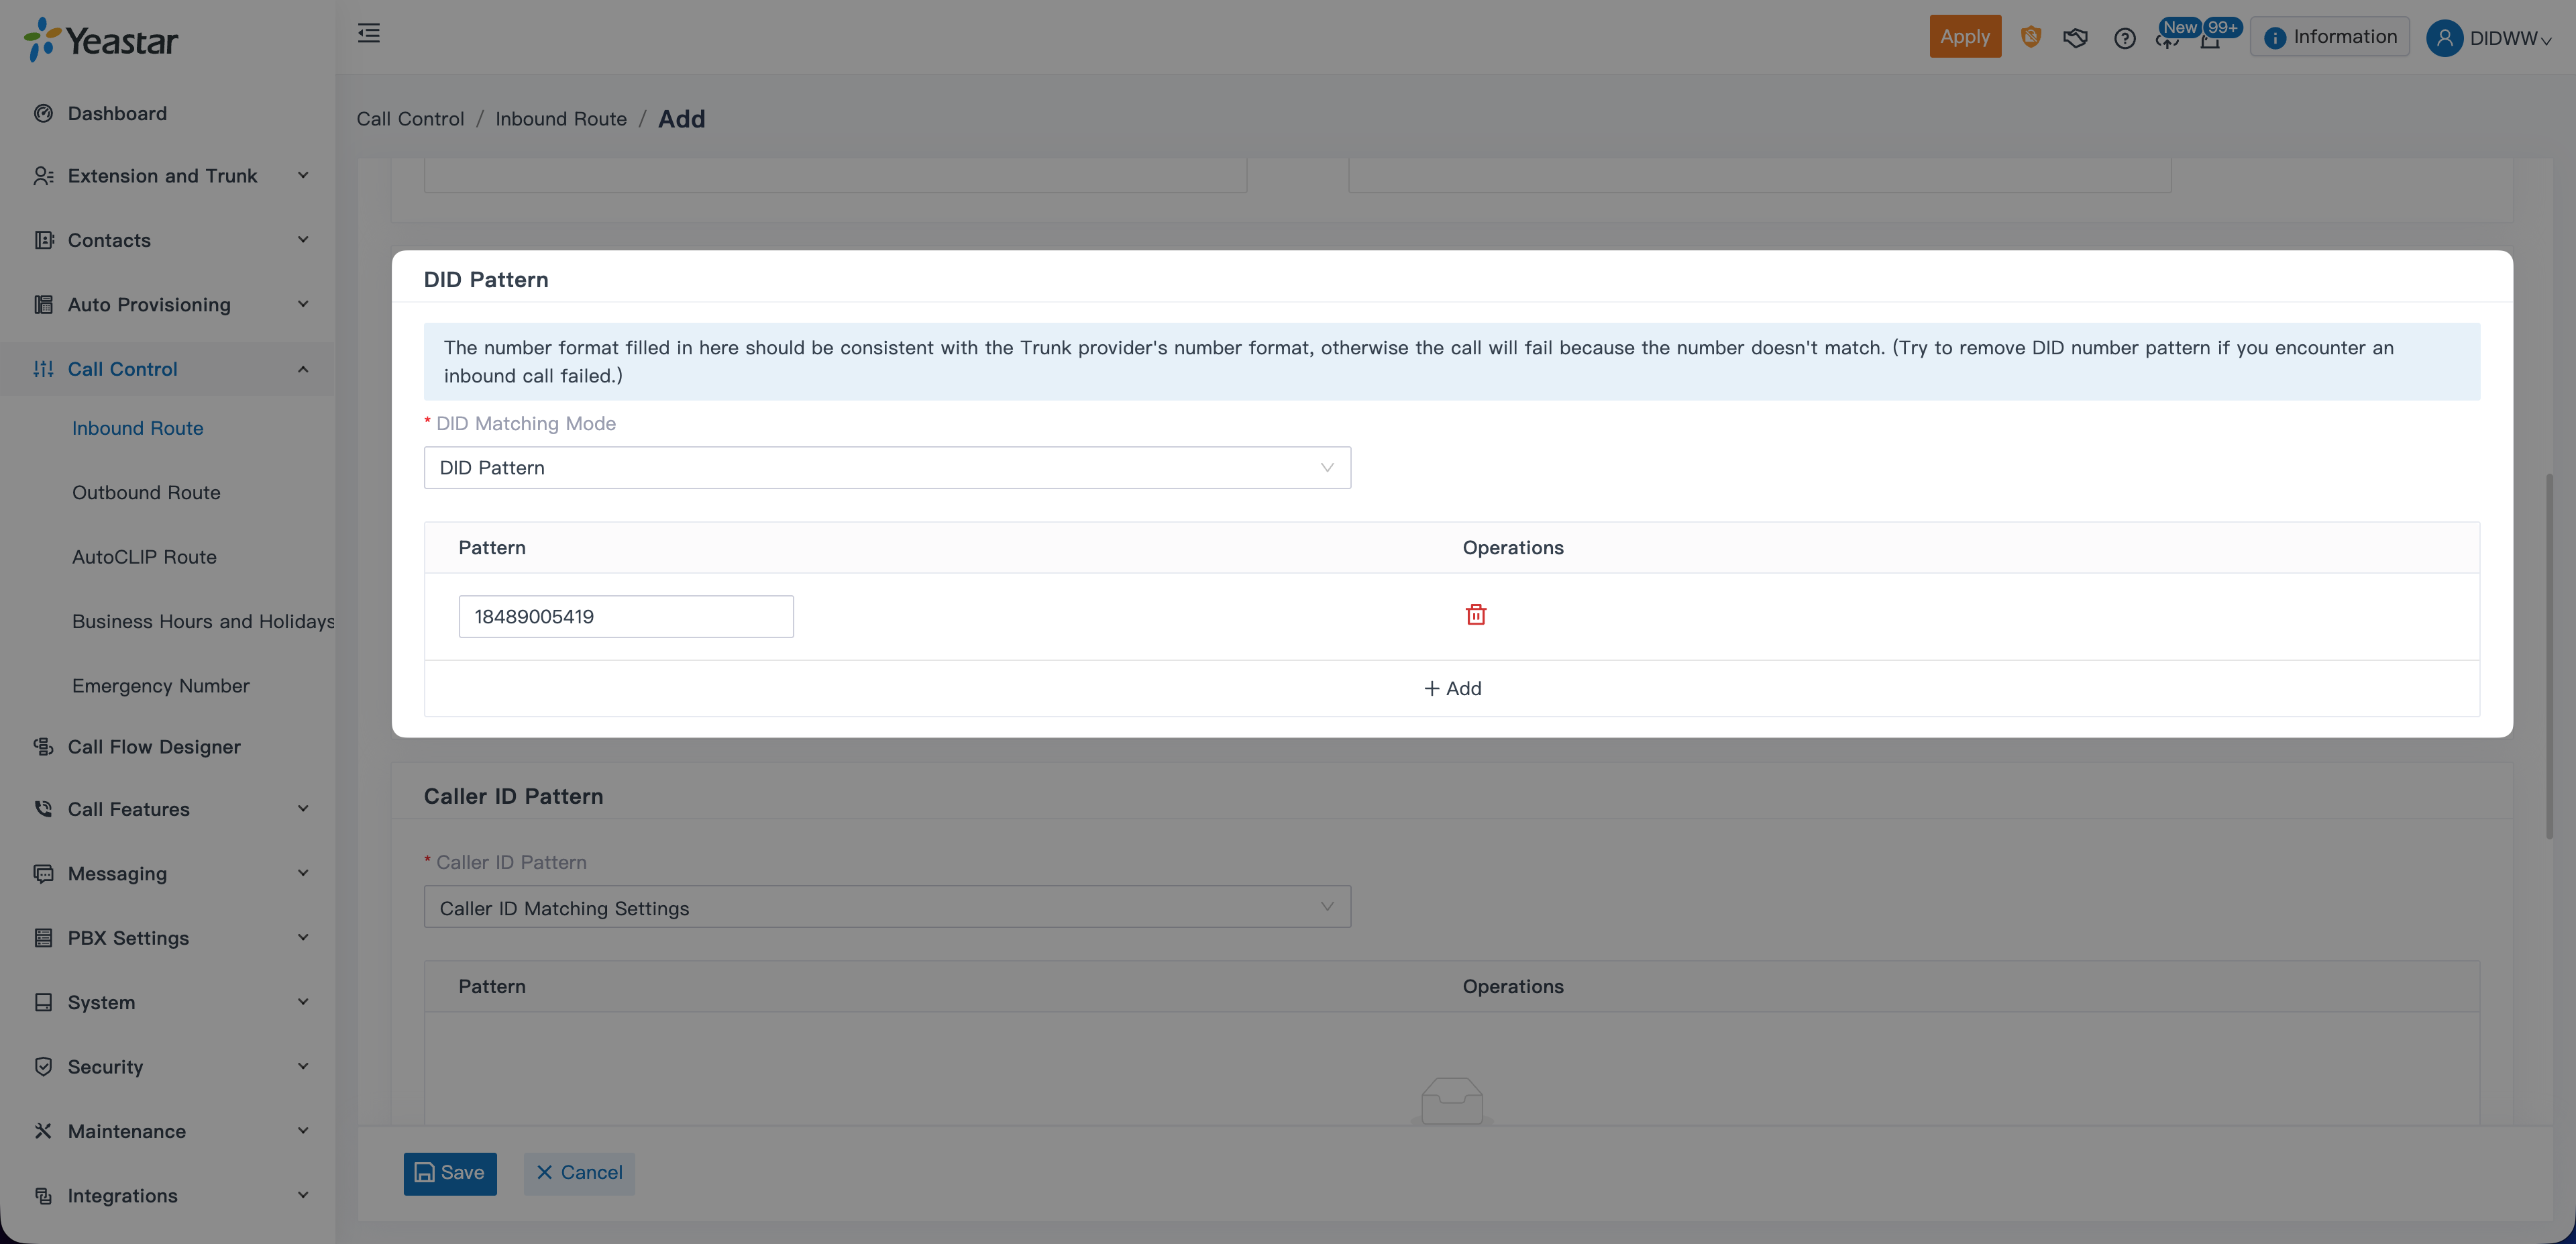
Bring inbound calls from your DIDWW DIDs into Yeastar P-Series PBX.
Route calls to extensions, ring groups, queues, or IVRs.
Apply Yeastar features such as time conditions, voicemail, and call recording.
Use DIDWW outbound SIP trunks for local and international calling.
Present DIDWW DIDs as caller ID based on Yeastar outbound rules.
Combine DIDWW connectivity with Yeastar dialing plans and user permissions.
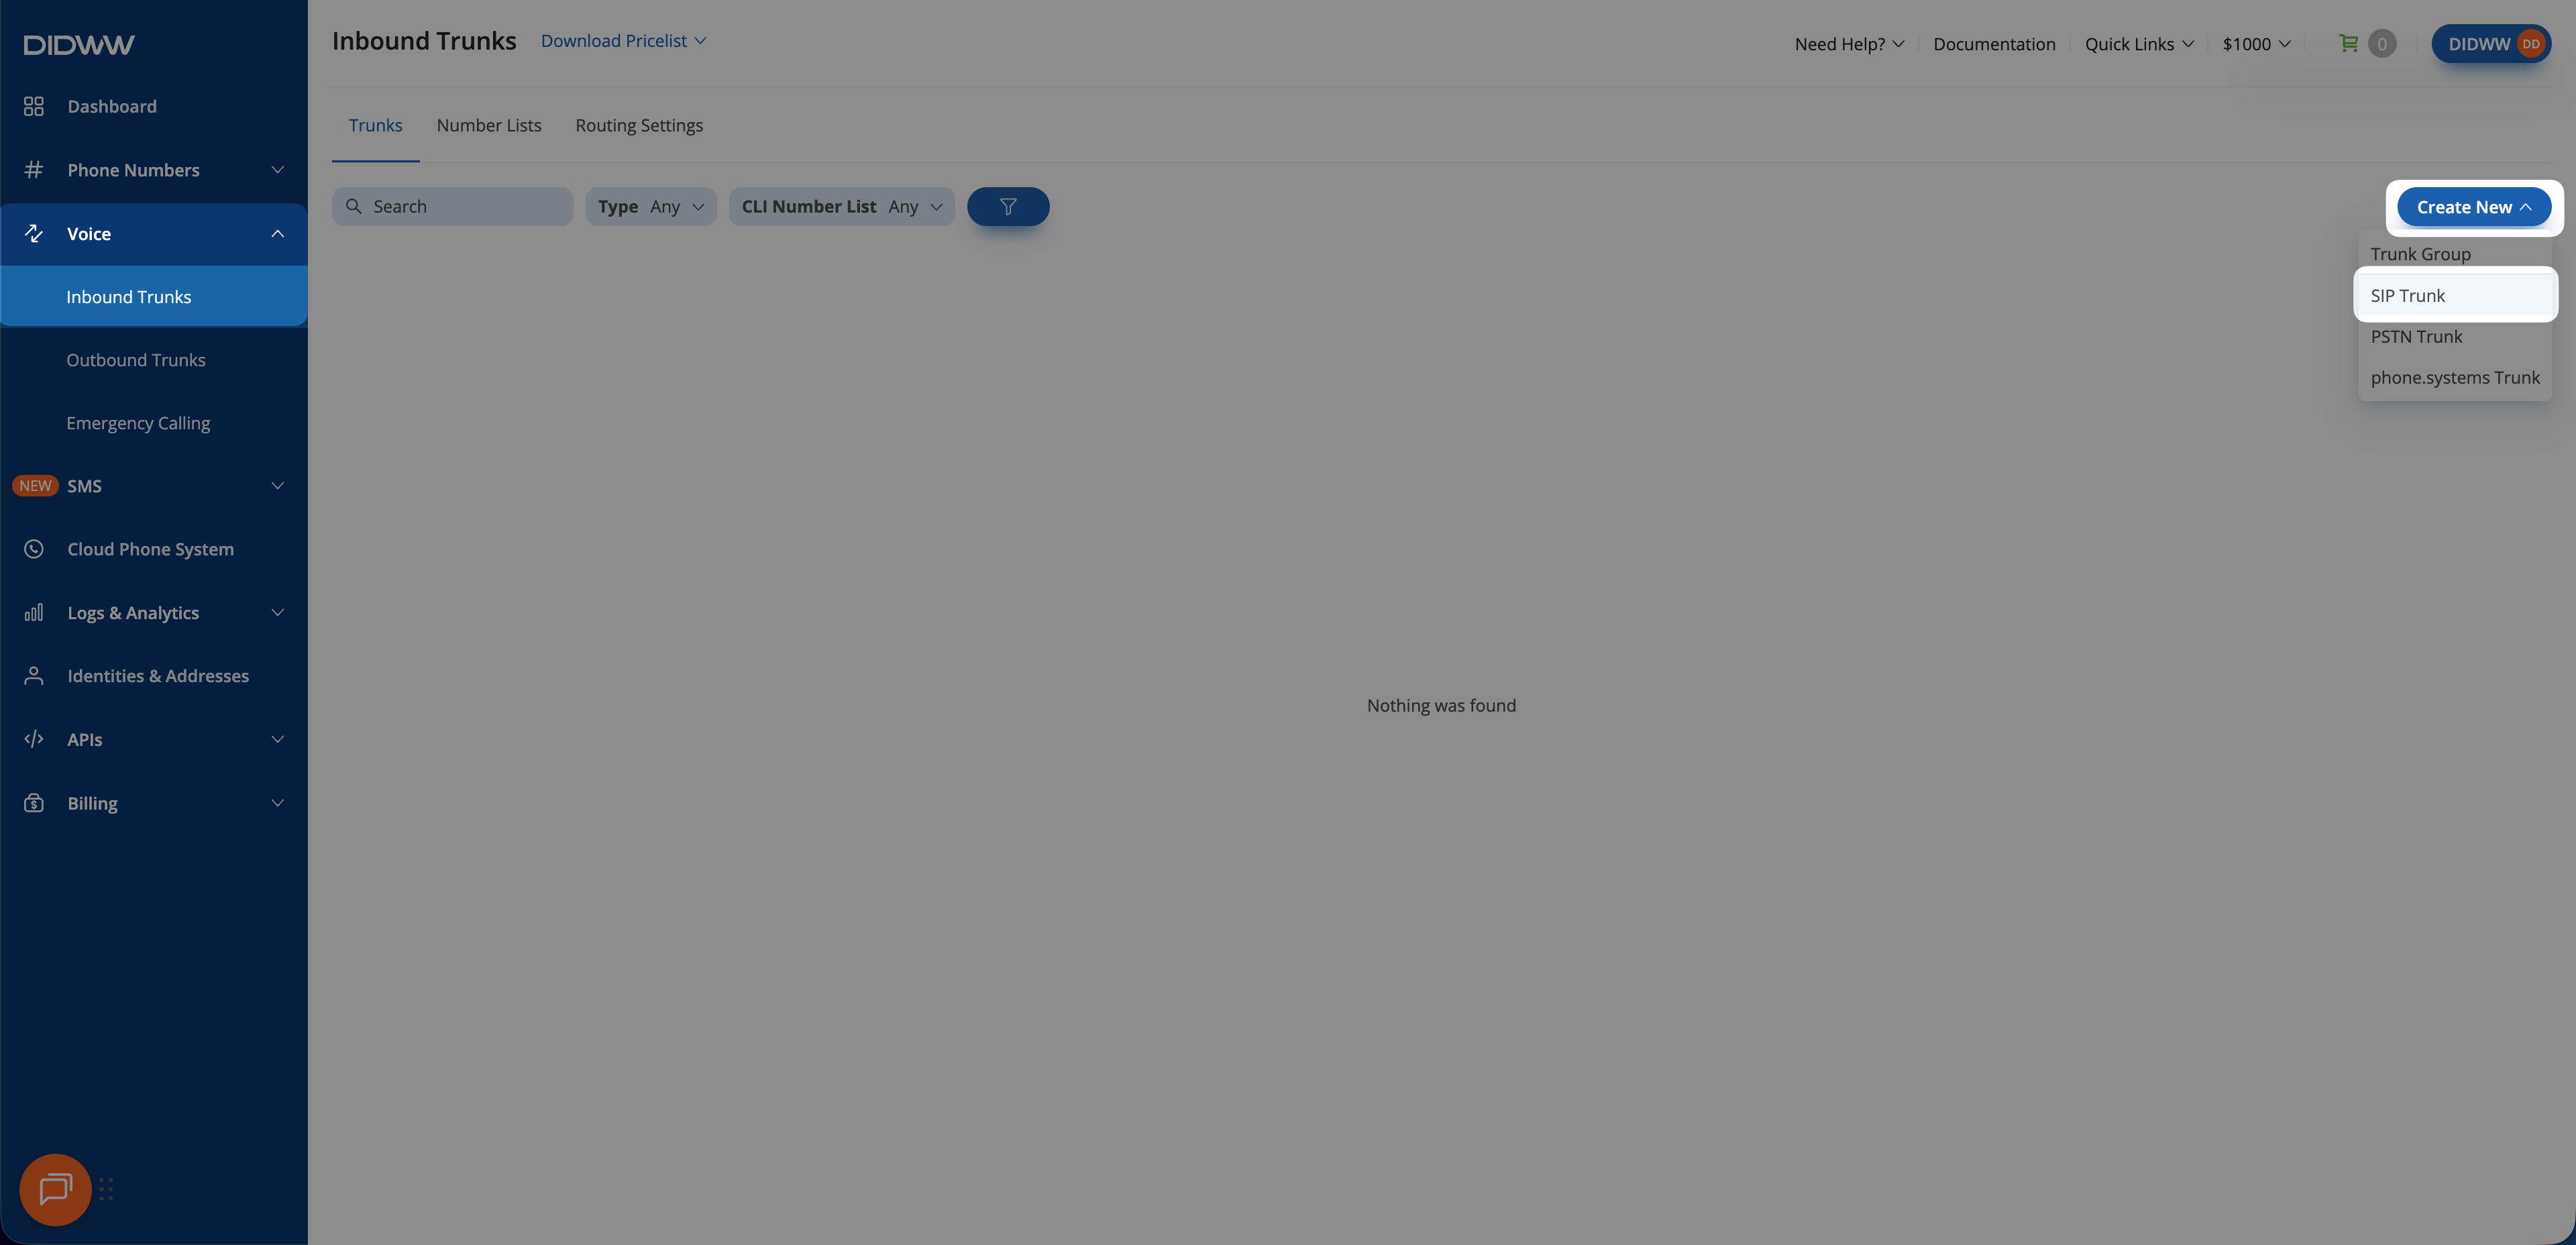
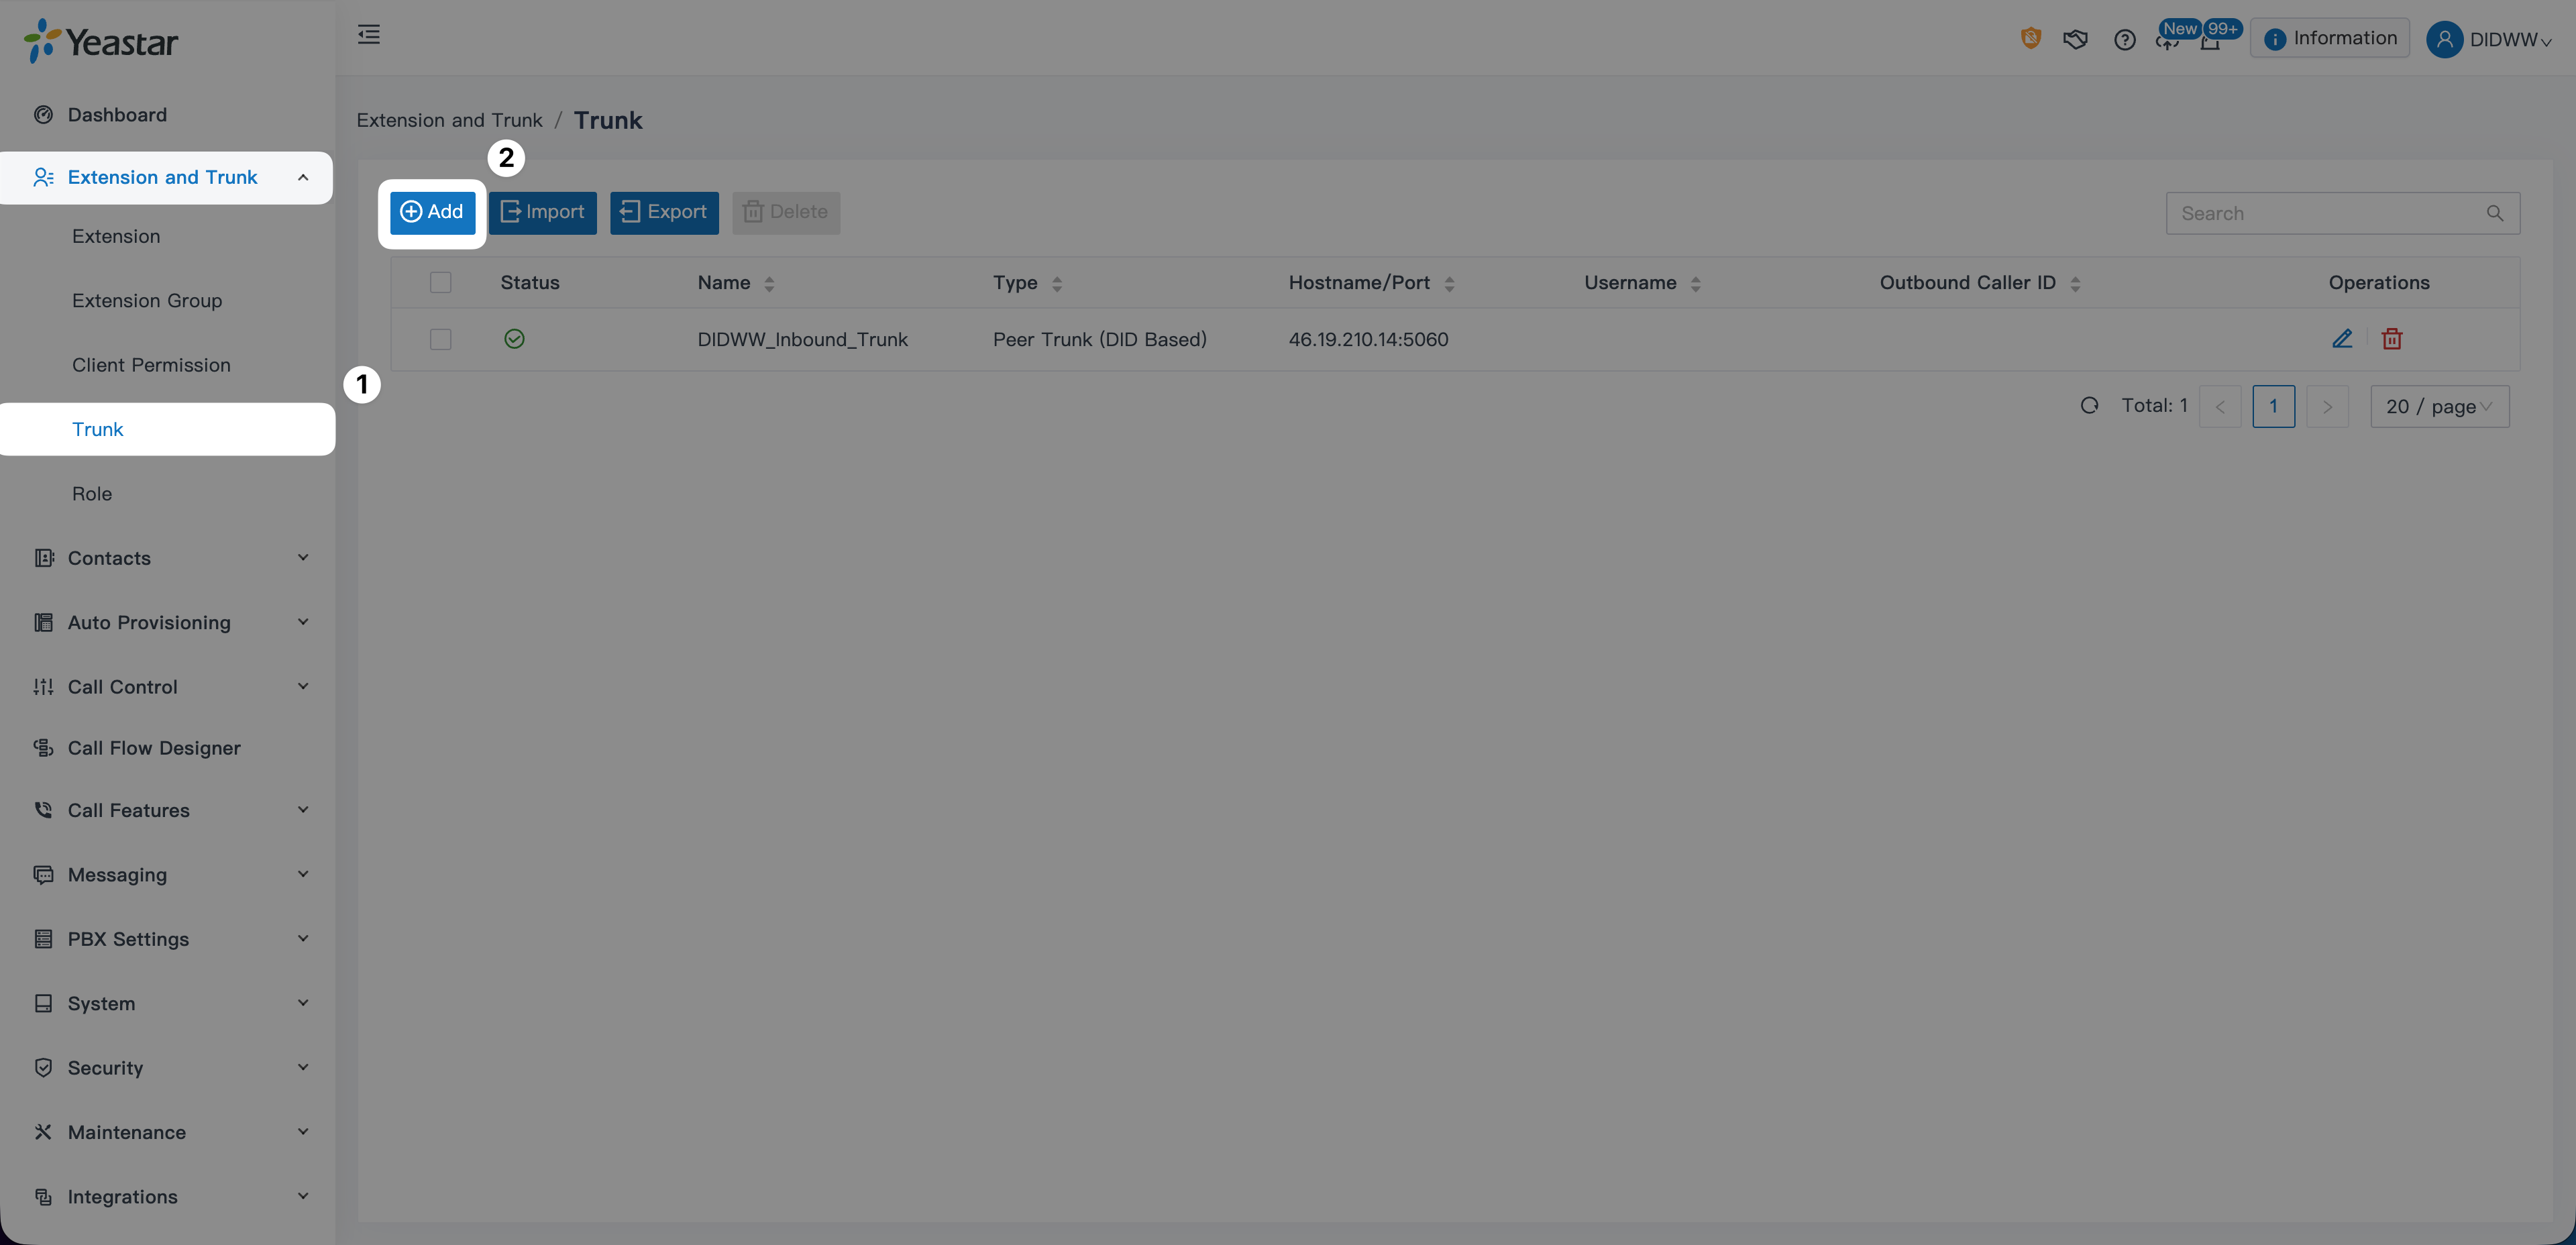
To begin connecting your DIDWW account with the Yeastar P-Series PBX, first create an Inbound SIP Trunk.
This trunk will establish the path for incoming calls from your DIDWW numbers to reach Yeastar.
Depending on whether you plan to use the self-hosted version of the PBX or the cloud-based version of the PBX, the configuration will differ slightly.
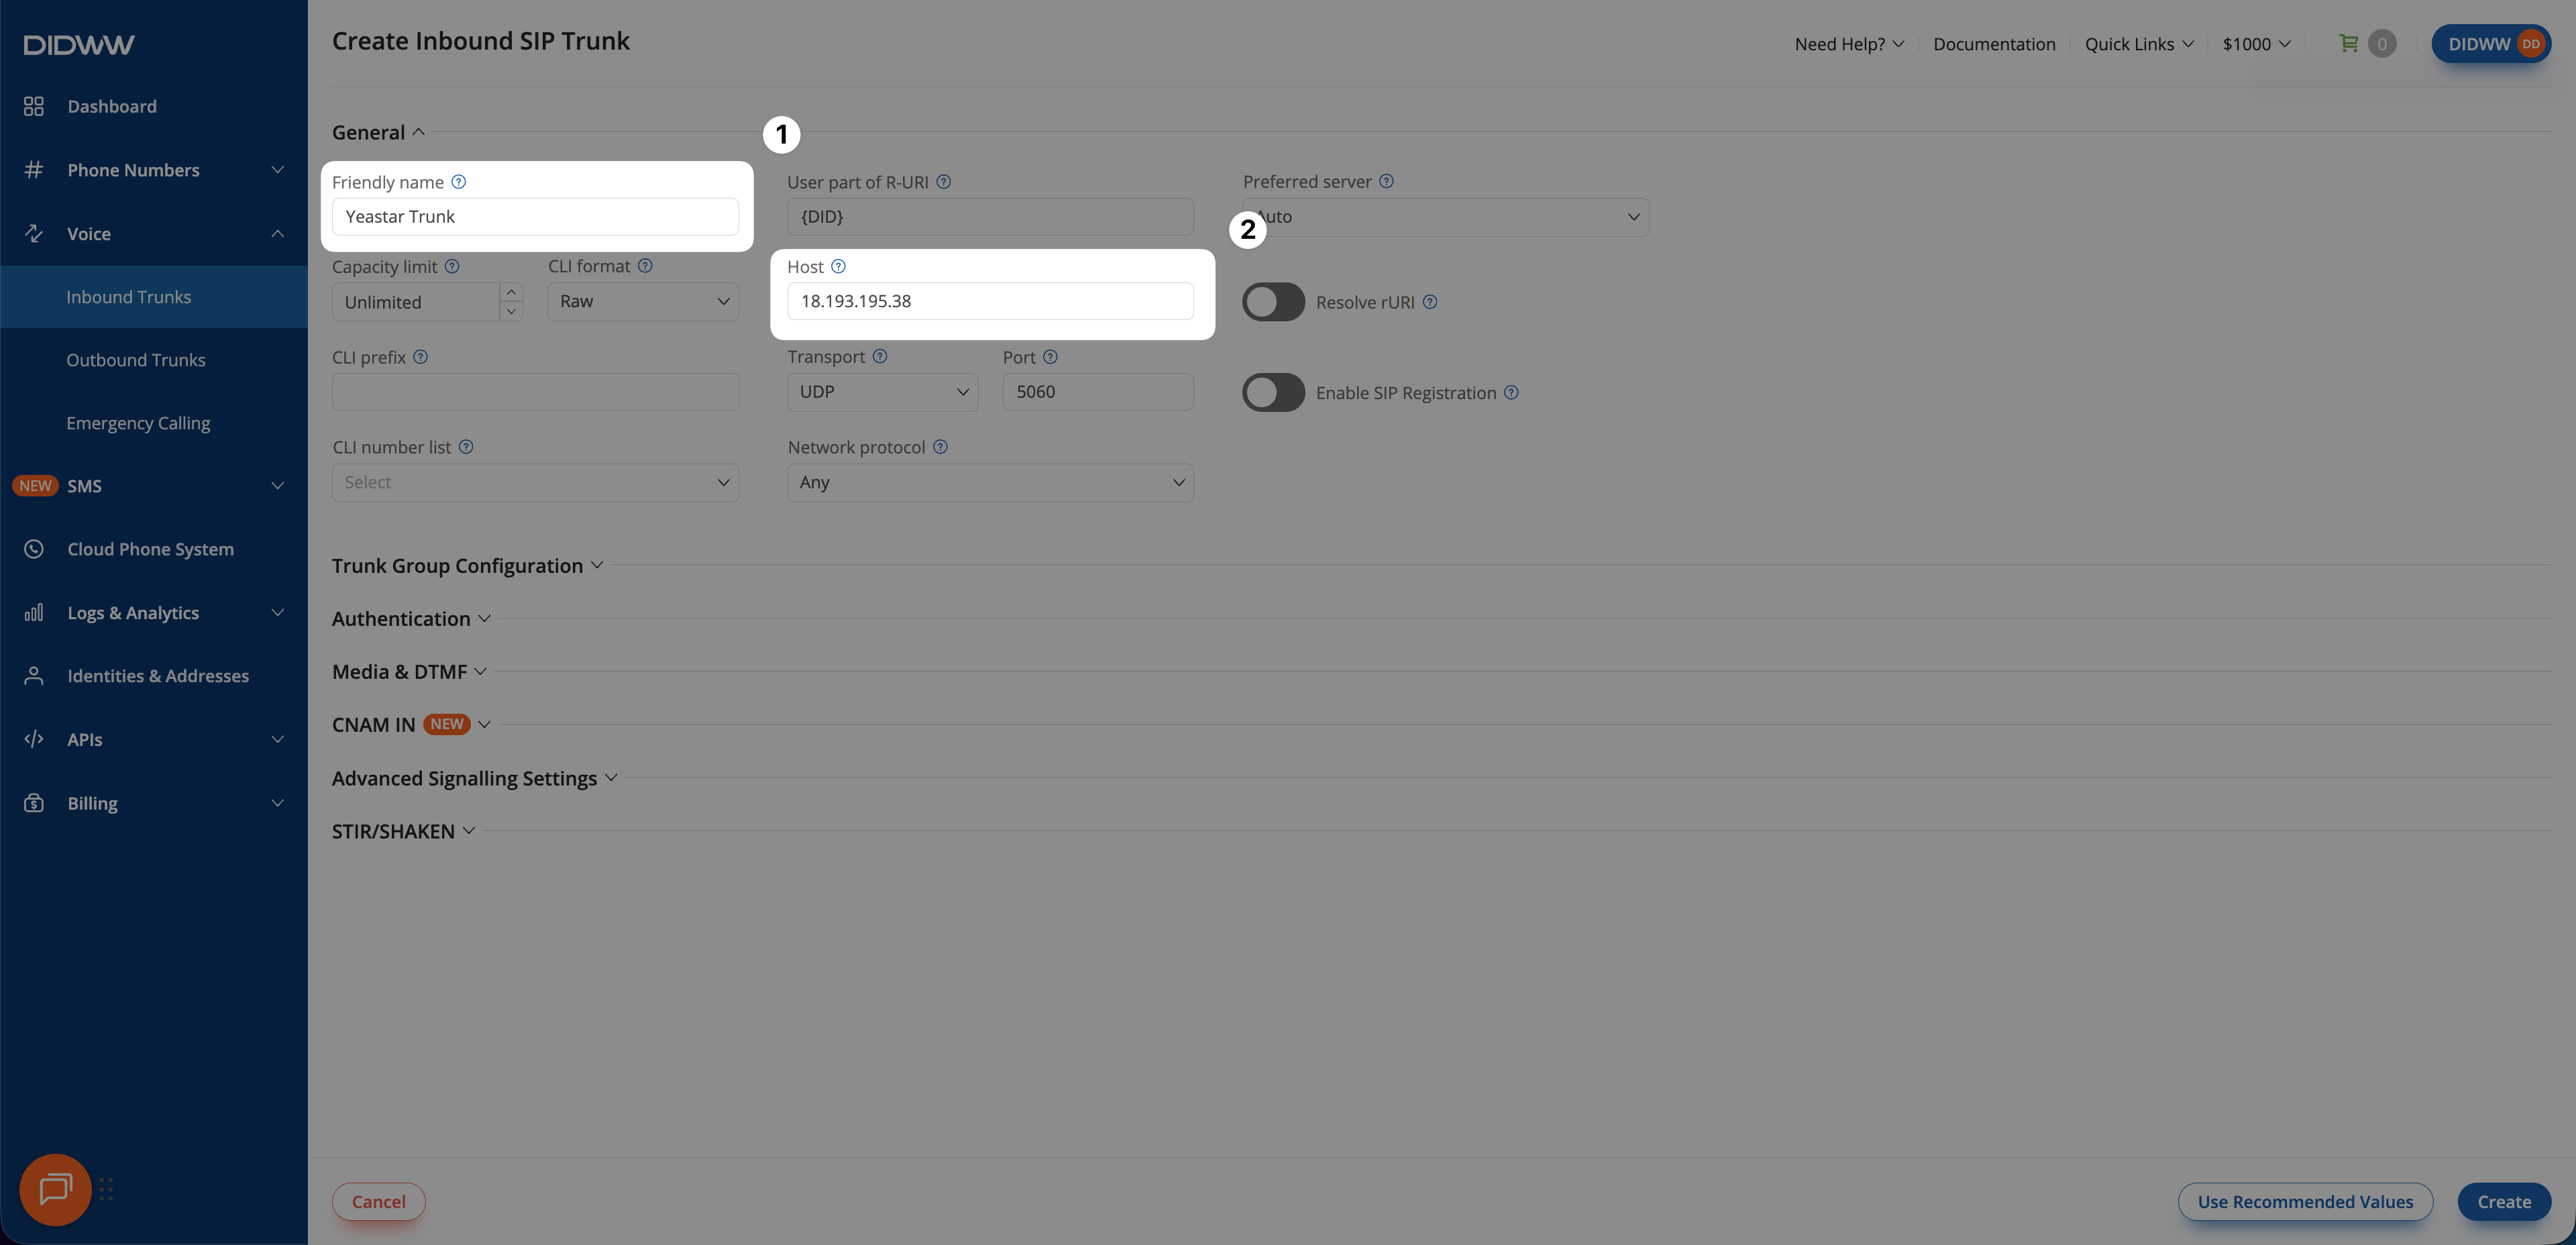
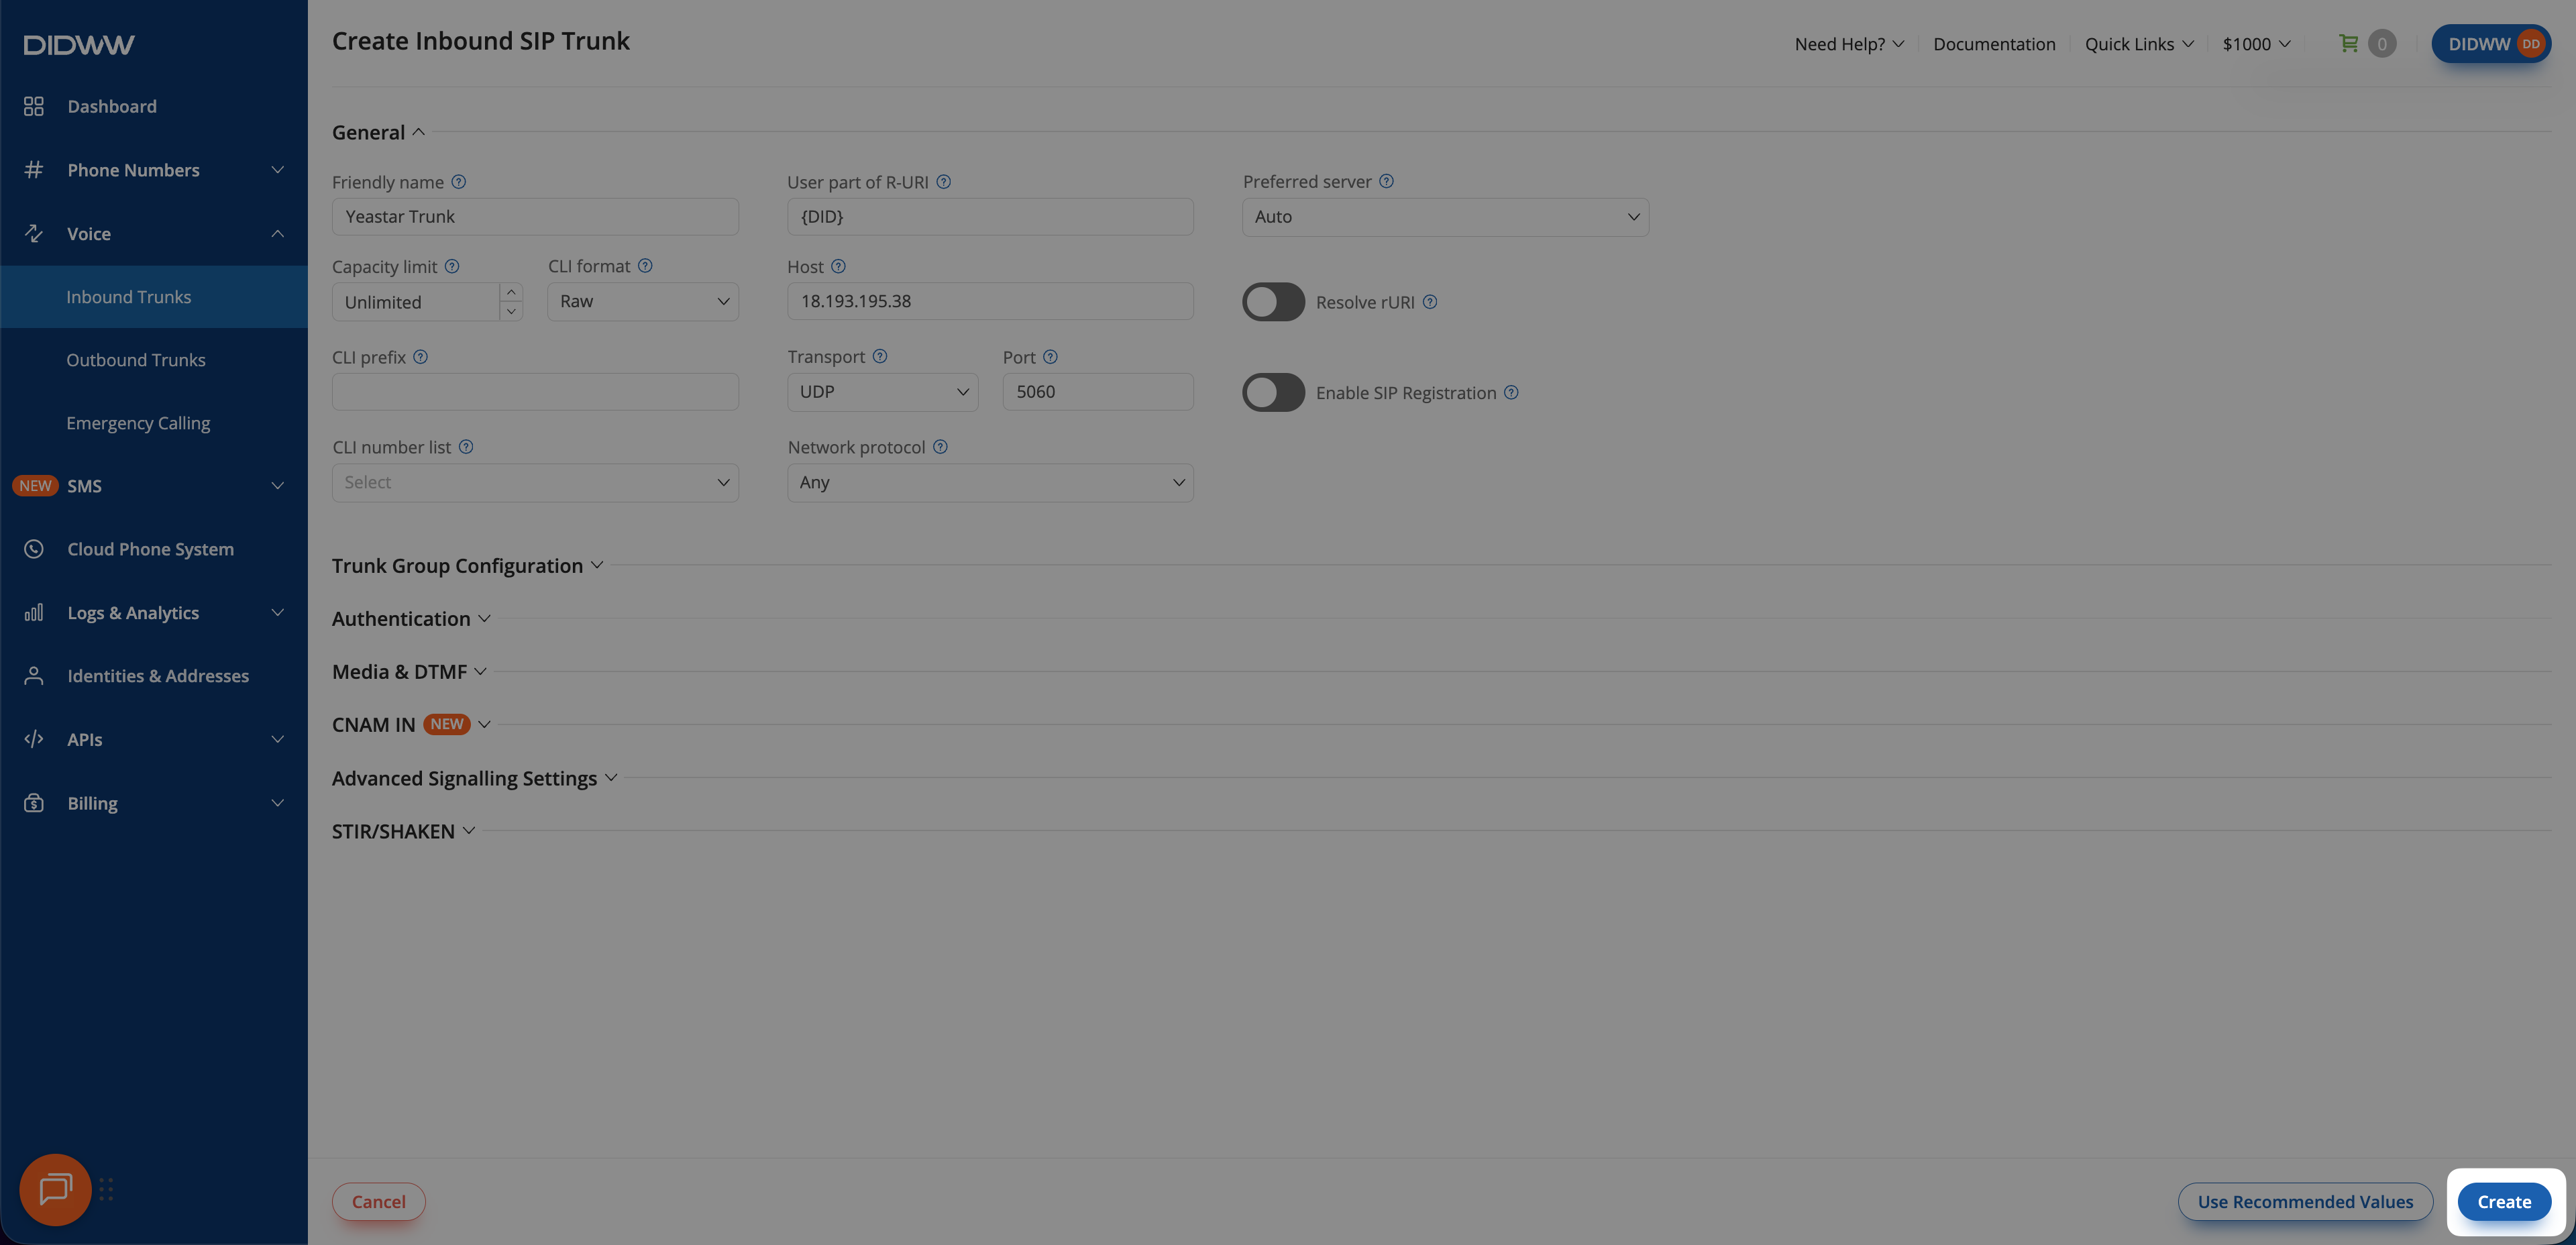
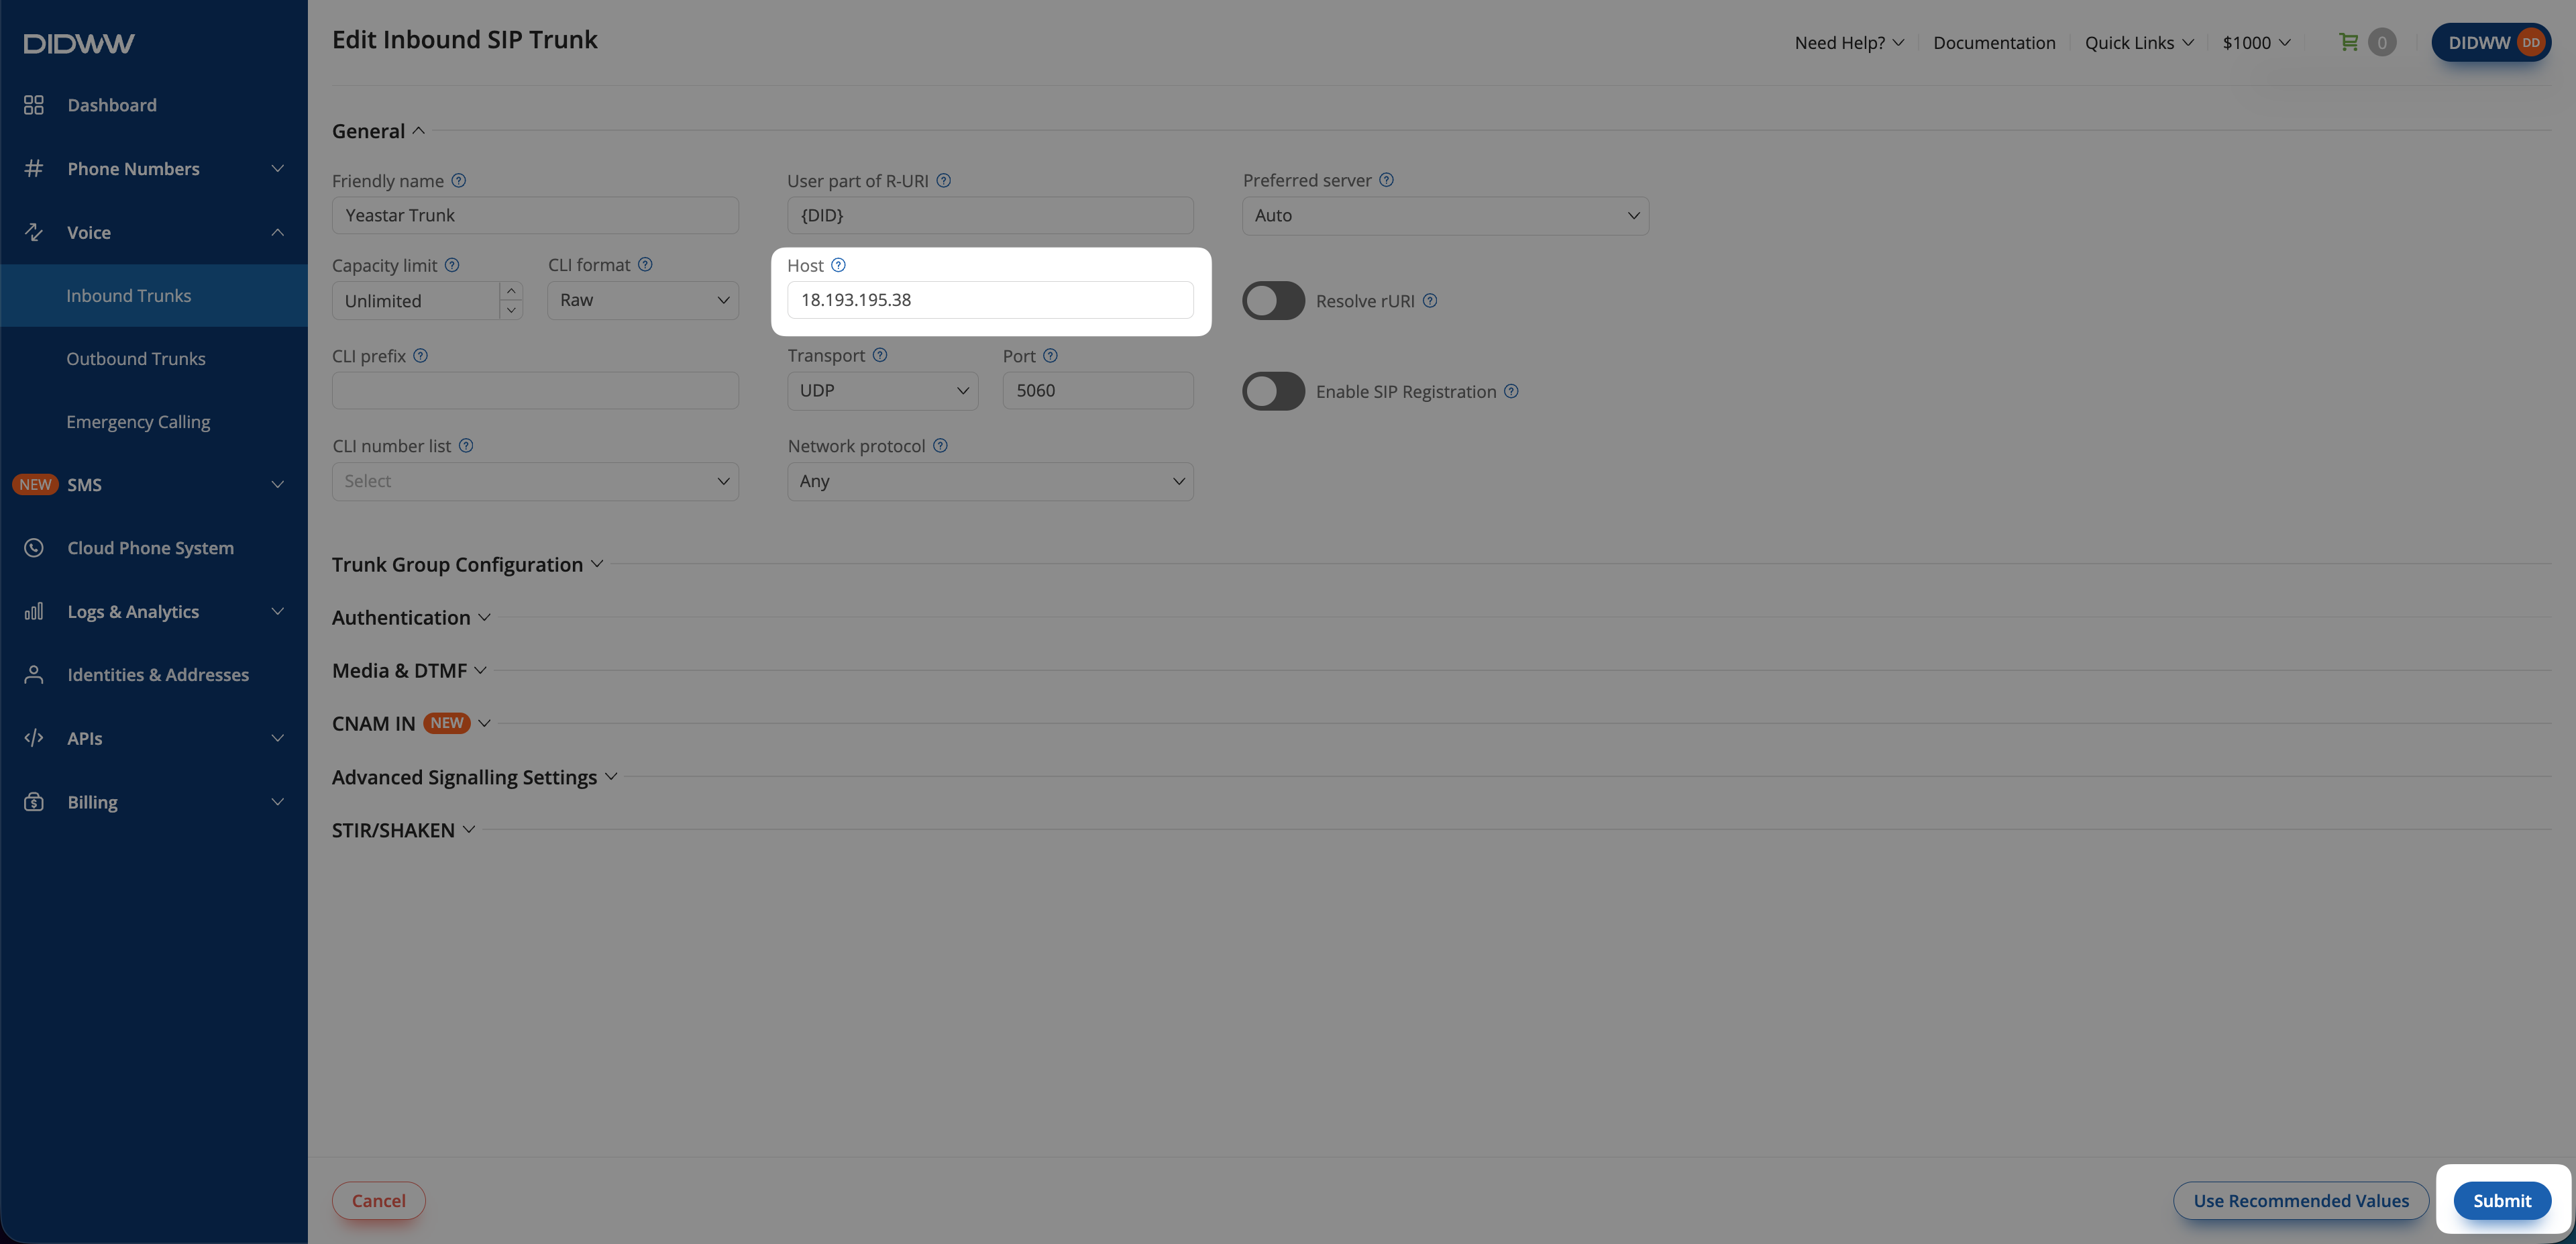
In the Create Inbound SIP Trunk form, enter the main requirements to route the calls to your Yeastar P-Series PBX.
Enter a descriptive Friendly Name for the trunk (e.g., YeastarTrunk).
In Host, enter the public IP address or FQDN of your Yeastar P-Series PBX.
Fig. 2. SIP trunk configured to send calls to self-hosted Yeastar P-Series PBX#
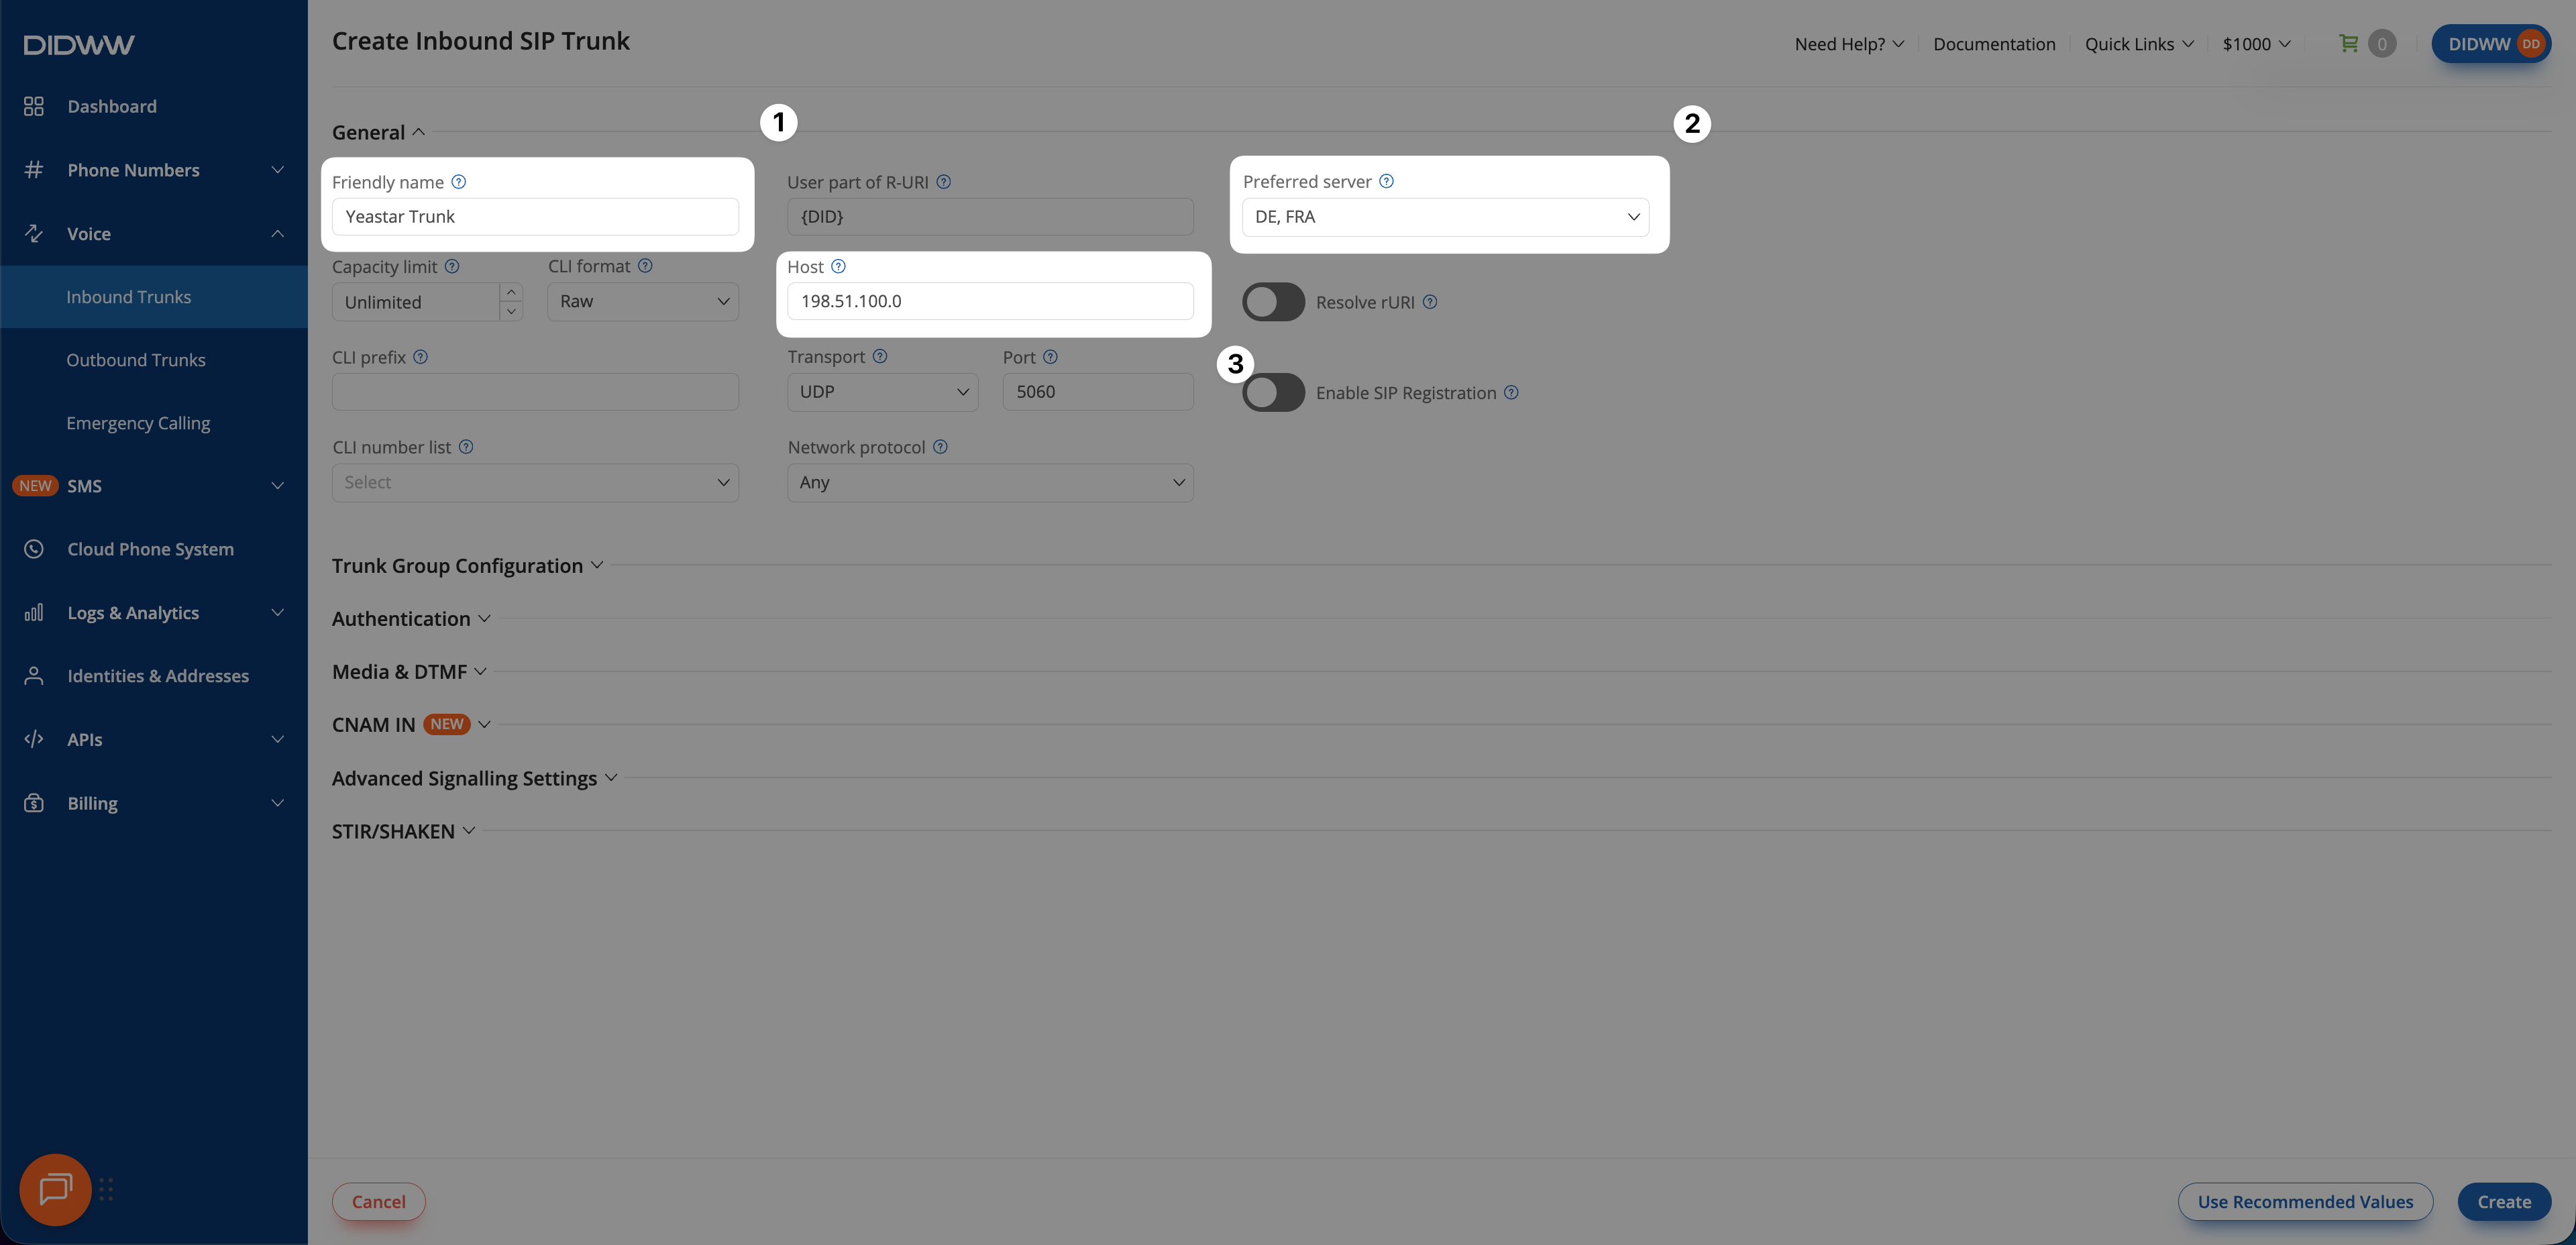
In the Create Inbound SIP Trunk form, enter the main requirements to route the calls to your Yeastar P-Series PBX.
Enter a descriptive Friendly Name for the trunk (e.g., YeastarTrunk).
Select the Preferred server (e.g., DE,FRA).
In Host, enter a placeholder IP address (e.g., 198.51.100.0).
Note
The Preferred server defaults to DE,FRA on the cloud-based Yeastar P-Series PBX. If you select a different Preferred server, additional steps will be required on the Yeastar PBX side.
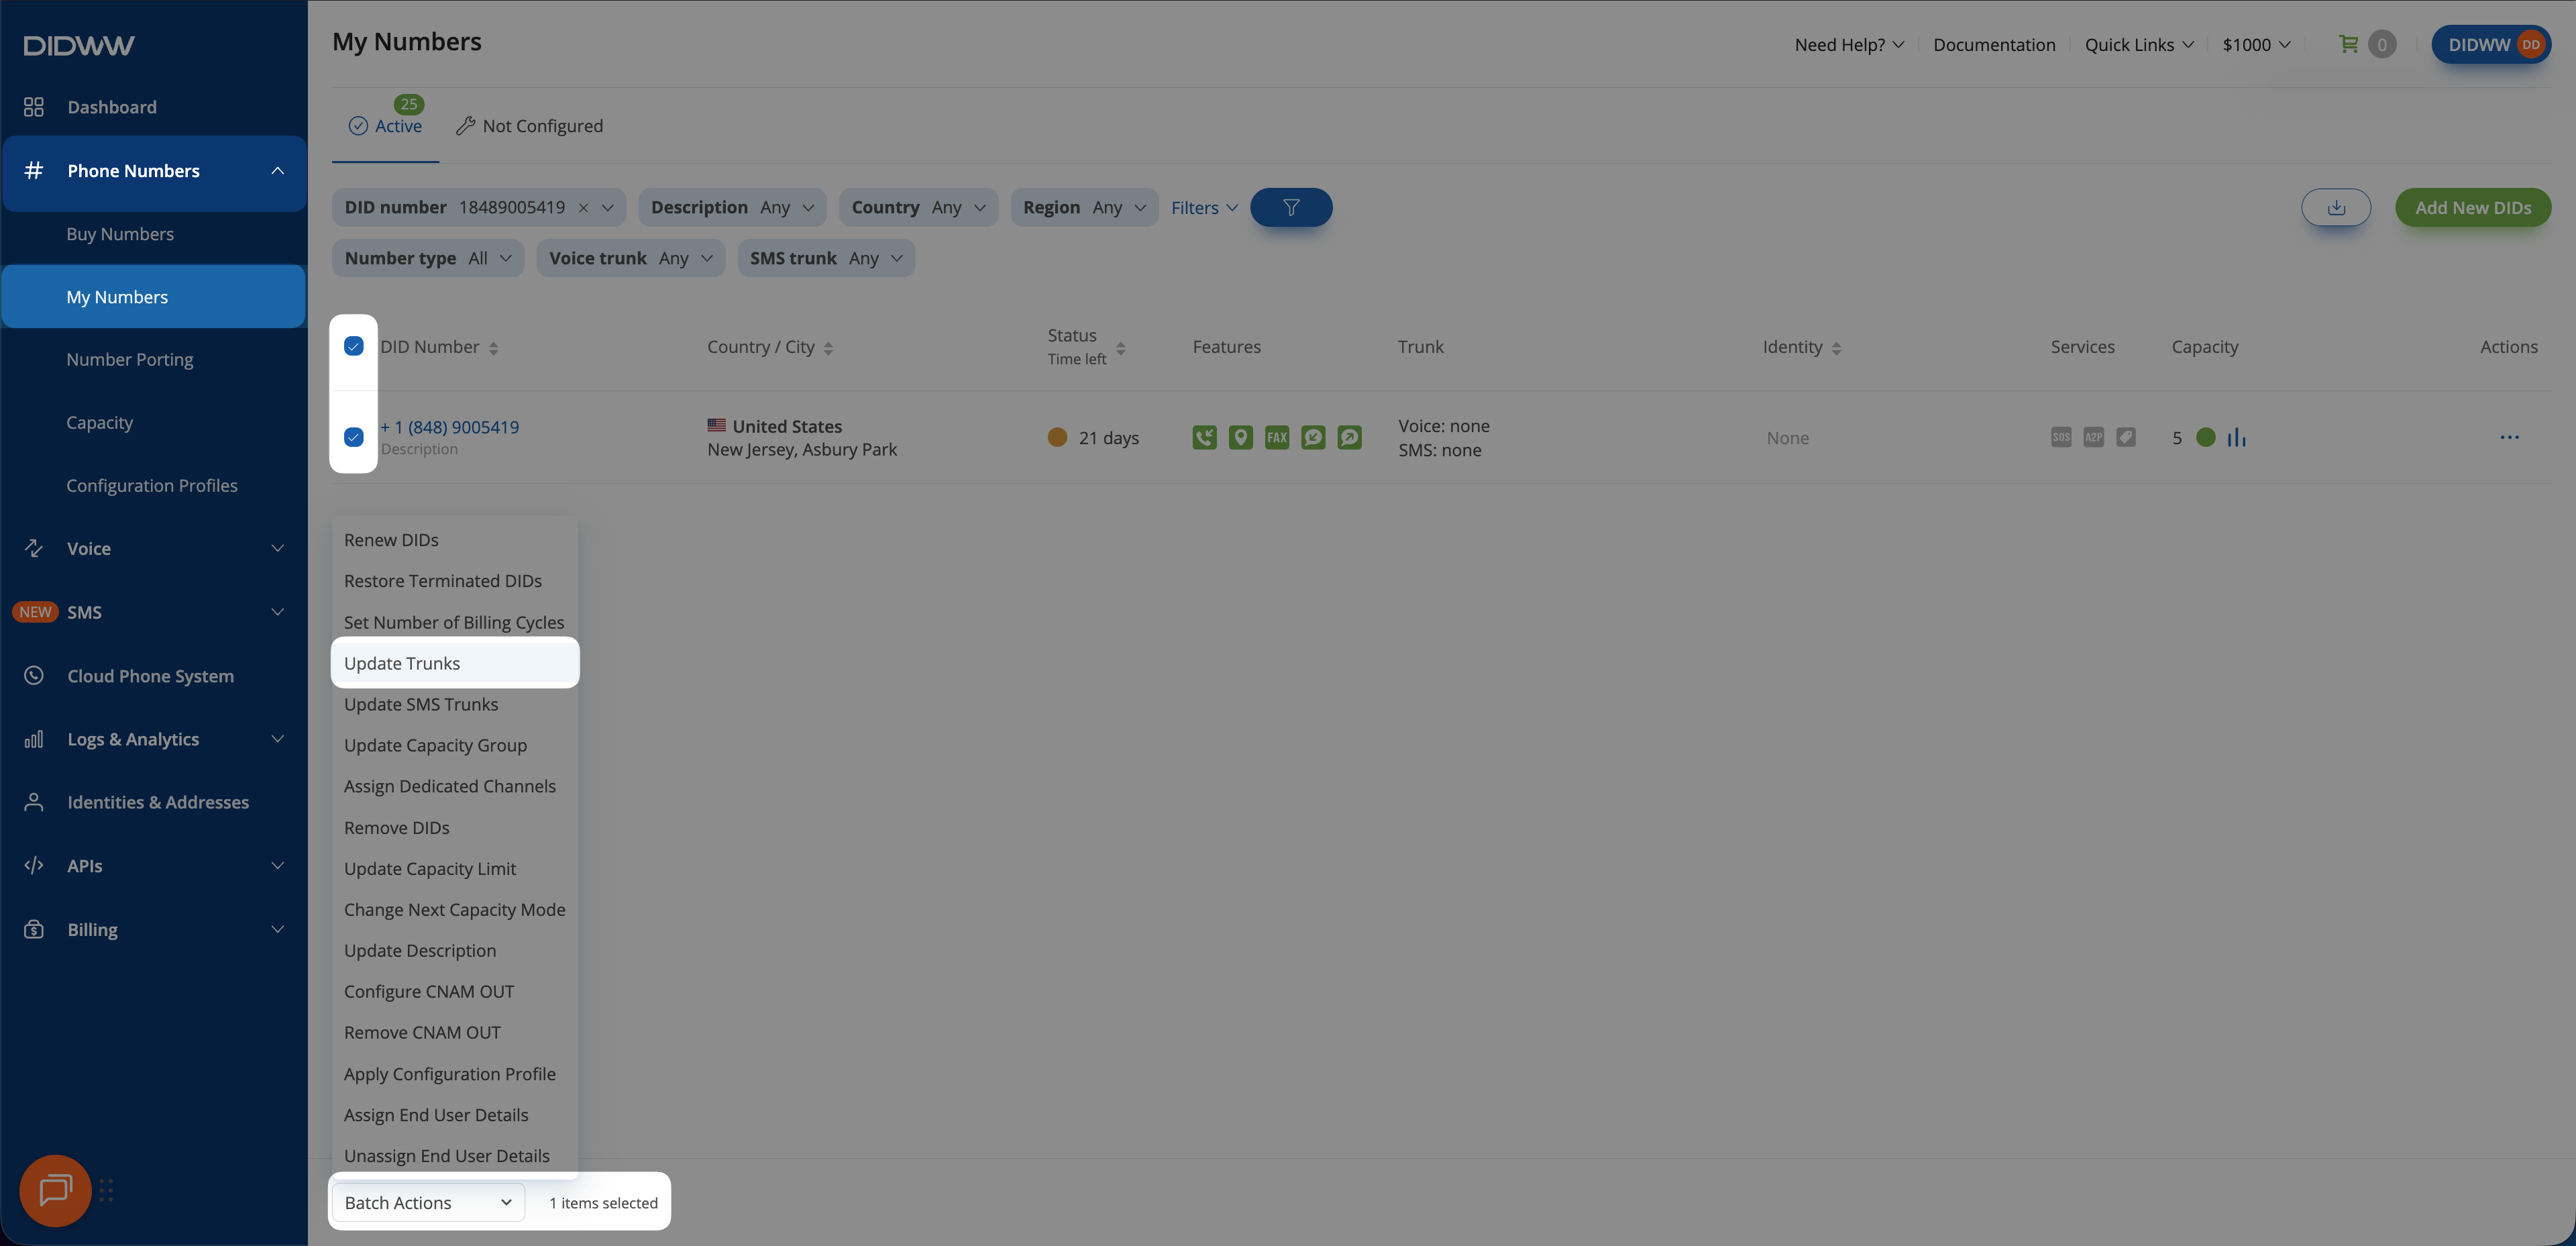
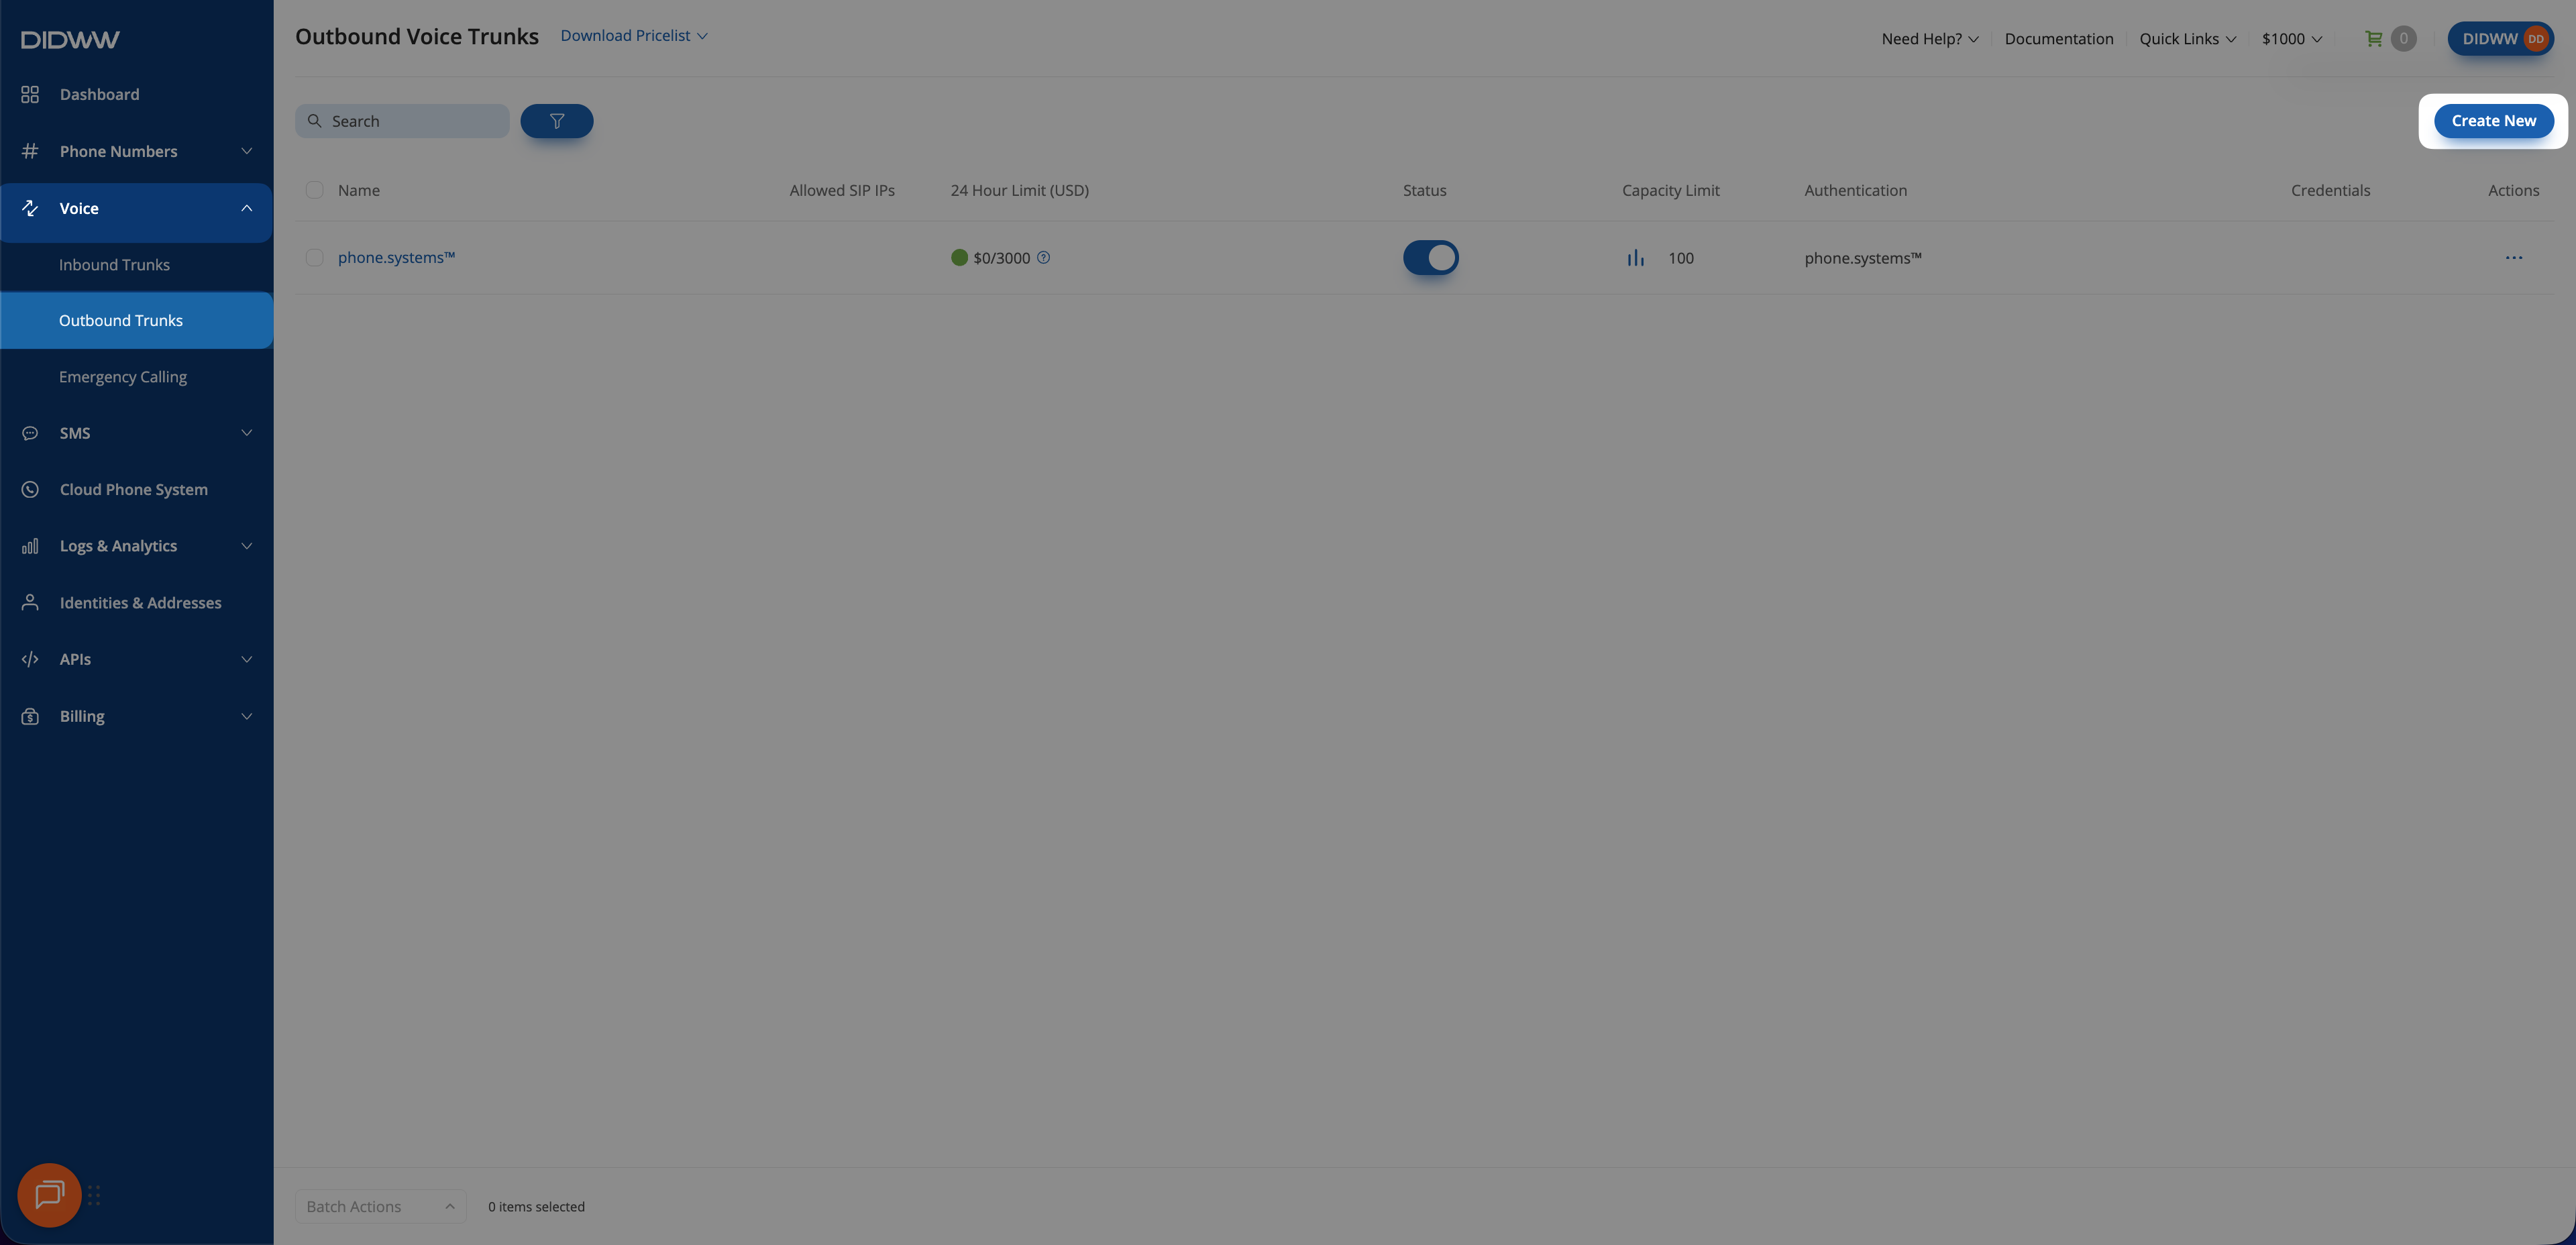
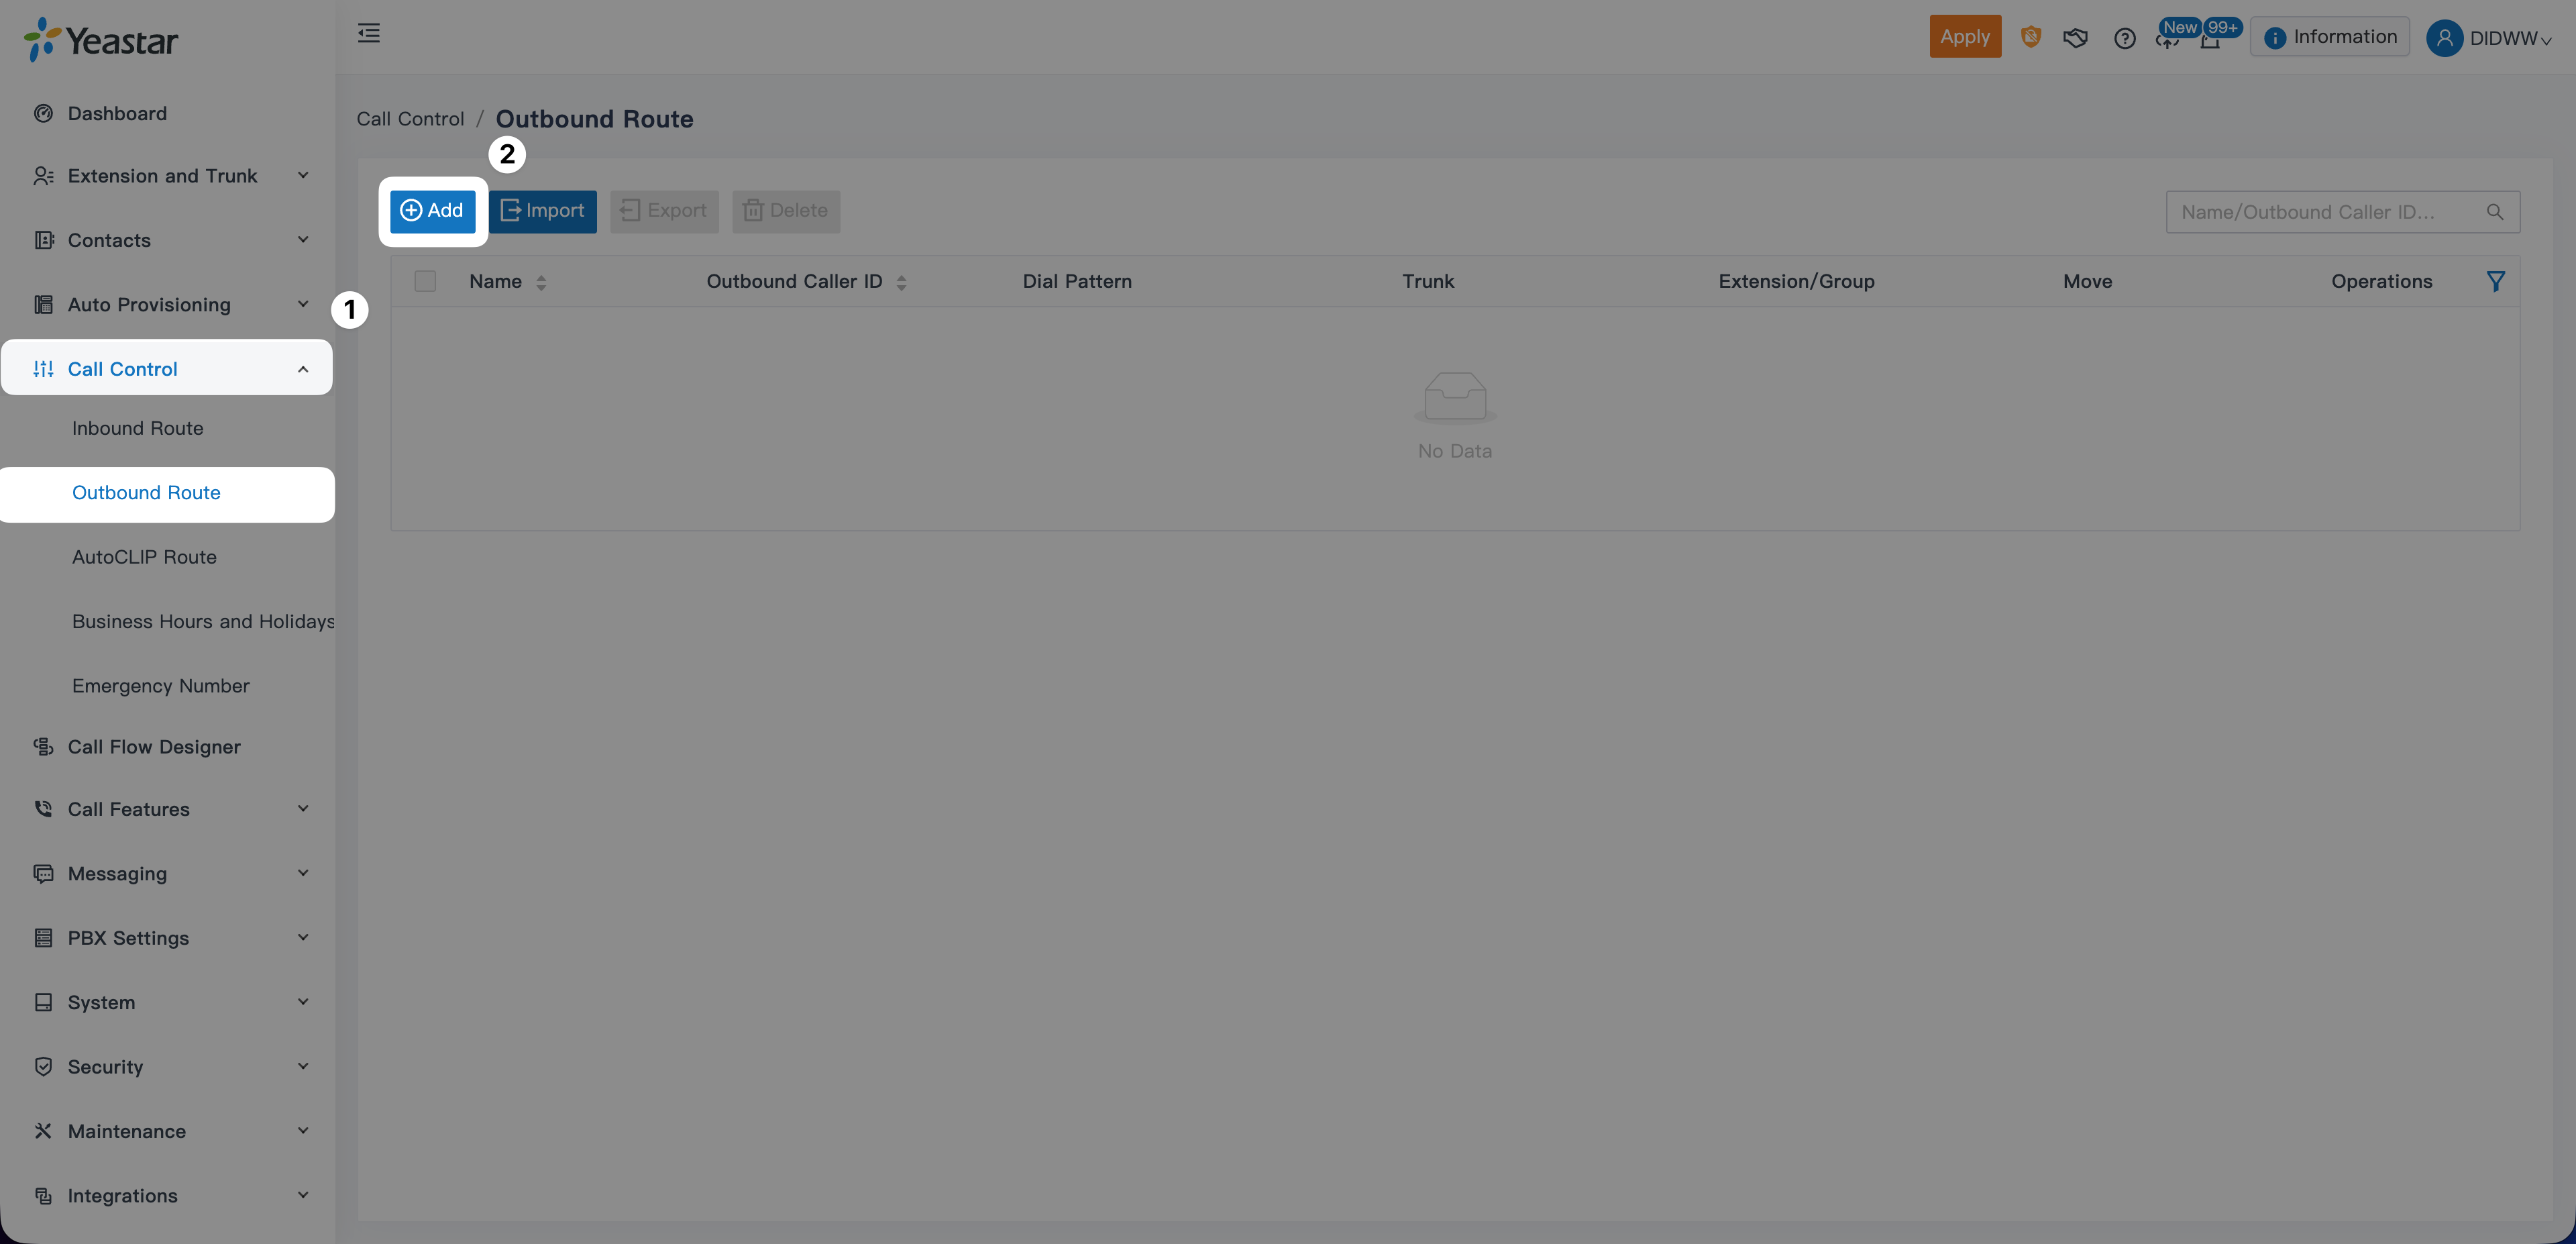
To configure outbound calling from your Yeastar P-Series PBX, create an Outbound SIP Trunk in the DIDWW User Panel.
This setup enables you to use Yeastar to place outbound calls through DIDWW termination routes.
Depending on whether you plan to use the self-hosted version of the PBX or the cloud-based version of the PBX, the configuration will differ slightly.
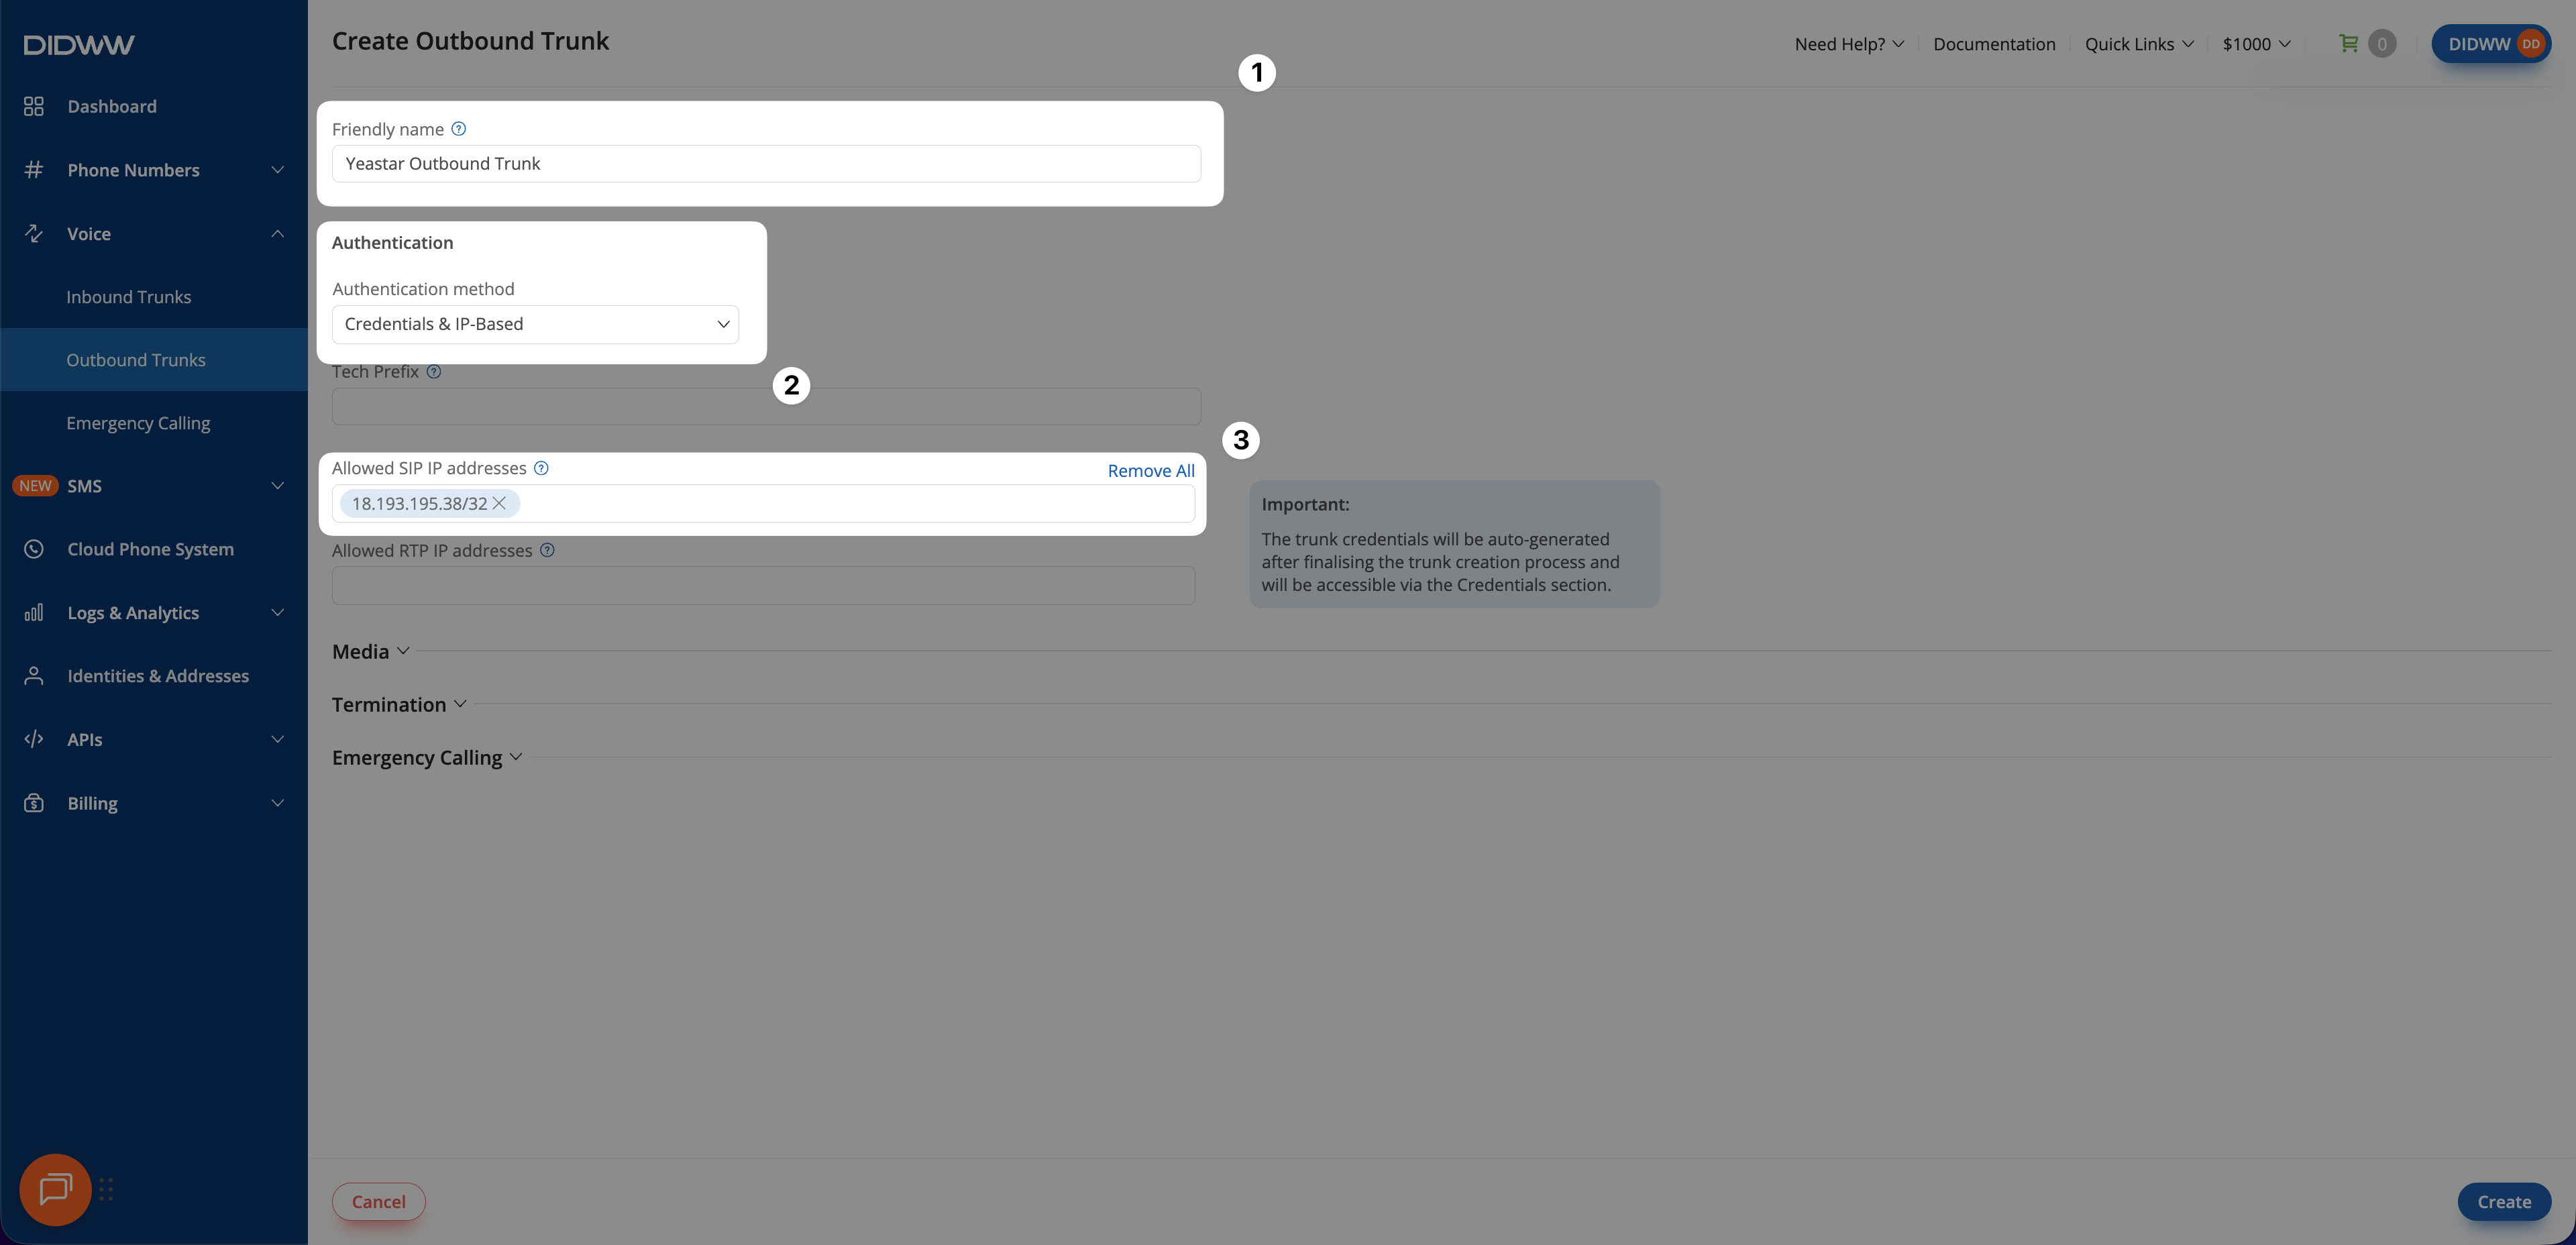
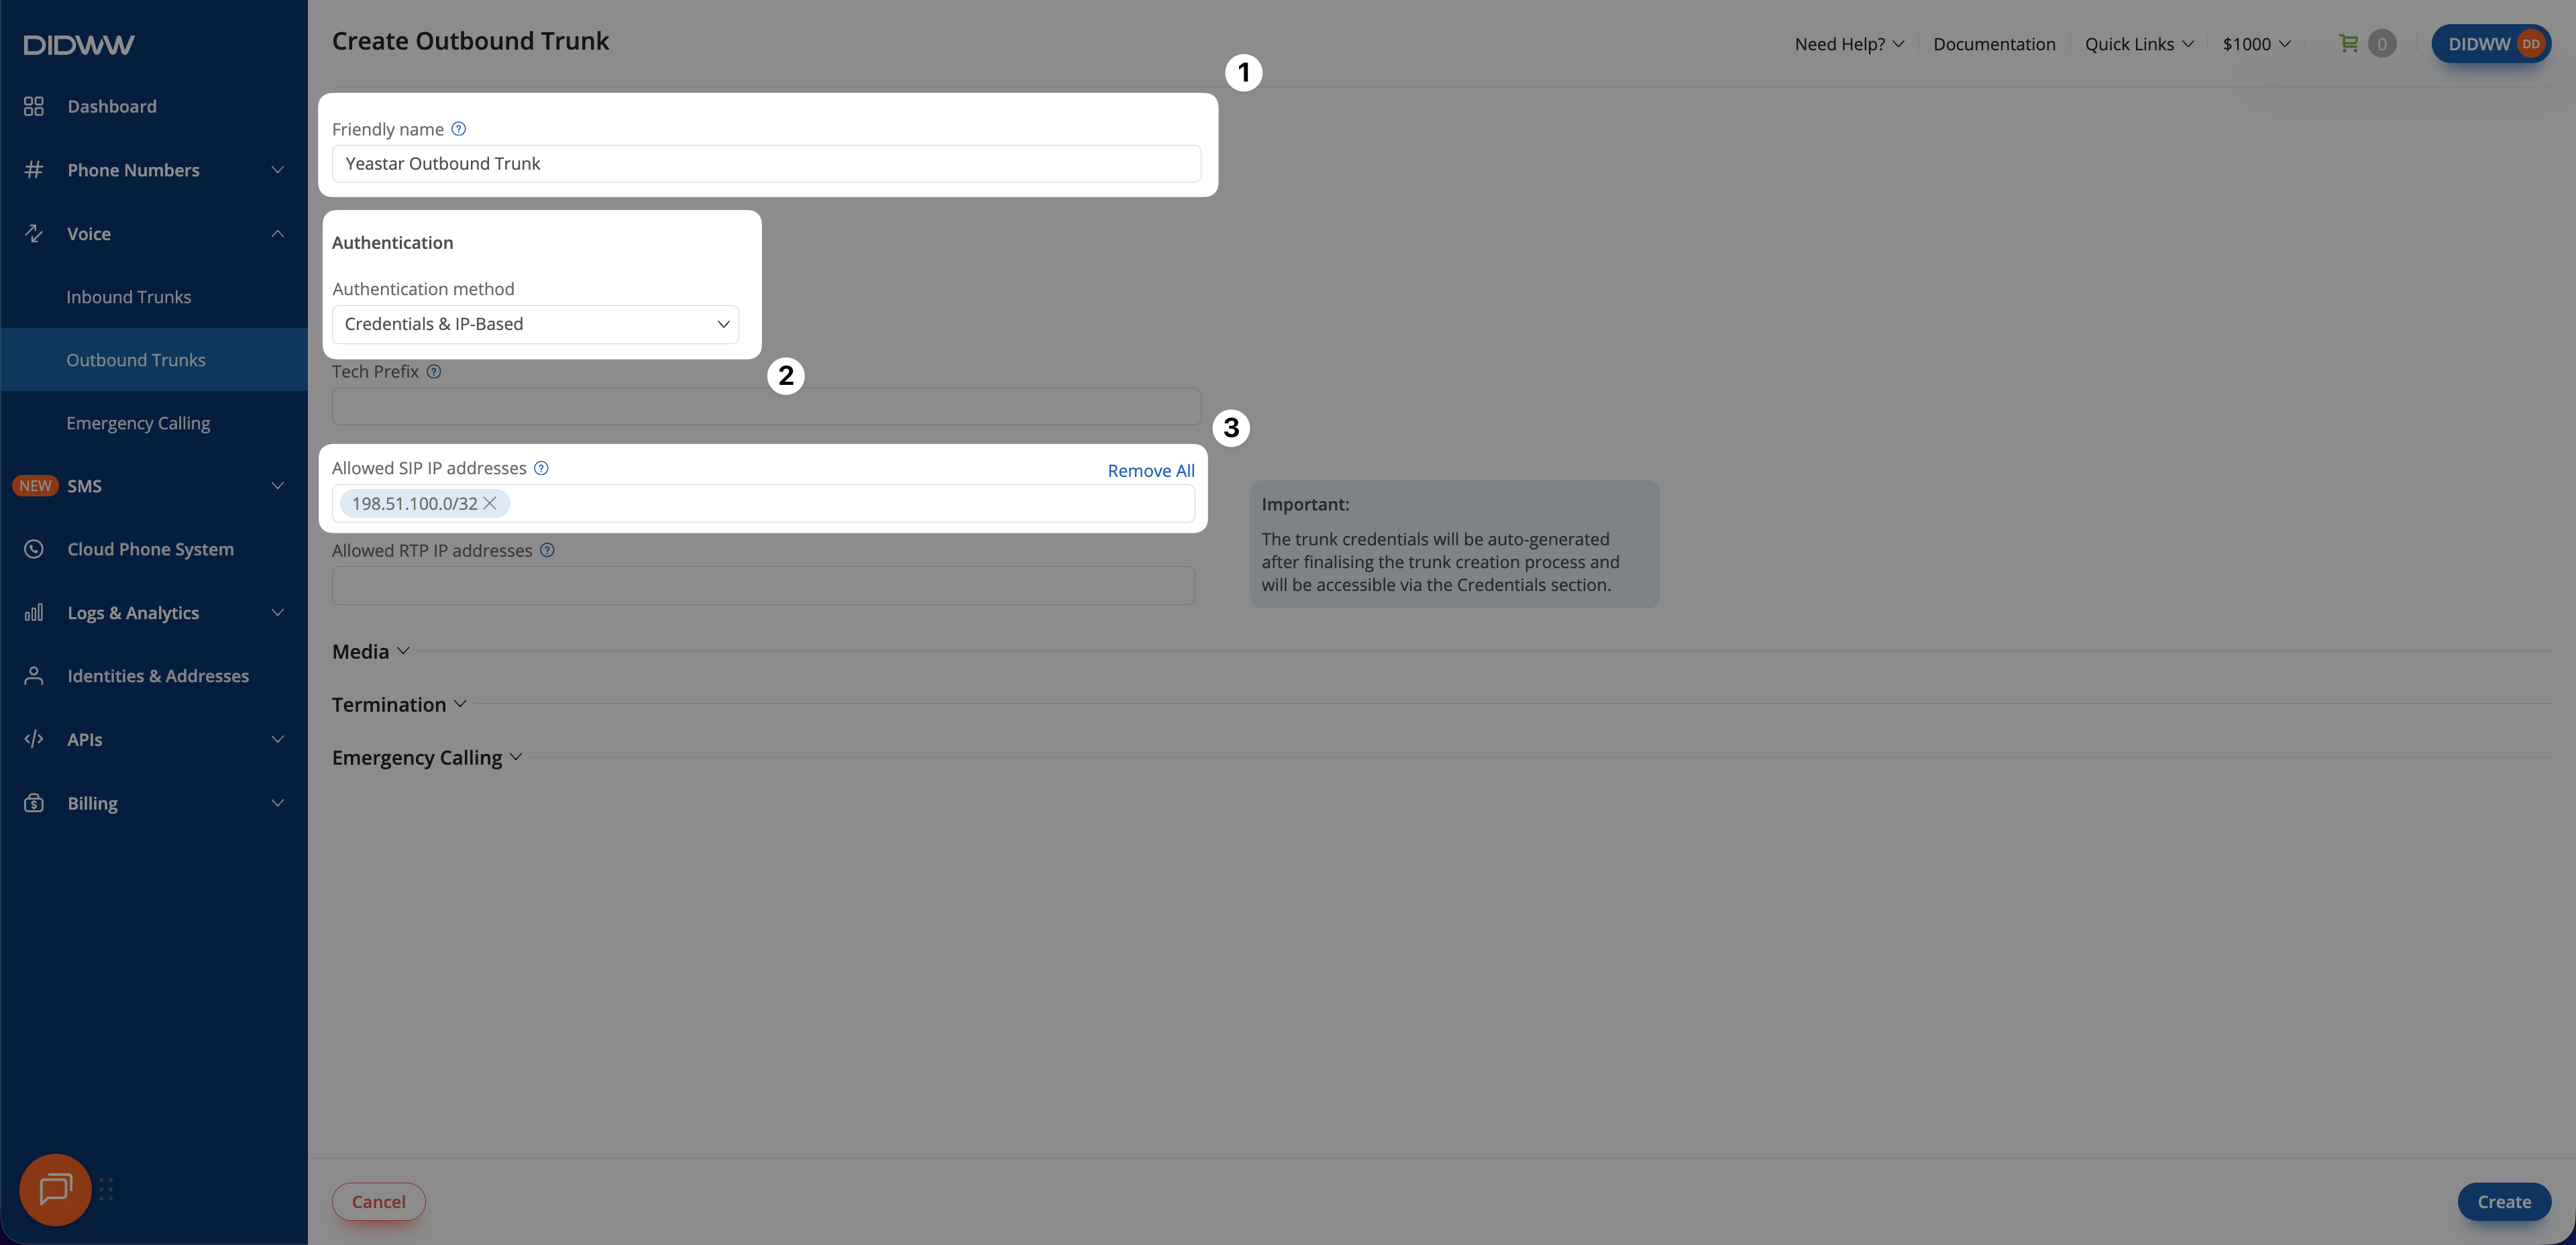
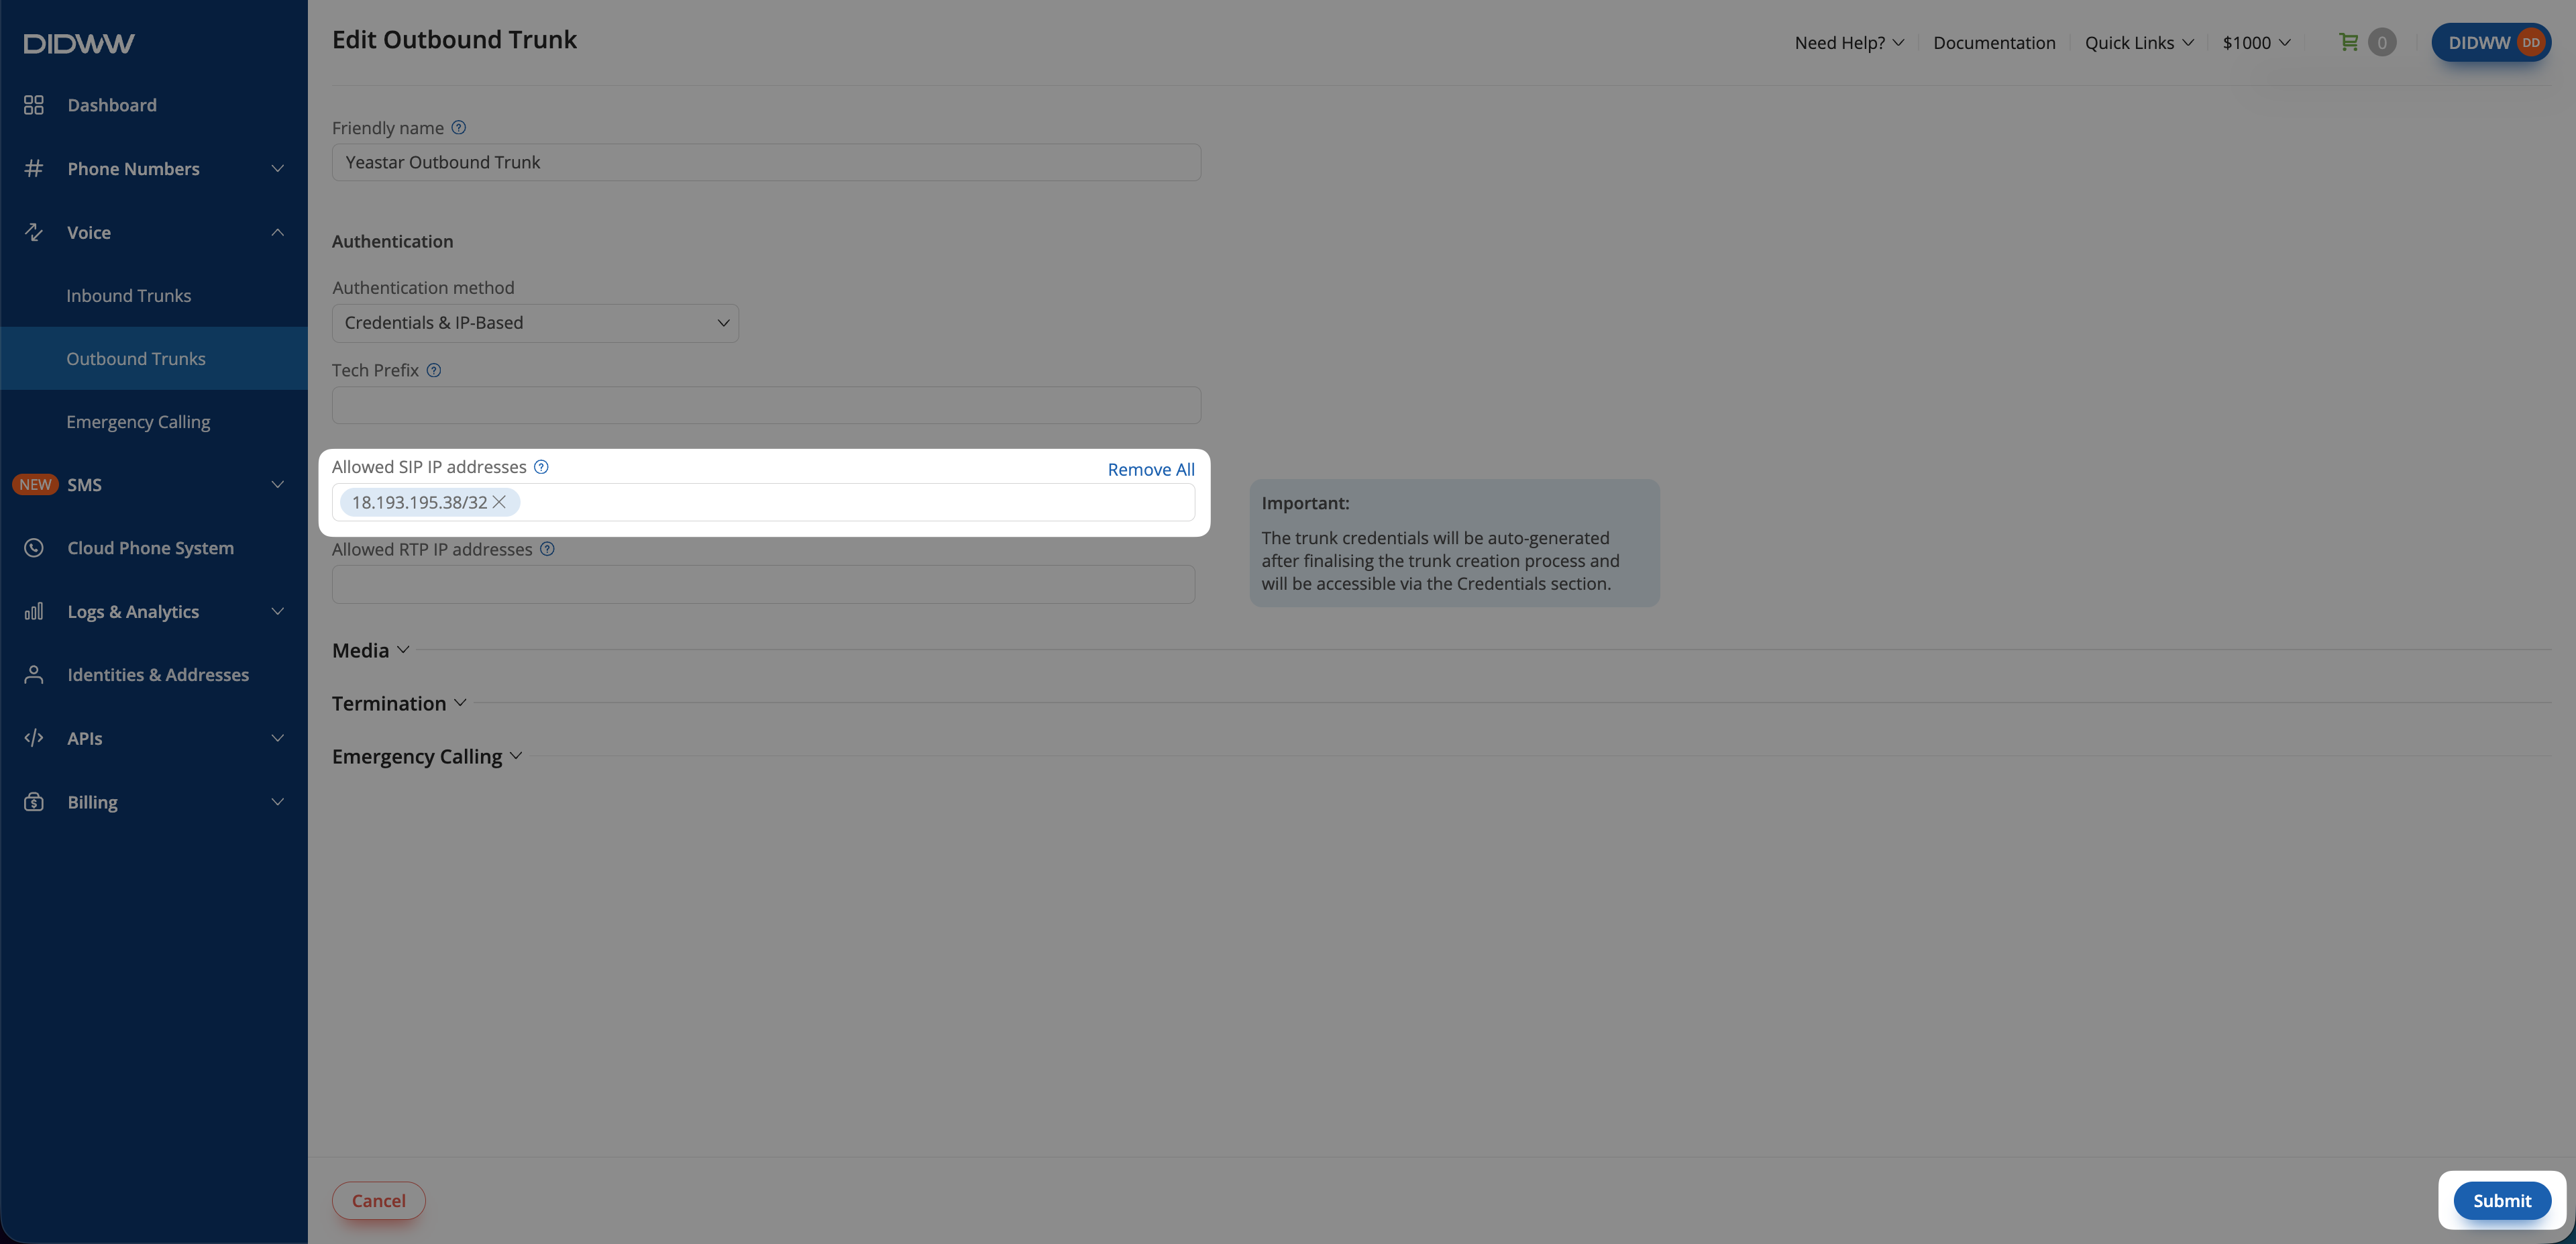
Update the Friendly Name (e.g., YeastarOutboundTrunk).
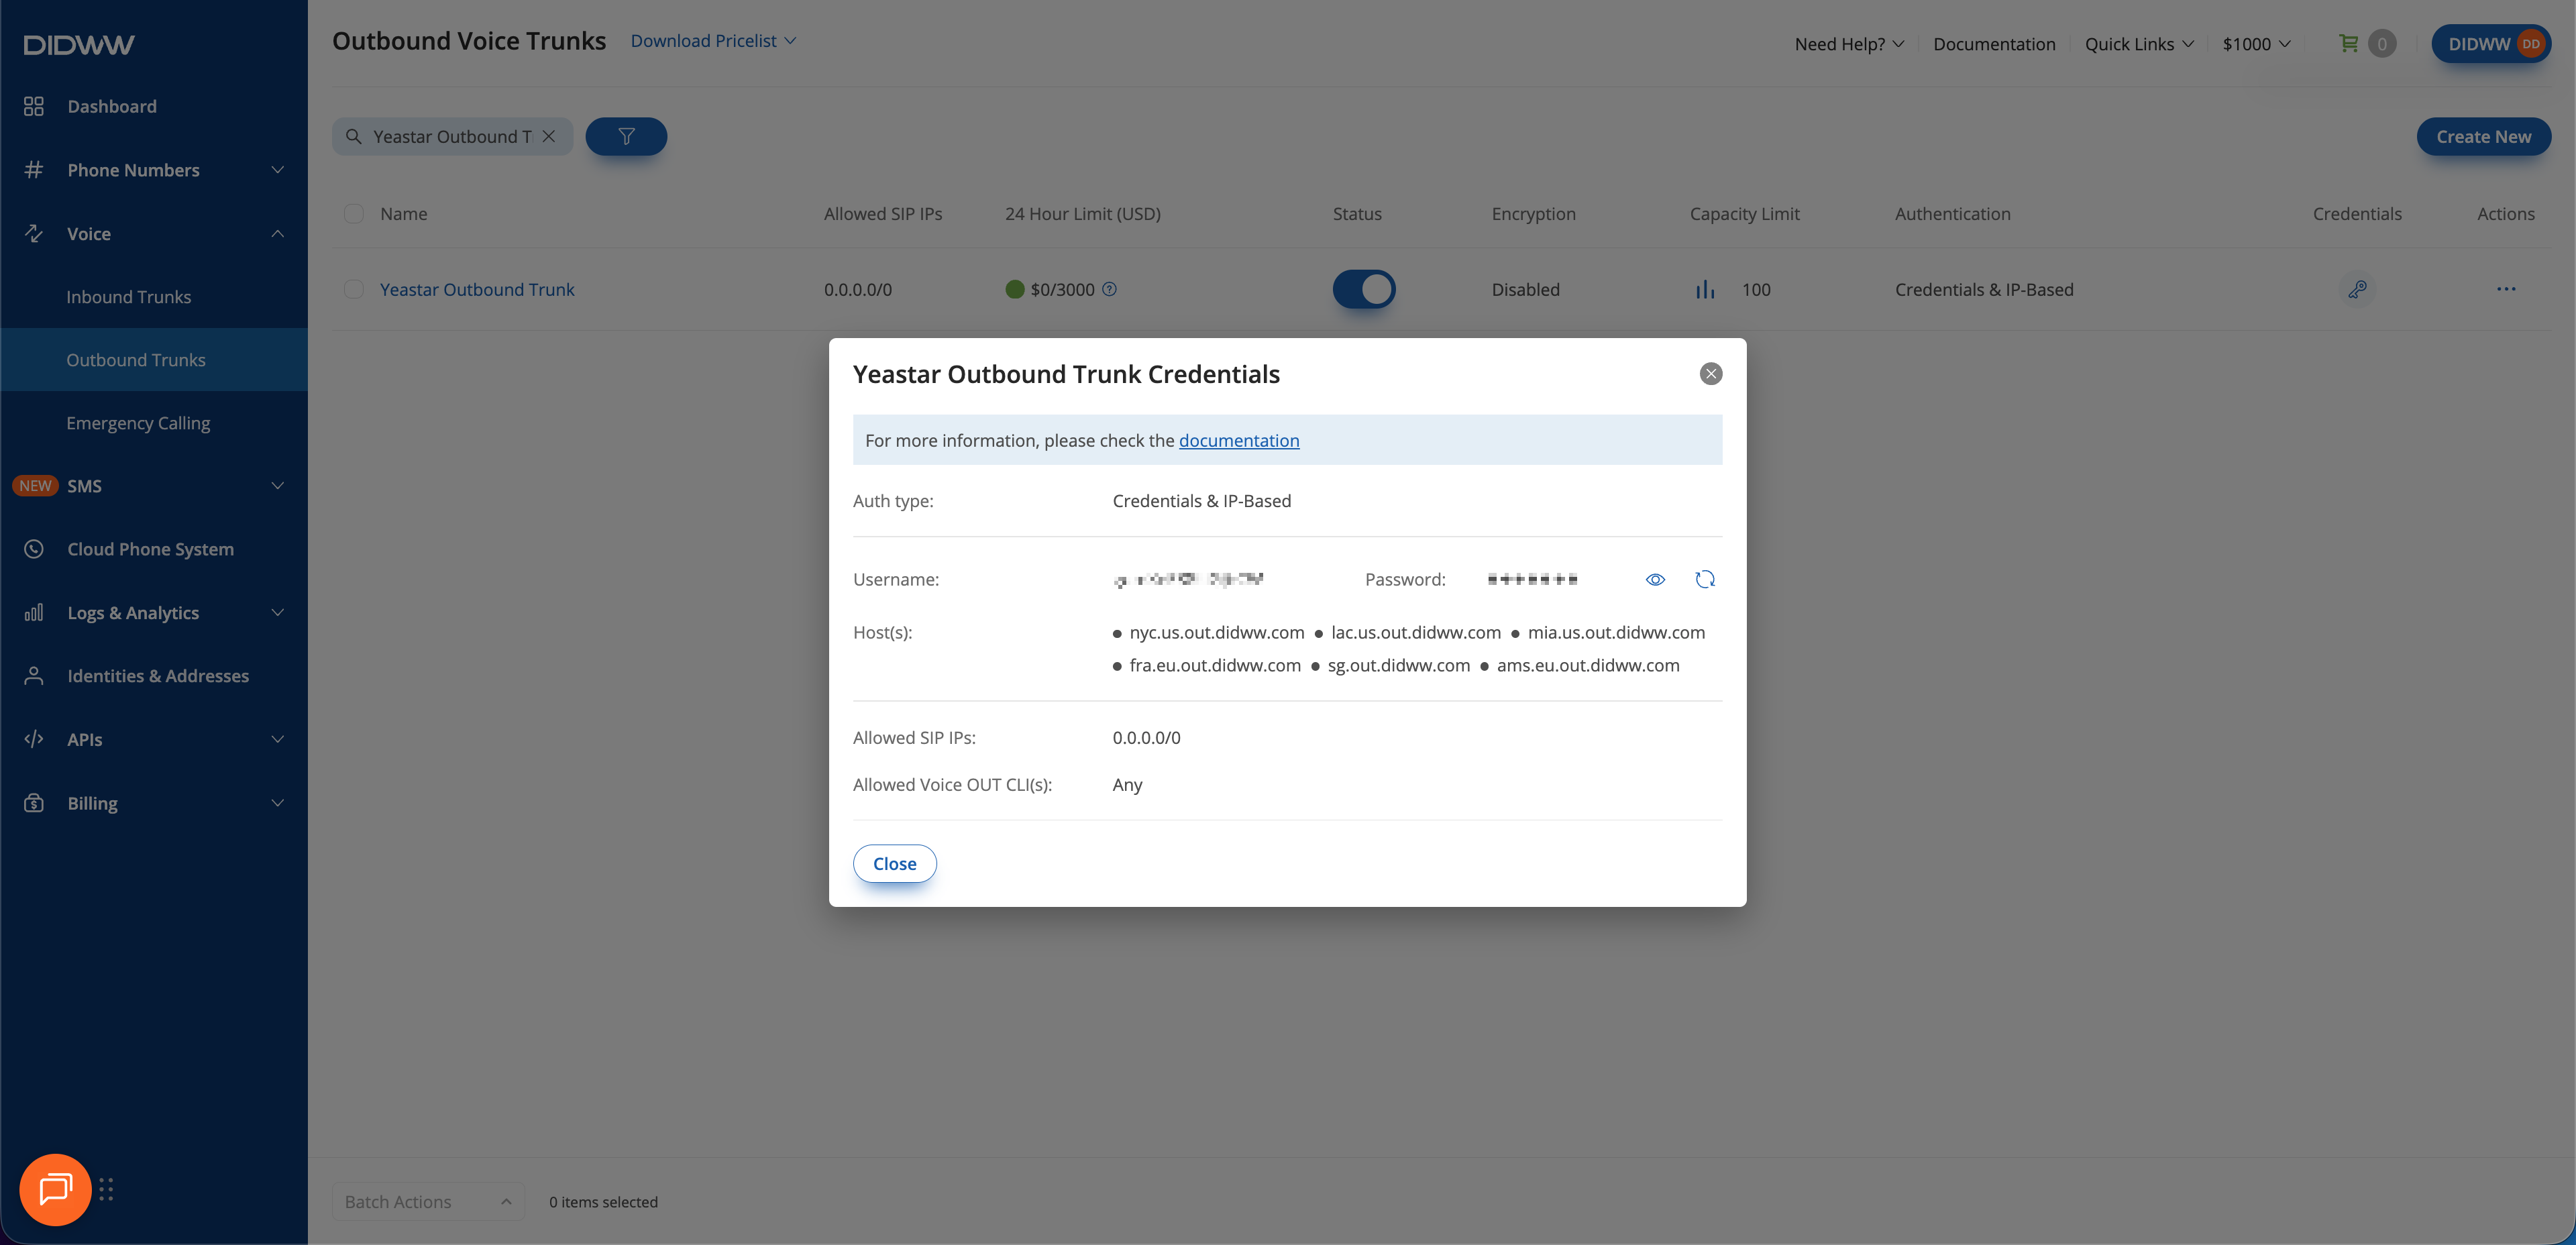
Keep the default Credentials & IP-based authentication method selected. The SIP digest credentials (username and password) will be accessible after the trunk is created.
In Allowed SIP IP addresses, enter the public IP address or subnet from which your Yeastar P-Series PBX will send outbound SIP traffic.
Note
Make sure you add the correct IP address or subnet so that outbound calls are accepted by DIDWW.
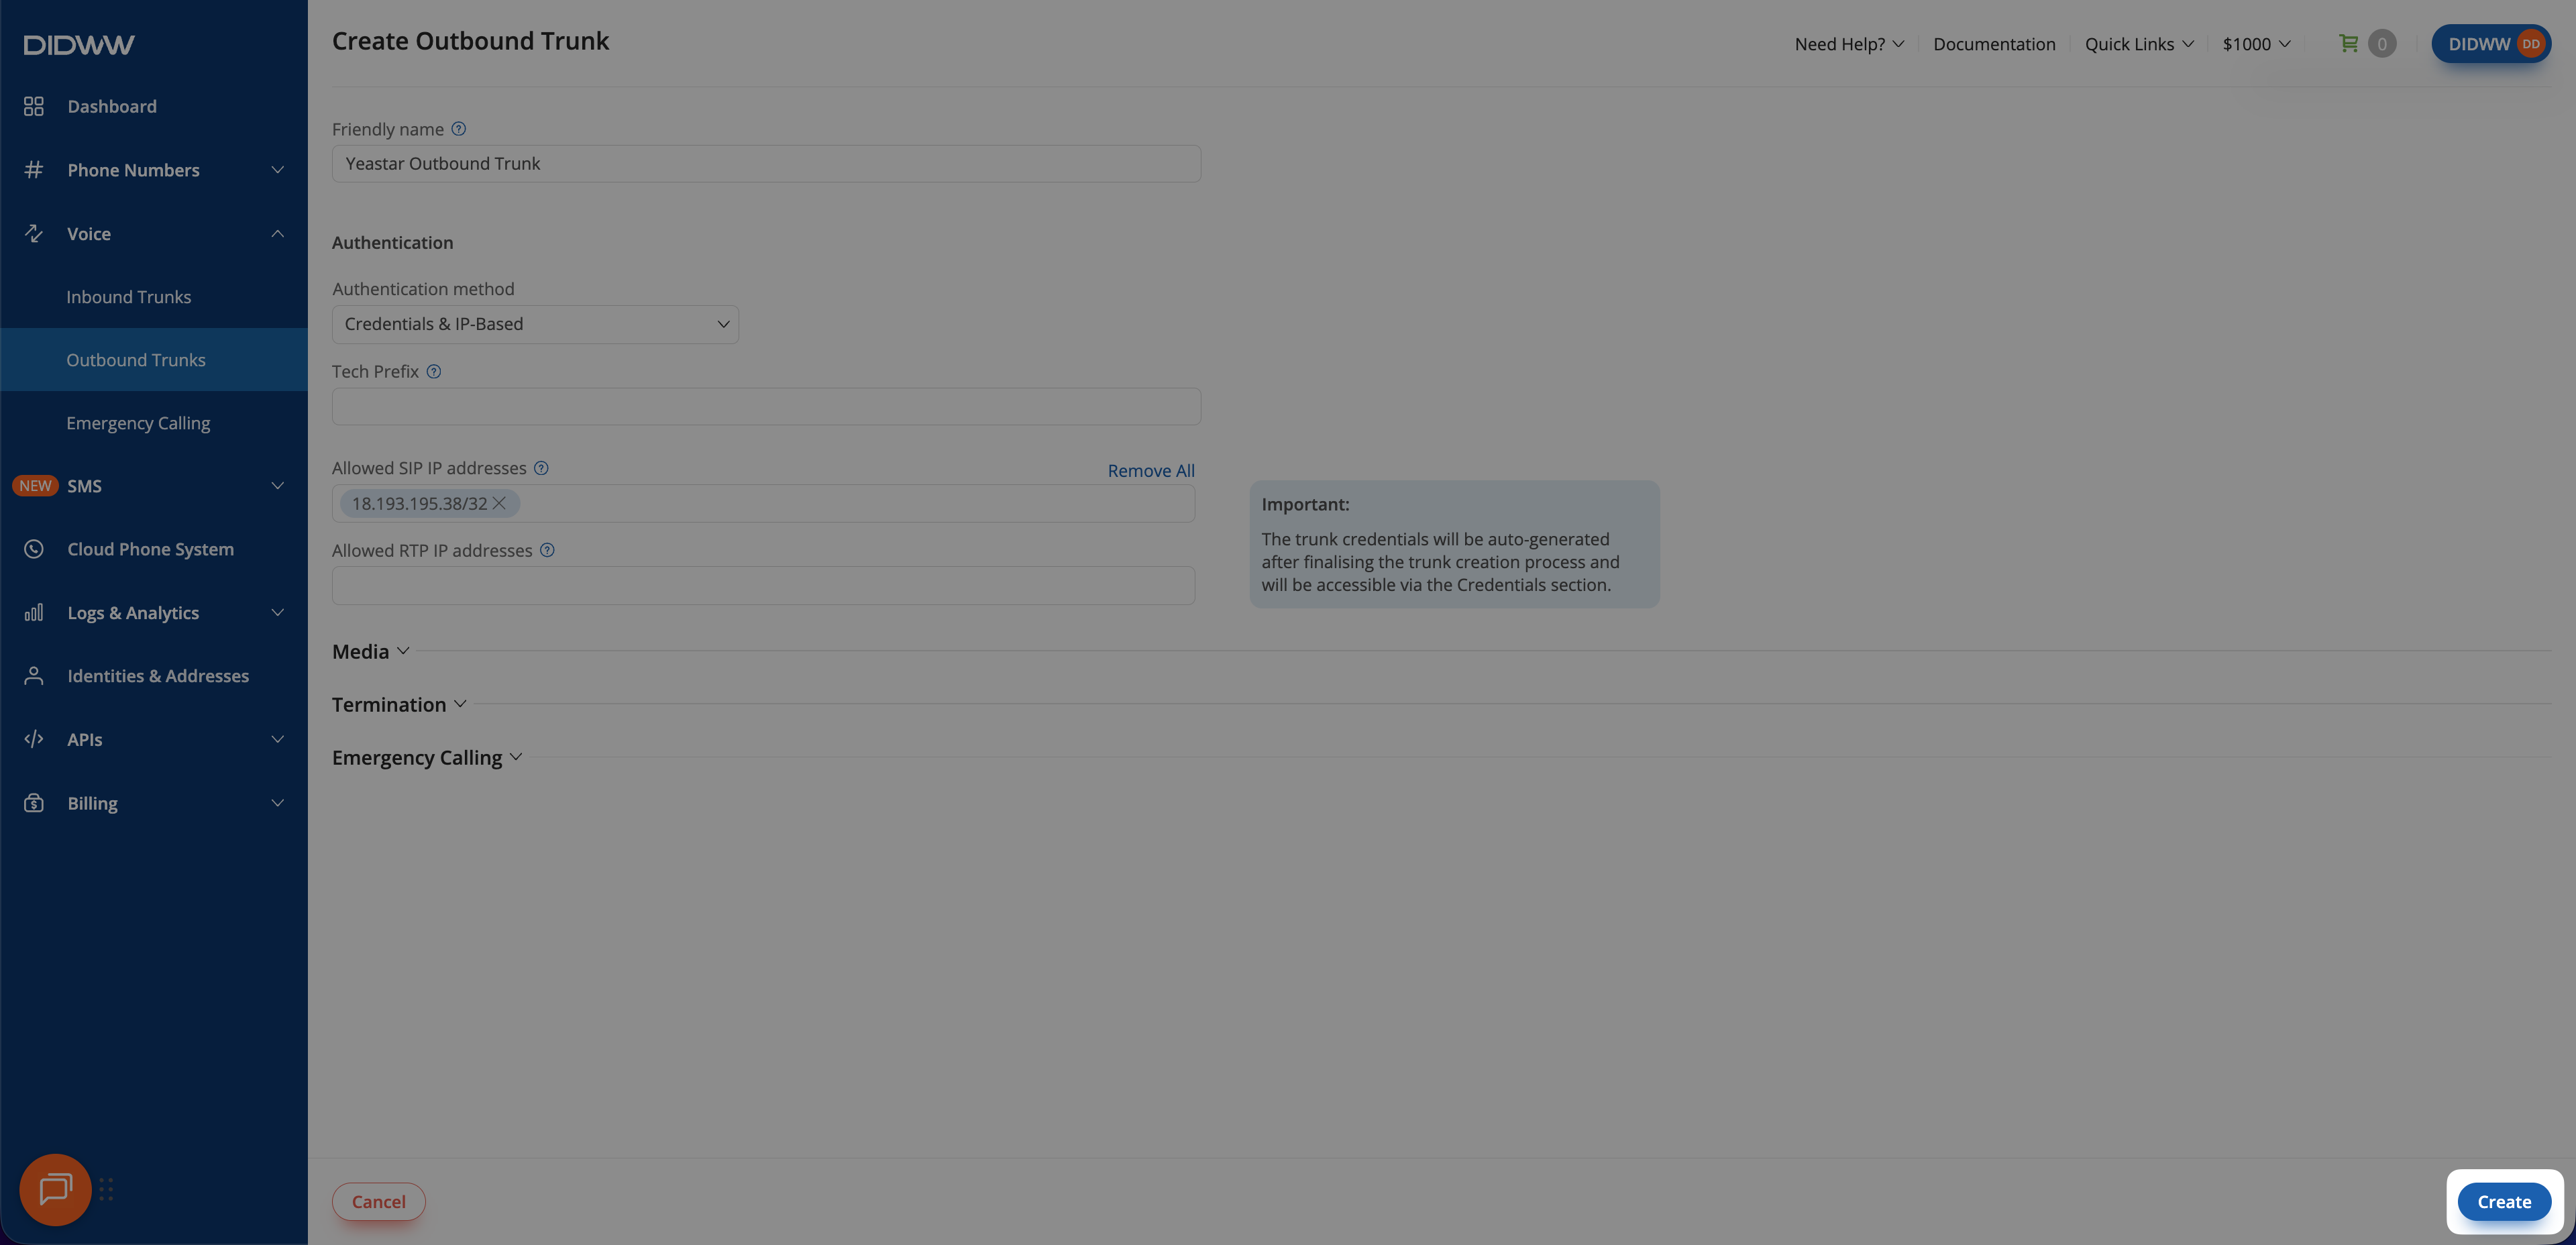
Update the Friendly Name (e.g., YeastarOutboundTrunk).
Keep the default Credentials & IP-based authentication method selected. The SIP digest credentials (username and password) will be accessible after the trunk is created.
In Allowed SIP IP addresses, enter a placeholder IP address (e.g., 198.51.100.0).
Optionally you can allow all traffic by adding 0.0.0.0/0, which removes all IP restrictions. Although SIP Digest Authentication will still verify requests using valid credentials, this setup is not recommended.
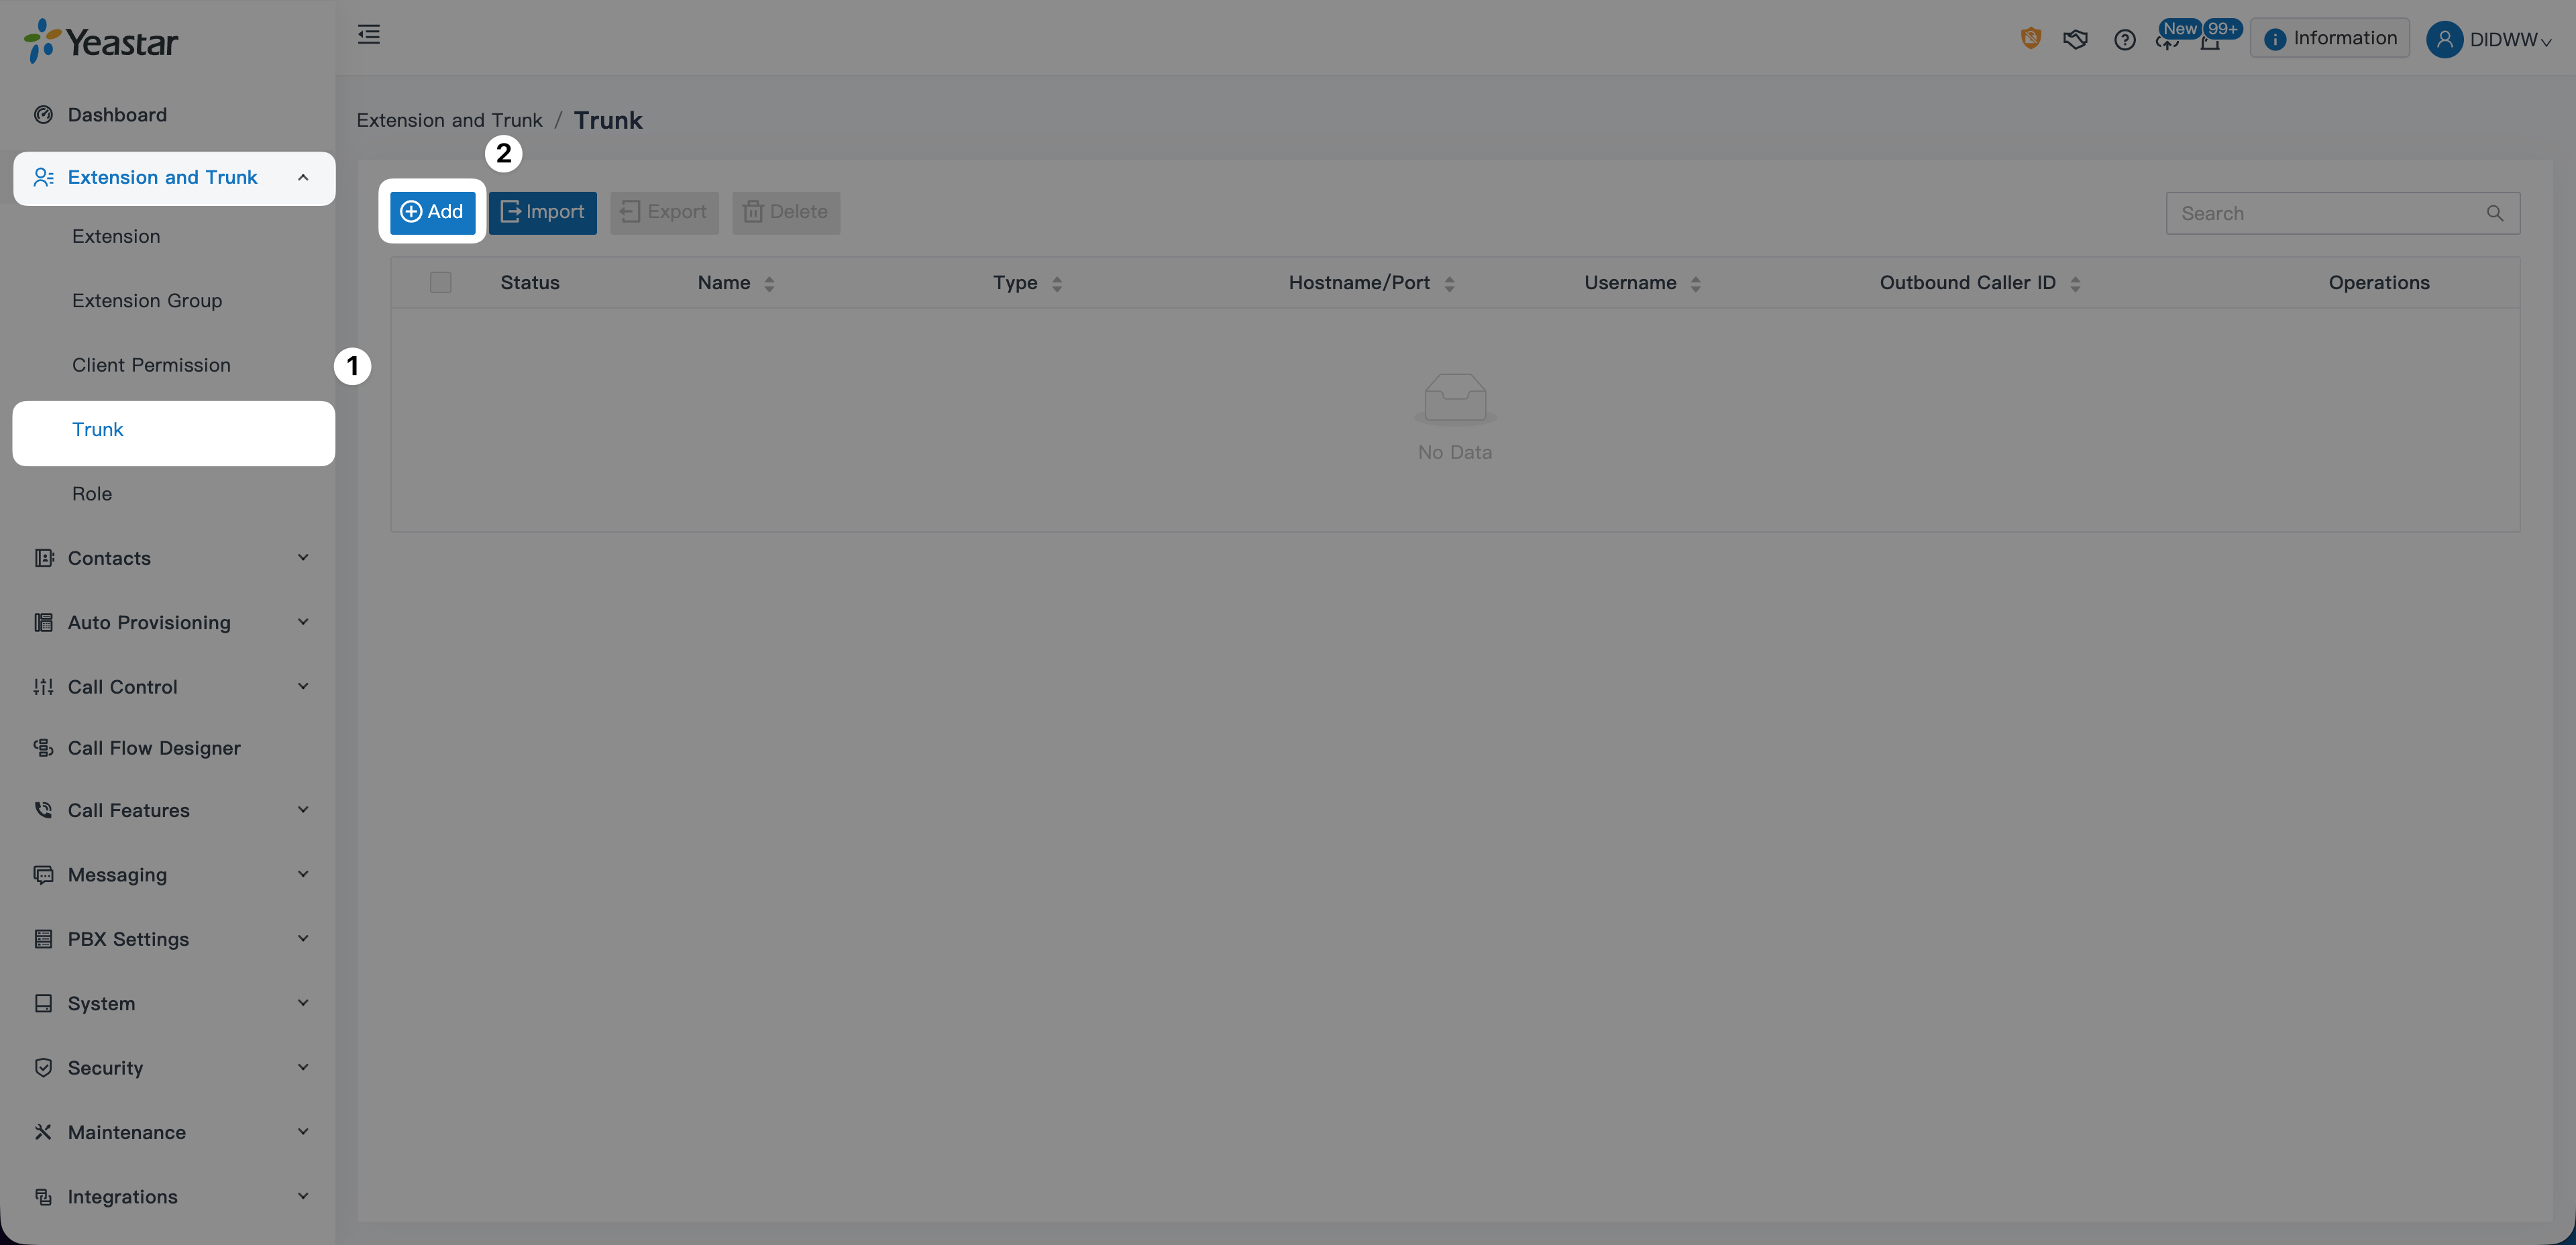
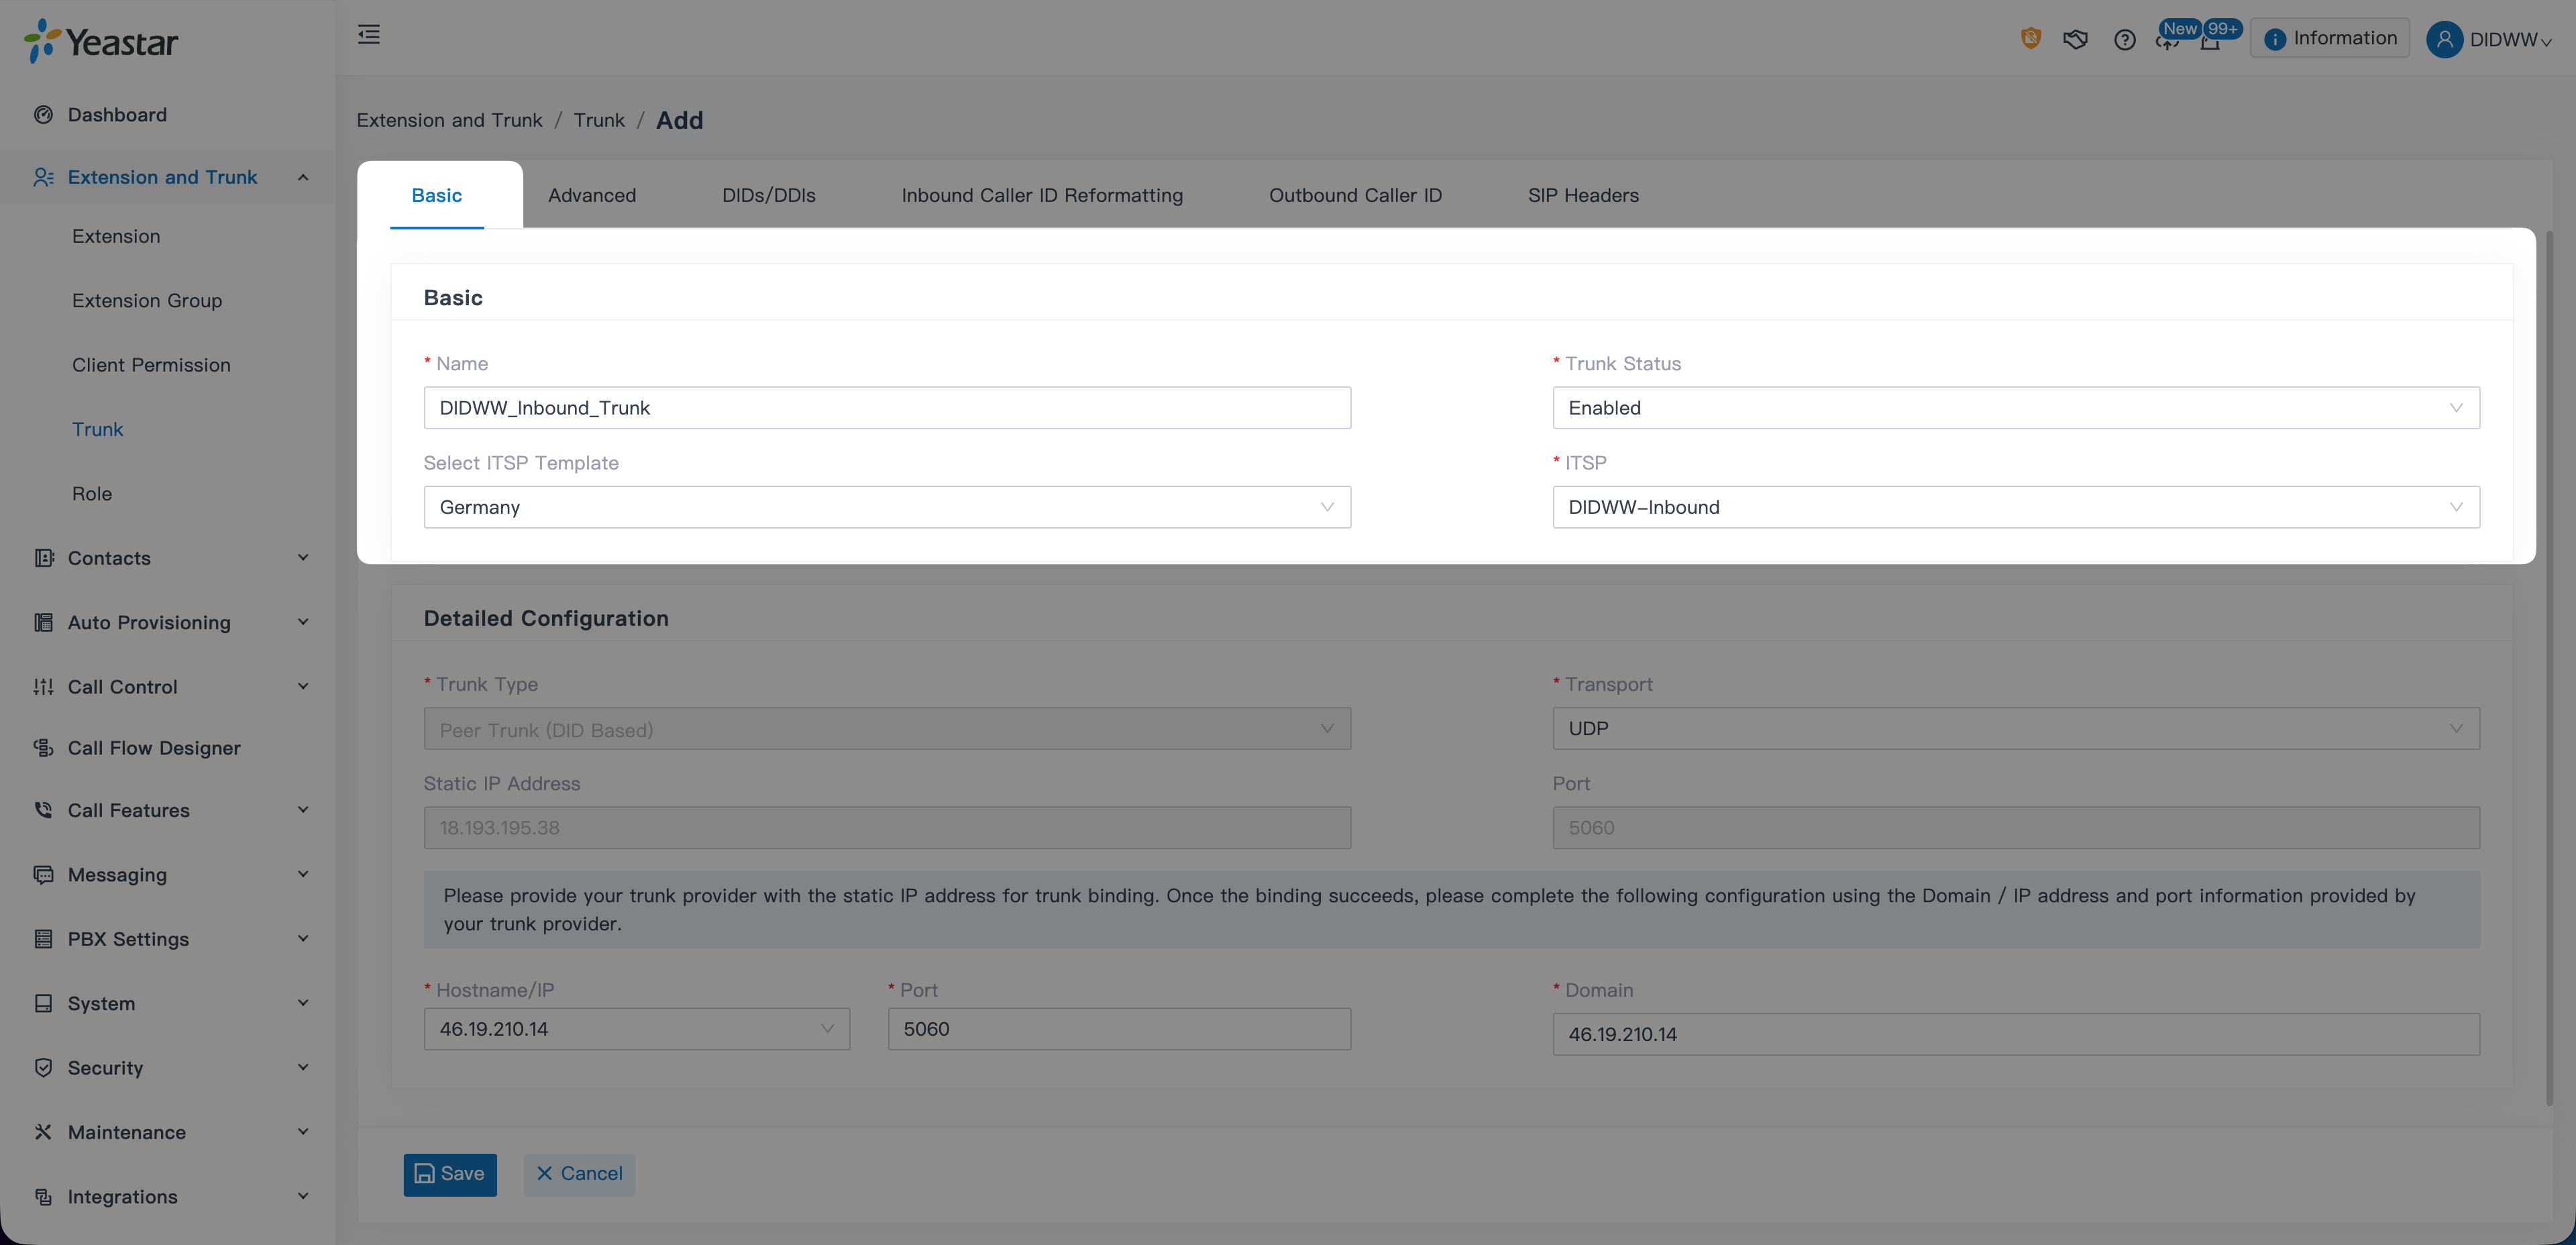
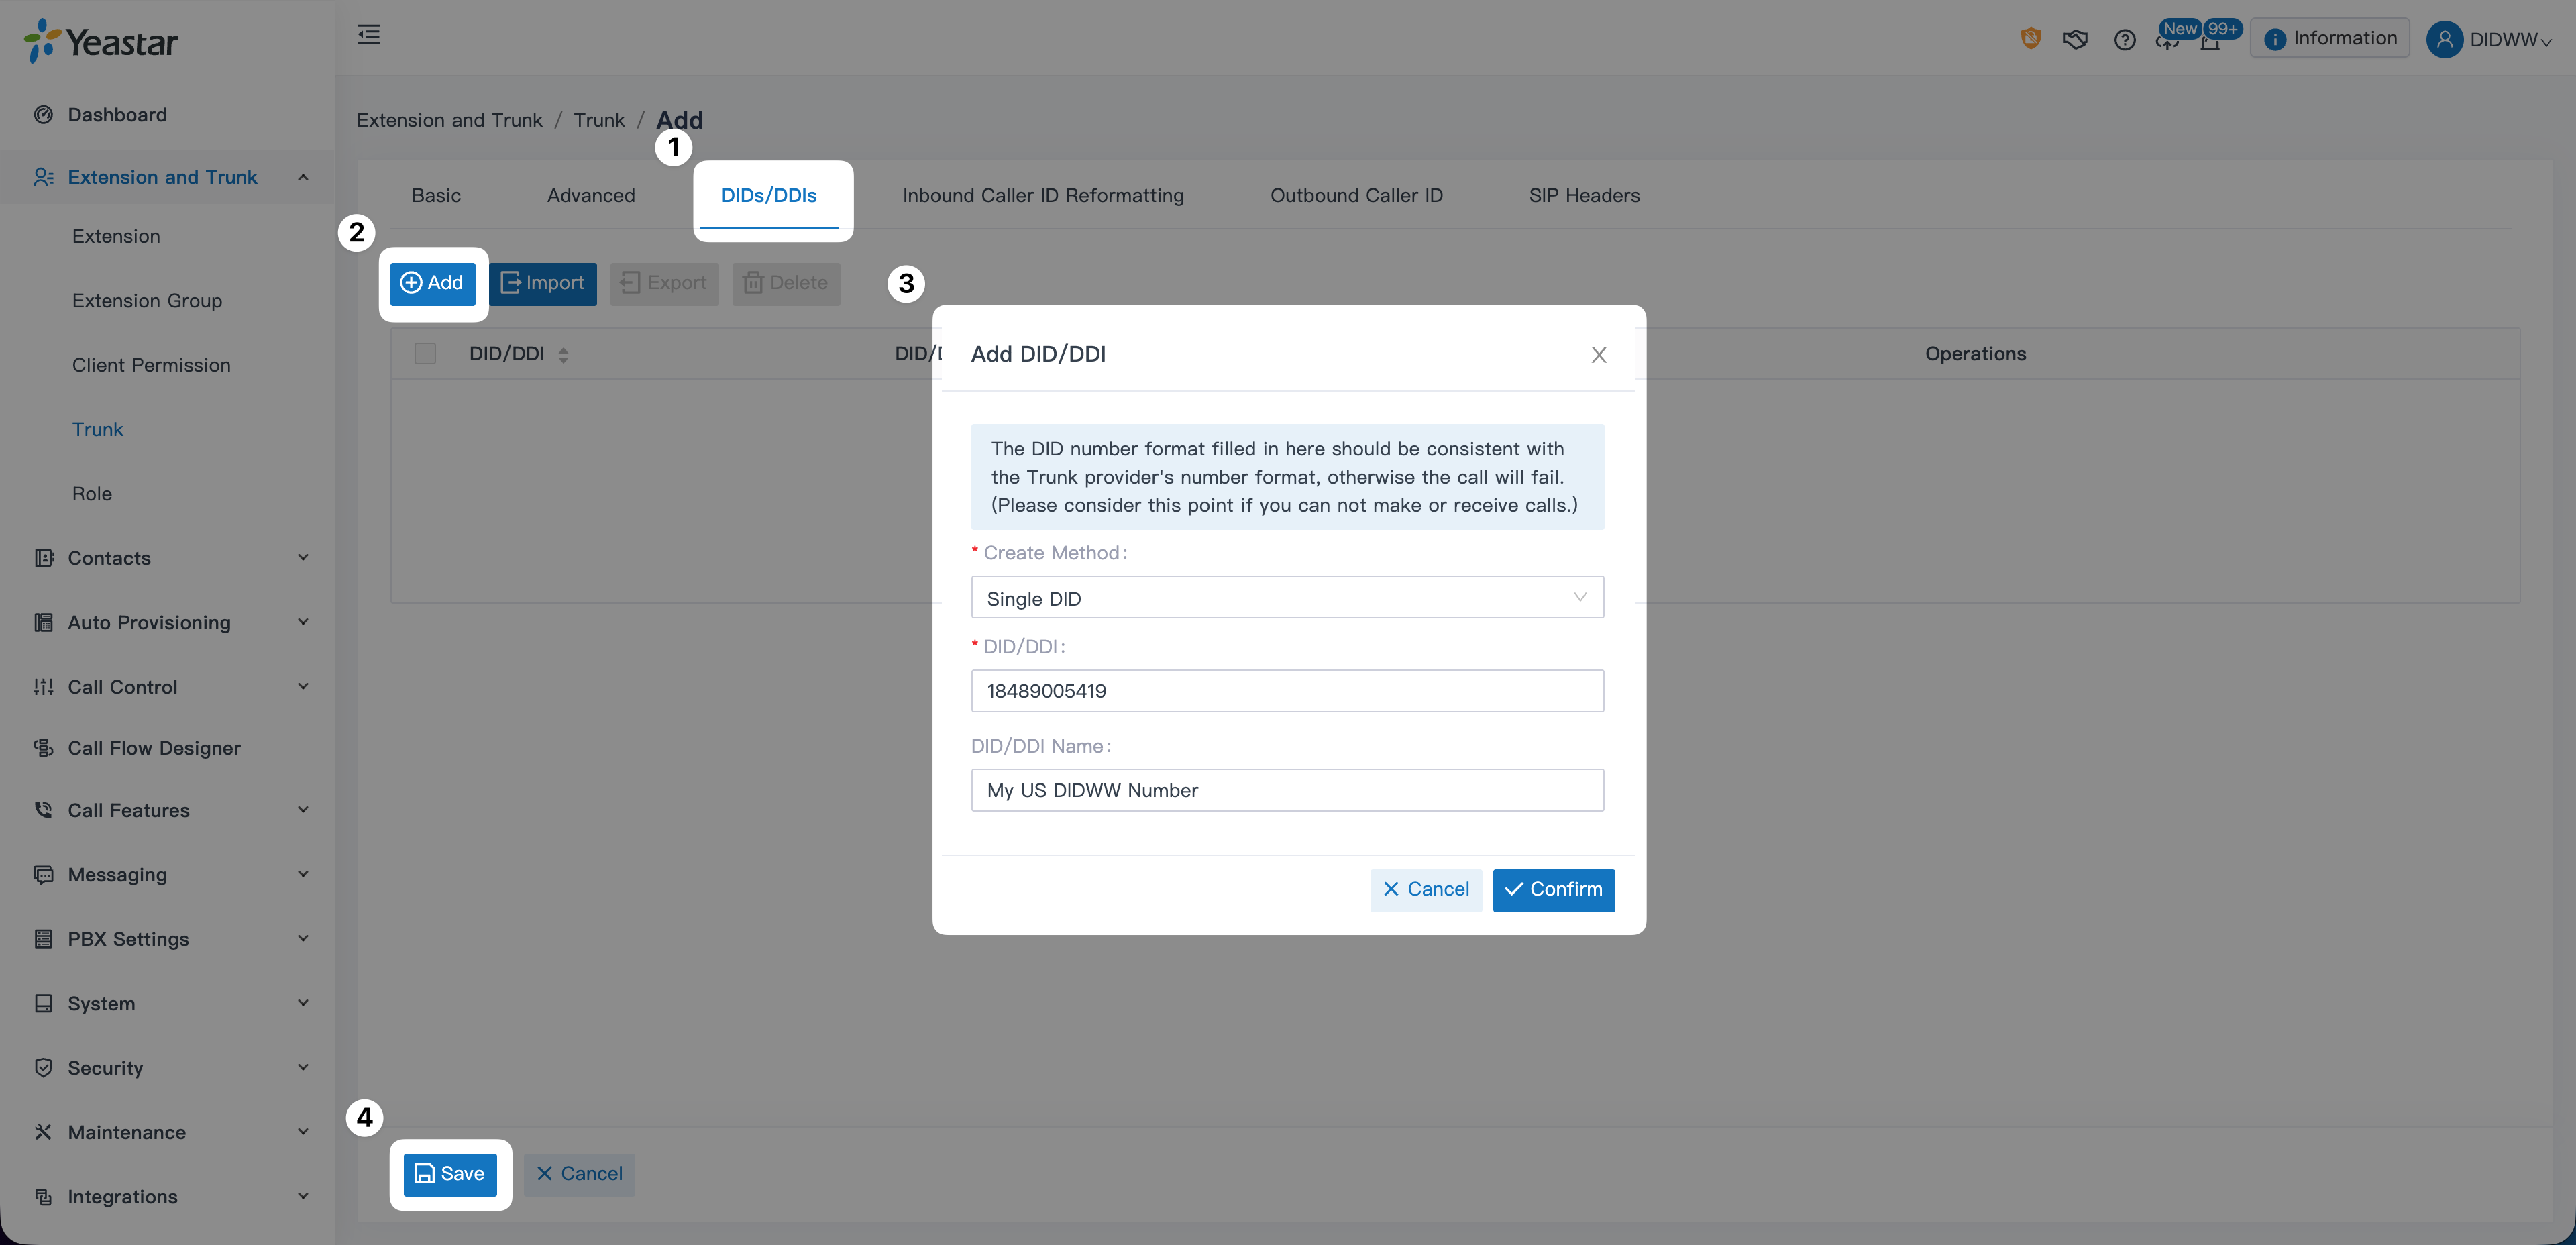
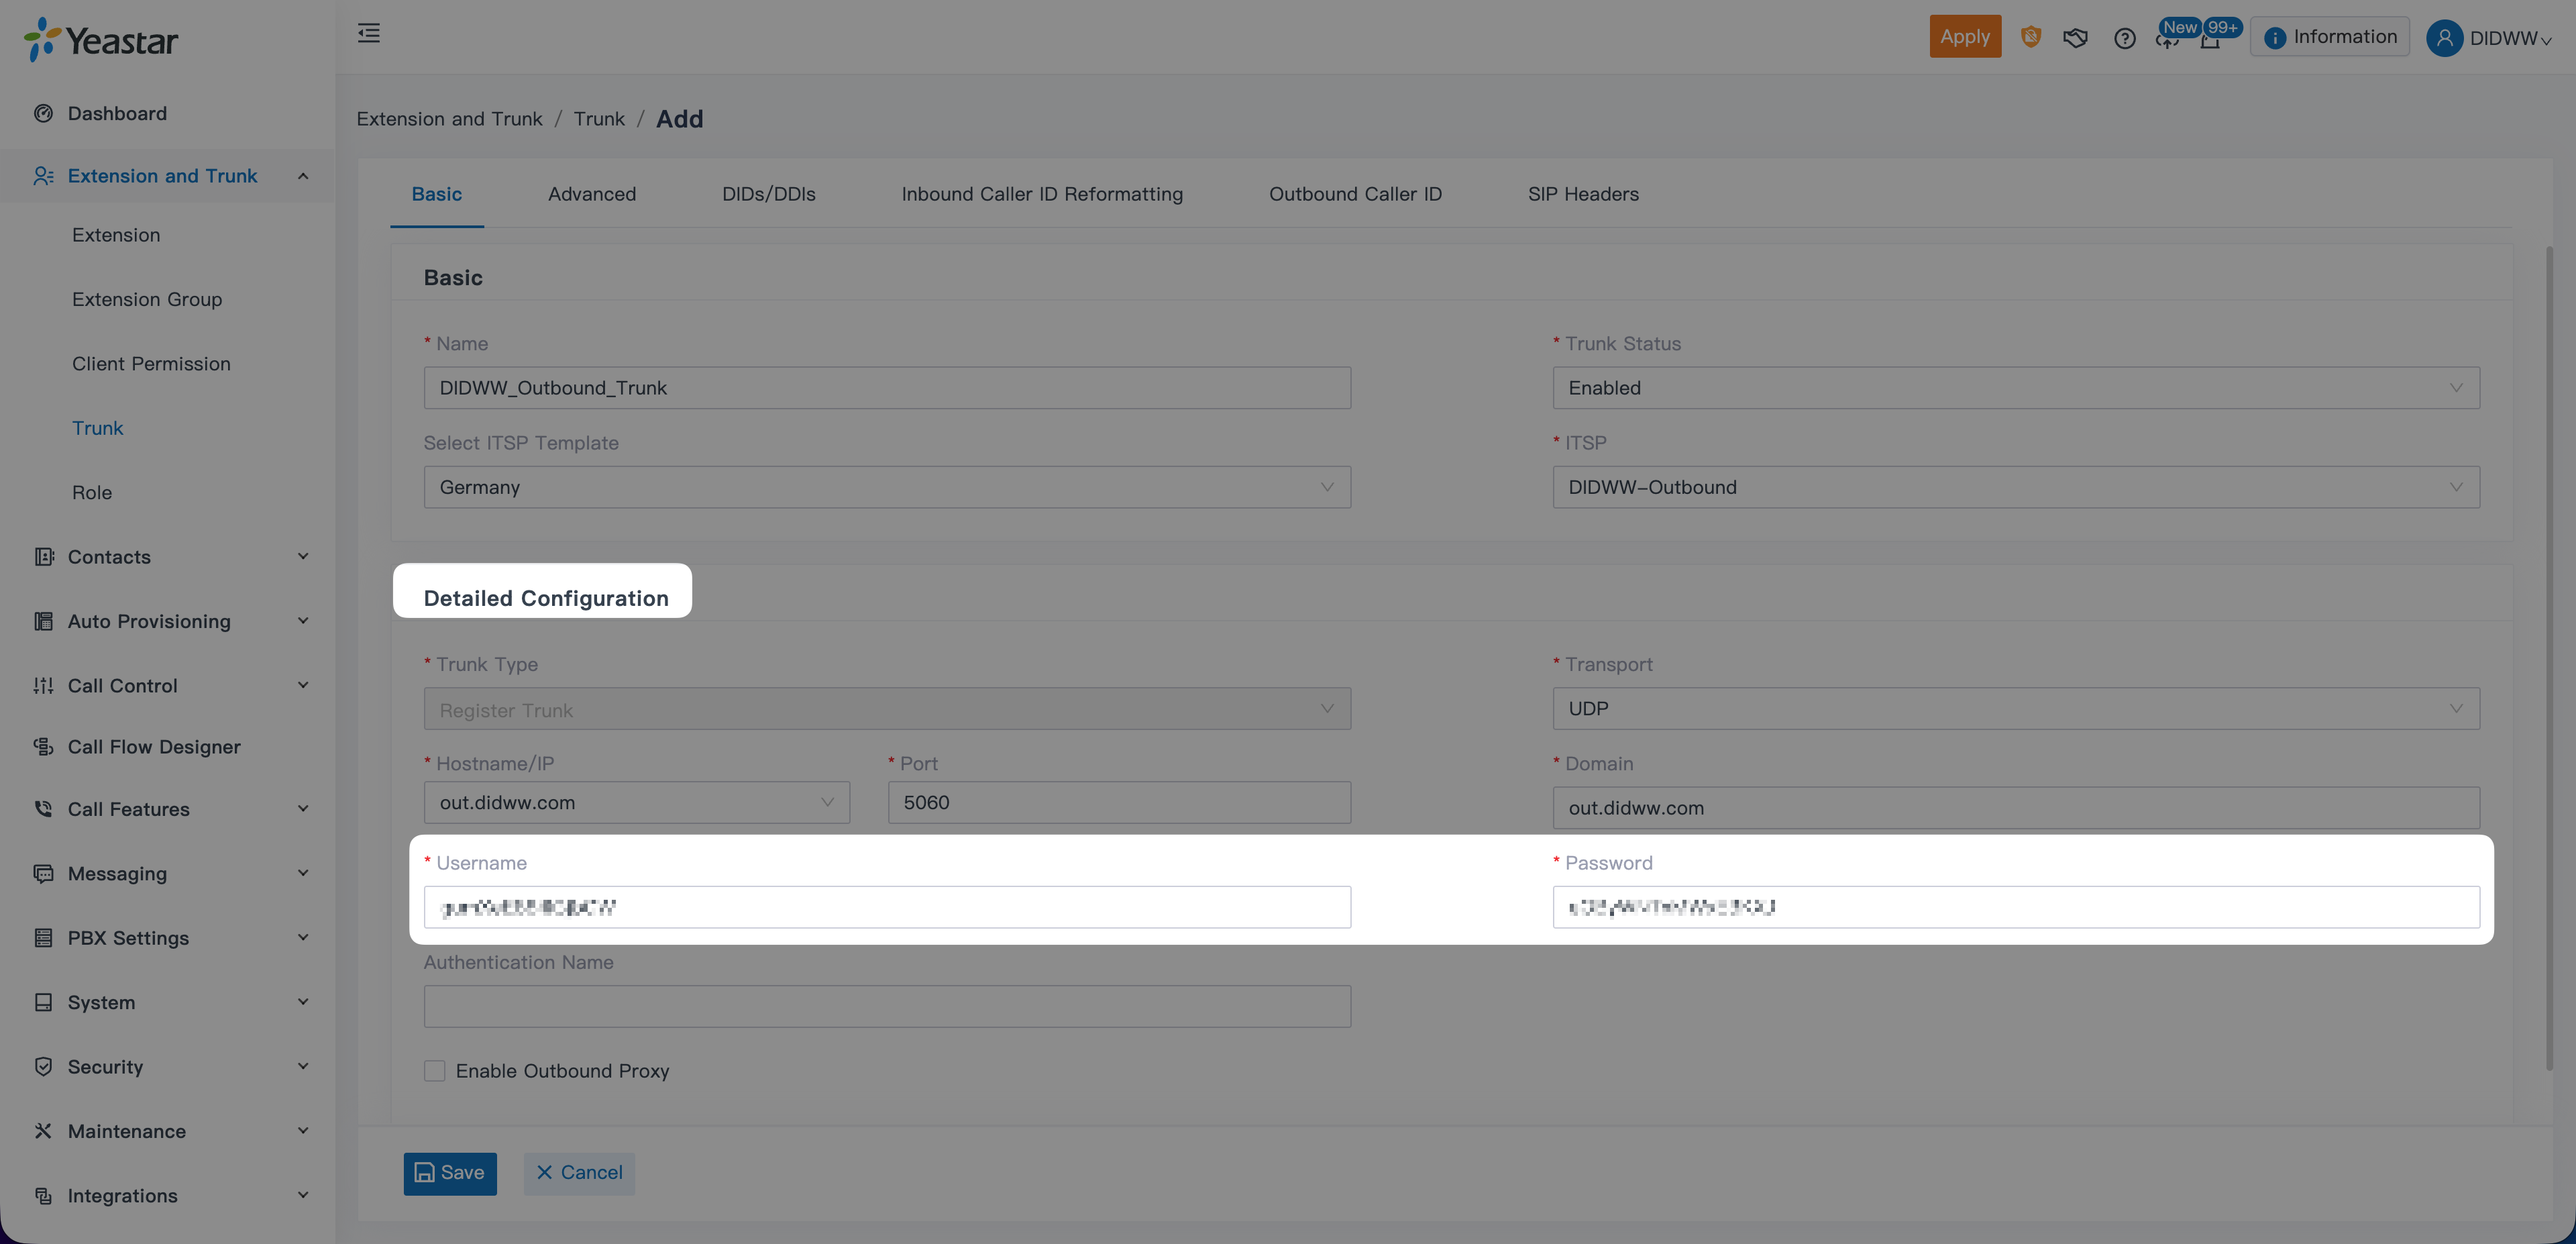
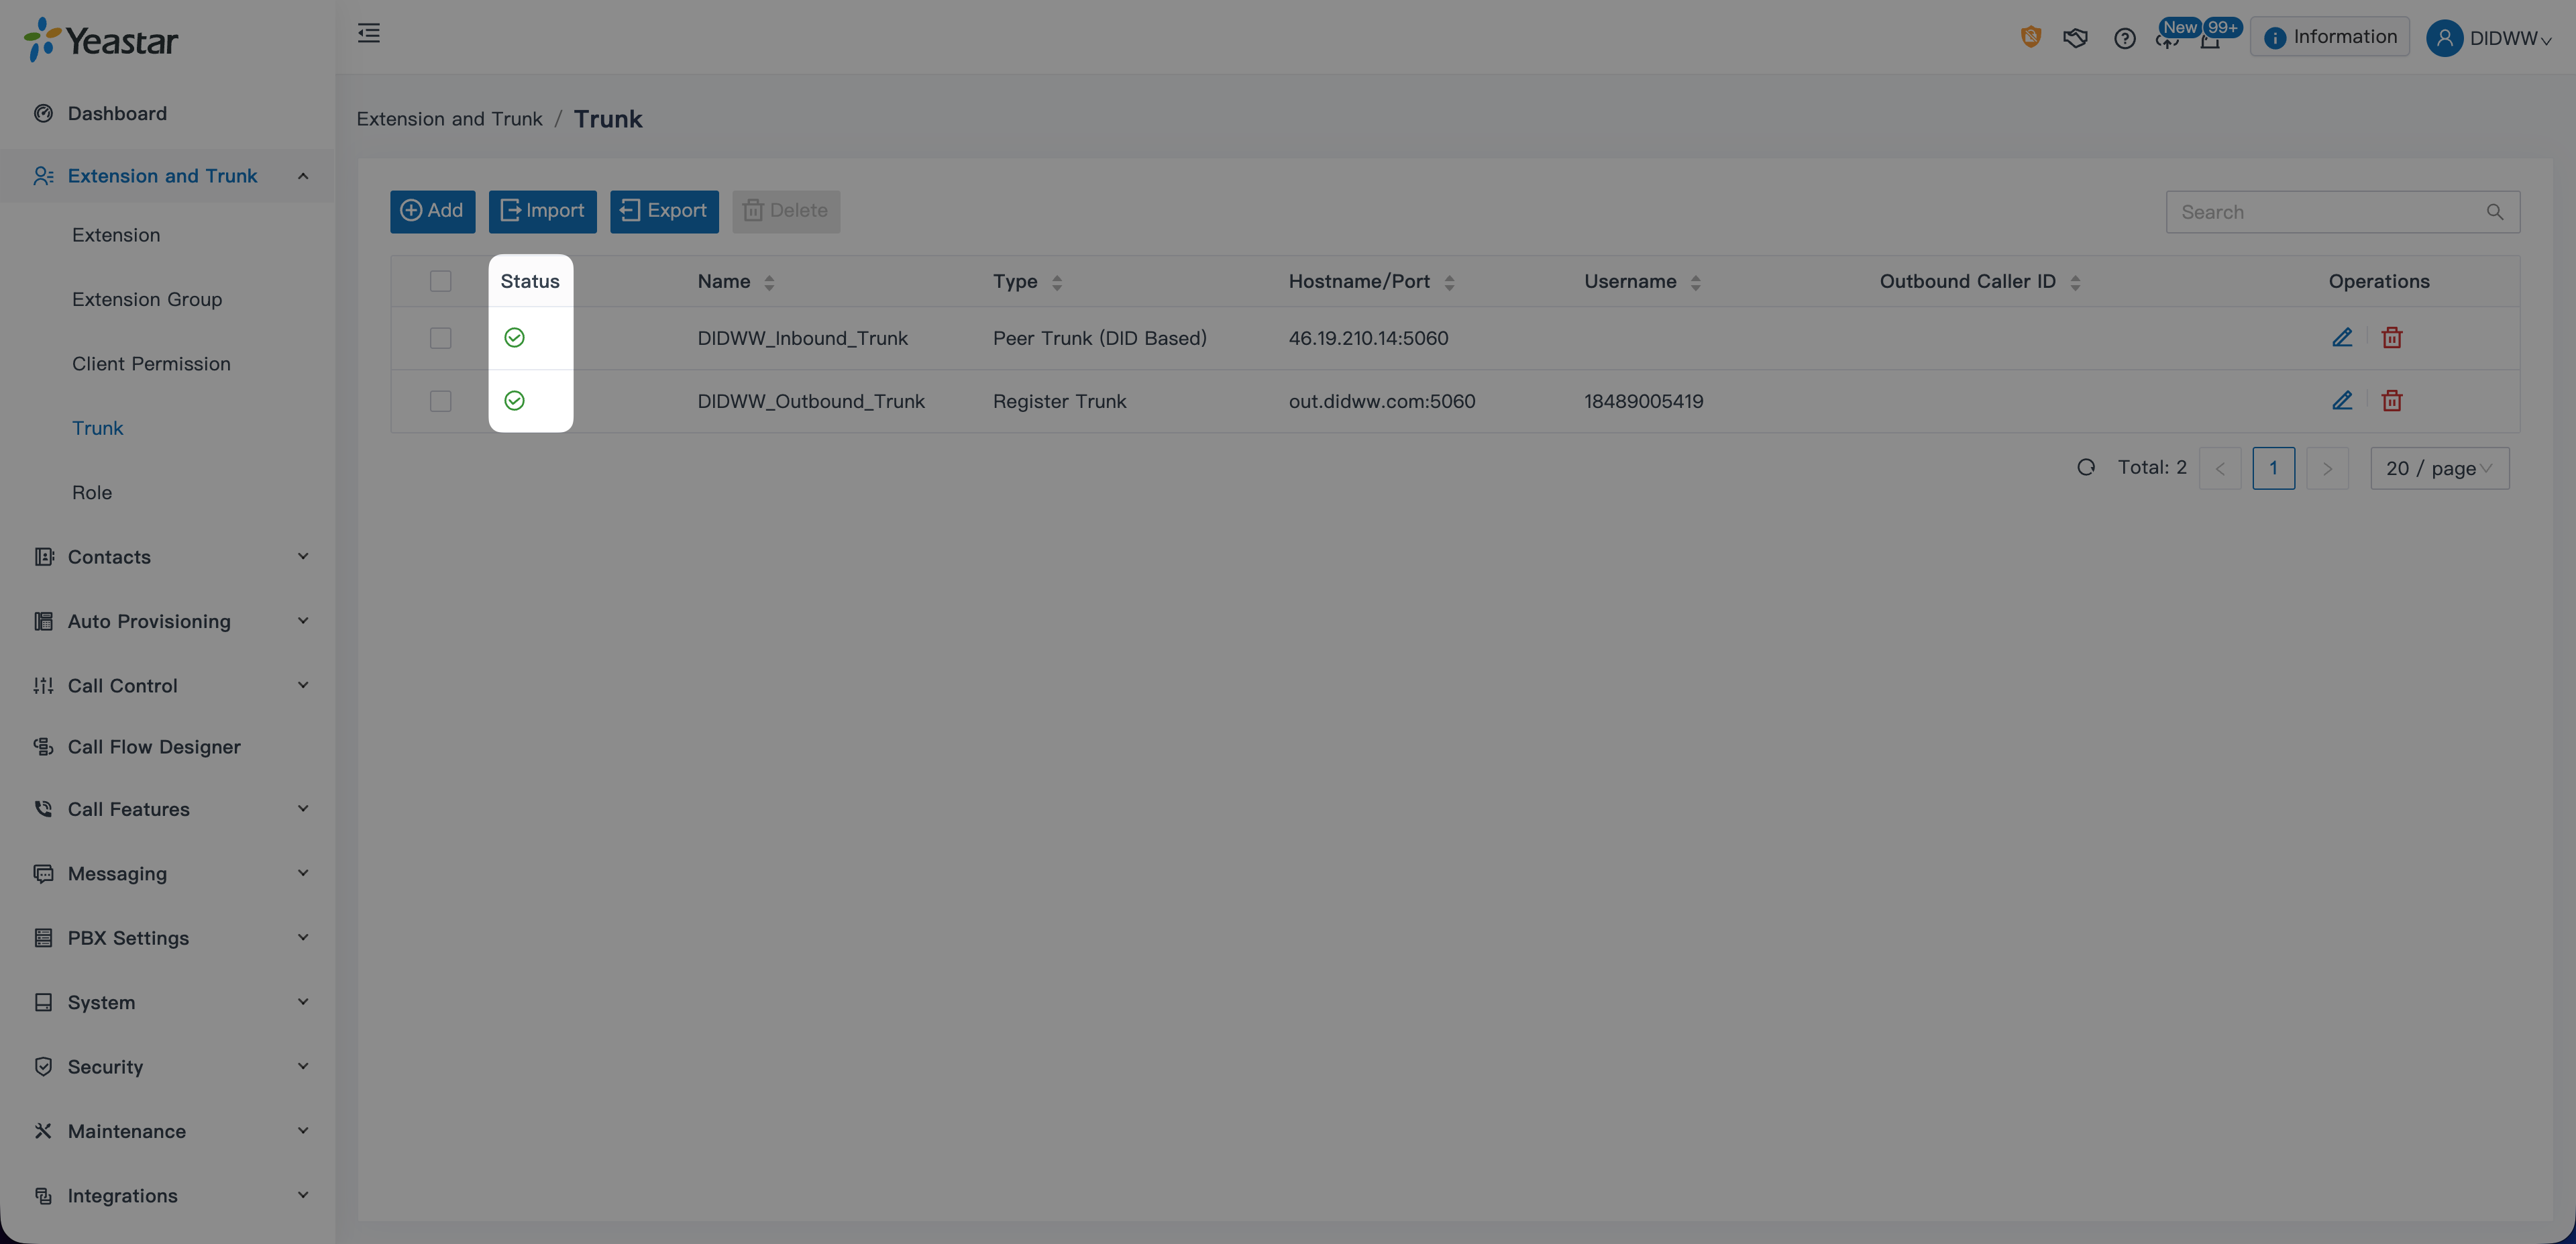
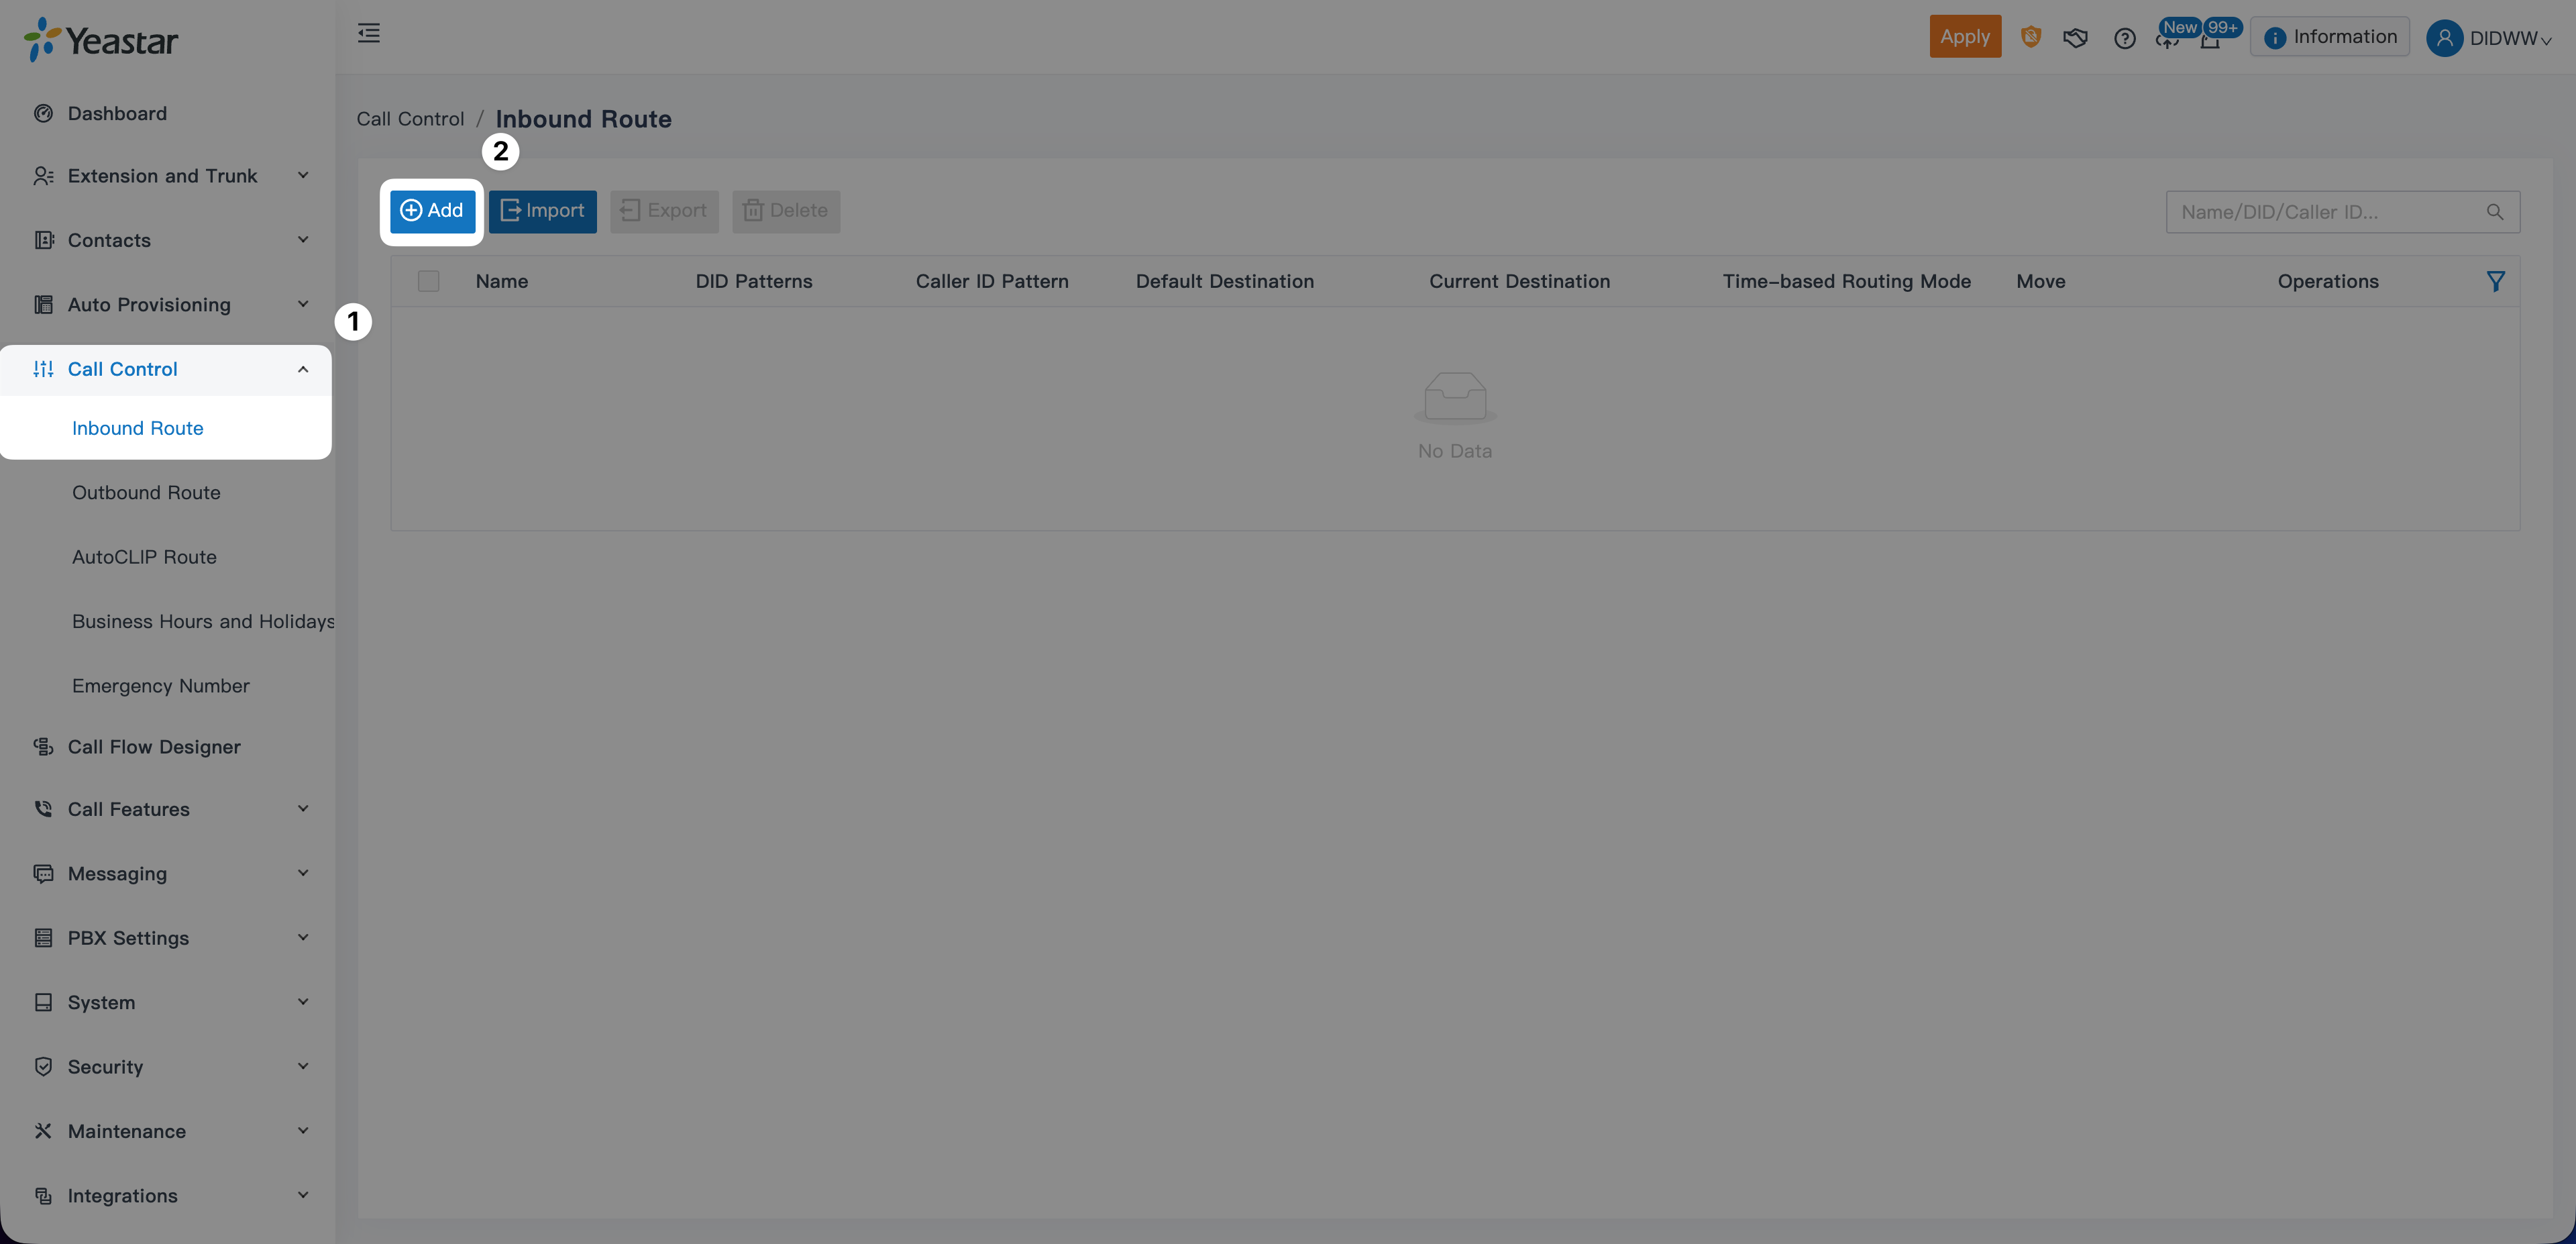
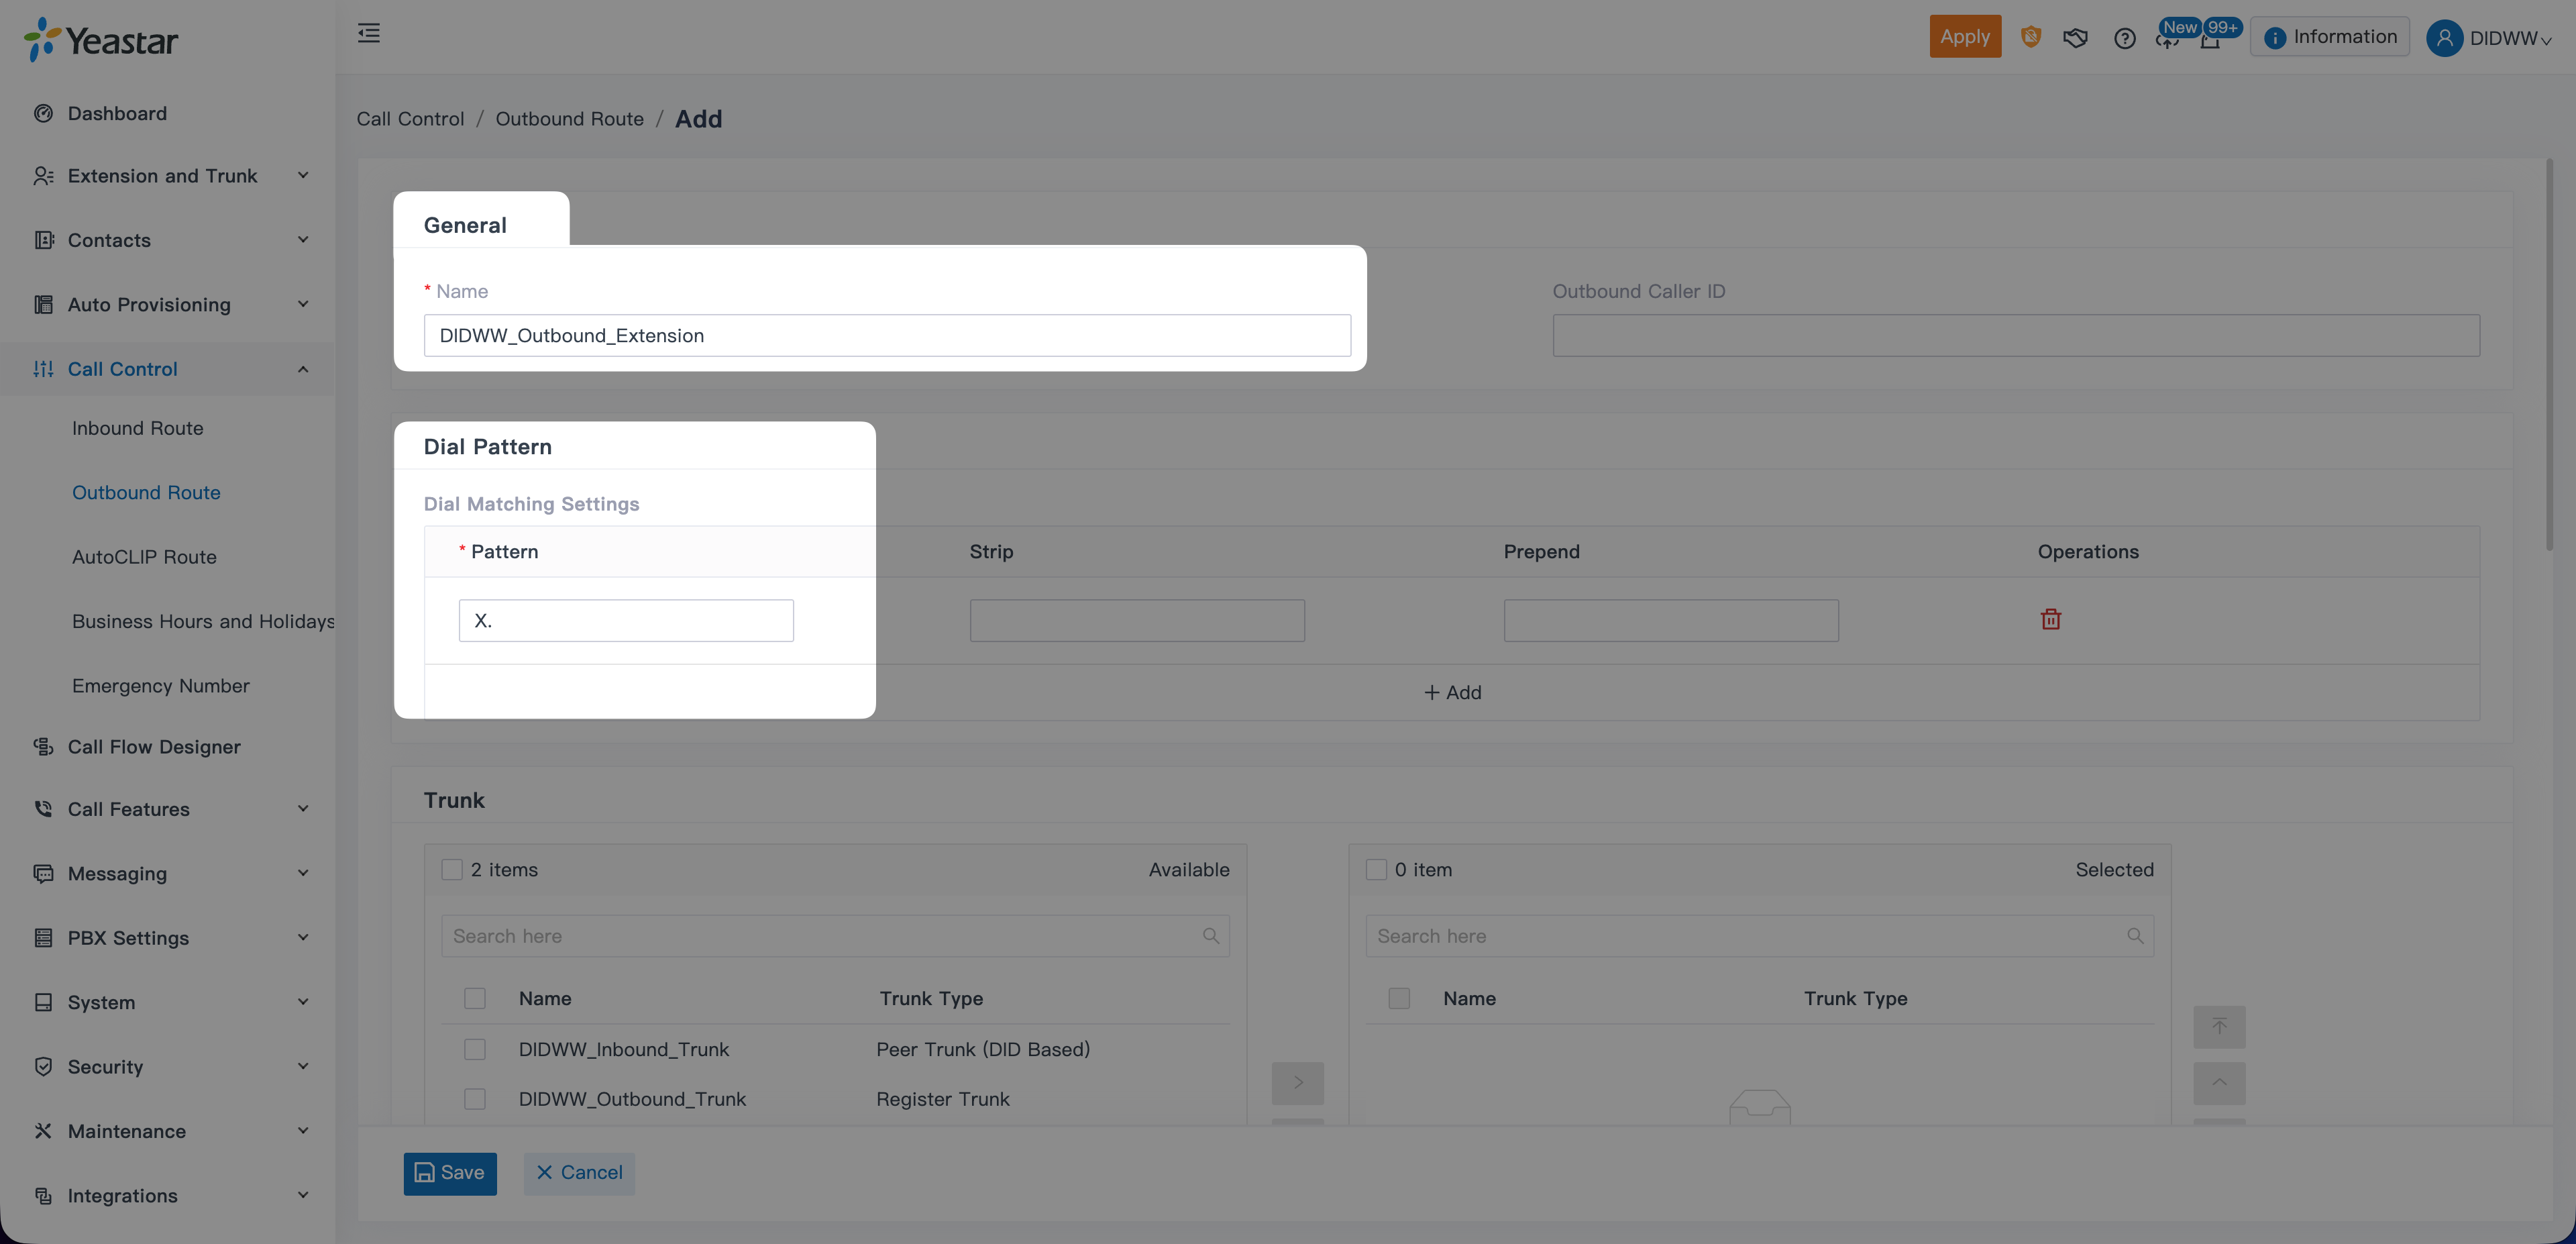
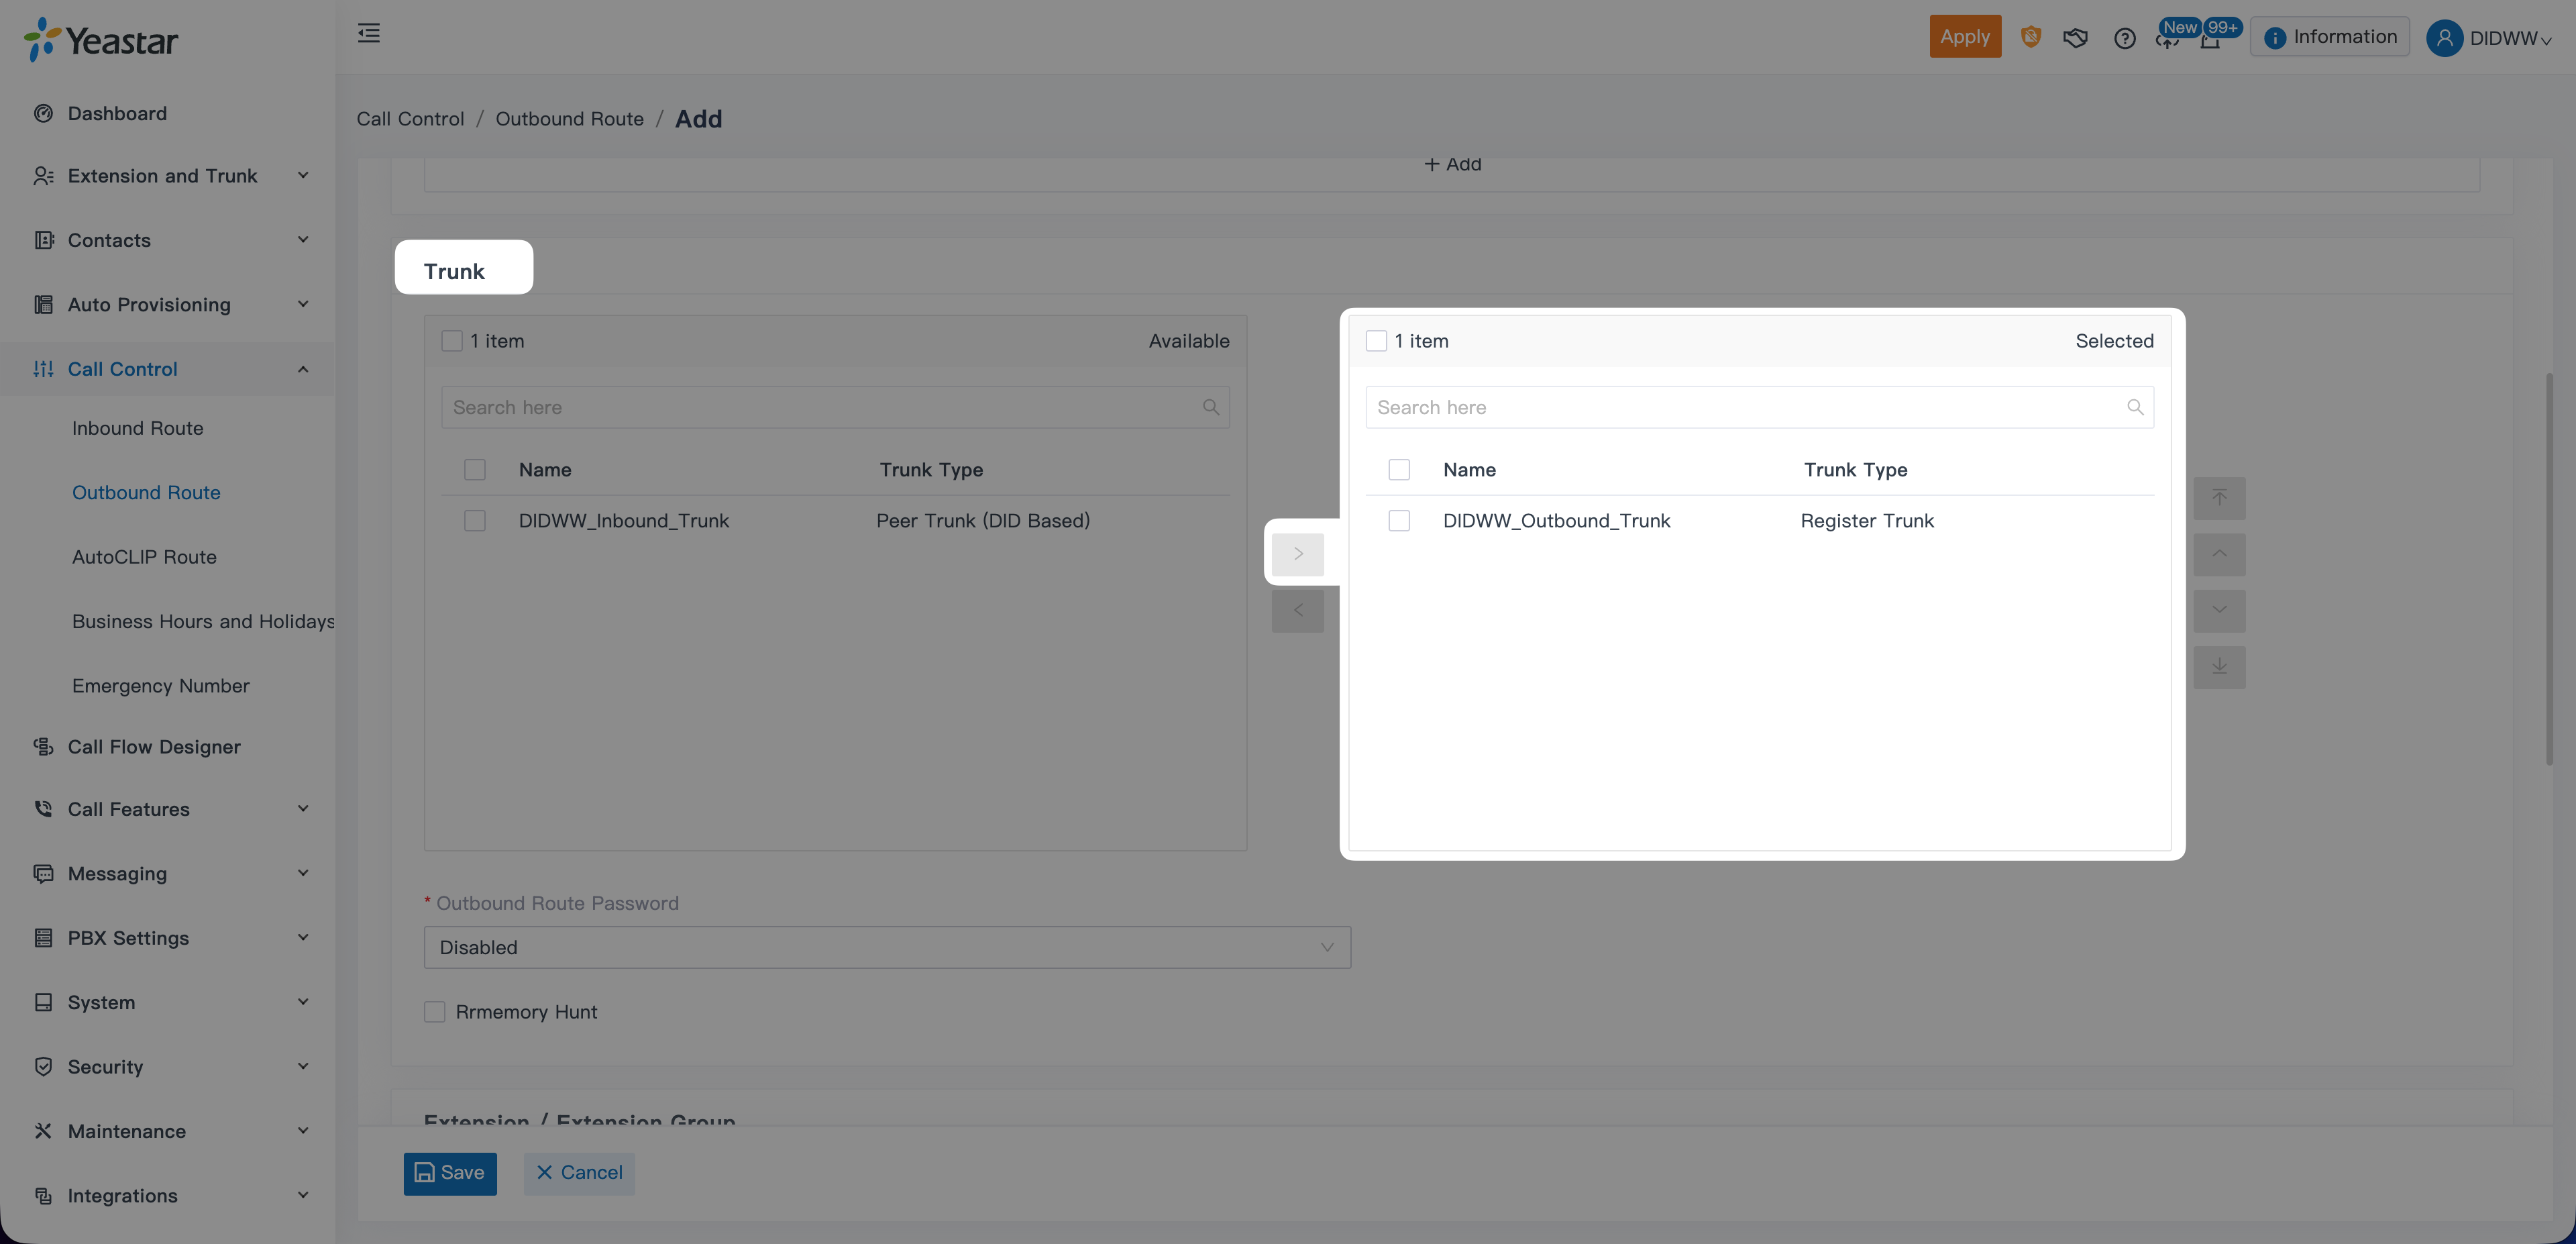
To complete your integration, configure the DIDWW SIP trunking settings inside the Yeastar P-Series PBX.
This setup links your DIDWW Inbound and Outbound SIP Trunks to Yeastar, allowing the PBX to manage call routing, features, and call handling for both inbound and outbound traffic.
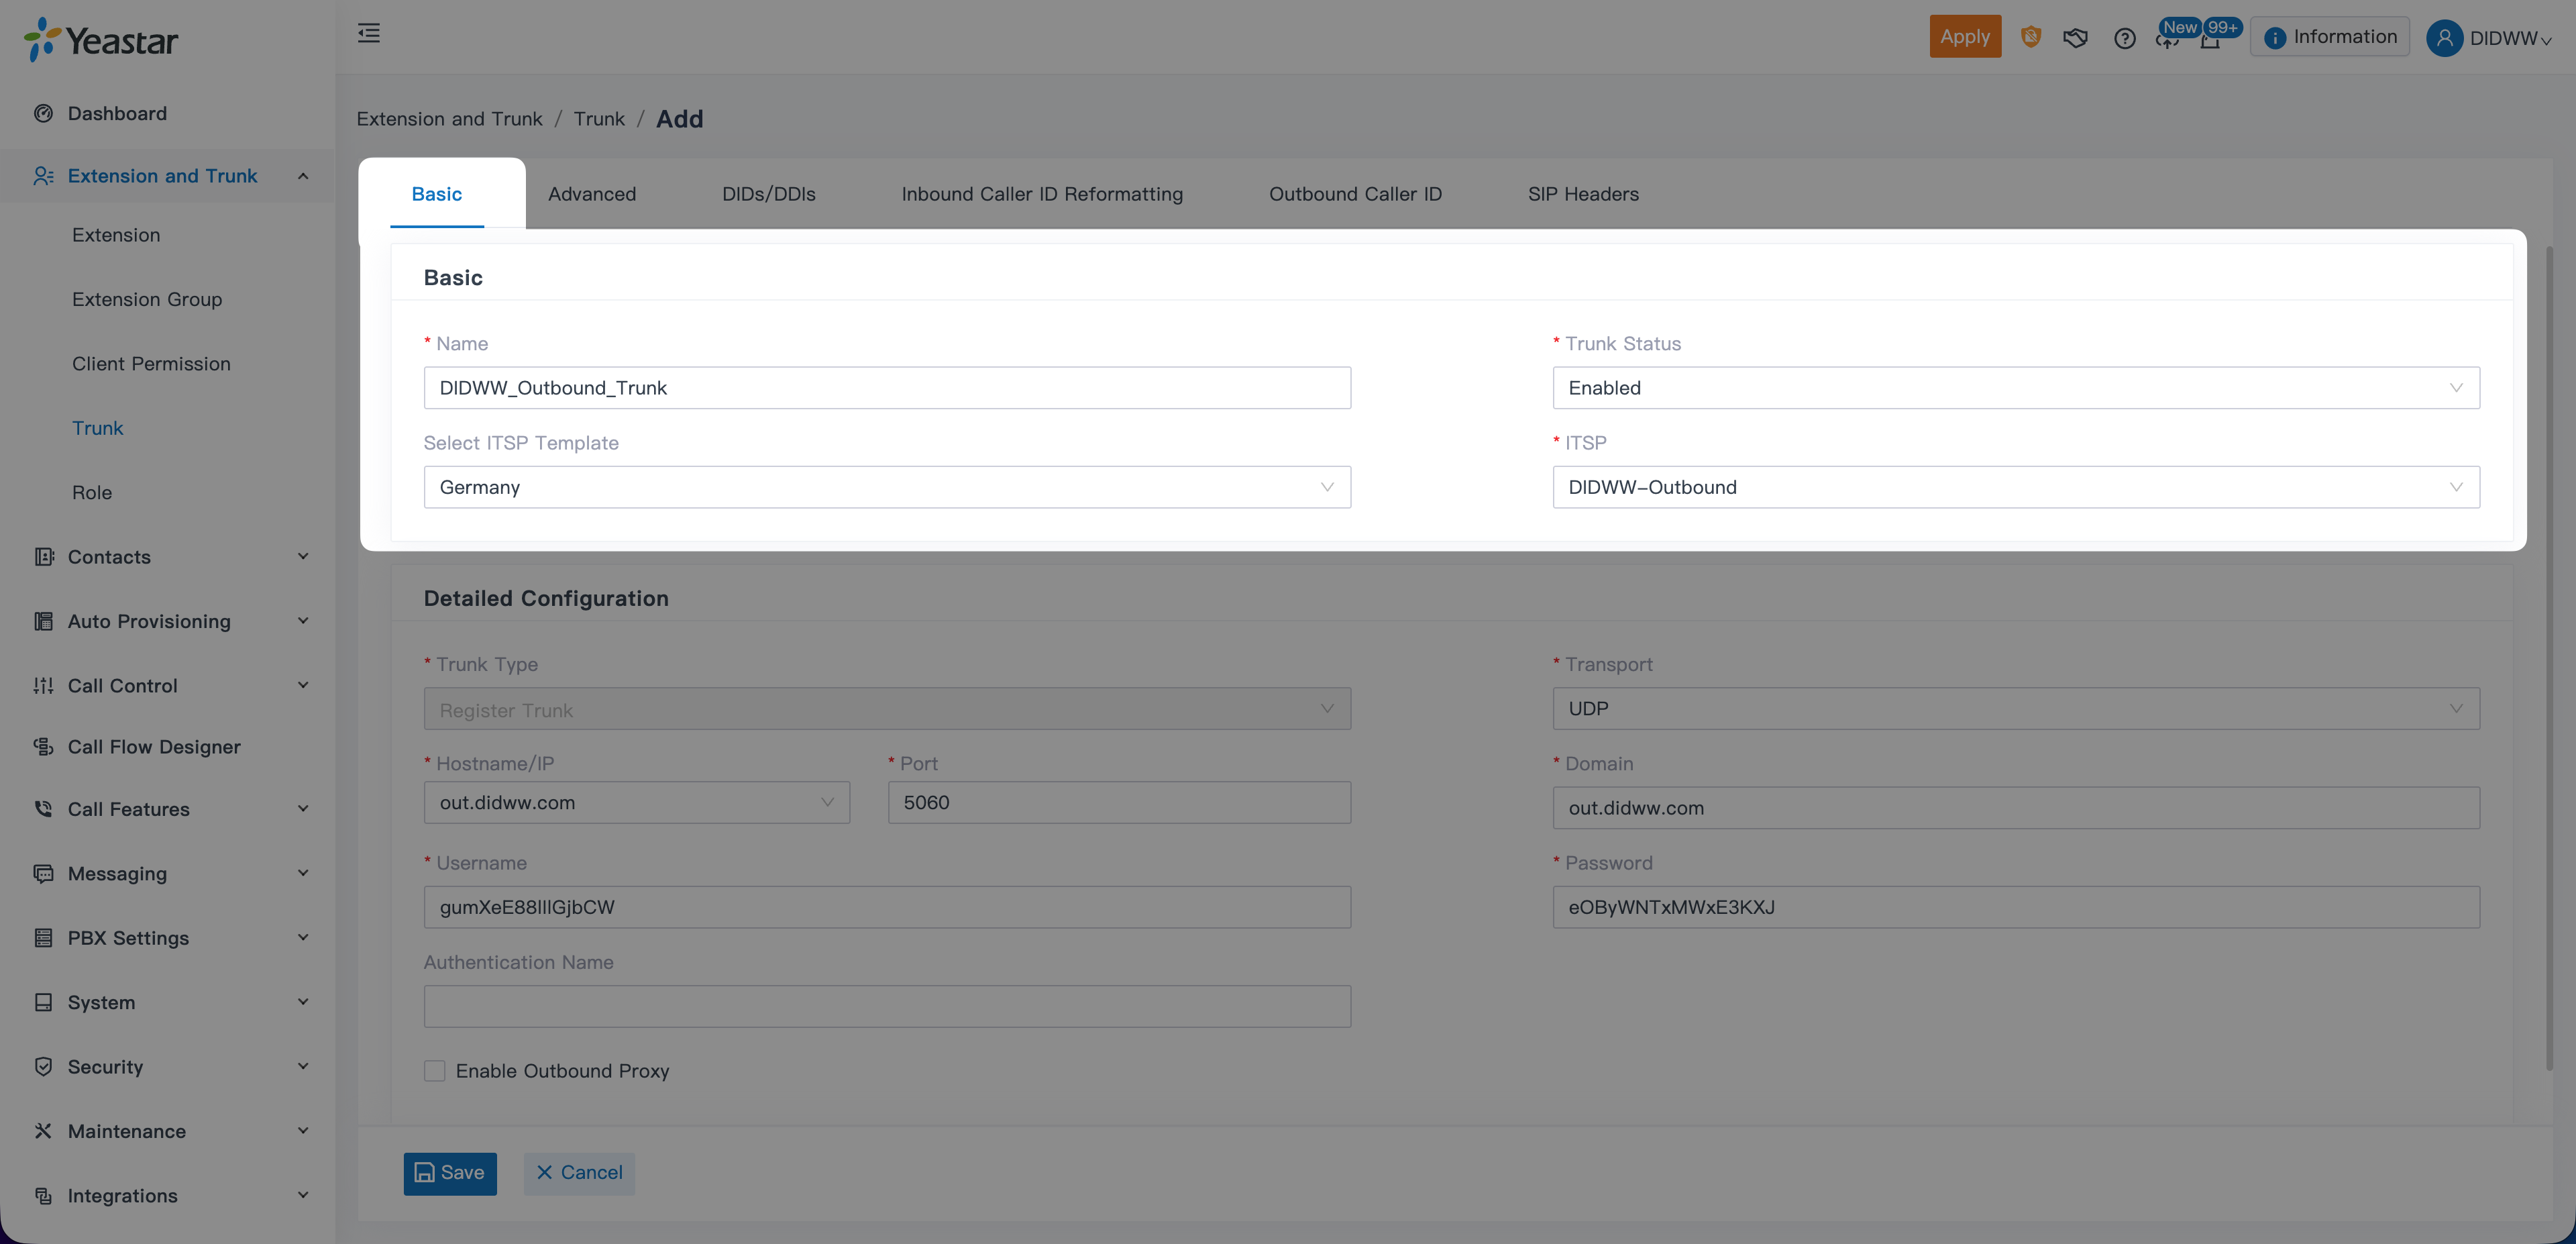
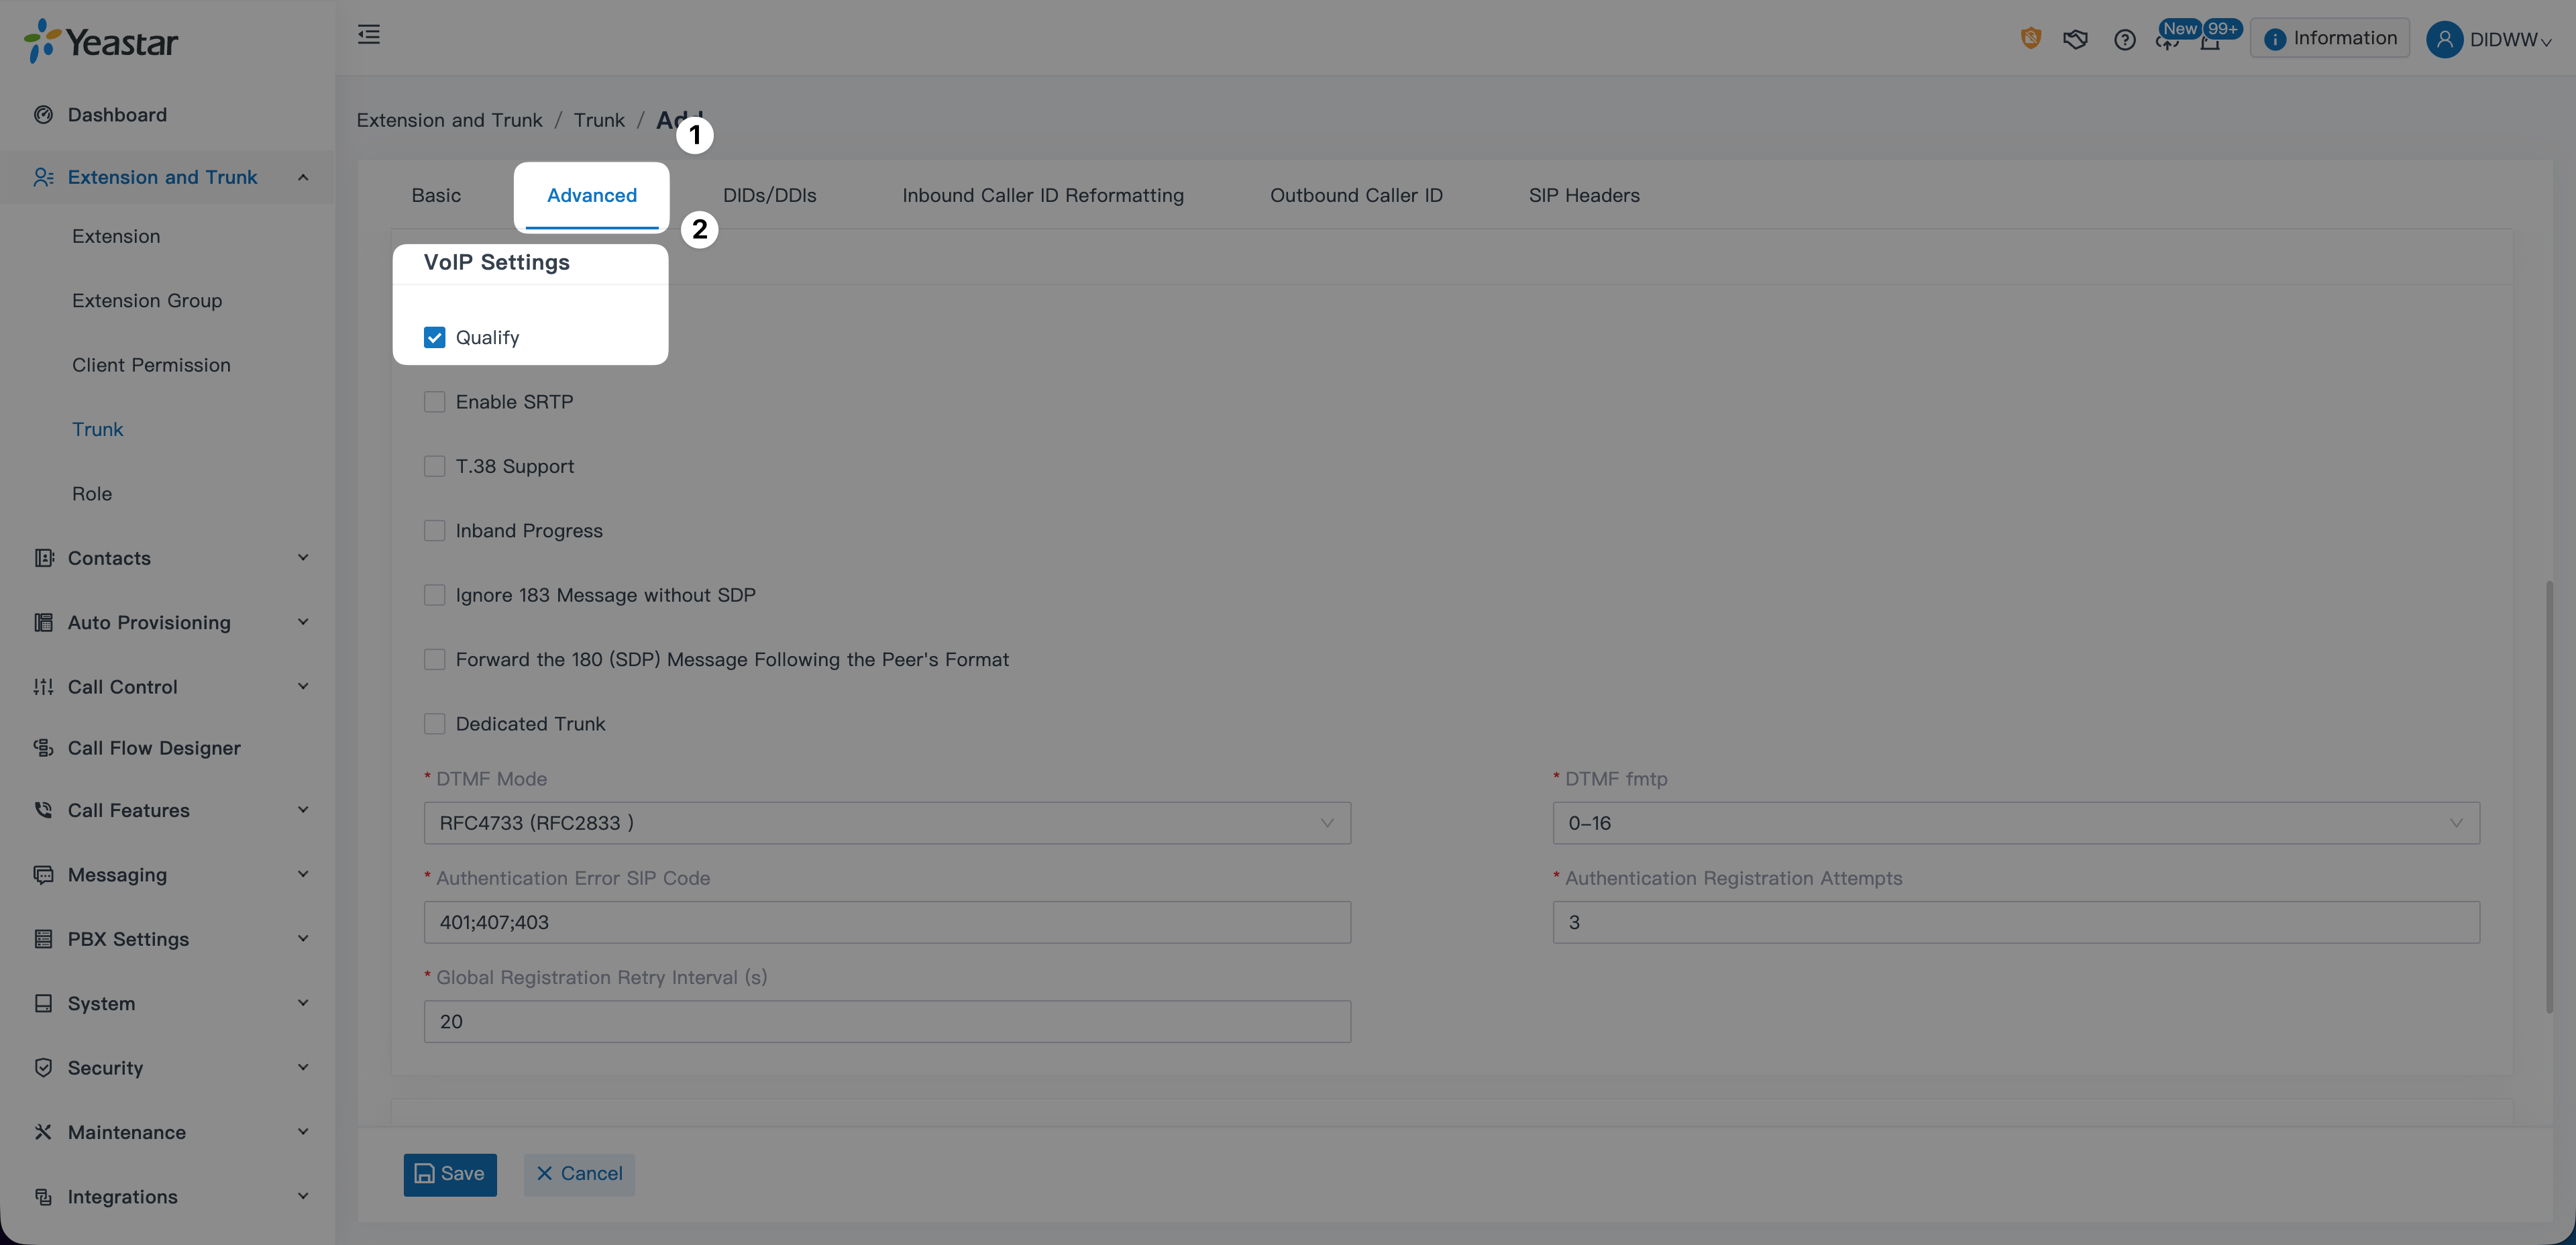
This section is part of the basic trunk setup.
The detailed configuration depends on whether you are using the self-hosted or cloud-based version of the Yeastar P-Series PBX.
The default values provided by the DIDWW template are sufficient.
No additional configuration changes are required.
Note
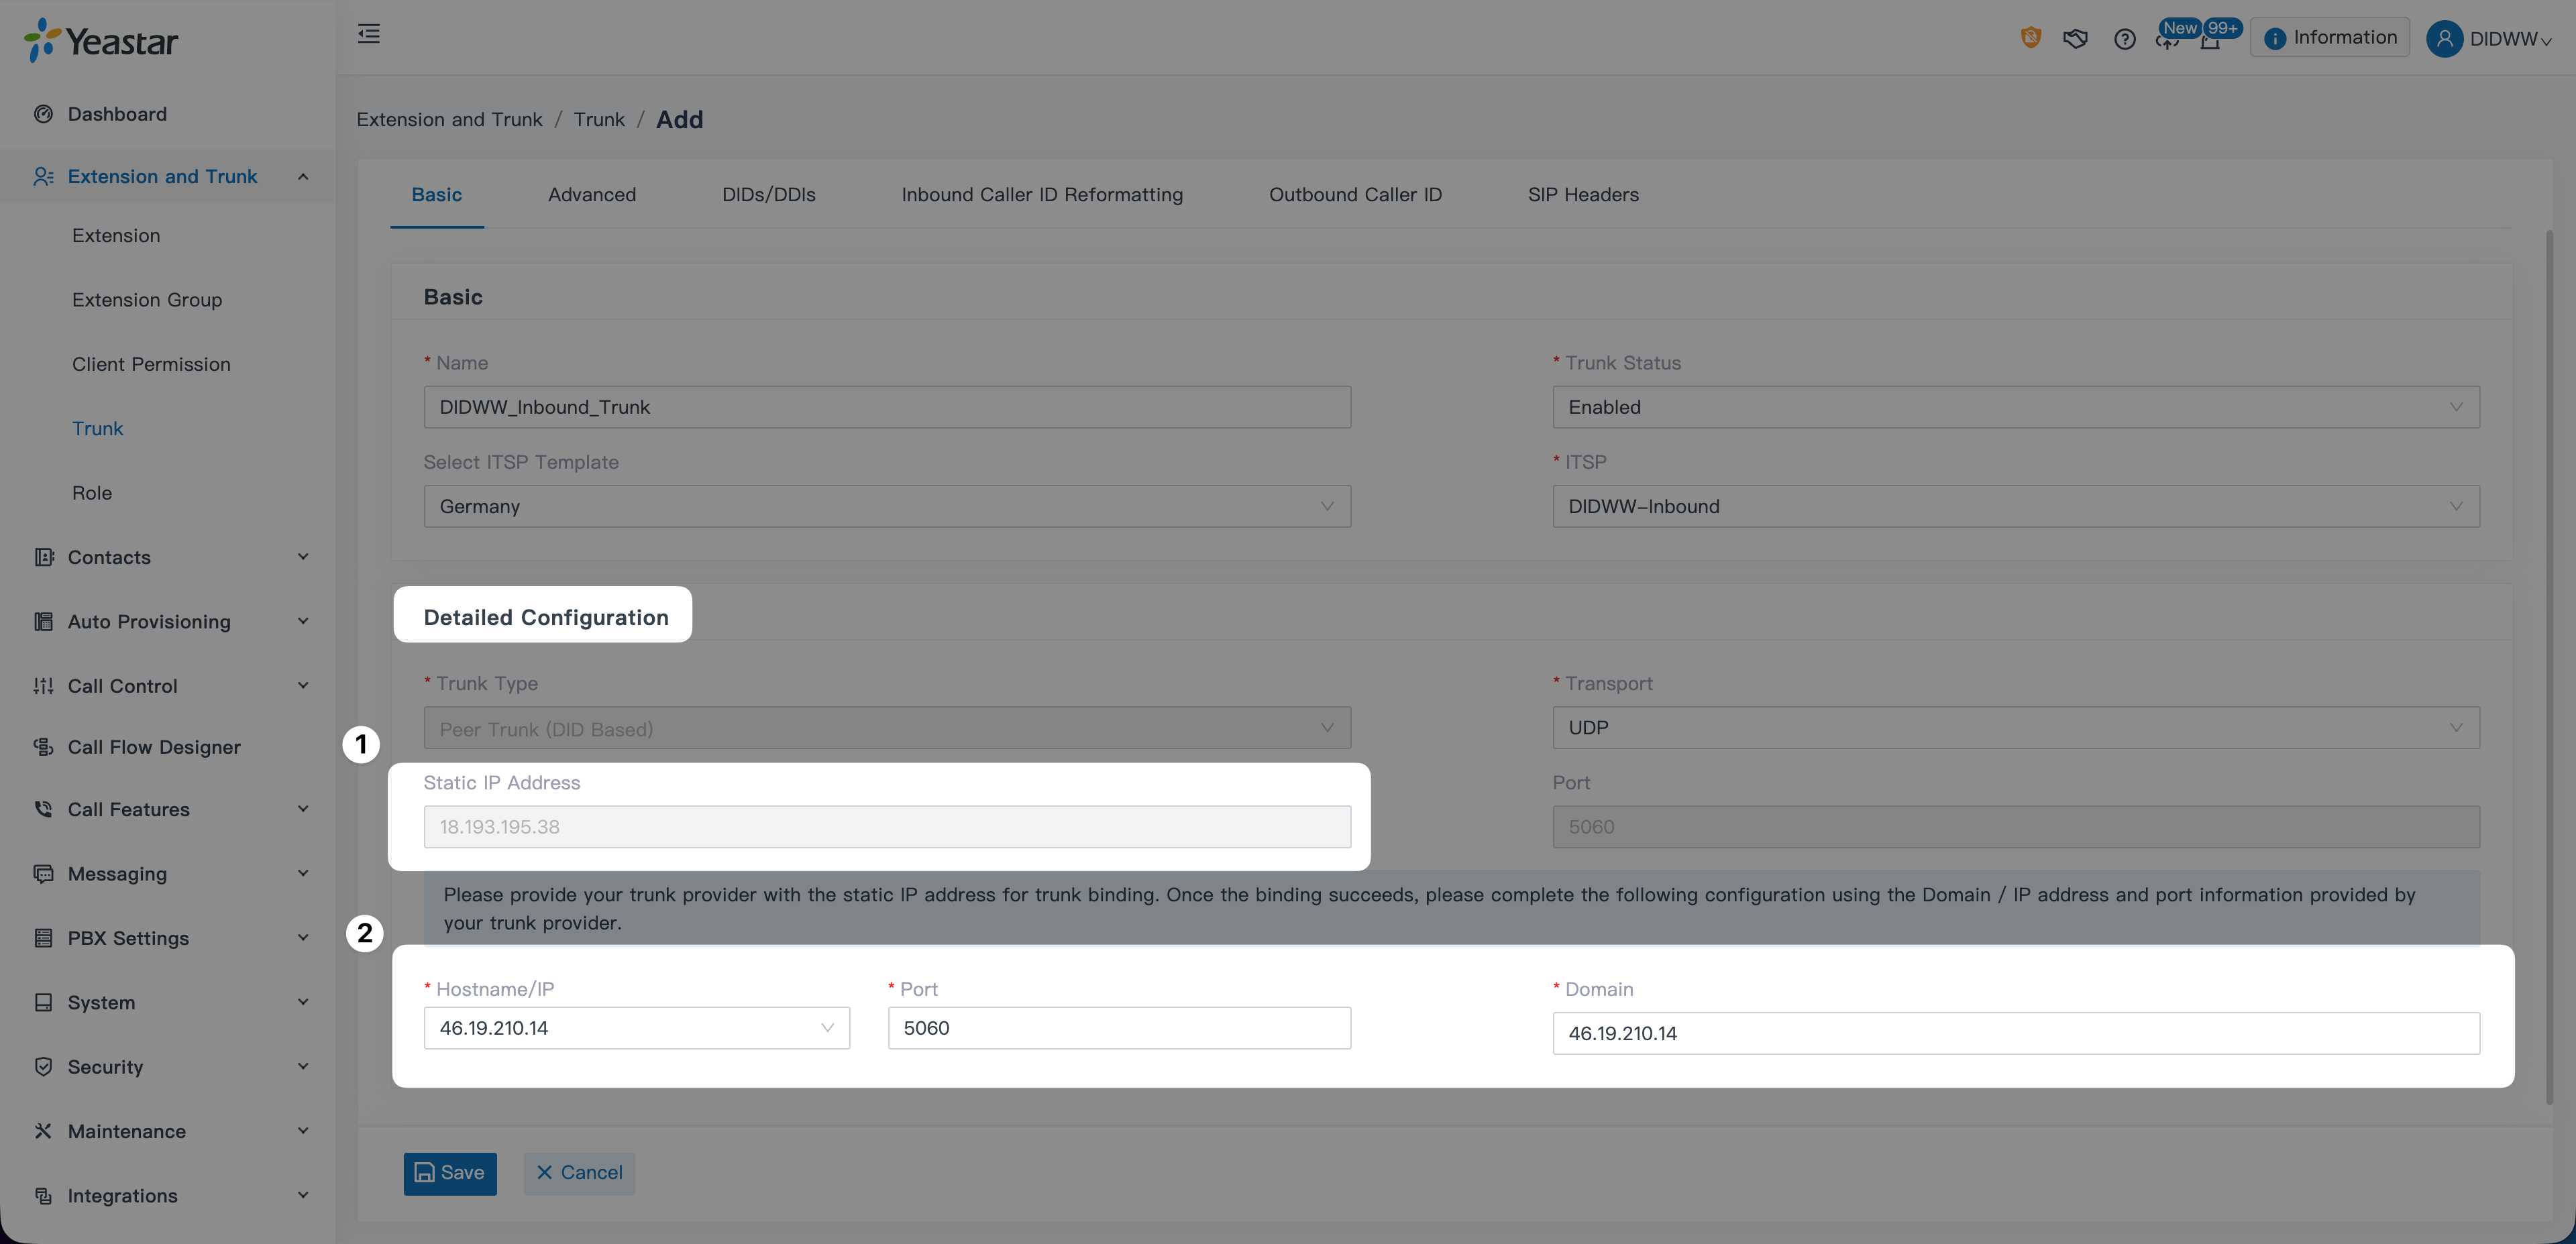
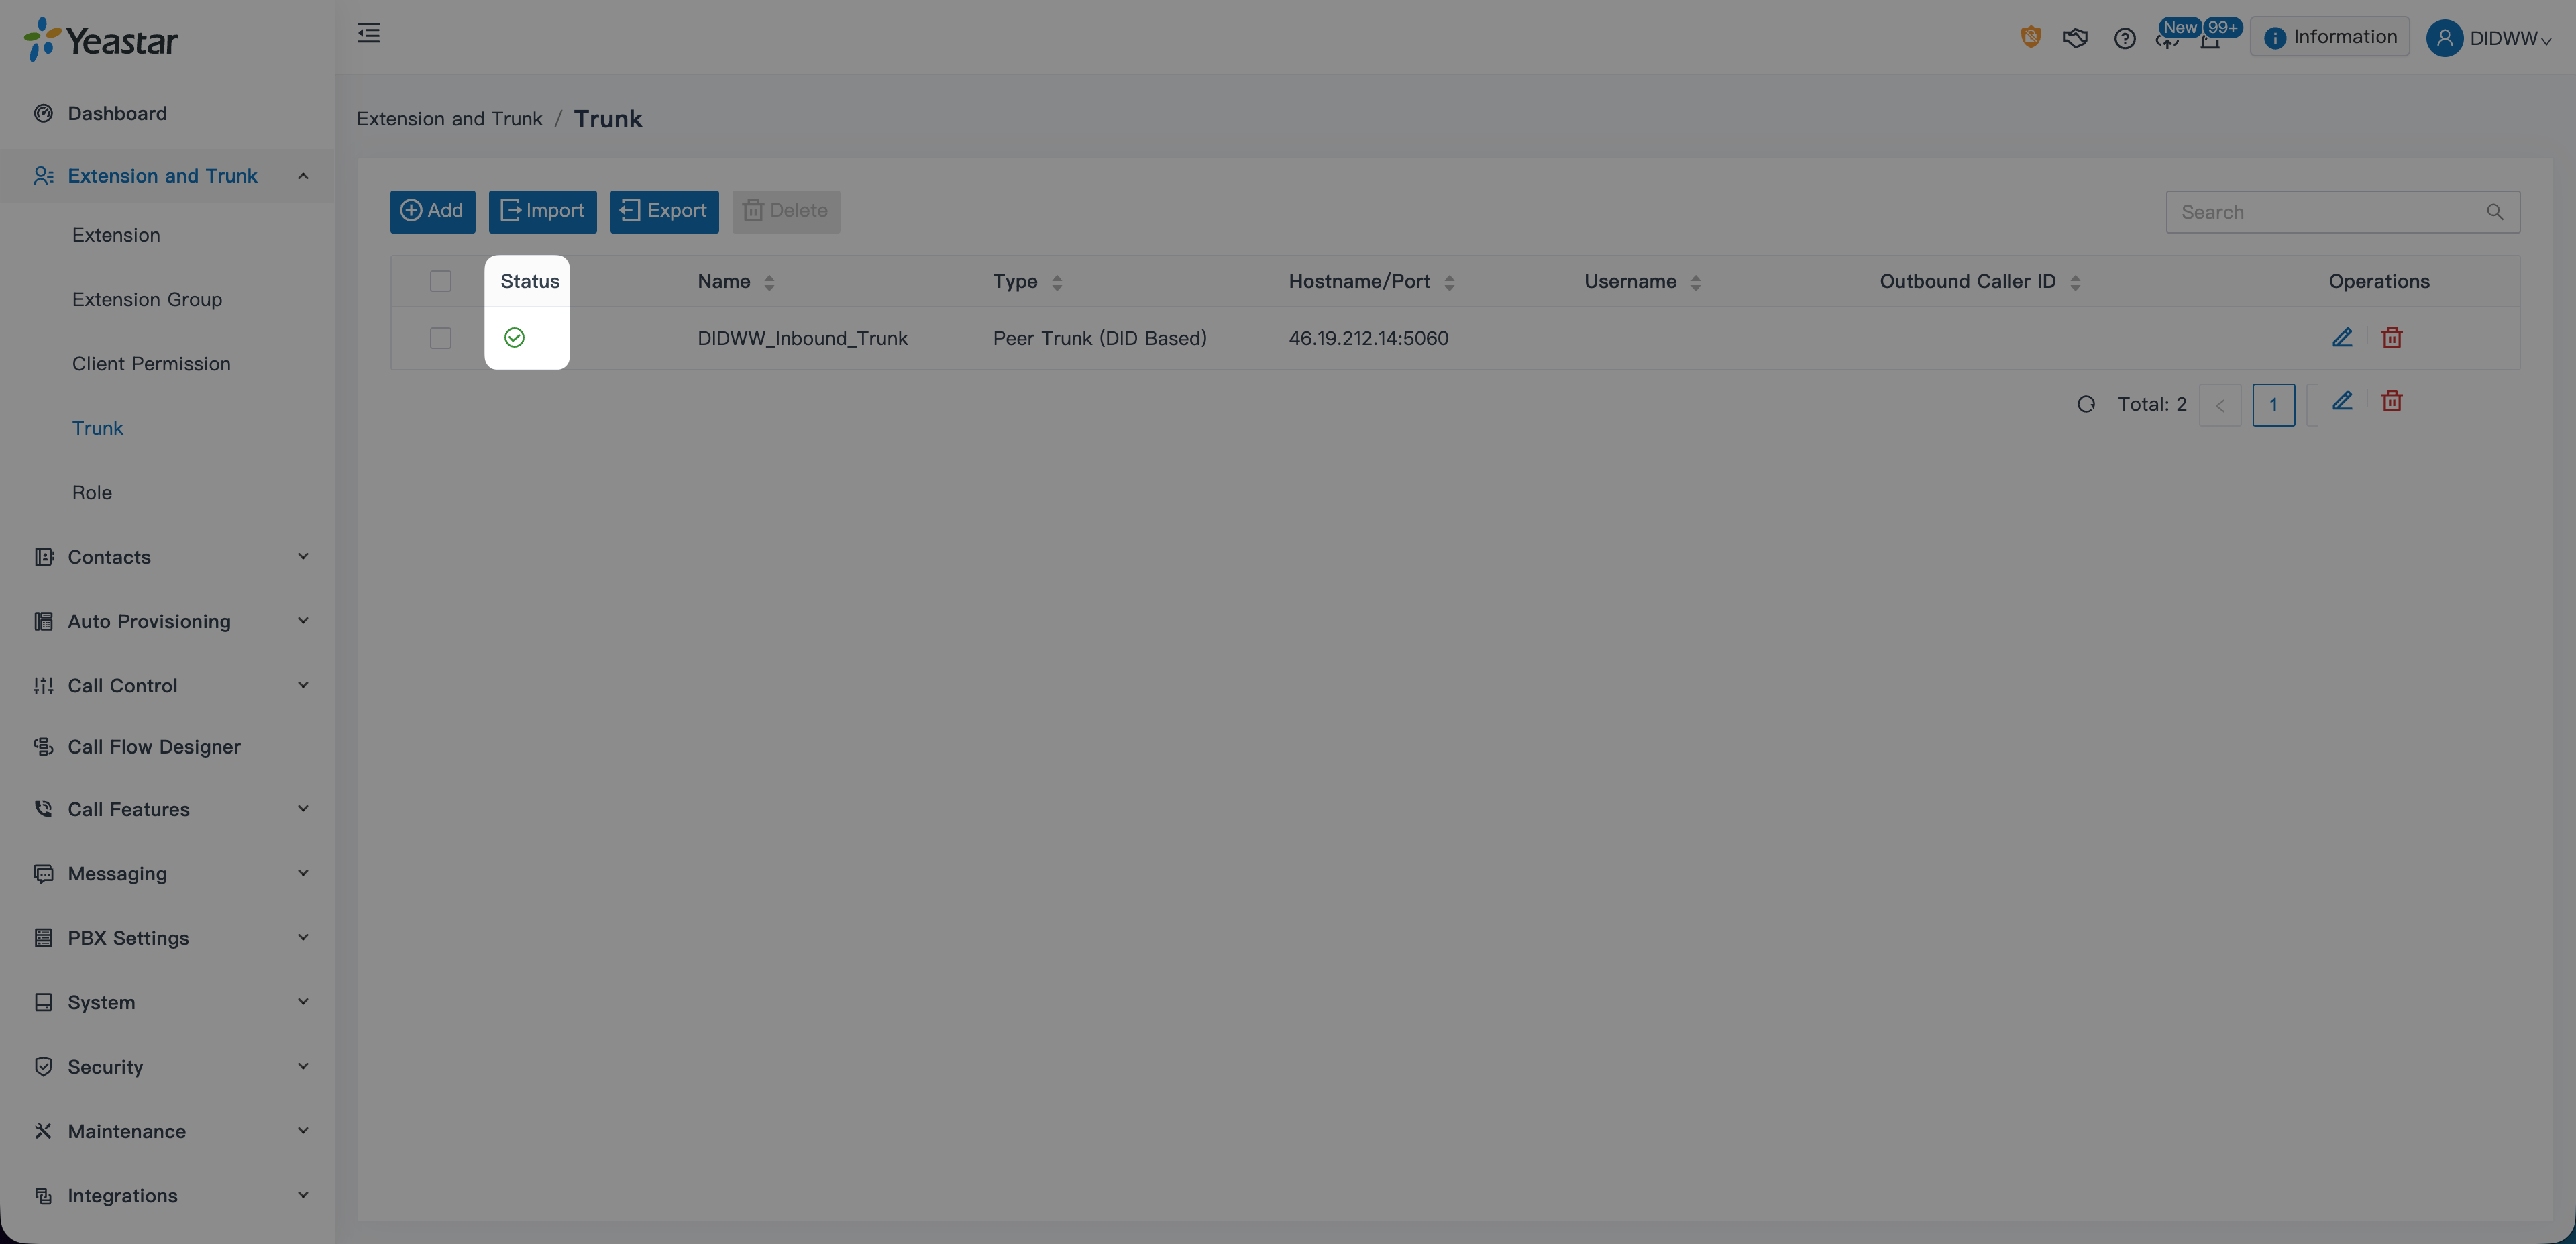
The DIDWW template automatically configures the primary IP (e.g., 46.19.210.14) and whitelists the necessary backup IPs in the background. This configuration works for all regions and ensures that calls from any DIDWW Point of Presence are accepted.
Copy the Static IP Address displayed in the trunk form.
You will later replace placeholder Hostname/IP values in your DIDWW trunks using this IP.
If you selected a different Preferred Server in the DIDWW User Panel, update the Hostname/IP and Domain fields to match the correct signaling PoP.
Refer to the DIDWW inbound SIP endpoints for the correct regional IP.
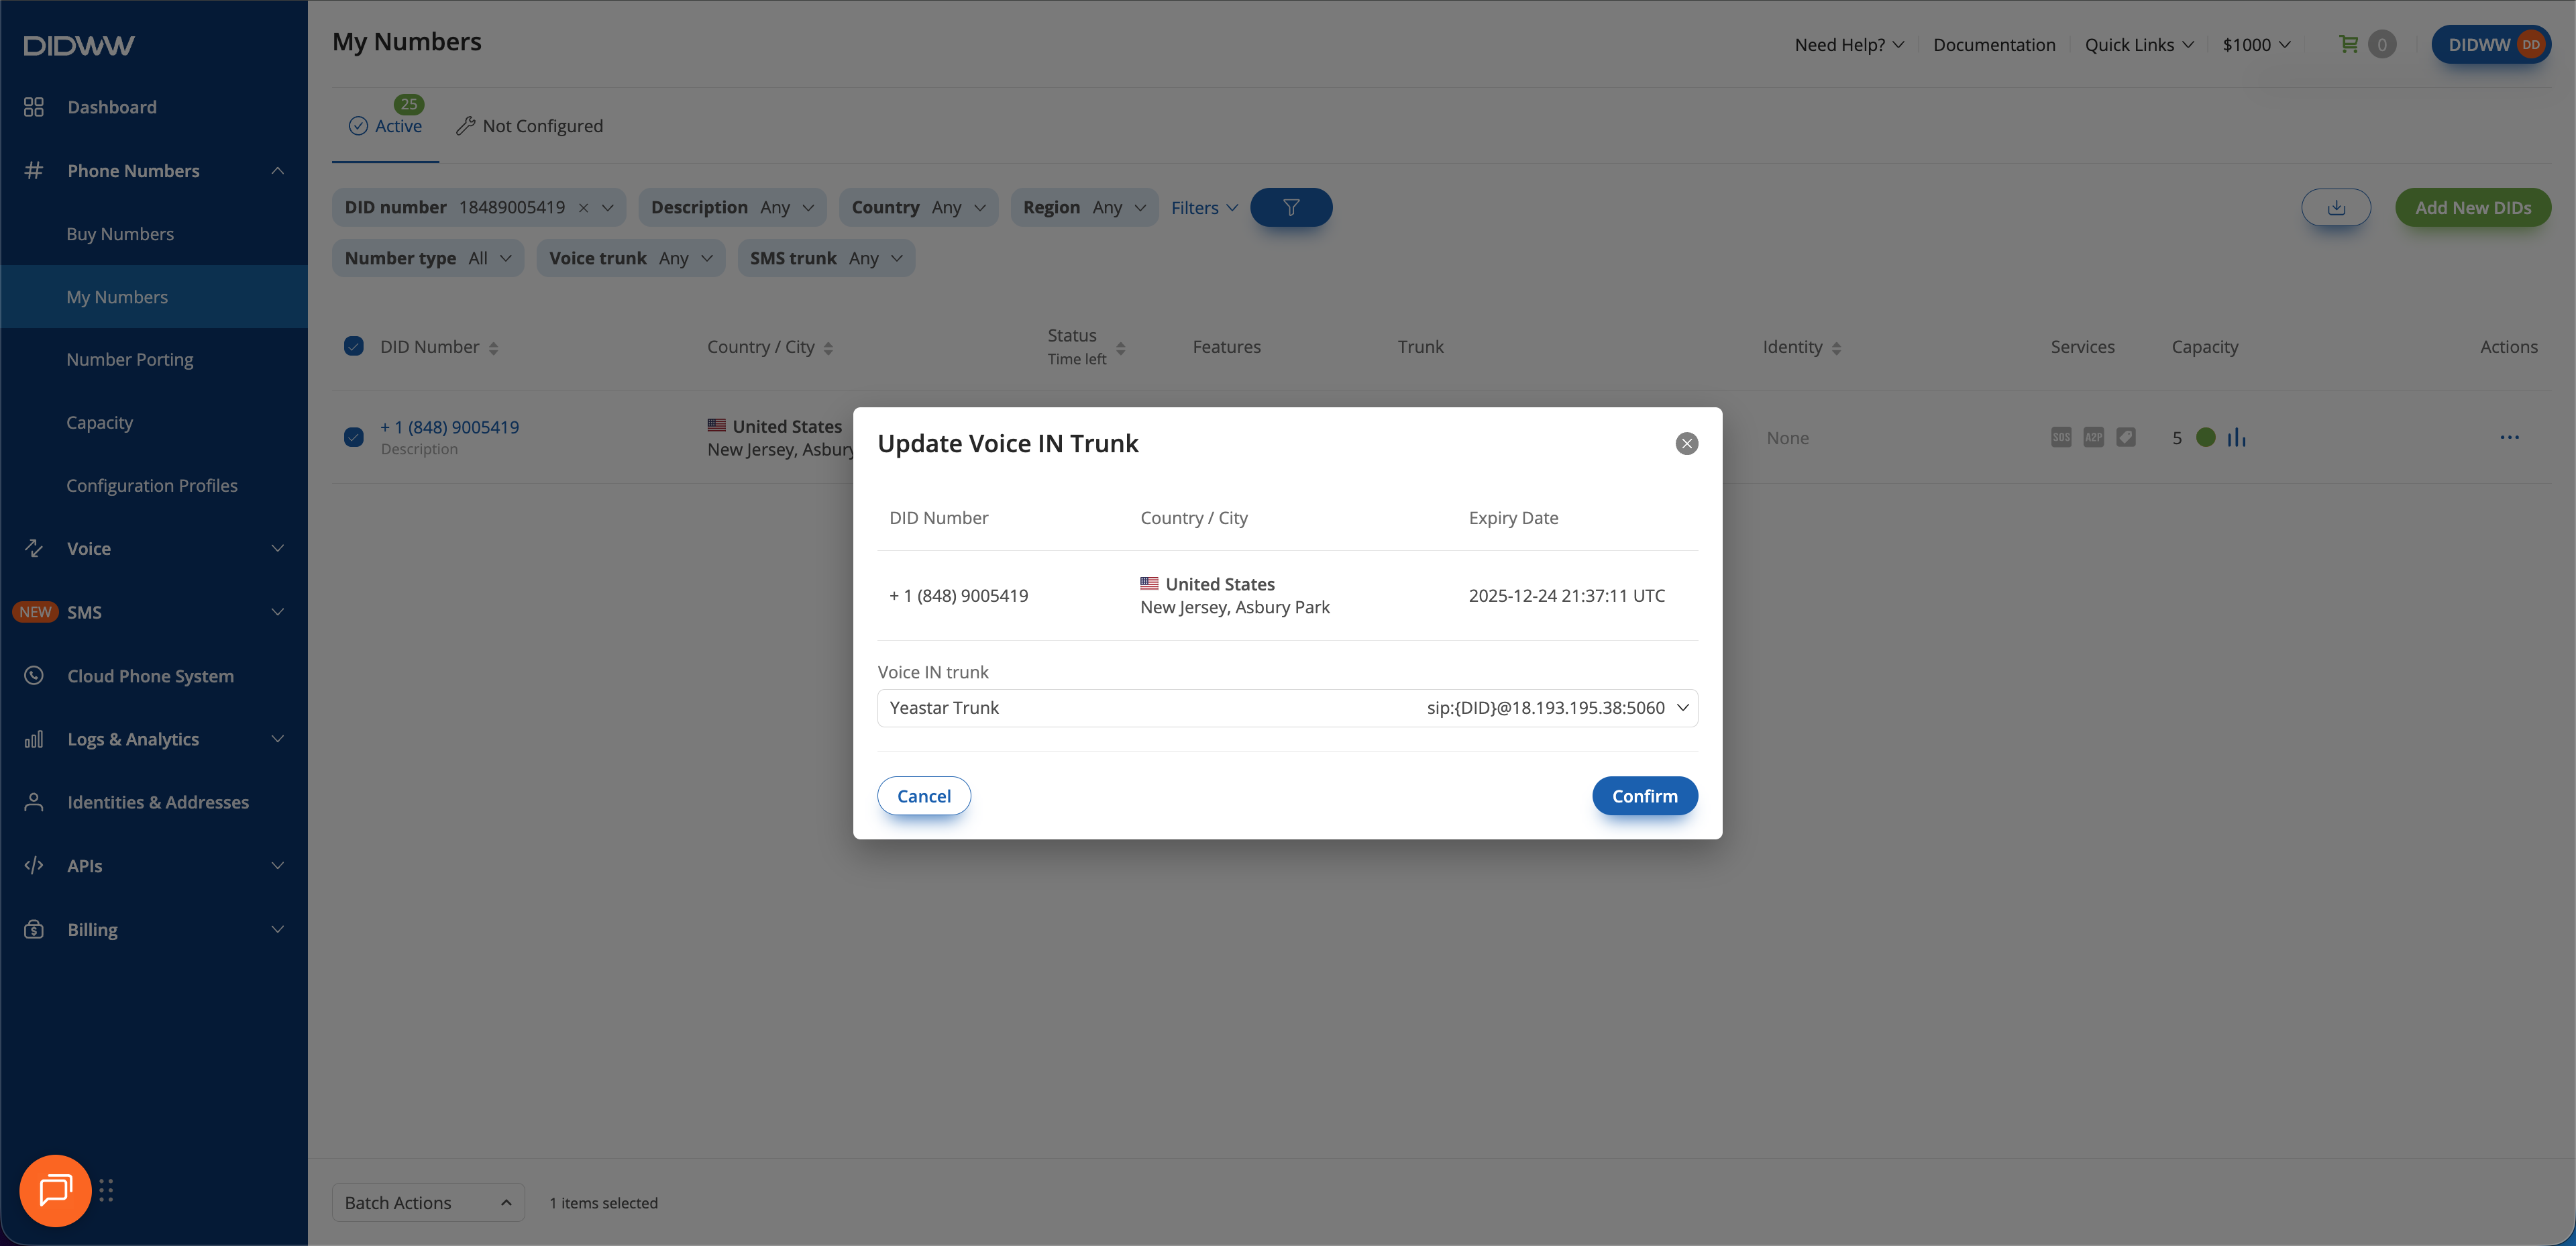
During the initial Create Inbound and Outbound SIP Trunk steps, a temporary placeholder IP address was entered to allow the trunk to be created.
After receiving the Static IP Address for your Yeastar Cloud PBX in the configuration details, you need to update the DIDWW SIP Outbound Trunk so that call traffic is routed to the correct Yeastar endpoint.
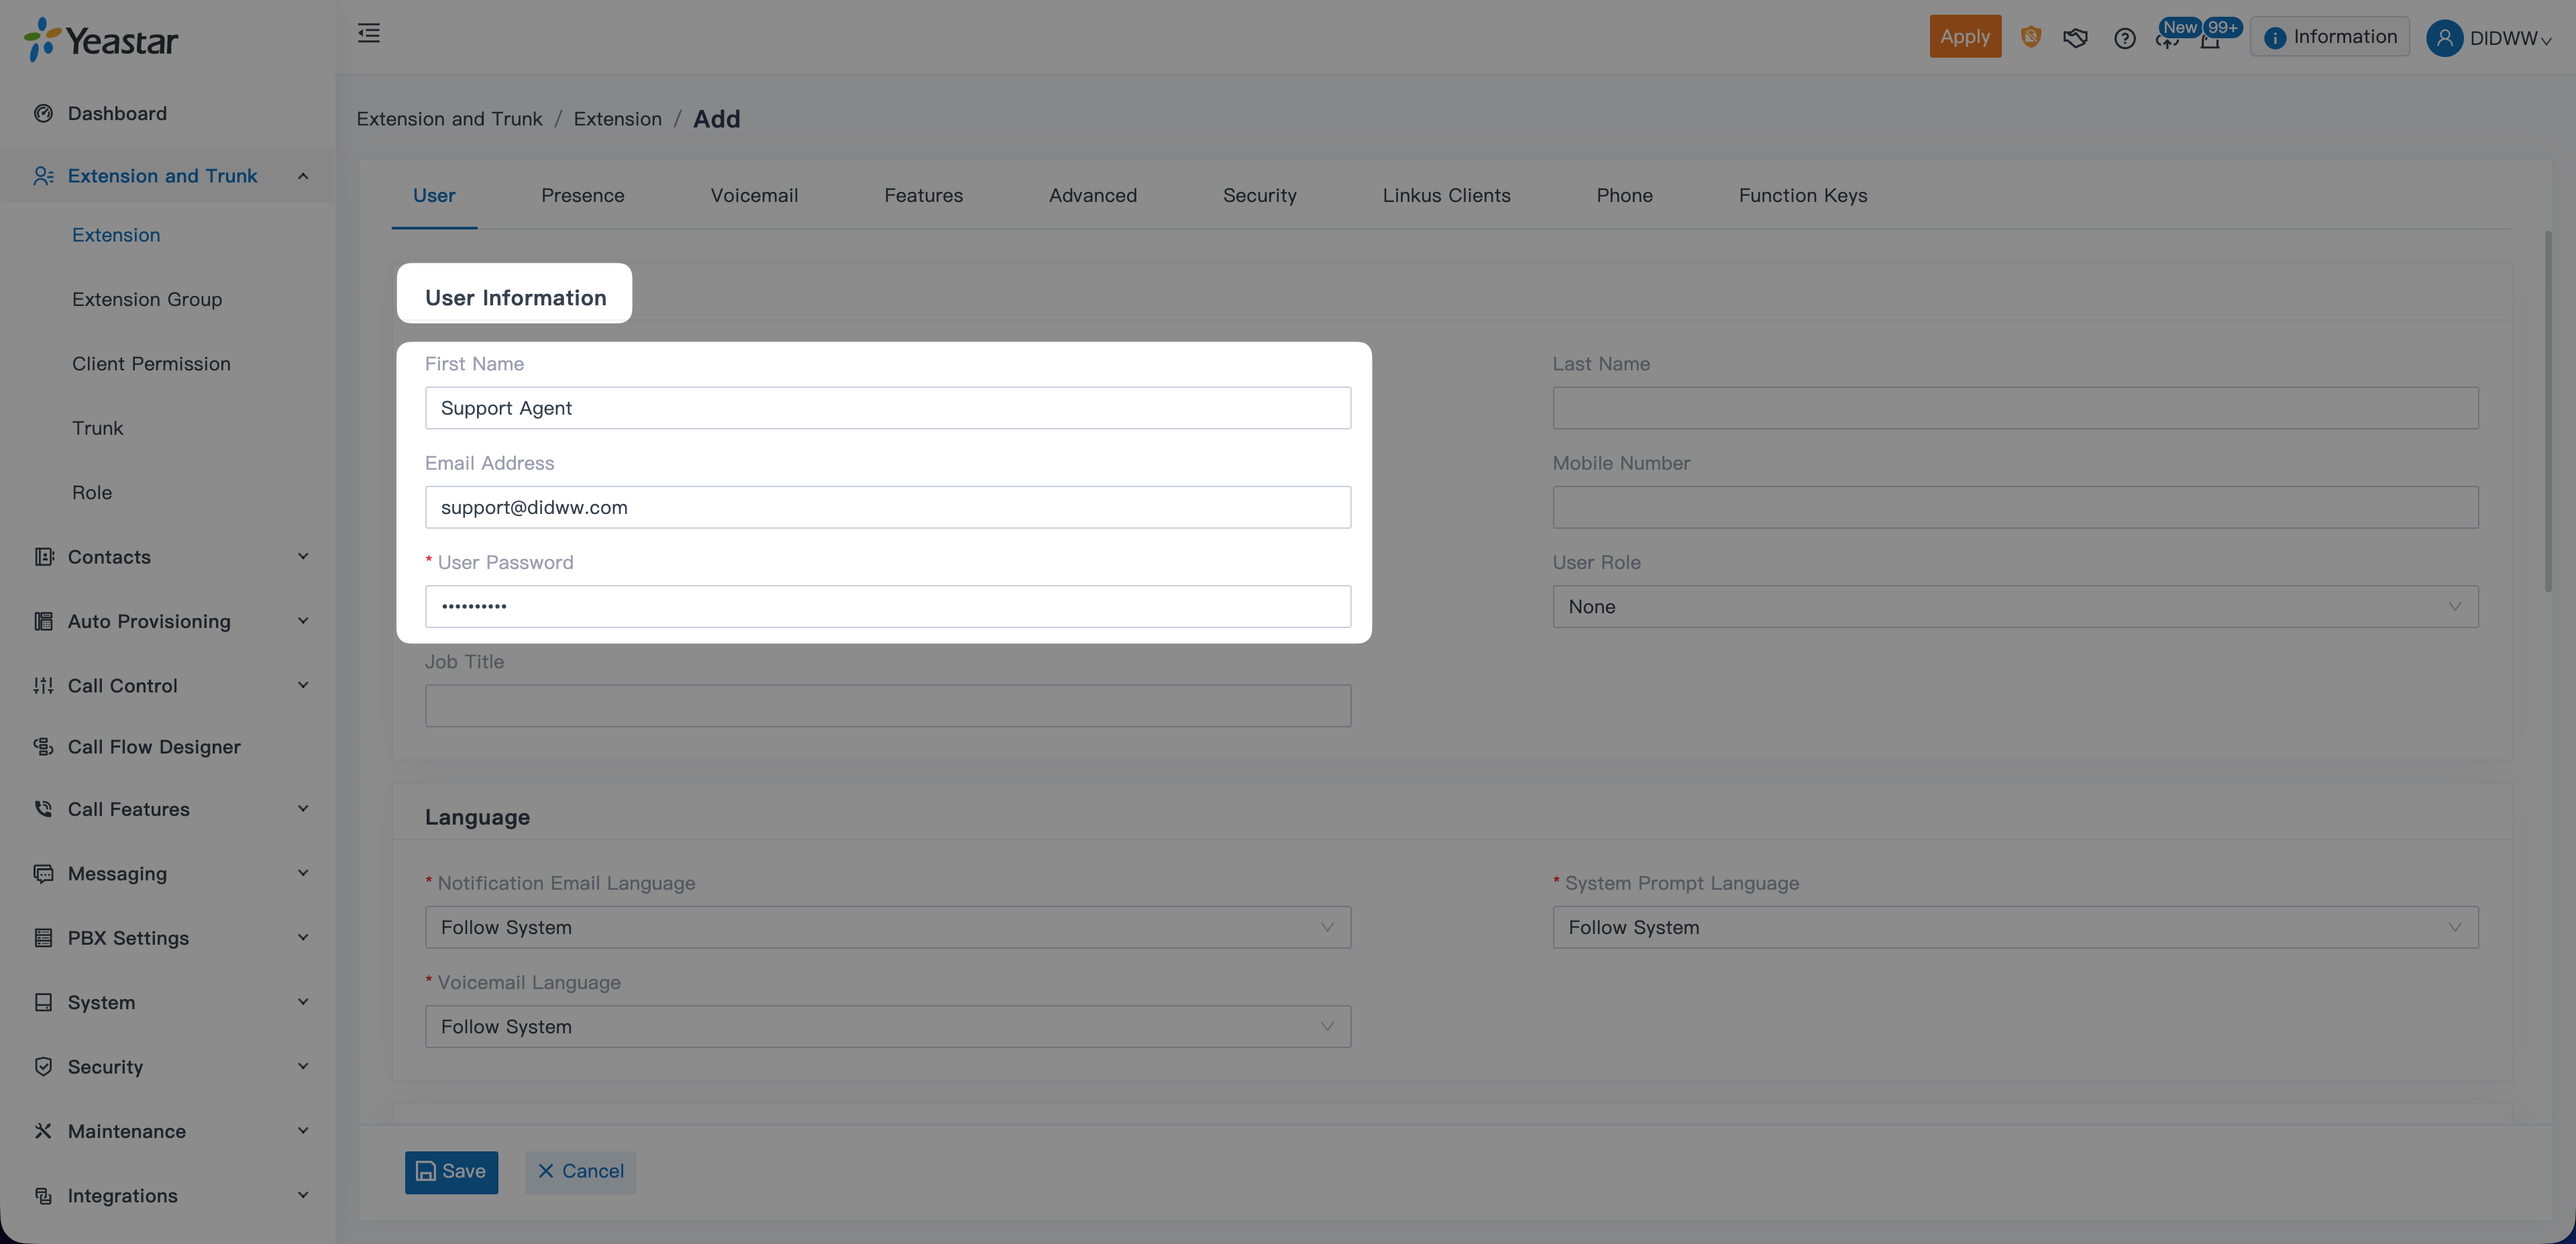
Fig. 28. Extensions User Information in Yeastar P-Series PBX#
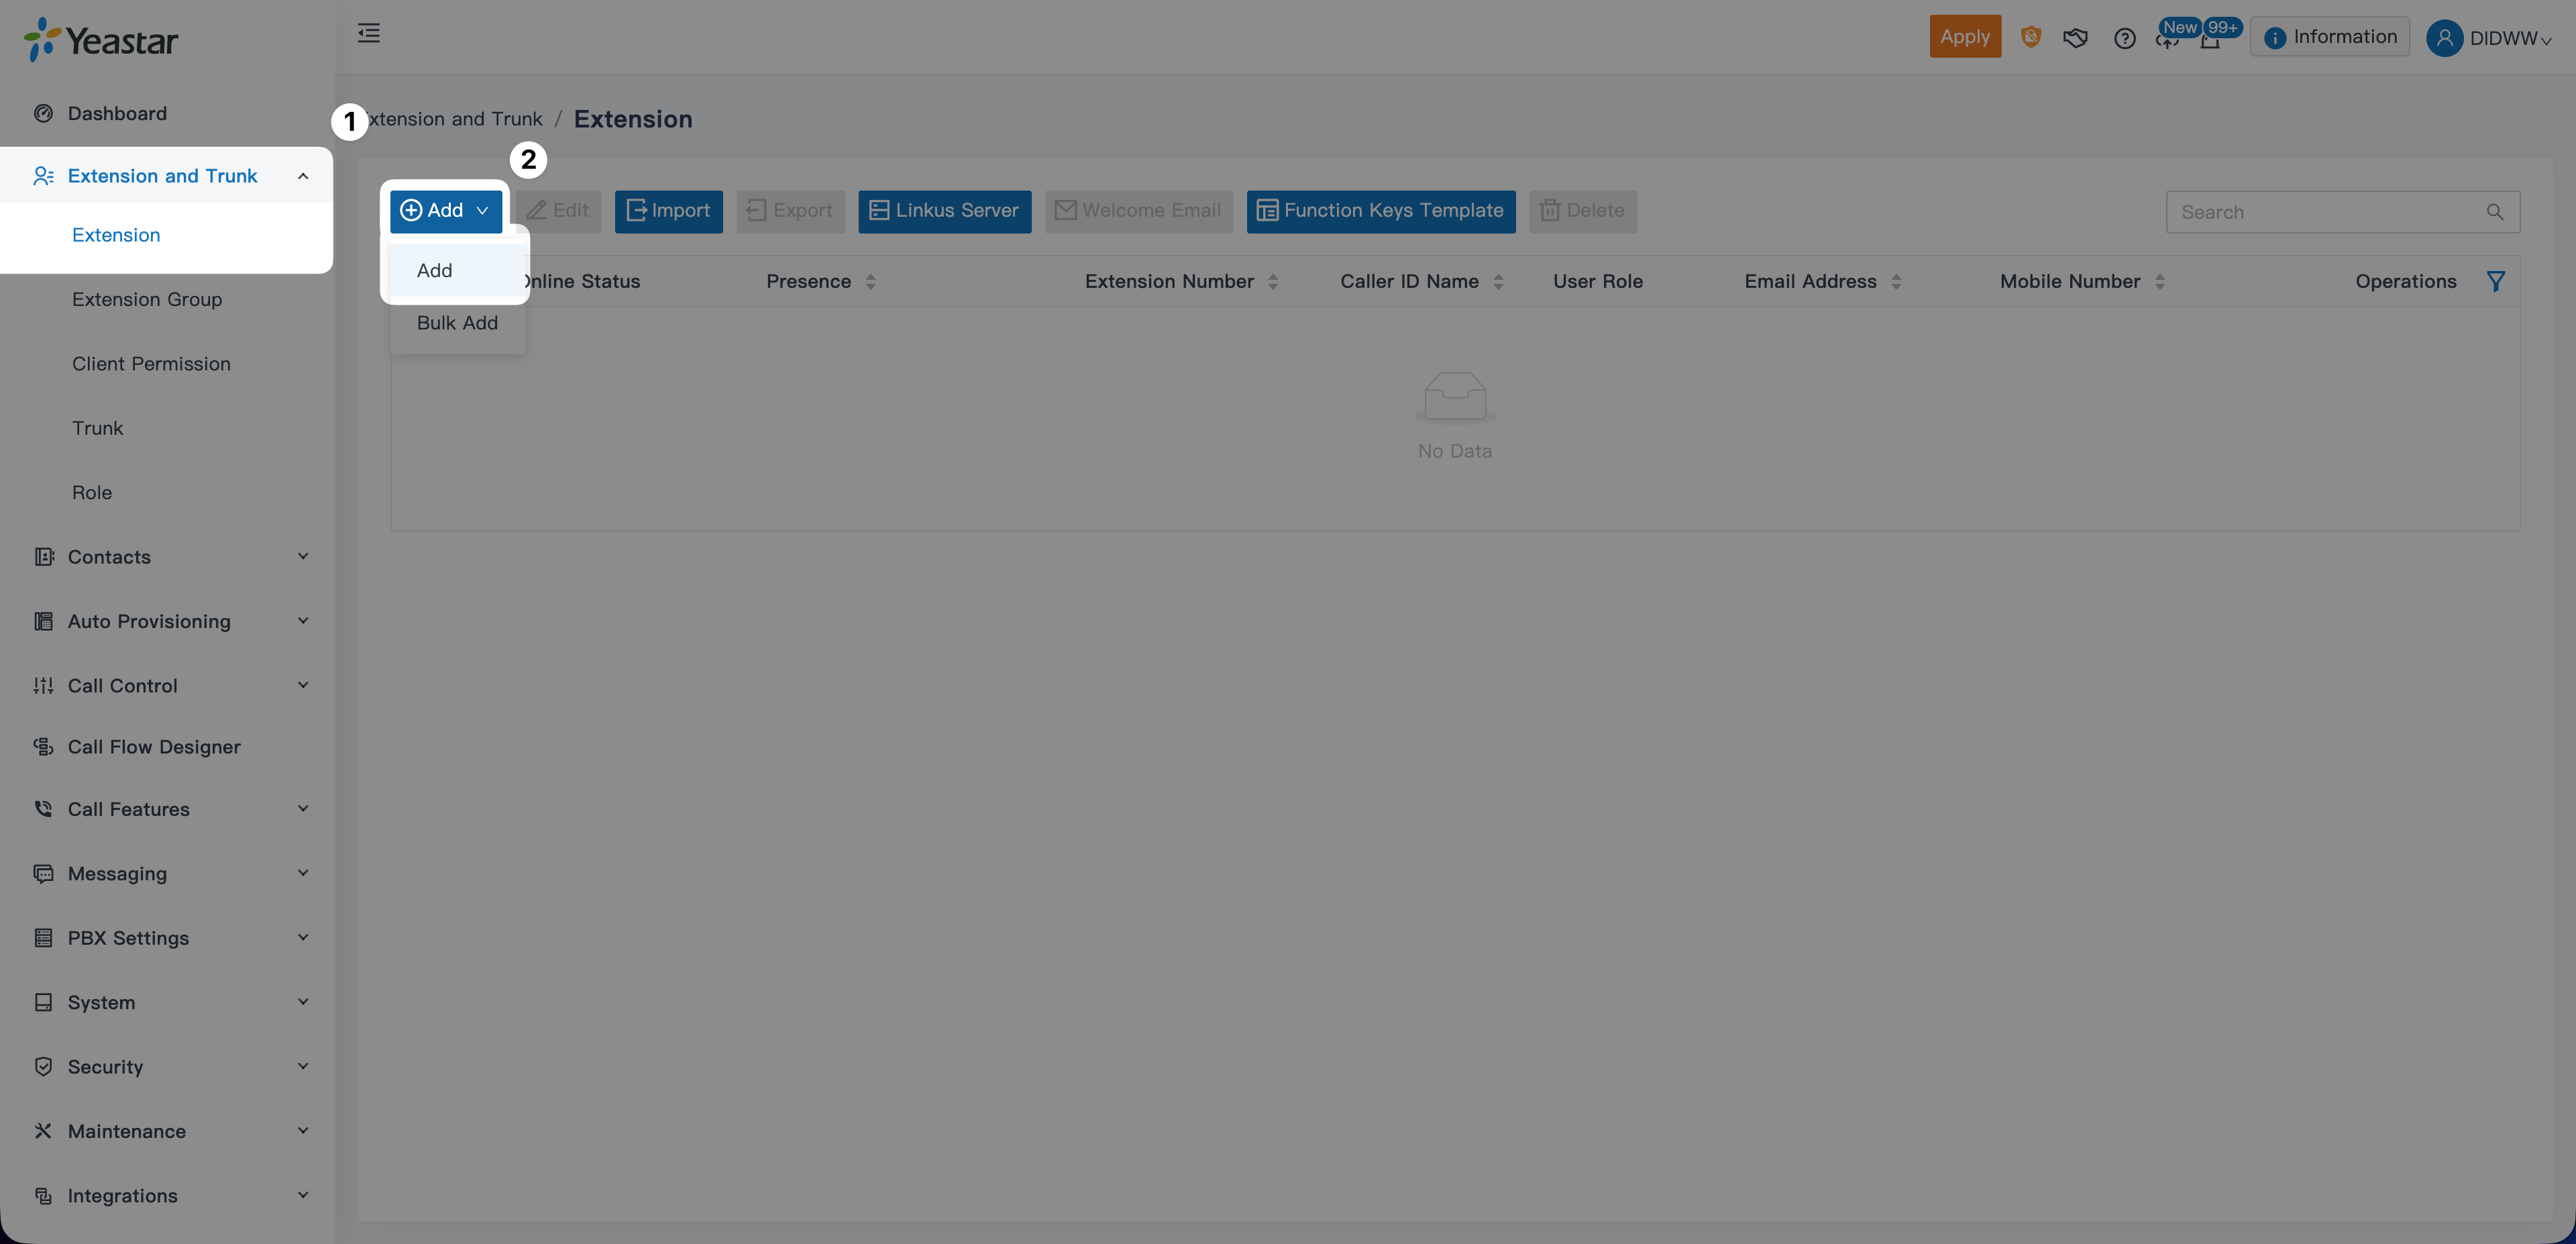
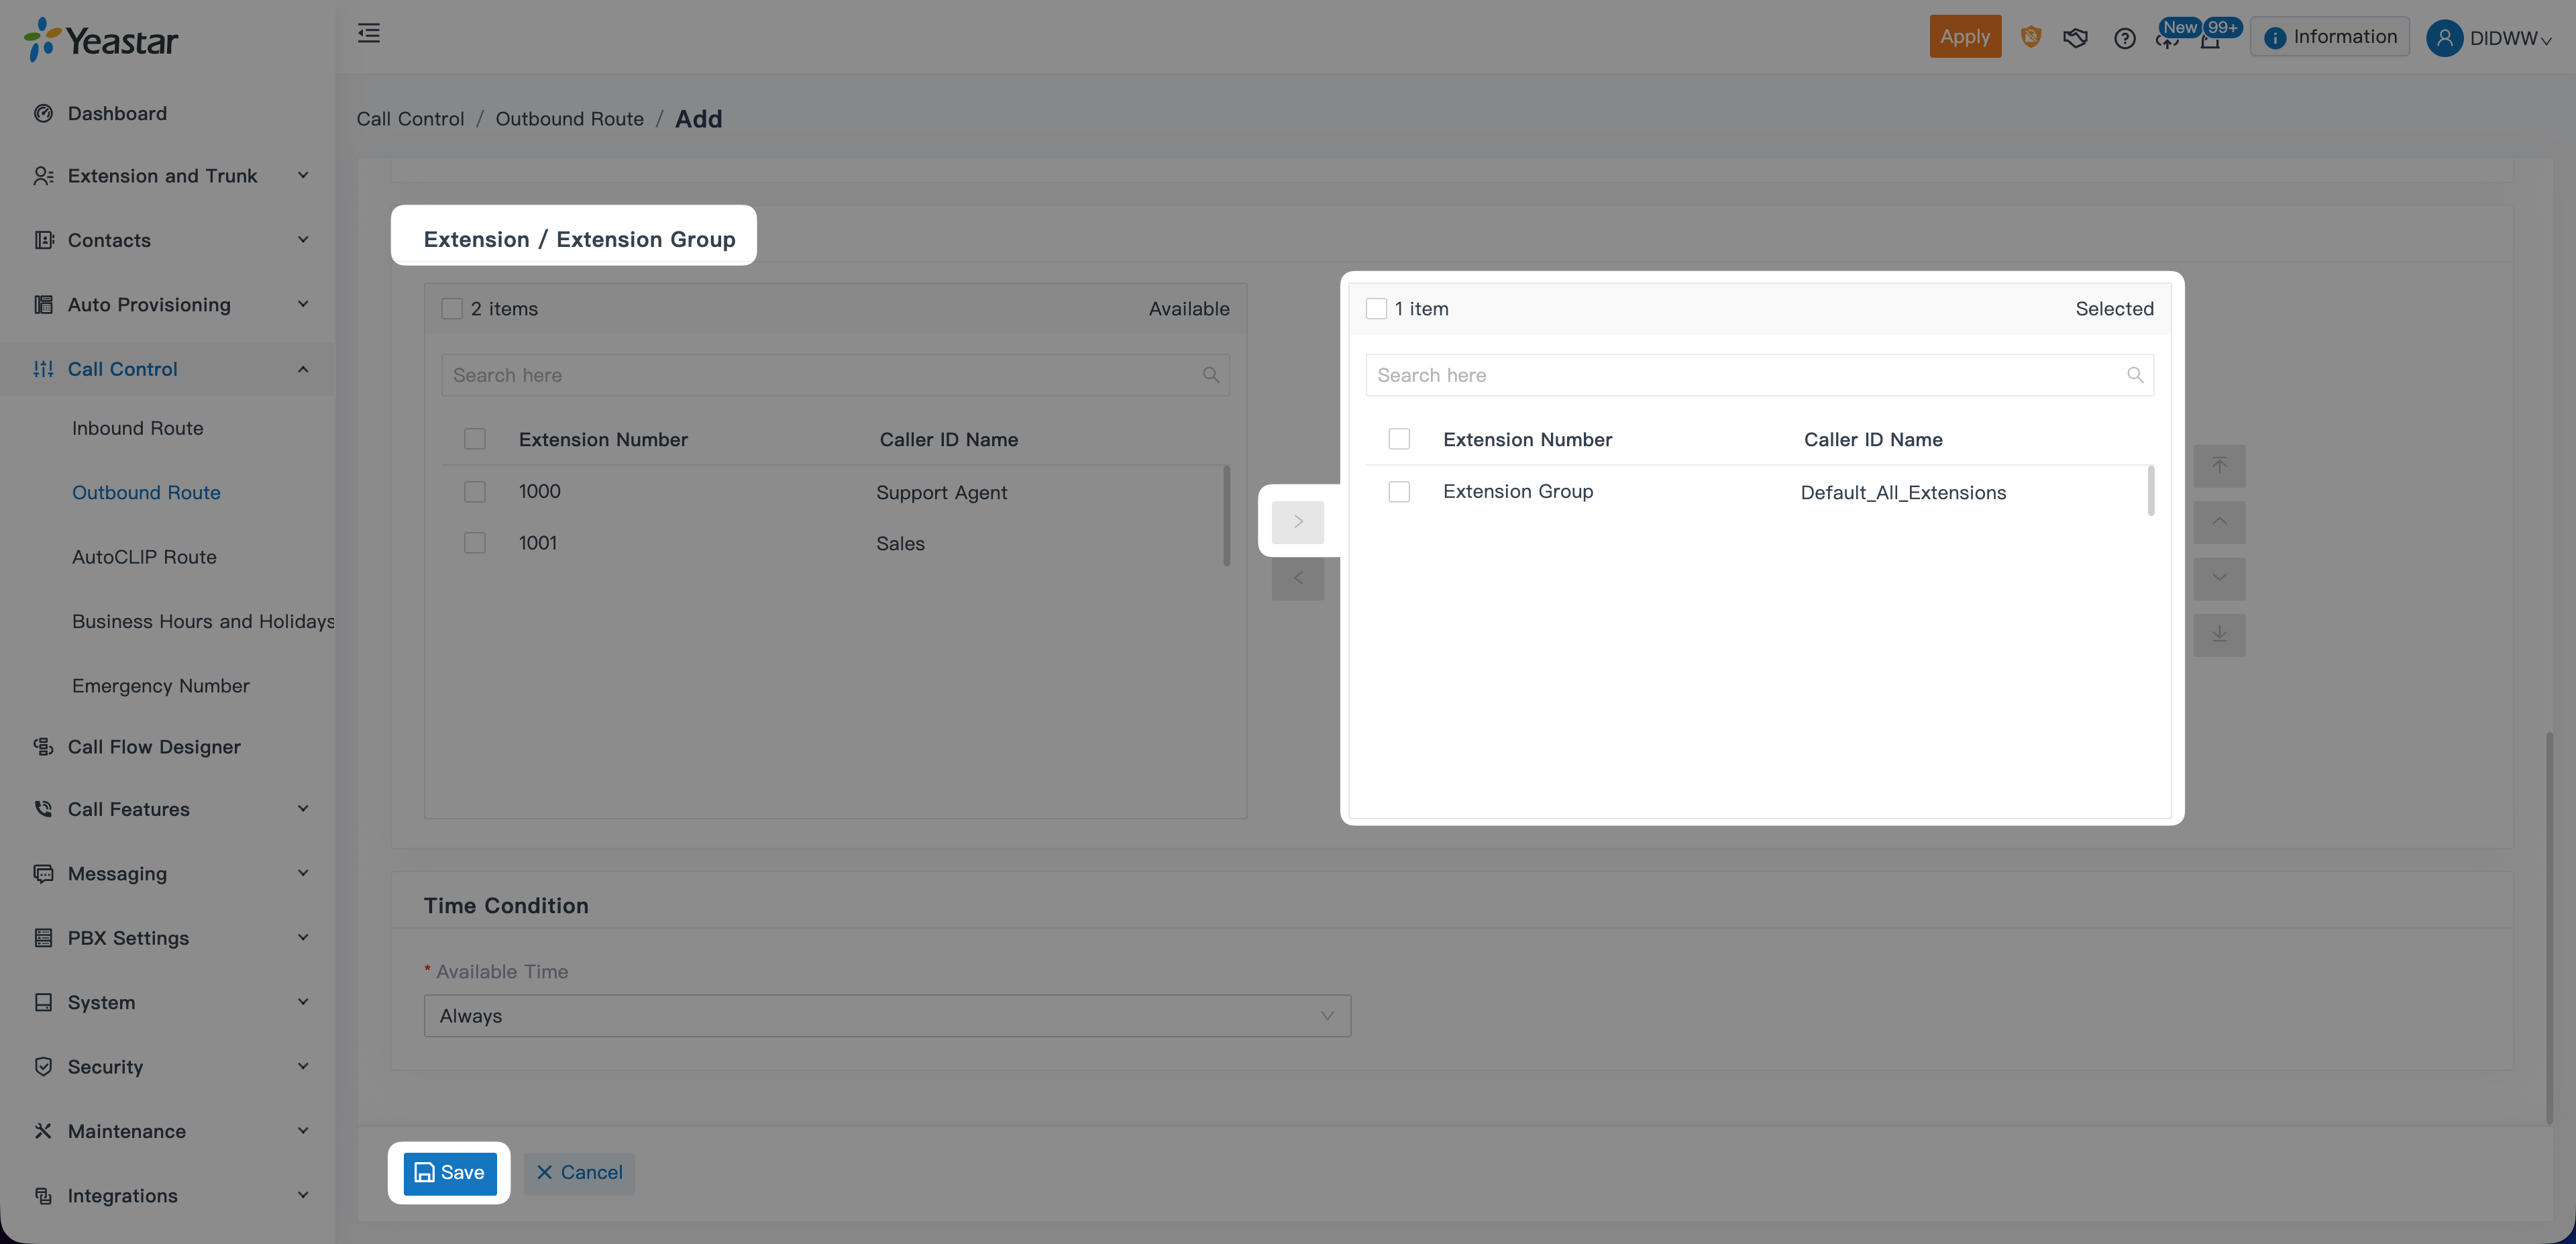
Configure Extension Information:
Select the Extension Number (e.g., 1000).
Set the Caller ID to match the extension number (e.g., 1000).
Click Save to create the extension.
Note
A default Extension Group is automatically created and includes all extensions.
To modify the default group or create a new one, refer to the
Yeastar Extension Group documentation .
Fig. 29. Extension Information in Yeastar P-Series PBX#
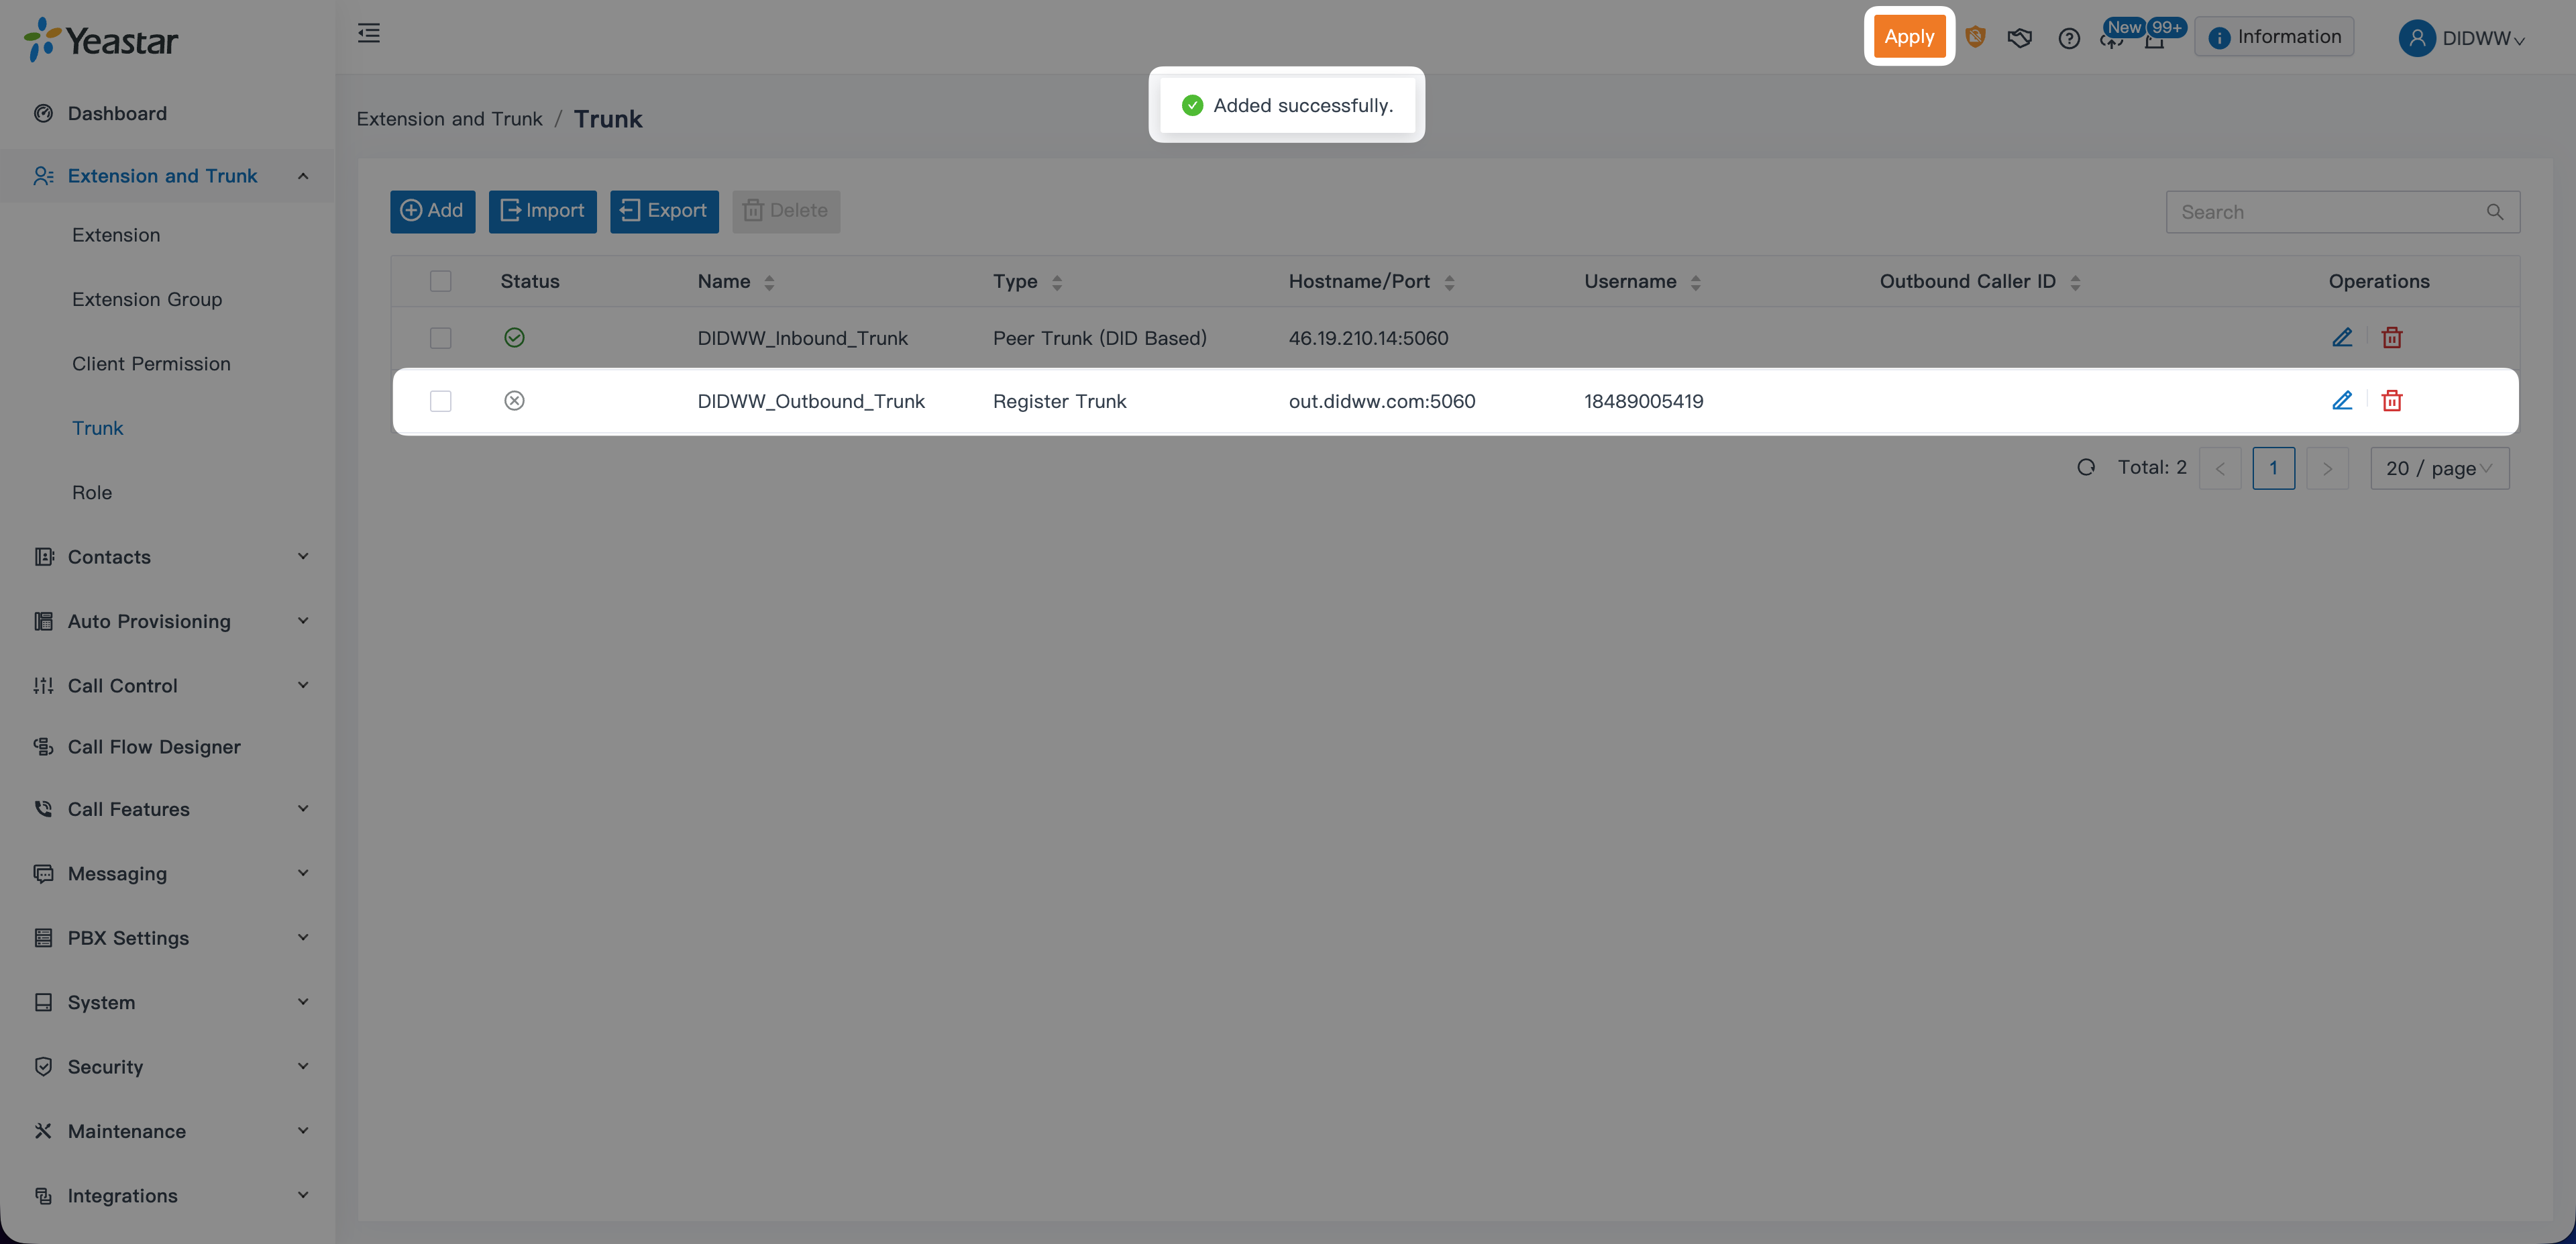
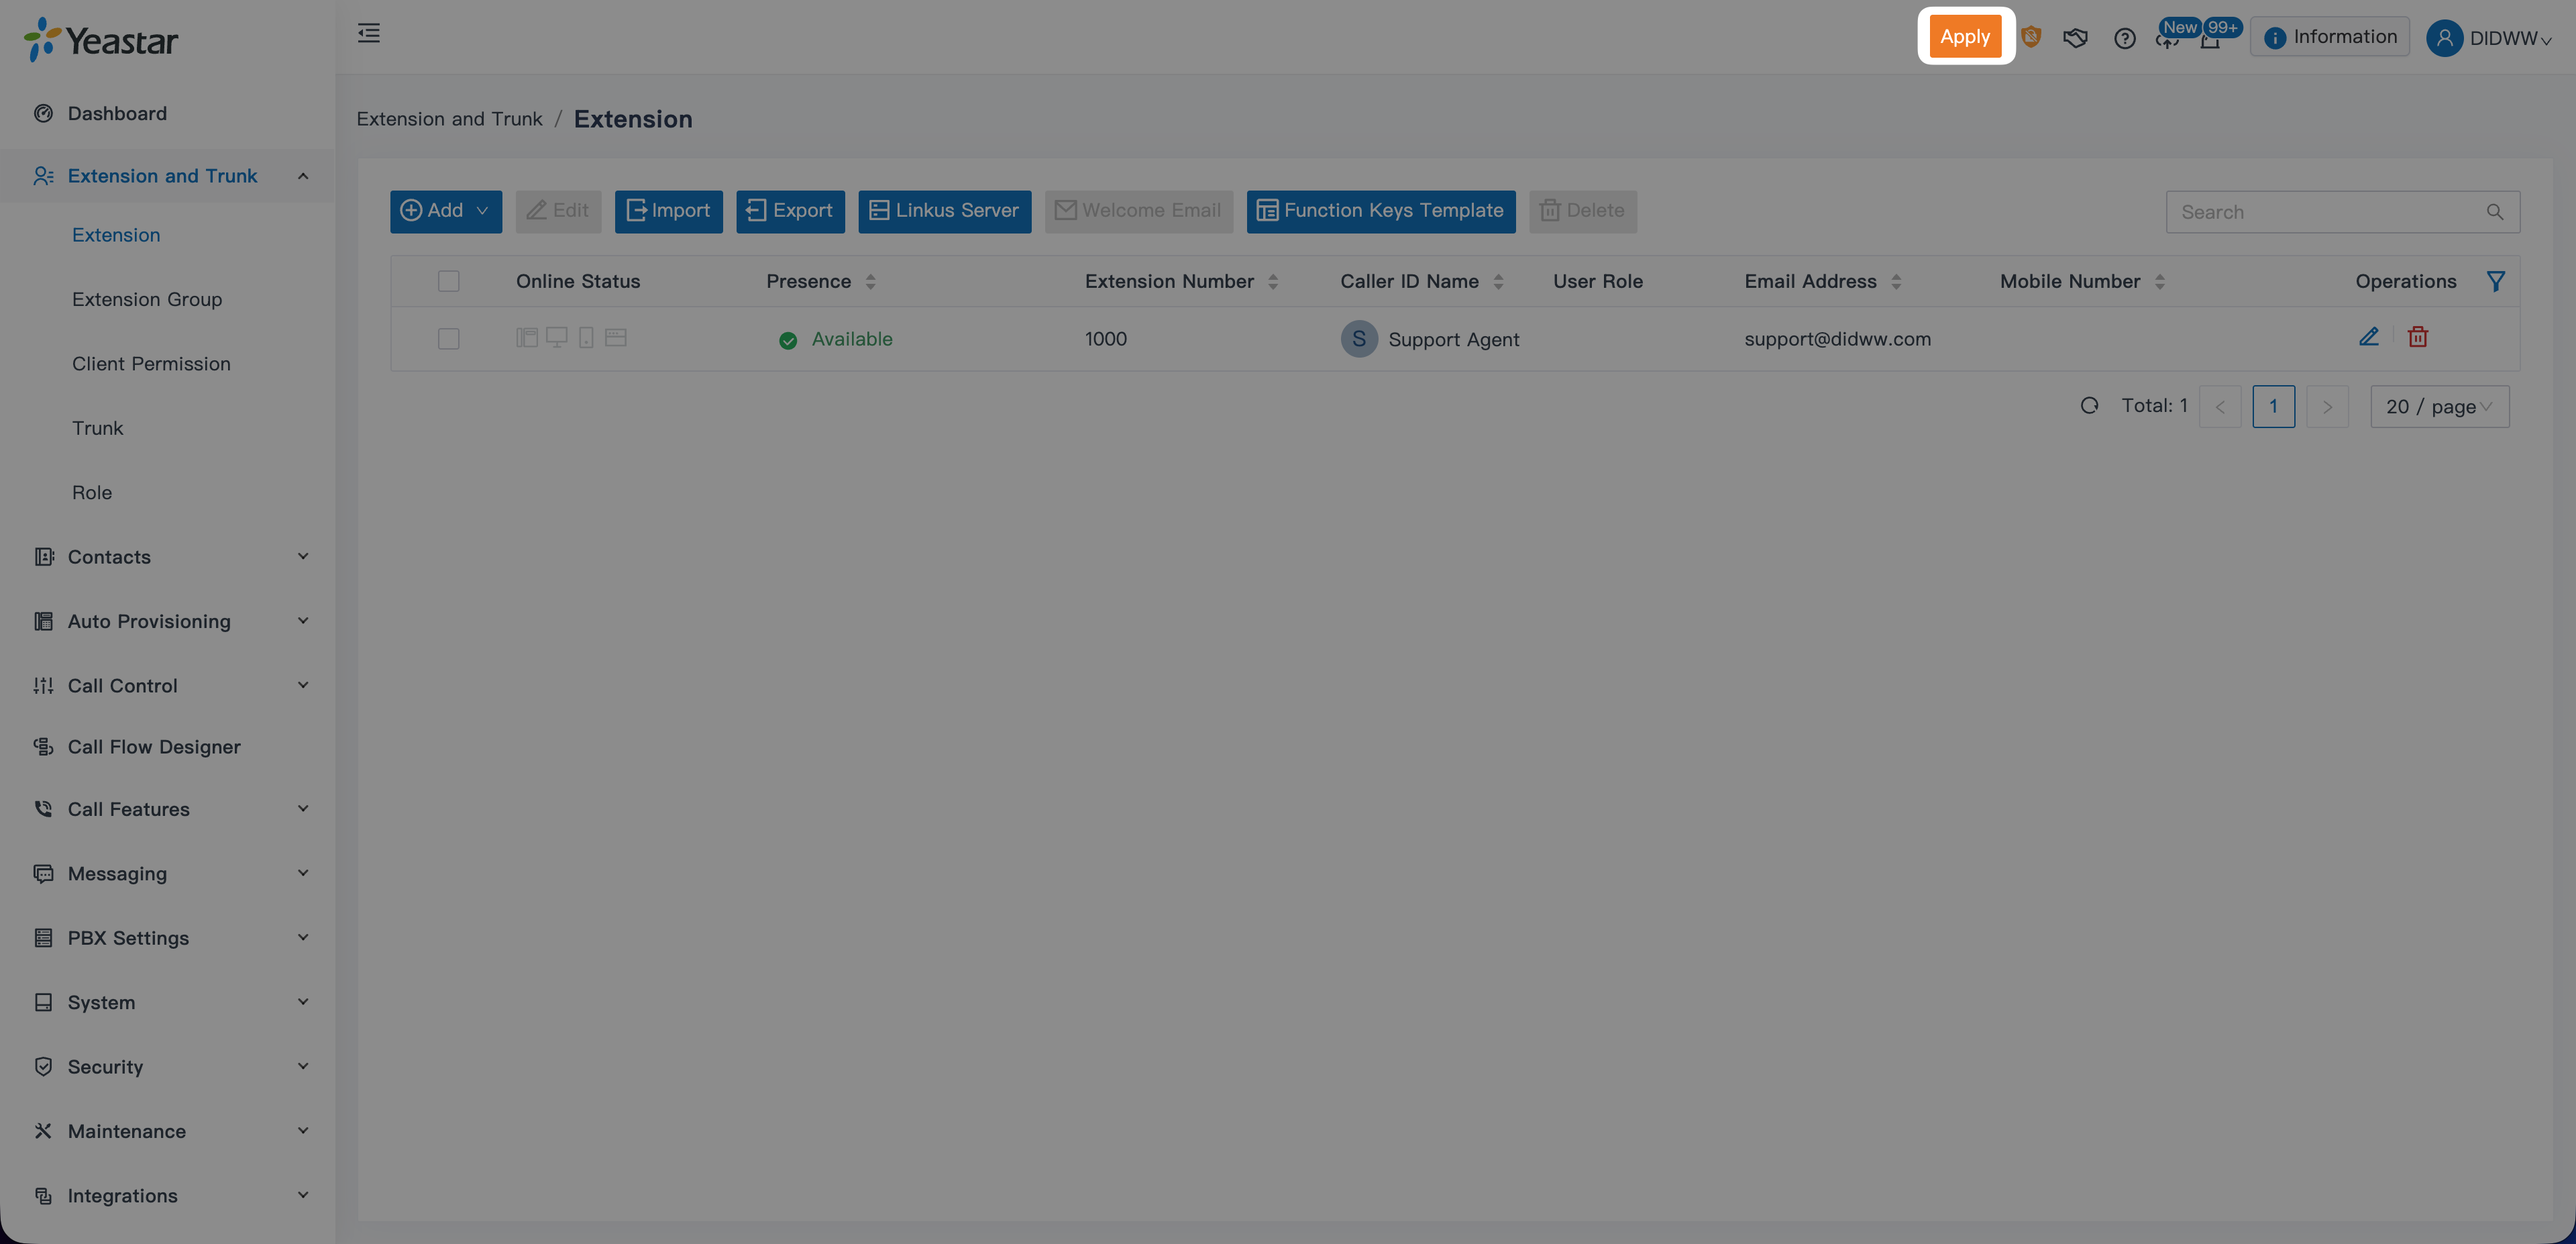
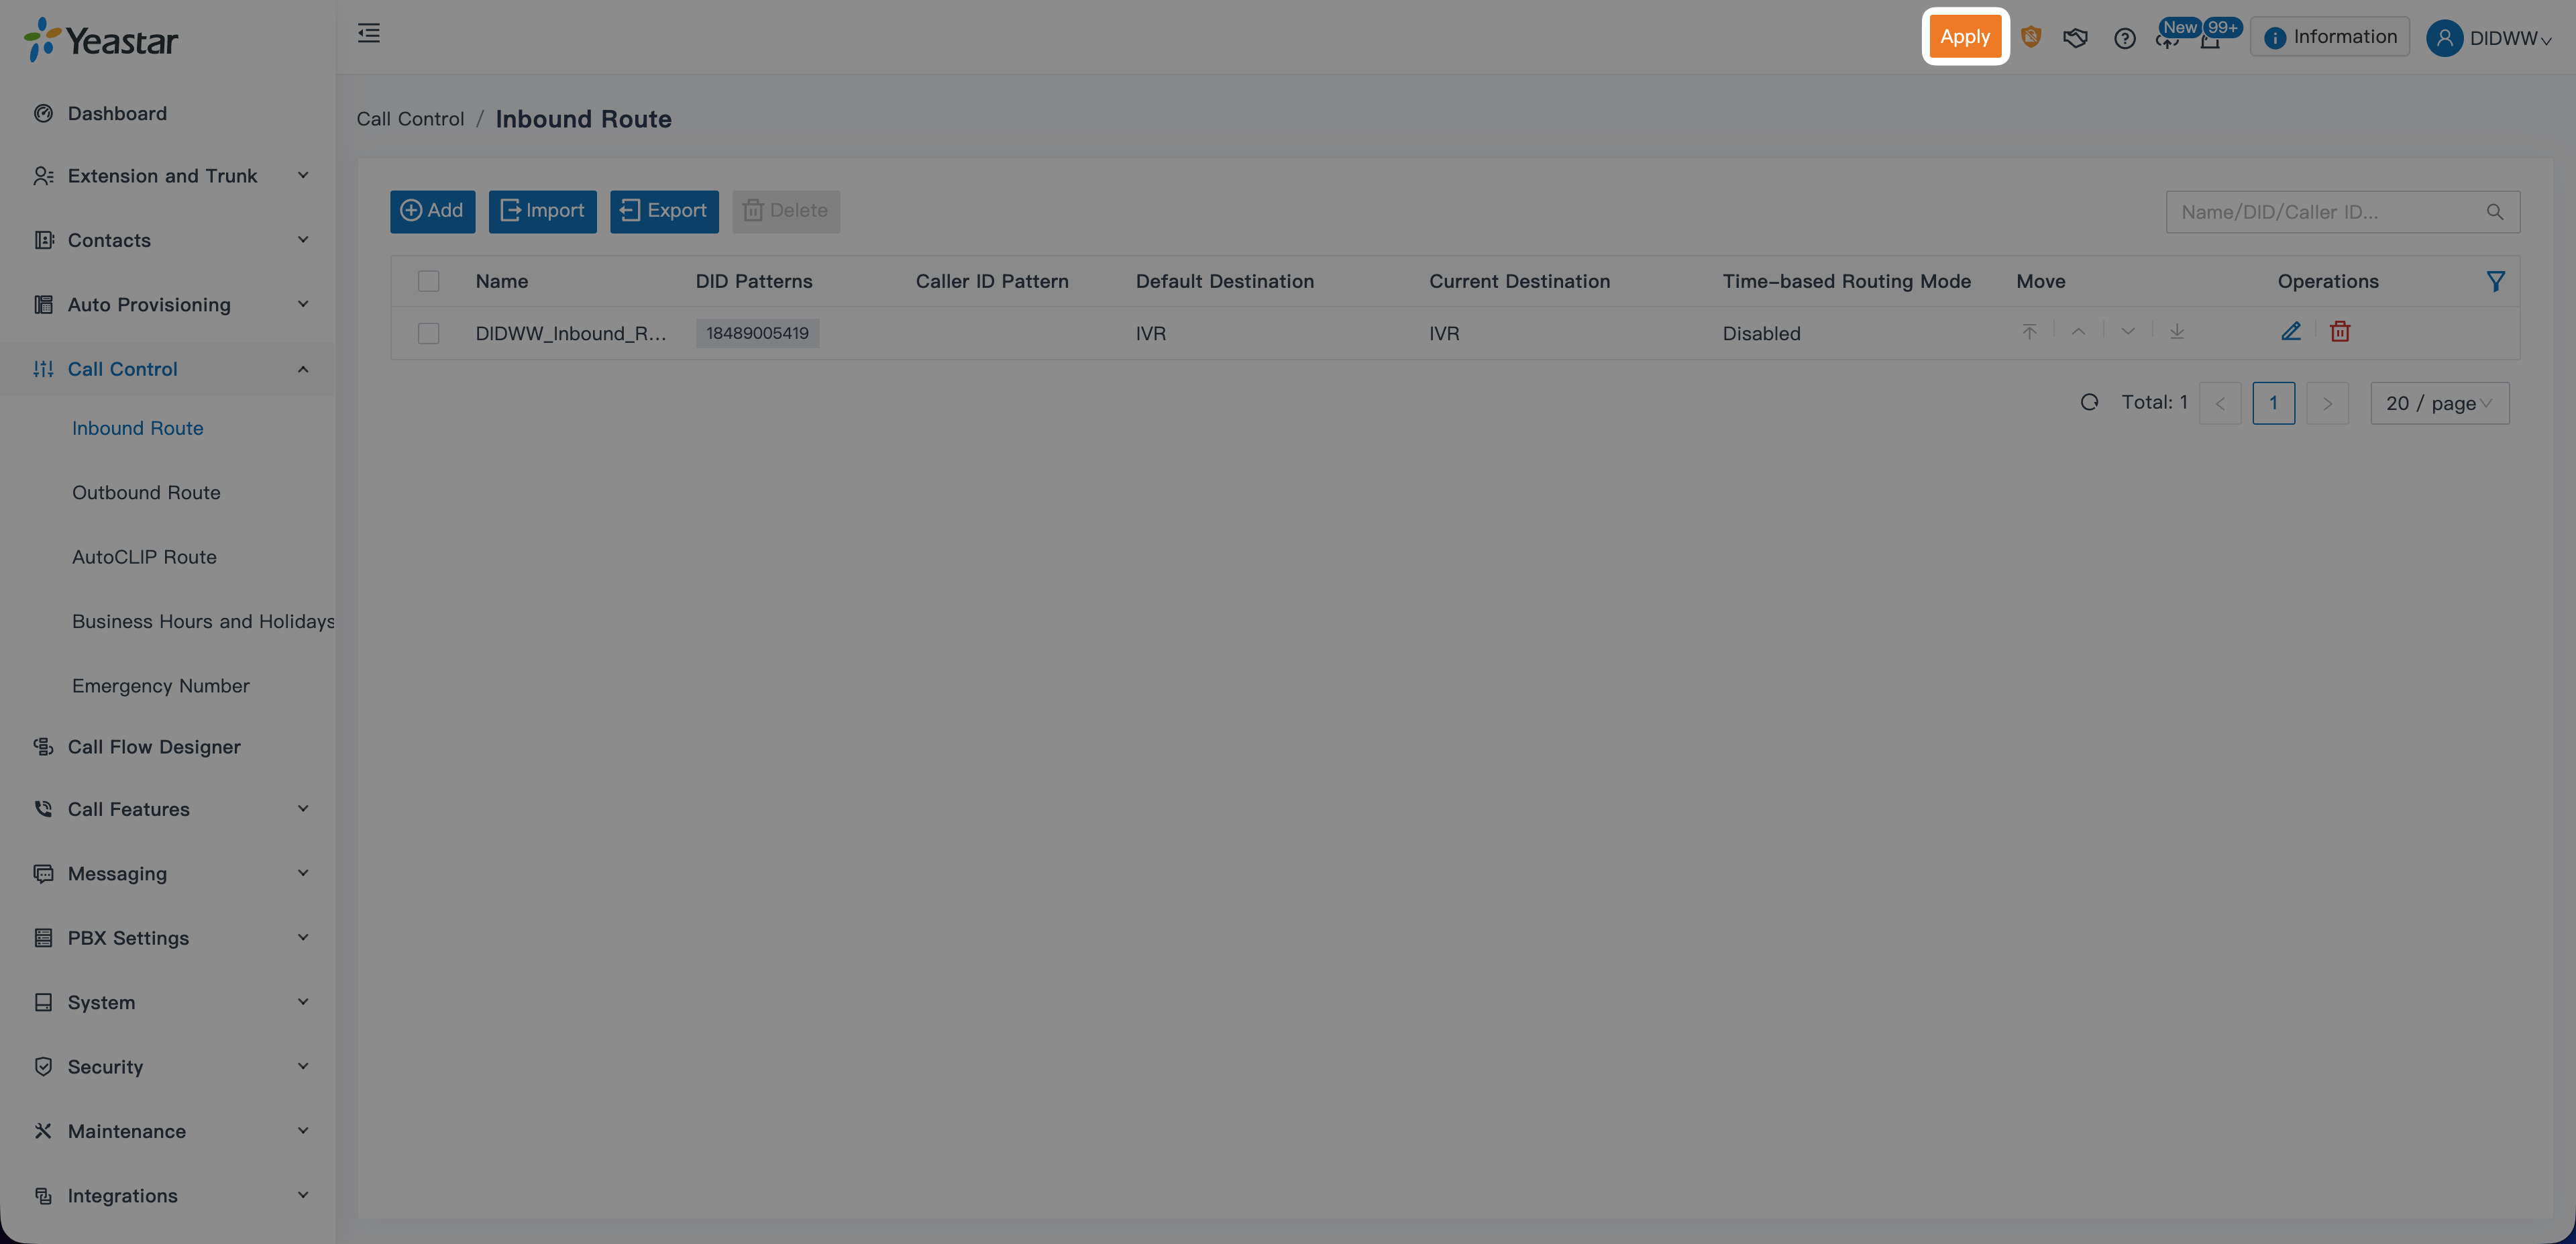
Click Apply to finalize the configuration.
Fig. 30. Configured Extensions in Yeastar P-Series PBX#
Before testing calls, ensure that at least one extension is registered.
You may use the Yeastar Linkus Desktop or Mobile Client to register an extension easily.