Contact List Automation Flow
Contact List triggered automation flows run when a contact is added to a specific list. These flows help automate onboarding, welcome messaging, and contact segmentation, ensuring timely and relevant communication based on list membership changes.
By using lists as flow triggers, you can initiate targeted communication the moment a contact is added. This allows for structured onboarding experiences, follow-ups, or tagging contacts based on source or intent.
Here are a few ways you can use the Contact List Trigger automation type:
Welcome new contacts – Automatically send an email, SMS, or WhatsApp message when a contact is added to a designated list.
Registration follow-ups – Initiate a flow that confirms sign-ups, provides next steps, or shares related resources after event or form registration.
Trigger event-based messaging – Send contest confirmations, event registrations, or lead follow-ups when contacts are collected through campaigns.
Note
Contacts can only trigger a list-based automation once. For example, if a contact is added, removed, and then re-added to the same list, the flow will not be triggered again.
Before You Begin
Make sure you have at least one contact list created. You’ll need it to configure the trigger. For more details, see the contact lists documentation.
Create a Contact List Automation Flow
Use the steps below to create an automation flow triggered when a contact is added to a specific list. This enables you to build onboarding and engagement flows that respond immediately to new contact additions in your lists.
Step 1: Open the Create Flow Panel
Navigate to Automations > Flows.
Click the + Create Flow button.
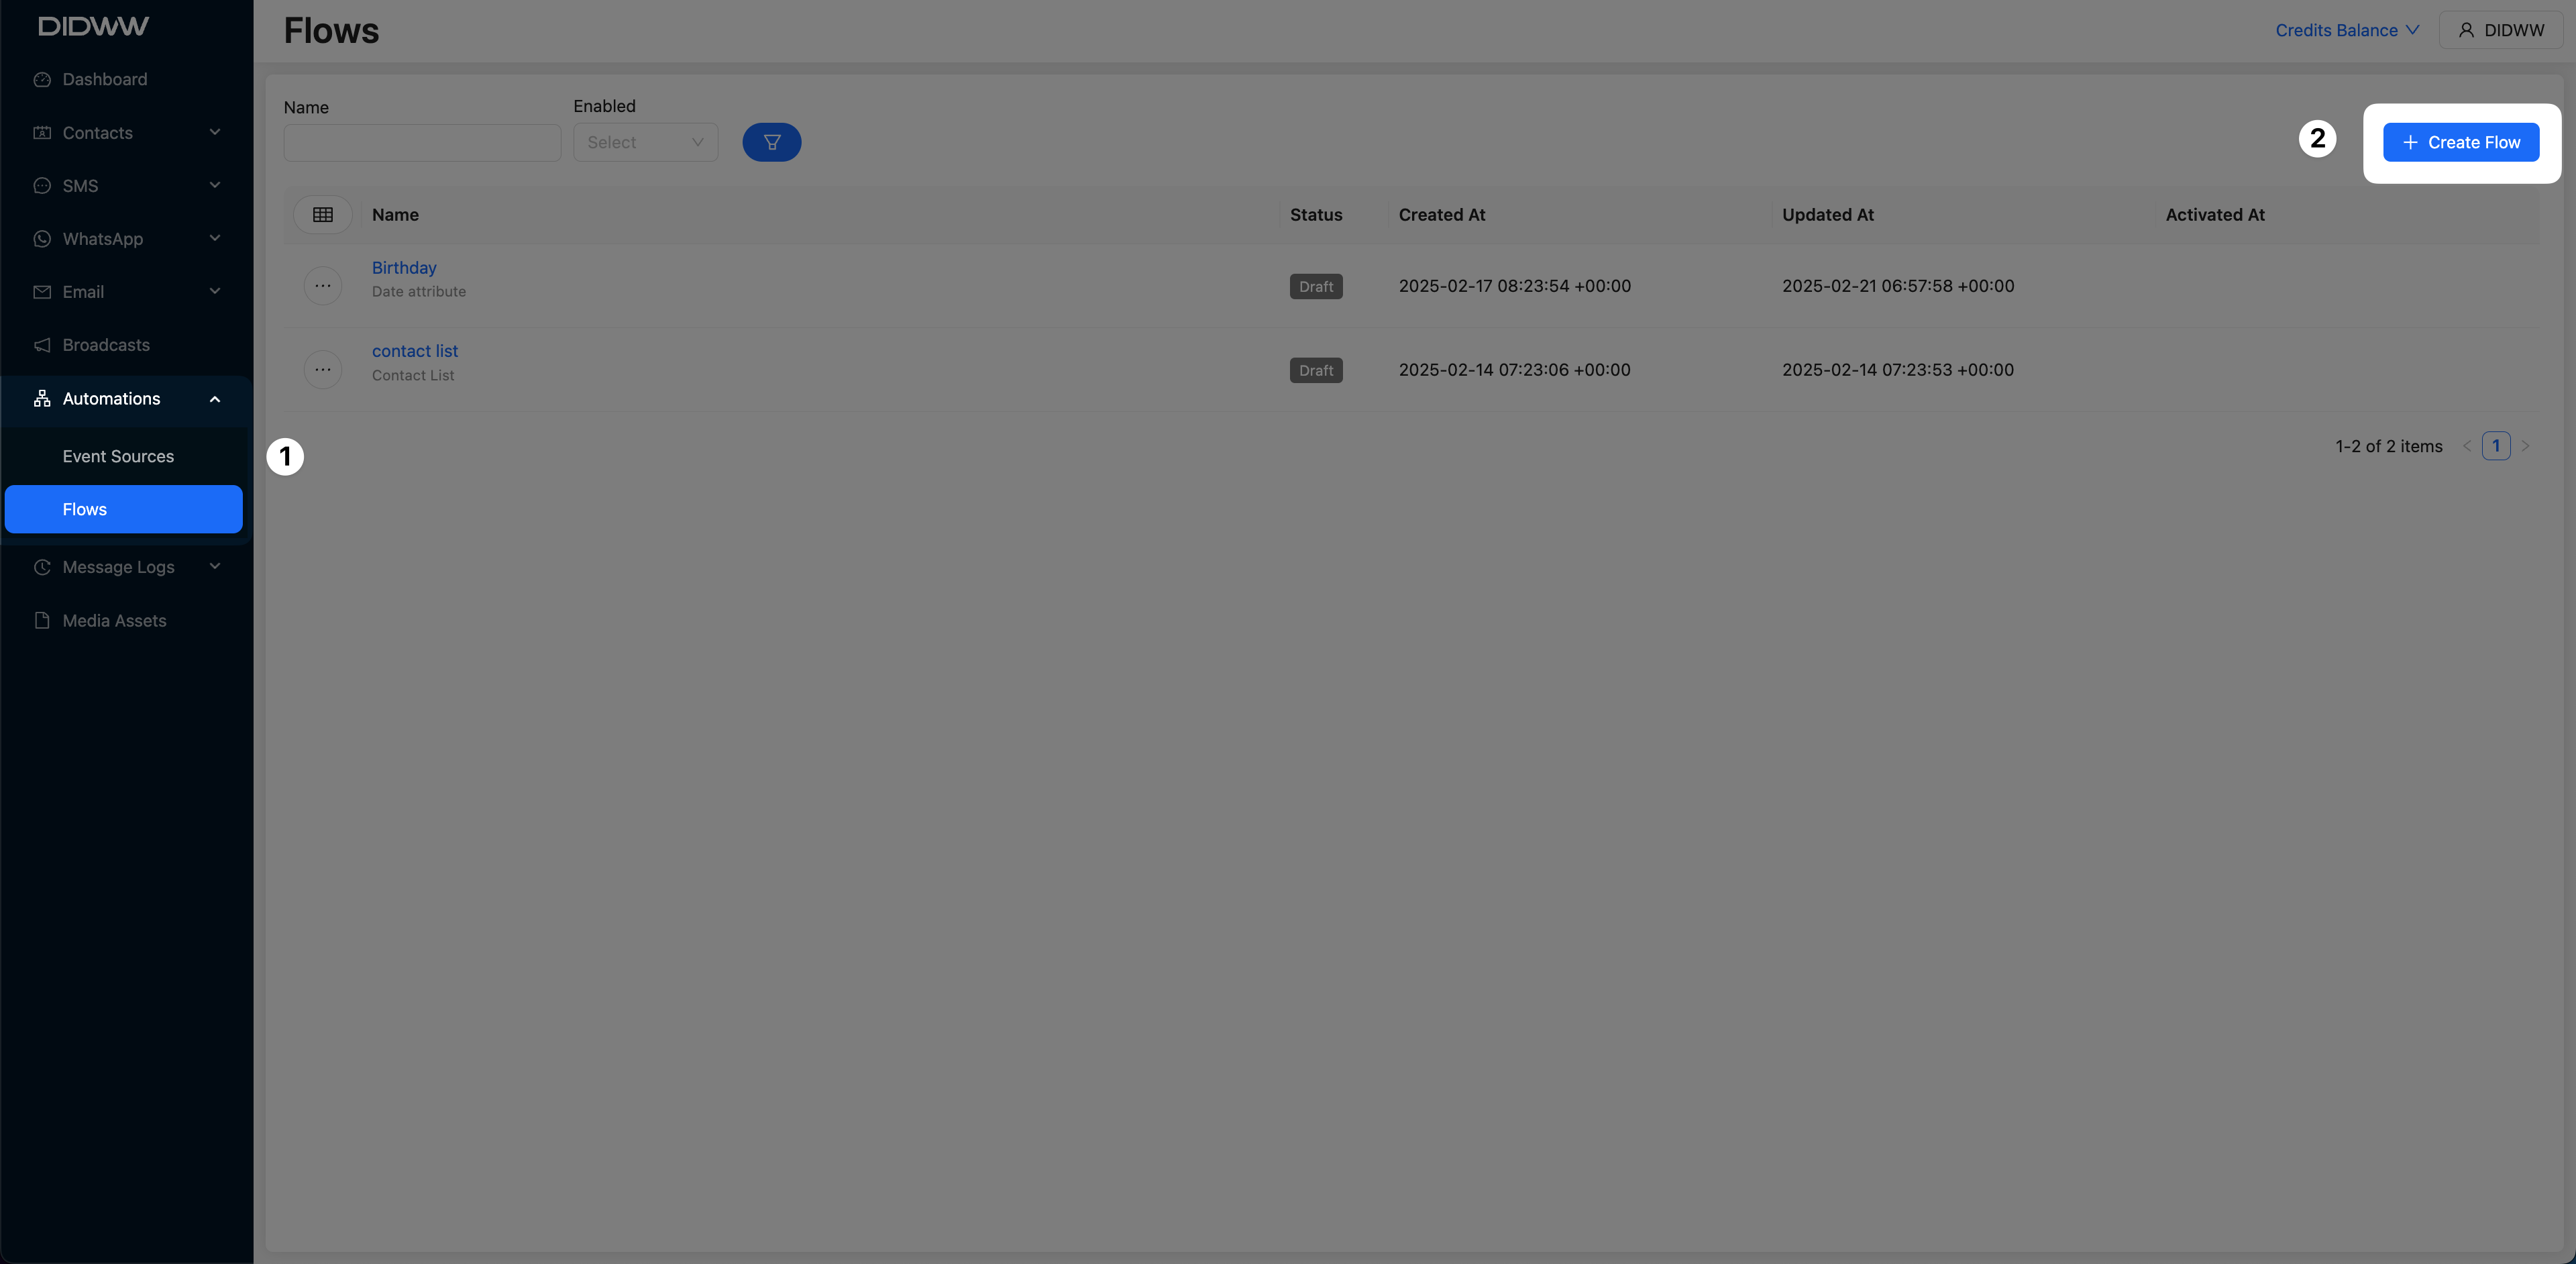
Fig. 1. Create Flow Button.
Step 2: Select the Contact List Trigger
Enter a descriptive name for your automation flow (for example, Welcome New Contacts).
In the Select a Trigger window, click Contact List.
Click OK to confirm.
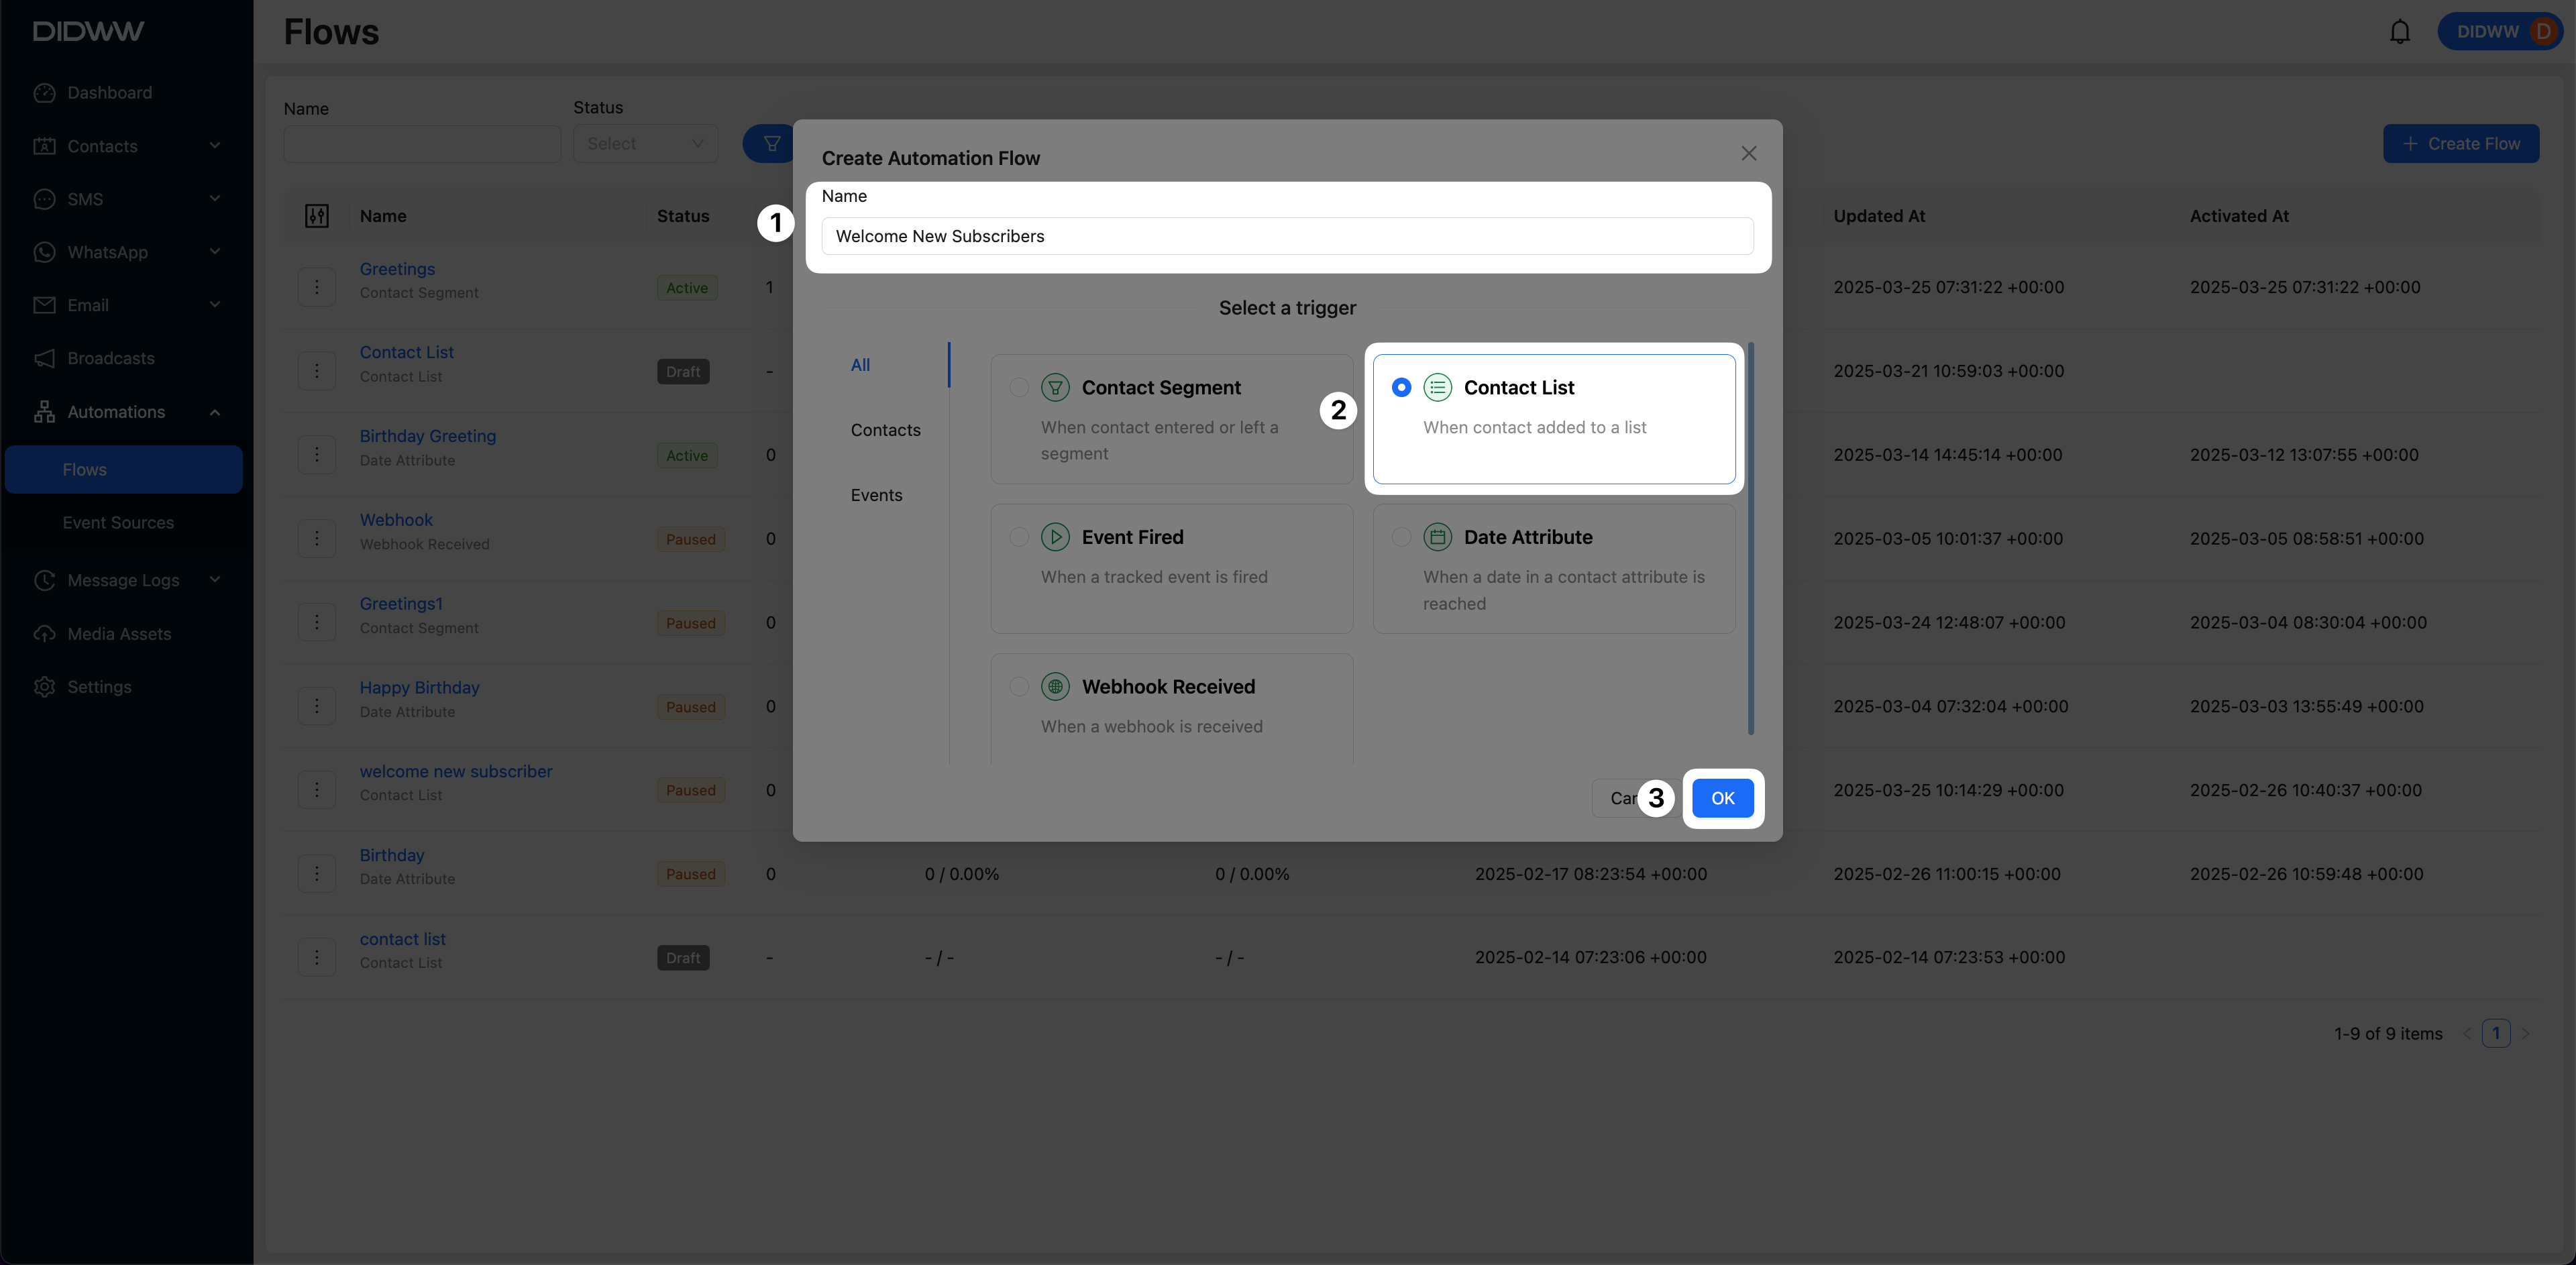
Fig. 2. Select the Contact List Trigger.
Step 3: Edit the Contact List Trigger
To proceed with the automation setup, the Contact List Trigger must be configured. This is a required step before the flow can be activated.
You can edit the Contact List Trigger using one of the following methods:

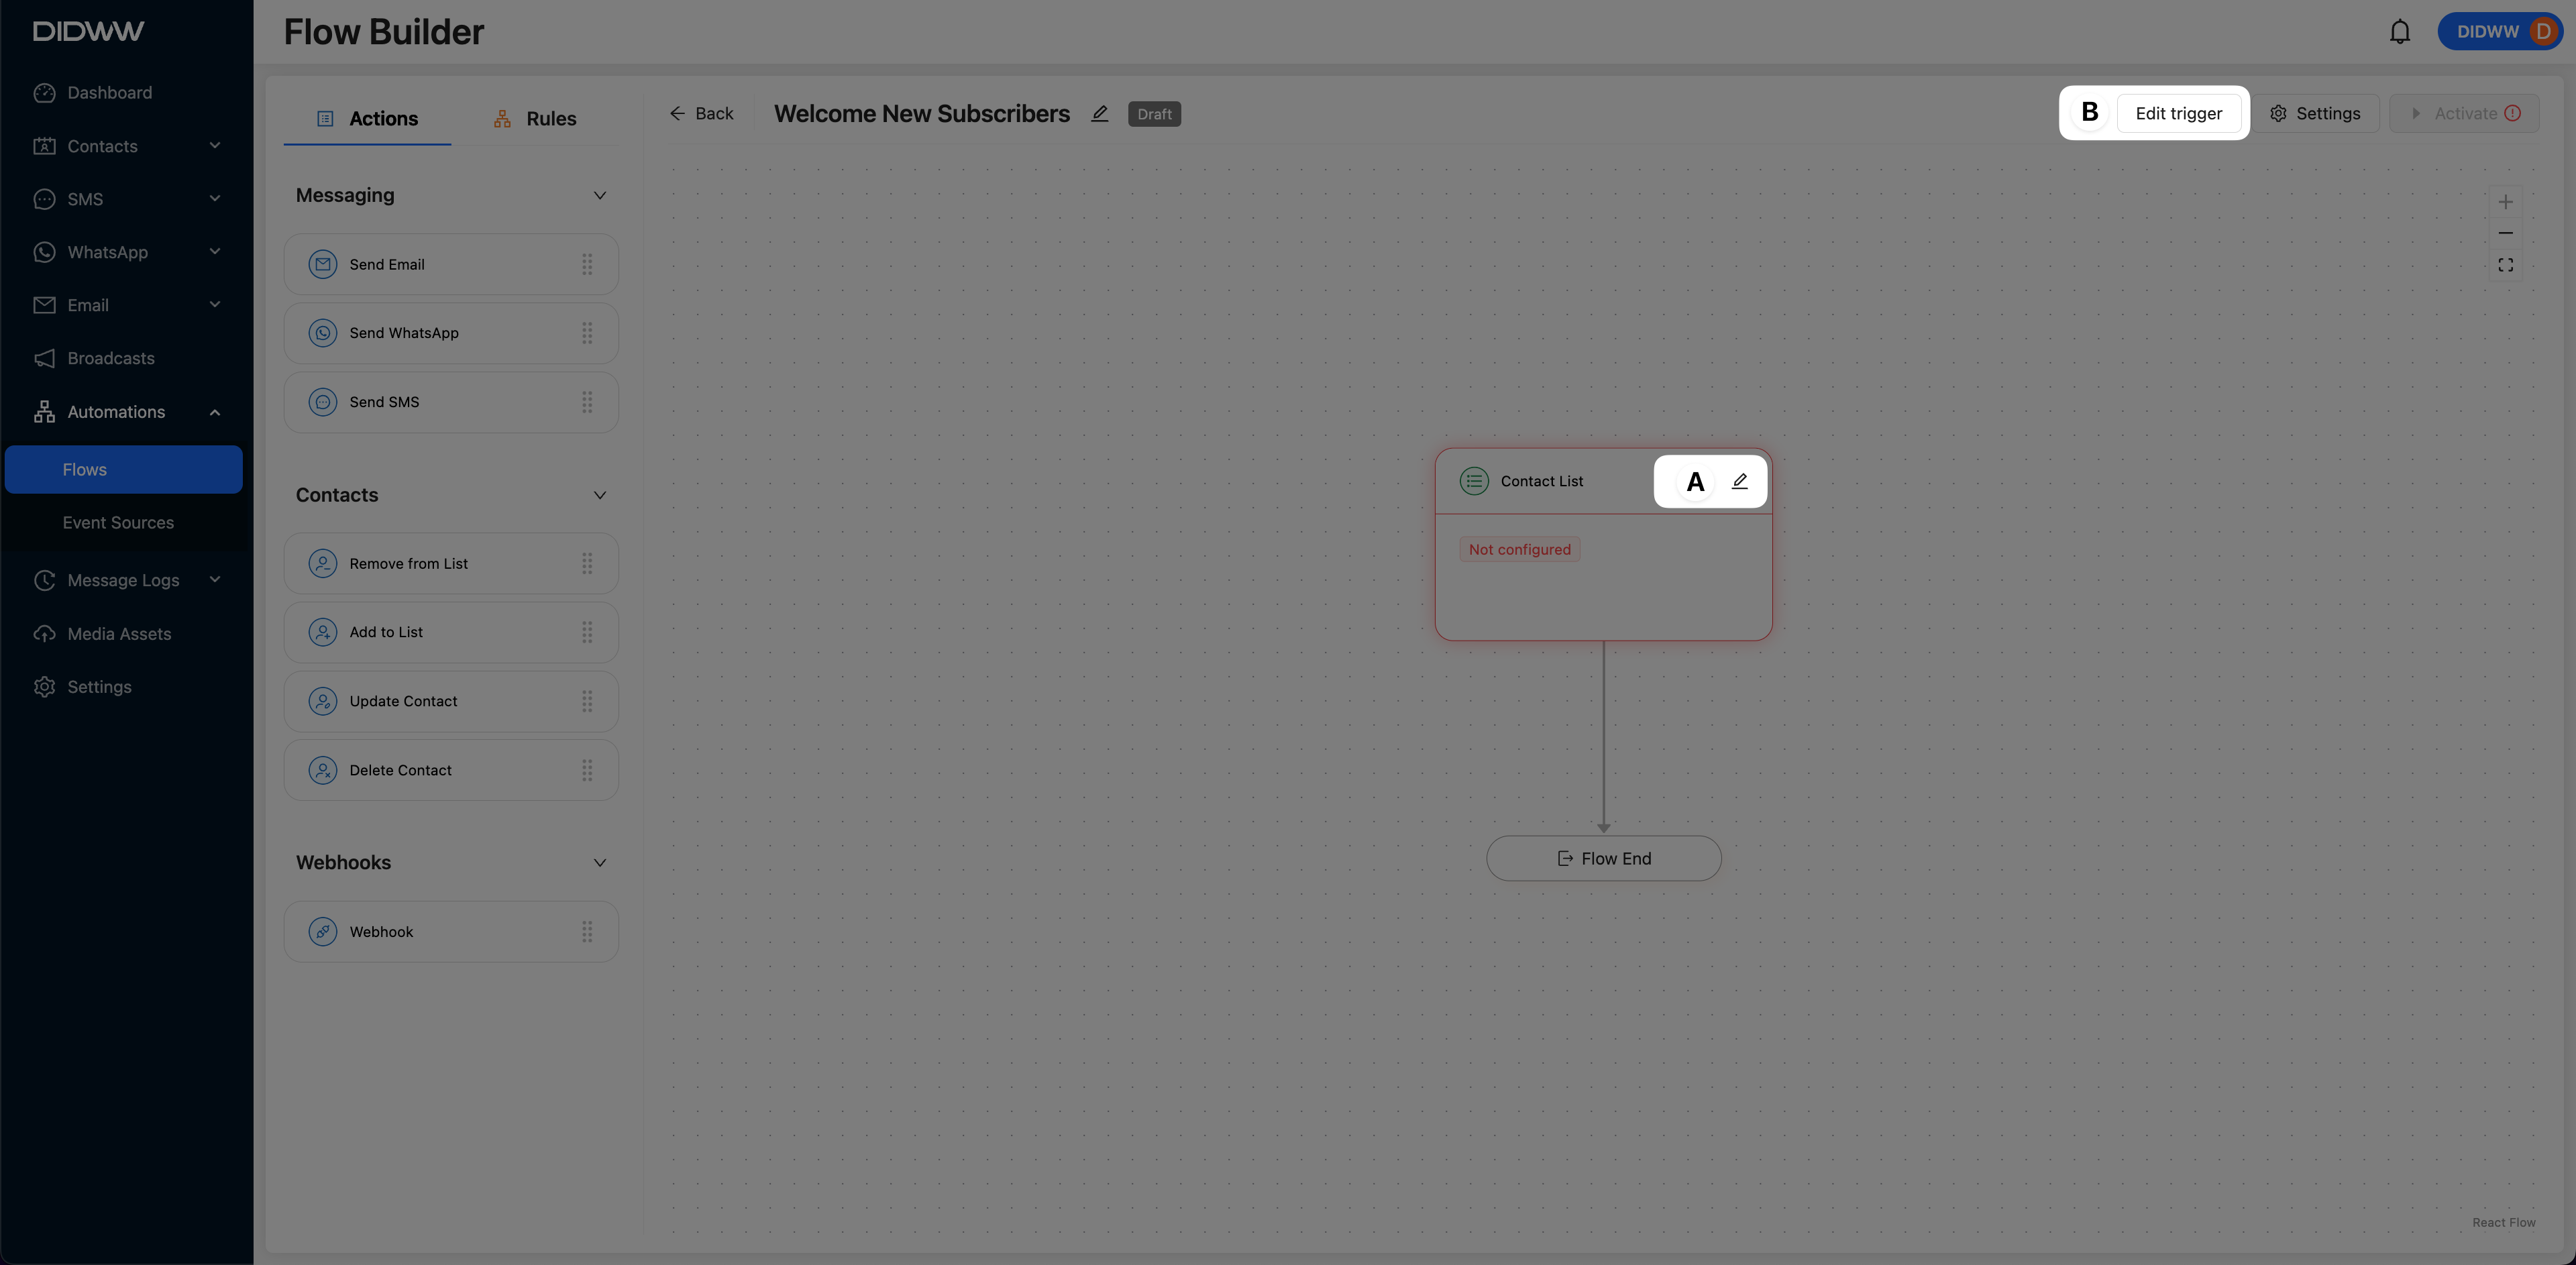
Fig. 3. Edit the Contact List Trigger.
Step 4: Configure the Contact List Trigger
In the Edit Contact List Trigger panel, complete the following steps:
Choose a Contact List – Select the contact list that will trigger the flow when a contact enters the list.
(Optional) Add Filters – Refine which contacts trigger the flow using additional conditions:
Use All of (AND) or At least one (OR) logic to group multiple conditions.
Click + Add Condition / Group.
Select a filter, such as Contact Attribute: SMS Subscribed = True.
Click Save to apply the trigger settings and return to the automation flow builder.
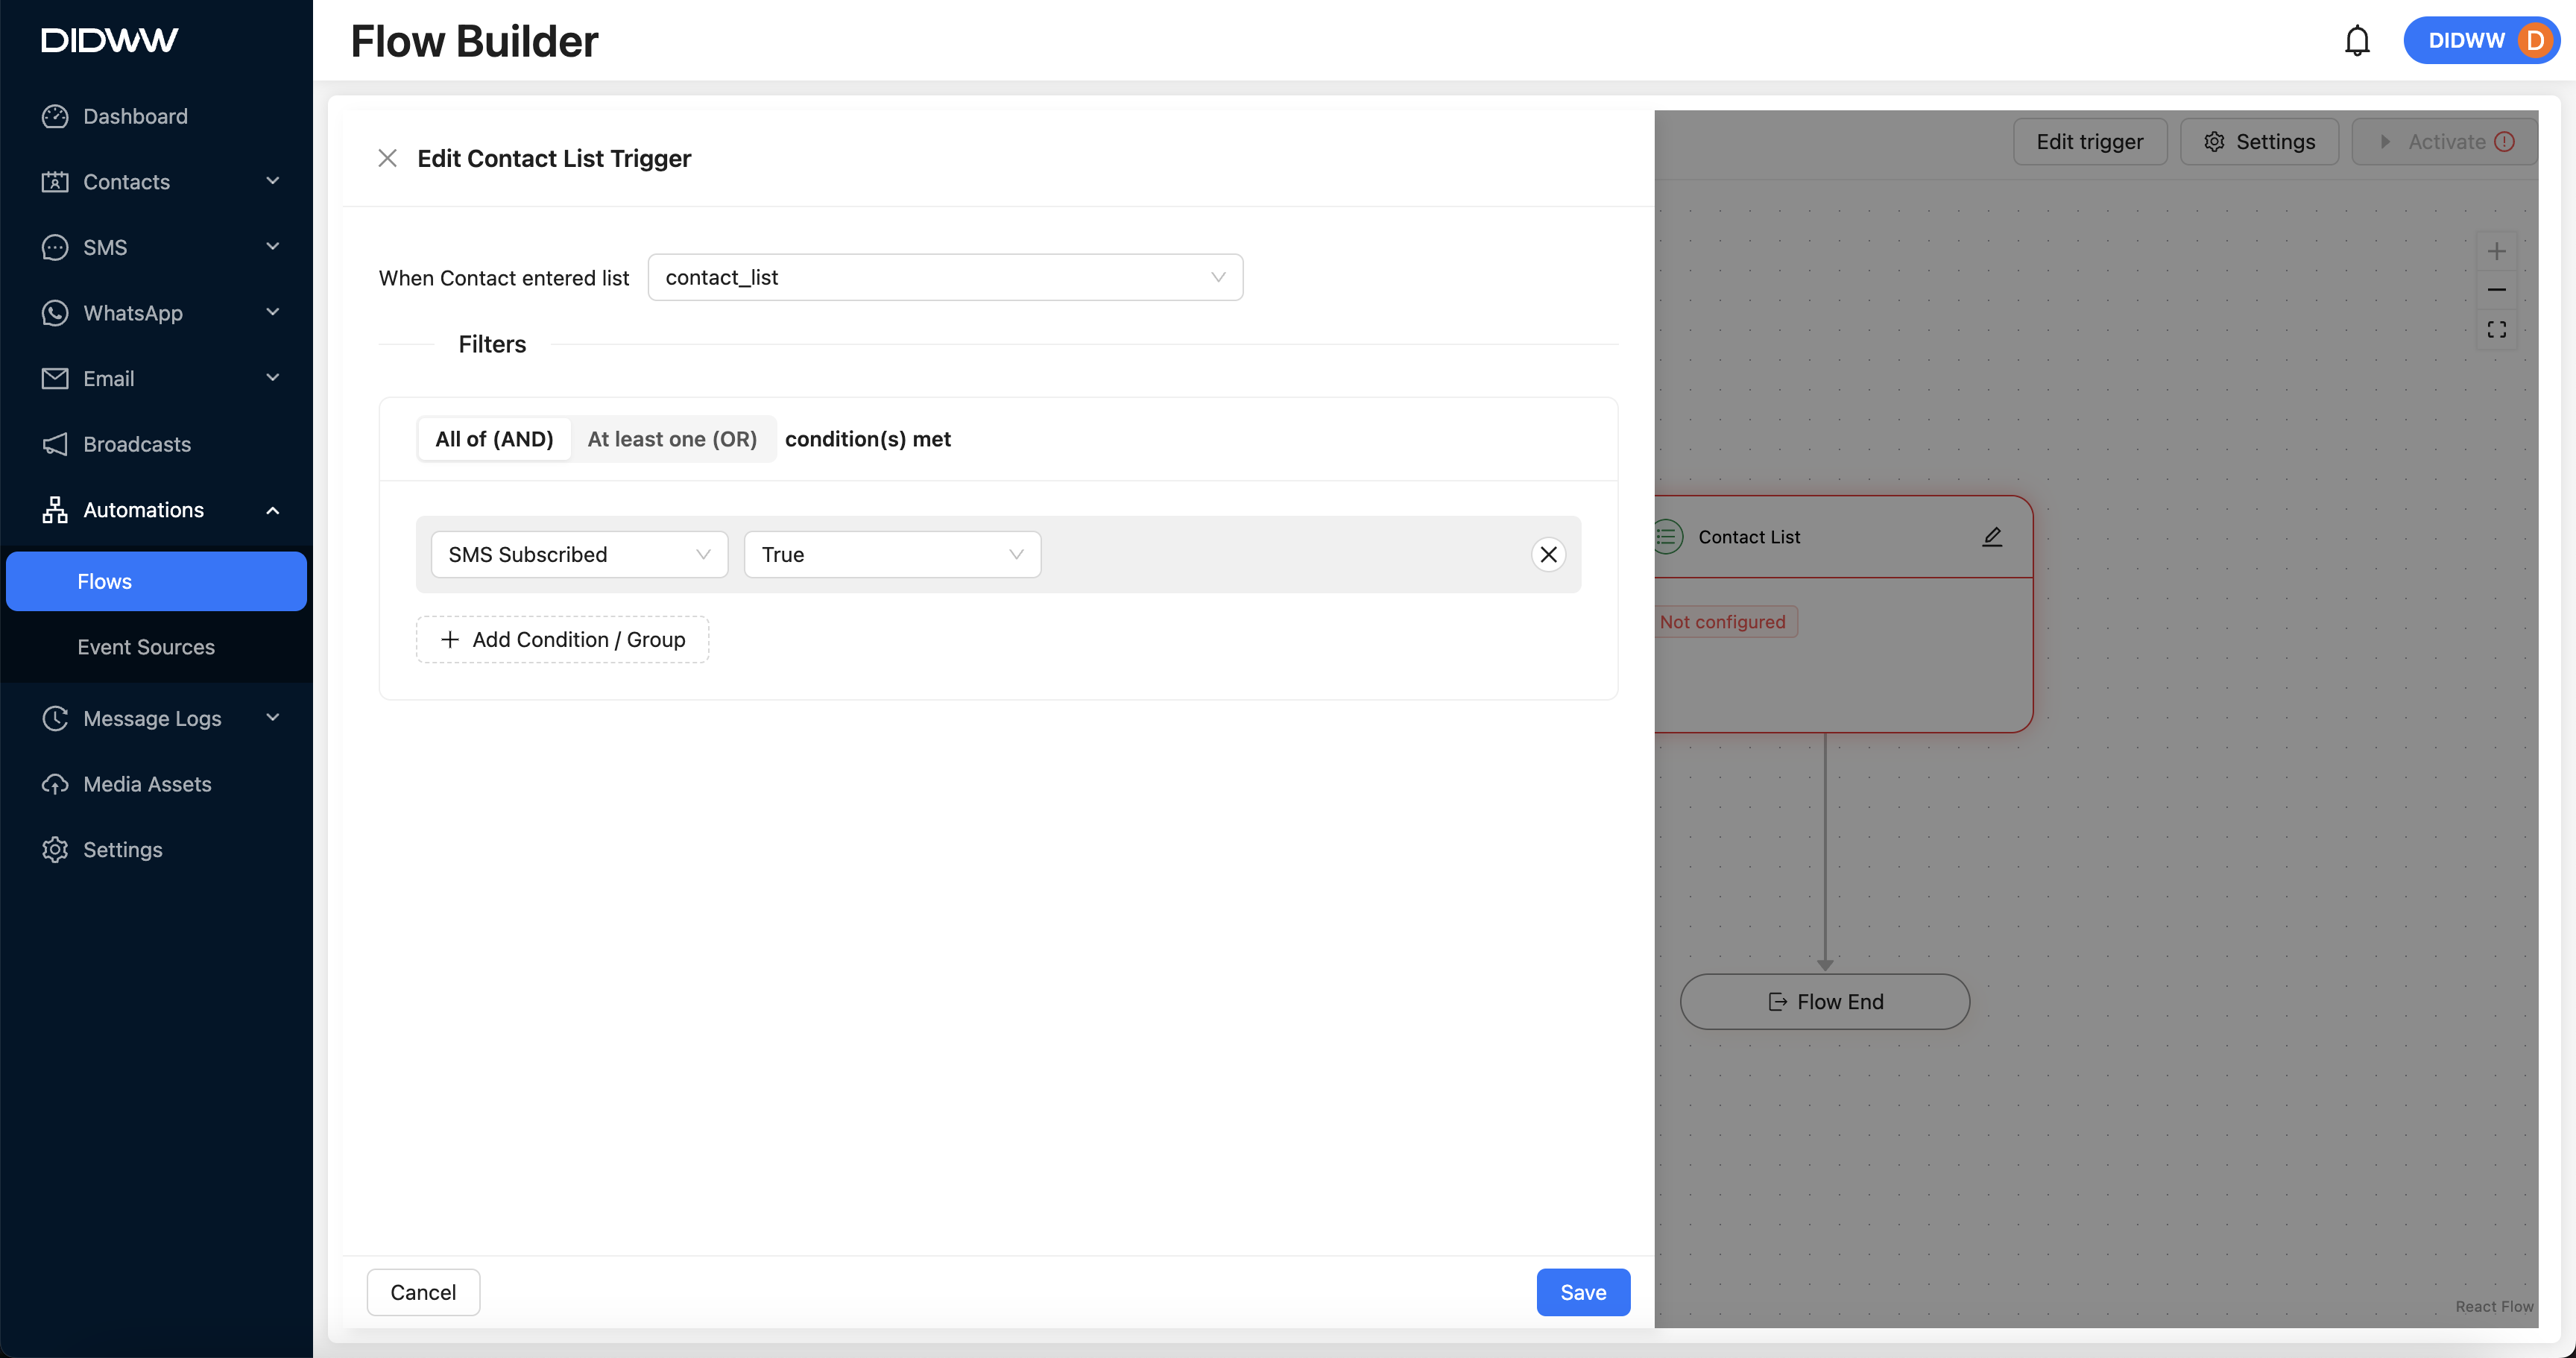
Fig. 4. Configure the Contact List Trigger.
Step 5: Build the Automation Flow
After configuring the Contact List trigger, proceed to build the automation flow using available Actions and Rules in the drag-and-drop interface.
To build your automation flow, you will use two types of components:
Actions – Define what should happen (e.g., send a message, update a contact attribute).
Rules – Logic-based controls that determine how and when actions are executed (e.g., wait, branch, check conditions).
Start by adding an action. For example, to send a welcome email:
From the Actions panel, select Send Email.
Drag the Send Email object to the + rectangle in the automation flow canvas.
Once placed, a configuration window will appear where you can customize the email content and sender settings.
Repeat this process to add additional messages or logic-based components to tailor the flow to your use case.
Fig. 5. Automation Flow Builder.
Once you understand the drag-and-drop process, review the available Actions and Rules described in the following sections to configure your automation flow in detail.
Actions in Flow Builder
Actions define what happens when a flow is triggered. These actions allow you to send messages, update contact information, manage lists, or interact with external systems.
The table below outlines each available action, including a description, required inputs, and common usage examples.
Action |
Description |
Inputs Required |
Usage Examples |
|---|---|---|---|
Sends an email to the contact using a predefined template. |
|
|
|
Sends a WhatsApp message via the WhatsApp Business API using |
|
|
|
Sends an SMS message using a selected template and campaign. Supports opt-out footers for compliance. |
|
|
|
Removes a contact from a specified list. Useful for segmentation and managing opt-outs. |
|
|
|
Adds a contact to a specified list. Used for managing subscriptions or categorizing contacts. |
|
|
|
Updates a contact’s attributes such as name, |
|
|
|
Permanently deletes a contact from the system. Used for compliance or list cleanup. |
|
|
|
Sends structured data to external systems via an HTTP request. Enables real-time integrations. |
|
|


Rules in Flow Builder
Rules define the logic that controls how and when actions are executed within an automation flow. They are used to introduce delays, evaluate conditions, and create decision branches based on contact data or behavior.
The table below describes the available rules, including what each rule does, the configuration inputs required, and examples of when to use them.
Rule |
Description |
Inputs Required |
Usage Examples |
|---|---|---|---|
Pauses the flow for a specified duration before executing |
|
|
|
Splits the flow into two paths based on whether a condition |
|
|


For detailed configuration steps and advanced usage, see the full documentation:
View the full guide on how to configure each available automation flow Action and Rule in the Flow Builder.
Step 6: Activate the Automation Flow
Once you’ve configured the Contact List trigger and built the flow based on your use case, you’re ready to activate the automation.
Note
The Activate button will be disabled if the trigger object has not been configured. To complete this setup, click Edit Trigger or refer to Step 3.
After activation, you can pause the automation at any time if you need to make changes or temporarily stop the flow.
Follow these steps to activate the flow:
Click Activate in the top-right corner of the automation flow builder.
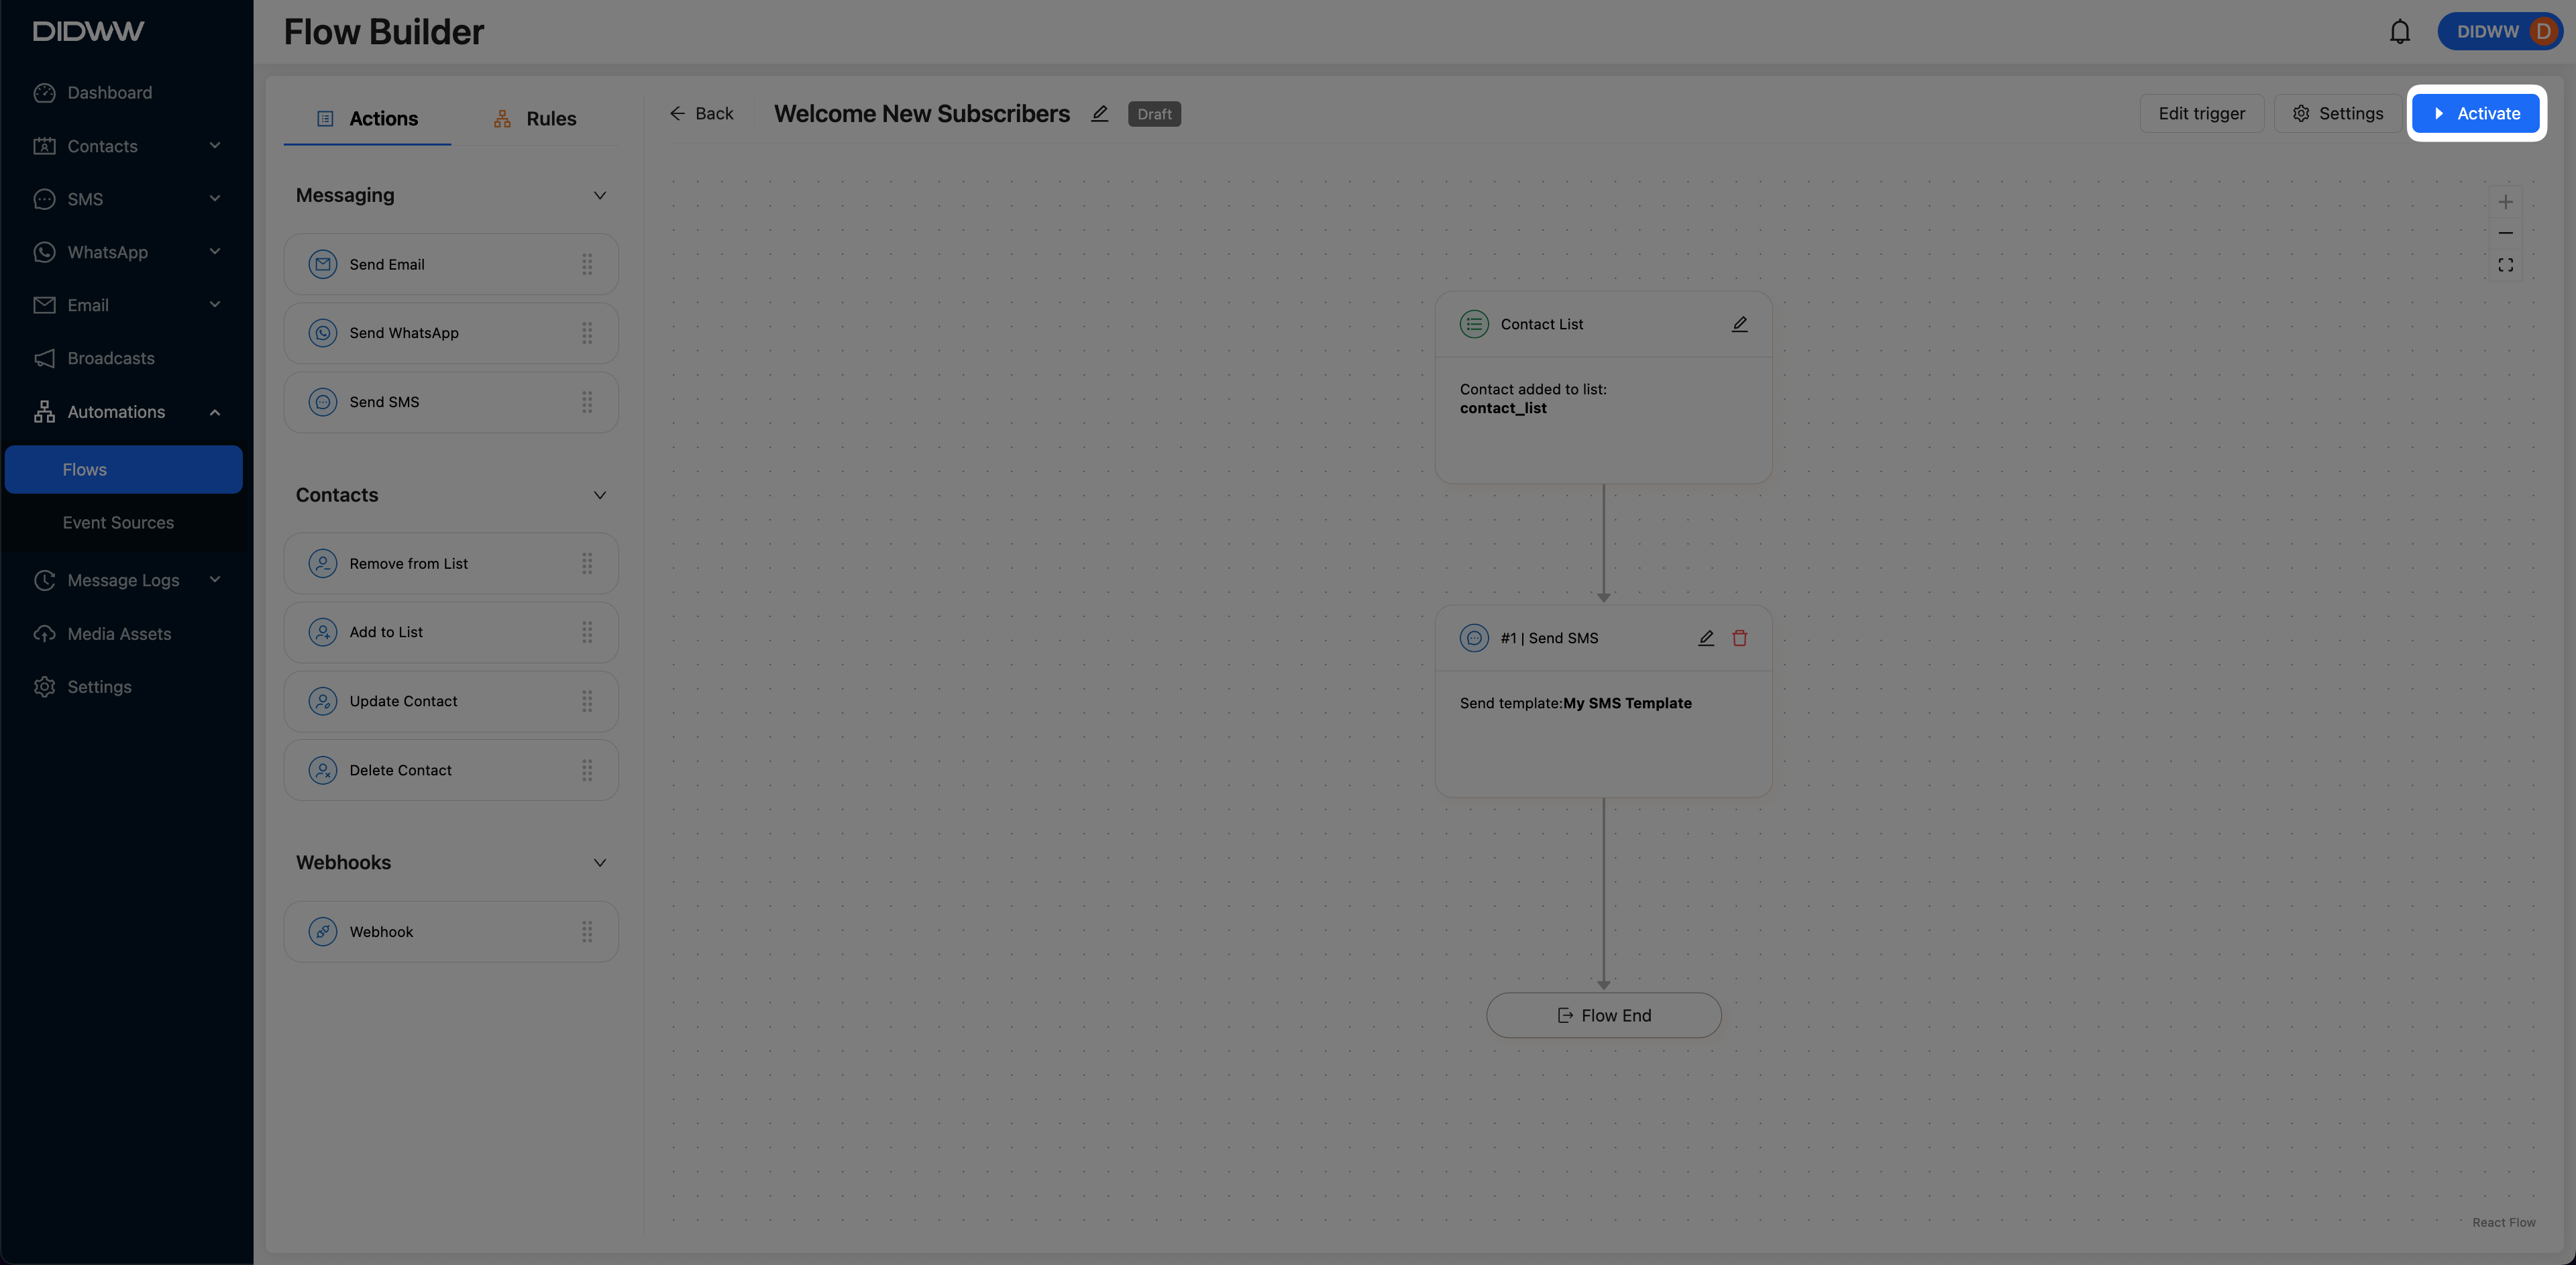
Fig. 6. Activating the Flow.
A modal window appears with optional settings you can configure before activating the flow:
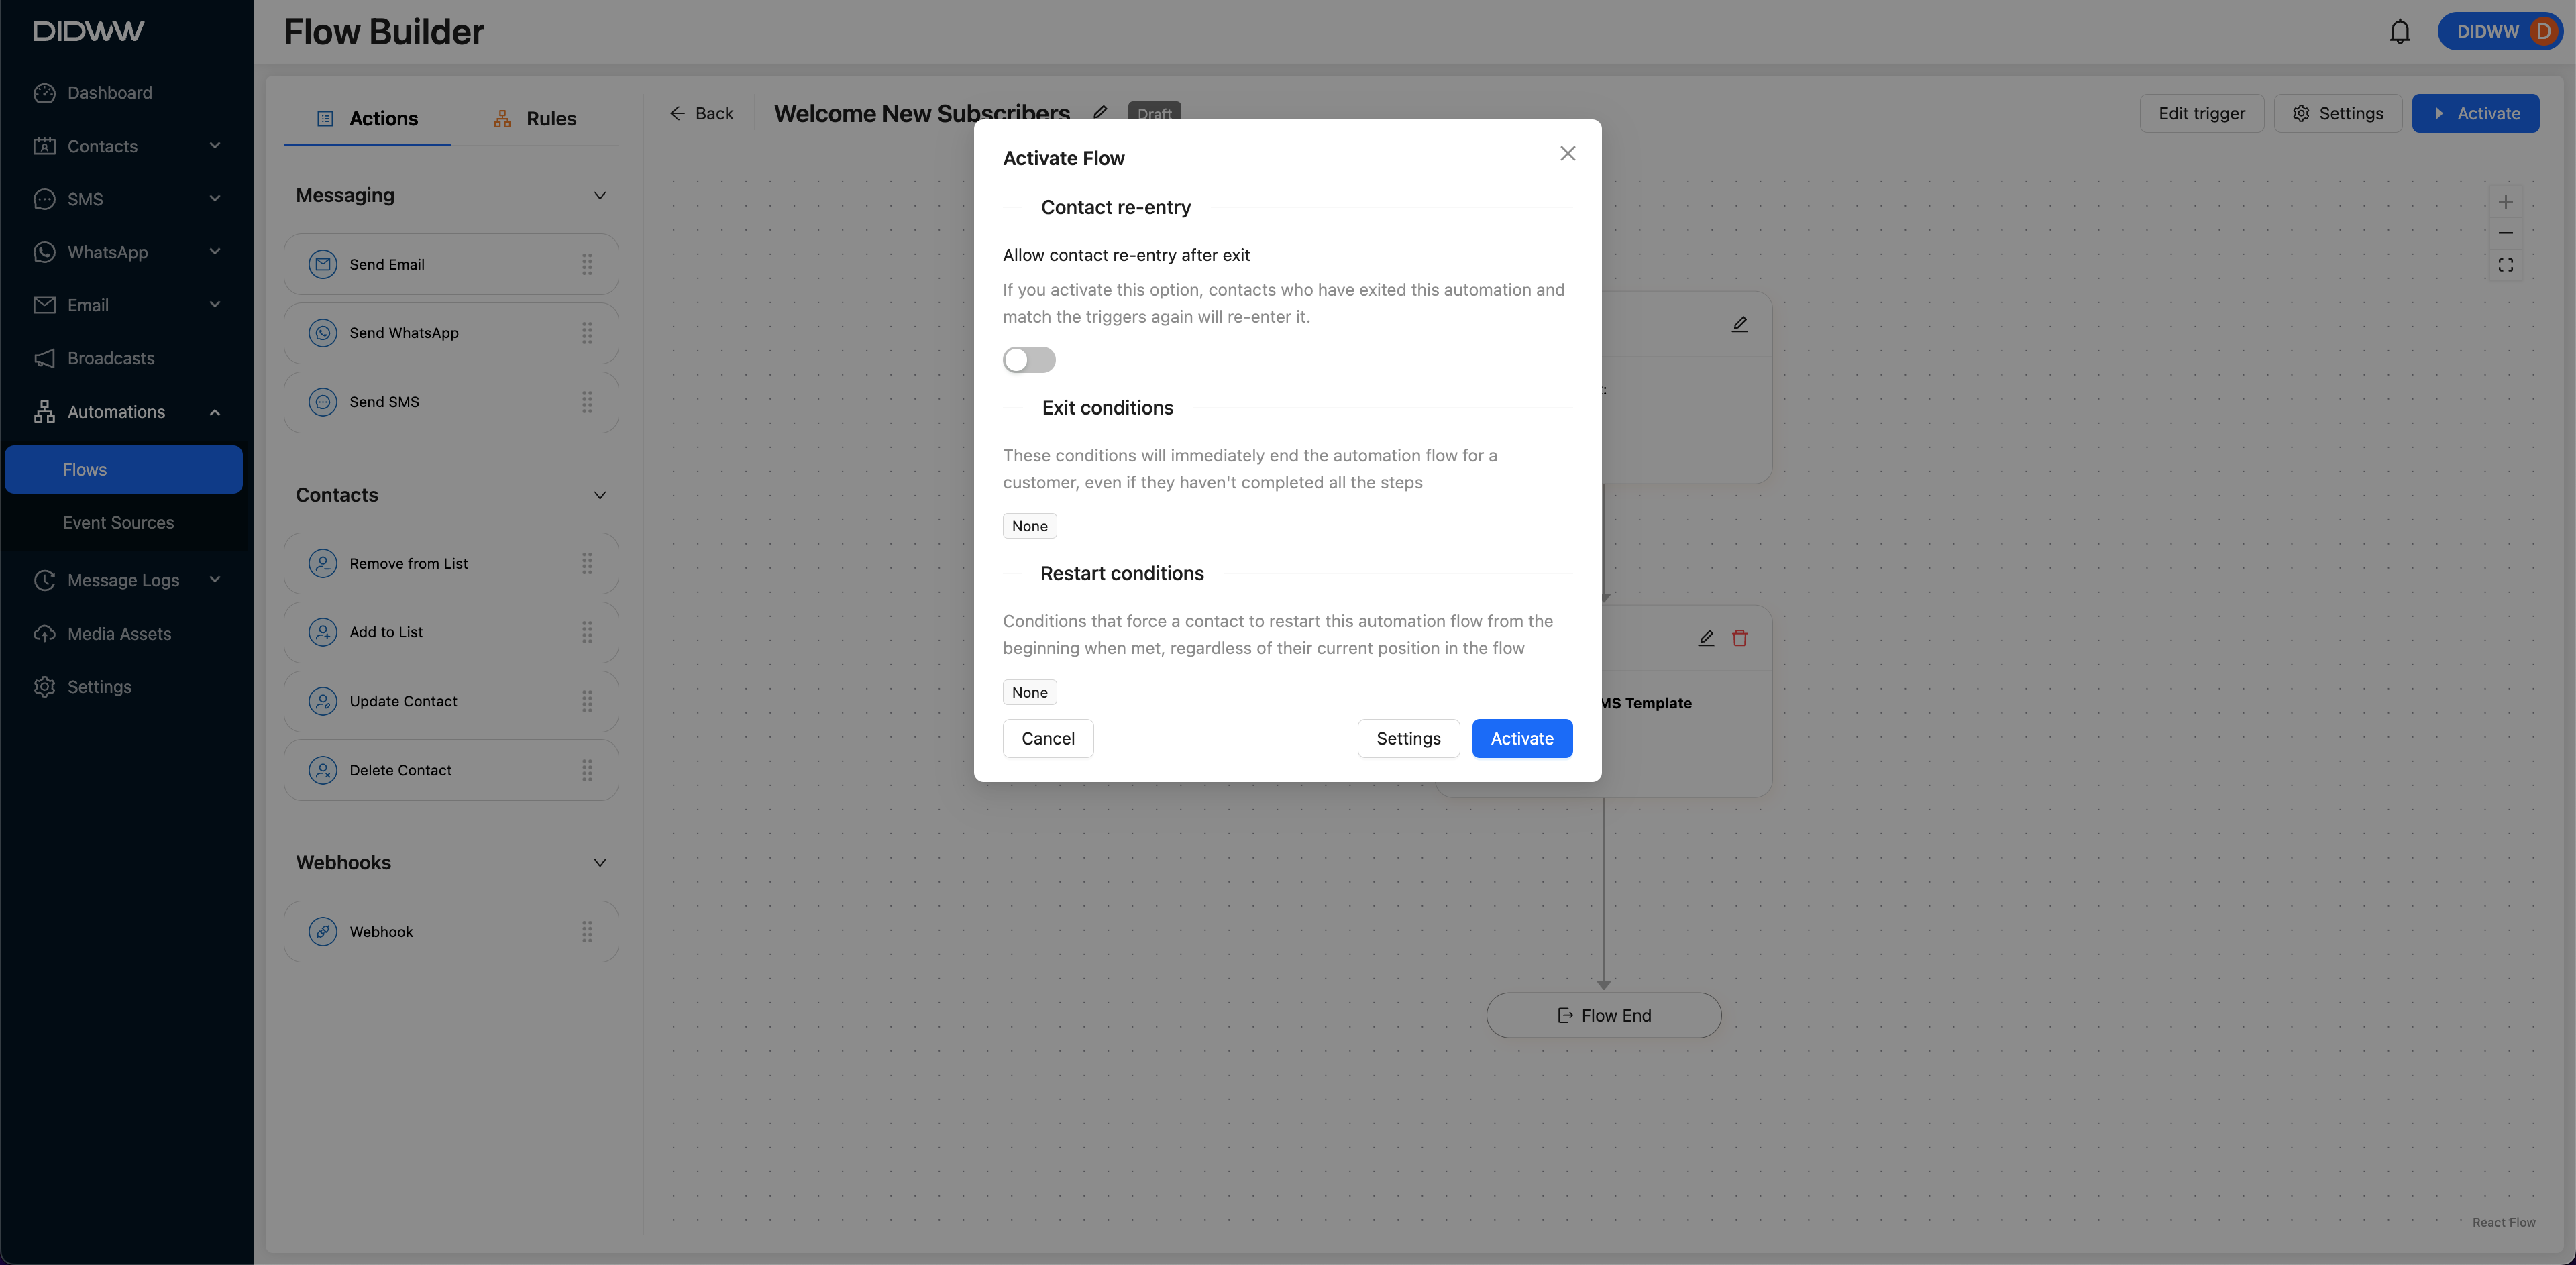
Fig. 7. Activate Flow Window.
In the Activate Flow window, you can configure the following options:
Option
Description
Allow contact re-entry after exit
Allows contacts to re-enter the automation if they meet the trigger conditions again after exiting.
Set up wait time (only visible if re-entry is enabled)
Specifies how long the system should wait before checking if the contact matches the trigger conditions again.
Exit conditions
Defines when a contact should immediately exit the flow. For example, if they are removed from the contact list.
Restart conditions
Forces a contact to restart the flow from the beginning, regardless of their current progress.
Note
To configure Exit Conditions and Restart Conditions, click the Settings button inside the modal. These settings are optional and depend on your flow logic.
Tip
If your flow is based on temporary list membership, consider adding an exit condition like “contact removed from the list” to stop contacts from continuing in the flow after they no longer qualify.
Once you’ve reviewed or configured the optional settings, click Activate to launch the automation.
The flow status will change from
 to
to
 and will automatically run based on the defined contact list entry criteria.
Edit the Contact List Automation Flow
To update an existing contact list automation flow, use the Flow Builder to access and modify its configuration. Follow the steps below to edit the flow, including its triggers, actions, and other components.

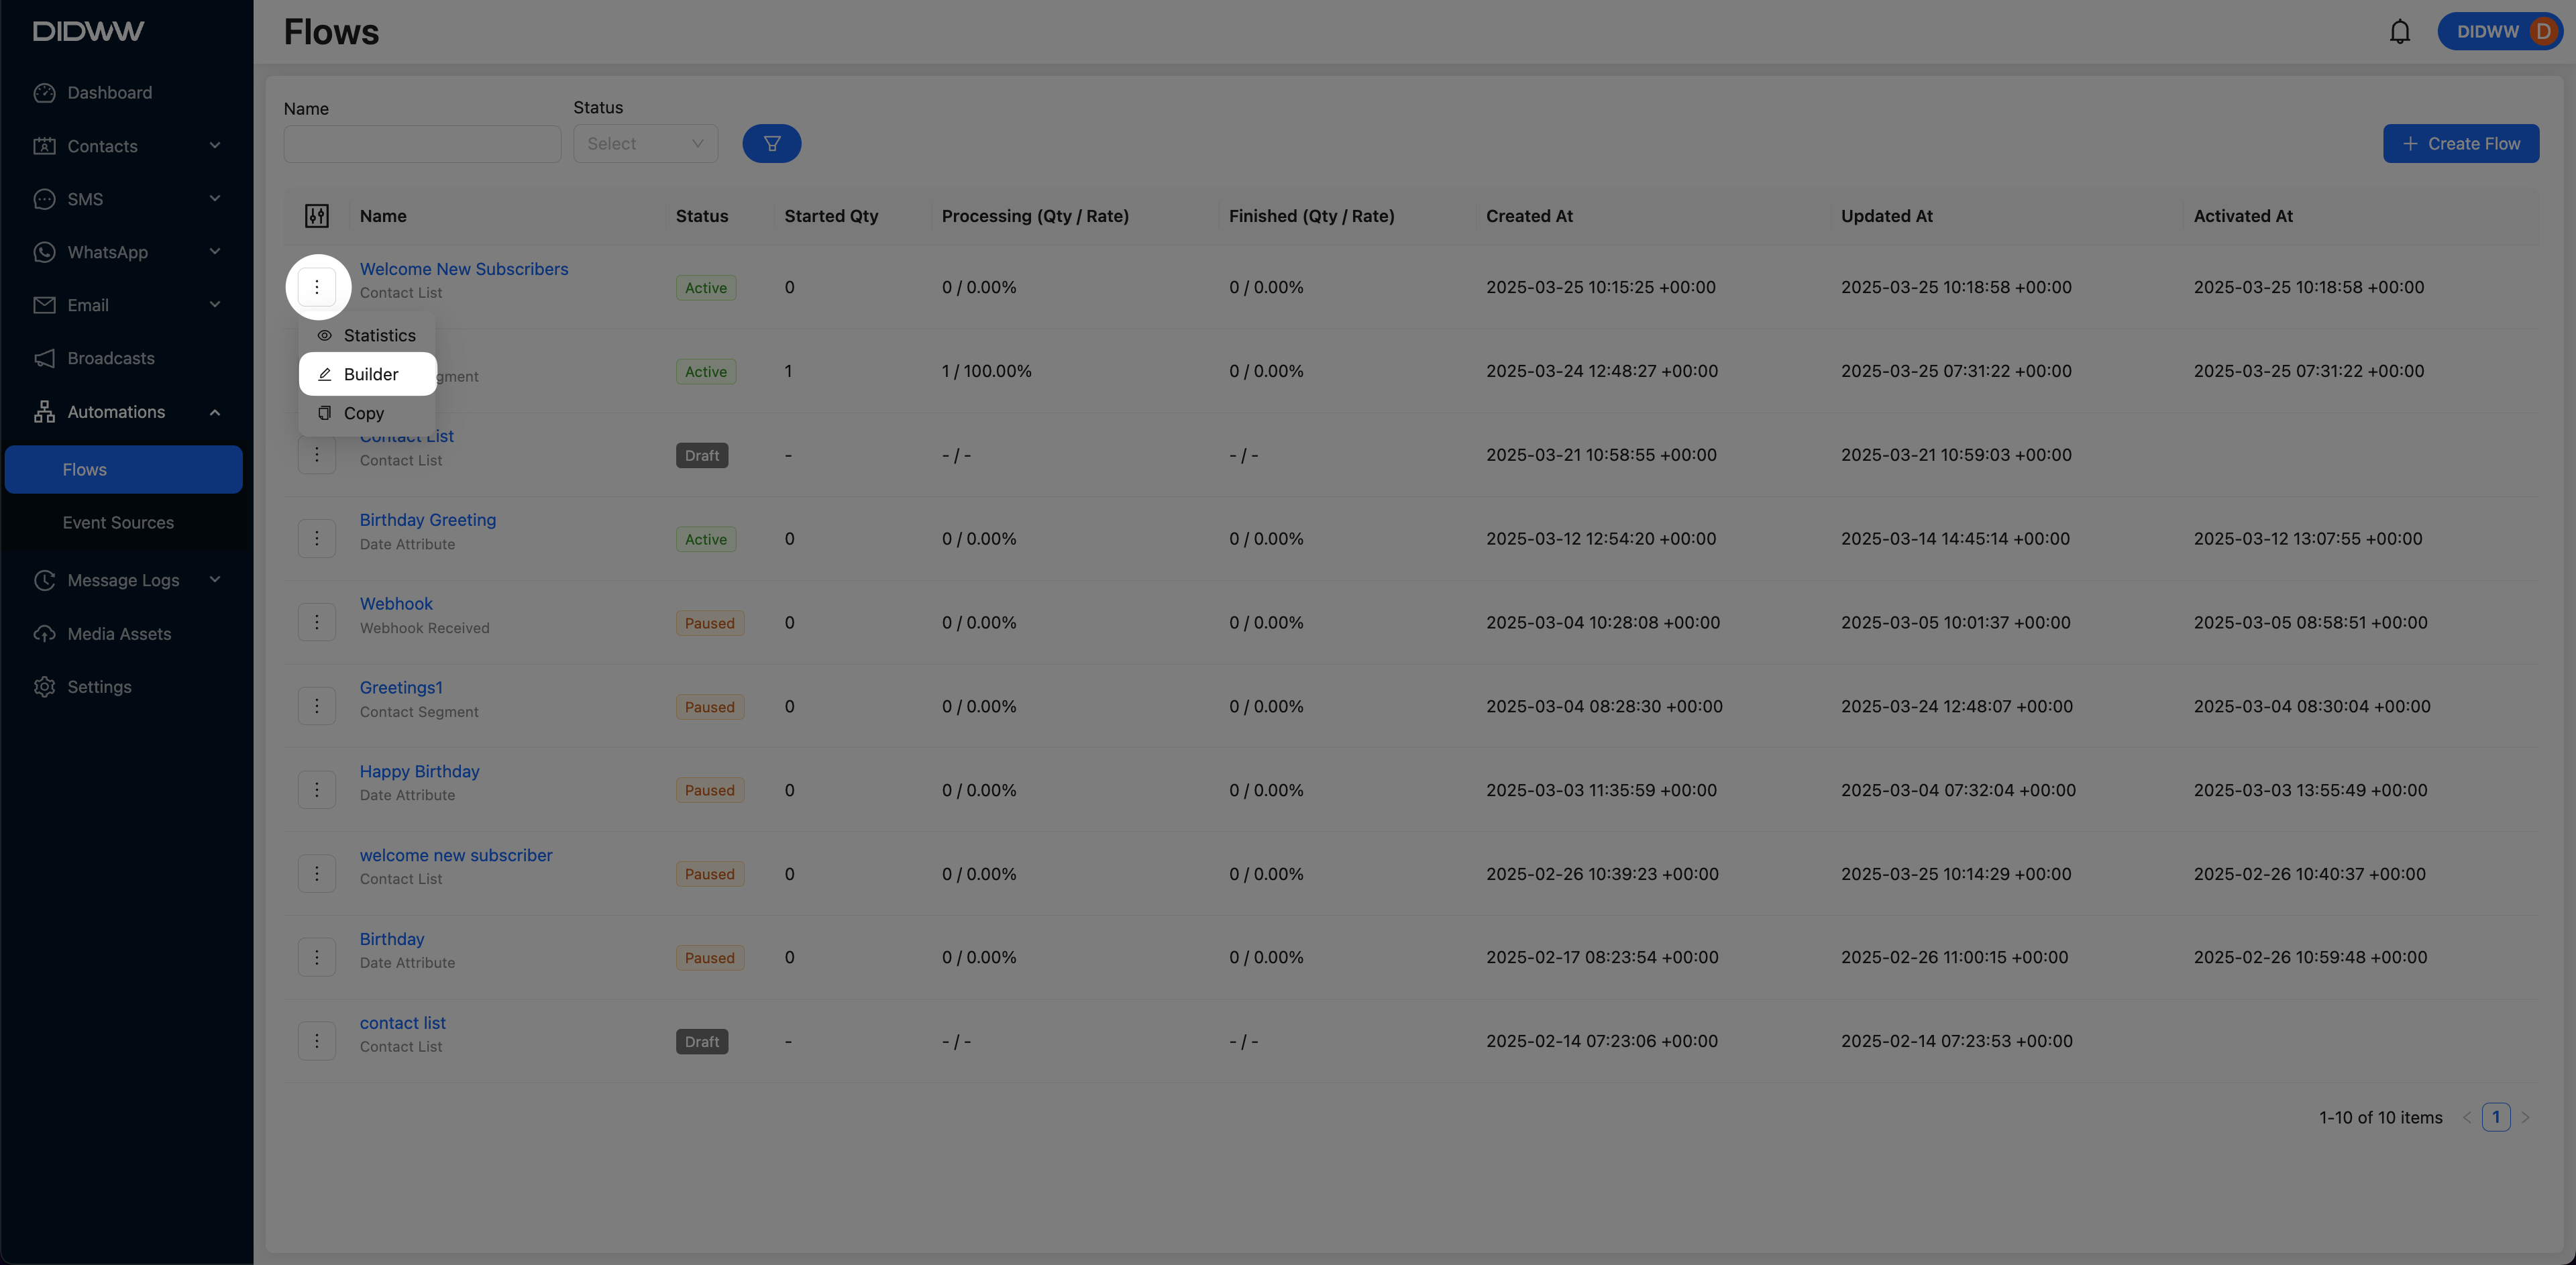
Fig. 8. Edit the Contact List Automation Flow.
Pause an Active Contact List Automation Flow
To temporarily stop an automation from running, you can pause the contact segment automation flow. Follow the steps below to access the Flow Builder and pause the active flow.
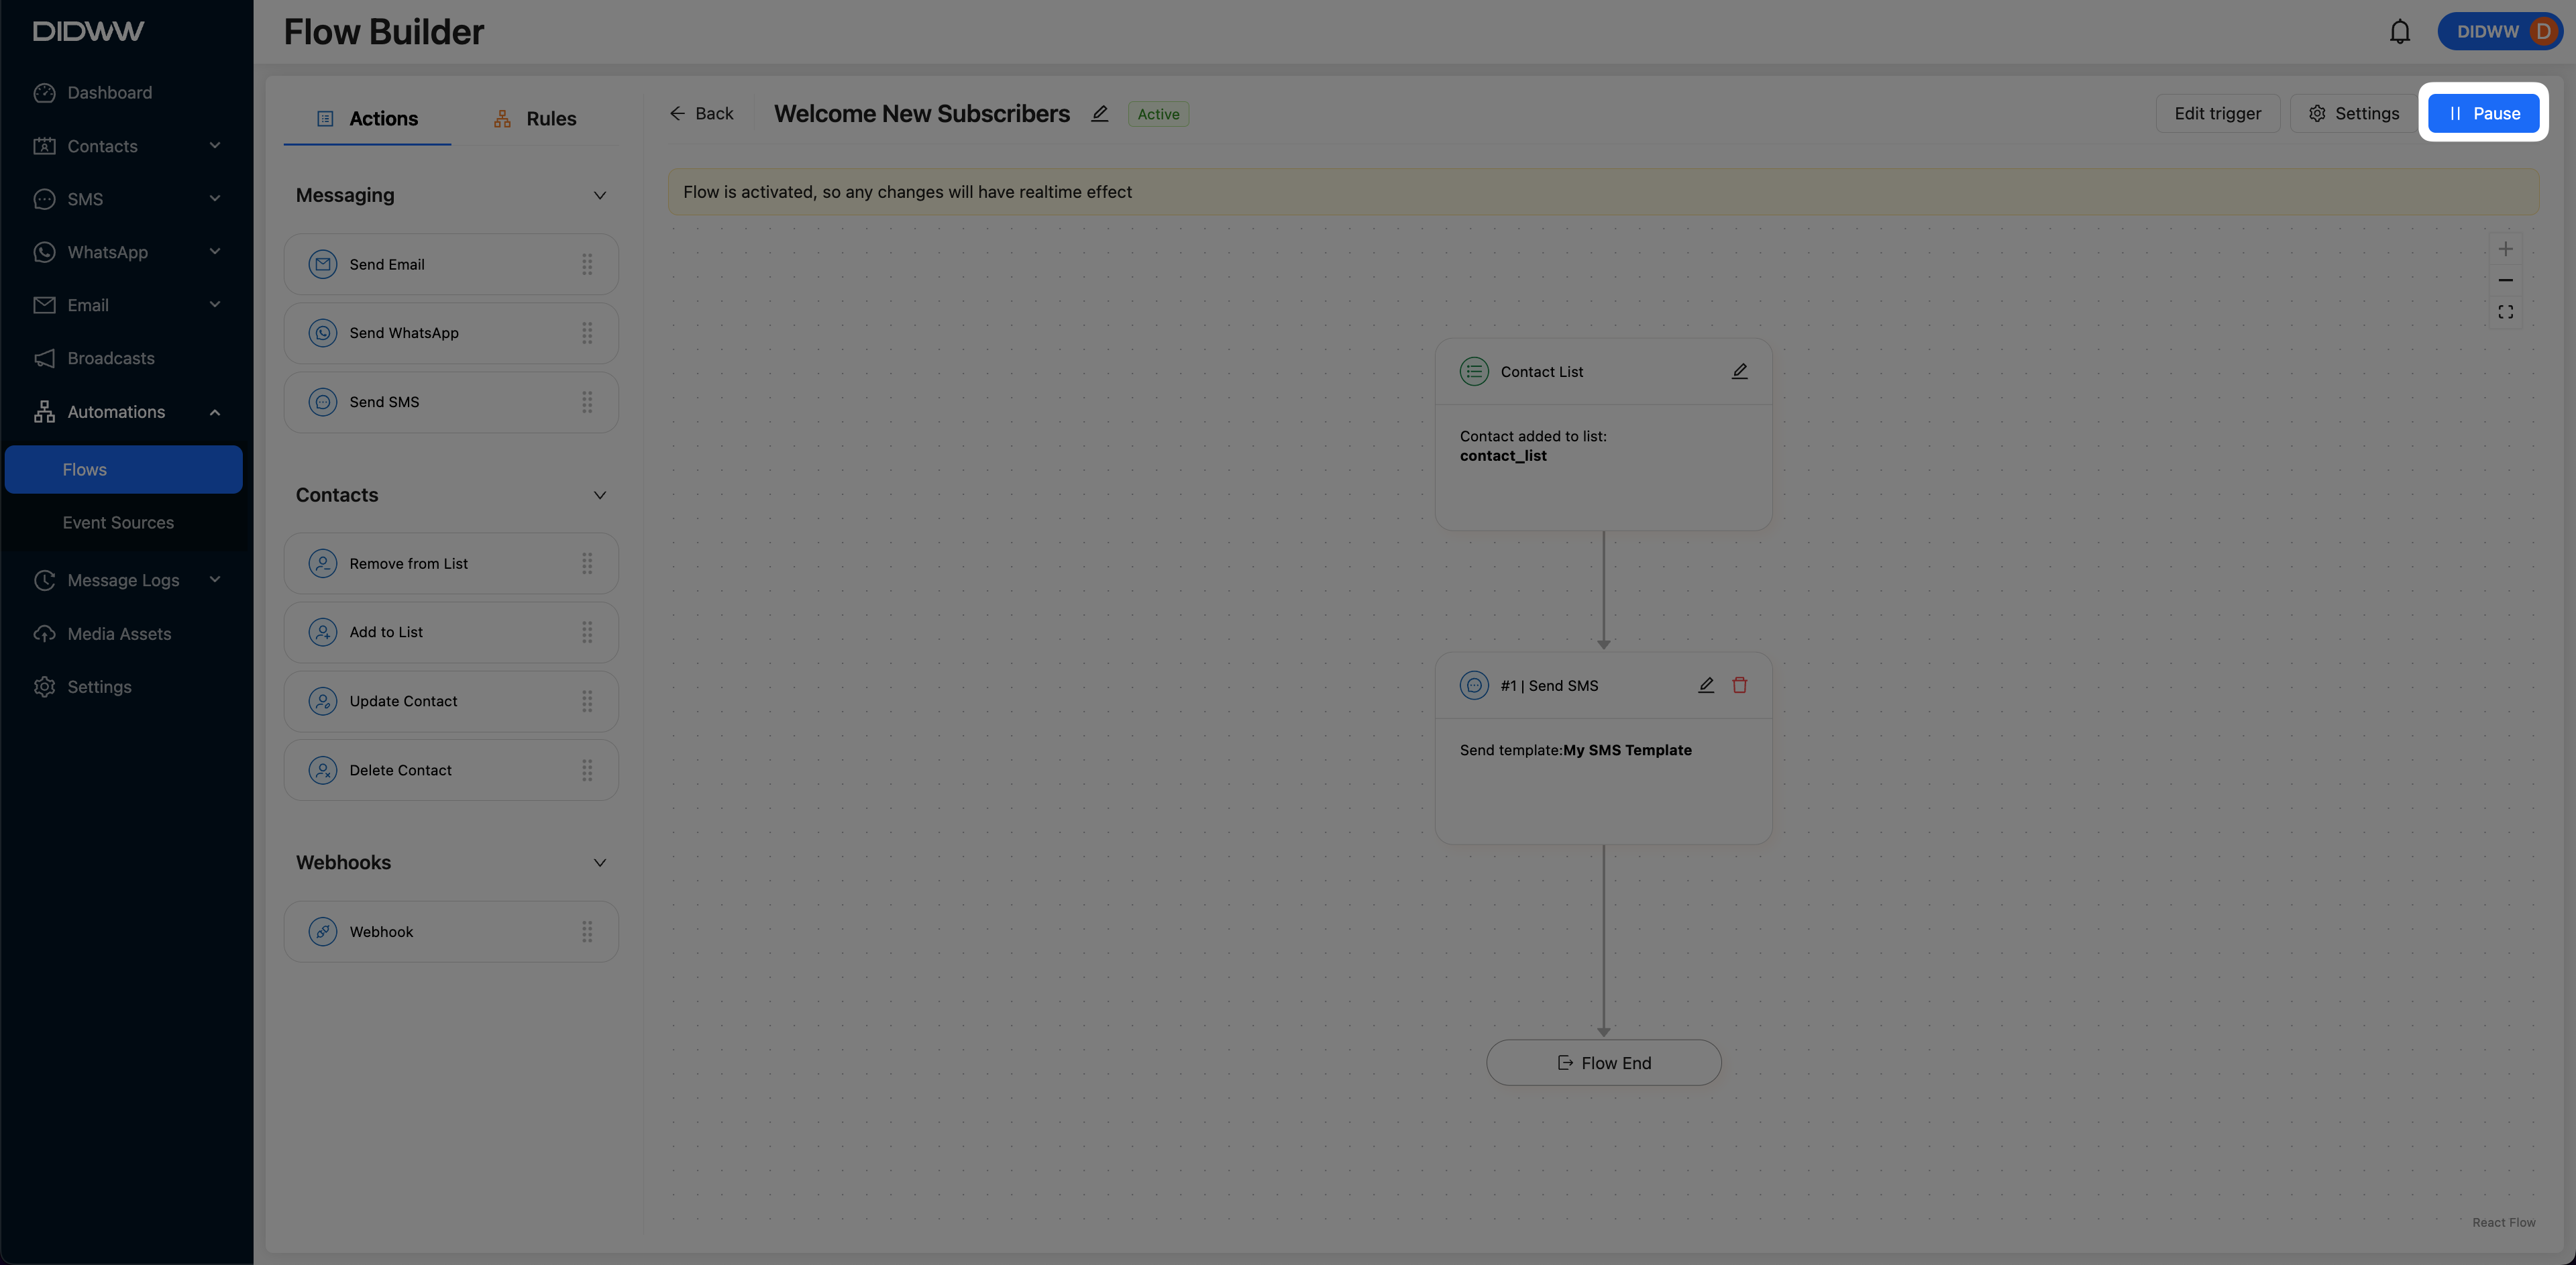
Fig. 9. Pausing the Contact List Flow.
Activate Paused Contact List Automation Flow
To resume a previously paused contact segment automation flow, follow the steps below. During activation, you can review and adjust settings such as re-entry rules, wait times, and exit or restart conditions before reactivating the flow.
Navigate to Automations > Flows.
Find the flow in the list.
In the Flow Builder, click Activate to reactivate the automation flow.
A modal window appears with optional settings you can configure before activating the flow. These settings control how contacts enter, exit, or restart the automation. Adjust them as needed before proceeding. To learn more about optional settings, see Step 6: Activate the Automation Flow.
Fig. 10. Activating a Paused Contact List Flow.
Explore Other Automation Flow Trigger Types
 Contact Segment Trigger
Automate messaging when a contact enters or exits a segment. Ideal for lifecycle marketing, engagement campaigns, and audience-based automation.
 Date Attribute Trigger
Run automations based on date-based attributes, such as birthdays, subscription renewals, or appointment reminders.
 Event Fired Trigger
Trigger workflows based on external events, such as purchases, cart abandonments, or user interactions. Requires event tracking configuration.
 Webhook Received Trigger
Execute actions when an external system sends a webhook request. Use webhook flows for real-time integrations and automated responses to external events.