Flow Builder
Flow Builder is a visual automation tool that lets you build message automation flows triggered by contact activity, events, dates, or webhooks. Using a simple drag-and-drop interface, you can connect Triggers, Actions, and Rules to automate messaging, update contact data, and control flow logic.
This documentation provides guidance on:
Available trigger types and when to use them
Configurable actions like sending messages or updating contacts
Logic rules for delays and branching
Flow settings, status states, and activation controls
Navigation tools within the builder interface
Use Flow Builder to streamline communication, automate repetitive tasks, and react to user behavior in real time—all without writing code.
Flow Builder Components
Flow Builder uses a visual interface made up of three core building blocks to design automation flows:
Triggers – Define when the automation starts.
Actions – Define what the automation does (e.g., send a message, update a contact).
Rules – Define how the automation flows (e.g., when to wait, how to branch).
You can drag Actions and Rules directly onto the canvas to build out your workflow. The Trigger is automatically placed at the top and stays fixed as the starting point, helping keep your flow clearly structured.
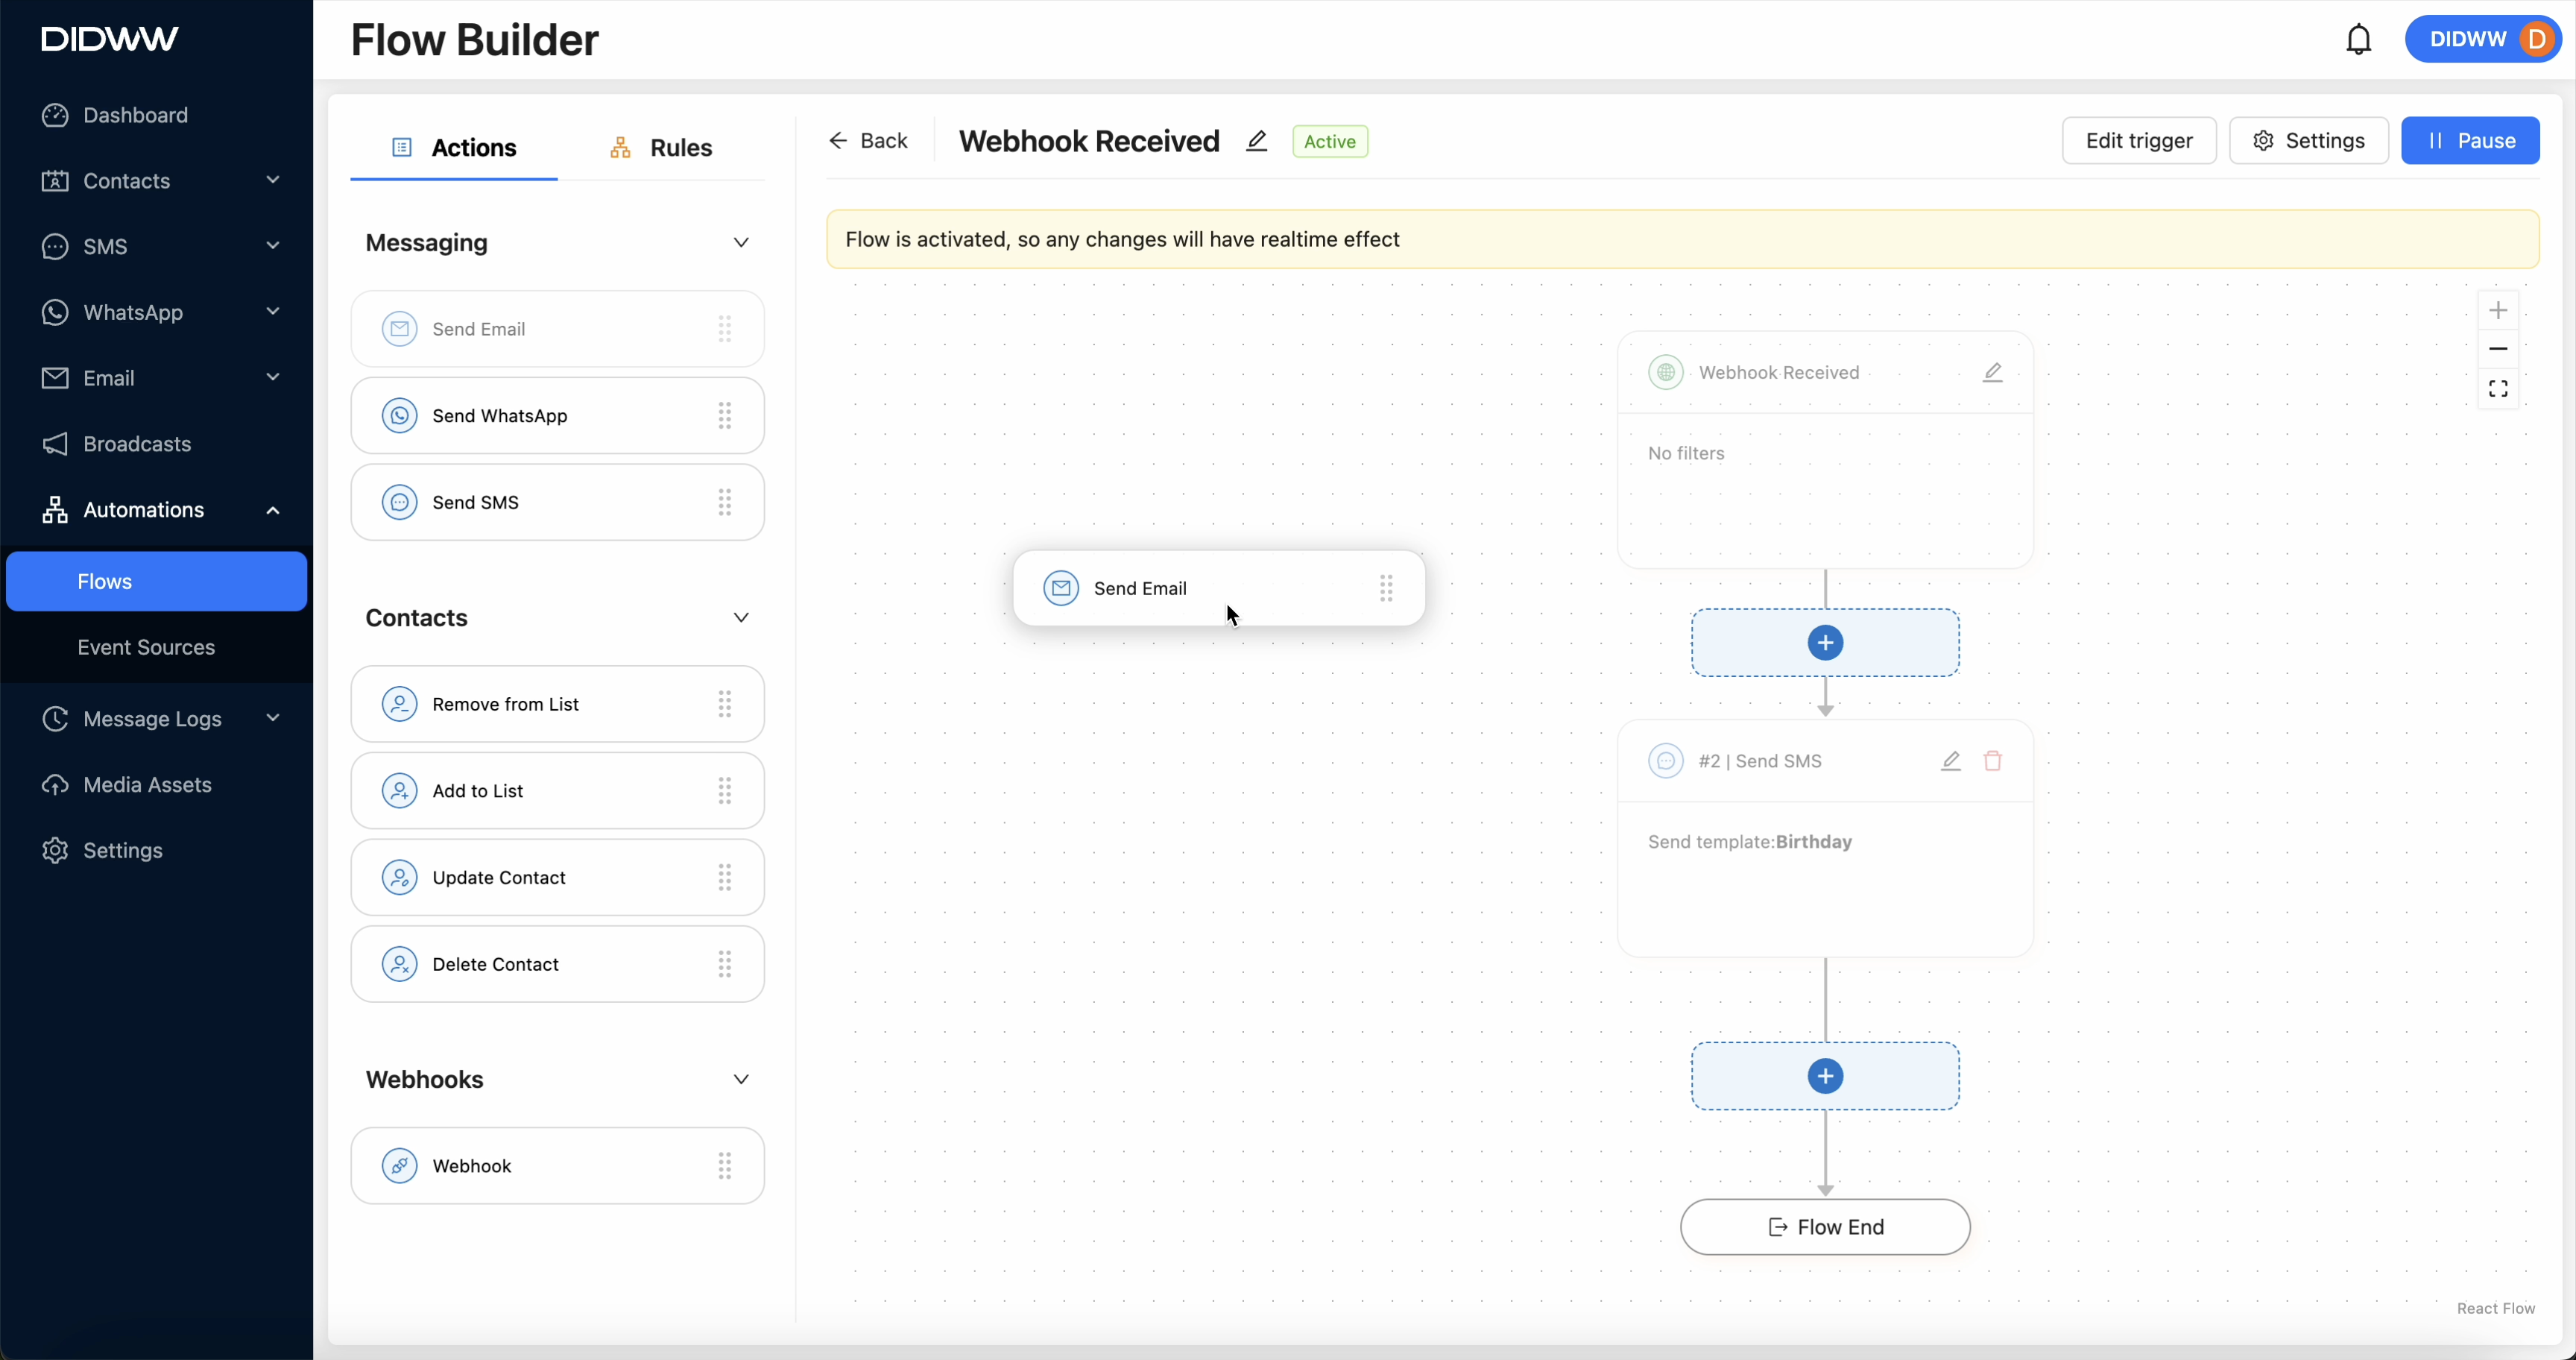
Fig. 2. Main component types: Triggers, Rules, and Actions.
Automation Flow Trigger Types
A trigger is the starting point of any automation. It determines when the flow begins based on incoming data or contact actions.
- Available trigger types:
 Contact segment – Starts the flow when a contact enters or leaves a segment.
 Contact list – Starts the flow when a contact is added to a list.
 Event fired – Starts the flow when a tracked event happens, like a form submission or purchase.
 Date attribute – Starts the flow on a specific date in the contact’s profile, such as a birthday or renewal date.
 Webhook received – Starts the flow when a webhook is received from an external system, allowing real-time integrations.
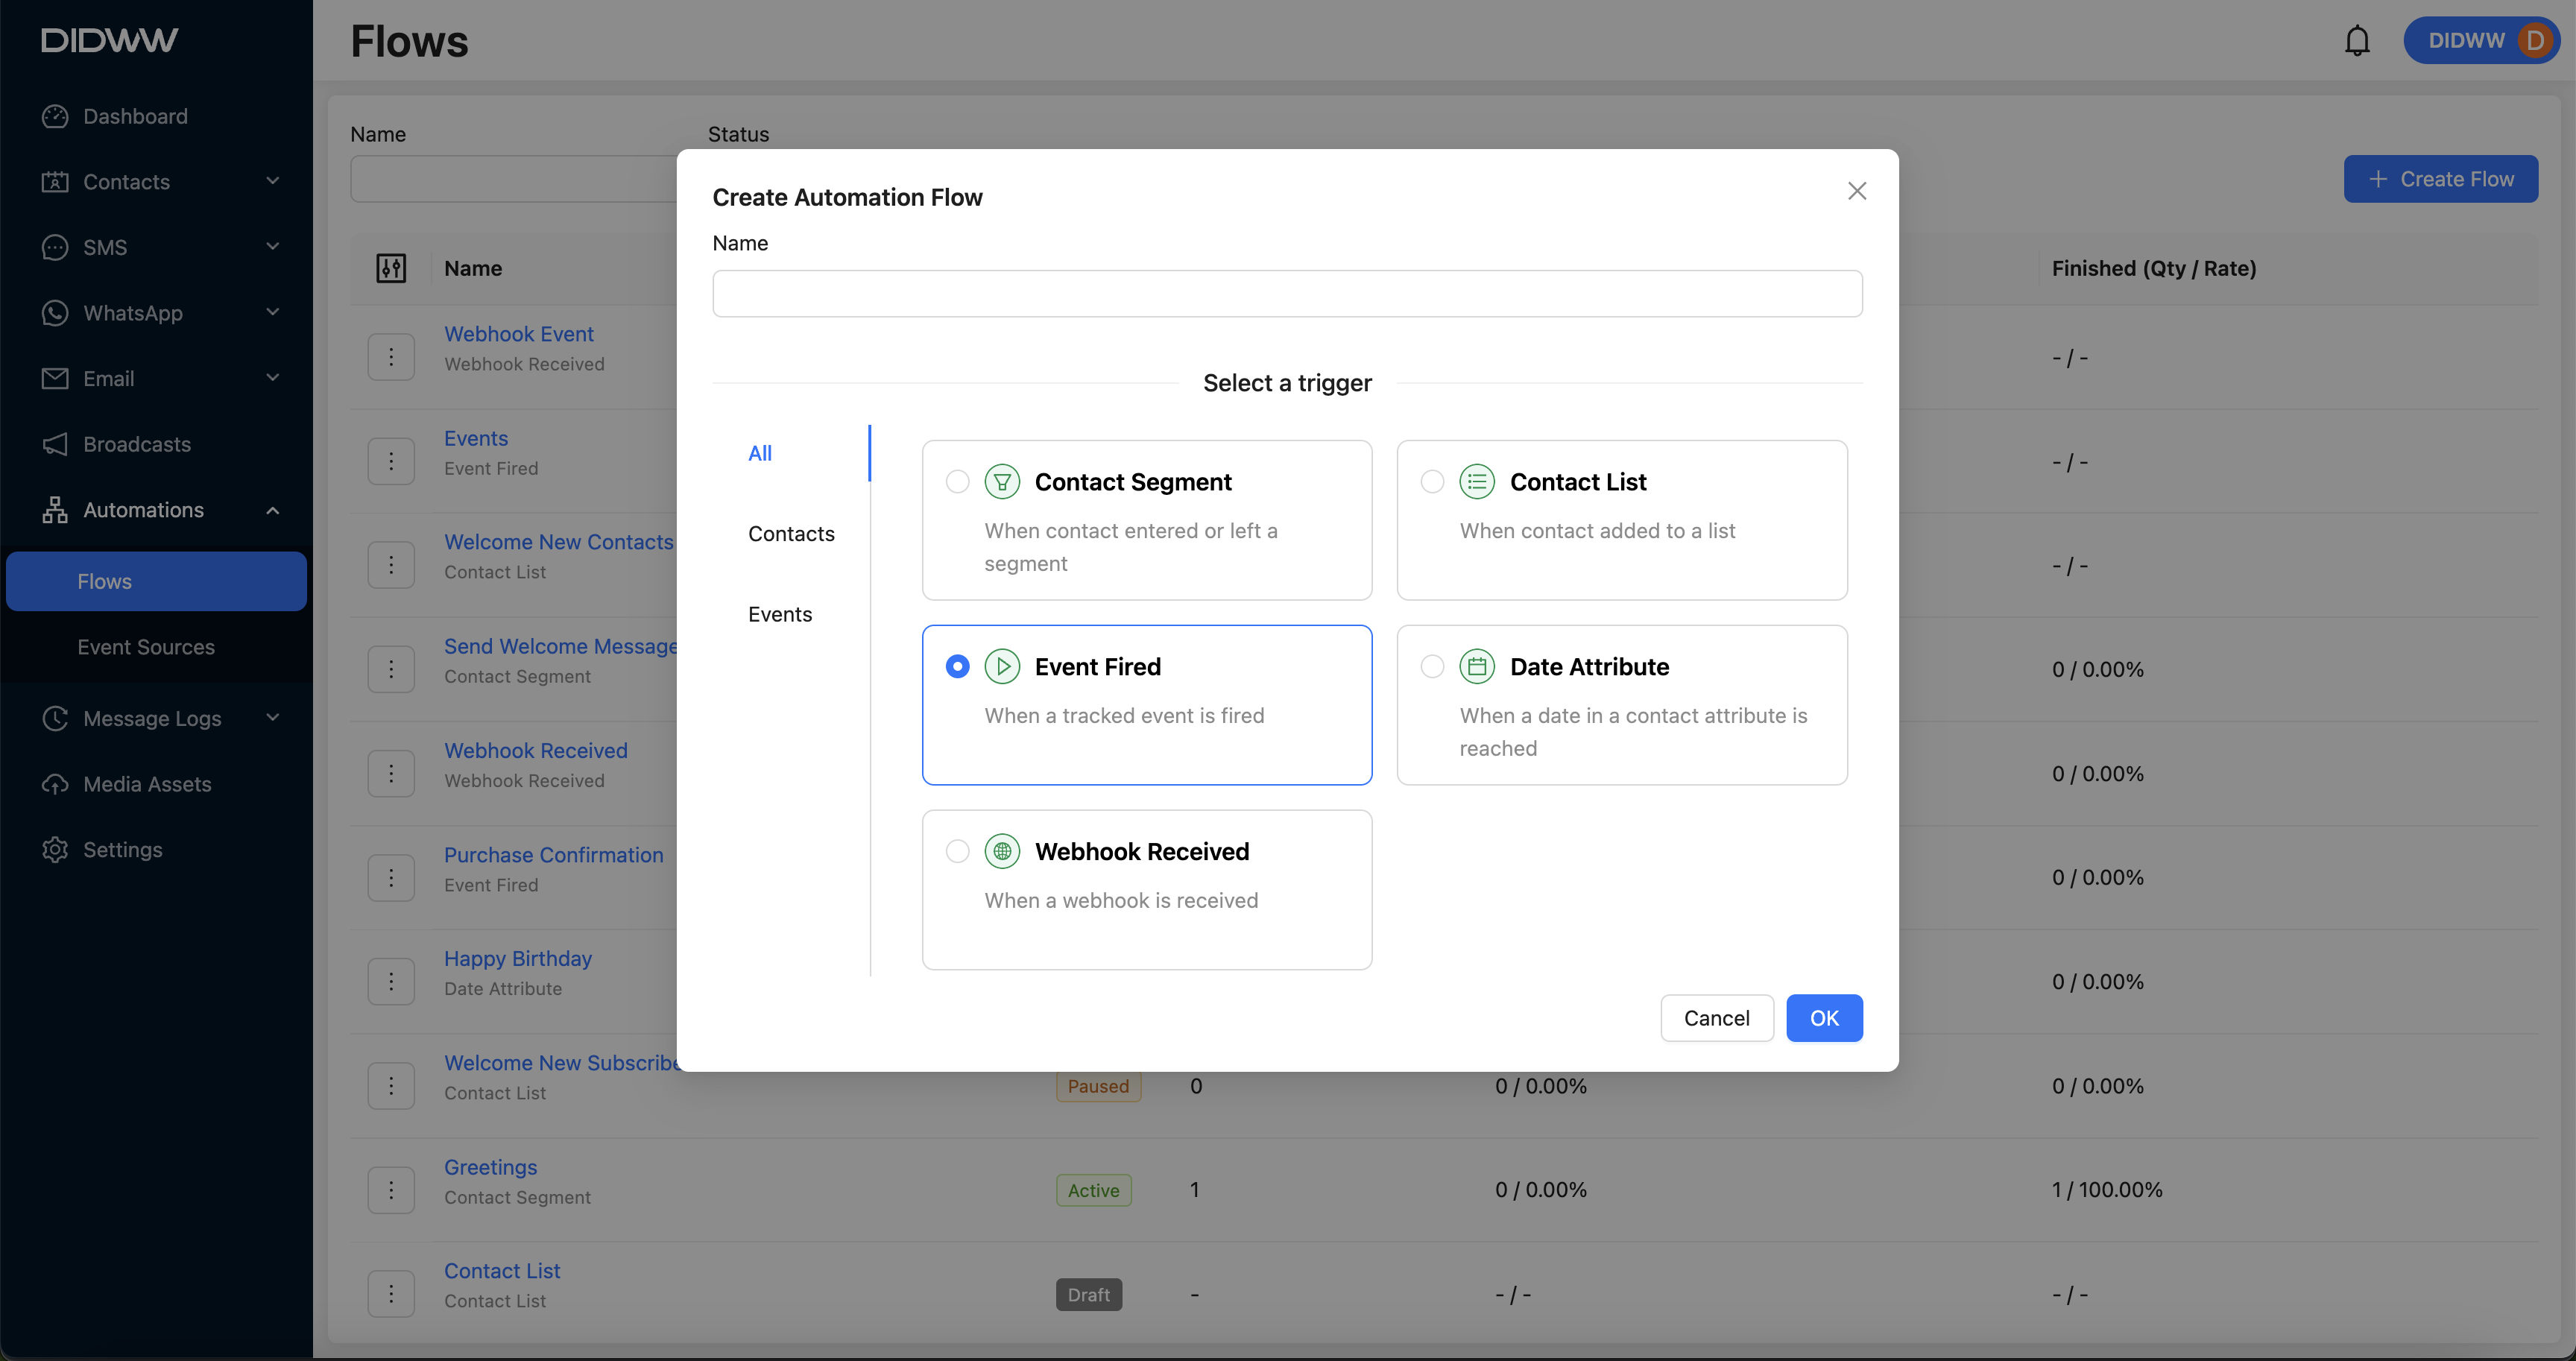
Fig. 3. Trigger selection types when creating a new automation flow.
Automation Flow Action Types
Actions define what happens after an automation flow is triggered. You can use actions to send messages, update contact information, manage list memberships, or integrate with external systems.
In the Flow Builder interface, actions are grouped into three categories:
Messaging – Send communications via email, SMS, or WhatsApp.
Contacts – Manage contact records and list memberships.
Webhooks – Send data to external services using HTTP requests.
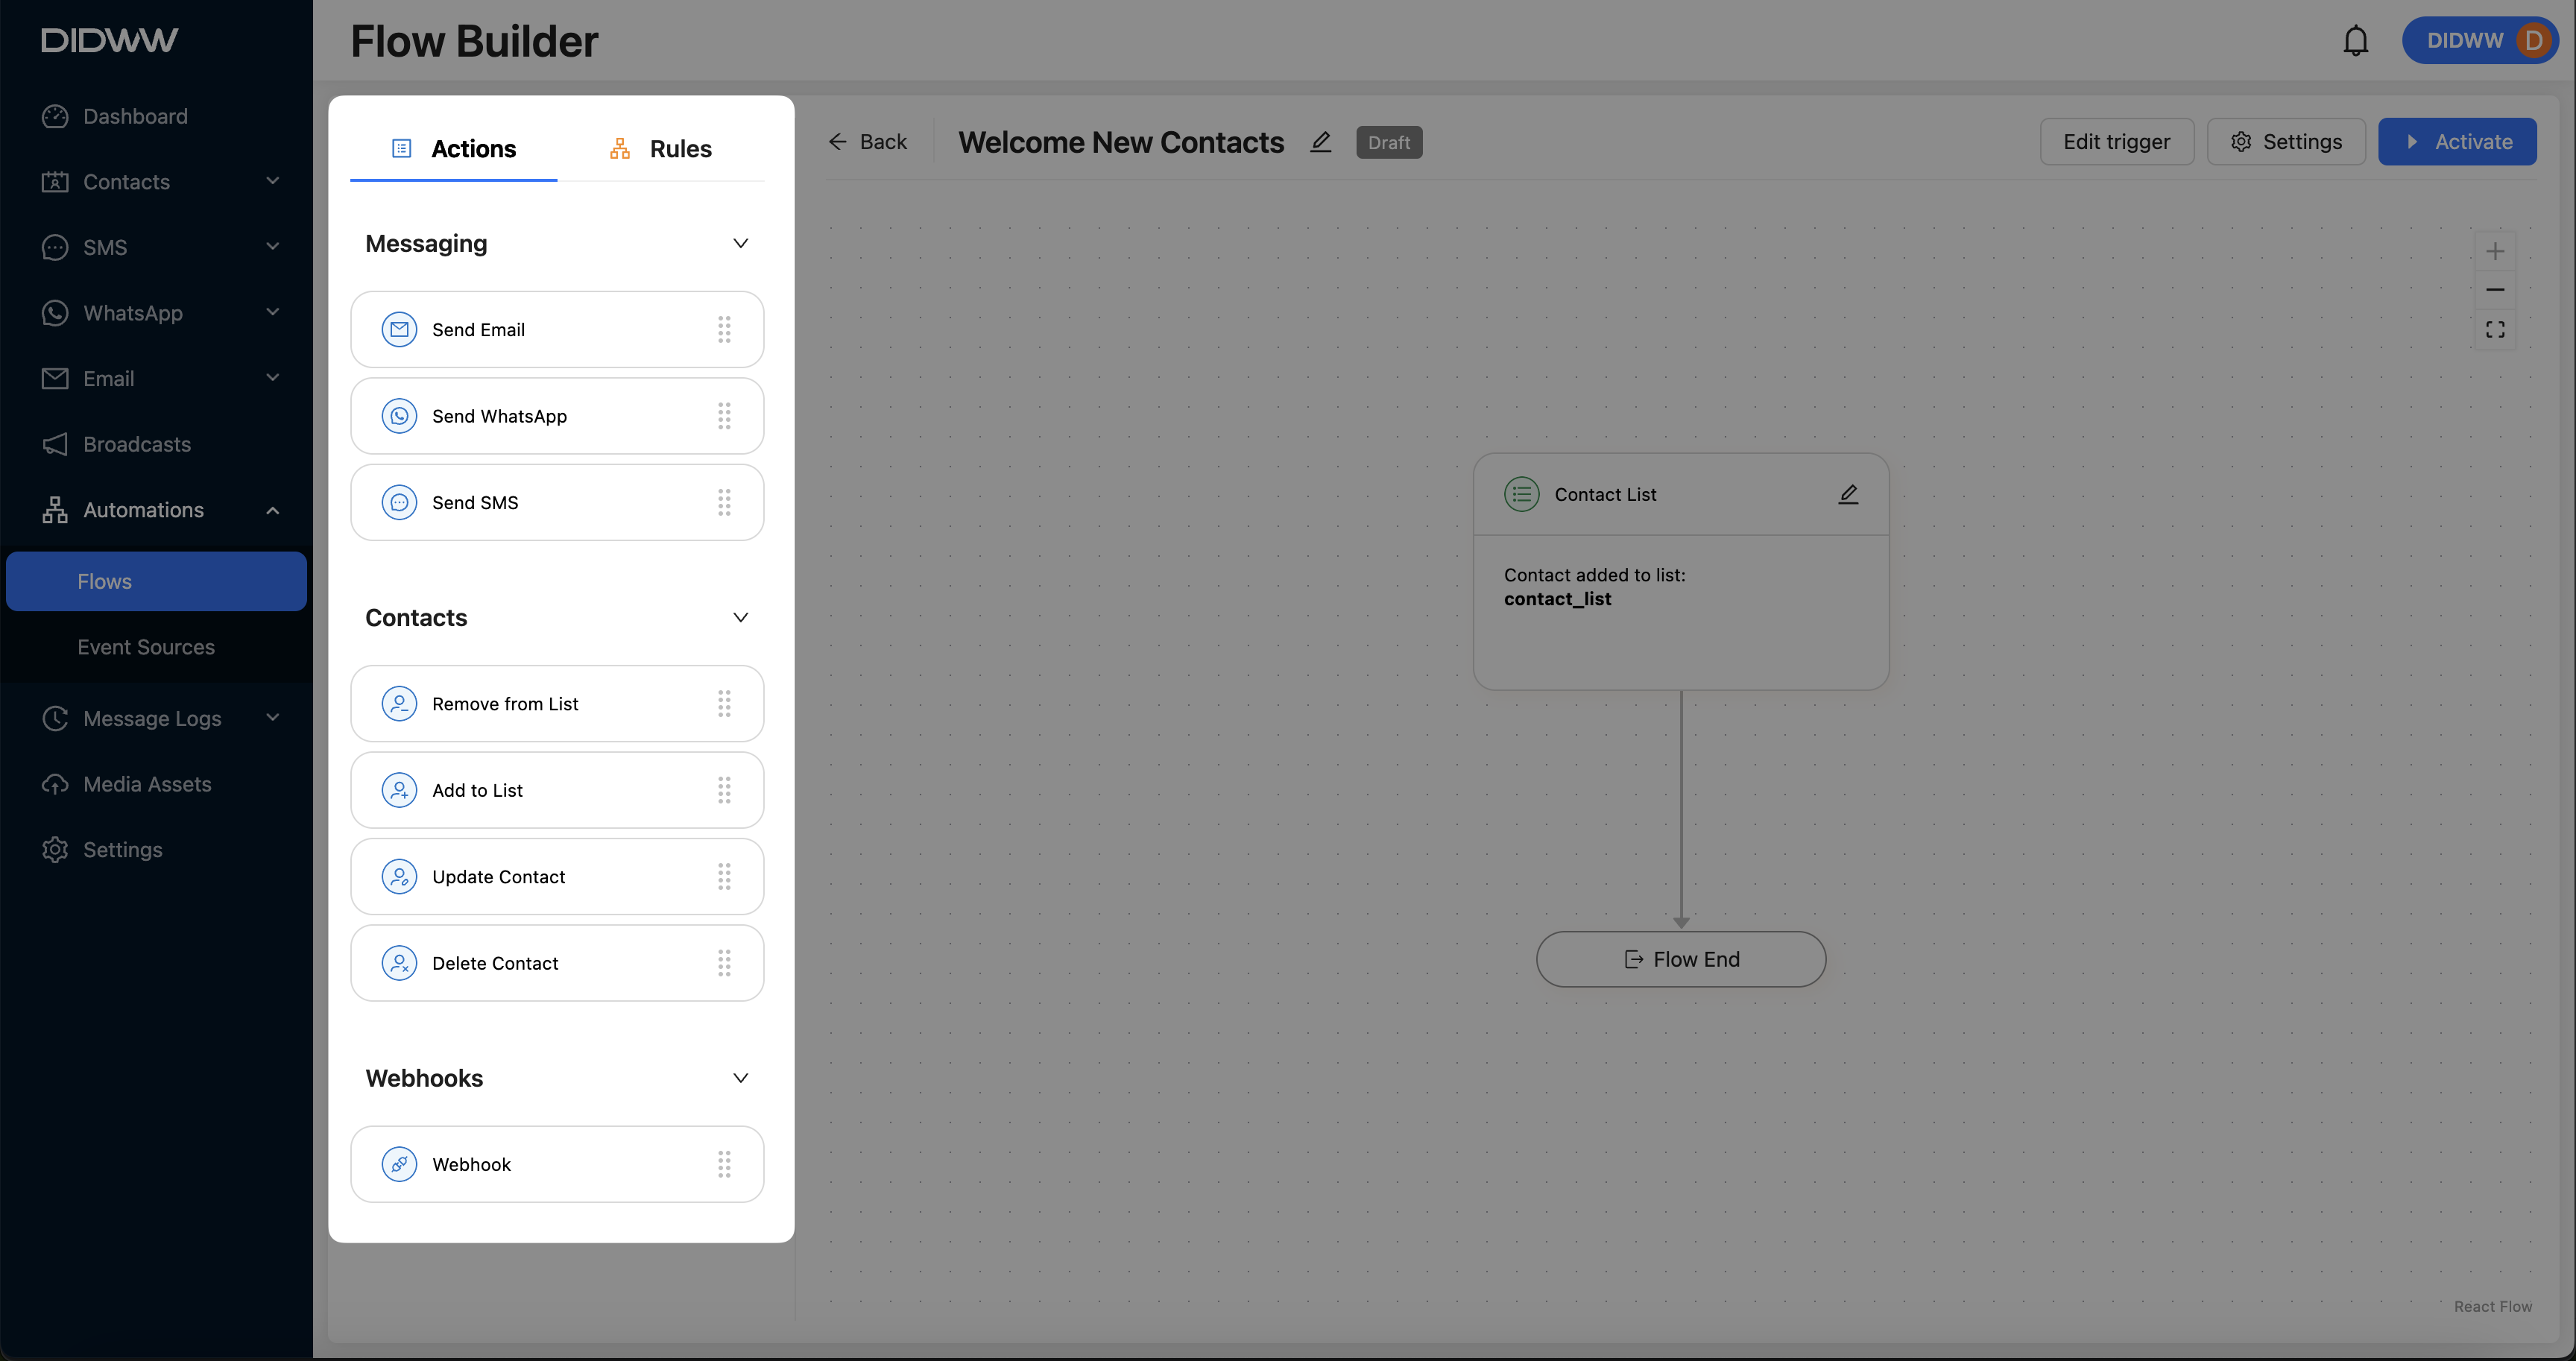
Fig. 6. Action types available in the Flow Builder.
Action |
Description |
Inputs Required |
Common Use Cases |
|---|---|---|---|
Sends an email using a predefined template. |
|
|
|
Sends a WhatsApp message using an approved template. |
|
|
|
Sends a text message using a selected template and campaign. |
|
|
|
Adds a contact to a selected list. |
|
|
|
Removes a contact from a selected list. |
|
|
|
Updates attributes in a contact profile. |
|
|
|
Permanently deletes a contact from your system. |
|
|
|
Sends data to an external system via HTTP POST. |
|
|


For full details on each available Action, including setup and advanced use cases, visit the full configuration guide:
Learn more about Flow Builder actions.
Automation Flow Rule Types
Rules define how and when an automation flow proceeds. They allow you to pause the flow, check conditions, and branch the logic based on contact data or behavior.
In Flow Builder, rules are available in the Rules tab and can be dragged onto the canvas to control flow execution.
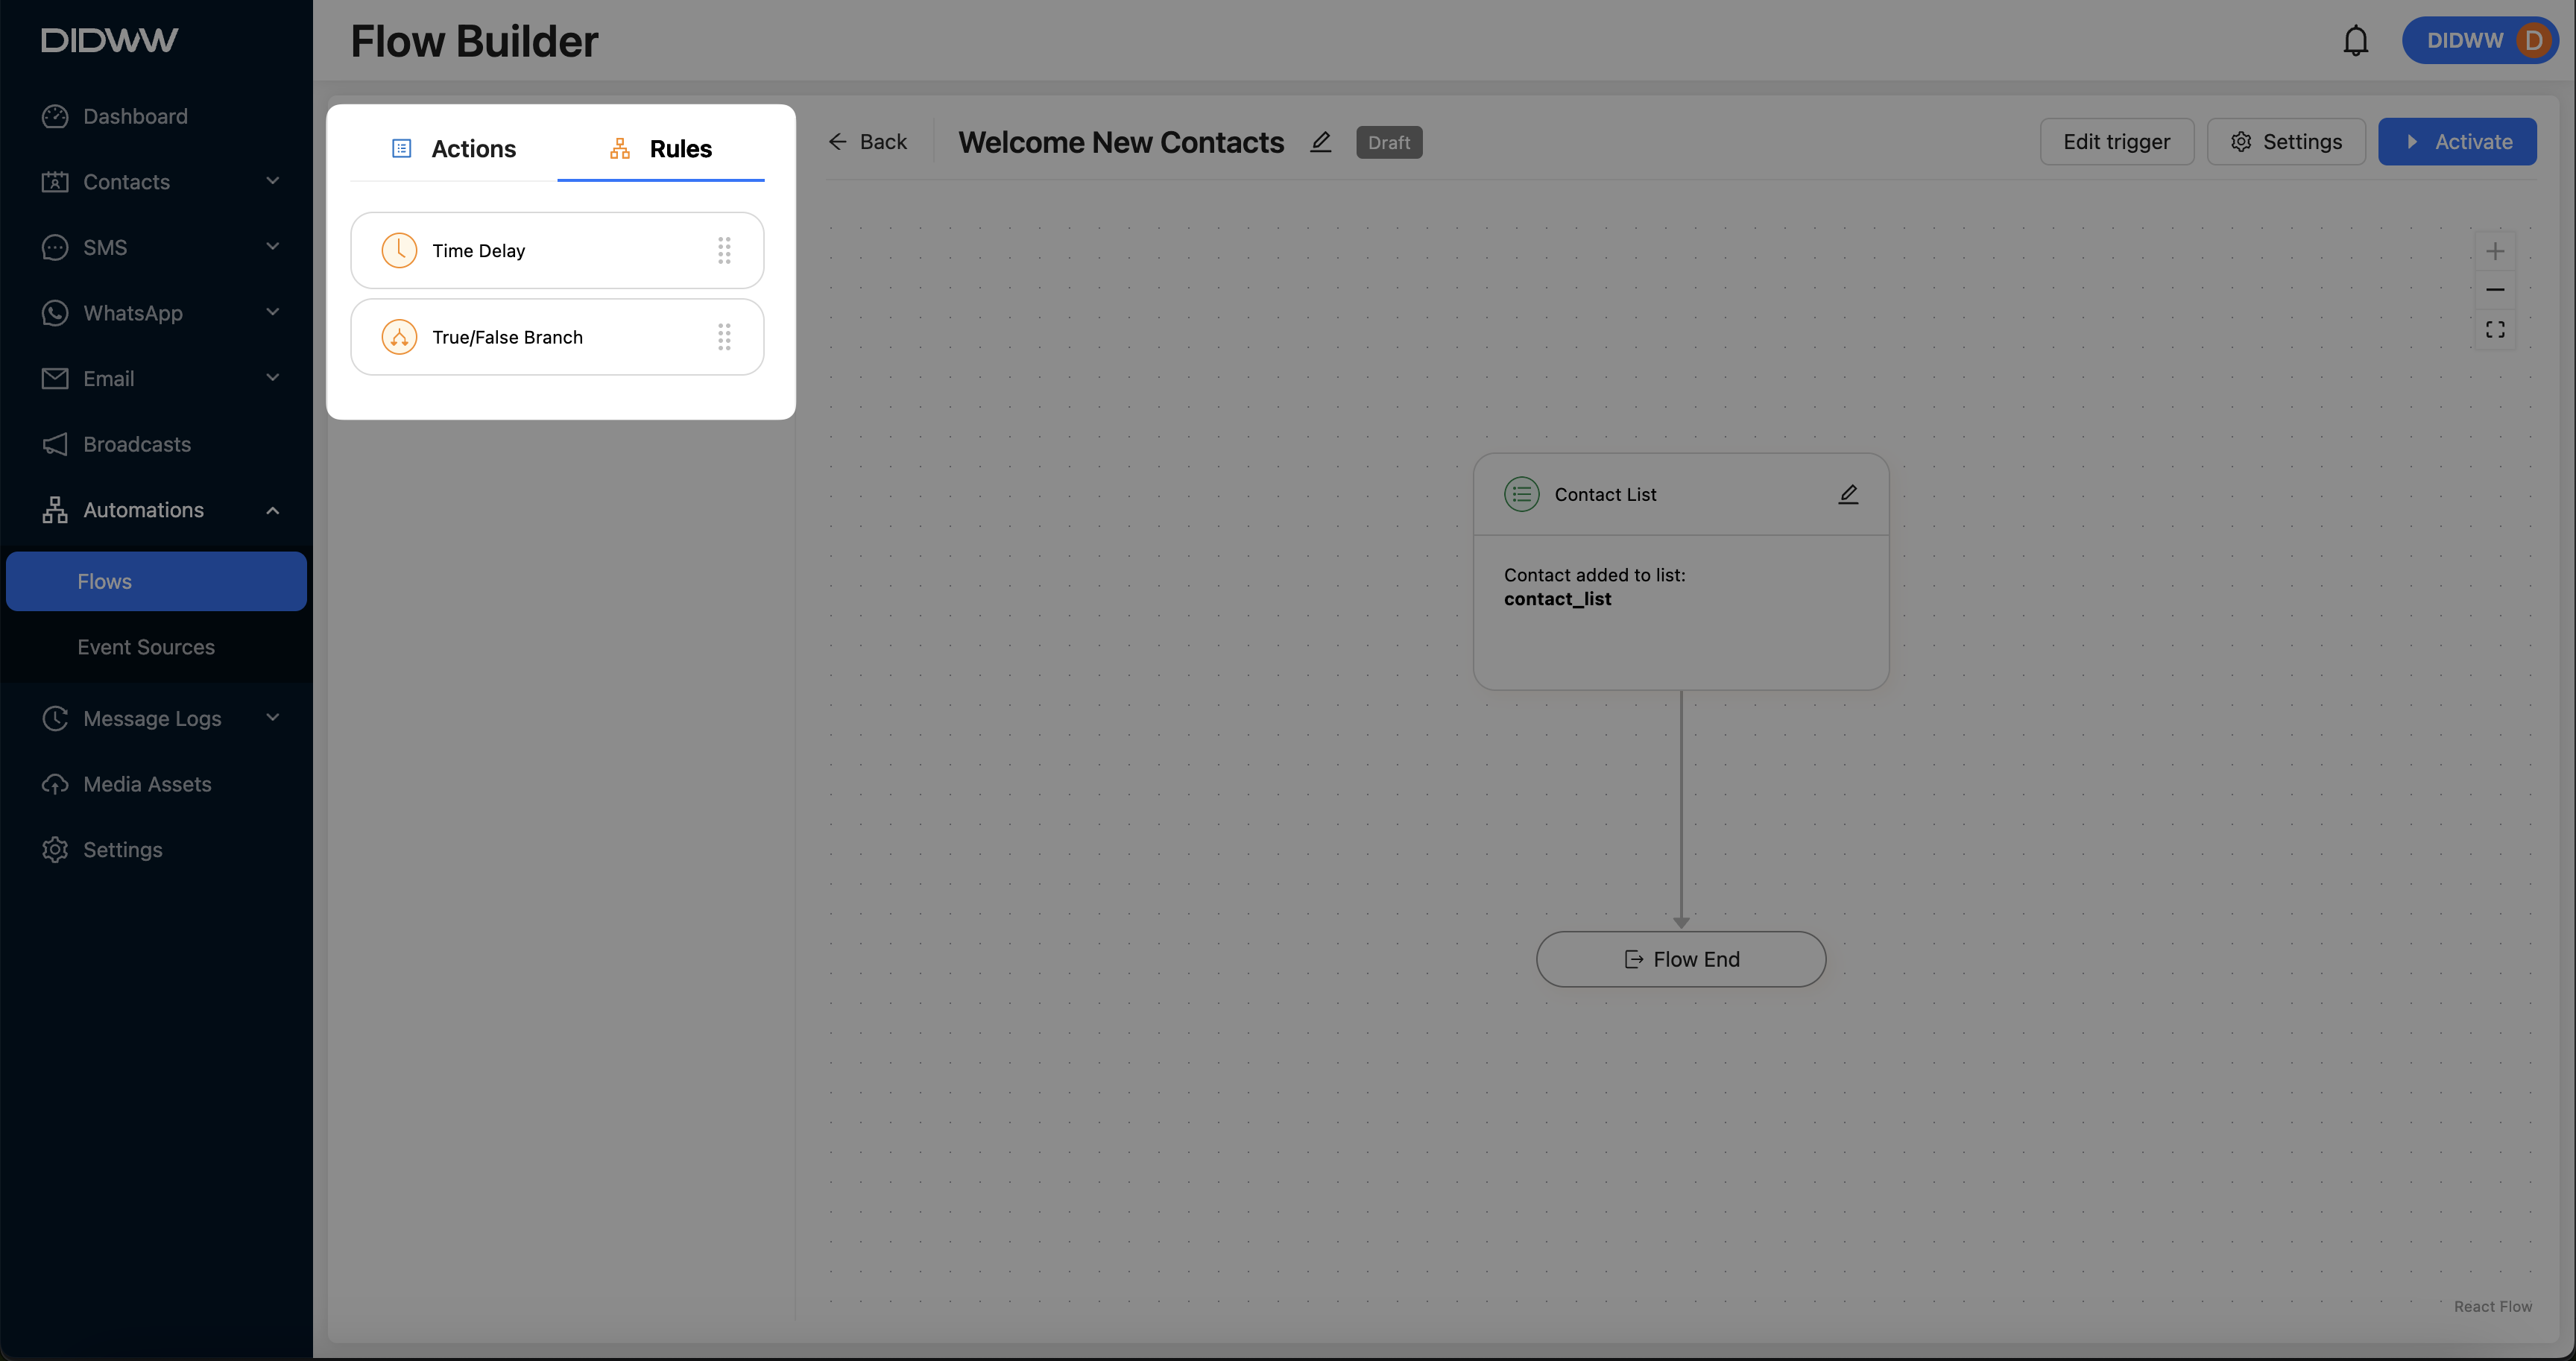
Fig. 7. Rule types available in the Flow Builder interface.
Rule |
Description |
Inputs Required |
Common Use Cases |
|---|---|---|---|
Adds a pause before the next step. |
|
|
|
Splits the flow by condition. |
|
|


For full details on each available Rule, including setup and advanced use cases, visit the full configuration guide:
Learn more about Flow Builder rules.
Automation Flow Settings and Logic
Flow settings let you control how contacts move through an automation — including if and when they can re-enter, exit early, or restart the flow from the beginning.
These options appear in the Activate Flow window when launching or resuming an automation:
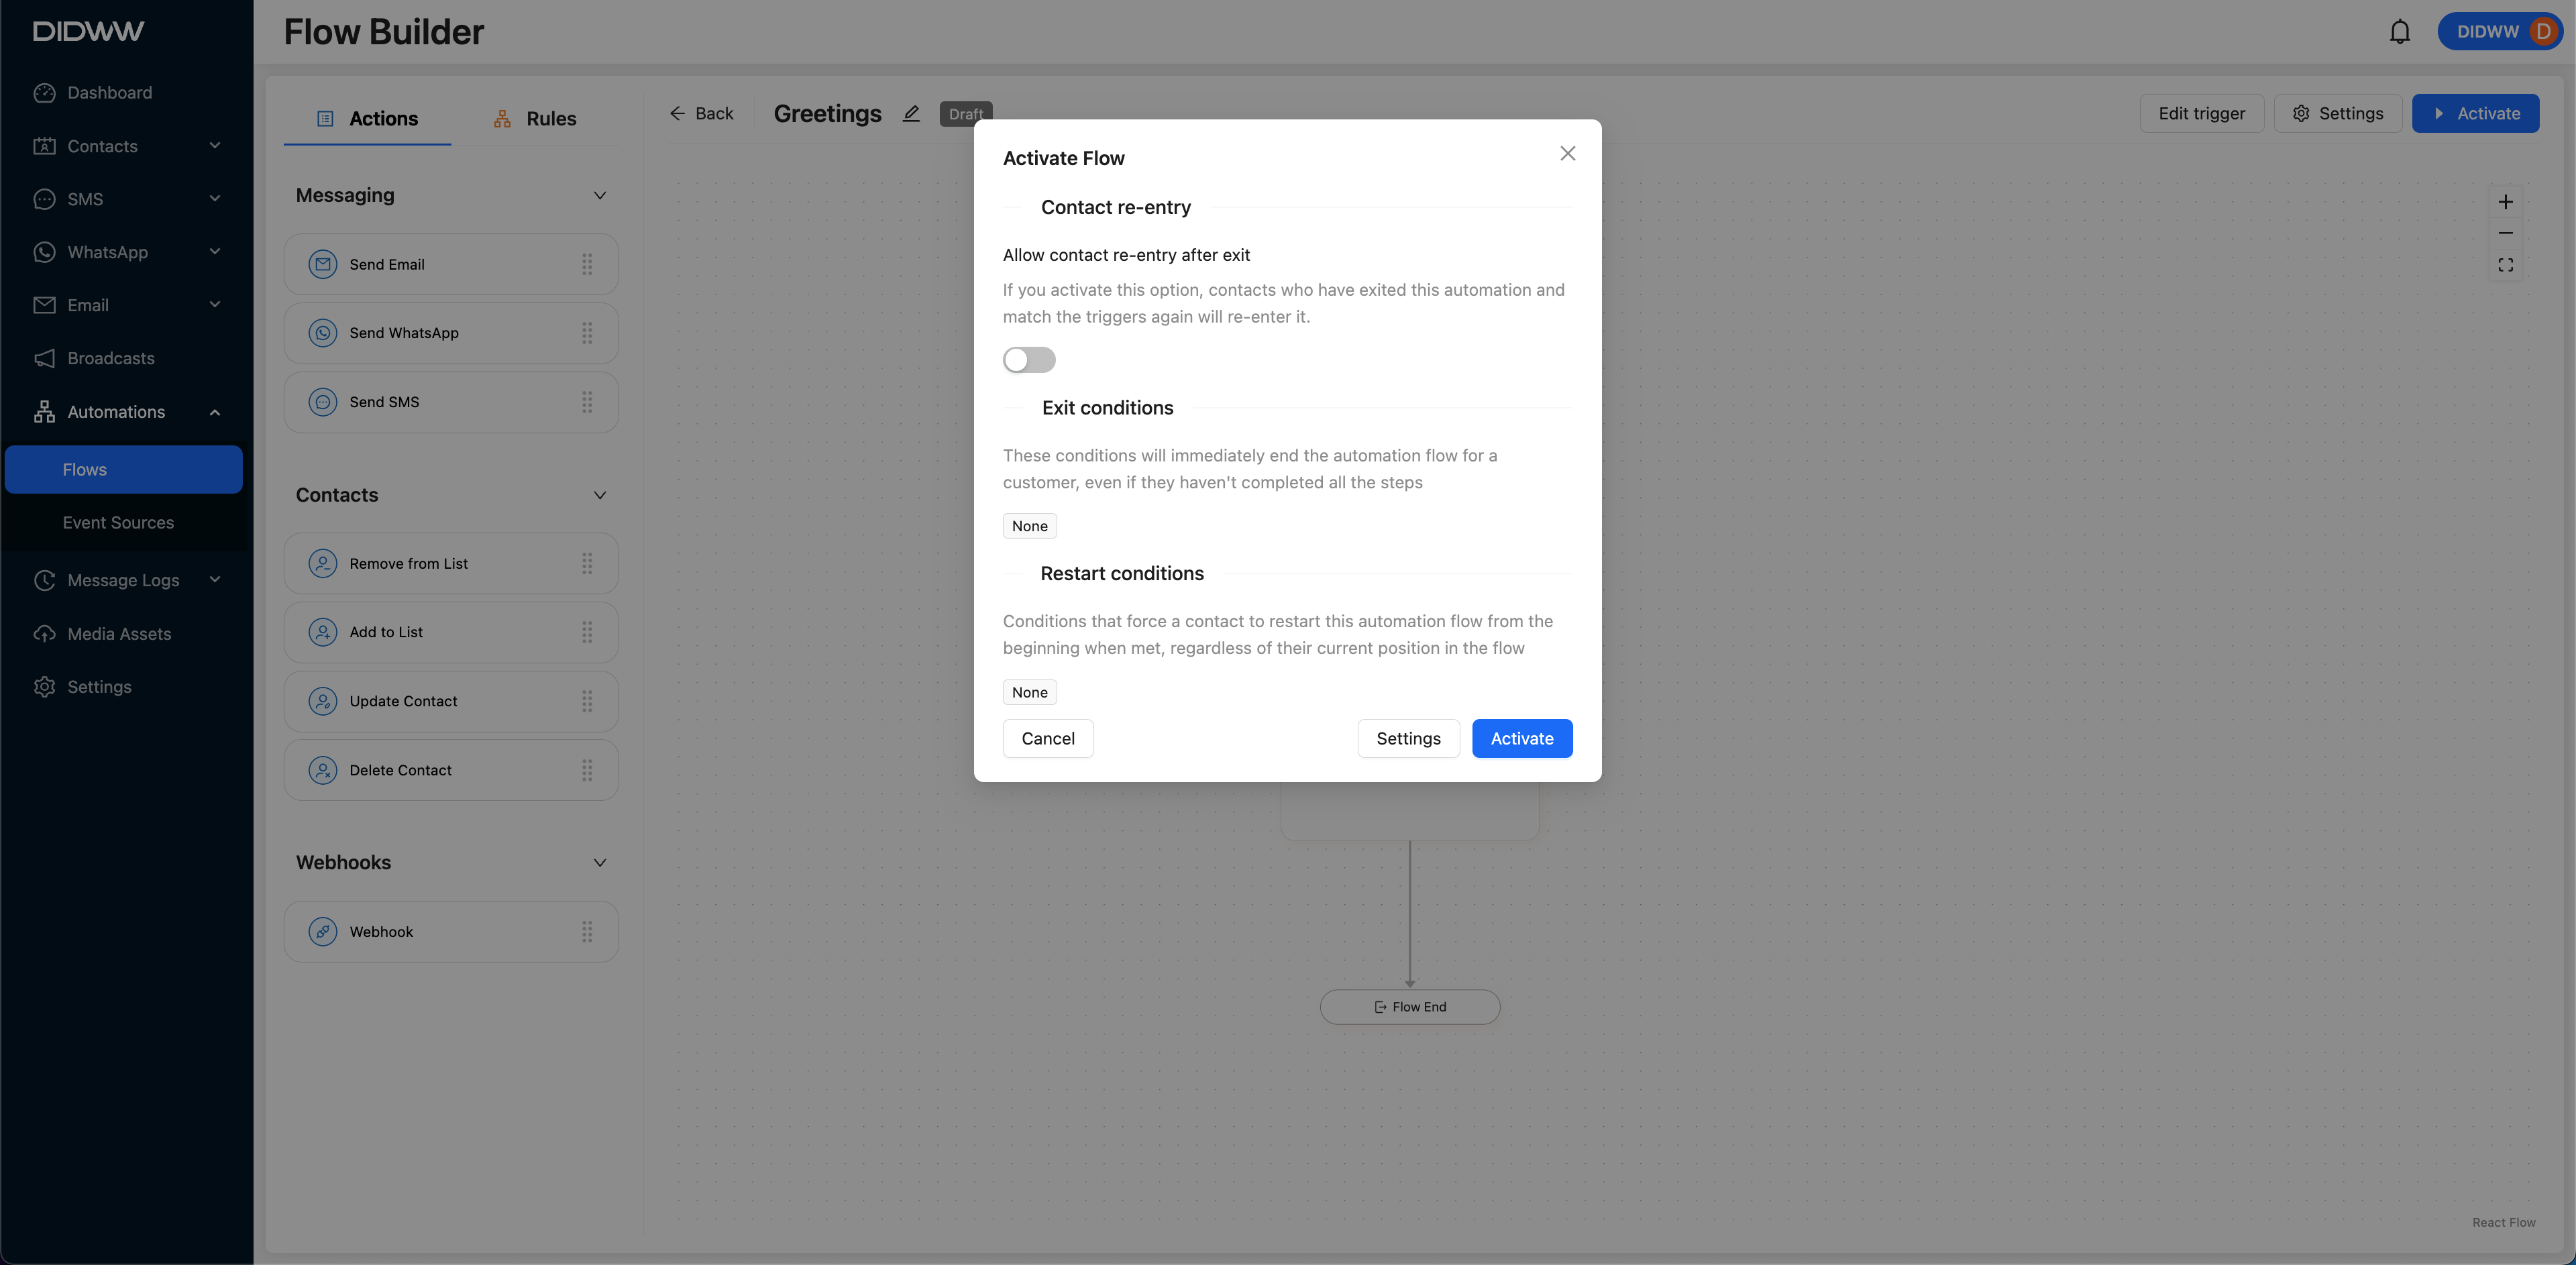
Fig. 7. Activate Flow Confirmation Window.
Option |
Description |
|---|---|
Allow contact re-entry after exit |
Lets contacts re-enter the flow if they meet the trigger conditions again after previously exiting. Useful for recurring automations. |
Set up wait time (only appears if re-entry is enabled) |
Defines how long the system should wait before allowing the contact to re-enter the flow. |
Exit conditions |
Ends the automation early for a contact when certain conditions are met (e.g., leaving a segment or unsubscribing). |
Restart conditions |
Forces a contact to restart the flow from the beginning, regardless of where they are in the current flow. |
Note
To configure Exit and Restart Conditions, click the Settings button in the Activate Flow window. These are optional and depend on your automation goals.
Tip
Adding the exit condition “contact exits the segment” is recommended when you want to stop contacts from continuing through the flow if they no longer belong to the segment. This helps ensure the automation behaves as intended.
Automation Flow Activation and Status
After configuring your automation flow, you can activate it to begin processing contacts based on the defined trigger and logic.
Flow statuses:
Status |
Description |
|---|---|
|
The flow is saved but not yet active. No contacts will enter the flow. |
|
The flow is live and actively processing contacts who meet the trigger conditions. |
|
The flow is temporarily disabled. It retains its configuration but will not accept new contacts until reactivated. |

To manage the flow’s status, use the buttons in the top-right corner of the Flow Builder to:
Edit Trigger – Modify the entry point of the flow.
Activate – Start the automation.
Pause – Temporarily stop contact entry into the flow.
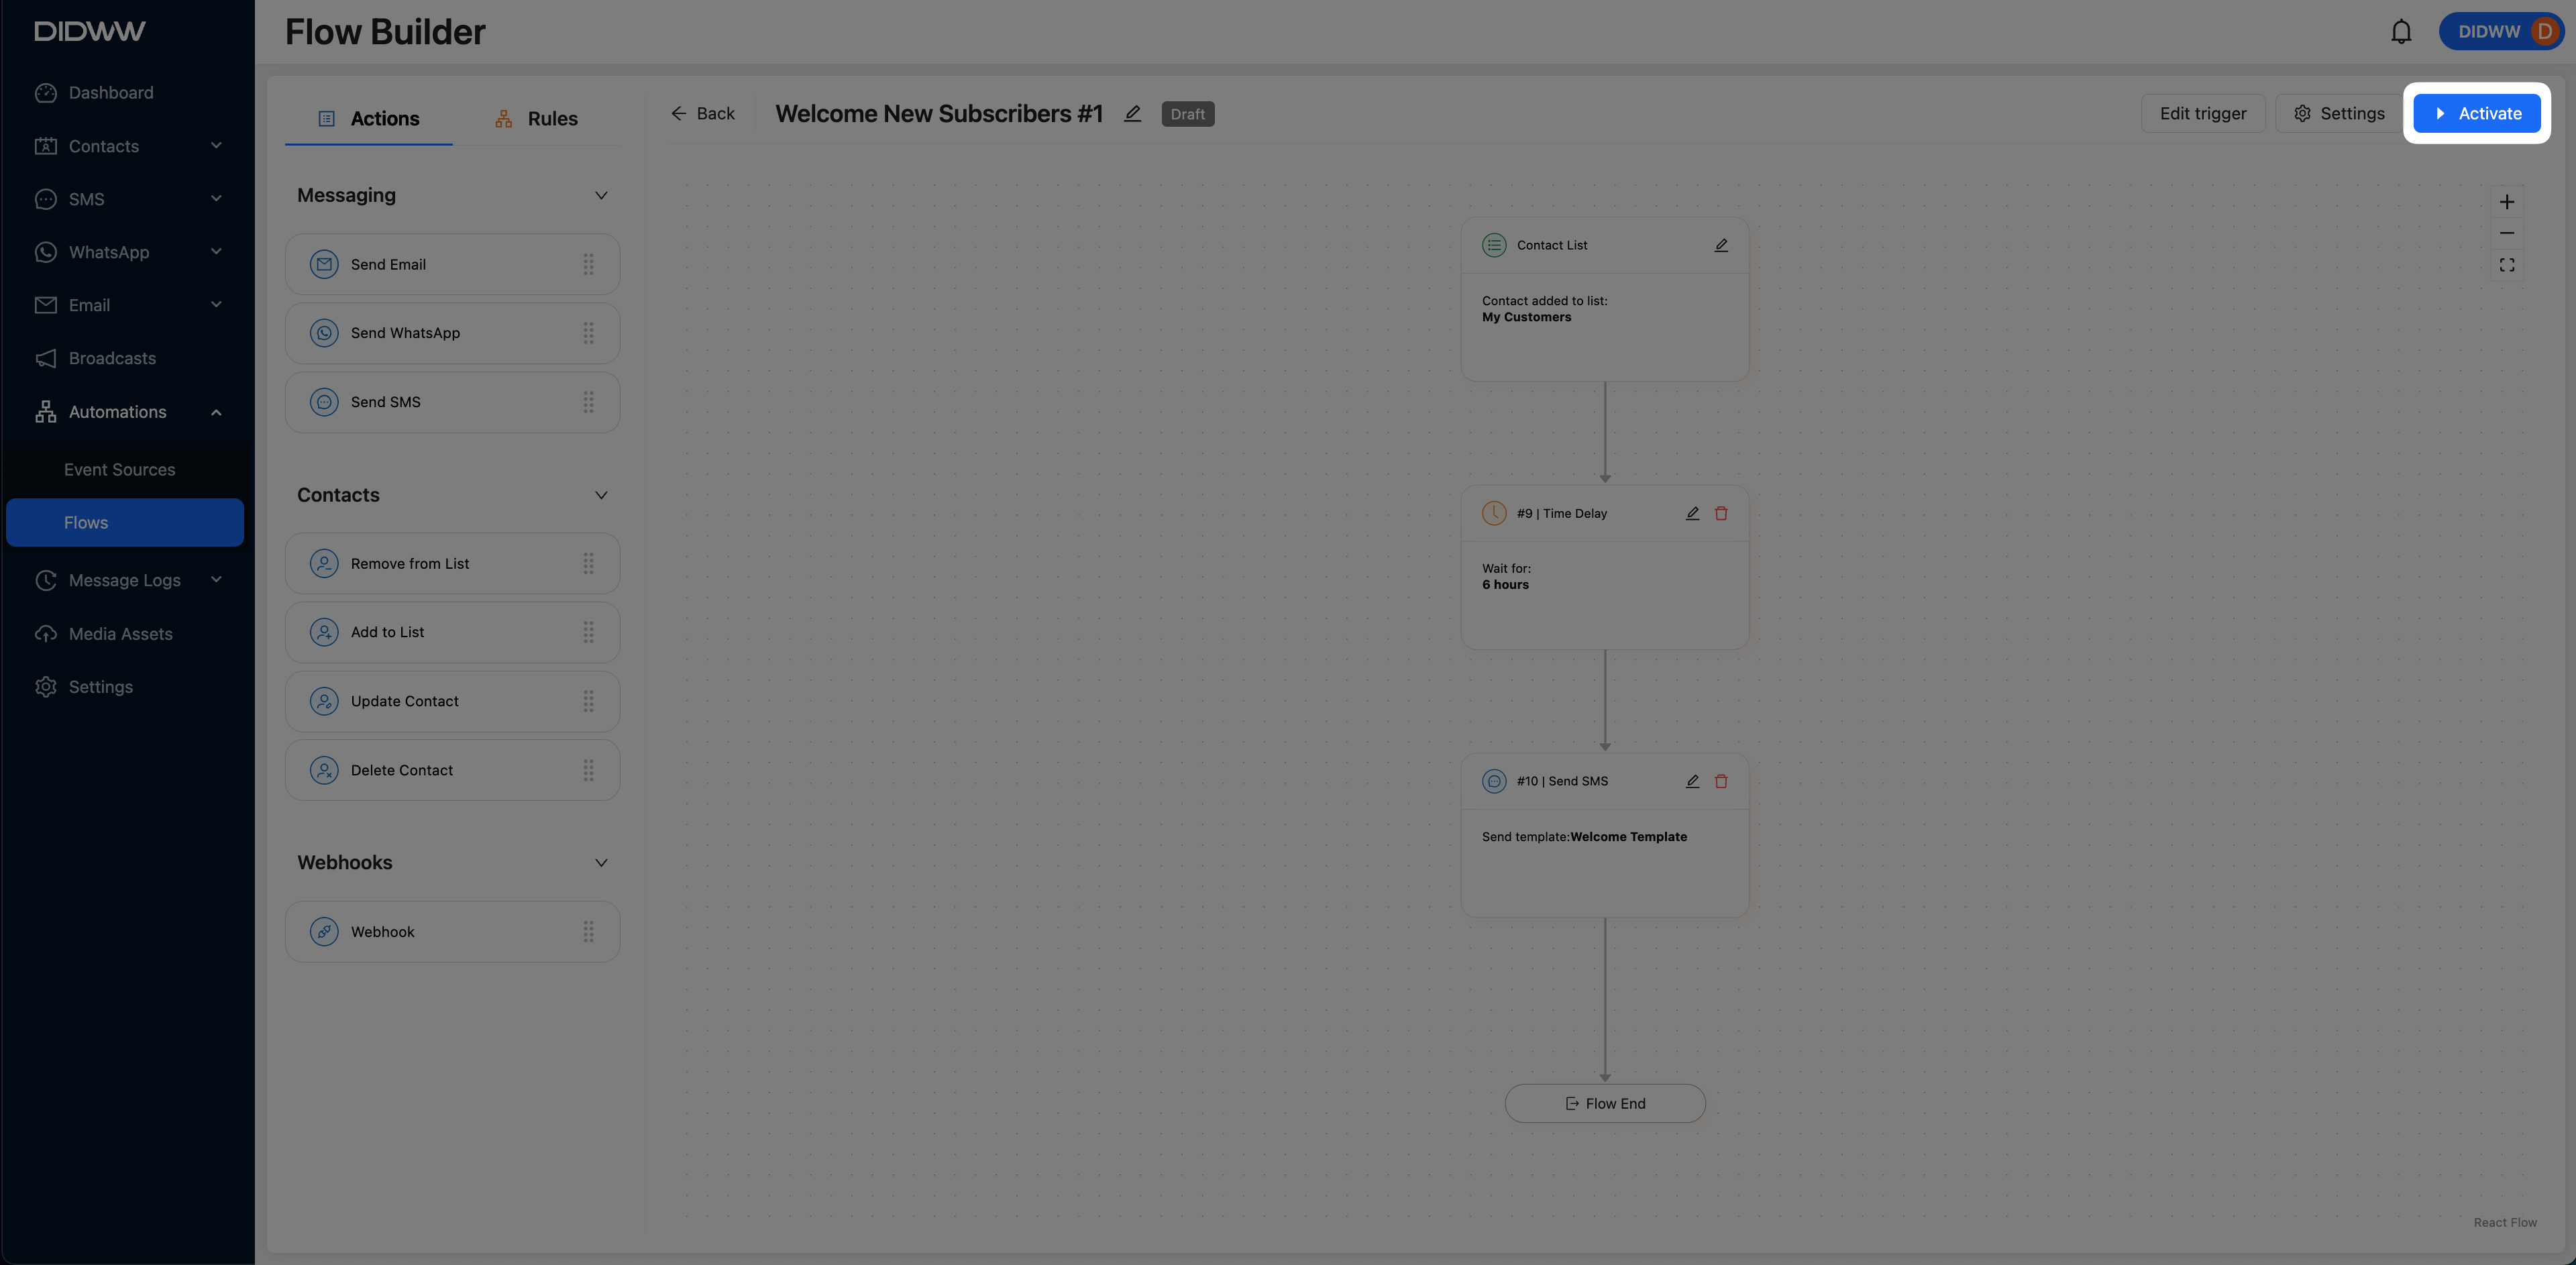
Fig. 1. Flow activation and status controls in the builder.
Canvas Tools & Navigation
Use the canvas tools to navigate, organize, and edit your automation flow layout. Each tool is represented by an icon on the Flow Builder interface.


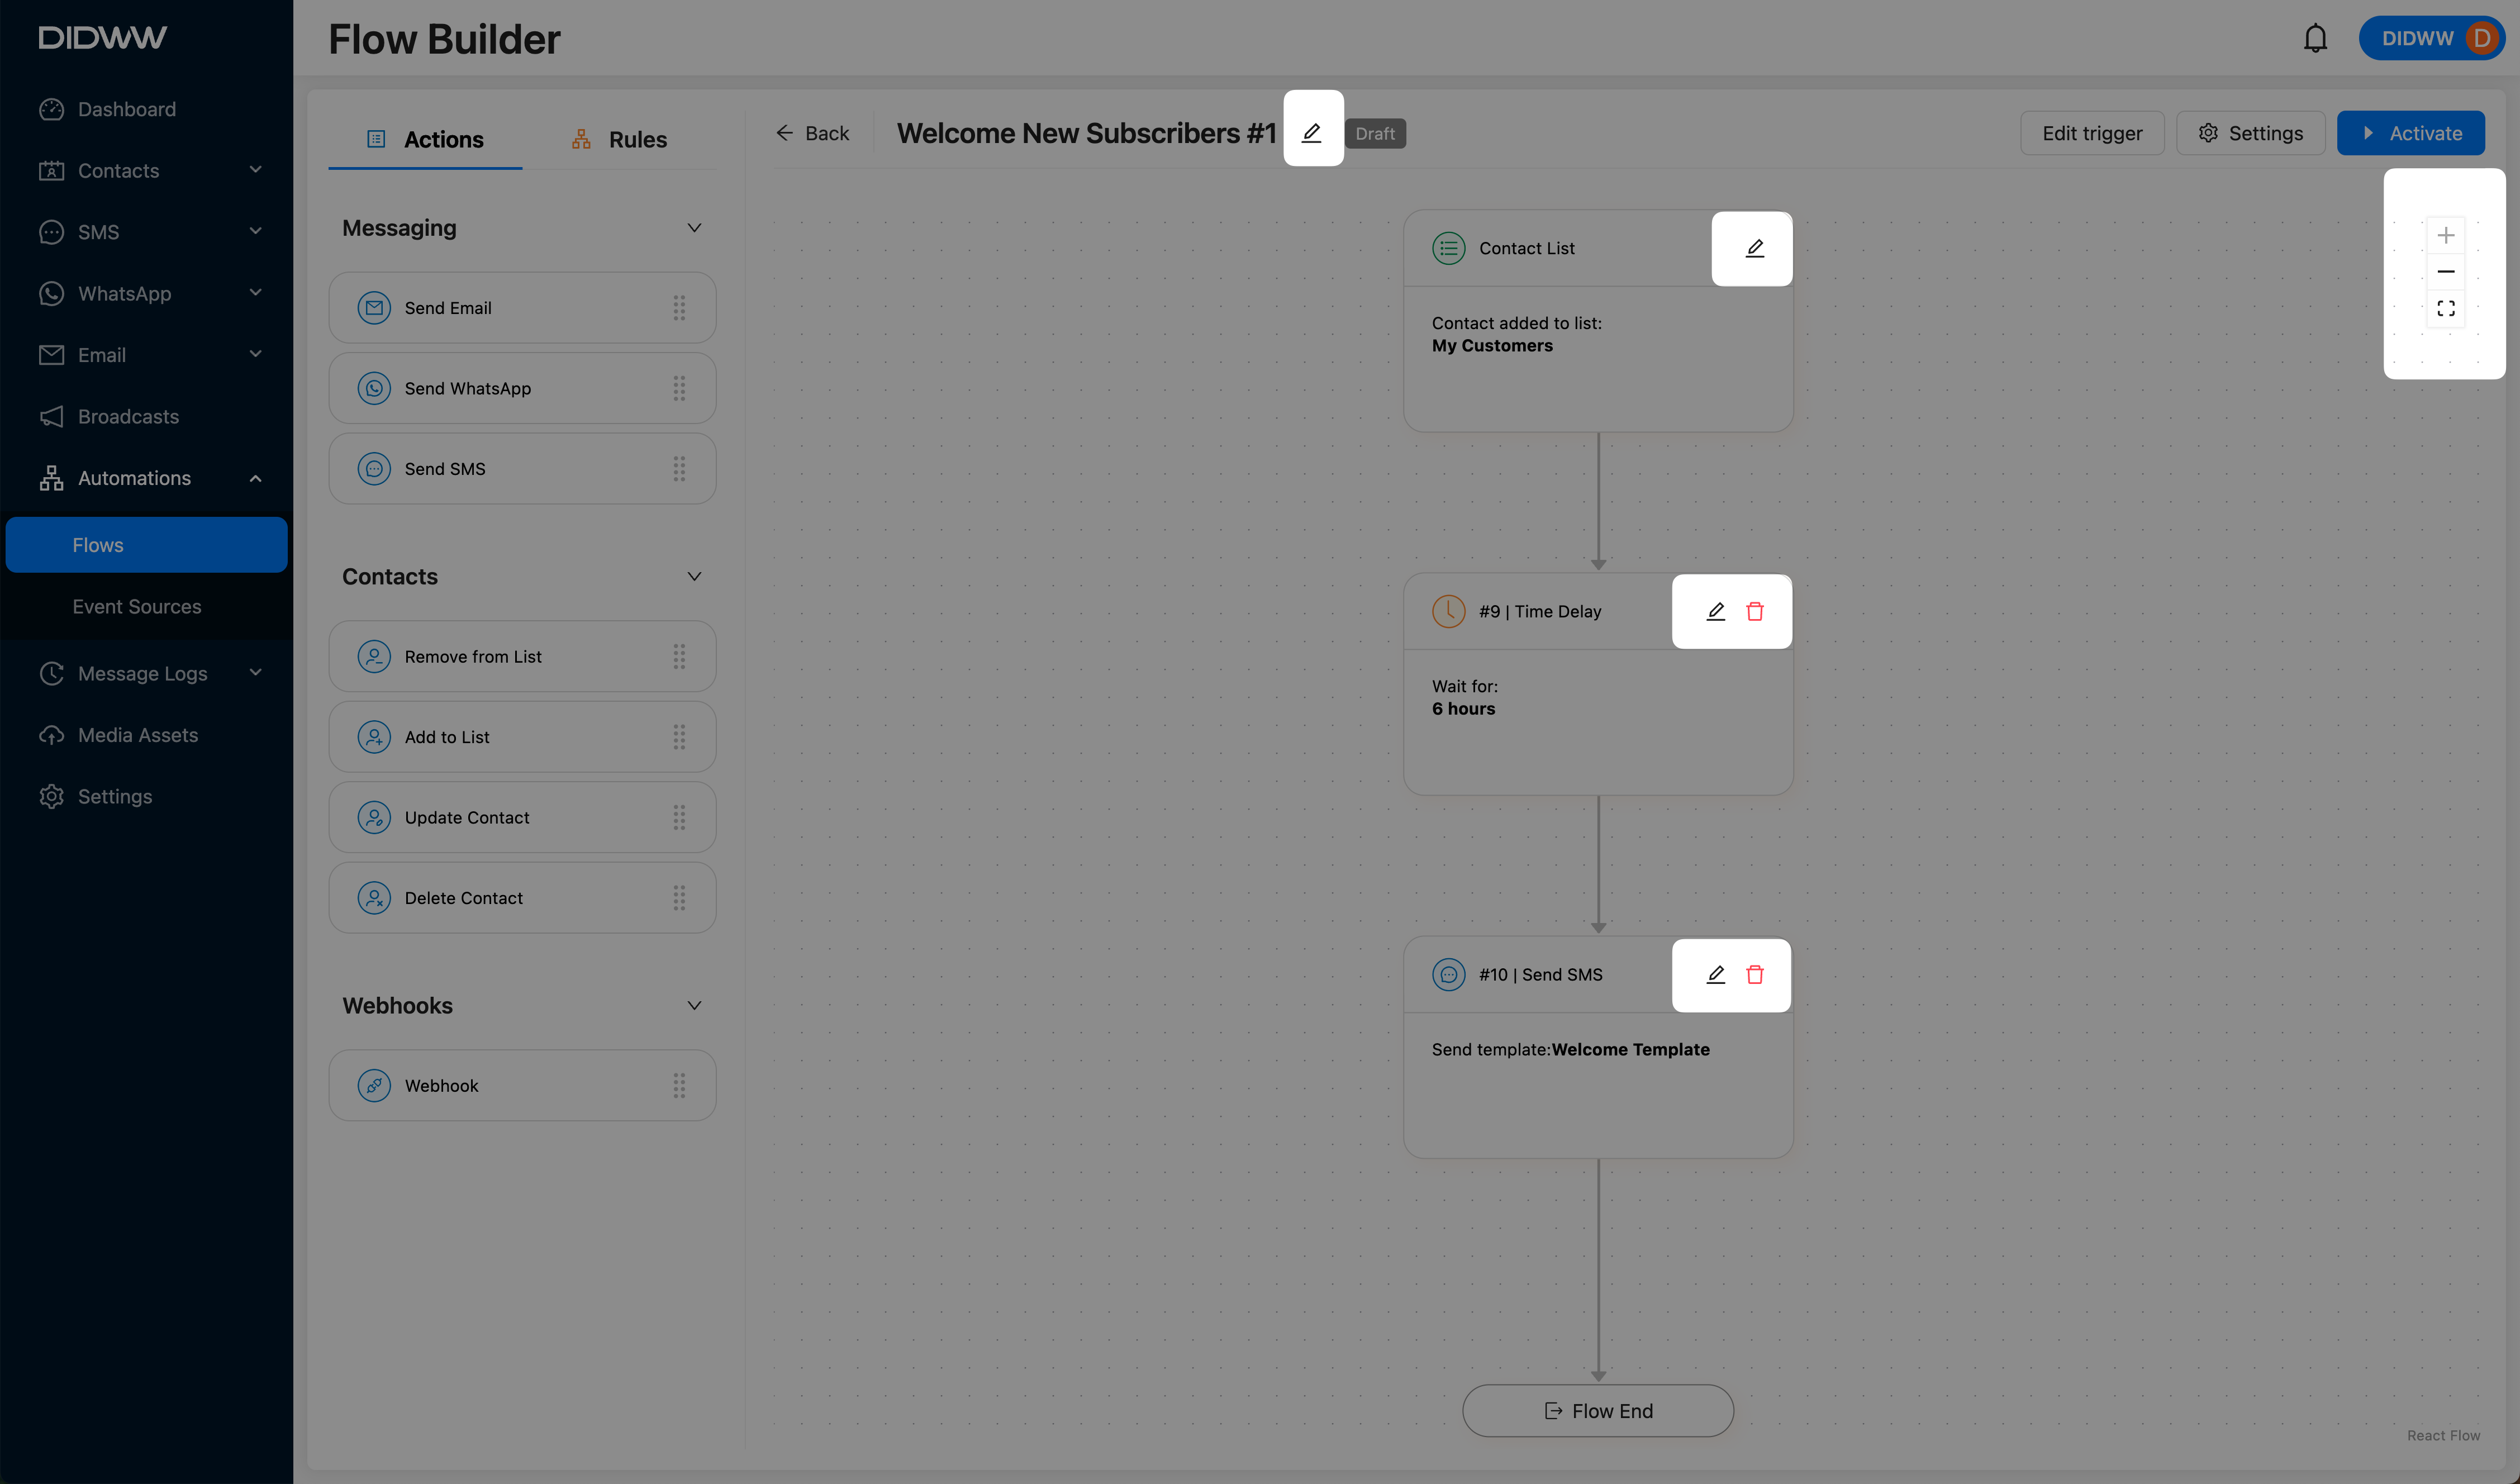
Fig. 2. Canvas tools for editing and navigating the flow layout.
Example: Welcome New Subscribers
This flow sends a welcome email to new subscribers after a delay.
- Flow Structure:
Trigger: When a contact is added to the list My Customers.
Rule: Wait 6 hours using Time Delay.
Action: Send a welcome email using Send Email.
End: The flow terminates.
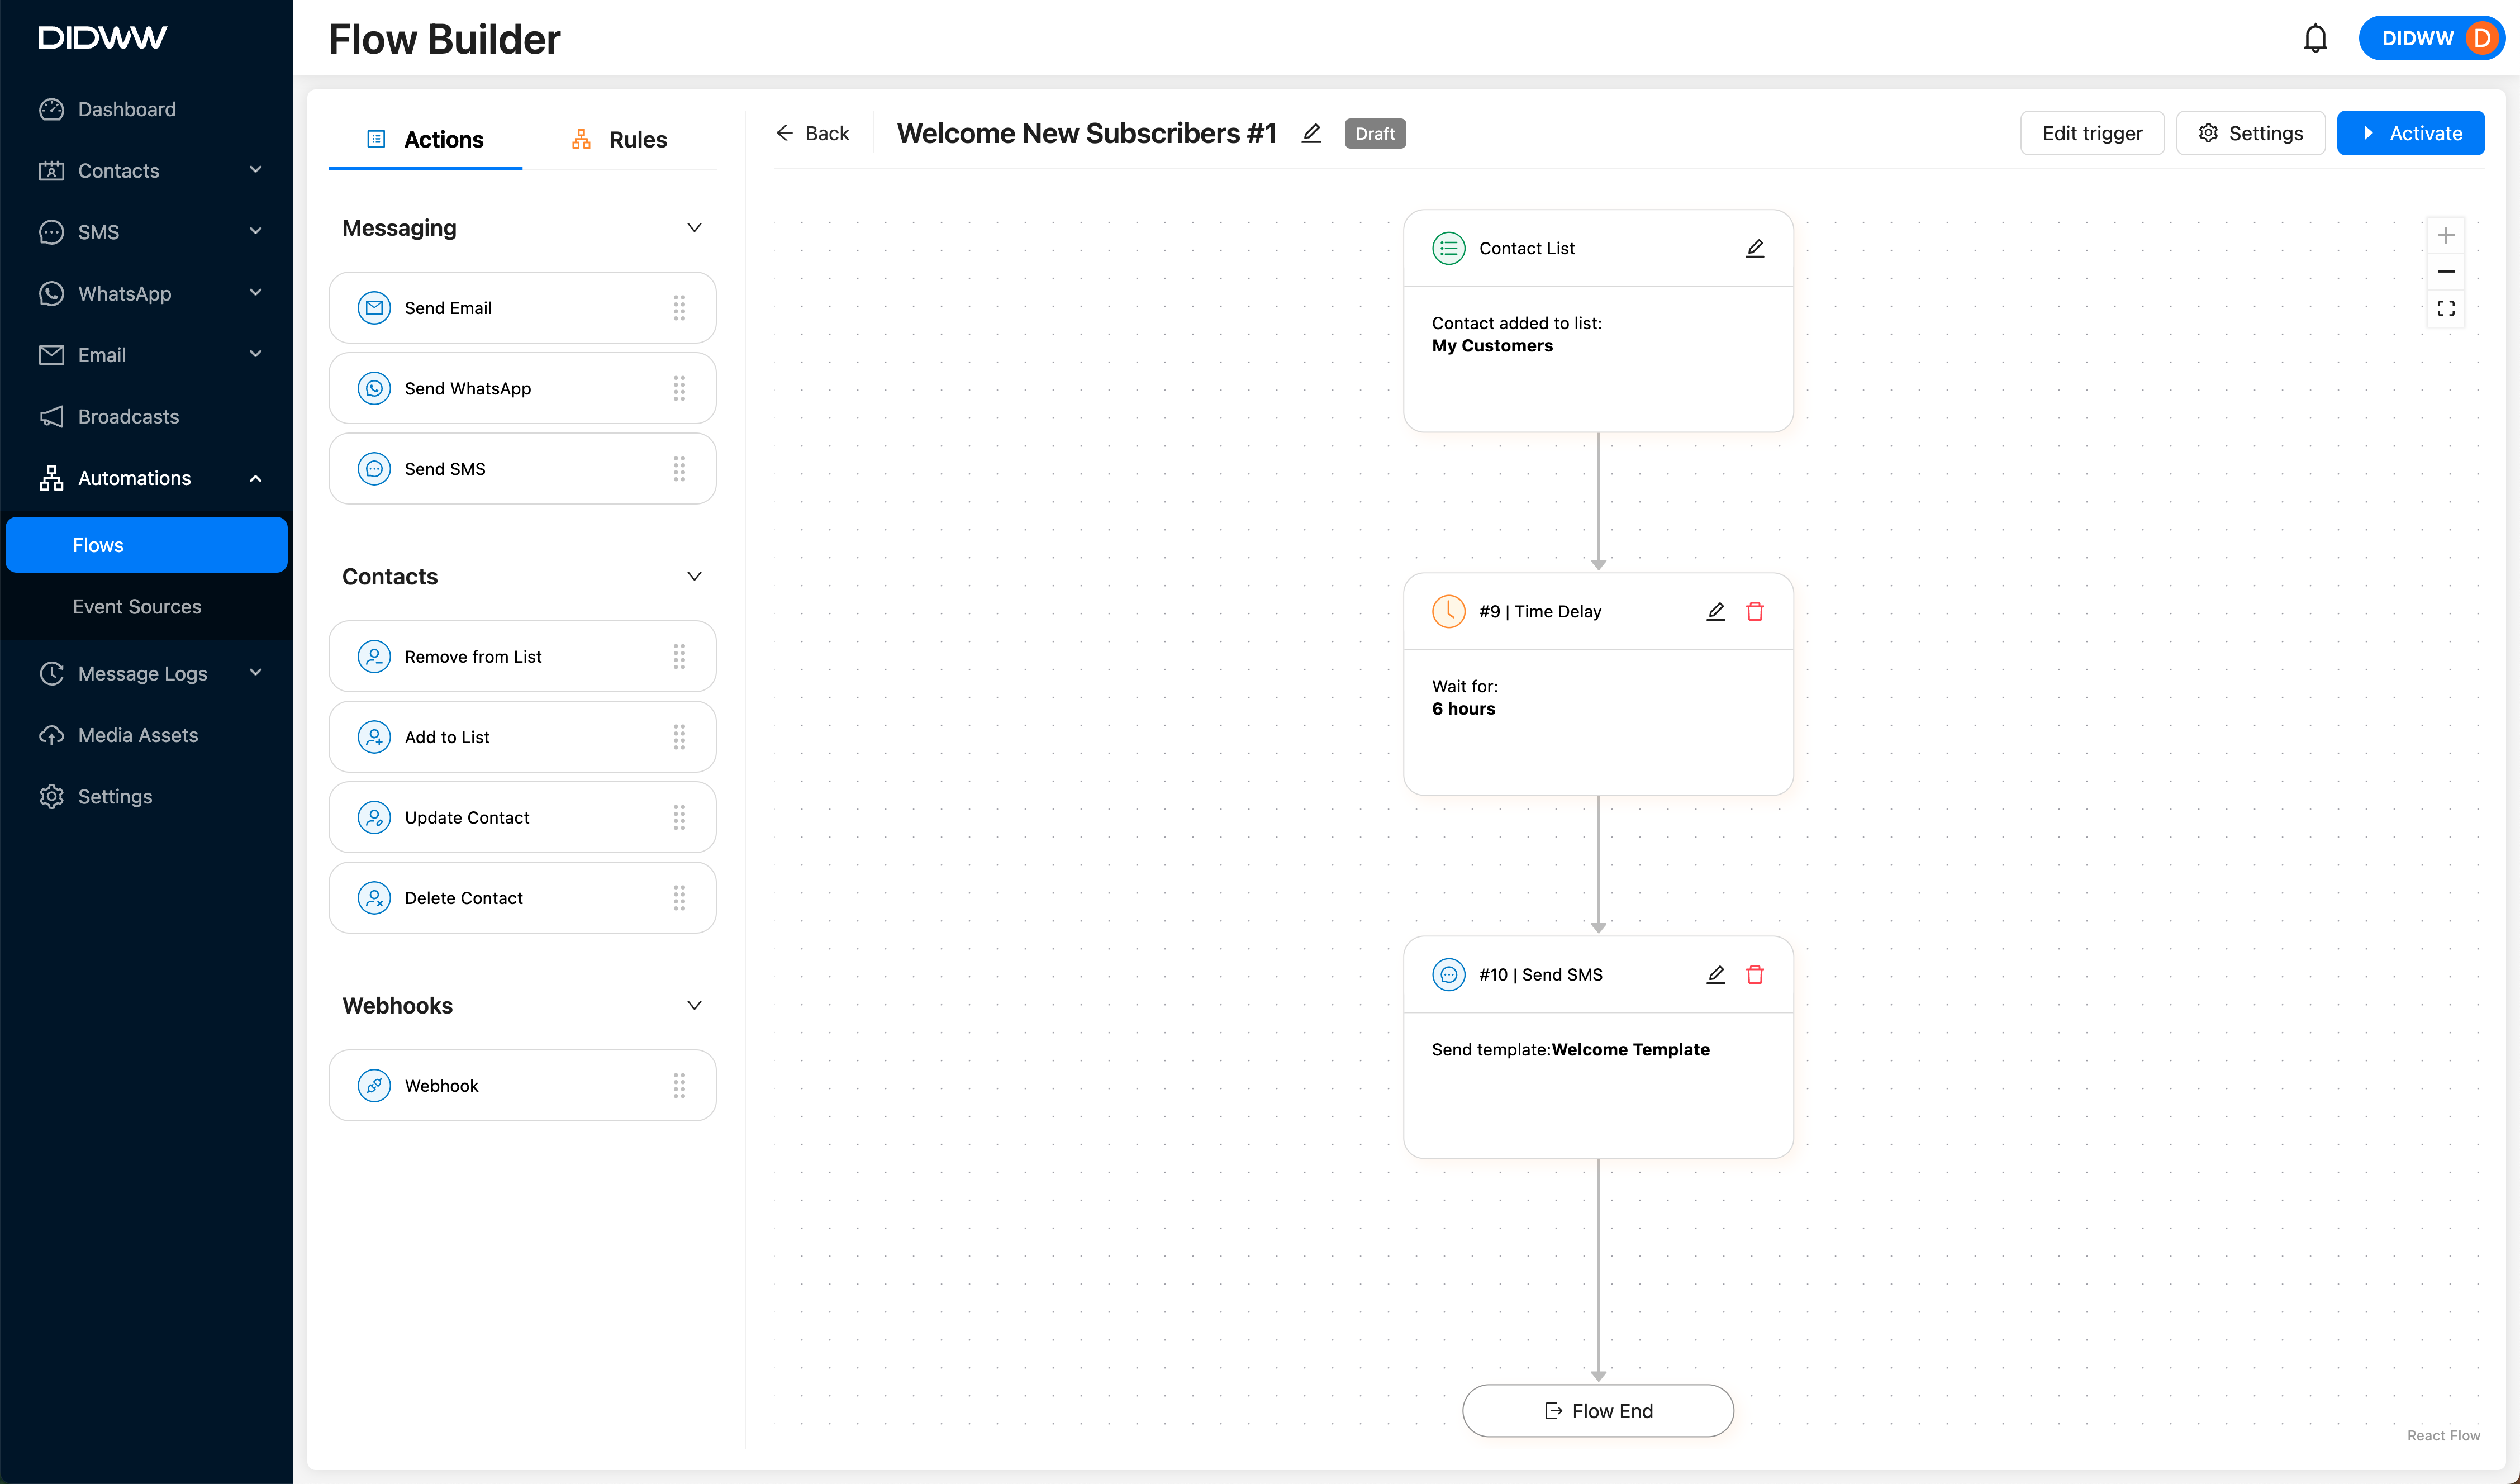
Fig. 3. Basic welcome automation.
Tip
Consider enhancing this flow with:
A True/False Branch to customize follow-up.
A Webhook to notify external tools.
Additional Resources
Learn how Flow Builder Actions and Rules govern the flow and define the actions that occur when a trigger is activated.