SIP Trunk

A SIP trunk is a virtual connection that delivers inbound voice calls from the public telephone network (PSTN) to an IP-based phone system over the internet.


Create a New SIP Trunk

To create an inbound SIP trunk, follow these steps:

  1. Navigate to the Voice section in the left-hand menu.

  2. Select Inbound Trunks from the submenu.

  3. Click the Create New button in the top-right corner of the screen.

  4. From the dropdown menu, select SIP Trunk.

Adding a new SIP Trunk

Fig. 1. Adding a new SIP Trunk


Quick SIP Trunk Configuration Guide

To quickly configure a SIP trunk, enter the required information below:
  1. Enter a Friendly Name - Provide a unique name to identify the trunk.

  2. Enter Your Host address - Specify the public IP address or domain name of your server.

  3. Click Create button to save and activate your configuration.

Warning

  • Click Use Recommended Values to apply the most widely supported SIP trunk settings instantly.

  • If the preferred server is set to Auto, ensure your system can accept traffic from all DIDWW SIP IPs.

Basic SIP trunk configuration example

Fig. 2. Basic SIP trunk configuration example


Advanced SIP Trunk Configuration Guide

For advanced configurations, you can customize additional SIP trunk settings.

General

Core routing, addressing, and SIP behavior settings.

General Settings
Trunk Group Configuration

Assign trunks to groups for failover and load balancing.

Trunk Group Settings
Authentication

Configure additional SIP digest authentication for the trunk.

Authentication Settings
Media & DTMF

Configure codecs, RTP security, DTMF methods, and media handling.

Media & DTMF Configuration
CNAM IN

Enable CNAM lookup for US numbers.

CNAM IN
Advanced Signaling Settings

Manage timers, timeout policies, diversion headers, and call redirection behavior.

Advanced Signaling Settings
STIR/SHAKEN

Configure caller authentication and identity header handling.

STIR/SHAKEN


General Settings

General Settings define how inbound SIP calls are processed, formatted, and routed to your SIP endpoint.

General Settings window

Fig. 3. General Settings window

You can configure the following settings:

1. General Properties

  • Friendly Name – Enter a unique name to identify the trunk.

  • Capacity Limit – Specify the maximum number of simultaneous calls allowed for this trunk.


2. CLI Settings

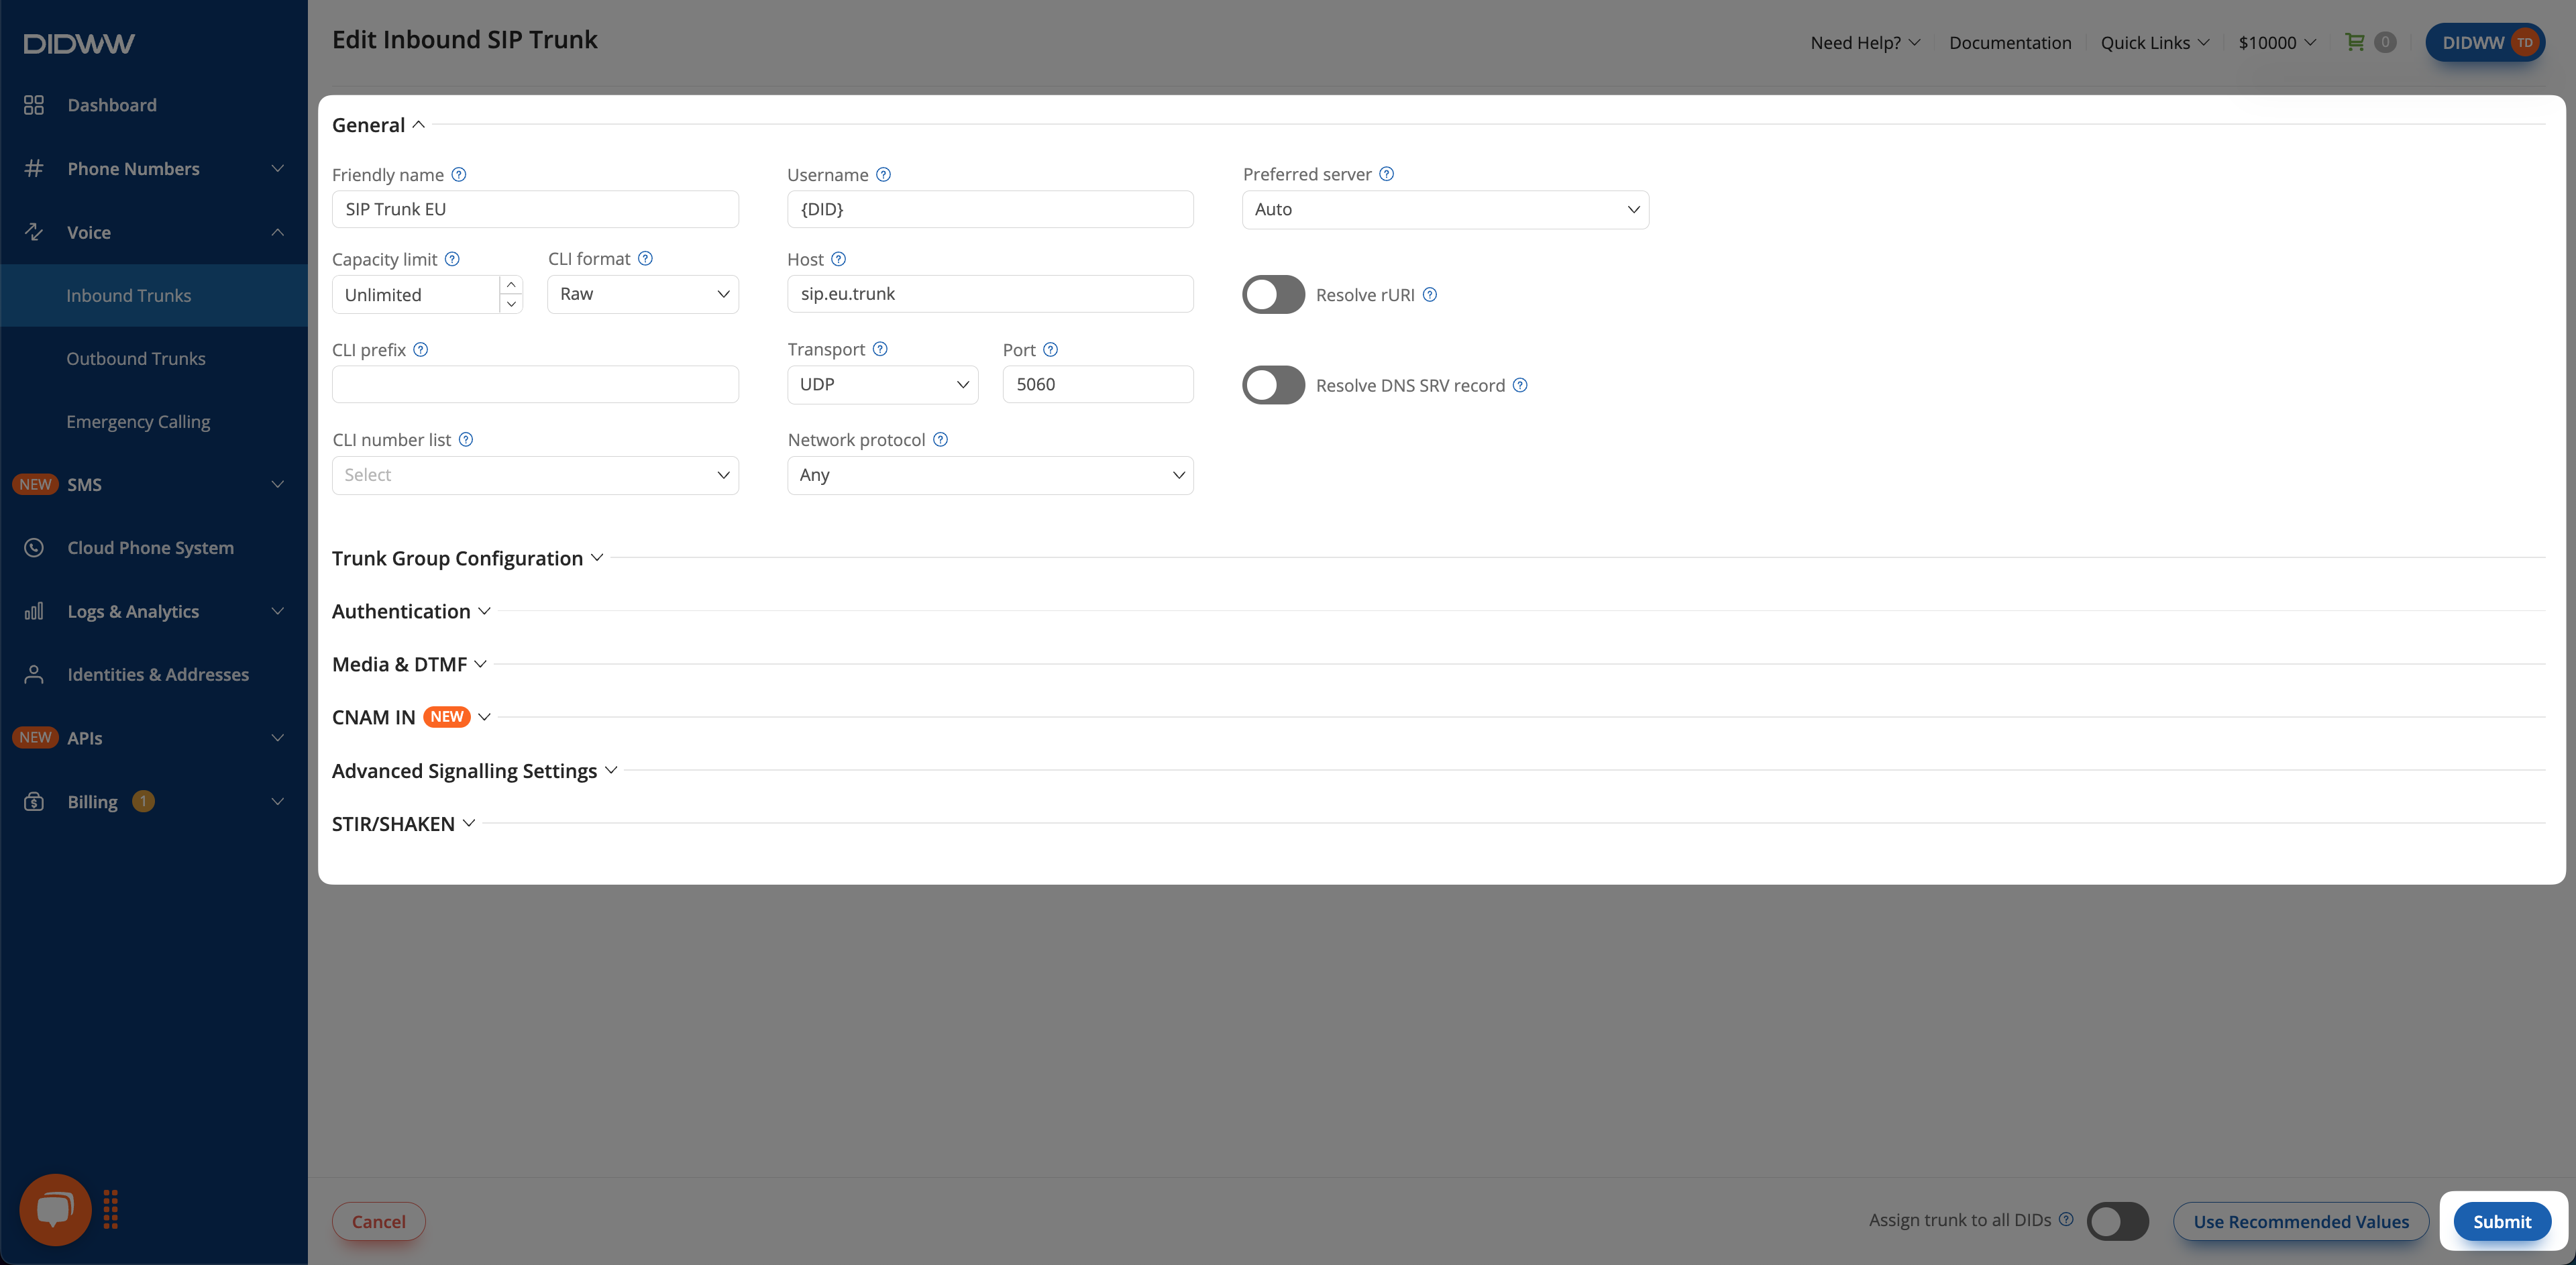
  • CLI Format – Select how the Caller ID (CLI) is formatted for incoming calls:

    Option

    Description

    raw

    Passes the caller ID unchanged (default).

    E.164

    Converts the CLI to E.164 format (Country Code + Area Code + Number).

    local

    Converts the CLI to local format (Area Code + Number).

  • CLI Prefix – Prepend a custom prefix to the incoming CLI for identification or routing purposes.

  • CLI Number List – Assign a Number List to allow or reject incoming calls based on full number matches, prefix matches, or length restrictions. For more information, see the Number List documentation page.

Warning

  • CLI format conversion may not work correctly for calls originating from outside the country of the DID.

  • Number Lists work by matching the inbound CLI. If you modify the CLI format and CLI prefix, you may need to adjust your numbers in the Number List accordingly.


3. Transport Settings

  • Transport Protocol – Choose the protocol for SIP signaling: UDP, TCP, or TLS.

  • Network Protocol – Specifies the IP protocol version used for communication between the SIP trunk and the endpoint. Options include:

    Option

    Description

    IPv4 only

    Use IPv4 exclusively.

    IPv6 only

    Use IPv6 exclusively.

    Any

    Use either IPv4 or IPv6.

    Prefer IPv4 over IPv6

    Prefer IPv4 but fallback to IPv6.

    Prefer IPv6 over IPv4

    Prefer IPv6 but fallback to IPv4.

Note

TLS is not enabled by default. Contact sales@didww.com to enable it.


4. Routing Method Settings

The routing method determines how DIDWW delivers calls to your endpoint.

Use Static SIP URI when your SIP endpoint has a fixed, reachable address. DIDWW always delivers calls to a single configured SIP URI, built from User part of R-URI, Host, and Port.

  • User part of R-URI – Define the user part of the R-URI in the INVITE request.

    Placeholder Variables
    • {DID} – Inserts the called DID in E.164.

    • {CALL_CPC} – Calling party category. See CPC usage.

  • Host – Host part of the R-URI in the SIP INVITE request. This can be an IP address or a domain.

  • Port – Port part of the R-URI in the SIP INVITE request.

    Port Auto-Resolution Behavior

    If Port is left empty, DIDWW first attempts an SRV record lookup.
    If no SRV record is found, it falls back to resolving the A record.

  • Resolve rURI – Replace the host part of R-URI with its resolved DNS address.

  • Preferred Server – Choose the DIDWW Point of Presence (POP) for routing:

    • Auto (recommended): Let DIDWW select the optimal SBC dynamically

    • US: LA, MIA, NY

    • Germany: FRA

    • Singapore: SG

    • Hong Kong: HK

    • Netherlands: AMS

    Warning

    • When using Auto, allow all inbound DIDWW signaling and RTP IPs on your equipment.

    • Ensure all POPs are enabled in settings. Disabling any POP may cause unnecessary routing hops.

    Routing Examples by Preferred Server

    The following figures illustrate how incoming calls are routed based on the selected preferred server:

    1. Preferred Server: FRA - Calls from the PSTN network reach the DIDWW HK SBC and are routed to the FRA POP.


      Preferred Server: FRA

      Fig. 3.1. Routing example with FRA as the preferred server.


    2. Preferred Server: Auto - Calls are dynamically routed from the same DIDWW SBC that received them.


      Preferred Server: Auto

      Fig. 3.2. Routing example with Auto as the preferred server.

Use SIP Registration when your PBX or SBC has a dynamic IP address, operates behind NAT, or when you prefer registration-based routing. DIDWW sends incoming calls to the Contact address learned during the SIP REGISTER process.

  • Enable SIP Registration – Activates dynamic call destination based on Contact information obtained during the SIP REGISTER sequence.

  • Use DID in R-URI – Replaces the user part of the R-URI in the SIP INVITE with the DID number, instead of the user part received in the Contact header during registration.

Important

  • Enabling SIP Registration disables the Host, Port, and User part of R-URI fields. Leave these fields empty.

  • A maximum of 10 simultaneous registrations are supported per trunk.

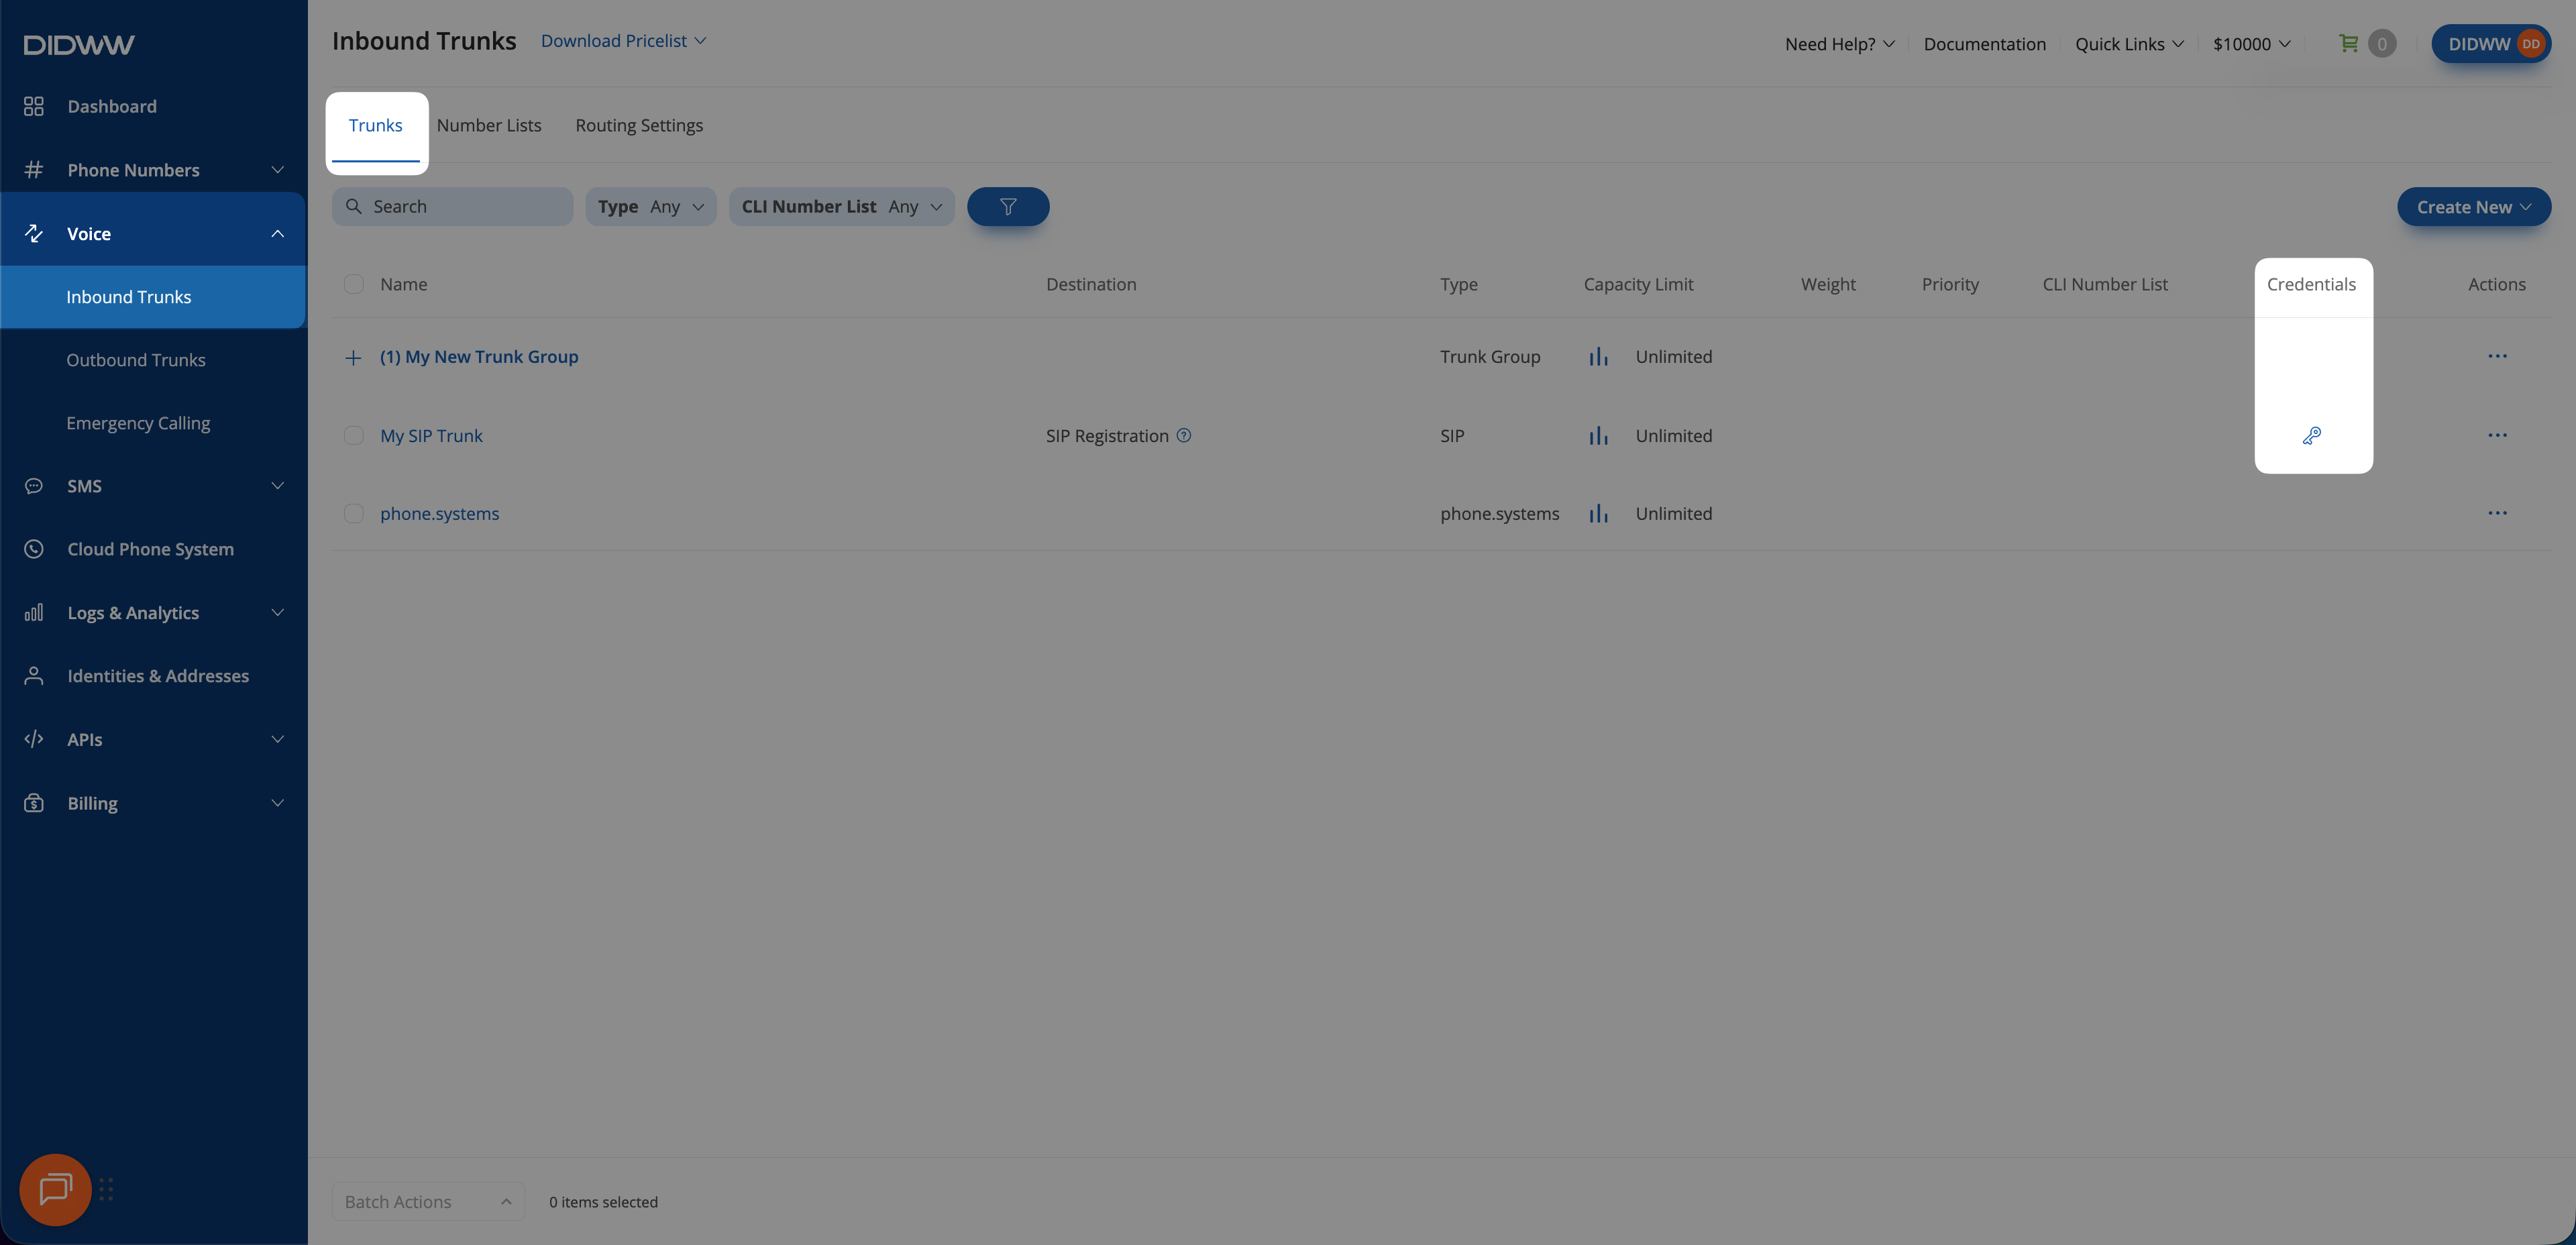
  • View your registration username and password by selecting the key icon in the Credentials column of the Inbound Trunks table. For detailed steps, see how to view credentials.

SIP Registration general settings

Fig. 3.3. SIP Registration general settings


Trunk Group Settings

SIP Trunk group configuration is optional and should only be used when multiple trunks need to be assigned to a single trunk group for failover or load balancing.

Trunk Group Settings

Fig. 4. Trunk Group Settings

To assign a trunk to a trunk group, configure the following settings:

Setting

Description

Trunk Group

Select the trunk group to assign the trunk to. If no trunk groups exist, refer to the Trunk Group Creation Guide.

Priority

Determines the order in which trunks are used for routing calls. Trunks with lower priority numbers are used first.

Weight

Distributes call traffic among trunks with the same priority. Trunks with higher weights handle a greater share of calls.

Ringing Timeout

Sets the maximum wait time (in seconds) for a call to be answered.

If the call is not answered within this period, the system disconnects the call due to a Ringing Timeout error.

Use Default Re-routing Disconnect Rules

If enabled, the system applies the DIDWW Default Rerouting Configuration.

Calls are always rerouted unless the SIP error message indicates that the destination is unreachable.

Manual Re-routing Configuration:

If Use Default Re-routing Disconnect Rules is disabled, you can manually configure re-routing disconnect codes:
  1. Select the error code.

  2. Use the Left left_arrow and right right_arrow arrow buttons to move it between the available options.


Authentication Settings

Authentication is an optional SIP Trunk setting that allows the trunk to be authenticated using digest authentication (credentials). Use this feature only if your SIP server requires authentication.

Authentication configuration window

Fig. 5. Authentication configuration window

To enable authentication, configure the following settings:

Setting

Description

Enable Authorization

Enables authentication for the SIP server.

Auth User

Defines the username for authentication.

Auth Password

Defines the password for authentication.

Auth “From” User

Specifies a custom user in the From field instead of the Caller ID.

Auth “From” Domain

Specifies a custom From domain in SIP messages.


Media & DTMF Configuration

The Media & DTMF section allows you to configure codec preferences, Dual-Tone Multi-Frequency (DTMF) signaling, and real-time transport protocol (RTP) settings.

Media & DTMF configuration window

Fig. 6. Media & DTMF configuration window

You can configure the following settings:

1. Select Codecs

You can add or remove codecs between the Available Codecs and Selected Codecs lists.
  • Use the right arrow right_arrow button to move a codec from the Available Codecs list to the Selected Codecs list.

  • Use the left arrow left_arrow button to move a codec back to the Available Codecs list.

Additional Codec Management Options
  • Click “Add All” to move all available codecs to the Selected Codecs list.

  • Click “Remove All” to move all selected codecs to the Available Codecs list.

  • Prioritize codecs by moving them up or down in the Selected Codecs list (the first codec has the highest priority).

For a list of supported codecs, see Inbound SIP Trunk Supported Codecs.


2. Allowed RTP IP Addresses

Define the IP addresses that are allowed to send RTP media packets to this SIP trunk.

  • If left blank, RTP packets are accepted from any source.

  • To restrict RTP sources, enter specific IP addresses or subnets in the following format: IPv4[/mask] or IPv6[/mask].


3. DTMF Format

Define how Dual-Tone Multi-Frequency (DTMF) tones are transmitted between DIDWW and your equipment.

Setting

Description

DTMF format (DIDWW to Customer)

Defines how DTMF signals are sent from DIDWW to the customer.

DTMF format (Customer to DIDWW)

Defines how DTMF signals are received by DIDWW.

For more details, see DTMF options.


4. RTP Settings

Configure real-time transport protocol (RTP) behavior to manage media streams.

Setting

Description

RTP Timeout

Defines the maximum time (in seconds) before a call is disconnected if no RTP packets are received. The value should be between 5 and 600 seconds.

Force Symmetric RTP

If enabled, the trunk operates in Symmetric RTP (COMEDIA) mode.

RTP Ping

If enabled, sends RTP ping packets to keep the media session active.

Symmetric RTP Ignore RTCP

If enabled, only RTP packets are considered for media path switching, and RTCP packets are ignored.


5. Media Encryption

DIDWW supports TLS for secure SIP signaling and SRTP for media encryption.

The following SRTP negotiation methods are supported:

Note

SRTP media encryption is disabled by default. To enable it, contact our sales team at sales@didww.com .


CNAM IN

SIP Trunk CNAM IN settings allow retrieving and displaying the caller’s name for US phone numbers on incoming SIP trunk calls.

CNAM IN configuration window

Fig. 7. CNAM IN configuration window

Inbound CNAM Lookup

When enabled, this feature performs a CNAM lookup for incoming calls from U. phone numbers and displays the caller’s name.

  • The system queries a remote CNAM database when a call originates from the US.

  • Billing applies only if the lookup is successful.

  • The retrieved CNAM name is included in the From header as the Display Name.

Warning

If a Trunk Group is used and any of its trunks have the CNAM IN feature enabled:

  • A CNAM lookup will be performed for all incoming calls.

  • A successful lookup will be billed additionally per call.

  • The retrieved CNAM value will be displayed only for trunks with CNAM IN enabled.

CNAM in the SIP From Header

The following examples show how CNAM appears in the From header:

  • CNAM IN not enabled: "12899230448" <sip:12899230448@46.19.213.14>;tag=24-6917EC3D-6453984E000C1C1E-5EA5B700

  • CNAM IN enabled and lookup successful: "KRIS TOTAL" <sip:15203981500@46.19.213.14>;tag=24-7EB42886-645381060002B85A-5EB5C700

  • CNAM IN enabled but lookup failed: "Unavailable" <sip:15203981500@46.19.213.14>;tag=24-7EB42886-645381060002B85A-5EB5C700

The CNAM value is also displayed in the Source Name field in inbound call logs.


Advanced Signaling Settings

The Advanced Signaling Settings section allows you to configure SIP session management, transaction timeouts, failover behavior, and diversion headers settings. These optional settings help maintain call stability, prevent unnecessary call drops, and optimize failover handling in case of network failures.

Advanced Signaling Settings

Fig. 8. Advanced Signaling Settings

1. Session Timers

Session Timers ensure that SIP sessions remain active by periodically exchanging messages. If a session remains idle for too long and the other endpoint is unresponsive, the dialog is automatically terminated. For more details, refer to RFC 4028 .

Setting

Description

SST Enabled

Activates SIP Session Timers. Ensures that SIP dialogs remain active by sending periodic keep-alive messages.

This feature requires support from both endpoints and is standardized by the IETF.

SST Accept 501

Prevents call drops when receiving a SIP 501 response for non-critical messages.

SST MIN Timer

Sets the minimum session timer value (default: 600 seconds).

SST MAX Timer

Sets the maximum session timer value (default: 900 seconds).

SST Session Expires

Defines the Session-Expires header value (must be within the MIN and MAX Timer range).

SST Refresh Method

Specifies the SIP method for session updates: INVITE, UPDATE, UPDATE (Fallback to INVITE).

2. Timeout and Failover Settings

These settings control SIP transaction timeouts and rerouting behavior.

Setting

Description

SIP Timer-B

Defines the timeout for an INVITE transaction (default: 8000 ms). For more details, see RFC 3261 Section 17.1.1.2 .

DNS SRV Failover Timer

Specifies the timeout per gateway when using DNS SRV-based failover (default: 2000 ms).

Max Transfers

Sets the maximum number of REFER requests allowed per call (default: 0).

Max 30x Redirects

Defines the maximum number of 301/302 SIP Redirect responses that will be followed (default: 0).

3. Diversion Headers

The Diversion Headers Settings section allows you to configure how diversion headers are handled for calls received on the inbound SIP trunk. These headers are used to indicate call forwarding or redirection events prior to reaching the trunk and may be required by downstream systems for routing, billing, or caller identity purposes.

Setting

Description

Diversion Relay Policy

Specifies how DIDWW should handle Diversion headers if they are received from the remote party. Options include:

  • Do not relay – Remove the Diversion header from outgoing SIP messages.

  • Relay as SIP URI – Format and relay the Diversion header as a SIP URI (e.g., sip:user@sip.didww.com).

  • Relay as TEL URI – Format and relay the Diversion header as a TEL URI (e.g., tel:+123456789).

Diversion Inject Mode

Controls whether DIDWW inserts a Diversion header in SIP messages. Options include:

  • Do not add Diversion – A Diversion header will not be generated or included by DIDWW.

  • Add Diversion as +DID number – A DIDWW-generated Diversion header will be added using the associated +DID number as the value, formatted in E.164 (e.g., tel:+123456789).

Note

If both Diversion Relay Policy and Diversion Inject Mode are enabled at the same time, two Diversion headers may be included in the SIP message, which may cause unexpected behavior on your system.


STIR/SHAKEN

The STIR/SHAKEN framework helps prevent caller ID spoofing by verifying the authenticity of the calling number. This section allows you to configure caller ID attestation headers.

STIR/SHAKEN Settings

Fig. 9. STIR/SHAKEN Settings

Transit Identity Headers

Defines whether STIR/SHAKEN headers should be included in SIP INVITE messages. The following options are available:

Option

Description

Do not send Identity header

No additional STIR/SHAKEN headers are included.

Transit Identity header

Includes the standard Transit Identity Header in SIP INVITE messages.

Add PAI, P-Attestation-Indicator, P-Origination-ID

Adds these attestation and identity headers to the SIP INVITE request.

Transit Identity header + Add PAI, P-Attestation-Indicator, P-Origination-ID

Includes both Transit Identity Header and additional attestation headers in the SIP INVITE request.

Add P-Stir-Verstat, P-Attestation-Indicator, P-Origination-ID

Adds verification status and attestation headers to the SIP INVITE request.

This option is supported by default and does not require enabling Identity Header Transit.

Note

The Transit Identity Header is not enabled by default. To enable it for your DIDWW account or from the originating side, contact our sales team at sales@didww.com .


View Inbound SIP Registration Credentials

If your inbound SIP trunk uses SIP Registration for dynamic routing, the system automatically generates a unique set of credentials. You can view these credentials by clicking the key icon in the Credentials column on the Inbound Trunks page.

Accessing SIP Registration credentials on the Inbound Trunks page

Fig. 10. Accessing SIP Registration credentials.

A SIP Credentials pop-up window will appear, showing the necessary details for registering your SIP endpoint:

My SIP Trunk SIP Credentials pop-up window

Fig. 11. SIP Registration Credentials pop-up.

The pop-up displays the following information:

Field

Description

Username

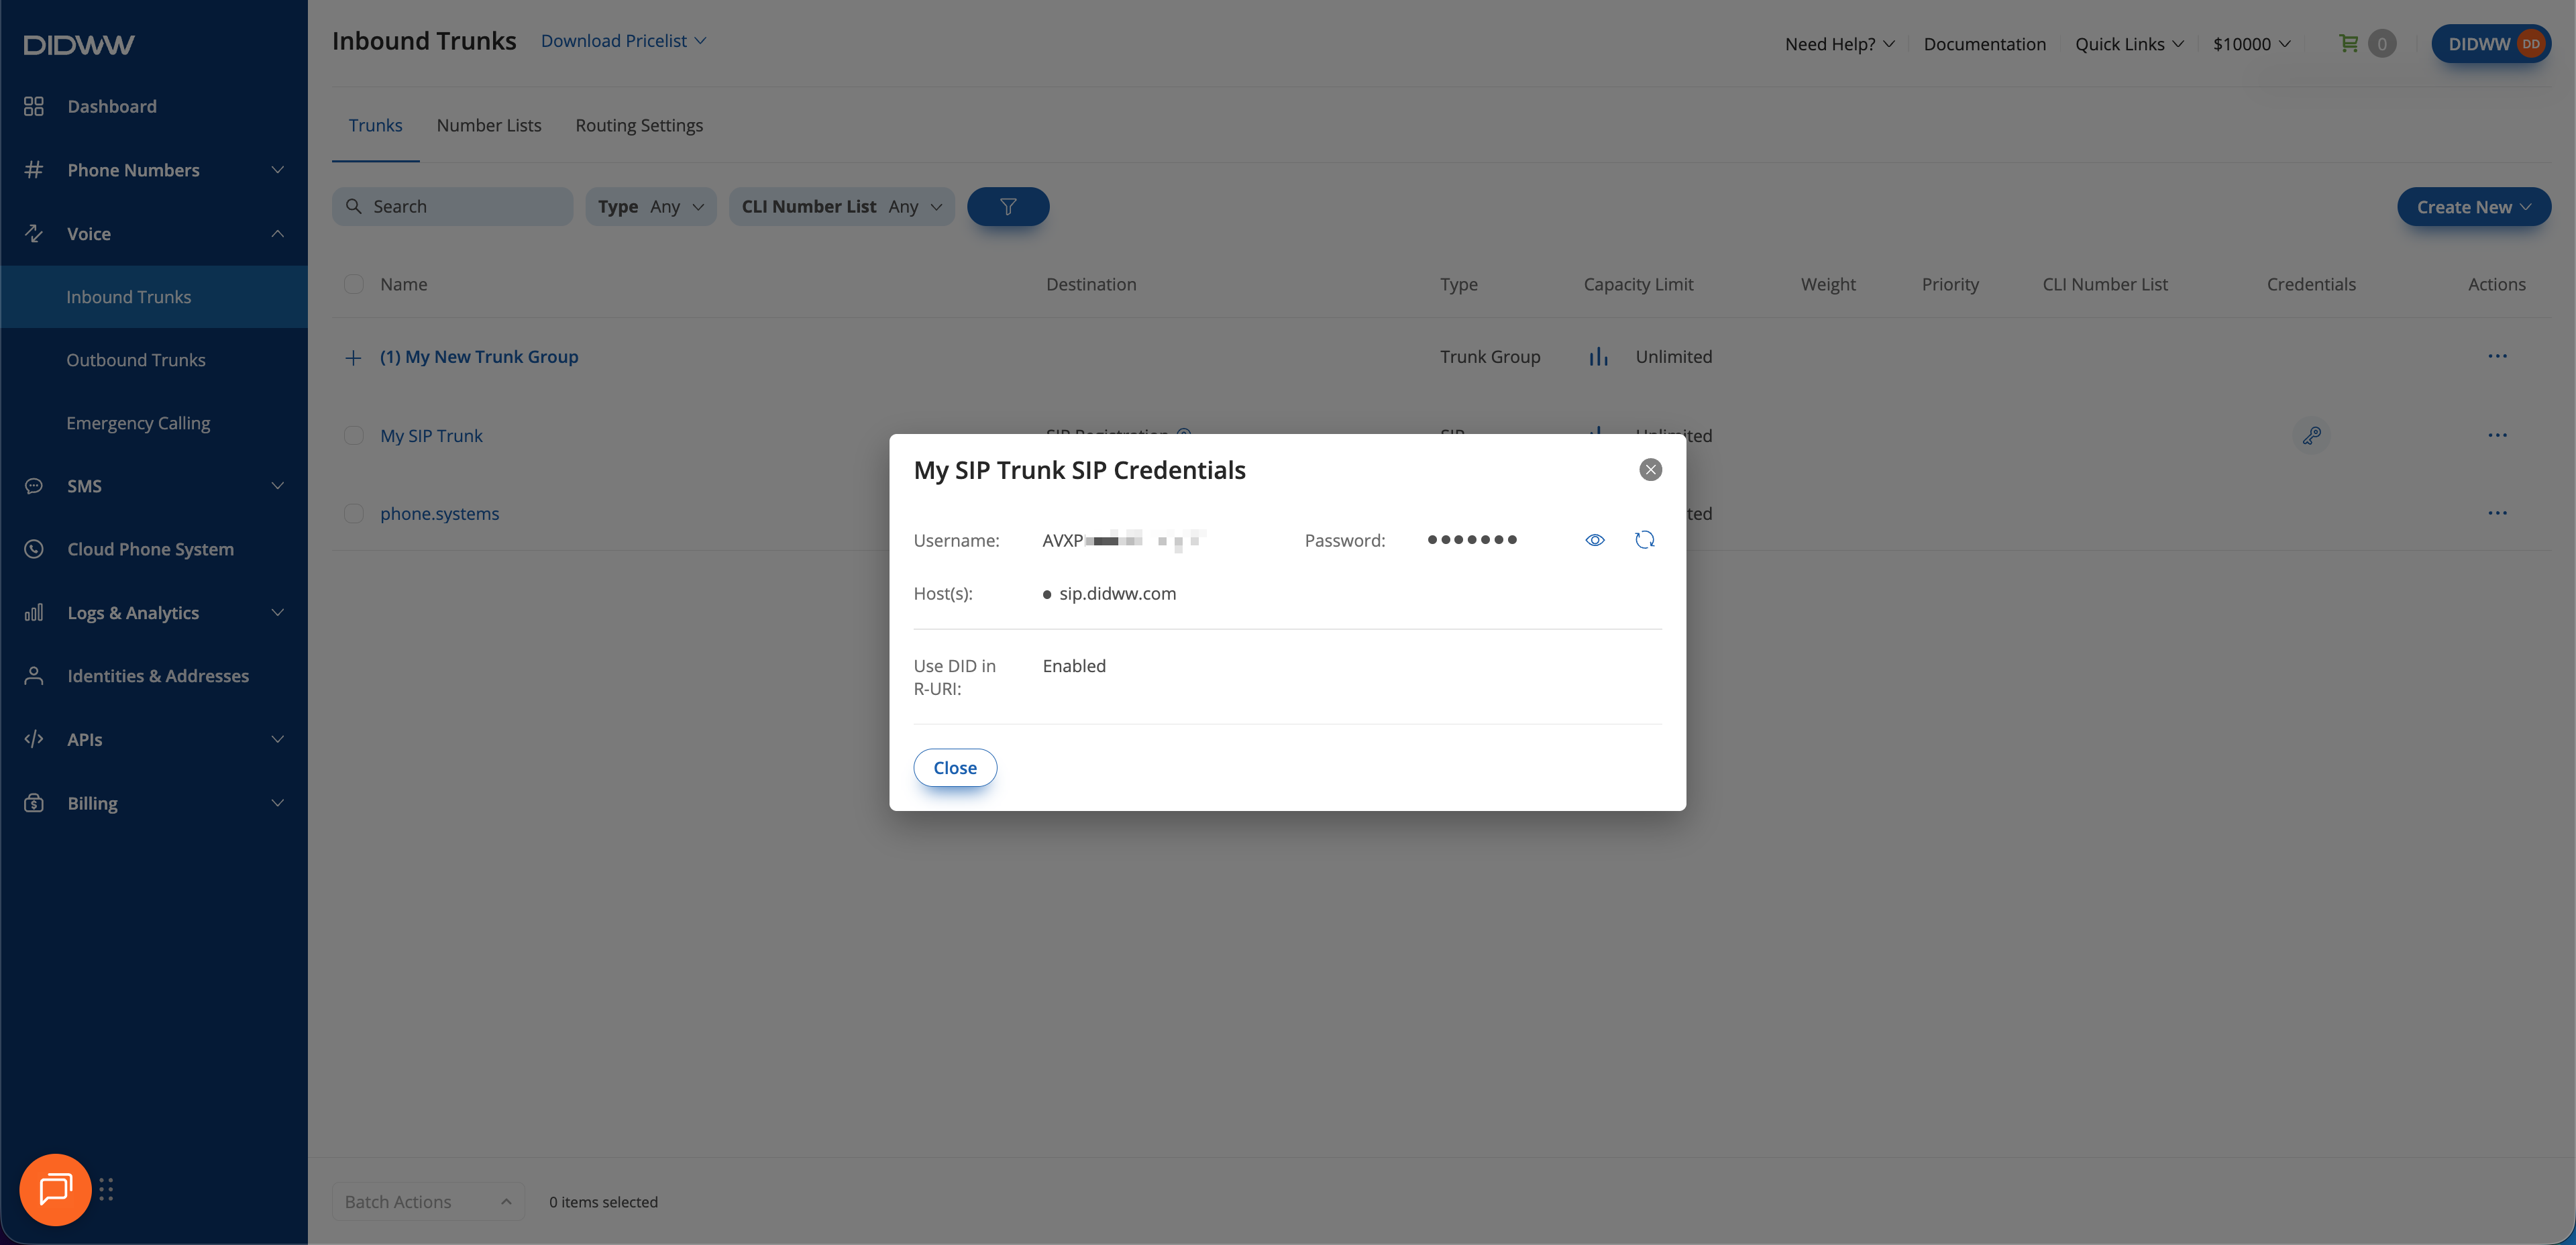
The unique, system-generated username required for your SIP endpoint to register with DIDWW.

Password

The password required for registration. Select the eye icon to view the password in clear text.

Host

The DIDWW SIP server hostname your SIP endpoint must register to (e.g., sip.didww.com). For more details, see General SIP Information.

Use DID in R-URI

Indicates the status of the Use DID in R-URI setting for this trunk. If Enabled, the called DID number will be used as the R-URI user part during call delivery.


Edit SIP Trunk

To edit an existing SIP Trunk, follow these steps:

  1. Navigate to the Voice section in the left-hand menu.

  2. Select Inbound Trunks from the submenu.

  3. Locate the SIP trunk that you want to edit and click the actions button.

  4. Click Edit.

Actions Button.

Fig. 12. Actions Button.

  1. In the Edit Inbound SIP Trunk perform the changes and click Submit to save the changes.

Edit Inbound SIP Trunk.

Fig. 13. Edit Inbound SIP Trunk.


View Registration History

Note

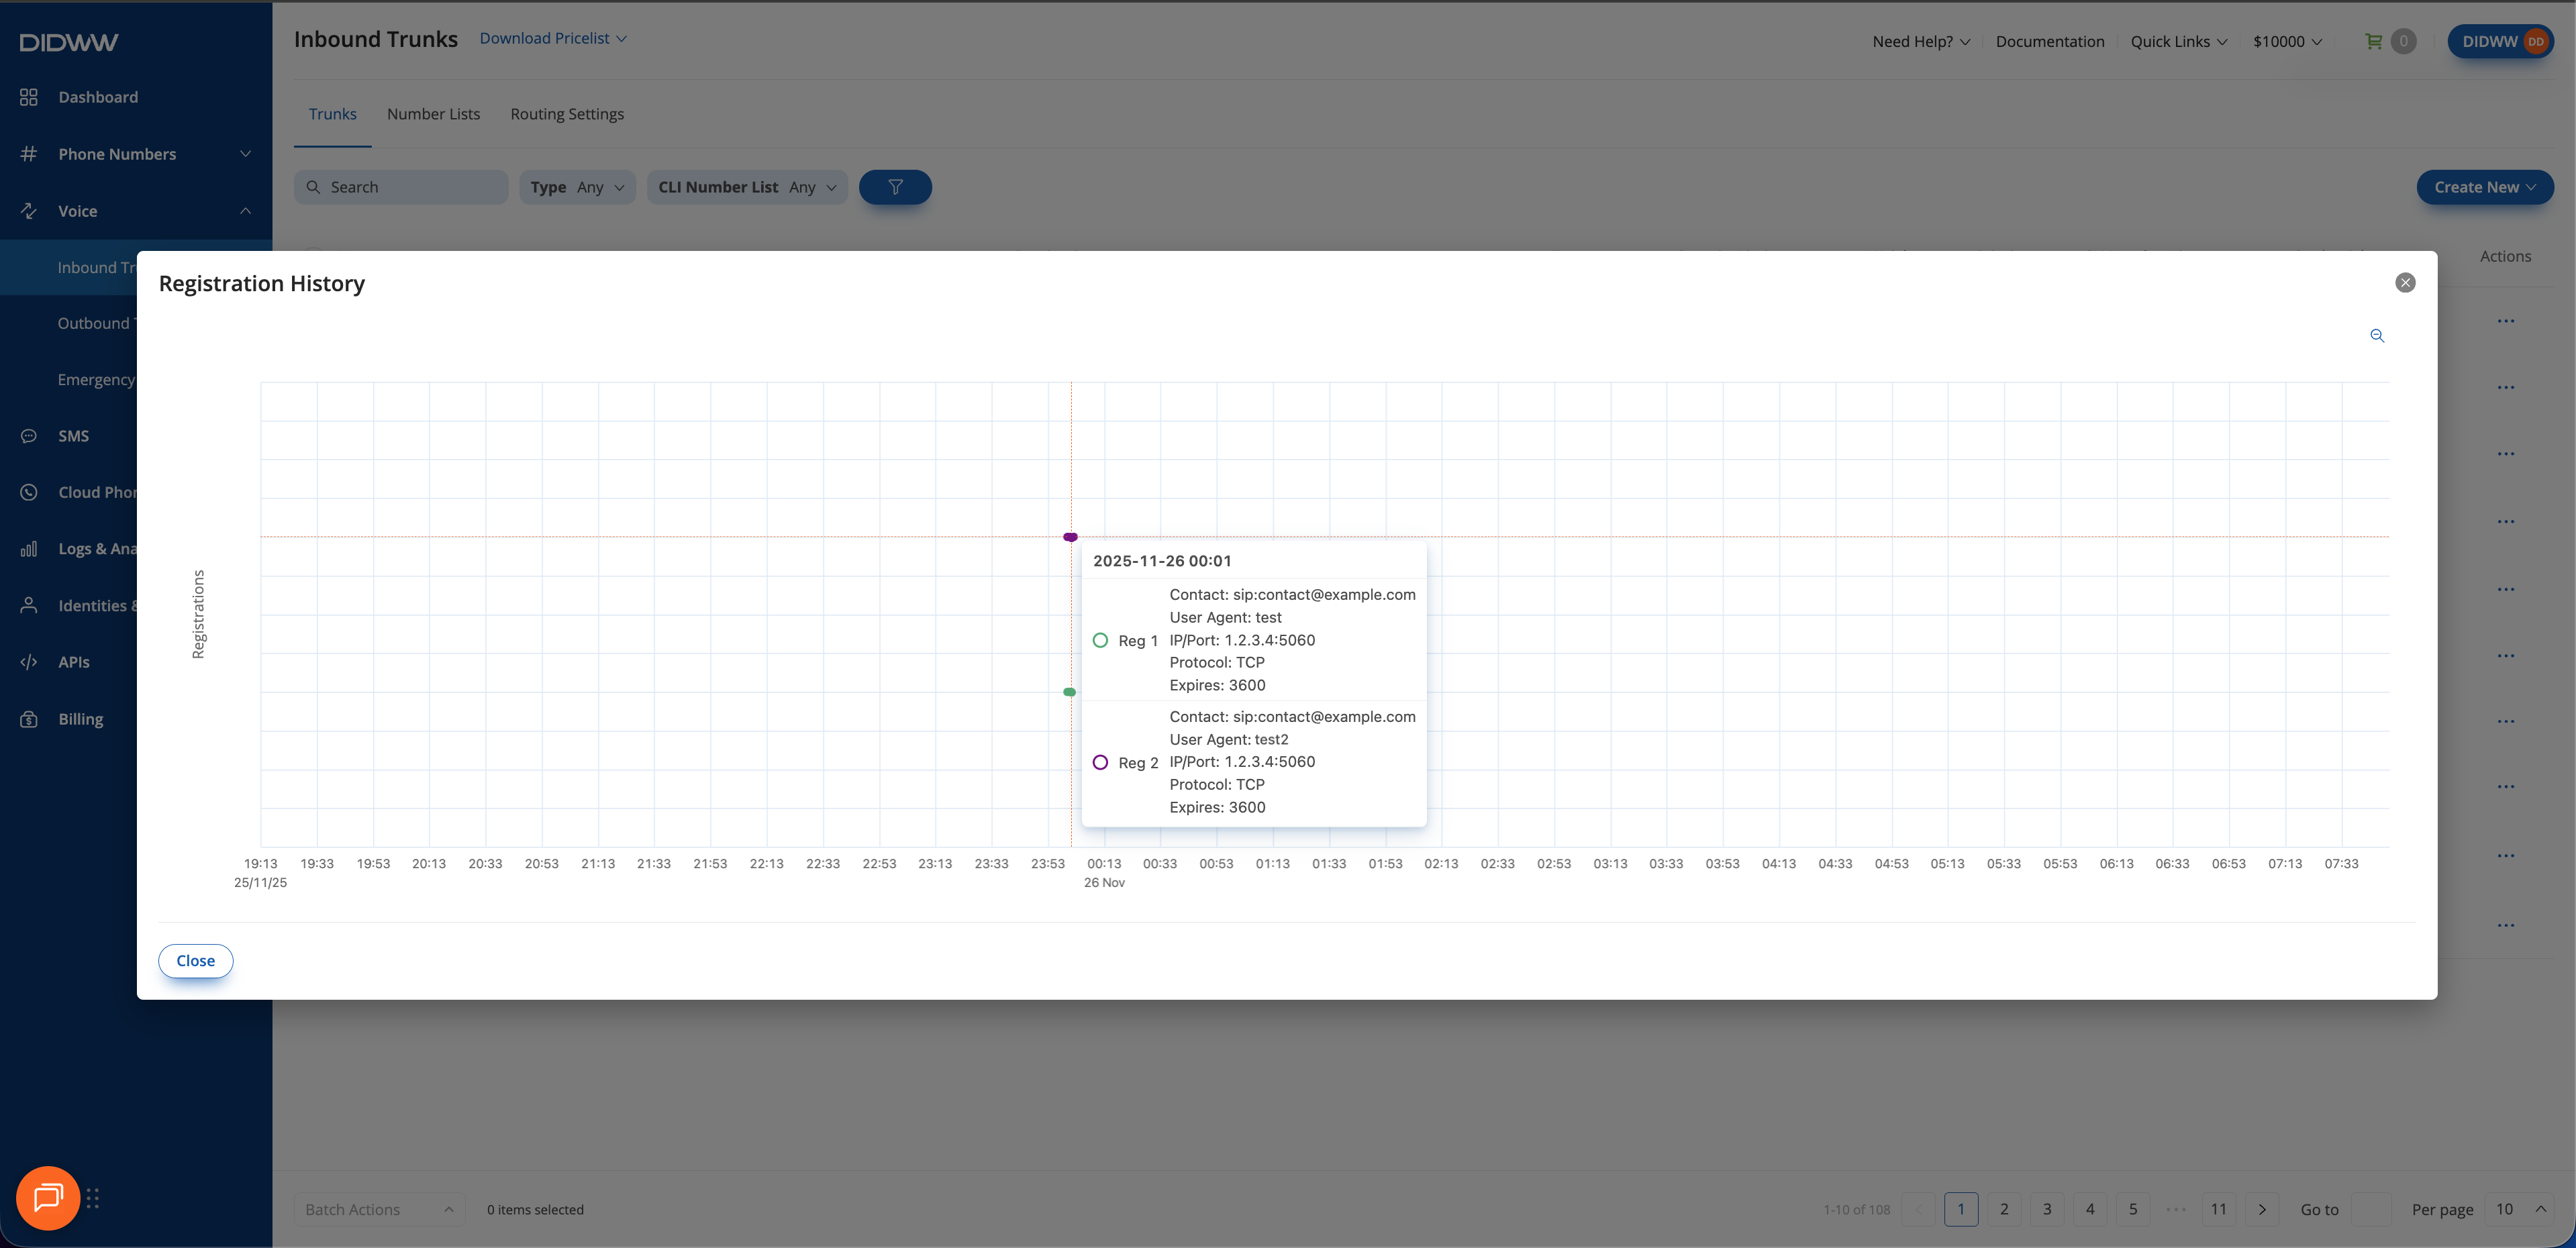
The Registration History is available only for trunks that use SIP Registration. It displays recent successful registration intervals for the selected trunk.

Follow these steps to view the Registration History:

  1. Go to the Voice section in the menu.

  2. Select Inbound Trunks.

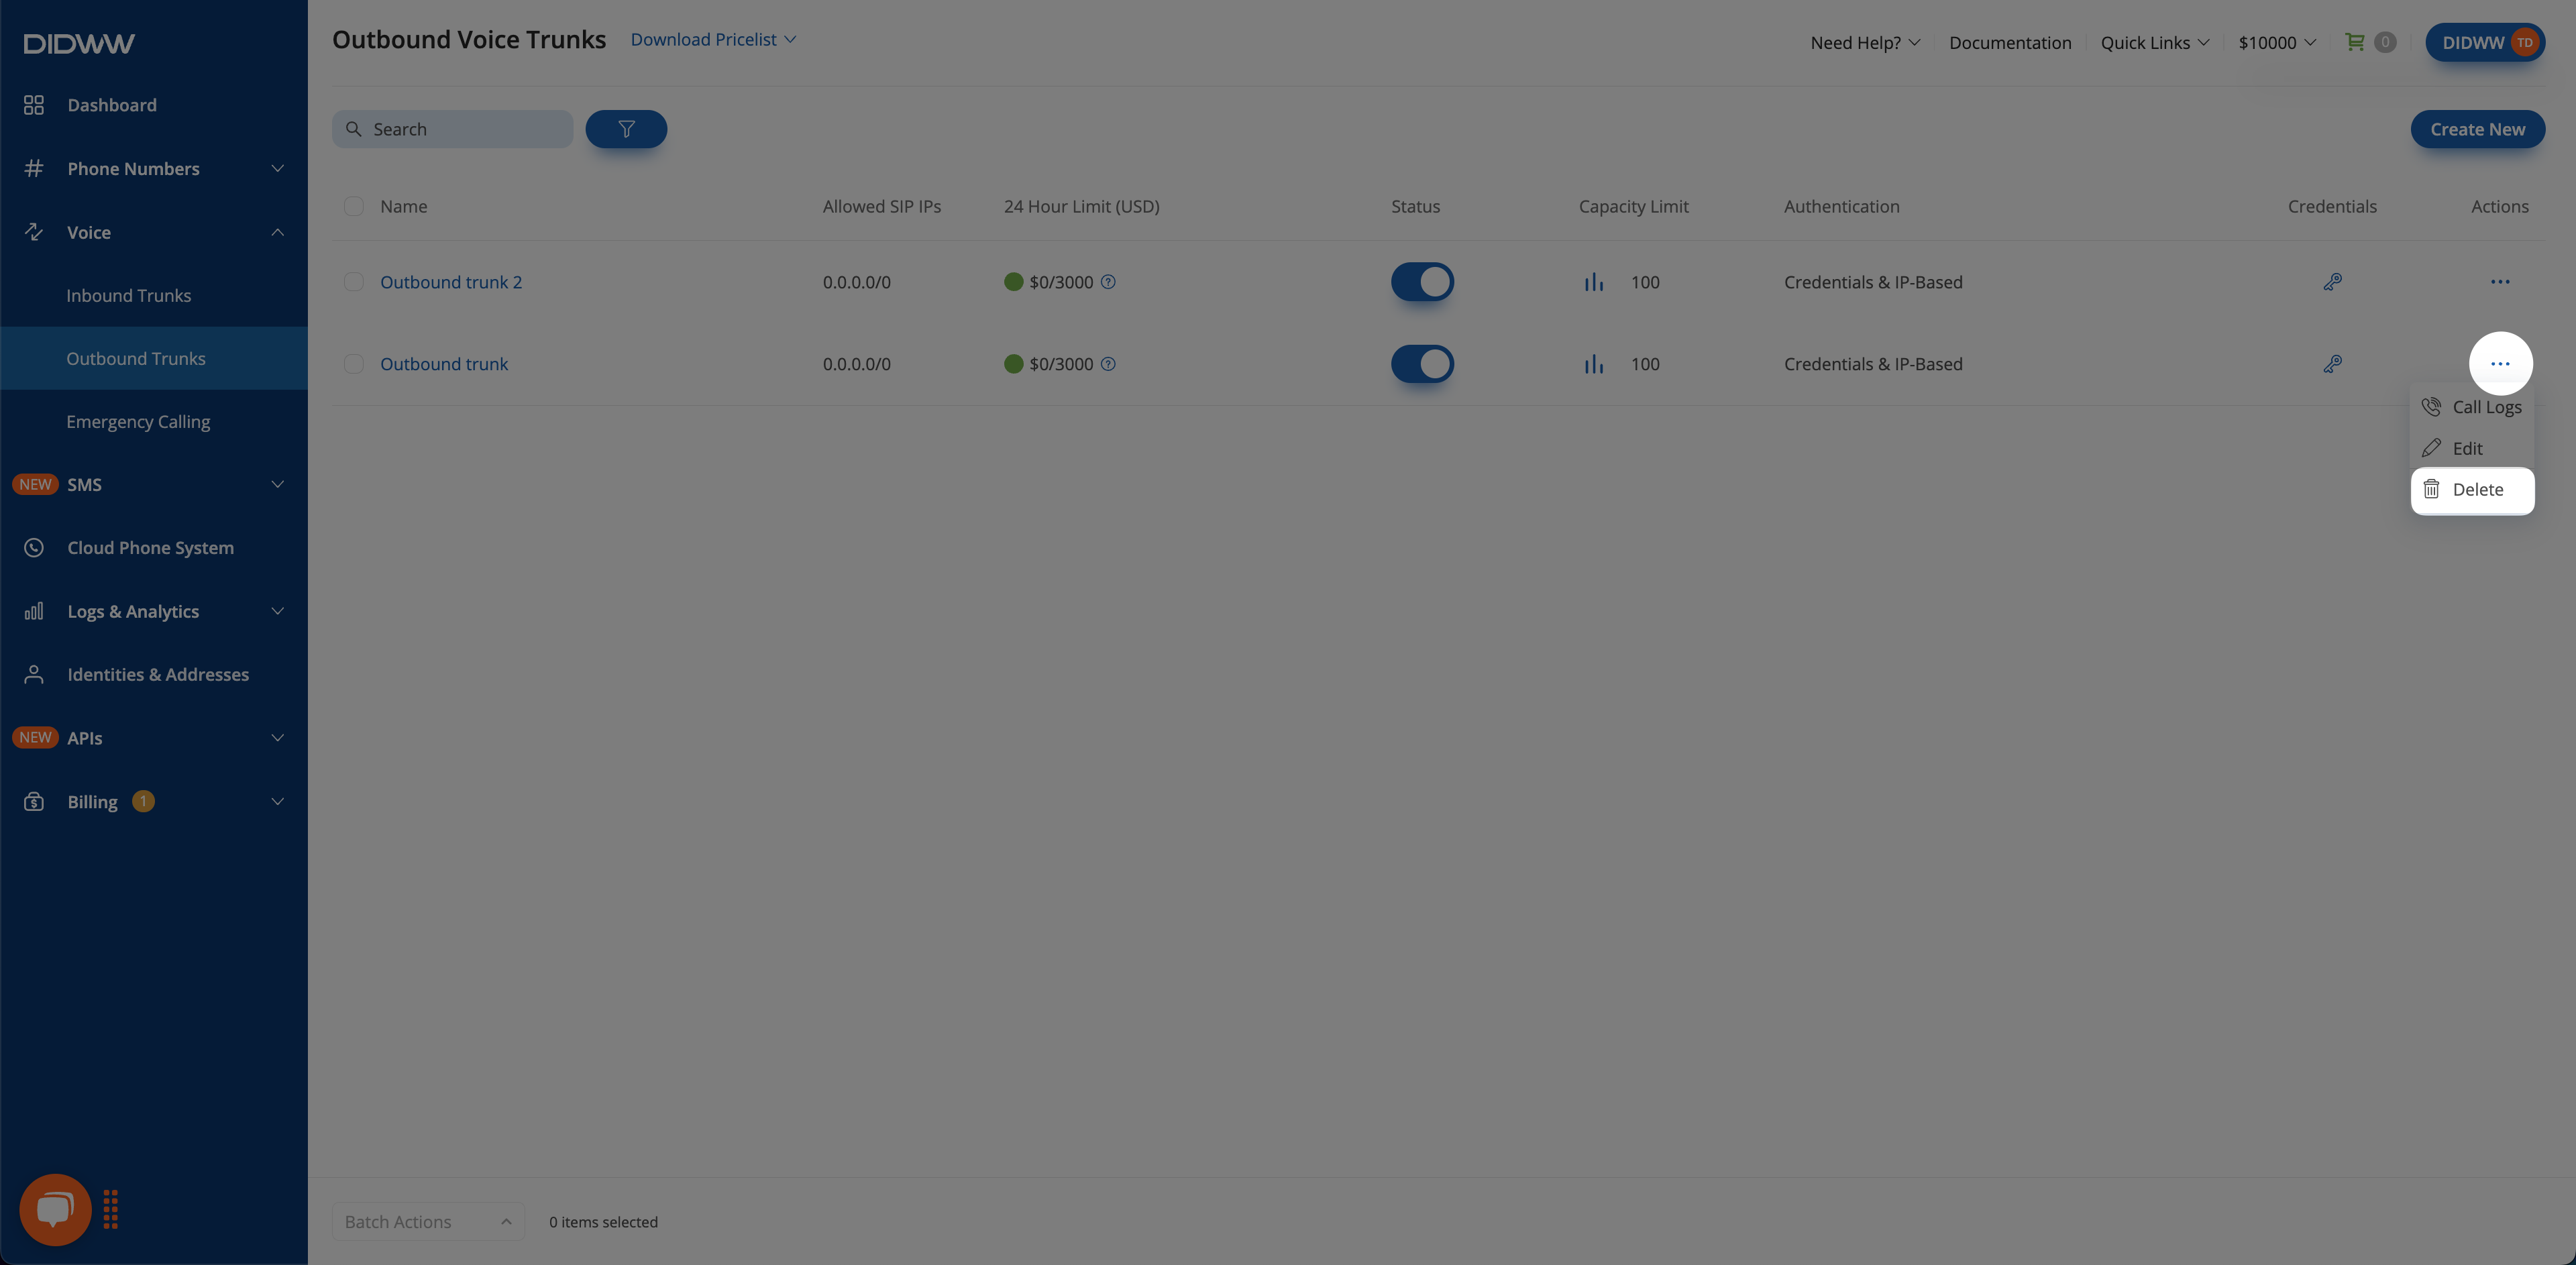
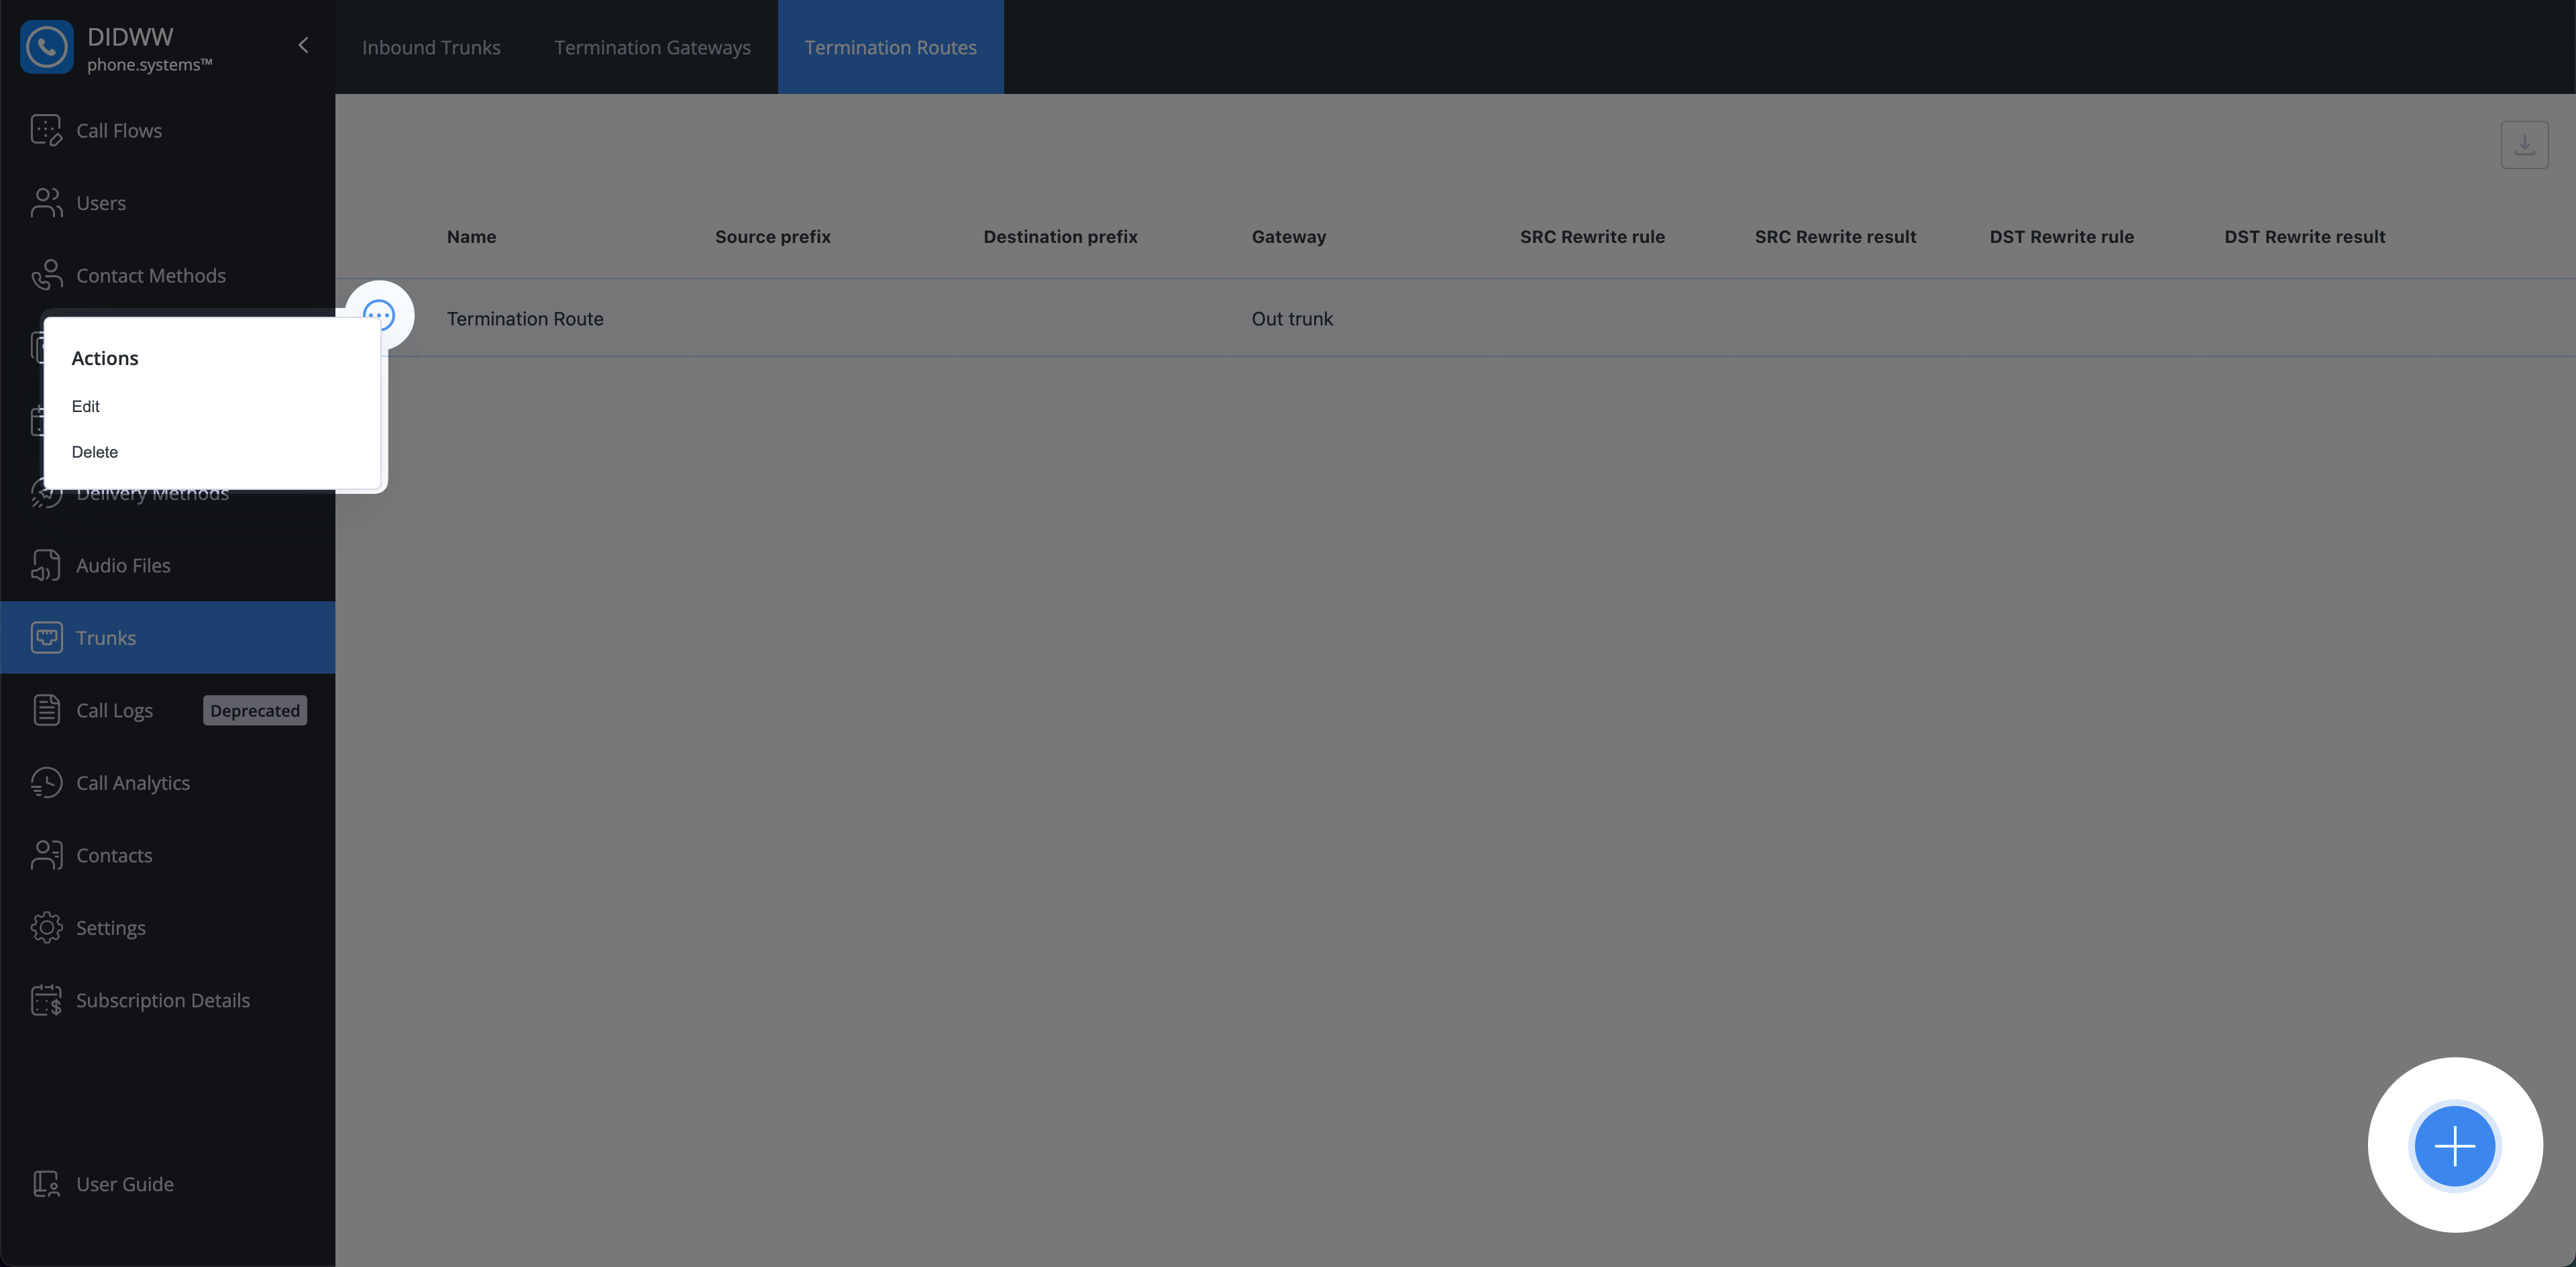
  3. Find the trunk you want to inspect and open the Actions menu.

  4. Click View Registration History.

Opening the Registration History window from the Actions menu.

Fig. 14. Opening the Registration History window.

Registration History Chart

The Registration History chart shows successful registration intervals, indicating when a valid Contact header was active for call routing.

Note

  • The chart shows the times when the trunk was successfully registered and online. Individual SIP REGISTER requests or failed attempts are not displayed.

  • Registration data is available for the last 7 days. If no successful registrations occurred in this period, no data will appear.

  • Registration activity is shown in one-minute intervals.

Hover over any point in the chart to view details about that registration interval, including:

Field

Description

Contact

The Contact address used by your system during registration.

IP/Port

The source IP address and port used for the registration.

Transport Protocol

The transport protocol used for the registration (UDP, TCP, or TLS).

User Agent

The User-Agent string reported by the registering system.

Expires

The registration lifetime (Expires value) provided by your endpoint.

SIP Registration History chart.

Fig. 15. SIP Registration History chart.

You can zoom in to focus on a specific time range. Click and drag across the chart to select the period you want to view.

Zooming and narrowing the Registration History chart.

Fig. 16. Zooming into a selected part of the chart.


Delete SIP Trunk(s)

You can either delete a single SIP trunk or delete multiple SIP trunks by using batch actions.

Note

Trunks assigned to DID numbers or in use cannot be deleted.

Delete a Single SIP Trunk

To delete an existing SIP Trunk, follow these steps:

  1. Navigate to the Voice section in the left-hand menu.

  2. Select Inbound Trunks from the submenu.

  3. Locate the SIP trunk that you want to delete and click the actions button.

  4. Click Delete.

Actions Button.

Fig. 17. Actions Button.

  1. In the pop-up Delete Trunk(s) window click Delete to confirm the Trunk deletion.

Delete a Single Trunk.

Fig. 18. Delete a Single Trunk.

Delete Multiple SIP Trunks

To delete multiple existing SIP Trunks, follow these steps:

  1. Navigate to the Voice section in the left-hand menu.

  2. Select Inbound Trunks from the submenu.

  3. Locate the SIP trunk that you want to delete and check them.

  4. Click on the Batch Actions button and click Delete.

Batch Actions Button.

Fig. 19. Batch Actions Button.

  1. In the pop-up Delete Trunk(s) window click Delete to confirm the Trunk deletion.

Delete Multiple Trunks

Fig. 20. Delete Multiple Trunks.


Additional Information

General SIP Information

Learn more about DIDWW inbound signaling, RTP IPs, supported codecs, DTMF transport methods, and encryption.

General SIP Information
Assign Trunks to DID Numbers

Learn how to configure DID numbers with trunks and trunk groups for routing inbound calls.

Assign Voice Trunk
Create a Trunk Group

Discover how to create and configure a trunk group for failover and load balancing.

Trunk Groups
STIR/SHAKEN

Understand STIR/SHAKEN, how it works, and the available handling modes for the Voice IN service.

STIR/SHAKEN
CPC Usage

Explore the Calling Party Category (CPC), its functionality, and usage examples in SIP URIs.

CPC Usage