Vapi#
Use Vapi assistants with DIDWW SIP Trunking to handle inbound and outbound calling over standard phone lines. Connect your DIDWW SIP trunks with Vapi to route incoming calls to assistants, place outbound calls through DIDWW trunks, and manage voice conversations using your existing DIDWW phone numbers.
Route incoming calls from DIDWW numbers to Vapi assistants.
Connect callers to AI assistants for real-time conversations.
Import existing DIDWW numbers into Vapi.
Place outbound calls through DIDWW Outbound Trunks.
Transfer active calls to external phone numbers through DIDWW.
Assign Vapi assistants to individual DIDWW phone numbers.
1. Route Incoming Calls to Vapi#
Configure an Inbound SIP Trunk in the DIDWW User Panel to send incoming calls from your DIDWW numbers to Vapi. This trunk defines the SIP path that delivers calls to your Vapi assistant and can be configured to support SIP REFER call transfers.
Before You Begin#
At least one active DID number with capacity to receive incoming calls is required. Buy Numbers .
Step 1: Create New SIP Trunk#
In the DIDWW User Panel , go to Voice > Inbound Trunks.
Click Create New > SIP Trunk.
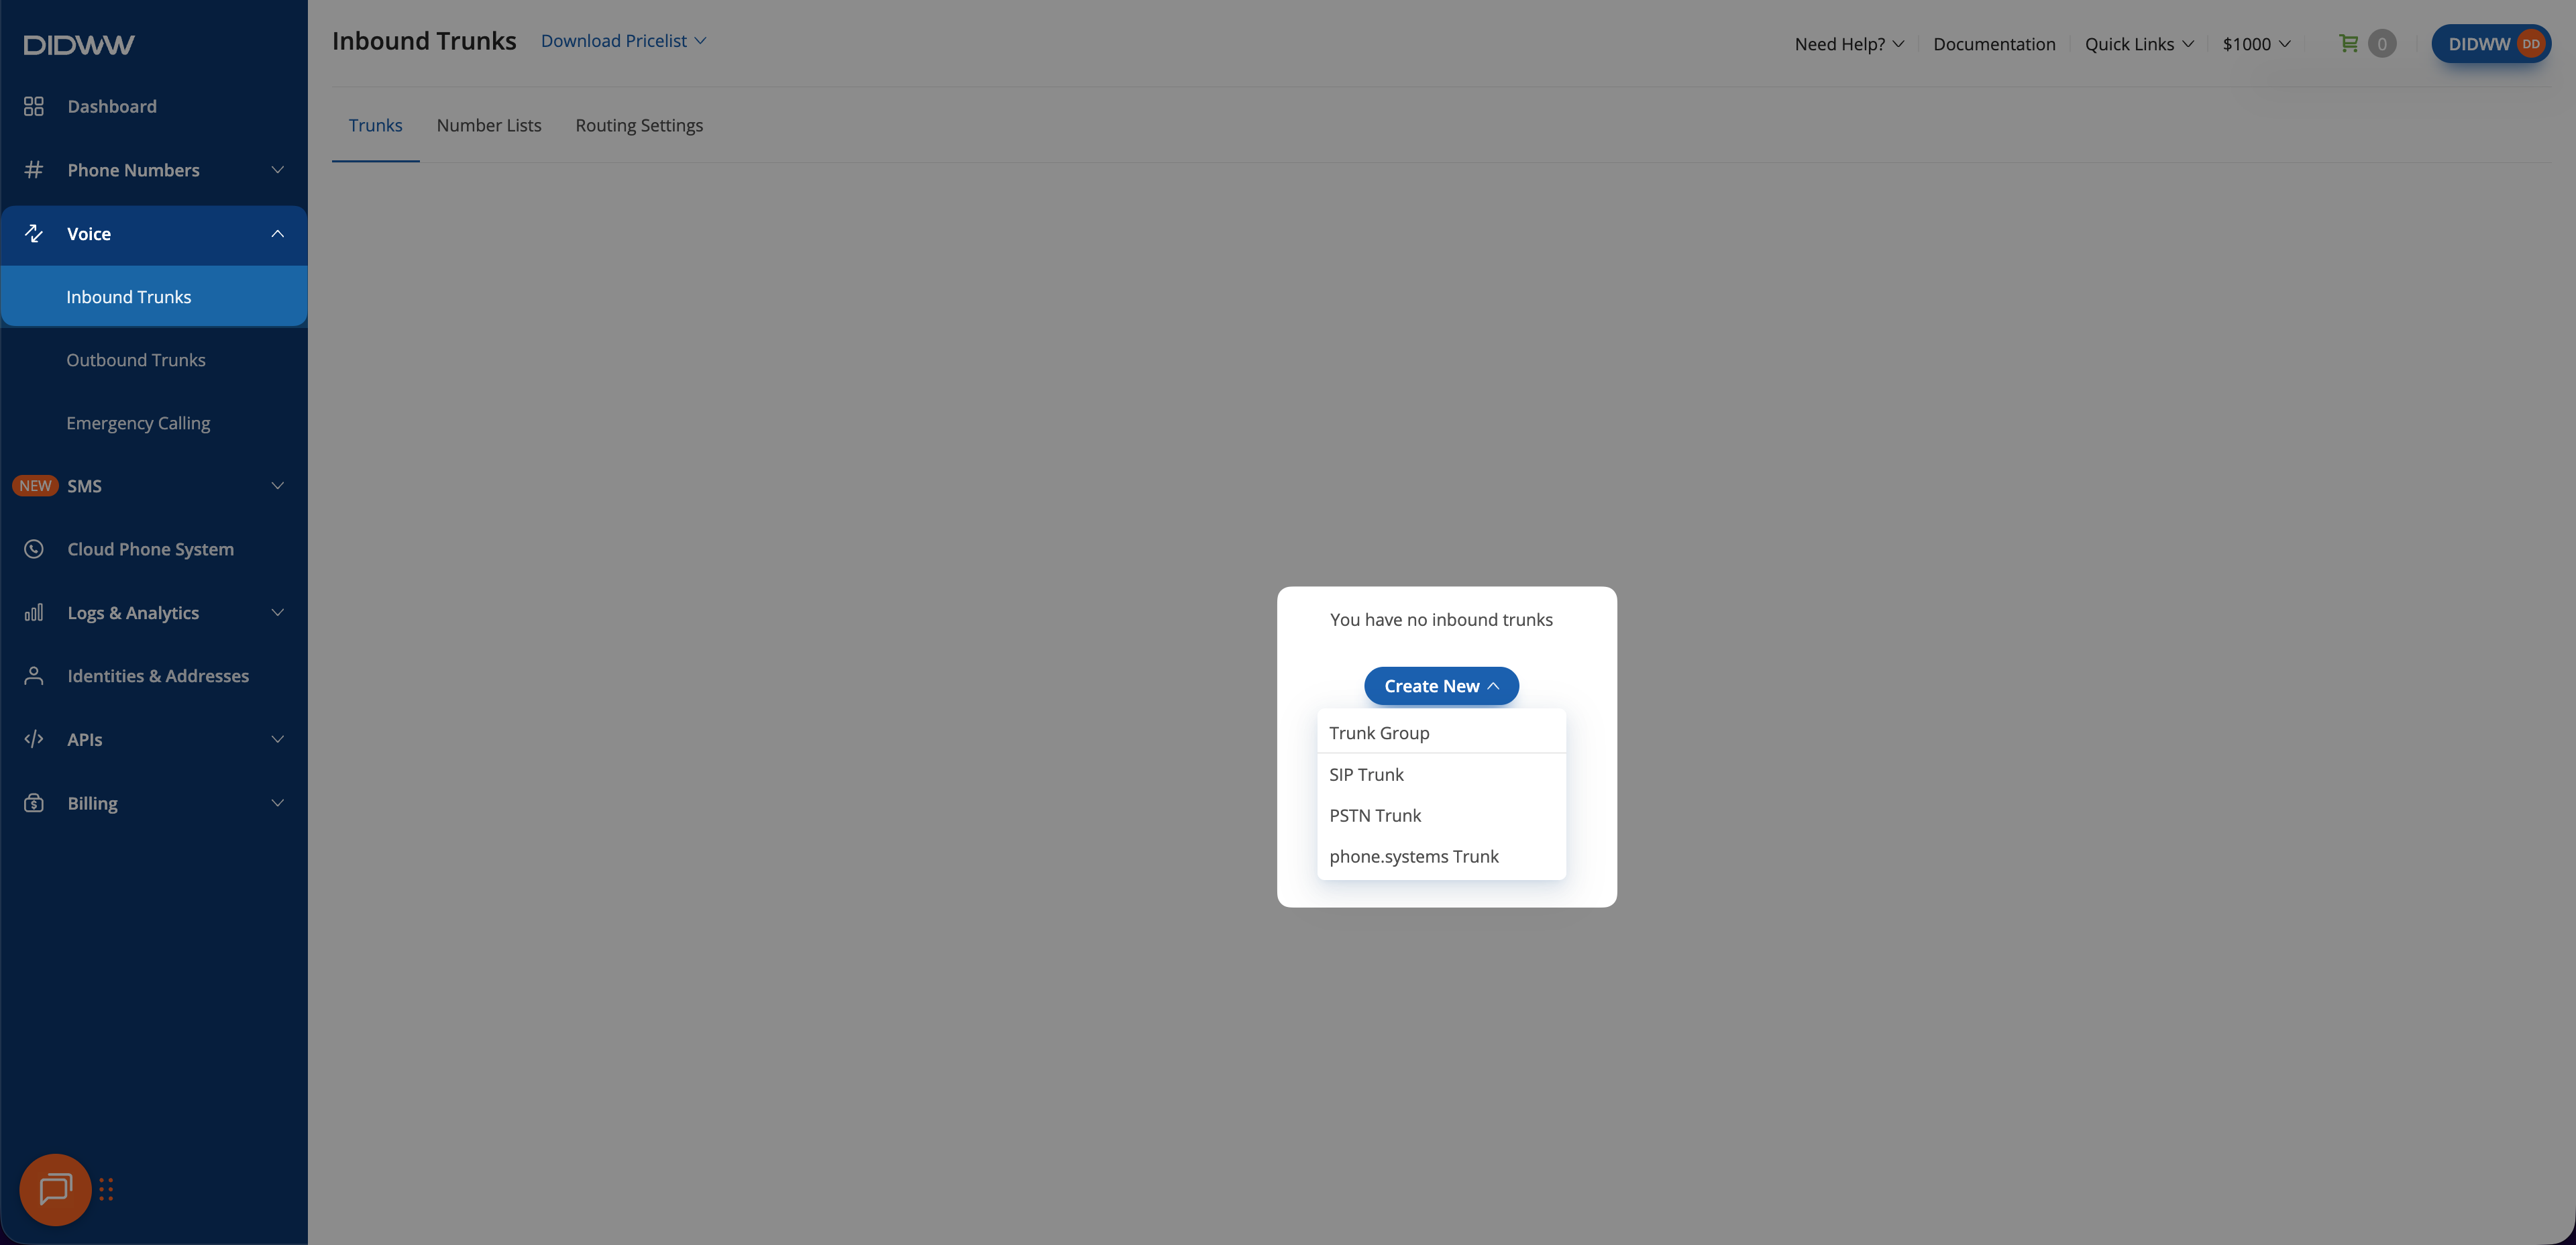
Fig. 1. Creating a new inbound SIP trunk#
Step 2: Configure General SIP Trunk Settings#
In the Create Inbound SIP Trunk form, enter the main requirements to route calls to Vapi.
In the General tab, enter a descriptive Name for the trunk (e.g.,
Vapi).Select Static Endpoint.
Enter the Host value
sip.vapi.ai.Select the Transport used by Vapi: UDP, TCP, or TLS.
Enter the corresponding Port:
5060for UDP or TCP, or5061for TLS.Set Network Protocol to match the IP version used by your DIDWW outbound trunk. If you allowed IPv4 addresses in the outbound trunk, use Prefer IPv4 over IPv6 or IPv4 only.
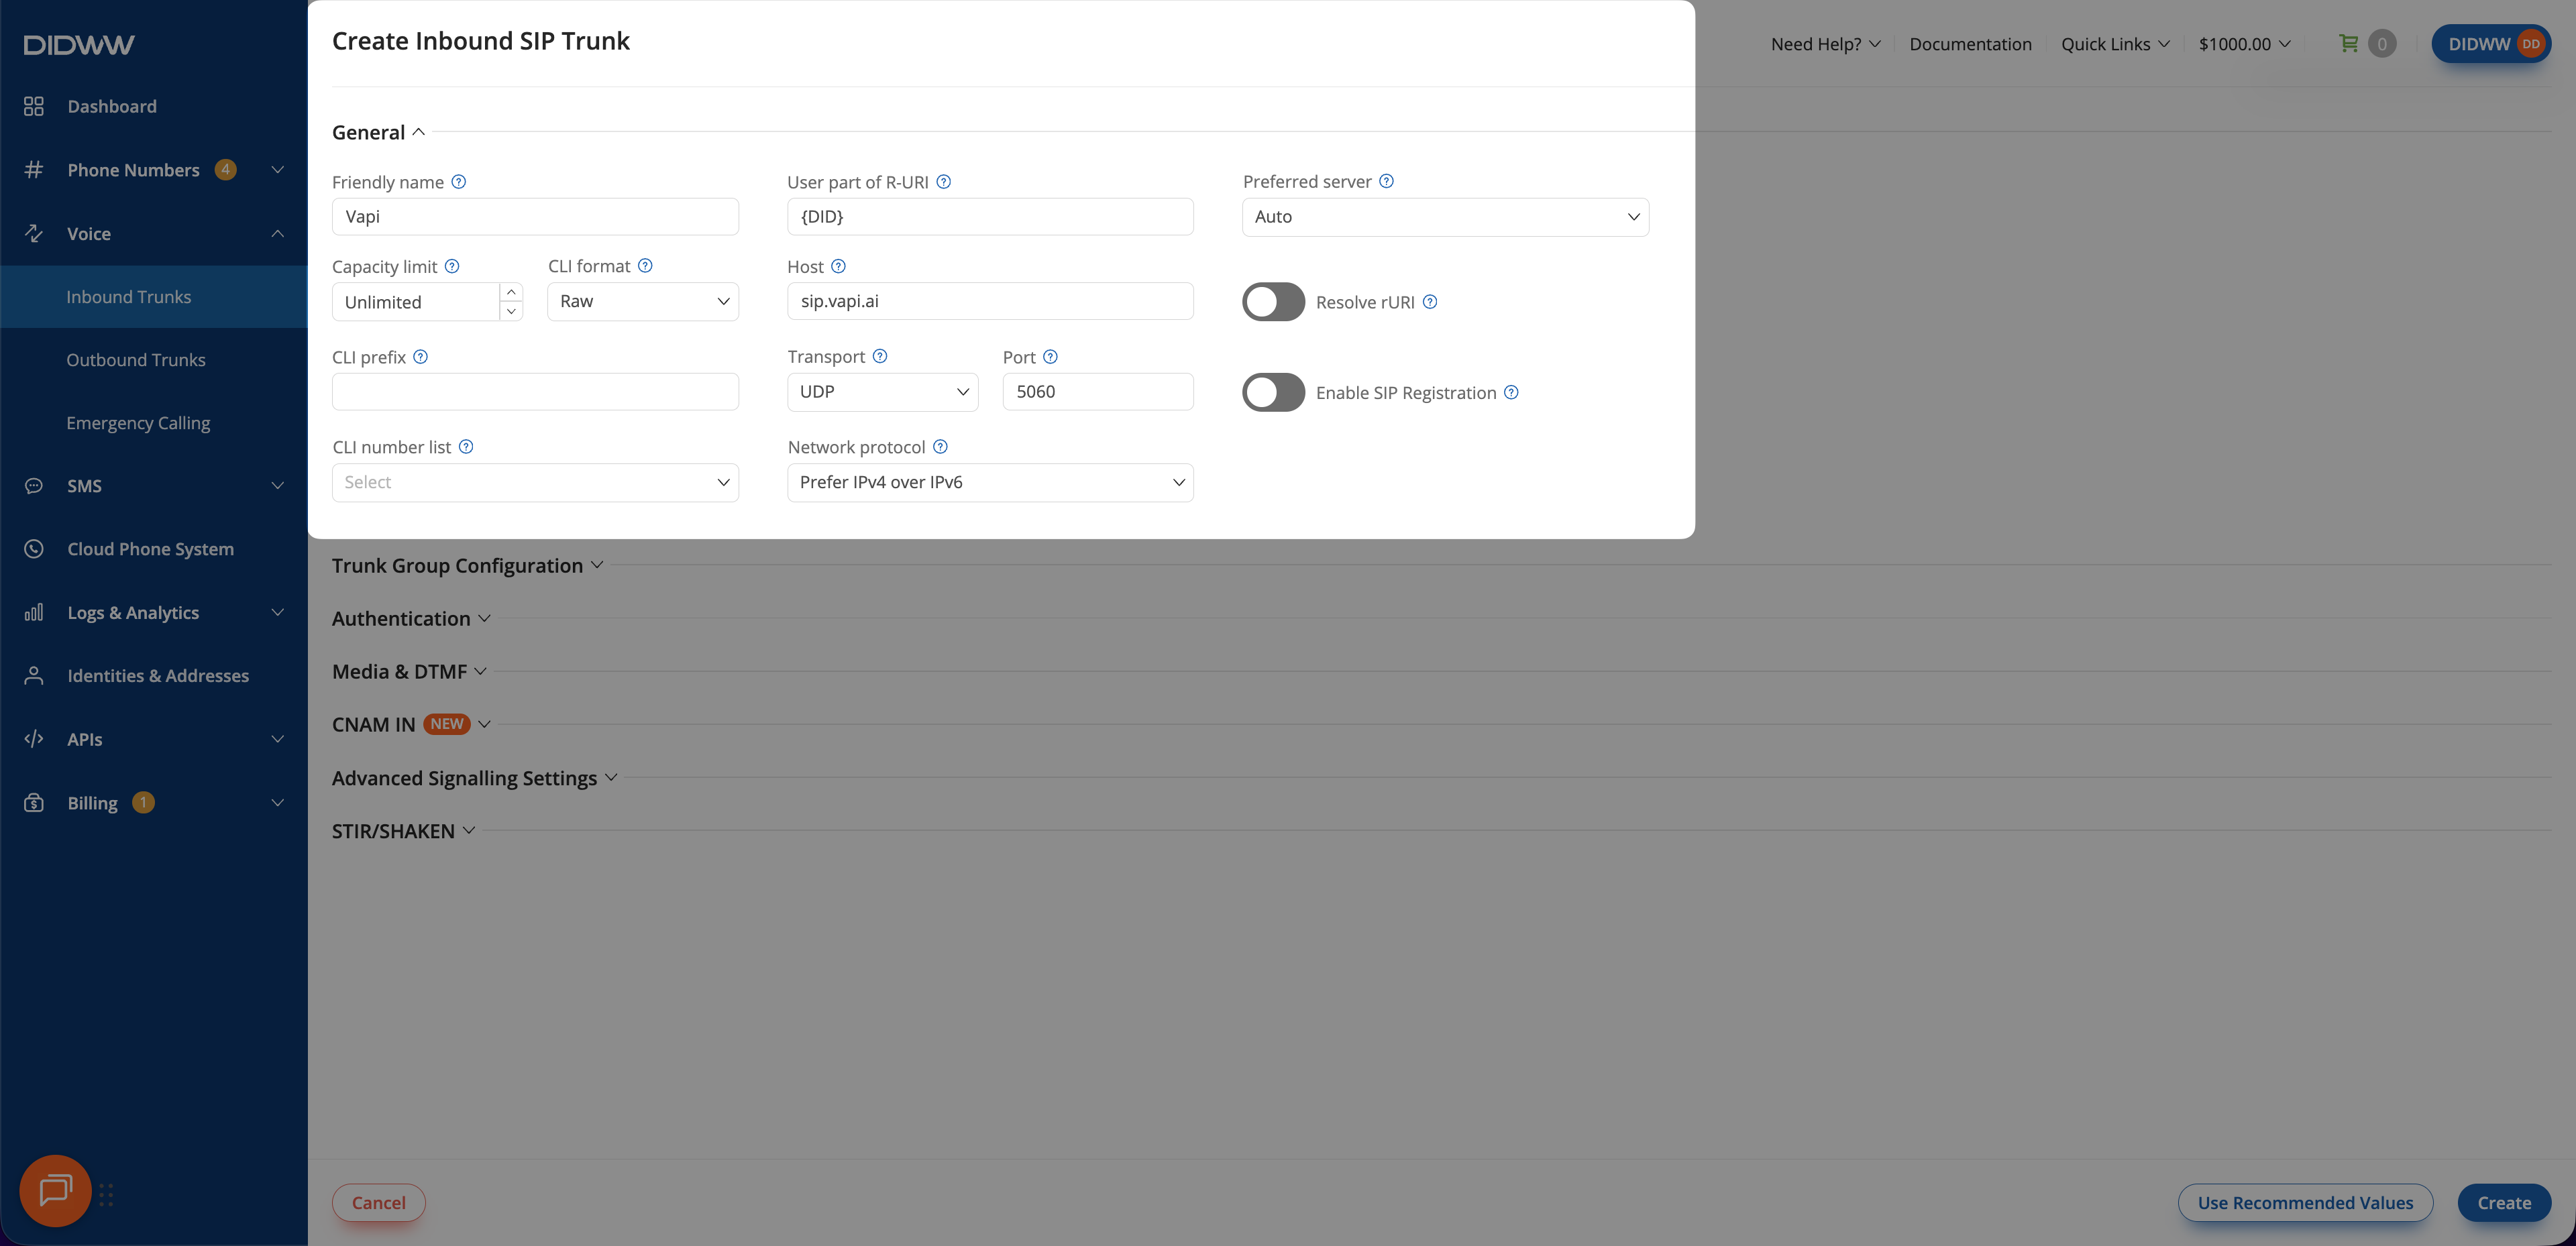
Fig. 2. SIP trunk configured for Vapi#
Step 3: Enable Call Transfer Signaling#
To support call transfers, configure the inbound trunk to allow in-dialog SIP REFER requests.
Open the Signalling tab.
Set Max transfers value to
1or higher.
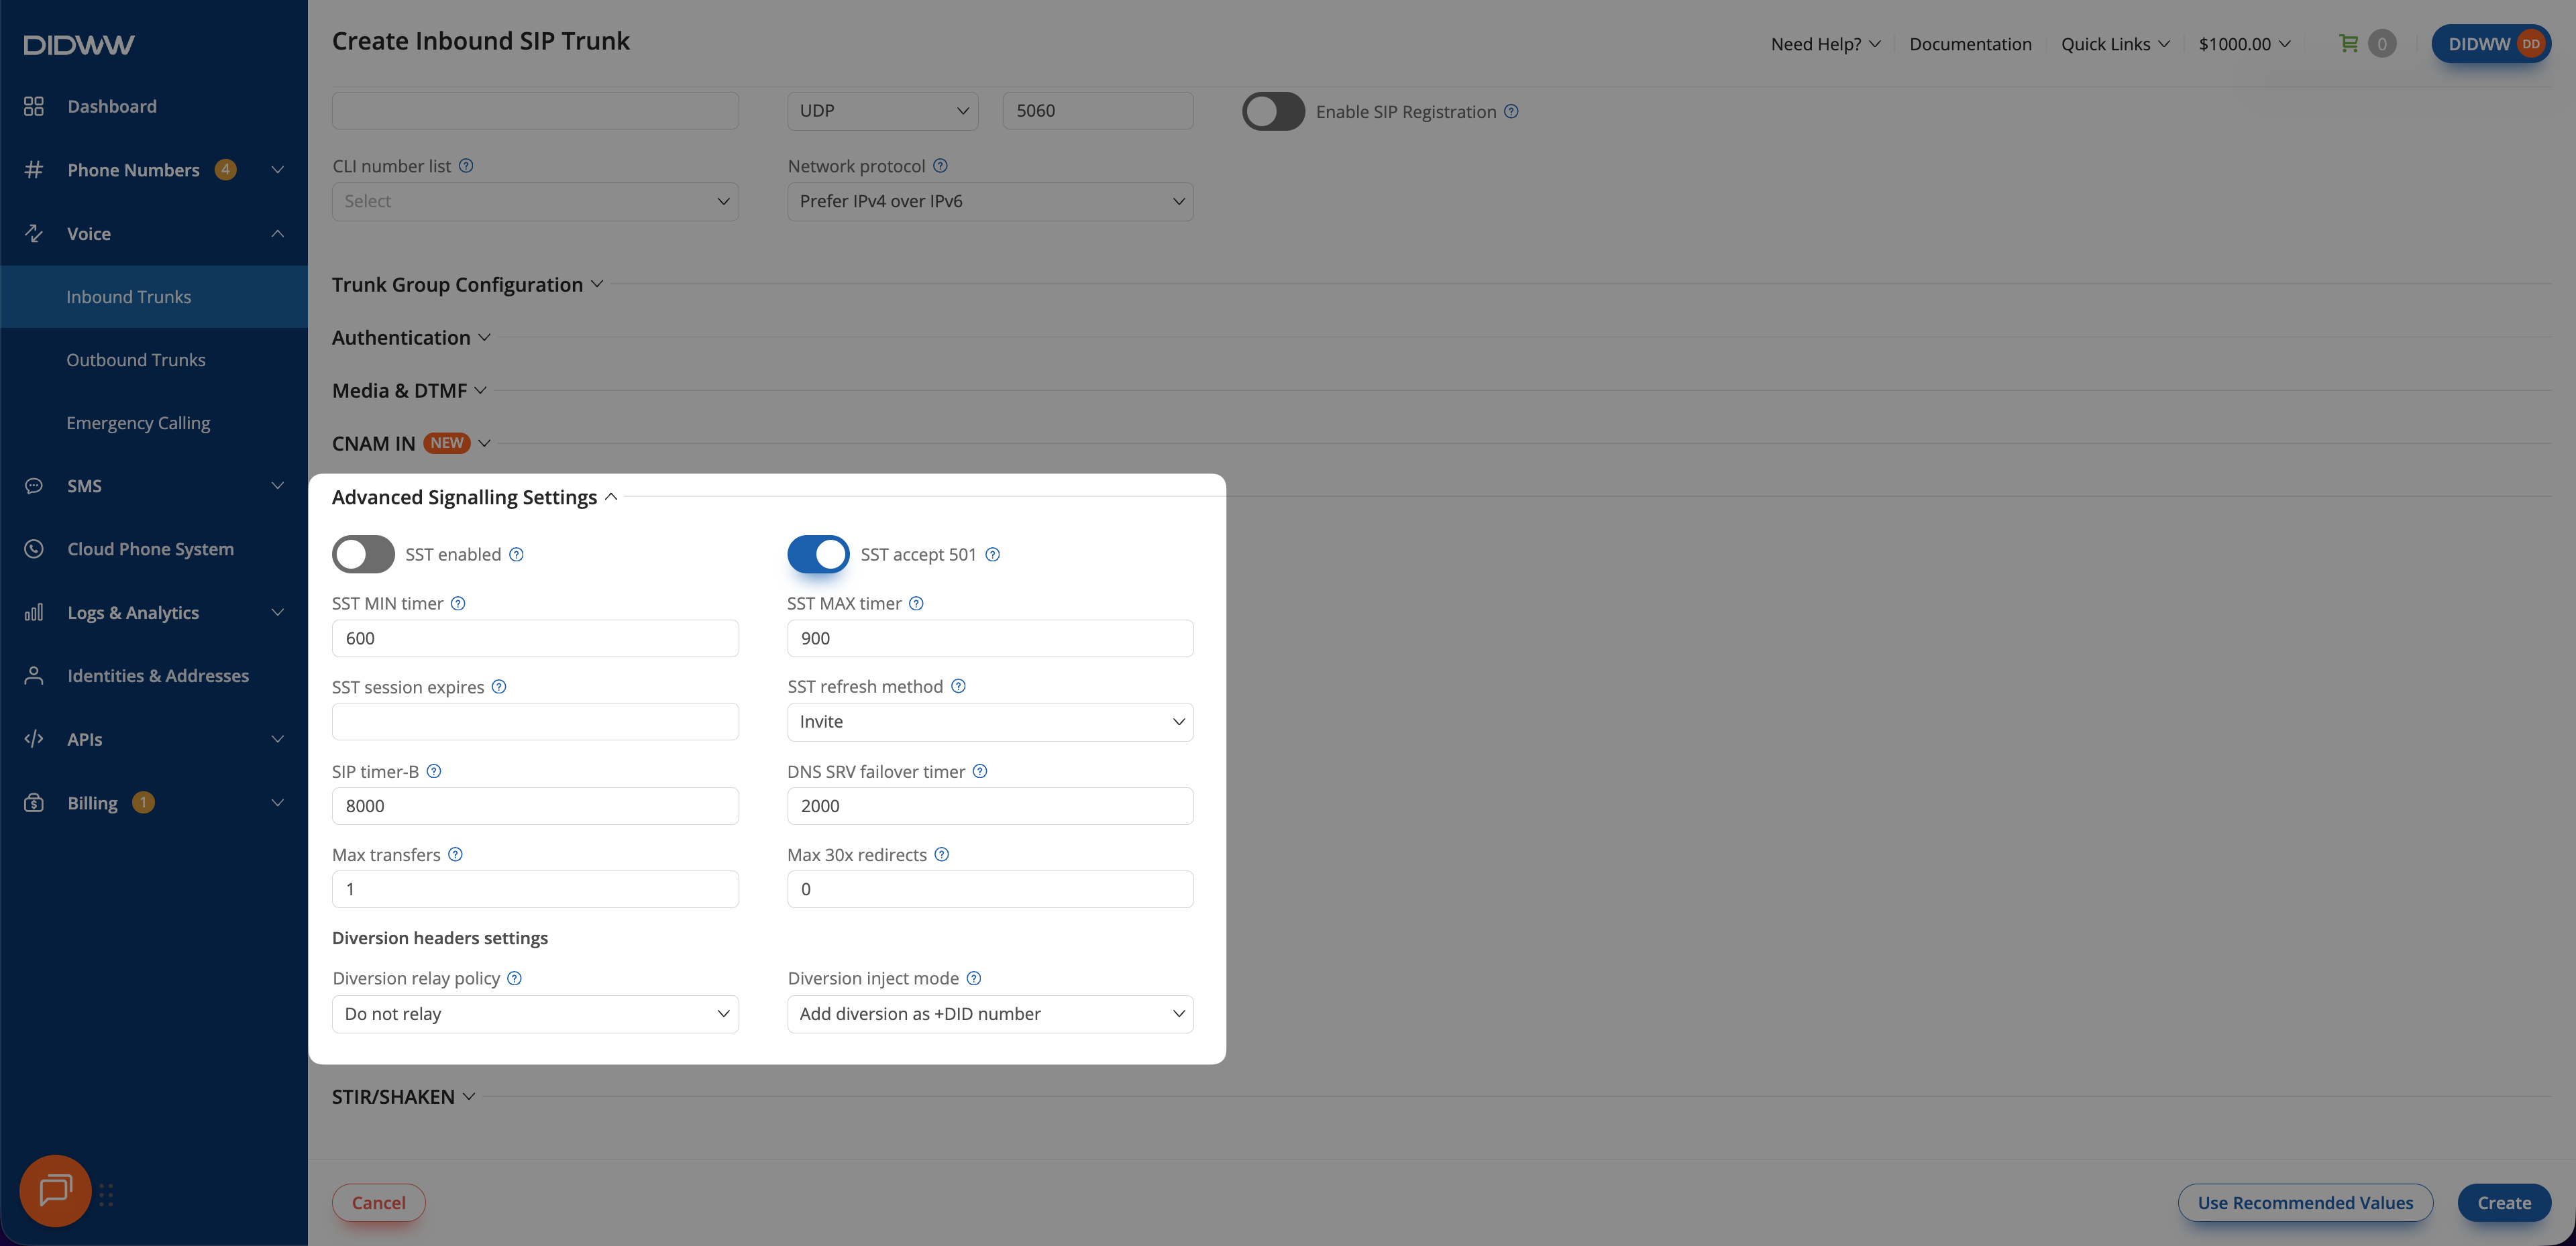
Fig. 3. Enable Call Transfer Signaling#
Step 4: Save the Inbound SIP Trunk#
When all required fields in the Create Inbound SIP Trunk are filled, click Create to save your inbound SIP trunk.
Note
For advanced SIP trunk configuration, see Advanced Inbound SIP Trunk documentation.
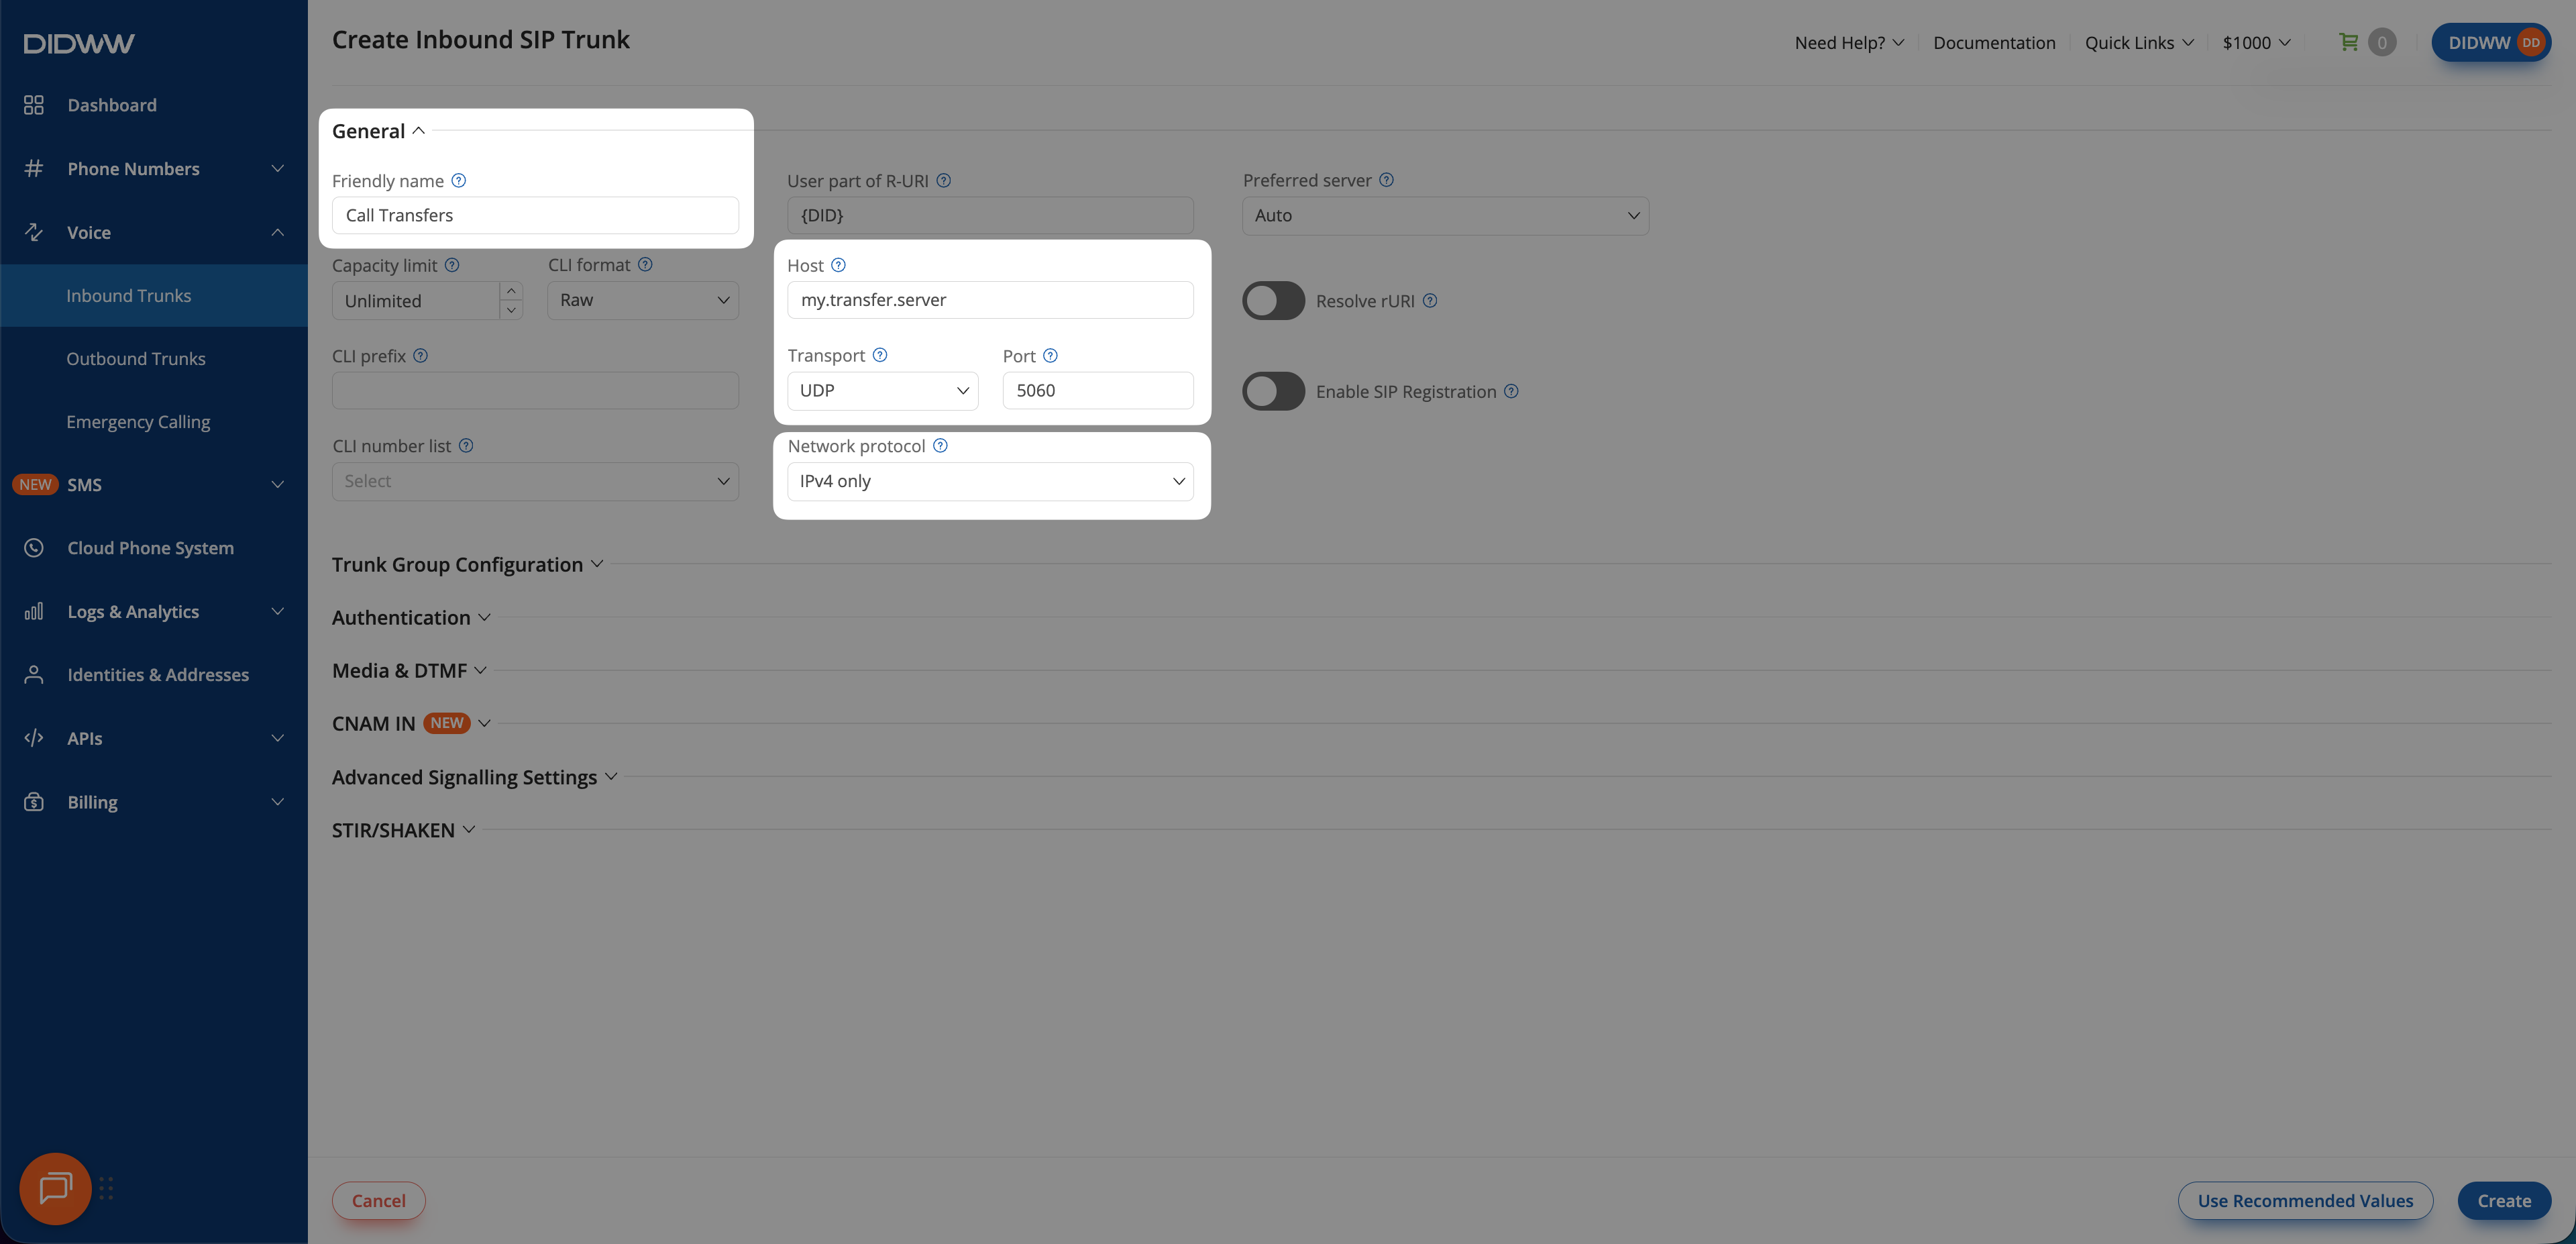
Fig. 4. Create the Inbound SIP Trunk#
Step 5: Assign Inbound SIP Trunk to Your DID Numbers#
After creating the Inbound SIP Trunk for Vapi, assign it to the DID number(s) that will deliver incoming calls to your Vapi assistant.
In the DIDWW User Panel, go to Phone Numbers > My Numbers.
Select the DID number(s) you want to assign to the inbound SIP trunk.
At the bottom of the page, click Batch Actions > Update Trunks.
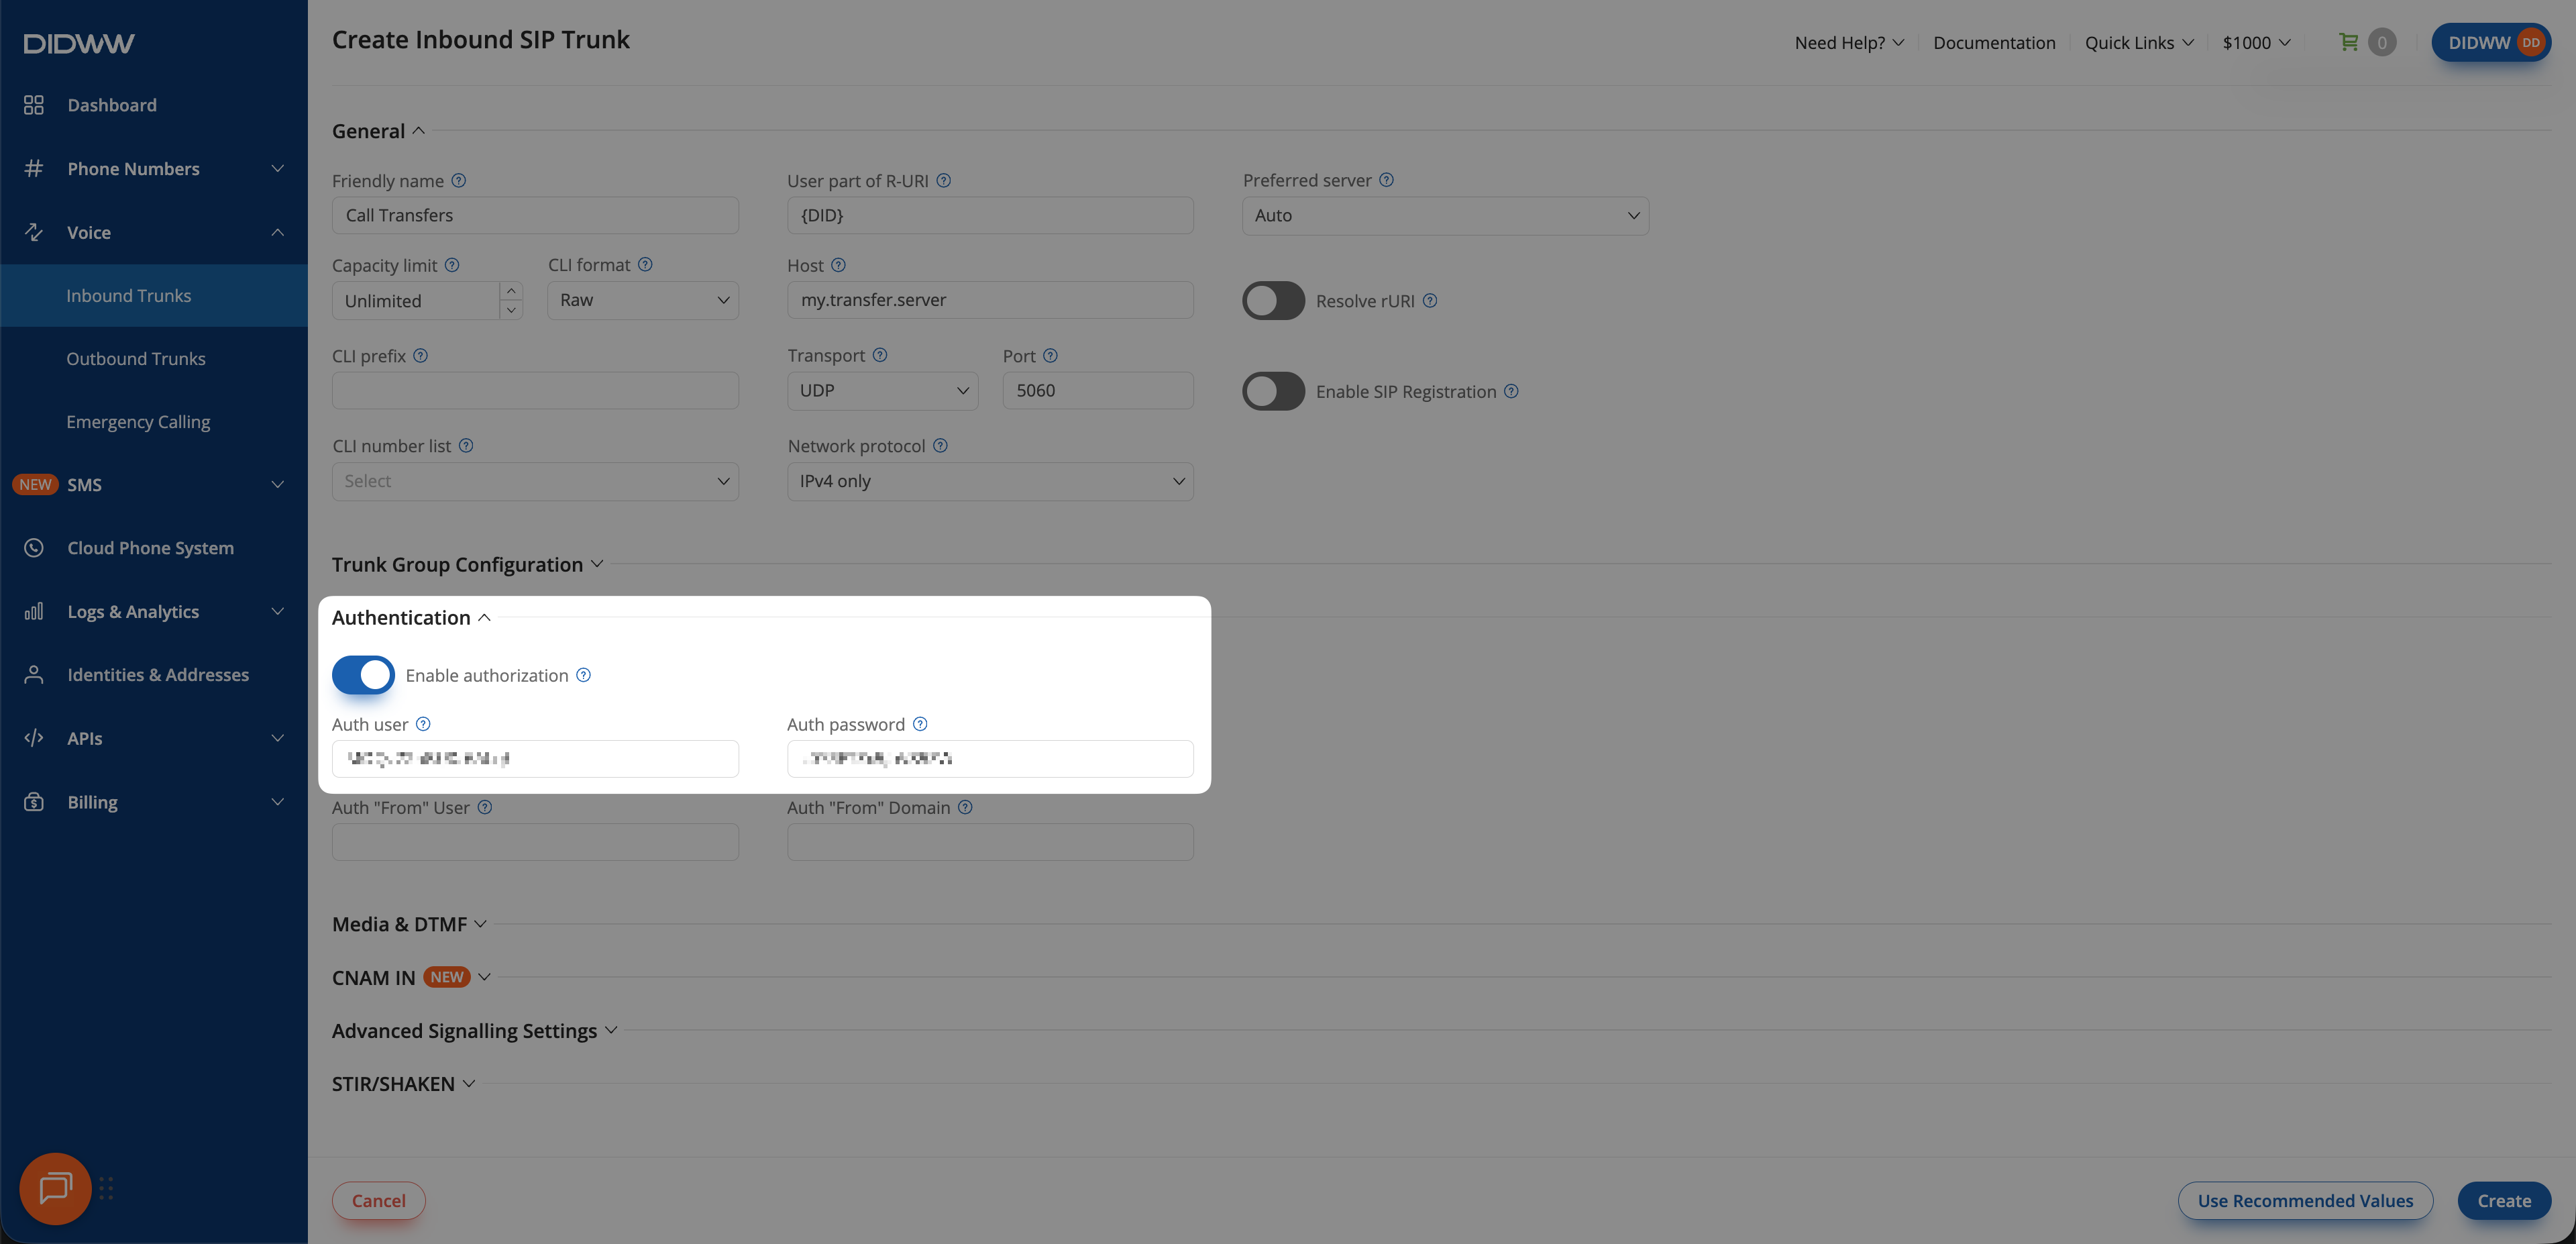
Fig. 5. Selecting Update Trunks from the Batch Actions menu#
From the dropdown menu, choose the Vapi SIP trunk you created earlier.
Click Confirm to apply the changes.
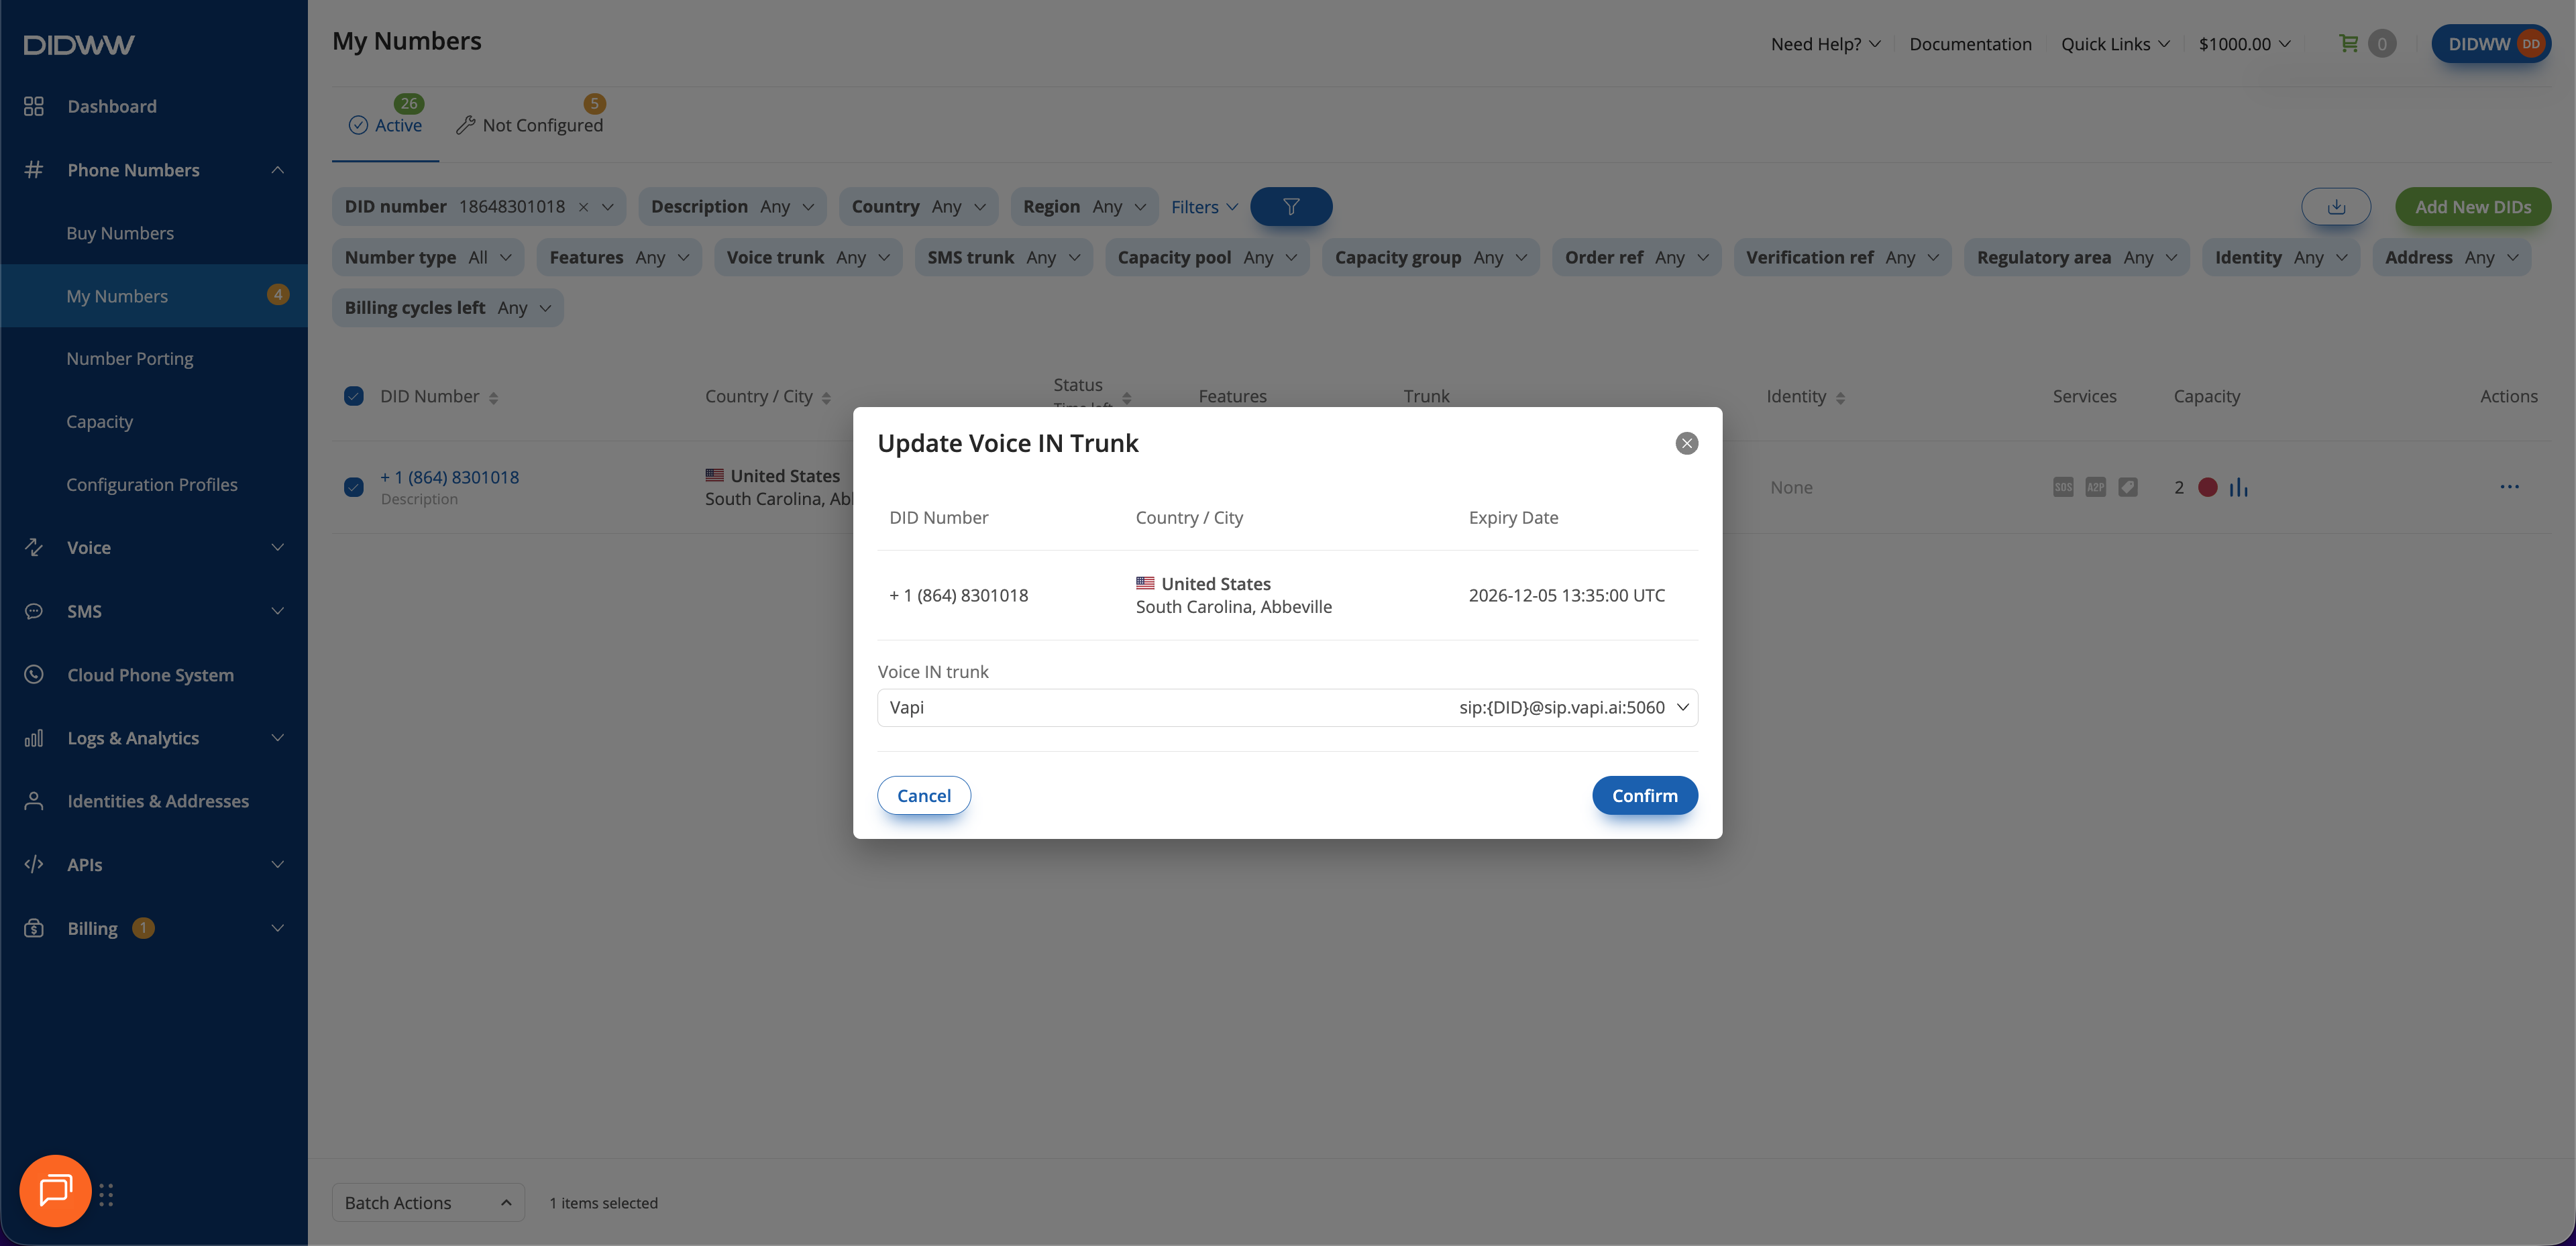
Fig. 6. Assigning the Vapi SIP trunk to the selected DID(s)#
2. Enable Outbound Calling from Vapi Through DIDWW#
Configure an Outbound SIP Trunk in the DIDWW User Panel to allow Vapi assistants to place outbound calls through DIDWW. This trunk also provides the SIP credentials required for authenticated SIP REFER call transfers to external phone numbers.
Before You Begin#
An active DIDWW account is required. Sign in to DIDWW or Create DIDWW account .
Access to DIDWW Outbound Trunks is required for making outbound calls. See Get Access to DIDWW Outbound Termination.
Step 1: Create New Outbound Voice Trunk#
In the DIDWW User Panel , go to Voice > Outbound Trunks.
Click Create New.
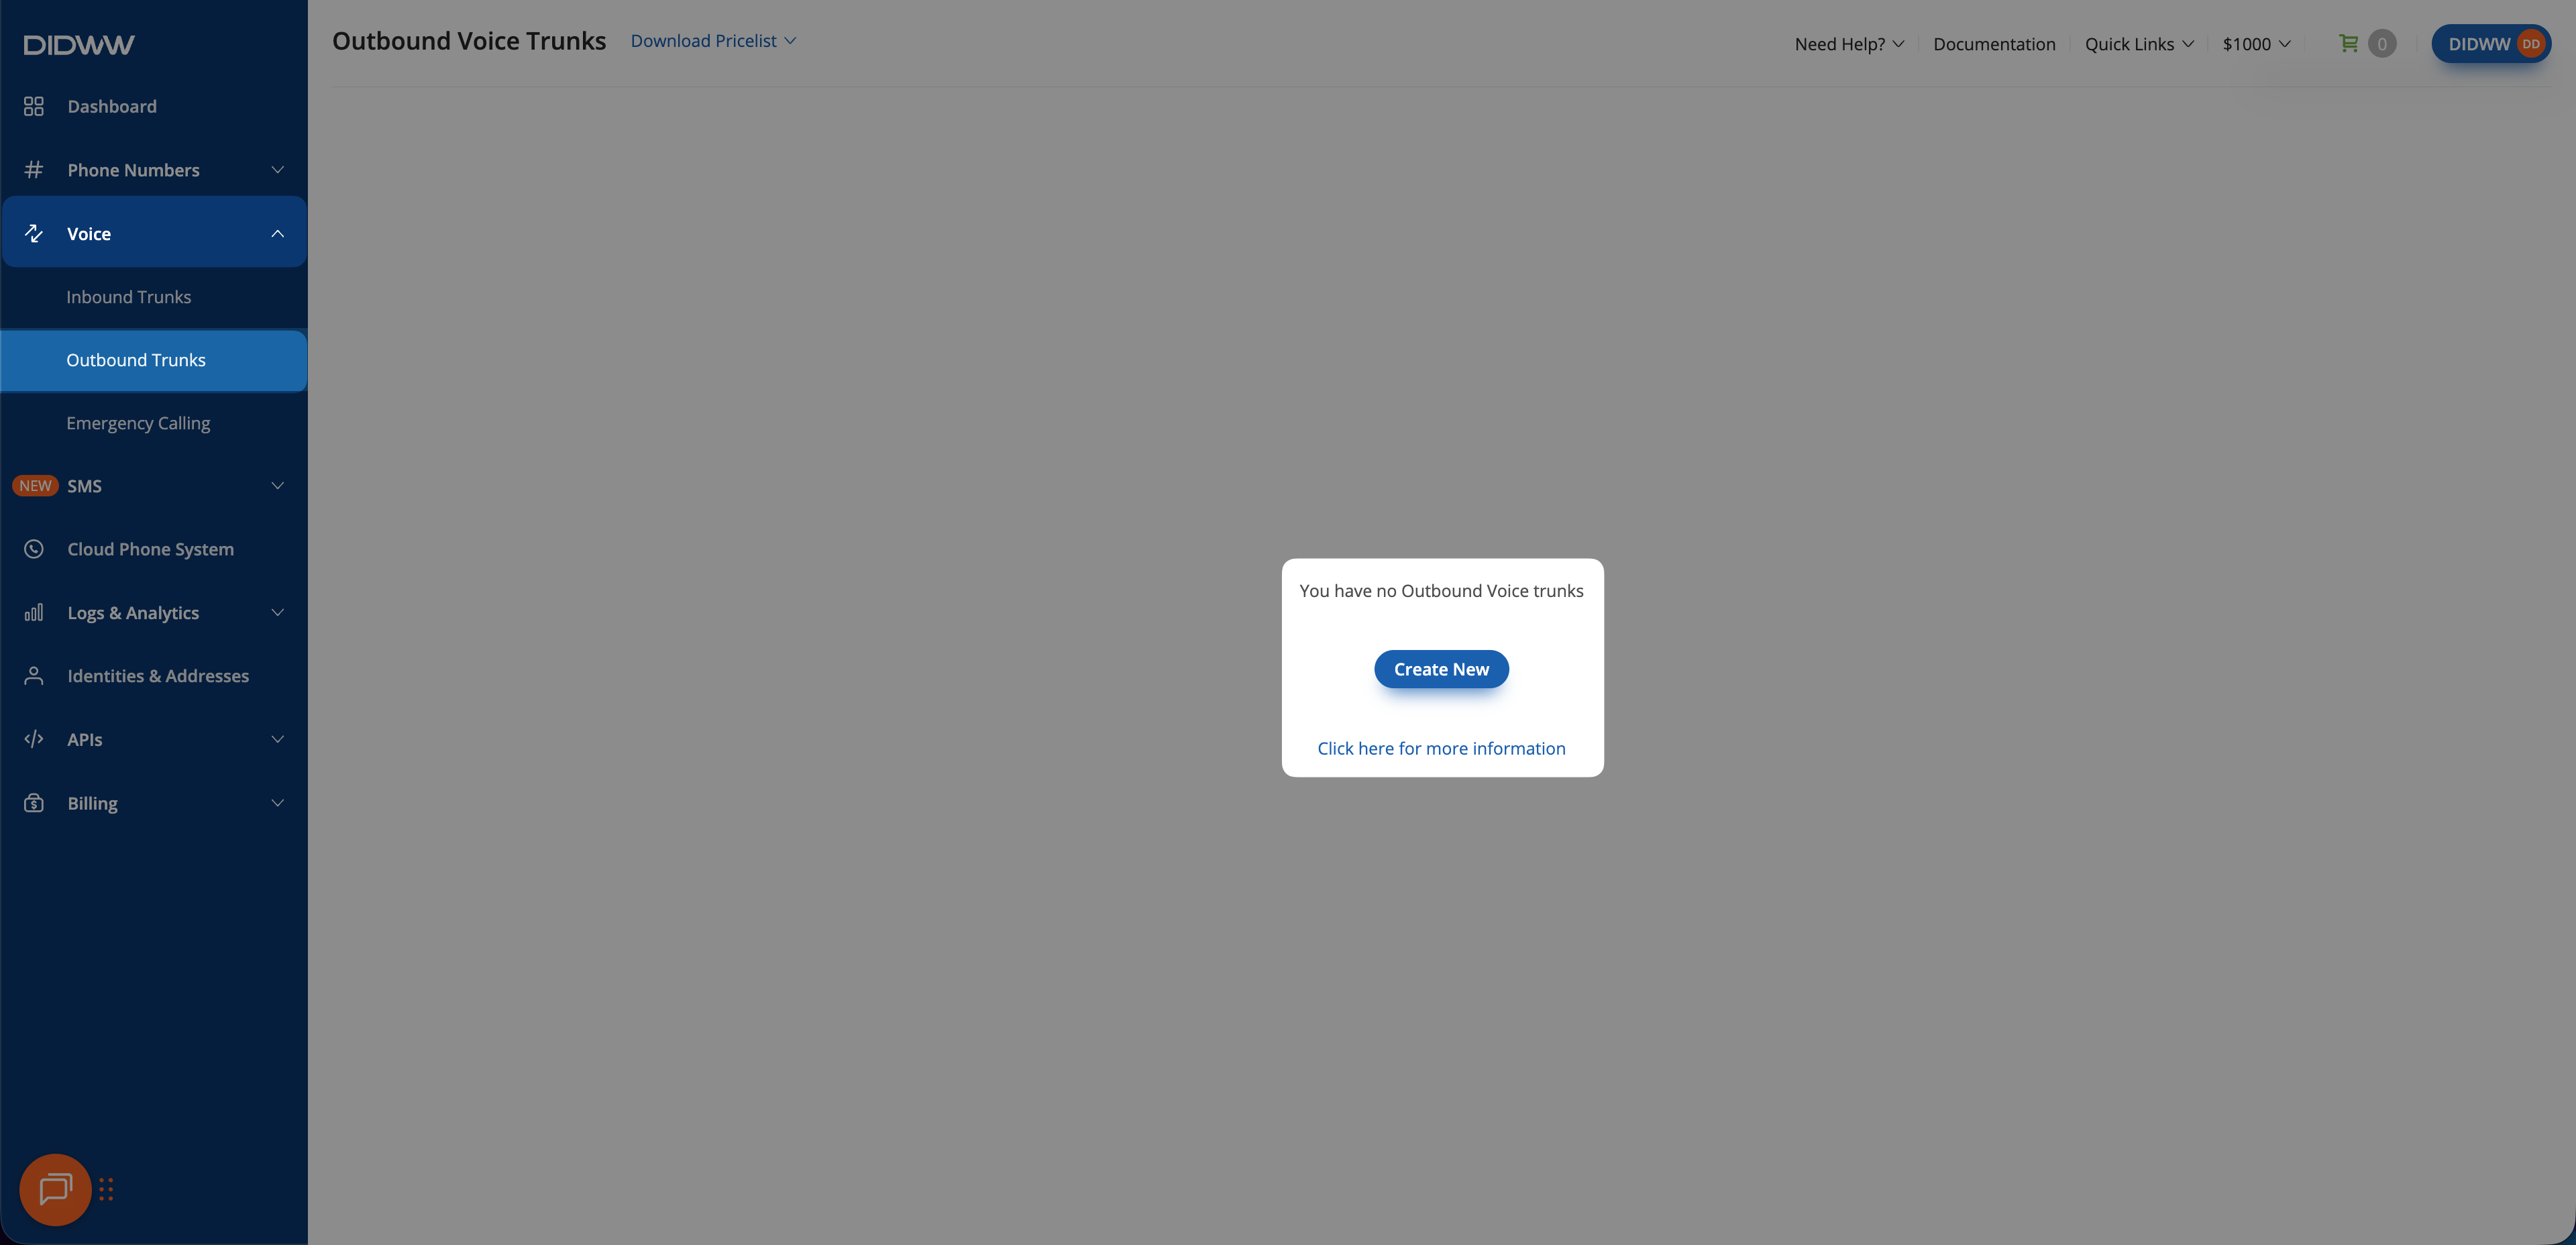
Fig. 7. Creating a new outbound SIP trunk#
Step 2: Configure Authentication#
Update the Friendly Name (e.g.,
Vapi).Keep the default Credentials & IP-based authentication method selected. The SIP digest credentials (username and password) will be provided after the trunk is created.
In Allowed SIP IP addresses, enter the public SIP signaling IP addresses for your Vapi region:
US:
44.229.228.186/32and44.238.177.138/32EU:
44.233.34.47/32and44.233.34.48/32
Then add the DIDWW inbound SIP addresses used for call transfers:
New York:
46.19.209.14Frankfurt:
46.19.210.14Los Angeles:
46.19.212.14Miami:
46.19.213.14Singapore:
46.19.214.14Hong Kong:
46.19.215.14Amsterdam:
185.238.173.14
Note
Vapi SIP signaling IP addresses depend on the region where your Vapi organization is hosted and may change. Refer to the official Vapi documentation for the most up-to-date information: Vapi SIP Networking and Firewall Configuration
Warning
You can allow all traffic by adding 0.0.0.0/0, which removes all IP restrictions.
Although SIP Digest Authentication will still verify requests using valid credentials, this setup is not recommended.
Restrict access to known Vapi SIP signaling IPs whenever possible.
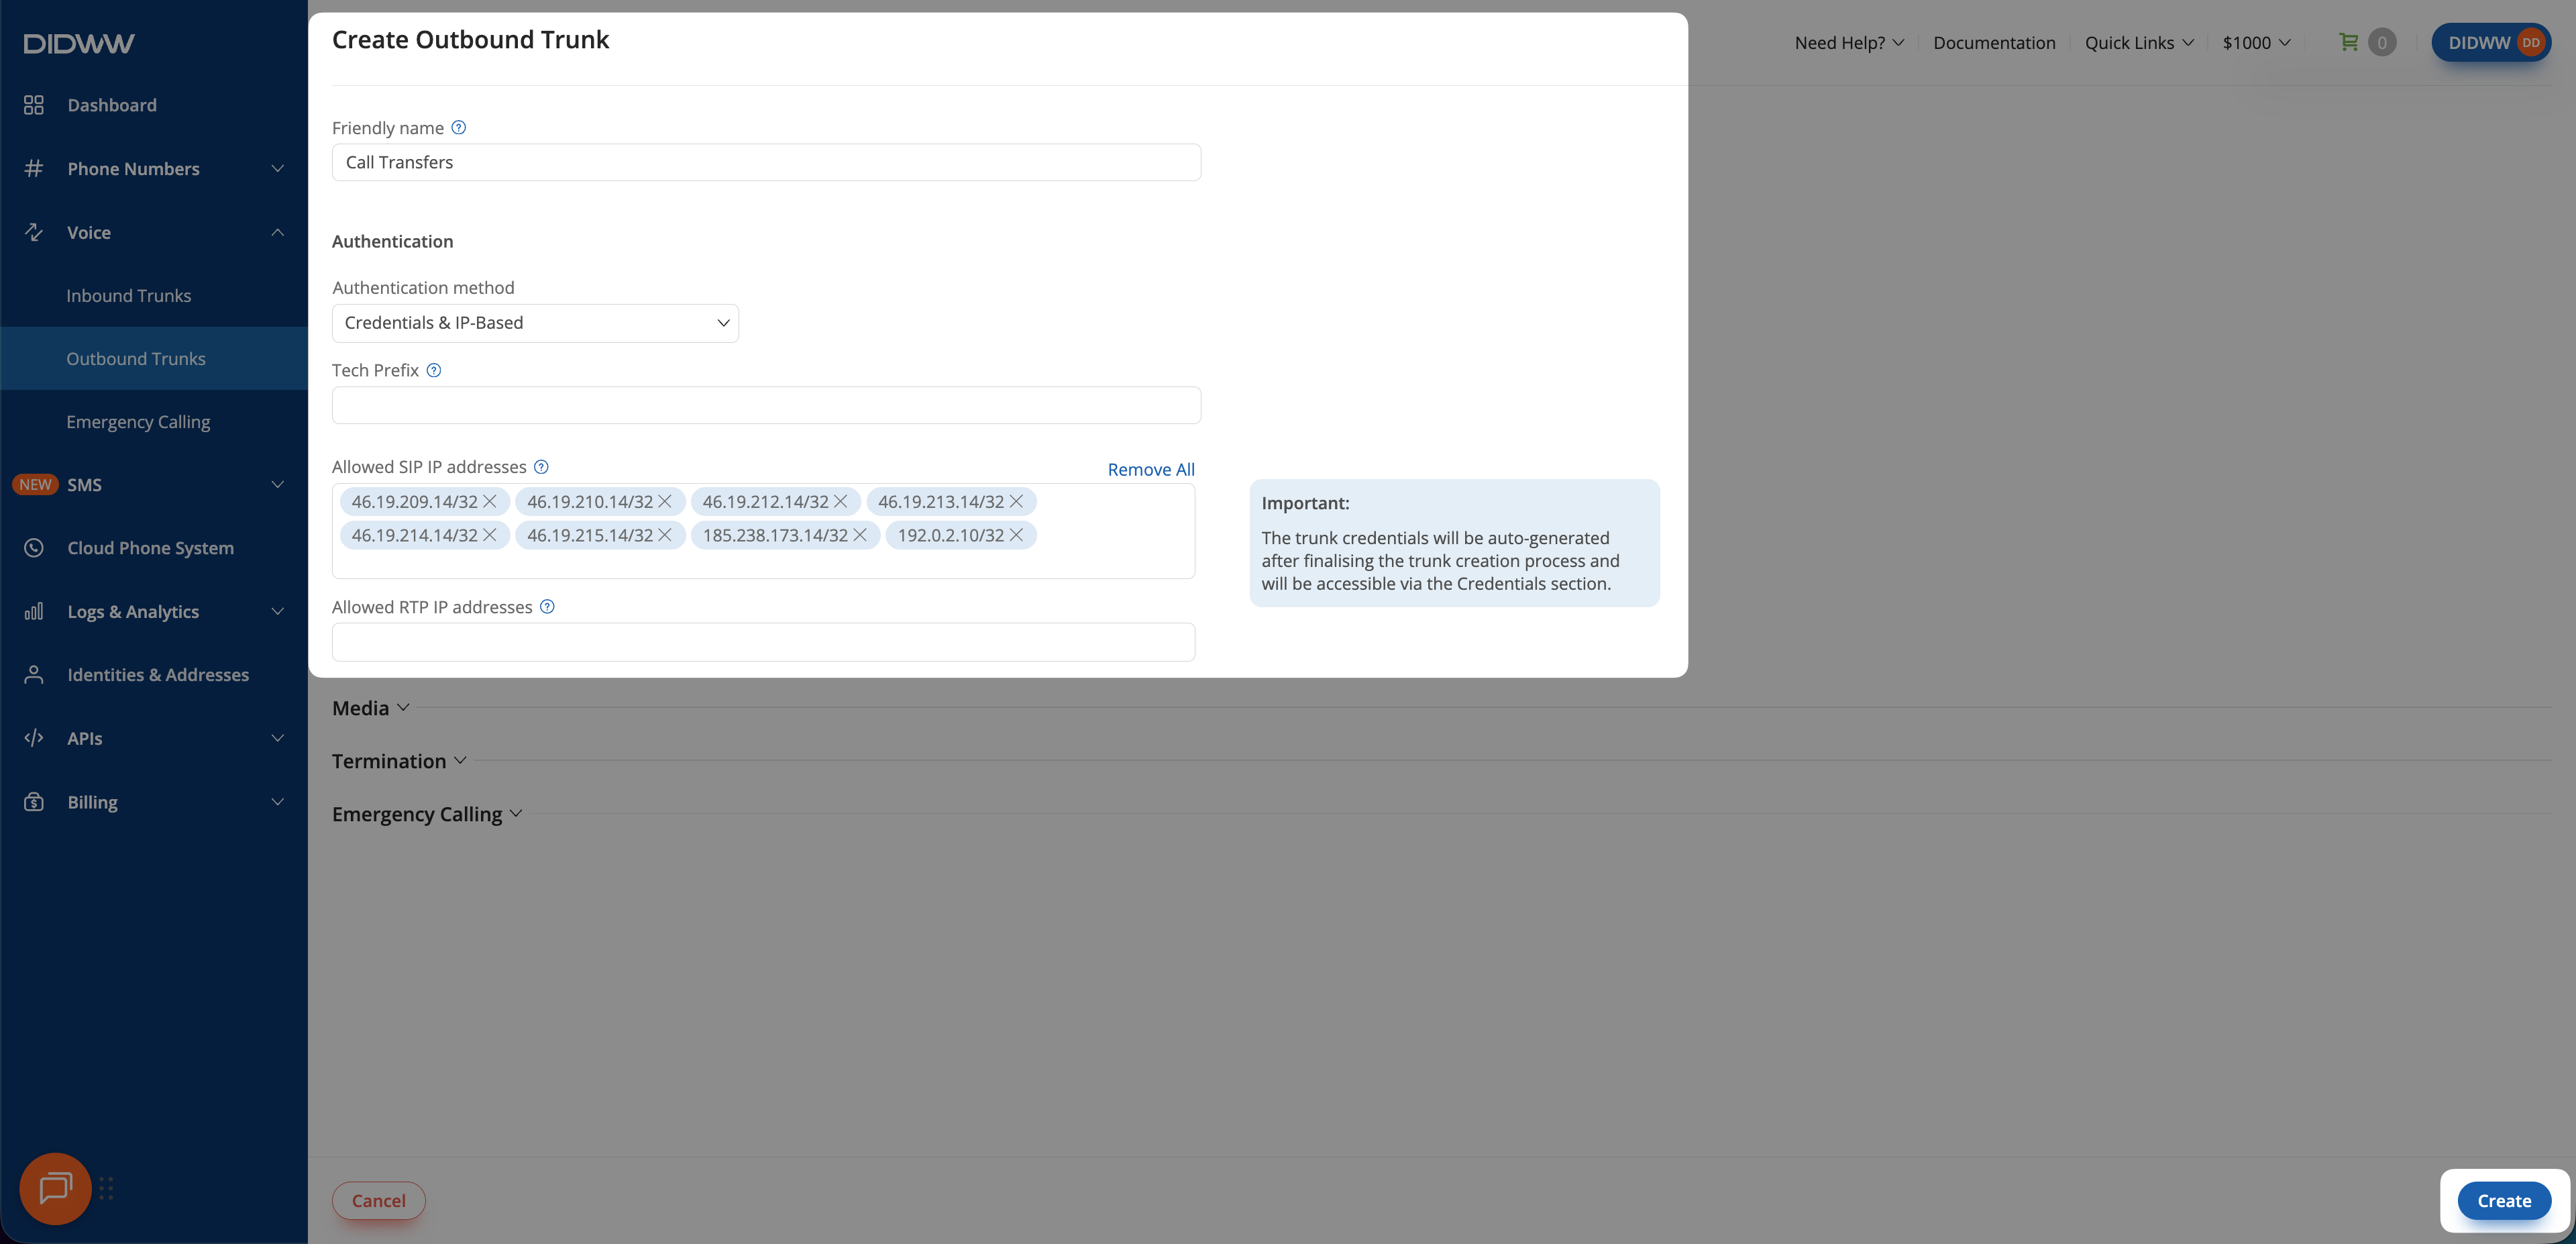
Fig. 8. Entering allowed SIP IP addresses for outbound authentication#
Step 3: Save the Outbound SIP Trunk#
When all required fields in the Create Outbound SIP Trunk are filled, click Create to save your outbound SIP trunk.
Note
For advanced outbound SIP trunk configuration, see Outbound SIP Trunk Guide.
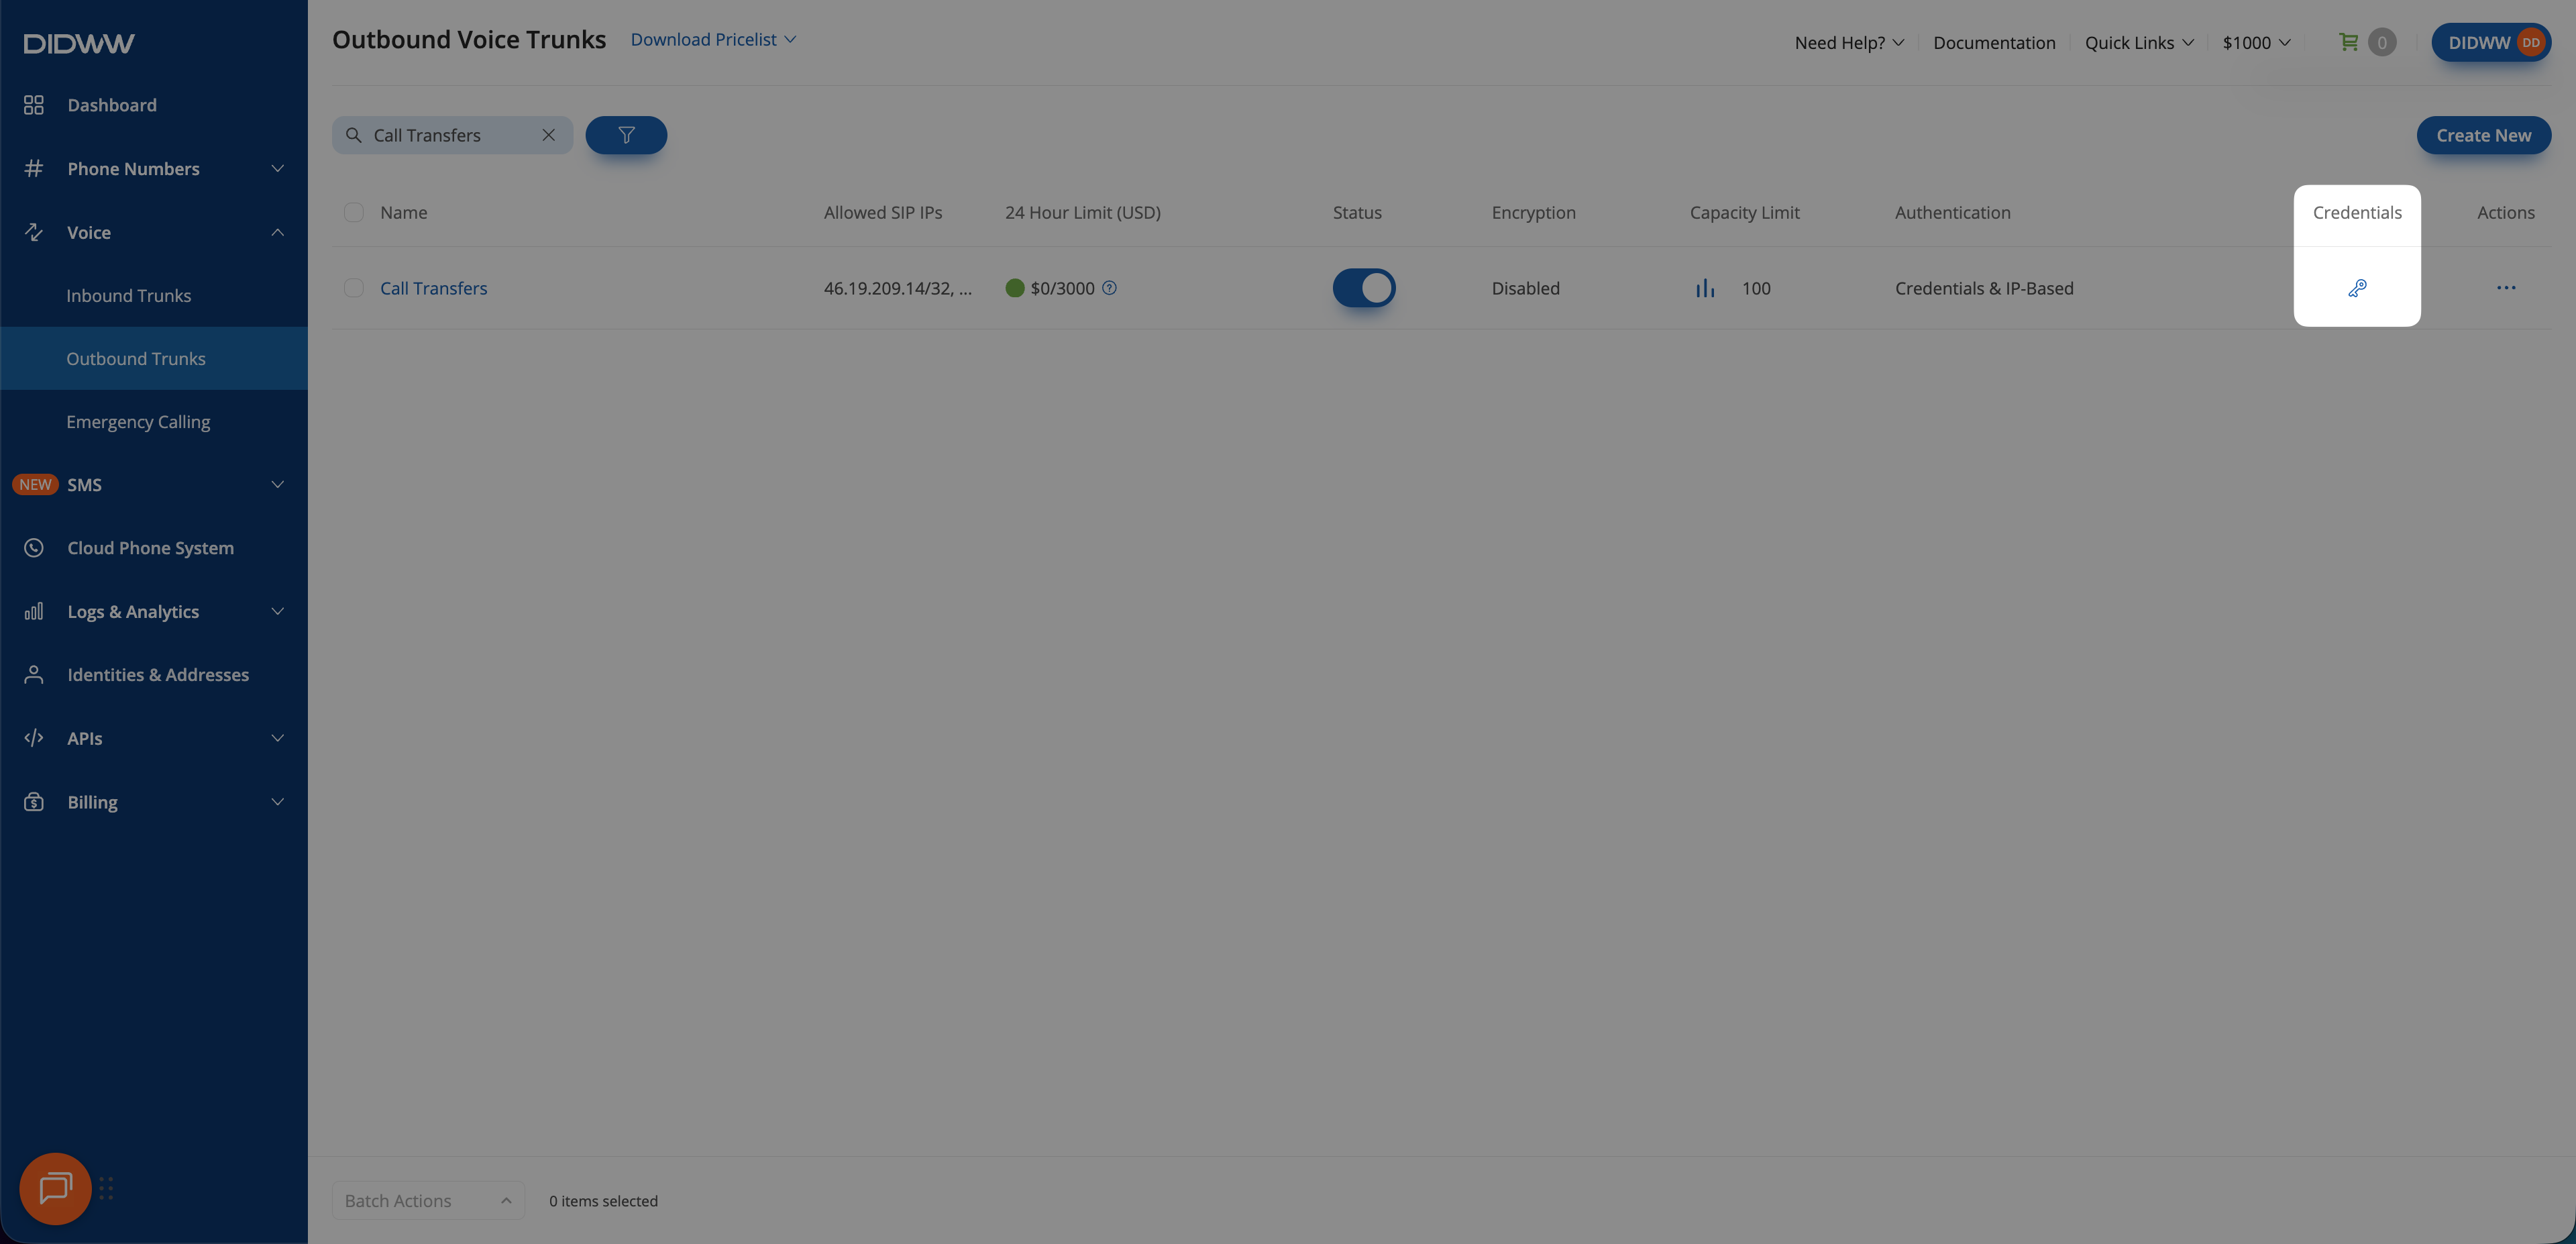
Fig. 9. Outbound SIP trunk created and ready for use#
Step 4: Copy Outbound Trunk Credentials#
When the outbound trunk is created, you can view its credentials by selecting the key icon in the Credentials column on the Outbound Trunks page.
Go to Voice > Outbound Trunks.
Locate your outbound trunk and click the key icon in the Credentials column.
The trunk credentials will appear, showing the Username and Password (click the eye icon to reveal the password).
Copy and securely store these credentials. You will need them later when configuring Vapi in Step 1: Create Outbound Trunk and Step 2: Create Inbound Trunk.
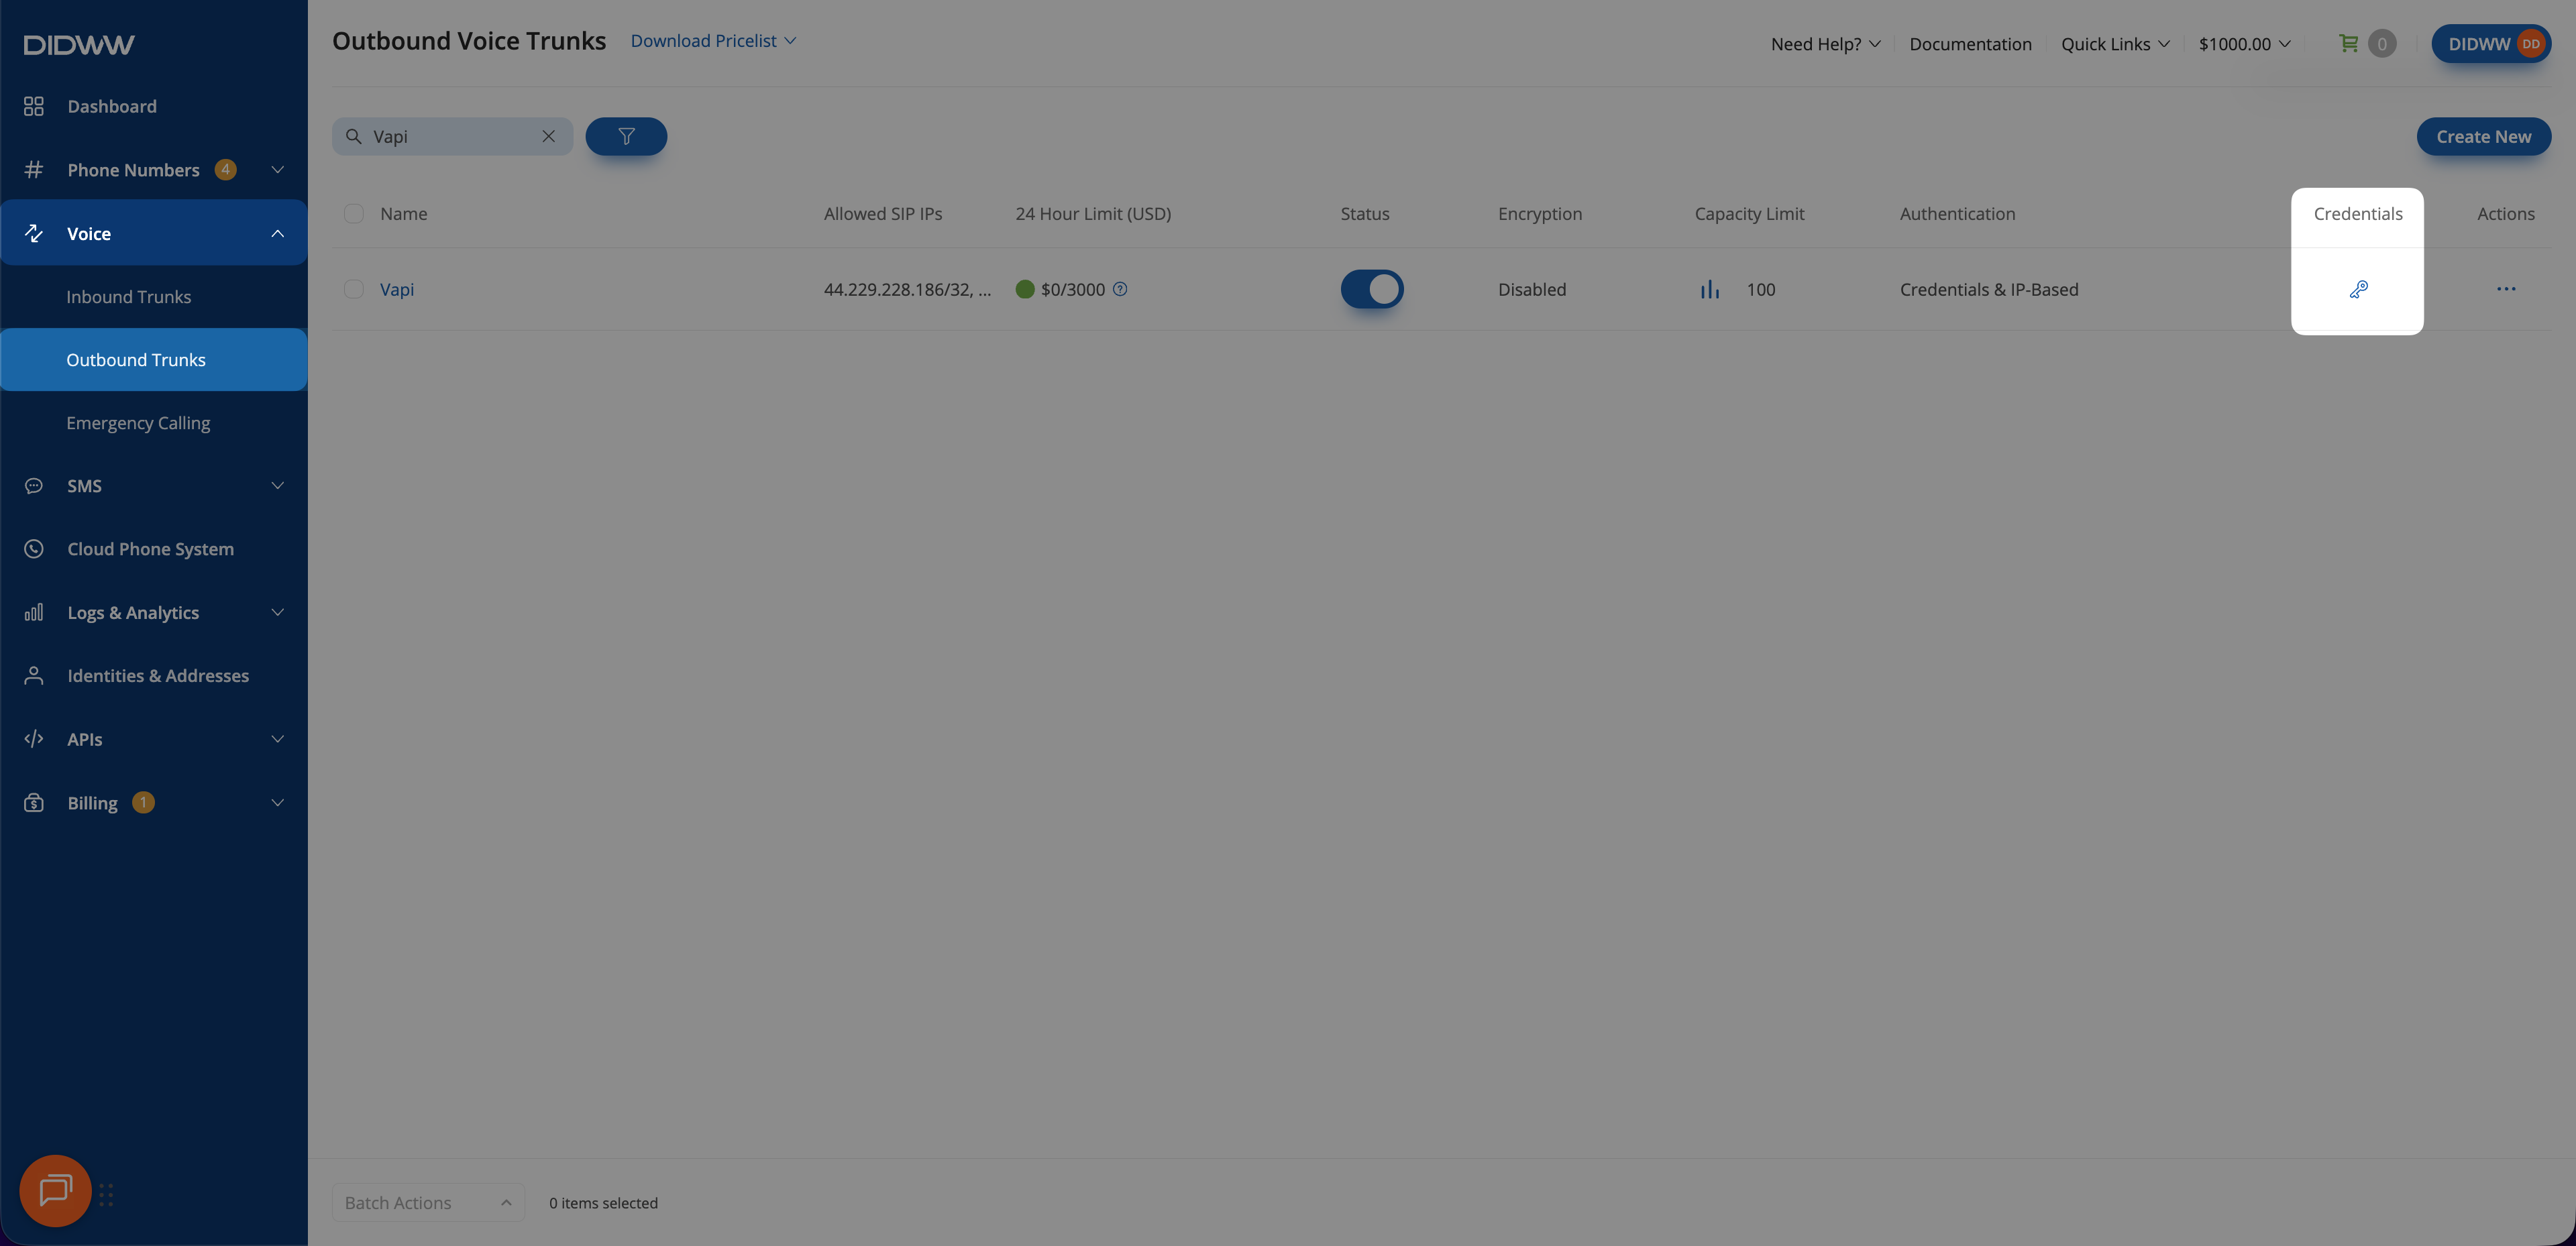
Fig. 10. Opening the outbound trunk credentials view#
Step 5: Add Outbound Credentials to the Inbound Trunk#
To support call transfers, configure the DIDWW inbound trunk to authenticate SIP REFER requests with the credentials generated for the outbound trunk.
Go to Voice > Inbound Trunks and locate the Vapi inbound trunk.
Click the Actions (⋯) icon, then select Edit.
Open the Authorization tab.
Turn on Enable Authorization.
In Auth User, paste the outbound trunk Username.
In Auth Password, paste the outbound trunk Password.
Click Submit.
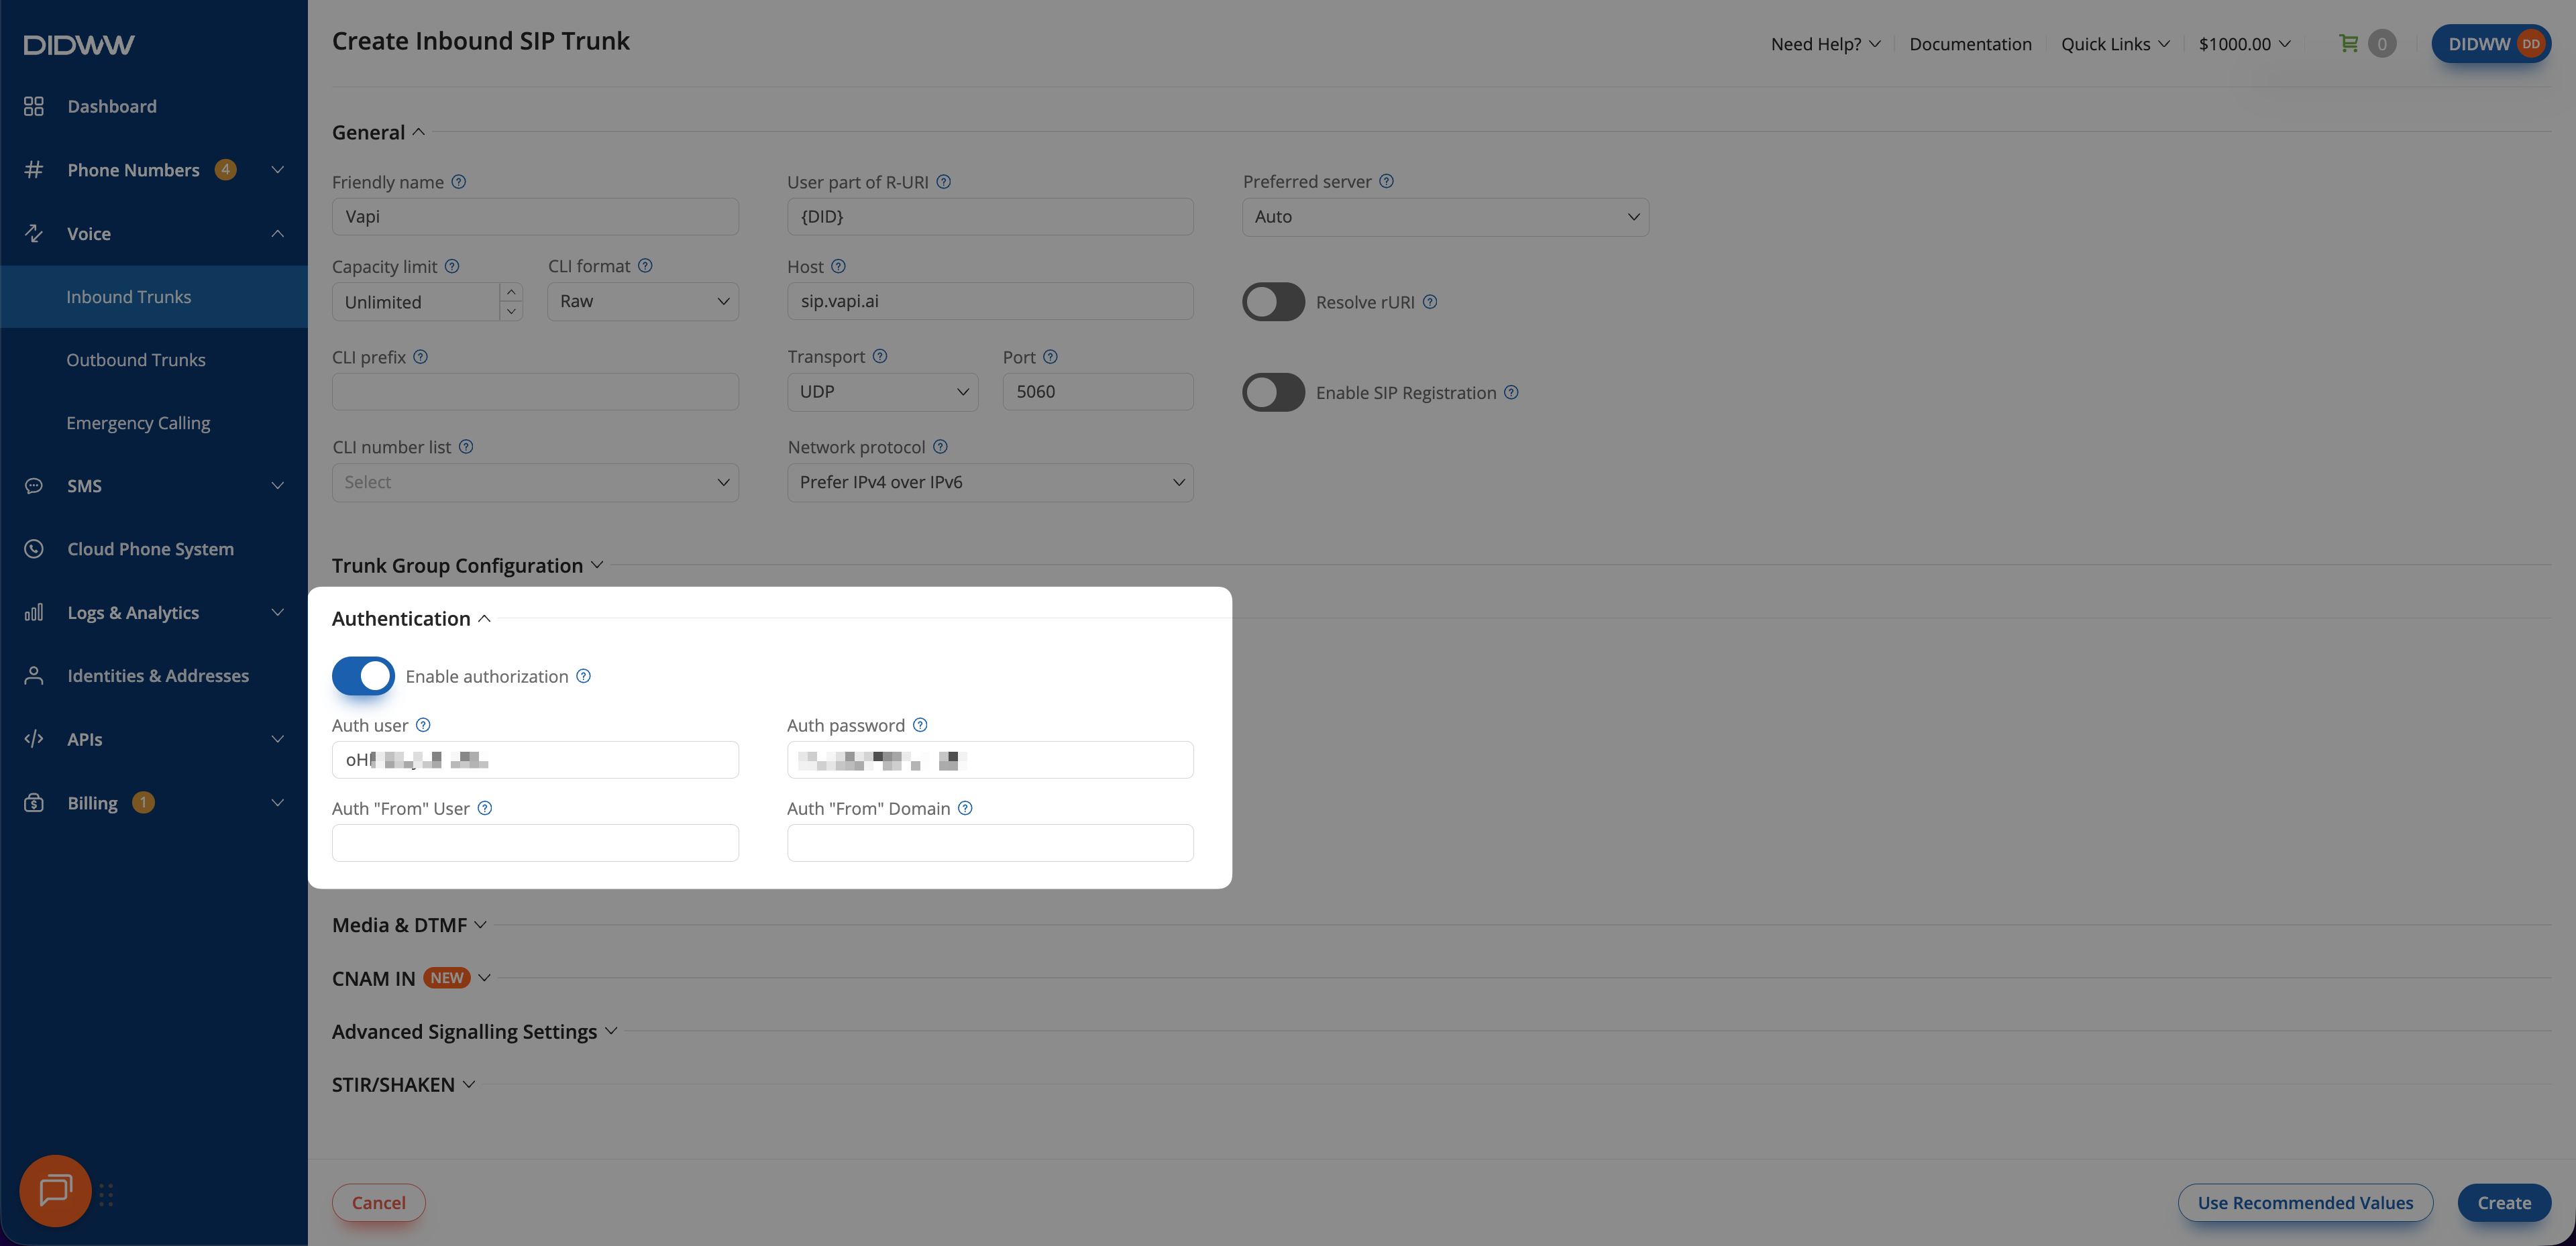
Fig. 11. Adding outbound trunk credentials to the inbound trunk#
3. Connect DIDWW SIP Trunks in Vapi#
Connect the DIDWW SIP trunks in Vapi so your assistant can receive incoming calls, place outbound calls, transfer active calls, and use your DIDWW phone numbers. This setup adds the required SIP trunk credentials, enables call transfer tooling, and links your DIDWW phone numbers to a Vapi assistant.
Before You Begin#
An active Vapi account is required. Sign in to Vapi or create an account if needed.
A configured Vapi assistant is required. See the Vapi Quickstart Guide for guidance on creating an assistant.
Step 1: Create Outbound Trunk#
Create a Vapi outbound SIP trunk credential that uses DIDWW as the SIP provider.
In Vapi, open the Integrations menu.
Locate Phone Number Providers and open SIP Trunk integrations.
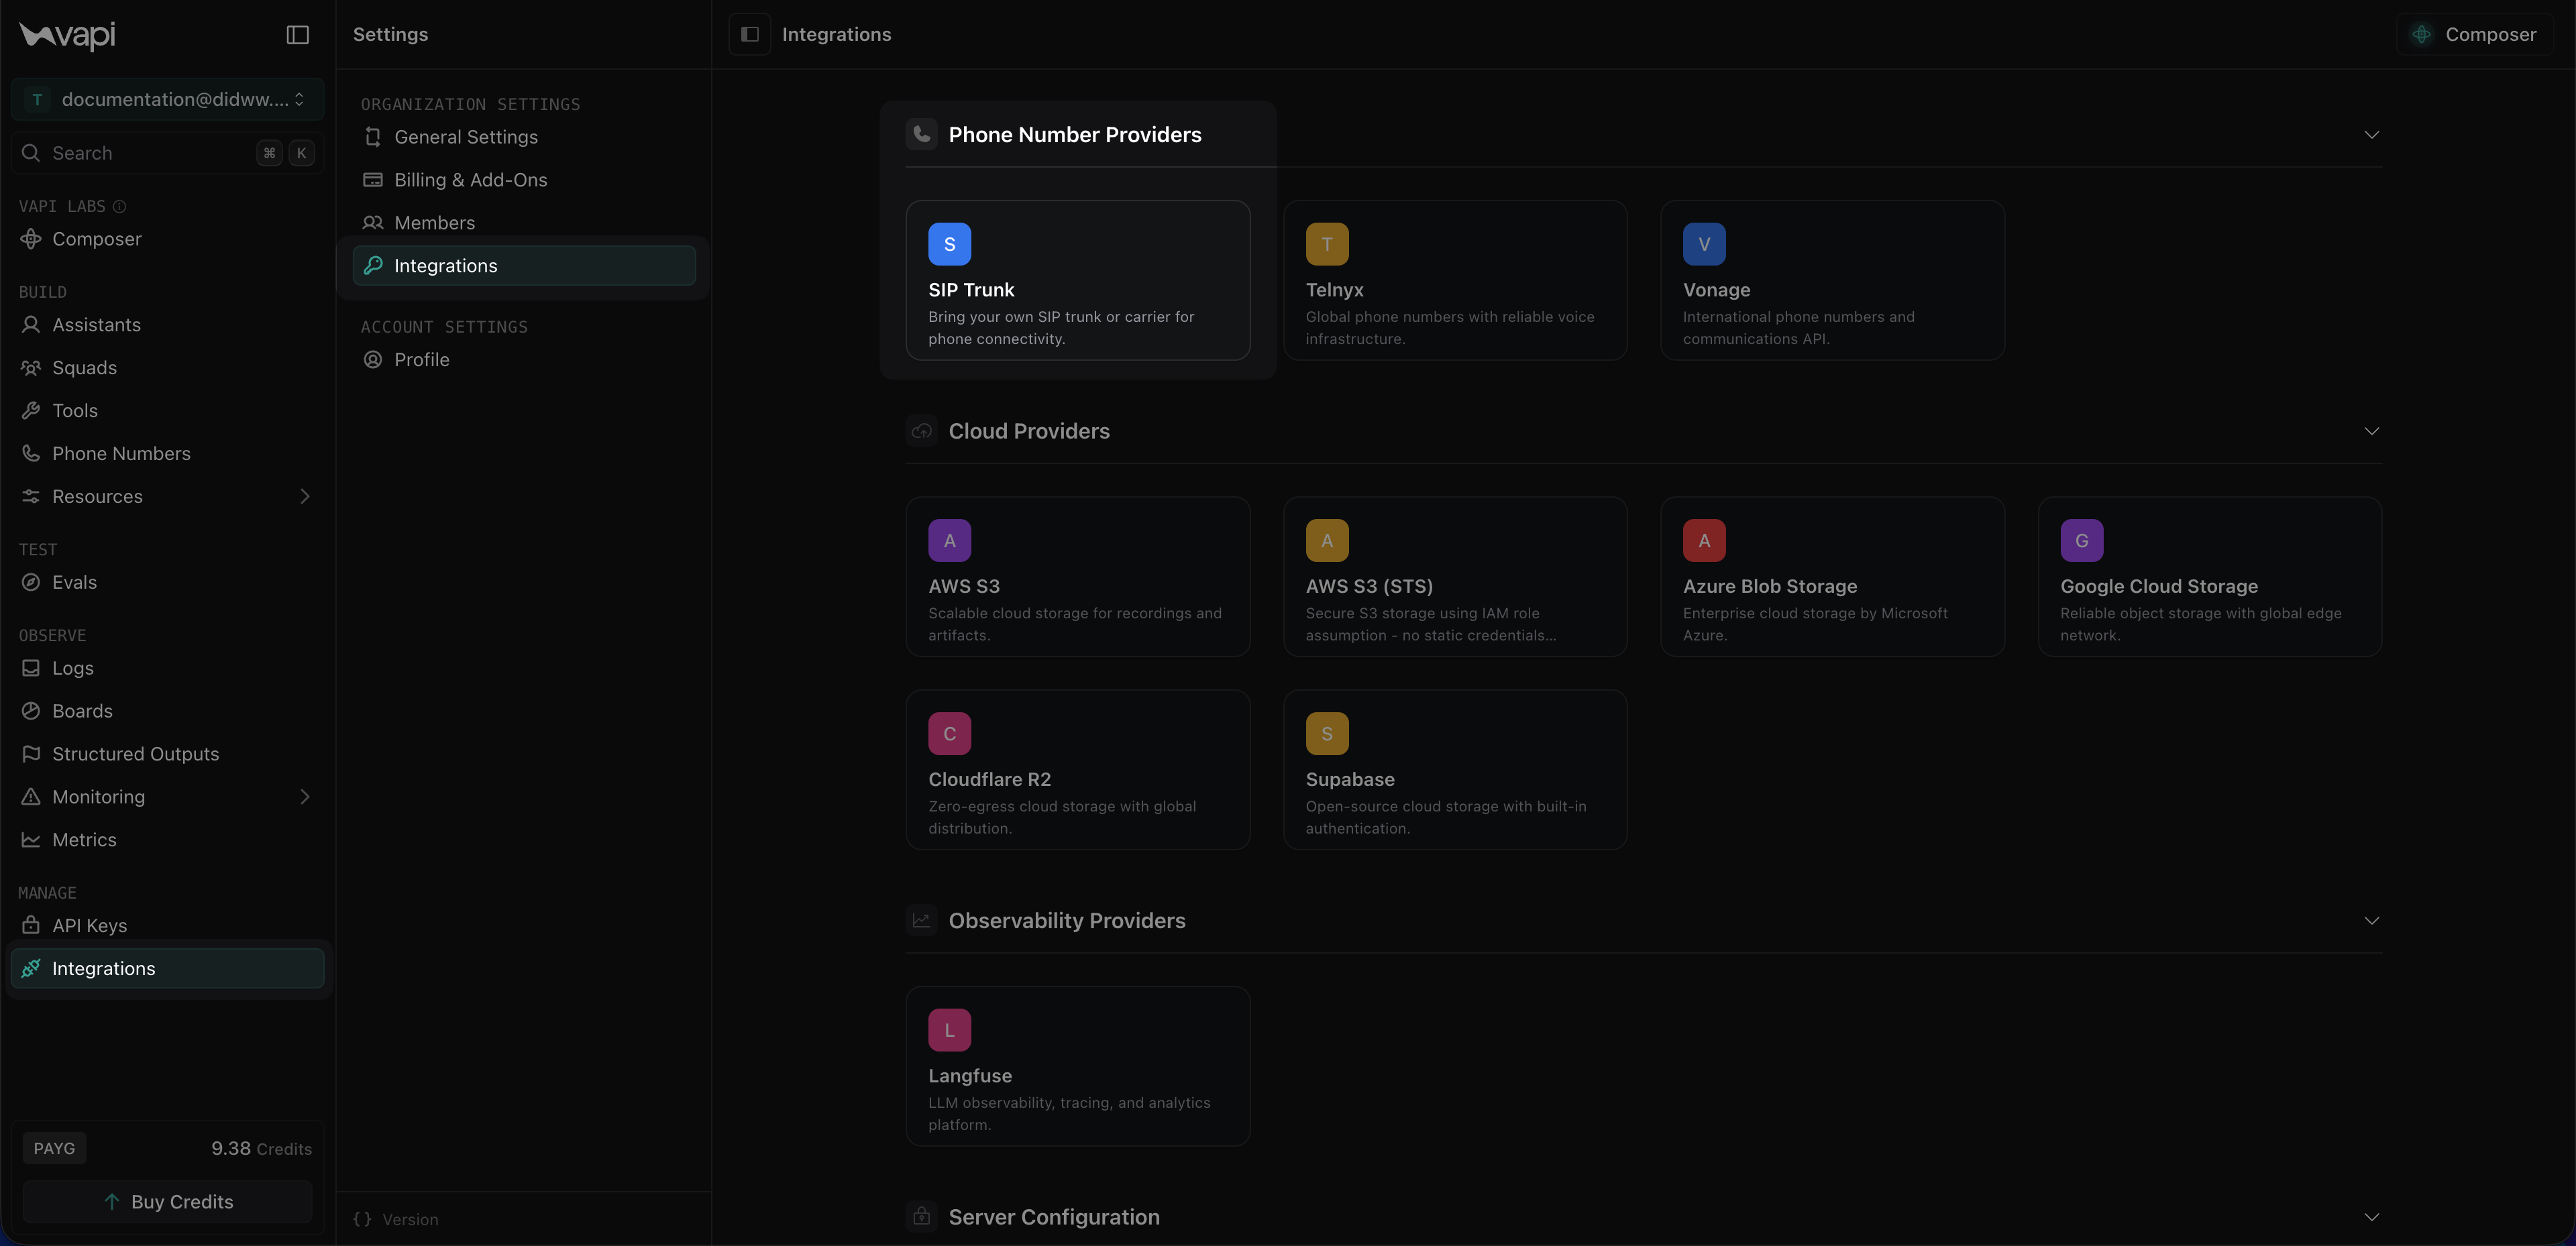
Fig. 12. Opening the SIP Trunk provider in Vapi#
Click Configure New SIP Trunk.
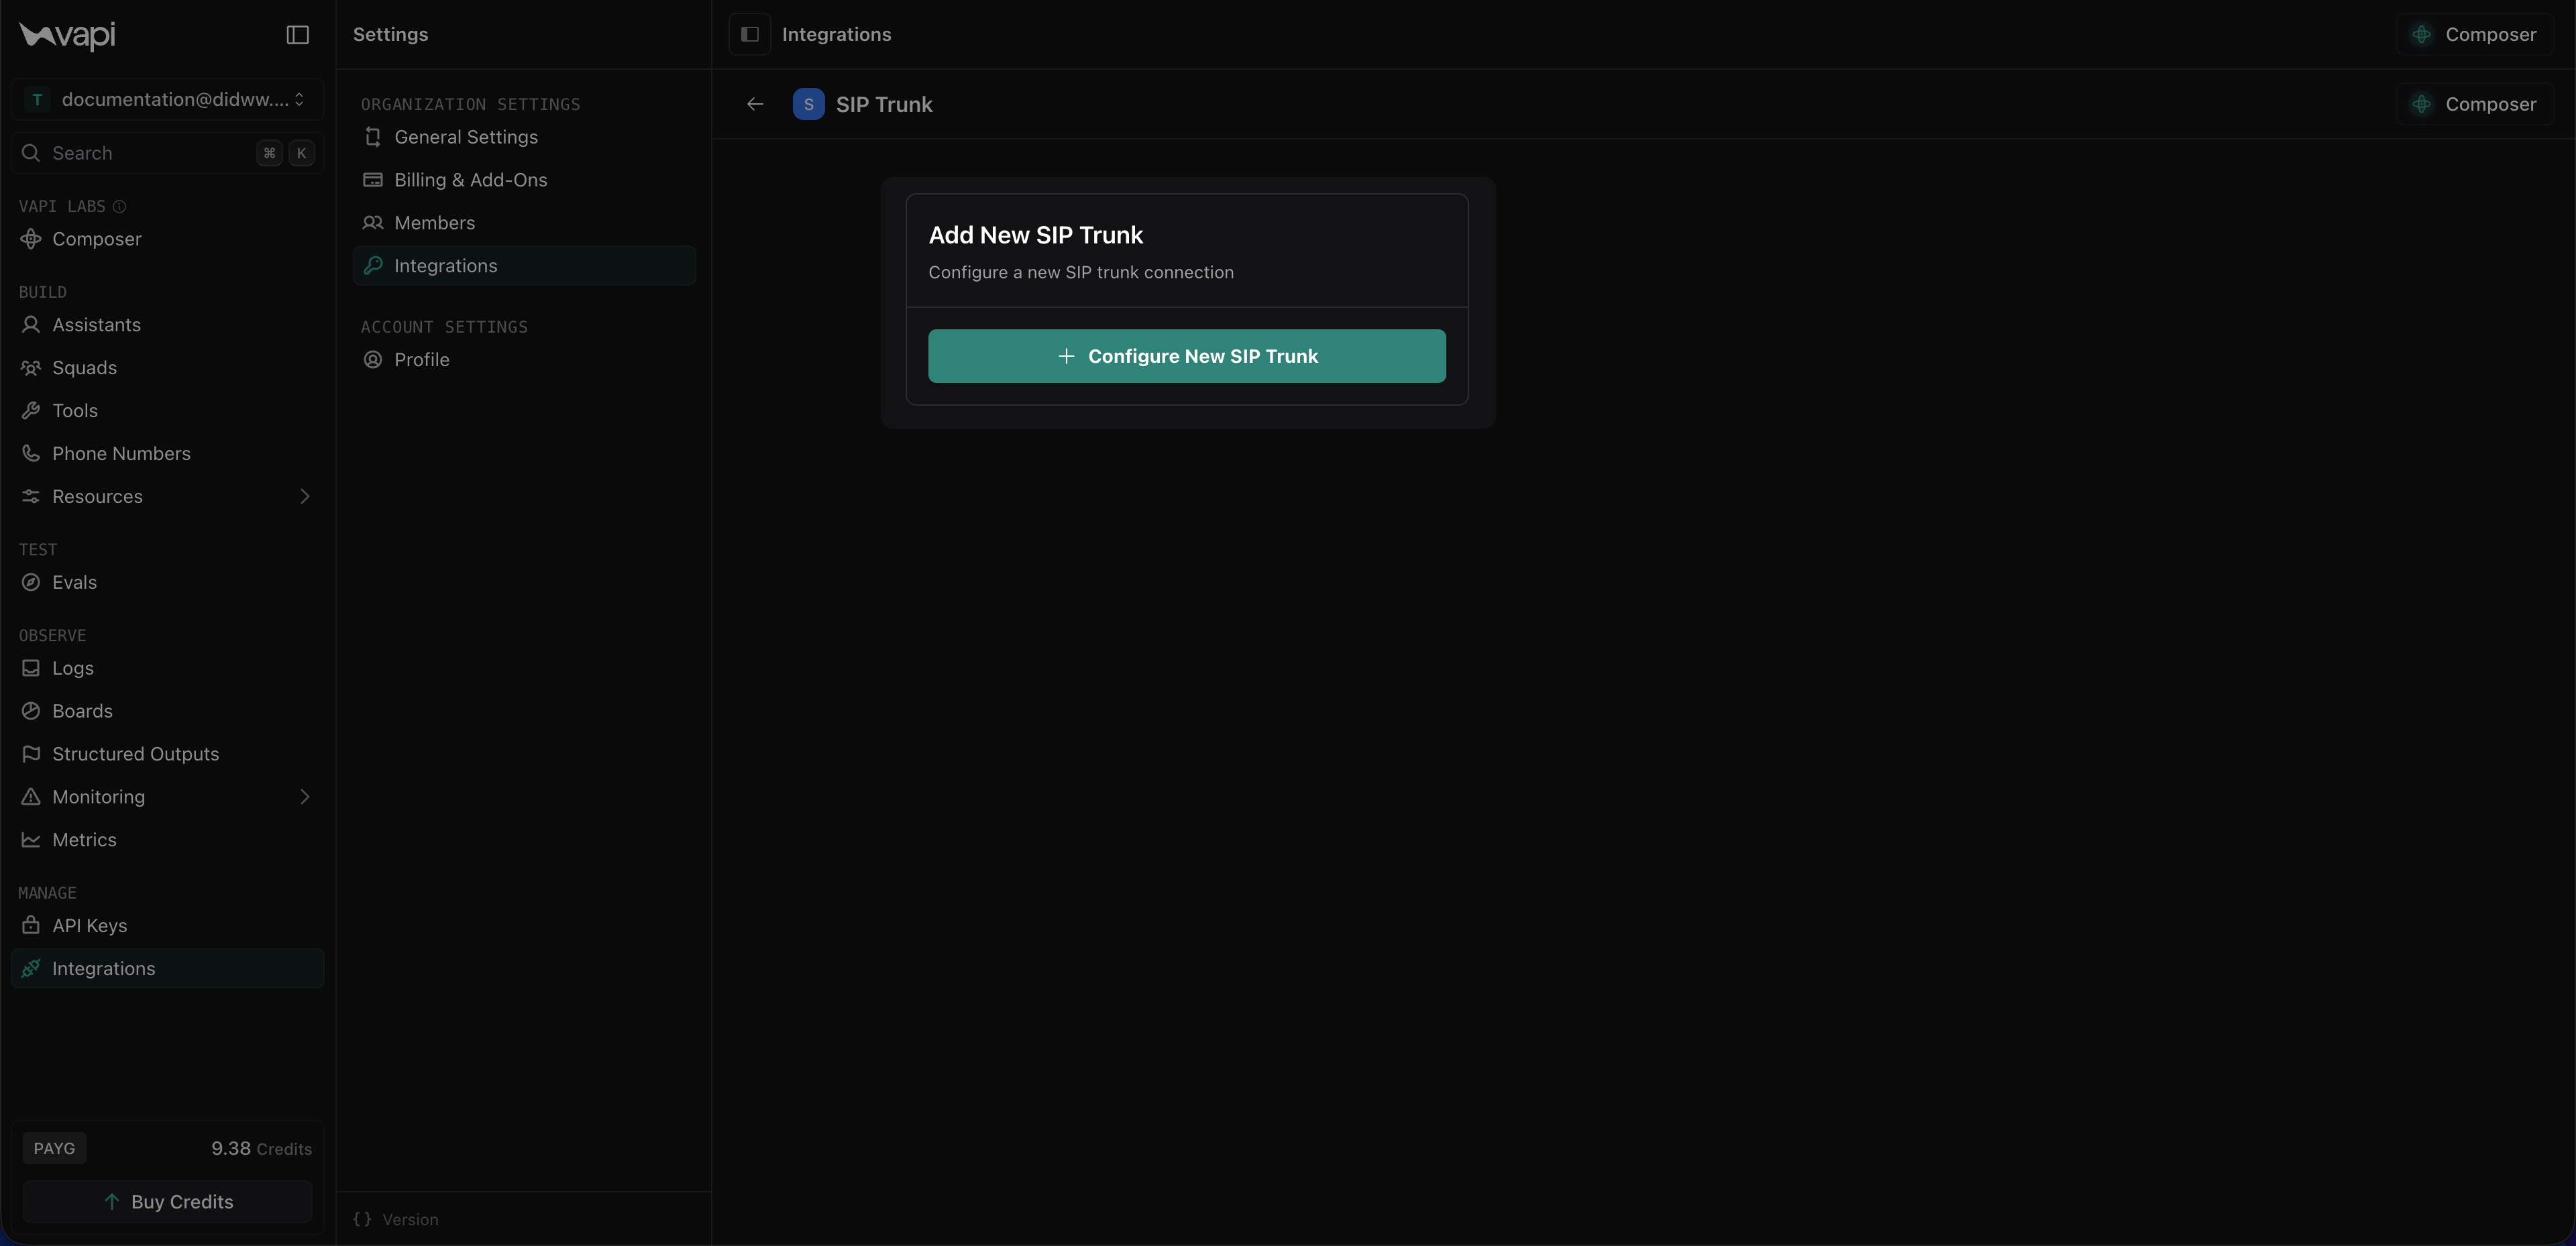
Fig. 13. Starting a new SIP trunk configuration in Vapi#
Enter a friendly Name (e.g.,
DIDWW Outbound Trunk).In IP Address / Domain, enter any of the DIDWW outbound signaling endpoints (e.g.,
fra.eu.out.didww.com).Configure the transport protocol and port. Use
5060for UDP/TCP or5061for TLS.Uncheck Allow inbound calls, leaving only Allow outbound calls selected.
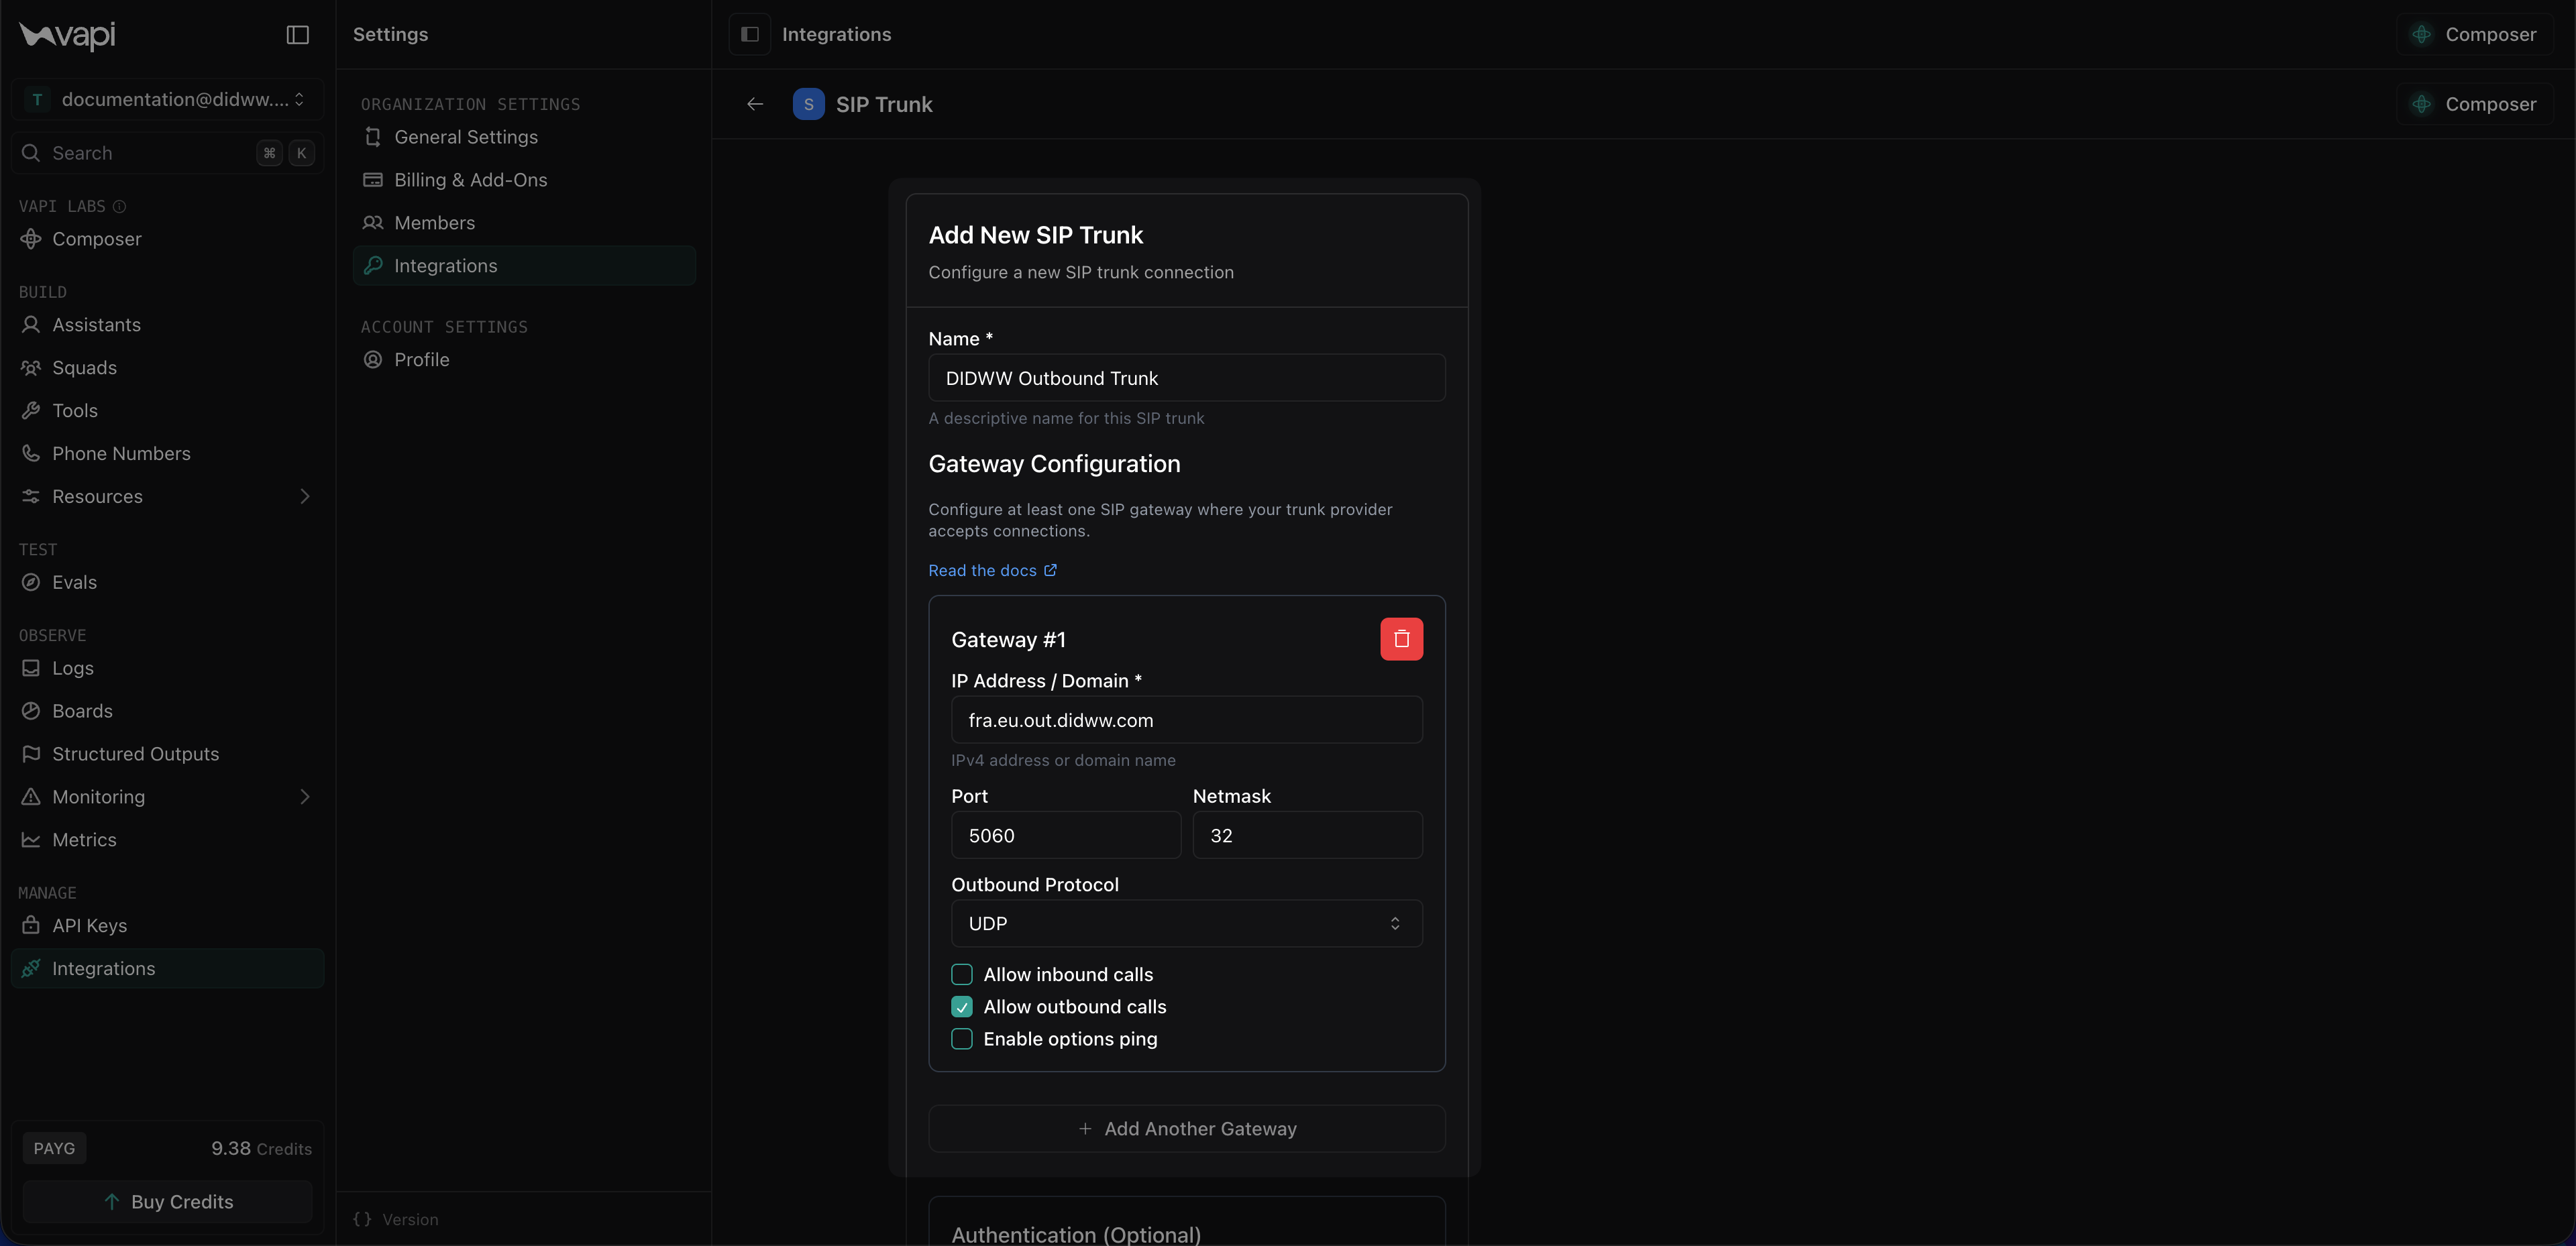
Fig. 14. Configuring DIDWW gateway settings#
In Authentication, enter the Username and Password copied from Step 4: Copy Outbound Trunk Credentials.
Click Save SIP Trunk.
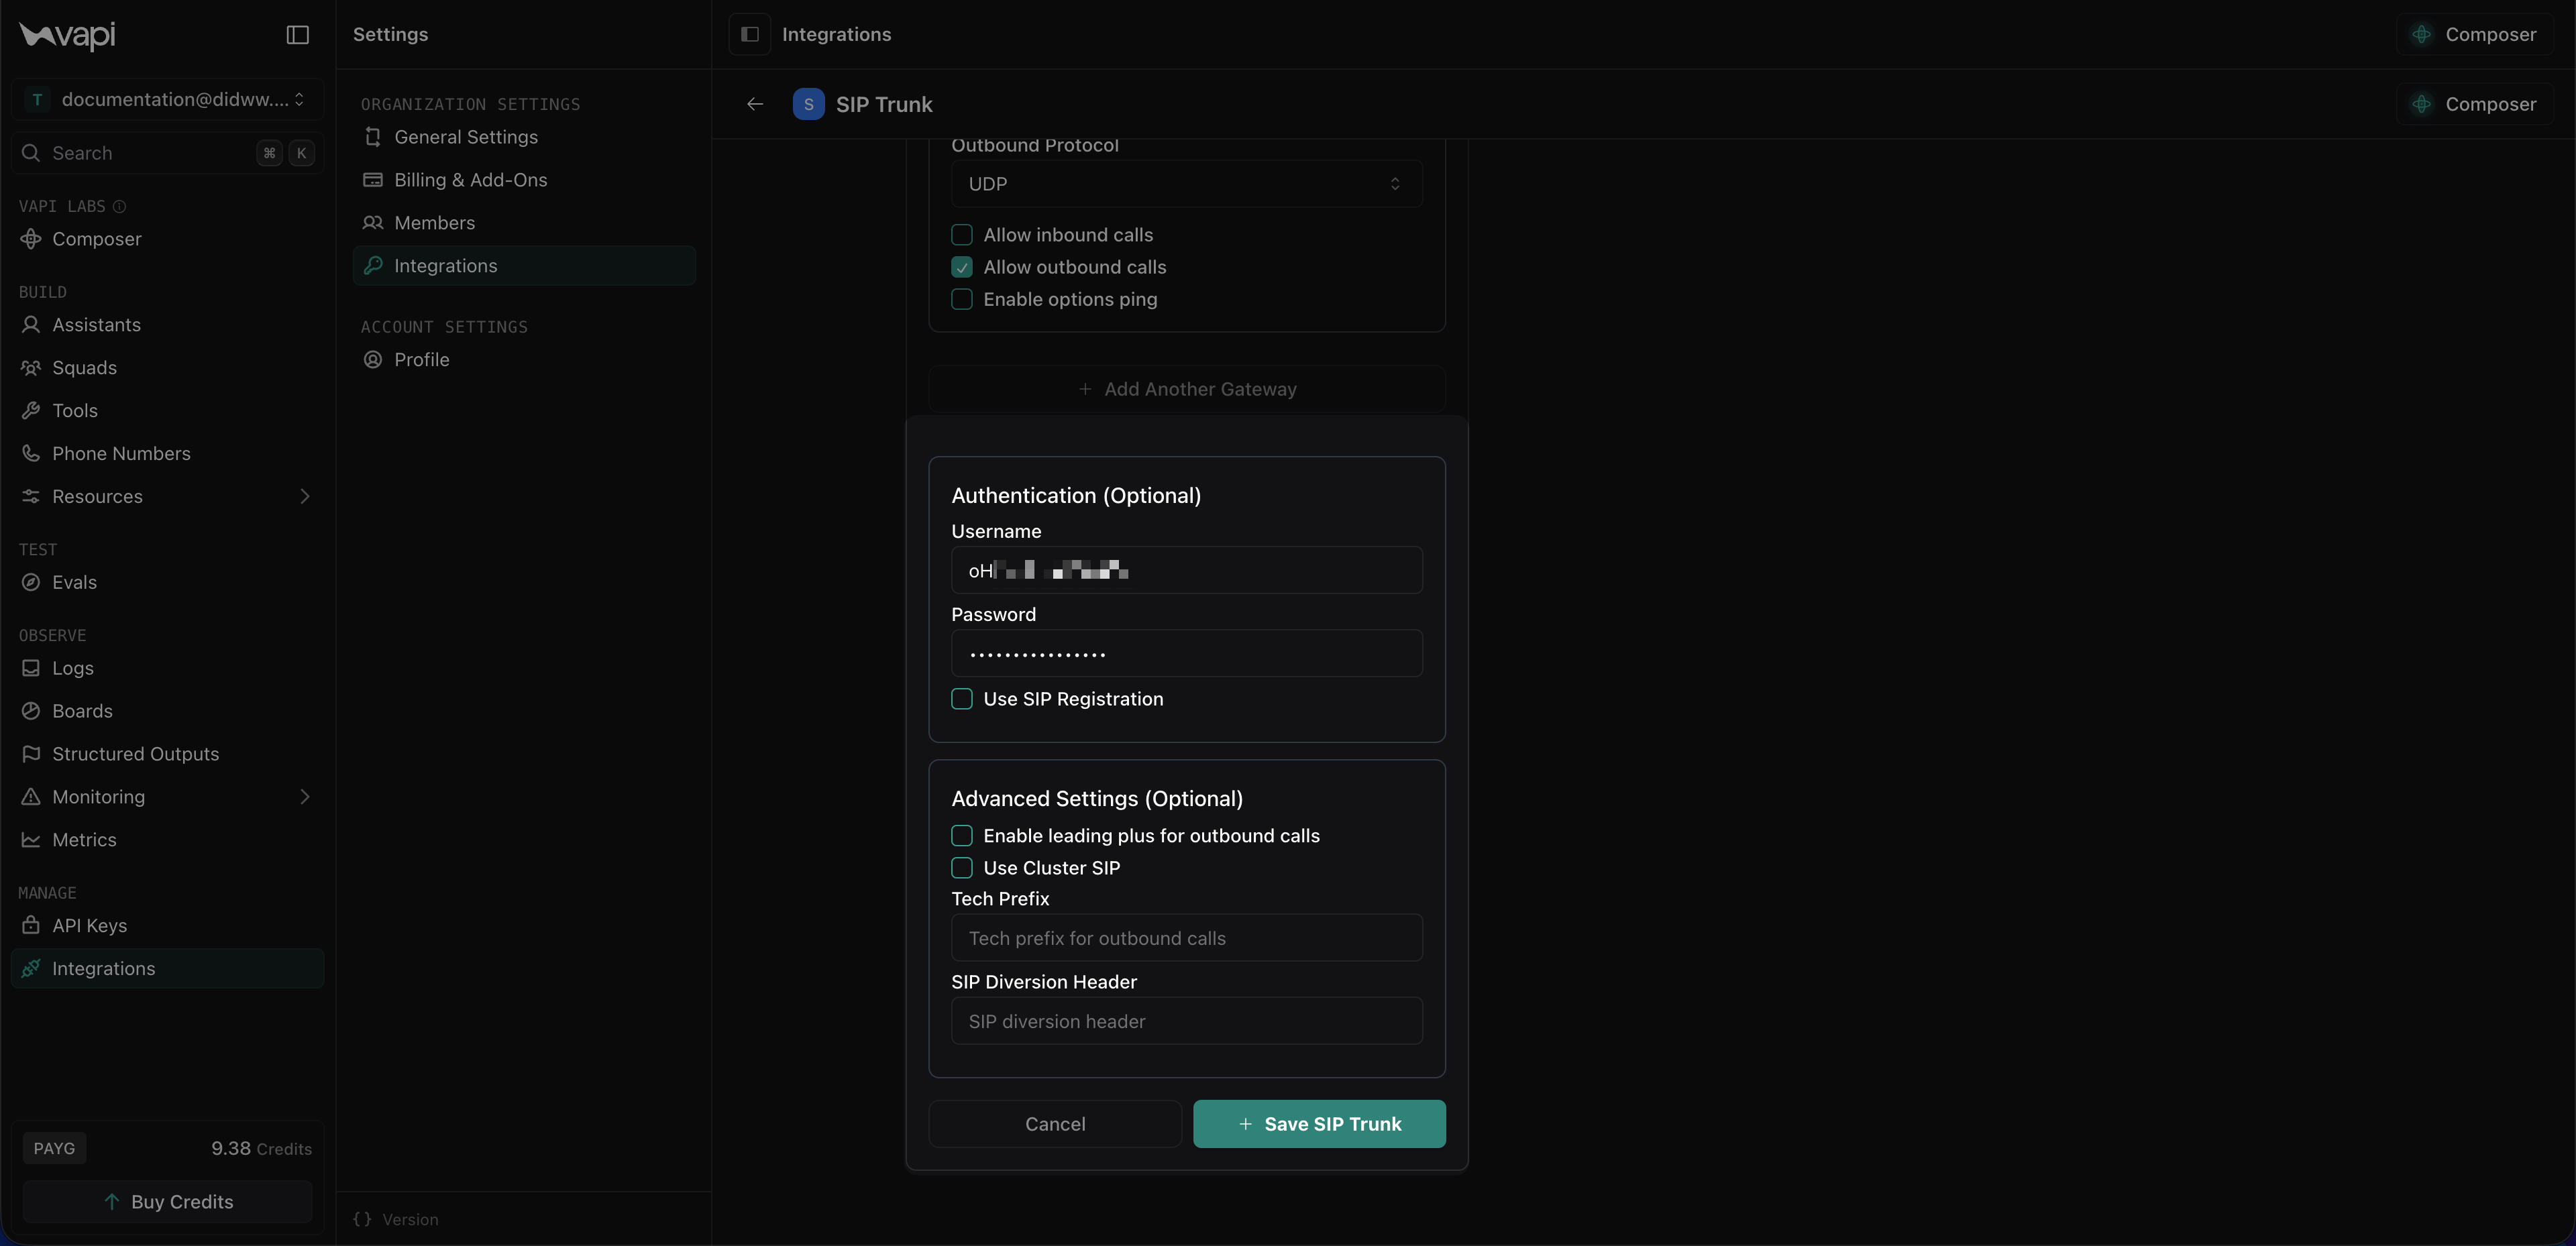
Fig. 15. Configuring outbound trunk authentication#
Step 2: Create Inbound Trunk#
Create the Vapi inbound trunk that will accept calls from DIDWW. Because Vapi allows only one allowed IP address per gateway, create one gateway for each required DIDWW SIP signaling IP.
In Vapi, open the SIP Trunk integration and click Configure New SIP Trunk.
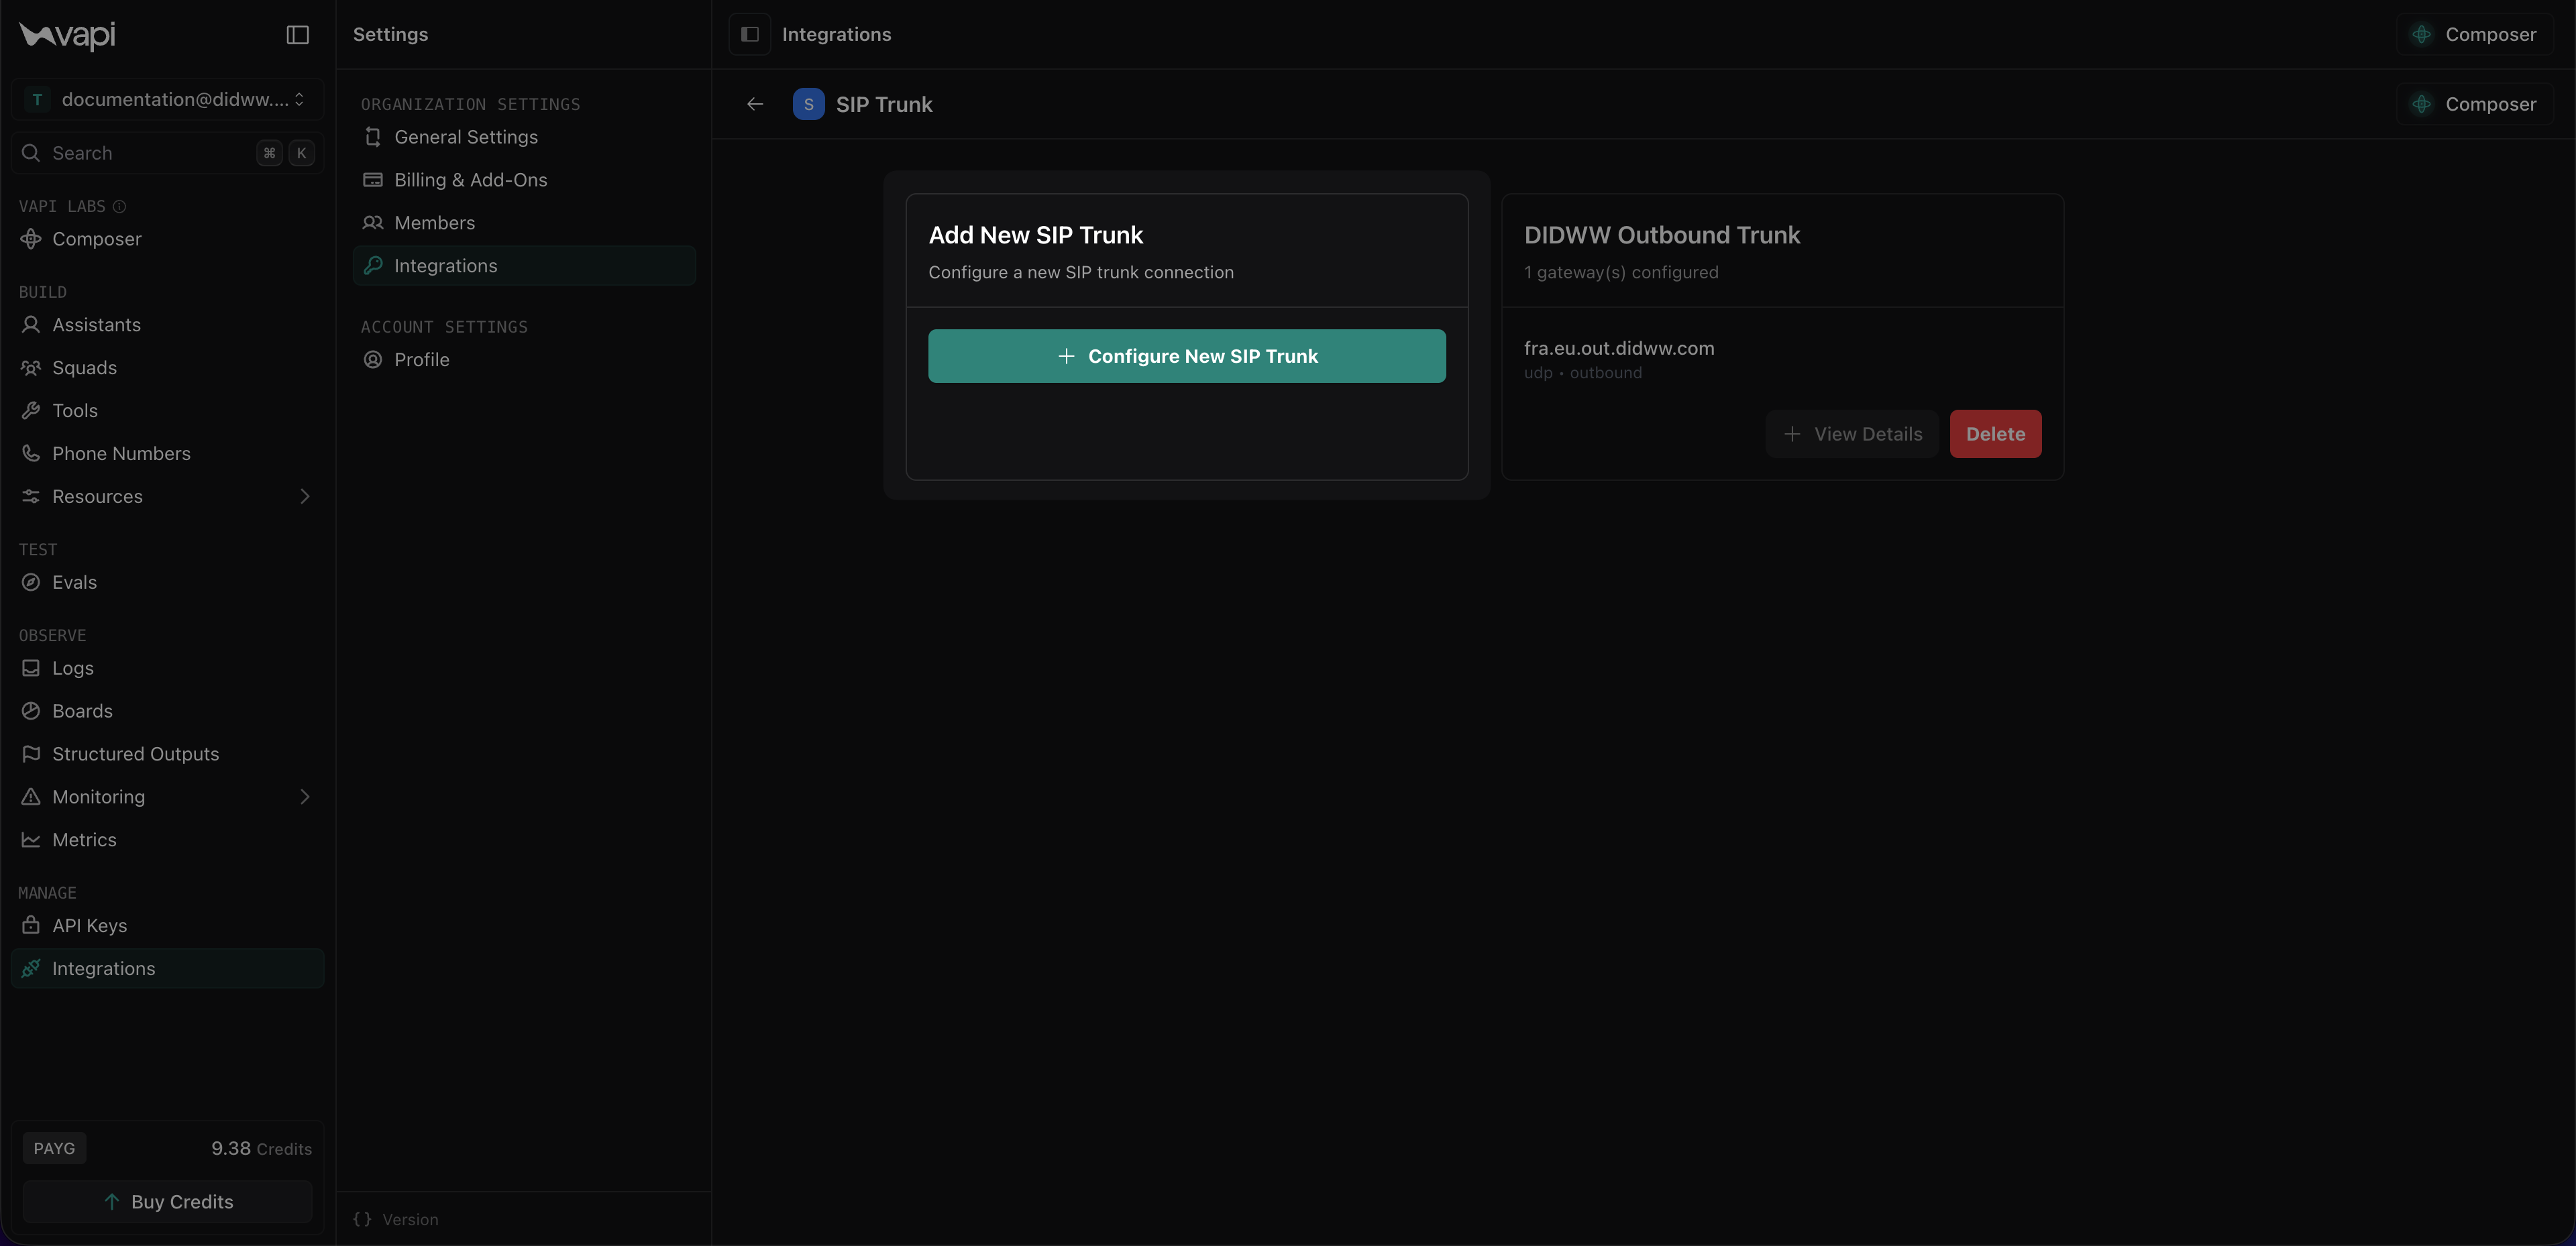
Fig. 16. Starting an inbound SIP trunk configuration in Vapi#
Enter a friendly Name (e.g.,
DIDWW Inbound Trunk).In the gateway settings, enter one of the DIDWW SIP IPs as the allowed signaling IP for the gateway (e.g.,
46.19.209.14).Configure the transport protocol and port. Use
5060for UDP/TCP or5061for TLS. This must match the transport protocol selected on the DIDWW inbound SIP trunk.Uncheck Allow outbound calls, leaving only Allow inbound calls selected.
Click Add Another Gateway and repeat steps 3-5 until you have added all DIDWW SIP IPs to the inbound trunk gateways. This is required because Vapi allows only one IP per gateway.
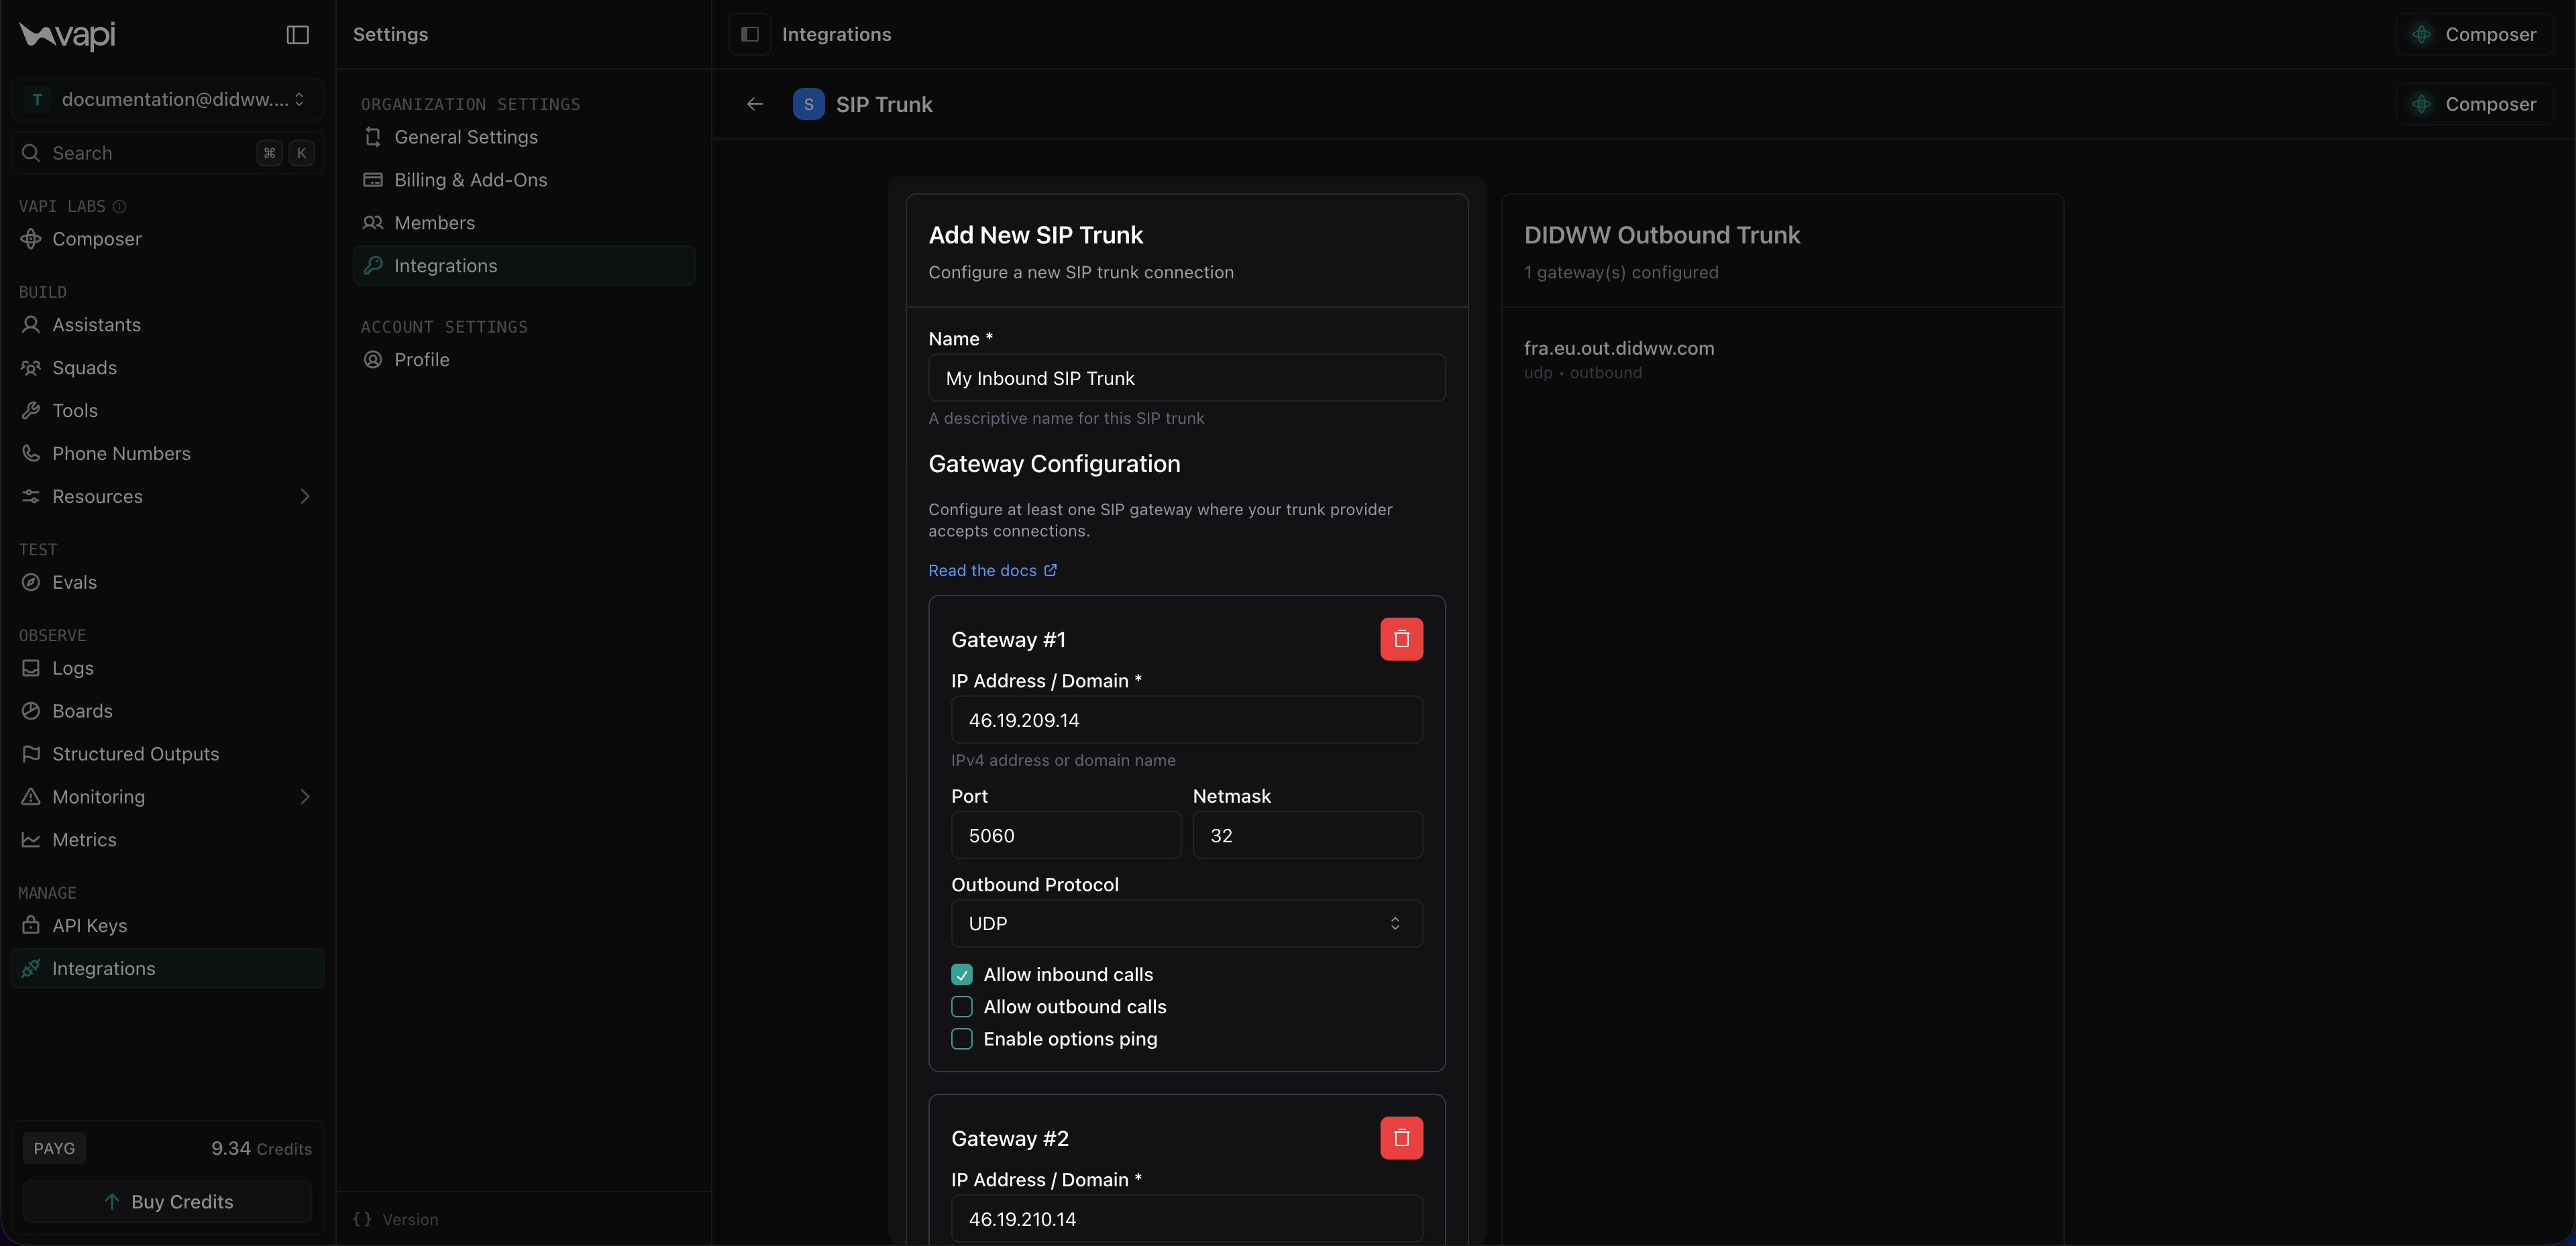
Fig. 17. Configuring DIDWW gateway IPs for the inbound trunk#
In Authentication, enter the Username and Password copied from Step 4: Copy Outbound Trunk Credentials.
Click Save SIP Trunk.
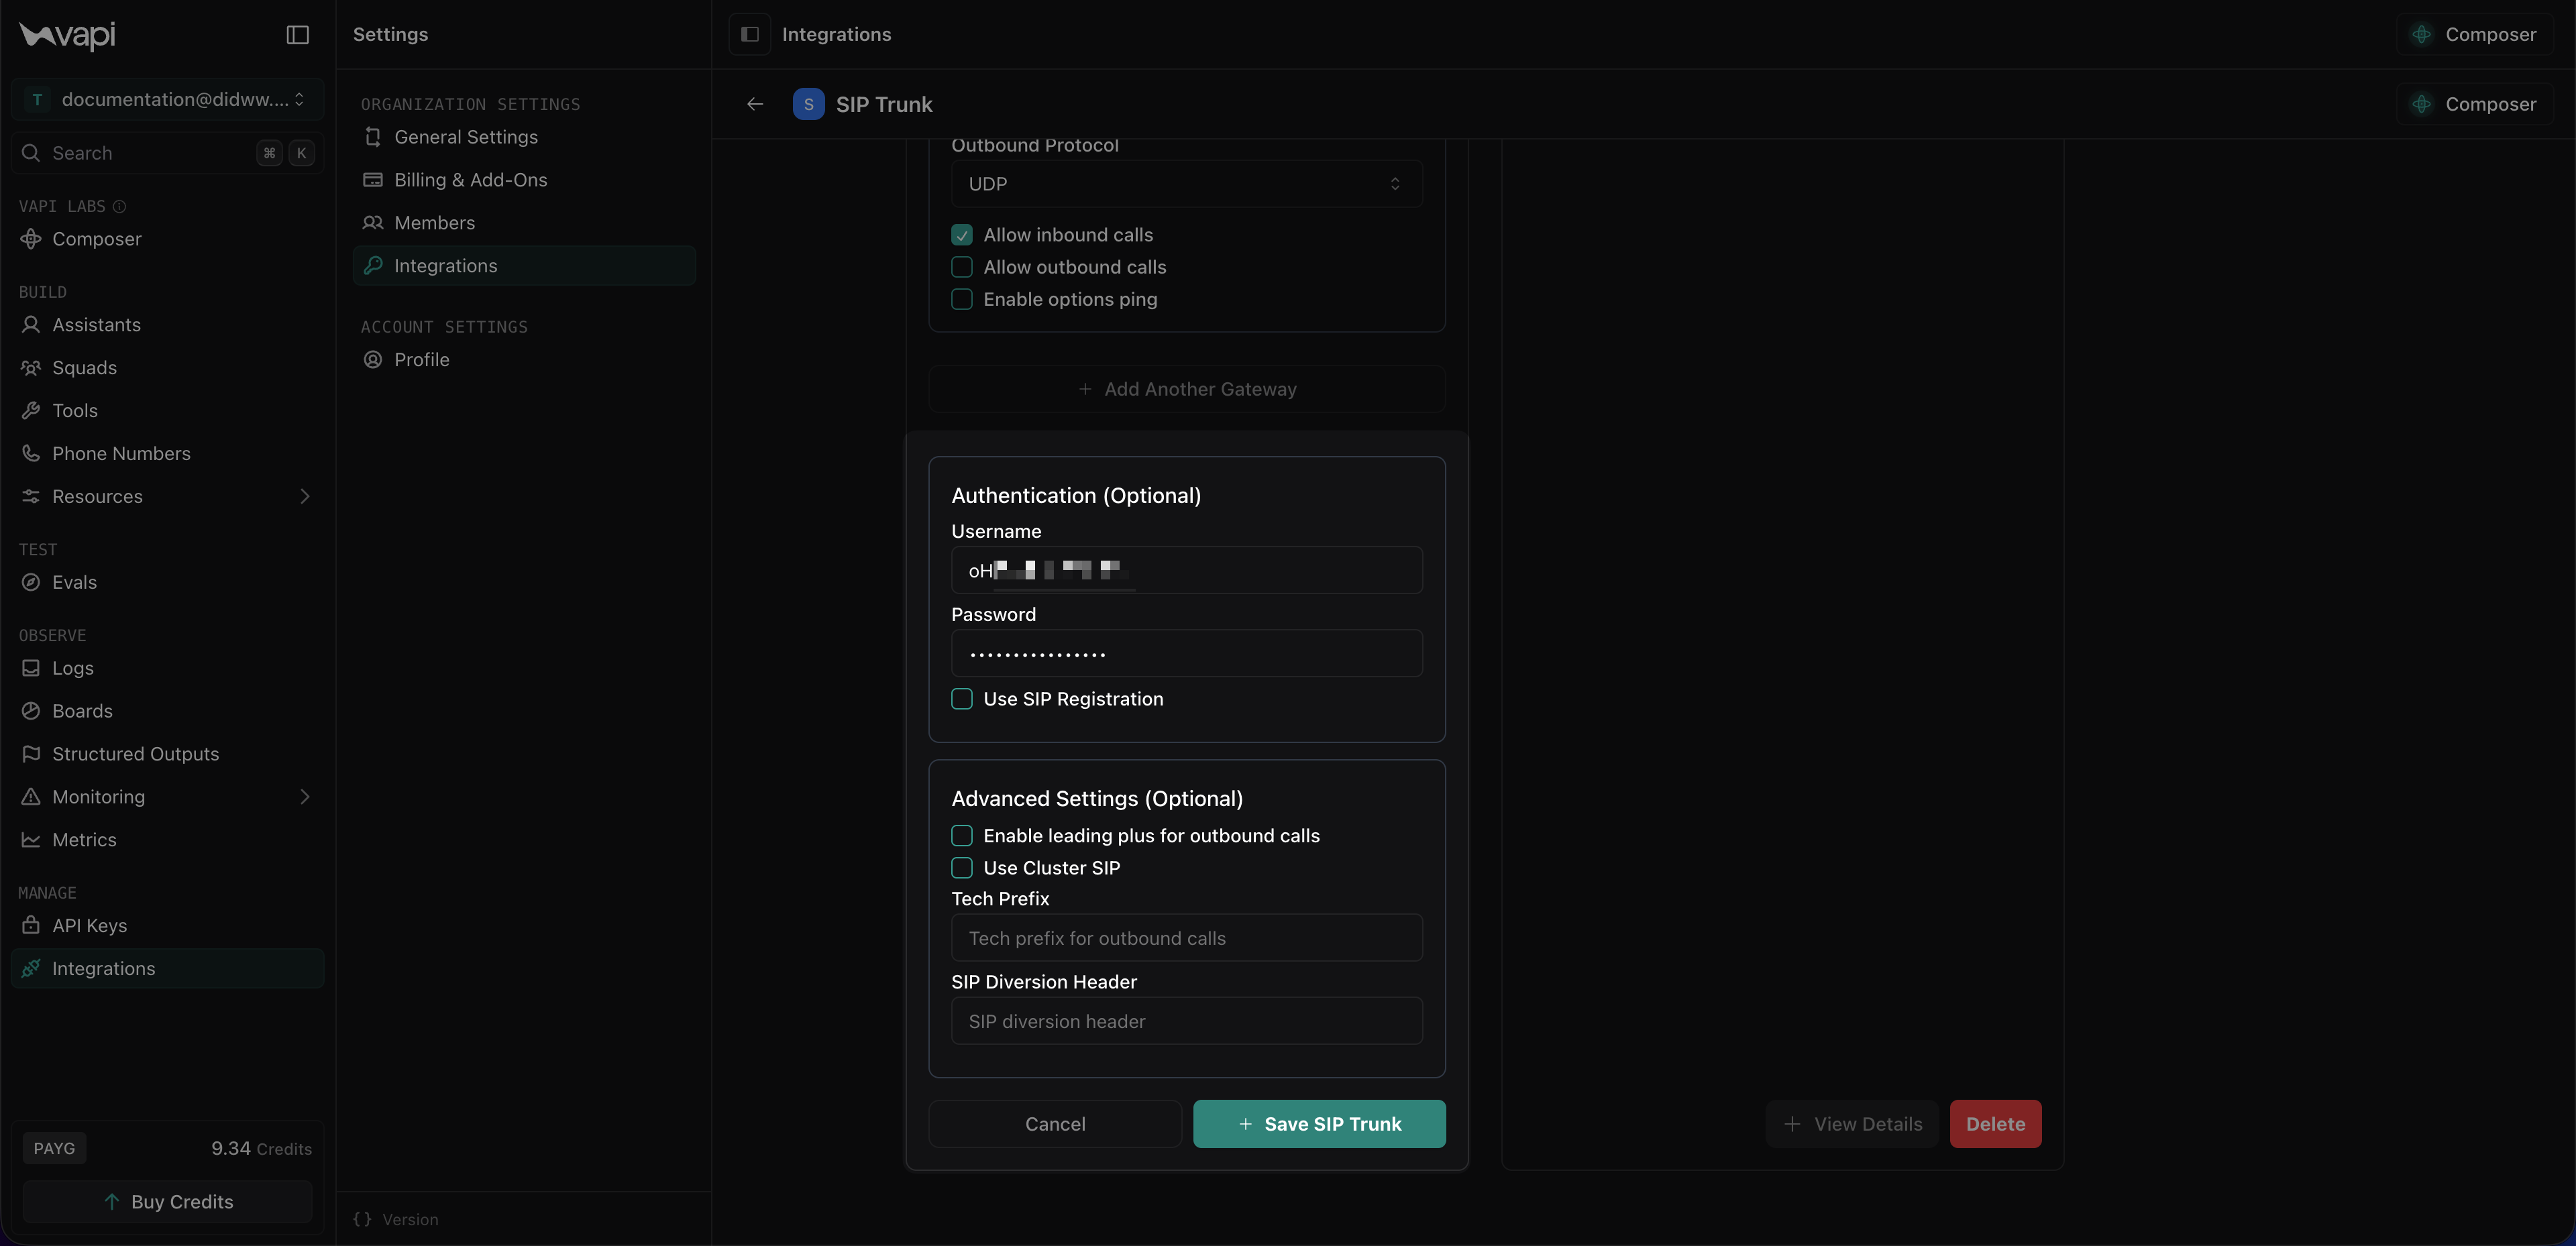
Fig. 18. Configuring inbound trunk authentication#
Step 3: Create Call Transfer Tool#
Create a call transfer tool in Vapi so the assistant can transfer an active call to a live person through DIDWW.
In Vapi, open the Tools page and click Create Tool and select Transfer Call.
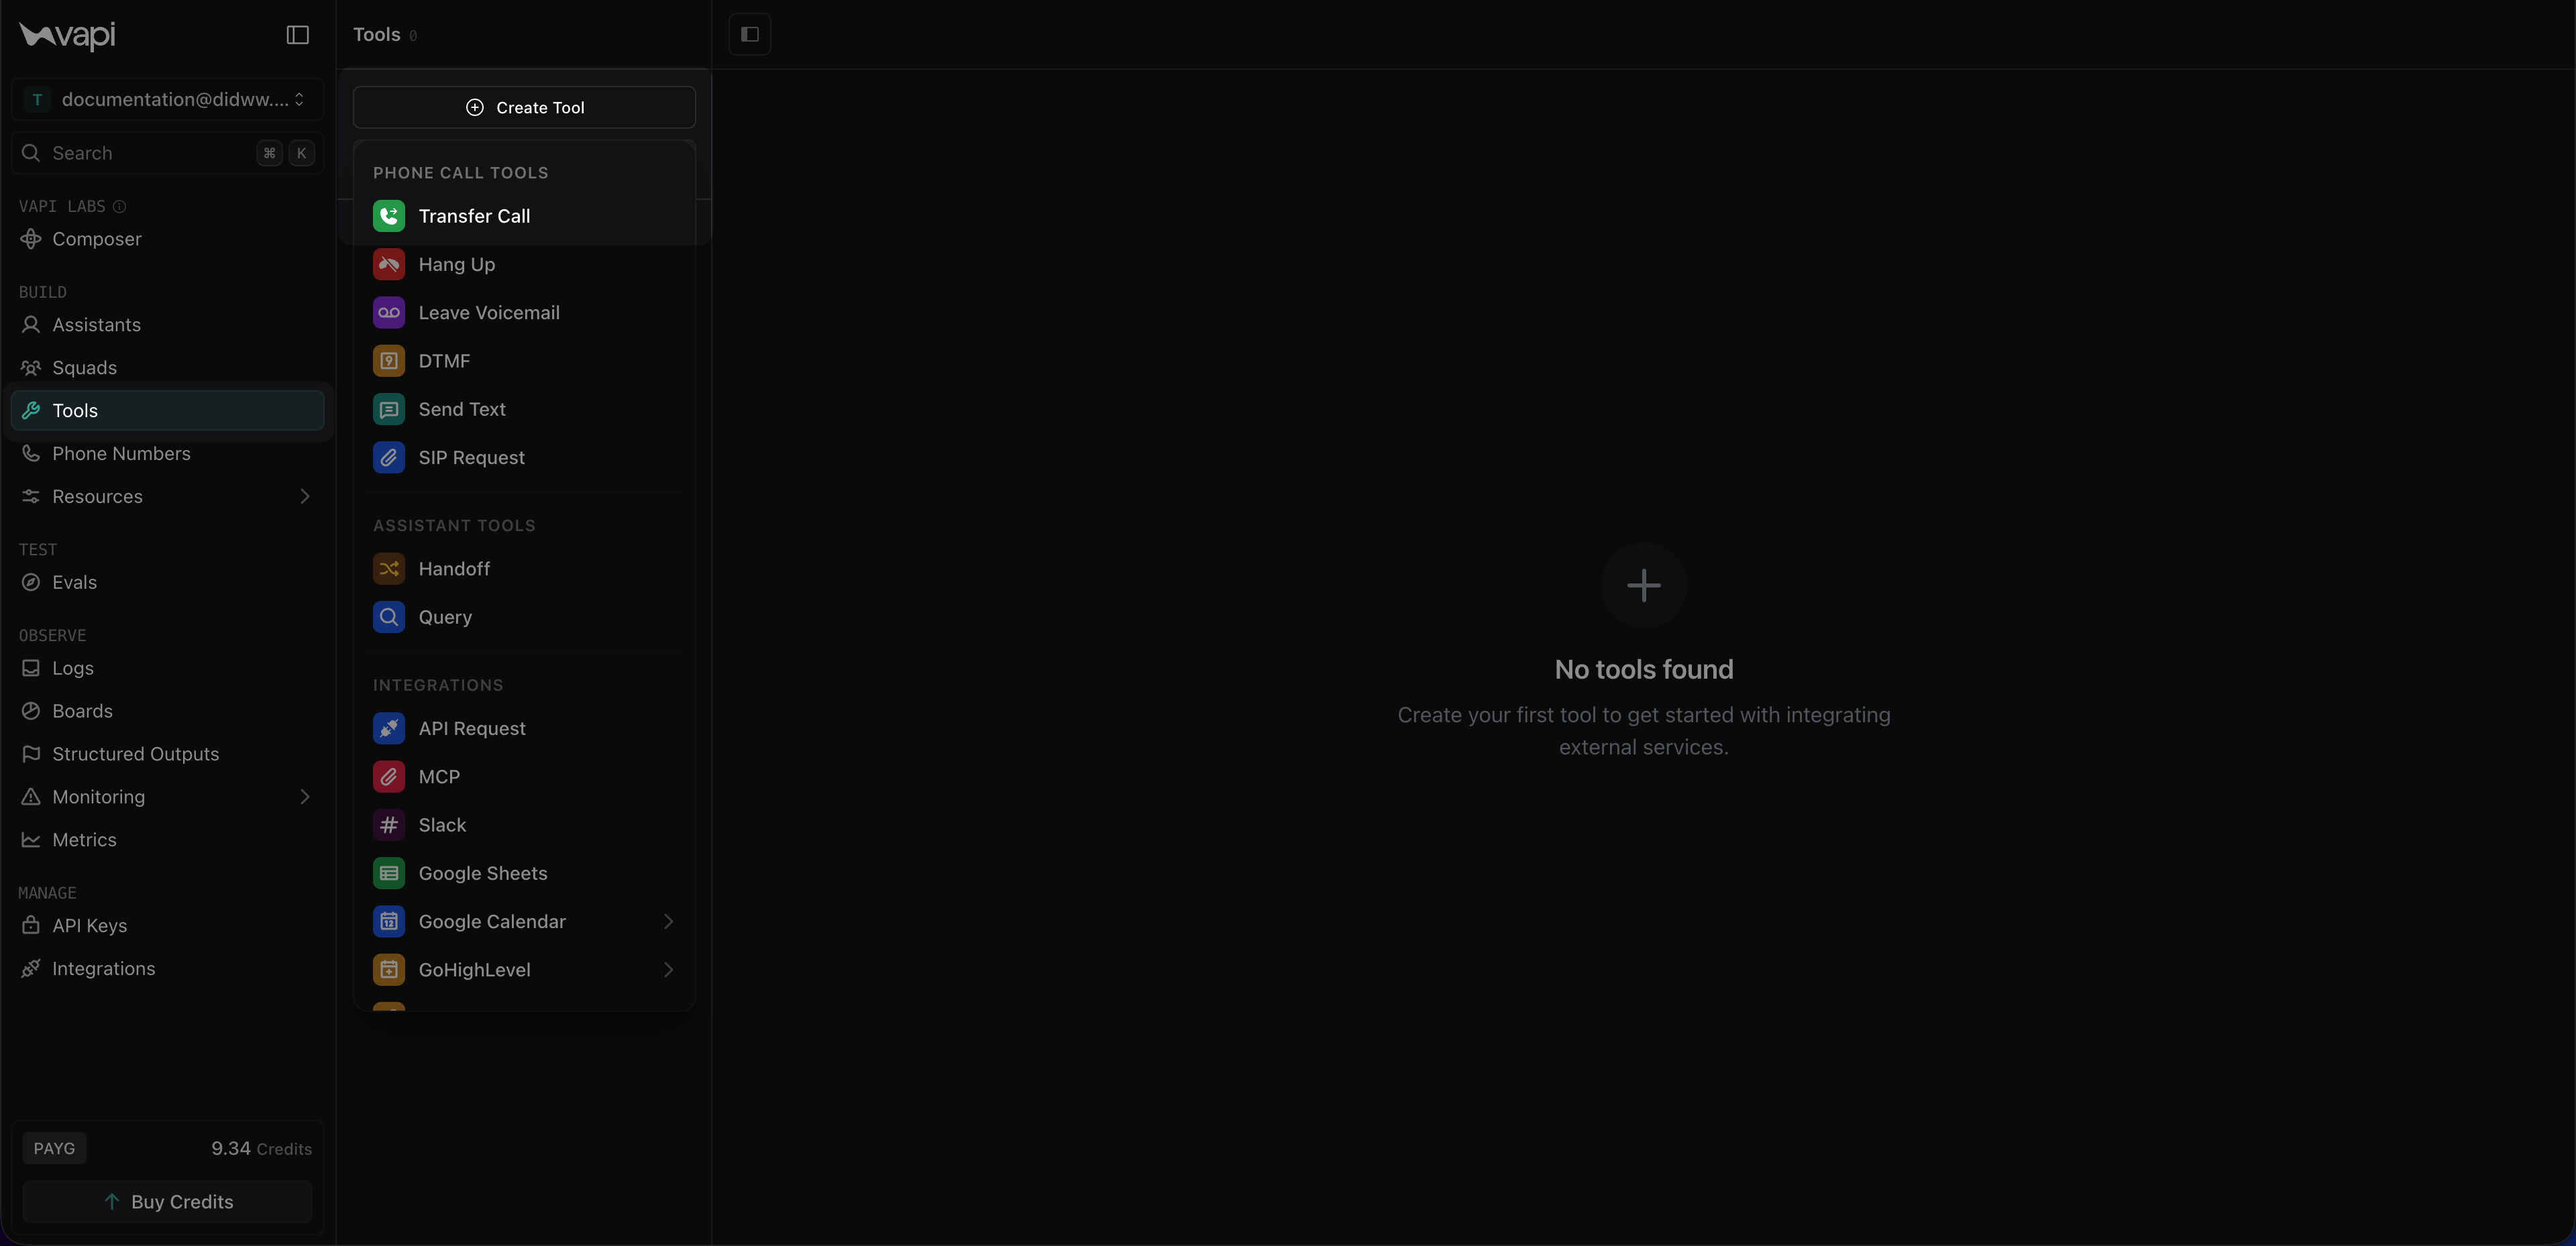
Fig. 19. Selecting the Transfer Call tool#
Enter a Tool Name (for example,
transfer_call_tool).In Description, enter a short explanation of when the tool should be used, for example:
Transfers the active call to a live person through DIDWW when the caller requests human assistance..Under Destinations, click Add Destination and select SIP.
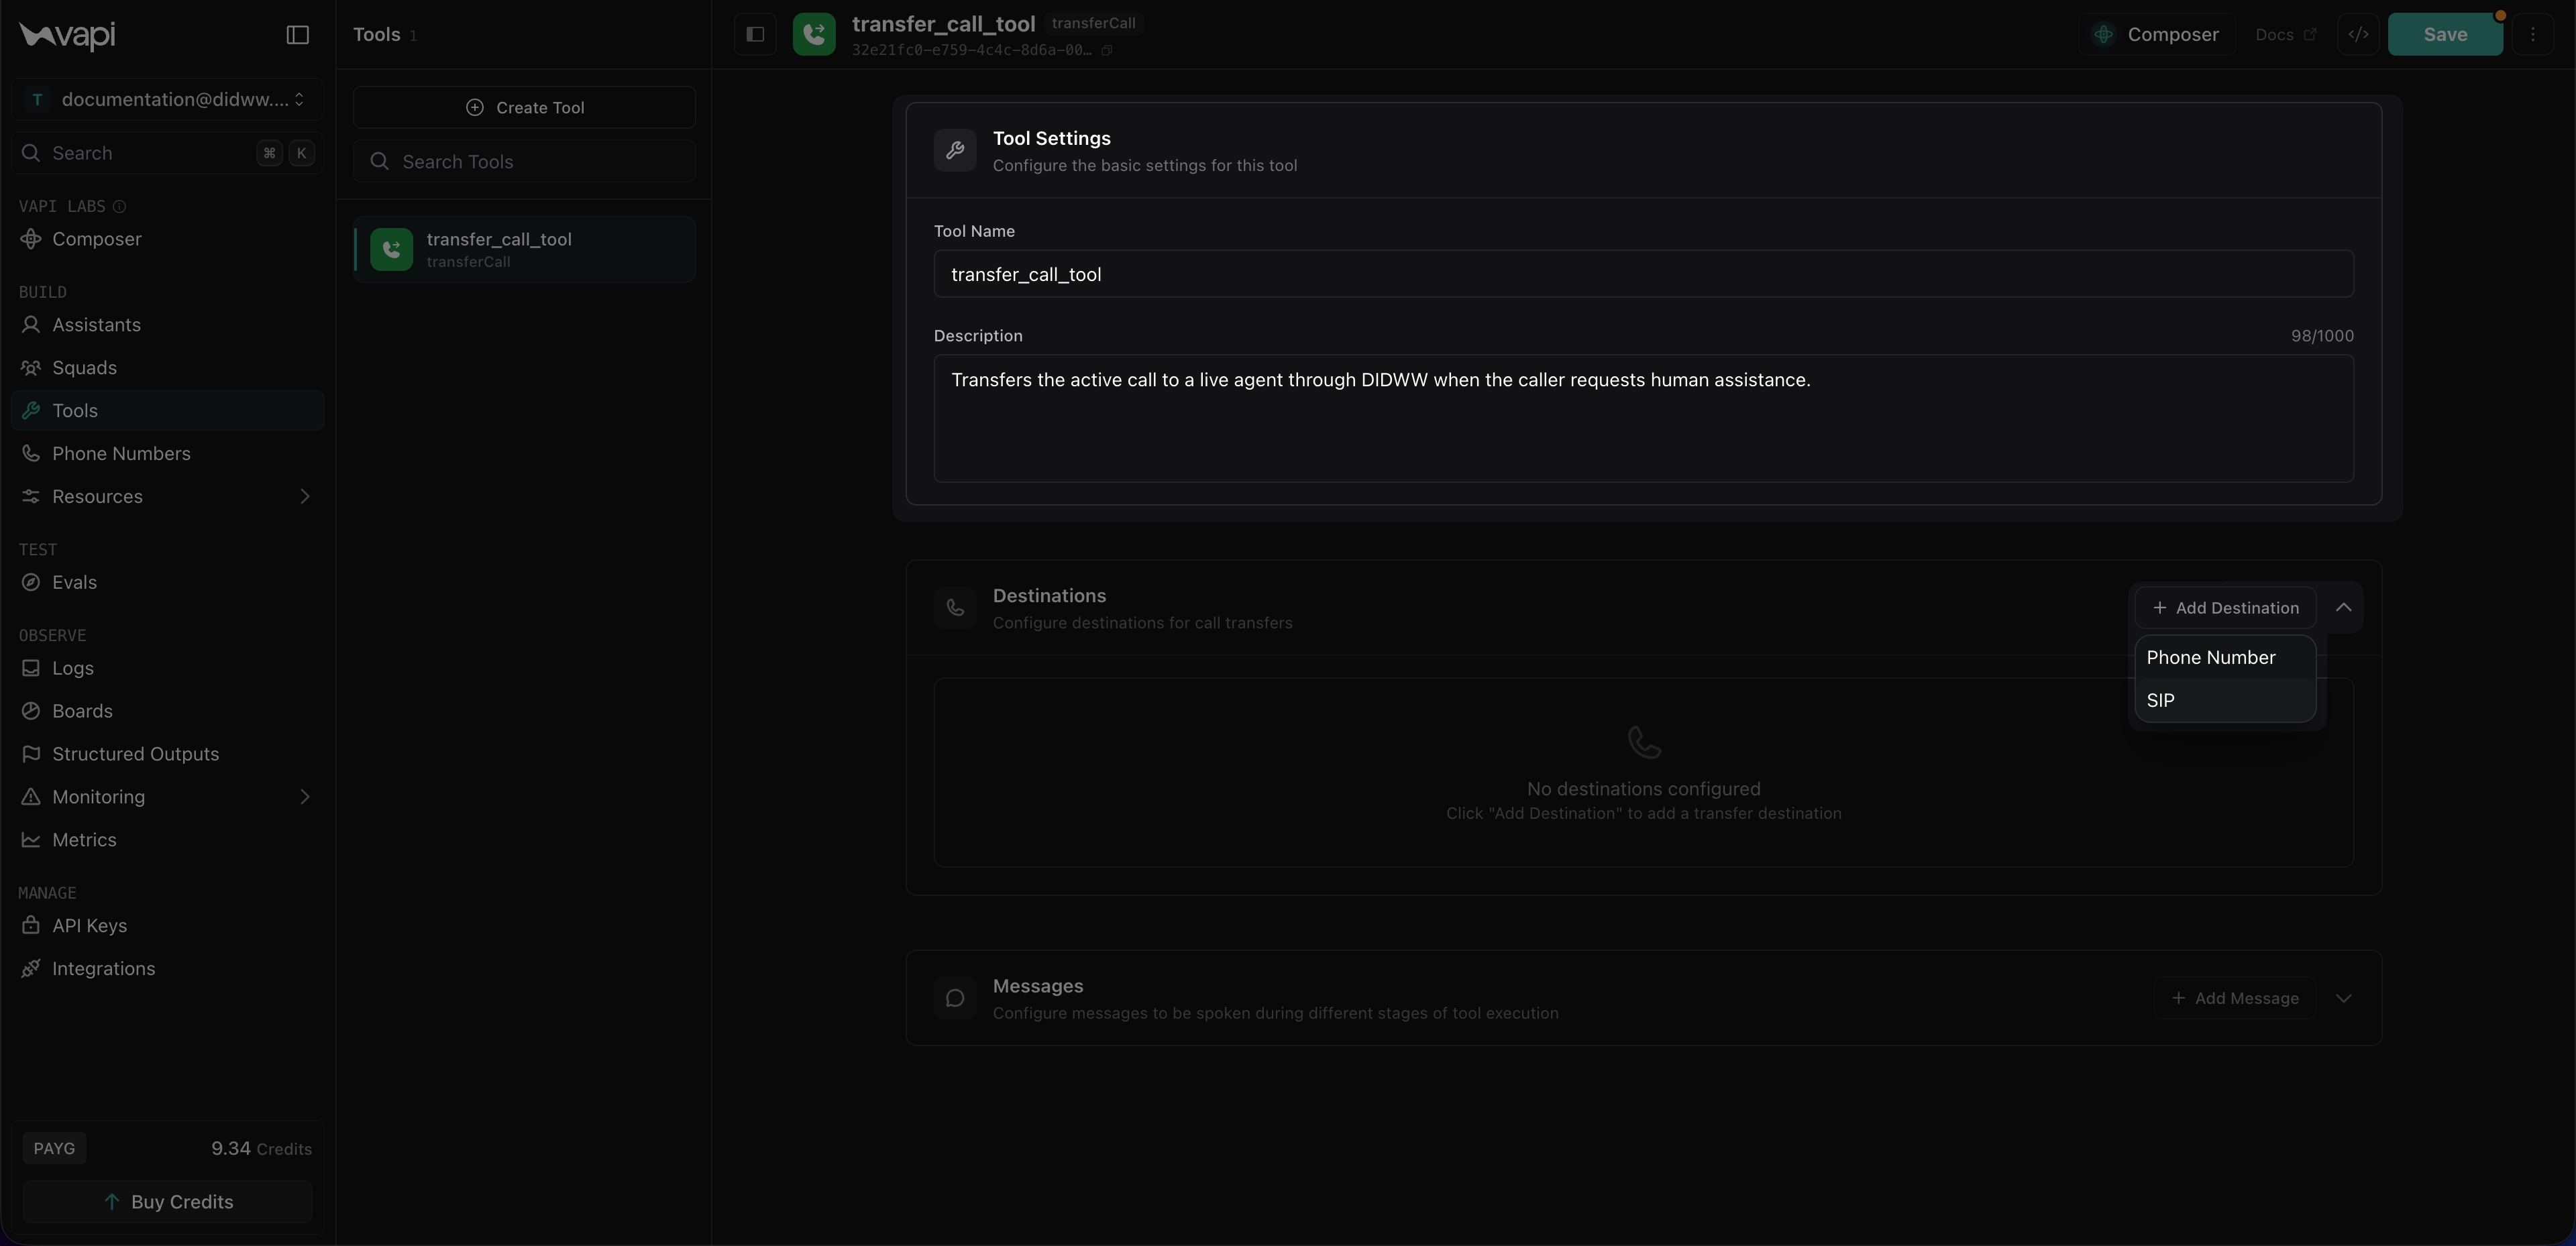
Fig. 20. Configuring the Transfer Call tool settings#
In SIP URI, enter the SIP URI in the format
sip:+E164_NUMBER@OUTBOUND_ENDPOINT, where the phone number is in E.164 format with the+symbol and the outbound endpoint is one of the DIDWW Outbound Trunk Signaling Endpoints, for examplesip:+1234567890@fra.eu.out.didww.com.In Message to Customer, enter the message that should be played before the transfer starts, for example
Please wait while I transfer your call.In the destination Description field, enter when this transfer destination should be used, for example
Trigger this tool when a caller asks to be transferred to a live person.In Transfer Mode, keep the default Blind Transfer mode.
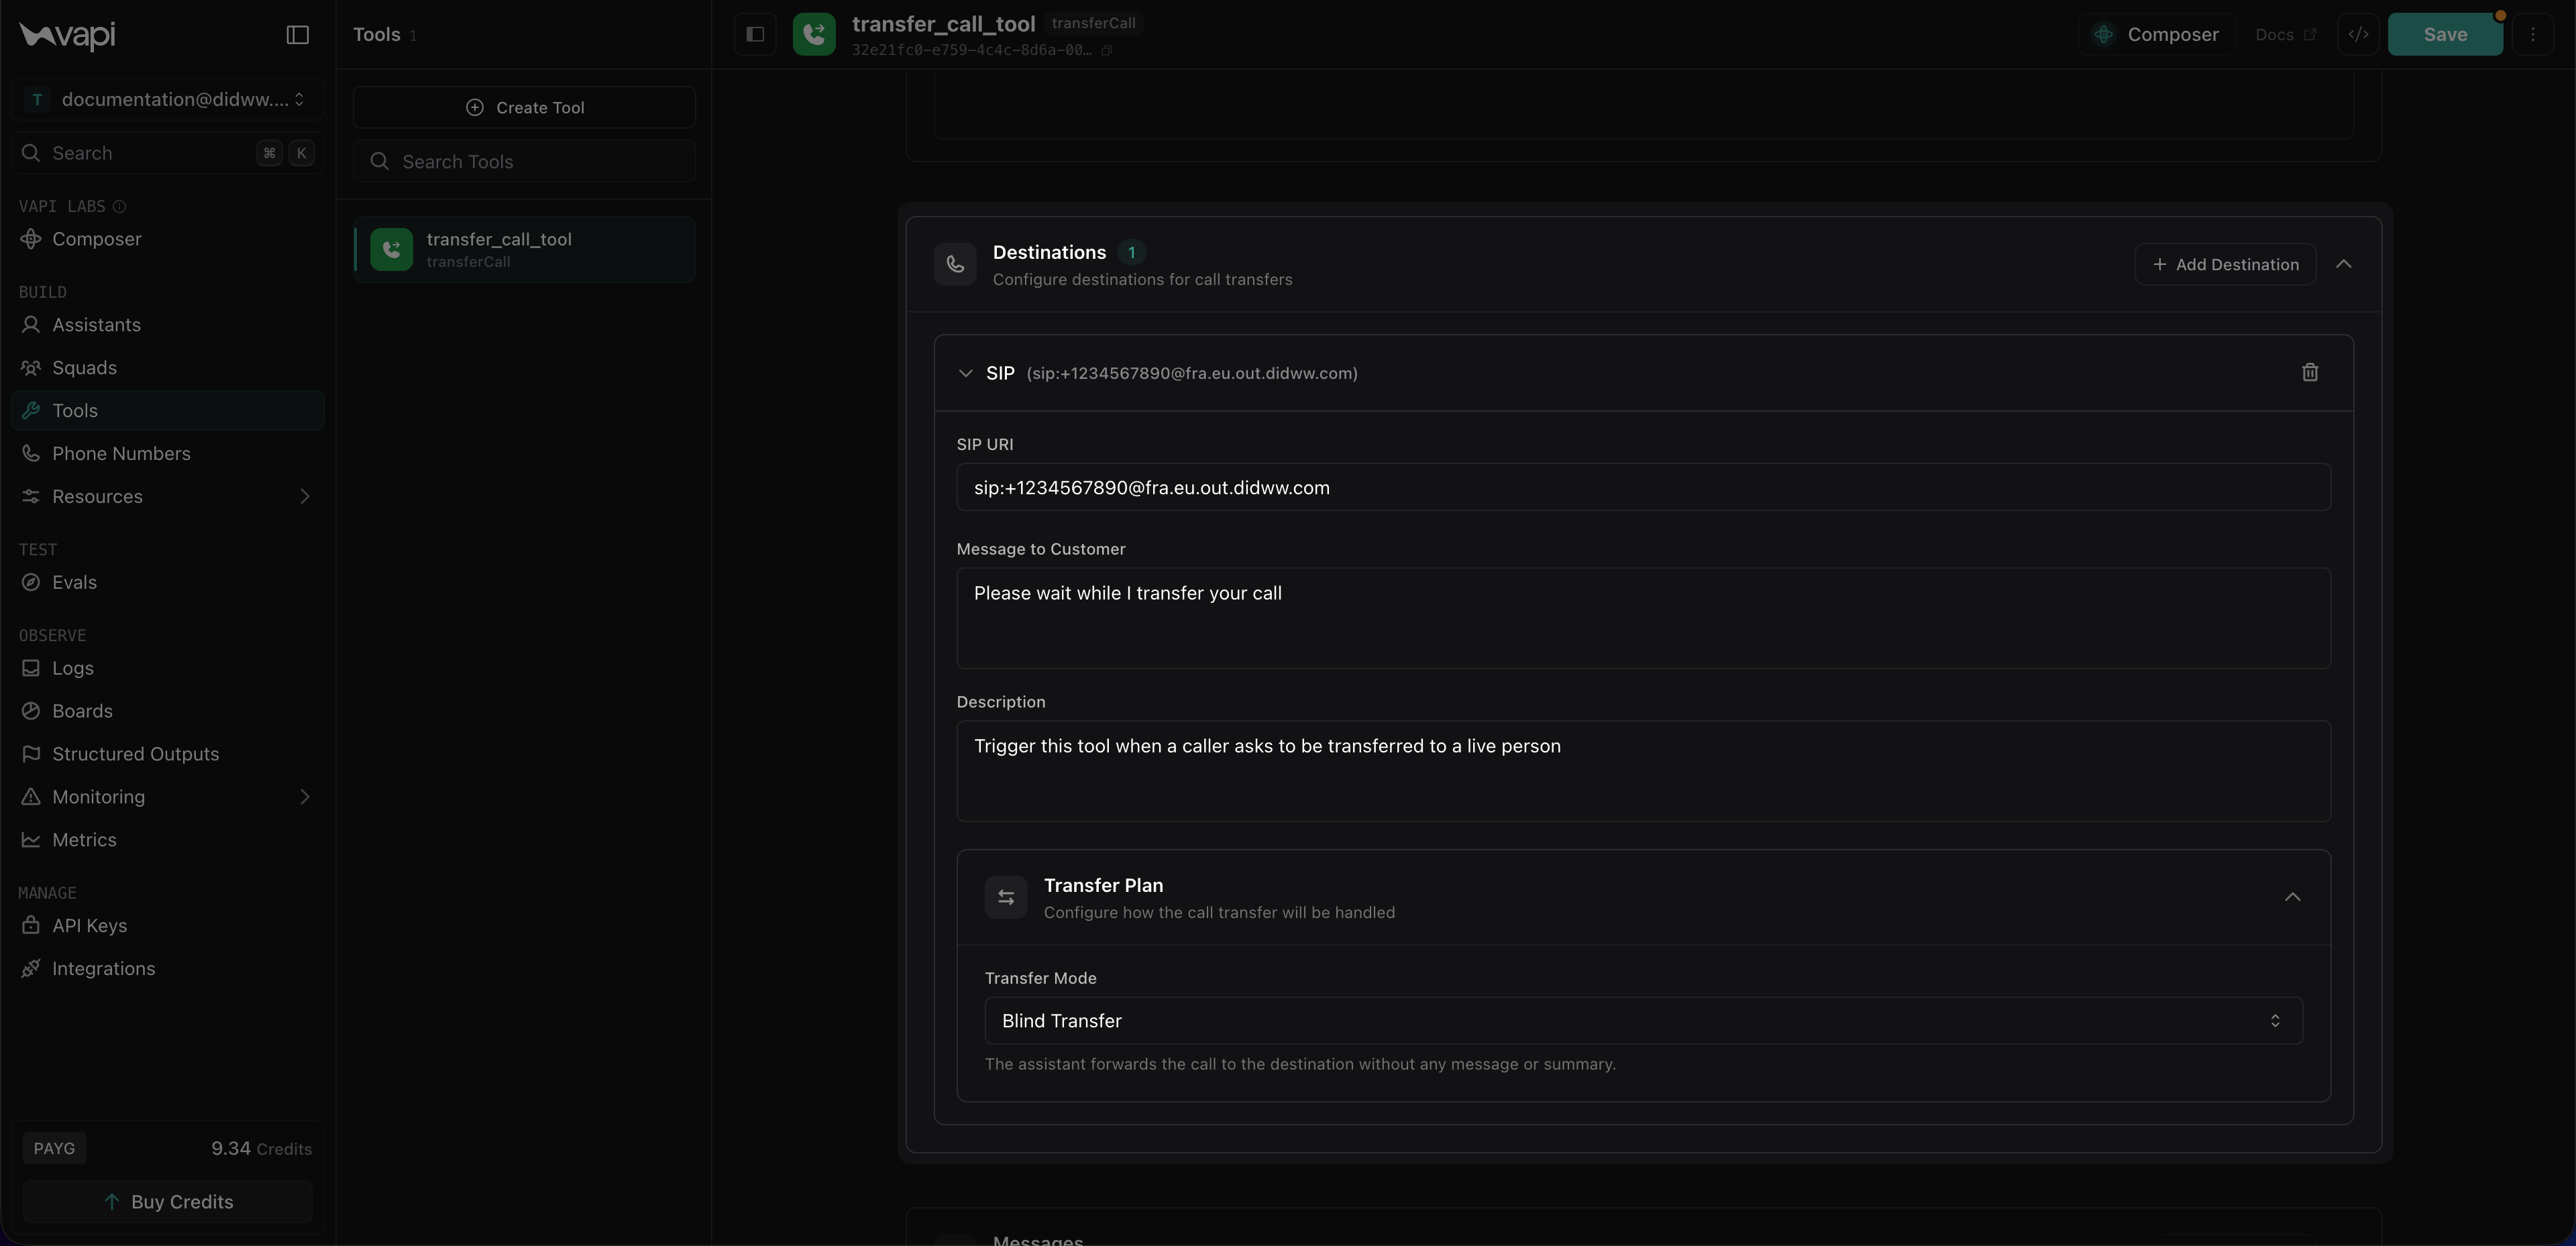
Fig. 21. Configuring the SIP destination for the Transfer Call tool#
Click Save to create the call transfer tool.
Step 4: Add Call Transfer Tool to Your Assistant#
Add the transfer tool to the assistant that will handle calls for your DIDWW number.
In Vapi, go to Assistants and open the assistant that will handle your DIDWW calls.
Open the Tools tab and click Add tool.
Select the Transfer Call Tool you created in the previous step.
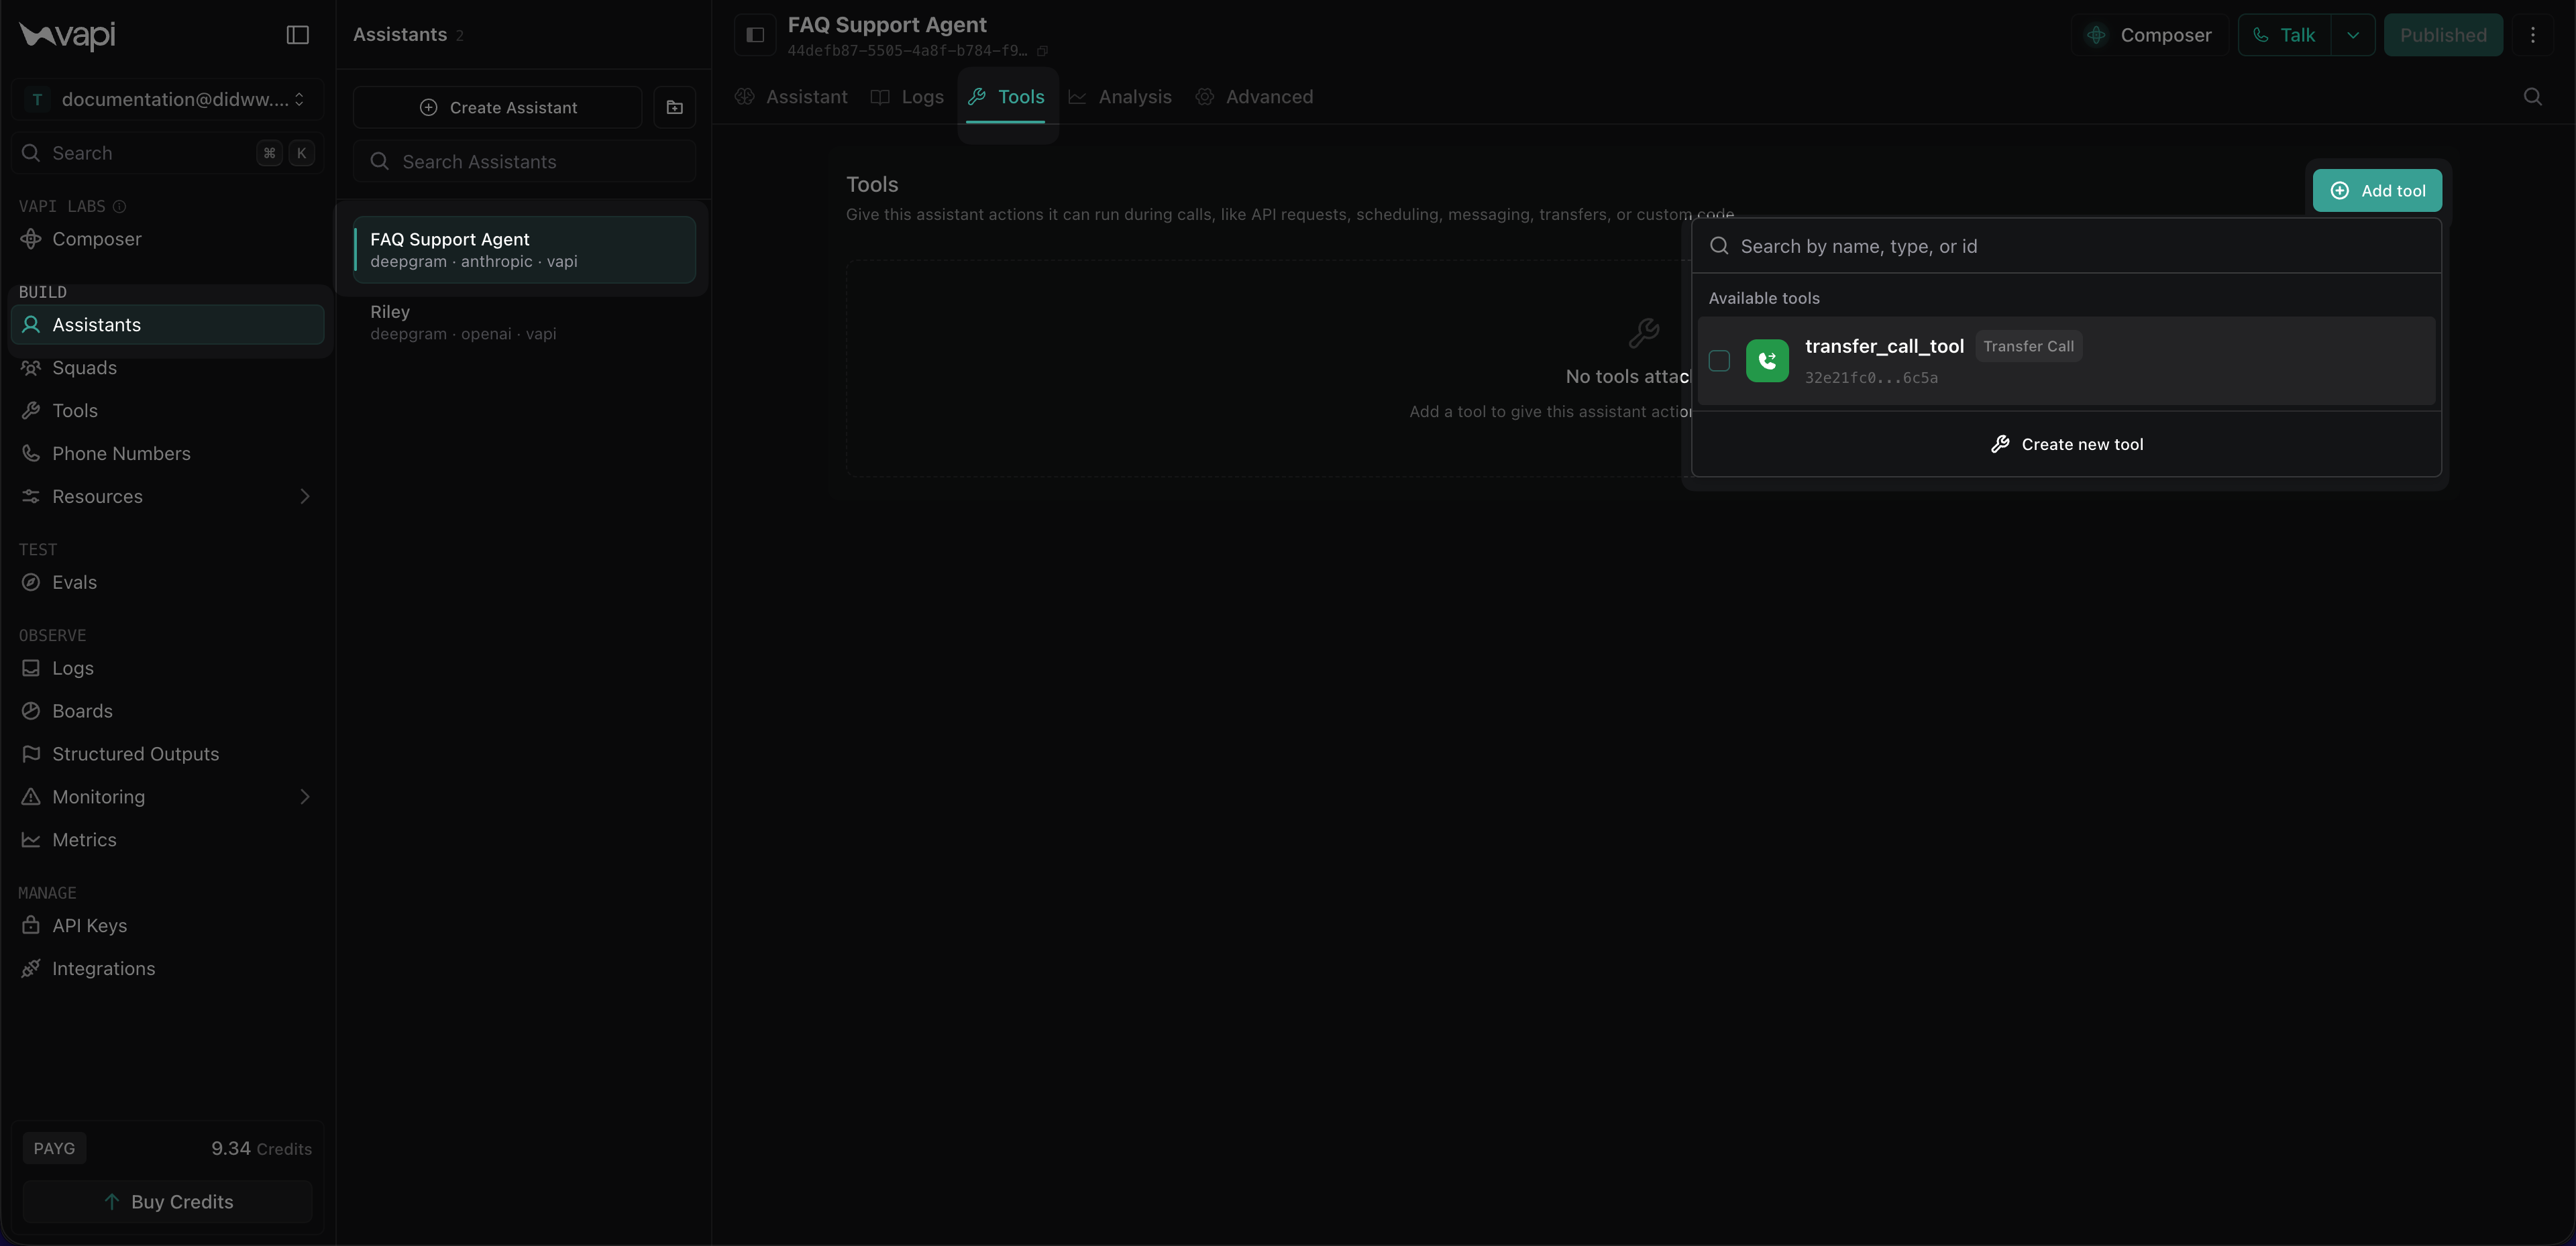
Fig. 22. Adding the transfer tool to a Vapi assistant#
Click Publish to apply the assistant changes.
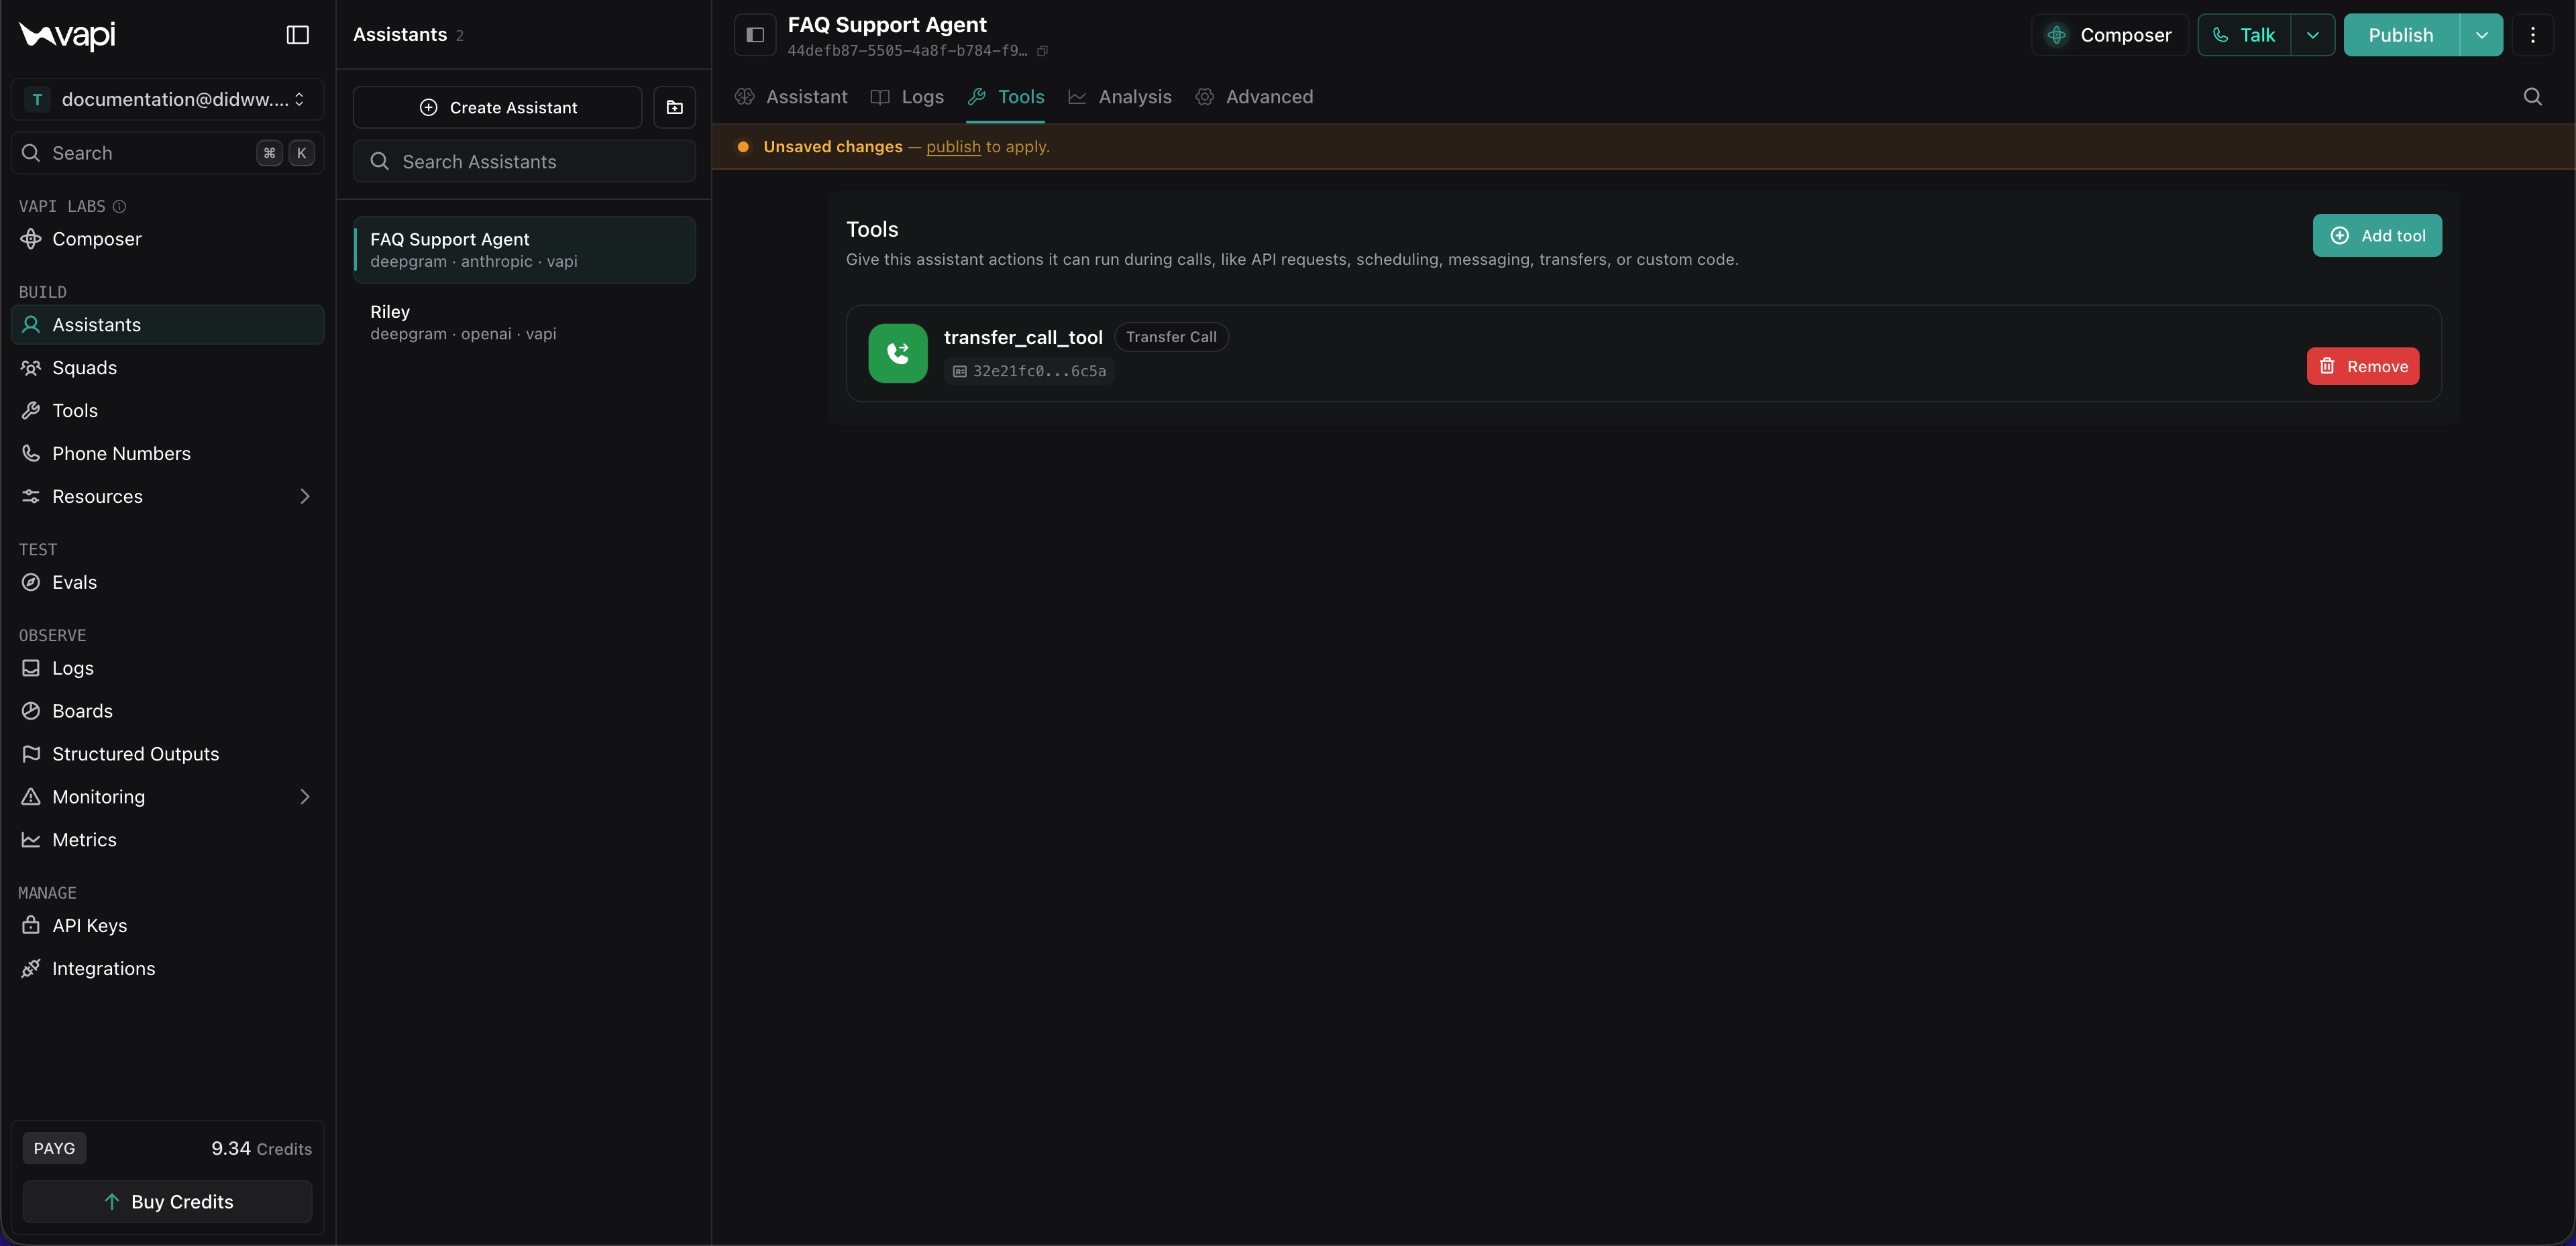
Fig. 23. Transfer tool attached to the assistant#
In the pop-up window, click Publish again to confirm the changes.
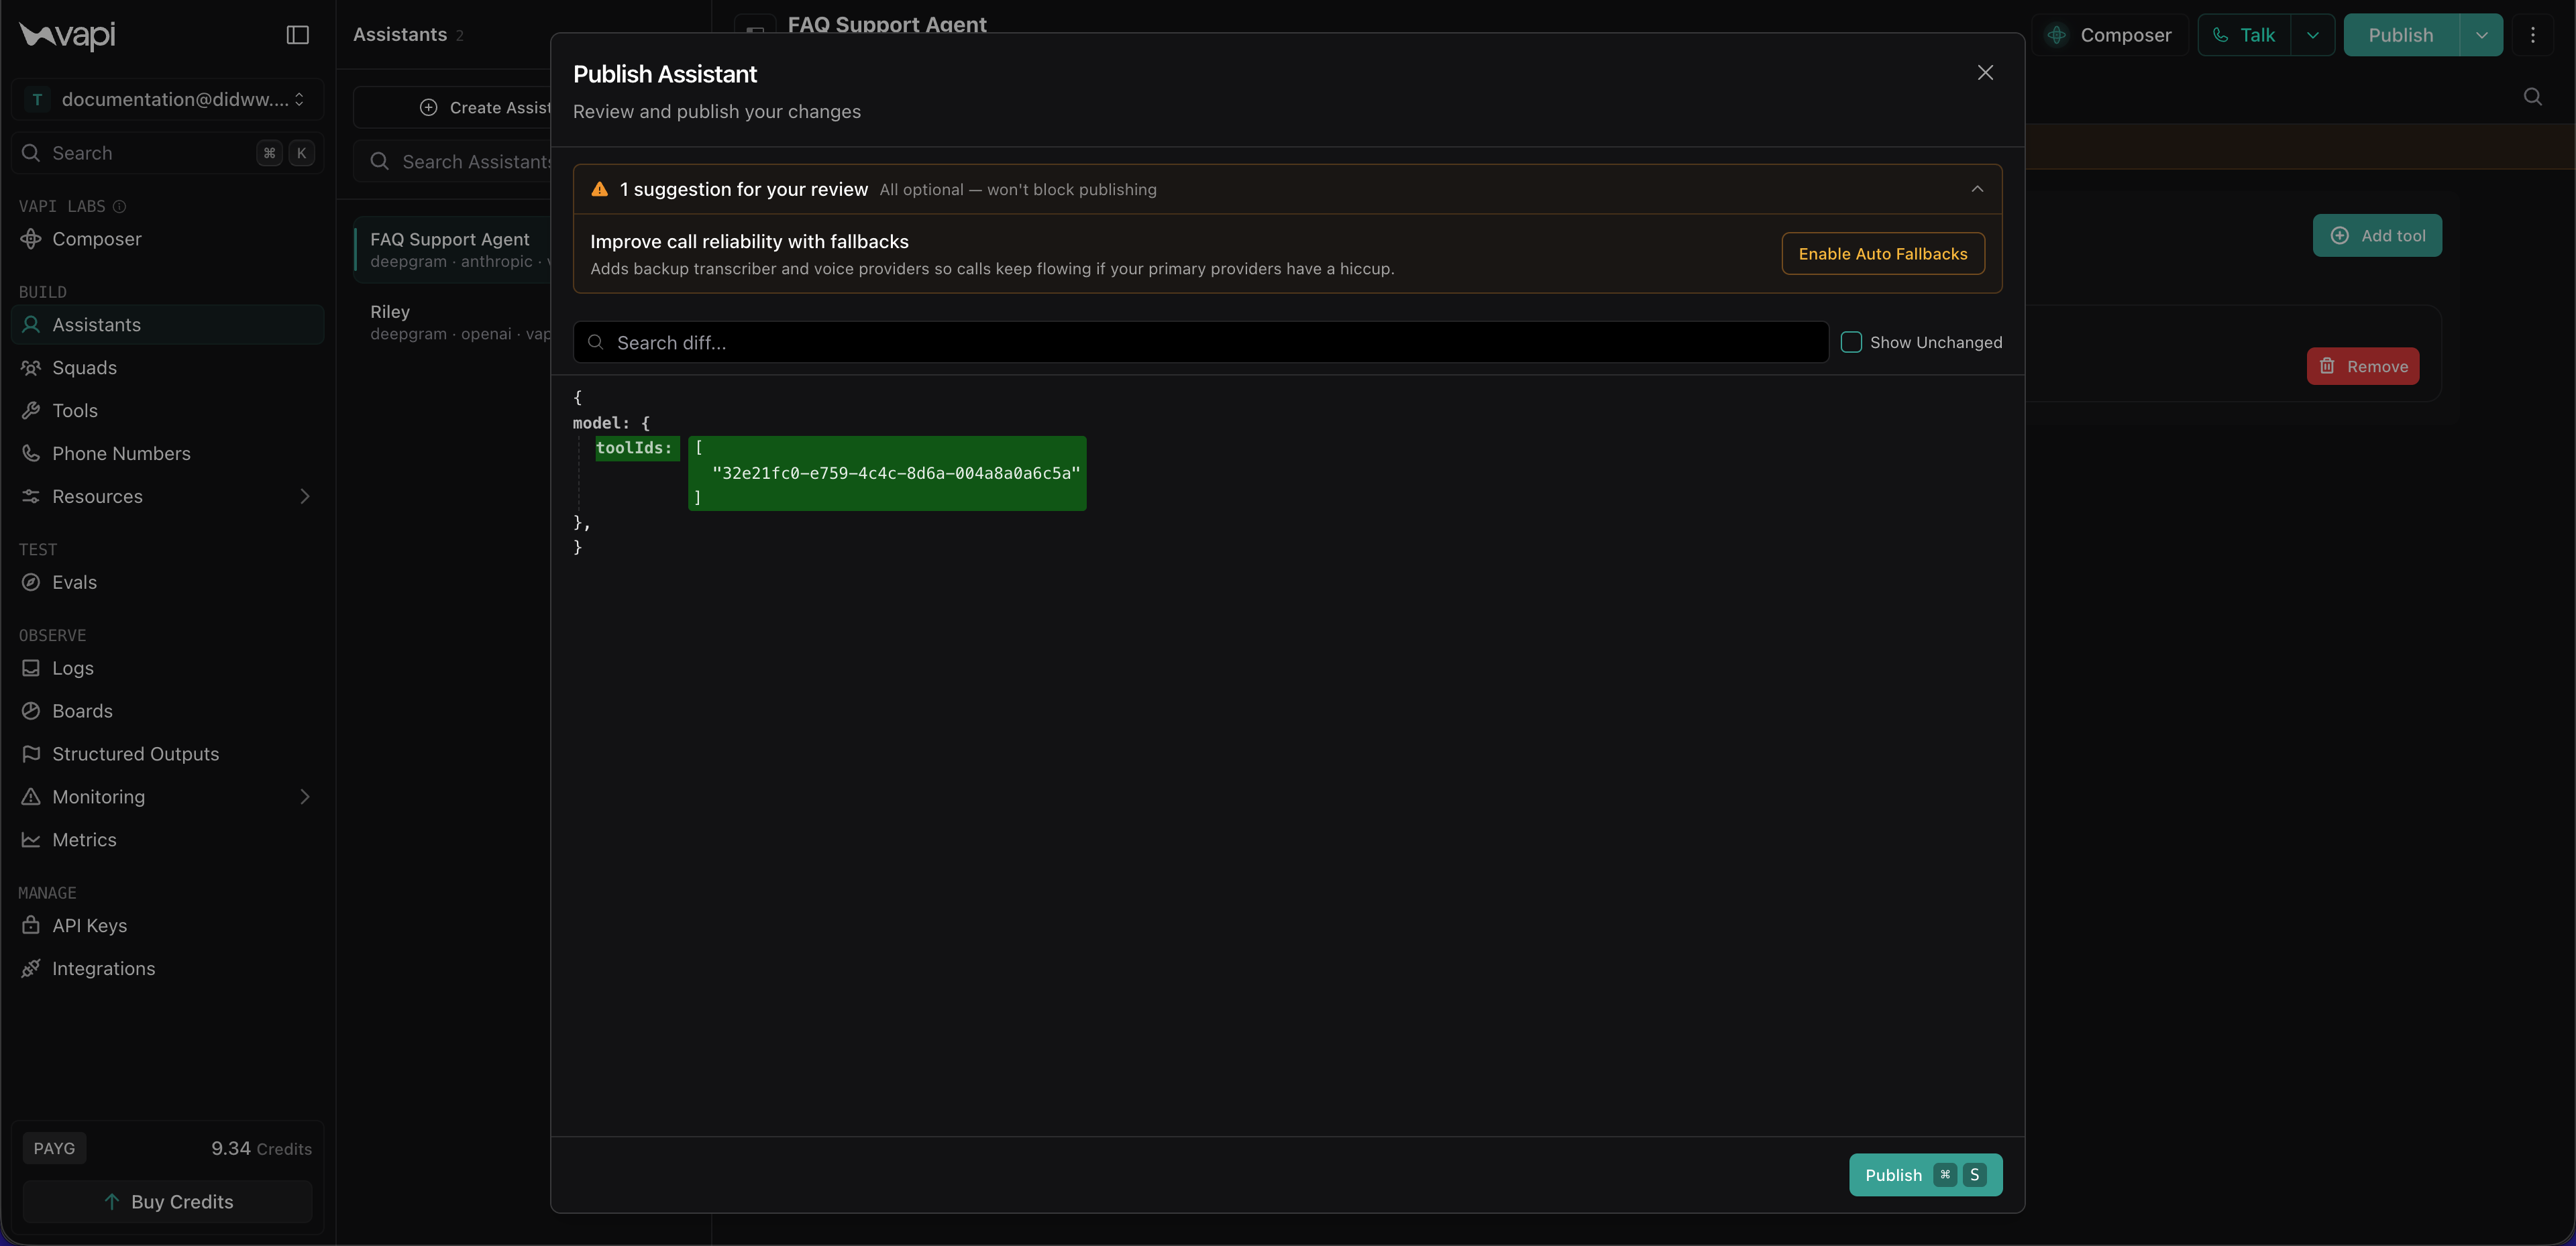
Fig. 24. Publishing the assistant changes#
Step 5: Import DIDWW Phone Numbers#
Import your DIDWW phone number to Vapi and assign it to the assistant that will handle incoming calls.
In Vapi, open the Phone Numbers menu and click Create Phone Number.
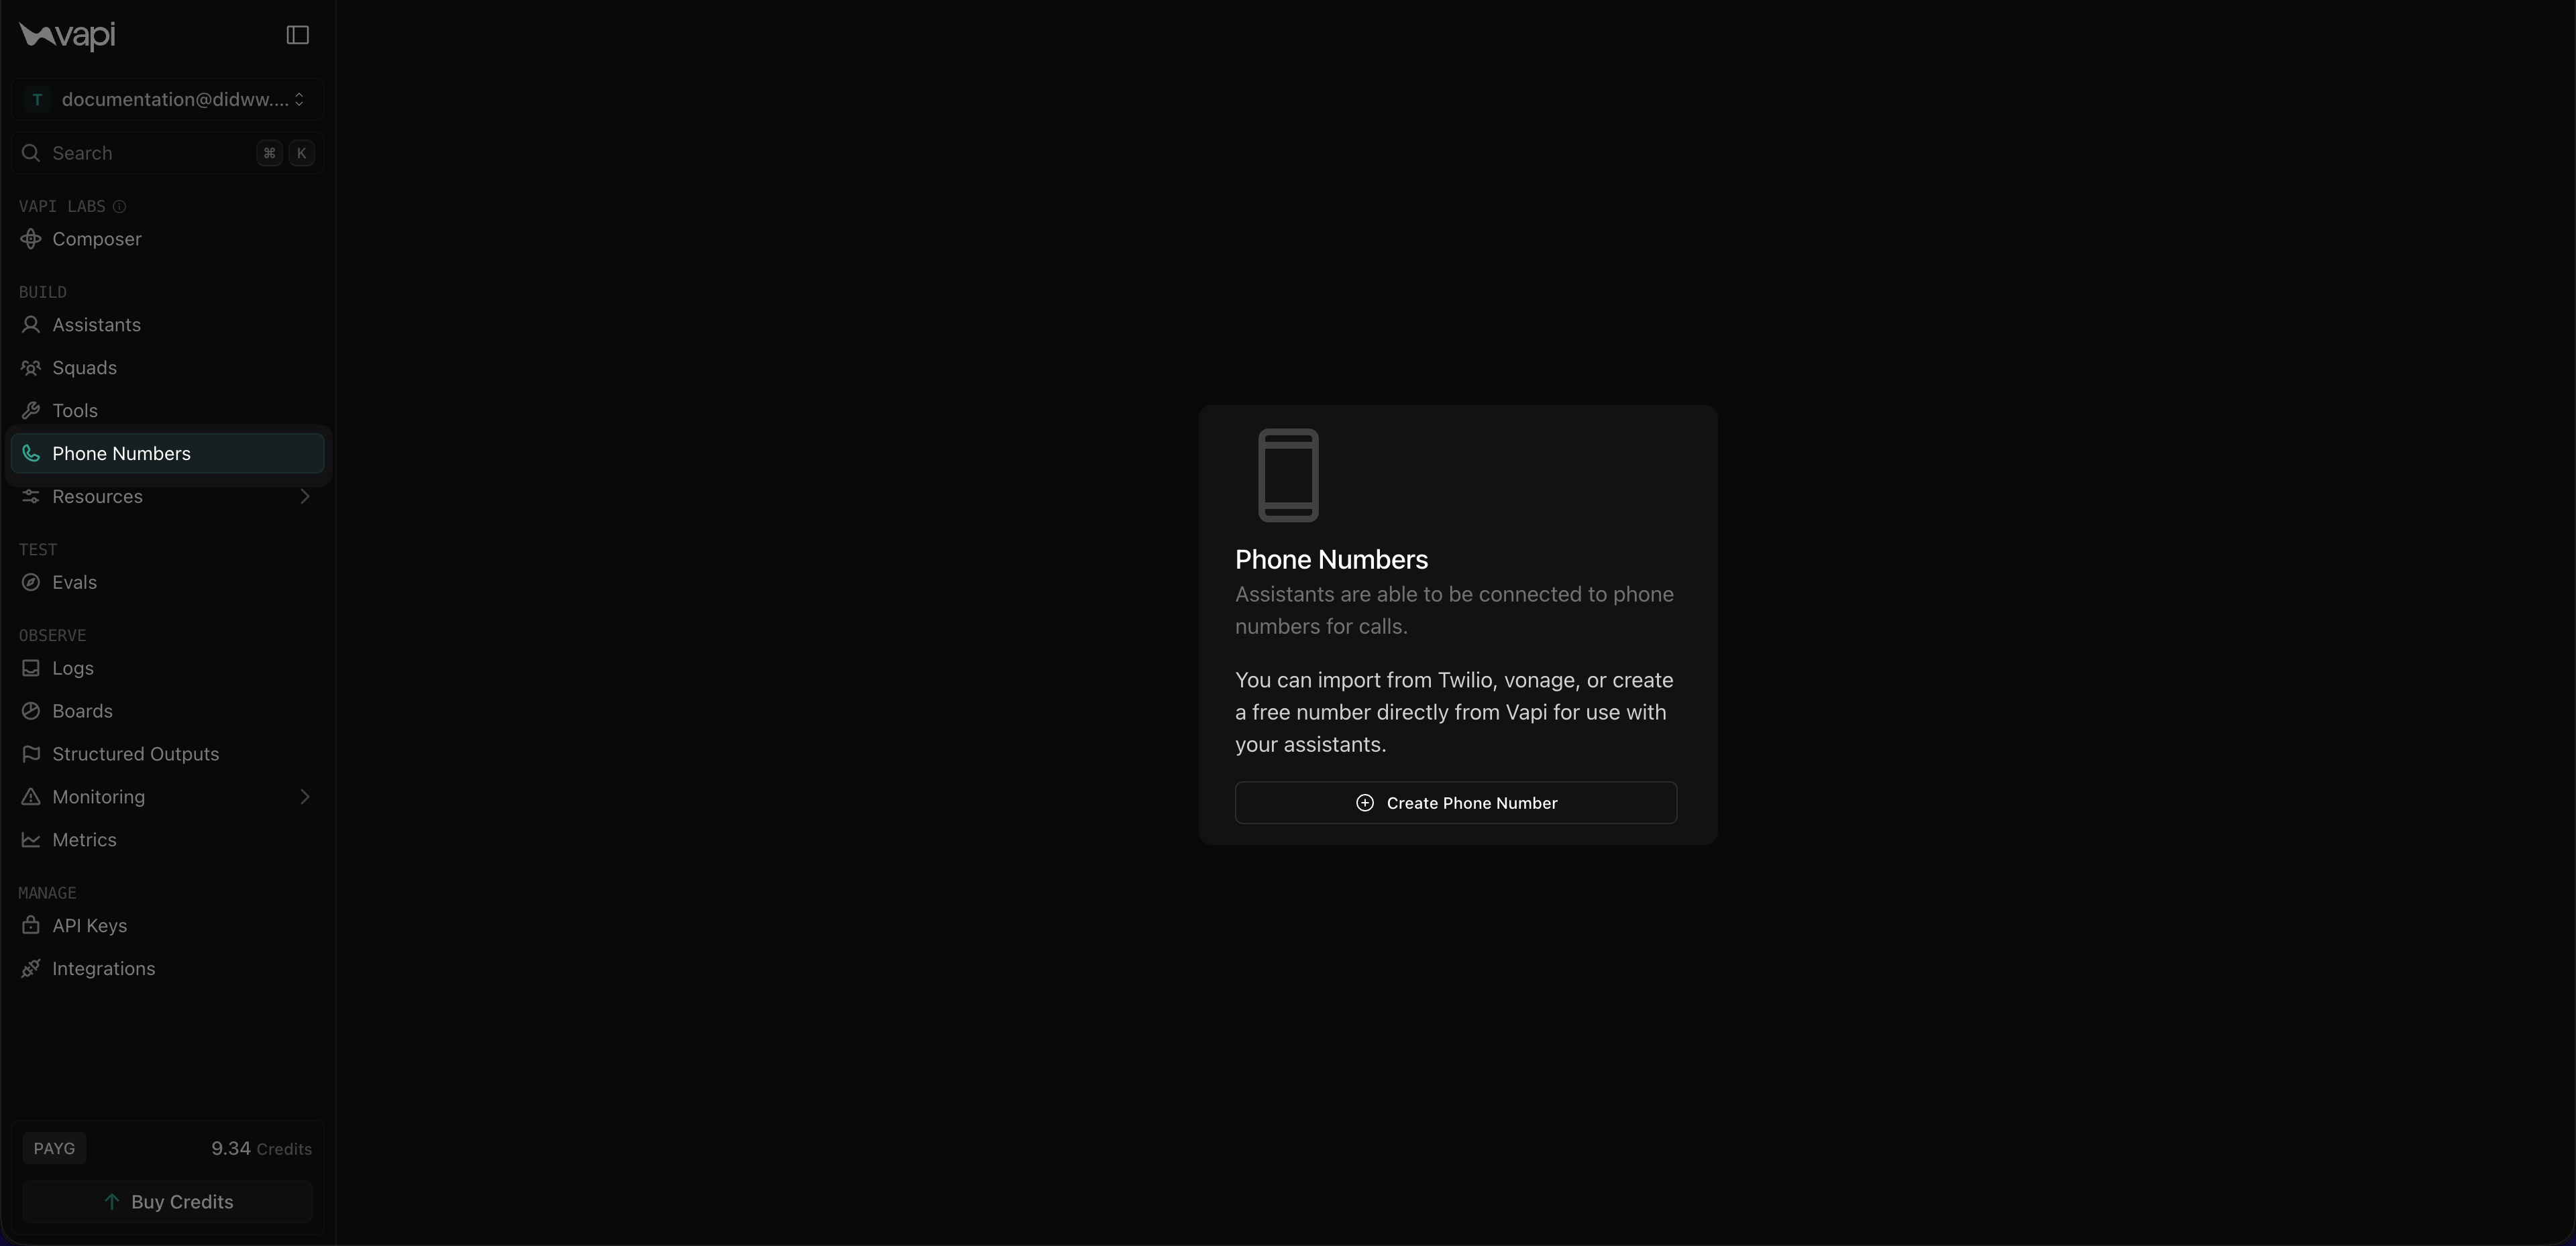
Fig. 25. Opening the Phone Numbers page in Vapi#
Select BYO SIP Trunk Number.
In Phone Number, enter your DIDWW number in E.164 format with the
+symbol (for example,+18648301018).Leave Allow non-E164 phone numbers unchecked.
In SIP Trunk Credential, select the Vapi inbound SIP trunk created in Step 2: Create Inbound Trunk.
Optionally, in Label, enter a descriptive name for the number (for example,
My DIDWW Phone Number).Click Import SIP Phone Number.
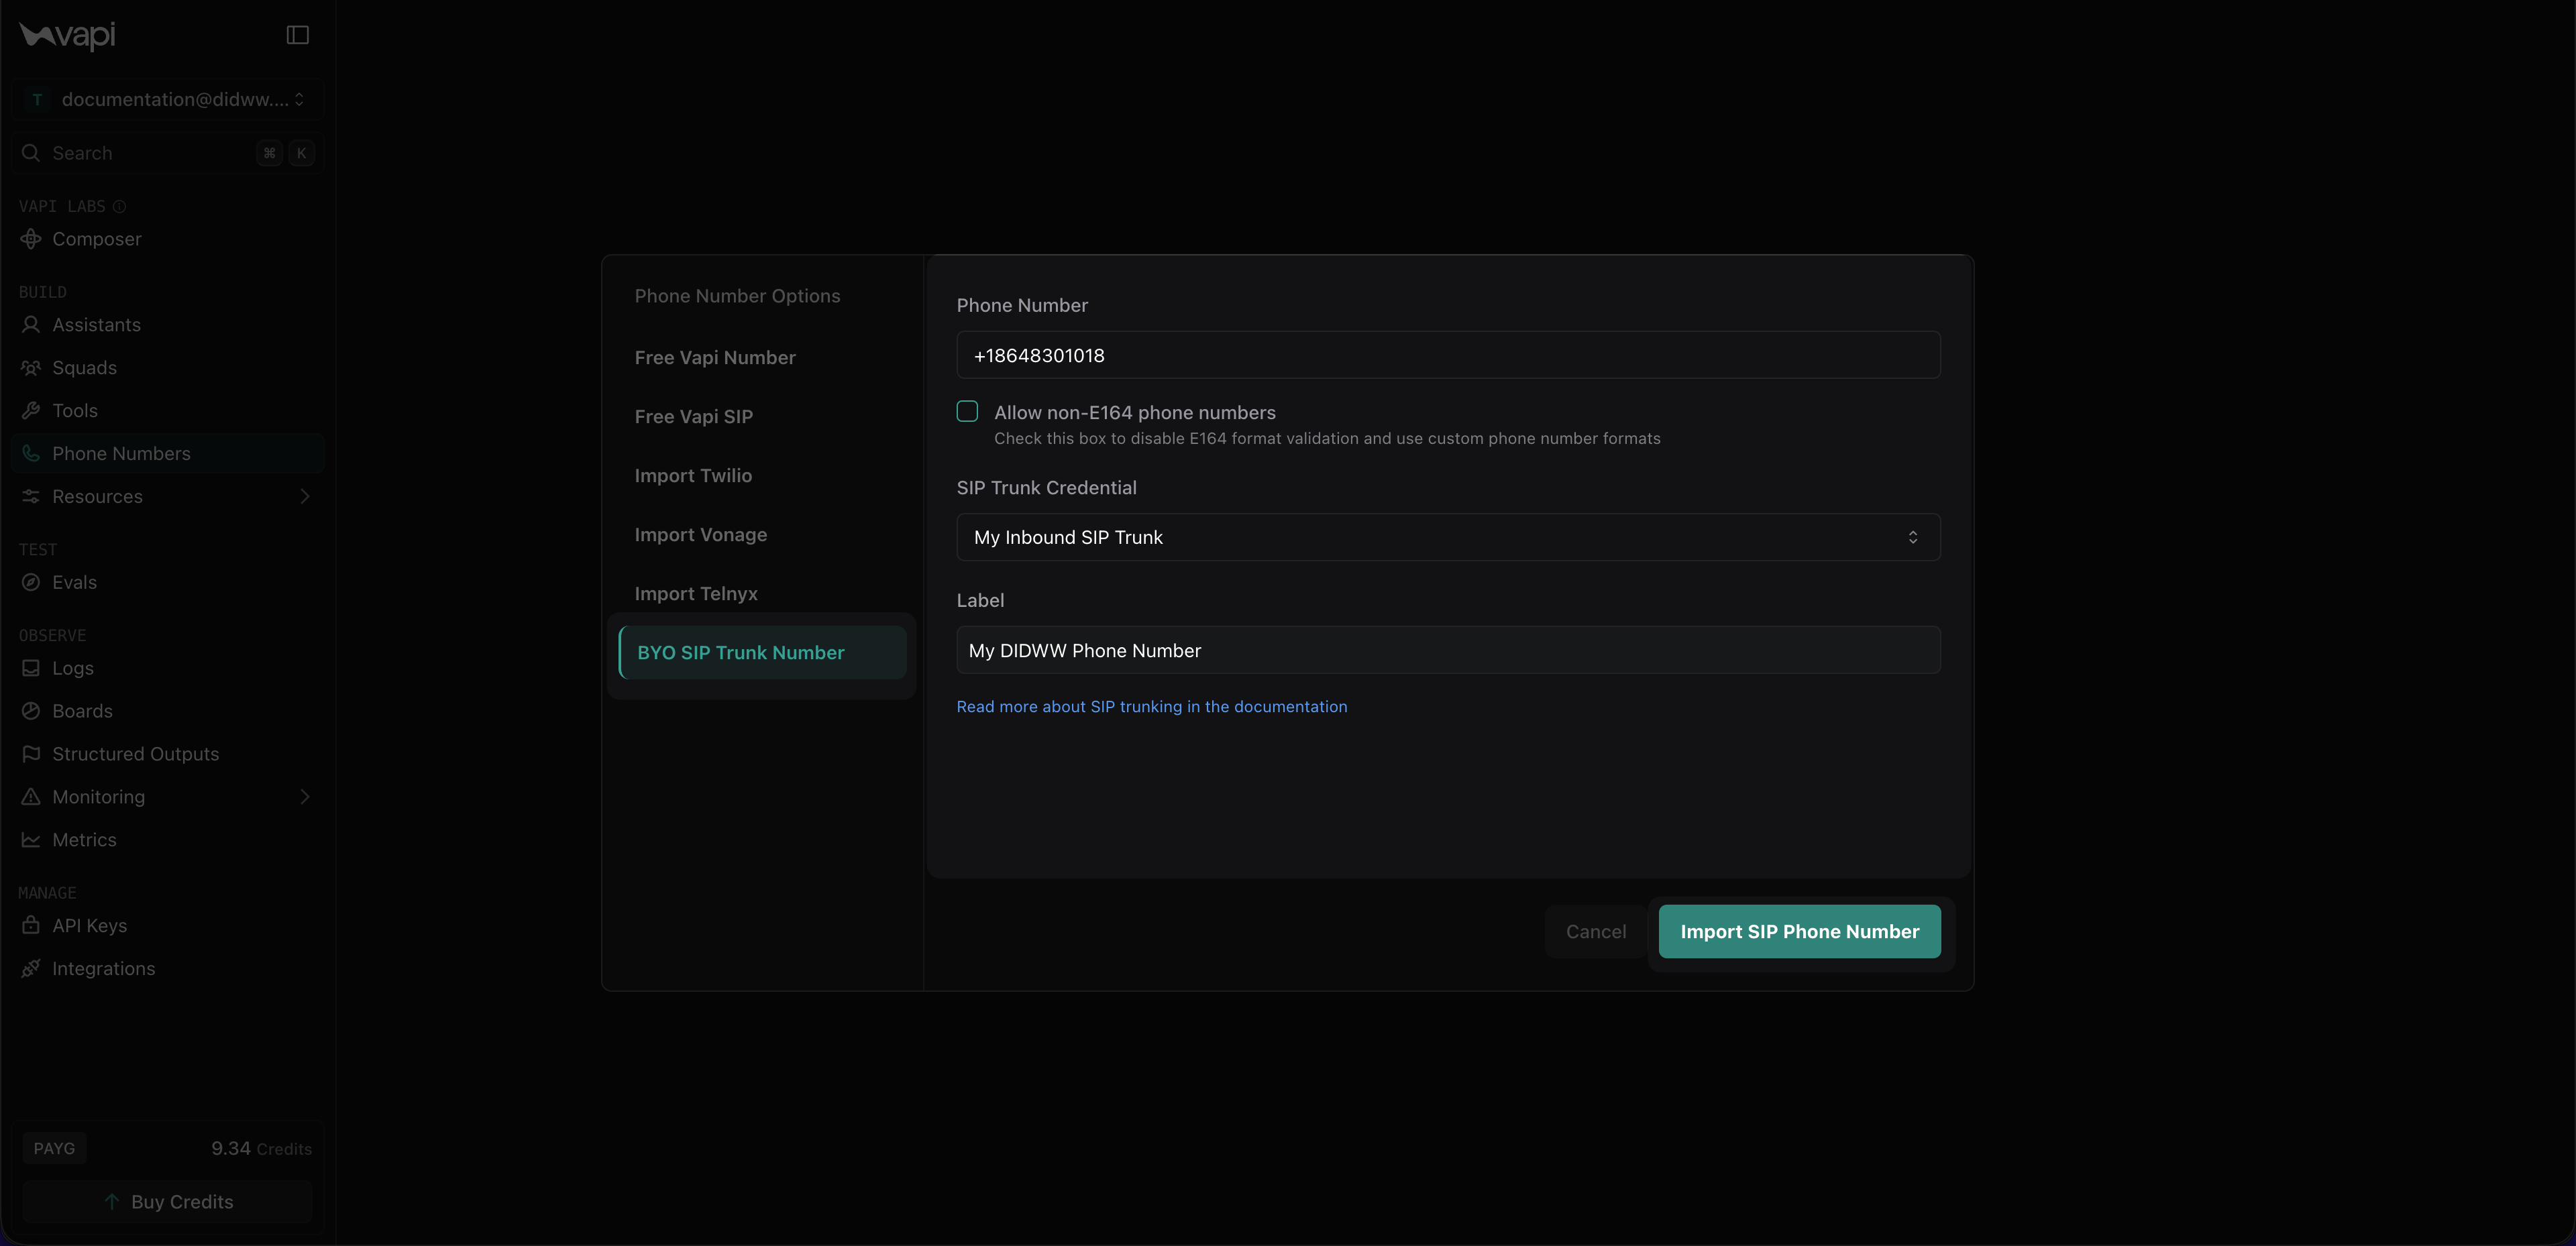
Fig. 26. Importing a BYO SIP trunk number#
In Assistant, select the Vapi assistant that will handle inbound calls.
Click Save to confirm the changes.
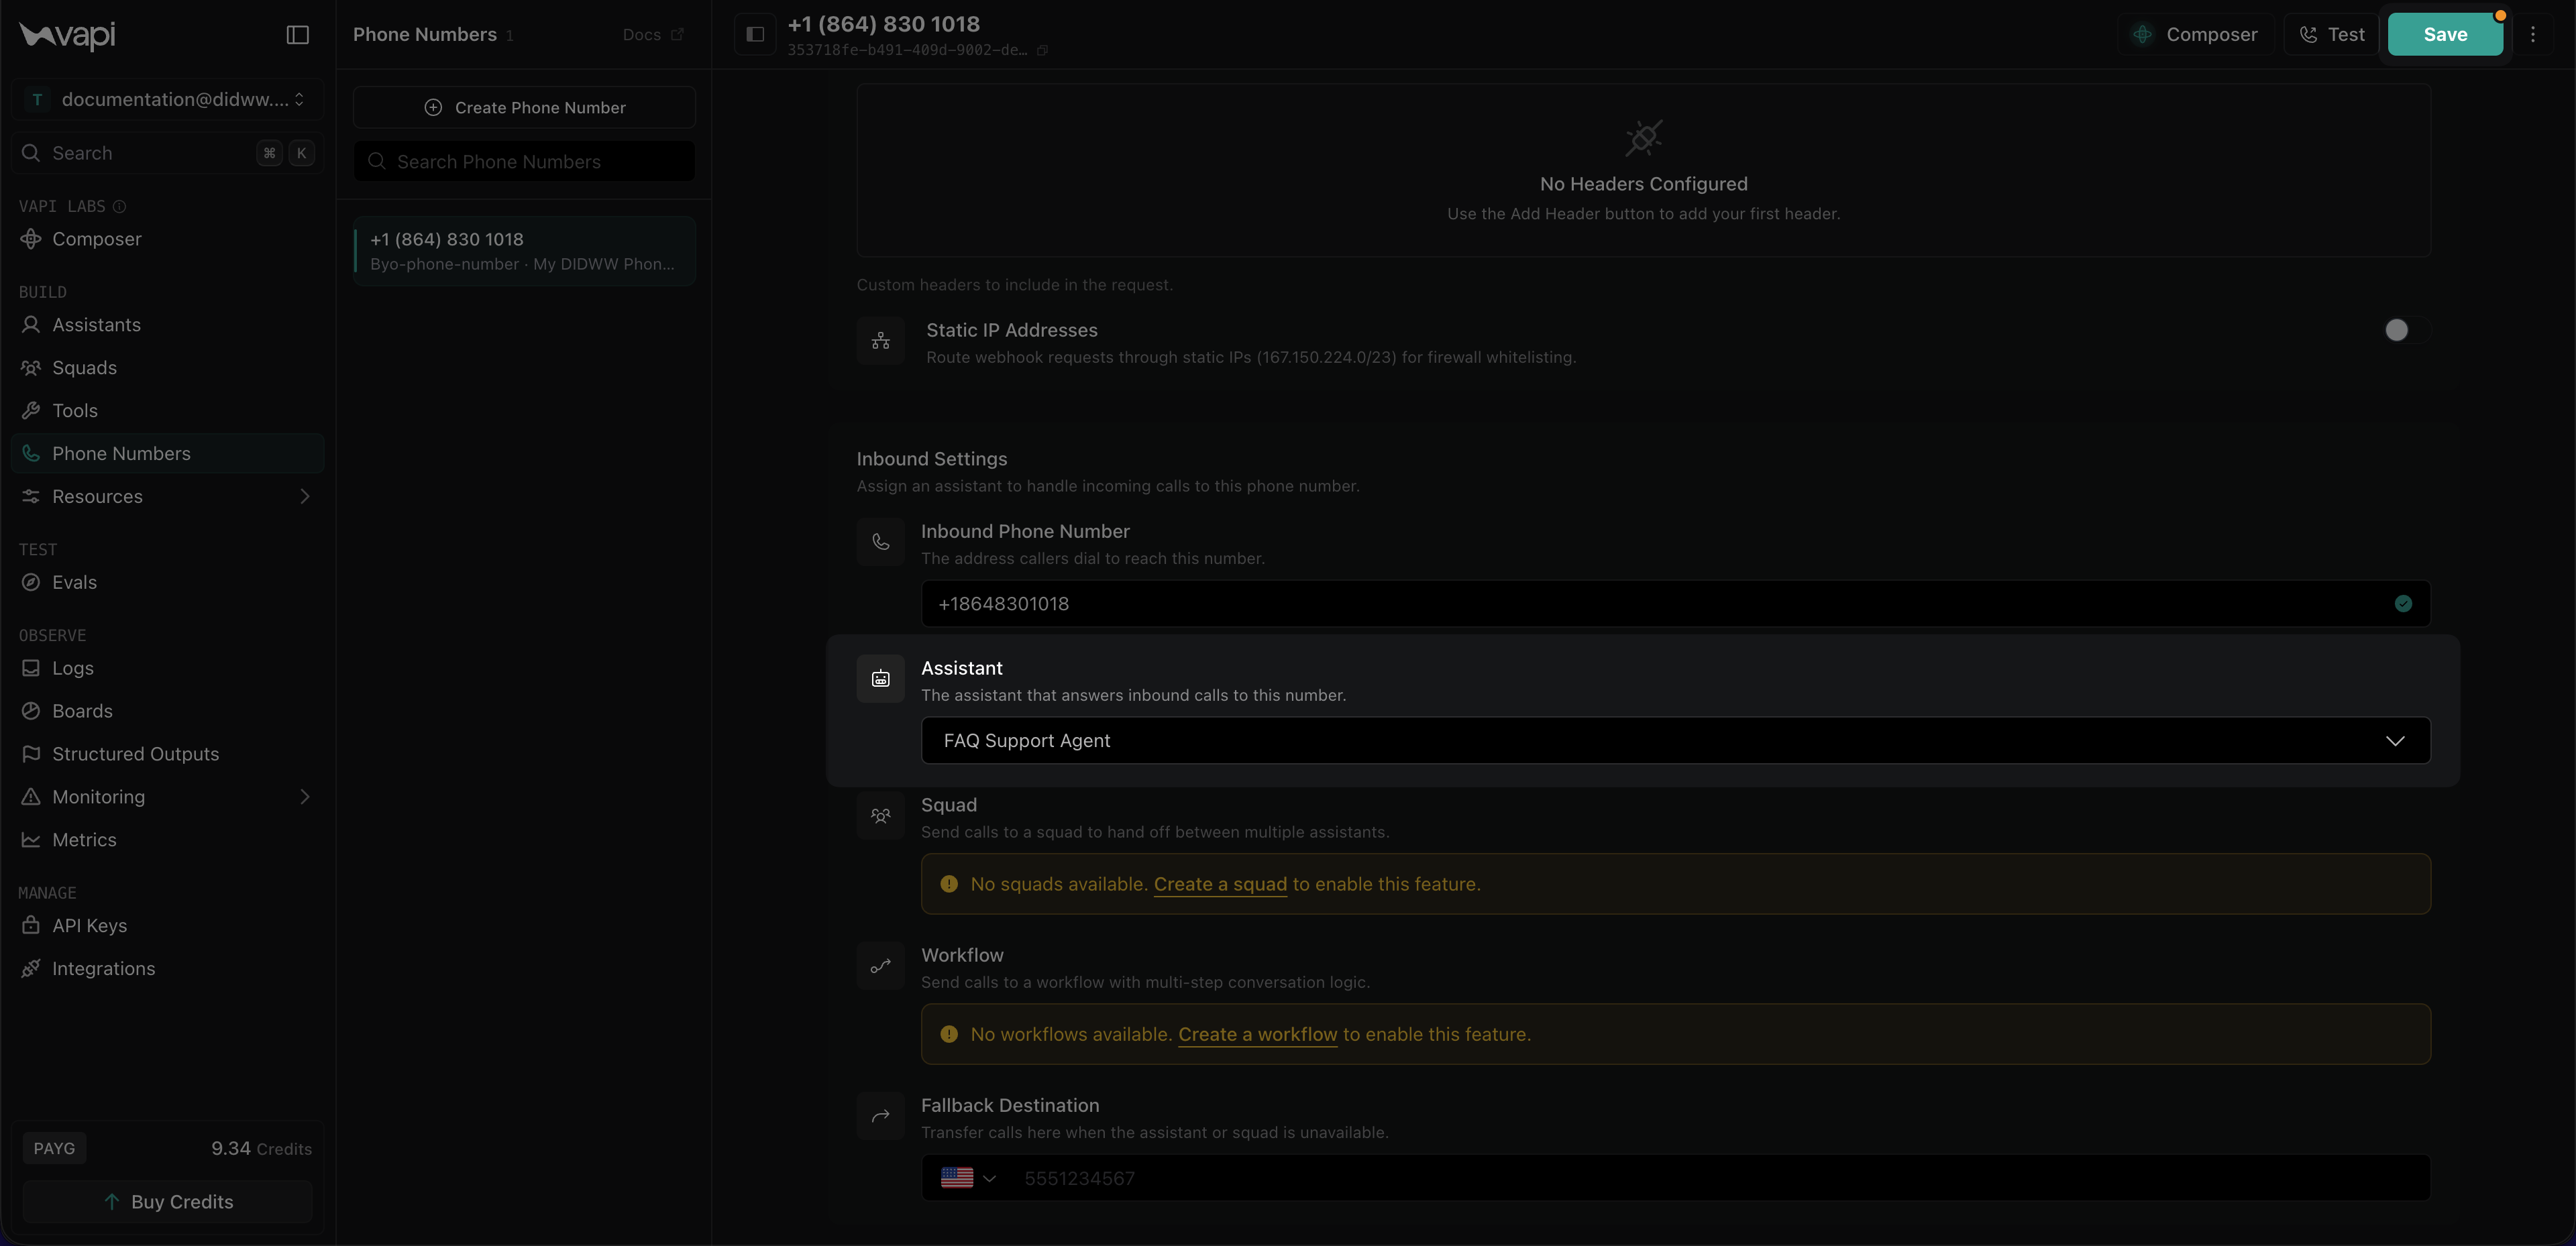
Fig. 27. Assigning an assistant to the imported phone number#
After saving, the imported number will appear in the Phone Numbers list and incoming calls to your DIDWW number will be routed to the selected assistant.
Step 6: Test the Configuration#
Verify that inbound calling, outbound calling, and call transfers are working as expected.
Place a test call to your DIDWW DID number to confirm that inbound calls are routed to Vapi and handled by the assigned assistant.
In the Vapi dashboard or API, place a test outbound call through your DIDWW outbound trunk.
Place another test call to your DIDWW DID number and trigger the call transfer condition, for example by asking to speak with a live person.
Confirm that Vapi sends the transfer request and the call is connected to the live-person destination through DIDWW.
Ensure that calls are successfully established in both directions, that the correct assistant handles the interaction, and that transferred calls connect with two-way audio.
Note
You can review call activity and verify call status or error codes in the DIDWW Inbound and Outbound Call Logs. See Inbound Call Logs and Outbound Call Logs for more details.