

Asterisk PJSIP Configuration (v20–23)#
Connect a plain Asterisk installation to DIDWW by using chan_pjsip. This
guide covers inbound calls through a Static Endpoint or Dynamic Registration
trunk and outbound calls through a DIDWW outbound trunk.
For general information about the channel driver and its configuration model, see the official Configuring res_pjsip documentation.
This configuration applies to Asterisk 20, 21, 22, and 23 versions and uses the configuration schema included with stock Asterisk. It does not require third-party patches.
Note
For Asterisk installations managed through FreePBX, use the
FreePBX guide. For an older installation that still has
chan_sip installed, see the Legacy Asterisk Configuration guide.
1. Configure inbound voice trunk#
Configure an Inbound SIP Trunk in the DIDWW User Panel to send incoming calls from your DIDWW numbers to Asterisk. Select the delivery method that matches your Asterisk deployment.
Before you begin#
An active DIDWW account is required. Sign in to DIDWW or create a DIDWW account.
At least one active DID number with capacity to receive incoming calls is required. If you do not have one, see How to buy numbers.
Step 1: Create New Inbound SIP trunk#
In the DIDWW User Panel, go to Voice > Inbound Trunks.
Click Create New > SIP Trunk.
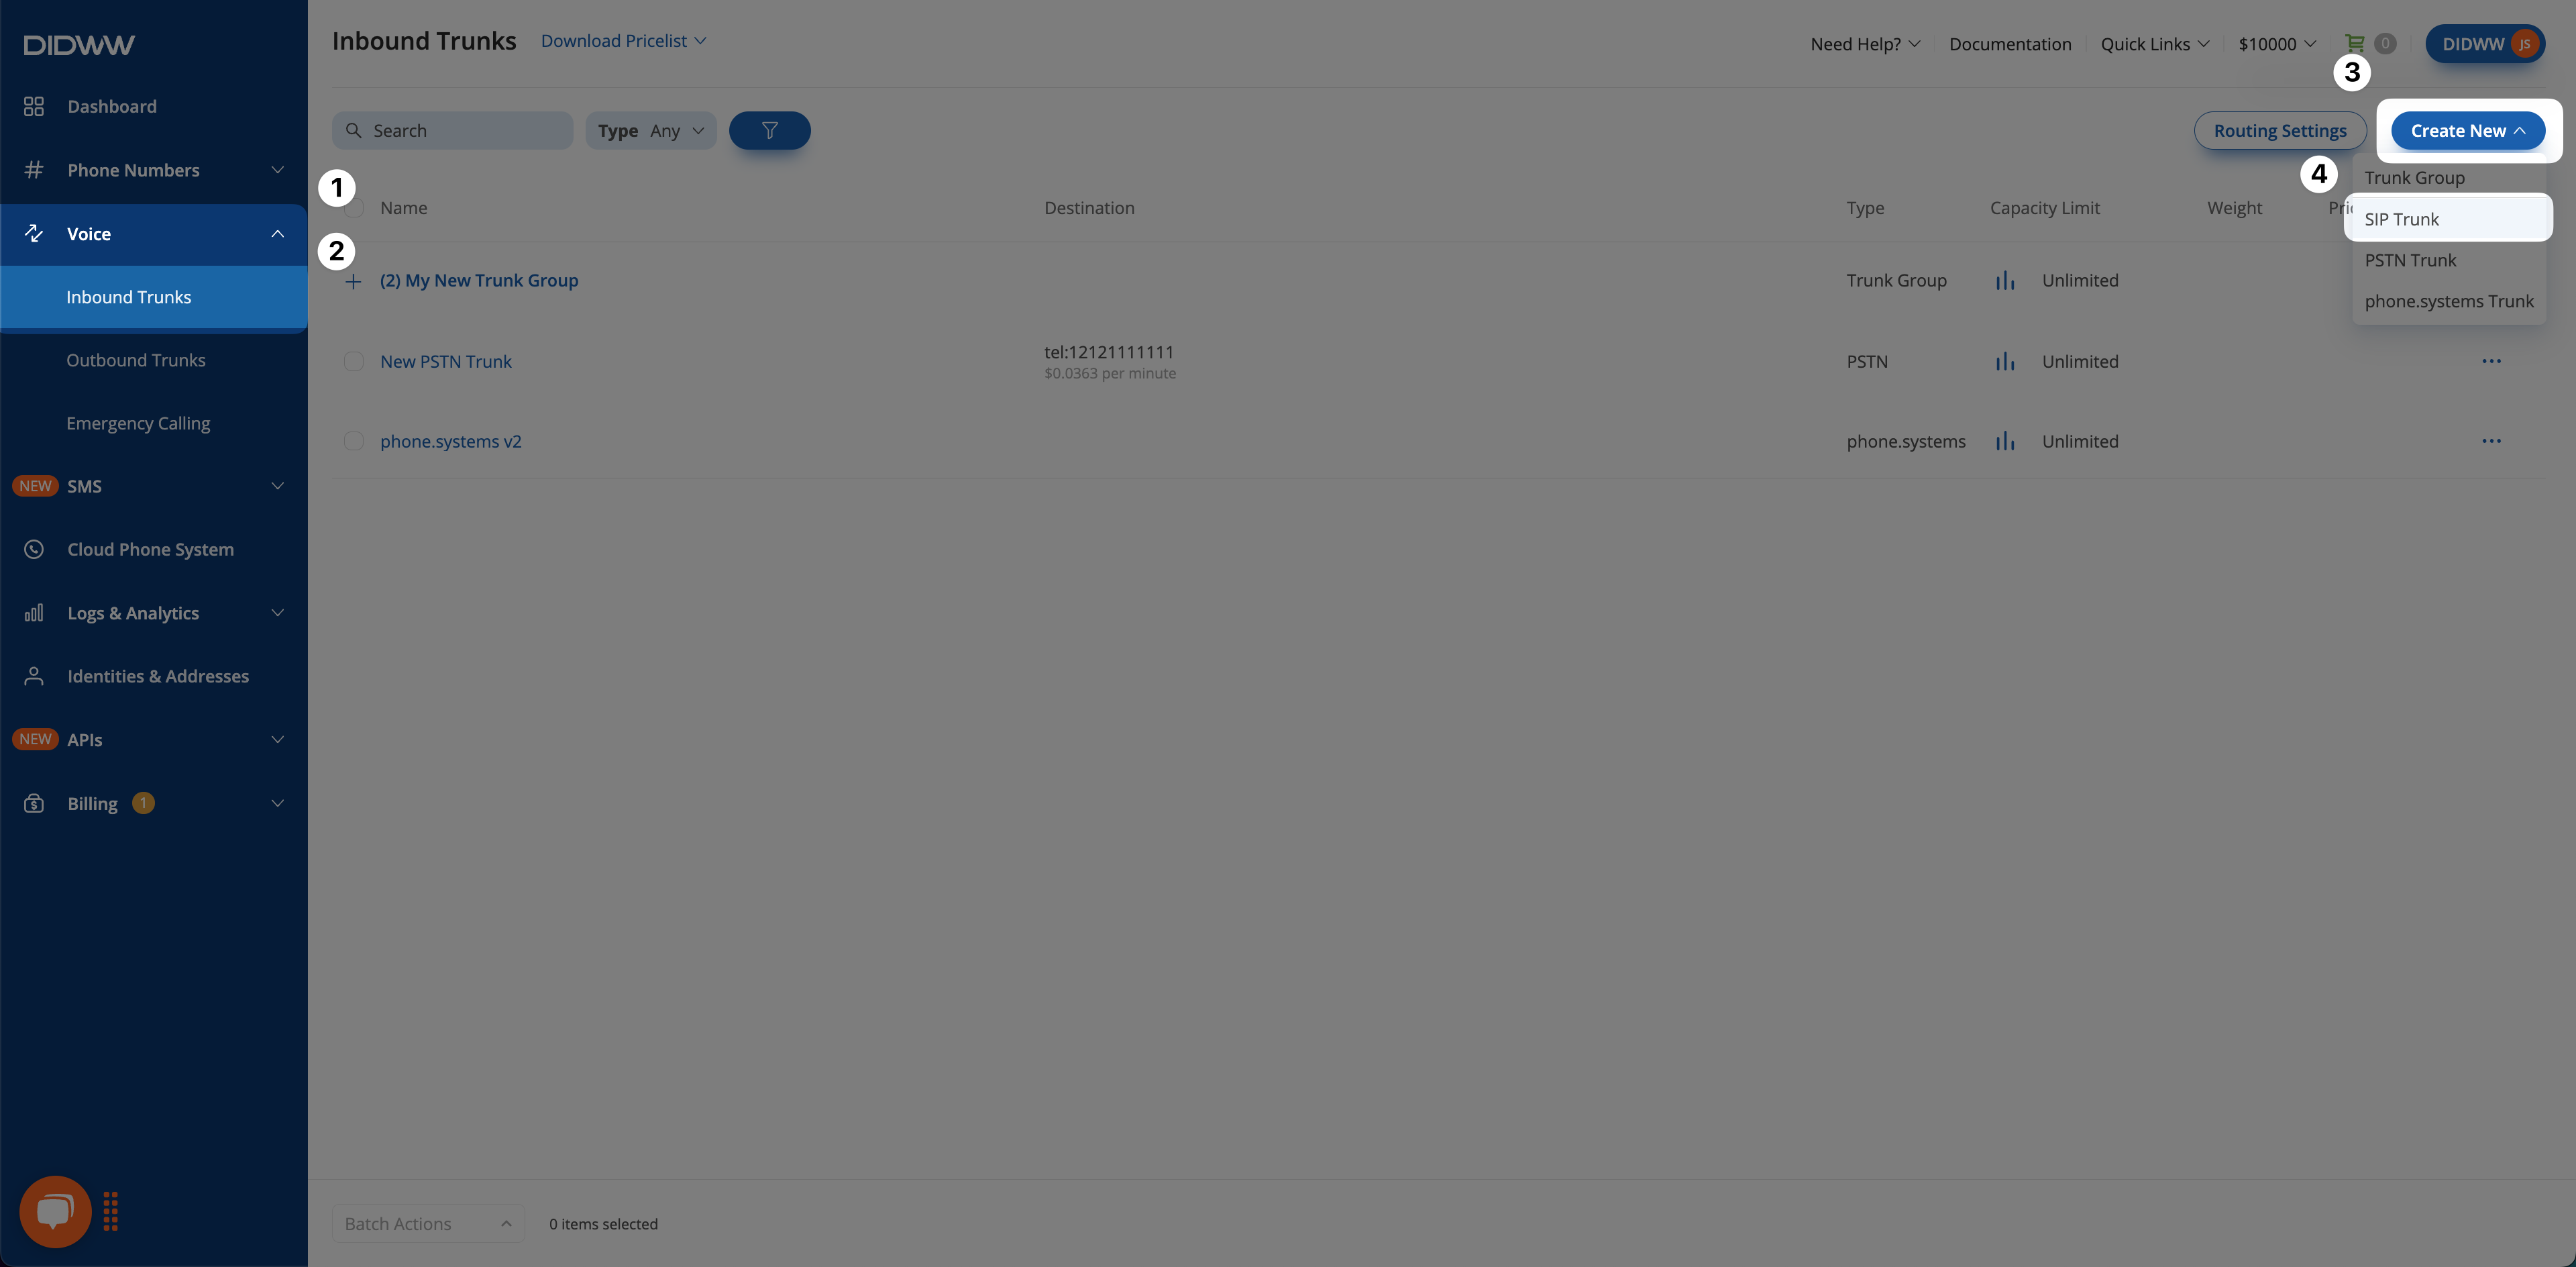
Creating a new inbound SIP trunk.#
Step 2: Configure general SIP trunk settings#
In the Create Inbound SIP Trunk form, enter the settings for the selected trunk type.
Enter a descriptive Name for the trunk (e.g.,
Asterisk).Select Static Endpoint as the trunk Type.
In Host, enter the public IP address of the Asterisk server or a domain name that resolves to it.
Select the signaling Transport and enter the corresponding Port used by Asterisk. The standard port is
5060for UDP or TCP and5061for TLS. If Asterisk uses a custom listening port, enter that port instead.Set User Part of R-URI to
{DID}. This placeholder inserts the called DID in E.164 format into the user part of the Request-URI.
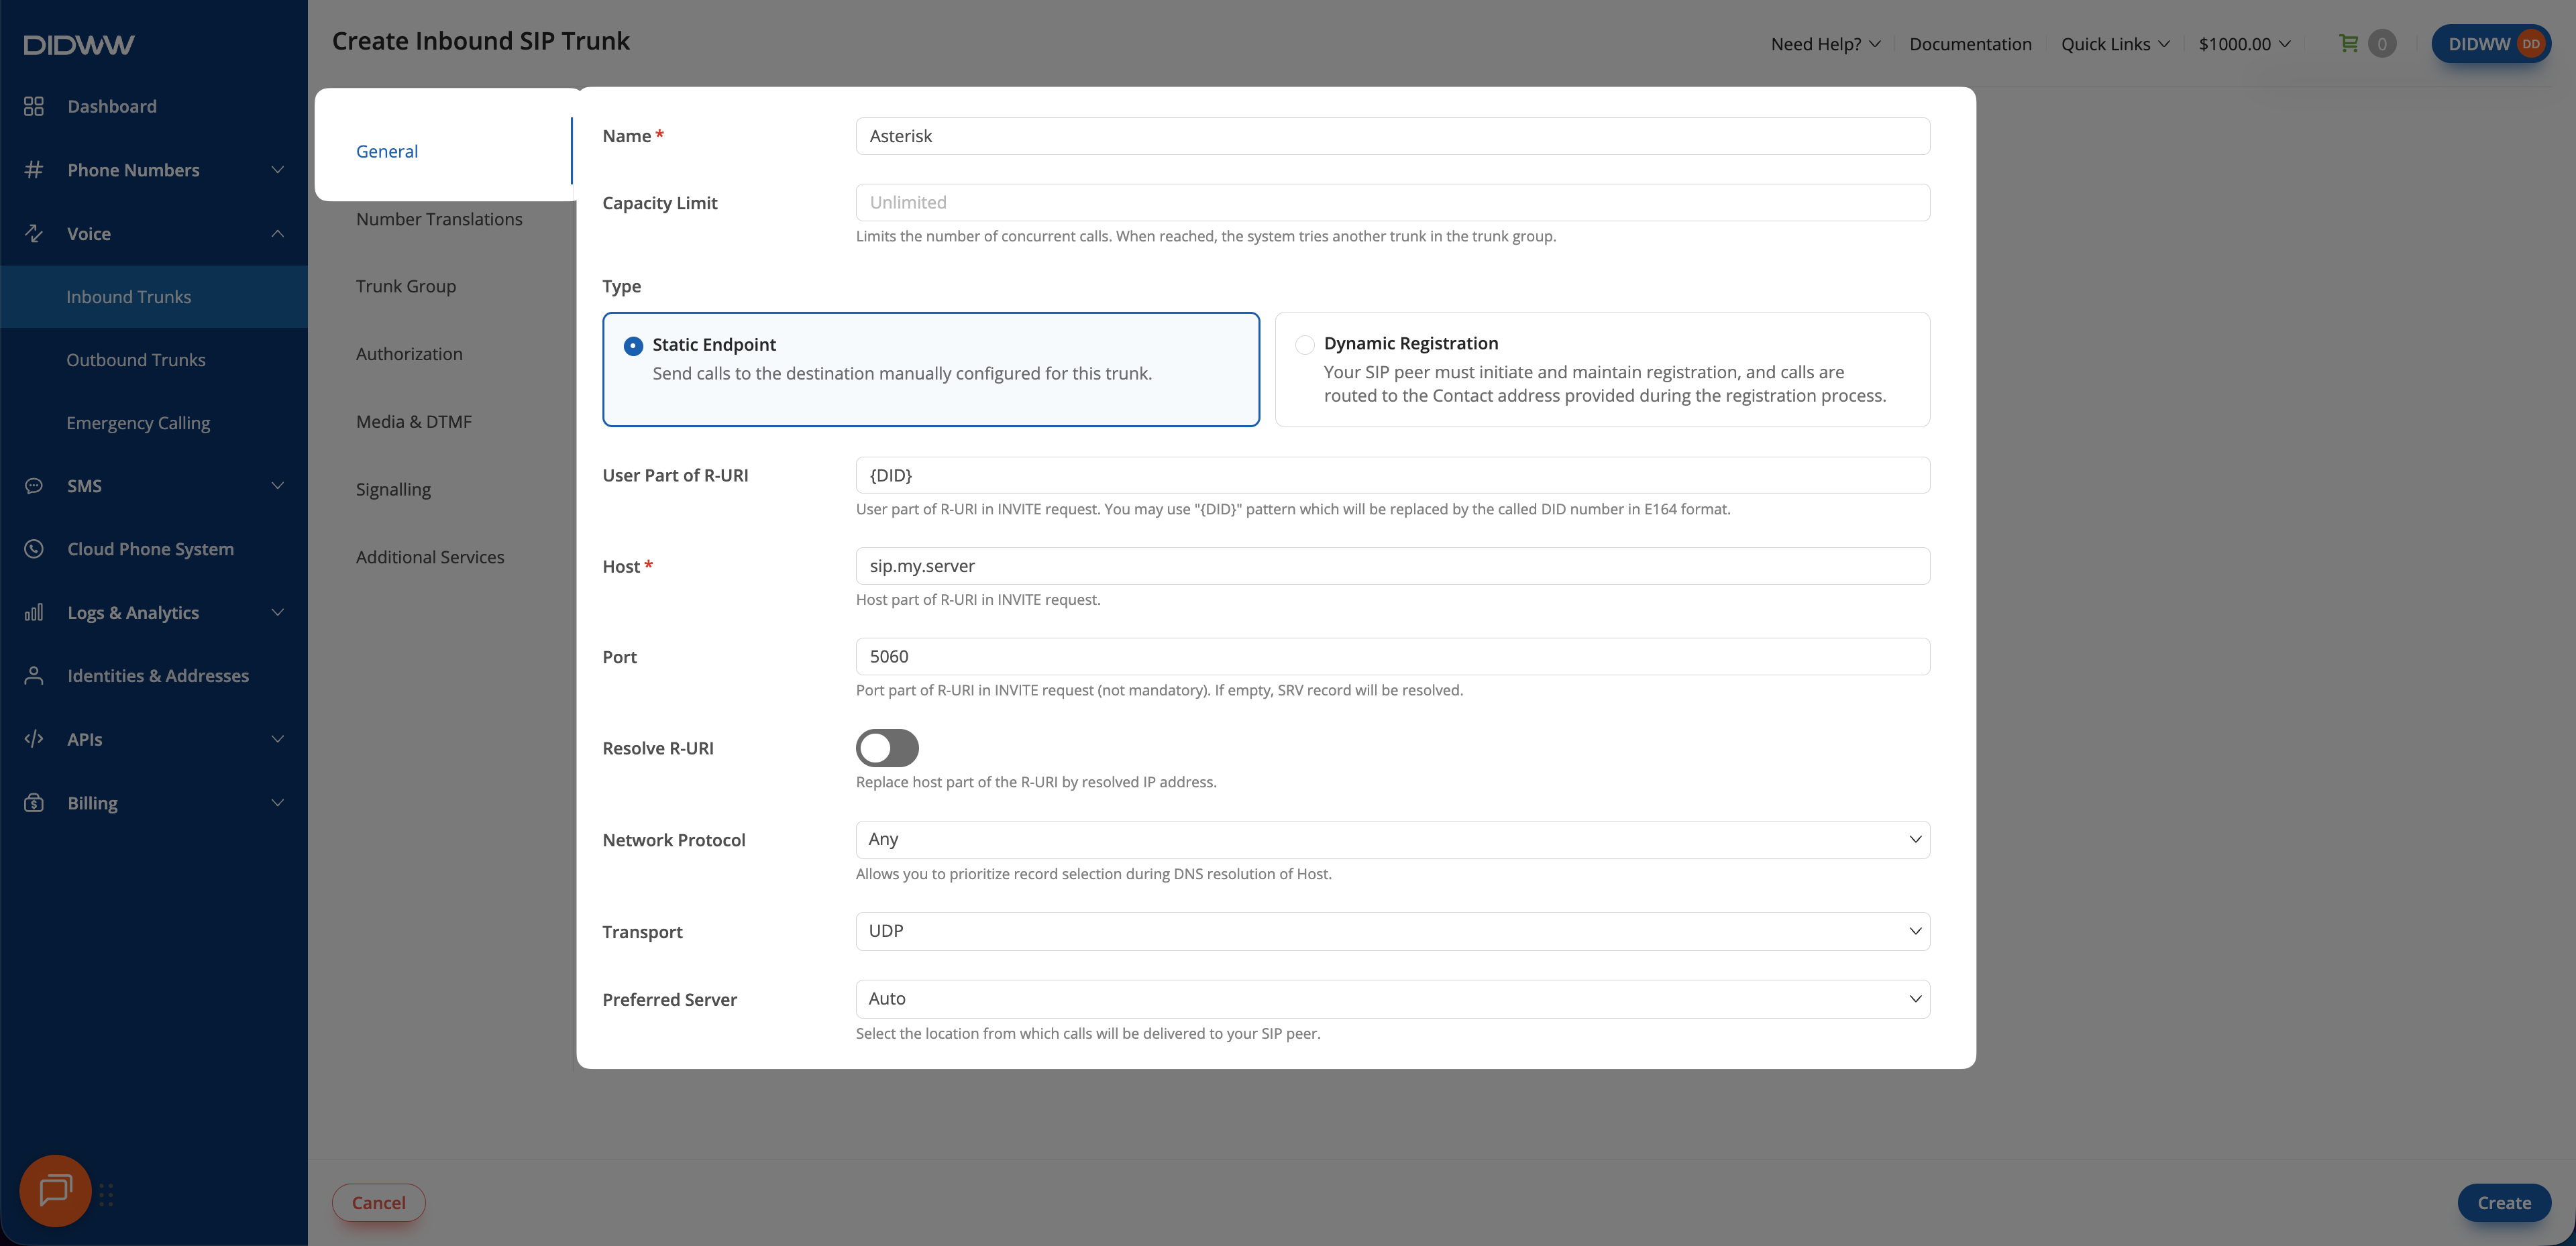
Static Endpoint trunk settings.#
Enter a descriptive Name for the trunk (e.g.,
Asterisk).Select Dynamic Registration as the trunk Type.
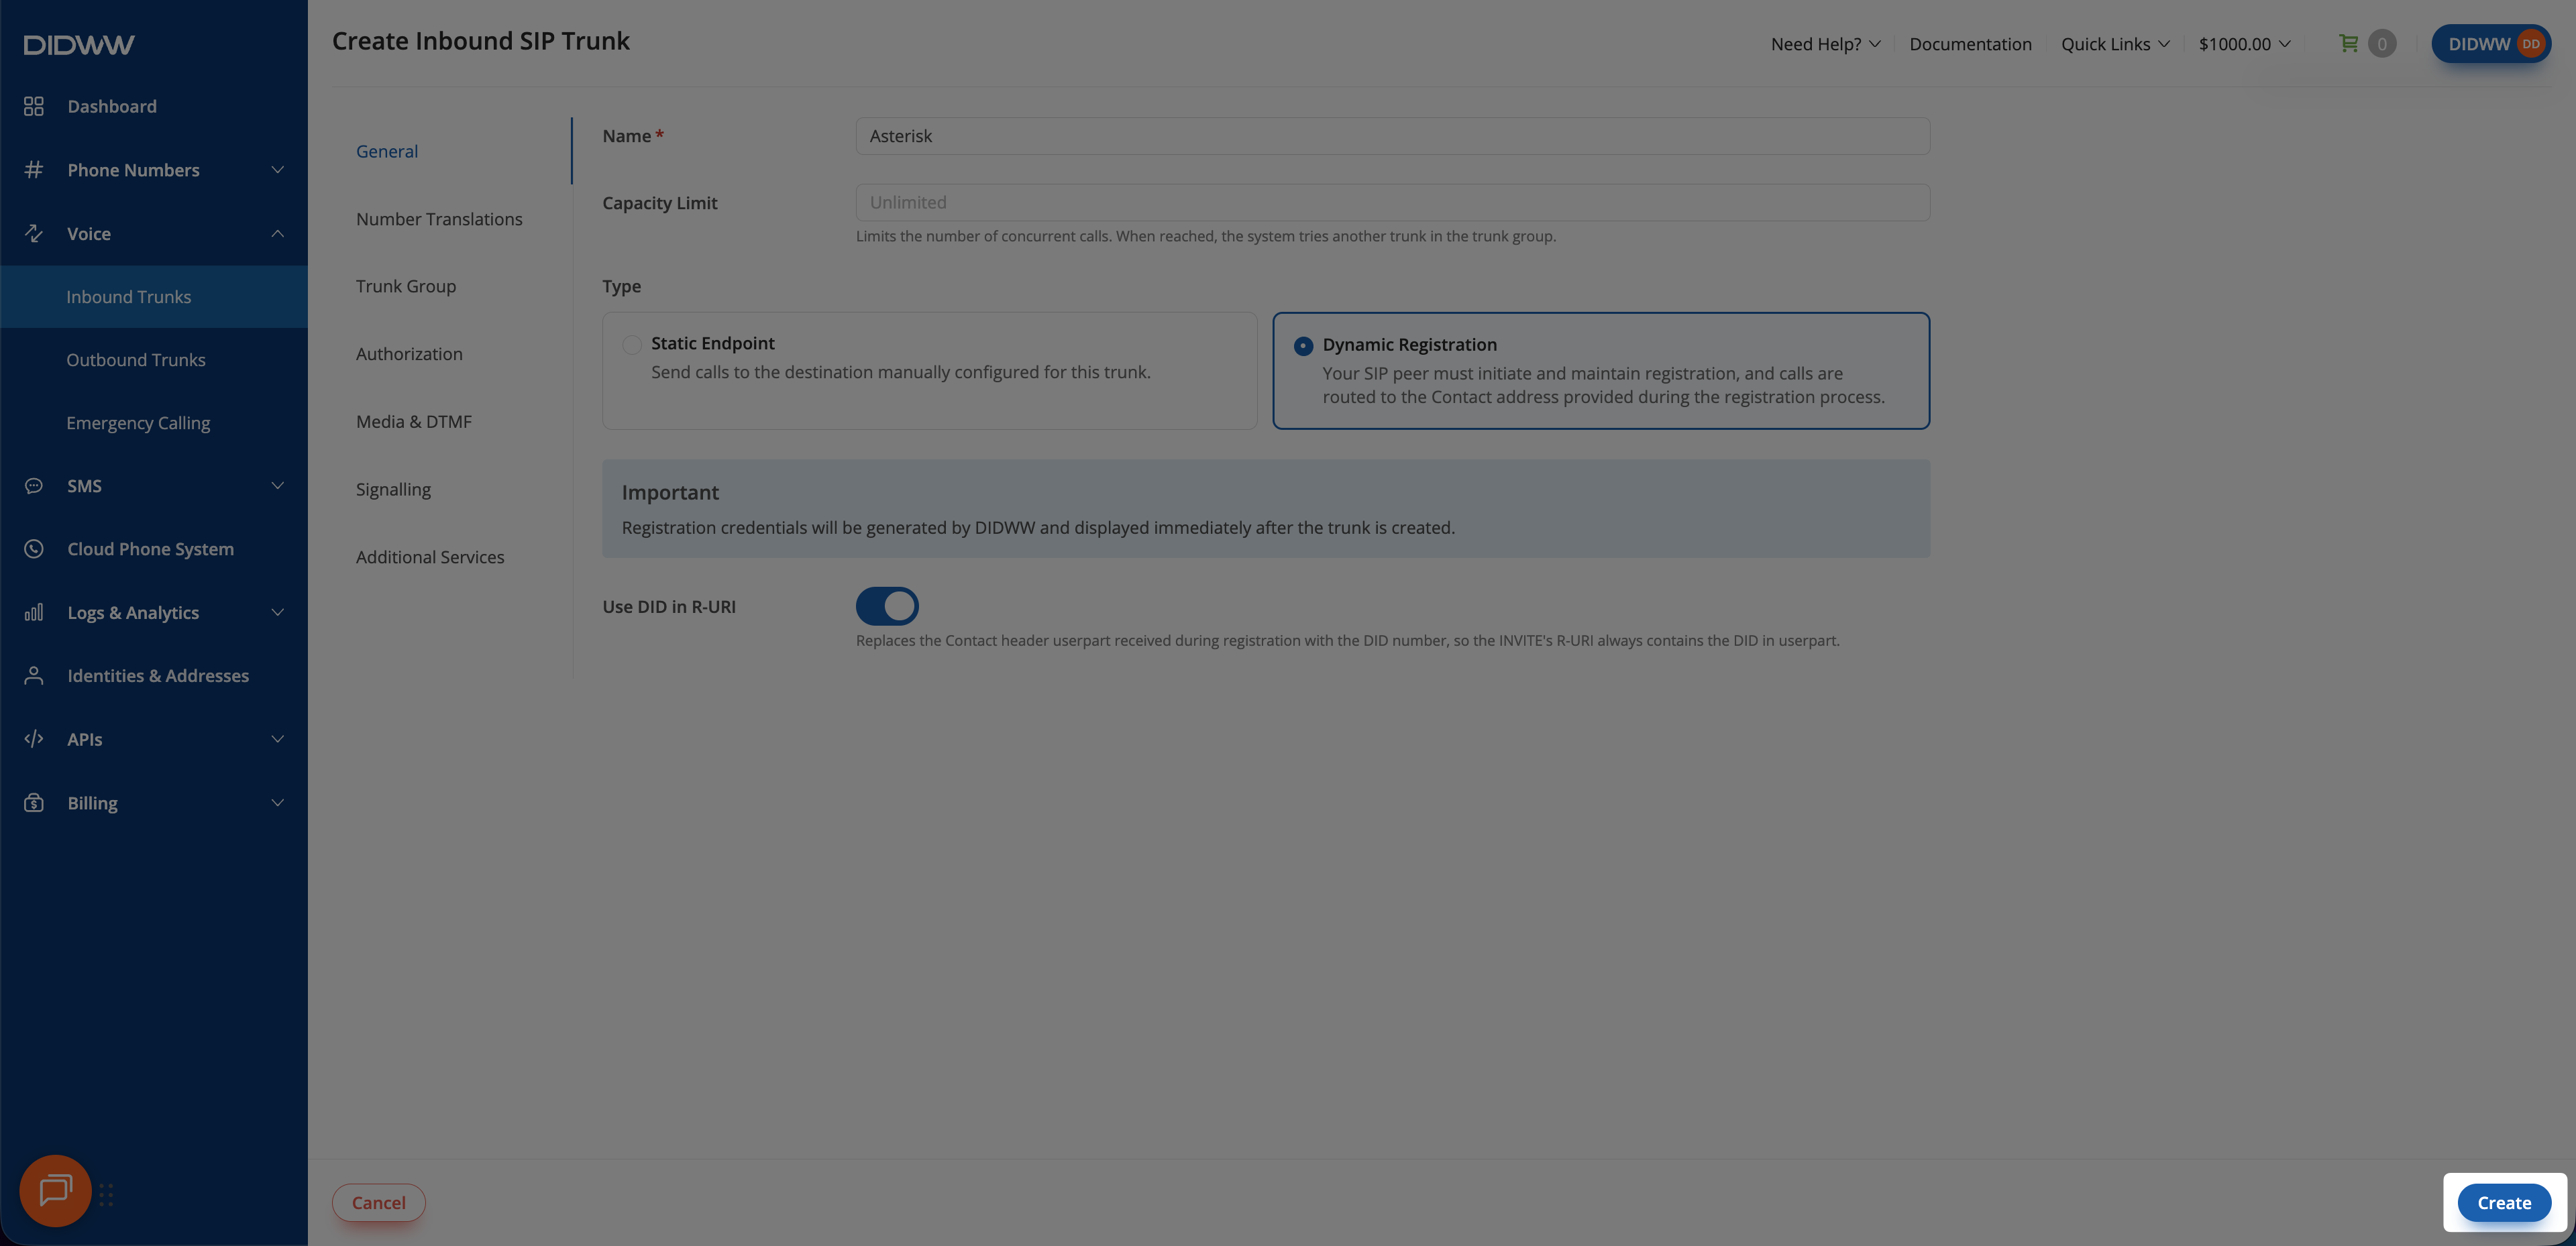
Enable Use DID in R-URI so the called DID replaces the registered contact user part in inbound requests.
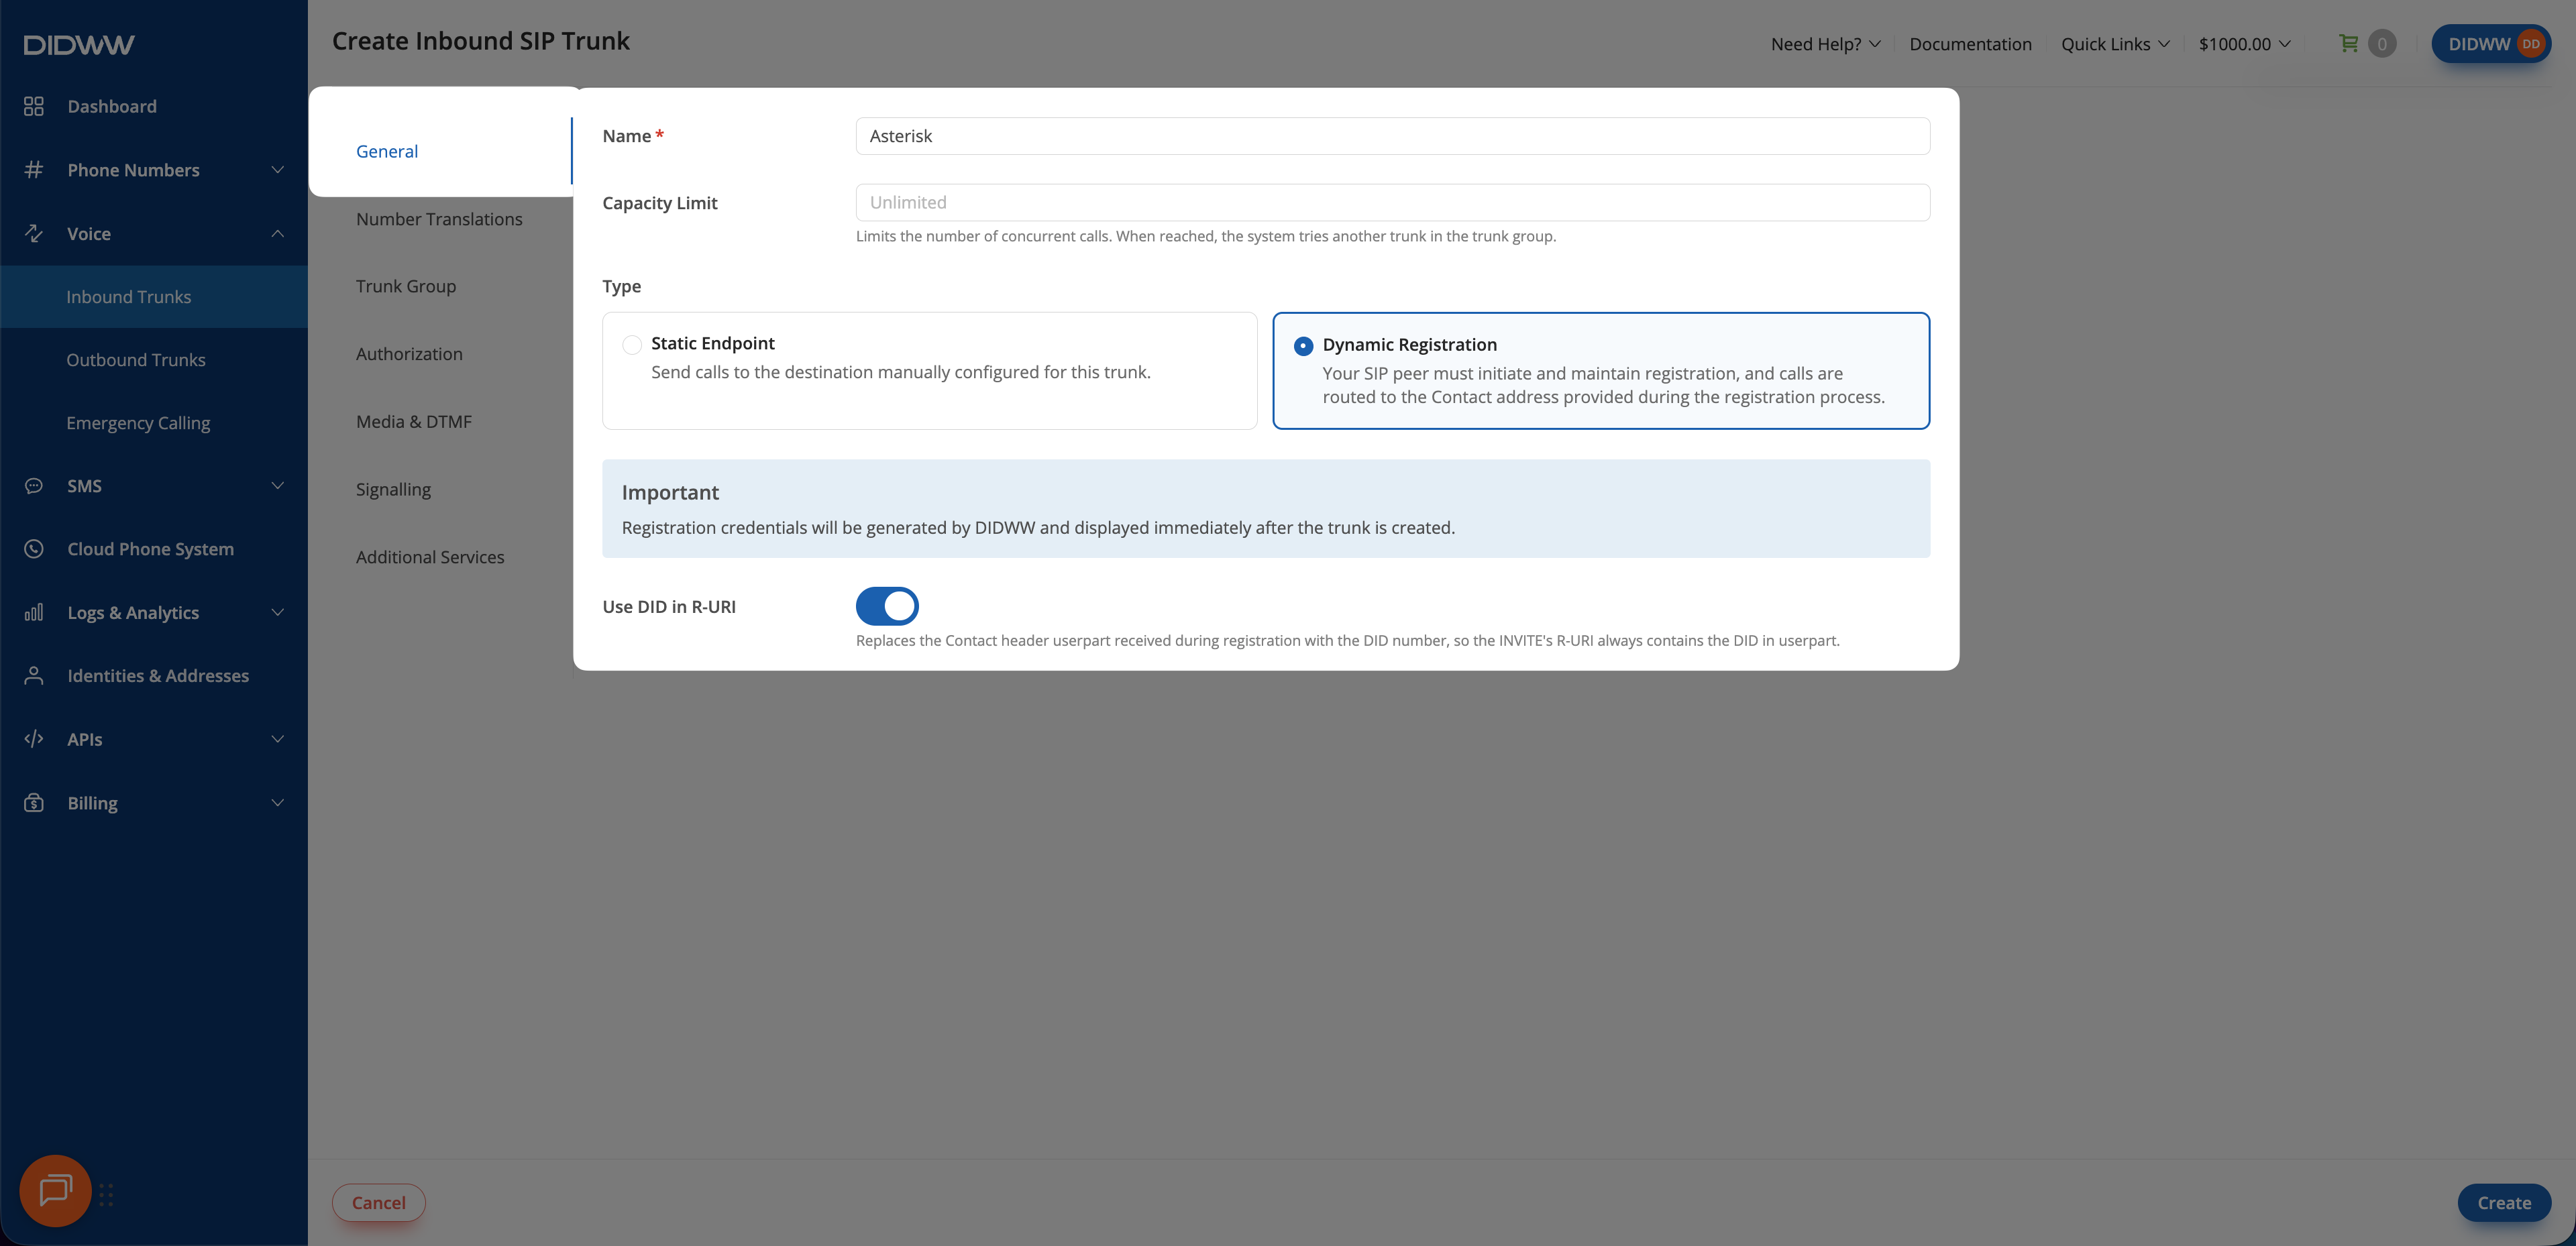
Dynamic Registration trunk settings.#
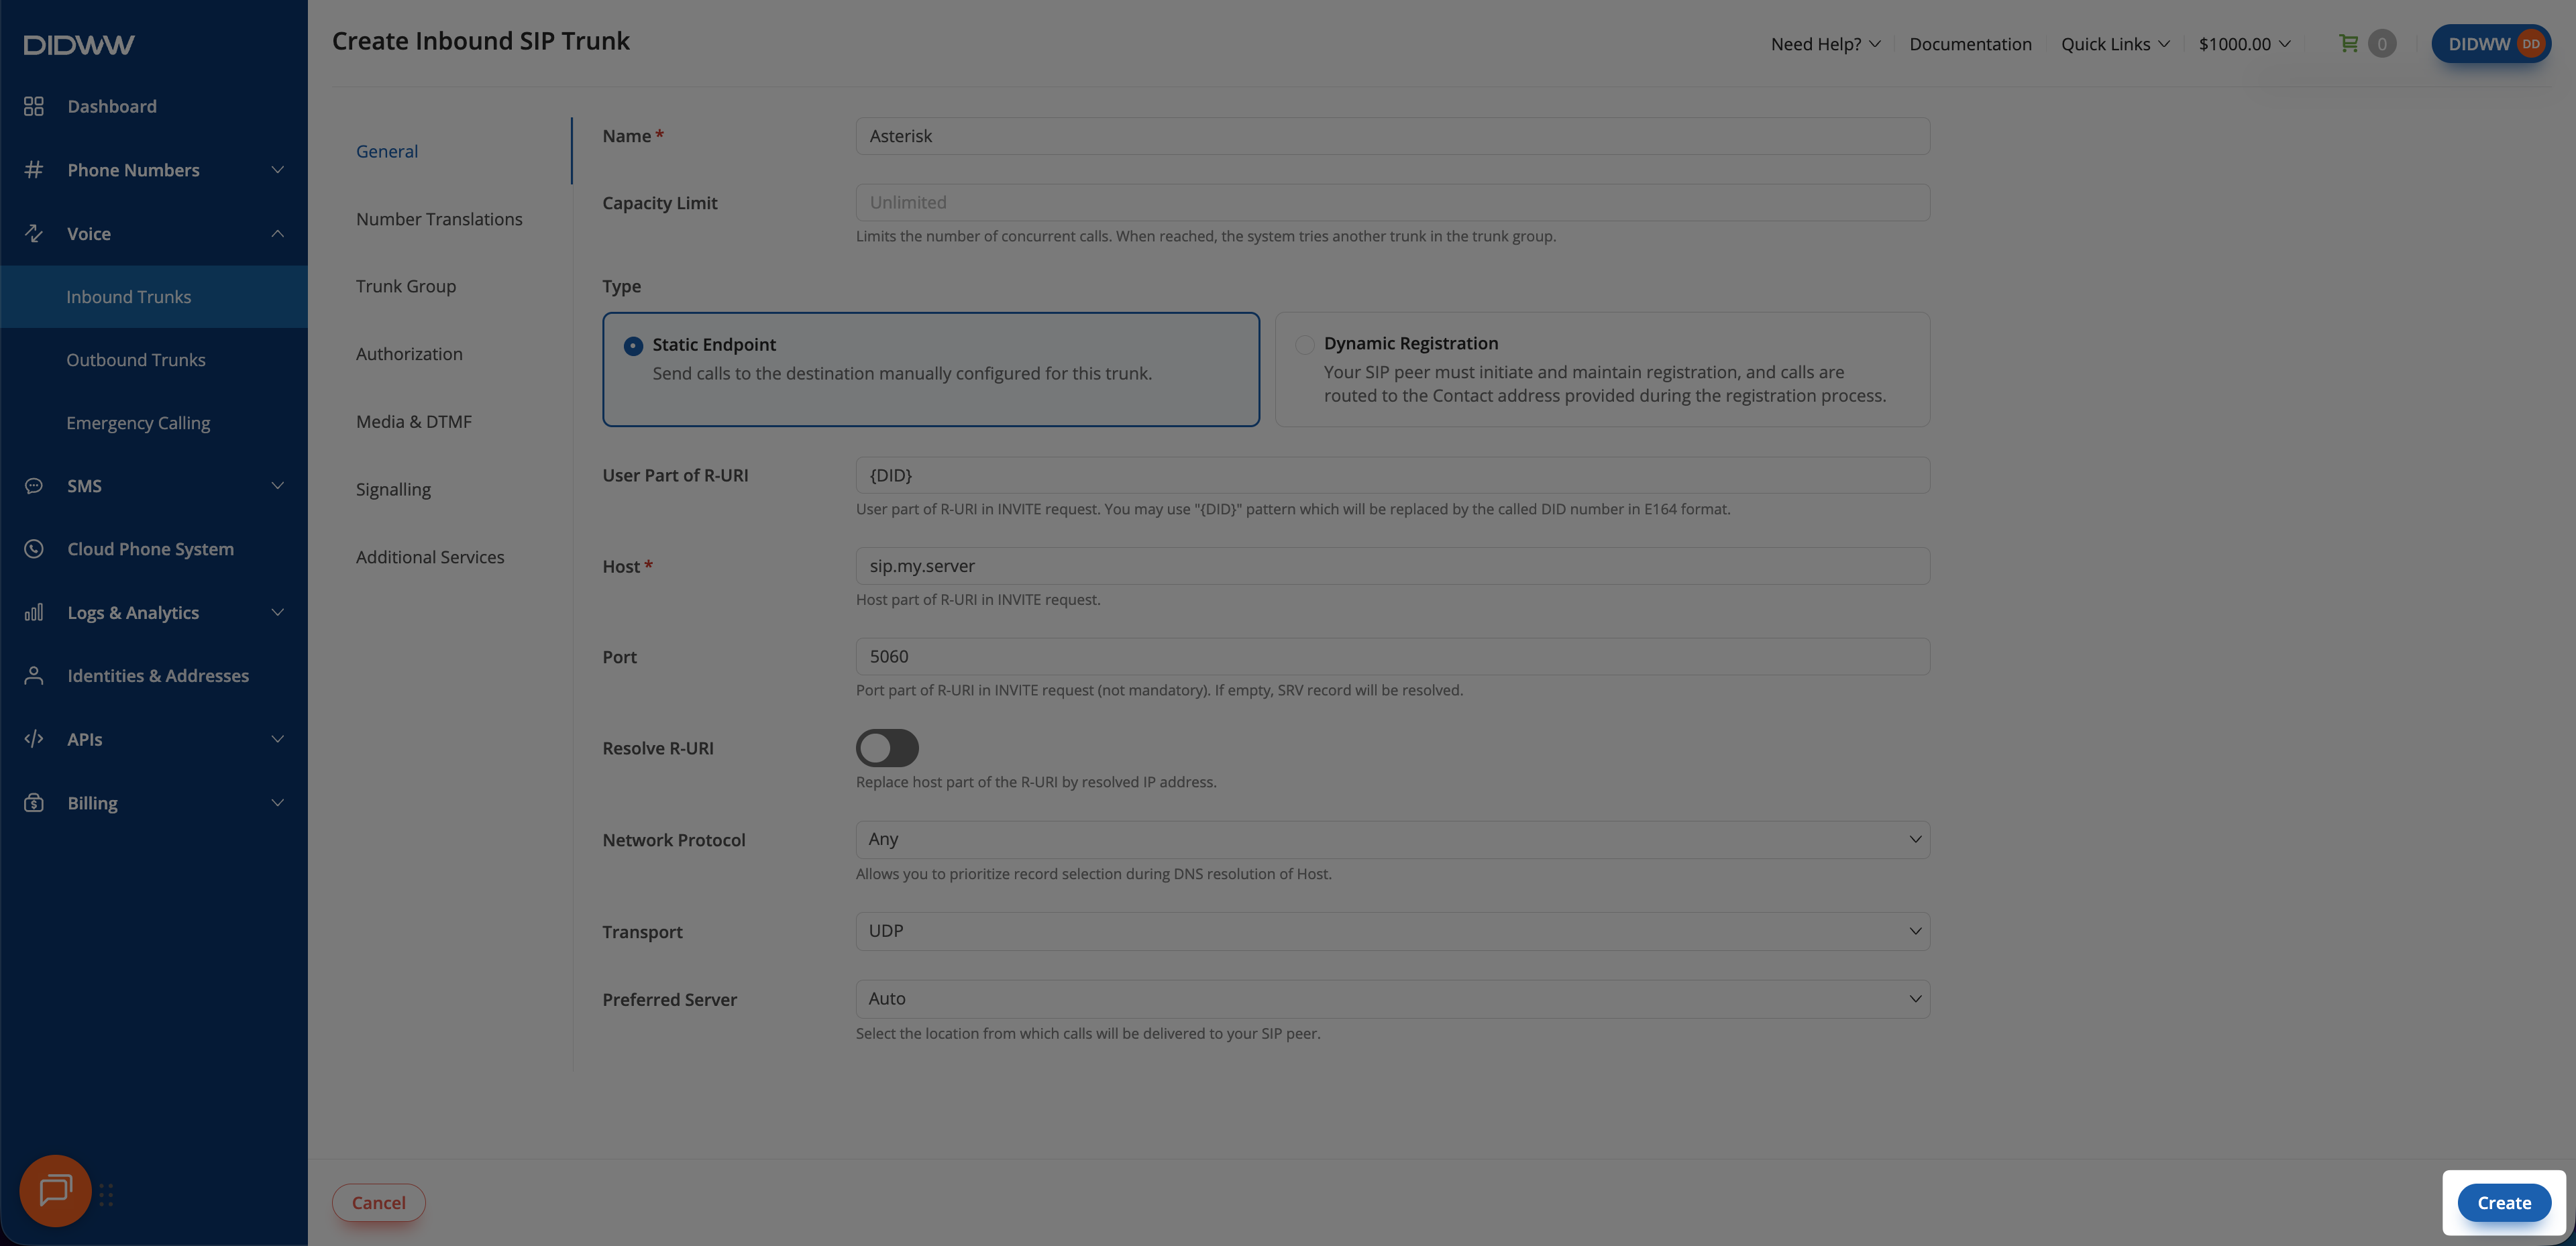
Step 3: Click Create and Save Inbound SIP Trunk Configuration#
When all required fields in the Create Inbound SIP Trunk form are filled, click Create to save the trunk.
Note
For advanced SIP trunk configuration, see Advanced Inbound SIP Trunk documentation.
Step 4: Copy Inbound Trunk Credentials (Dynamic Registration Only)#
For a Dynamic Registration trunk, open the created trunk and copy its
generated username, password, and registration endpoint. You will use these
values in pjsip.conf. Static Endpoint trunks do not use registration
credentials.
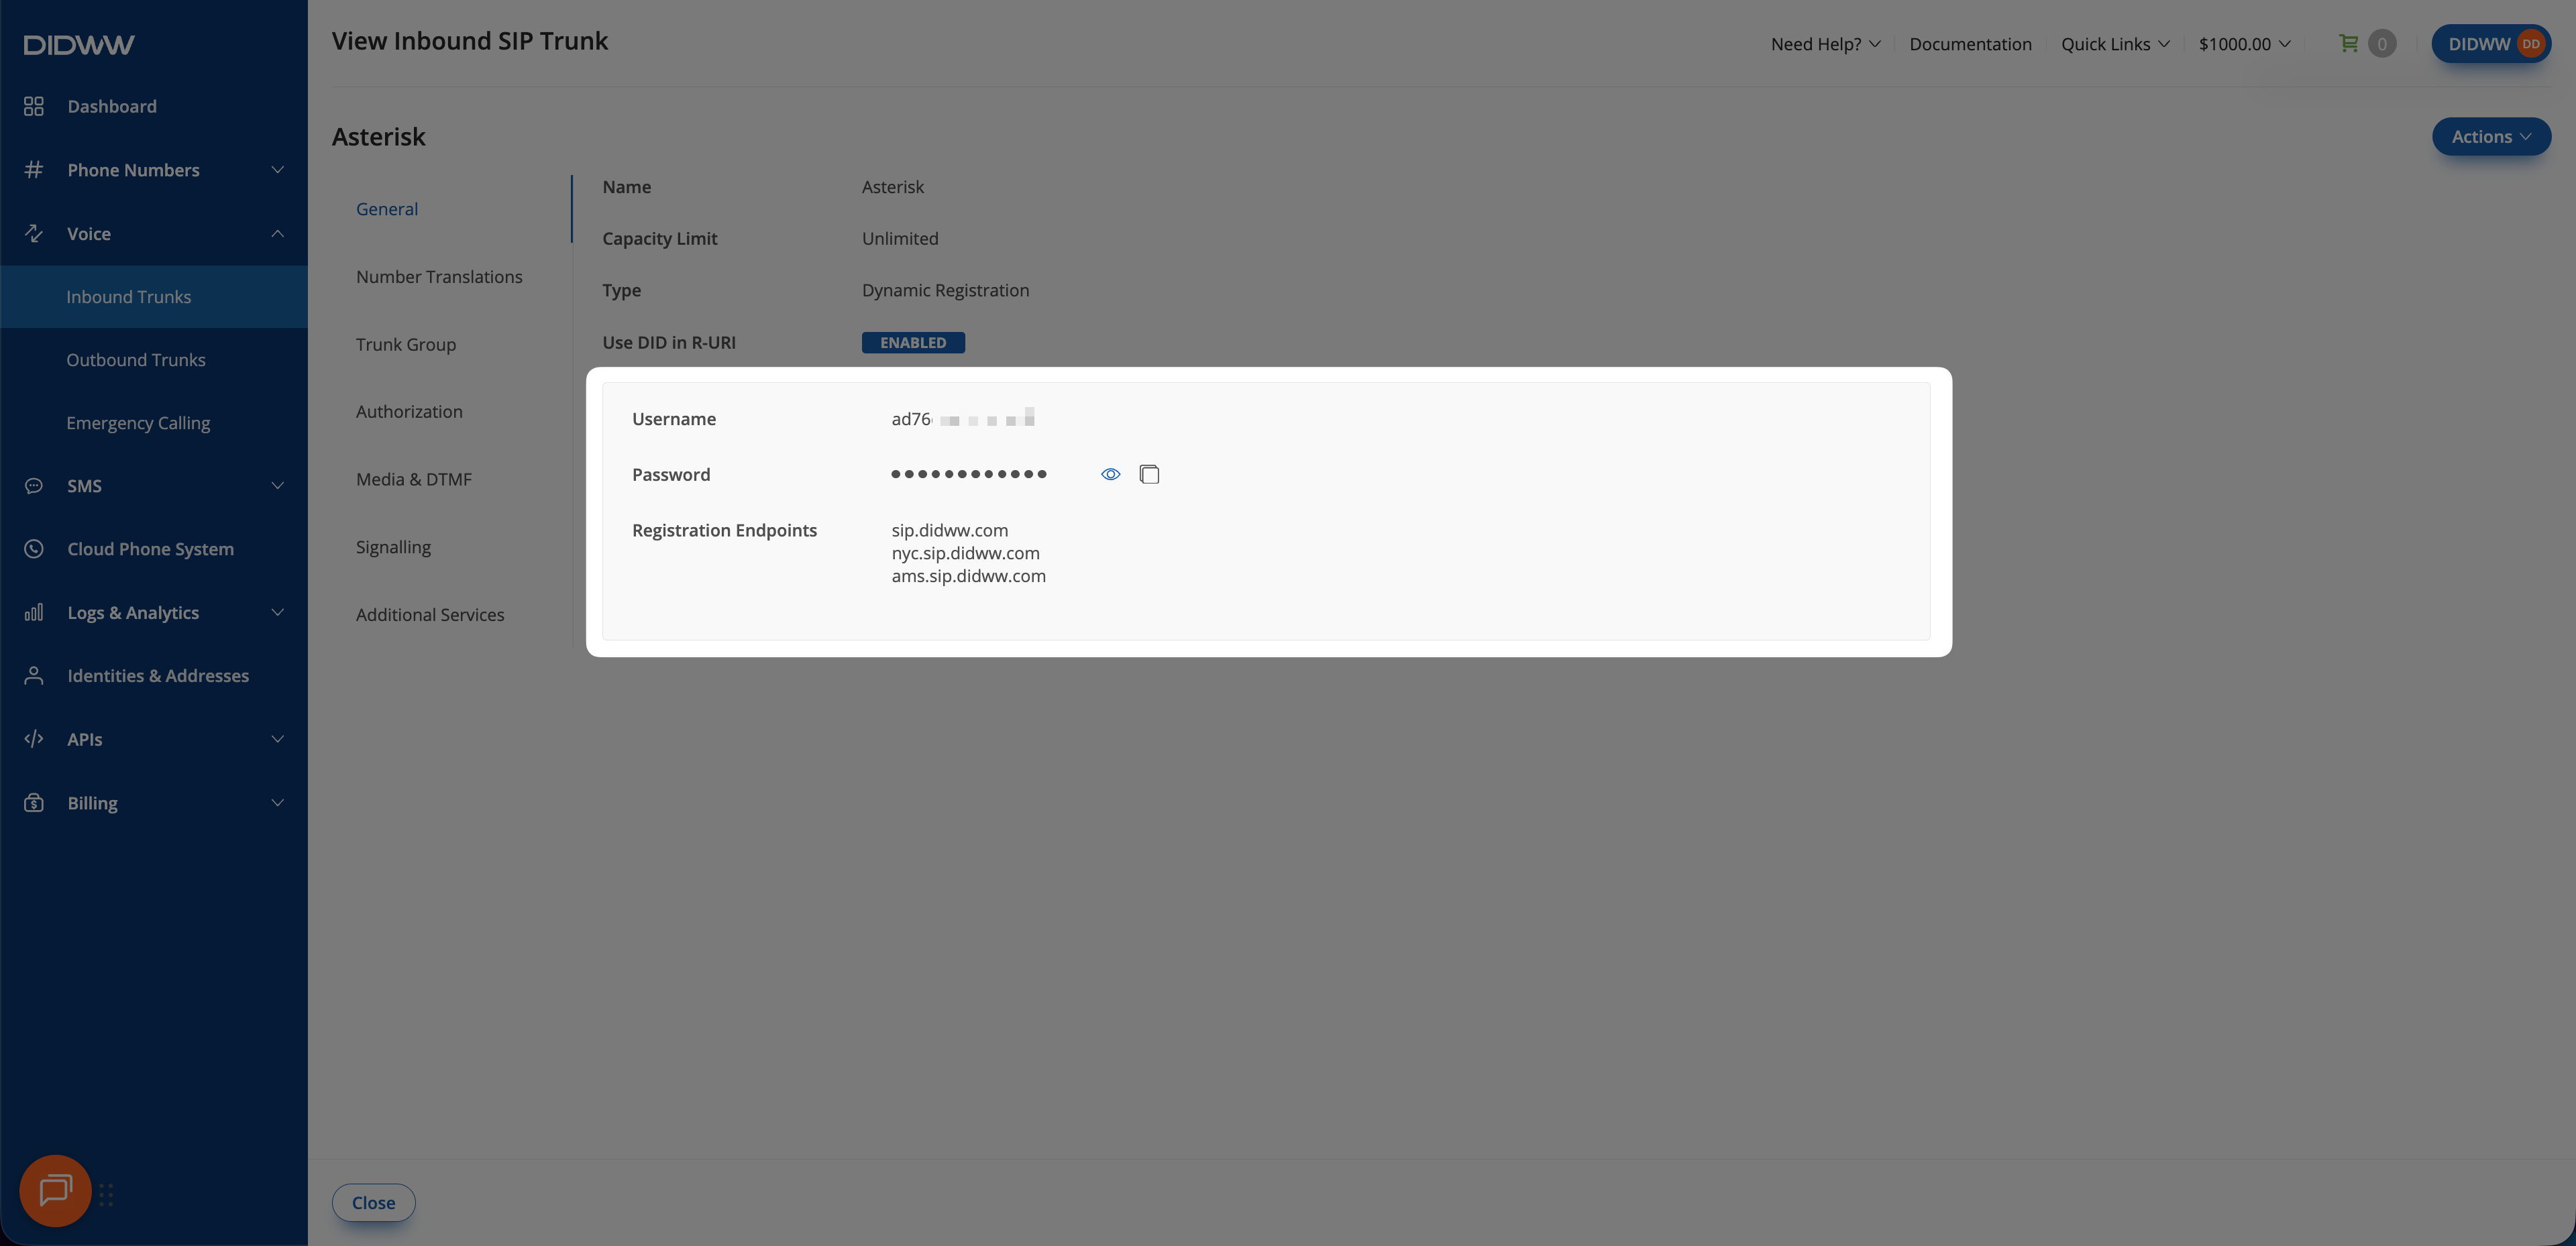
Dynamic Registration credentials and endpoints.#
Step 5: Assign inbound SIP trunk to your DID numbers#
After creating the Inbound SIP Trunk for Asterisk, assign it to the DID number(s) that will deliver incoming calls to Asterisk.
In the DIDWW User Panel, go to Phone Numbers > My Numbers.
Select the DID number(s) you want to assign to the inbound SIP trunk.
At the bottom of the page, click Batch Actions > Update Trunks.
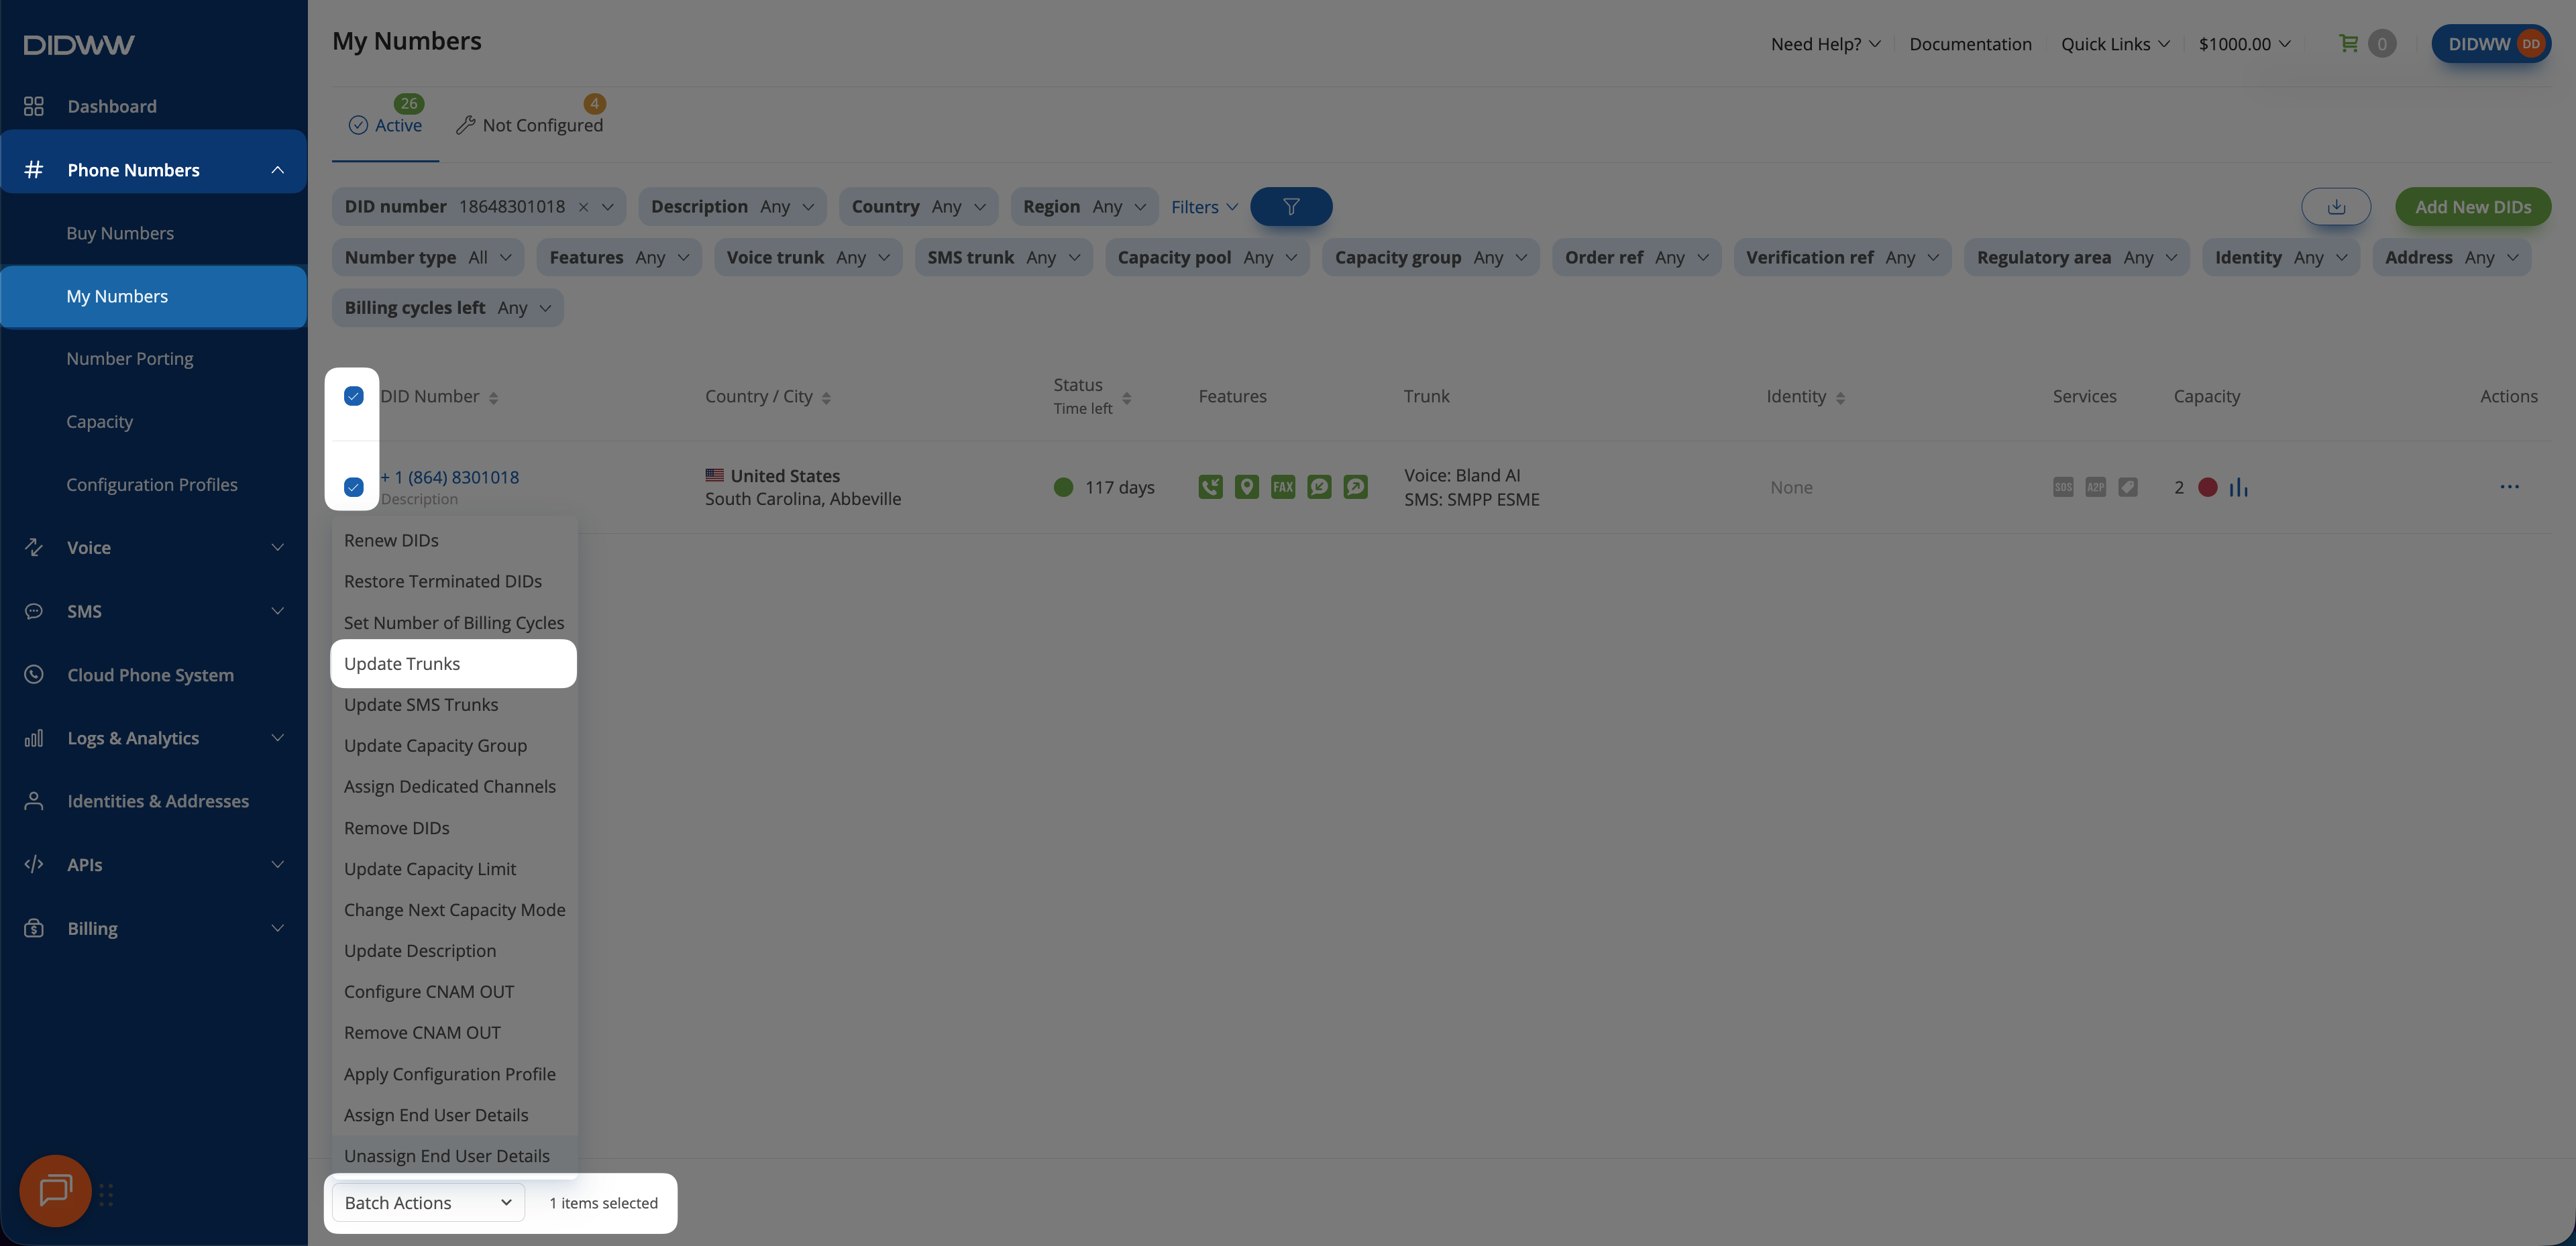
Selecting Update Trunks from the Batch Actions menu.#
From the dropdown menu, choose the Asterisk SIP trunk you created earlier.
Click Confirm to apply the changes.
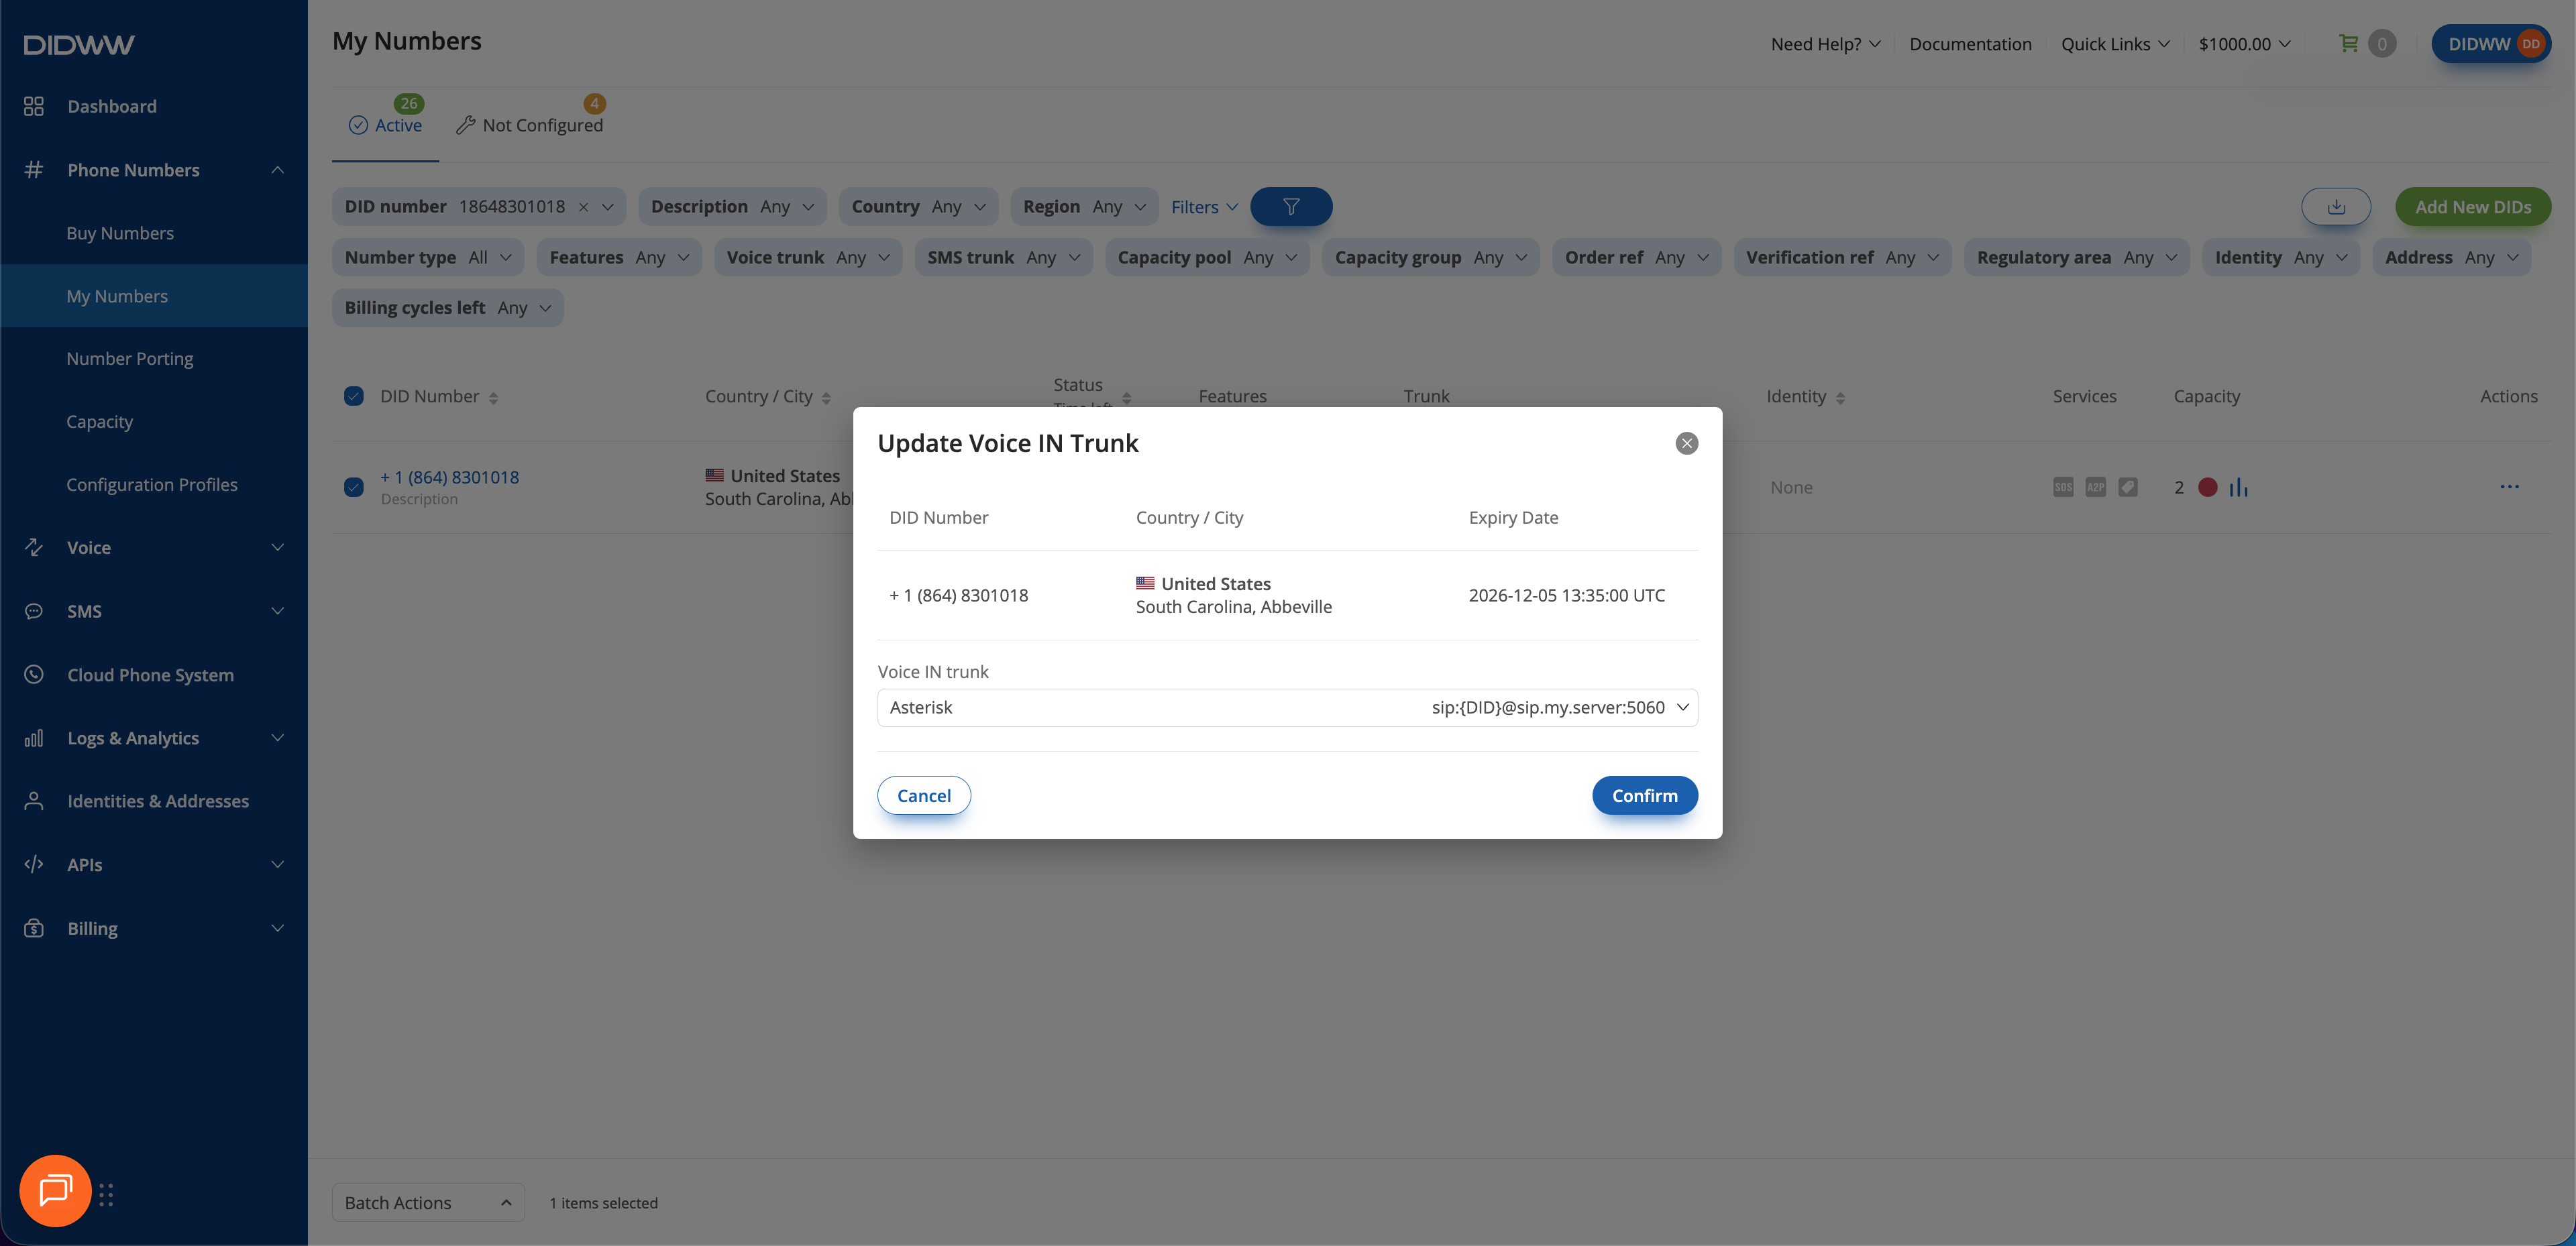
Assigning the newly created SIP trunk to the selected DID(s).#
2. Configure outbound voice trunk#
Configure an Outbound SIP Trunk in the DIDWW User Panel to allow Asterisk to place outbound calls through DIDWW. This trunk provides the SIP credentials and routing settings required for outbound calls to external phone numbers.
Before you begin#
Access to DIDWW Outbound Trunks is required for making outbound calls. See Get Access to DIDWW Outbound Termination.
Step 1: Create New Outbound SIP Trunk#
In the DIDWW User Panel, go to Voice > Outbound Trunks.
Click Create New.
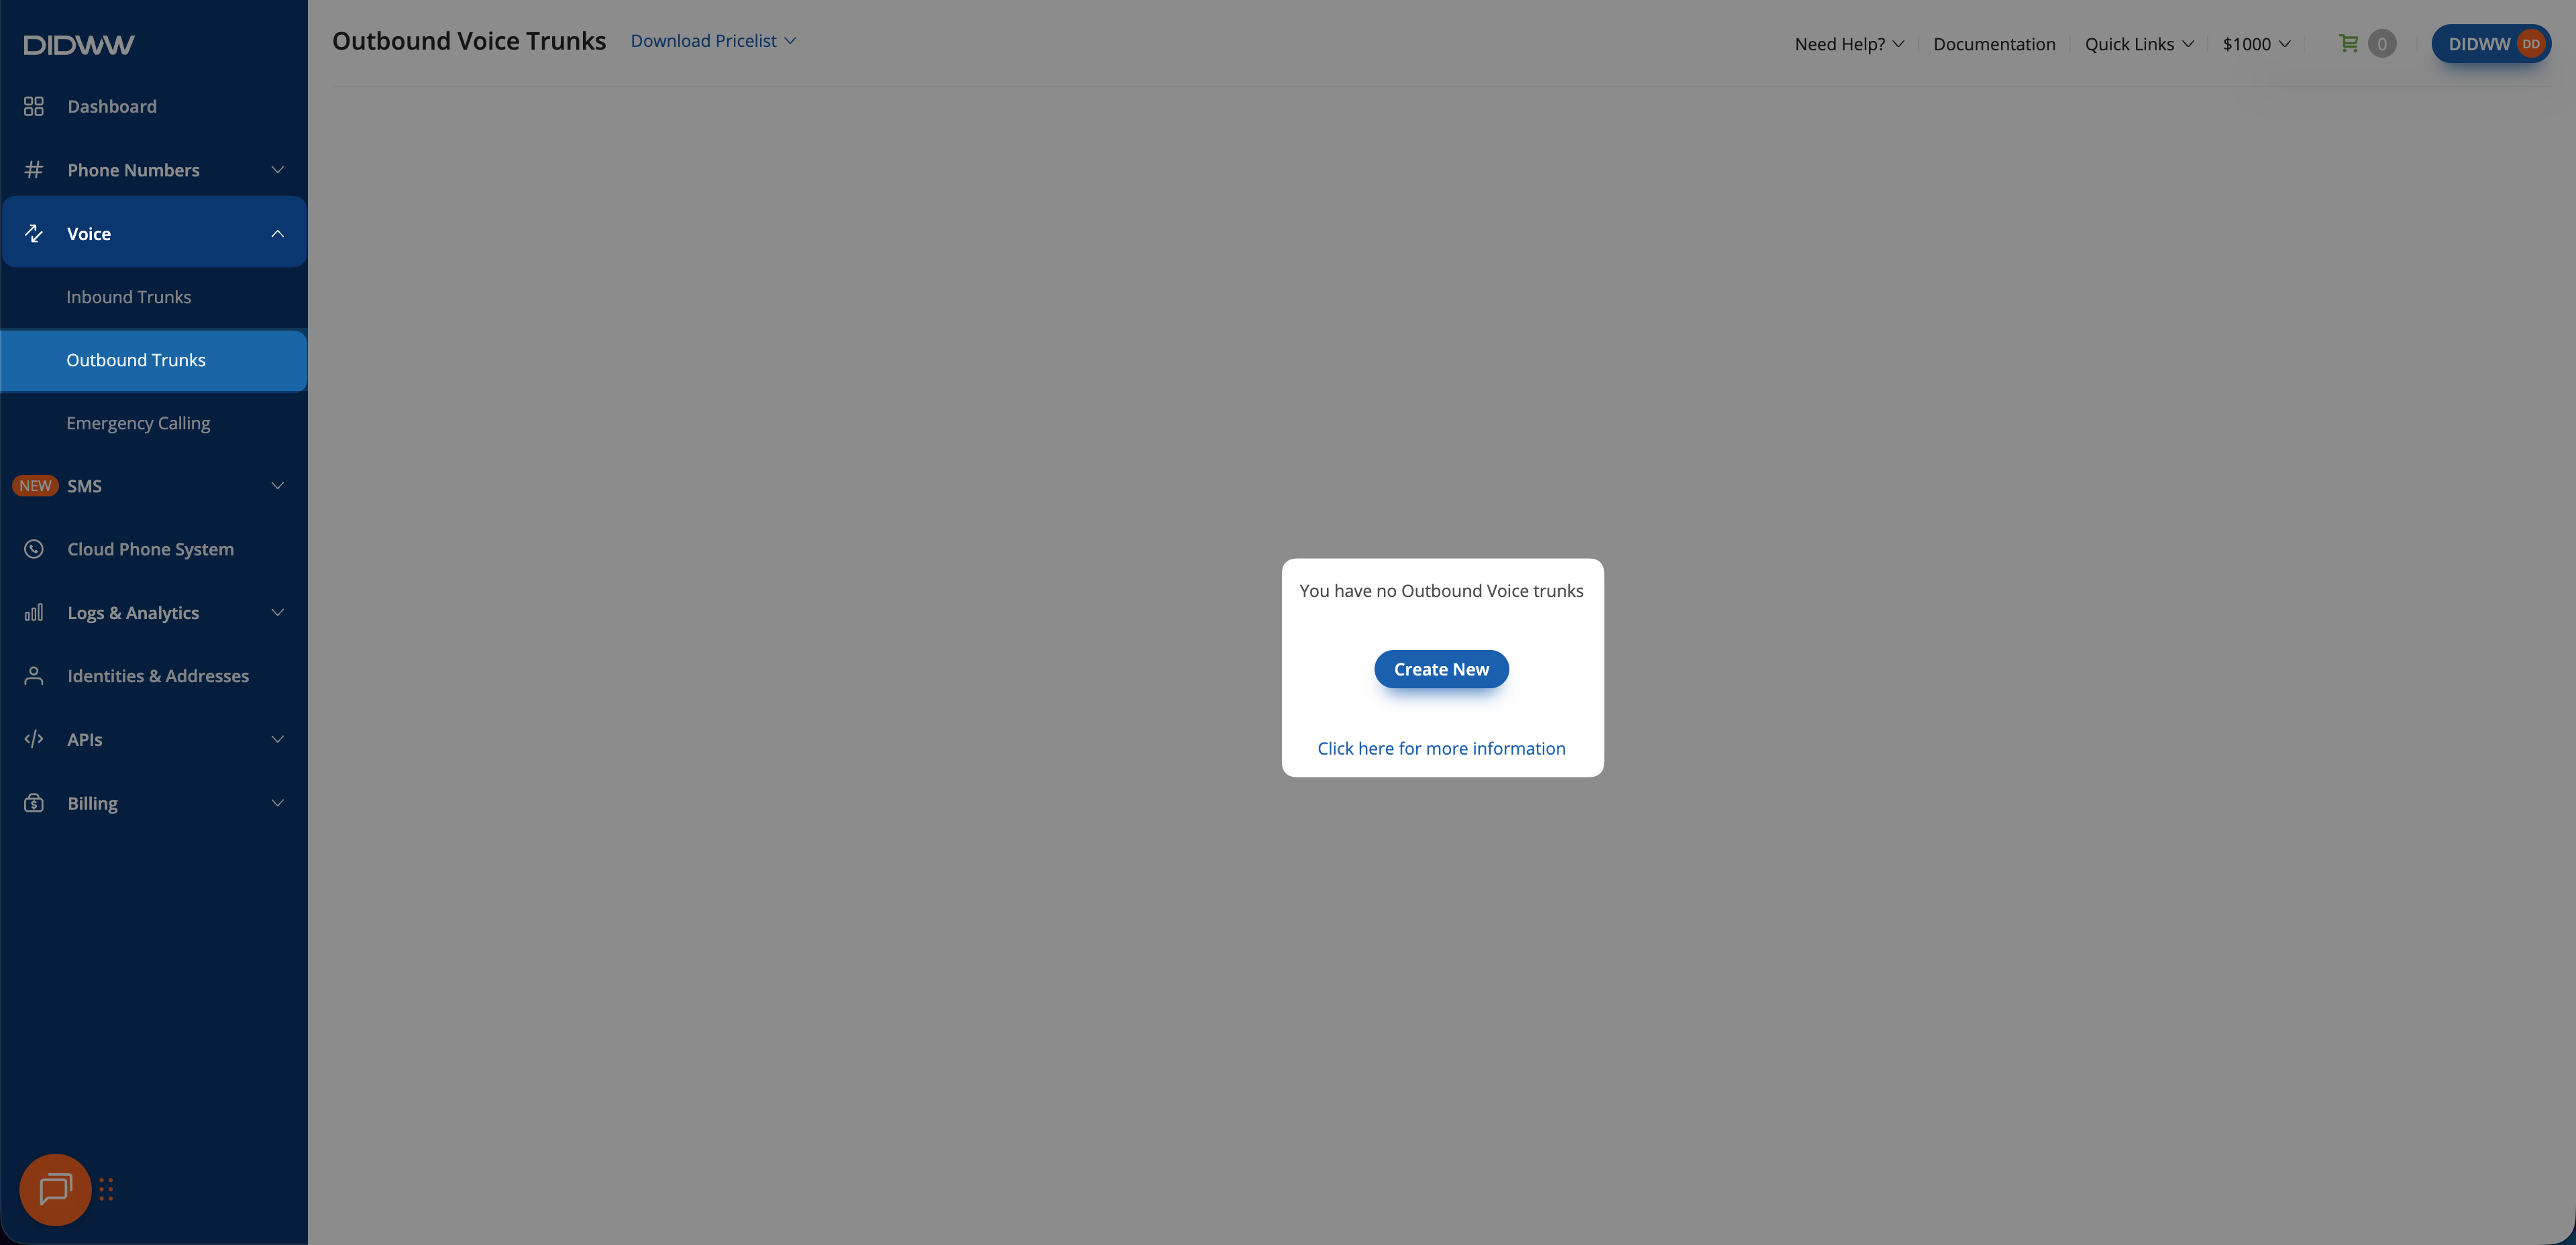
Creating a new outbound SIP trunk.#
Step 2: Configure Authentication#
Update the Friendly Name (e.g.,
Asterisk).Keep the default Credentials & IP-based authentication method selected. The SIP digest credentials (username and password) will be provided after the trunk is created.
In Allowed SIP IP addresses, enter the public IP address or subnet from which Asterisk will send outbound SIP traffic.
Configure Allowed CLI(s) and the other termination settings required by your deployment.
Note
Make sure you add the correct public IP address or subnet so that outbound calls are accepted by DIDWW.
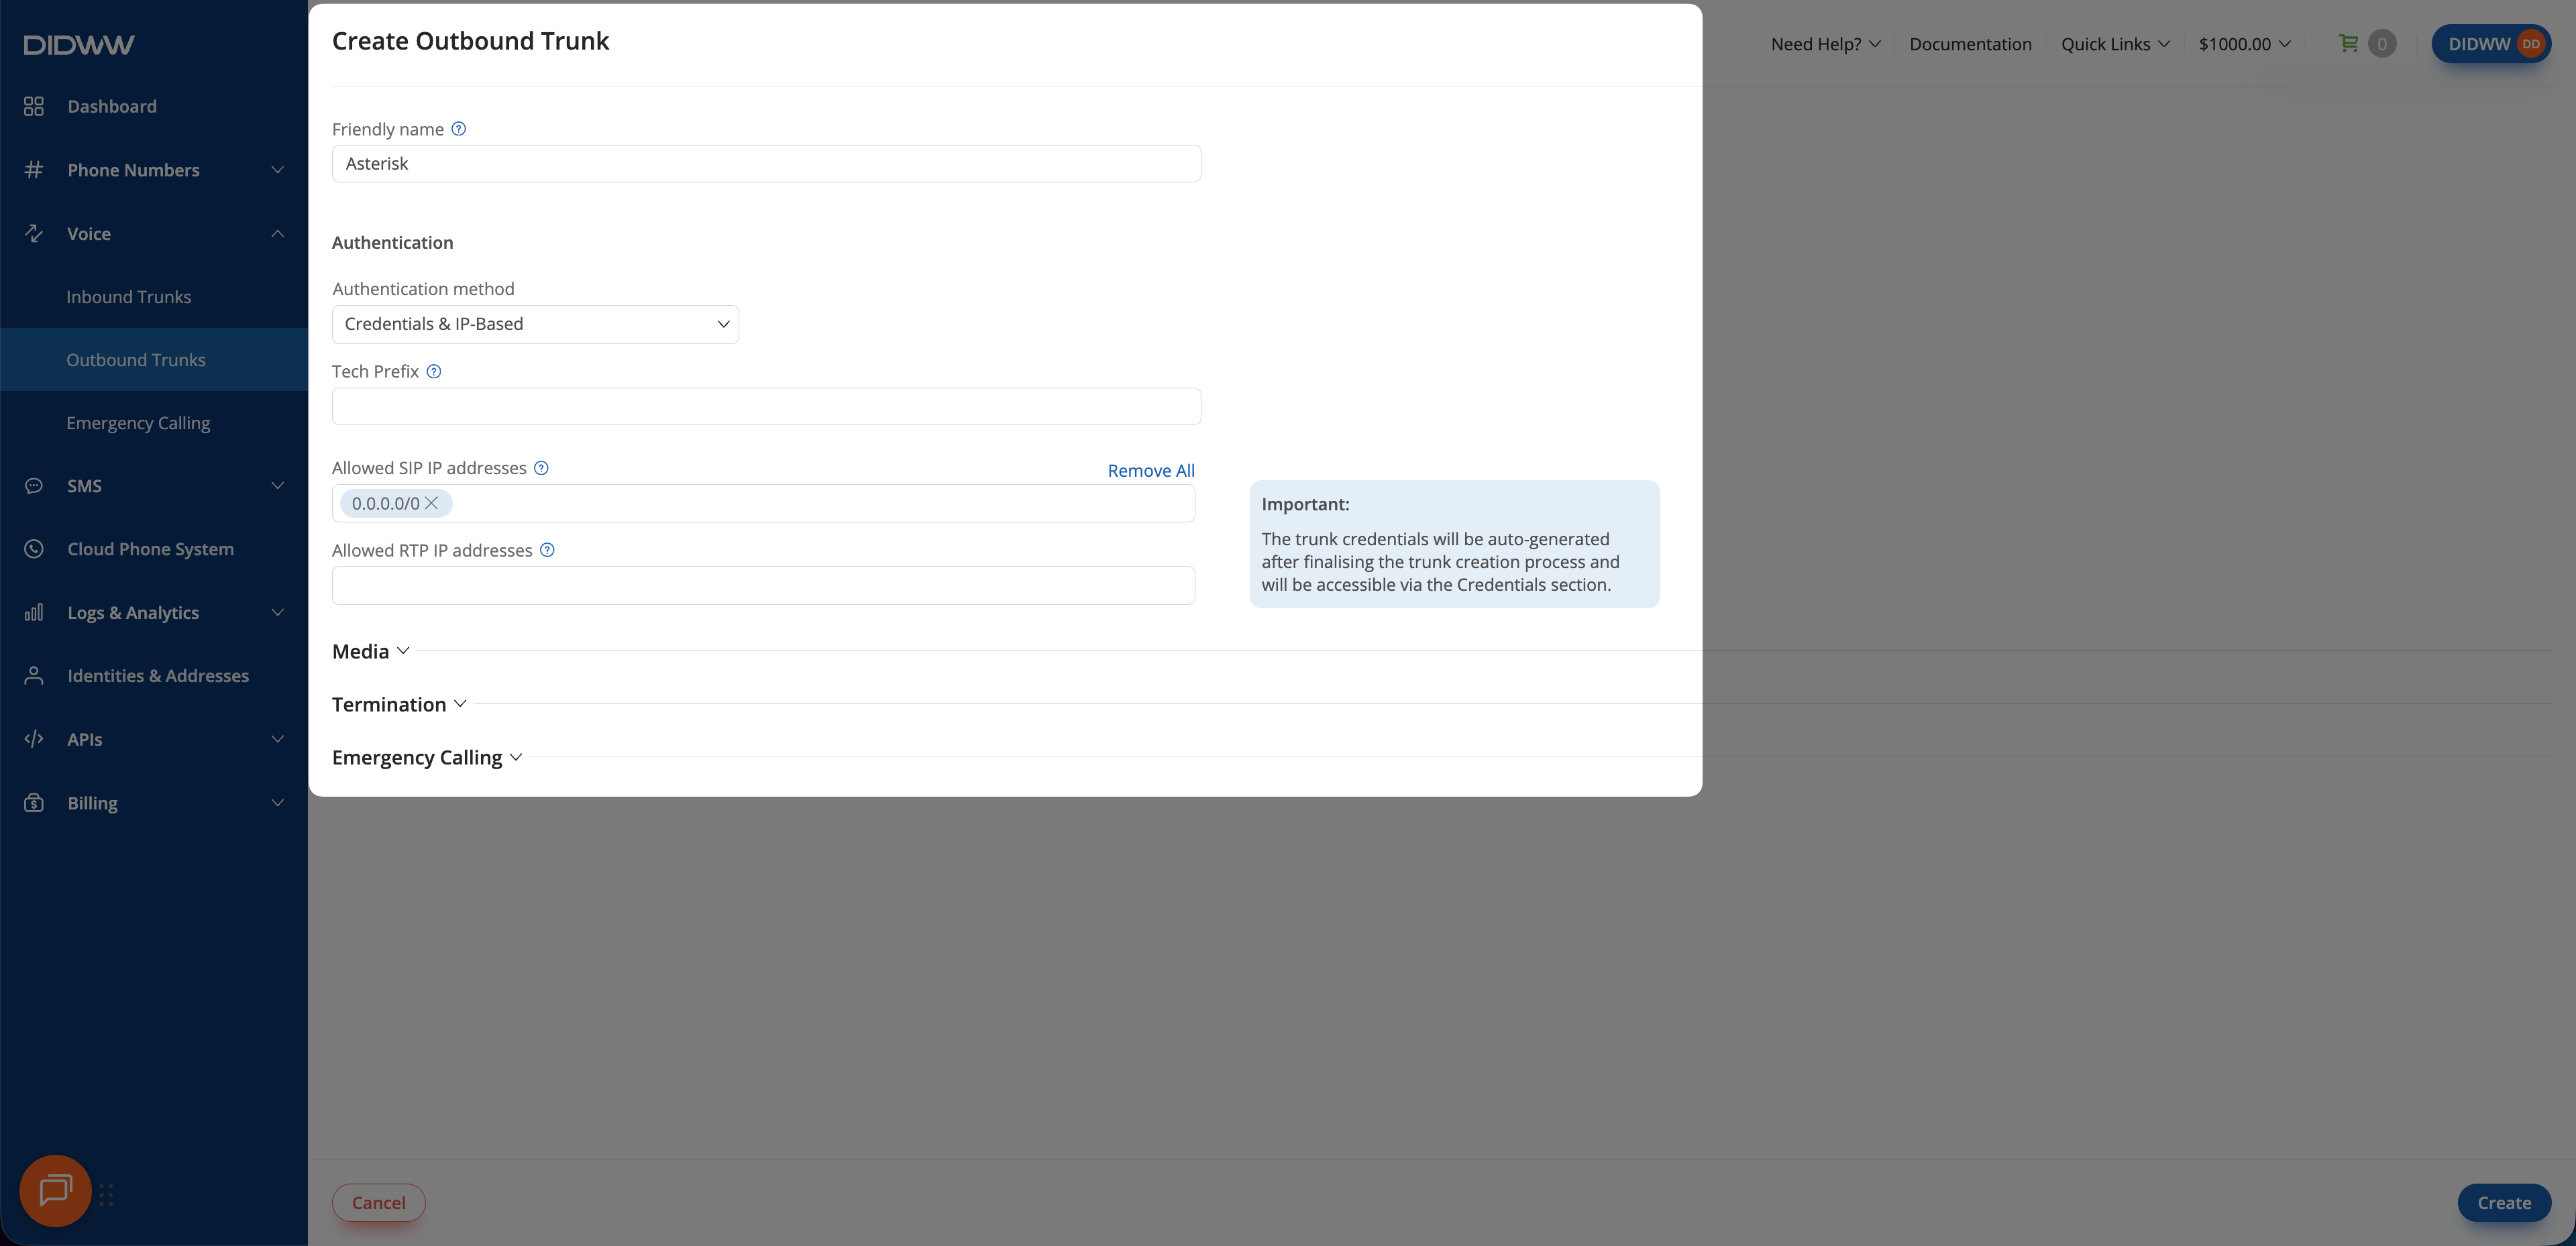
Entering allowed SIP IP addresses for outbound authentication.#
Step 3: Click Create and Save Outbound SIP Trunk Configuration#
When all required fields in the Create Outbound SIP Trunk are filled, click Create to save your outbound SIP trunk.
Note
For advanced outbound SIP trunk configuration, see Outbound SIP Trunk Guide.
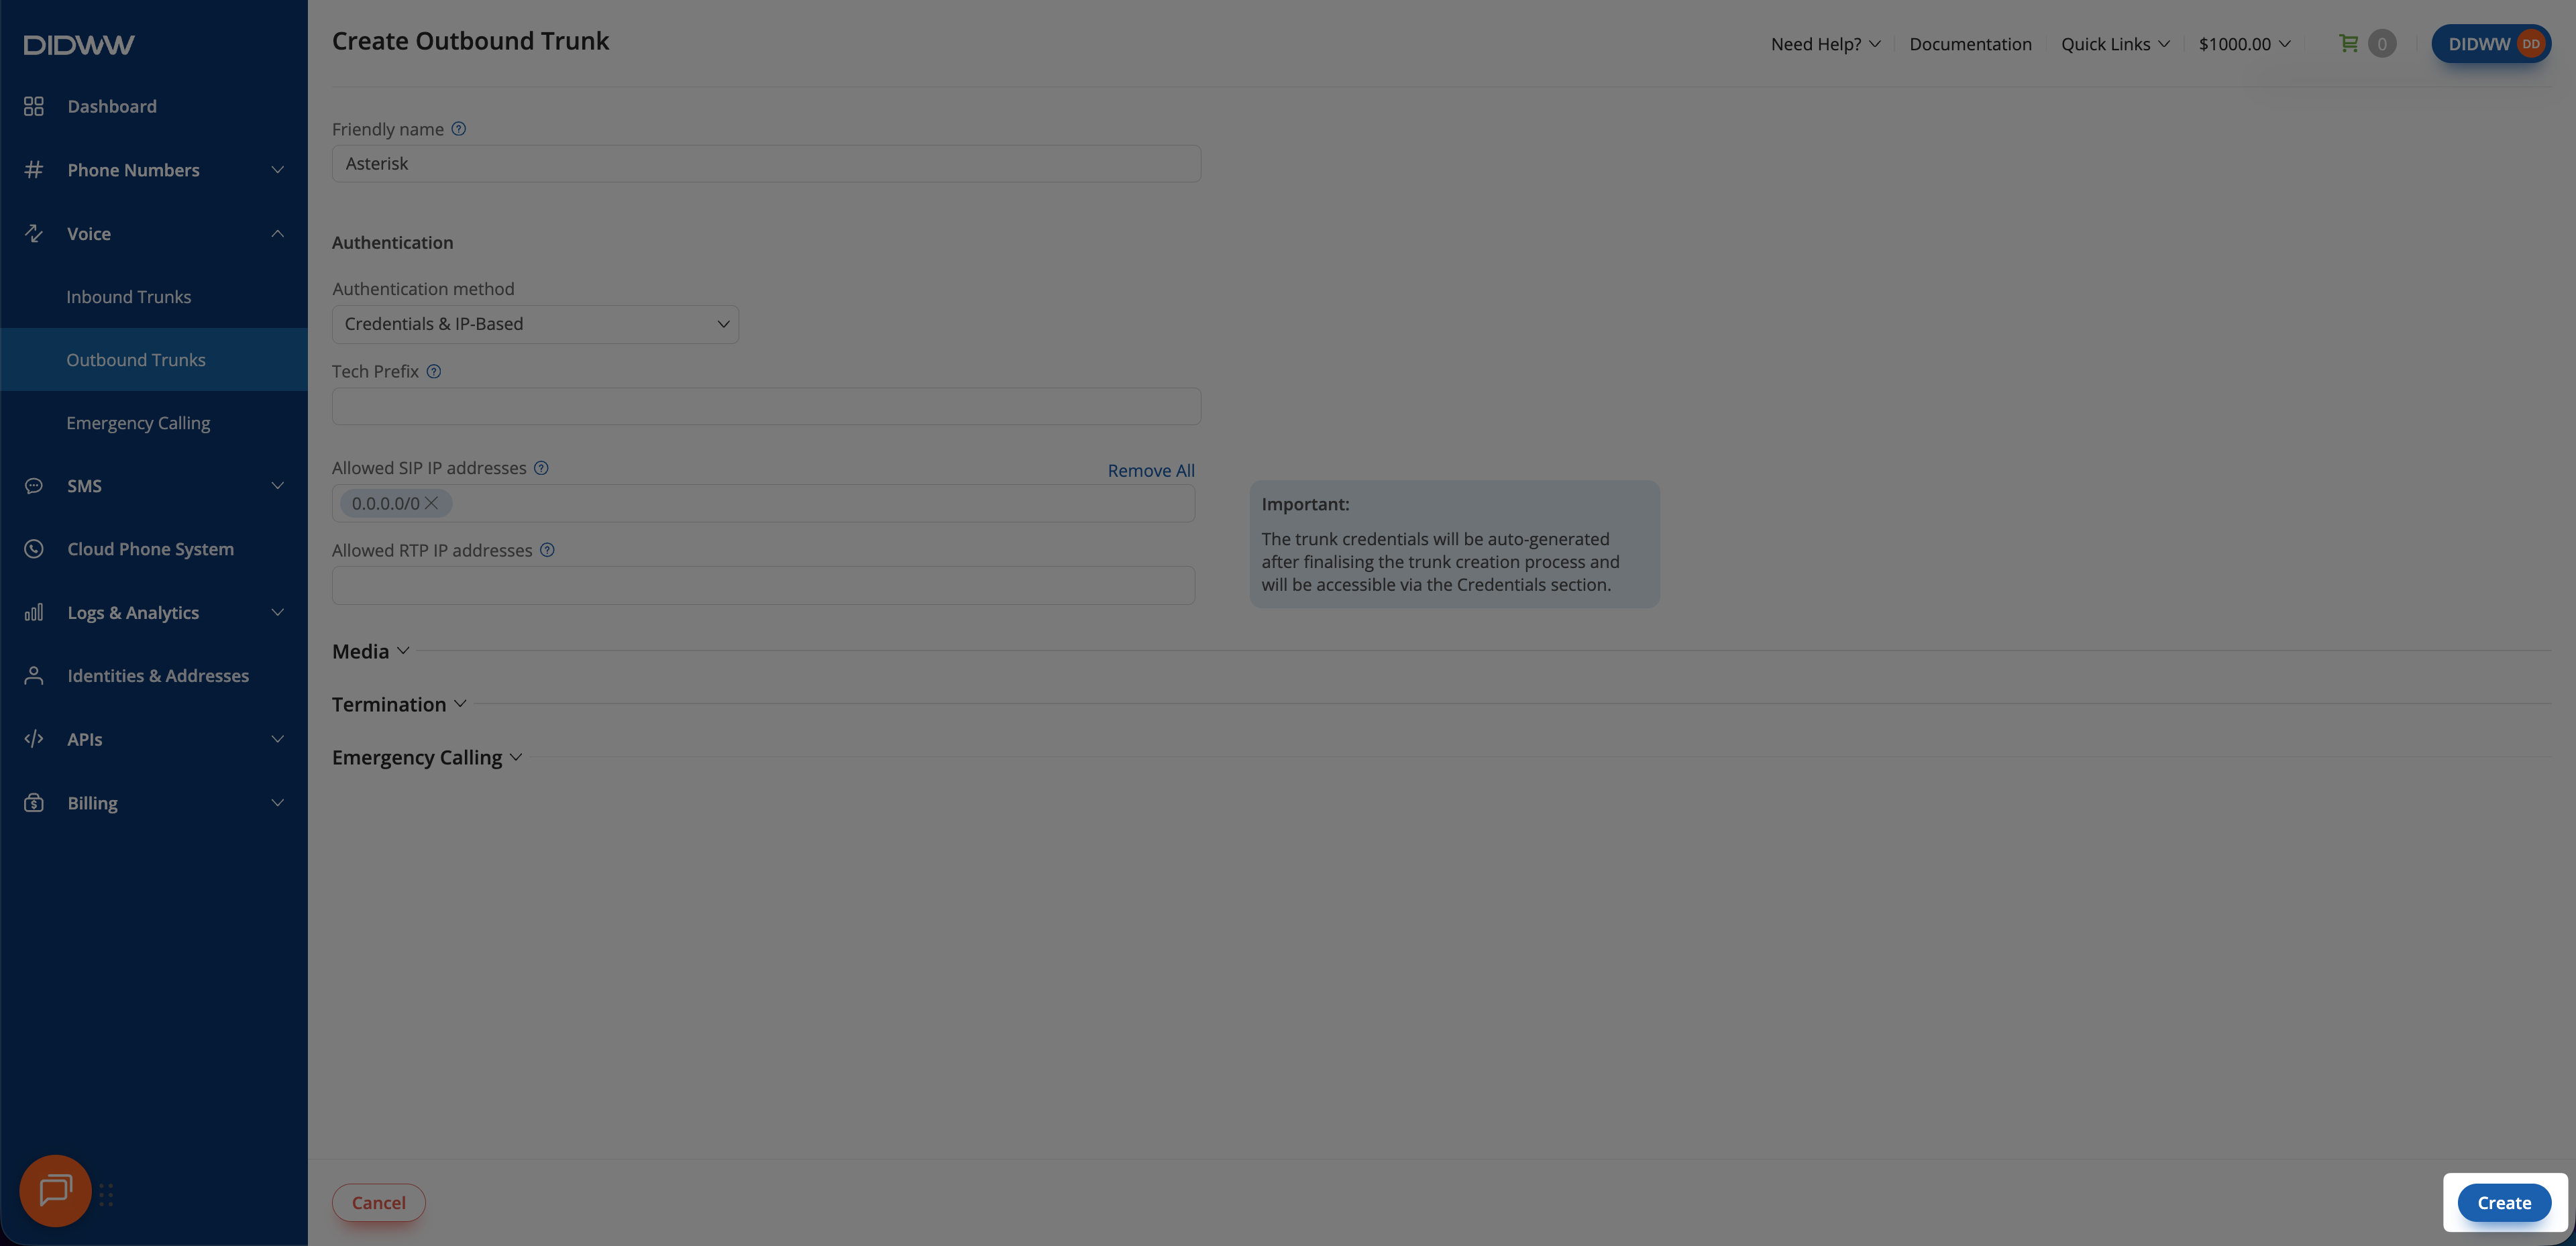
Outbound SIP trunk created and ready for use.#
Step 4: View Outbound Trunk Credentials#
After the outbound trunk is created, you can view its credentials by selecting the key icon in the Credentials column on the Outbound Trunks page.
Go to Voice > Outbound Trunks.
Locate your outbound trunk and click the key icon in the Credentials column.
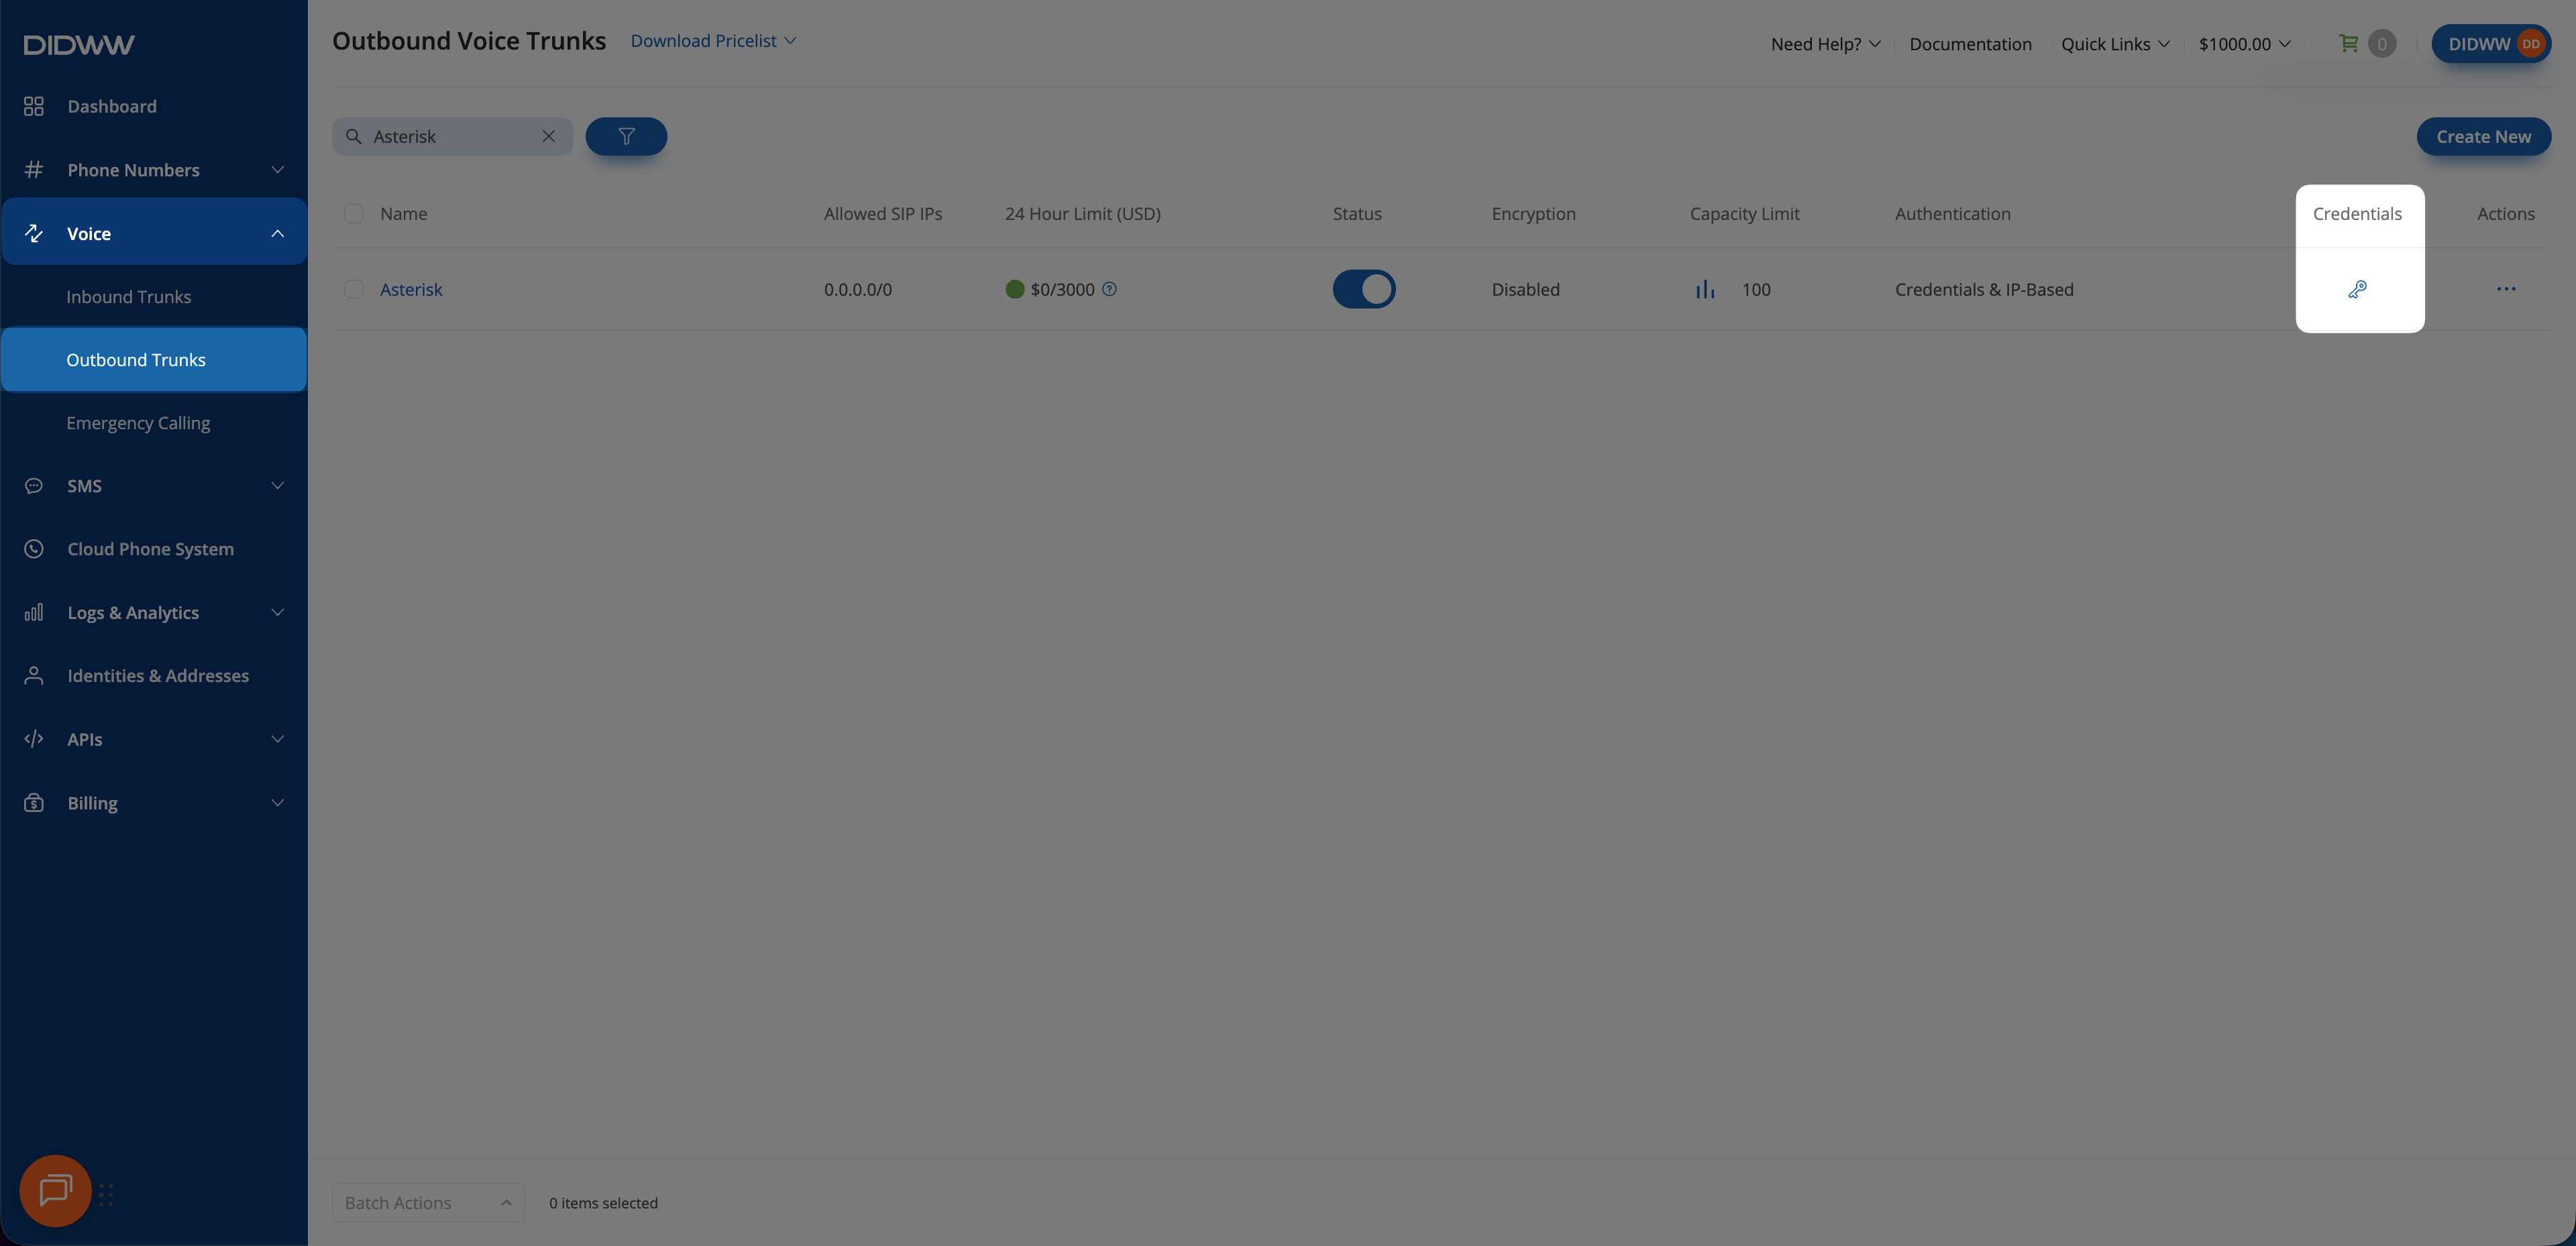
Opening the Asterisk outbound trunk credentials.#
The trunk credentials will appear, showing the Username and Password (click the eye icon to reveal the password).
Copy and securely store these credentials. You will need them when configuring outbound calling in Asterisk.
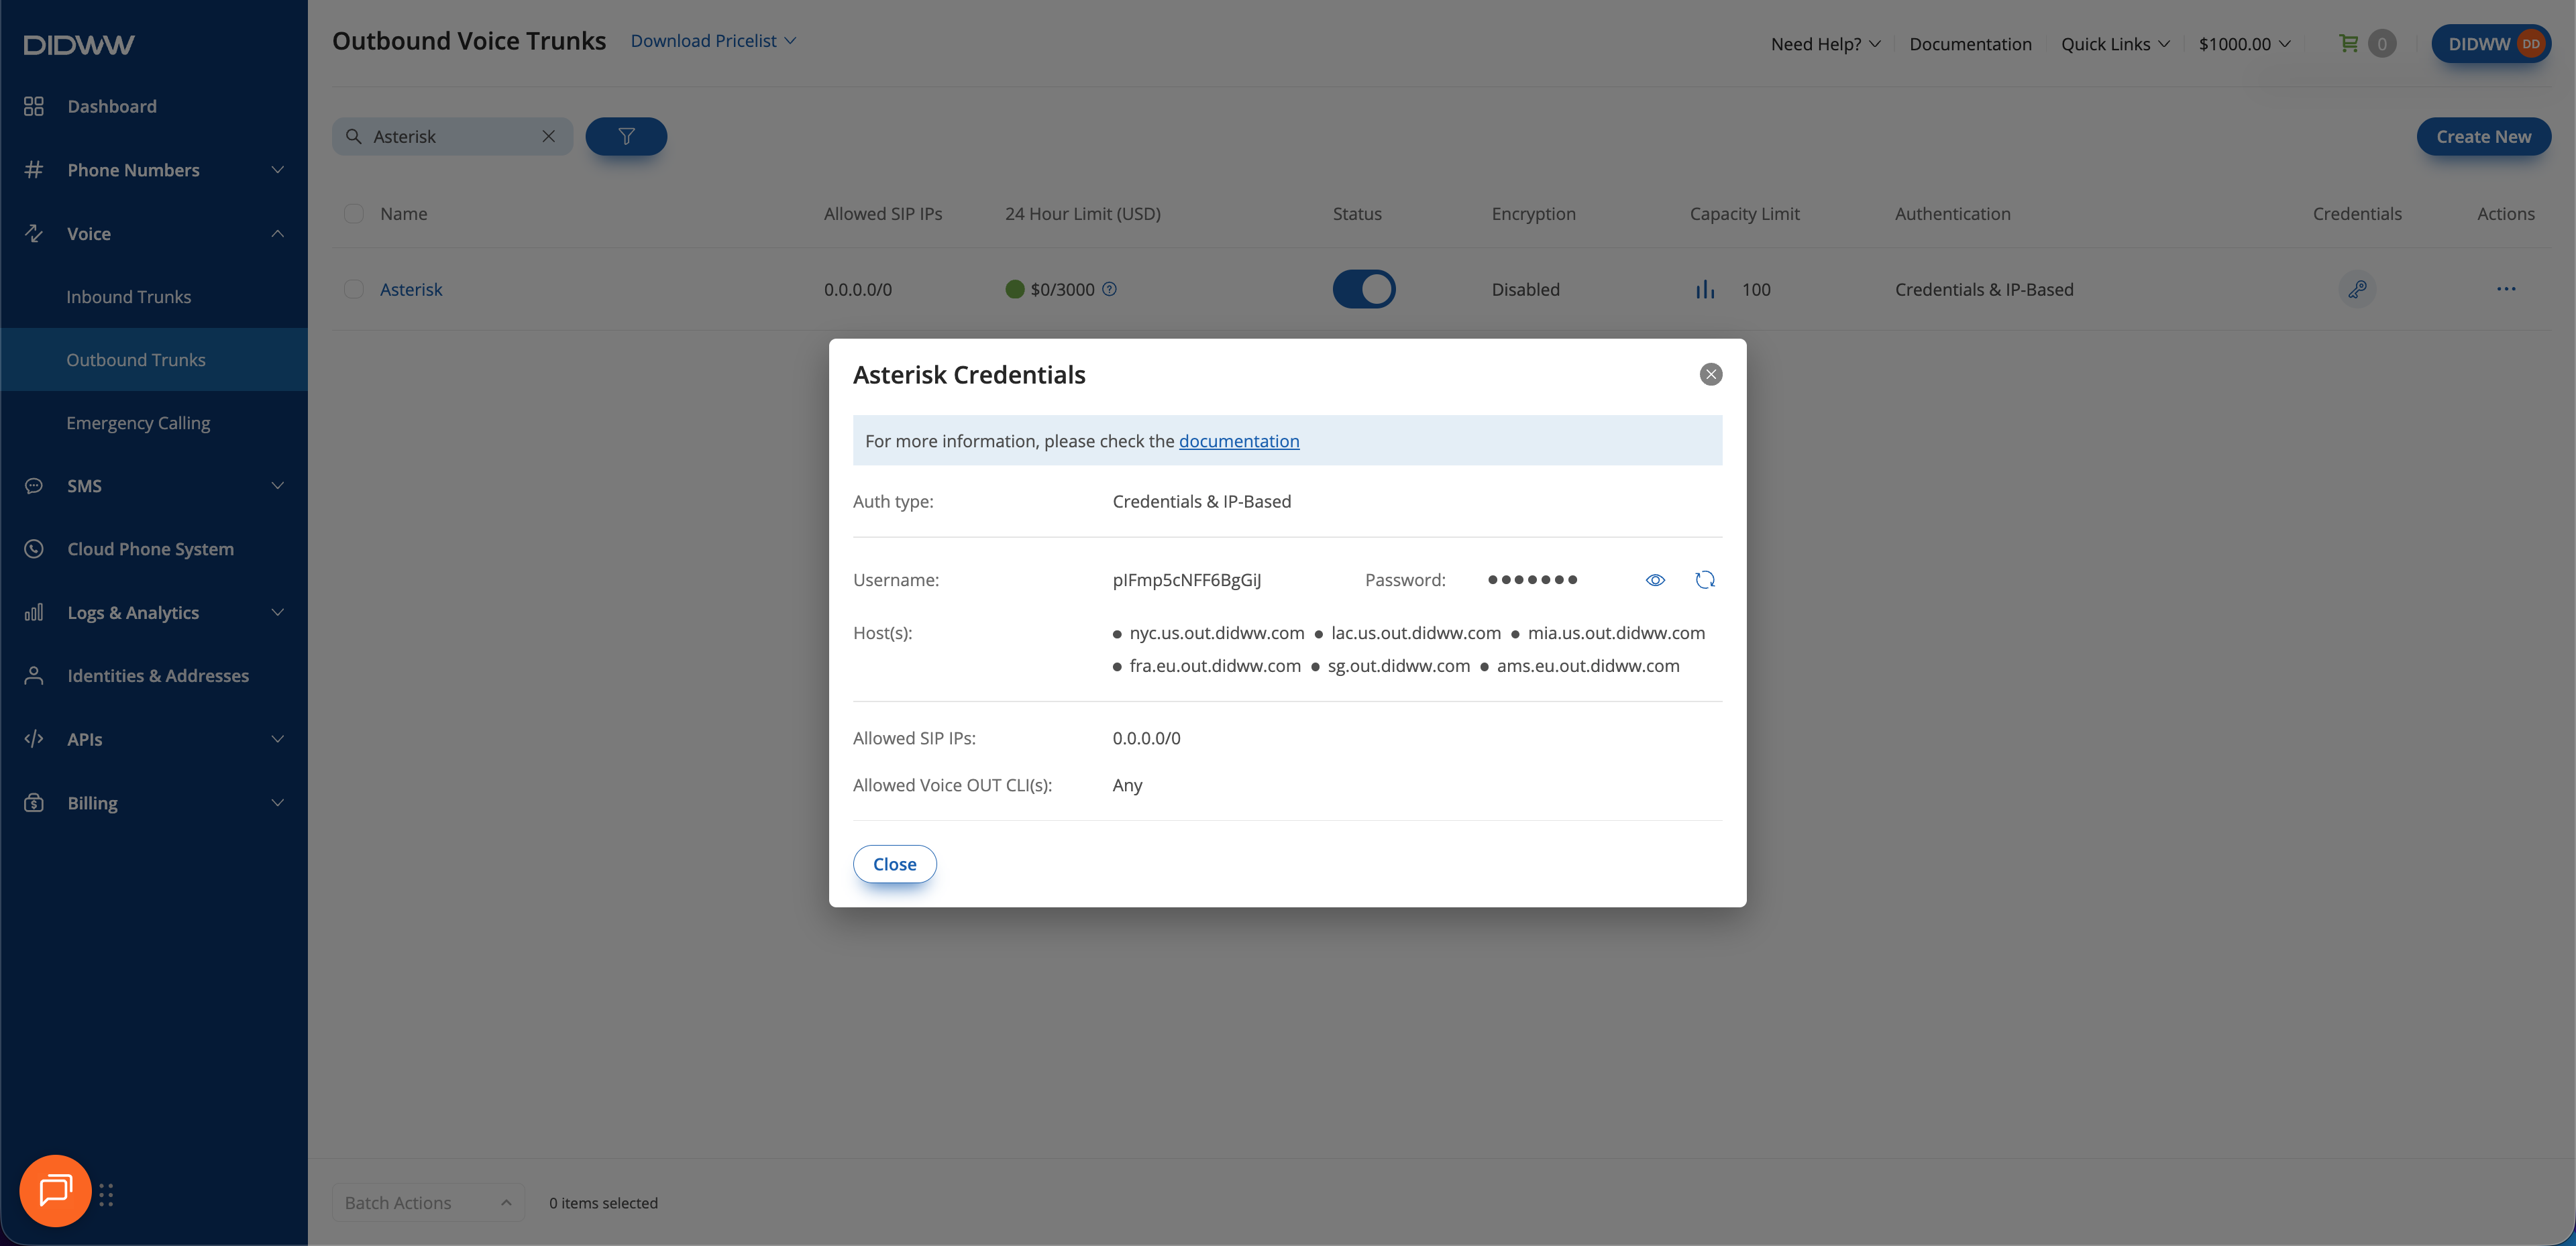
Asterisk outbound trunk credentials and hostnames.#
3. Configure Asterisk#
Configure Asterisk to use the DIDWW inbound and outbound trunks created in the previous sections. Add the required PJSIP transport, trunk, and dialplan settings for your deployment.
Before you begin#
Asterisk 20 or later is required with chan_pjsip and res_pjsip loaded. See the official Configuring res_pjsip documentation.
Note
The examples use /etc/asterisk/pjsip.conf and
/etc/asterisk/extensions.conf. Replace all uppercase placeholder values
before applying the configuration.
For an explanation of the transport, endpoint, authentication, AoR, registration, and identify objects, see the official PJSIP Configuration Sections and Relationships documentation.
Step 1: Configure SIP trunks (pjsip.conf)#
Complete the core trunk configuration first. Then add only the optional settings required by the Asterisk deployment.
Core trunk configuration#
In /etc/asterisk/pjsip.conf, configure the SIP transport and the inbound
and outbound DIDWW trunks. These settings establish the core SIP signaling
and media configuration required for calling through DIDWW.
Configure SIP transport#
Define the signaling transport in pjsip.conf. For inbound calling, the
transport and port must match the DIDWW inbound trunk settings. Skip this step
if pjsip.conf already contains the required transport.
Add the UDP transport:
[transport-udp]
type = transport
protocol = udp
bind = 0.0.0.0:5060
Add the TCP transport:
[transport-tcp]
type = transport
protocol = tcp
bind = 0.0.0.0:5060
Add the TLS transport:
[transport-tls]
type = transport
protocol = tls
bind = 0.0.0.0:5061
method = tlsv1_2
cert_file = /etc/asterisk/keys/asterisk.crt
priv_key_file = /etc/asterisk/keys/asterisk.key
verify_server = yes
ca_list_file = /etc/ssl/certs/ca-certificates.crt
Replace cert_file and priv_key_file with the paths to the
Asterisk TLS certificate and private key. Update ca_list_file if the
system CA bundle uses a different path.
Note
The remaining examples use UDP. If Asterisk is behind NAT, complete Configure NAT and firewall rules.
For Asterisk transport selection rules and additional examples, see the official PJSIP Transport Selection documentation.
Configure inbound trunk#
Add the configuration that matches the inbound trunk type selected in the
DIDWW User Panel to pjsip.conf.
Add the inbound endpoint and identify object:
[didww-in]
type = endpoint
transport = transport-udp
context = from-didww
disallow = all
allow = alaw,ulaw
dtmf_mode = rfc4733
direct_media = no

[didww-in-identify]
type = identify
endpoint = didww-in
match = 46.19.209.14
match = 46.19.210.14
match = 46.19.212.14
match = 46.19.213.14
match = 46.19.214.14
match = 46.19.215.14
match = 185.238.173.14
Replace transport-udp with transport-tcp or transport-tls
when using TCP or TLS. Preferred Server is set to Auto by
default, so add all addresses listed under SIP Signaling Addresses.
Note
The
identifyobject maps incoming DIDWW traffic to thedidww-inendpoint. Noaororregistrationobject is required.This guide uses IPv4. For IPv6, use the DIDWW addresses under SIP Signaling Addresses and configure an IPv6 PJSIP transport.
Add the inbound endpoint and registration using the credentials provided by DIDWW:
[didww-reg-auth]
type = auth
auth_type = userpass
username = INBOUND_TRUNK_USERNAME
password = INBOUND_TRUNK_PASSWORD

[didww-reg]
type = registration
transport = transport-udp
outbound_auth = didww-reg-auth
server_uri = sip:sip.didww.com
client_uri = sip:INBOUND_TRUNK_USERNAME@sip.didww.com
retry_interval = 60
expiration = 3600
line = yes
endpoint = didww-in

[didww-in]
type = endpoint
transport = transport-udp
context = from-didww
disallow = all
allow = alaw,ulaw
dtmf_mode = rfc4733
direct_media = no
Replace transport-udp with transport-tcp when using TCP. When
using TLS, set transport = transport-tls and include port 5061
in both registration URIs:
server_uri = sip:sip.didww.com:5061\;transport=tls
client_uri = sip:INBOUND_TRUNK_USERNAME@sip.didww.com:5061\;transport=tls
sip.didww.com selects the registration location automatically. See
SIP Registrars to use a regional hostname.
Note
Replace
INBOUND_TRUNK_USERNAMEandINBOUND_TRUNK_PASSWORDwith the credentials copied from the DIDWW User Panel.line = yesandendpoint = didww-inassociate incoming calls with thedidww-inendpoint. Noidentifyobject or signaling IP address list is required.
For both trunk types, the called DID is sent to the from-didww dialplan
context in E.164 format.
The inbound examples use G.711 A-law and G.711 µ-law. See Supported codecs to use other inbound codecs.
Configure outbound trunk#
Add the outbound trunk to pjsip.conf:
[didww-out-auth]
type = auth
auth_type = userpass
username = OUTBOUND_TRUNK_USERNAME
password = OUTBOUND_TRUNK_PASSWORD

[didww-out]
type = aor
contact = sip:any.out.didww.com
qualify_frequency = 60

[didww-out]
type = endpoint
transport = transport-udp
disallow = all
allow = alaw,ulaw,g729
dtmf_mode = rfc4733
direct_media = no
outbound_auth = didww-out-auth
aors = didww-out
from_user = AUTHORIZED_CALLER_ID
Note
Replace
OUTBOUND_TRUNK_USERNAMEandOUTBOUND_TRUNK_PASSWORDwith the credentials copied from the DIDWW User Panel.Replace
AUTHORIZED_CALLER_IDwith a caller ID allowed by the outbound trunk’s CLI settings, for example,12025550123.Send destination and caller ID numbers in E.164 format. See Outbound dialing.
In /etc/asterisk/pjsip.conf, add the following setting to the existing
type = endpoint object for each internal PJSIP endpoint that is allowed to
make outbound calls. The outbound dialplan context is configured in
Step 2.
context = outbound
The example uses UDP and the DIDWW anycast endpoint
any.out.didww.com. Anycast uses network routing to select a DIDWW point of
presence. See SIP Protocol Details to use a
regional endpoint instead.
For TCP, replace
transport-udp with transport-tcp. For TLS, use transport-tls and a
regional endpoint on port 5061. Replace the contact and transport
values with, for example:
; In the didww-out aor object
contact = sip:nyc.us.out.didww.com:5061\;transport=tls

; In the didww-out endpoint object
transport = transport-tls
The outbound example uses G.711 A-law, G.711 µ-law, and G.729. See SIP Protocol Details to use other outbound codecs.
Note
In Asterisk PJSIP, dtmf_mode = rfc4733 configures the RTP
telephone-event method commonly referred to as RFC 2833. See
DTMF transport methods.
Optional trunk configuration#
Use only the sections required by your deployment. Configure NAT when Asterisk is behind NAT. Media encryption and T.38 fax are optional.
Configure NAT and firewall rules#
When Asterisk is behind NAT, add the following settings to each transport object used with DIDWW:
external_media_address = PUBLIC_IP_ADDRESS
external_signaling_address = PUBLIC_IP_ADDRESS
local_net = 192.168.0.0/16
Replace PUBLIC_IP_ADDRESS with the public IP address of the Asterisk server
and adjust local_net to the local network in CIDR format.
Allow DIDWW signaling and media traffic through the firewall using the
addresses and ports listed in General SIP Information and SIP Protocol Details.
Allow the configured Asterisk SIP port and the RTP range defined in
rtp.conf through the firewall. If the Asterisk server is behind port-based
NAT, forward these ports to the server.
For details about the Asterisk NAT settings, see Configuring res_pjsip to work through NAT.
Configure media encryption#
The Asterisk media-encryption method must match the SRTP Mode of the inbound trunk and the Media Encryption setting of the outbound trunk.
Add one of the following configurations to each DIDWW-facing endpoint.
Use TLS signaling to protect the SRTP keys included in the SDP.
media_encryption = sdes
media_encryption = dtls
dtls_auto_generate_cert = yes
dtls_verify = fingerprint
dtls_setup = actpass
DIDWW also supports ZRTP key negotiation, but stock Asterisk PJSIP does not.
SRTP requires the res_srtp module. See the Asterisk PJSIP endpoint
options
and the DIDWW encryption details for inbound calling and outbound calling.
Note
Encryption applies only to the call leg between DIDWW and Asterisk. It is not end-to-end encryption.
Configure T.38 fax#
For an inbound DID that supports T.38, add the following setting to the
didww-in endpoint:
t38_udptl = yes
This setting enables T.38 negotiation and does not affect normal voice calls.
The dialplan must route fax calls to a T.38-capable application or endpoint.
If Asterisk relays T.38 to another PJSIP endpoint, enable t38_udptl on that
endpoint as well.
When Asterisk is behind NAT, also add t38_udptl_nat = yes and allow the
UDPTL port range configured in udptl.conf. For T.38 availability and G.711
fax alternatives, see FAX Services.
Important
Run pjsip reload from the Asterisk CLI
after changing PJSIP endpoints, authentication objects, or registrations.
Transport changes require a complete Asterisk restart.
Step 2: Configure the dialplan (extensions.conf)#
Add the inbound and outbound routing contexts to extensions.conf.
[from-didww]
exten => INBOUND_DID,1,NoOp(DIDWW inbound call to ${EXTEN})
 same => n,Dial(PJSIP/INTERNAL_ENDPOINT,30)
 same => n,Hangup()

[outbound]
; Send an E.164 destination through the DIDWW outbound trunk.
exten => _X.,1,Set(CALLERID(num)=AUTHORIZED_CALLER_ID)
 same => n,Dial(PJSIP/${EXTEN}@didww-out)
 same => n,Hangup()
Replace INBOUND_DID with the DID in E.164 format, for example,
12025550123; INTERNAL_ENDPOINT with the destination PJSIP endpoint,
for example, 1001; and AUTHORIZED_CALLER_ID with a caller ID allowed
by the outbound trunk, for example, 12025550123.
Warning
Keep the from-didww and outbound contexts separate. Do not allow
inbound calls to access the didww-out endpoint.
For dialplan concepts and extensions.conf syntax, see the official
Asterisk dialplan
documentation.
Note
Run dialplan reload from the Asterisk CLI
after changing extensions.conf.
Step 3: Verify and troubleshoot the configuration#
Use the following Asterisk CLI commands to confirm that Asterisk loaded the configuration and can communicate with DIDWW:
Check |
Command |
|---|---|
Loaded endpoints |
|
Configured transports |
|
IP-based endpoint matches |
|
Registration state |
|
Gateway reachability |
|
Loaded dialplan contexts |
|
Live SIP trace |
|
Force an inbound registration attempt |
|
Common issues#
Inbound calls return 401 or 404, or Asterisk reports No matching endpoint.
For a Static Endpoint trunk, confirm that the request source is present
in the identify object.
For a Dynamic Registration trunk, confirm that line = yes and
endpoint = didww-in are set on the registration.
An inbound call reaches Asterisk but does not reach the internal endpoint.
Run dialplan show from-didww and confirm that the DID received in
the Request-URI matches INBOUND_DID in extensions.conf.
Confirm that INTERNAL_ENDPOINT identifies an available PJSIP endpoint.
A call has one-way audio.
Check external_media_address, local_net, and the firewall rules.
Confirm that the applicable DIDWW RTP ranges and the Asterisk RTP port range are allowed.
A call fails with 488 Not Acceptable Here.
Confirm that Asterisk and the corresponding DIDWW trunk have a common codec.
If media encryption is enabled, confirm that the configured SRTP method matches the trunk settings.
DTMF input is not recognized.
Confirm that the endpoint uses dtmf_mode = rfc4733.
This is the Asterisk PJSIP setting for the RTP telephone-event method commonly referred to as RFC 2833.
Outbound calls return 403 or repeat 407 challenges.
Confirm the outbound trunk credentials, the public Asterisk address in Allowed SIP IP addresses, and the caller ID in the trunk’s CLI settings.
Asterisk cannot establish a TLS connection.
Confirm that the TLS transport is loaded, the certificate and CA bundle
paths are correct, and the configured DIDWW hostname uses port 5061.
For outbound TLS, use a regional DIDWW endpoint.
Run pjsip set logger on to inspect the failure.
A Dynamic Registration trunk remains Rejected.
Confirm that the username in client_uri matches the generated trunk
username.
Run pjsip set logger on to inspect the authentication challenge and
response.
A Dynamic Registration trunk remains Unregistered or cannot reach the registrar.
Confirm that the selected transport is loaded and that the firewall permits signaling to the configured DIDWW registrar and port.
Confirm that server_uri uses the same transport and port.
For additional diagnostic procedures, see the official Asterisk PJSIP Troubleshooting Guide.