Inbound#
DIDWW SIP Trunks can be used with FreePBX for Inbound calls. The following guide will explain the steps necessary to configure the FreePBX.
Note
This guide has been created with FreePBX Version 16.0.21.9.
Getting Started#
What you need to get started:
Access to DIDWW self-service portal to create DIDWW Inbound SIP Trunk trunk and assign it to the preferred DID number.
Access to FreePBX Administration UI.
Configuring Asterisk SIP Settings#
Step 1. Click Settings on the top section, then select Asterisk SIP Settings from the dropdown menu.
Step 2. On the SIP Settings page, click on the SIP Settings [chan_pjsip] tab and enter the fields (Fig. 1):
Port to Listen On: your preferred port
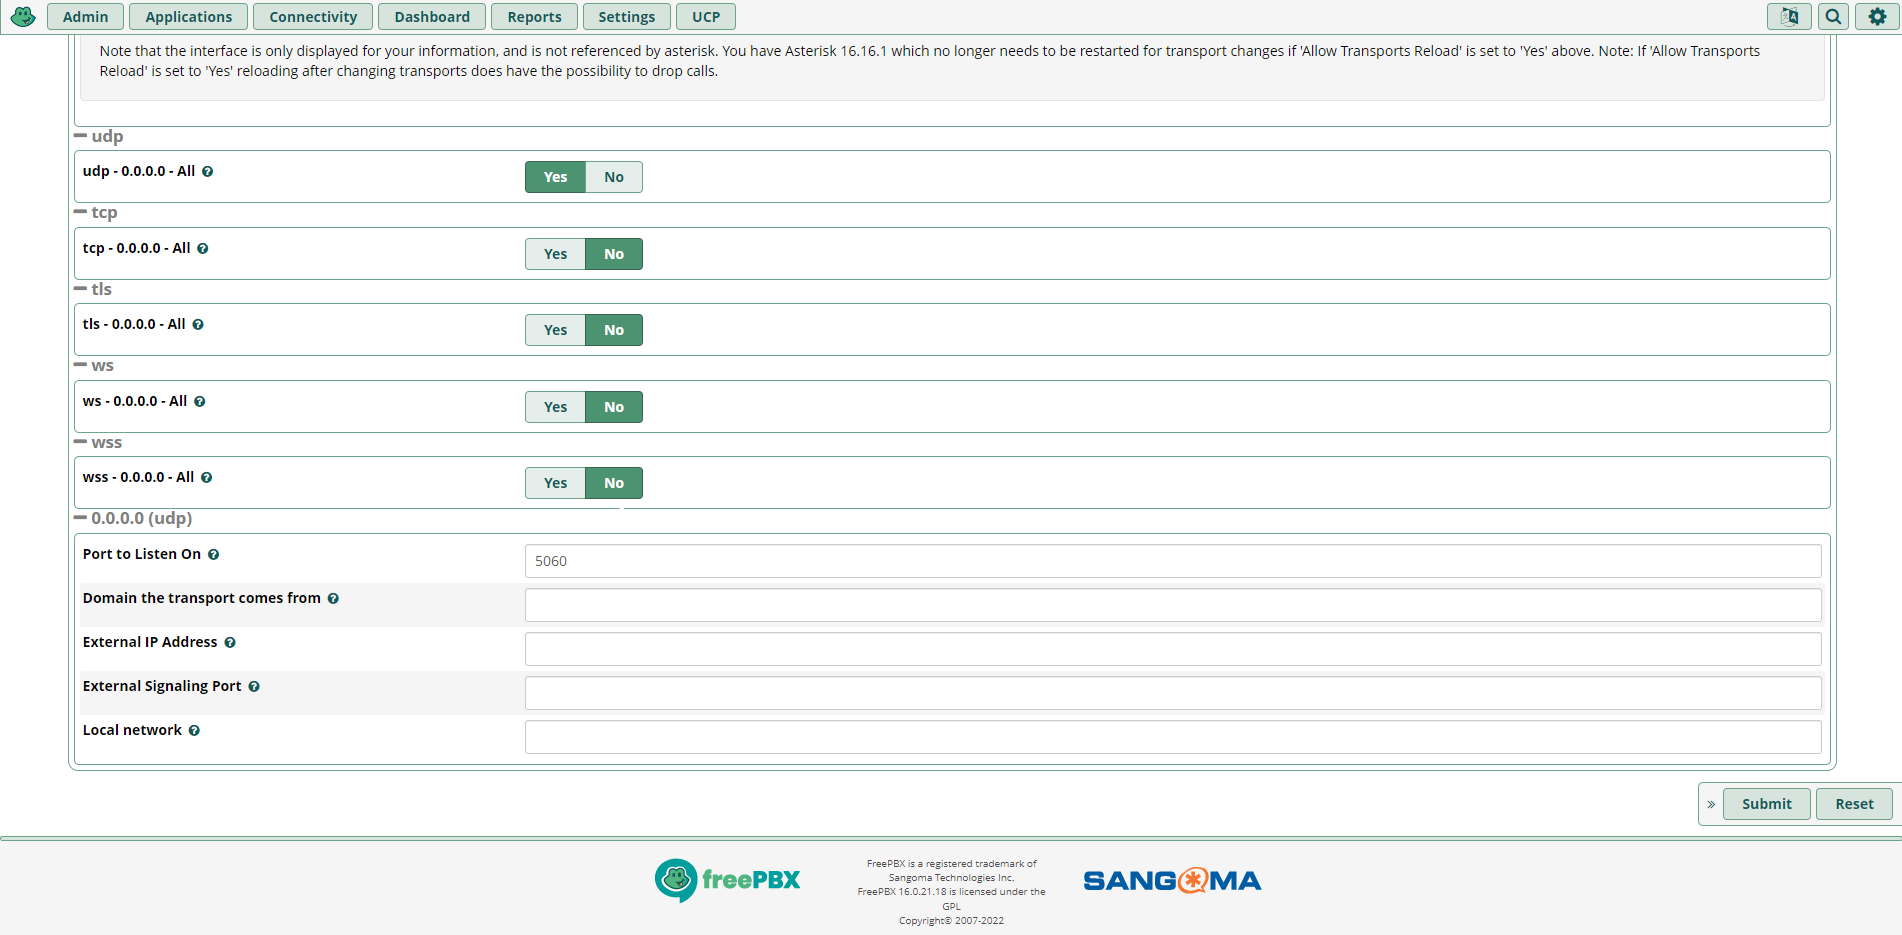
Fig. 1. SIP settings page, SIP Settings [chan_pjsip] tab.#
Step 3. Complete configuration by clicking the Submit button on the bottom right side. Click on Apply Config located on the top right side.
Configuring the Inbound Trunk#
Step 1. On the top menu of the Admin interface click Connectivity and select Trunks from the dropdown menu.
Step 2. In the Trunks window, click on Add Trunk, and select Add SIP (chan_pjsip) Trunk from the dropdown menu (Fig. 1).
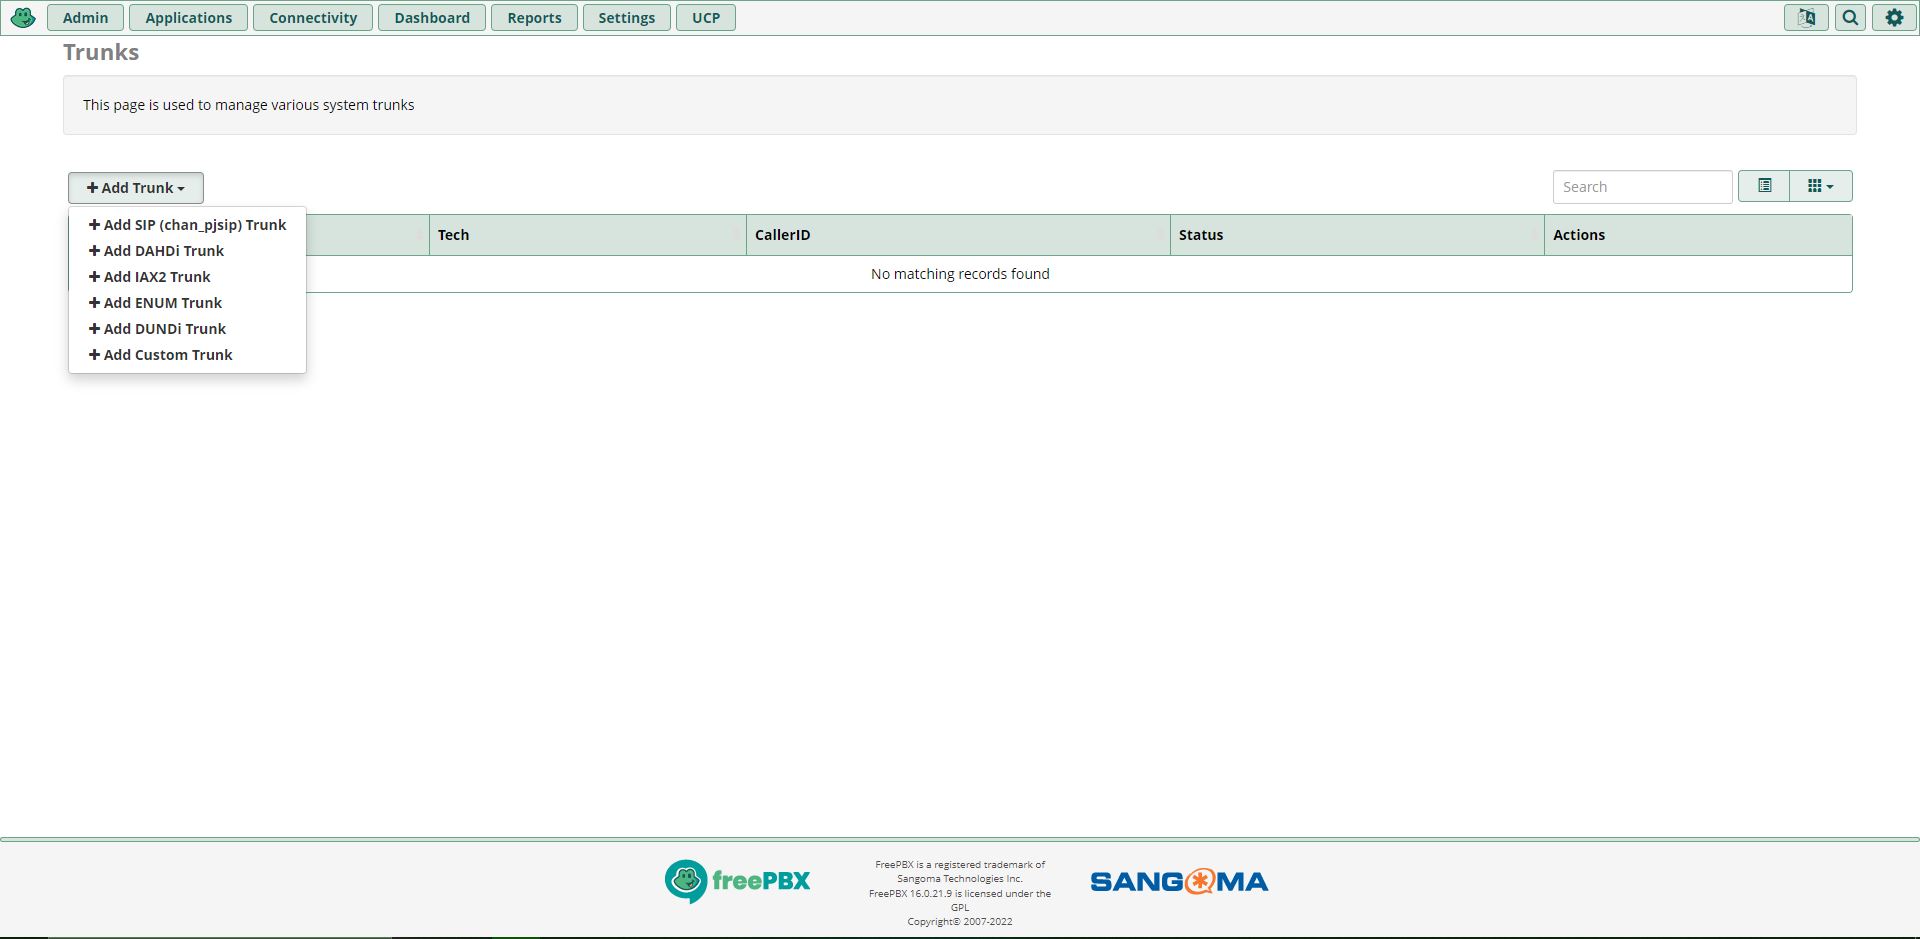
Fig. 1. Trunks page.#
Step 3. Enter your preferred Trunk name in Add Trunk window, under the General tab (Fig. 2).
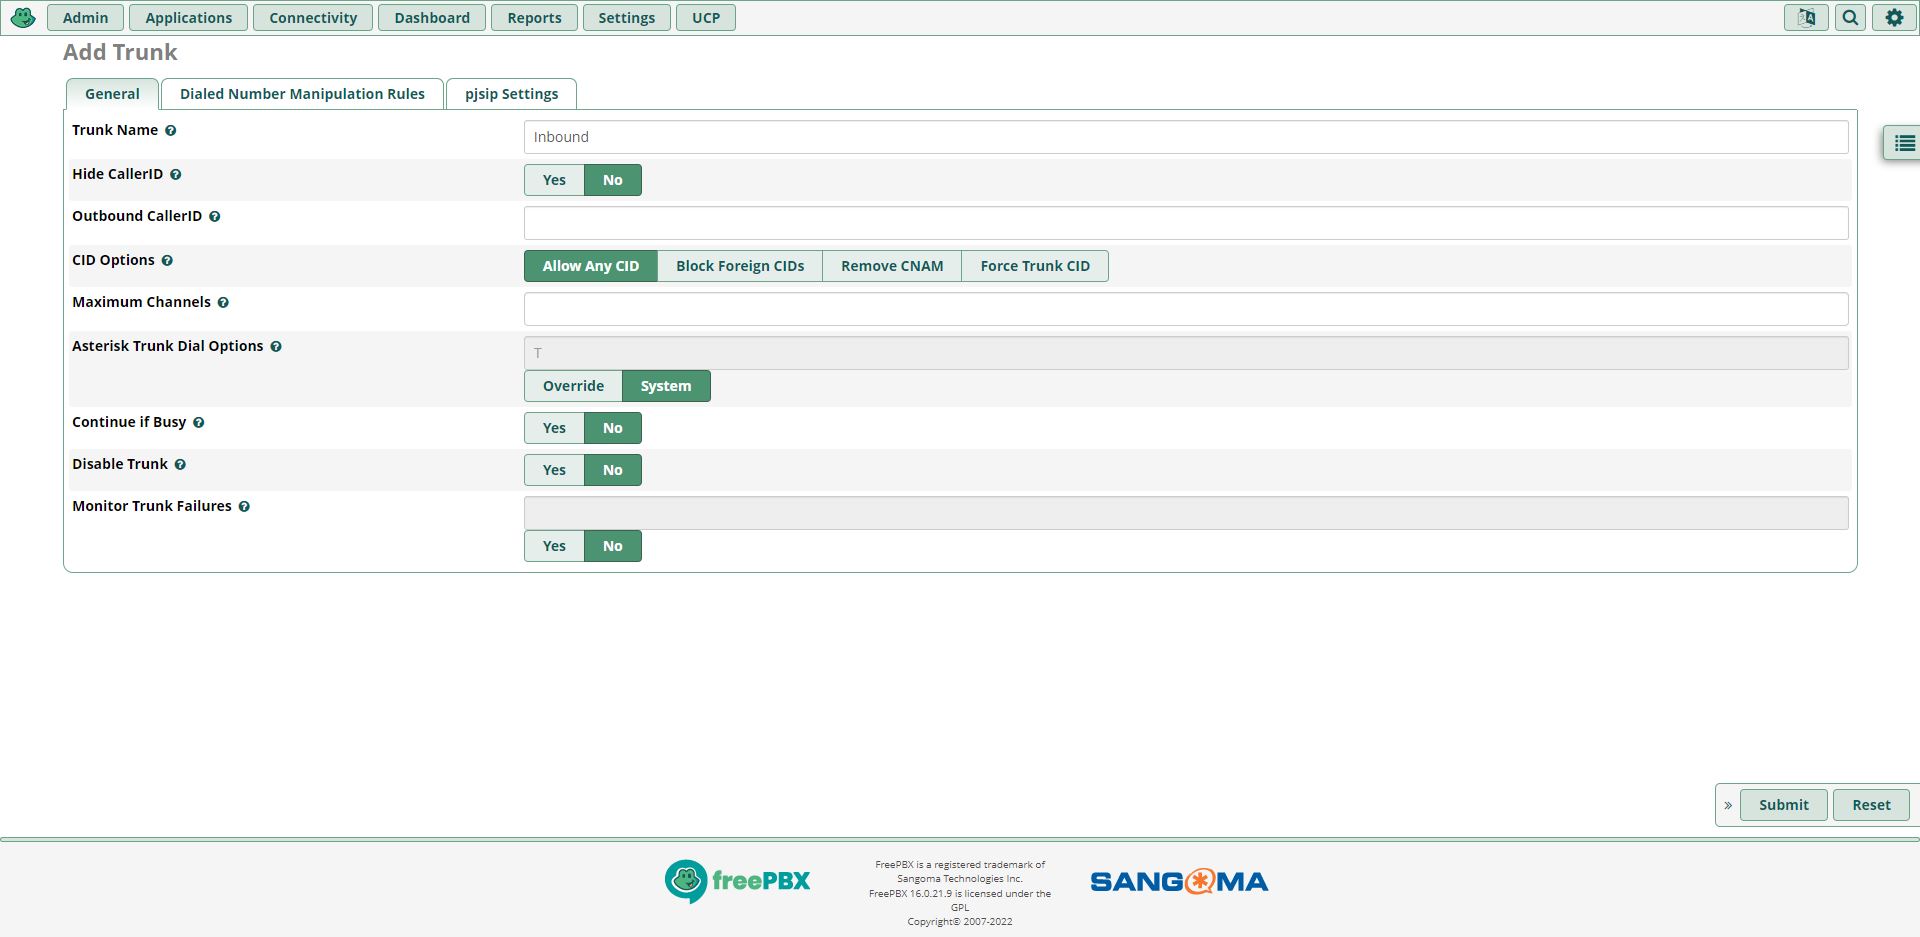
Fig. 2. Add Trunk page, General tab.#
Step 4. Navigate to pjsip Settings, General Tab, and fill out these fields (Fig. 3):
Authentication: None (Registration field will change to None accordingly)
SIP Server: all IP addresses separated by comma
SIP Server Port: your preferred port
Context: from-pstn
Transport: 0.0.0.0-udp (instead of 0.0.0.0 FreePBX public IP can be displayed)
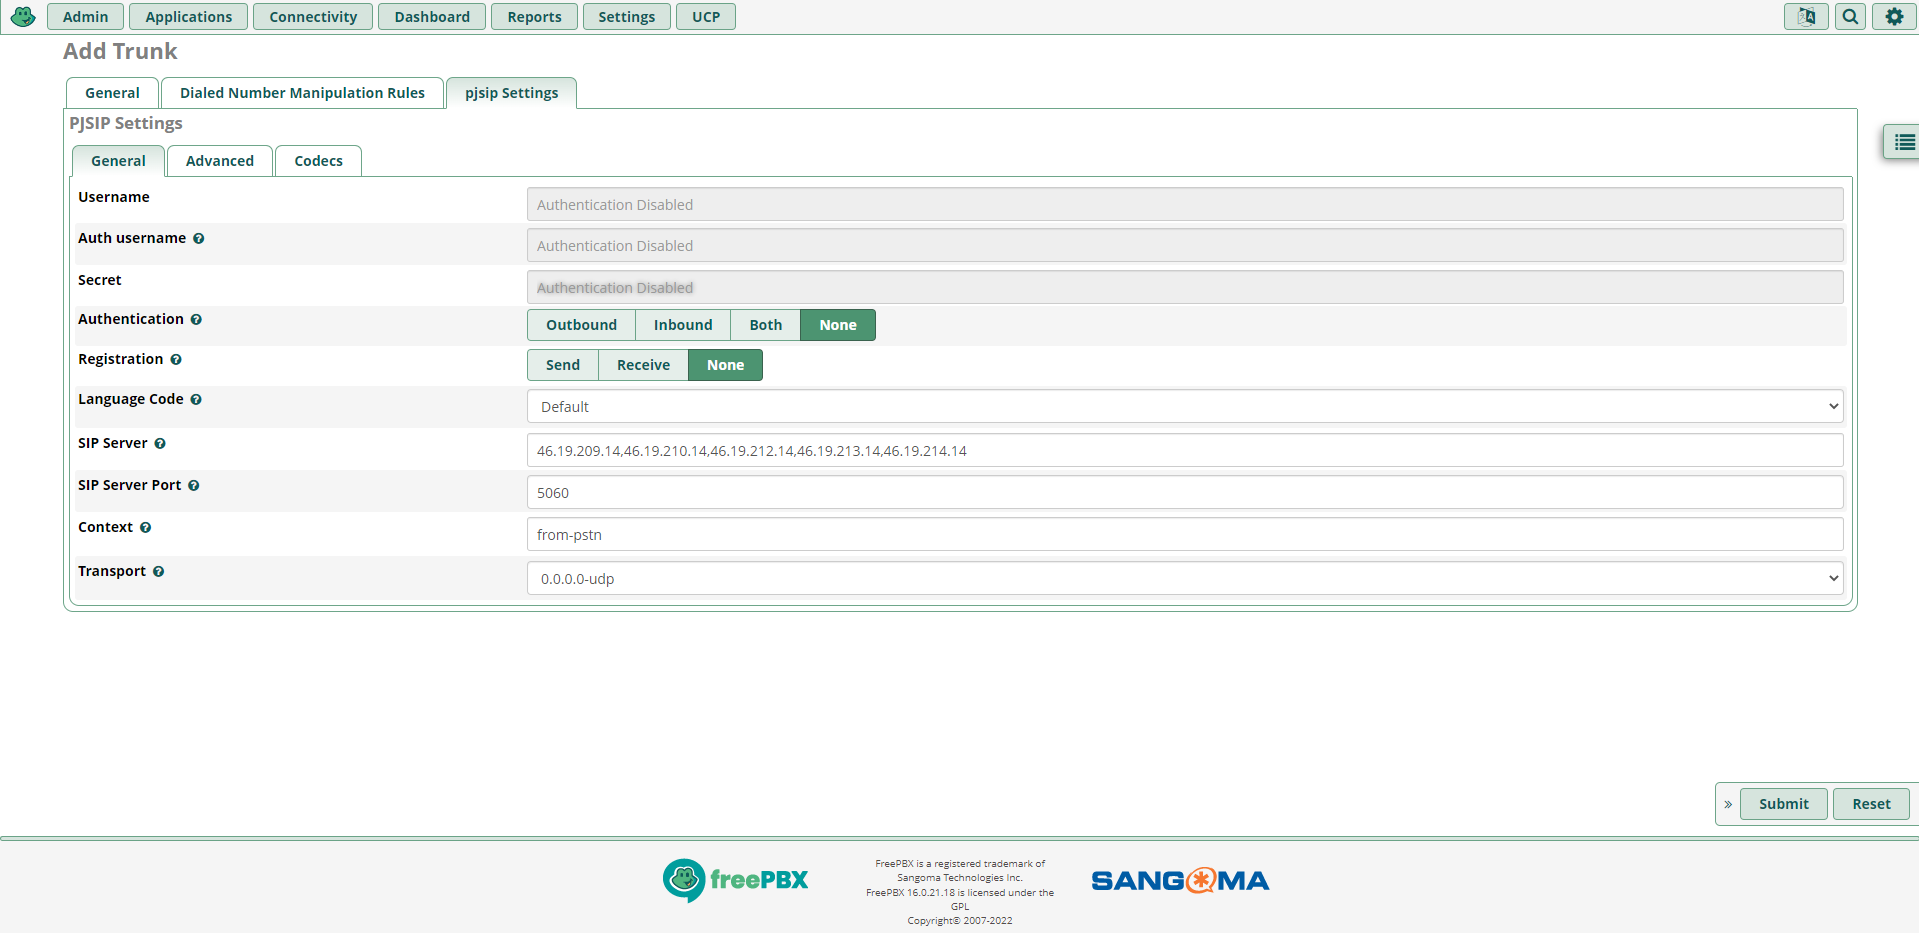
Fig. 3. Add Trunk page, pjsip Settings General tab.#
Note
Optional authentication for SIP trunk can be enabled by selecting Inbound in Authentication and Receive in Registration fields, then entering trunk name as Auth user and Secret as Auth password in DIDWW SIP Inbound trunk configuration.
Step 5. Navigate to the Advanced tab of pjsip Settings and enter all IP addresses separated by a comma in Match (Permit) field (Fig. 4).
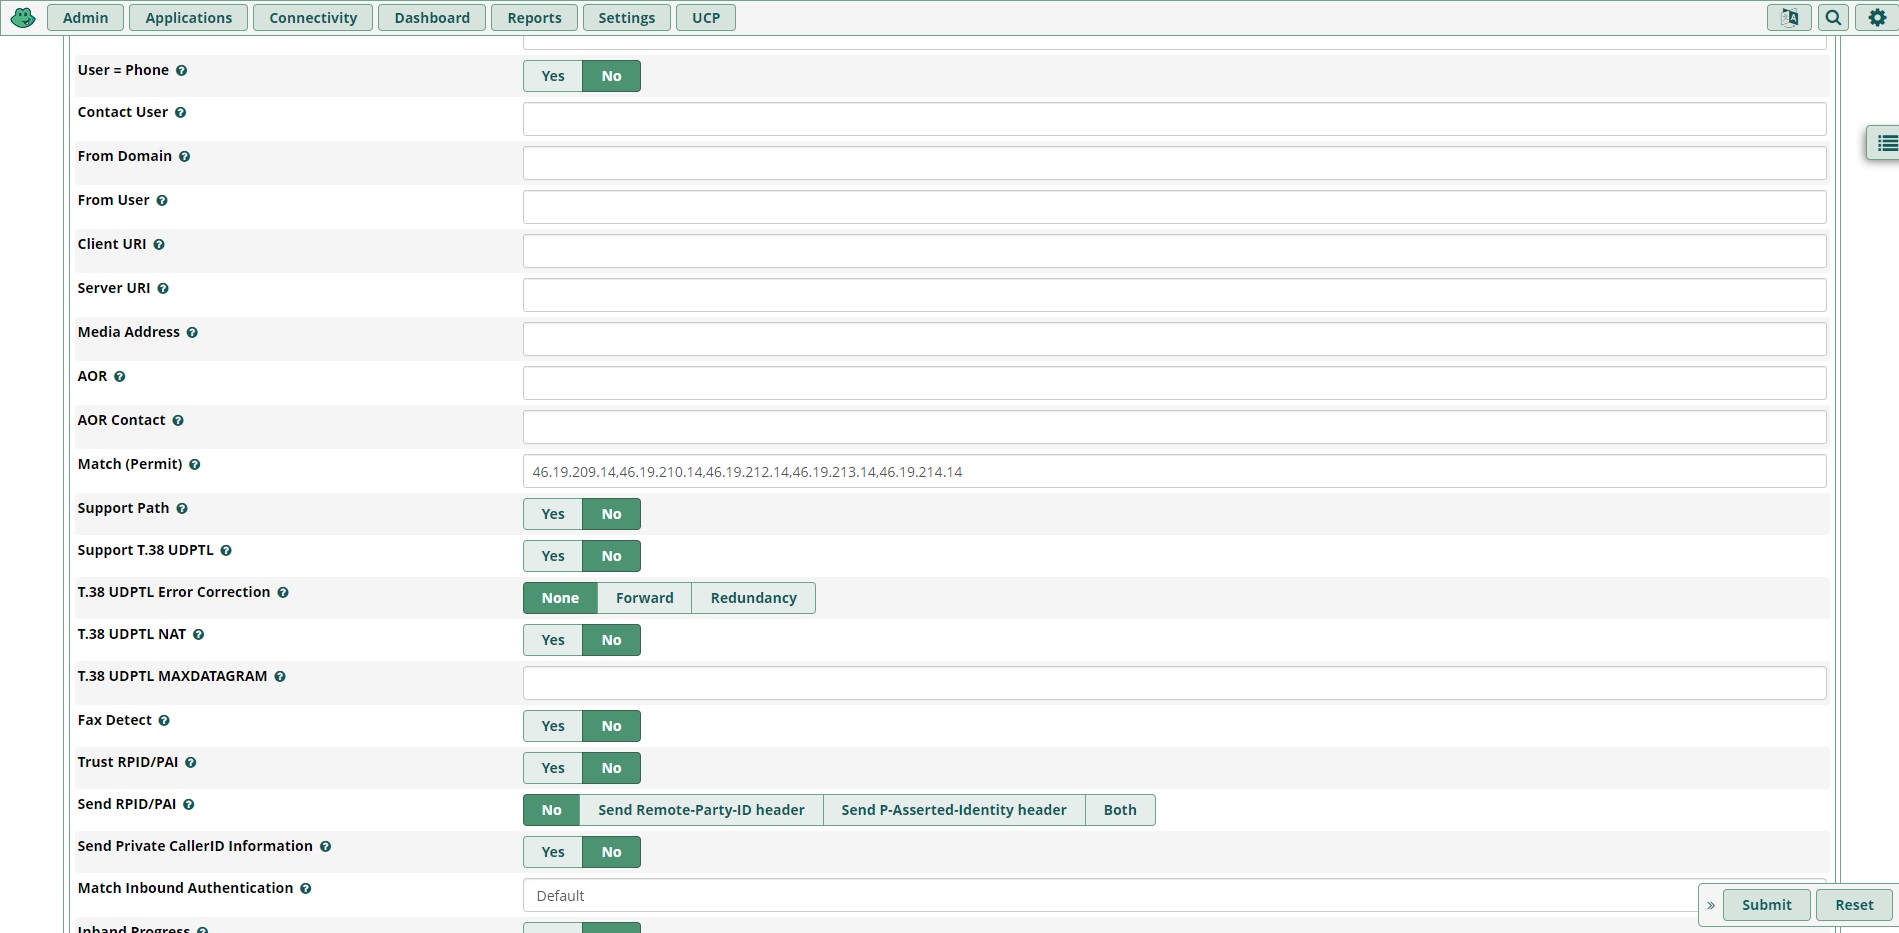
Fig. 4. Add Trunk page, pjsip Settings Advanced tab.#
Step 6. Complete configuration by clicking the Submit button on the bottom right side.
Configuring the Inbound Route#
Step 1. Navigate to the Connectivity section in the top menu. Select the Inbound Routes from the dropdown menu and a new page will pop up. Select Add Inbound Route (Fig. 1).
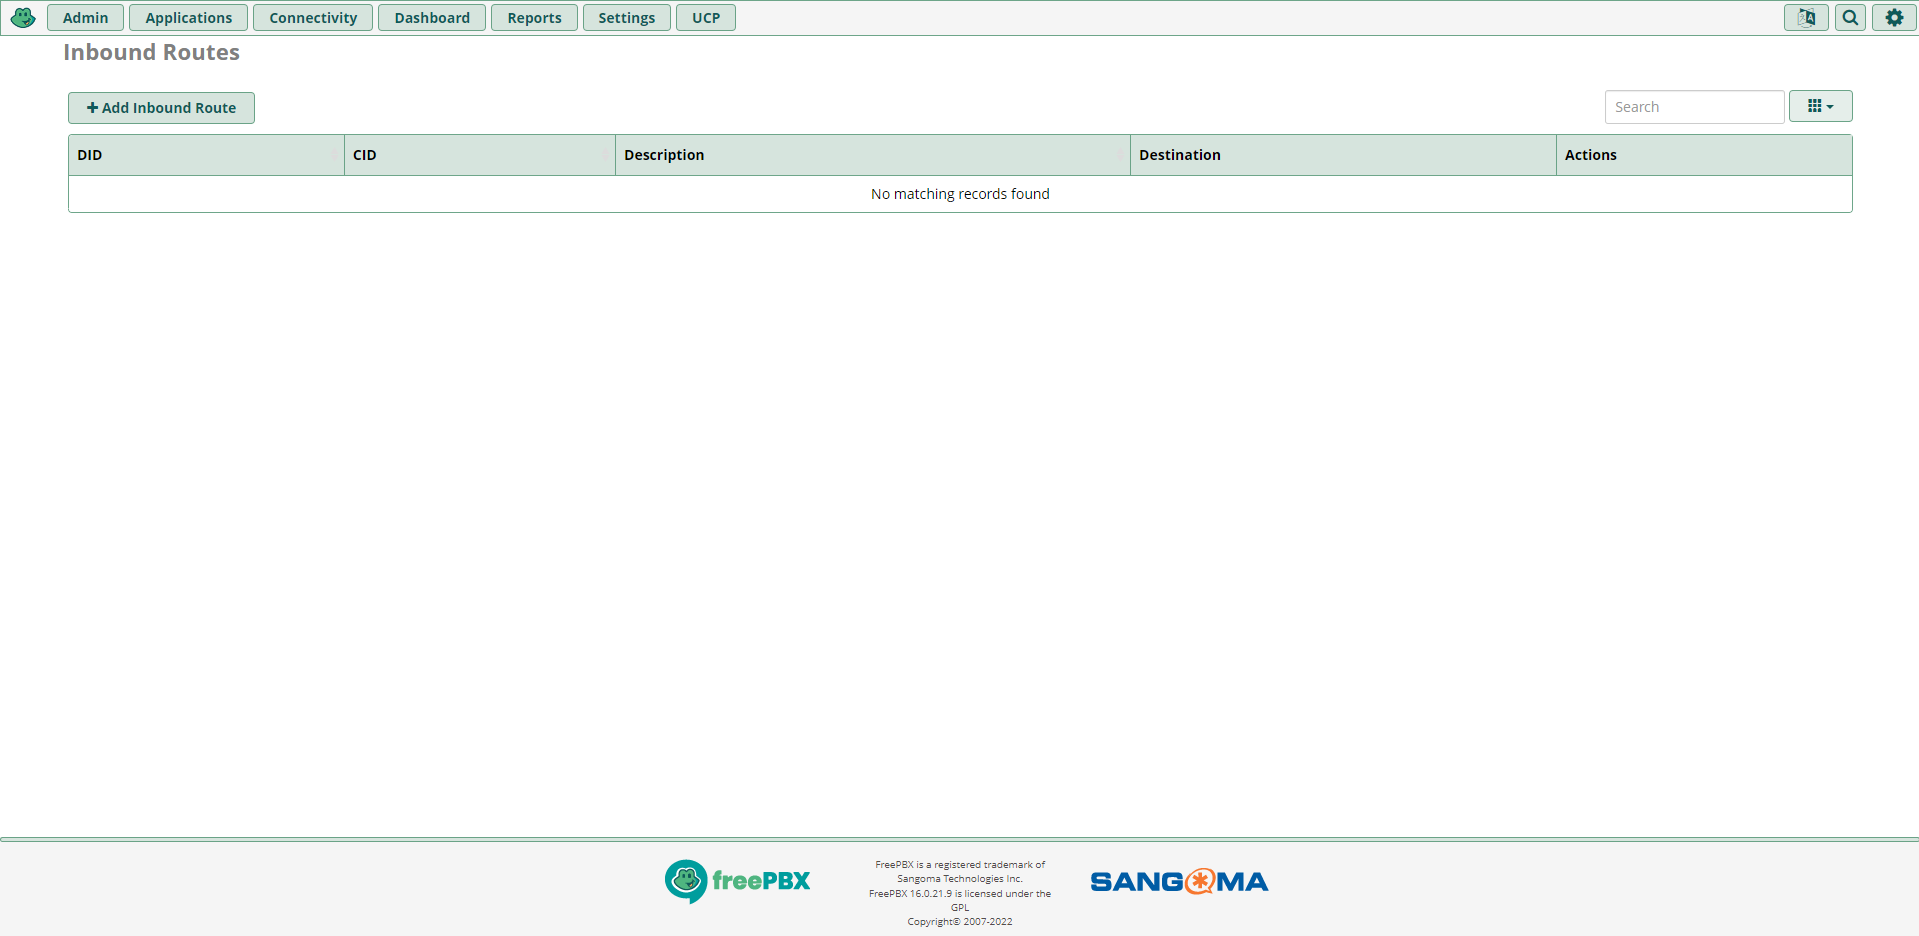
Fig. 1. Inbound Routes page.#
Step 2. On the Add Incoming Route page, enter your preferred Description, DID number (optional if you want to forward calls from a specific DID), and select Destination (Extension, Queues, Ring Groups, etc.) (Fig. 2).
Note
To set Extension, Queue or Ring Group as Destination, firstly it needs to be configured in their designated pages, which can be located under the Applications section.
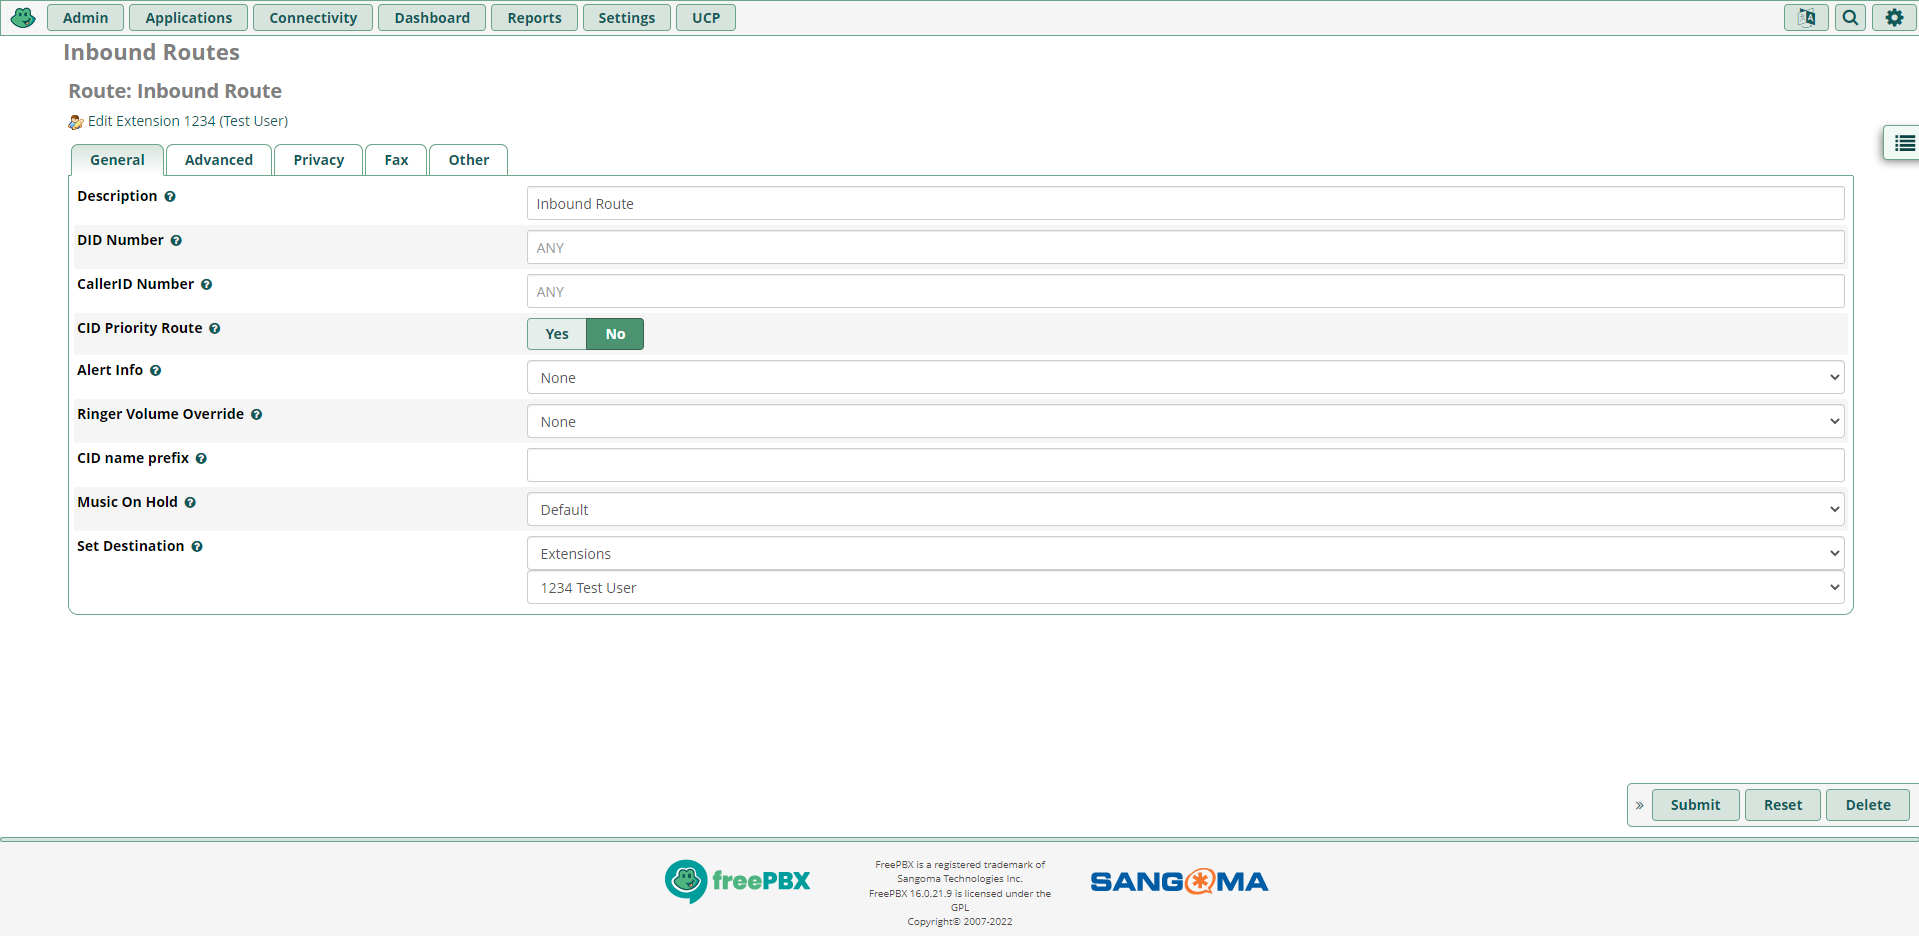
Fig. 2. New Inbound Route creation page.#
Step 3. Complete the configuration by clicking the Submit button on the bottom right side. Click on Apply Config located on the top right side.