Odoo#
Use Odoo with DIDWW and phone.systems™ to place and receive business calls directly from the Odoo Phone app. This integration routes DIDWW phone numbers through phone.systems™ and connects them to Odoo using secure WebSocket signaling for browser-based WebRTC calling.
Route DIDWW phone numbers to the Odoo Phone app.
Place and receive calls directly in Odoo.
Use existing DIDWW numbers for browser-based calling.
Link Odoo users to dedicated phone.systems™ SIP Accounts.
Deliver calls to individual users through phone.systems™.
Keep business calling inside the Odoo workspace.
1. Route DIDWW Numbers to phone.systems™#
Prepare your DIDWW account and route your DID numbers to phone.systems™. This step is required because phone.systems™ acts as the calling layer between DIDWW and the Odoo Phone app. After your DID numbers are assigned to the phone.systems™ trunk, phone.systems™ can forward incoming calls to the SIP Accounts that are later connected to Odoo users.
Before You Begin#
An active DIDWW account is required. Sign in to DIDWW or Create DIDWW account .
At least one active DID number with inbound calls and local CLI features with sufficient Capacity to receive incoming calls is required. See Buy Numbers and Number Porting.
Step 1: Purchase phone.systems™ Seats#
Before you configure the DID number routing, you will need at least one phone.systems™ seat to gain access to phone.systems™ trunks. If you do not have any seats yet:
In the DIDWW User Panel, open the Cloud Phone System menu.
Purchase the required amount of phone.systems™ seats.
Note
Purchase one phone.systems™ seat for each Odoo user who will make or receive calls.
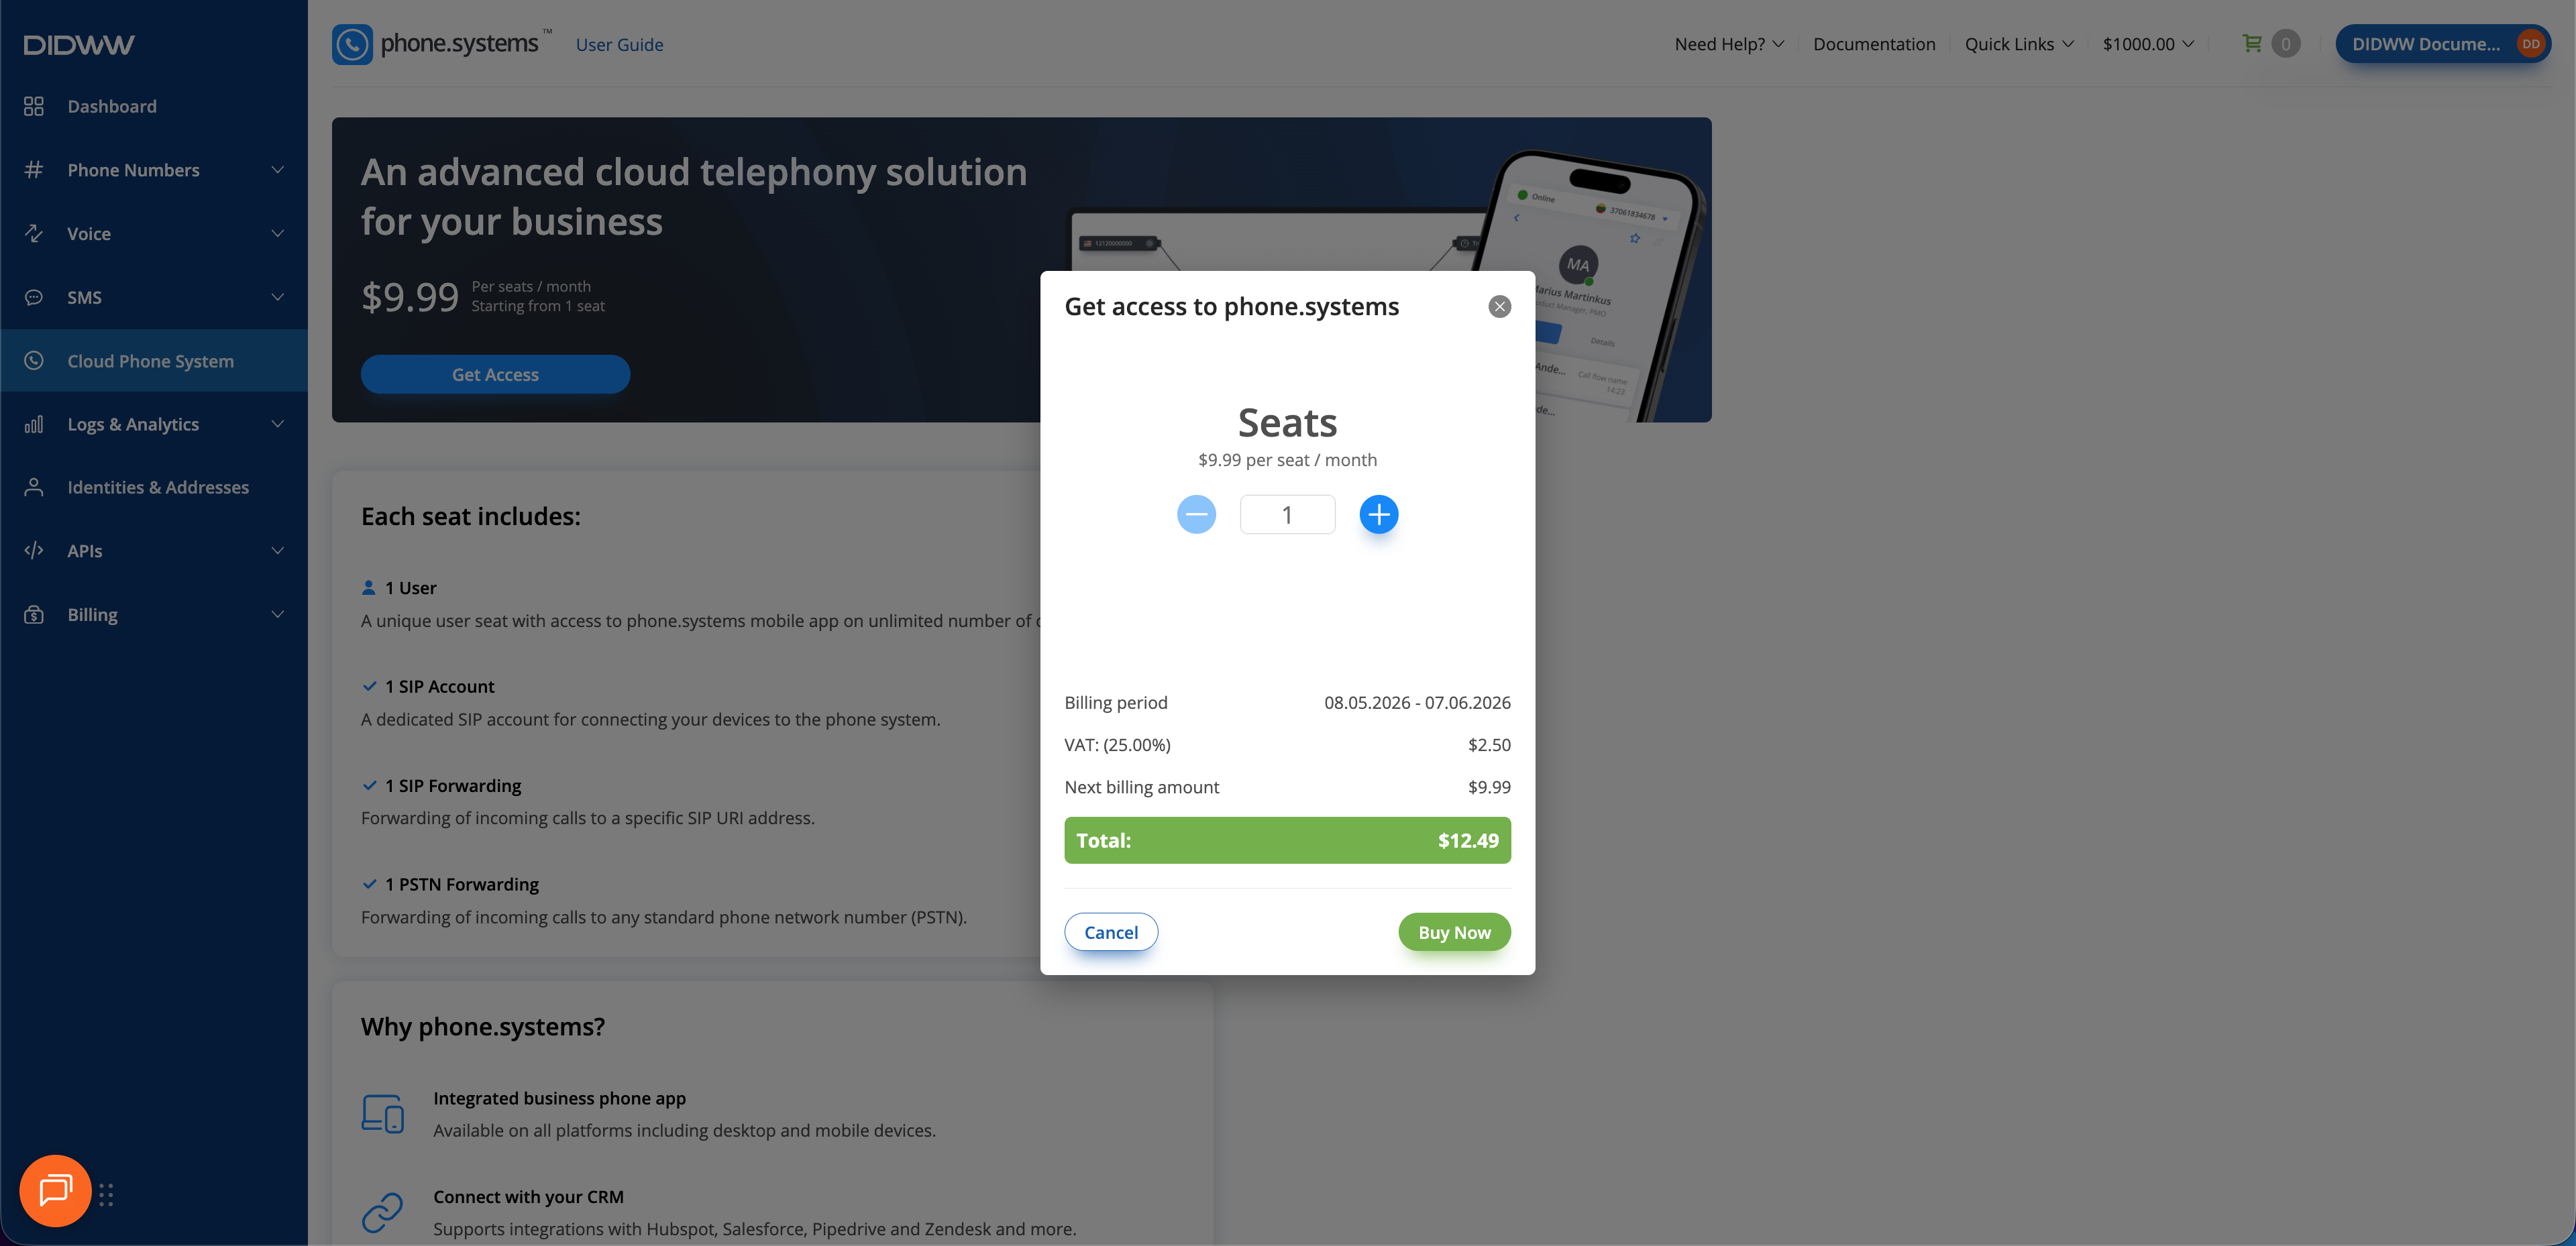
Fig. 1. Purchasing phone.systems™ seats in DIDWW#
Step 2: Assign phone.systems™ Trunk to Your DID Numbers#
After purchasing the required phone.systems™ service, assign the phone.systems™ trunk to the DID number(s) that will be used with Odoo.
In the DIDWW User Panel, go to Phone Numbers > My Numbers.
Select the DID number(s) you want to assign to the phone.systems™ trunk.
At the bottom of the page, click Batch Actions > Update Trunks.
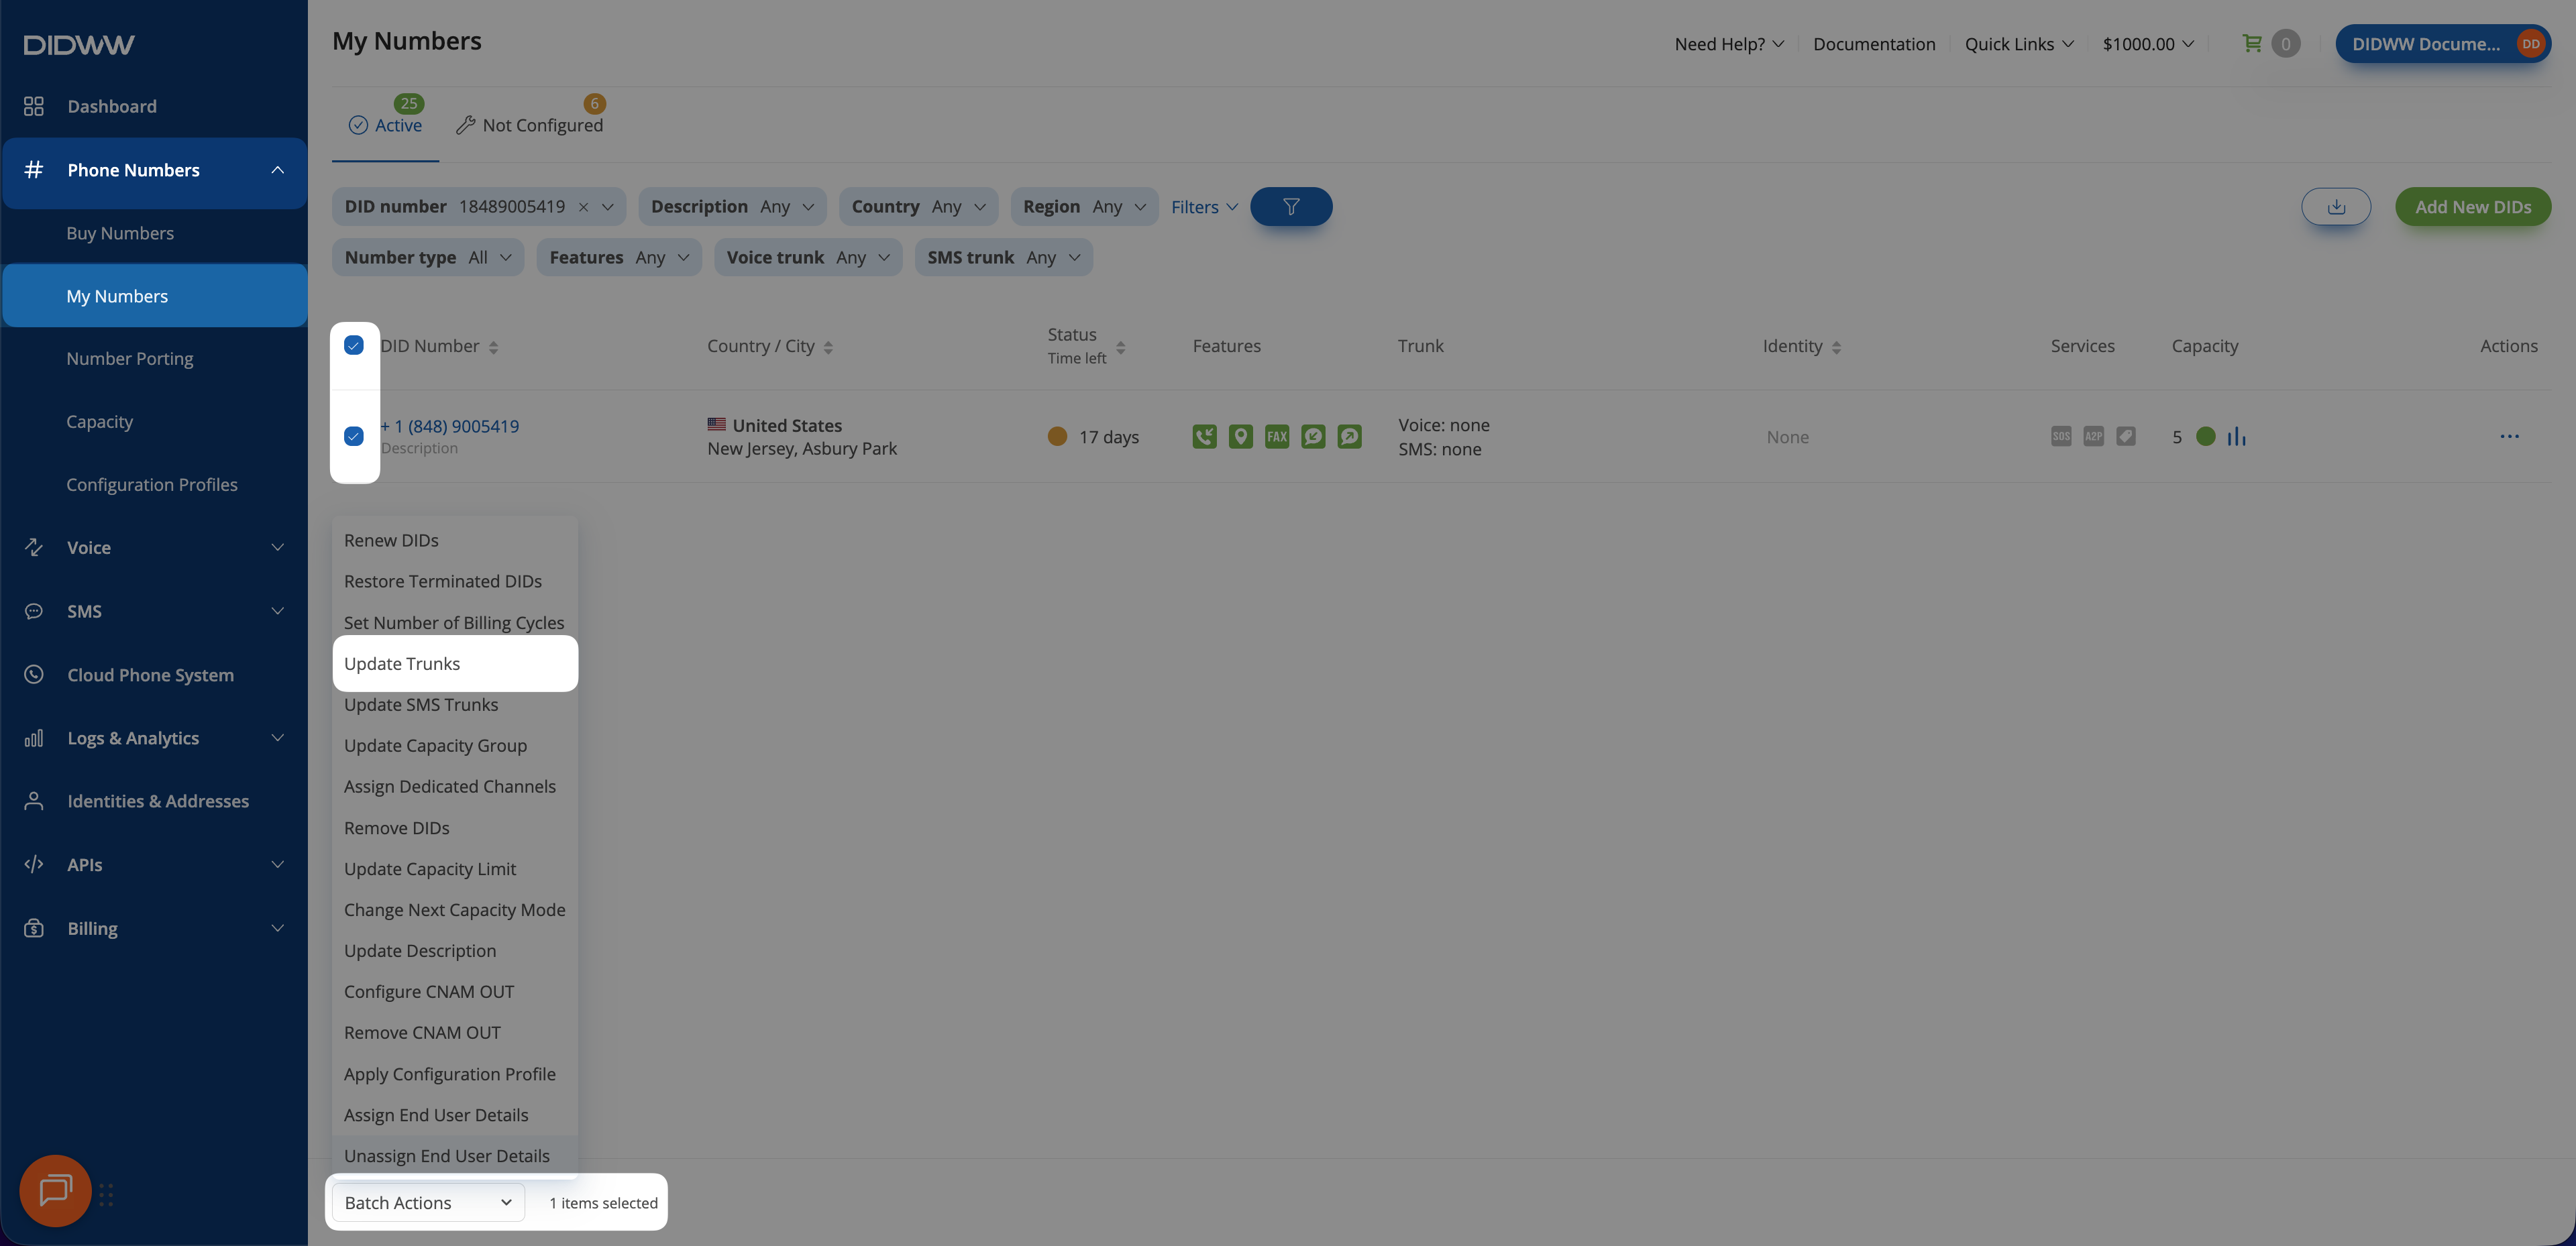
Fig. 2. Selecting Update Trunks from the Batch Actions menu#
From the dropdown menu, choose the phone.systems™ trunk.
Click Confirm to assign the trunk.
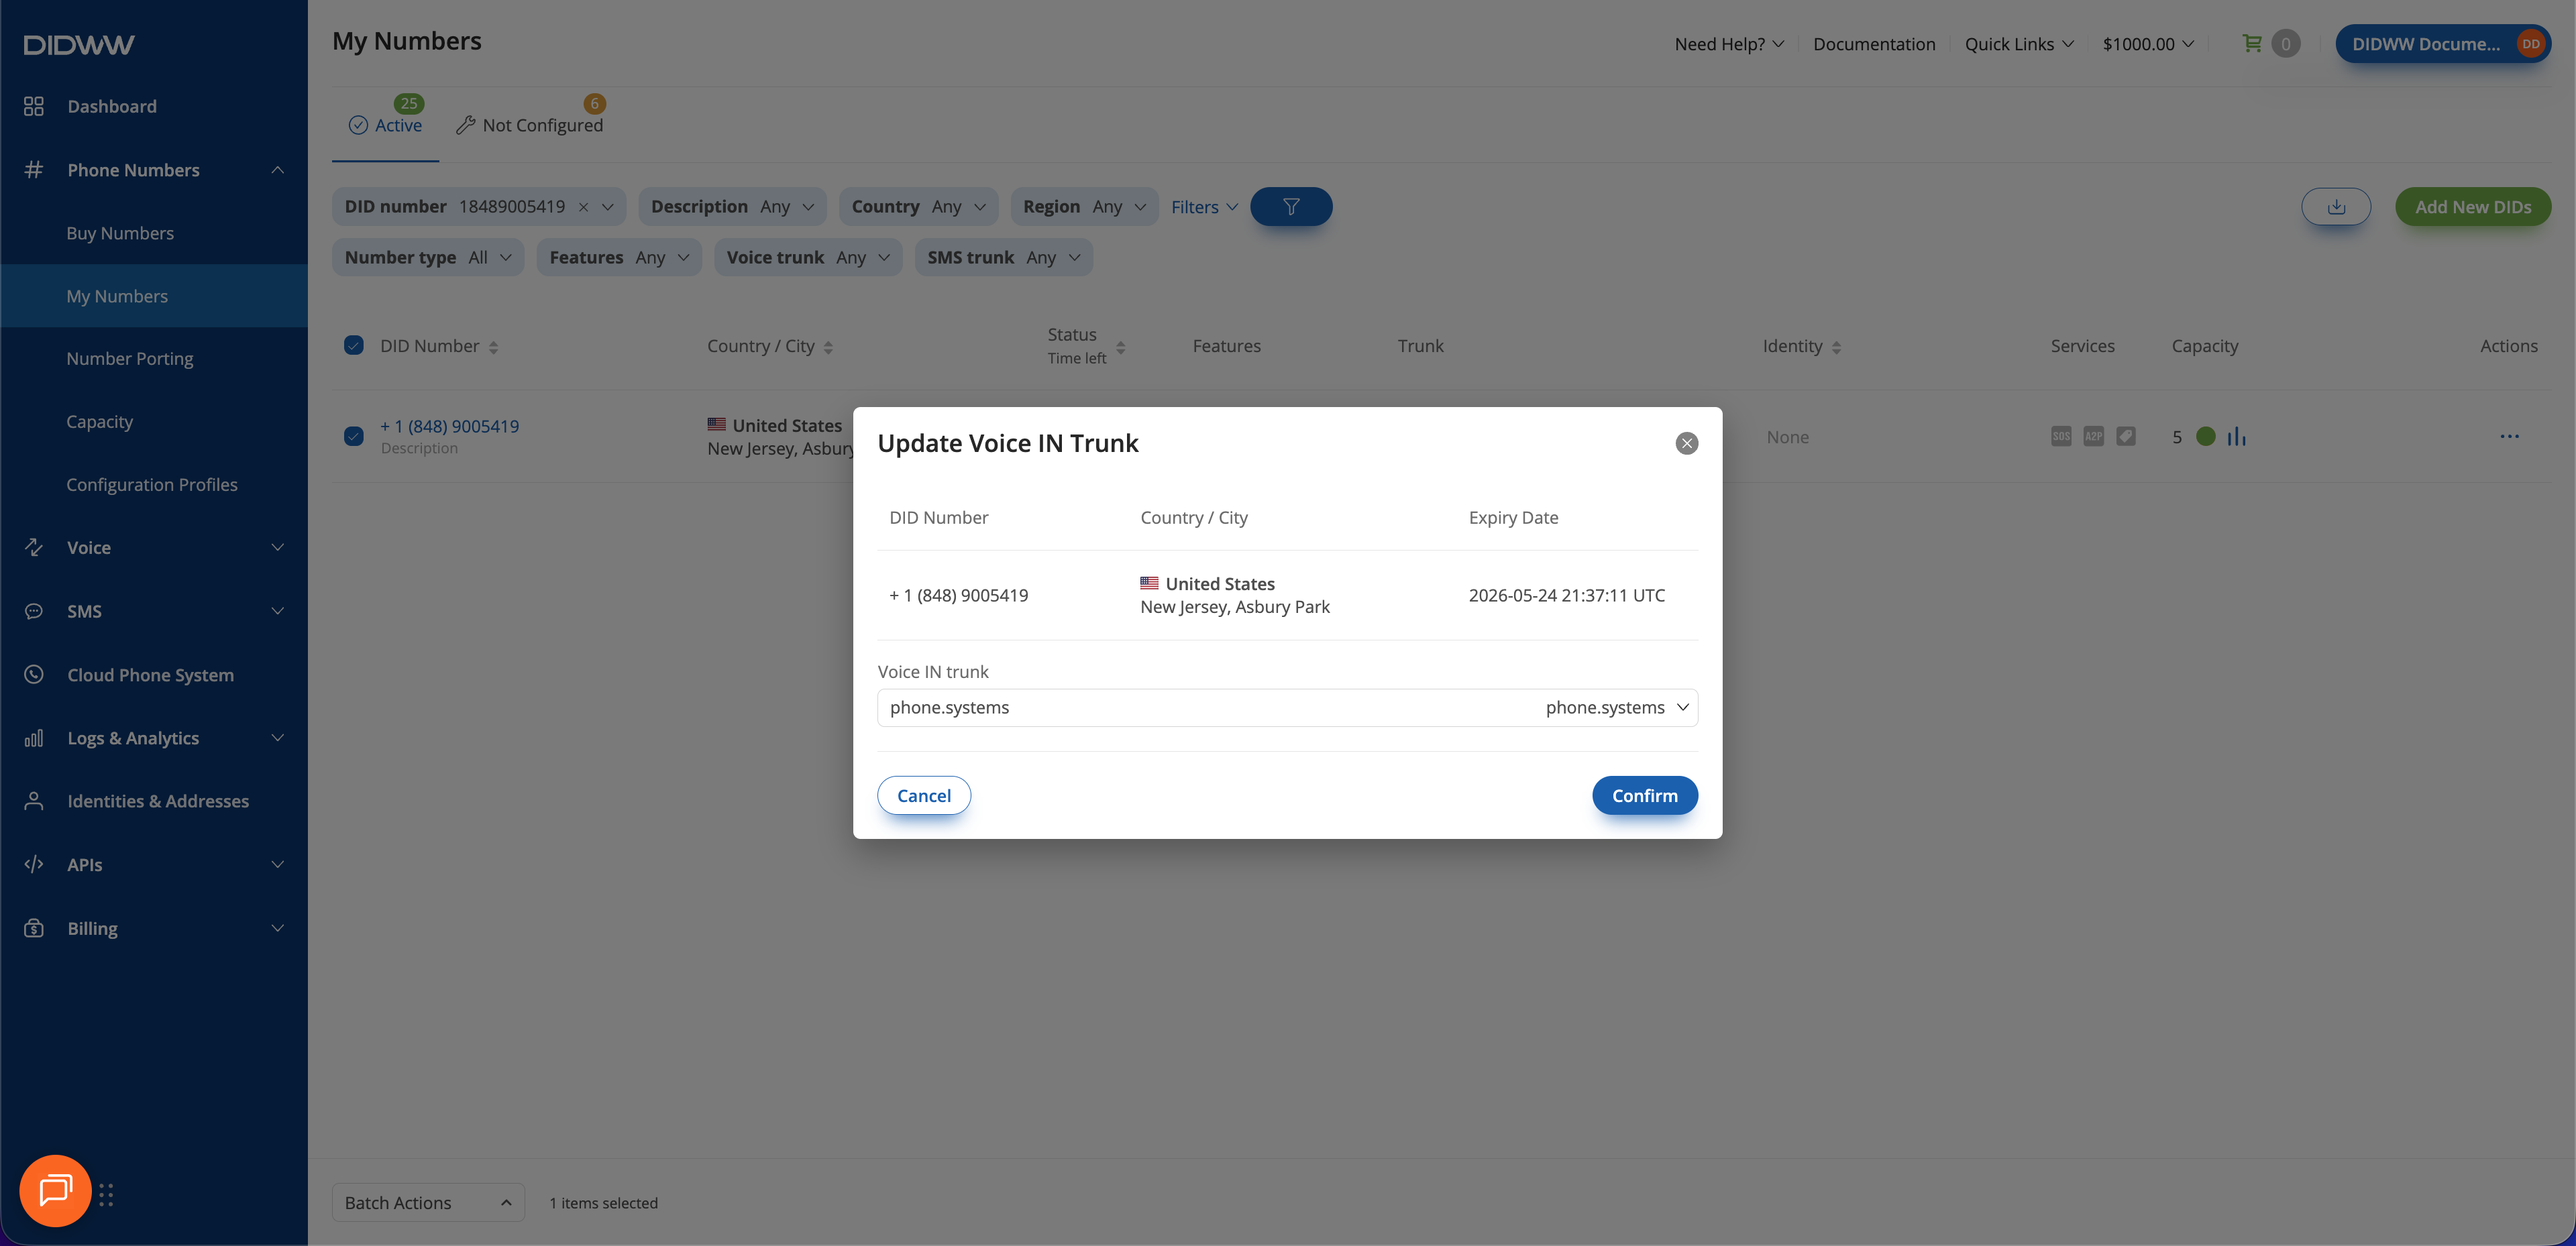
Fig. 3. Assigning the phone.systems™ trunk to the selected DID(s)#
Step 3: Launch phone.systems™#
In the DIDWW User Panel, go to Cloud Phone System menu.
Click Launch admin UI.
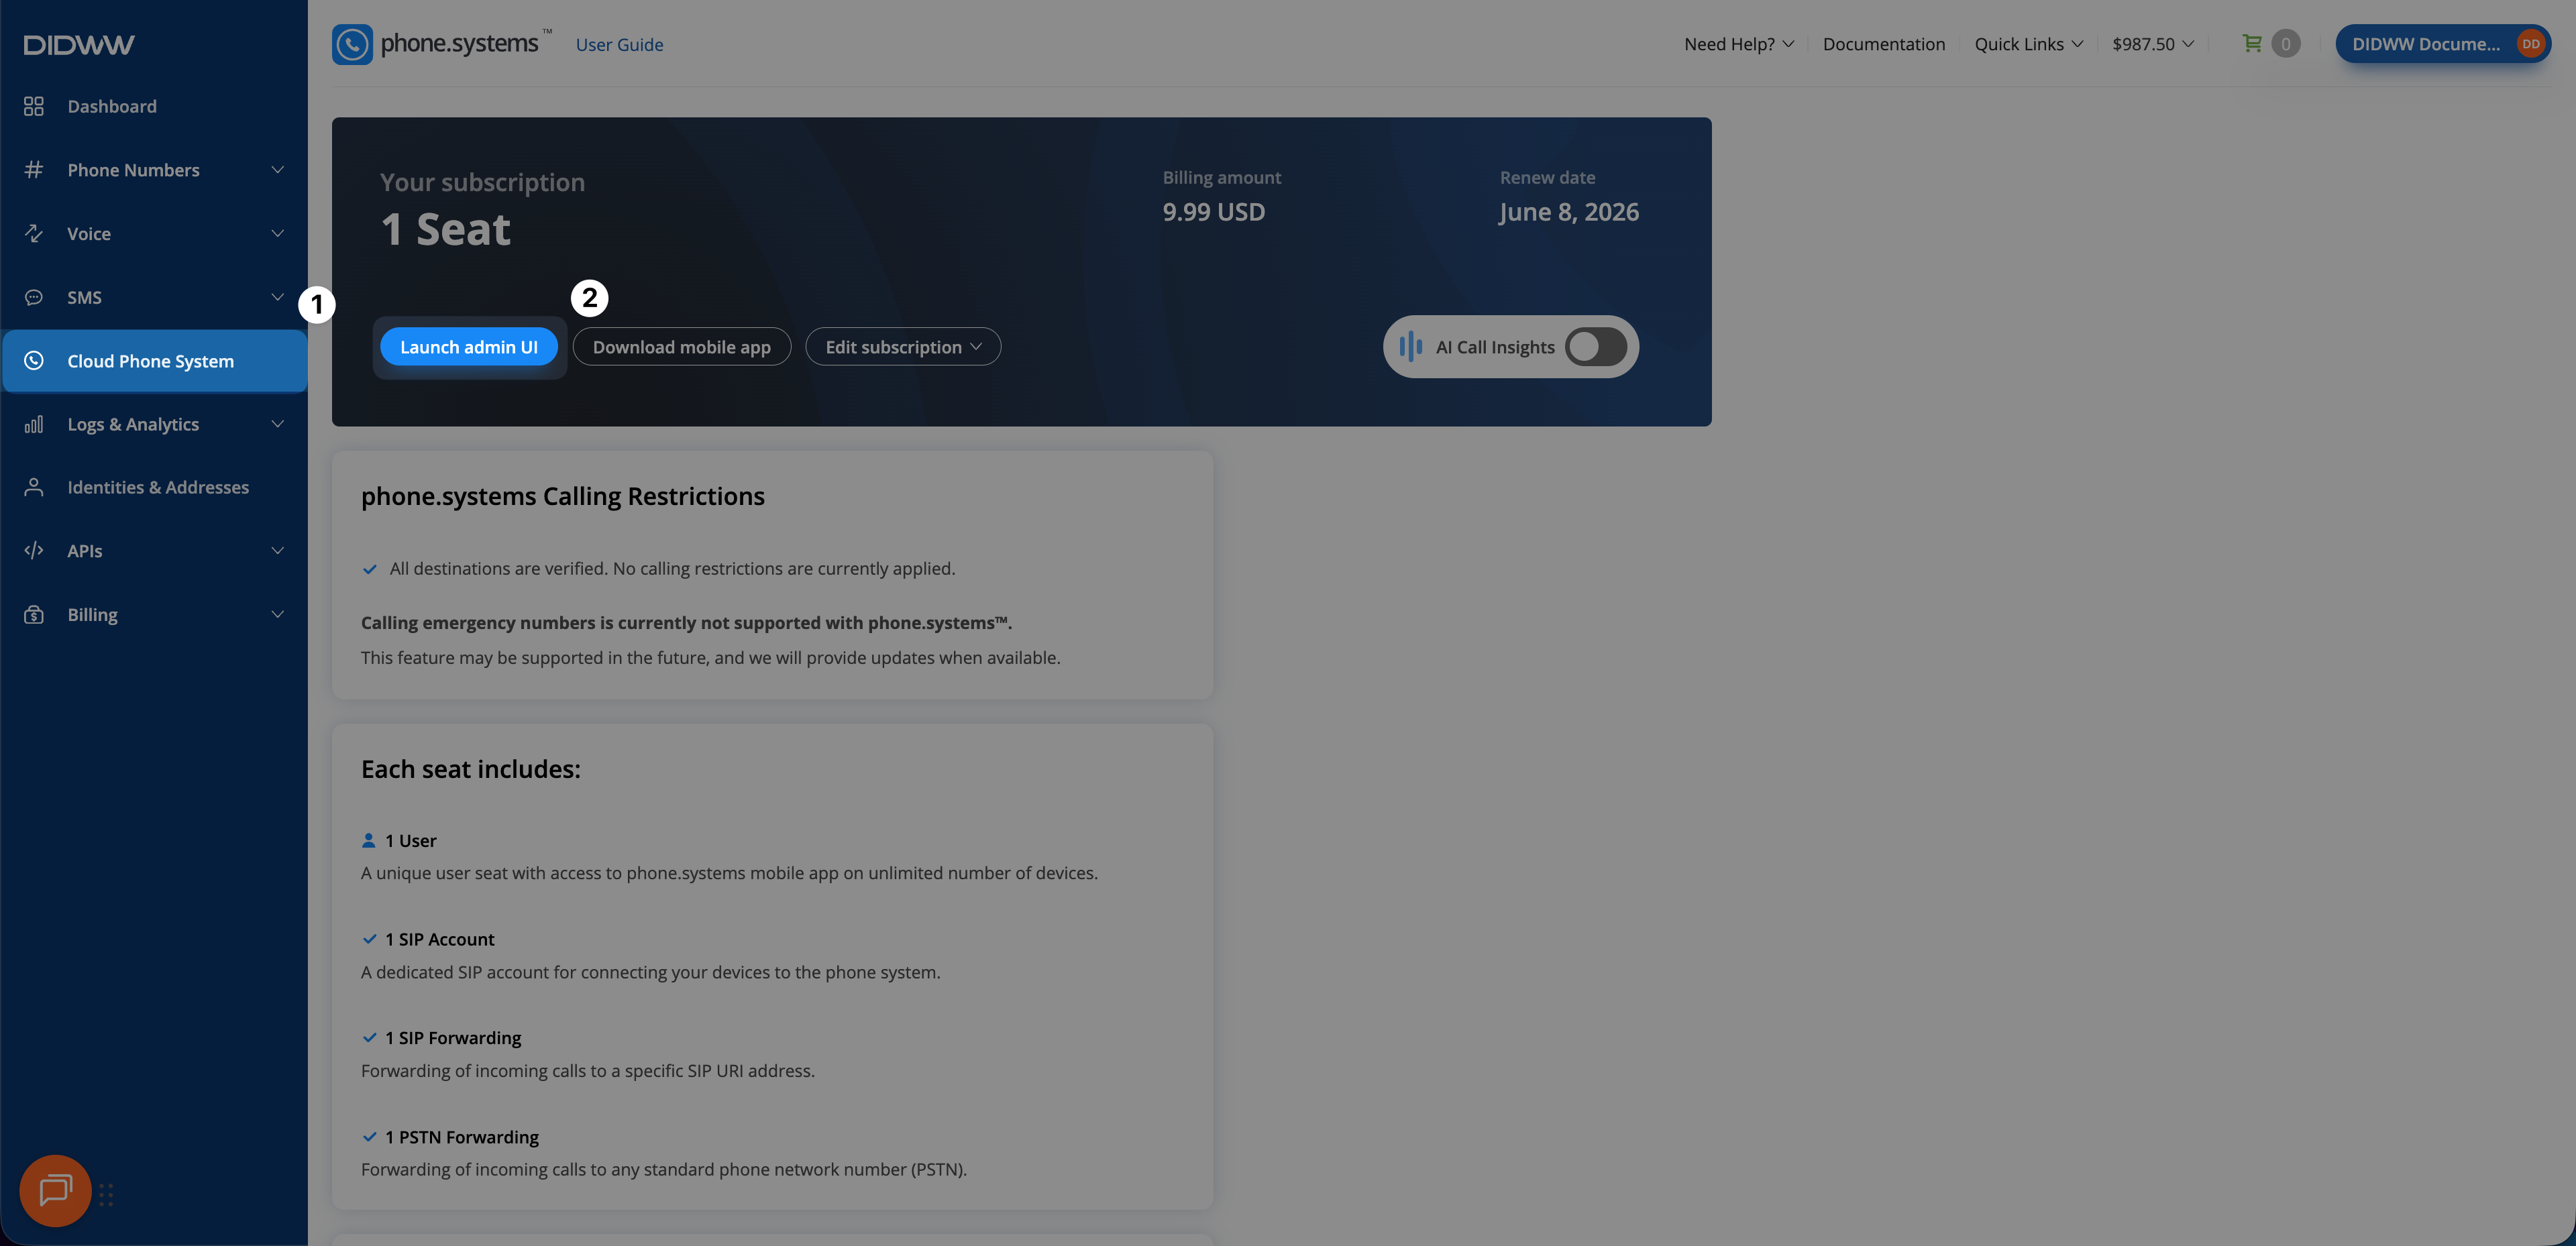
Fig. 4. Launching the phone.systems™ admin UI#
2. Set Up phone.systems™ SIP Accounts for Odoo Users#
After assigning your DID number to phone.systems™, create the user and SIP Account that will be connected to an Odoo user. This step is required because phone.systems™ provides the SIP credentials, inbound routing, outbound caller ID, WebSocket signaling, and secure media settings used by the Odoo Phone app. Each Odoo user who makes or receives calls should have a dedicated phone.systems™ SIP Account.
Step 1: Create User#
In the phone.systems™ admin UI, go to Users.
Click the plus sign and select Create New to create a new user.

Fig. 5. Creating a new user in phone.systems™#
Enter the required user details, such as First name, and Last name.
Uncheck the Configure application line in the next step slider.
Save the user.
Note
Create one phone.systems™ user for each Odoo user who will use the Odoo Phone app.
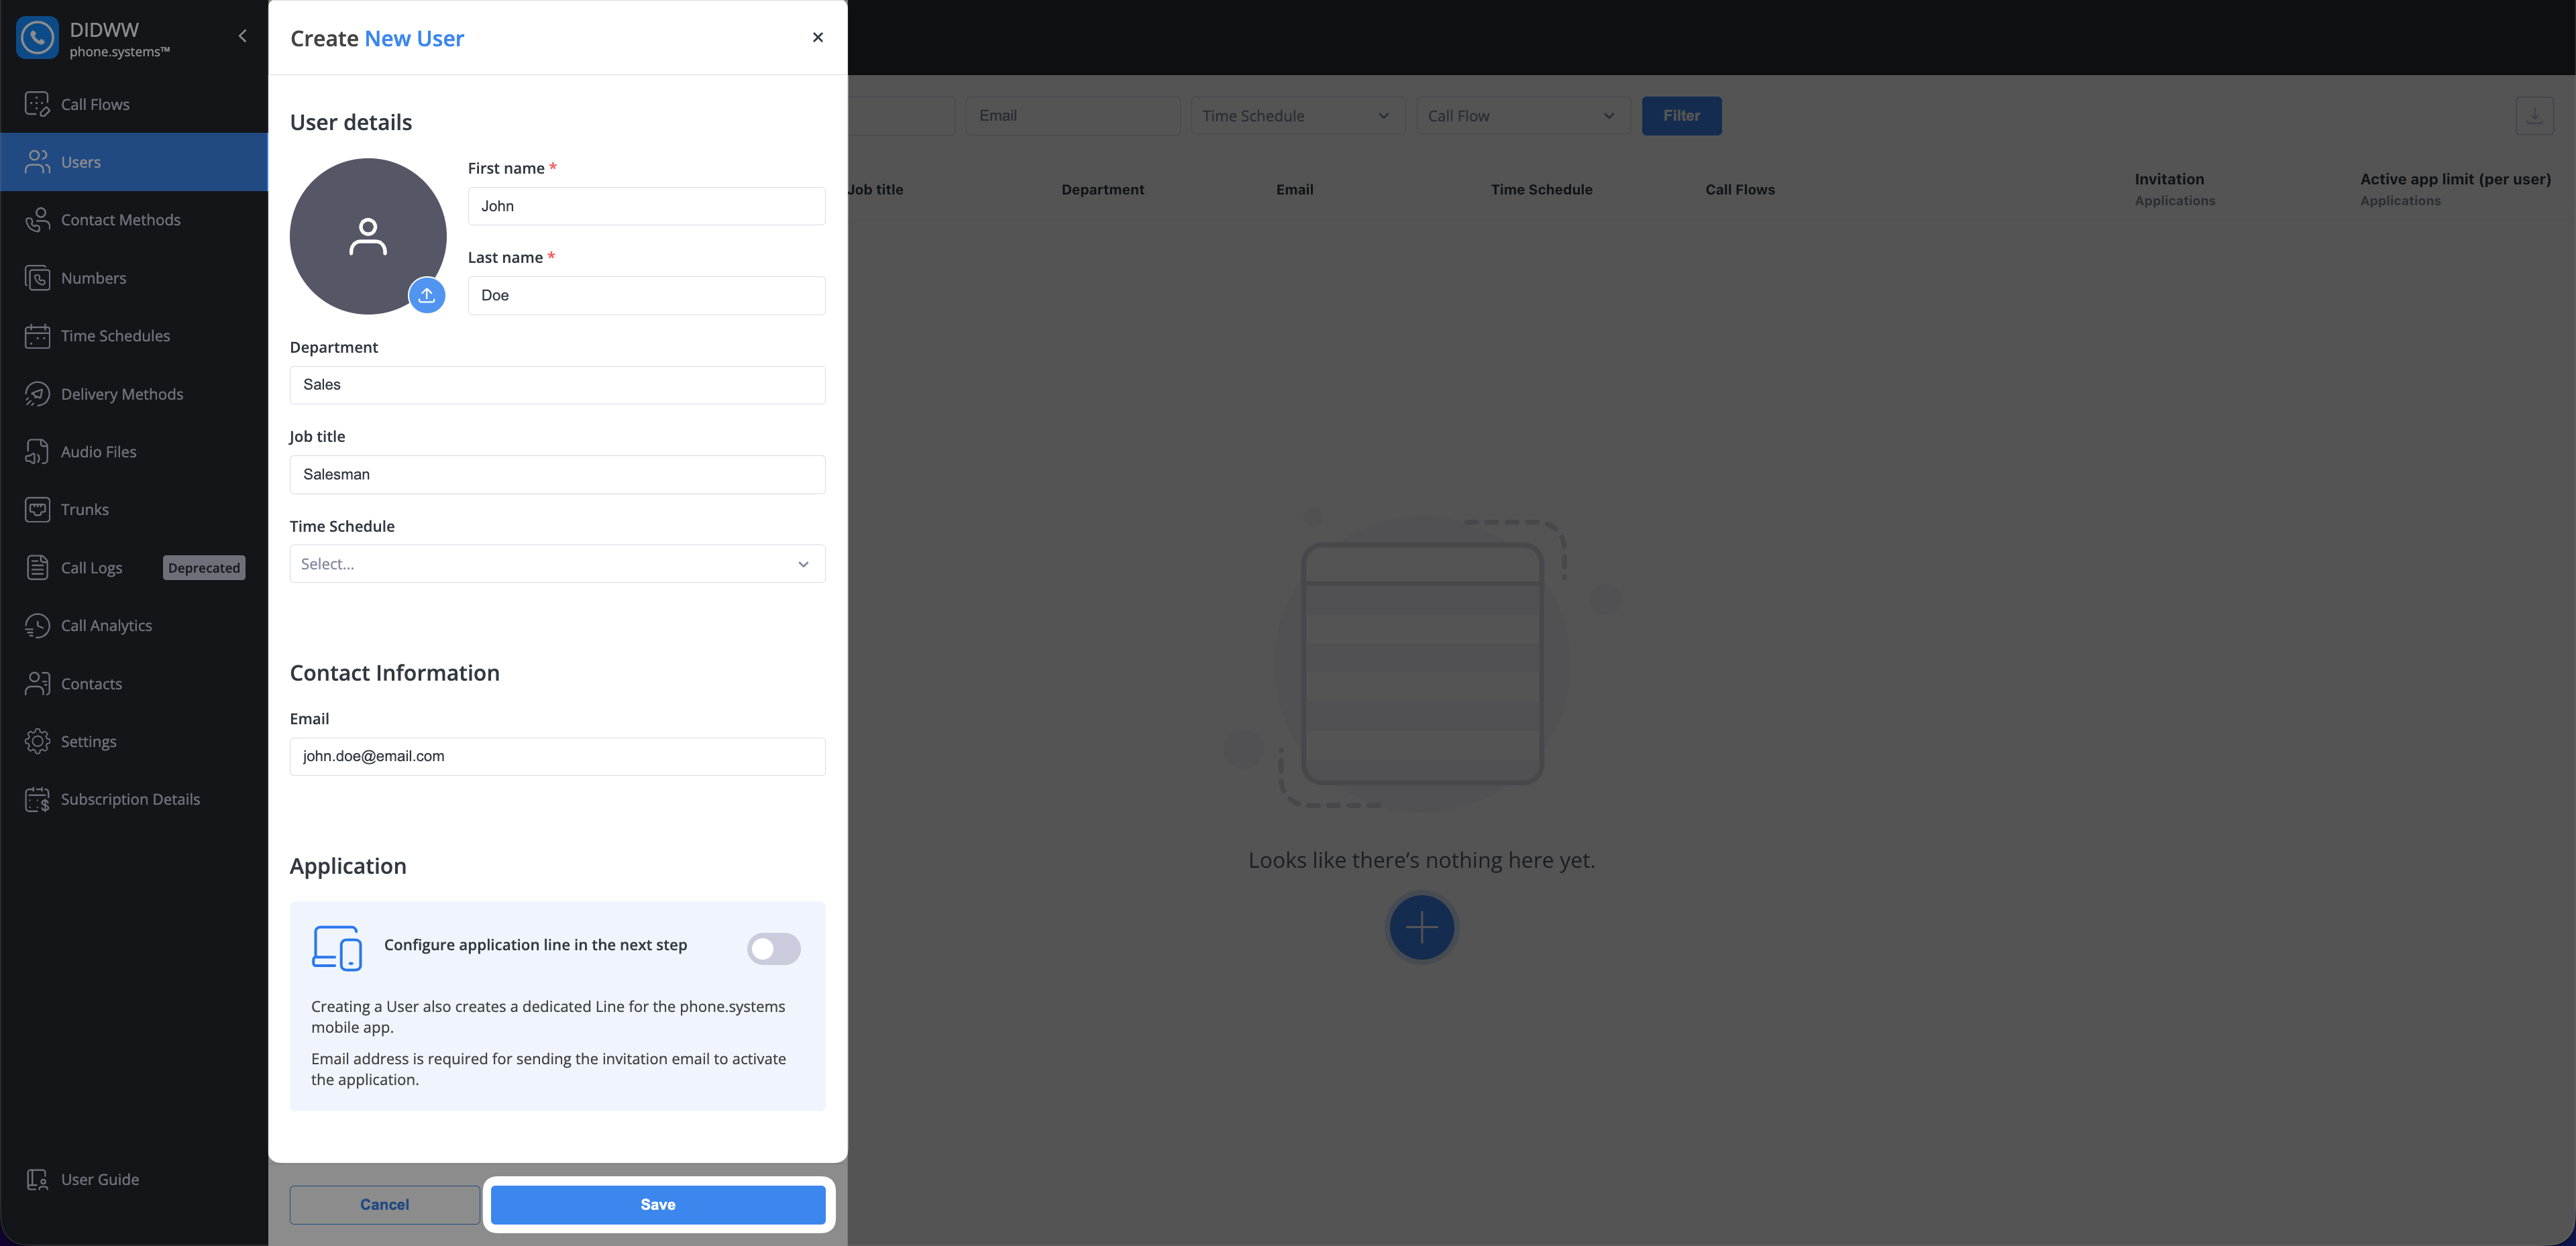
Fig. 6. Entering user details and saving the new user#
Step 2: Create and Configure a SIP Account#
Go to Contact Methods > SIP Accounts.
Click the plus sign to create a new SIP Account.
Note
Create one SIP Account for each Odoo user. Each Odoo user should use their own dedicated phone.systems™ SIP credentials.
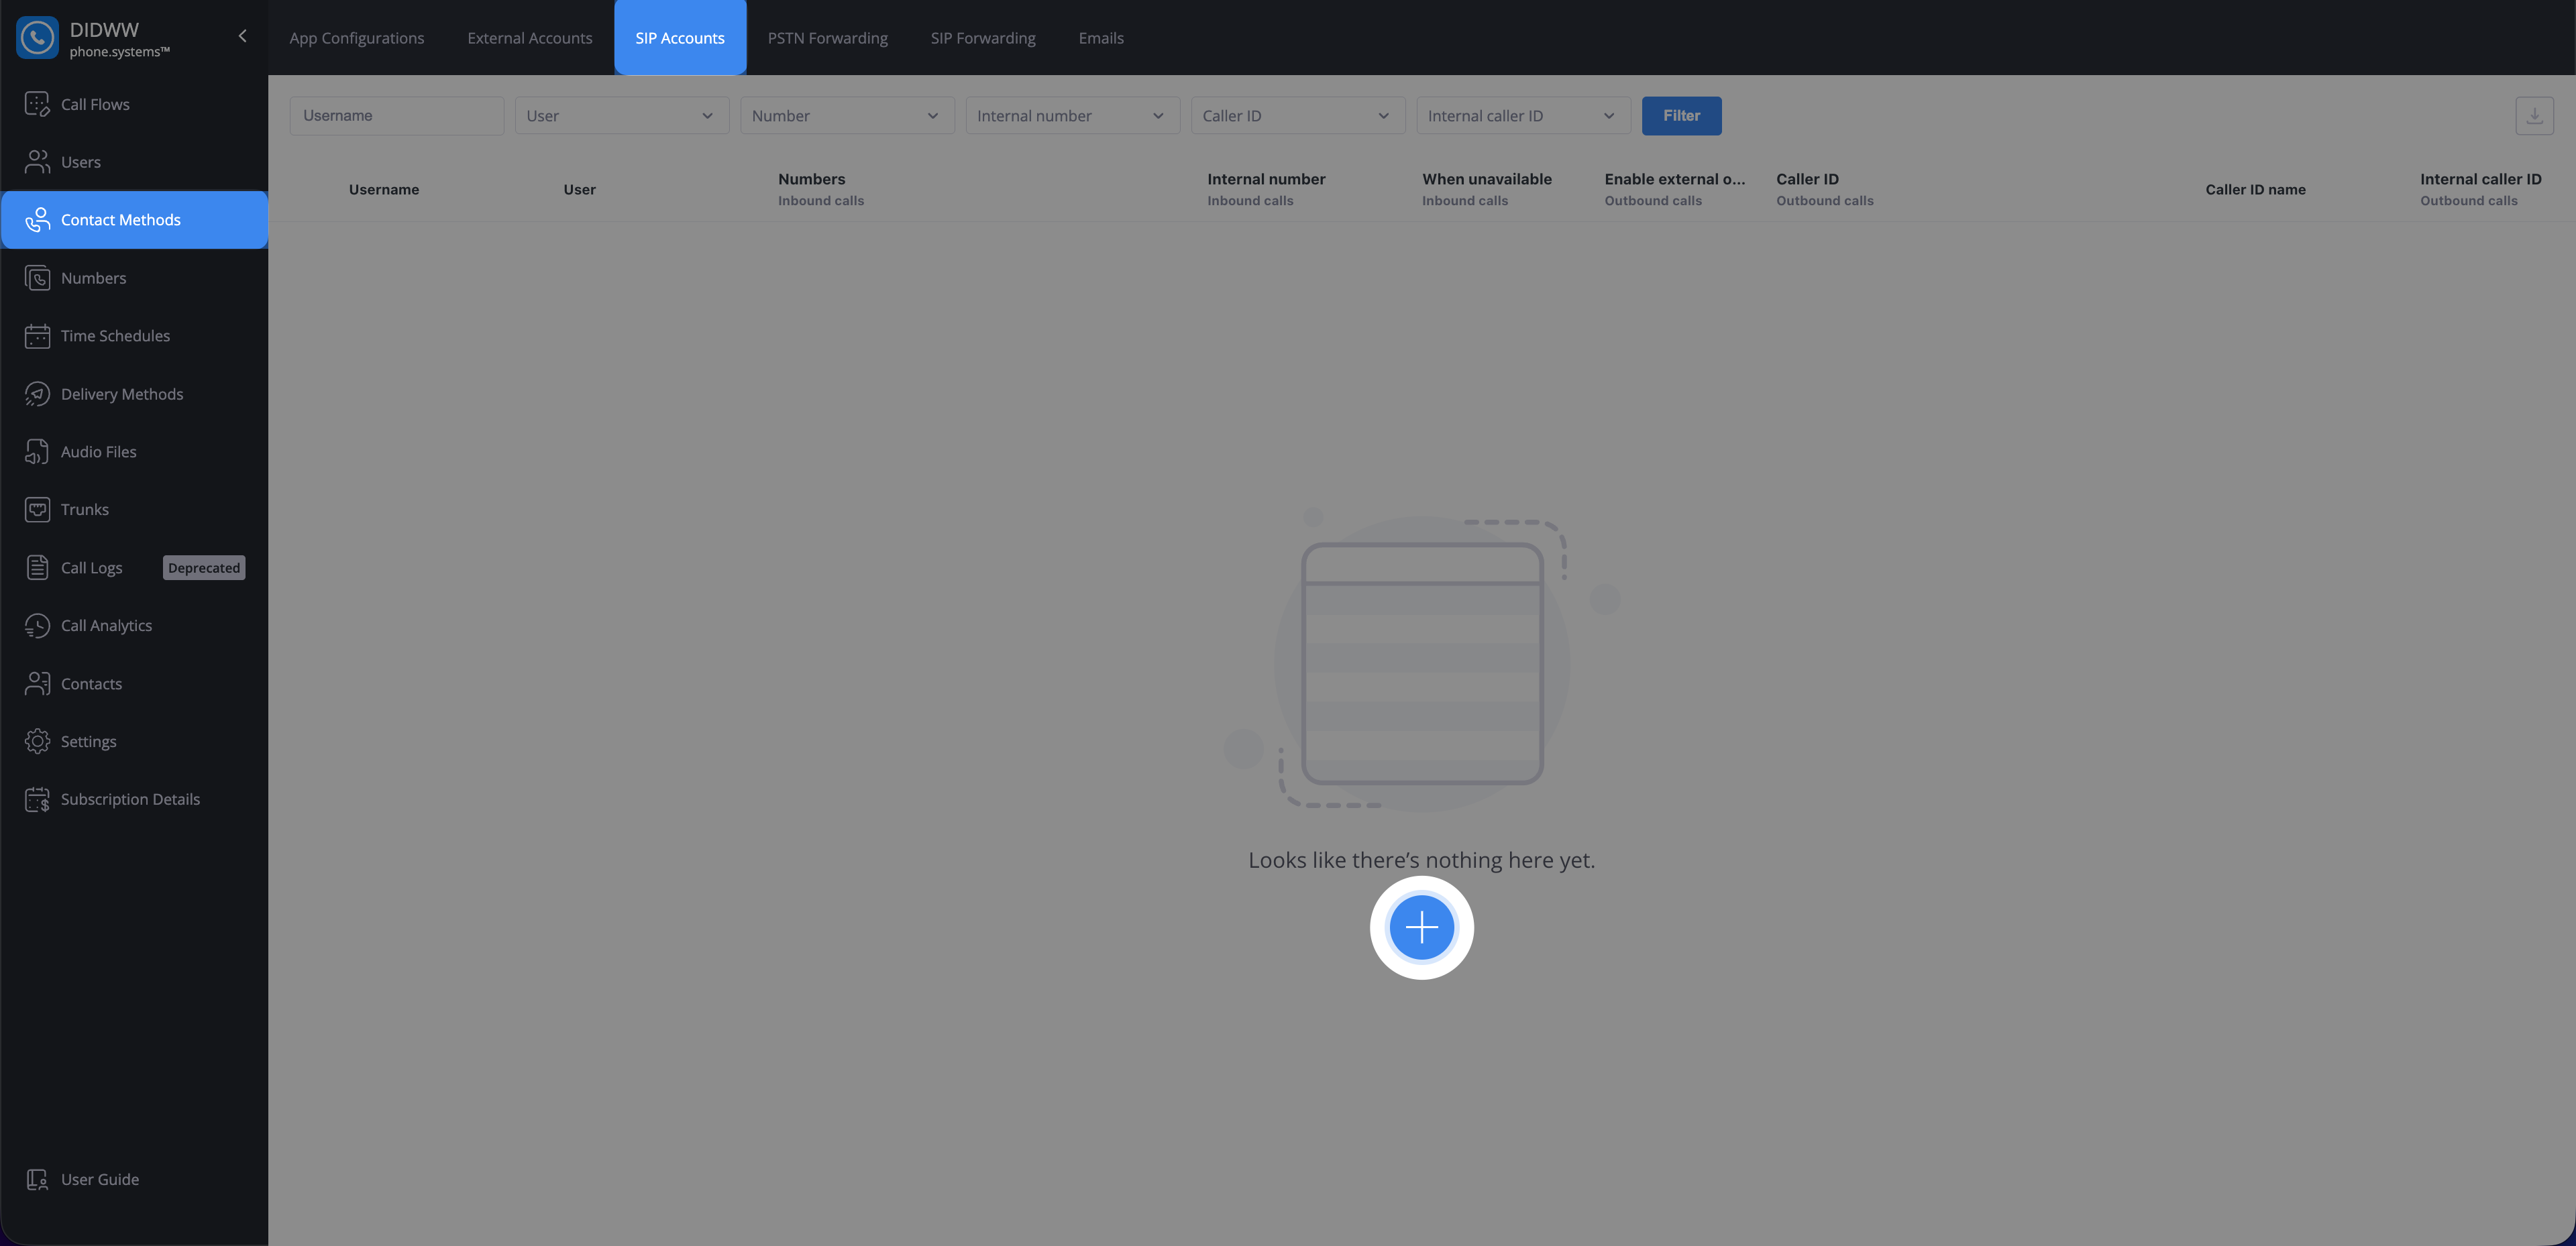
Fig. 7. Creating a SIP Account#
Configure User and Inbound Calls#
In the General section, select the user that you created in the previous step.
In the Inbound calls section, select the DID number you assigned to phone.systems™ in DIDWW.
Note
For additional inbound configuration options, such as internal numbers, voicemail, and unavailable behavior, see SIP Account inbound calls.
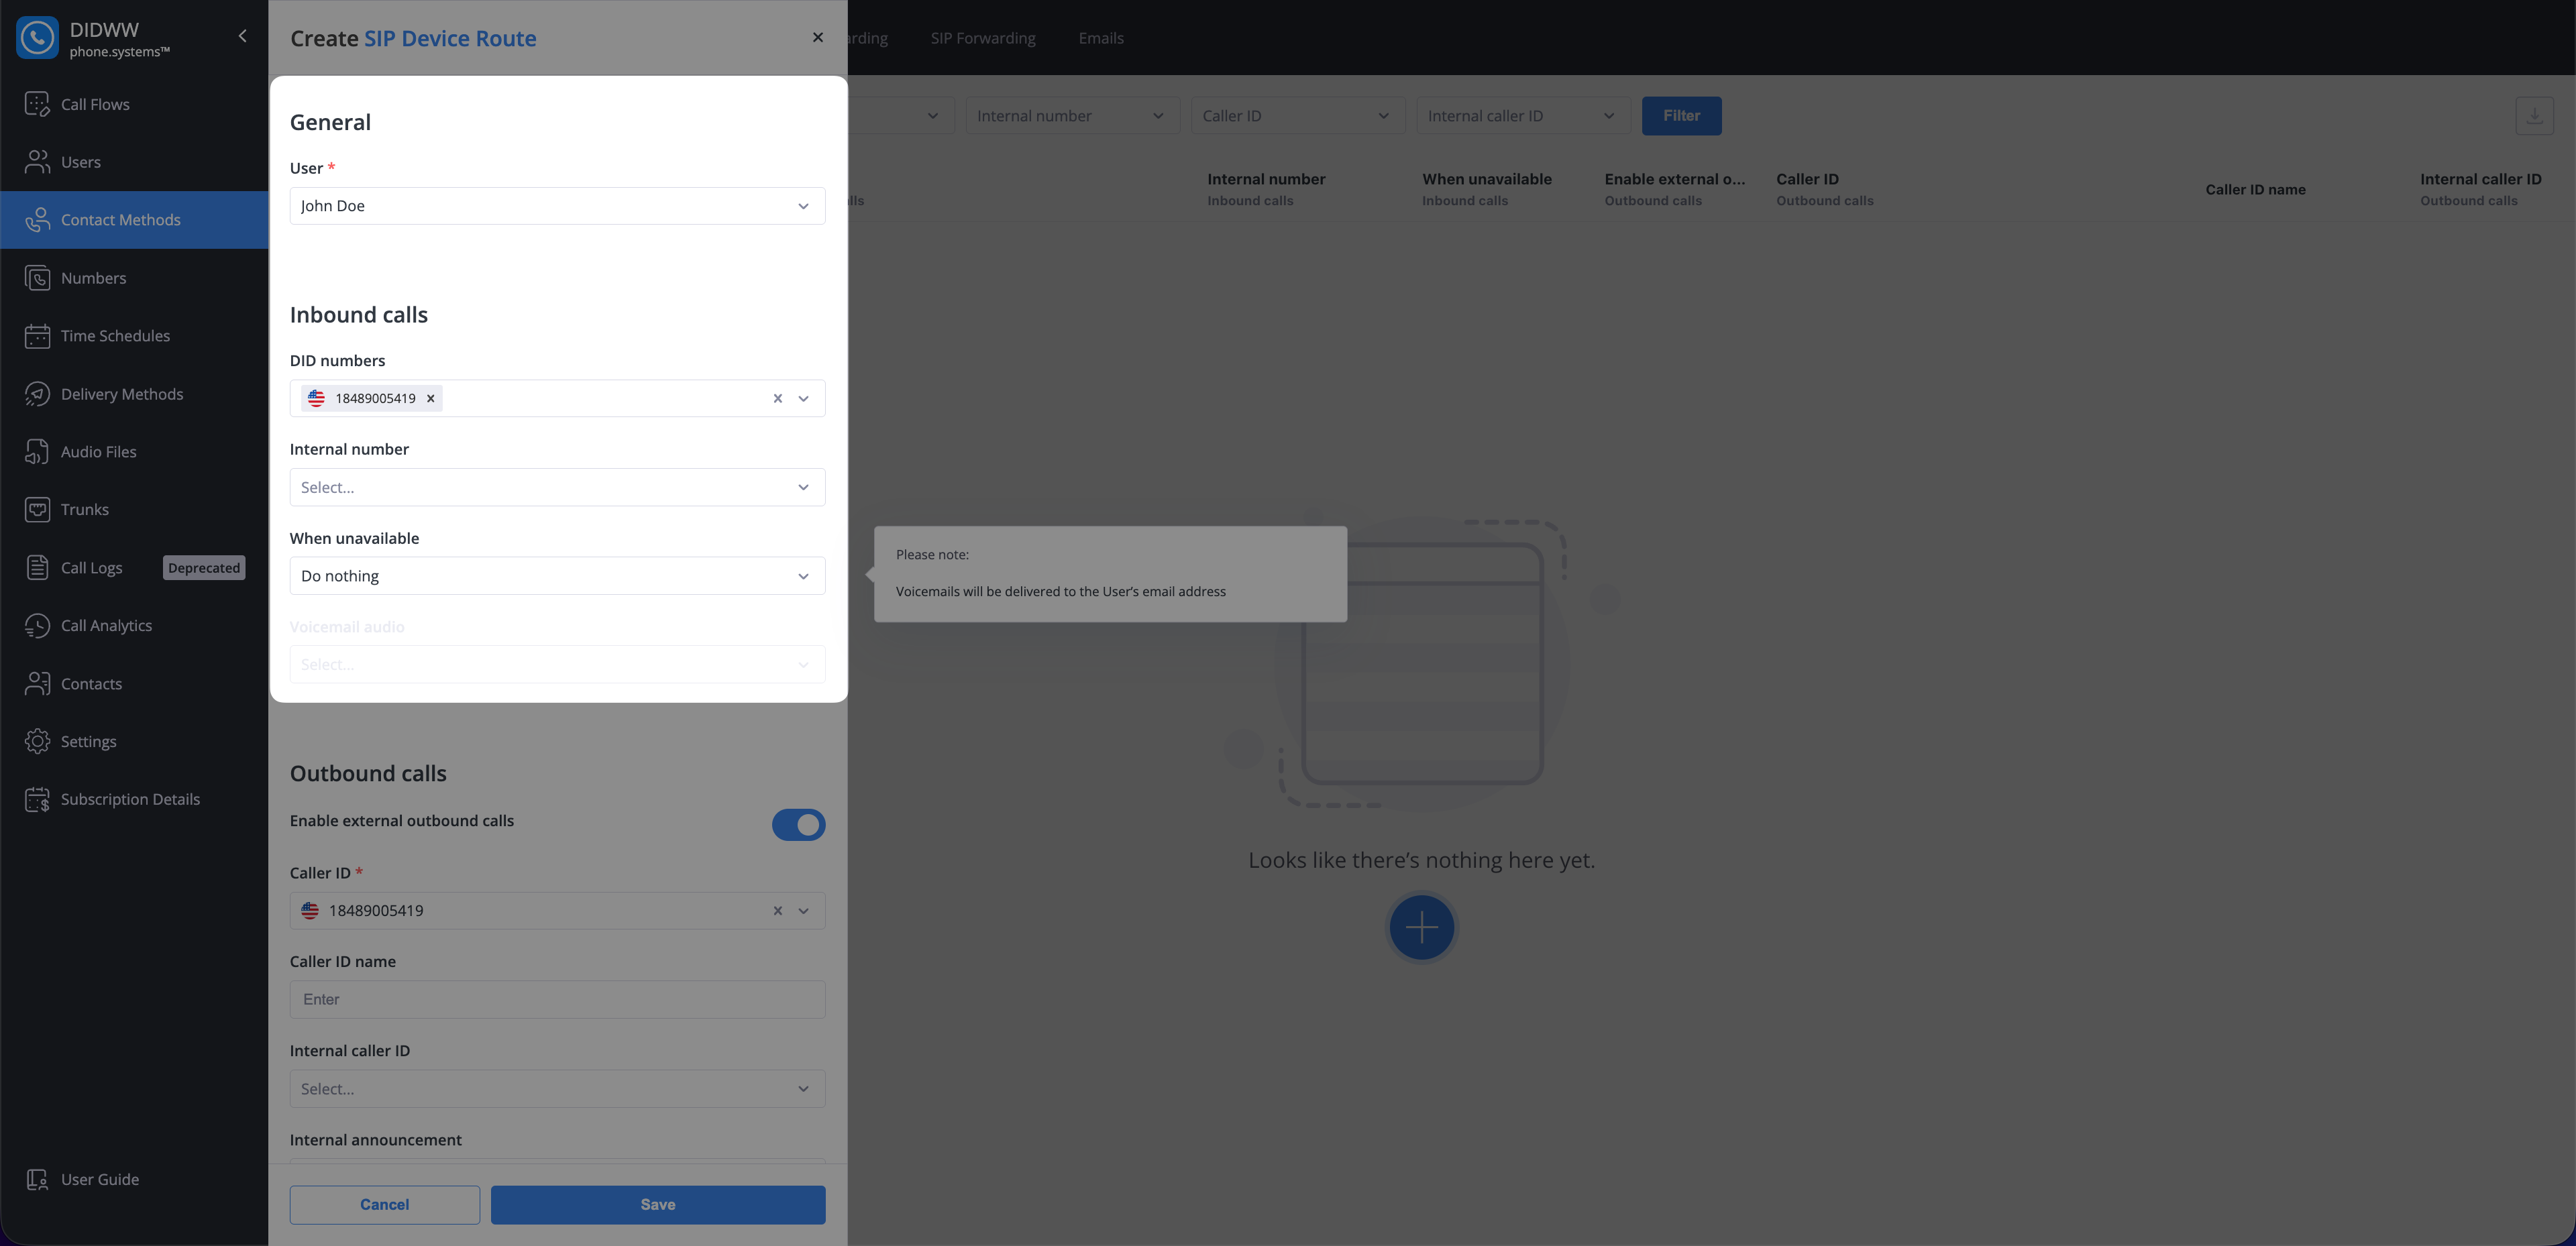
Fig. 8. Configuring inbound calls in the SIP Account#
Configure Outbound Calls#
In the Outbound calls section, enable Enable external outbound calls.
In Caller ID, select the same DID number assigned for inbound calling.
Note
For additional outbound configuration options, such as internal caller ID, announcements, and call recording, see SIP Account outbound calls.
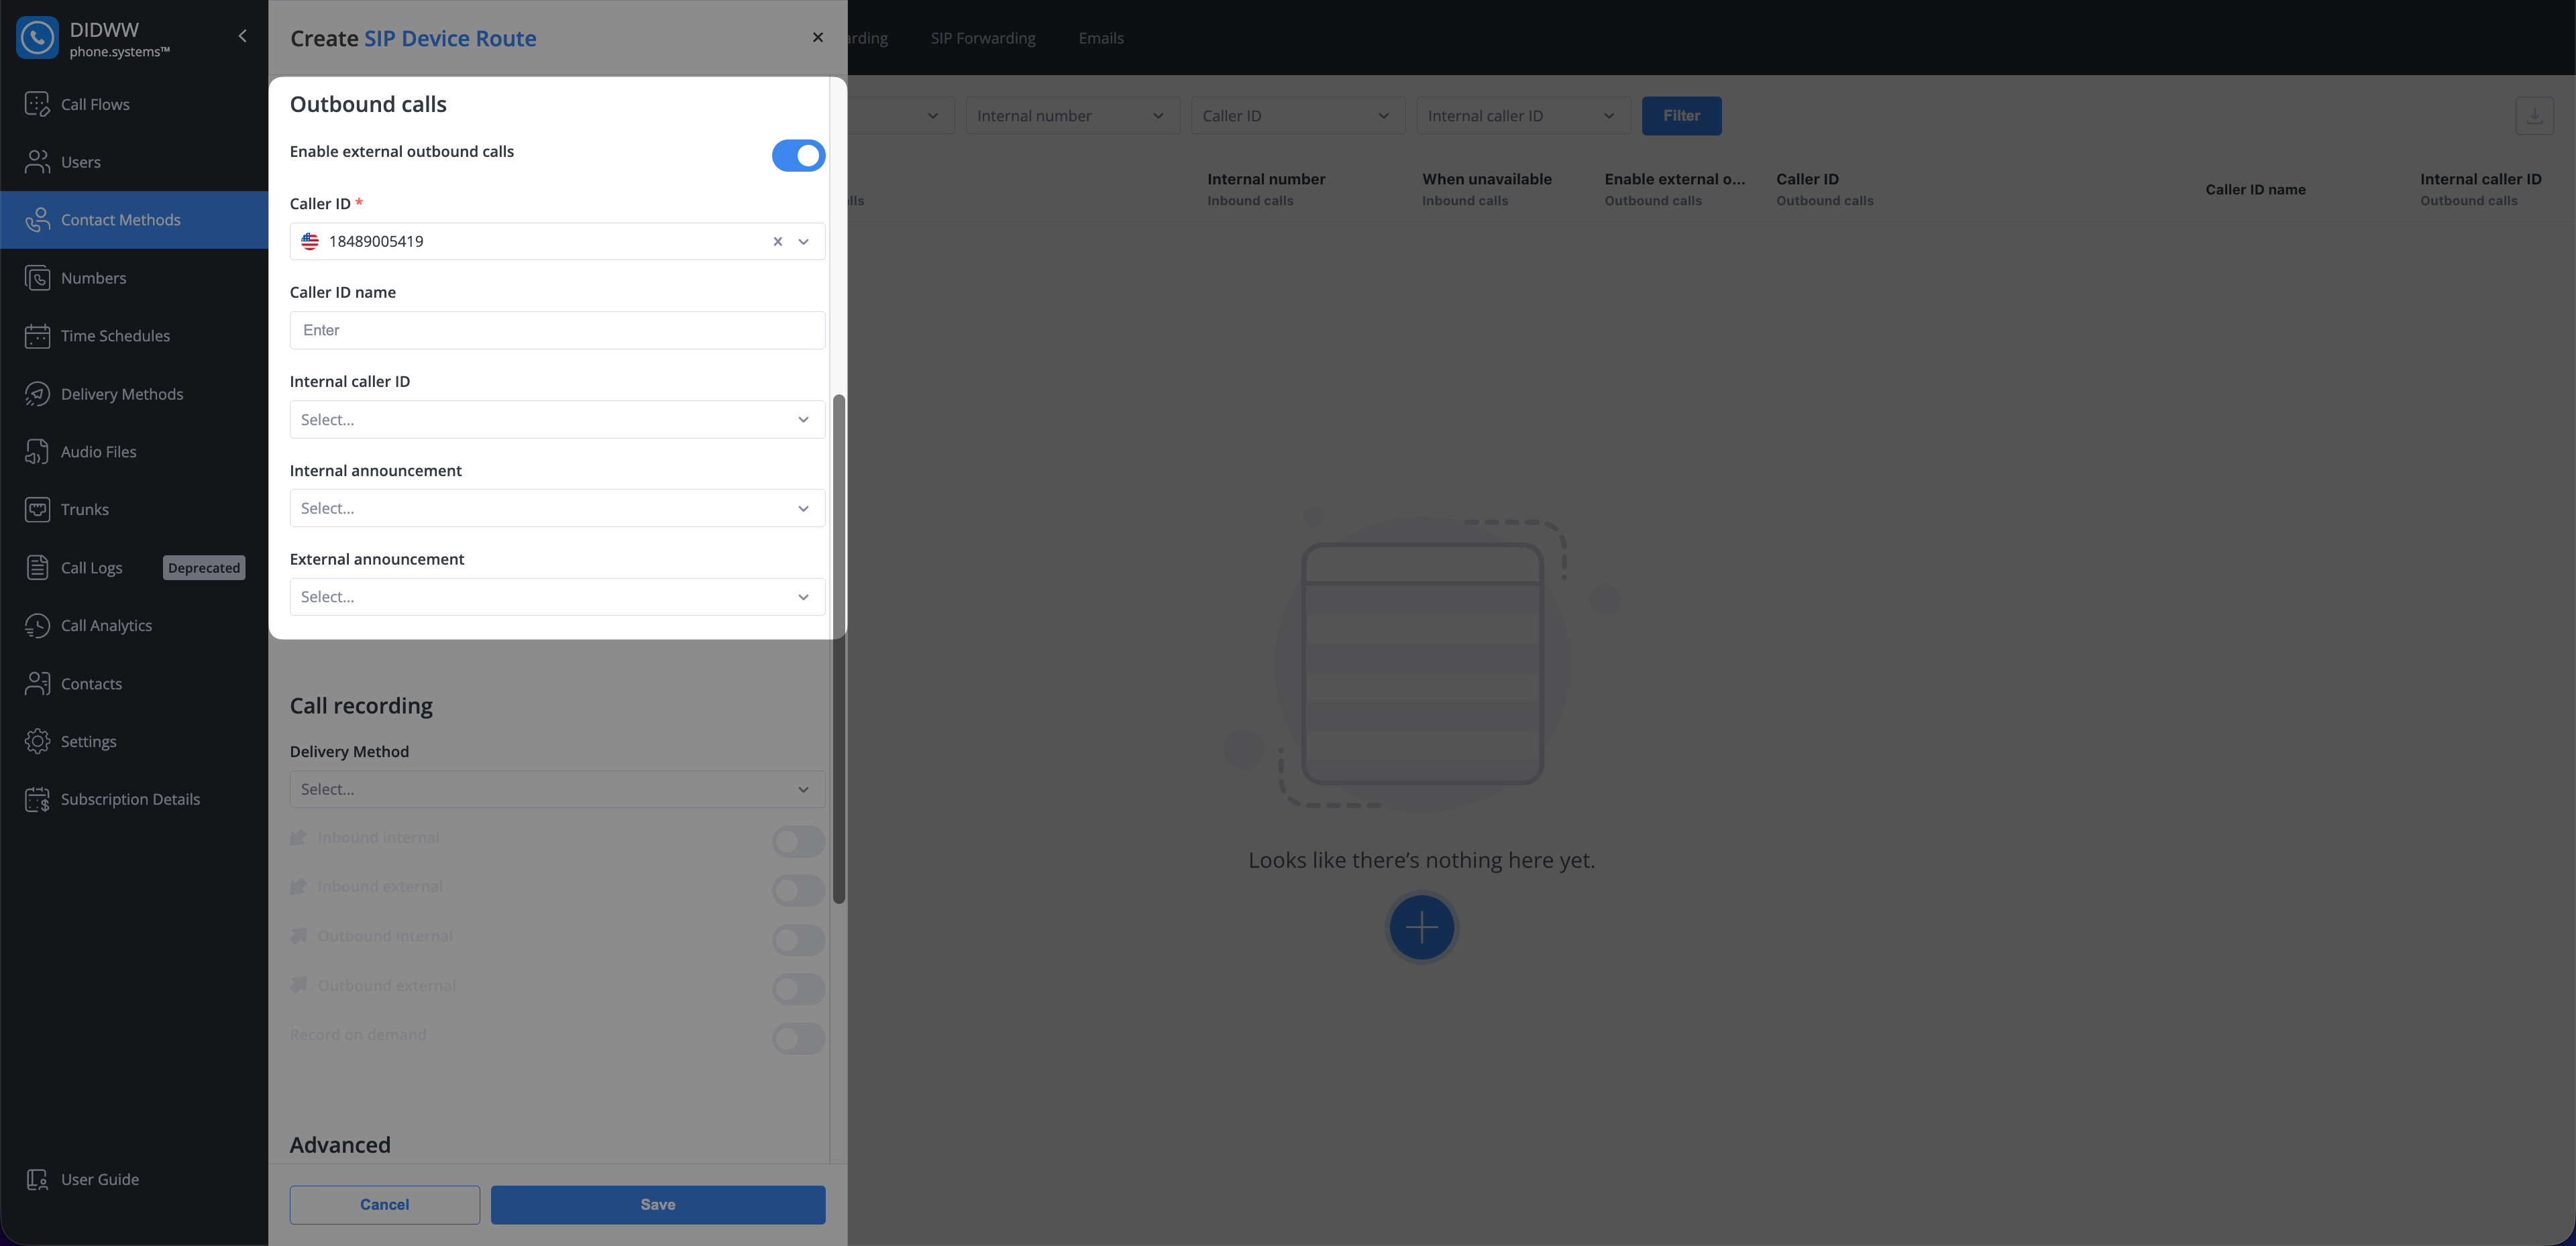
Fig. 9. Configuring outbound calls in the SIP Account#
Configure Advanced Settings and Save#
In the Advanced section, configure the settings required for Odoo Phone.
Keep the default Allowed Codecs unless your deployment requires custom codec restrictions.
In Allowed media types, select
SRTP-DTLS.In Default media type, select
SRTP-DTLS.In Transport protocol, select
WSS.Save the SIP Account.

Fig. 10. Configuring advanced settings in the SIP Account#
Step 3: Copy SIP Account Credentials for Odoo#
Locate your SIP Account and click Actions > Edit.
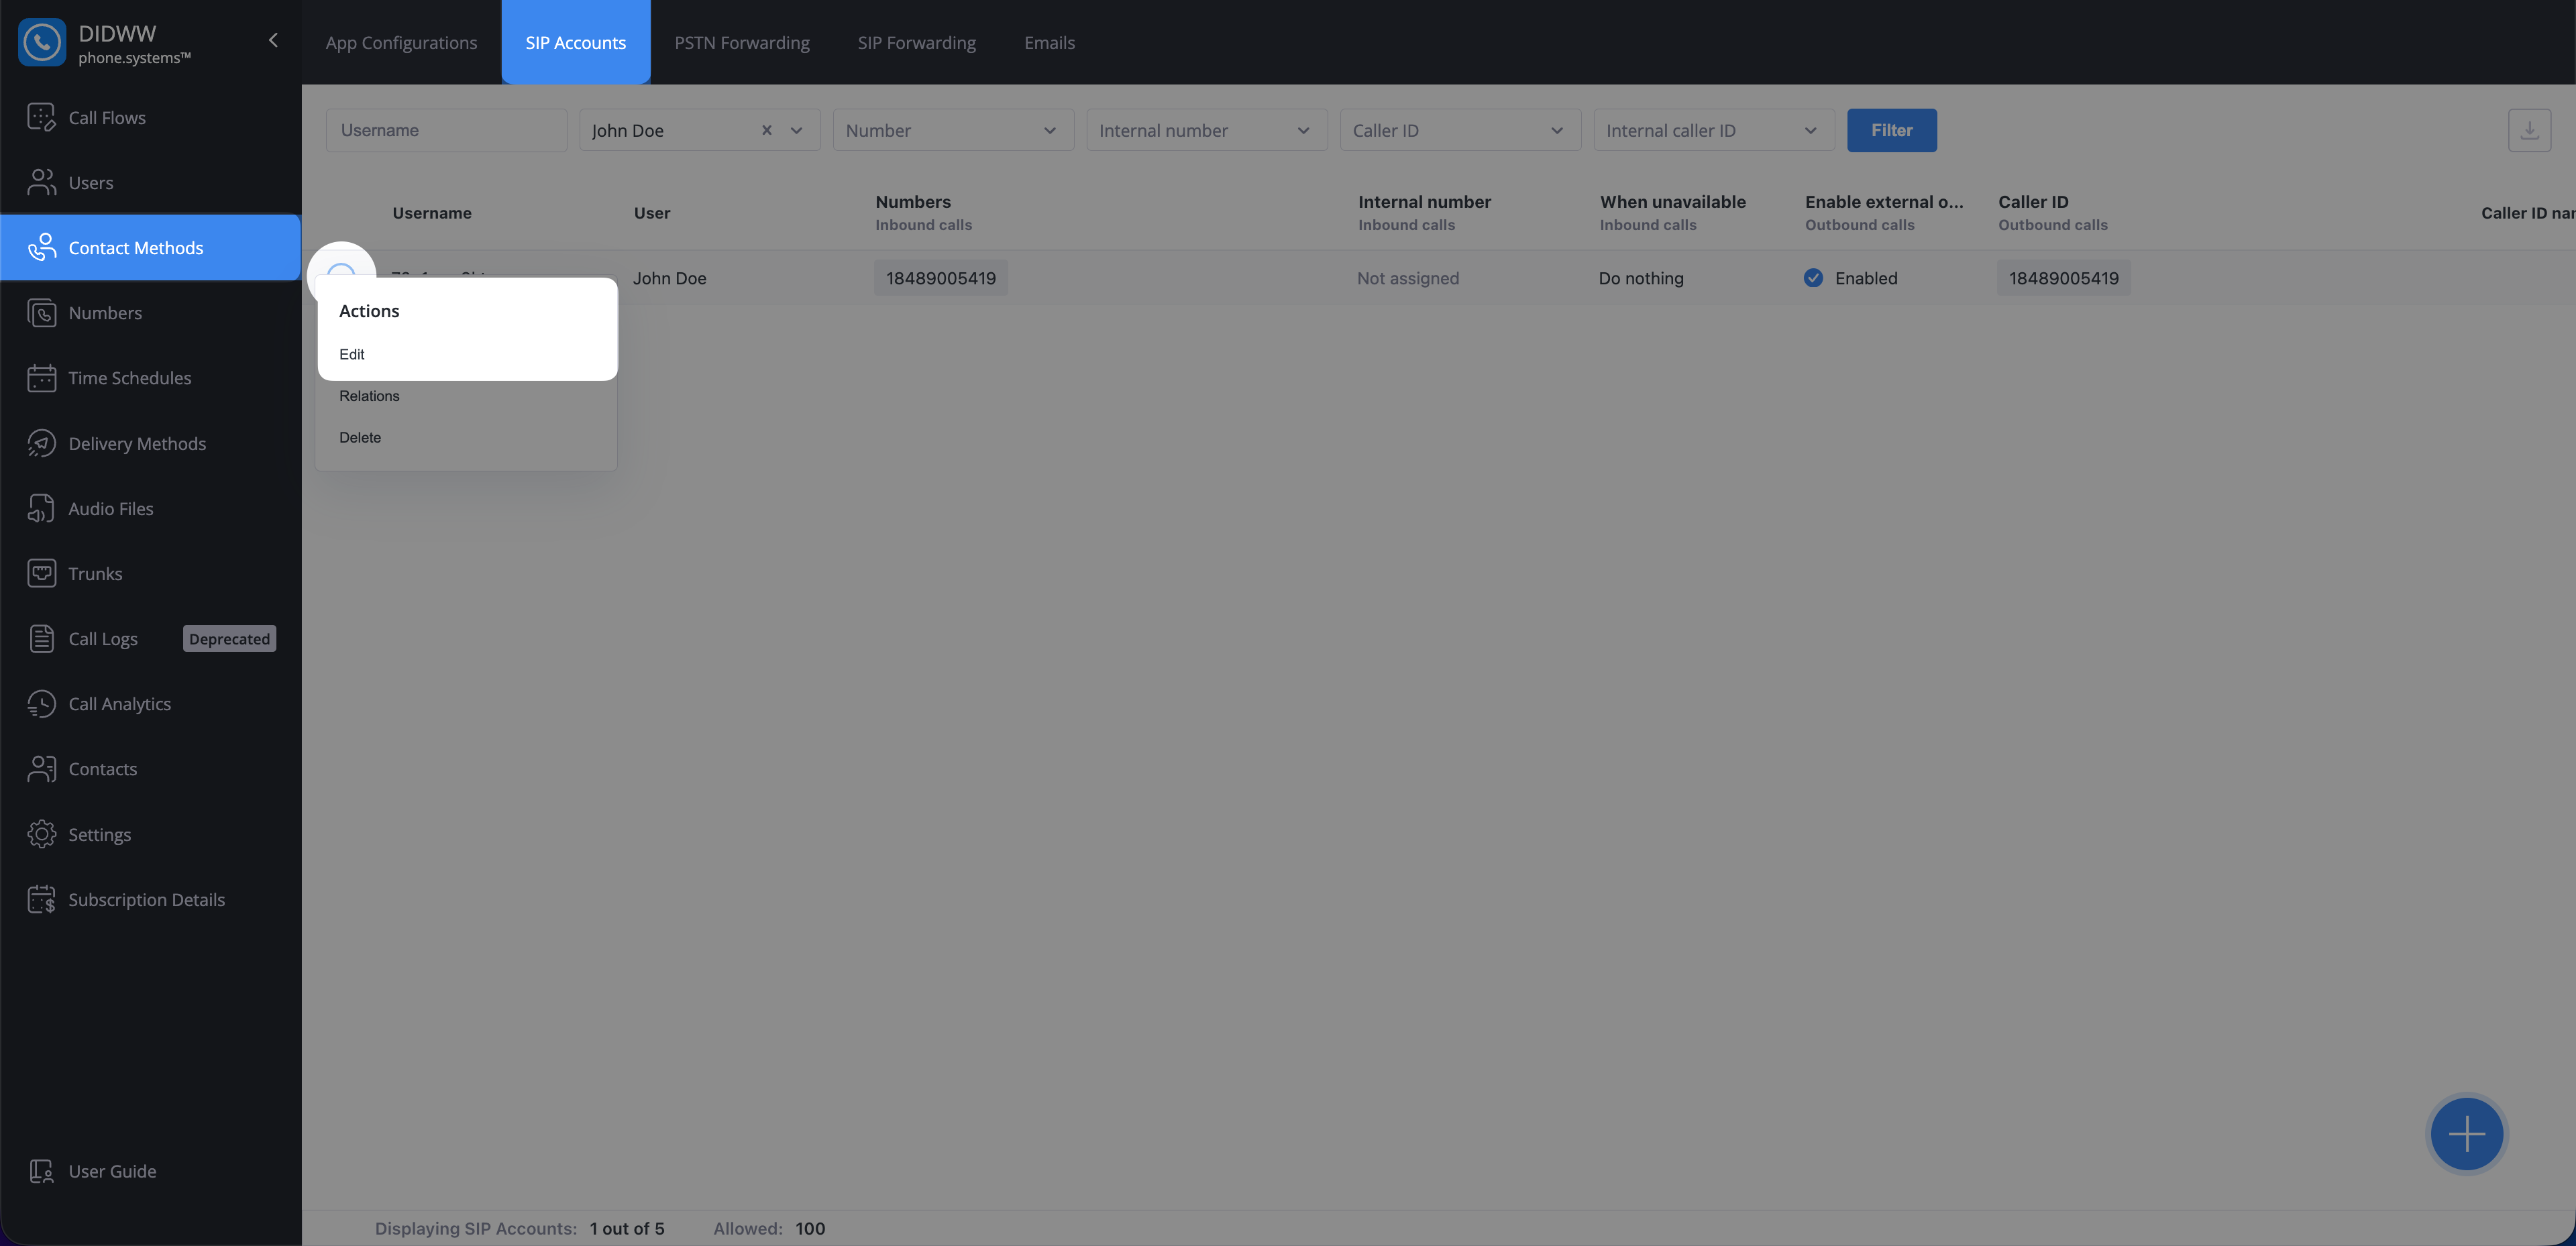
Fig. 11. Opening the SIP Account edit view#
Copy and save the SIP Account credentials for later use in Odoo.
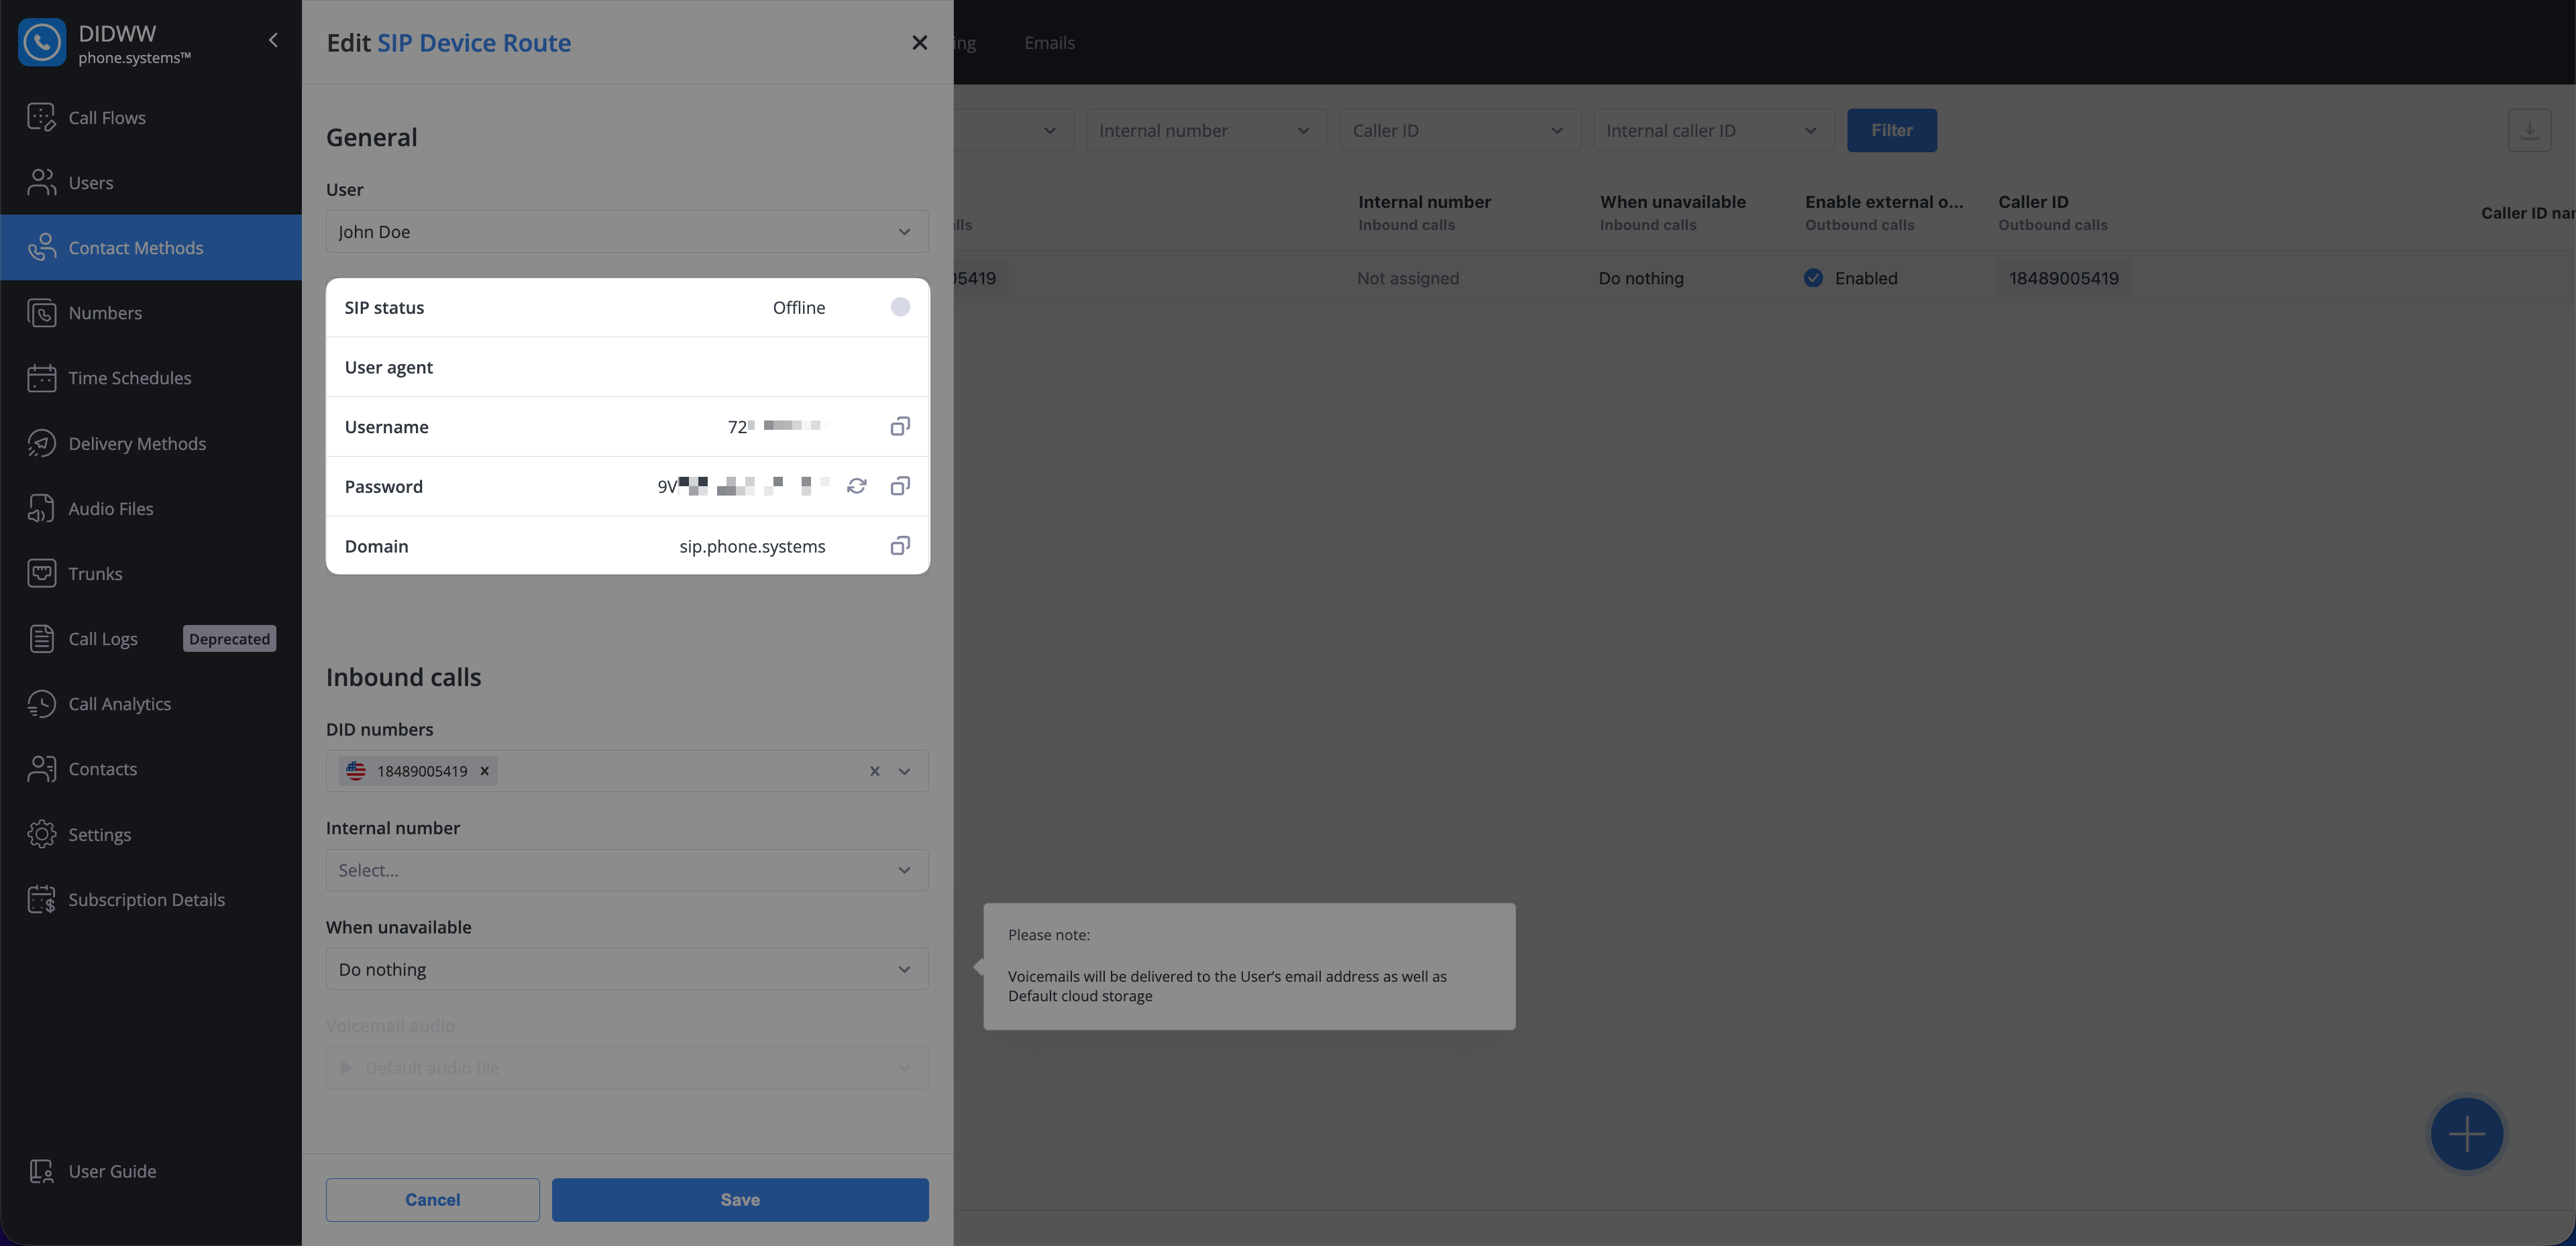
Fig. 12. Viewing SIP Account credentials#
3. Connect Odoo to DIDWW#
After DIDWW and phone.systems™ are configured, connect the phone.systems™ SIP Account to the Odoo Phone app. This step allows Odoo to use DIDWW as the calling provider and use the SIP Account credentials for browser-based inbound and outbound calls. Each Odoo user is linked to their own phone.systems™ SIP Account so calls are delivered to the correct user.
Step 1: Install Phone App#
Before configuring the DIDWW provider, install the Phone app in Odoo.
In Odoo, open the Apps menu.
Search for the
phoneapp and click Install.
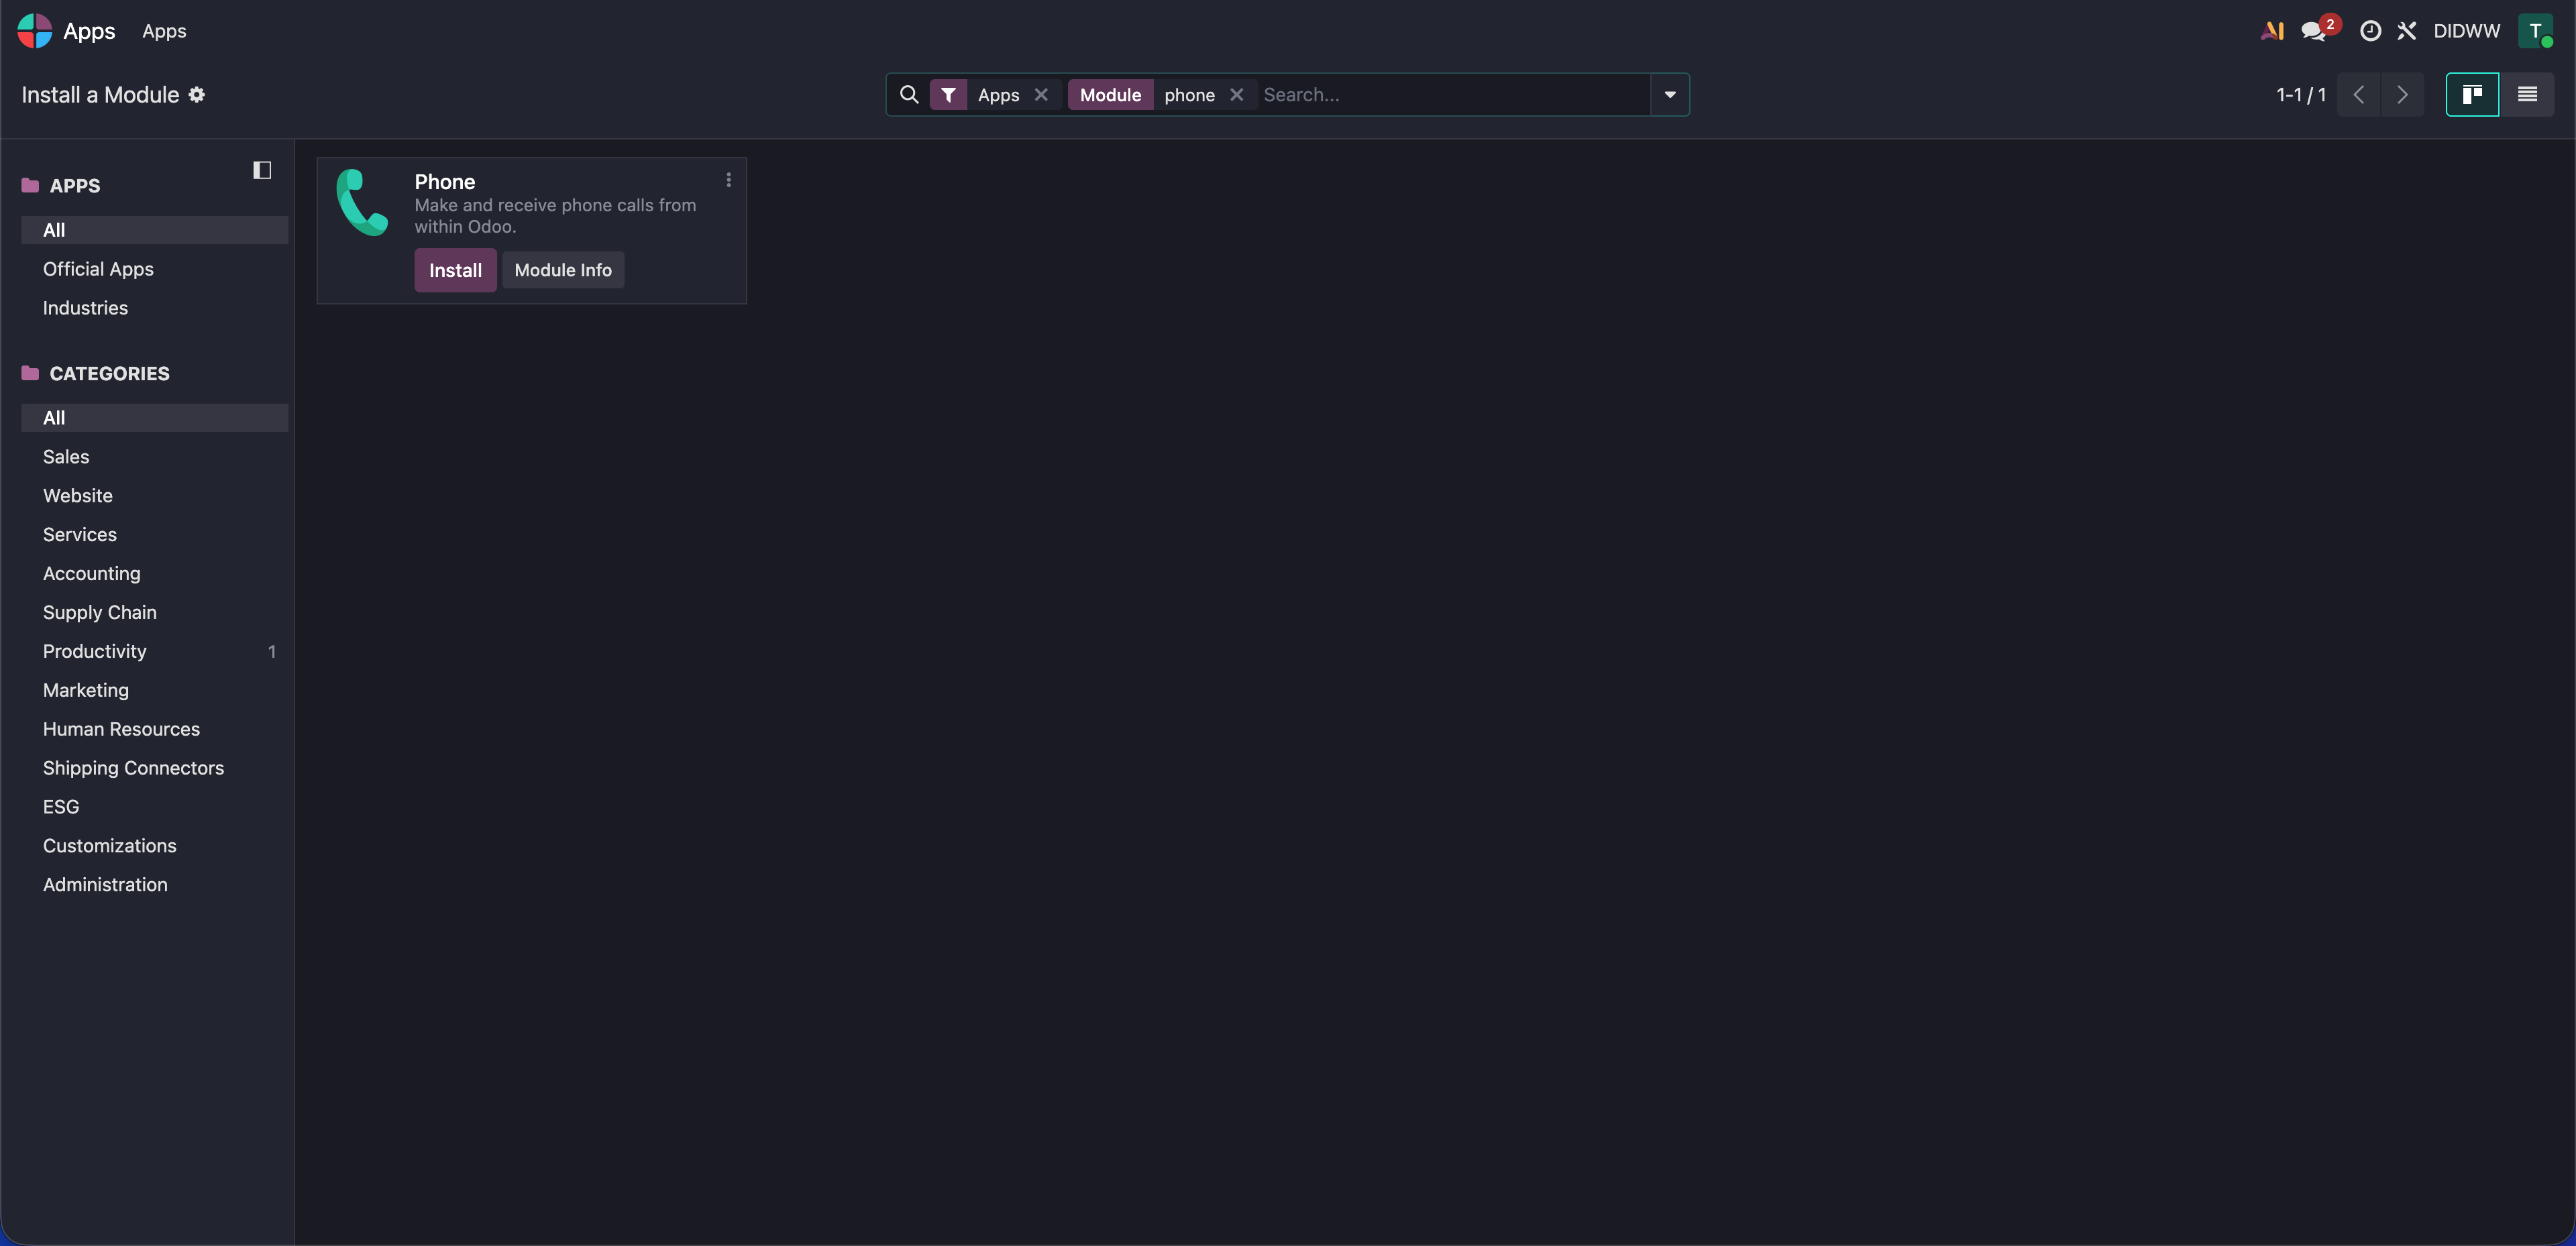
Fig. 13. Installing the Phone app in Odoo#
Step 2: Configure DIDWW Provider in Odoo#
In Odoo, open the Phone app.
Go to Configuration > Providers.
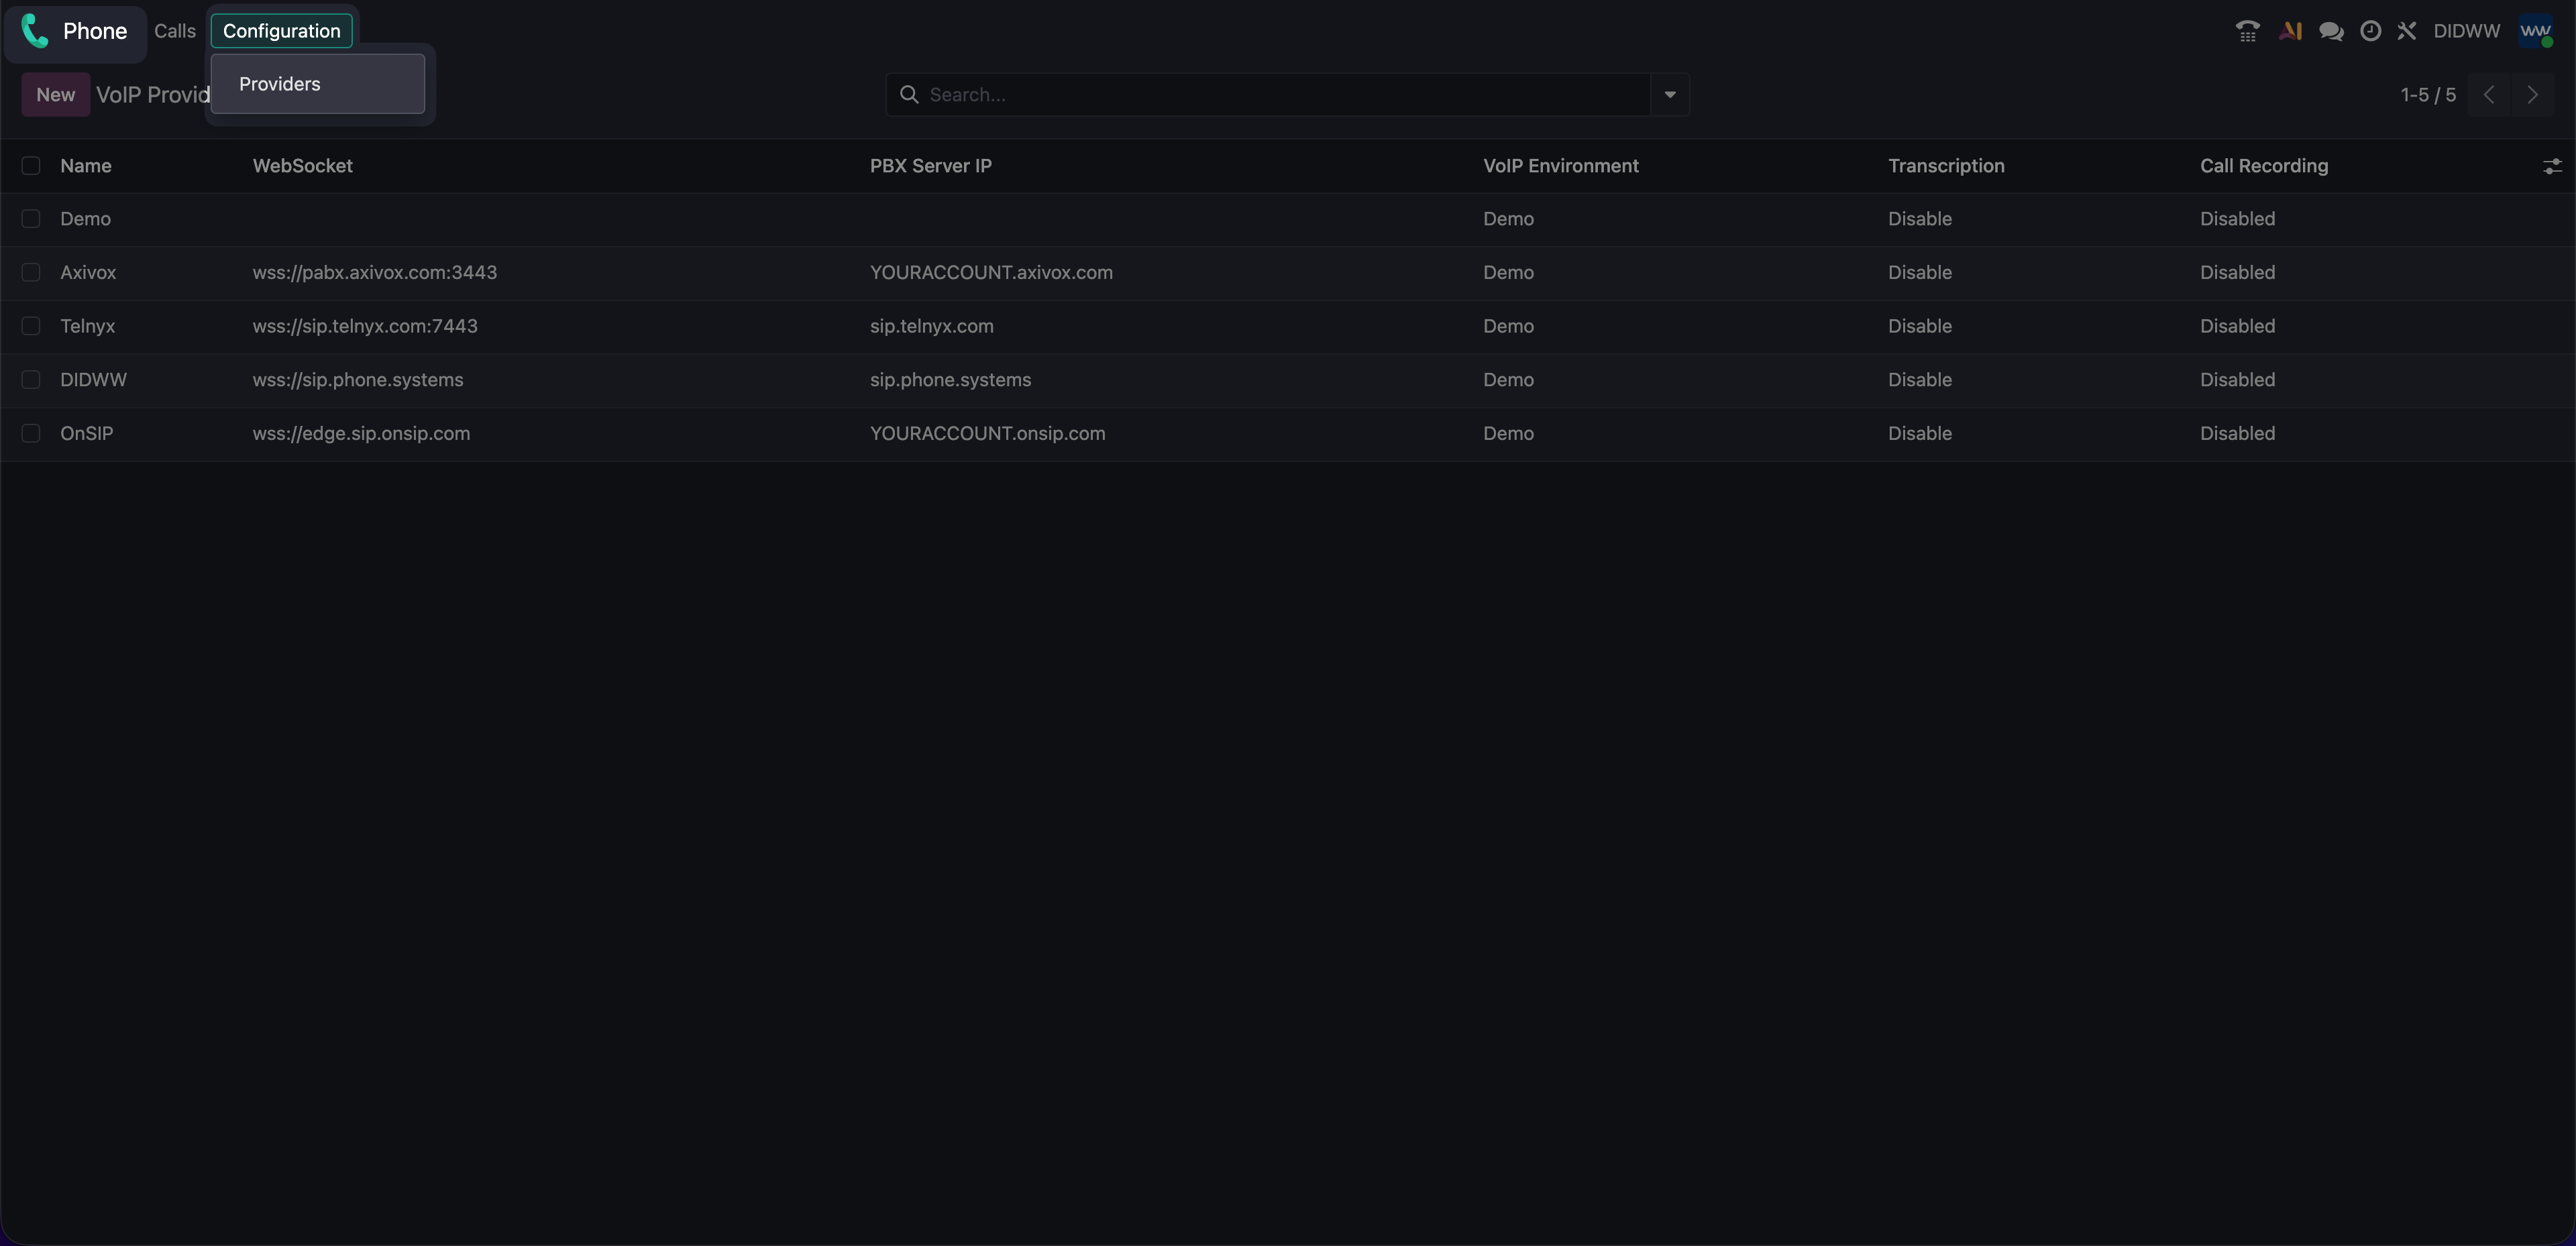
Fig. 14. Opening the Providers page in Odoo Phone#
In the DIDWW provider row, set VoIP Environment to Production to enable real SIP connectivity.
Click Save.
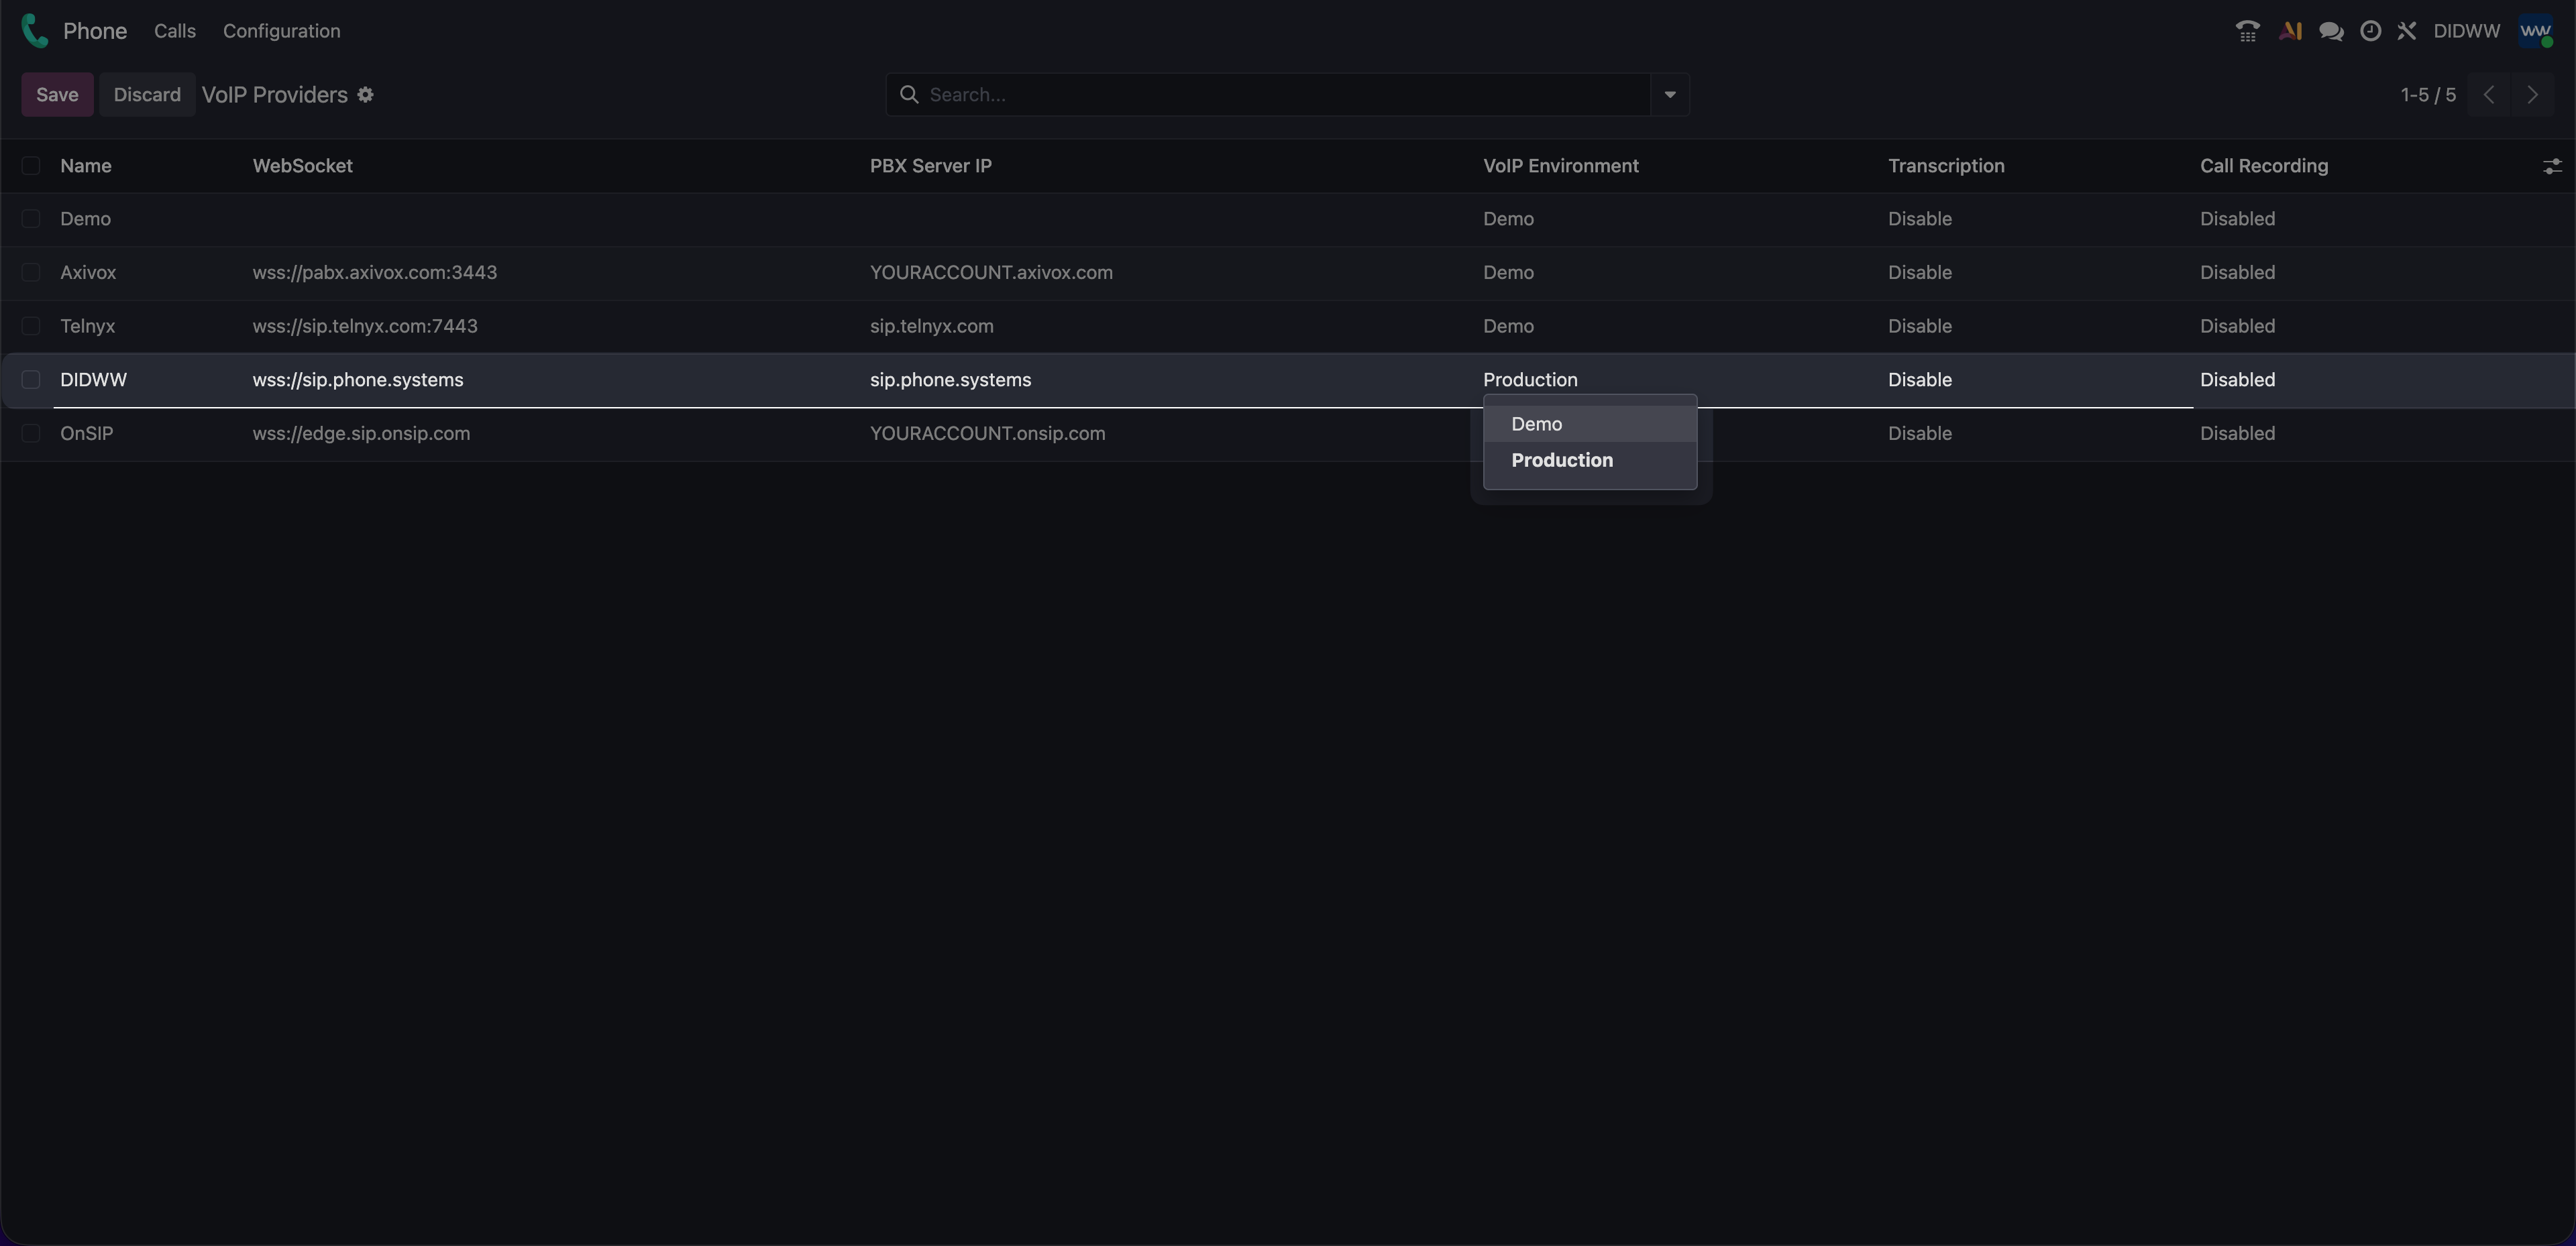
Fig. 15. Setting the DIDWW VoIP Environment to Production#
Step 3: Configure User VoIP Credentials in Odoo#
Open Settings.
In the General Settings > Users section, click Manage Users.
Note
Repeat these credential steps for each Odoo user who will use the Phone app.
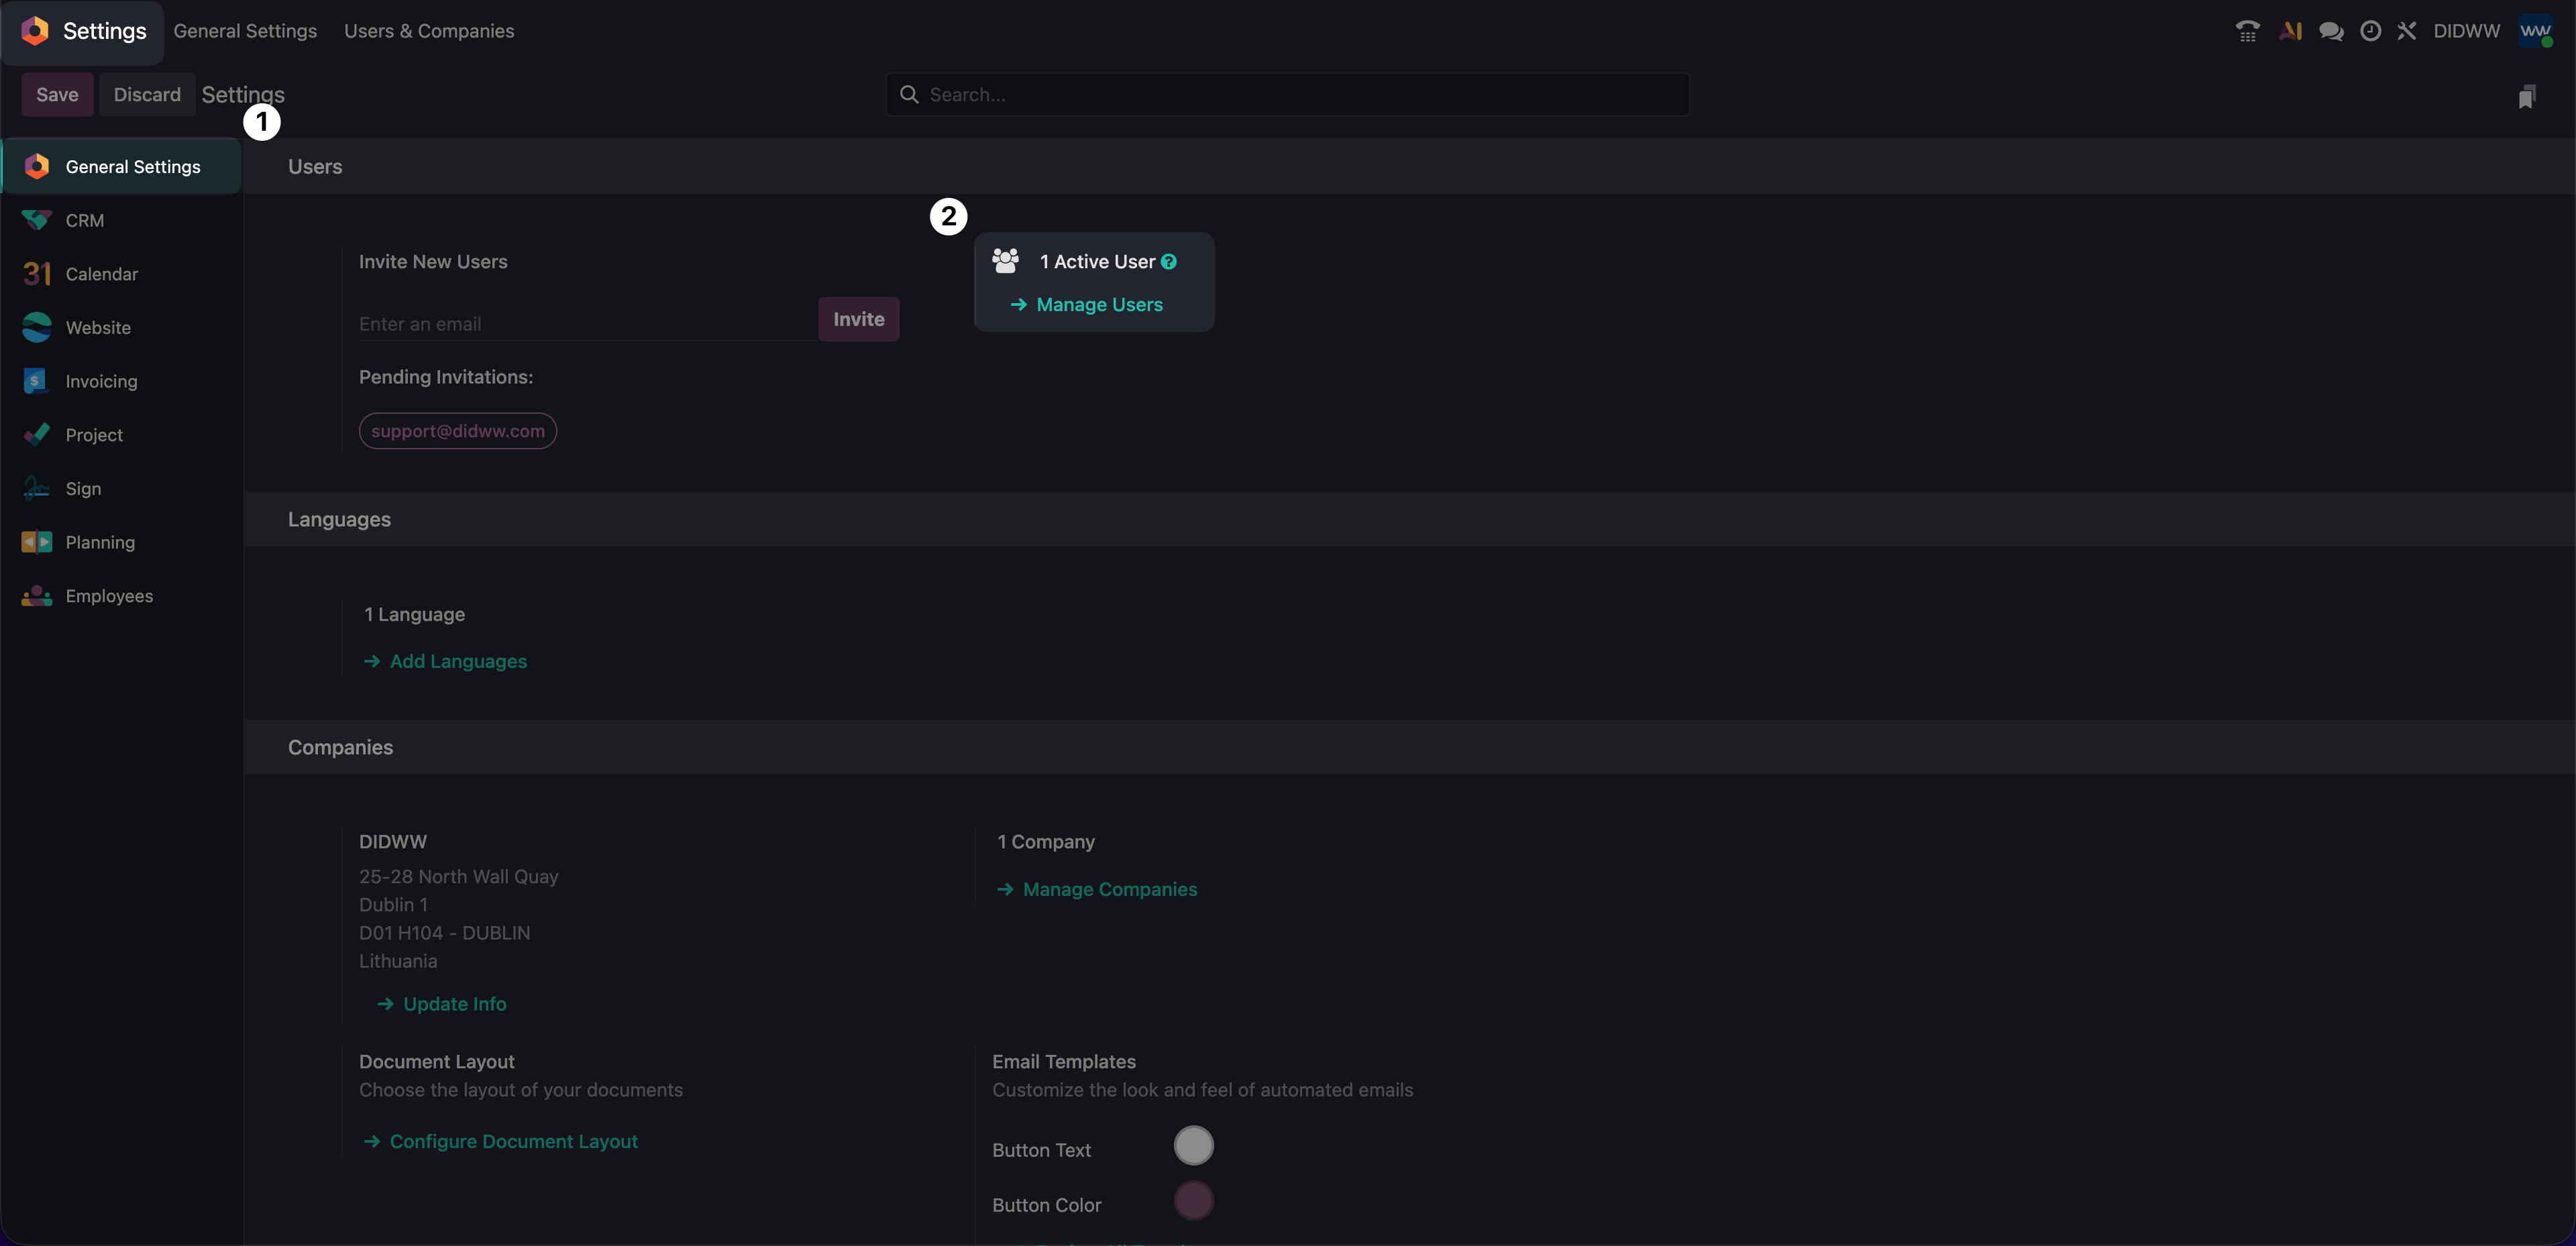
Fig. 16. Opening the Users page from Odoo Settings#
Open the user who will use the Odoo Phone app.
Open the VoIP tab.
Configure Credentials settings:
Select DIDWW as the Provider.
Enter the user’s phone.systems™ SIP Account Username.
Enter the SIP Account’s Password in the Secret field.
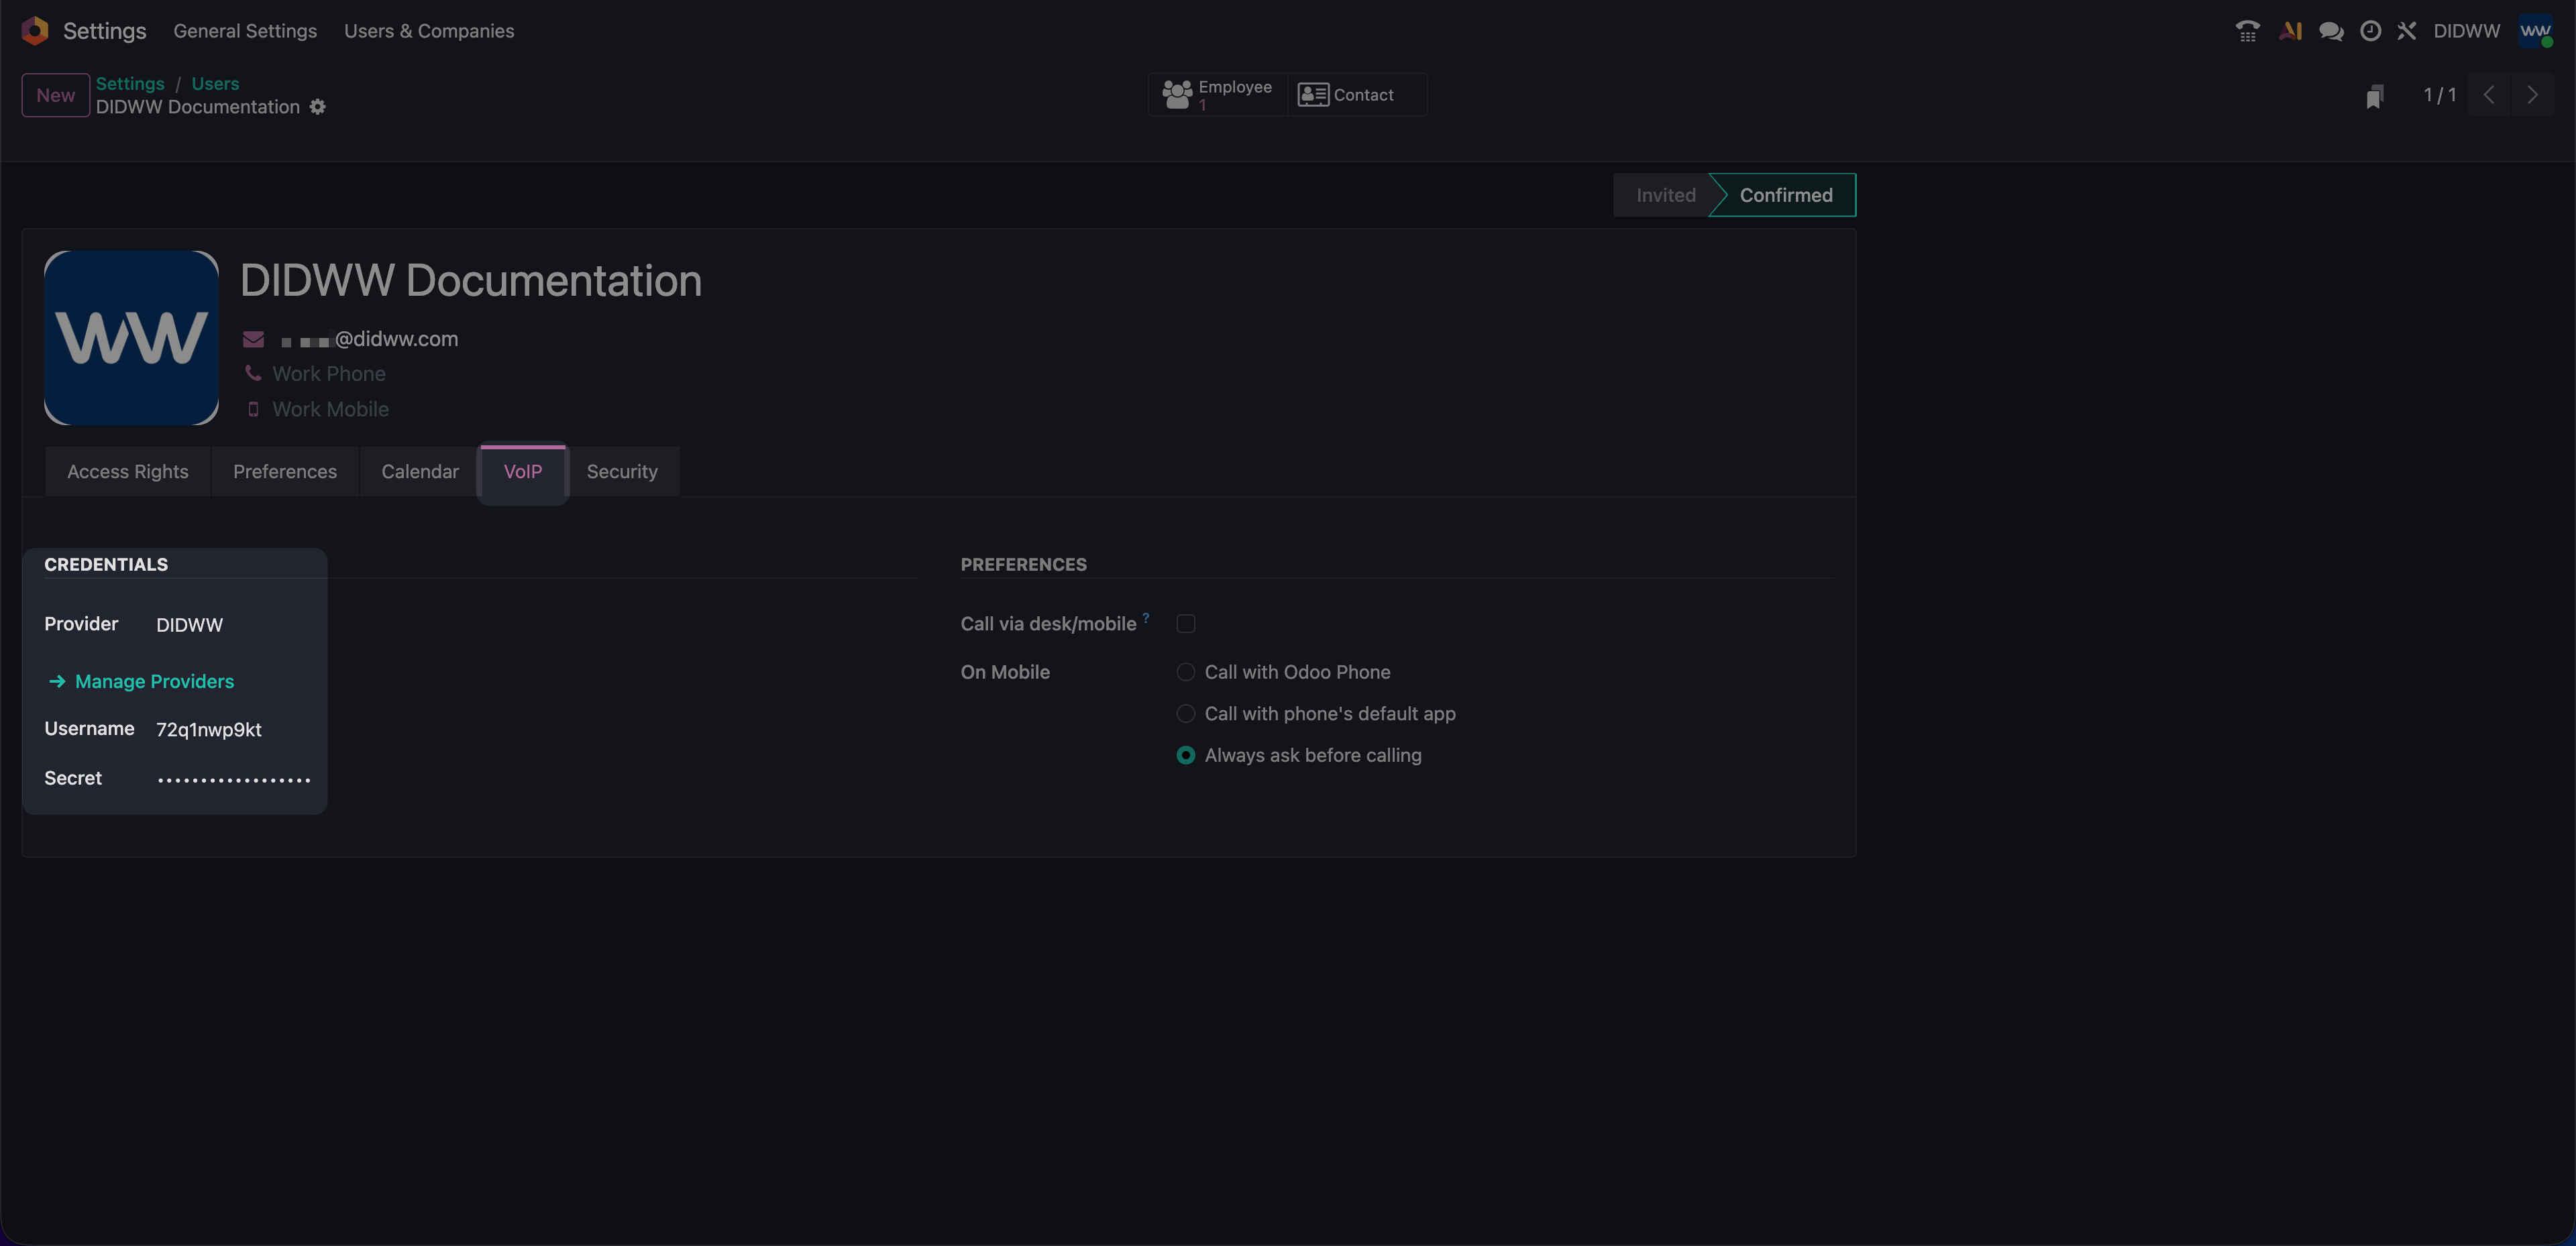
Fig. 17. Configuring VoIP credentials for an Odoo user#
Step 4: Test Inbound and Outbound Calls#
When the DIDWW provider and user credentials are configured, test the connection in Odoo.
Click the Phone icon in the top-right corner of Odoo to open the softphone.
Place a test inbound call to the DID number assigned to phone.systems™.
Place a test outbound call to any PSTN number in E.164 format (country code + area code + subscriber number, e.g., 15550100001).
Verify that calls connect successfully and that the user can both place and receive calls in Odoo.
Note
You can review call activity and verify call status or error codes in the phone.systems™ Call Analytics.
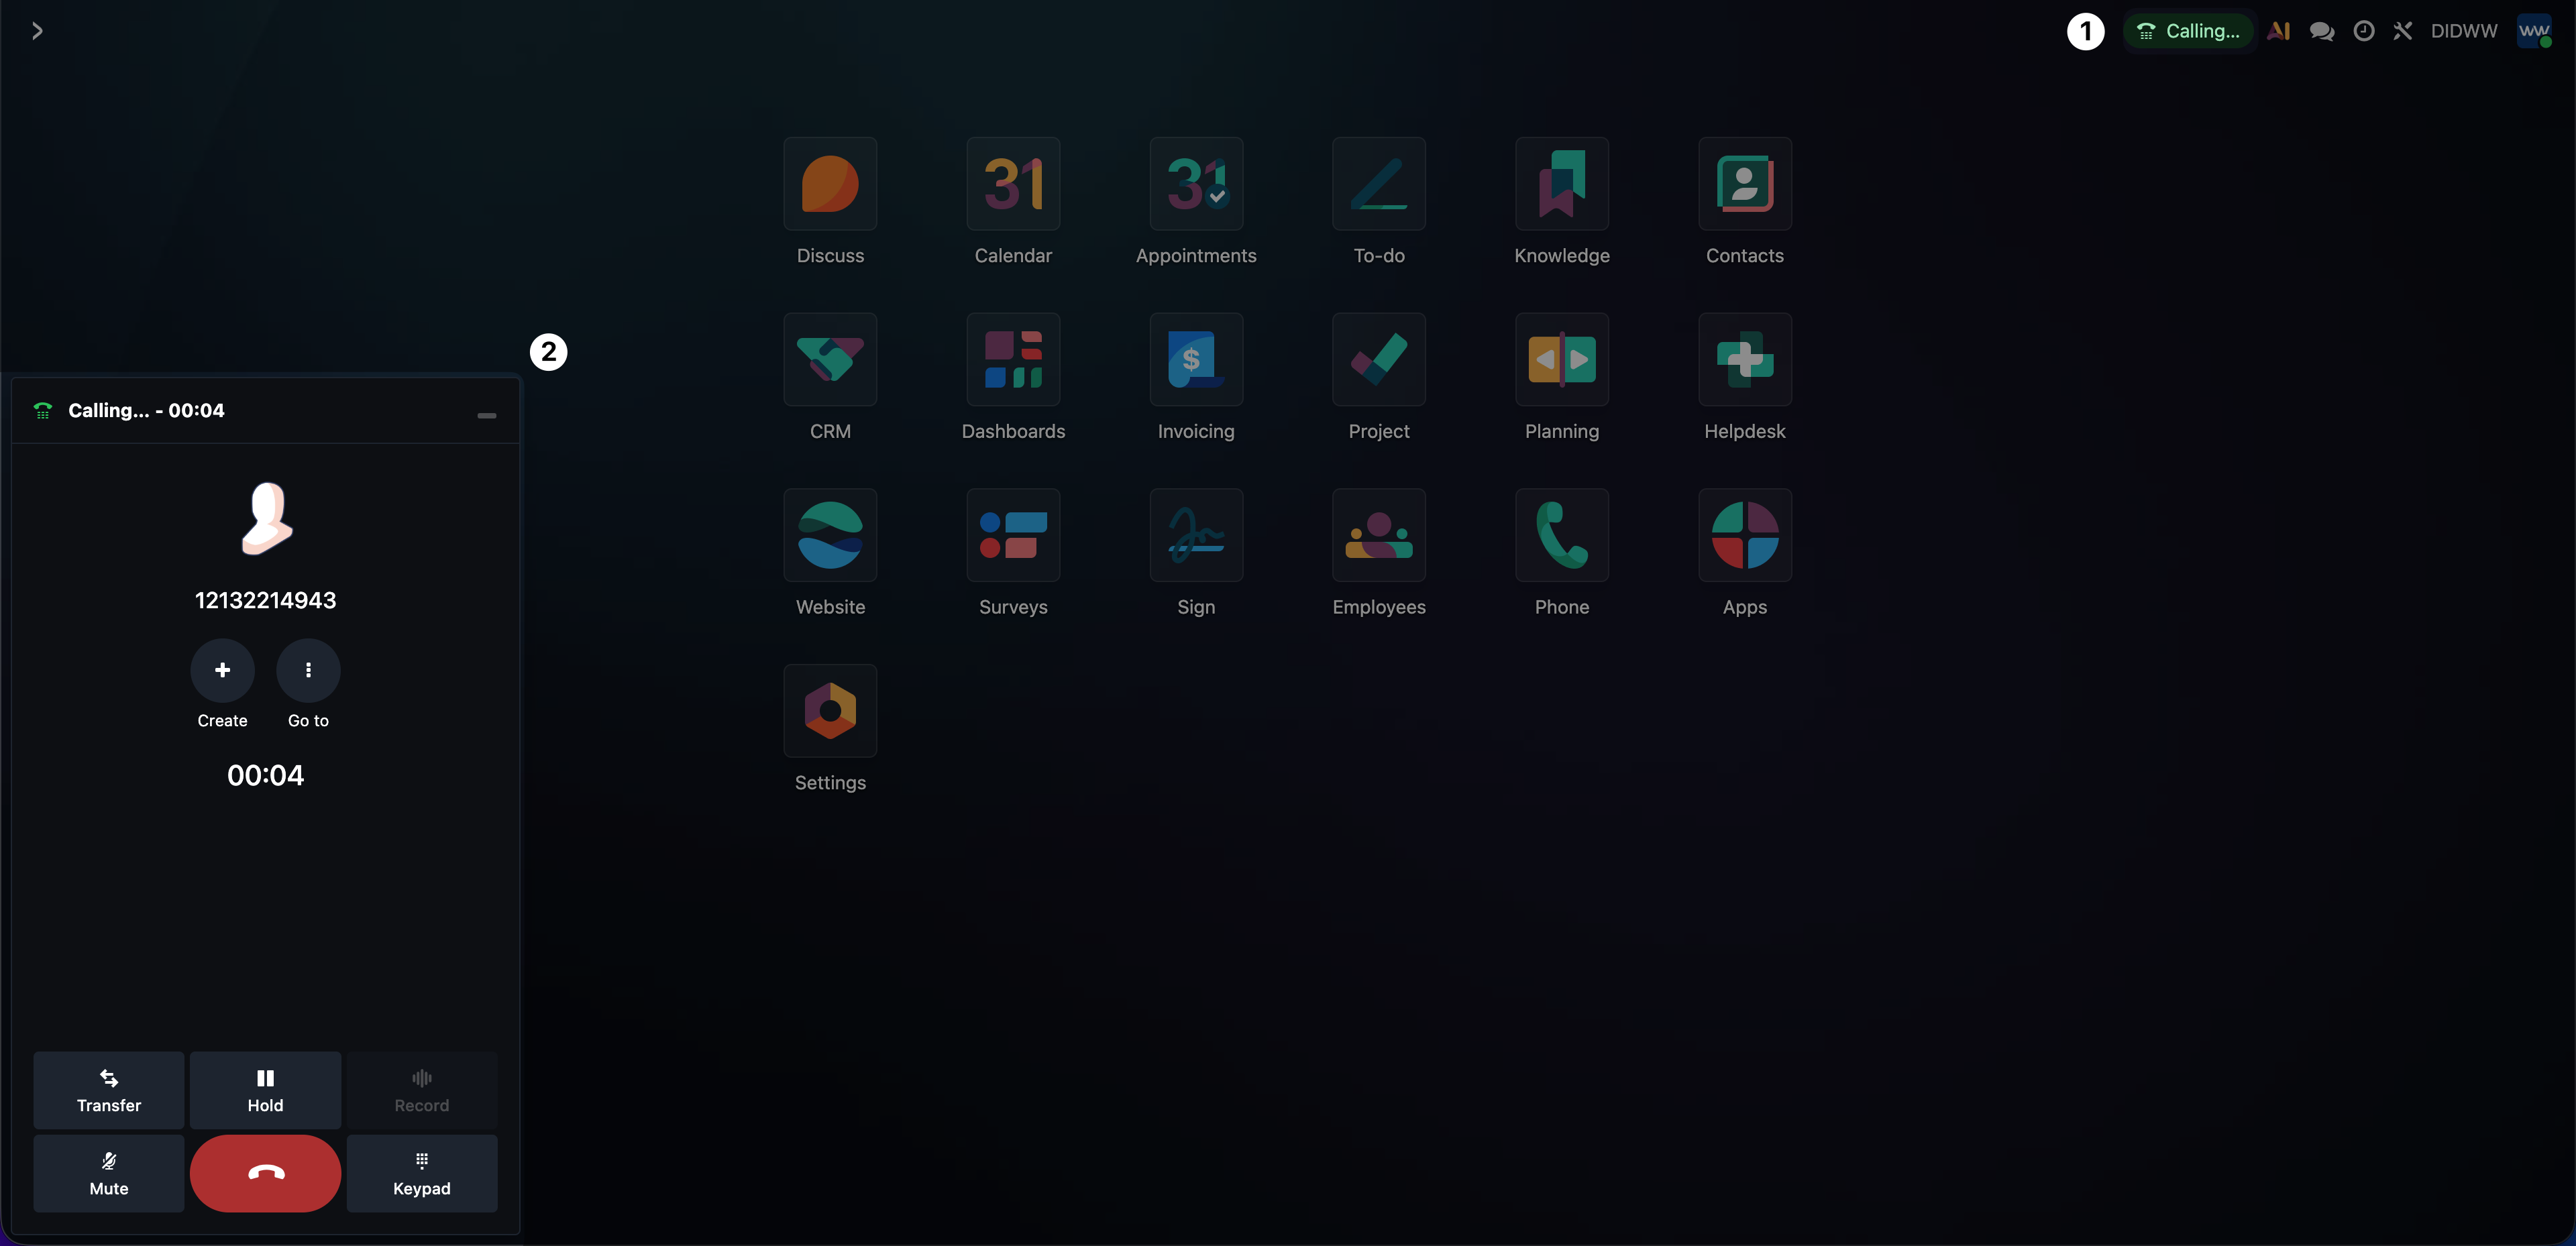
Fig. 18. Testing a call in the Odoo Phone softphone#
Additional Resources#
Official Odoo documentation for the Phone app and its features.
Official Odoo guide for using the Phone app with DIDWW.