Retell AI#
Use Retell AI voice agents with DIDWW SIP Trunking to handle inbound and outbound calling over standard phone lines. Connect your DIDWW SIP trunks with Retell AI to route incoming calls to AI agents, place outbound calls through DIDWW trunks, and manage voice conversations using your existing DIDWW phone numbers.
Route incoming calls from DIDWW numbers to Retell AI agents.
Connect callers to AI agents for real-time conversations.
Import existing DIDWW numbers into Retell AI.
Place outbound calls through DIDWW Outbound Trunks.
Assign inbound and outbound AI agents to DIDWW numbers.
Manage voice conversations over standard phone lines.
1. Route Incoming Calls to Retell AI#
Configure an Inbound SIP Trunk in the DIDWW User Panel to send incoming calls from your DIDWW numbers to Retell AI. This trunk defines the SIP path that delivers calls to your Retell AI agent.
Before You Begin#
An active DIDWW account is required. Sign in to DIDWW or Create DIDWW account .
At least one active DID number with capacity to receive incoming calls is required. Buy Numbers .
Step 1: Create New SIP Trunk#
In the DIDWW User Panel , go to Voice > Inbound Trunks.
Click Create New > SIP Trunk.
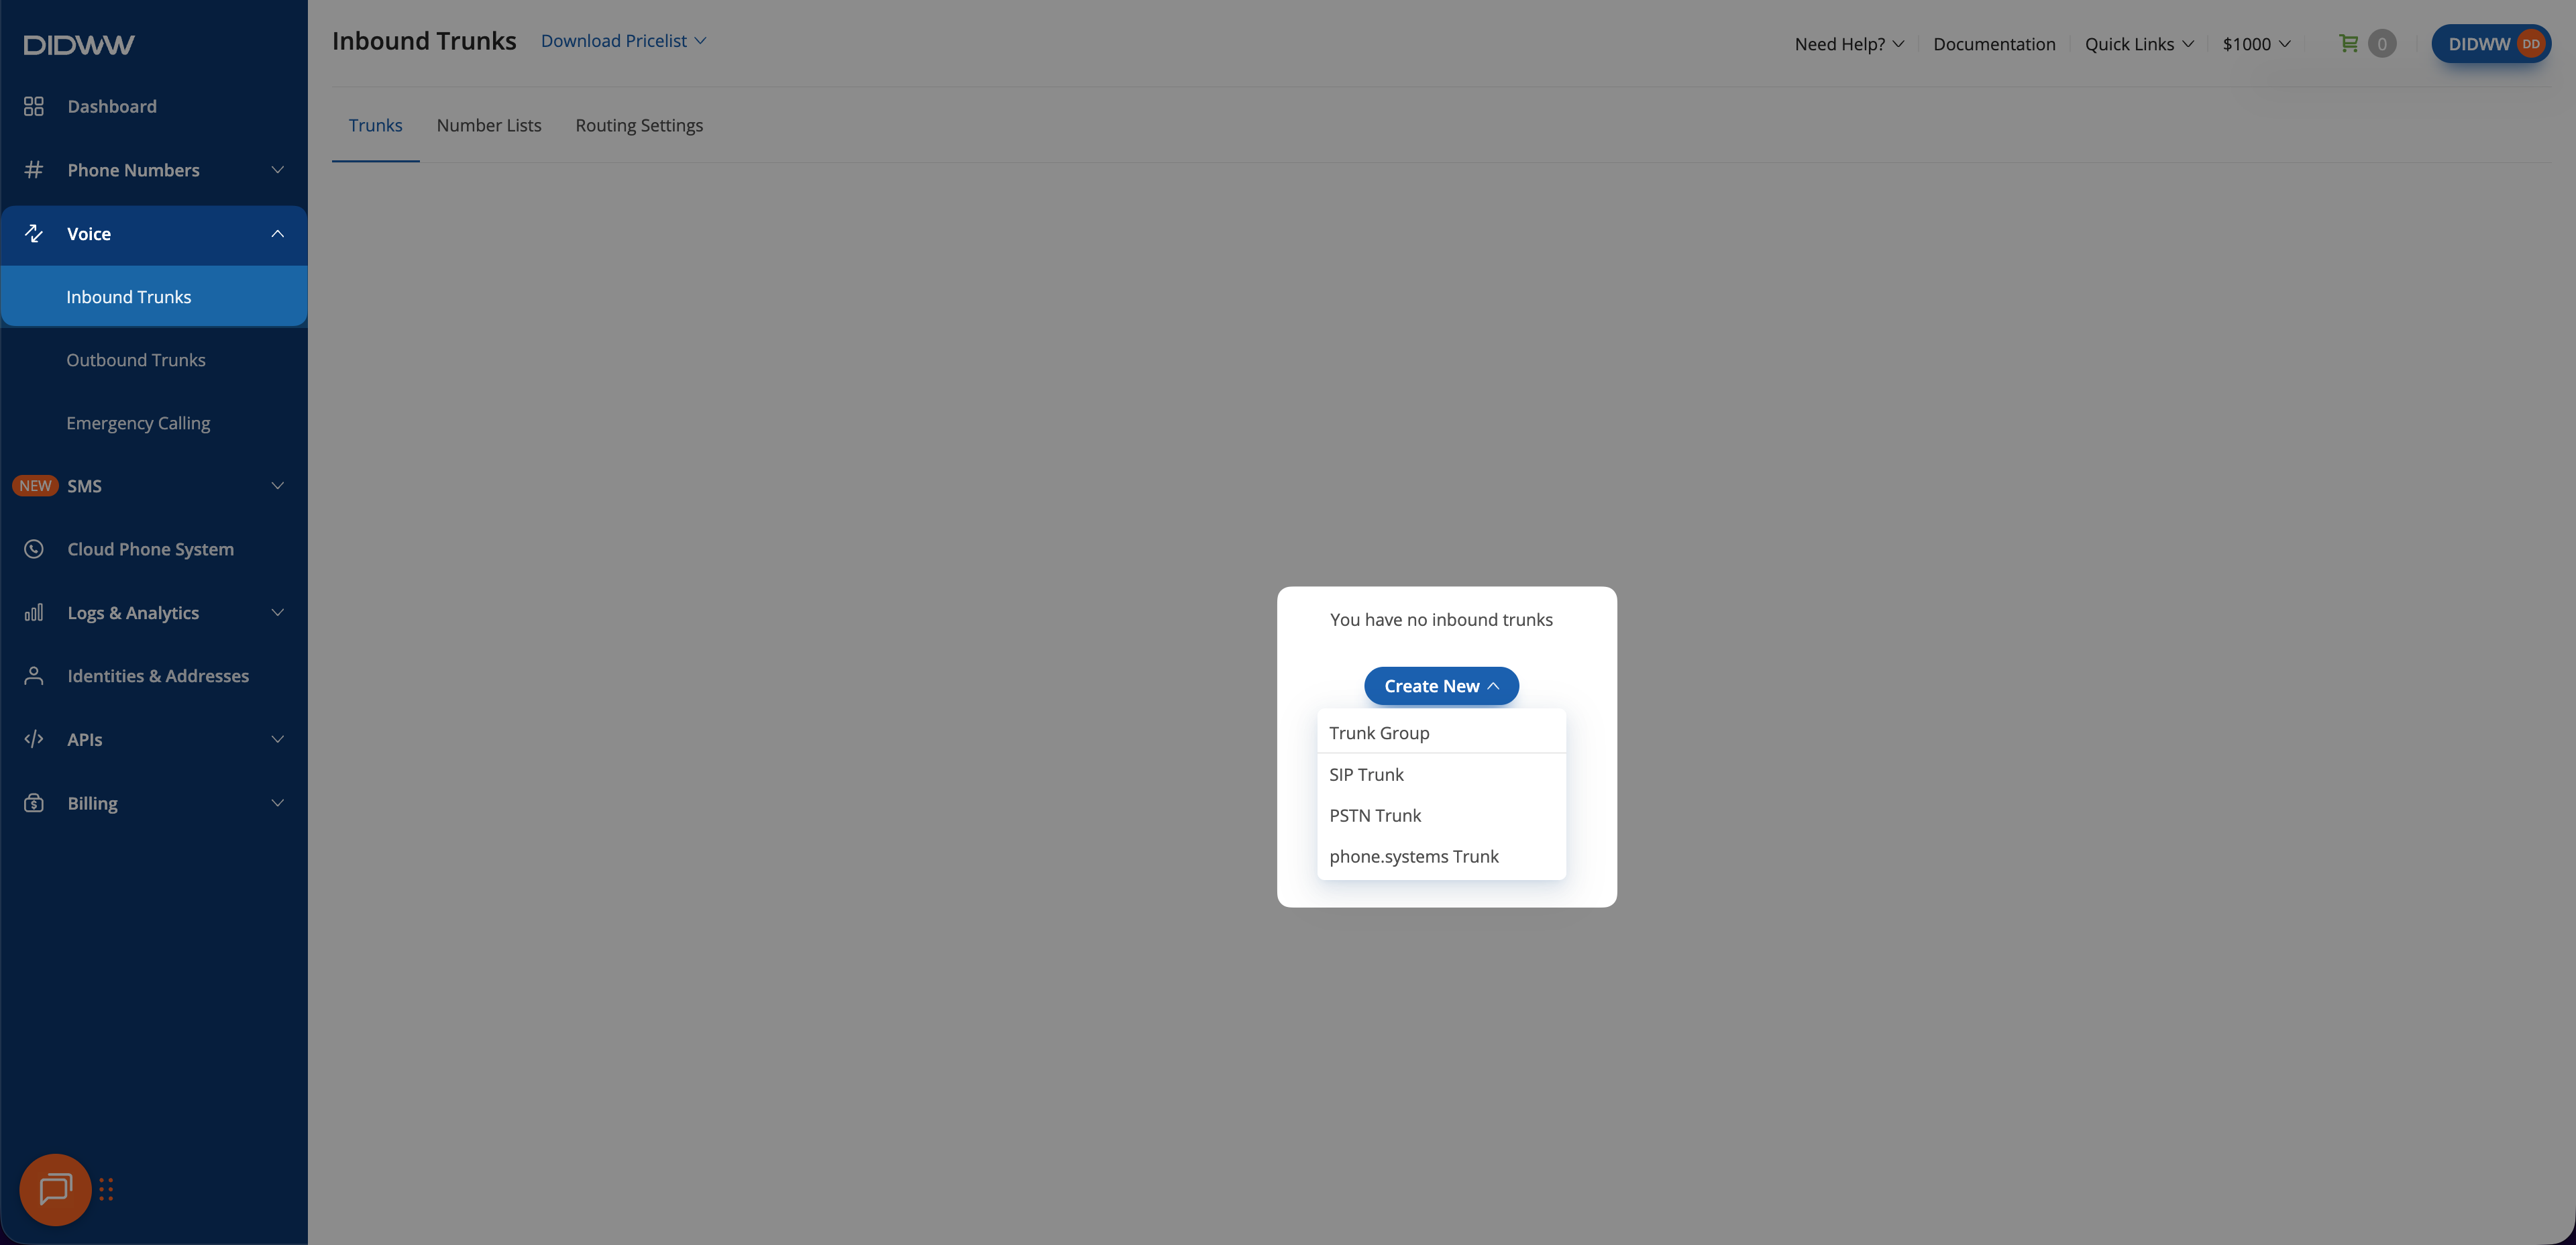
Fig. 1. Creating a new inbound SIP trunk#
Step 2: Configure General SIP Trunk Settings#
In the Create Inbound SIP Trunk form, enter the main requirements to route the calls to Retell AI.
Enter a descriptive Friendly Name for the trunk (e.g.,
Retell AI).Enter the Retell AI SIP endpoint hostname:
sip.retellai.com.Select Transport Protocol Type and Port for SIP signaling: TCP/UDP (Port
5060) or TLS (Port5061).
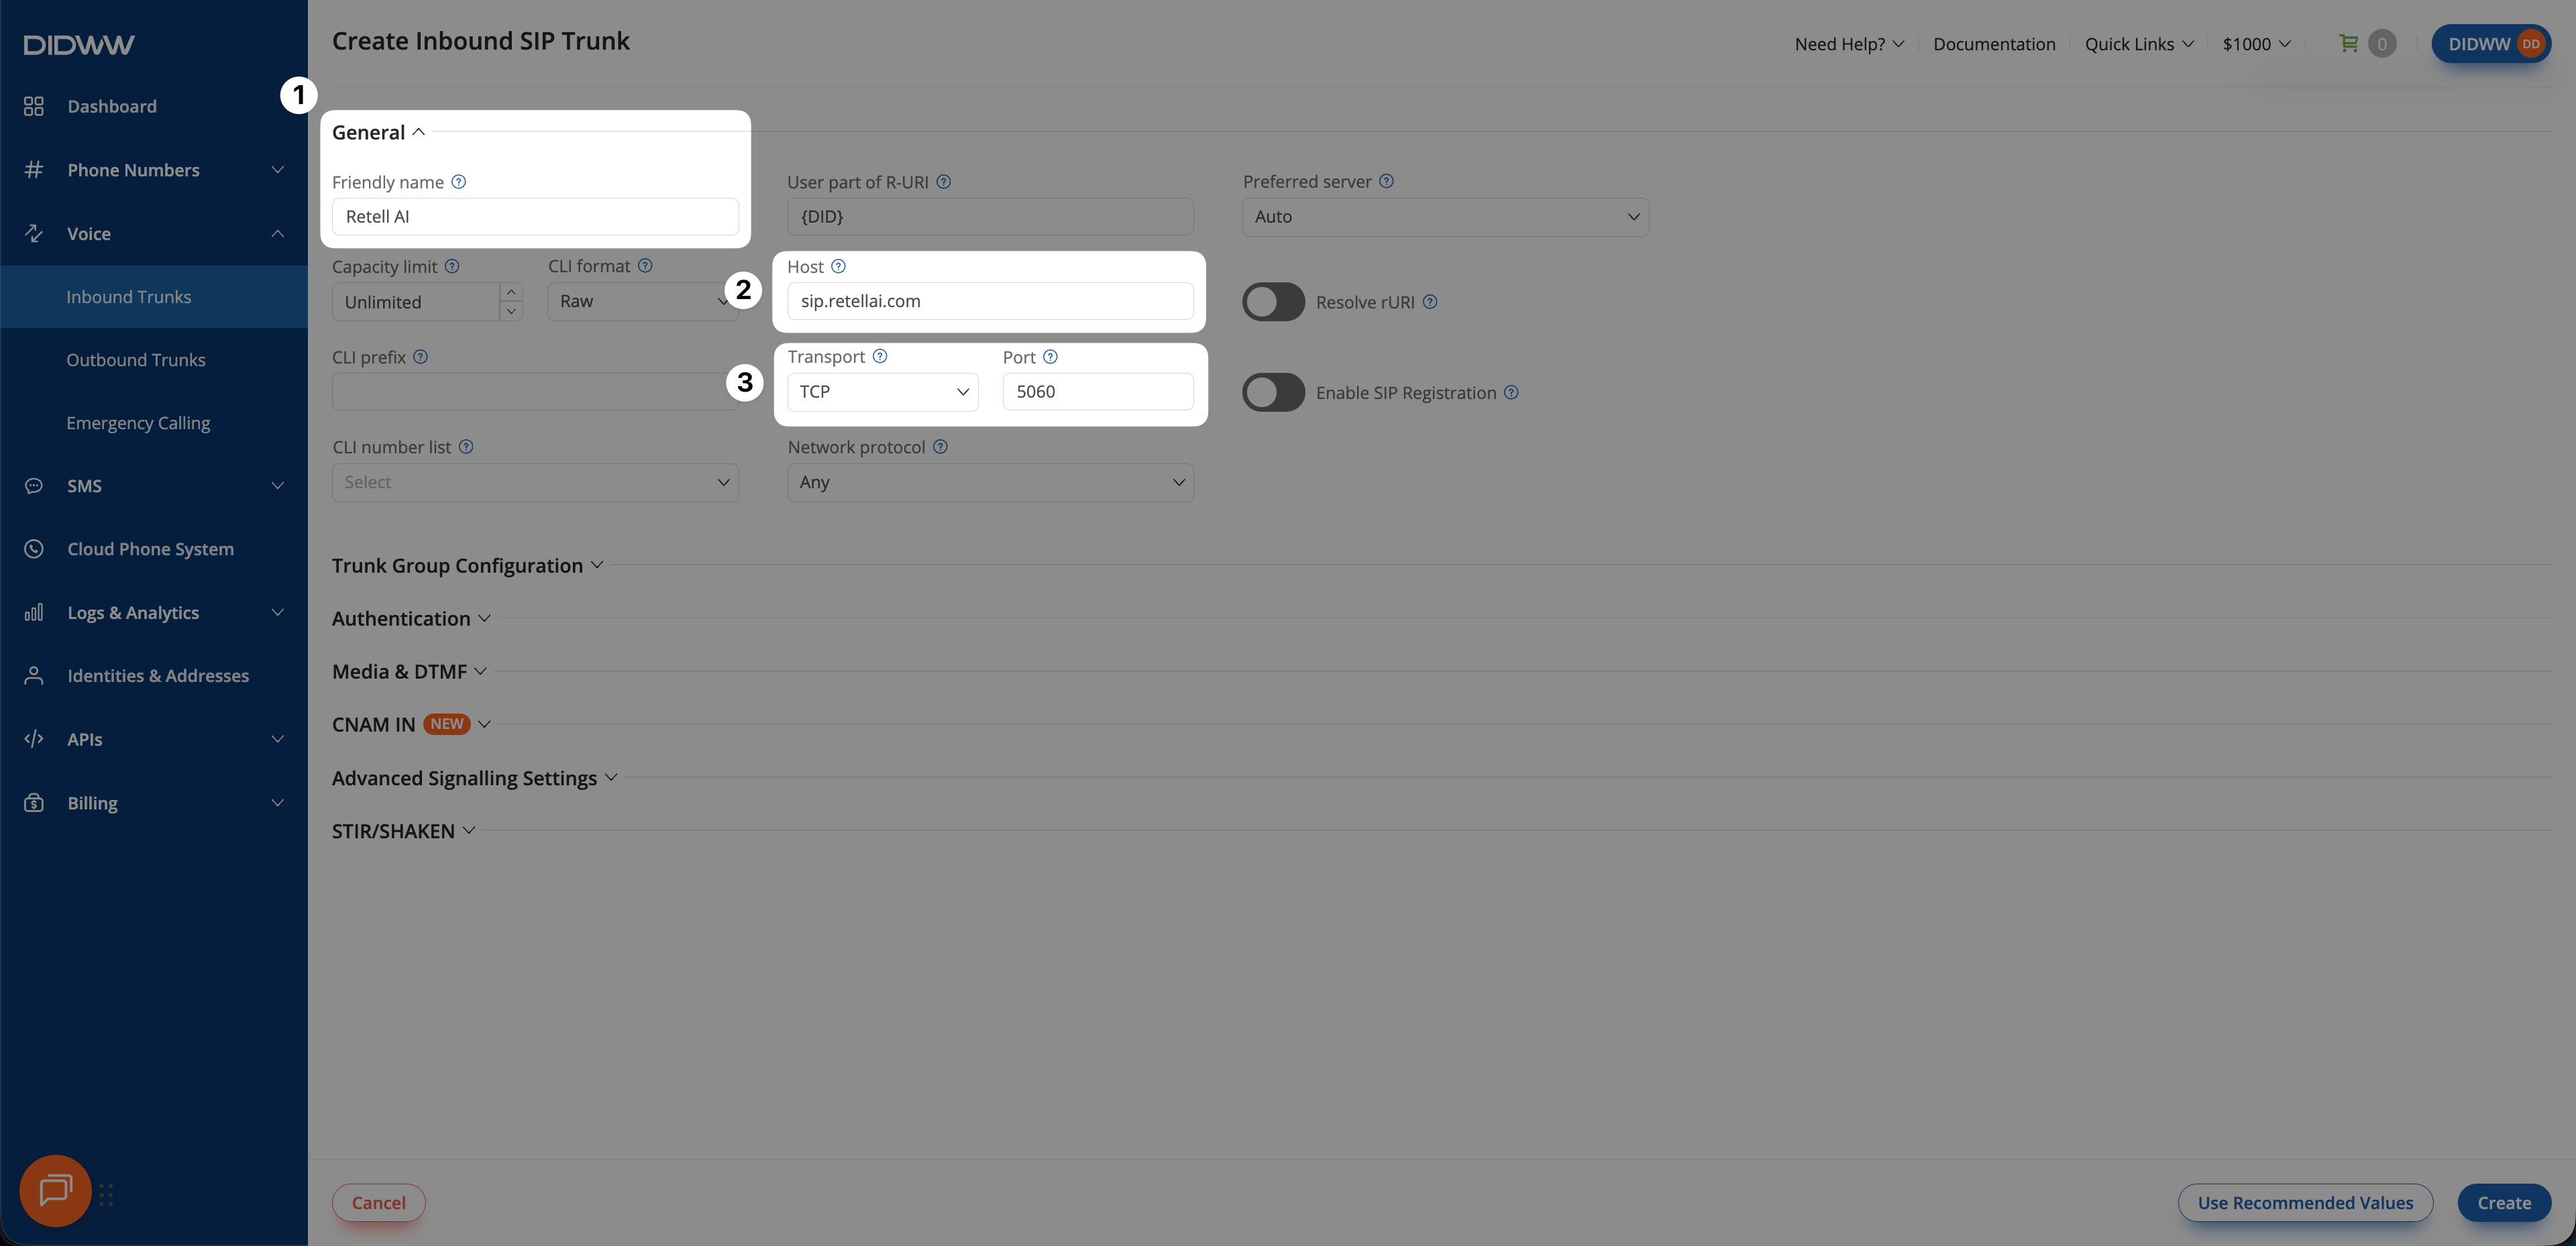
Fig. 2. SIP trunk configured for Retell AI#
Step 3: Click Create and Save Inbound SIP Trunk Configuration#
When all required fields in the Create Inbound SIP Trunk are filled, click Create to save your inbound SIP trunk.
Note
For advanced SIP trunk configuration, see Advanced Inbound SIP Trunk documentation.
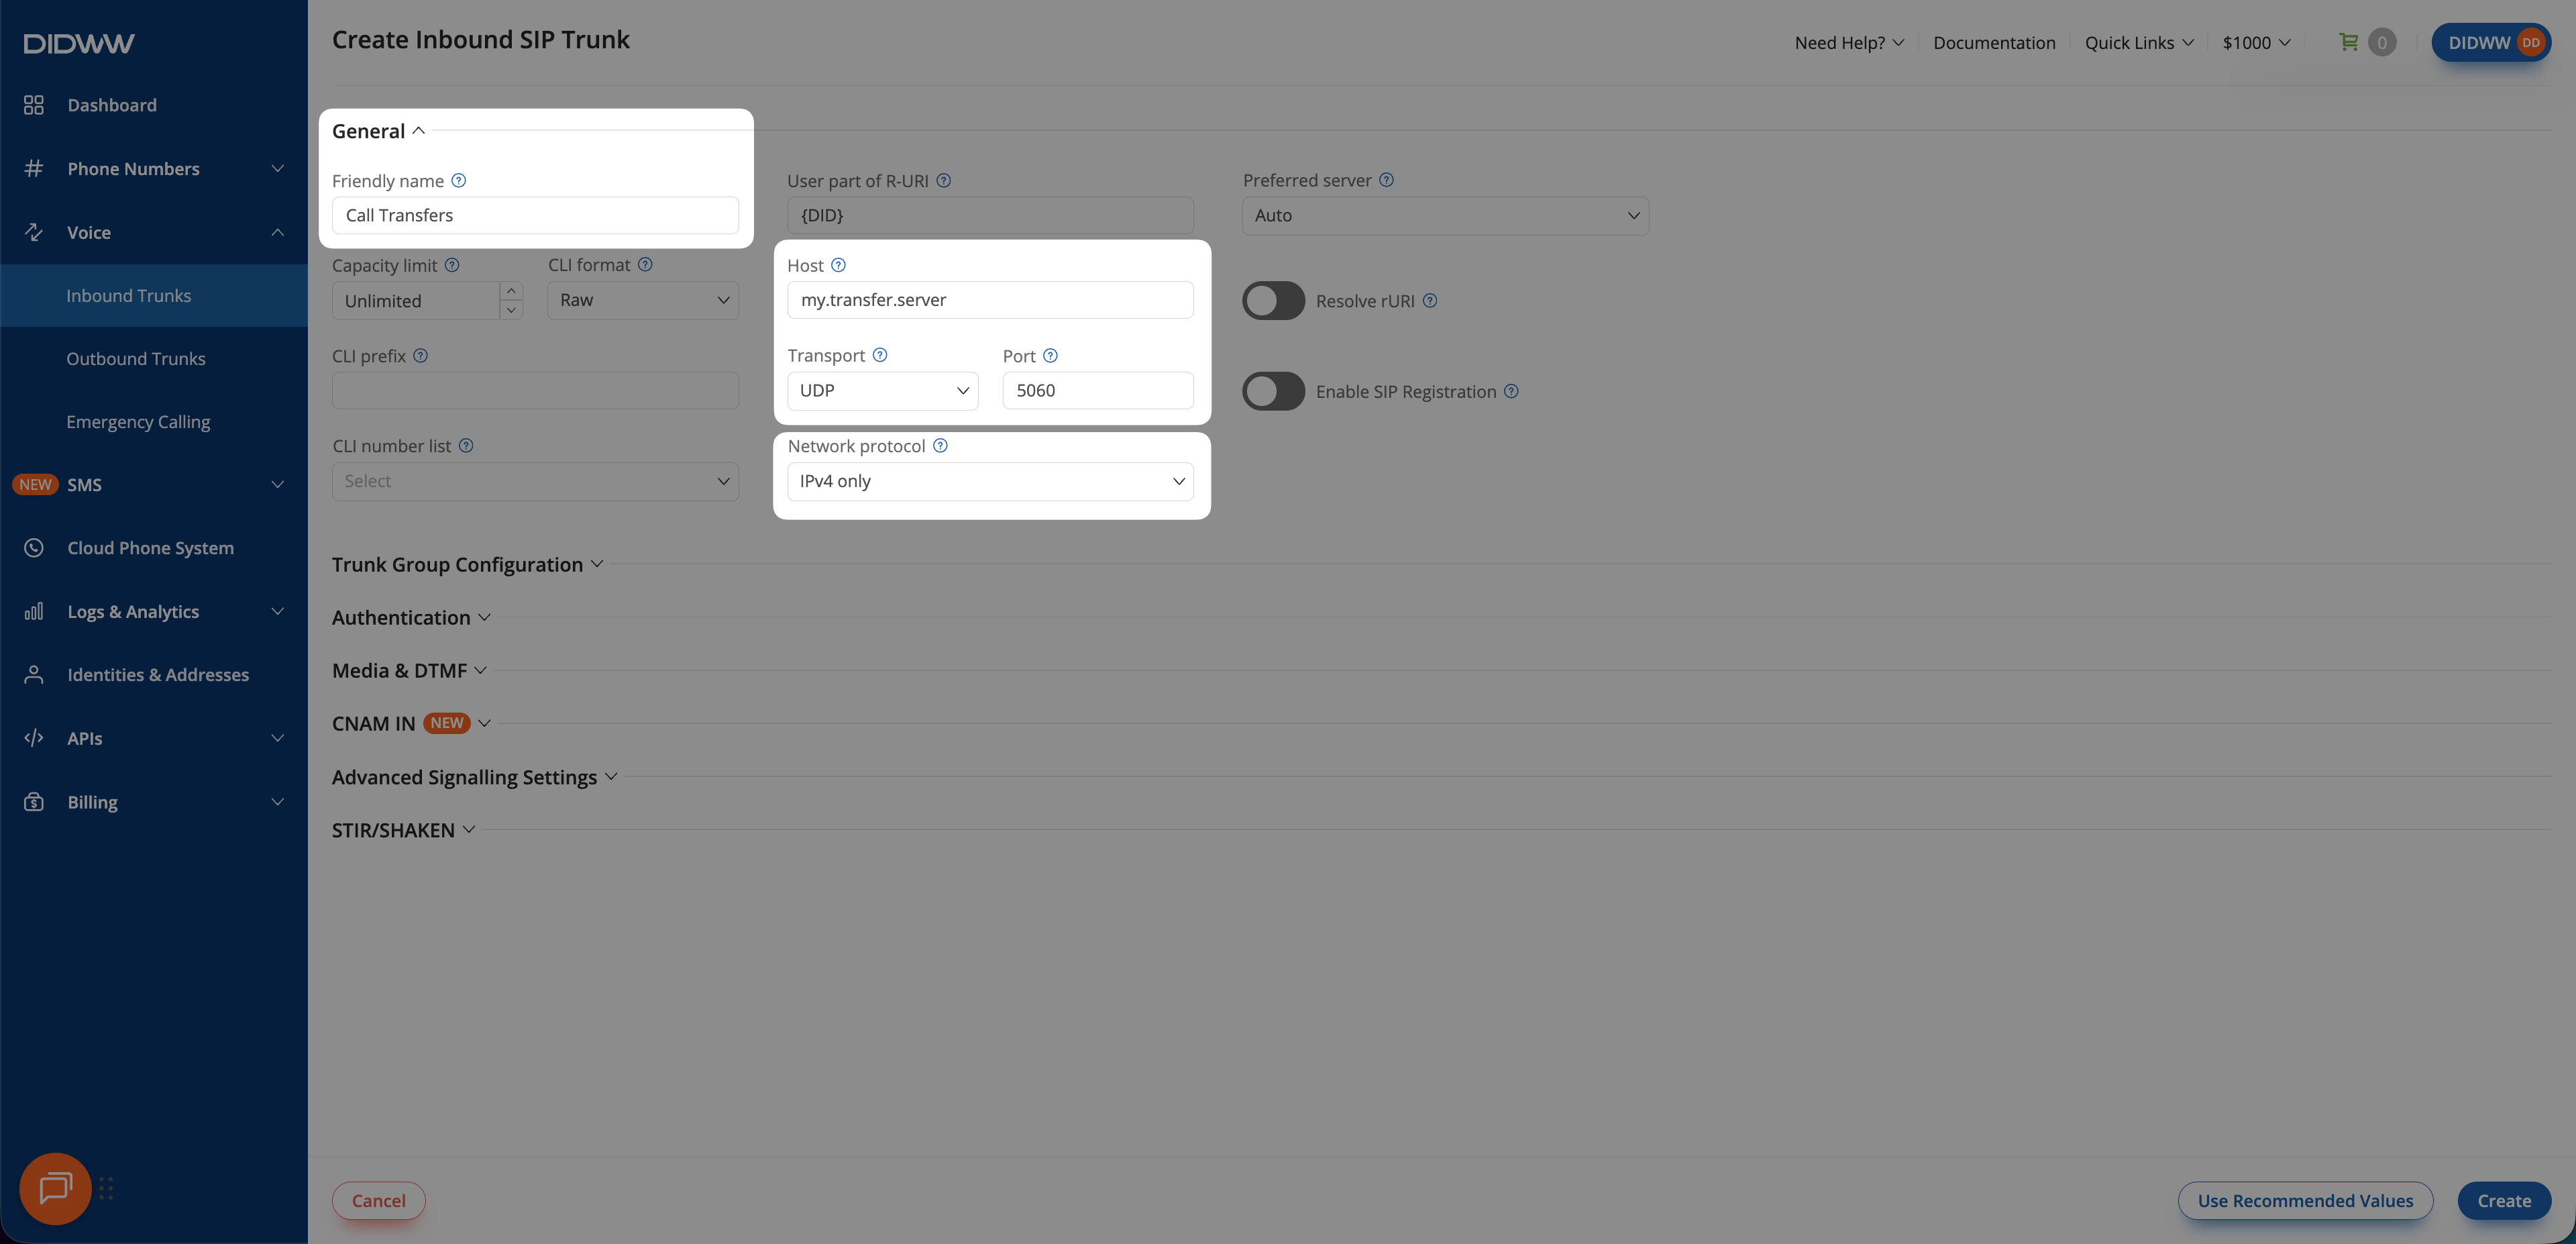
Fig. 3. Create the Inbound SIP Trunk#
Step 4: Assign Inbound SIP Trunk to Your DID Numbers#
After creating the Inbound SIP Trunk for Retell AI, assign it to the DID number(s) that will deliver incoming calls to your Retell AI agent.
In the DIDWW User Panel, go to Phone Numbers > My Numbers.
Select the DID number(s) you want to assign to the inbound SIP trunk.
At the bottom of the page, click Batch Actions > Update Trunks.
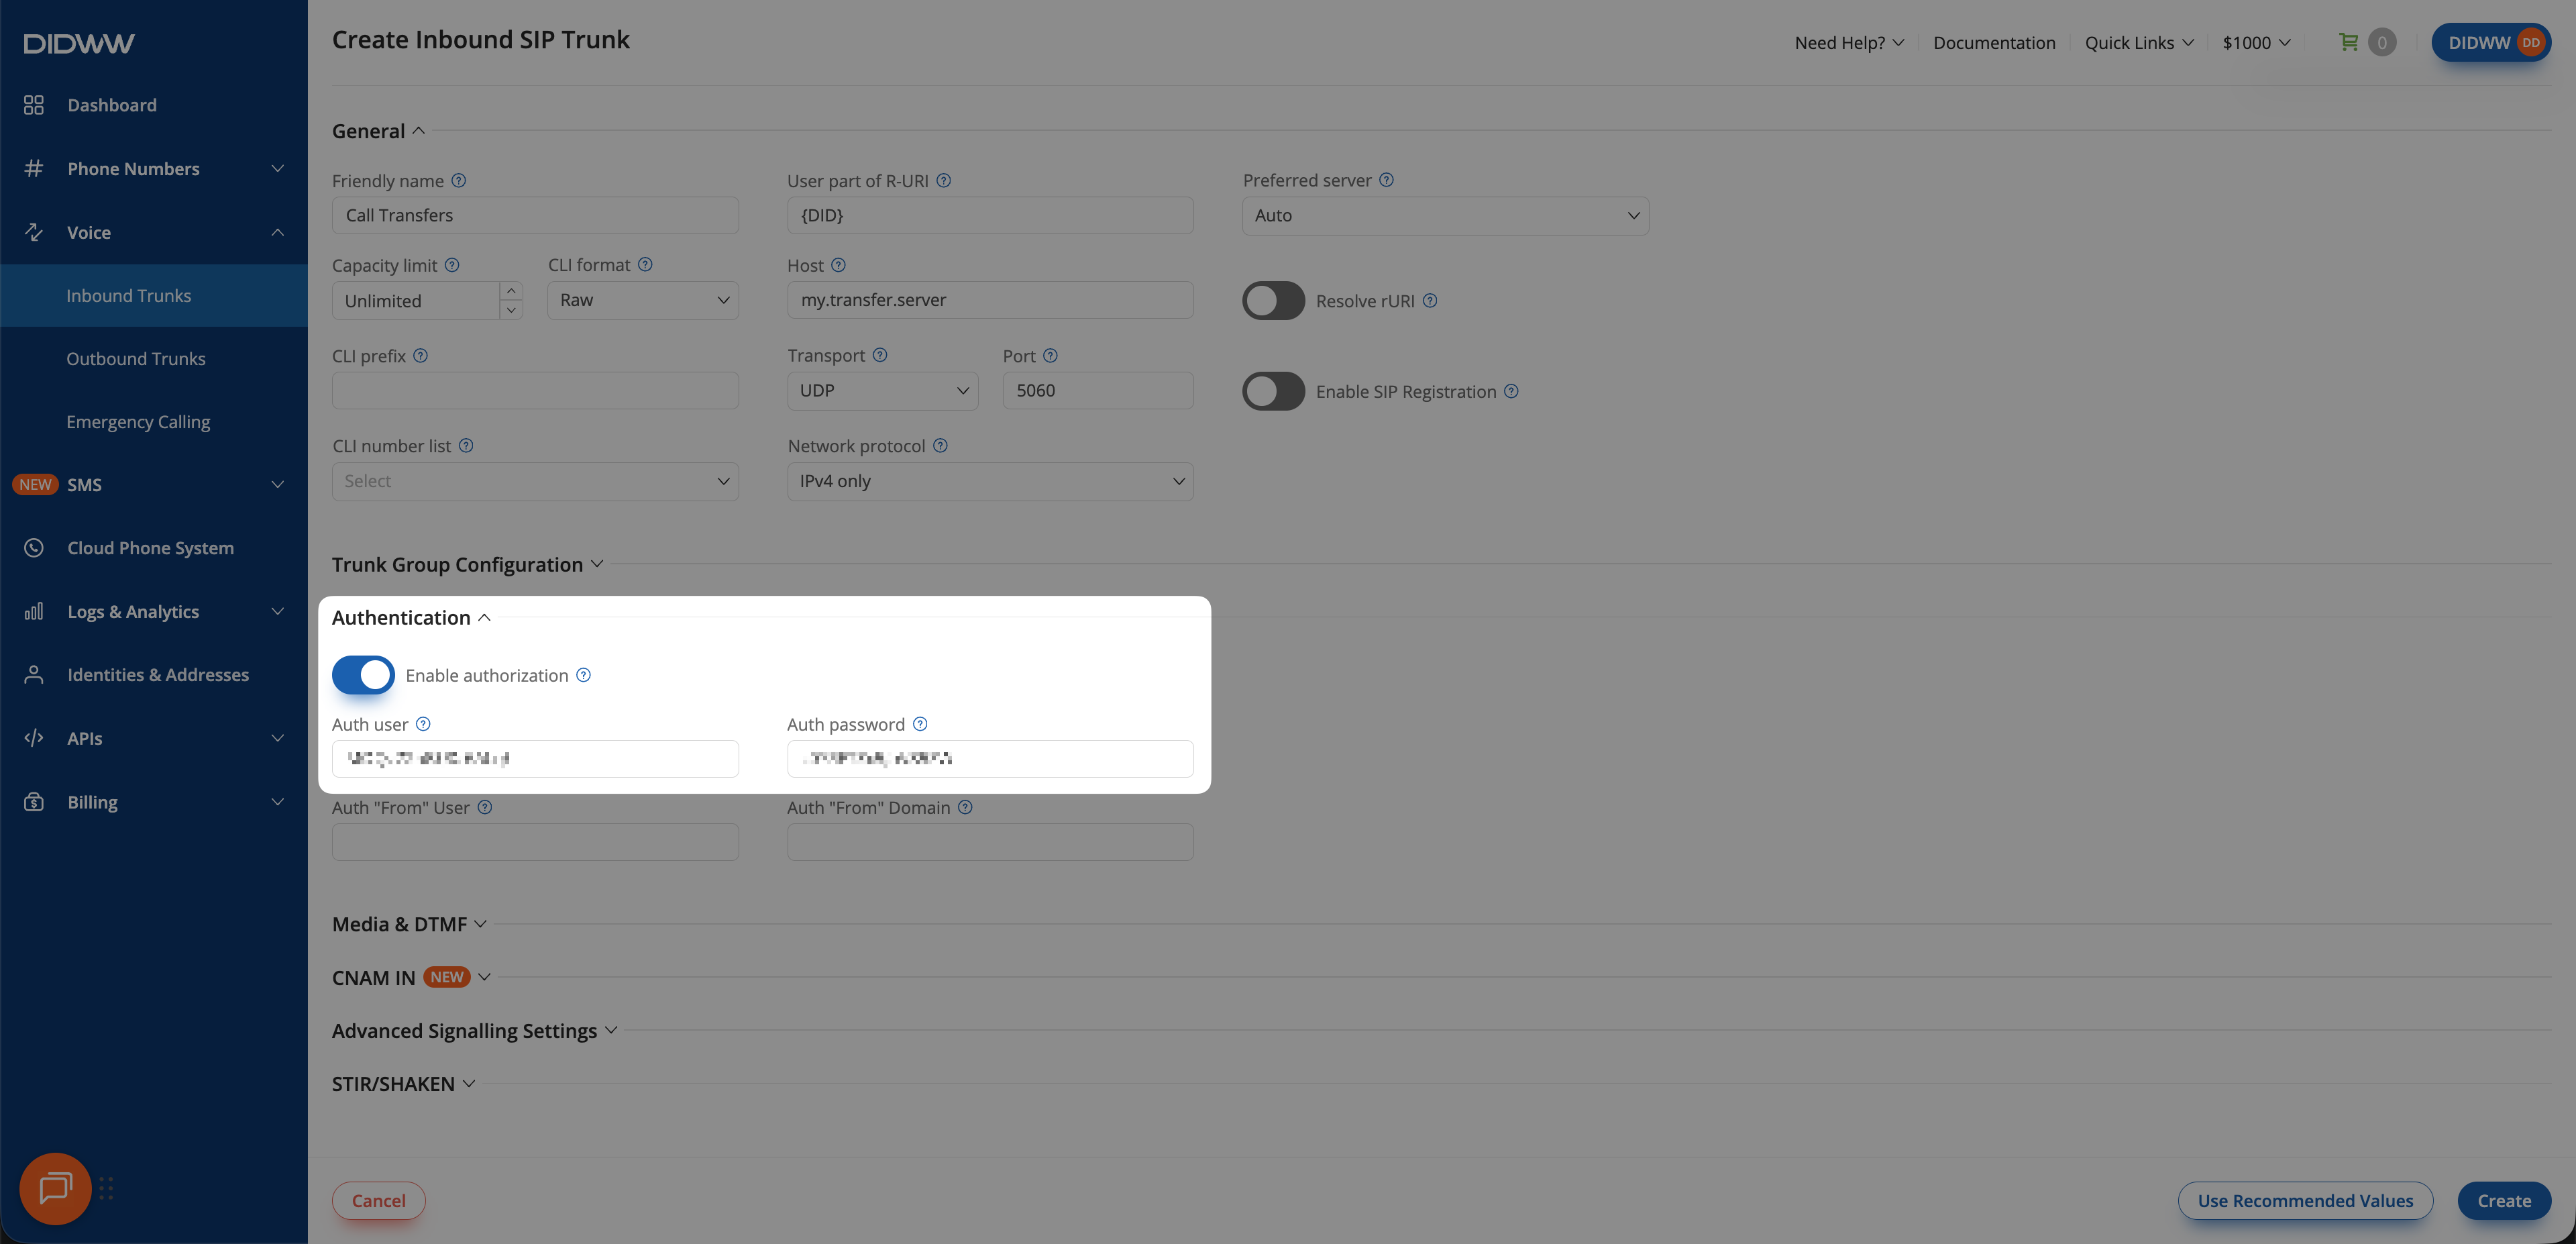
Fig. 4. Selecting Update Trunks from the Batch Actions menu#
From the dropdown menu, choose the Retell AI SIP trunk you created earlier.
Click Confirm to apply the changes.

Fig. 5. Assigning the newly created SIP trunk to the selected DID(s)#
2. Enable Outbound Calling from Retell AI Through DIDWW#
Configure an Outbound SIP Trunk in the DIDWW User Panel to allow Retell AI agents to place outbound calls through DIDWW. This trunk provides the SIP credentials and routing settings required for outbound calls to external phone numbers.
Before You Begin#
Access to DIDWW Outbound Trunks is required for making outbound calls. See Get Access to DIDWW Outbound Termination.
Step 1: Create New Outbound Voice Trunk#
In the DIDWW User Panel , go to Voice > Outbound Trunks.
Click Create New.
Fig. 6. Creating a new outbound SIP trunk#
Step 2: Configure Authentication#
Update the Friendly Name (e.g.,
Retell AI).Keep the default Credentials & IP-based authentication method selected. The SIP digest credentials (username and password) will be provided after the trunk is created.
In Allowed SIP IP addresses, enter the public IP address subnet from which Retell AI will send outbound SIP traffic:
18.98.16.120/30.
Note
Retell AI SIP traffic originates from IP ranges that may vary depending on your plan or region.
Refer to the official Retell AI documentation for the most up-to-date information:
Retell AI SIP Trunking IP Information
Warning
You can allow all traffic by adding 0.0.0.0/0, which removes all IP restrictions.
Although SIP Digest Authentication will still verify requests using valid credentials, this setup is not recommended.
Restrict access to known Retell AI IPs whenever possible.
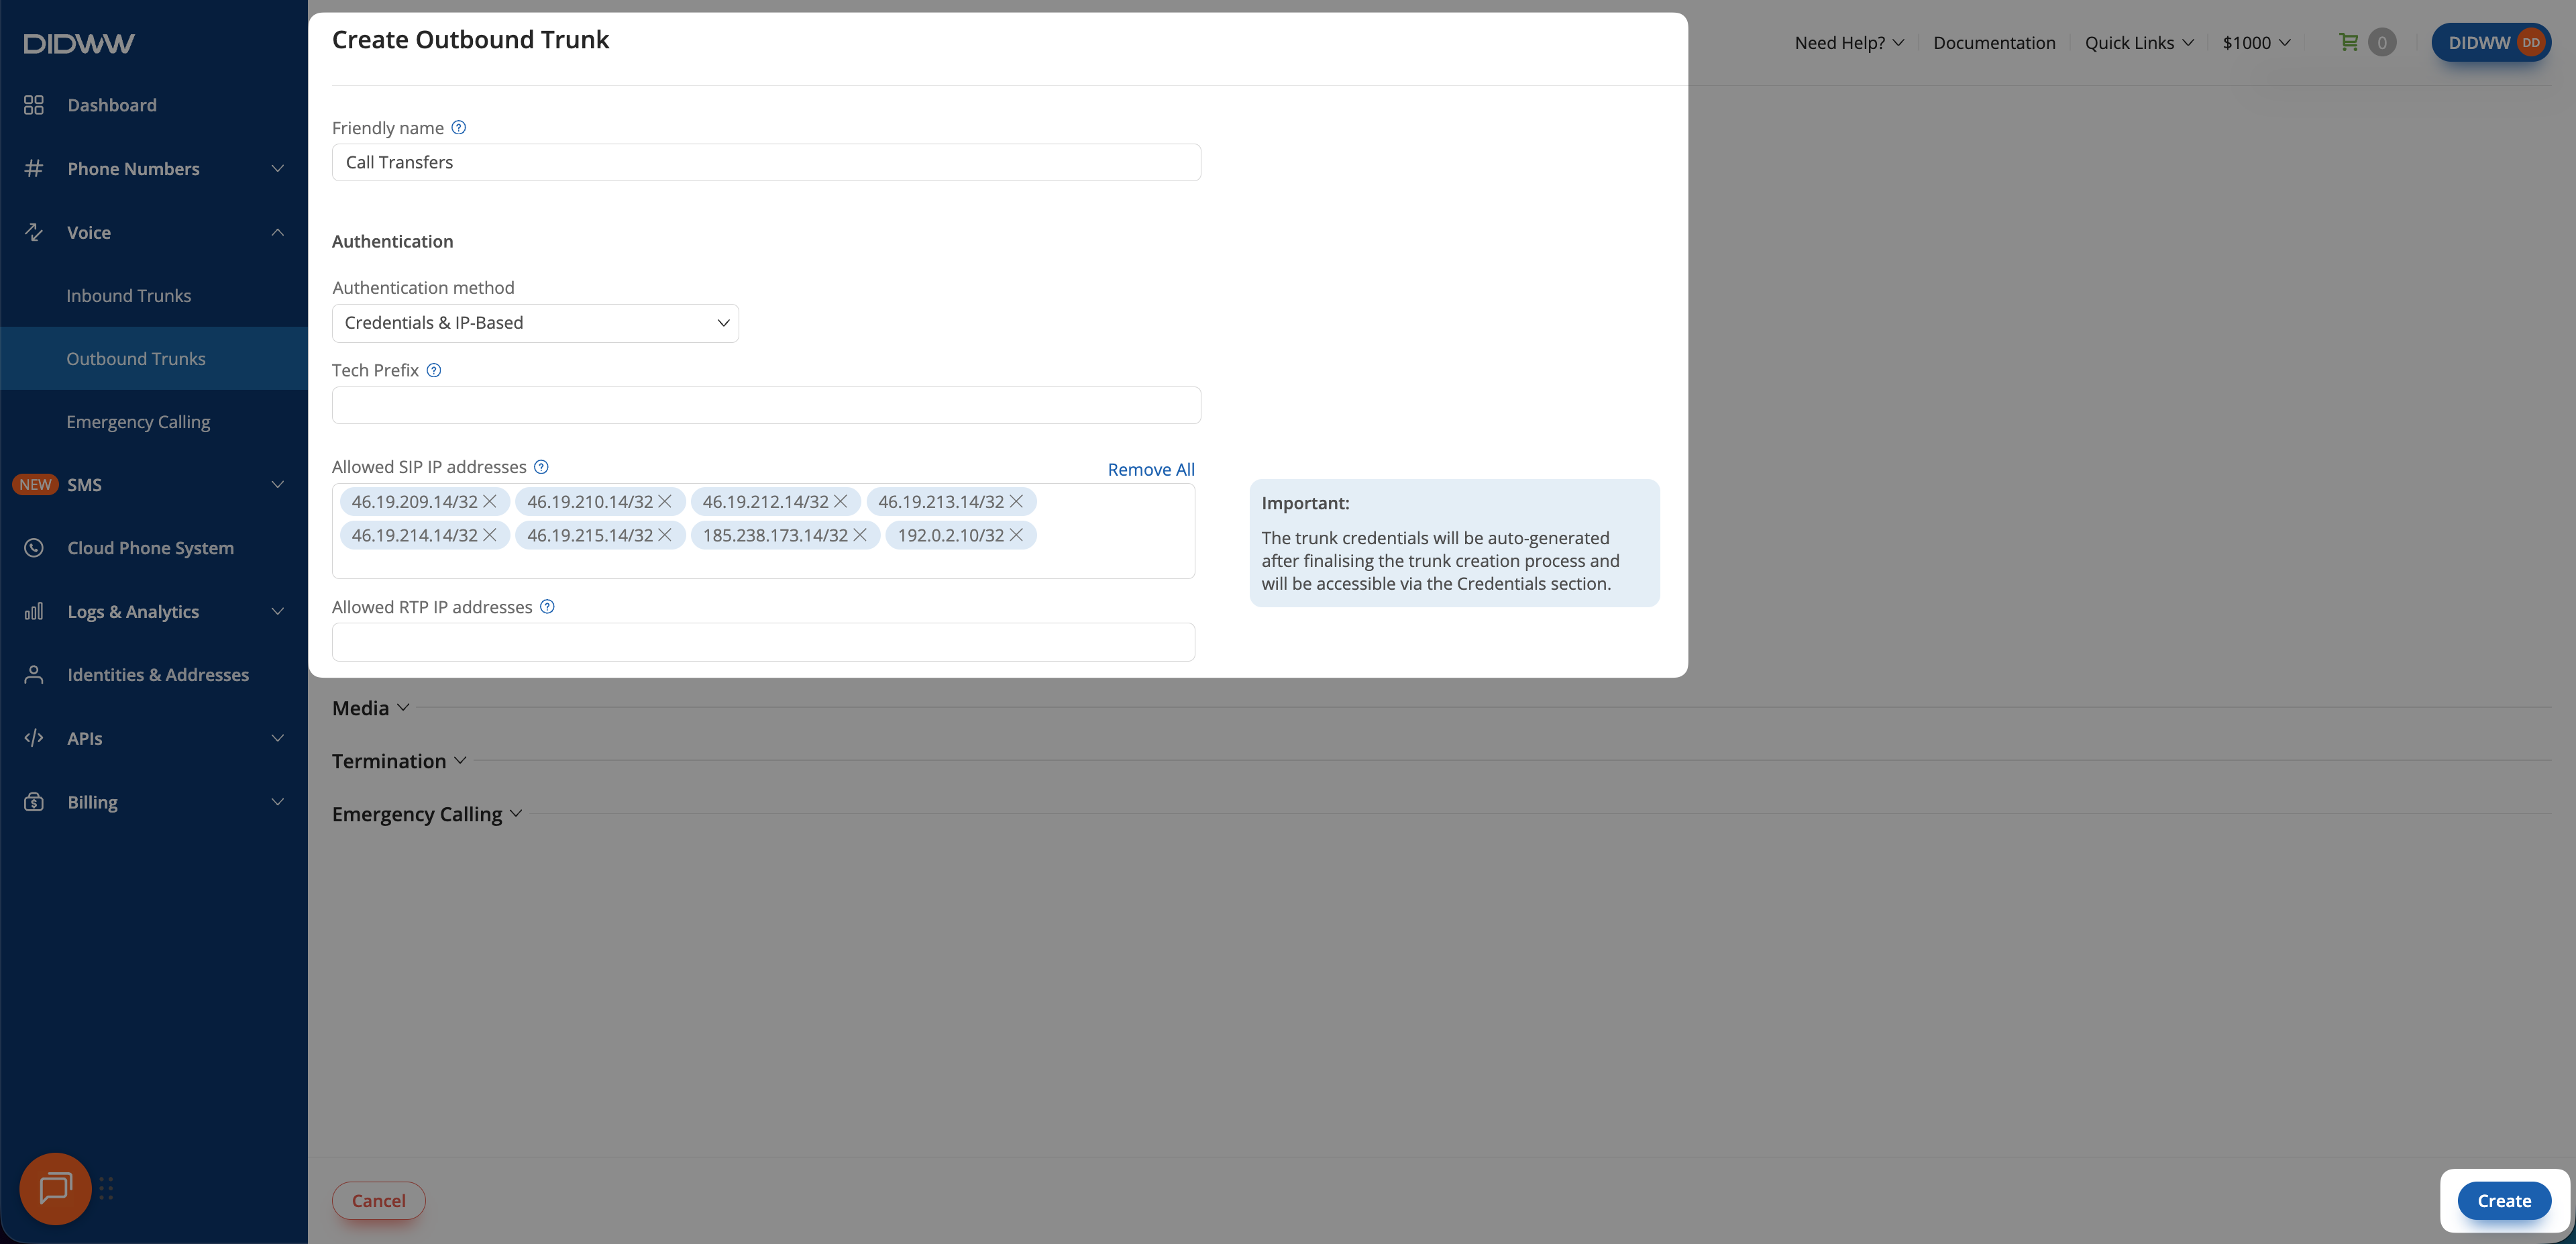
Fig. 7. Entering allowed SIP IP addresses for outbound authentication#
Step 3: Click Create and Save Outbound SIP Trunk Configuration#
When all required fields in the Create Outbound SIP Trunk are filled, click Create to save your outbound SIP trunk.
Note
For advanced outbound SIP trunk configuration, see Outbound SIP Trunk Guide.
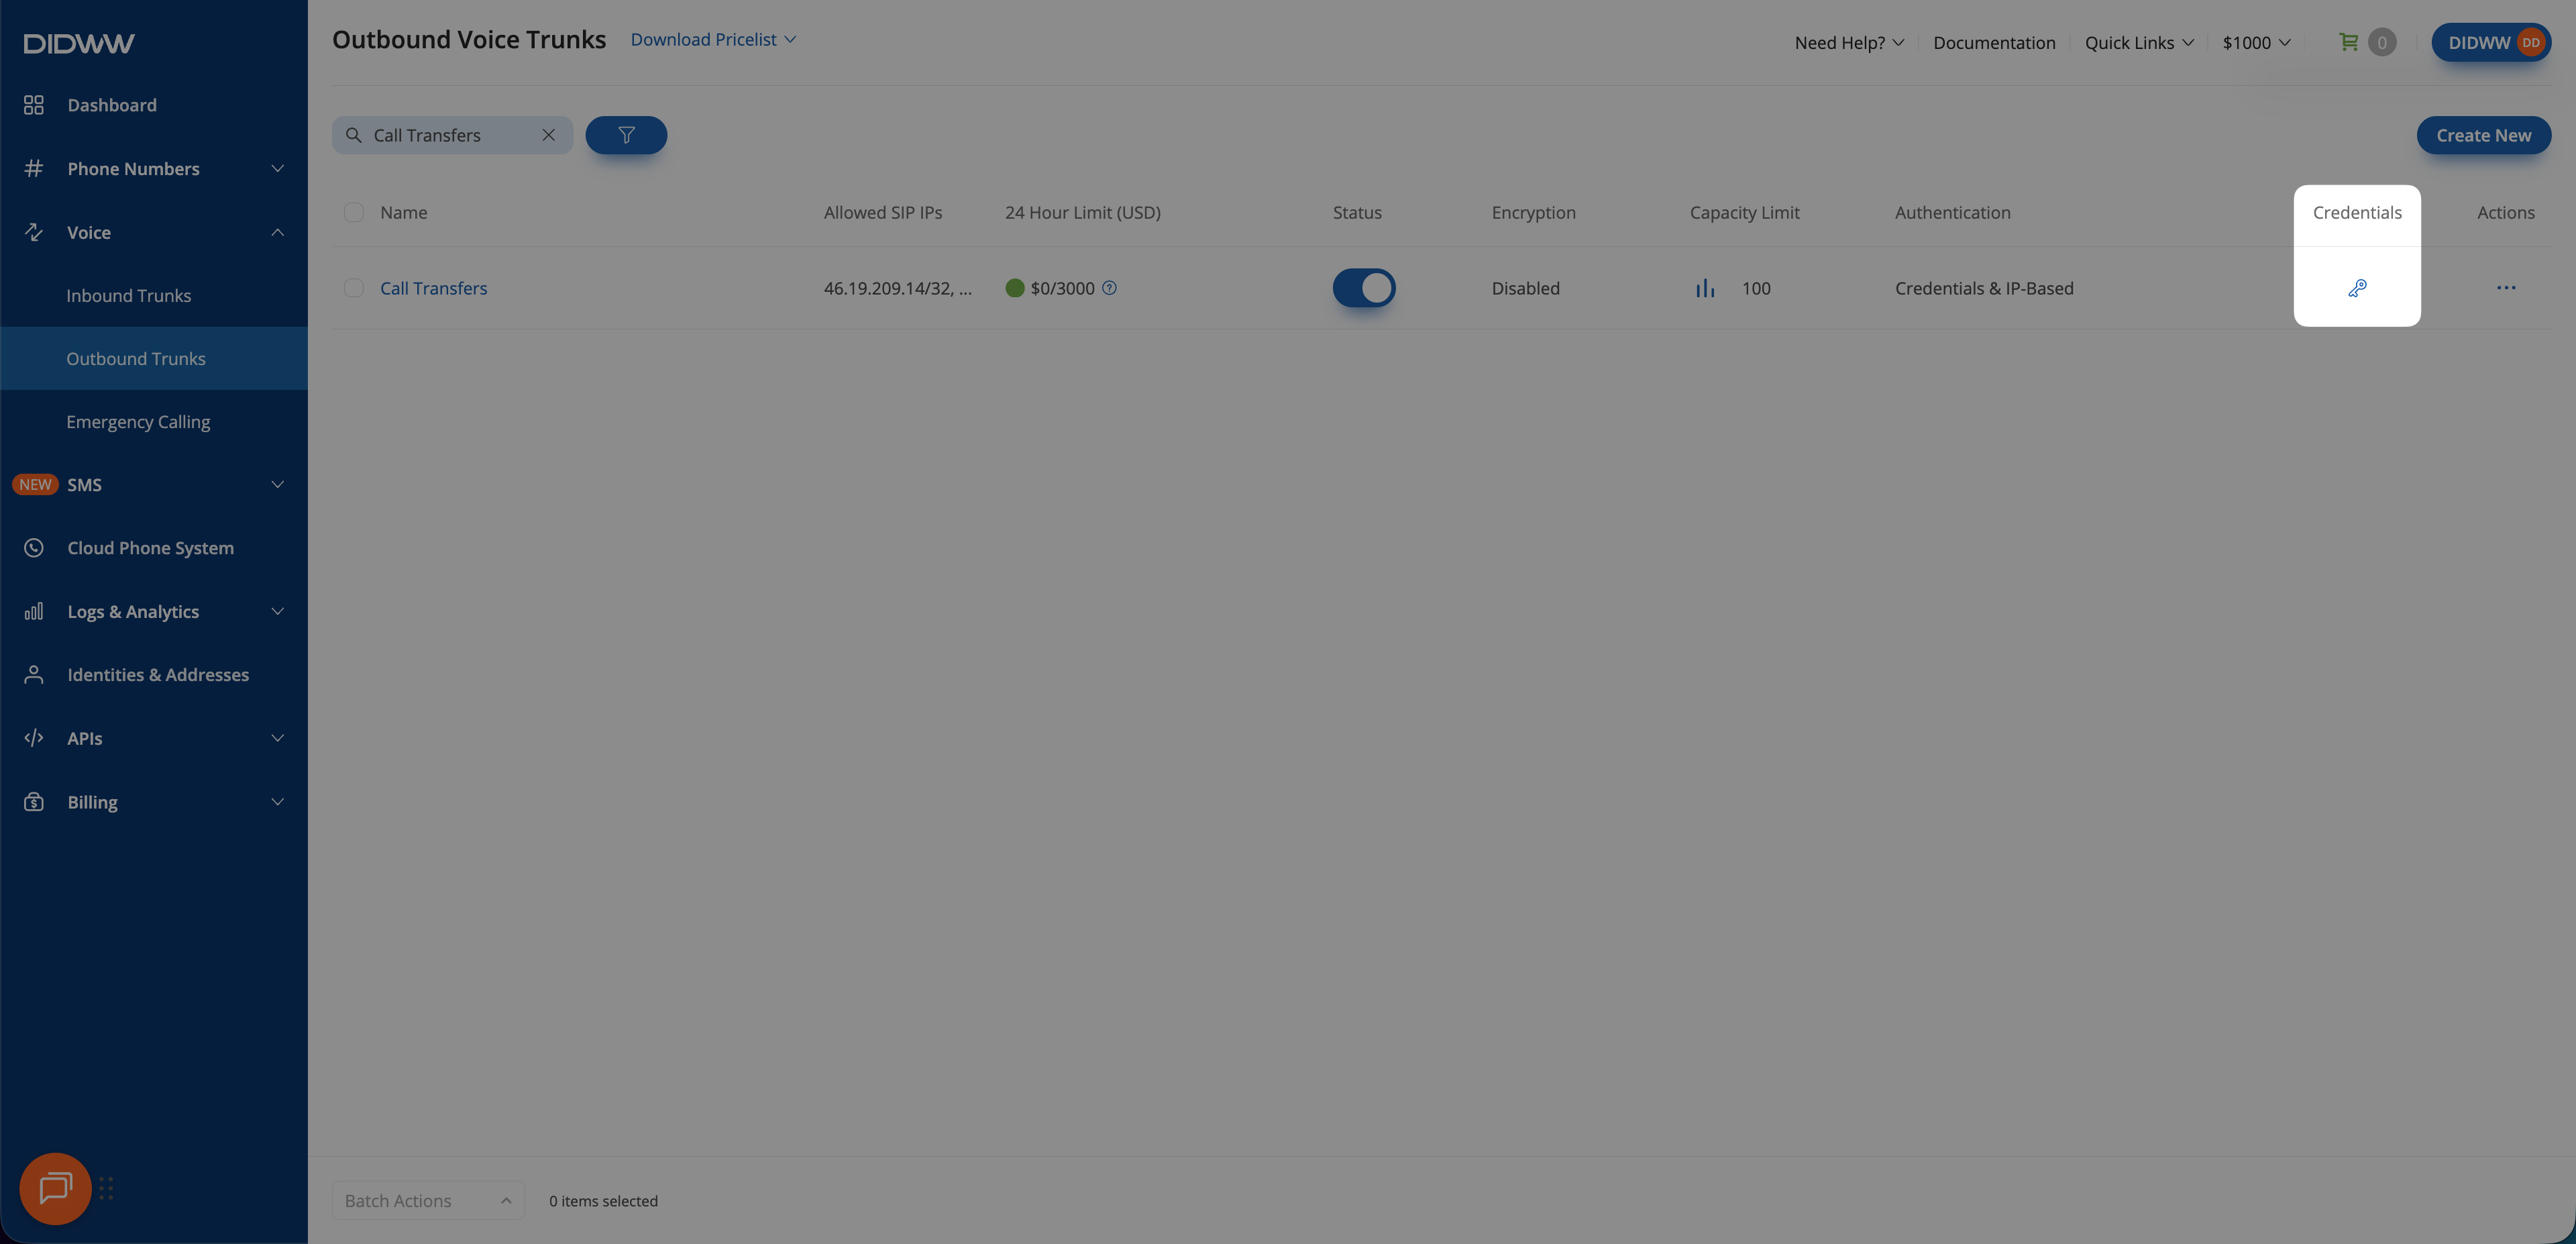
Fig. 8. Outbound SIP trunk created and ready for use#
Step 4: View Outbound Trunk Credentials#
When outbound trunk is created you can view its credentials by selecting the key icon in the Credentials column on the Outbound Trunks page.
Go to Voice > Outbound Trunks.
Locate your outbound trunk and click the key icon in the Credentials column.
The trunk credentials will appear, showing the Username and Password (click the eye icon to reveal the password).
Copy and securely store these credentials. You will need them later when configuring Retell AI in Step 2: Enter SIP Trunking Details.
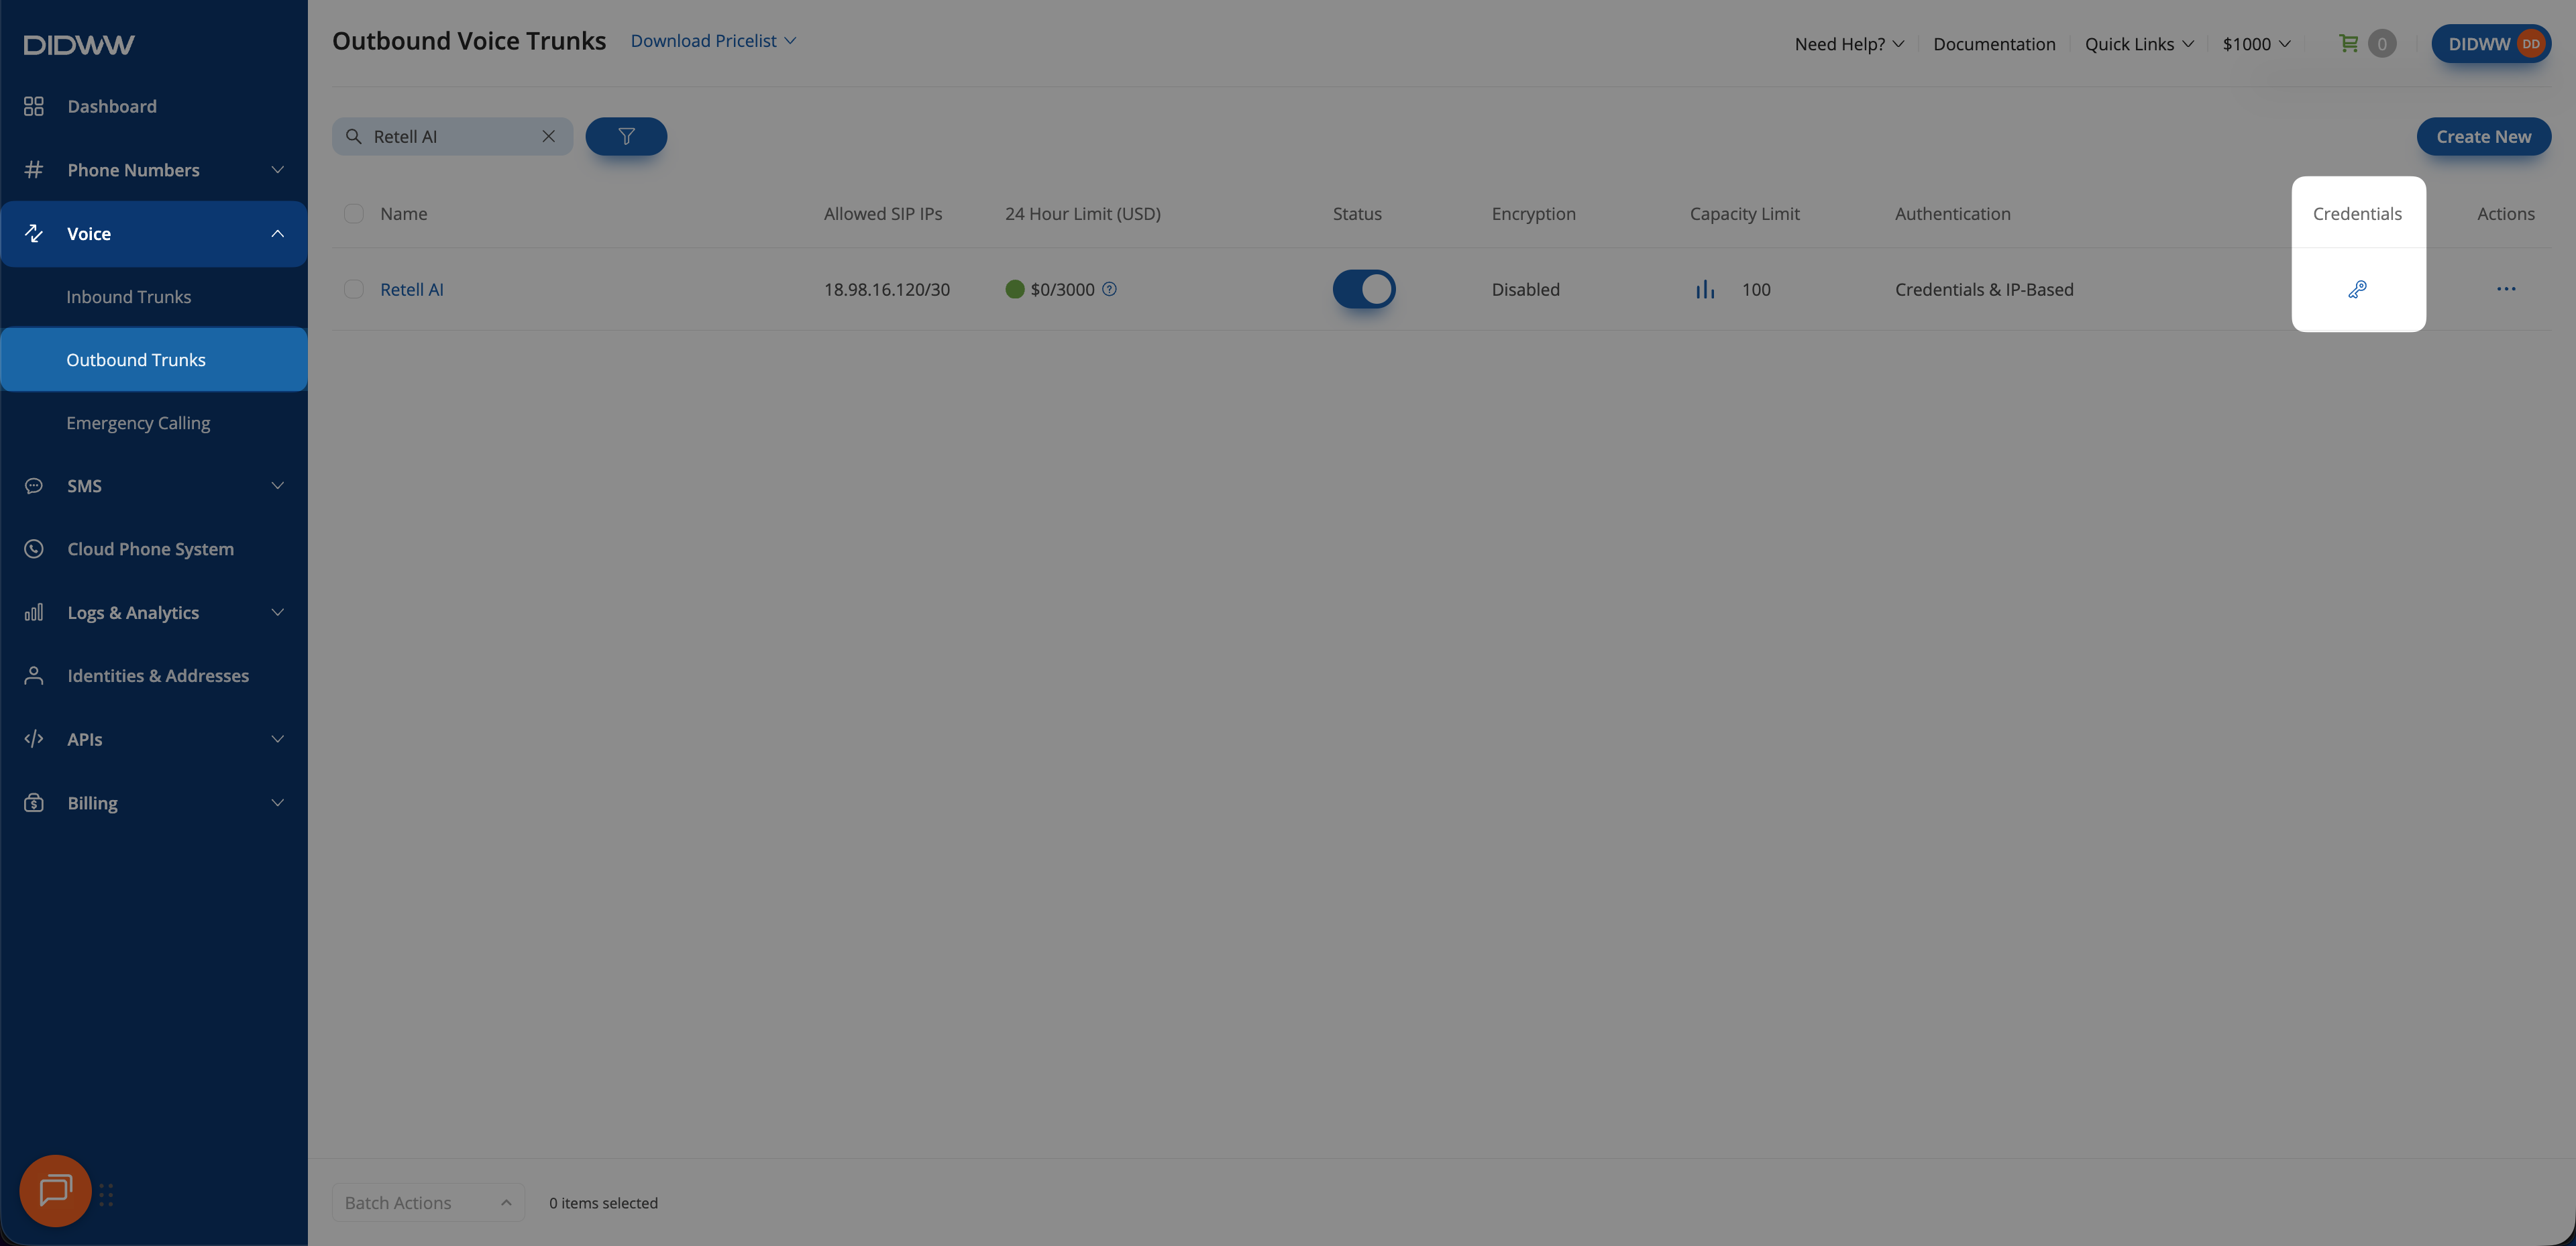
Fig. 9. Opening the outbound trunk credentials view#
3. Connect DIDWW Numbers to Retell AI#
To connect your DIDWW phone numbers with Retell AI, you’ll configure the DIDWW SIP trunking details inside Retell AI. This setup imports your existing DID numbers and assigns an AI agent to handle both incoming and outgoing calls.
Before You Begin#
A Retell AI account is required. Sign in to Retell AI or create an account if needed.
AI Voice Agent is required in Retell AI. See the Retell AI Quickstart Guide for guidance on creating an agent.
Step 1: Open Phone Numbers Page#
In the Retell AI dashboard, go to Deploy > Phone Numbers.
Click the + button and select Connect to your number via SIP trunking.
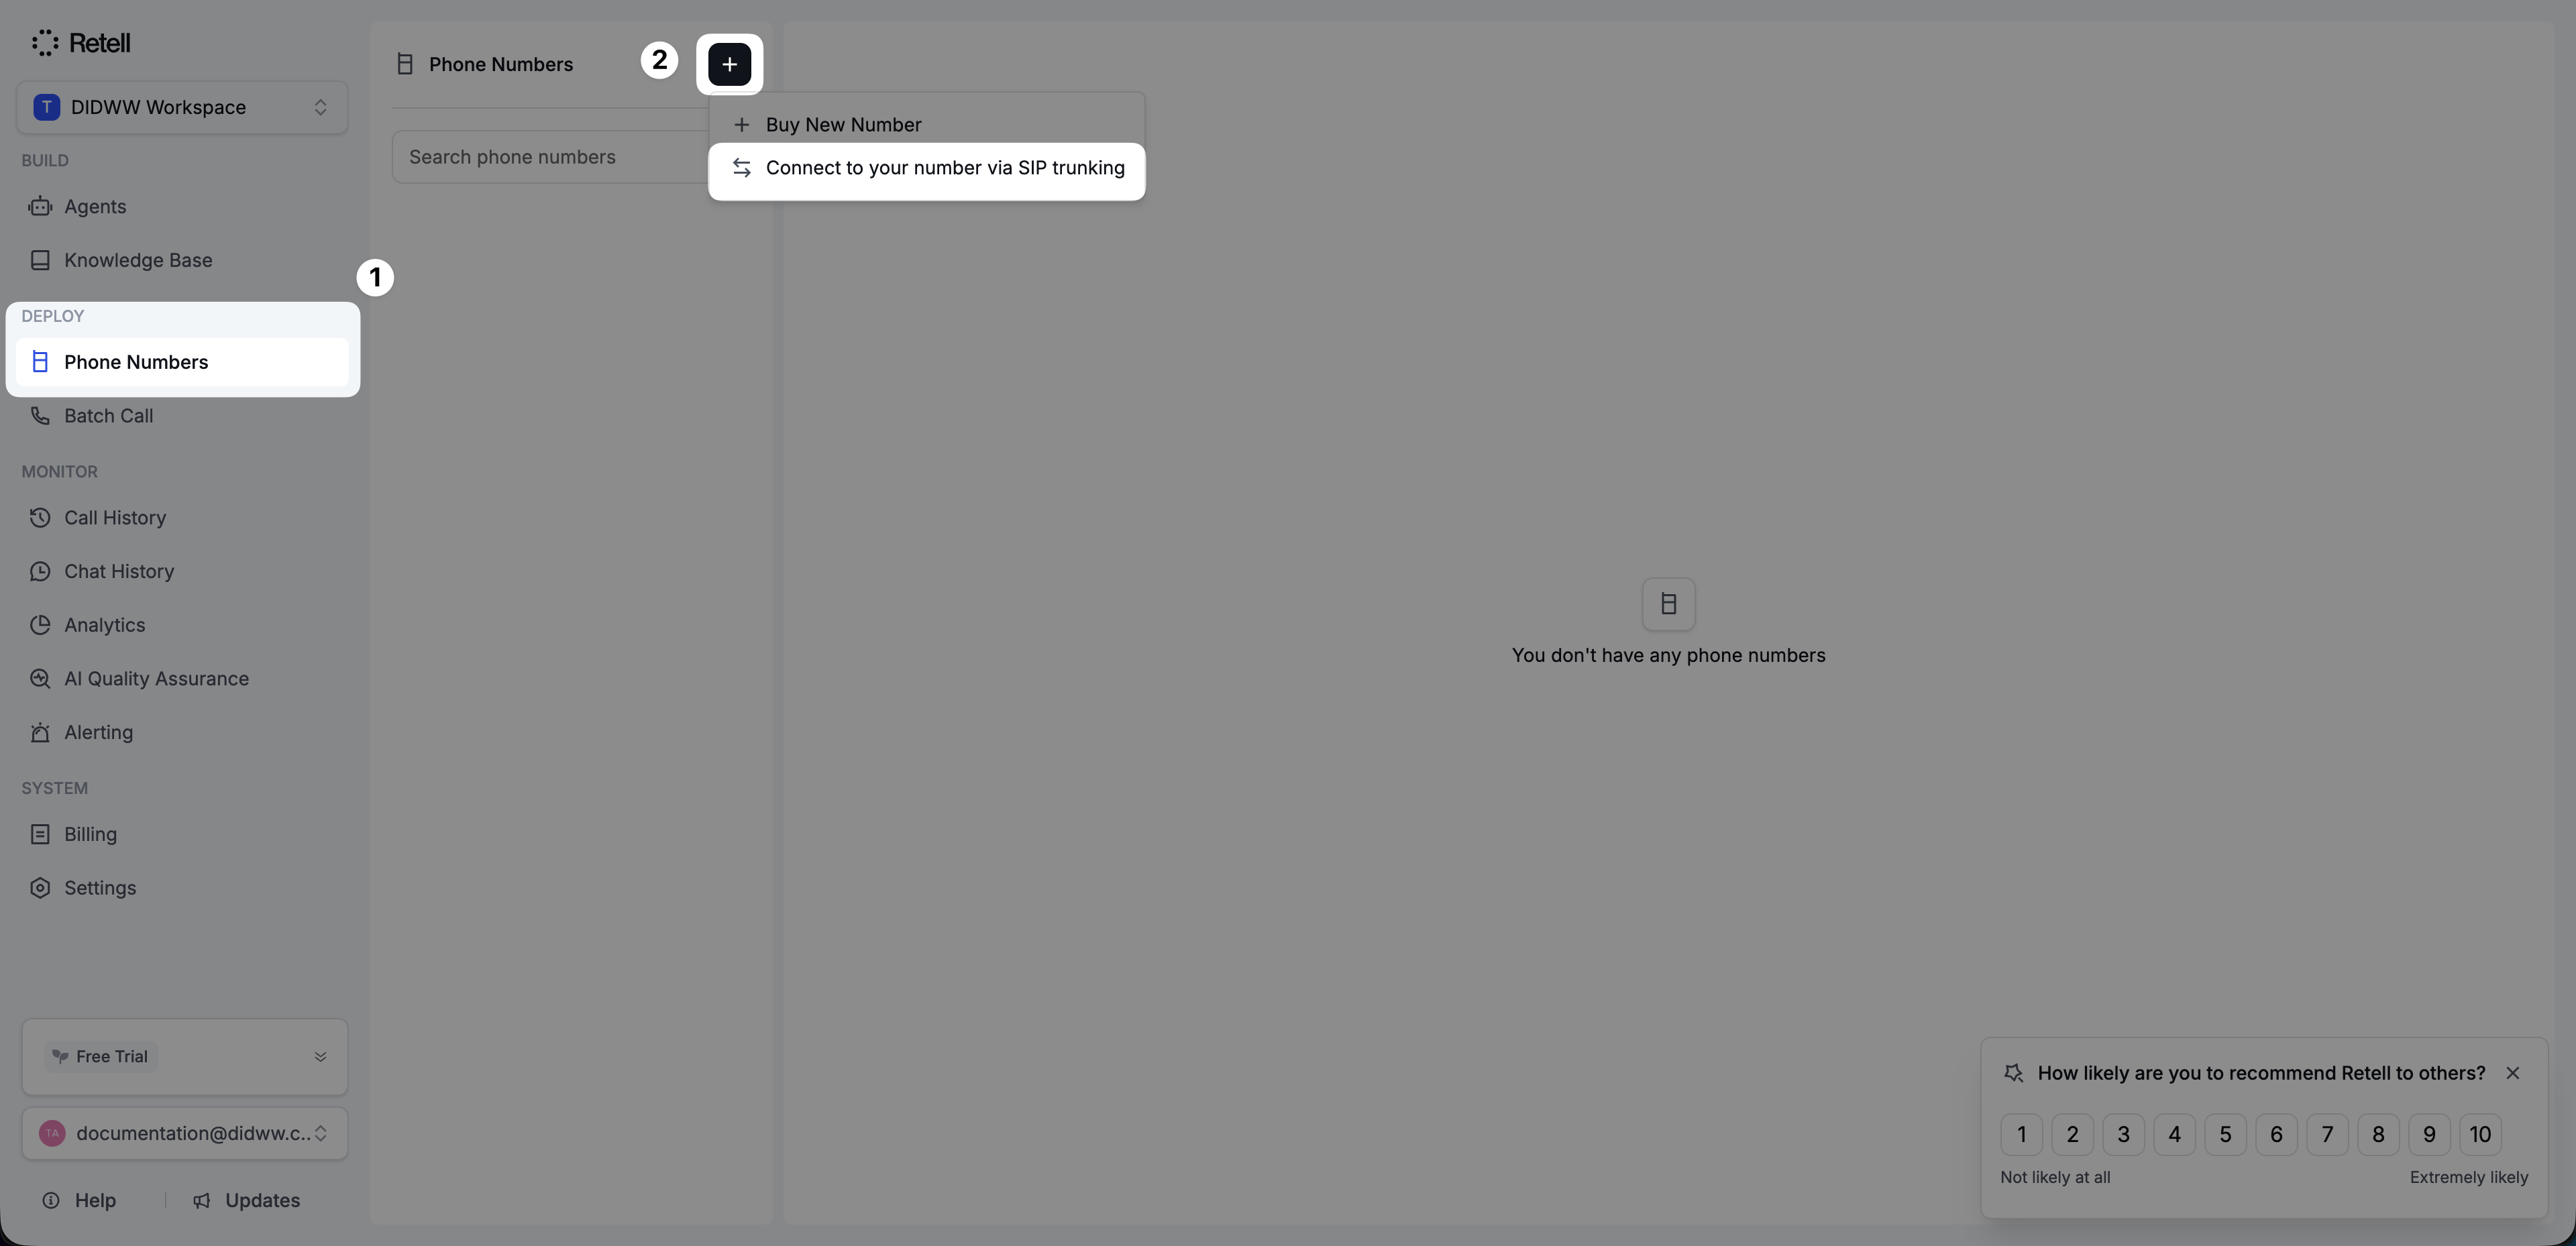
Fig. 10. Starting SIP trunking configuration in Retell AI#
Step 2: Enter SIP Trunking Details#
In the SIP trunk configuration window, enter your DIDWW number and outbound routing details.
Enter your Phone Number in E.164 format without the
+symbol (e.g.,18489005419).In Termination URI, enter the DIDWW outbound signaling endpoint (e.g.,
out.didww.com).Enter the SIP Trunk Username and SIP Trunk Password from Step 4: View Outbound Trunk Credentials.
(Optional) Enter a Nickname to identify the number (e.g.,
DIDWW Number).Select Outbound Transport (e.g.,
TCP).Click Save to add your DIDWW number to Retell AI.
After saving, the number will appear in the Phone Numbers list.
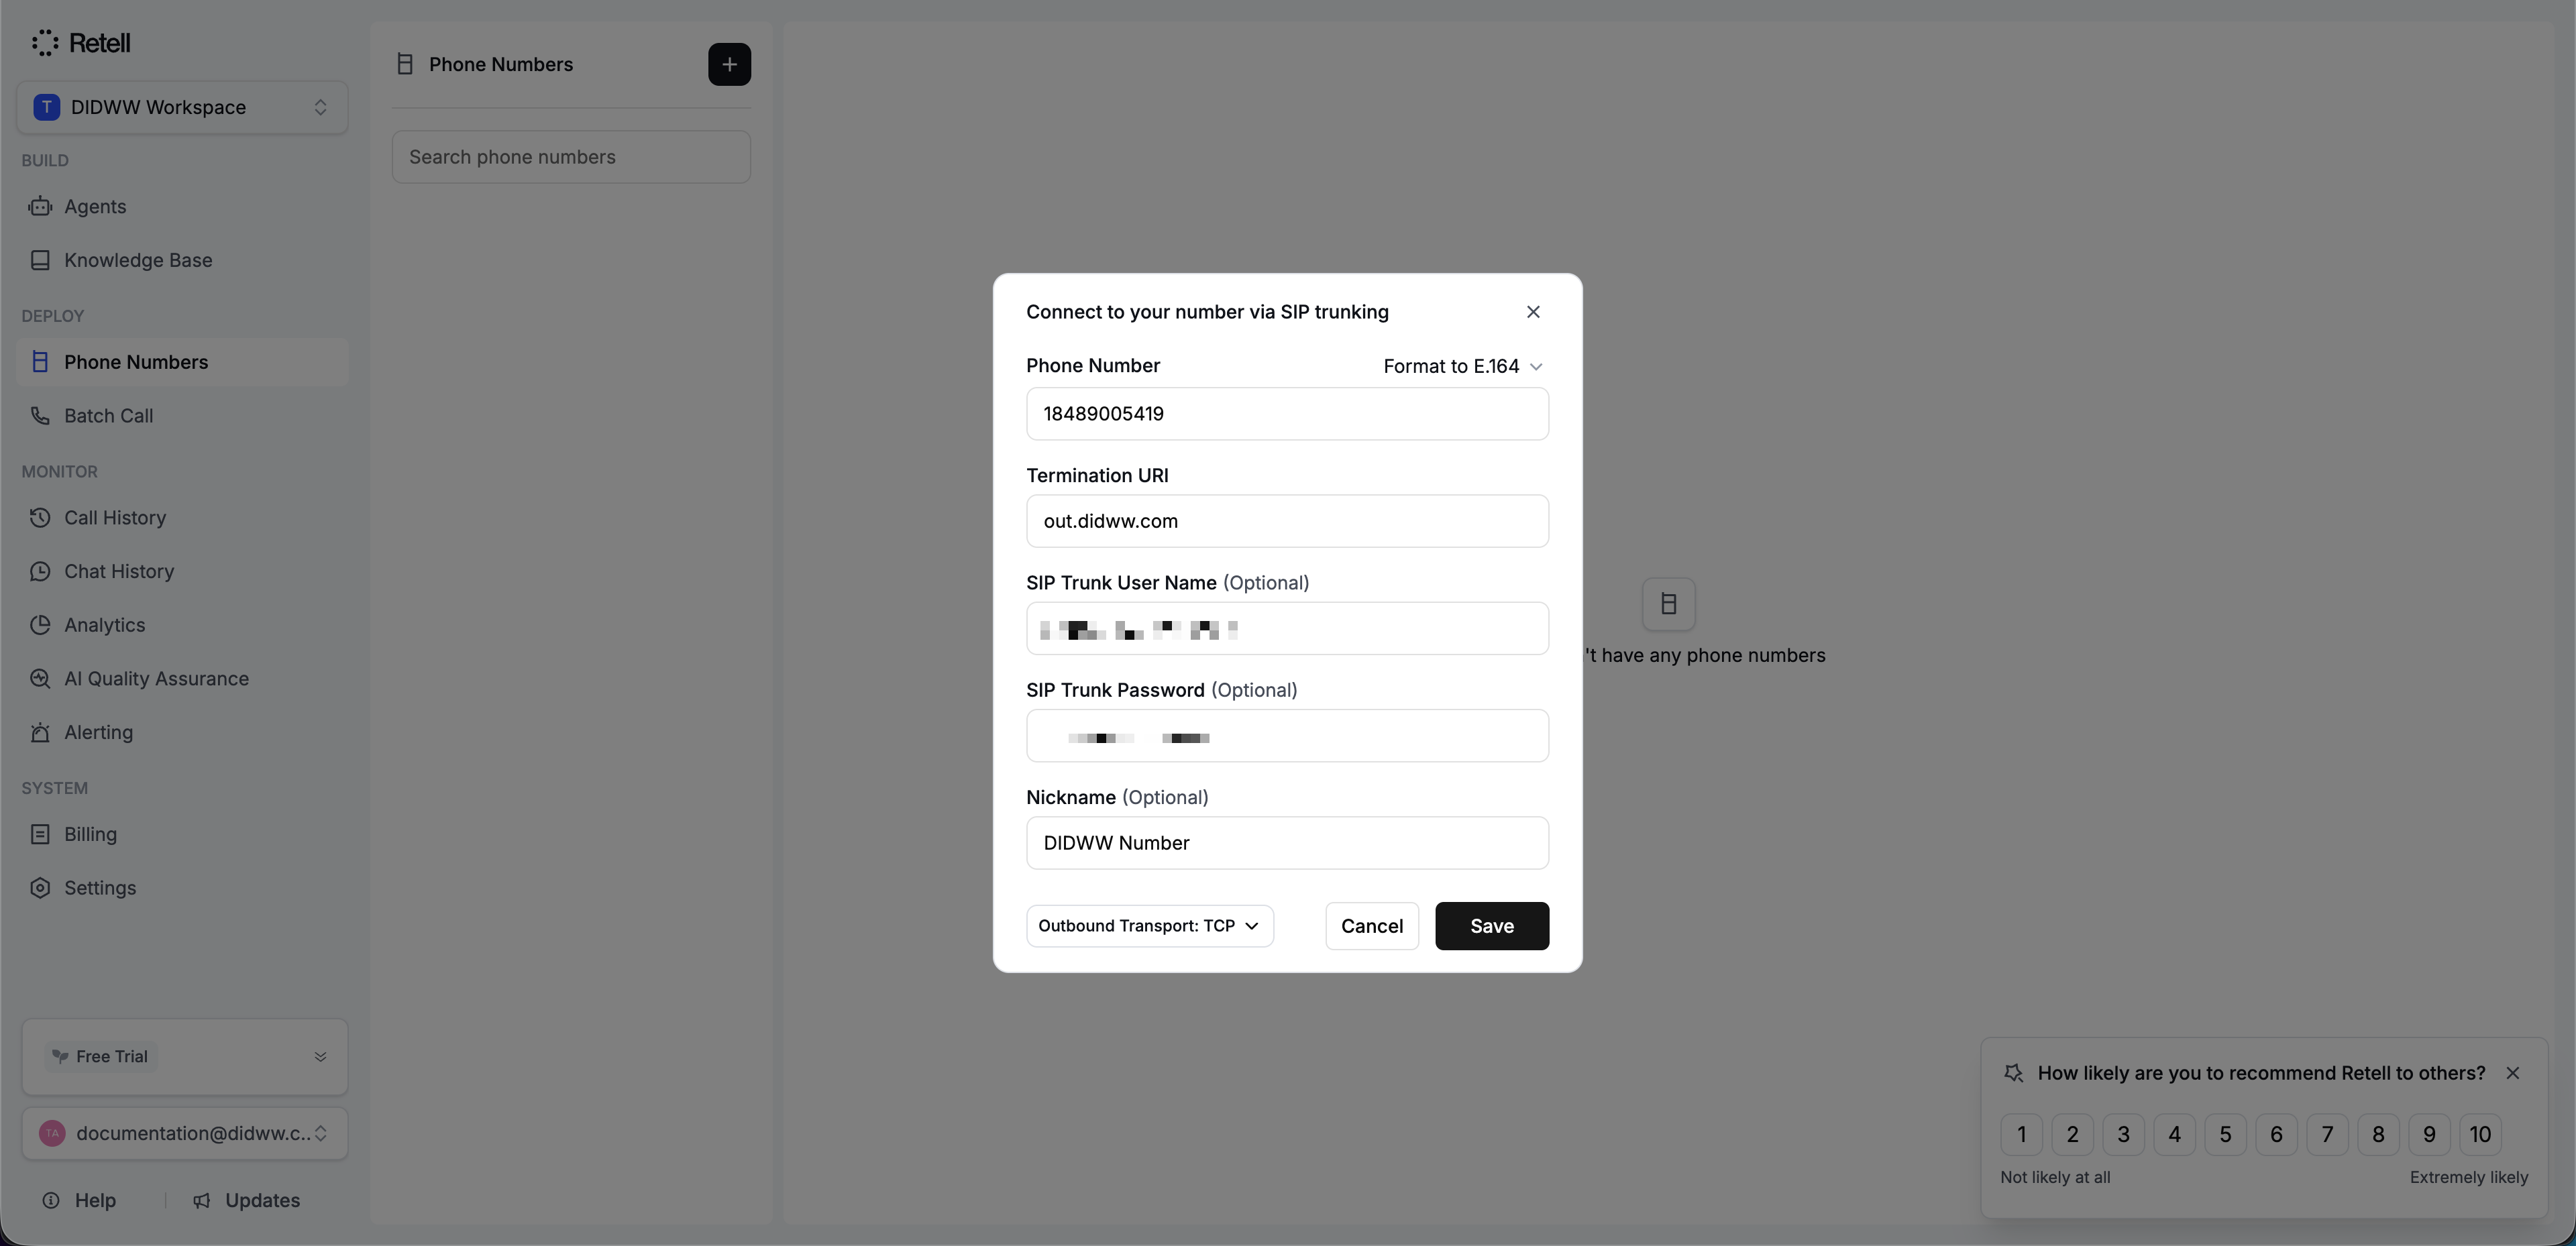
Fig. 11. Configuring SIP trunk connection settings#
Step 3: Assign Call Agents#
Configure which AI agents will handle inbound and outbound calls for your DIDWW number.
In the Inbound Call Agent section, select the Call Agent to handle incoming calls.
In the Outbound Call Agent section, select the Call Agent to use for outbound calls.
(Optional) Configure additional options such as allowed countries or webhook settings.
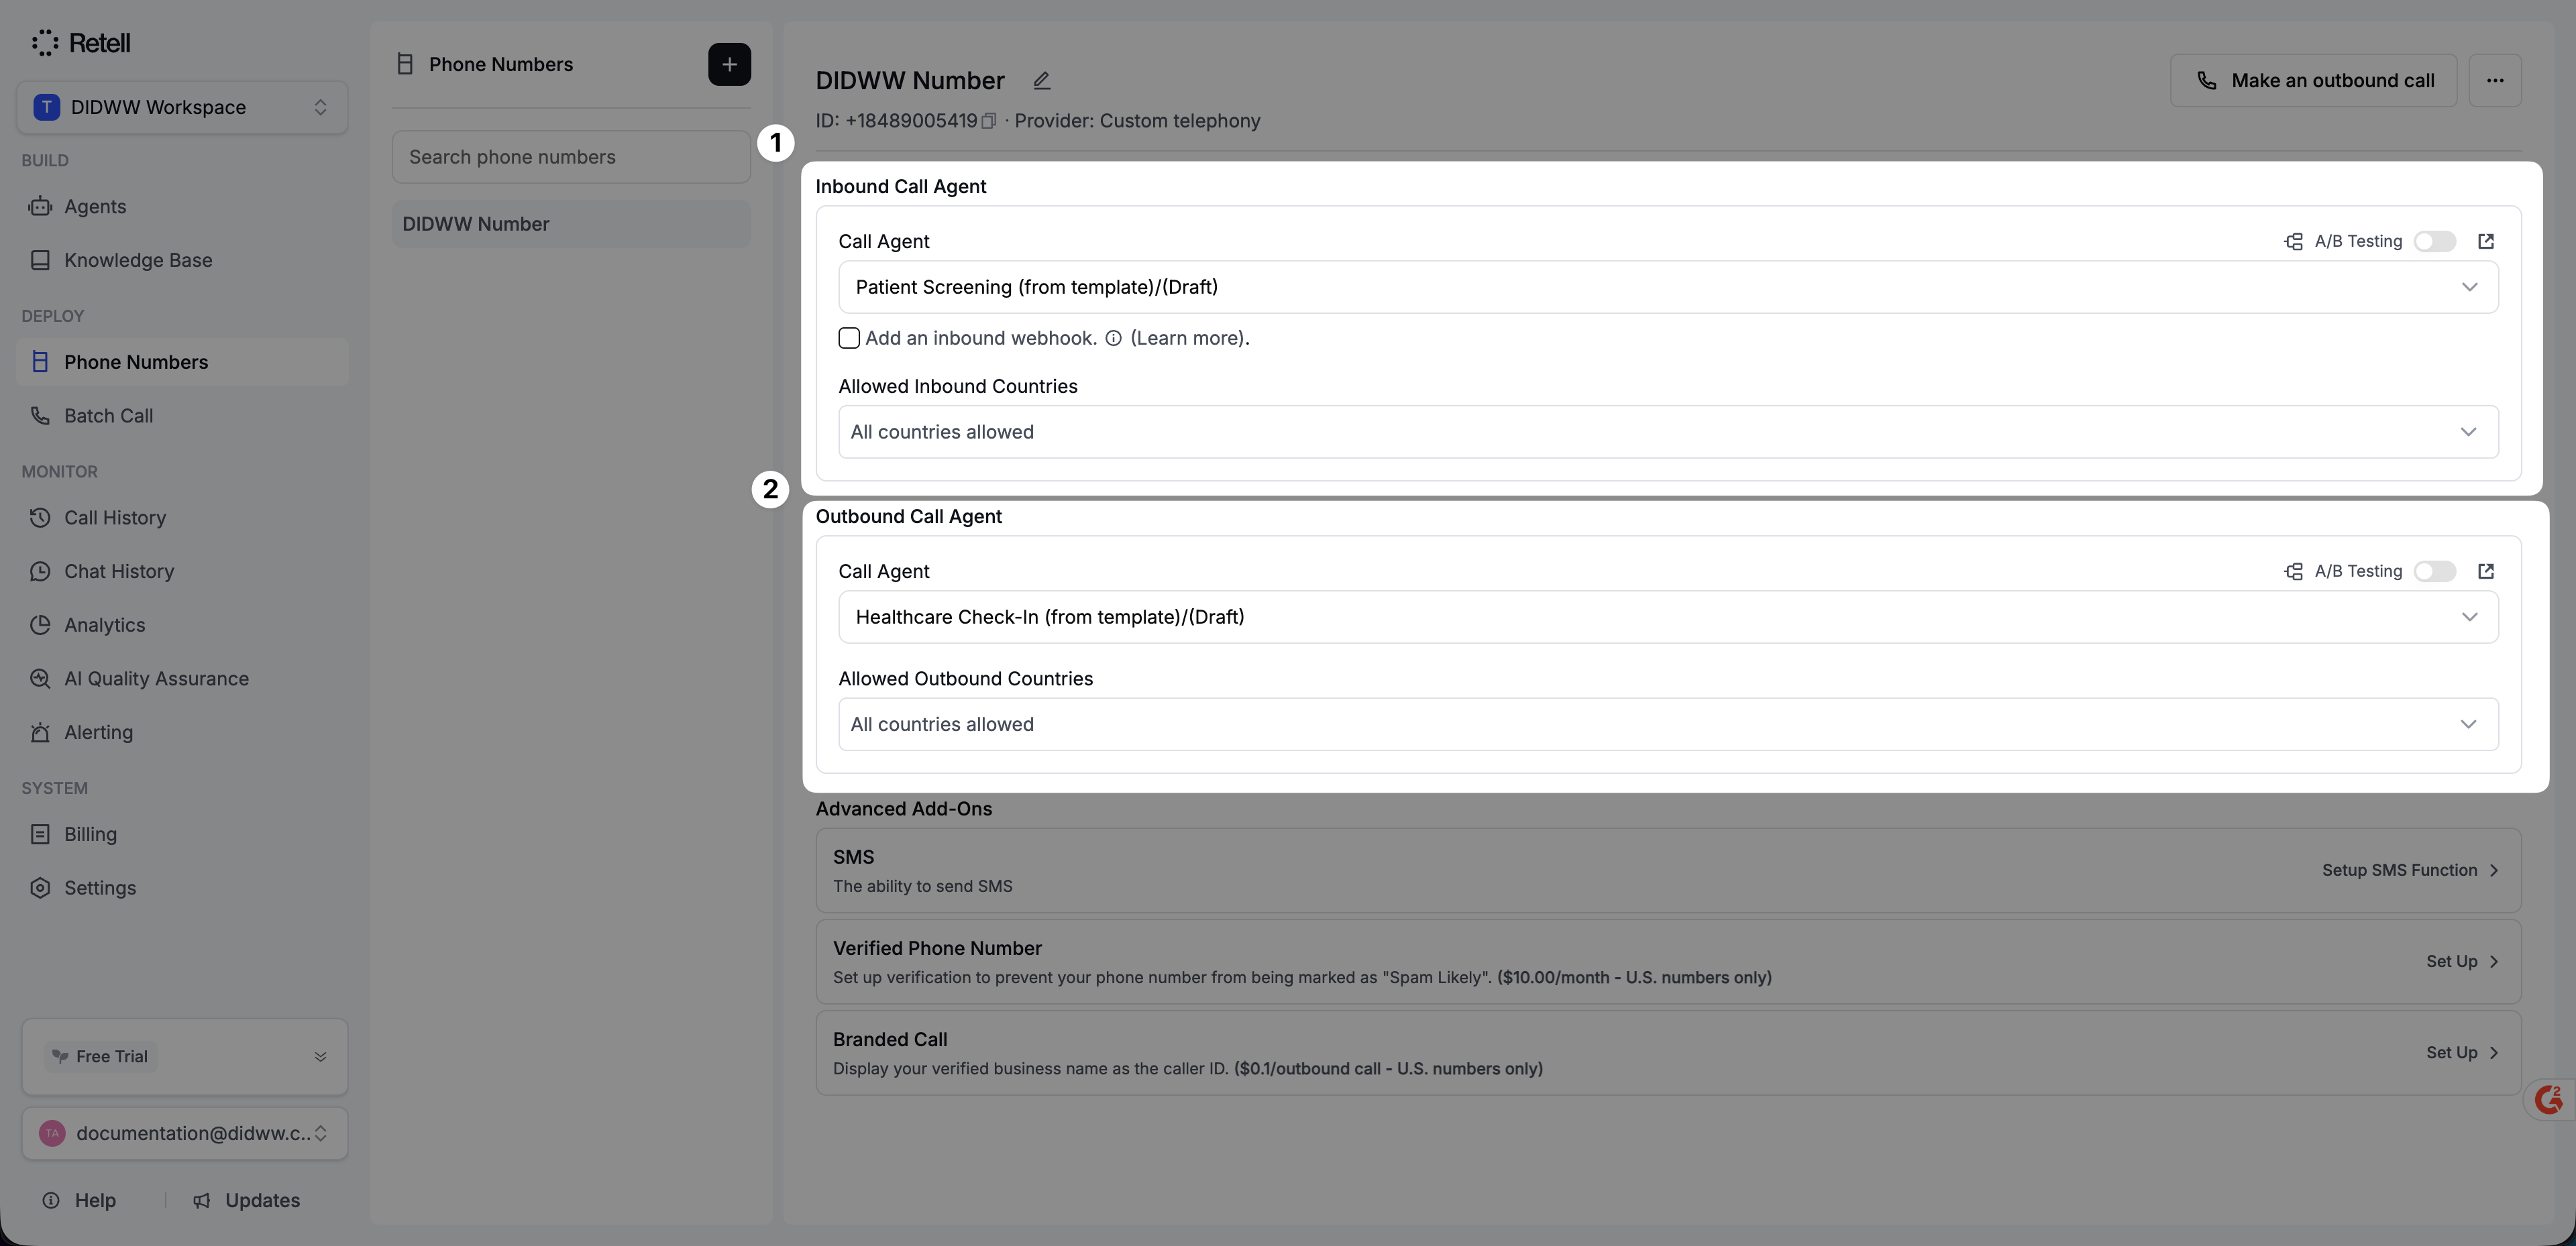
Fig. 12. Assigning inbound and outbound AI agents#
Step 4: Test the Configuration#
Verify that both inbound and outbound calling are working as expected.
Place a test call to your DIDWW DID number to confirm that inbound calls are routed to Retell AI and handled by the assigned AI agent.
In the Retell AI dashboard, use the Make an outbound call option to place a test call through your DIDWW outbound trunk.
Ensure that calls are successfully established in both directions and that the correct agents are handling the interactions.
Note
You can review call activity and verify call status or error codes in the DIDWW Inbound and Outbound Call Logs. See Inbound Call Logs and Outbound Call Logs for more details.