SMS Opt-out Settings
The SMS Opt-out Settings in the Messaging Platform allows you to configure custom opt-out messages and response flows, ensuring compliance with unsubscribe requests. You can personalize the opt-out form, reply-based opt-out actions, and success confirmation screens using available placeholders.
To access and configure the SMS opt-out settings, follow these steps:
Step 1: Access the Opt-out Settings Page
In the main menu on the left, go to SMS > Opt-out Settings.
Click the Edit button.
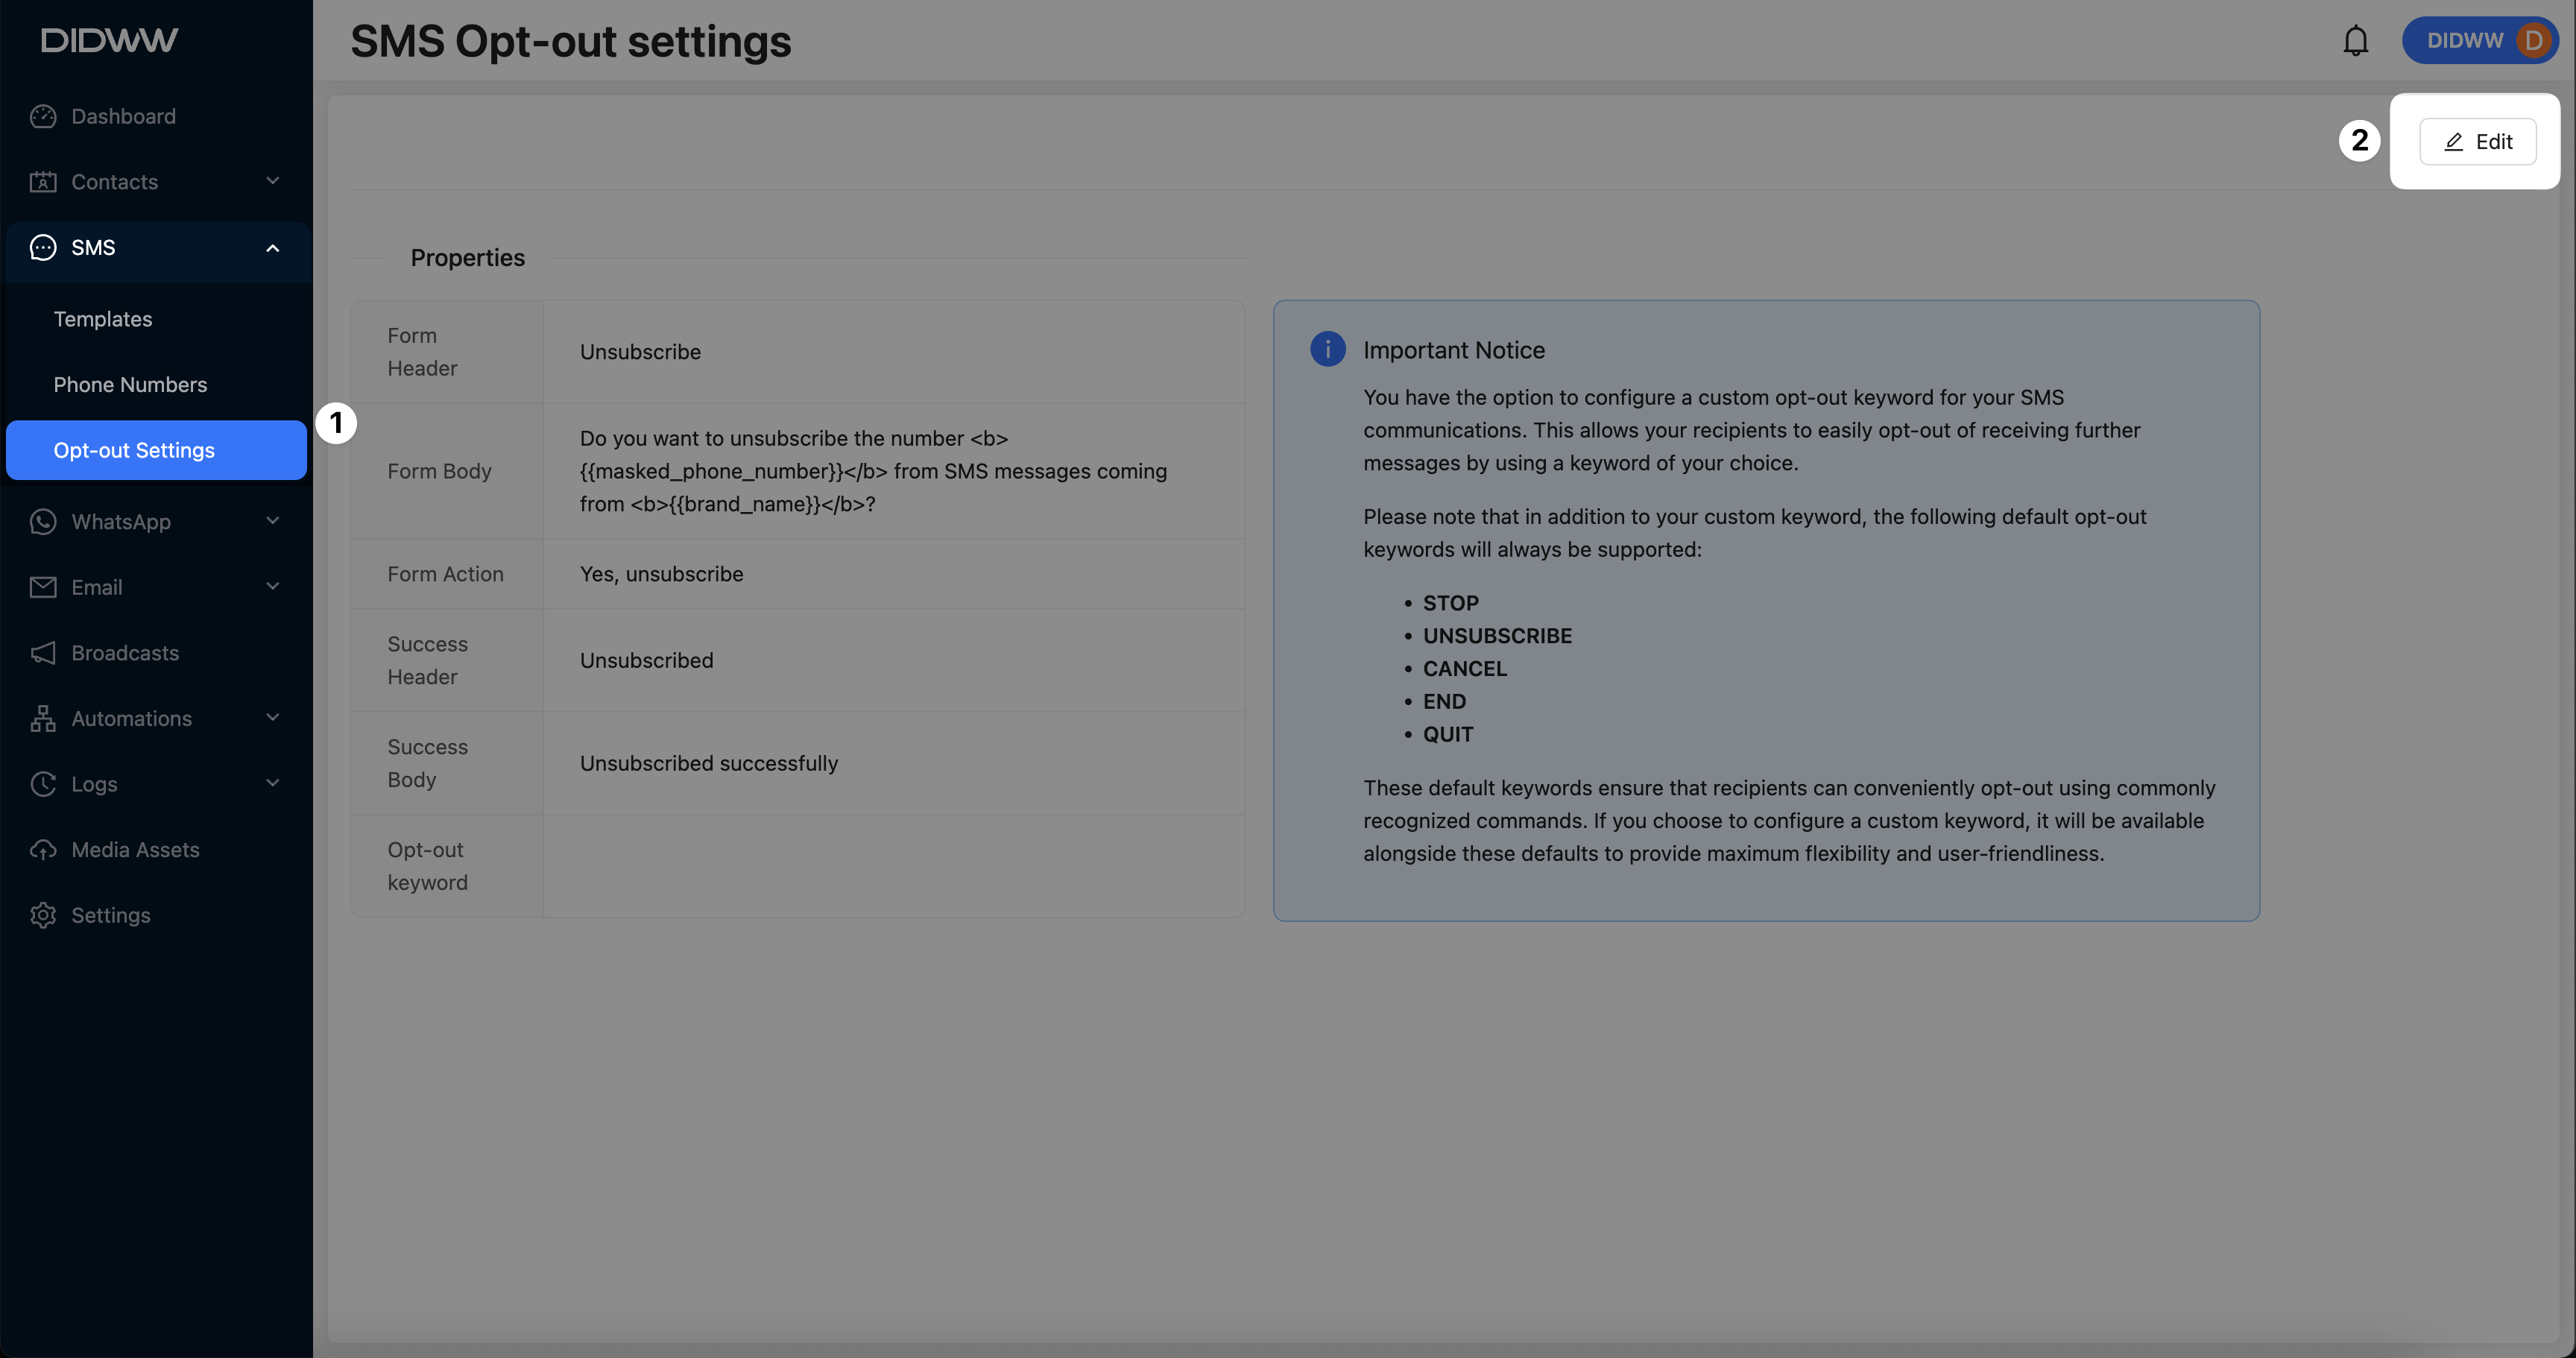
Fig. 1. Opt-out Settings Overview and Edit Button.
Step 2: Configure Opt-out Form Section
On the Opt-out Settings section, you can configure the following fields:
Field
Description
Form Header
The title displayed at the top of the opt-out form. By default, set to “Unsubscribe.”
Form Body
The main message asking users if they want to unsubscribe. You can insert placeholders for personalization such as:
{{masked_phone_number}}to display the masked phone number.
{{workspace_name}}to show the workspace name.Form Action
The text on the button that users click to confirm unsubscribing. Default is “Yes, unsubscribe.”
Success Header
The header shown on the success page after users unsubscribe successfully.
Success Body
The confirmation message displayed on the success page.
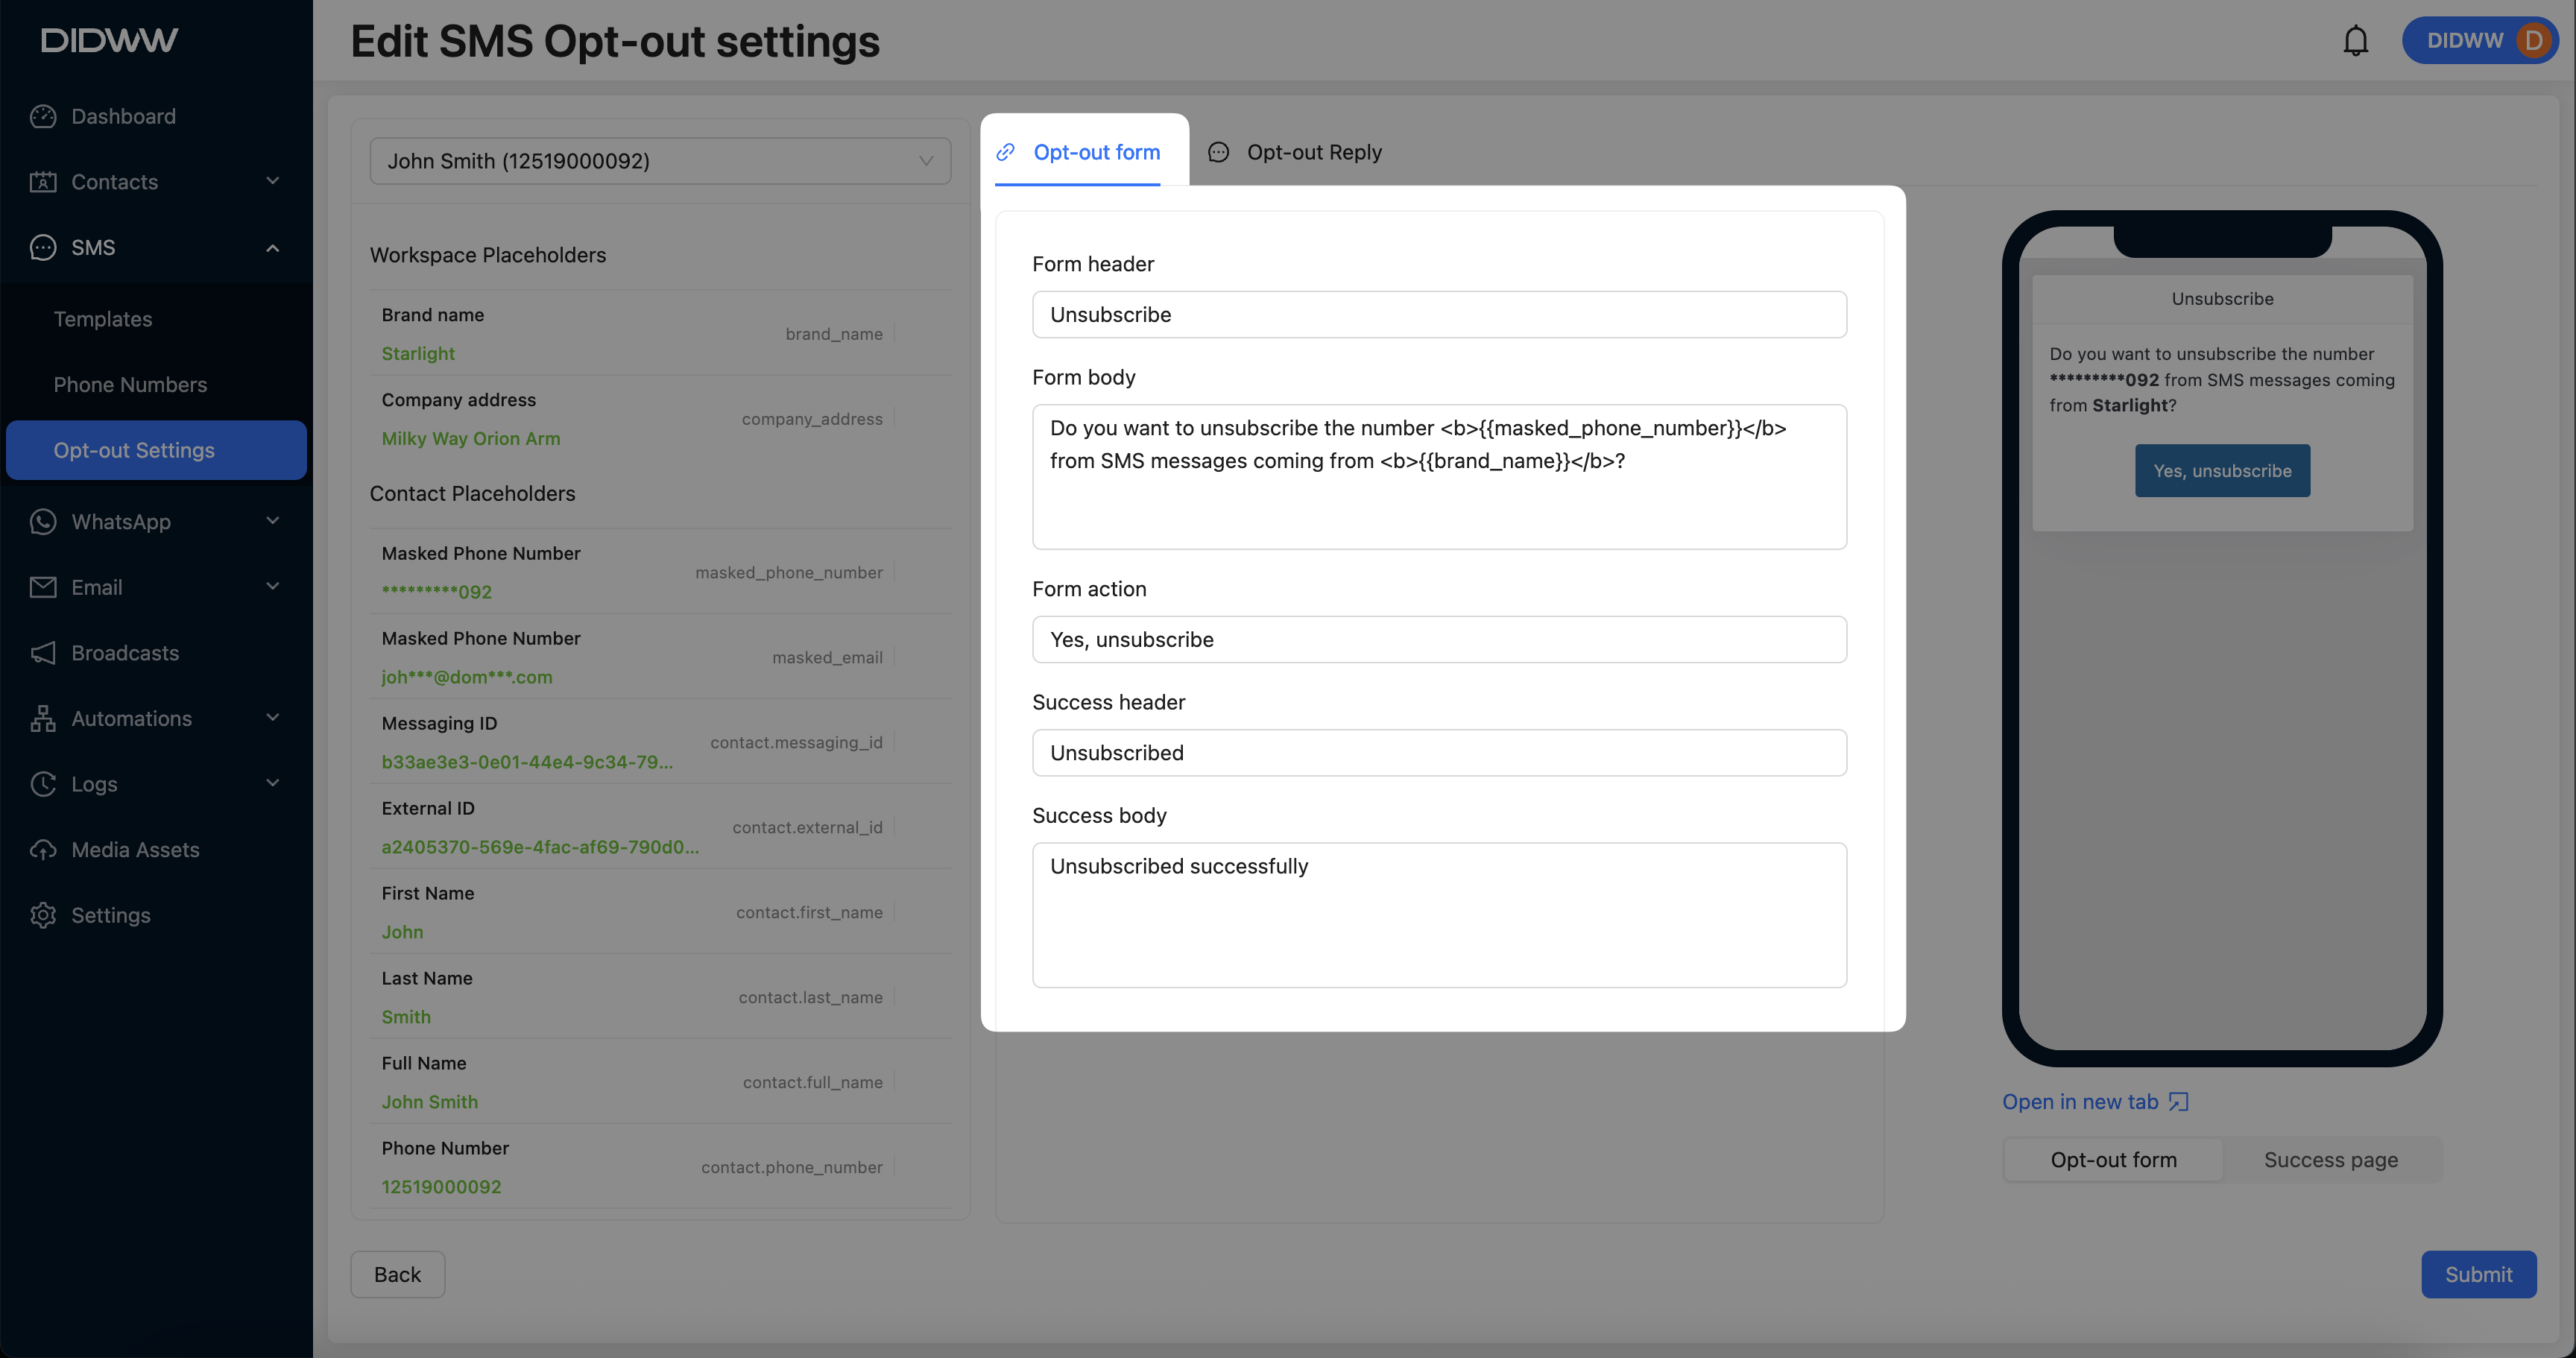
Fig. 2. Editing SMS Opt-out Settings.
Step 3: Use Placeholders for Personalization
Use the list of available Workspace Placeholders and Contact Placeholders to dynamically personalize the opt-out form fields.
To insert a placeholder:
Click into the form field where you want the placeholder to appear (for example, the Form Body field).
Scroll through the available list to find the placeholder you want to use, and click on it.
The selected placeholder will be automatically inserted into the active field.
Tip
To view more placeholders, hover your mouse over the placeholder list area and scroll down using your mouse wheel.
Using placeholders allows you to display personalized details, such as the recipient’s masked phone number or your workspace name, enhancing the opt-out form experience.
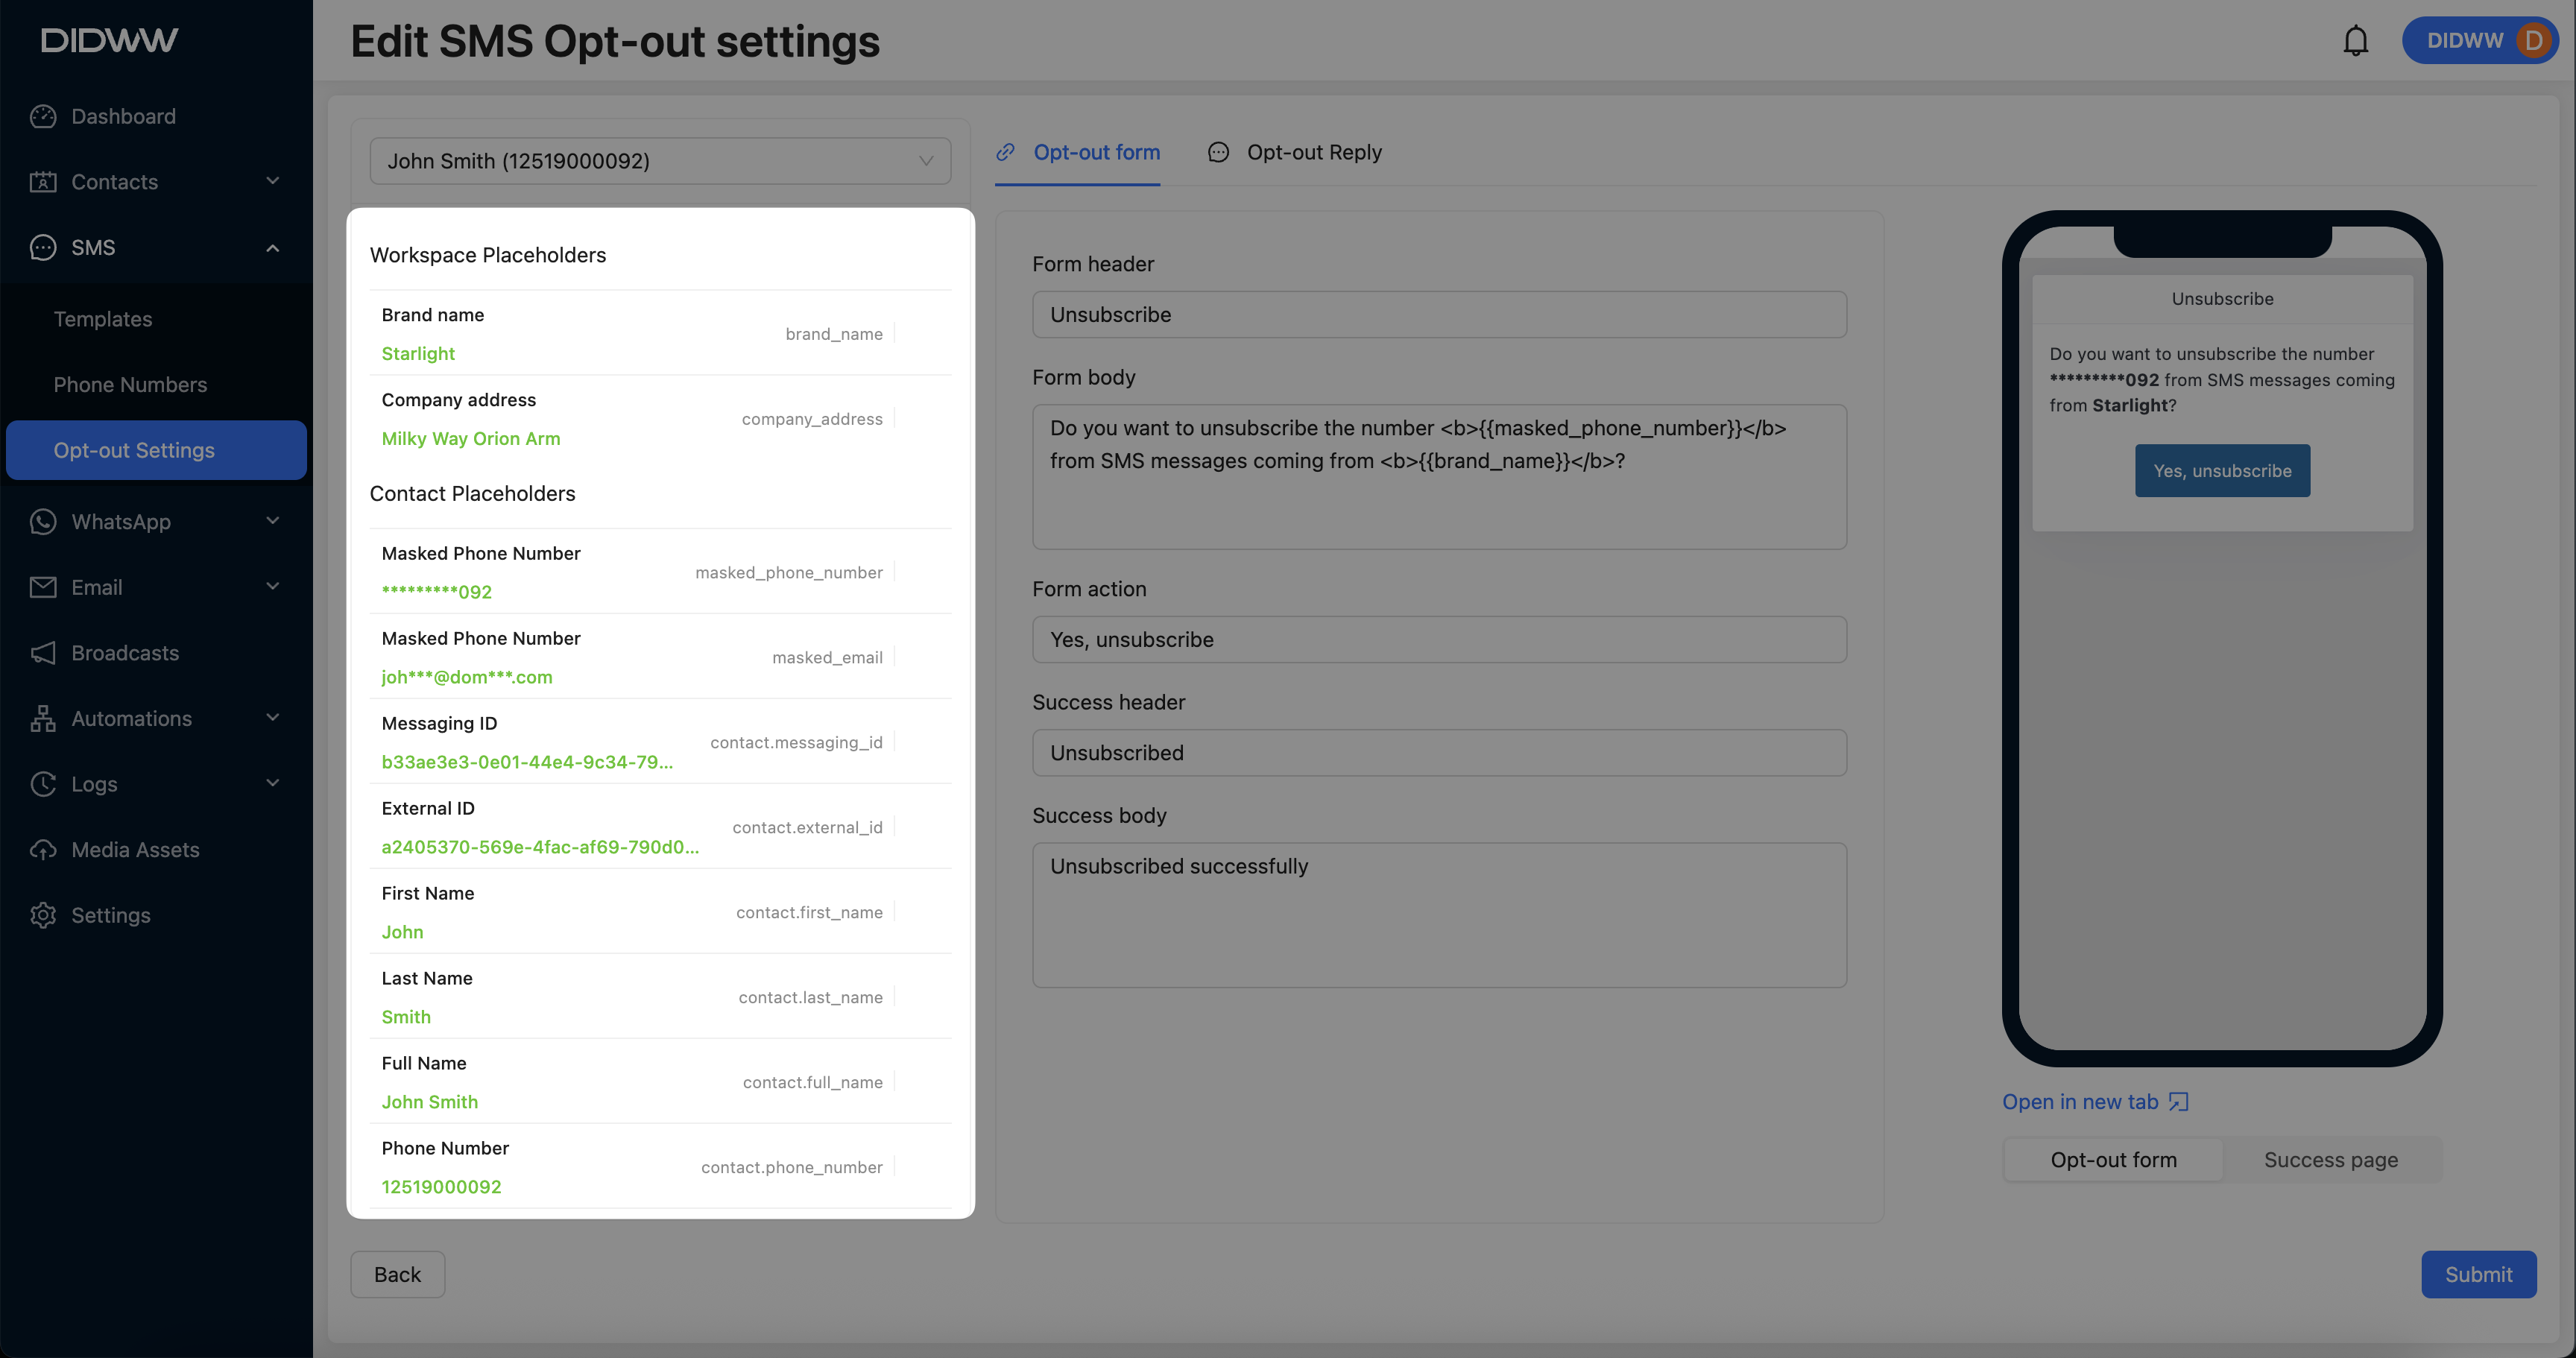
Fig. 3. Inserting Workspace and Contact Placeholders.
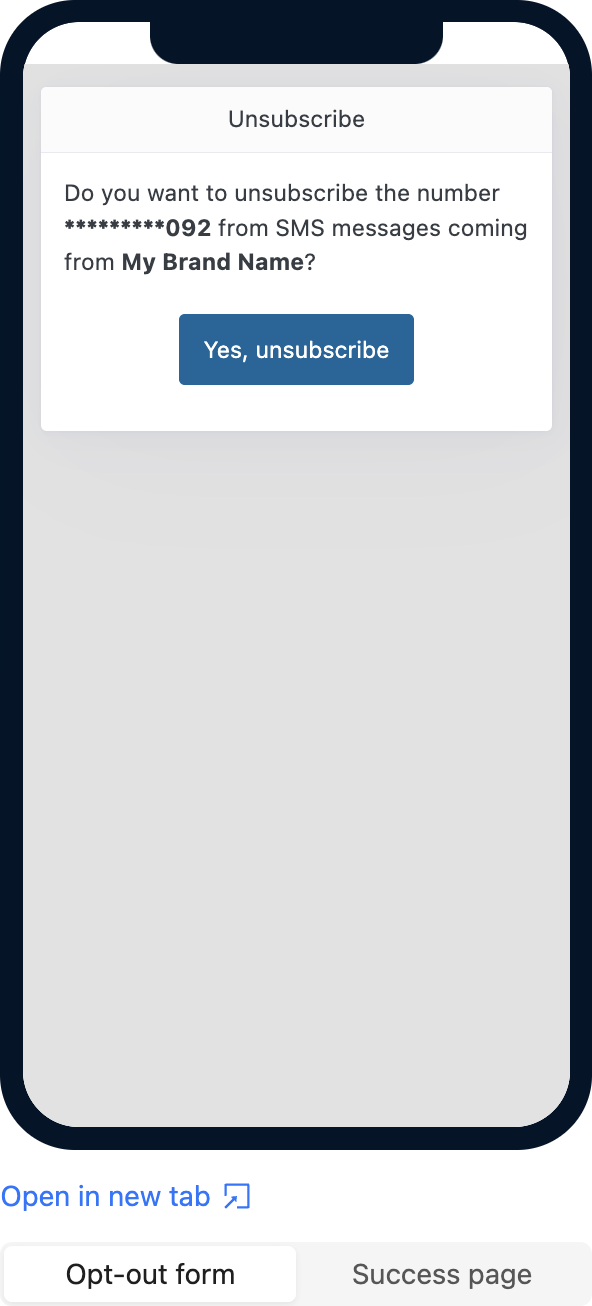
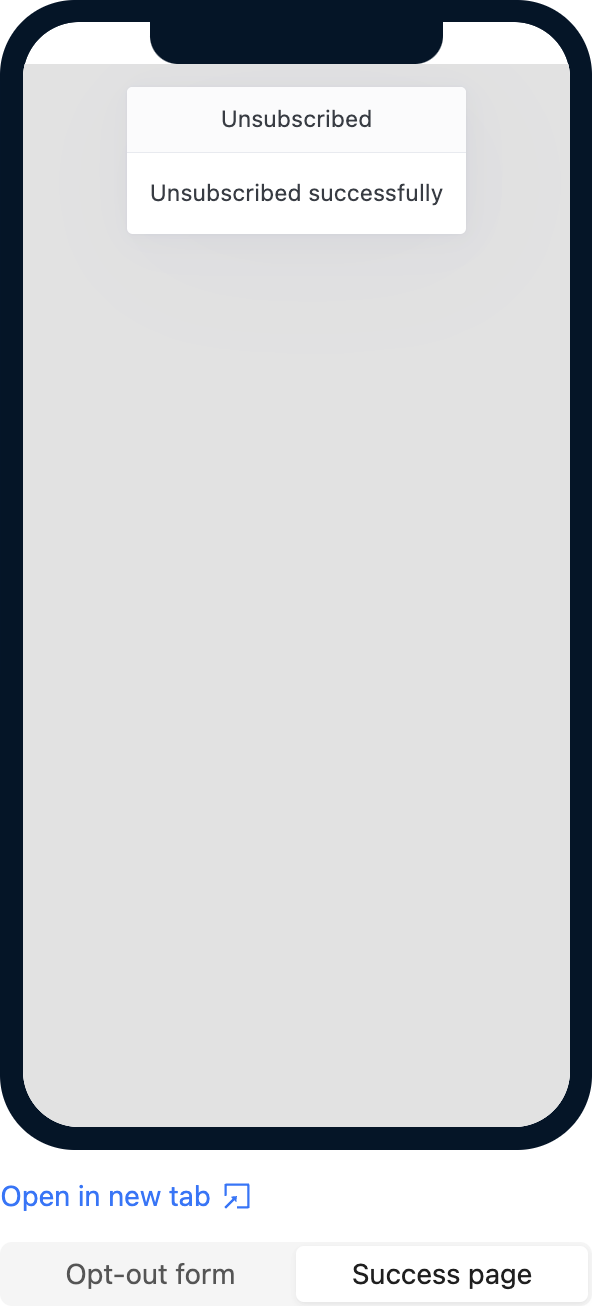
Step 4: Preview the Opt-out Form and Success Page
The preview panel on the right shows how the opt-out form and the success confirmation page will look to users.
Opt-out Form: Shows the unsubscribe prompt.
Success Page: Displays the confirmation after unsubscribing.
You can switch between the views to verify the customized text appearance.
Step 5: Configure Opt-out Reply Keyword
On the Opt-out Reply settings Tab, you can configure the Opt-out keyword and write a custom keyword that user can write in the sms message to stop receiving the messages automatically and unsubscribe from it :
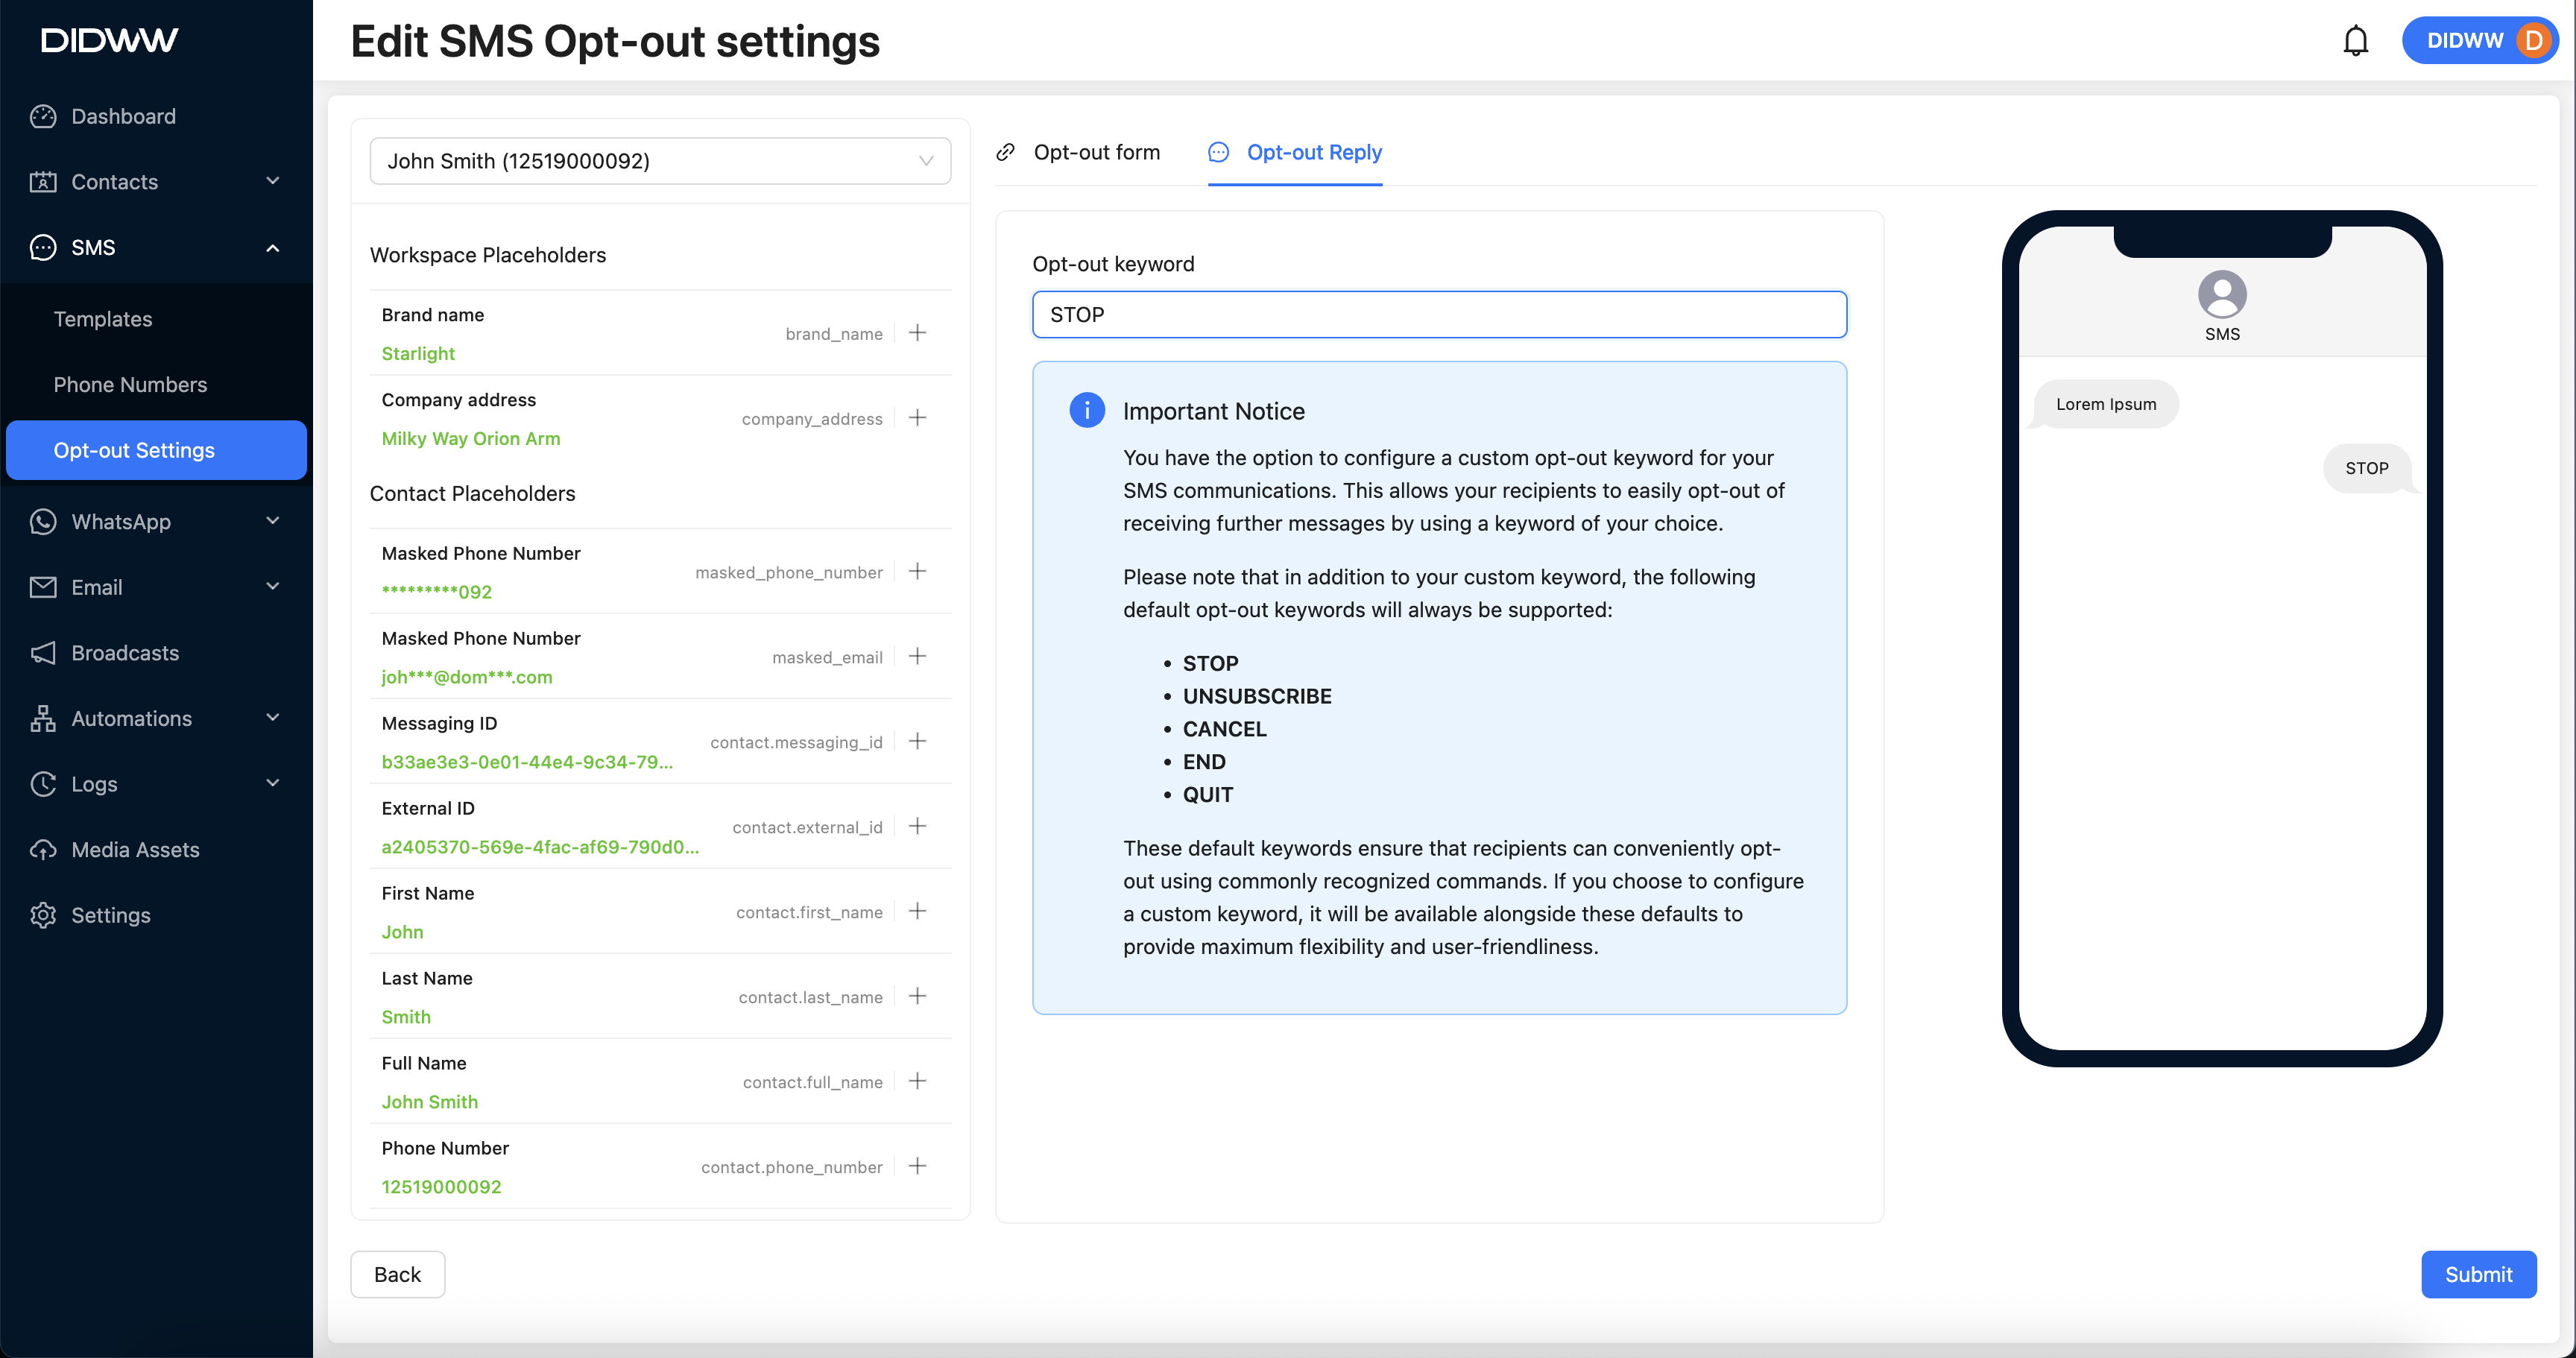
Fig. 4. Editing SMS Opt-out Reply Keyword.
Step 6: Submit Your Changes
After configuring the opt-out settings, click Submit to save your changes.