Before creating Email templates, make sure you have:
A Verified Domain – Required to send test emails and preview templates. To verify your email domain, visit the How to Add and Verify Your Email Domains documentation.
Email Credits – You must have email credits to send emails successfully. To purchase them, visit the messaging platform menu in DIDWW User Panel Messaging Platform Page .
Creating a New Email Template Using the Email Builder
To create a new email template using the built-in Email Builder, follow these steps.
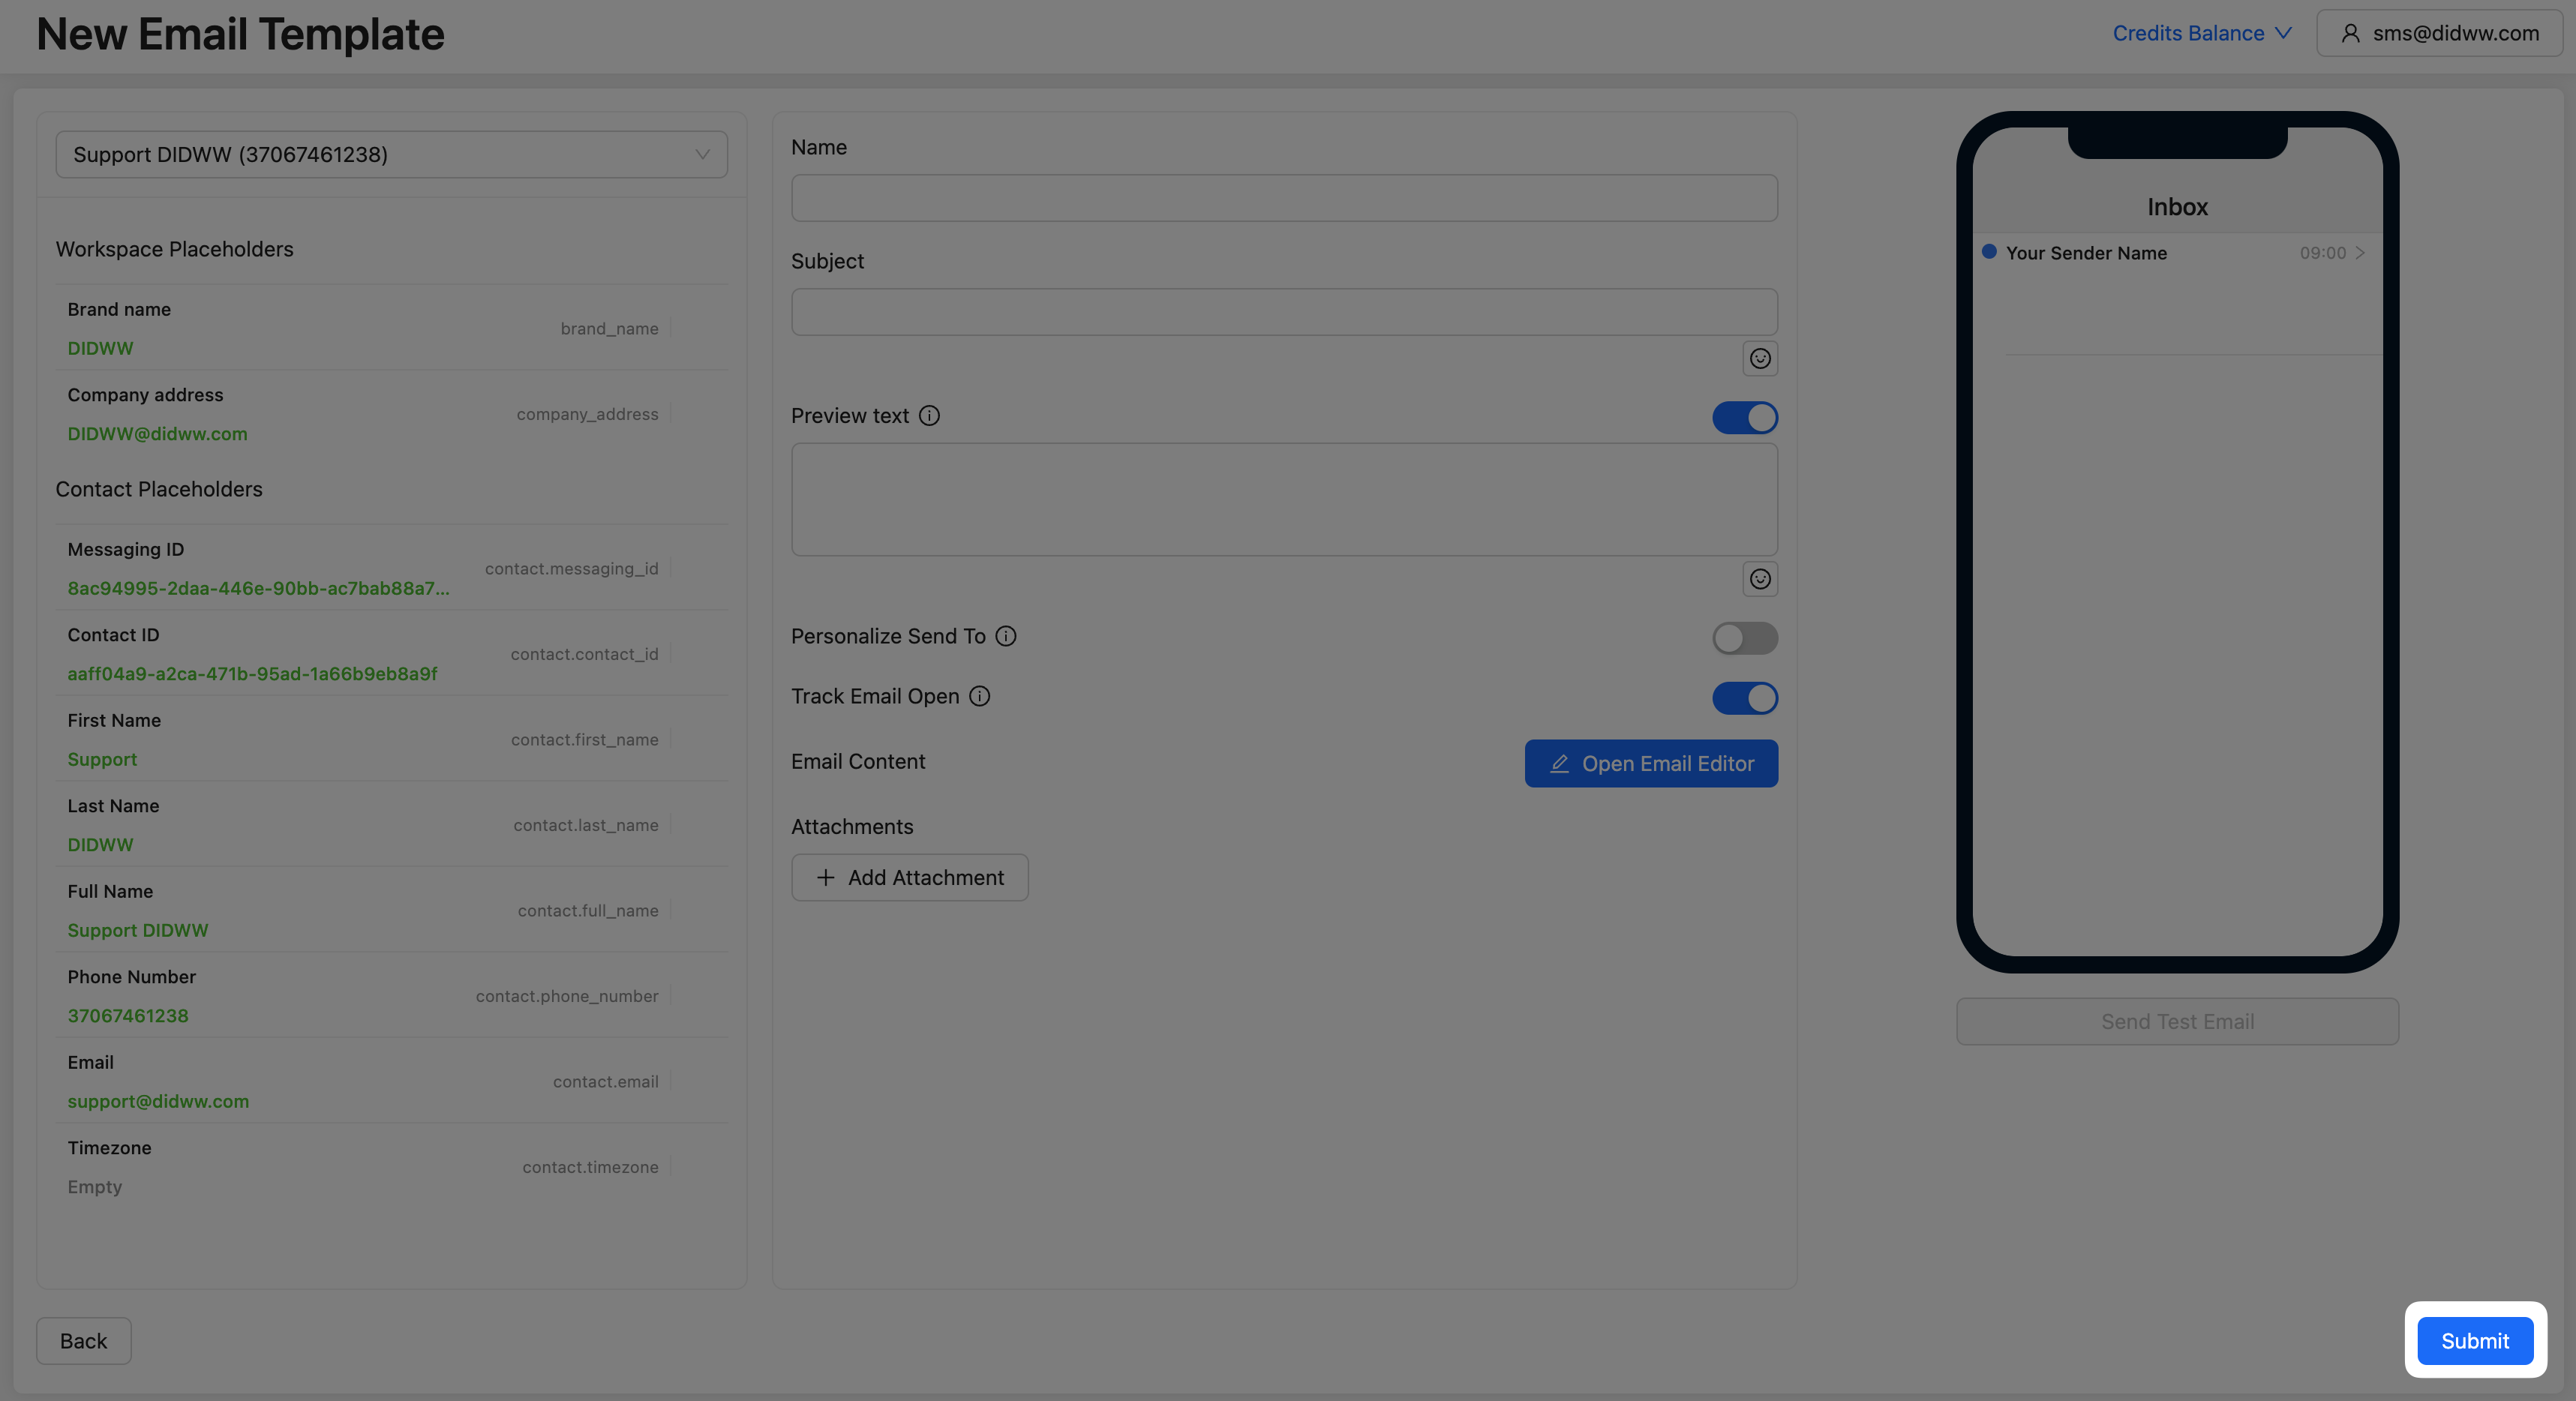
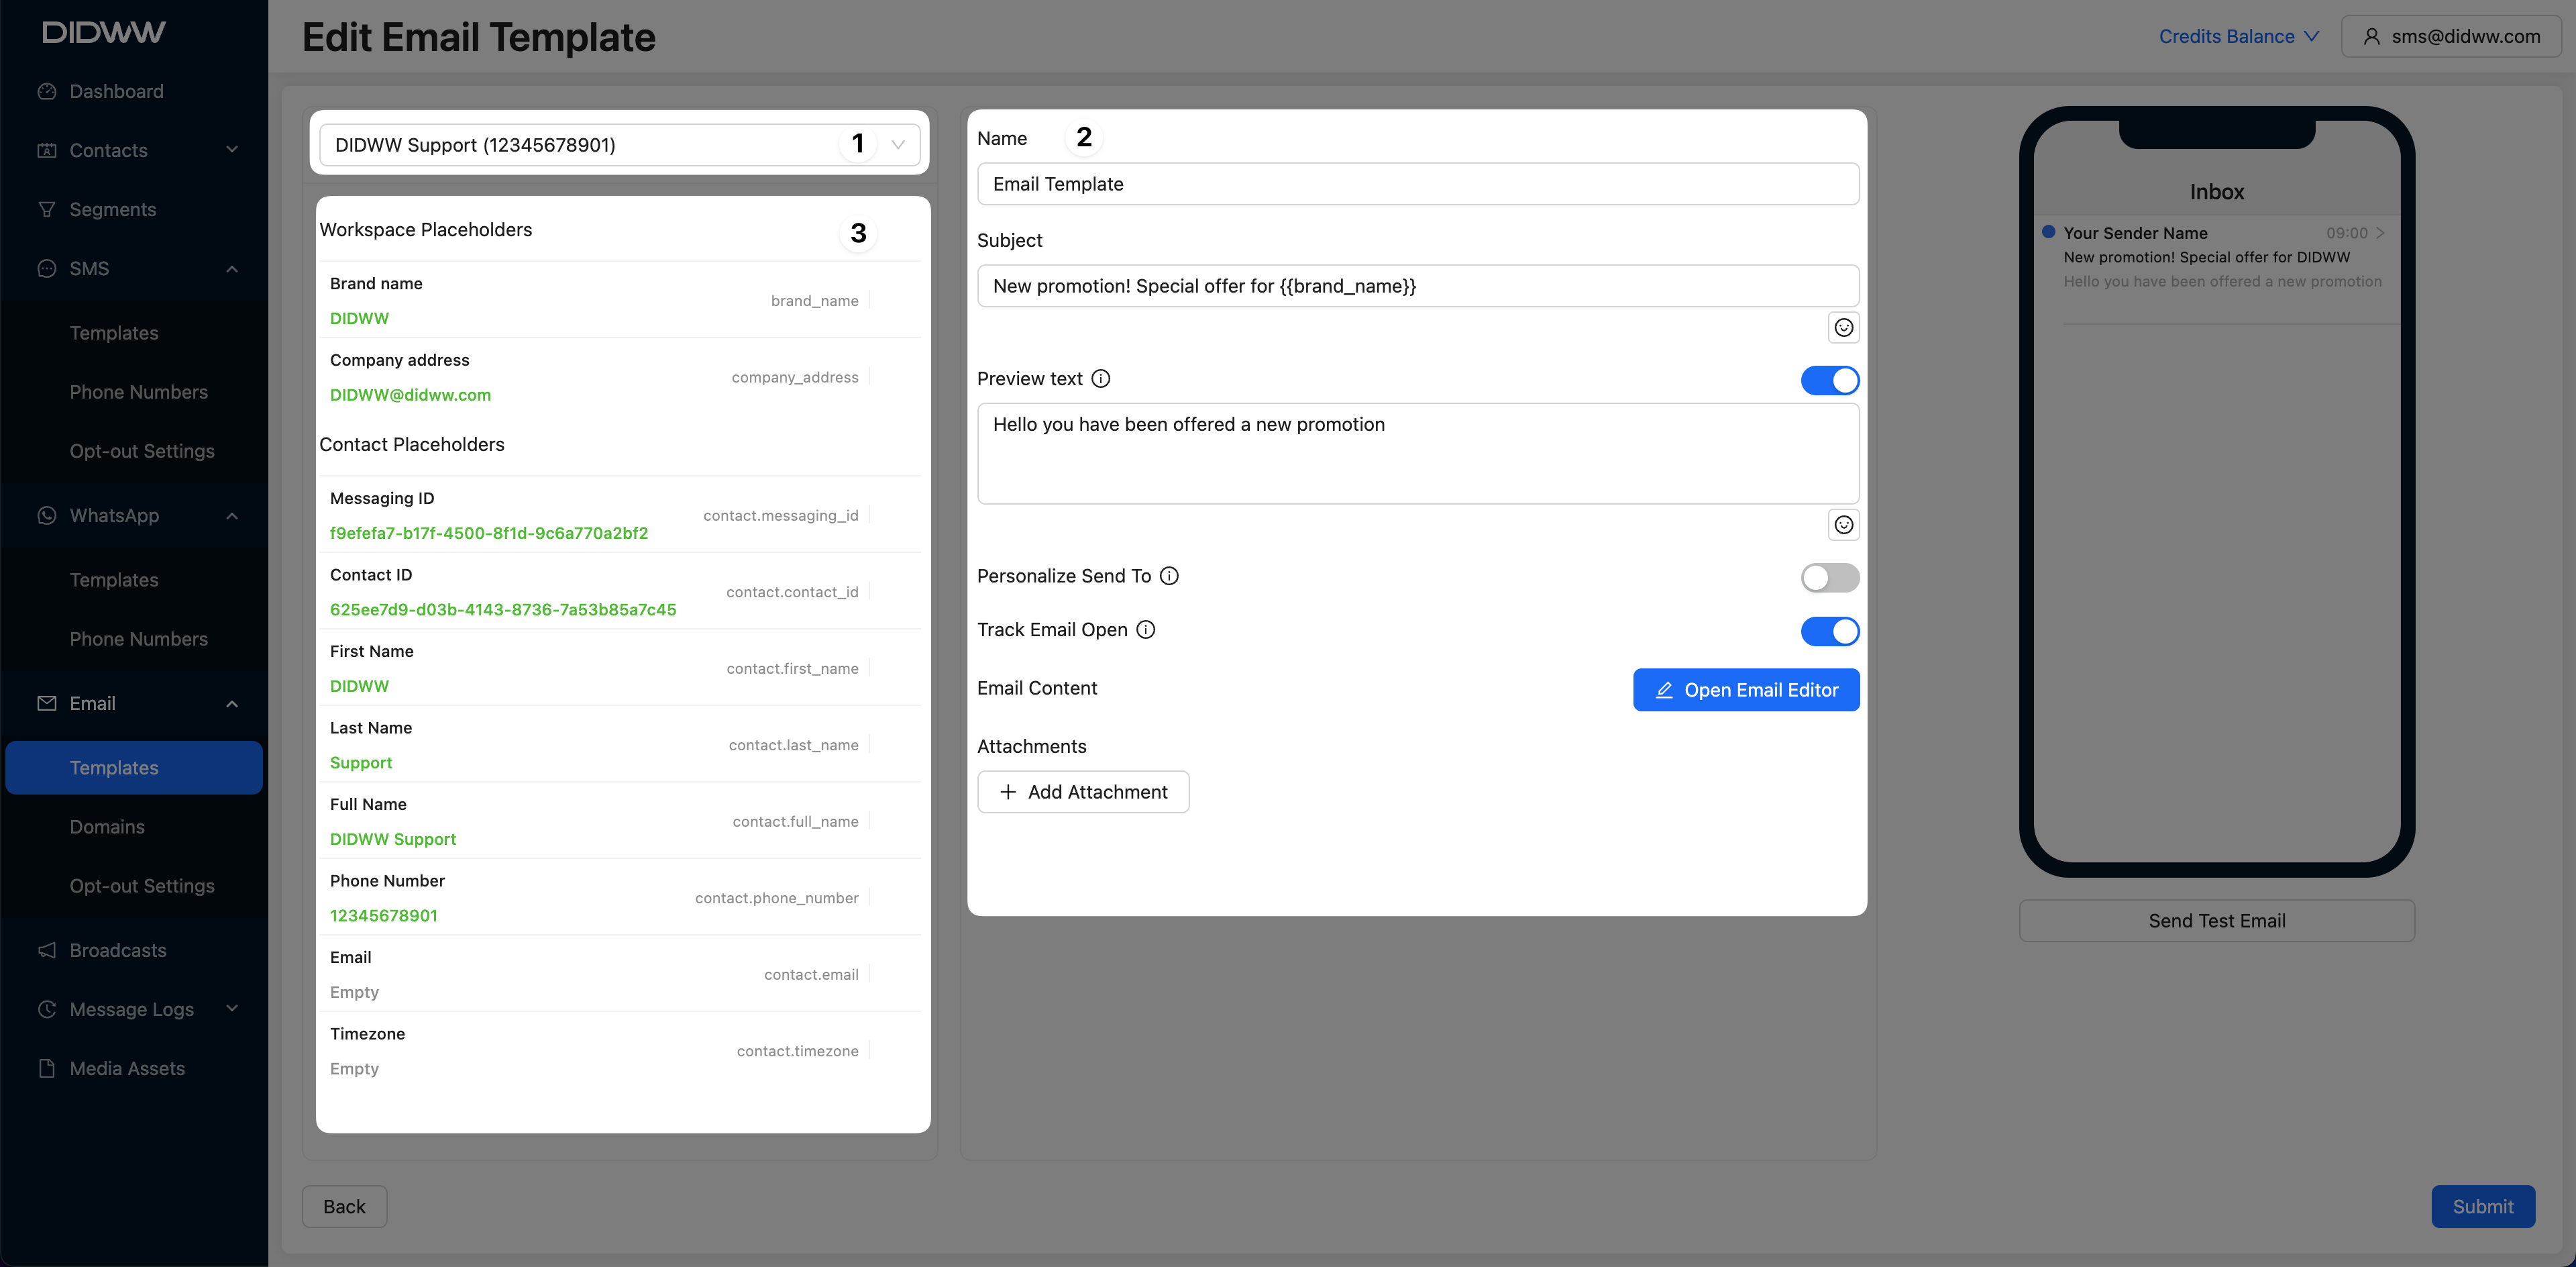
In the main menu on the left, select Email > Templates to access the Email Templates page. From the dropdown menu, select Using Email Builder. This opens the New Email Template configuration page.
Fig. 1. Create New Email Template Using Email Builder
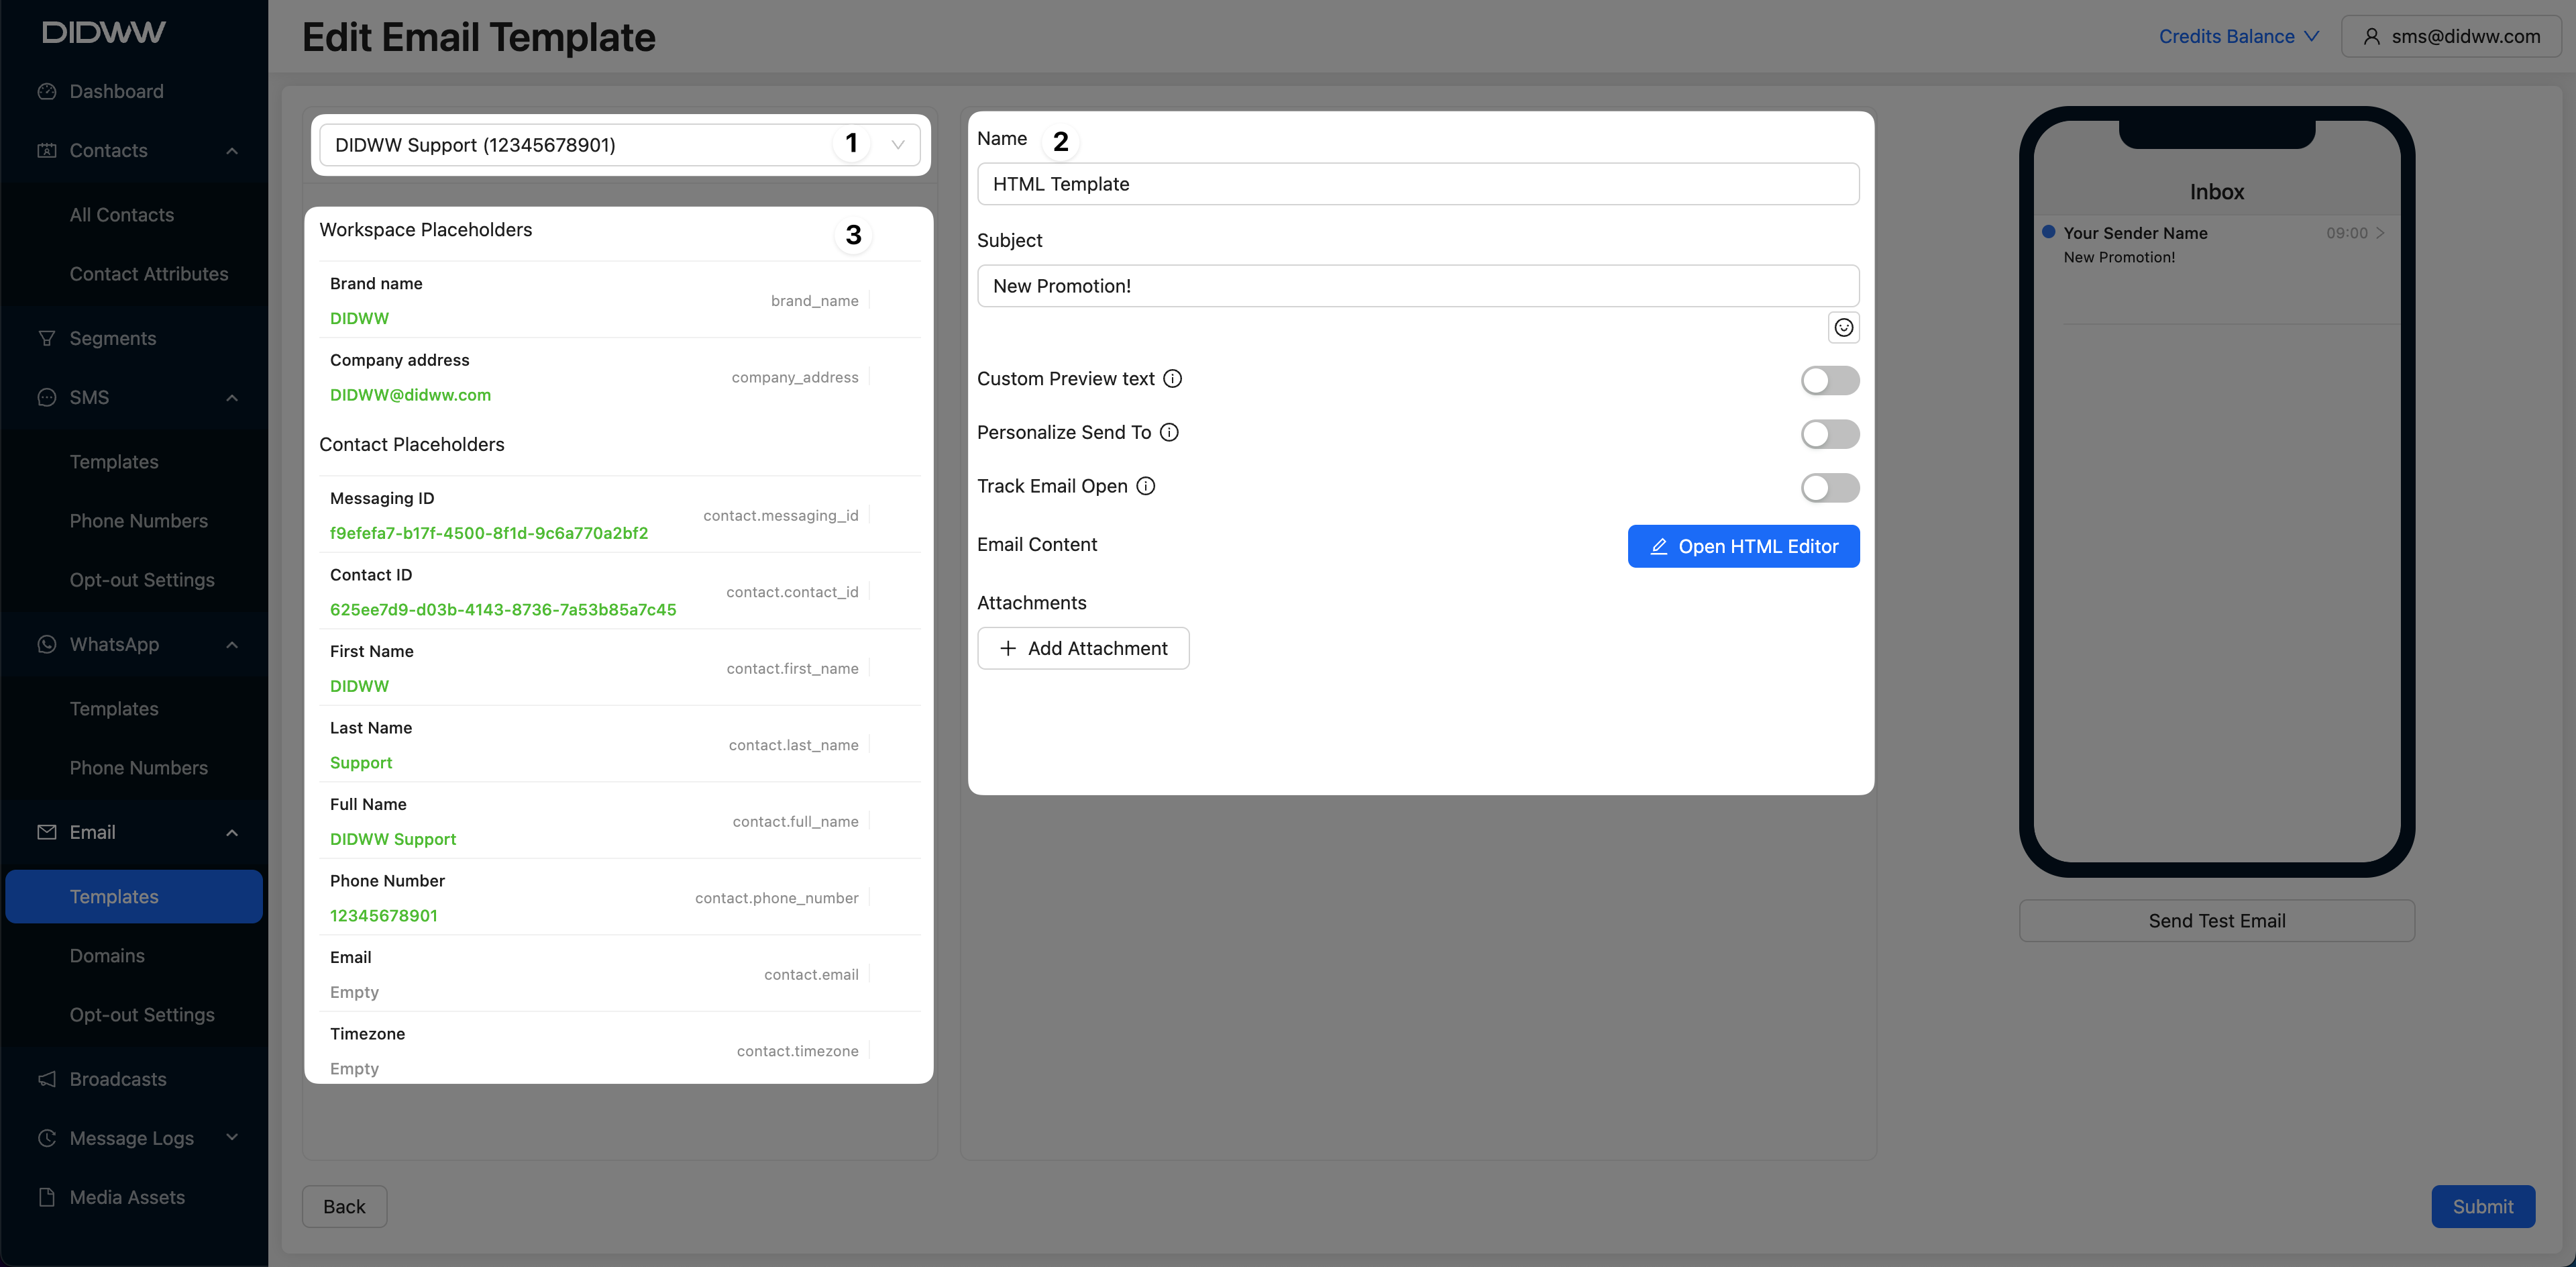
From the dropdown menu, select a placeholder contact to enable the use of workspace and contact placeholders in your template configuration.
Then, configure the following fields:
Name: Enter a name for your email template. This name is for internal reference and will help you identify the template later.
Subject: Specify the subject line of the email, which will be displayed to recipients.
Preview Text: Enter a short preview text that appears next to the subject line in recipients’ inboxes. This is optional but recommended for better engagement.
Personalize Send To: Toggle this option on if you want to personalize the email based on contact-specific attributes.
Track Email Open: Enable this option to track whether recipients open the email. Tracking can provide valuable engagement metrics.
In the left pane, you’ll find Workspace Placeholders and Contact Placeholders that can be used to personalize the email. Click on a placeholder to insert it into the Subject, Preview Text, or the email body.
Placeholders like {{contact.first_name}} or {{company_address}} dynamically insert information based on each contact’s details.
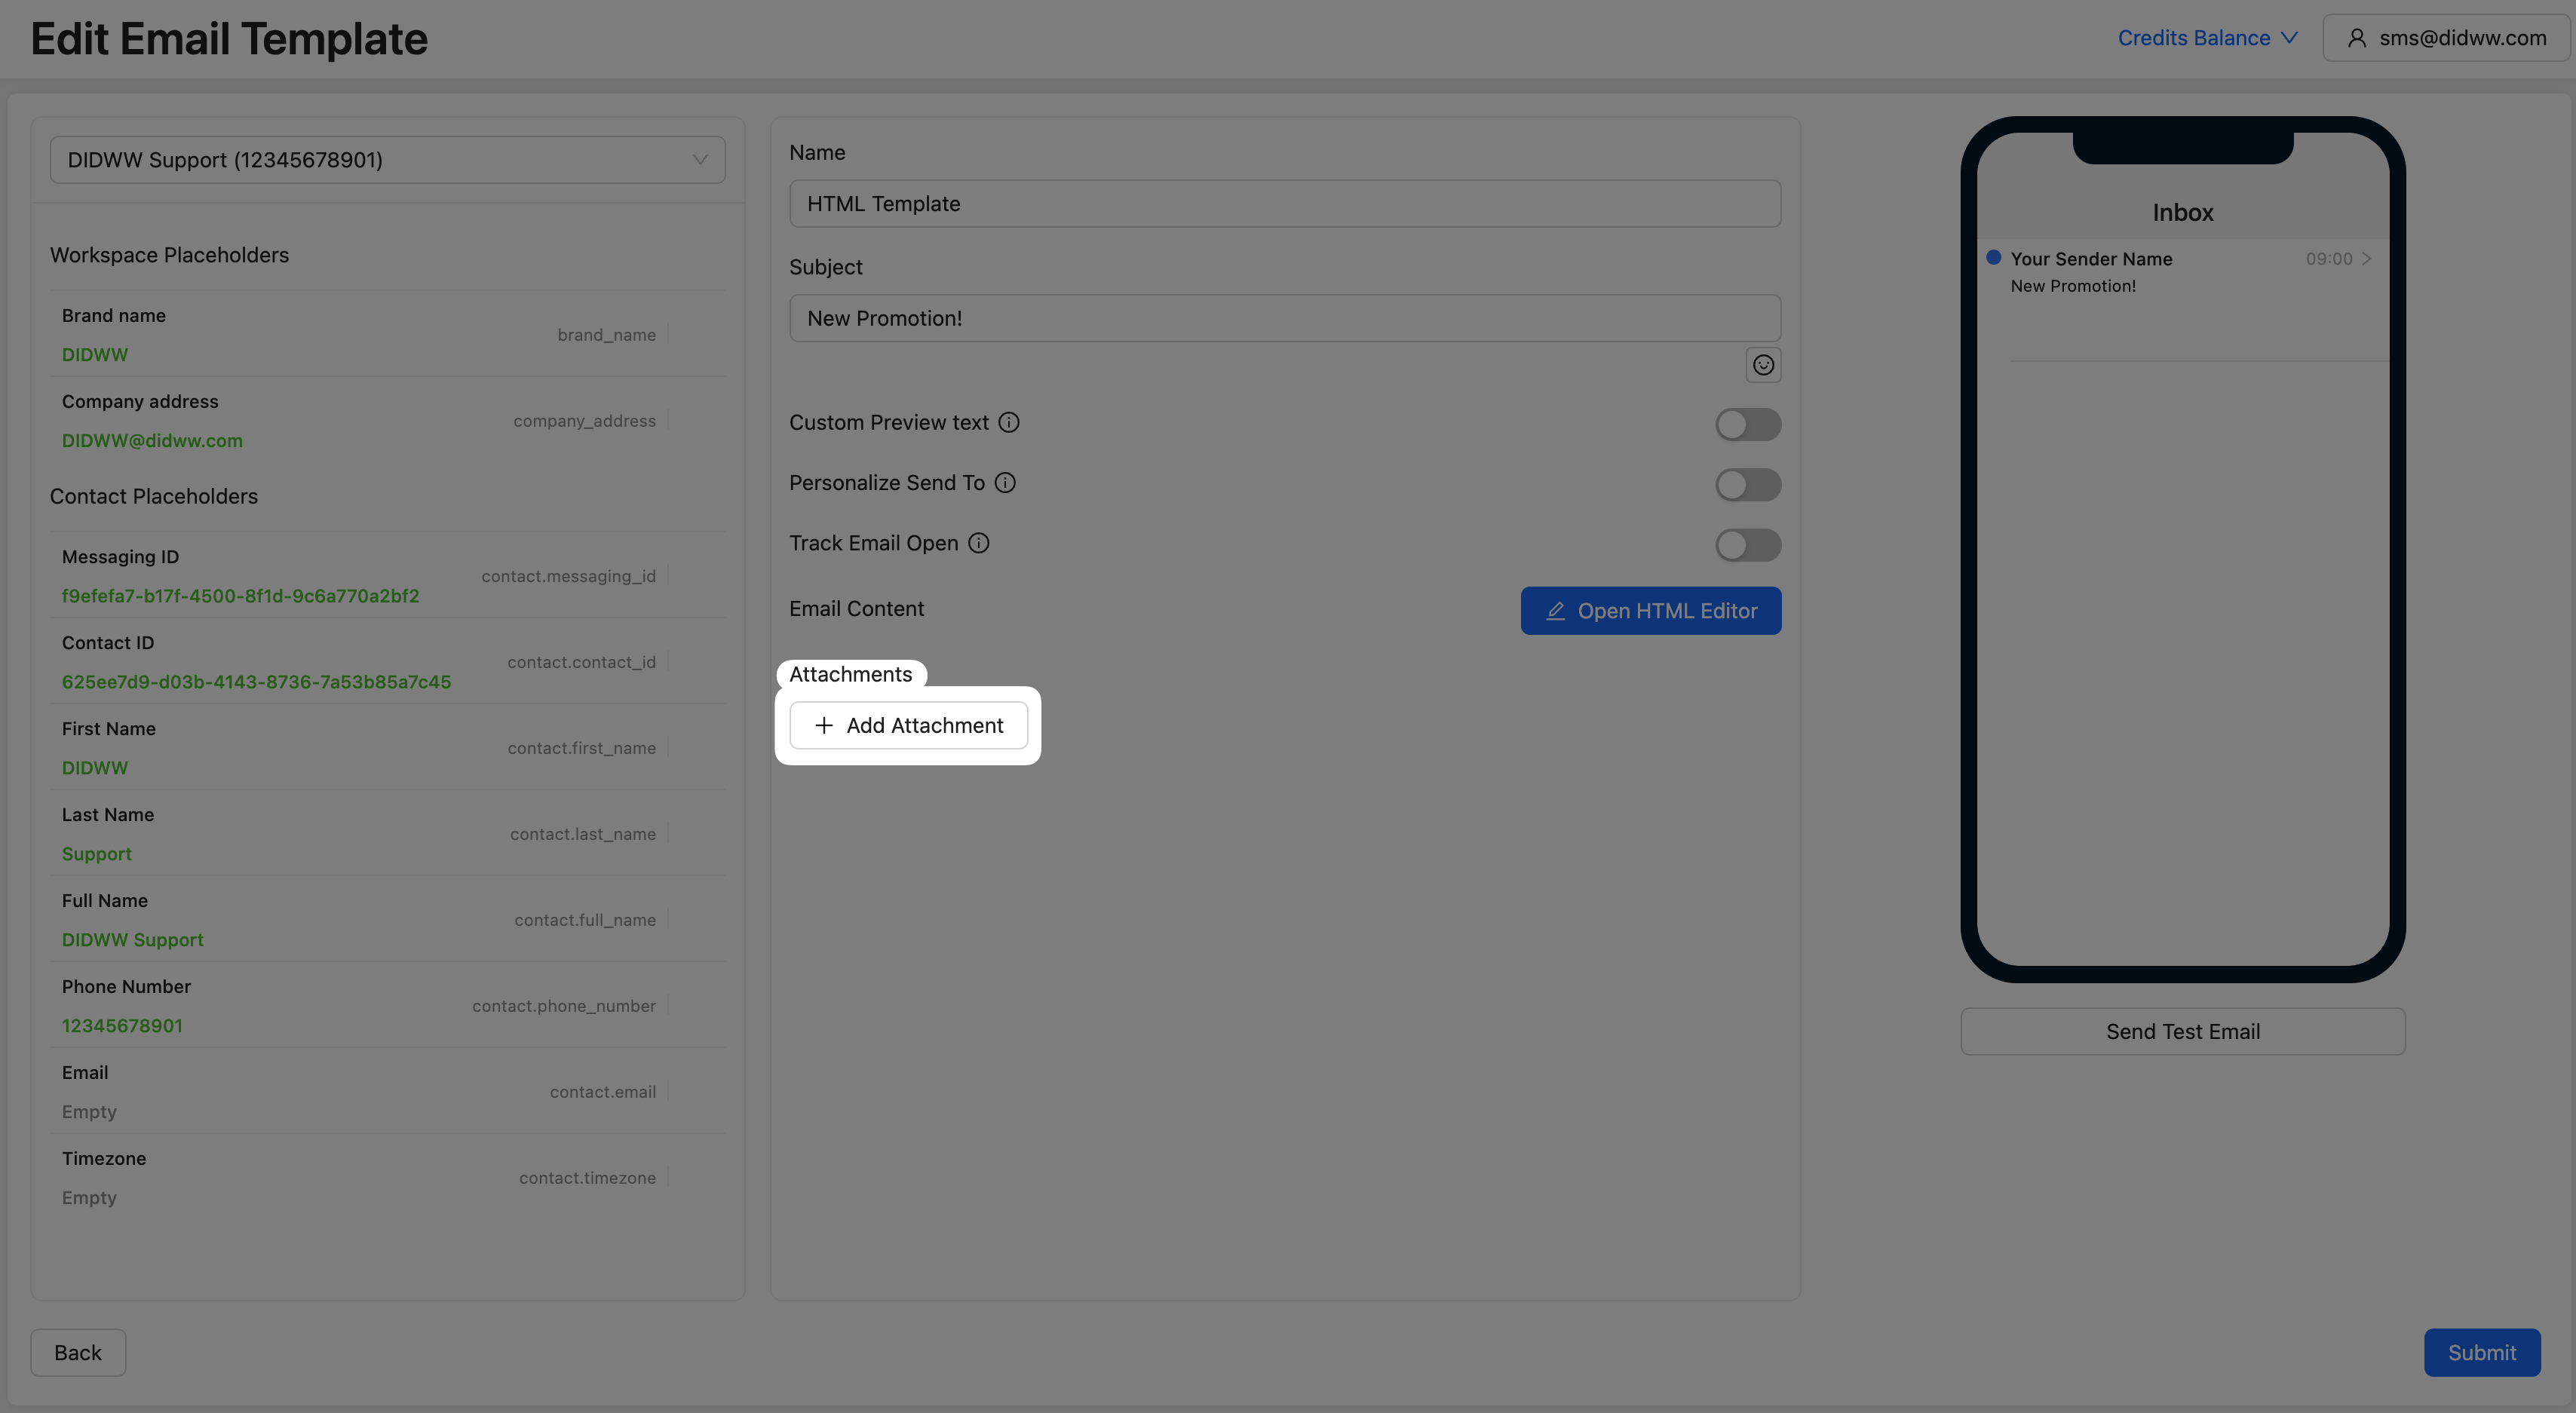
Attachments can be added in the Email Builder to enhance your template by including supporting documents such as PDFs, images, or other files that complement the message content.
To include attachments in your email, click the Add Attachment button.
The Sections in the DIDWW Email Template Builder allows you to quickly create and organize different parts of an email layout. It offers a range of pre-designed layouts, grouped into categories for specific purposes, to streamline the template design process. Below are the available section types:
The Saved column provides access to blocks you’ve previously saved, allowing you to easily add them to your template design area. To save a block, select it and click the
button.
To add an object to your template, drag it from the left panel and drop it into the template design area on the right. You can arrange objects to create a custom layout and adjust settings for each object to fit your branding.
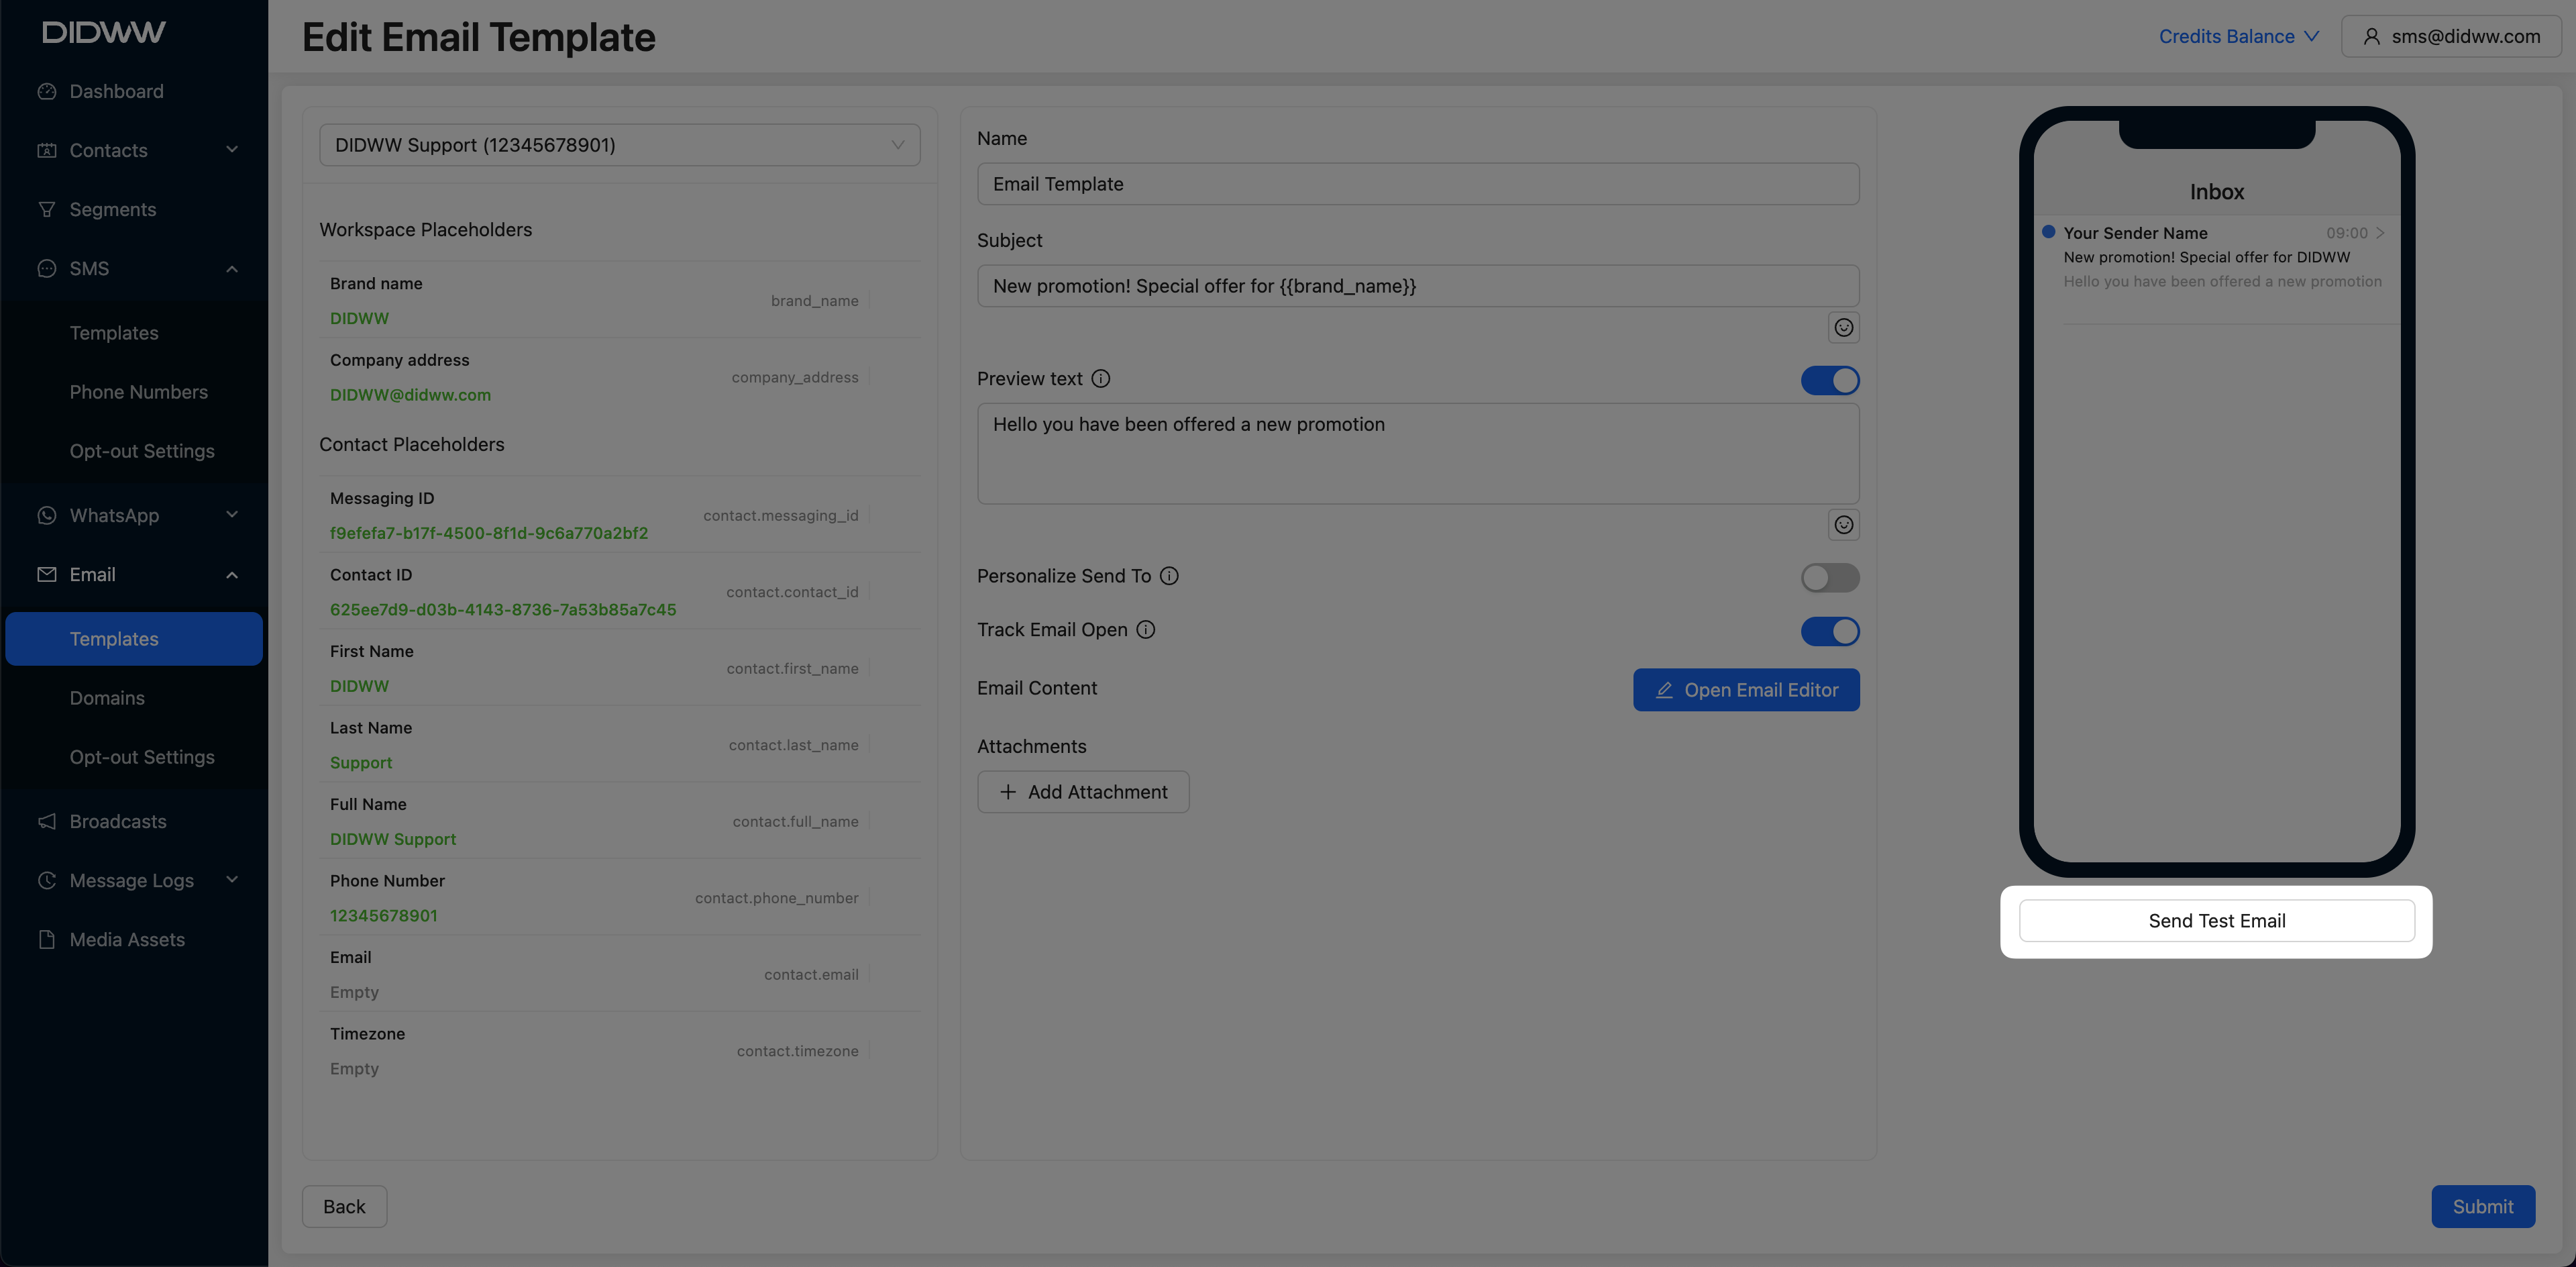
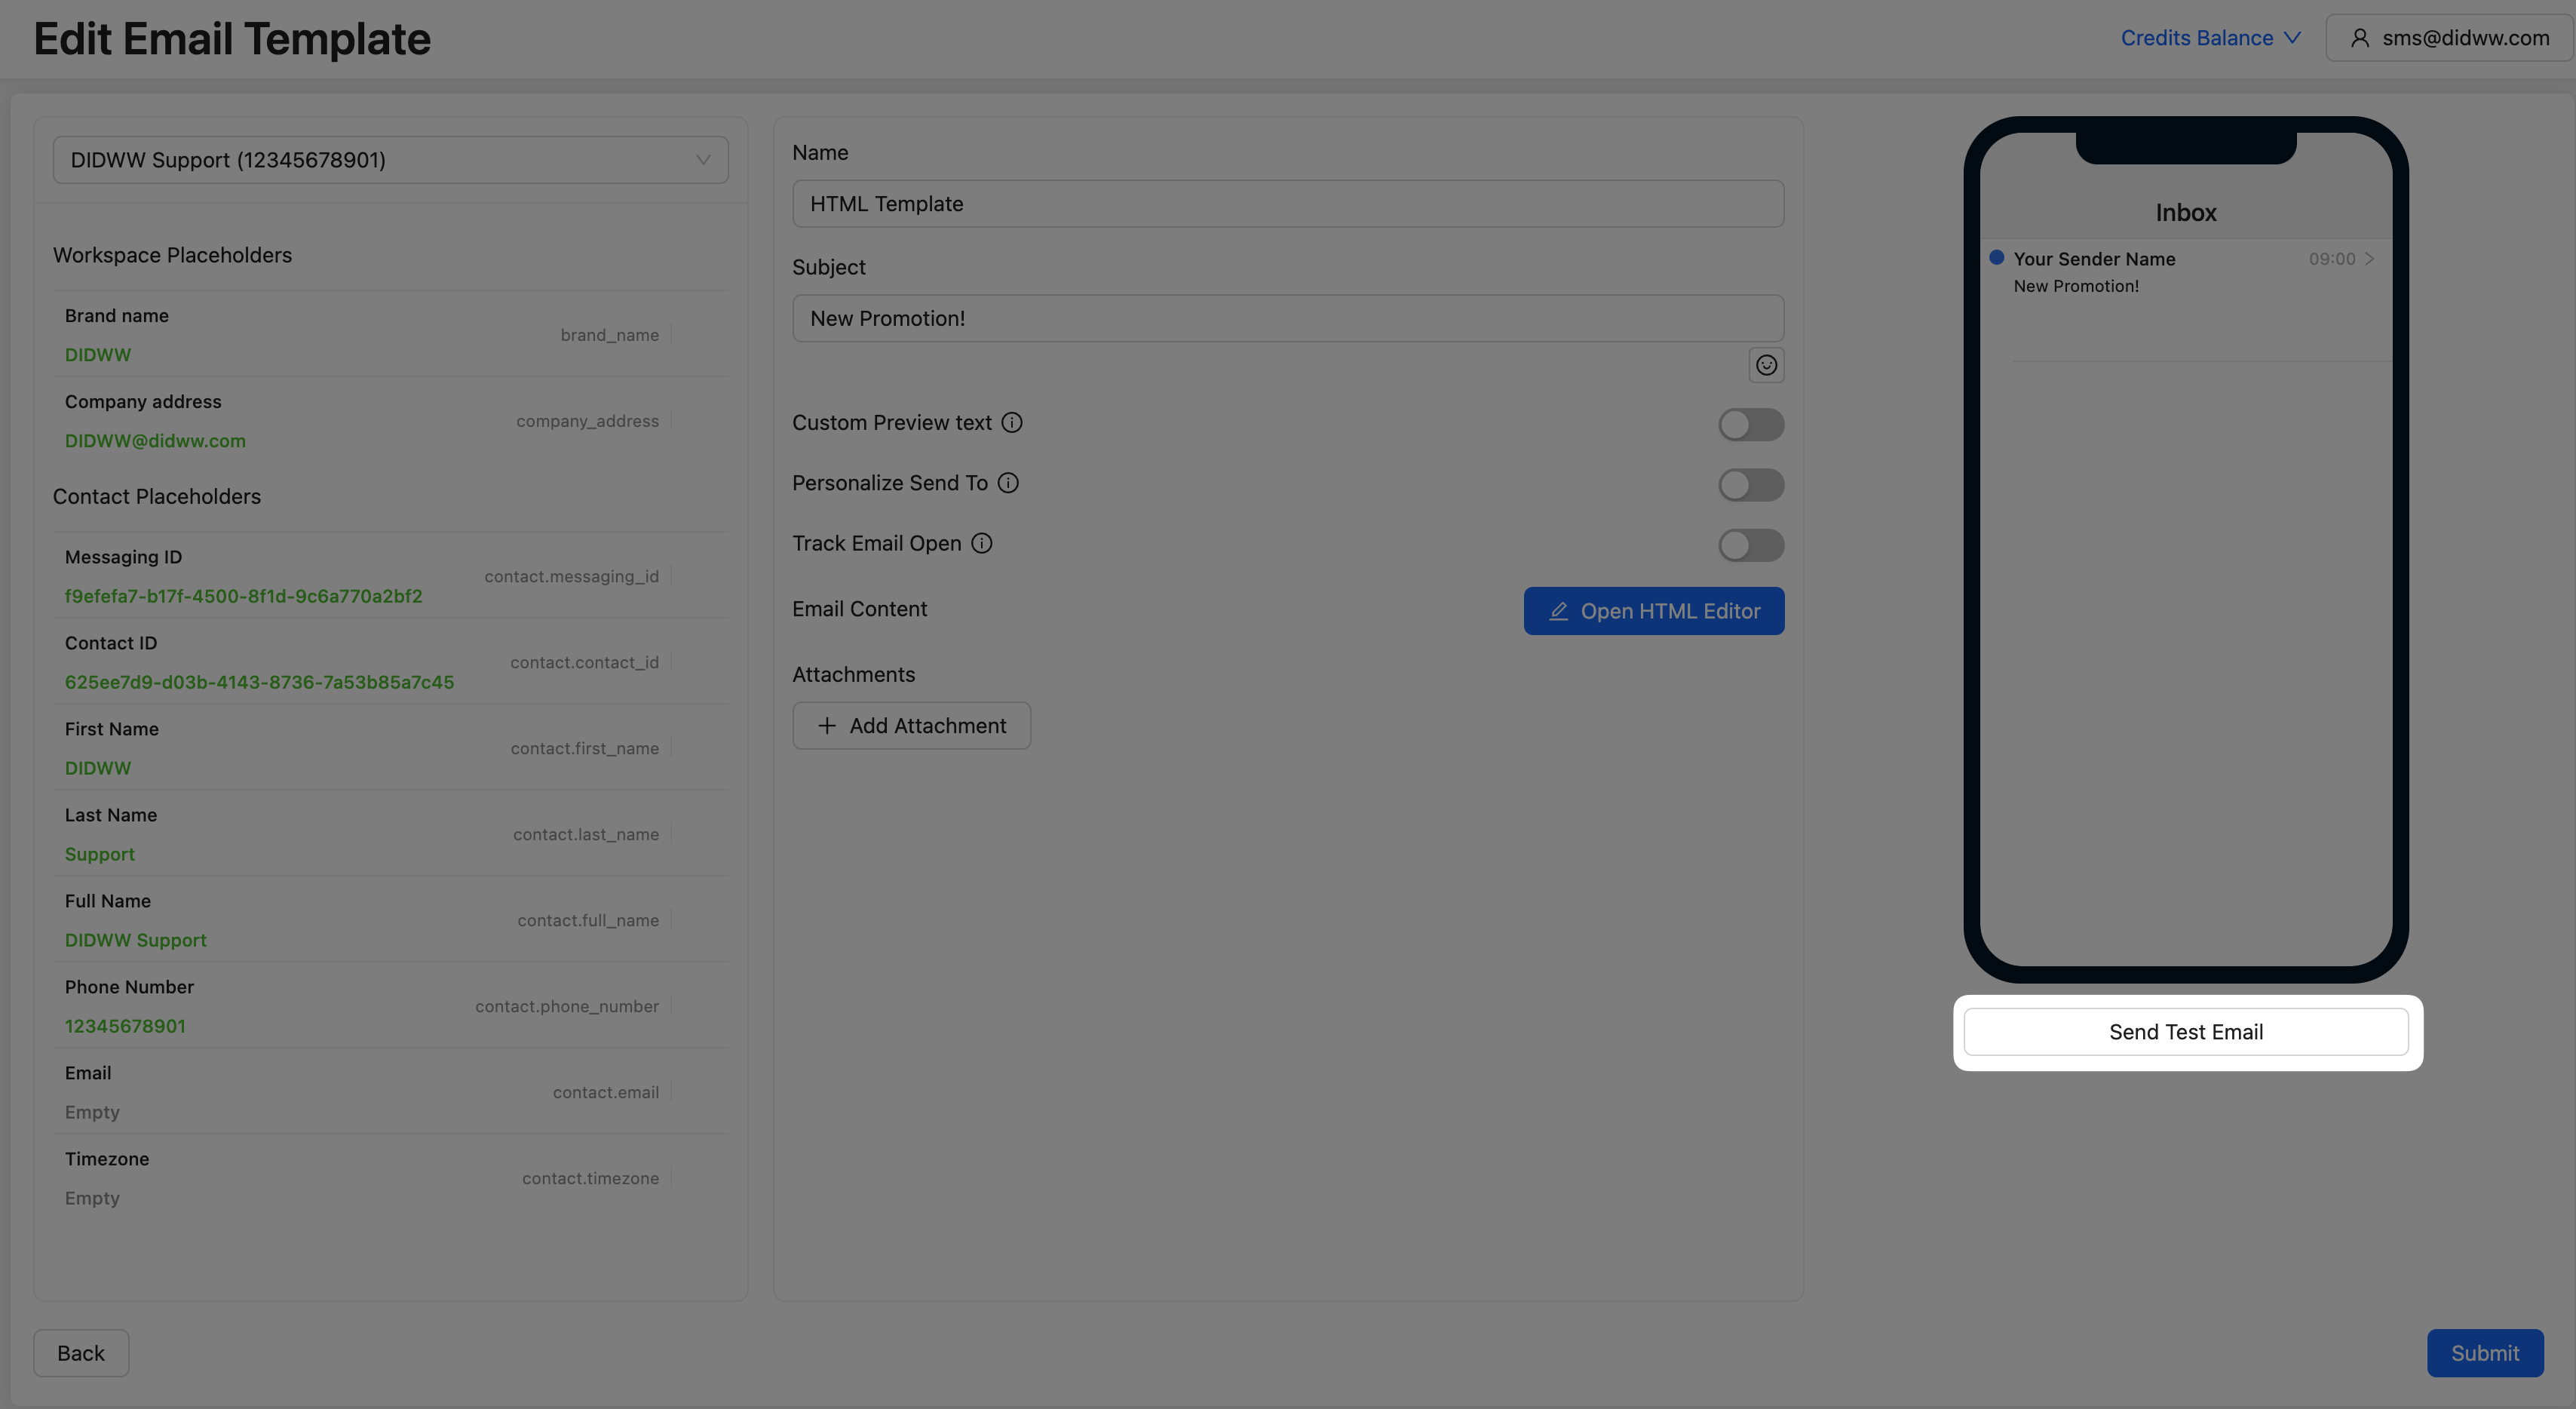
To preview the email’s appearance and content before saving the template, you can send a test email. On the create email template page, click Send Test Email.
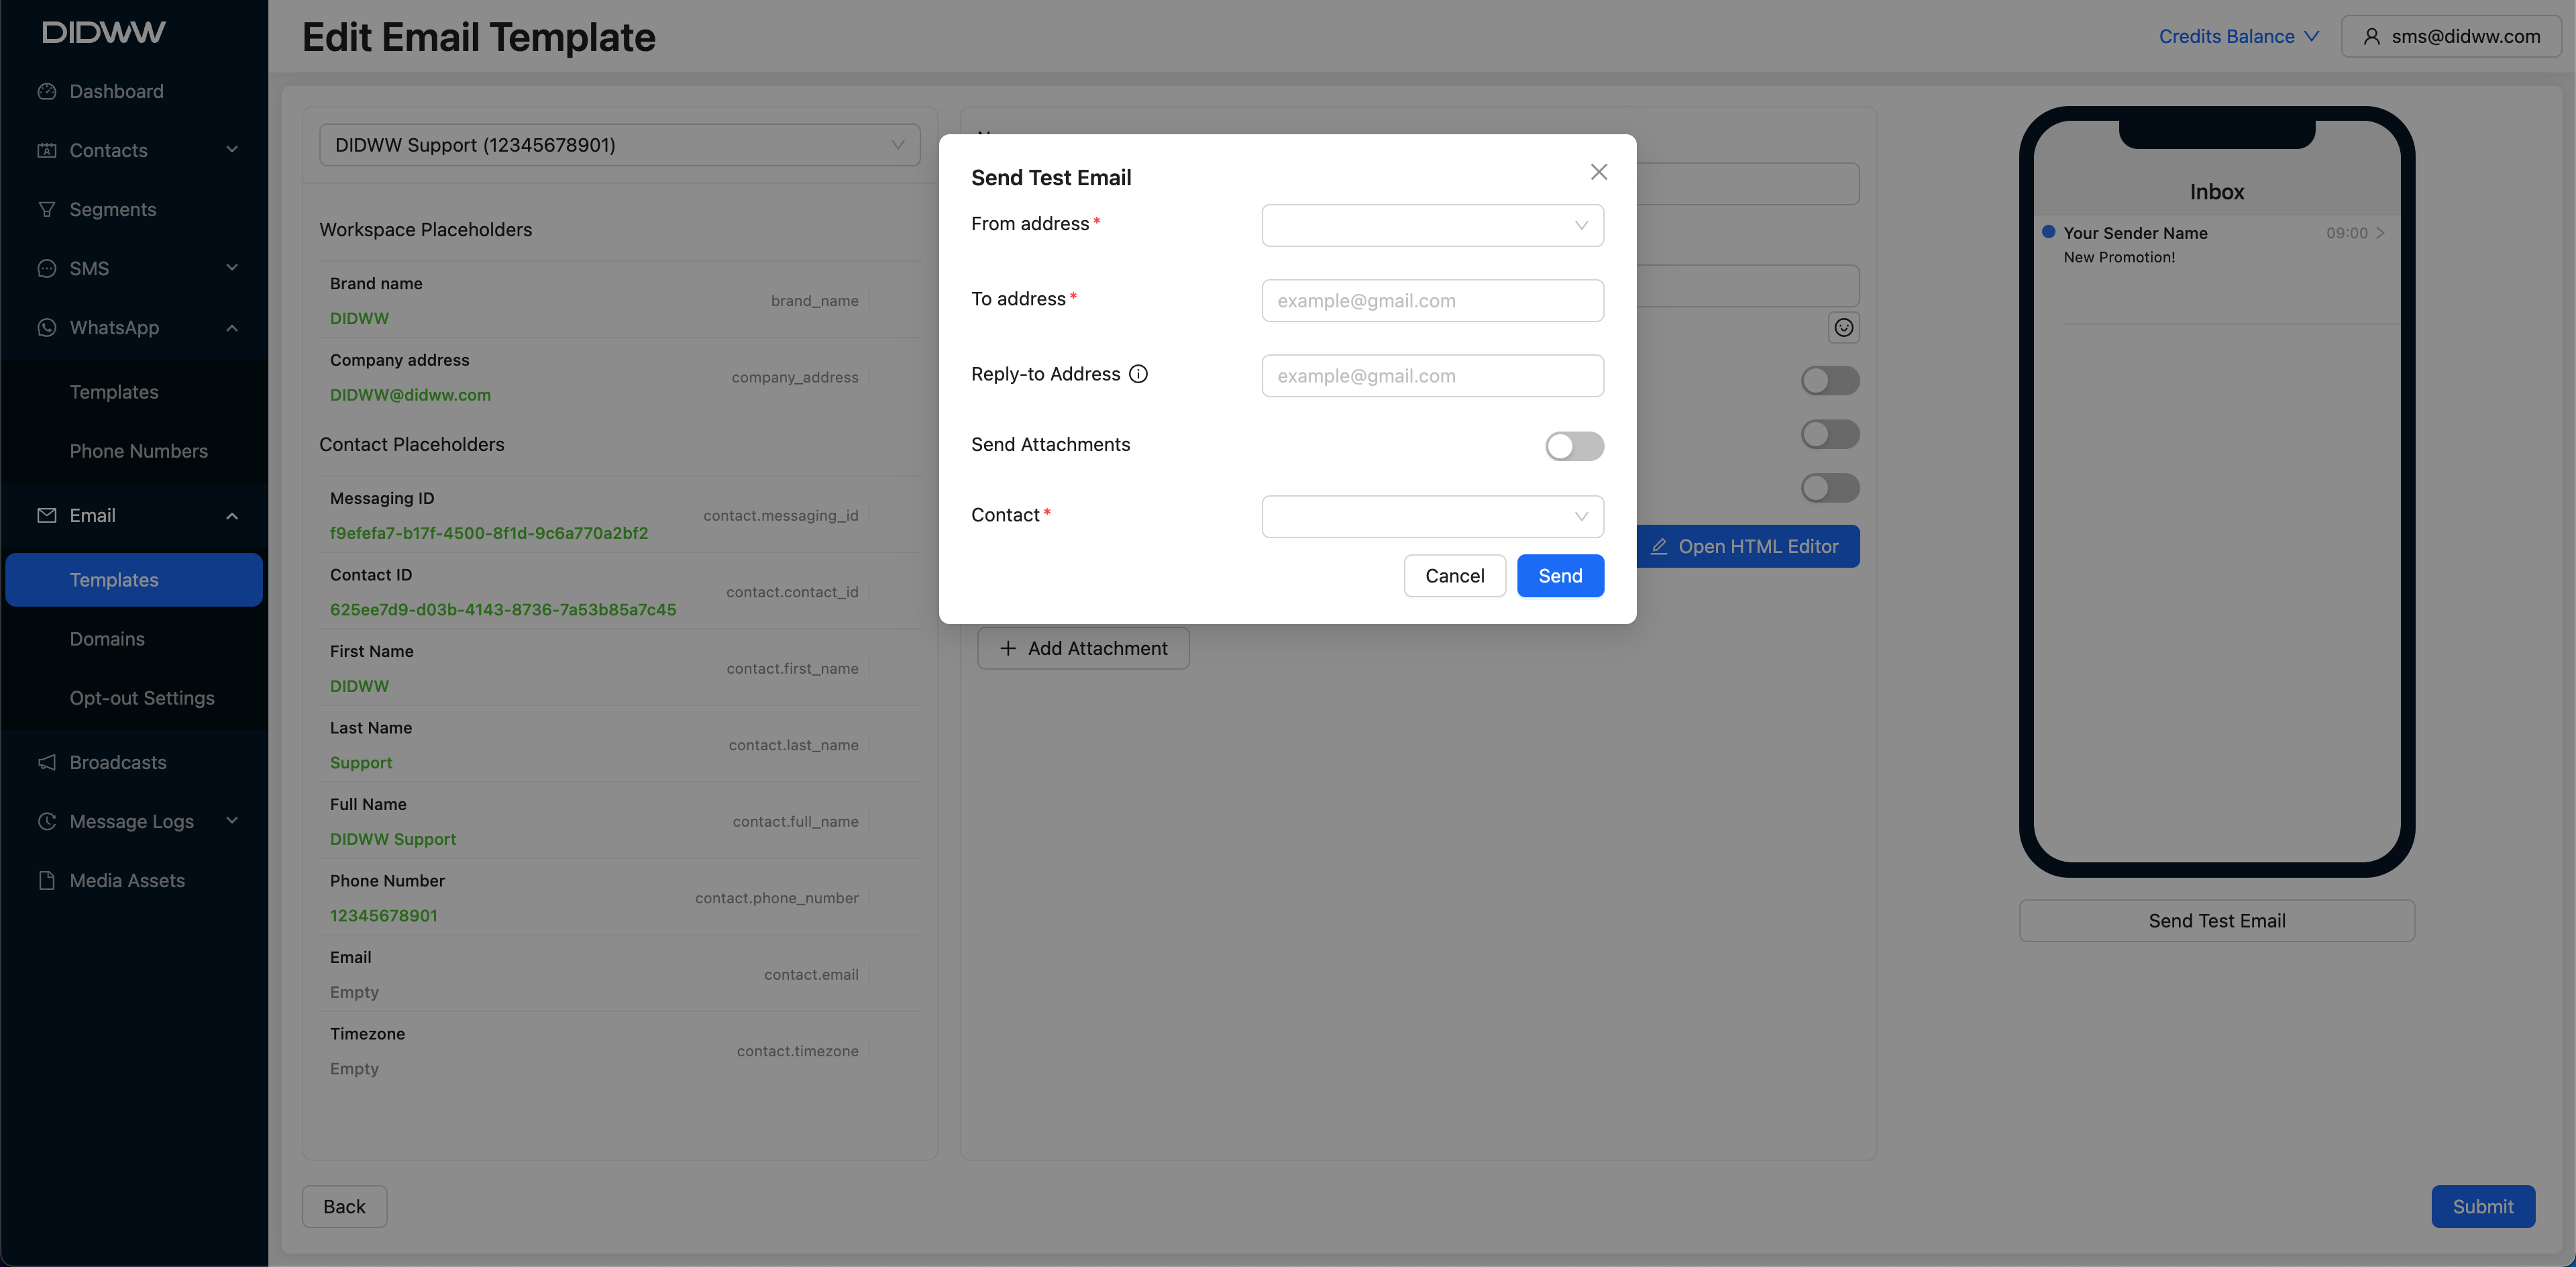
In the Send Test Email window, enter the following details:
From address: Select the email address you want to display as the sender.
To address: Enter the recipient’s email address where the test email will be sent.
Reply-to Address: Specify the email address to which replies will be directed. If left empty, the reply-to address will be the same as the sender’s email address.
Send Attachments: Toggle this option on if you want to include any attachments that are part of the email template.
Contact: Choose a contact from the dropdown list if you want to populate placeholders with actual contact data.
After filling in the fields, click Send to deliver the test email.
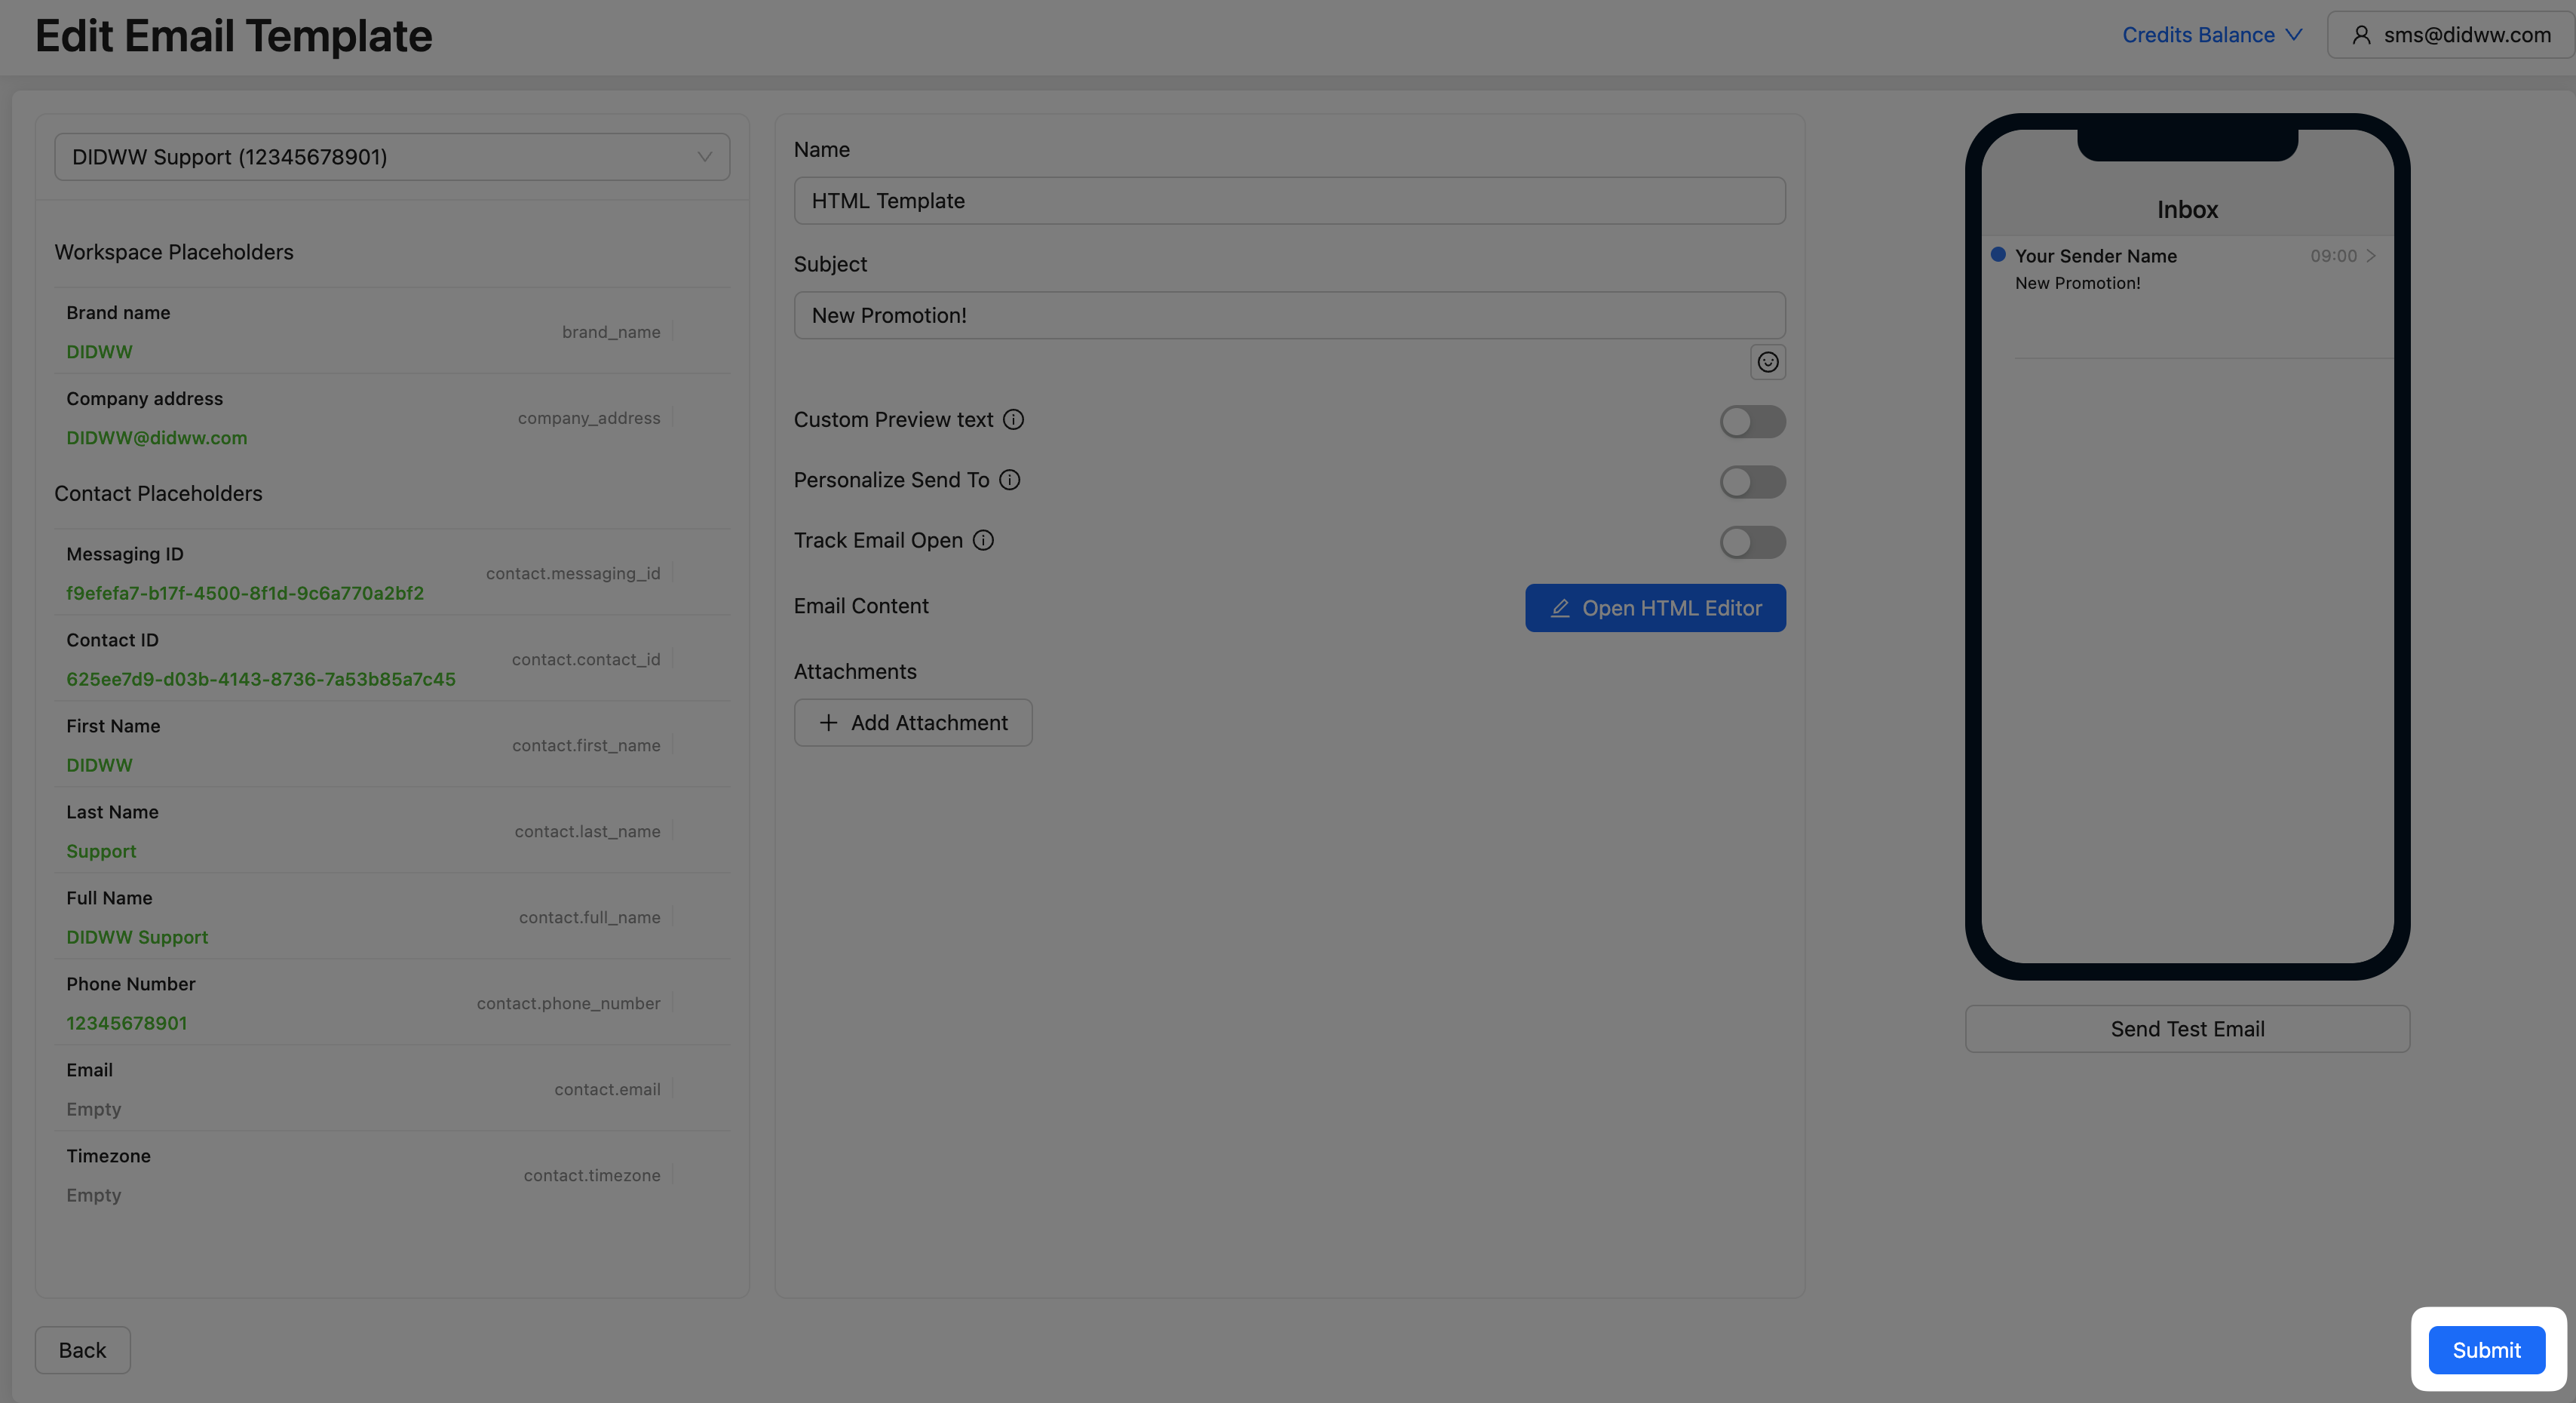
To create a new email template with HTML, use the Messaging Platform’s code editor, which includes syntax highlighting and HTML beautification for easier editing. This option is ideal for users needing full control over design or working with pre-written HTML code. Follow the steps below to set up your template.
From the dropdown menu, select a placeholder contact to enable the use of workspace and contact placeholders in your template configuration.
Then, configure the following fields:
Name: Enter a name for your email template for internal reference.
Subject: Specify the subject line that recipients will see in their inboxes.
Preview Text: (Optional) Add preview text that appears next to the subject line in recipients’ inboxes.
Personalize Send To: Toggle this option on if you want to personalize the email based on contact attributes.
Track Email Open: Enable this option to track whether recipients open the email, providing valuable engagement metrics.
In the left pane, you’ll find Workspace Placeholders and Contact Placeholders that you can use to personalize the HTML template. To insert a placeholder, click on a placeholder from the list, and it will be added at the cursor’s position in the HTML code. Placeholders like {{contact.first_name}} or {{company_address}} dynamically insert information based on each contact’s data.
In the right pane, use the code editor to enter your HTML code. The editor supports syntax highlighting, making it easier to structure and read your code.
The Beautify HTML option is available to automatically format your HTML for better readability.
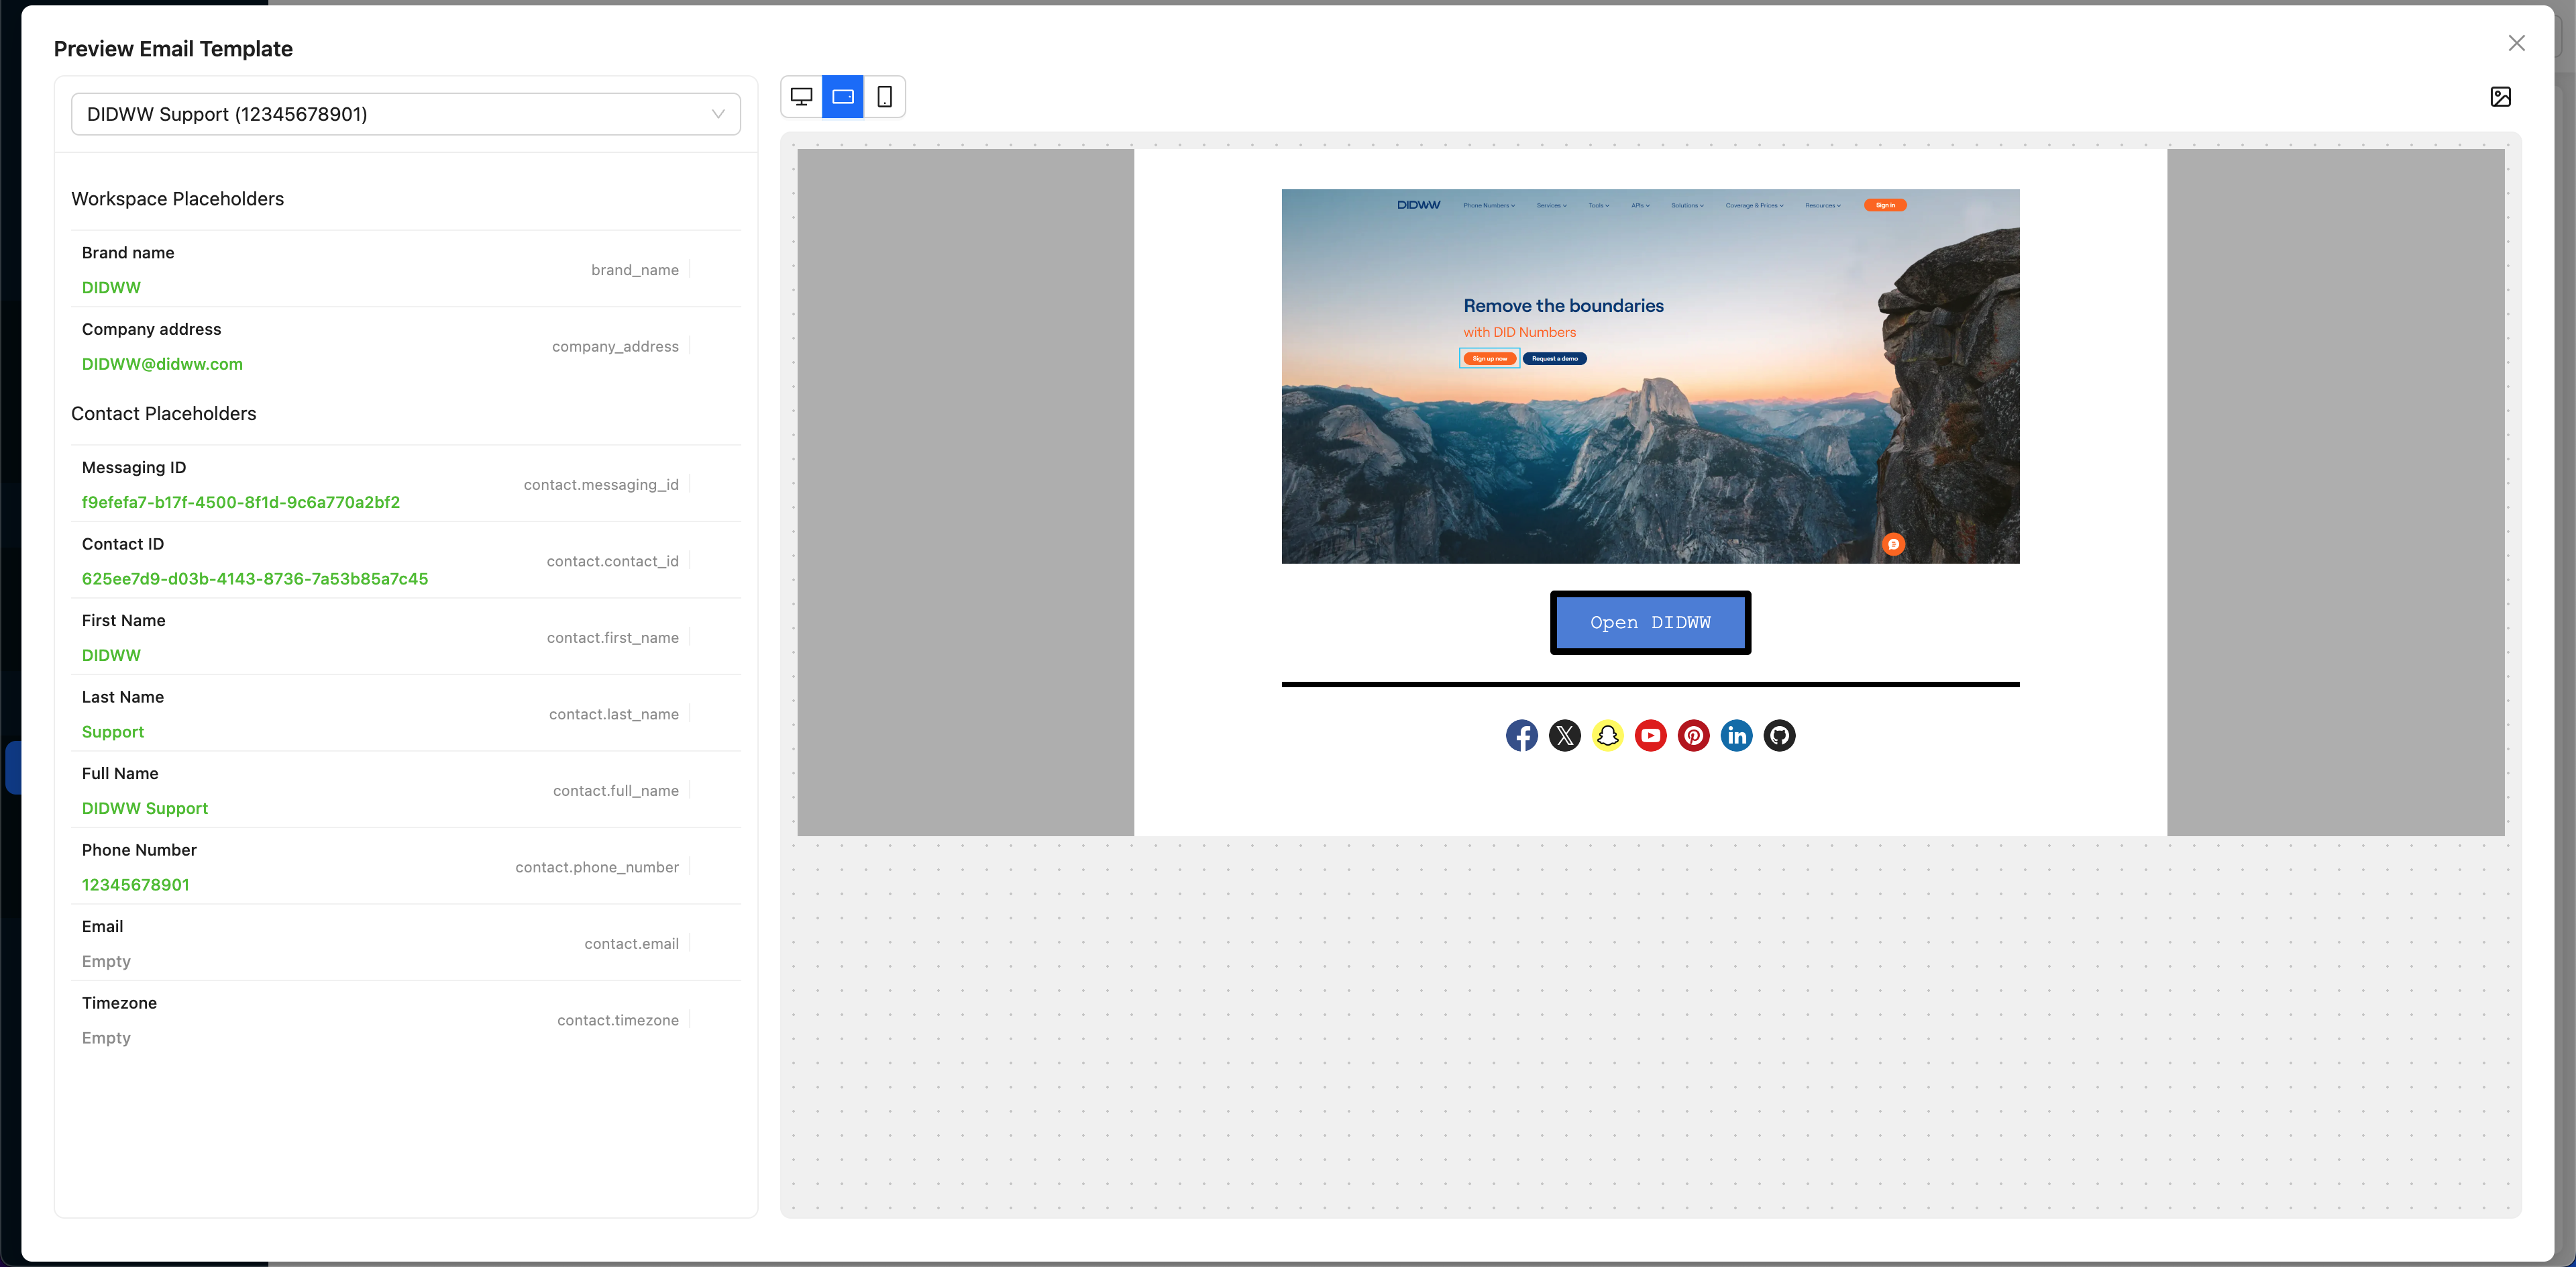
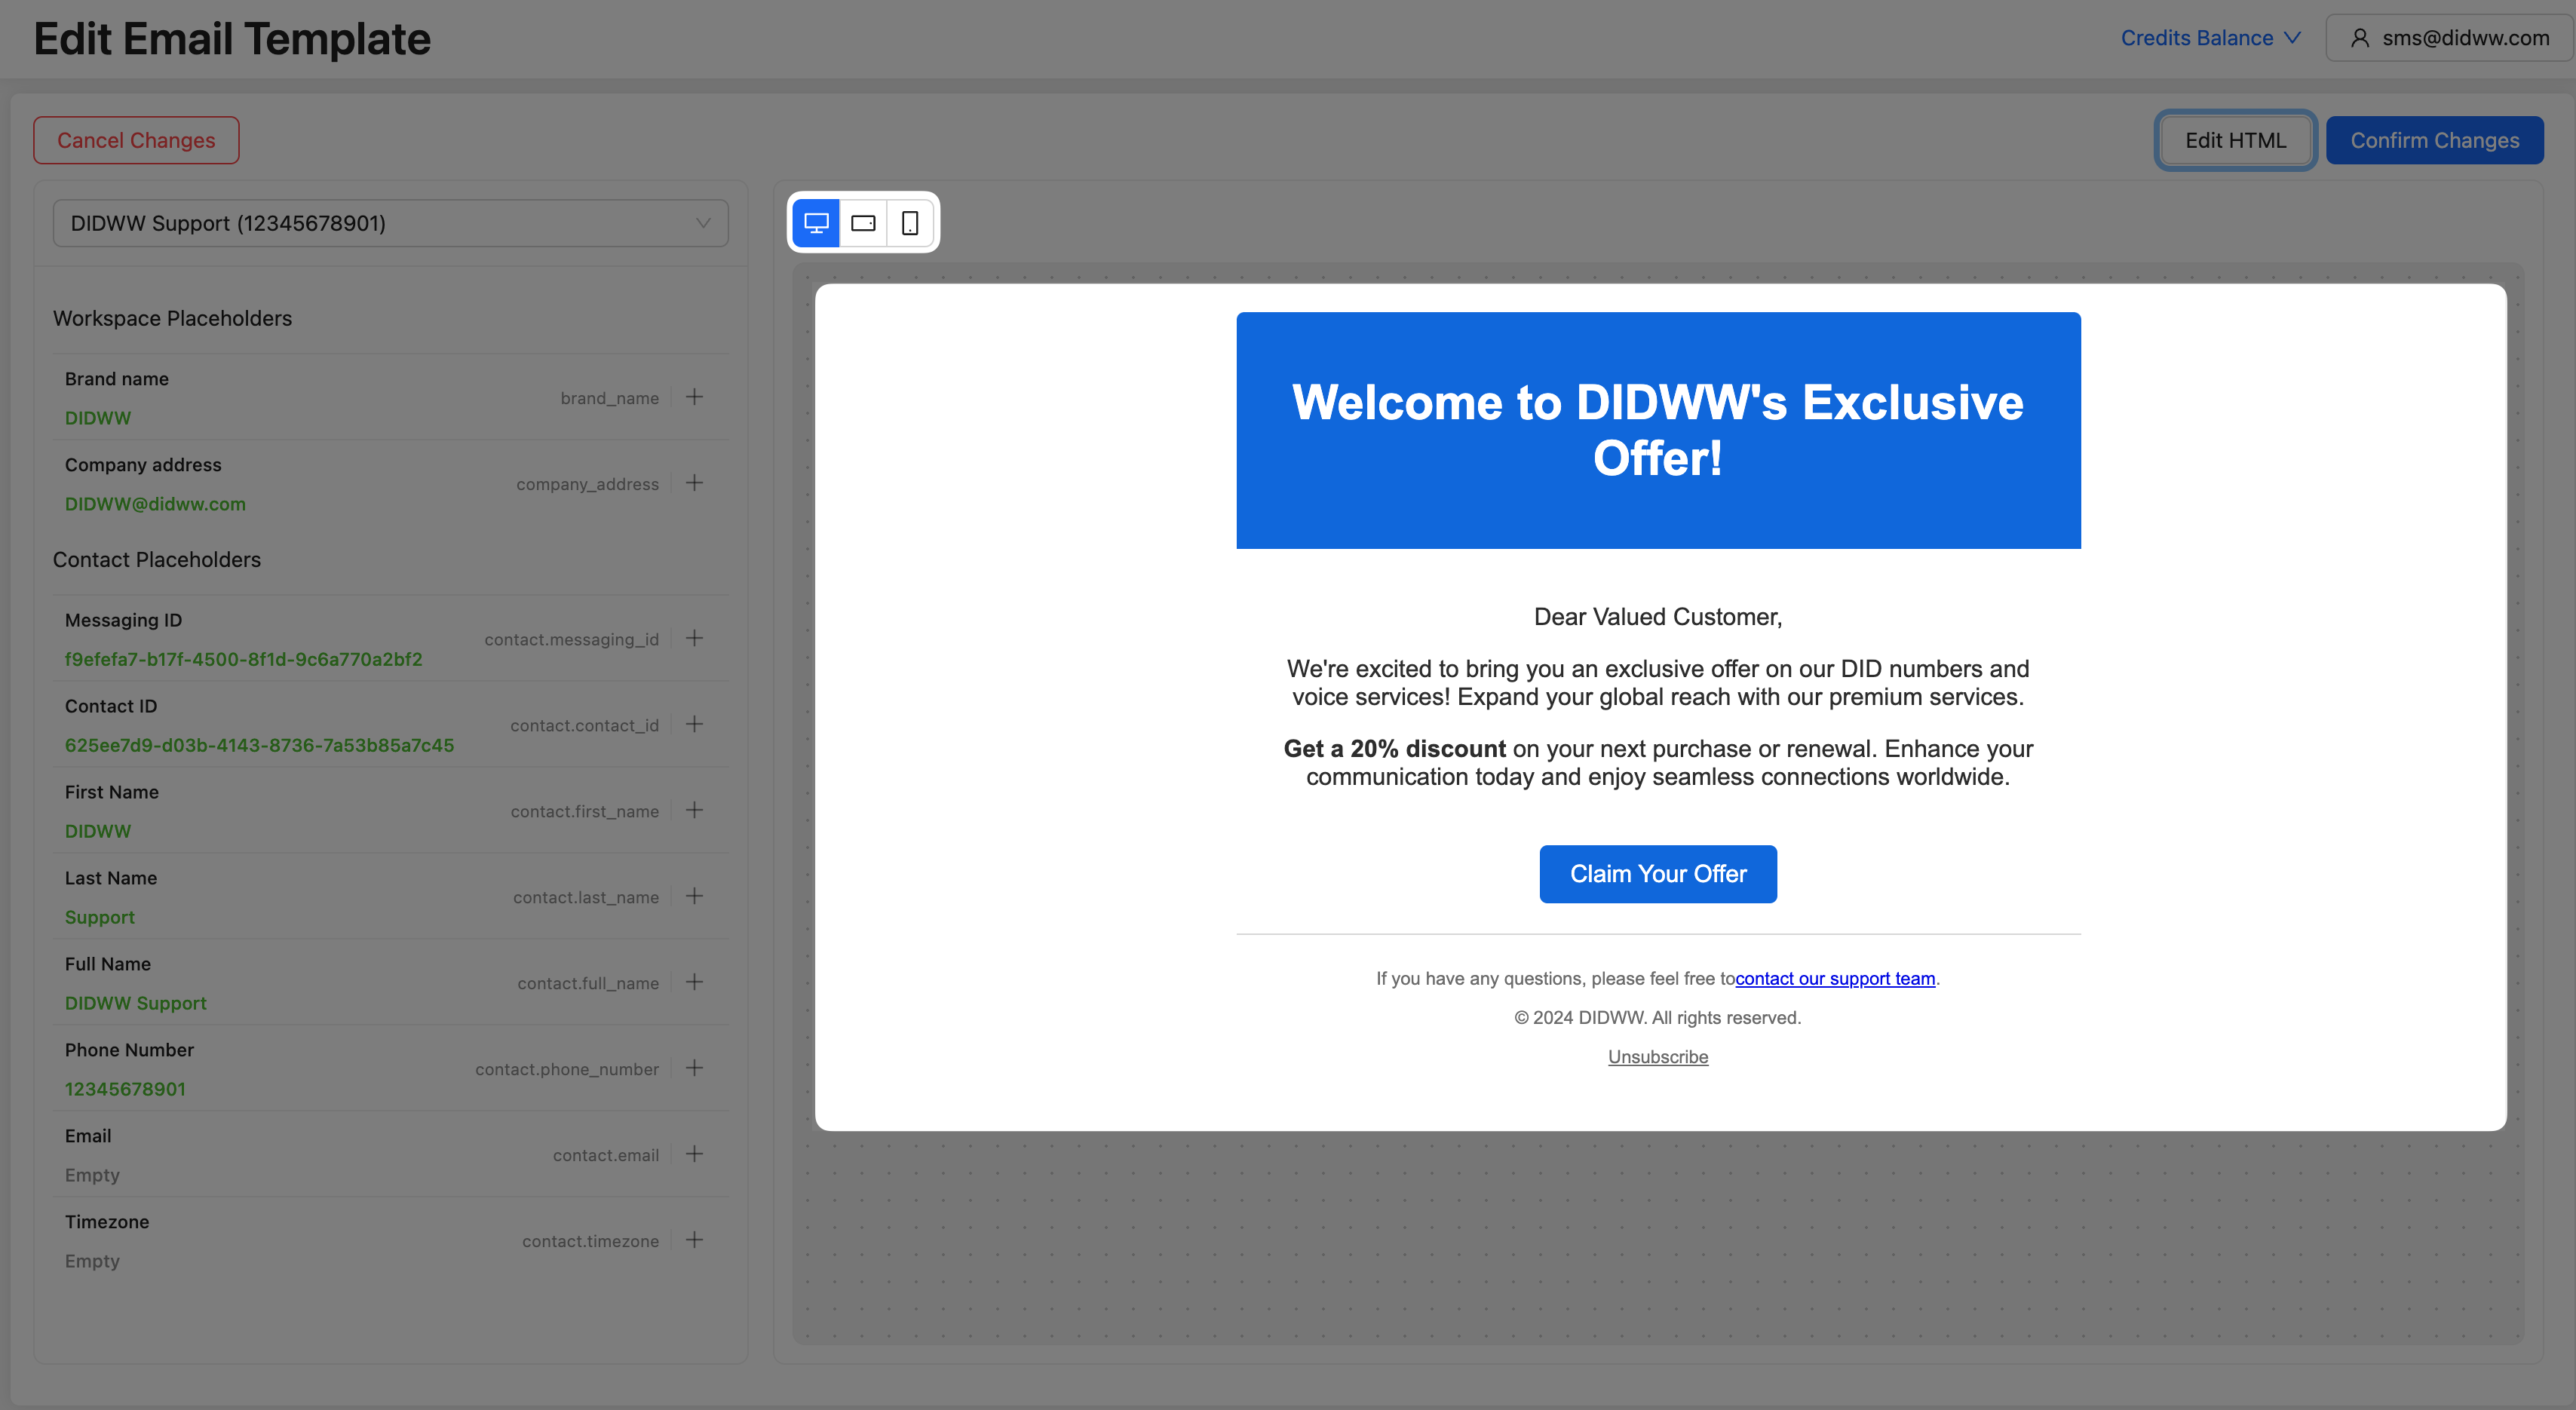
The preview feature allows you to see how the email will appear on both desktop and mobile devices. This is especially useful for checking the layout, styling, and overall appearance to ensure the HTML renders as expected across different devices.
In preview mode, you can interact with links and view the layout as recipients will see it, allowing you to make adjustments before finalizing the template.
To preview the email’s appearance and content before saving the template, you can send a test email. On the create email template page, click Send Test Email.
 button to open the Email Builder.

 button.
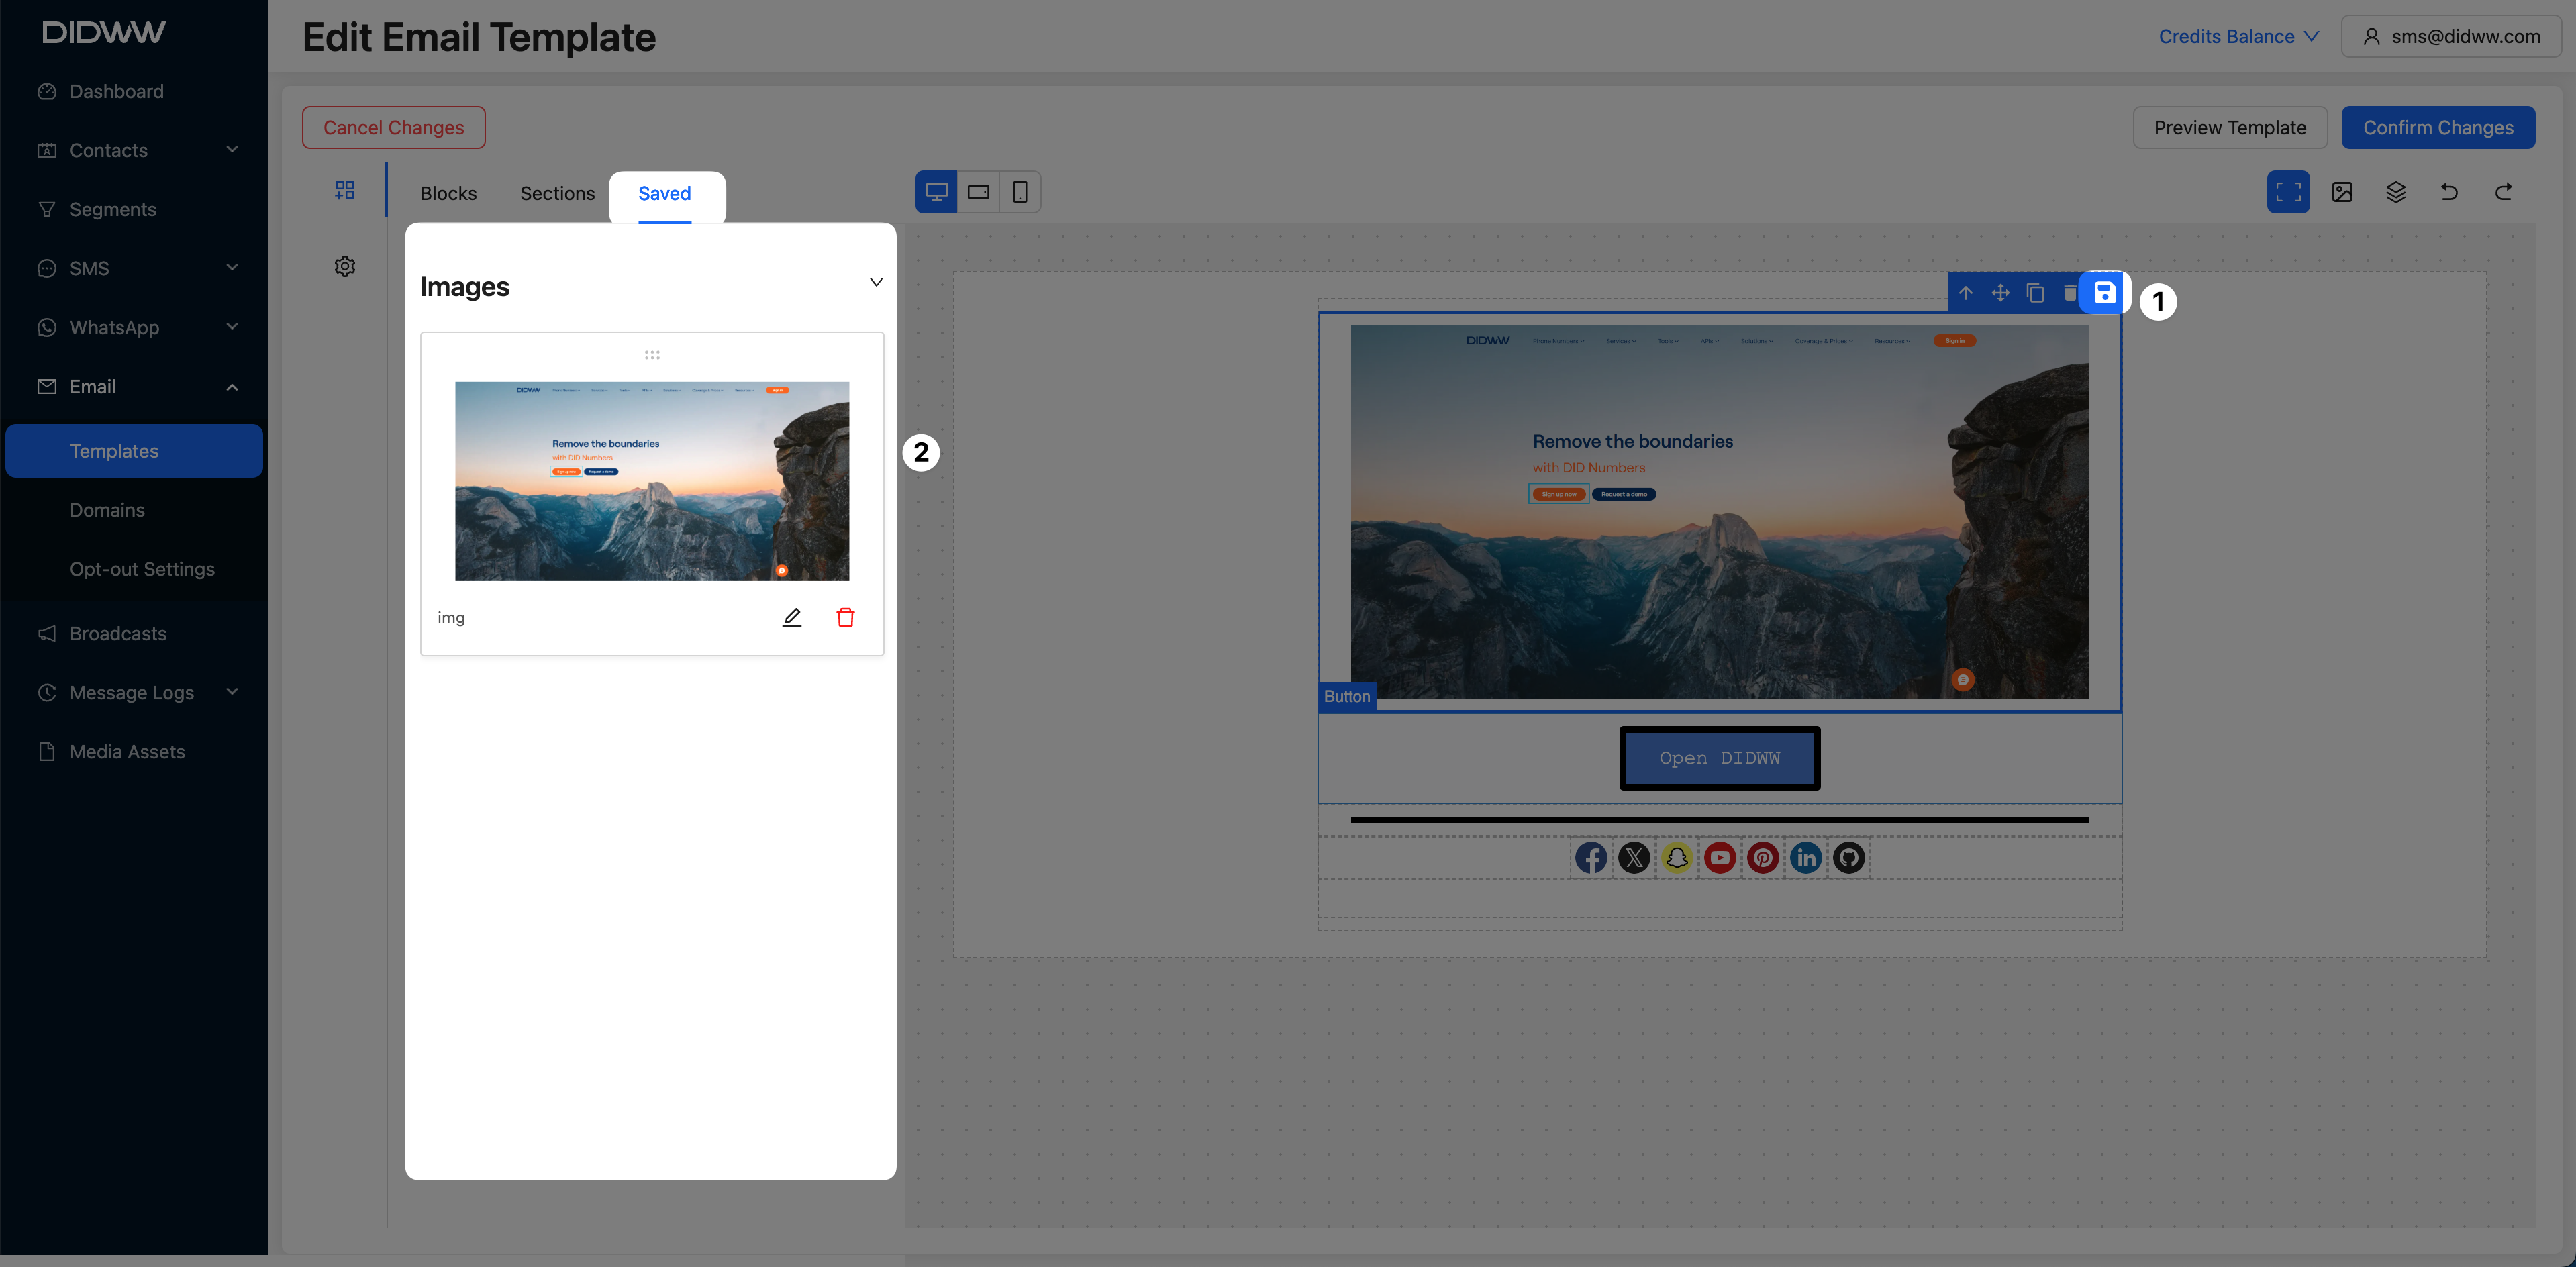
 in the top-right to to open the preview window and click on
 buttons to swap between PC, Tablet, and Mobile devices view.