Buying and managing Capacity
Channel - the network capacity for carrying a single phone call.
Channel Pool - a group of channels which may be selectively assigned to Shared Capacity Groups, or individually designated as Dedicated Channels for use by specific DIDs.
Capacity Group - a group of channels that share their call capacity amongst a number of DIDs that are assigned to the Shared Capacity Group.
Capacity Pool - a list of countries where additional capacity is supported.
Note
There are 2 Capacity Pools (Extended and Standard). They differ by the amount of countries available per each pool. Extended pool supports more countries from the DIDWW coverage.
Step 1. Select the “Capacity Pool” where the channels need to be purchased, and click on the “Add New Channels” button (Fig. 1).
Fig. 1. Selecting Capacity Pool
Step 2. Enter the desired channel quantity and click the “Complete Order” button (Fig. 2).
Fig. 2. Channel purchase
Step 3. To configure the Capacity Group which will be used with DID numbers, proceed as follows:
Click the “Create Capacity Group” button (Fig. 3).
Fig. 3. Creating a Capacity Group
Create a “Capacity Group” by entering a Group name and defining the number of Shared and/or Metered channels to be used by this Capacity Group. Click “Create” (Fig. 4)
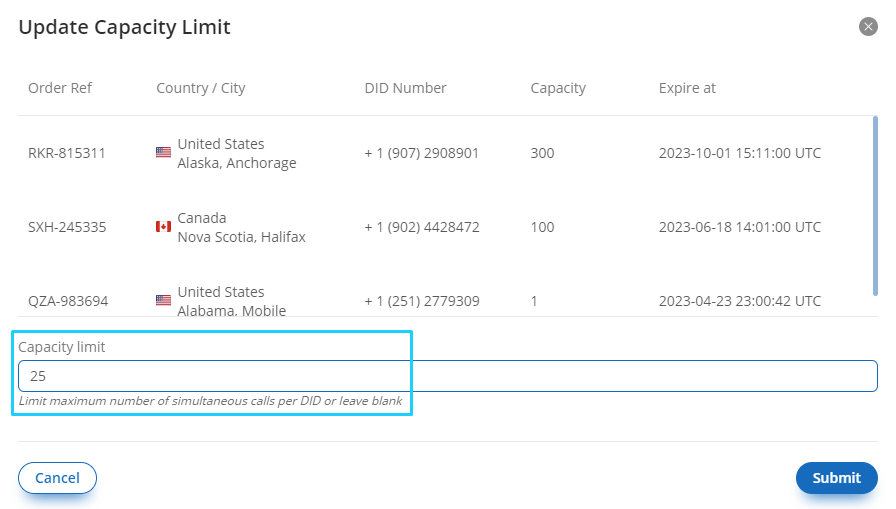
Fig. 4. Creating Shared Capacity Group
Step 4. To edit a Capacity Group or manage the assigned DID numbers, use the “Actions” tab in the Capacity Group list (Fig. 5)
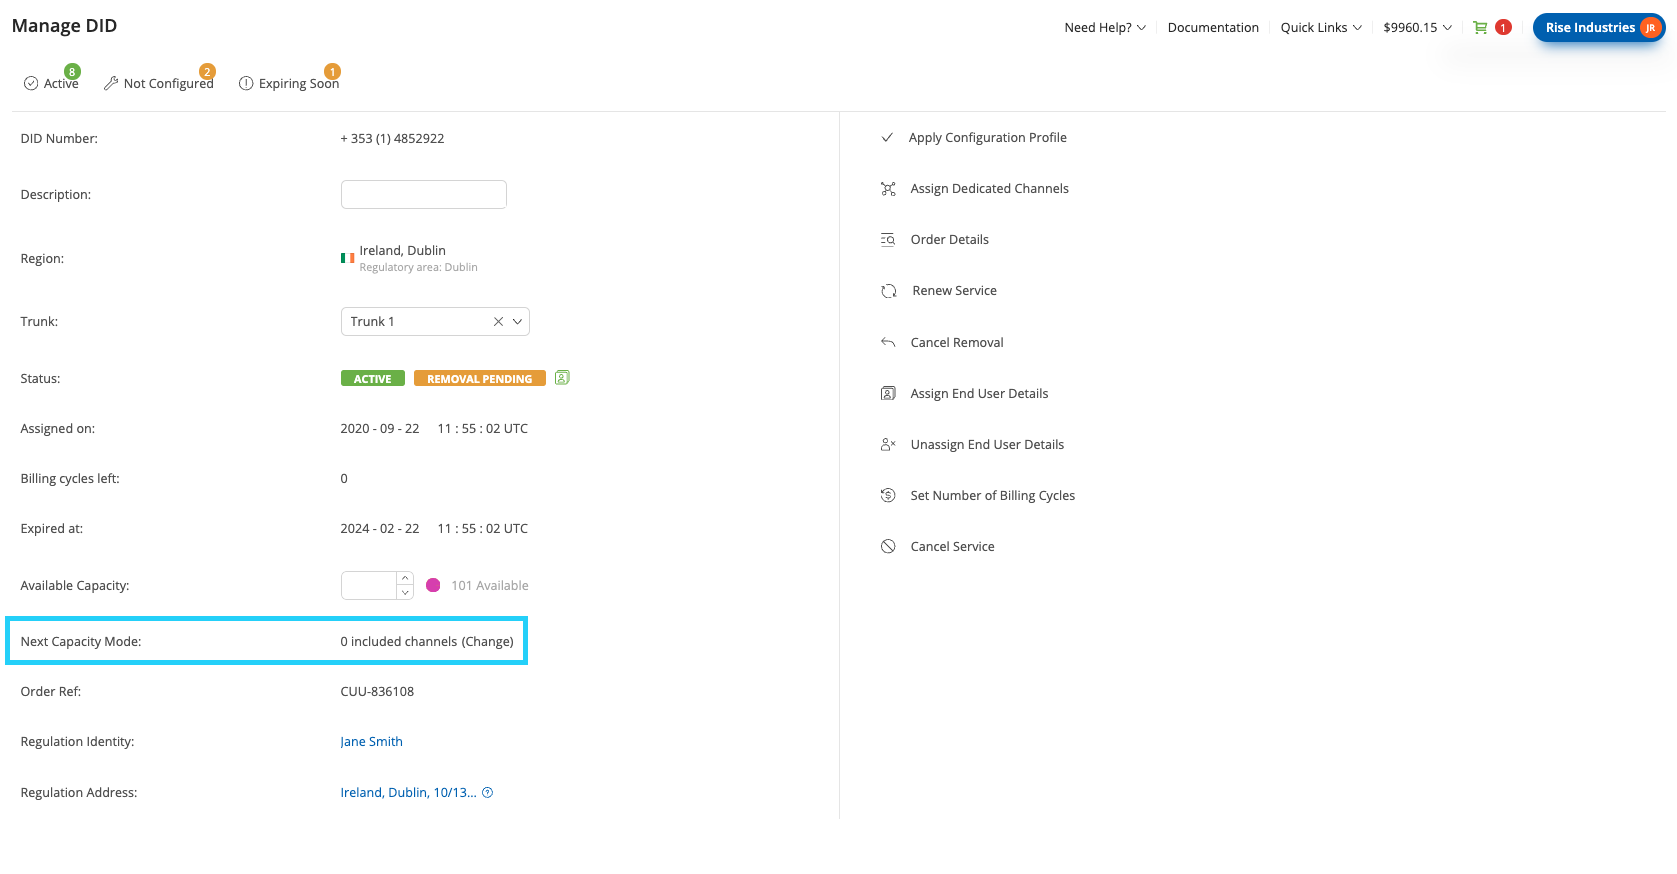
Fig. 5. Capacity Group management
Step 5. To assign/unassign DID numbers to/from the selected Capacity Group, click on “Manage assigned DIDs” (Fig. 5) to open a new window, and add/remove the required DID numbers (Fig. 6).
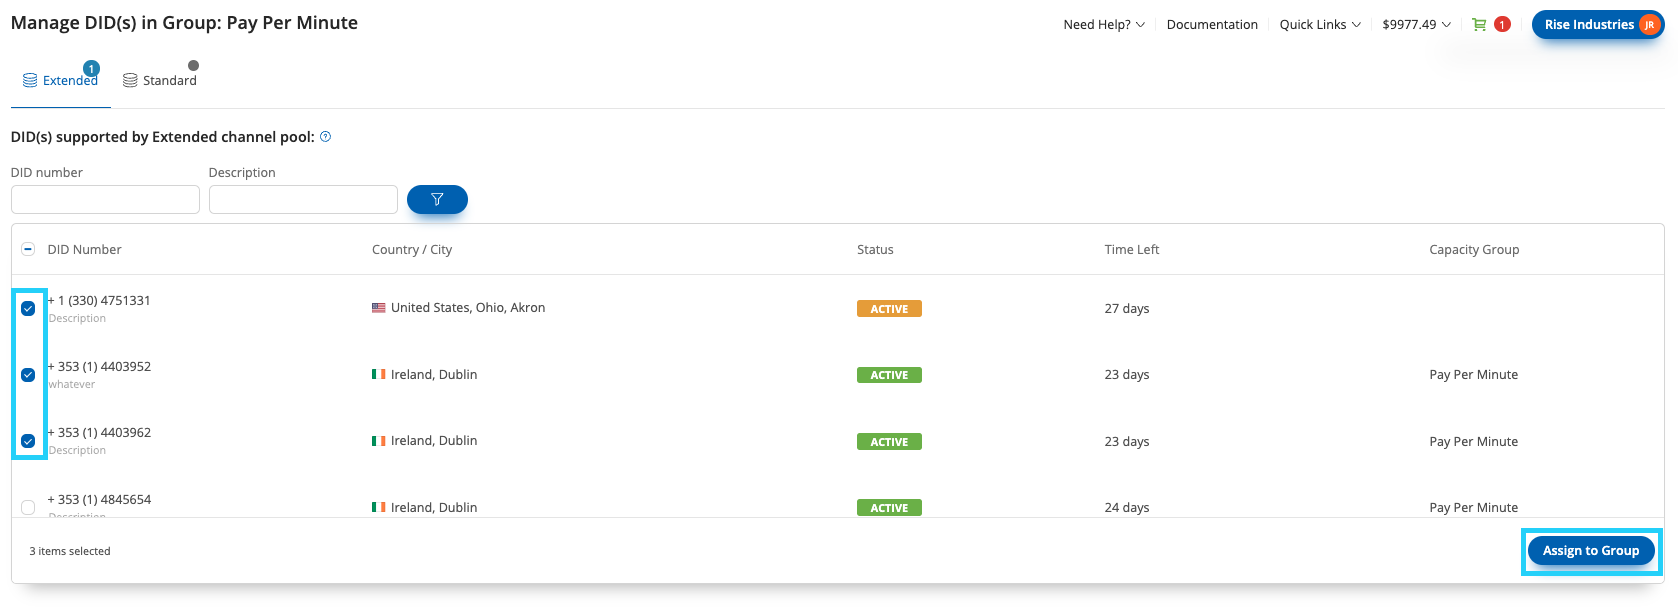
Fig. 6. Assign/unassign DID numbers from the Capacity Group
Step 6. Once added, DIDs can be managed through the “Actions” tab, or via “Batch actions” to select multiple numbers (Fig. 7).

Fig. 7. DID number management
Step 7. To assign Dedicated channels to DID number(s), click on the “My Numbers” section in the menu, select your required DID(s), and from the “Batch actions” menu choose “Assign Dedicated Channels” (Fig. 8).
Fig. 8. Assigning Dedicated Channels
Step 8. Assign dedicated channels by selecting the Capacity Pool and entering the quantity of Dedicated channels per DID number. Once completed, click on the “Confirm” button (Fig. 9).
Fig. 9. Assigning Dedicated channels
Step 9. To confirm that Dedicated channels were assigned successfully, click on the “Pie” icon on the Capacity tab in “My Numbers” section (Fig. 10).
Fig. 10. Dedicated channels assignment confirmation
To cancel channels that are not assigned to any capacity group or numbers click on the “Remove Channels” (Fig. 11), enter the required quantity, and click “Remove”.
Note
The indicated quantity of unassigned channels will be removed from your account
Fig. 11. Unused channel removal