Version 20
Getting Started
What you need to get started:
For Inbound:
Access to DIDWW self-service portal to create VoiceIn trunk and assign it to the preferred DID number.
Access to 3CX Management Console with 3CX PRO (Professional) or 3CX ENT (Enterprise) plan.
For Outbound:
Access to DIDWW self-service portal to create VoiceOut trunk.
Access to 3CX Management Console with 3CX PRO (Professional) or 3CX ENT (Enterprise) plan.
Note
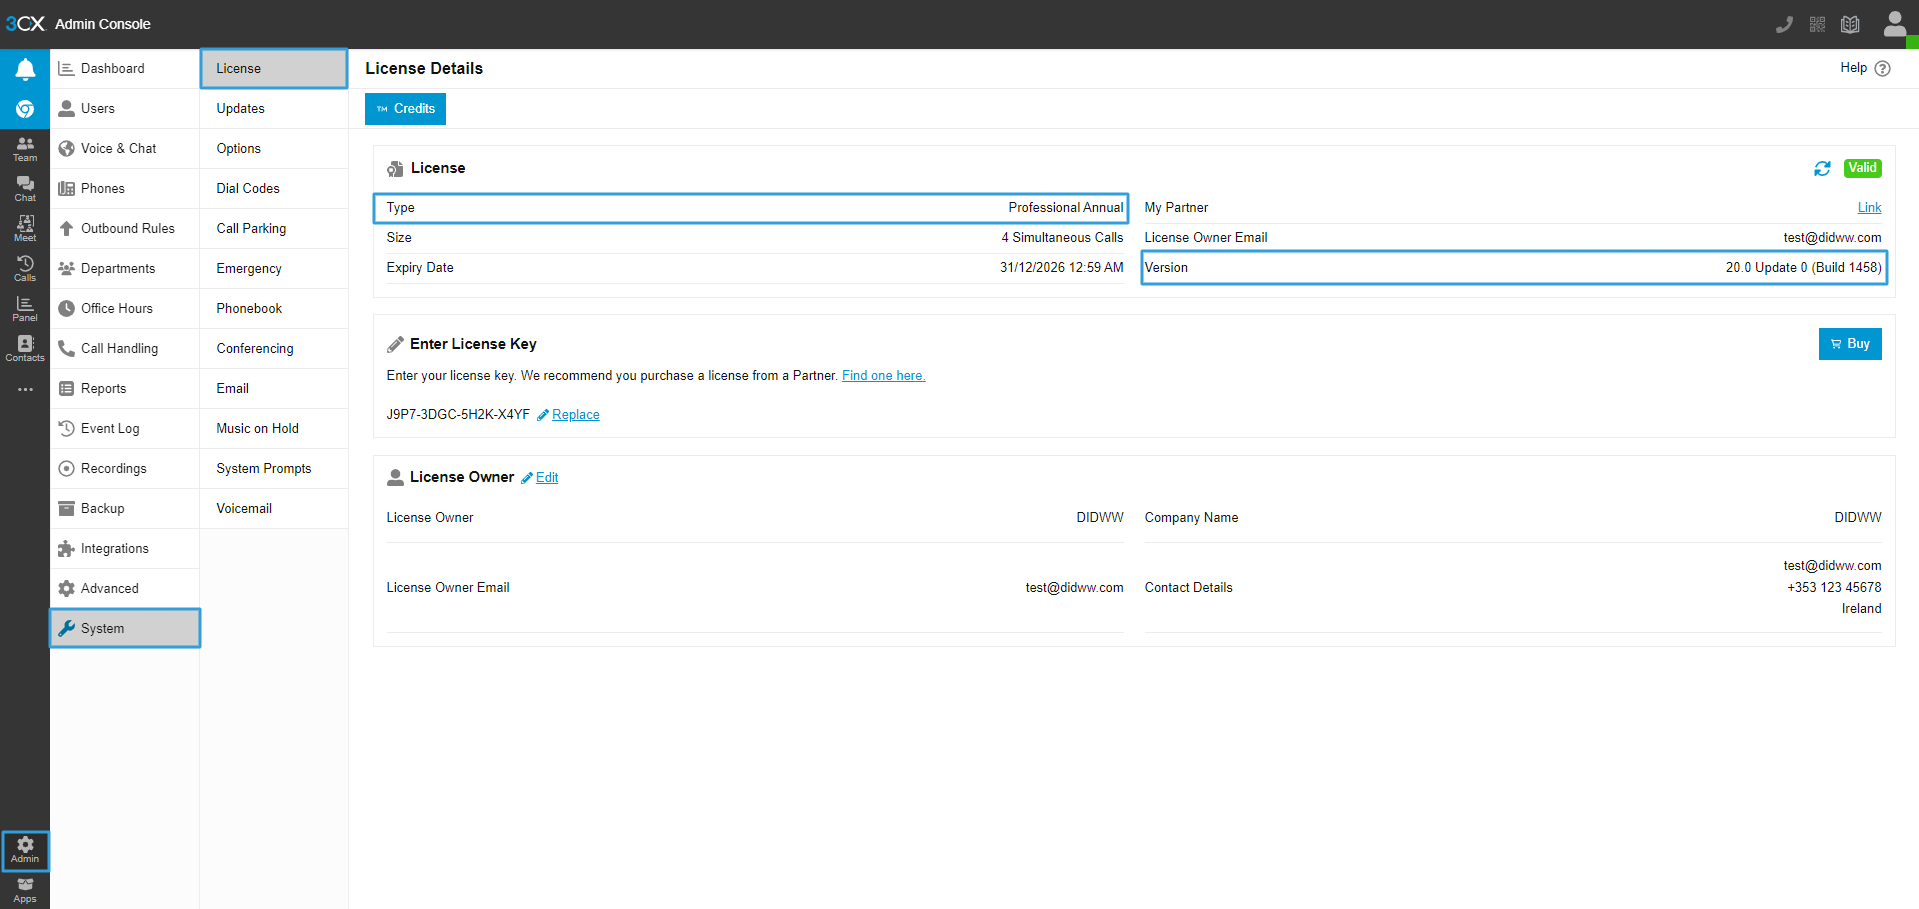
Fig. 1. 3CX Admin Console, License window.
Inbound
To add the DIDWW Inbound SIP Trunk into your 3CX console, proceed with the following steps:
Step 1. In the management console of 3CX navigate to Admin Console (Fig. 1).
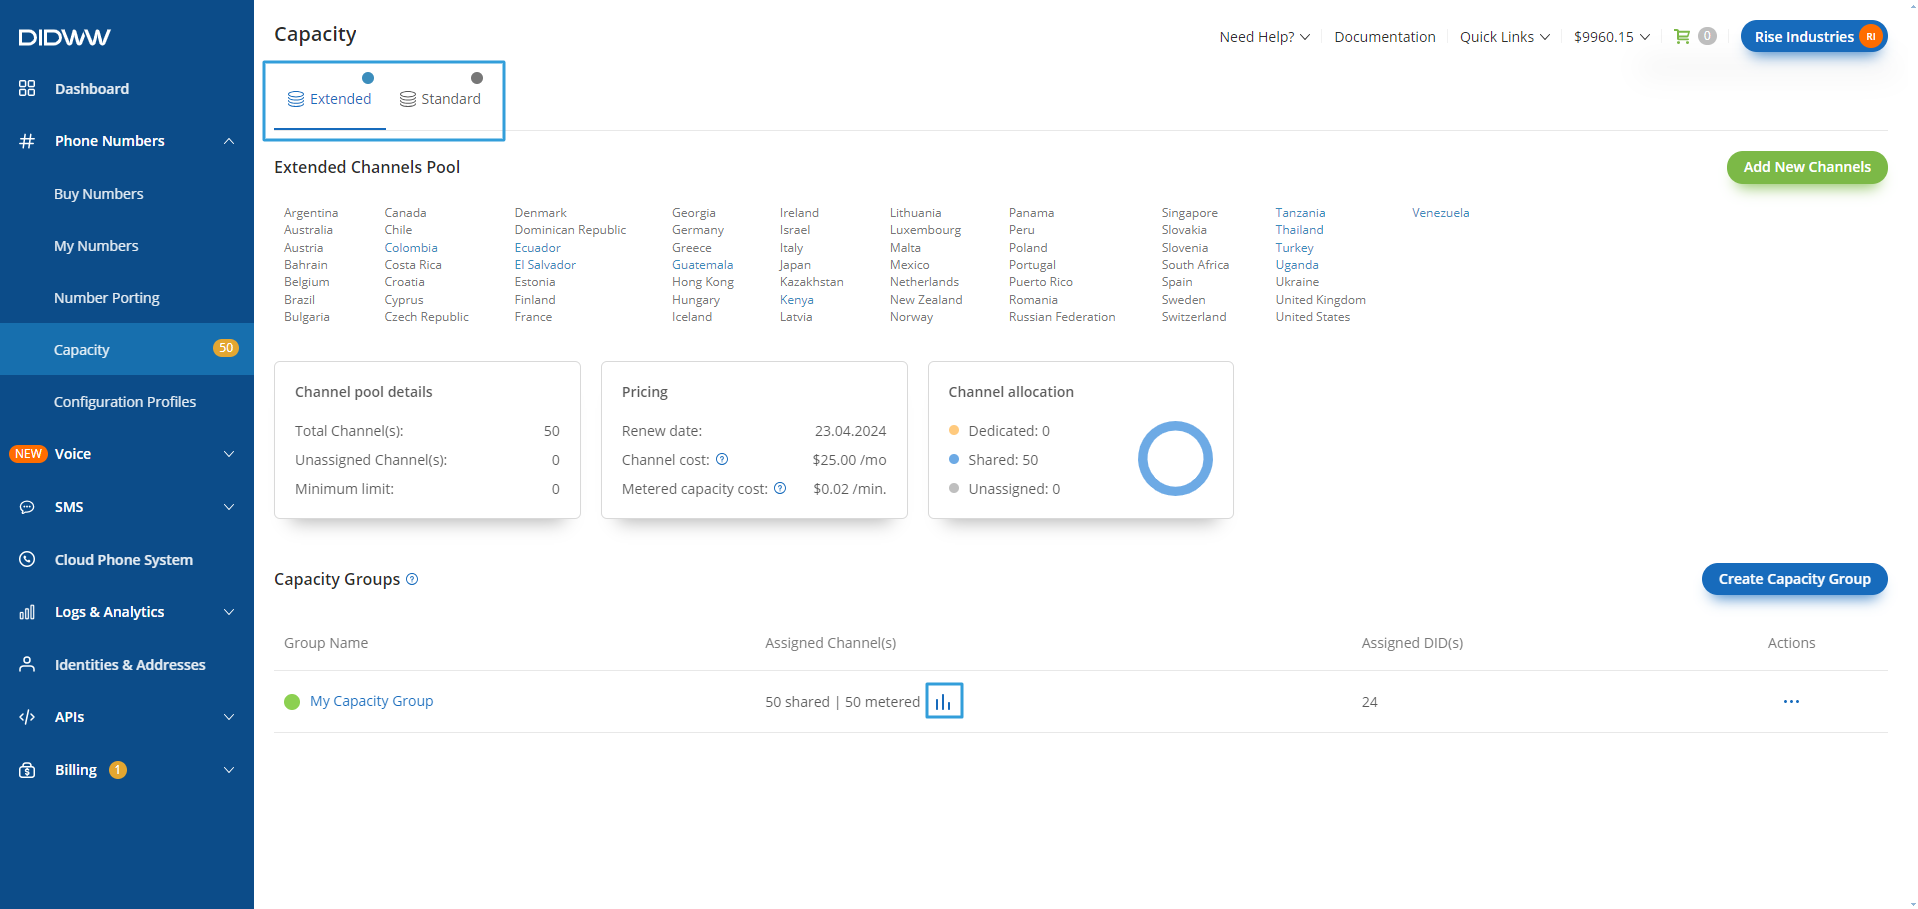
Fig. 1. 3CX management console Team window.
Step 2. In Admin Console, select Voice & Chat option (Fig. 2).

Fig. 2. 3CX Admin Console window.
Step 3. Select “Import Provider” button and upload inbound configuration file (Fig. 3).
Fig. 3. “Import Provider” window.
Note
If the file opens as a New Tab with XML source code, use “Save As” on this new tab to save this file as XML.
Step 4. Select Default route destination (User, Ring Group, Queue, etc.) and enter Main Trunk Number. Select DID numbers tab and enter your DID numbers or import them from text file. Select “Save” to apply configuration (Fig. 4).
Note
In order to select Ring Group or Queue, such actions should be configured within Call Handling section first.
Fig. 4. Add Trunk window, General section.
Note
Once trunk is added, trunk row will be marked with red border and exclamation mark in Information column. This indicates that trunk is from untested provider, and such warning can be ignored.
Step 5. Navigate to “Users” section, select user and add DIDs within “Assigned DID number(s)” field (Fig. 5).
Note
This step is optional, can be used when calls from specific DID number should be forwarded to extension instead of default route.
Fig. 5. Edit User window.
Outbound
Note
To add the DIDWW Outbound SIP Trunk into your 3CX console, proceed with the following steps:
Step 1. In the management console of 3CX navigate to Admin Console (Fig. 1).

Fig. 1. 3CX management console Team window.
Step 2. In Admin Console, select Voice & Chat option (Fig. 2).
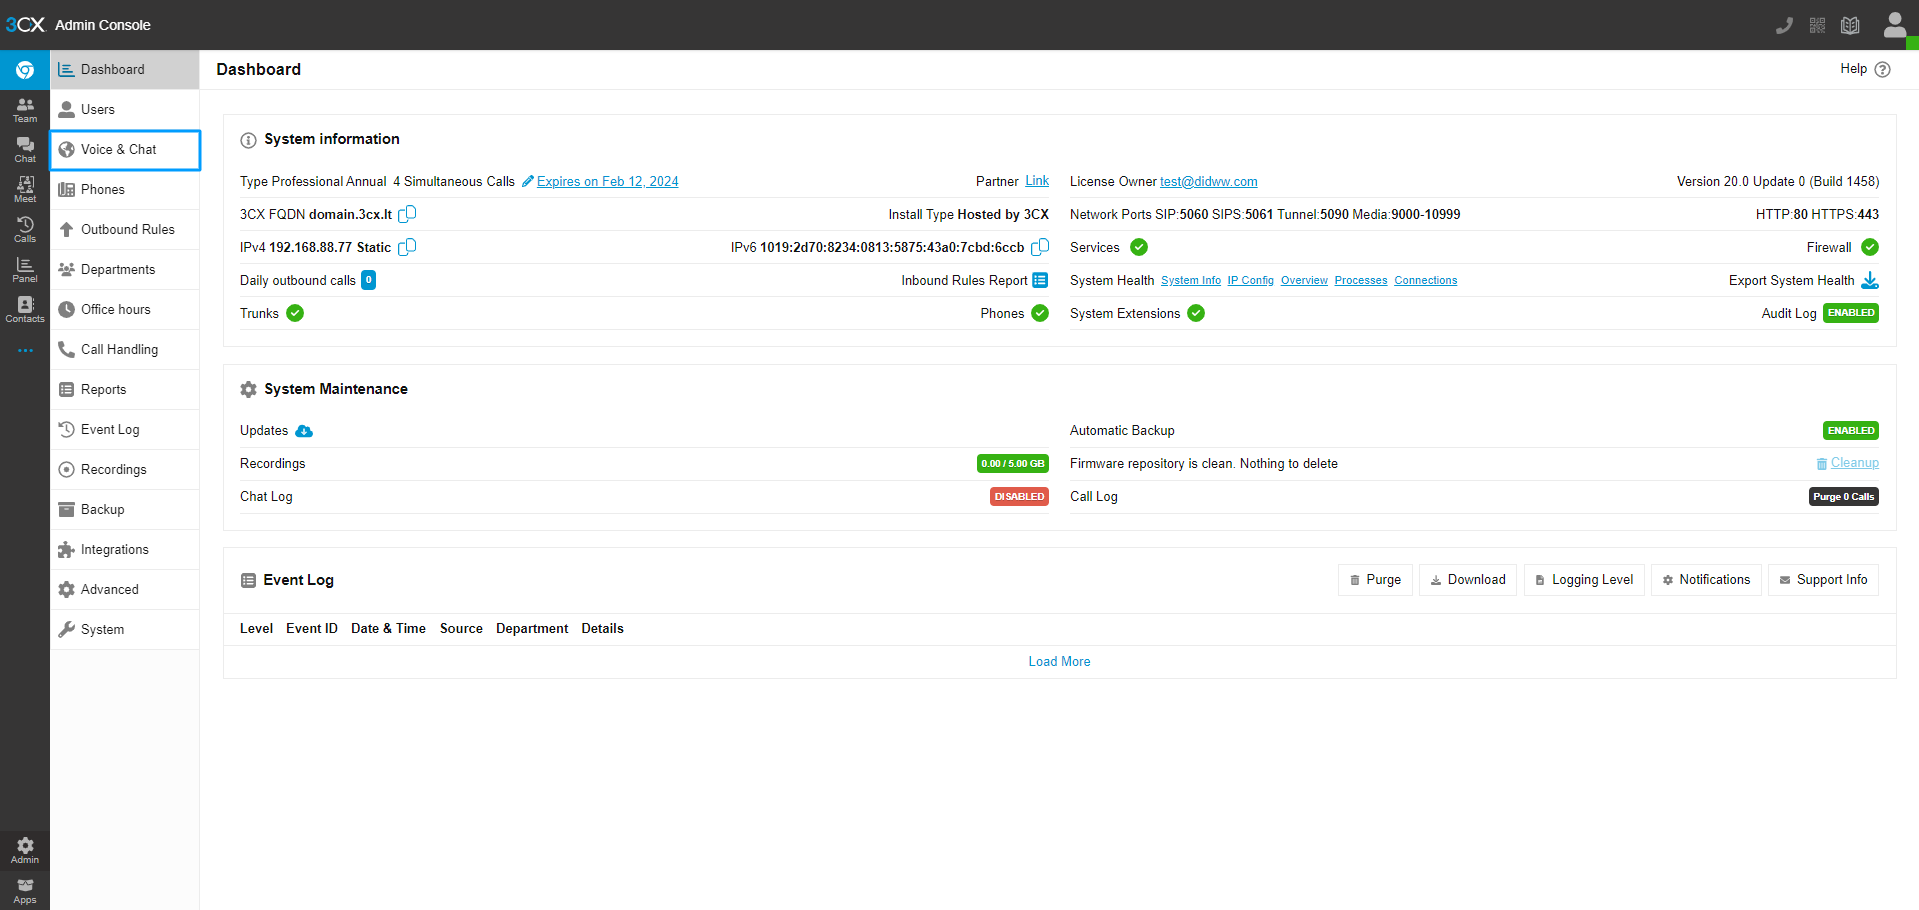
Fig. 2. 3CX Admin Console window.
Step 3. Select “Import Provider” button and upload outbound configuration file (Fig. 3).
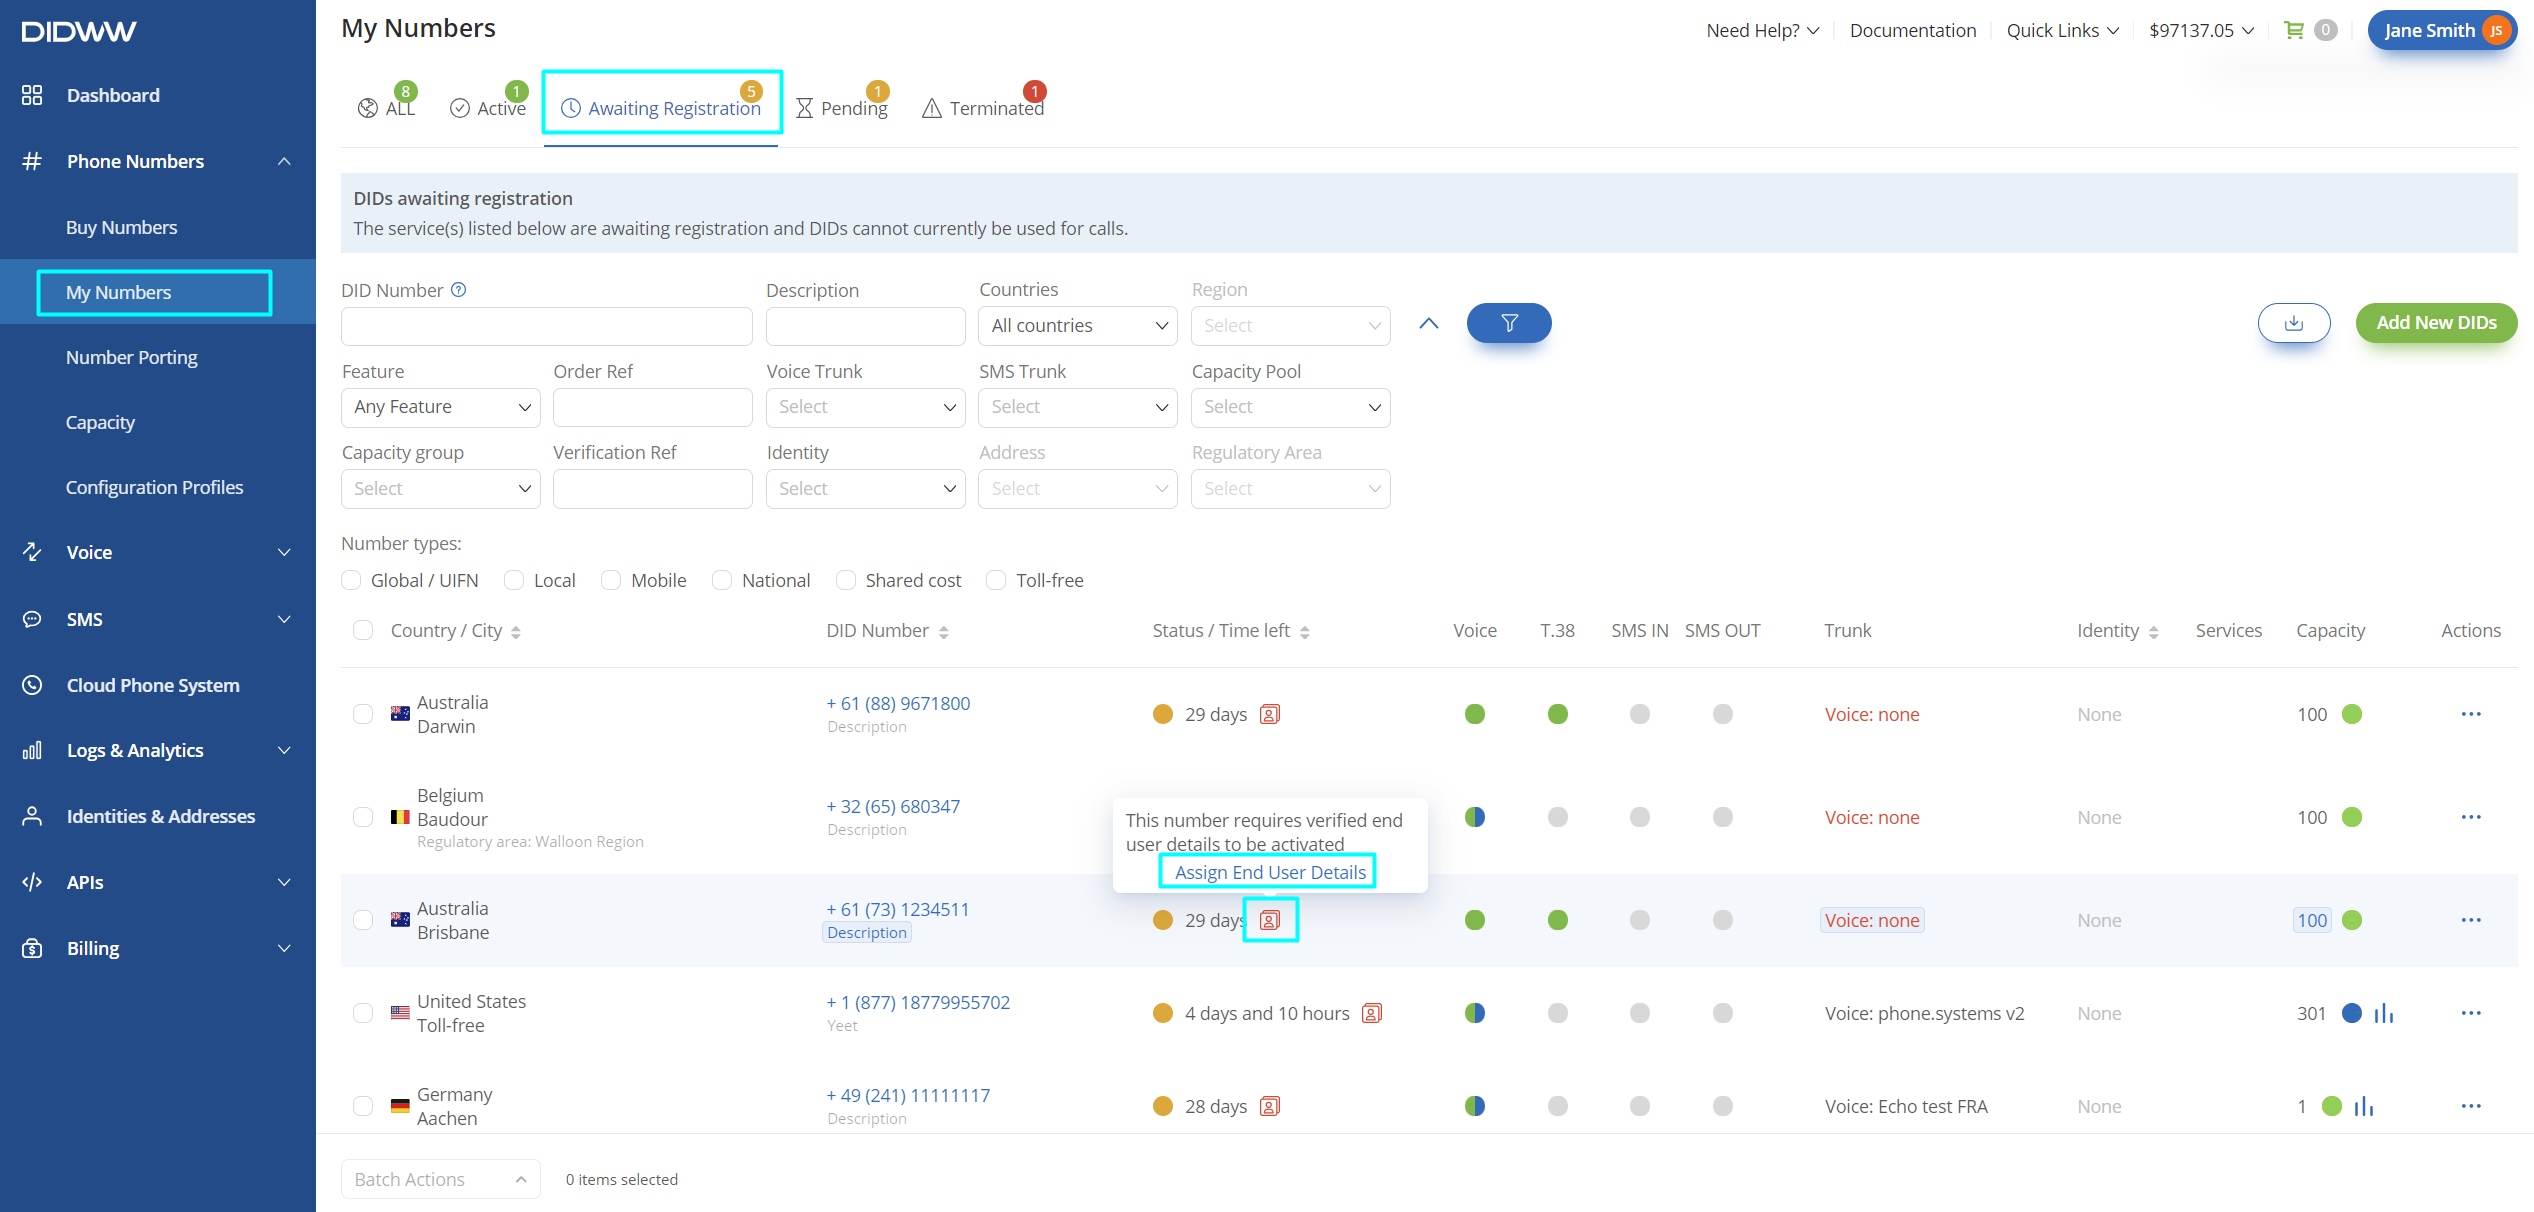
Fig. 3. “Import Provider” window.
Note
If the file opens as a New Tab with XML source code, use “Save As” on this new tab to save this file as XML.
Step 4. In opened SIP trunk window, at Authentication section, change Type of Authentication to “Outbound - Outbound only” or “Register/Account based” (optional), enter Main Trunk Number (e.g. 1357), and put Authentication ID (DIDWW Outbound Trunk username) and Authentication Password (DIDWW Outbound Trunk password) (Fig.4).
Fig. 4. Add Trunk window, General section.
Note
Once trunk is added, trunk row will be marked with red border with exclamation mark in Information column. This indicates that trunk is from untested provider, and such warning can be ignored.
Step 5. Go to “Outbound Rules” section in the menu and click “Add” button. Enter the Rule Name along with events (prefix, extension, length), which will route Outbound call via this Rule. In Route 0 select the created SIP Outbound trunk and apply other options for this route (optional) (Fig. 5).
Fig. 5. Add Outbound Rule window.